In the Vintage Kitchen: Sage Smothered Chicken with Polenta

An Herb and Spice Cookbook

This week in the vintage kitchen we are celebrating the wonders of the summer herb garden with a vintage recipe that has absolutely antique roots.

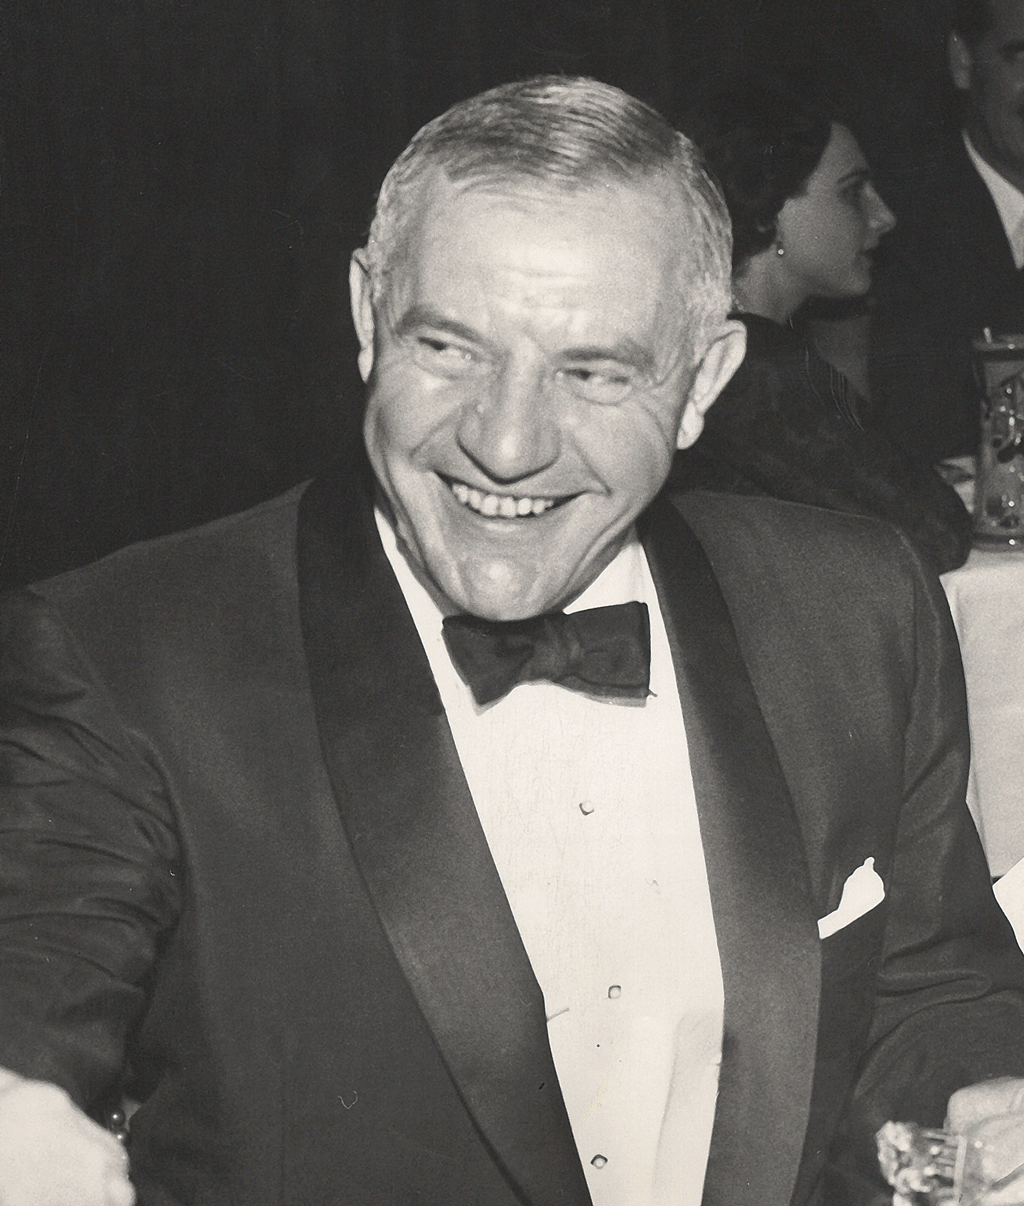
If you are a regular reader of the blog, you’ll recognize the name and face of the recipe writer…

craigclaiborne2

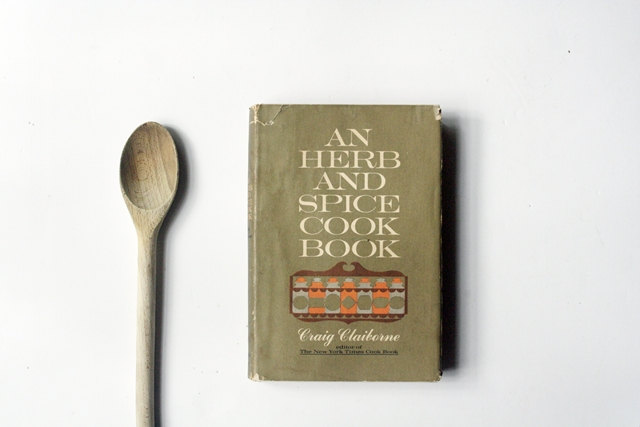
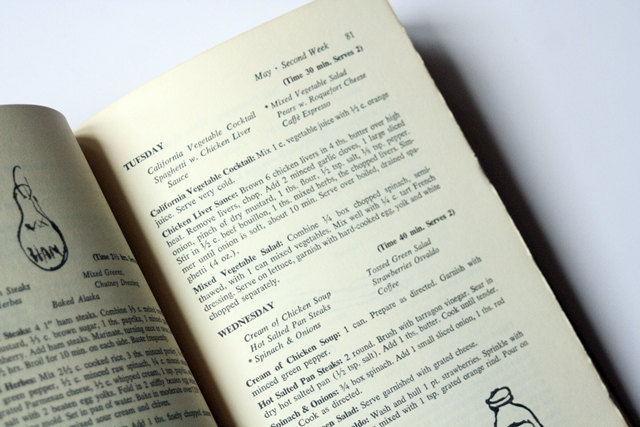
…celebrated New York Times food critic and cook Craig Claiborne. Back in February Ms. Jeannie shared his recipe for Eggplant Pizza from his 1963 Herb and Spice Cook Book – a complete gem of a compendium organized by herb and spice for quick reference.  In that post, oregano was the featured herb and Ms. Jeannie gave all the credit to Craig for his imaginative and most delicious creation.

pizza6
Eggplant Pizza! Find the recipe here.

But while Craig was the chef in the kitchen, the writer of the words and the name attached to the dust jacket, there was another face behind the flavor of the book – a muse of intellectual imagination that inspired Craig and enhanced his cook book.

Hilda Layel (1880-1957)
Hilda Leyel (1880-1957)

Her name was Hilda Leyel and she was the woman behind the crusade to bring back the herb.

For centuries herb gardening has been considered a feminine endeavor and a maternal skill –  a salve for the sick, a staple for the diet and a component in clean living. But with the introduction of doctors and hospitals and modern medicine, and the dawn of the industrial revolution, herbs and herb gardening fell out of fashion by the early part of the 20th century. Then Hilda came along.

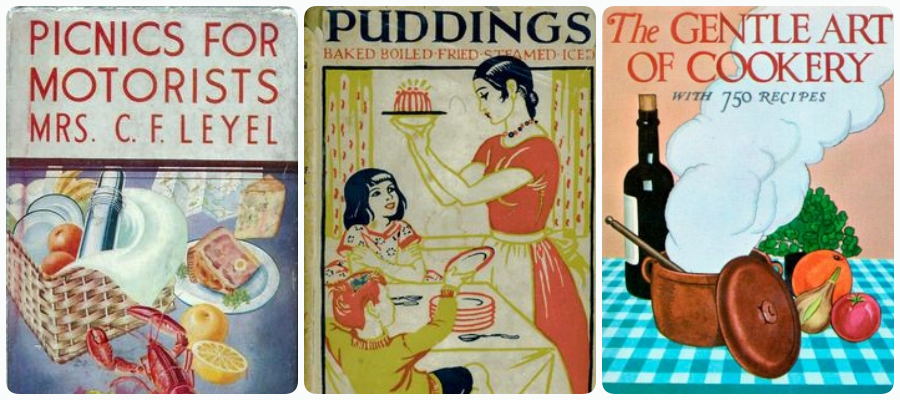
A life long lover of gardens, a student of medicine, and an appreciator of fine food, good wine and natural living Hilda published several books on the importance of herbs, opened Culpepers, the first herbal-only shop in England (which offered herbal remedies, food, makeup and holistic products) and founded the still-going strong  Herb Society all within a decade between the 1920’s and 1930’s.  The efforts of this one woman single-handedly revitalized the popularity of herbs in gardening, cooking and personal product choices for not only the citizens of England but also of the world at large.

Three of Hilda's cookbooks.
Three of Hilda’s cookbooks.

It was Hilda’s passion, promotion and sheer love that inspired Craig with his Herb and Spice cookbook. Her detailed research and botanical understanding of each of the 54 herbs and spices featured in his cookbook tell of the history, symbolism and importance of each plant. Which makes the two of them a great team. She tells why herbs are important and he shows how they taste great.

It is wonderful to see that Hilda’s efforts had numerous and lasting effects decades after her death in 1957.  To honor Hilda’s magnificent determination, it is only fitting to feature a recipe from the sage section of the Herb and Spice Cook Book which comes from the botanical name salvio, meaning to “save” since Hilda in her own way saved the herbs from obscurity. Cheers to Hilda!

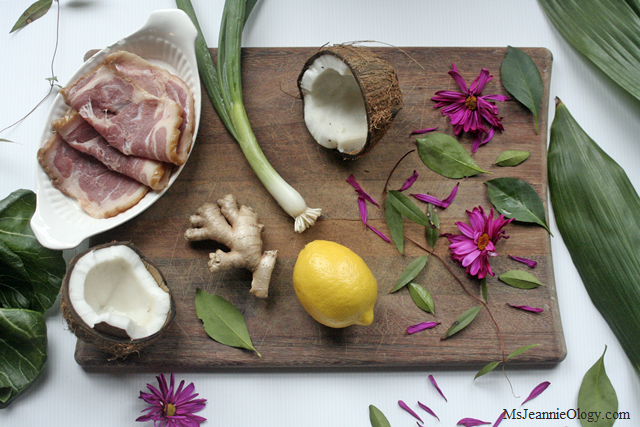
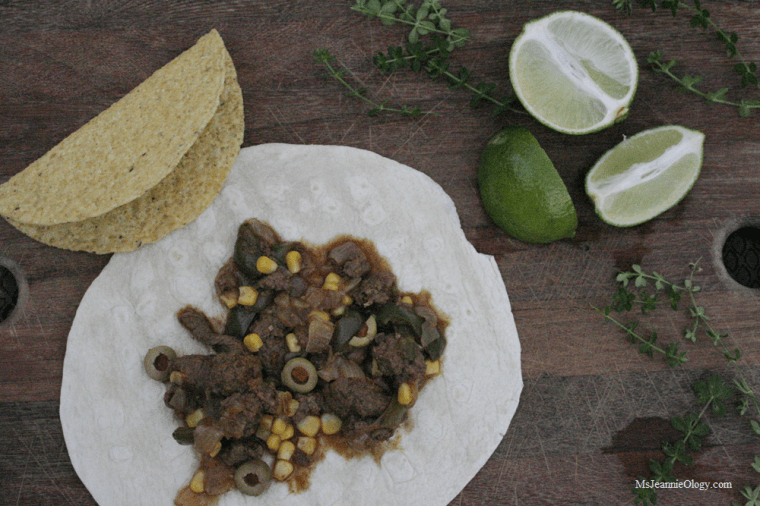
This week we are making Sage Smothered Chicken with Polenta, which is on the heavier side of summer cooking but features so many garden ingredients that its hard to resist. If you want to make a lighter (aka cooler) dinner during this hot season, just omit the polenta and serve the chicken alongside a fresh garden salad. It’s delicious either way!

sage3

Sage Chicken with Polenta

(serves 4-6)

1 4lb. chicken cut into serving pieces

Salt and freshly ground Pepper

1/4 cup olive oil

1/2 cup onion, chopped

1 clove garlic, minced

2 1/2 cups diced tomatoes (canned if your garden tomatoes aren’t ready yet!)

1 six-ounce can tomato paste

1/2 teaspoon ground sage

A small bunch of fresh sage leaves (for garnish)

4 cups water

1 teaspoon salt

1 cup yellow or white corn meal

Sprinkle the chicken pieces with one teaspoon salt and one quarter teaspoon black pepper. Heat the oil and brown the chicken, onion and garlic lightly. Add the tomatoes, paste, sage and pepper (about 1/4 teaspoon pepper or more to taste).

sage2

Cover and simmer until chicken is tender, about 50 minutes or so. While chicken is cooking prepare the polenta by bringing two and a half cups water to boil. Add 1 teaspoon salt. In a separate bowl mix the cornmeal with one and a half cups water until combined. Add cornmeal mixture to the boiling water and stir until pot comes to a boil. Reduce heat to low, cover and cook, stirring occasionally for 45 minutes.

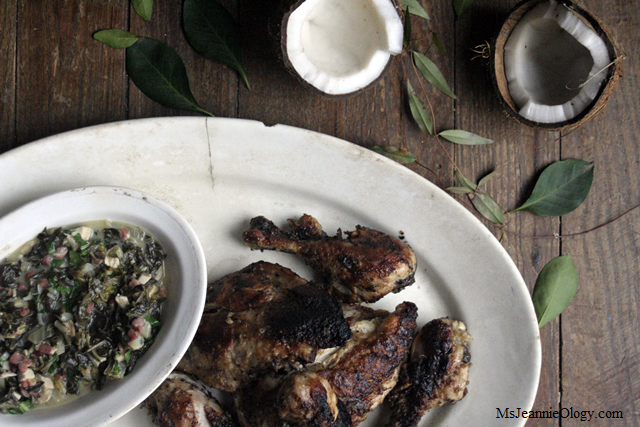
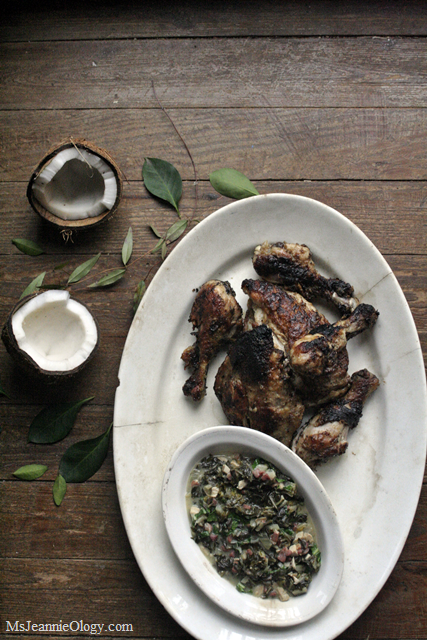
Place the polenta on a large platter. Arrange the chicken on top and spoon the sauce over it. Garnish the platter with fresh sage leaves for presentation. Serve hot.

sage4_1

You will most likely have extra sauce left over with this recipe, which you can freeze for later use as a homemade tomato sauce for pasta or pizza. Delicious and helpful! A big cheers to Hilda for inspiring Craig who then inspired Ms. Jeannie.

Find the Herb and Spice cookbook for sale in Ms. Jeannie’s book shop here. 

Happy cooking dear readers!


9 Ways to While Away Your Holiday Weekend!

memday1

It’s here! It’s here! The summer holiday season has officially started. Happy Memorial Day dear readers! If you are looking for some fun activity suggestions look no further, Ms. Jeannie has just the thing. Whether you want to get out or stay-in, celebrate or sleep, here is a list of nine different ways to while away your weekend…

  1. Go Stargazing!

stars
The How and Why Wonder Book of Stars. 1960 edition. Find it here in the bookshop.

Give that neck of yours a break from always looking down, down, down at computer and phone screens! Nothing is more relaxing or more magical than taking some time to simply look up at the stars. Right now, in Ms. Jeannie’s section of the globe, the constellation Hercules is taking center stage in the night sky, which is appropriate for the holiday weekend because Hercules led an exhausting life performing all sorts of daunting tasks in service to King Eurystheus before succumbing to a fiery death. He needed a restful break, just like you and he finally got it in his after-life as star of the spring/summer sky. His kneeling pose proves that he is truly relaxed (finally!) in the night sky.

Hercules is the upside man in gold. Photo courtesy of RetroPrintMaker.
Hercules is the upside man in gold at the top of the picture. This antique constellation print can be found at RetroPrintMaker via Etsy!

You are never to old to enjoy astronomy from a child’s point of view, and that is exactly what the How & Why Wonder Book of the Stars brings to you directly from 1960. Whether you read it to yourself or to a little one, you’ll come away with a new found sense of the solar system that is both whimsical and wise. Find the book here. And visit EarthSky to find out what stars will be appearing in your specific section of sky tonight.

2. Feed Your Friends and Family!

Cooking for a Crowd - vintage style!
Cooking for a Crowd – vintage style!

Whether you are grilling out, picnic-ing, pot-lucking or just plain partying this weekend bring something new to the festivities with a vintage recipe! Find all the inspiration you need in Ms. Jeannie’s instagram feed and in the vintage kitchen section of the blog, where she features recipes from all the vintage cookbooks available in her bookshop.

3. Plant Some Flowers!

vintage planters

Liven up your indoor spaces with some outdoor plants and flowers! These versatile vintage planters transition so well between all the seasons. Great for herb gardens, micro plants and artistic succulent-scapes these ceramic vessels bring pretty personality to any shelf, table top or sill. Find the the above assortment here.

4. Go Birdwatching!

birdwatch_collage
Fall in love with your favorite birds day after day after day with these vintage 1950s bird botanical prints. Find a large assortment here.

This past week Ms. Jeannie’s neighborhood was taken over by an unexpected kite festival. Not the colorful cloth kite flyers that you find at the beach but the bird species, the Mississippi Kite.

The falcon-like Mississippi Kite in all it's silvery beauty. Photo via pinterest.
The falcon-like Mississippi Kite in all it’s silvery beauty. Photo via pinterest.

Dozens of these intriguing characters swooped and dipped and dived for days around the house giving Ms. Jeannie the opportunity to take a break and look at the wonderful world happening around her. Closely resembling falcons, kites have silver under-bellies that shimmer in the sky like diamonds. And just like star-gazing there is something both calming and curious about looking and listening to the bird world around us.

5. Get Back to You!

tea_collage
Bright and cheery vintage tea treasures can be found in the bookshop here.

Sometimes we all just need to calm the heck down. Tea helps in this department immensely! A pretty personalized tea service and some embroidered vintage linens make the presentation of your soothing experience all the more zen-like. Dive into a novel set in China, written by Pulitzer and Nobel Prize winning author Pearl S. Buck, and you have set the mood for a mini-vacation in the making.

pearl s buck
A vintage 1969 edition of The Three Daughters of Madame Liang can be found in the bookshop!

6. Go to the Zoo!

Speaking of unusual nature sightings, if you want a little bit of whimsy take yourself to the zoo! In the land of Ms. Jeannie curiosity comes in all forms, and travel happens both literally and metaphorically, so if you find that you don’t have access or ability to a real-life zoo – no problem! Take your imagination on a pictorial adventure with Robert Lopshire and his polka-dotted pal. Find them here.

zoo1
This 1960 edition of Put Me In the Zoo is so cute and colorful! Find it here.

7. Go on a Date!

dressup_collage
Sometimes all the dinner date inspiration you need is wrapped up in one vintage clothing piece. Make new memories with old classics like this 1960s beaded cashmere sweater or this snappy vintage silk bowtie.

One of the few seriously great and often overlooked activities in the warmer months is eating outdoors. In the South practically no one eats outside because of the humidity except for Ms. Jeannie! Whether its a bustling city cafe, a rural garden restaurant or even just the back patio of your favorite local hangout, nothing says easy summer like a breezy Memorial Day dinner that you have no hand in preparing (or cleaning up!). So pull out your best dress and your date’s summer suit and make this Memorial Day the most romantic one on record!

8. Have a Cocktail!

Vintage 1950's flash card spells out the sentiment of the holiday weekend! Find it here
Vintage 1940’s flash card spells out the sentiment of the holiday weekend! Find it here.

Or maybe two or three! It’s the sign of a spirited environment when your fellow weekenders say “I’ll have another please!” One of Craig Claiborne’s favorite May-inspired cocktails was Luchow’s May Wine Bowl, which featured two stars of the late spring/early summer growing season: woodruff and strawberries. If woodruff (the herb) is unavailable in your area you can substitute it for vanilla.

Luchow’s May Wine Bowl

1/2 cup dried woodruff (or two teaspoons of vanilla)

1/4 cup superfine granulated sugar

1/2 cup cognac

2 bottles Rhine or Moselle  wine

1 bottle champagne or club soda

1/2 cup whole fresh strawberries

  1. Tie the woodruff up in a small piece of cheesecloth. Place in a bowl and add sugar, cognac and one-half bottle of wine. Cover closely and let stand overnight.
  2. Strain the woodruff-wine mixture into a punch bowl containing ice cubes or a large chunk of ice. And the remaining still wine, champagne and strawberries. Serve in stemmed glasses. Yields eight to 10 cups.

This recipe was featured in Craig’s Herb and Spice Cook Book which you can find here.

9. Take a Trip!

travel_book_collage
Find a bevy of assorted travel books and other vintage reads in the bookshop here.

This may be the ultimate luxury on a three day weekend! But if you can’t afford a trip away this holiday, do not fret! Traveling is a mindset as much as it is an experience. Relish in the adventure of reading with this selection of travel inspired books that will transport you to other places and other times.

Hitchhike your way around 1970’s Europe in the Hitchhiker’s Road Book; kiss the shore goodbye as you head out on ocean waters in Let’s Explore the Seas; fly through 1930s Africa in Following the Sun Shadow; explore 1960s New York City with composer Ned Rorem; learn how to parlez vous in French like a local with Collins French Phrase Book; and take in the sights around London with adorable Zachary Zween.

As you can see, holiday adventures await in an assorted number of ways. However you chose to spend this festive weekend, Ms. Jeannie hopes that it is magical!  Happy Memorial Day dear readers. Now… let the summer begin!

*** From Friday through Tuesday, take 20% off your purchase in Ms. Jeannie’s shop using the coupon code: MEMORIAL2016 ***


Indonesian Inspiration: It’s Summer in the Vintage Kitchen!

Roedjack Manis

This week in the vintage kitchen we are traveling culinary style to the exotic locale of Indonesia with a flavorful summer salad recipe that capitalizes on the best of fresh garden vegetables. The recipe, Roedjak Manis, hails from the vintage 1967 cookbook A World of Nuts by Morton Gill Clark...

A World of Nuts Cookbook by Morton Gill Clark

and features one of the South’s most prolific crops – the peanut. Poor peanuts have gotten a bad rap in recent years due to all the nut allergy problems, but if you don’t suffer from any such malady than this recipe might just become your most favorite salad of the season.

As colorful as Indonesia’s  floating marketplace in Lok Baintan Kalimantan…

indonesia1

this coleslaw like salad is bursting with a bright bouquet of garden goodness that not only makes it delicious in the flavor department but also pretty on the plate.

Roedjack Manis

And unlike some international recipes, if your garden isn’t yielding this type of produce just yet, no worries, you can find all these ingredients easily at the farmers market or the grocery.

Before we dive into the recipe, let’s look at the place where our salad hails from…

indonesia_collage

Home to over 6,000 islands, Indonesia is an epicenter of culture and cuisine combining Chinese, Indian, European and Middle Eastern nationalities. This unique blend of heritage paired with it’s lush tropical environment provide the platform for some of the most flavorful cuisine in the world. 

Morton Gill Clark, traveled around the world gathering inspiration for his nut cookbook, picking up recipes that not only were not only indigenous of the places he visited but also easily adaptable for American cooks and kitchens. As a mid-century food journalist for Gourmet Magazine and Vogue, he had a refined palette for good, clean food that was easy to prepare and interesting to play around with. His recipe for Roedjak Manis is a shining example of both. Loaded with vitamins, nutrients and healthy fats, it offers a variety of serving options – a side salad, an appetizer, a snack, a unique hors d’ouevre – it is literally a feast for your imagination and for your belly.

If your summer scrapbook doesn’t include a trip to the idyllic islands of Indonesia, don’t fret, your senses will transport you on a trip of a lifetime with this culinary kitchen adventure. Are you ready dear readers? Let’s go!

Roedjak Manis (serves 4-6)

2 sweet red peppers or 8 mini bell peppers in assorted colors, seeded

1 cup peanuts

1 tblsp. brown sugar

1 tsp anchovy paste

1/4 cup lemon juice

1 1/4 cups finely shredded green cabbage

1 cup finely shredded lettuce (spring salad mix, romaine, etc)

1 cup thinly sliced bamboo shoots

1/4 cup slivered scallions

1/3 cup whole toasted peanuts

1 medium cucumber, peeled and thinly sliced

1 hard-boiled egg, chopped

A quick note on ingredients: Ms. Jeannie purchased a bag of dry roasted, salted peanuts in the shell, which she then de-shelled for this recipe. If you don’t have this extra few minutes you can use a jar of already shelled peanuts. Bamboo shoots come in cans packed with water and can be found in the Asian section of the grocery.   

Roughly chop the peppers. Combine peppers and peanuts in a blender and pulse until they form a creamy paste similar to hummus. Depending on the water content of your peppers you might need to add a few squeezes of lemon juice to get the appropriate consistency. After a few minutes in the blender, peanuts and peppers should look like this…

Roedjack Manis

Next, add the sugar, anchovy paste and lemon juice to the pepper mixture and blend until combined. Set aside.

Thinly slice the cabbage, lettuce and bamboo shoots and toss together in a large mixing bowl.

Roedjack Manis

Then add the pepper mixture, whole peanuts and scallions with the lettuce and toss. It’s easiest to use your hands for this process since the pepper mixture is thick.

Roedjack Manis

Once all the ingredients are combined, set salad aside while you chop the egg and slice the cucumber. You can serve these last two ingredients either on top of the salad or on the side depending on your preference. Ms. Jeannie served her egg/cucumber on the side and put the salad in a big bowl, family-style so her dinner mates could serve themselves.

Roedjack Manis

Because this salad is packed with peanut protein, you could make this a meat-free meal or it would also be delicious with simple sautéed or poached chicken breasts, carrot chips or steamed rice. Like the summer season itself, it is easy breezy in the adaptability department and transports well as a picnic component.

Find more nut-based recipes in Morton’s cookbook here.  And find more around-the-world inspiration in the vintage kitchen with these previous cooking related posts.

Cheers and happy cooking!


Derby Day Fun: Pick A Winner, Win A Prize

derb1

It’s Kentucky Derby time dear readers! As you know from past years, this is always a fun and festive time in the land of Ms. Jeannie. The roses are blooming, the mint is growing and the party planning is underway. Post time for the big race is Saturday (May 7th) at 6:34pm, where 20 horses will compete in the 142nd run for the roses. As of this (blog) post publication time, the field is large this year with 26 entrants in possible contention, which means six names will drop off before Saturday.

It’s a big guess as to who will make the final list and who will win the Derby. Anything is possible in horse racing and nothing can be left up to certainty until hooves pass the finish line, which is one of the elements that make this Saturday so exciting. In honor of such spirited sportsmanship, Ms. Jeannie is hosting a little competition of her own right here on the blog. Post the name of the winner in the comments section between now and 5:45pm on Saturday and you’ll win a very cool vintage prize that will be mailed out to you on Monday.

Here are all 26 entrants compiled in three sets in random order. Pick your favorite, type their name in the comments section below this post and Ms. Jeannie will be in touch if you (lucky you!) have chosen the winner!

derby1_collage#
2016 Kentucky Derby Entrants: 1.Lani 2. Outwork 3. Suddenbreakingnews 4. Brody’s Cause 5. Gun Runner 6. Discreetness 7. Nyquist

You can only enter once, so make your selection count!

8.
8. Dazzling Gem 9. Mo Tom 10. My Man Sam 11. Creator 12. Adventist 13. Shagaf 14. Fellowship 15. Trojan Nation 16. Exaggerator

You can be easy breezy about this whole contest by picking a horse by name or face value or you can read up on each of the entrants on kentuckyderby.com 

18.
17. Cherry Wine 18. Tom’s Ready 19. Laoban 20. Mor Spirit 21. Destin 22. Oscar Nominated 23.  Mohaymen 24. Majesto 25. Whitmore 26. Danzing Candy

Good luck dear readers and happy guessing! Contest winner will be announced early next week!!!

Catch up on past Derby Day festivities here.  Photo credits of all racers in this post courtesy of: ladyandthetrack.com, coady photography, thisishorseracing.com, dylan buell, el porto roberto, horse racing nation, kentuckyderb.com, clb photography

Oh My Cod: It’s Friday in the Vintage Kitchen!

Cod Cakes!

This week Ms. Jeannie was in the kitchen with two famous figures: Richard Nixon and James Beard. Richard assisted in the artwork (that’s his face on that vintage 1974 newspaper!) and James provided the recipe, which is a spin on an iconic food hailing from coastal Maryland.

baltimore
The beautiful view from Baltimore, Maryland!

In 1959 celebrated American chef James Beard published his second cookbook simply titled The James Beard Cookbook.

beard5
The James Beard Cookbook 1959 edition

In 1970 he revised it and in 1980 he had intentions of revising it again. By this point in his career he was five decades into cooking, writing and teaching people about good food and how to prepare it. He had written 18 cookbooks and he had traveled the world in search of good taste. He also had twenty five years under his belt as a teacher in his brownstone cooking school in New York City.

beard3
The Beard House … still enticing cooks world-wide!

But  for all the things he did have by this point in his illustrious career, there was one thing he was sorely missing. Enthusiasm. The energy to refine recipes that felt satisfying in 1959 felt forced by 1980.  As he was embarking on the third revision of his 21 year old cookbook, James was 77 years old and his palette had changed. The way he wanted to prepare food had changed. He was less interested in salt, kitchen gadgets, and formulaic steps. He was more interested in whimsicality, natural selection and on-the-spot innovation. From the 1930’s-1970’s James Beard taught America how to cook. By 1981, with the publication of The New James Beard, he gave America courage to cook for themselves.

beard7
First edition of The New James Beard, 1981.

To play around with a semblance of recipes that could be altered to suit your taste, budget, time constraints and party plans was the essence of his new cookbook and his new approach to confident culinary creativity.

Which brings us to today’s recipe and that famous food hailing from Maryland – crab cakes. Only we are not making crab cakes exactly because James Beard gave us confidence to think outside the box (or the cake if you like a fun pun!). This week Ms. Jeannie is in the kitchen with Richard Nixon and James Beard making Cod Cakes – a simple easy to prepare dinner capitalizing on fresh flavors, inexpensive ingredients and easy preparation.

cakes8

This is a three step recipe broken down in order of the three P’s – potatoes, poaching, patty-ing for efficient preparation.  Intended to serve eight, you can easily cut the recipe in half at all steps if you are feeding less people or make the full recipe and freeze the leftover cakes for a future dinner. Let’s begin with the potatoes…

Step One: POTATOES

2 large potatoes (enough to make 2 cups of mashed potatoes)

3 tablespoons butter

water

Peel and cube potatoes. Place in medium size pot with enough water to cover and boil until potatoes are tender when poked with a fork. Remove from heat and drain. Mix potatoes with butter in a medium size bowl with a hand mixer until fully mashed. Set aside.

Step Two: POACH

White Wine Court Bouillon

2 quarts water

2 cups dry white wine

1 onion stuck with two cloves

1 rib celery

1 clove garlic

1 tablespoon salt

1 strip lemon peel

2 sprigs parsley

4 pounds cod filets, whole or chunked

Preheat oven to 170 degrees and place an empty covered dish in the oven to warm. Make sure the dish is large enough to hold all the fish you are preparing. Combine all ingredients (minus the fish) in a large saute pan, and bring to a boil before reducing the heat and simmering for 20 minutes. Add the fish and poach gently for 10 minutes for each measured inch of thickness. (So if your filet measures 2 inches at its thickest part, poach for 20 minutes, if it is 1 inch poach for 10, 3 inches for 30 etc.). Once the fish is cooked through, remove your covered casserole dish from the oven, place the fish inside, cover it and leave on top of the stove to keep warm while you prepare the next set of ingredients.

Step Three: Patty

Codfish Cakes

2 cups flaked poached codfish

2 cups mashed potato mixture

1 egg

1 egg yolk

1/2 teaspoon freshly ground black pepper

4 tablespoons butter

Chopped parsley for garnish

Combine the codfish, potatoes, egg, egg yolk and pepper in a large bowl. Mix well and form into cakes about 3 inches across and 1 inch thick. Melt the butter in a heavy skillet and saute the cakes until crispy brown on both sides. Add more butter if needed. Garnish with parsley and serve immediately on top of a bed of mixed lettuce or wilted spinach.

James Beard's Cod Cakes recipe from The New James Beard, 1981
James Beard’s Cod Cakes recipe from The New James Beard, 1981

In the spirit of creativity that this cookbook encourages, James also recommends mixing other ingredients into your cod cakes. If you like try mixing in fresh ginger, onions, bacon or salt pork. Swap the butter for olive oil if you are so inclined. Bake your cakes in the oven instead of on the stovetop. Go a more traditional route and serve your cod cakes with fresh lemon slices and homemade tarter sauce or on top of a bed of smashed peas or alongside a lemon, dill and onion salad. The sky is the limit with this recipe because that’s half the fun of cooking – inventing new twists as you go along:)

cakes7

According to former White House cooking staff, Richard Nixon’s favorite foods were fruit, cottage cheese with ketchup and a weekly splurge of meatloaf (half ground pork/half ground beef). There’s no mention that he was necessarily a huge fish fan, but Ms. Jeannie guesses that these cod cakes would A-Okay in his book, because he rarely refused any type of food. James would have given Richard a thumbs up on the ketchup and cottage cheese combo not because this necessarily sounds appetizing but because Richard himself thought it was, and really that’s all that matters when it comes to cooking. If James Beard taught us anything with The New James Beard cookbook, it was to please your palette first and then please your dinner companions next.

So mix things up, change your tactics, refine your techniques. Explore and experiment and have fun dear readers! The vintage kitchen awaits! If you need a little more inspiration to get you going, perk up your palette with this vintage kitchen items and see what possibilities await…

Clockwise left to right starting at the top:
Clockwise left to right starting at the top: Striped 1940’s mixing bowl1960’s Herb & Spice Cook Book, Vintage Red Floral Platter, Vintage White Serving Bowl, Vintage 1960s Caribbean Cookbook , Antique English Platter, Vintage 1970s Best Recipes Cook Book, Antique Porcelain Gravy Boat, 1930’s French Floral Platter

With love from Richard and James and Ms. Jeannie.


Dinner with Downton Abbey

Camembert, Sweet Onion & Spinach Tart

It’s not every day that a woman receives a castle for Christmas, but indeed that is just exactly what happened to Ms. Jeannie last December. That’s right dear readers, a castle! It might as well have been a box full of magic that’s how excited Ms. Jeannie was with her gift!

Downton Abbey Christmas Ornament

Gold, glittery and delicate, Ms. Jeannie hung her magical manor house on a nail above her kitchen doorframe, where it remains year–round as a symbol for whimsy, wonder and unexpected surprises. Passing underneath it every day, she is inspired by the stories it symbolizes and by the possibilities of passion. Without Julian Fellowes interest in history and his love of storytelling we would have never known Downton Abbey and in turn we would have never known this blog post.

the cast of downton abbey

This week Ms. Jeannie is featuring a twist on a recipe from the 2014 coffee table book, A Year In the Life of Downton Abbey by Jessica Fellowes (Julian’s niece!). This is one of several Downton Abbey coffee table books that has been released throughout the series, but by far this is Ms. Jeannie’s favorite. It breaks down Season 5 specifically month by month as far as story lines and contains a lot of behind the scenes info on costumes, hair and makeup and cast/crew interviews. It also contains recipes of the types of fare that the Crawley family would have enjoyed with each passing season.

A Year in the Life of Downton Abbey by Jessica Fellowes

On page 132 in the middle of the month of May, you’ll find this elegant recipe…

Asparagus Tart - Downton Abbey style!

tucked amidst the stories swirling around Rose’s coming out season. Her presentation at Court signifies her debutante status for the season, and the chapter is filled with the proper attire, mannerisms and preoccupations that such a lady would have experienced during this exciting time in the mid-1920’s. In all its behind-the-scenes glory, the chapter is also filled with the challenges the crew faced in filming the stand-in location for Buckingham Palace (which was actually Lancaster House in London) and the massive undertaking of outfitting and making up the large ensemble cast of extras at the debutante ball.

Rose as a debutante!

While the scenes in the book (and on film!) were quite elaborate for the month of May, the recipe was quite simple… Asparagus Tart. Ideal in the eating seasonably chart, asparagus is at its peek of flavor in late Spring and can be enjoyed in any dish ranging from breakfast to dinner. It is also party perfect because of its straight-lined style and a lovely way of being quite adaptable to artistic displays of culinary wonder.

There was only one slight problem with all this.  After discovering the recipe,  Ms. Jeannie had just returned from market with a basketful of two other shooting stars of the spring season – sweet onions and spinach and sadly, no asparagus. So she improvised, playing a little game of surprise with Mrs. Patmore. By switching out some ingredients for others but retaining the same tart crust and the same measurements of additional ingredients, Ms. Jeannie made a similar tart that would have served all party-goers just as well during the season. This is what she made…

Simple Ingrediants for a simple spring tart

Spinach, Sweet Onion & Camembert Tart

1 1/2 cups all purpose flour, plus extra for dusting

Salt and Pepper to taste

5 tablespoons butter

1/4th cup ice water

A handful of fresh spinach

½ of a large sweet onion, very thinly sliced

4 eggs

1 1/4th cups organic vanilla soy milk (or light cream if you prefer)

4 tablespoons of chopped Camembert cheese

One pinch of nutmeg

  1. Preheat the oven to 350 degrees.
  2. Sift the flour in a mixing bowl with a large pinch of salt. Cut up the butter in small chunks and incorporate it into the flour until you get a crumb-like texture. Add the ice water and mix together with your hands until you can form a ball of dough.
  3. Dust your workspace with flour and roll dough out in all directions so that it becomes large enough to fill an 8”inch tart pan. Place the dough in the pan, trim the extra edges with a knife and prick the dough all over with a fork. Insert baking beans into the tart shell and place in oven for 20 minutes. If you don’t have baking beans, which help weight down the dough and keep it from puffing up, you can place a pan on top of the dough – just make sure that the pan is oven friendly and fits the entire inside dimension of the tart.
  4. While the crust is baking, rinse the spinach and thinly slice the onions (so thin that they are almost transparent!). Set both ingredients aside.
  5. In a bowl beat together the eggs, milk and nutmeg. Season with salt and pepper. Set aside.
  6. Remove the tart crust from the oven. Remove the baking beans or the weighted pan and return the tart crust back to the oven for 5 more minutes.
  7. Remove the tart crust from the oven and fill it with the egg mixture until it is about ¾ full. You might have extra egg left over. Evenly sprinkle the cheese in the egg mixture. Gently float the onions in a circular pattern on top of the eggs and cheese. Then add the spinach on top of the onions in the same circular fashion. Bake in the oven for 40-50 minutes checking often to make sure that the tart is not bubbling over or browning too quickly. Serve immediately right out of the oven!

Camembert, Sweet Onion and Spinach Tart

Depending on the time of day that you enjoy this tart, additional accompaniments that would work great alongside it include:  a mixed fruit/berry sampler or a vegetable salad, potato pancakes, buttered rolls with jam compote, a juice smoothie or sliced chicken for a more protein packed affair. Or just embrace your inner purist and serve it as is!

Just like the pretty presentation of Rose’s debut, this tart also makes perfectly wonderful party food for modern day May. Whether you are surprising Mom with brunch on Mother’s Day, hosting a bridal shower for your best friend or just getting together for an informal event, this recipe promises easy and effortless entertaining.

Camembert, Sweet Onion and Spinach Tart

*If you’d like to make the asparagus version simply omit the spinach, onion and camembert and replace them with 8-10 stalks of asparagus, 4 tablespoons of parmesan cheese and a sprinkling of fresh thyme.

Cheers and happy Downton daydreaming!

Downton Abbey Christmas ornament

And as a final side note: new items were added to the shop last week all with an “F’ theme: french books, fire hoses and florals! Stop by for a peek!

Clockwise from top left:
Clockwise from top left: Vintage rubber lined fire hose fabric, 1960s French mystery novel, Le Juane Chien by Georges Simenon, Vintage fire hose coupling, Vintage 1970′ s French theater book, L’Avant-Grde Theatrale, Collection of six vintage fire hose couplings, Vintage Fire hose fabric, 1950s botanical Azalea flower bookplate, 1960’s French phrase book 

Tahiti Bound: An Exotic Adventure in the Vintage Kitchen!

Vintage Tahiti travel poster.

This week in the Vintage Kitchen we are going on an exotic adventure to the beautiful beachy, balmy enclave of Papeete on the French Polynesian island of Tahiti. The weather in Ms. Jeannie’s world recently has been crazy. She’s seen it all – frost, snow, heat, humidity, rain, strong winds, fog, sleet, hail, and tornado warnings all just within the past 14 days. And while the air and temperatures of the past few weeks have been very unsettled,  Ms. Jeannie is excited because all of this wacky end-of-winter weather means that sunny Spring will be here very very soon!

While she waits for Mother Nature to get her schedule sorted out, Ms. Jeannie has been daydreaming of tropical island breezes thanks to the help of Mr. Victor Bergeron and his 1968 Pacific Island Cookbook. 

tv7

If you are unfamiliar with Victor’s full name, you might know him by his more casual moniker, Trader Vic, the king of 20th-century hospitality. A worldwide traveler and an enigmatic restaurateur Victor founded the world’s first highly successful string of polynesian-themed restaurants.

Victor Bergeron (1903-1984) the founder of Trader Vic’s restaurant chain.

First opened in the 1950s in California, the still growing Trader Vic’s restaurant brand was a re-invention of Bergeron’s first attempt in the food industry with his humble lodge-style eatery and bar called Hinky Dink’s which he opened in 1934.

Victor smiles for a photoshoot in a 1951 issue of Holiday magazine.
Victor smiles for a photo shoot in a 1951 issue of Holiday magazine.

Learning the ropes in the food industry taught him a lot those first twenty years, so by the time Trader Vic’s (the restaurant) launched, Victor was a skilled businessman with a big flair for entertaining and fine-tuned instincts as to what people wanted in a dining experience. As a lover of Cantonese-style cooking, Bergeron married exceptional storytelling, authentic exotic antique decorations, and traditional South Seas recipes with a festive dining atmosphere to create a unique brand of restaurant chemistry that appealed to the adventure seeker and jet-setter of mid-century America. It was the rise of all things terrifically tiki.

Victor Bergeron mixing it up!

Victor’s travel experiences are all colorfully detailed in his cookbook making it a sort of fun travel journal and kitchen cooking primer in one. And then there are the drinks!  In addition to cooking, Victor was also a mixologist creating a slew of enticing cocktails, like the first Mai Tai, which launched a wave of tropical drink requests for bartenders from then on out. Escapism never tasted so sweet!

luau6

Which gets us back to Ms. Jeannie’s island getaway in the kitchen this February day. With 30-degree temperatures chilling the air outside, Ms. Jeannie cracked open coconuts, peeled ginger, poured a rum cocktail, and got down to cooking all the while pretending she was beach-side in Papeete where the view looks like this…

tahiti3
Vintage Tahitian postcard of Papeete.

Cheers to Victor! It’s Pota on the menu tonight served alongside steamed rice and chicken sauced with coconut ginger.

Pota with Chicken and Ginger

Pota

4 tablespoons diced salt pork

1/2 cup chopped cooked chicken

5 cups coarsely chopped Bok Choy

4 tablespoons chopped green onions (scallions)

1/2 cup chicken stock

Salt & Pepper to taste

Juice of 1/2 lemon

4 tablespoons coconut milk

2 teaspoons cornstarch mixed with 1/4 cup water

  1. Saute salt pork until brown in large skillet. Add chicken, chard and green onion.
  2. Stir in chicken stock, seasonings and lemon juice. Simmer until chard is tender.
  3. Add coconut milk, bring to a boil but just barely. Thicken with cornstarch, stirring constantly, adding just enough to thicken the mixture.
  4. Serve immediately or keep warm over low heat until chicken and rice are ready.

Chicken with Ginger

1 whole chicken, 5 lbs

1/2 cup flour seasoned with salt and pepper

2-3 tablespoons olive oil

1 piece fresh ginger root (about the length of your thumb finger), grated

1/4 cup coconut milk

  1. Preheat oven to 350 degrees.
  2. Cut chicken in pieces. Do not remove the skin.
  3. Place chicken, flour and salt and paper in a paper bag and shake until all chicken pieces are well-coated.
  4. Heat the oil in a large pan on the stovetop and then saute the chicken, turning only once, until thoroughly cooked on each side (internal temperature should be 180).
  5. Remove chicken from heat and place in oven-proof dish.
  6. In a separate bowl mix together coconut milk and ginger. Pour over chicken and place dish in the oven for 5 minutes until the coconut sauce melts.

Serve alongside Pota and steamed rice and a fun fruity cocktail! Perhaps a homemade Mai Tai or two in Victor’s honor. He’d be as pleased as (rum) punch!

A Tahitian Dinner: Pote and Chicken with GInger
A Tahitian Dinner: Pote and Chicken with Ginger

This is a surefire recipe to chase away those end-of-winter blues. Satisfying for the spirit and for the belly! Find more Trader Vic recipes here. And more tropical cookbooks here. Manuia!

In the Vintage Kitchen: Eggplant Pizza

Eggplant Pizza

Pizza has been a favorite in the U.S. since the early 1900’s with the first of its kind debuting in New York City in 1905. Popular right from the start, pizza wars started popping up all over the city, then the region then the country as Italian immigrants spread across America with their claims of making the best pizza in town.

G. Lombardi's the trendsetter on the american (pizza) frontier.
G. Lombardi’s on Spring Street in New York City was the trendsetter on the American (pizza) frontier.

And while bravado and traditional recipes may have fueled the pizza craze initially, creativity, with its variations on a theme, has kept it going ever since.

Strolling through 19th century pizza signs
A walk through 20th century pizza signs…

By the 1960’s American home chefs were experimenting with the complimentary trifecta of tomato sauce, bread and cheese in new and spectacular ways.  By thinking beyond the boundaries of size, shape and similarity, pizza was elevated to a nouveau cuisine that could incorporate a host of  ingredients from the humble to the exotic appealing to palates both simple and sophisticated.

One such experimenter determined to add a new twist to the traditional pizza pie was food editor, critic and chef Craig Claiborne.

craigclaiborne2

In his 1963 Herb and Spice Cookbook, he capitalized on the subtle yet dynamic flavor pairings of basil, oregano and garlic and came up with a dough-less version of eggplant pizza.

An Herb And Spice Cookbook by Craig Claiborne

Craig was no slouch in the cooking department. He knew his way around a home kitchen just as much as he did a commercial kitchen and he knew what and how people liked to eat. As the The New York Times food and restaurant critic for 29 years from 1957-1986, he pretty much pioneered food journalism in the Unites States at a time in the mid-1950’s when such editorial posts were primarily held by women for the female homemaker audience. But Craig was different, he was interested in casting wider nets, reaching more diverse audiences and bridging a relationship between restaurants, patrons and cultures.

craigclaiborne1

The author of over twenty cookbooks throughout his career, Craig’s Herb and Spice Cook Book is marvelous in both content and presentation. Organized alphabetically by spice or herb name it is a great reference cookbook when you have ten pounds of basil ready to harvest in your garden or you are craving a specific spice like curry or cinnamon… or marjoram!

marjoram

The eggplant pizza recipe fell under the oregano section which included recipes for Eggplant Antipasto, Chicken Napolitana, Herb-Broiled Swordfish and Creole Cabbage among four others. Excited by the possibility of giving her indoor oregano plant a hair-cut, Ms. Jeannie was happy to try this new version of pizza which turned out to be really delicious.

pizza1

It is a fun recipe for a few different reasons: 1} you make a quick version of homemade tomato sauce that takes little time and tastes great; 2} the “pizzas” can range in a variety of customizable sizes depending on the girth of your eggplant… if you have a skinnier eggplant you could serve those as appetizers or hors d’ouevres  for a party (maybe this weekend’s Super Bowl?!) or if you have a more rubenesque eggplant that would be a perfect size for dinner entrees; and 3} the breadcrumbs add a fabulous bit of crunch to the whole package just like a traditional pizza dough would.

So without further ado, here’s the recipe…Ms. Jeannie hopes you love this magical version of pizza just as much as the tradtional.

Eggplant Pizza (serves 6)

2 tablespoons cooking oil (Ms. Jeannie used olive oil)

1 small clove of garlic, minced

3/4 cup finely chopped onion

3/4 cup finely chopped green pepper

4 1/2 tablespoons tomato paste

3 tablespoons water

1 teaspoon oregano

3/4 teaspoon basil leaves

3/4 teaspoon sugar

2 3/4 teaspoons salt* (Ms. Jeannie thinks this might be a typo as it seems like a lot of salt for this size recipe so please use caution and your own sensibilities with this ingredient. And remember you an always add more salt but never take it away.  Ms.Jeannie used about 1 teaspoon total but you might adjust that according to your taste).

1 medium eggplant

1 egg

1 tablespoon milk

1/2 cup bread crumbs (Ms. Jeannie used plain panko-style bread crumbs)

1/4 cup freshly grated Parmesean cheese

1/4 teaspoon freshly ground pepper

flour for dredging

Oil for frying (Ms. Jeannie used olive oil)

Toppings of your choice: whatever  you normally like on a pizza ie: mozzarella cheese, fresh basil, olives, etc.

Directions:

1. Heat the oil in a one quart saucepan. Add the garlic, onion and green pepper. Cook, stirring, three minutes or until the onions and green pepper are limp.

pizza3

2. Add the tomato paste and water. Cover and cook, stirring frequently, over low heat until very thick, about ten minutes Add the oregano, basil, sugar and 1/2 teaspoon of salt* before the end of cooking time. *Salt to taste here. If you think the sauce needs more add a little bit, just keep in mind you’ll be adding salty parmesean cheese and possibly salty toppings later).

3. Remove sauce from heat and set aside while preparing the eggplant.

4. Wash, peel and cut eggplant into cross-wise slices one half inch thick.

5. Beat the egg with the milk and set aside. Mix bread crumbs with the remaining cheese, 1/2 teaspoon salt and the pepper.

6. Dip the eggplant slices in the flour, then in the beaten egg, then in the seasoned bread crumbs.

7. Saute the eggplant in the hot oil until golden, turning to brown on both sides. Remove from the pan and drain on paper towels. Repeat until all eggplants are cooked.

pizza4

8. Place the cooked eggplant slices on a cookie sheet and spread them with the cooked tomato sauce. Top with mozzarella cheese and your desired toppings . Place under a broiler until the cheese has melted and is lightly browned. Serve immediately.

pizza6

Ms. Jeannie kept her pizzas simple and just topped them with mozzarella, capers, basil and garlic but other ideas include prosciutto, pineapple, mushrooms, pepperoni, olives, figs, etc. So many possibilities!

Happy experimenting dear readers! With love from Ms. Jeannie and Craig Claiborne

You can find Craig Claiborne’s Herb and Spice Cook Book here and a host of other vintage recipes Ms. Jeannie has blogged about previously here.

Want to know what it is like to run a real-life modern day pizza kitchen? Check out the recently published book Delancey by Molly Wizenberg – it is completely entertaining. And if you are not craving pizza by the end of all this, you are extraordinary:)

mollywizenberg


In the Vintage Kitchen: How To Make Healthy Refried Beans From Scratch

beans1

Happy New Year dear readers! Ms. Jeannie is sending you bucketfuls (it’s been raining a lot here) of good wishes, good fortune and good health for this new year.

This week we are back in the vintage kitchen with a healthy recipe that features a food staple held high in the luck department for January. Beans! They also made the news this past week as something we Americans should be eating more of (poor unfortunate sugar just got the worst rap) so we are conquering two bright and shiny wish you well tidings with one post here – good health and good luck.

If you are anything like Ms. Jeannie you might never have thought much about refried beans…how they are made, what exactly they are made with and how you might possibly make your own better version at home. In the store they come canned in two varieties, vegetarian and traditional and most contain hydrogenated oils and preservatives which are not the healthiest of options. But refried beans are great on tacos, burritos and nachos and are a great source of protein so Ms. Jeannie was excited to come across a from-scratch recipe in this vintage cookbook recently listed in her shop

bestrecipes1
Best Recipes from the Cook Book Guild published in 1972

Published in 1972, The Best Recipes from the Cook Book Guild is actually a compilation book of hundreds of recipes from other note-worthy cookbooks published between the 1940’s and the 1960’s. Each recipe comes with source notes and sometimes a story about where the recipe came from and who made it originally, which of course opens the door to a myriad of culinary adventures to pursue.


mexicancooking

The refried bean recipe came from the 1967 edition of The Complete Book of Mexican Cooking by Elisabeth Lambert Ortiz (1915-2003), who was an award-winning  British food writer and the wife of Mexican diplomat Cesar Ortiz Tenoco.

elisabethlambertortiz

Through extensive travels in South America (and perhaps a few helpful lessons from Cesar’s family!) Elisabeth became an expert at preparing and instructing others on the art of Mexican cooking. The author of numerous international cookbooks, she is credited primarily with introducing Latin American cuisine to home cooks in both the U.S. and her native England during the 1960’s singing it’s flavor-packed praises in the forms of books and articles for Gourmet magazine and various food-related periodicals.  So what we have here dear readers is a fresh approach to an ethnic recipe from  a woman who learned her way through the culture. In Ms. Jeannie’s opinion, this is the best kind of cooking – learning through curiosity, love and experience .

Part One: Cooking the Beans

Refried Beans (Frijoles Refritos) serves 6

2 cups dried pinto, black or red kidney beans (Ms. Jeannie used black beans for her recipe)

cold water

2 onions, chopped

2 cloves garlic, chopped

1 bay leaf

2 serrano chiles, chopped or 1 teaspoon dried chilis, crumbled (Ms. Jeannie used one teaspoon red pepper flakes since fresh chiles aren’t in season yet here in the South)

11 tablespoons lard or oil (Ms. Jeannie used olive oil)

salt

freshly ground pepper

1 tomato, peeled, seeded and chopped ( if tomatoes aren’t in season yet you can substitute 1 can of diced tomatoes, drained of juice)

  1. Wash the beans and place in a saucepan, without soaking, with enough cold water to cover, 1 of the chopped onions, 1 of the garlic cloves, the bay leaf and the chiles.
  2. Cover, bring to a boil, reduce heat; and simmer gently , adding more boiling water as it evaporates from the pan. {Note: Using black beans, this process took about one hour and 30 minutes with about a cup of additional boiling water added halfway through.}
  3. When the beans begin to wrinkle (or become sift as in the case of the black beans) add one tablespoon of lard or oil and continue to cook for an additional 30 minutes over the same heat. Do not add anymore water.
  4. Heat the remaining lard or oil in a skillet, and saute the remaining onion and garlic until limp. Add the tomato and cook for an additional 2 minutes.
  5. Remove the pan from the heat and working in small batches add beans to the onion/garlic mixture mashing them together to form a paste. Repeat this step until all beans have mashed with the onion and garlic.
  6. Heat 2 tablespoons of lard or oil in a large skillet, add the beans in small batches and mash over low heat, forming a creamy heavy paste. Add two additional tablespoons of lard or oil intermittently throughout this process.
  7. Repeat step six again with the last 4 tablespoons of oil, once the beans have all been initially pureed. (This is the re-fried part in the name refried beans!) It should look like this when finished…
Homemade Refried Beans
Part Two: Mashing and Frying the Beans

This recipe is a great one because, once you understand the principles of refried beans  you can really change things up and add your own flair if you like. Spice it up, experiment with different herbs or chopped vegetables like leeks or scallions or different types of cheese.  If you like your refried beans a little bit more loose, you can add a little water to the pan after step 7 and mix it into the beans until you get the desired consistency. Likewise you can use the beans as part of lots of different dinner options from hors d’oeuvres to appetizers to main courses.

beans5

Ms. Jeannie made chicken tostados with her refried beans.  Quick and easy, she prepared them with the same whimsical, spur-of-the-moment method she uses for making tacos.  This one featured layers of tostado with chicken breast, green olives, lettuce, onion, avocado, cheddar cheese, tomatoes and the warm refried beans.

There are so many beans left over, Ms. Jeannie’s already hatching new recipes in her head about how else she can use them in her cooking this week ahead.  It looks like luck will continue spilling forth across many days this week in the kitchen department. If you want to save your luck for another day store it in an air-tight container and freeze it for later use:)

To embark on more culinary adventures using The Best Recipes from The Cookbook Guild as your spring board, please visit here. And as always, you can access dozens of other delicious vintage recipes on Ms. Jeannie’s blog using this link.

Happy cooking dear readers!


Taco Tuesday: In the Vintage Kitchen

mex1

In 1963, a new edition of a popular 12 year old cookbook was published by Beverly Pepper.

glamour magazine's after five cookbook

The cookbook was Glamour Magazine’s New After Five Cookbook containing a year’s worth of dinner recipes designed for the young modern woman who didn’t have a lot of extra time to sit down and menu plan. With an audience comprised primarily of busy career girls, new mothers, college grads, young marrieds and the over extended singleton…

photo via pinterest
photo via pinterest

the After Five Cookbook was a dream come true. Broken down by month and then further by week, each section begins with a pantry staple list needed for the month followed by a weekly shopping list of all ingredients needed over the next six days..

recipe2

The recipes are laid out from from Sunday to Friday of each week with Saturday of course left out, assuming either a night off, a party engagement or better yet, a dinner date out.

recipe1

The last twenty pages contain special large-scale menus ideal for holidays or house parties when ladies were cooking for a crowd.

photo via pinterest
photo via pinterest

This is the section where Ms. Jeannie found the recipe for this blog post – a feast of flavor (or a gourmet gangfest as Beverley Pepper liked to call it) that serves eight but could easily be doubled or tripled to feed the proverbial army. Time is always short-handed in December so while this recipe does take two hours to prepare, it freezes wonderfully, sits well in a chafing dish, makes excellent leftovers and transports easily if you are tailgating or pot-lucking your way through the month.

Mexican Beef with Olives

Mexican Beef with Olives (serves 6-8)

3 lbs. cubed grass-fed stew beef

4 tablespoons olive oil

1/2 lb. ground grass-fed beef

2 minced garlic cloves

3 green peppers, cut in 1″inch strips

6 onions, chopped

2 tblsp. tomato paste

6 dashes Tabasco sauce (or equivalent hot sauce)

3 tblsp. chili powder

3 cups chicken broth

2 cans corn kernels, drained but reserve the liquid

1 cup spanish olives, sliced

salt and pepper (to taste)

  1. In a large pan, brown the stew beef, ground beef, garlic, peppers and onions in the olive oil over medium high heat until the beef is browned and the onions begin to caramelize.
  2. Add the tomato paste, tabasco, chili powder, salt and pepper to the pan and mix well.
  3. Add the chicken broth, reduce heat to medium, cover and simmer for one hour.
  4. Add the corn kernals and simmer uncovered for an additional 30-45 minutes until most of the liquid is consumed.
  5. The mixture at this point should be thick and saucy, if it looks too liquidy or thin let it simmer longer, if it looks too dry add some of the reserved liquid from the drained corn kernels. Once the mixture reaches the desired consistency, add the olives and stir thoroughly over medium heat for 4 minutes.
  6. If you prepare this dish ahead of time add the olives just before reheating.
  7. Serve with rice, soft tortillas, hard tacos and lime wedges.

Mexican Beef with Olives

Ms. Jeannie served her tacos with white rice that was lightly tossed with freshly squeezed lime juice (half of a lime), a touch of salt and a few dashes of cumin.  Other serving options that would be equally delicious include: sour cream, cheddar cheese, cilantro, and/or sliced mango.

Fun for family and friends, this recipe only gets better as it sits in the fridge making leftovers and quick dinner reheats fast and easy throughout the week. A fun gift for food bloggers, kitchen experimenters and vintage cookbook lovers, the After Five Cookbook is available here.

Happy cooking dear readers!