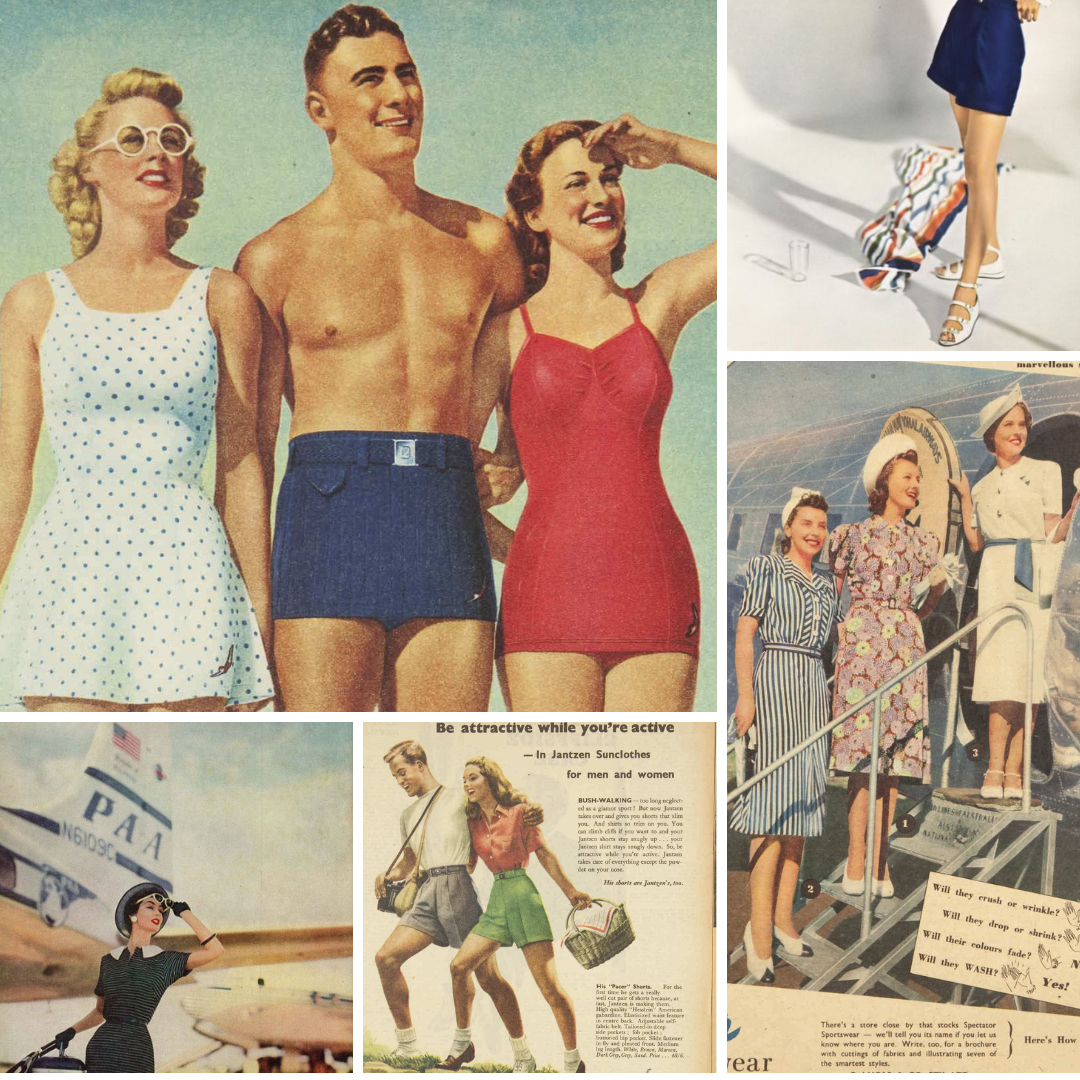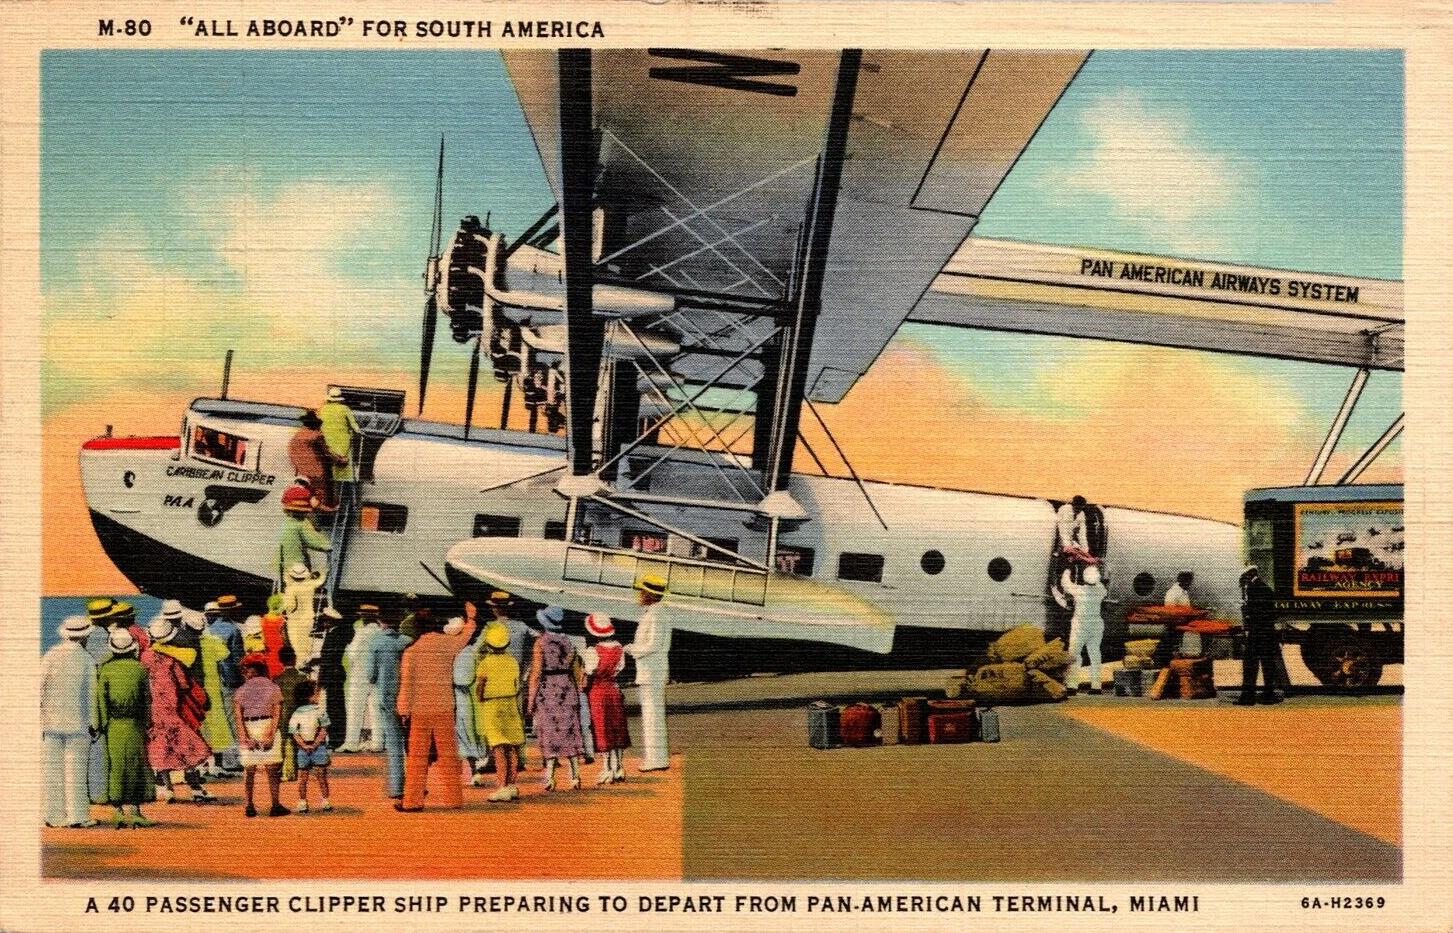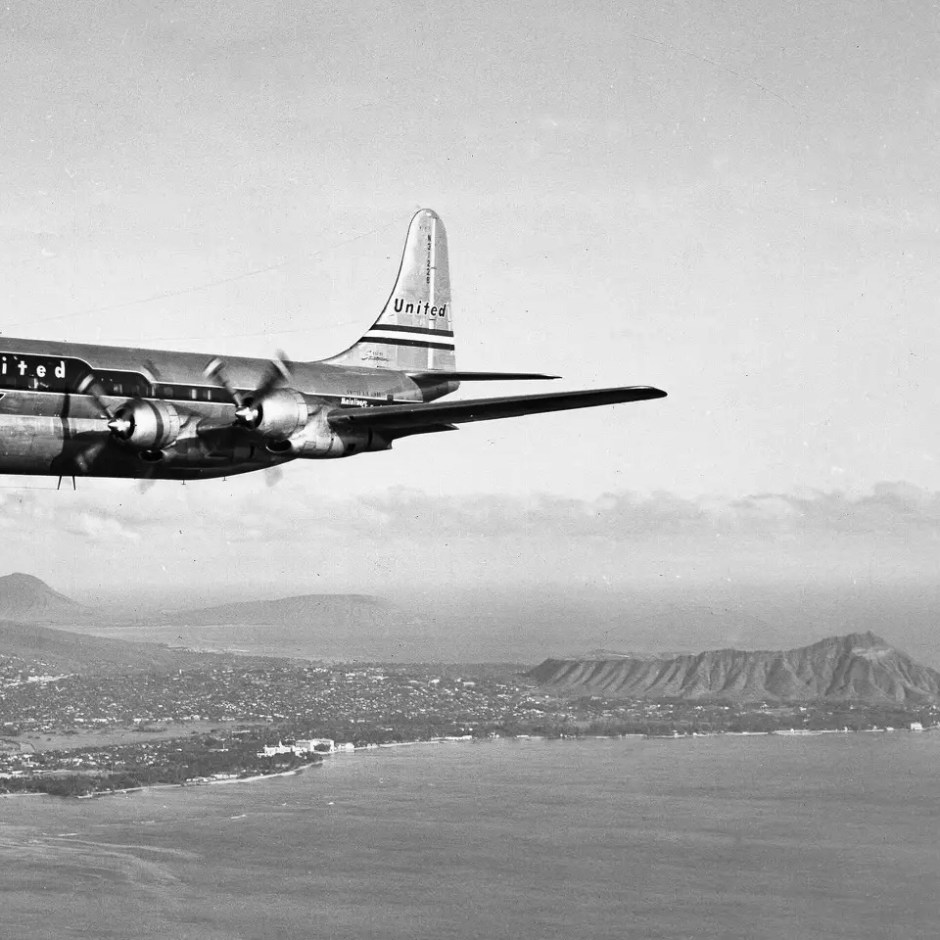

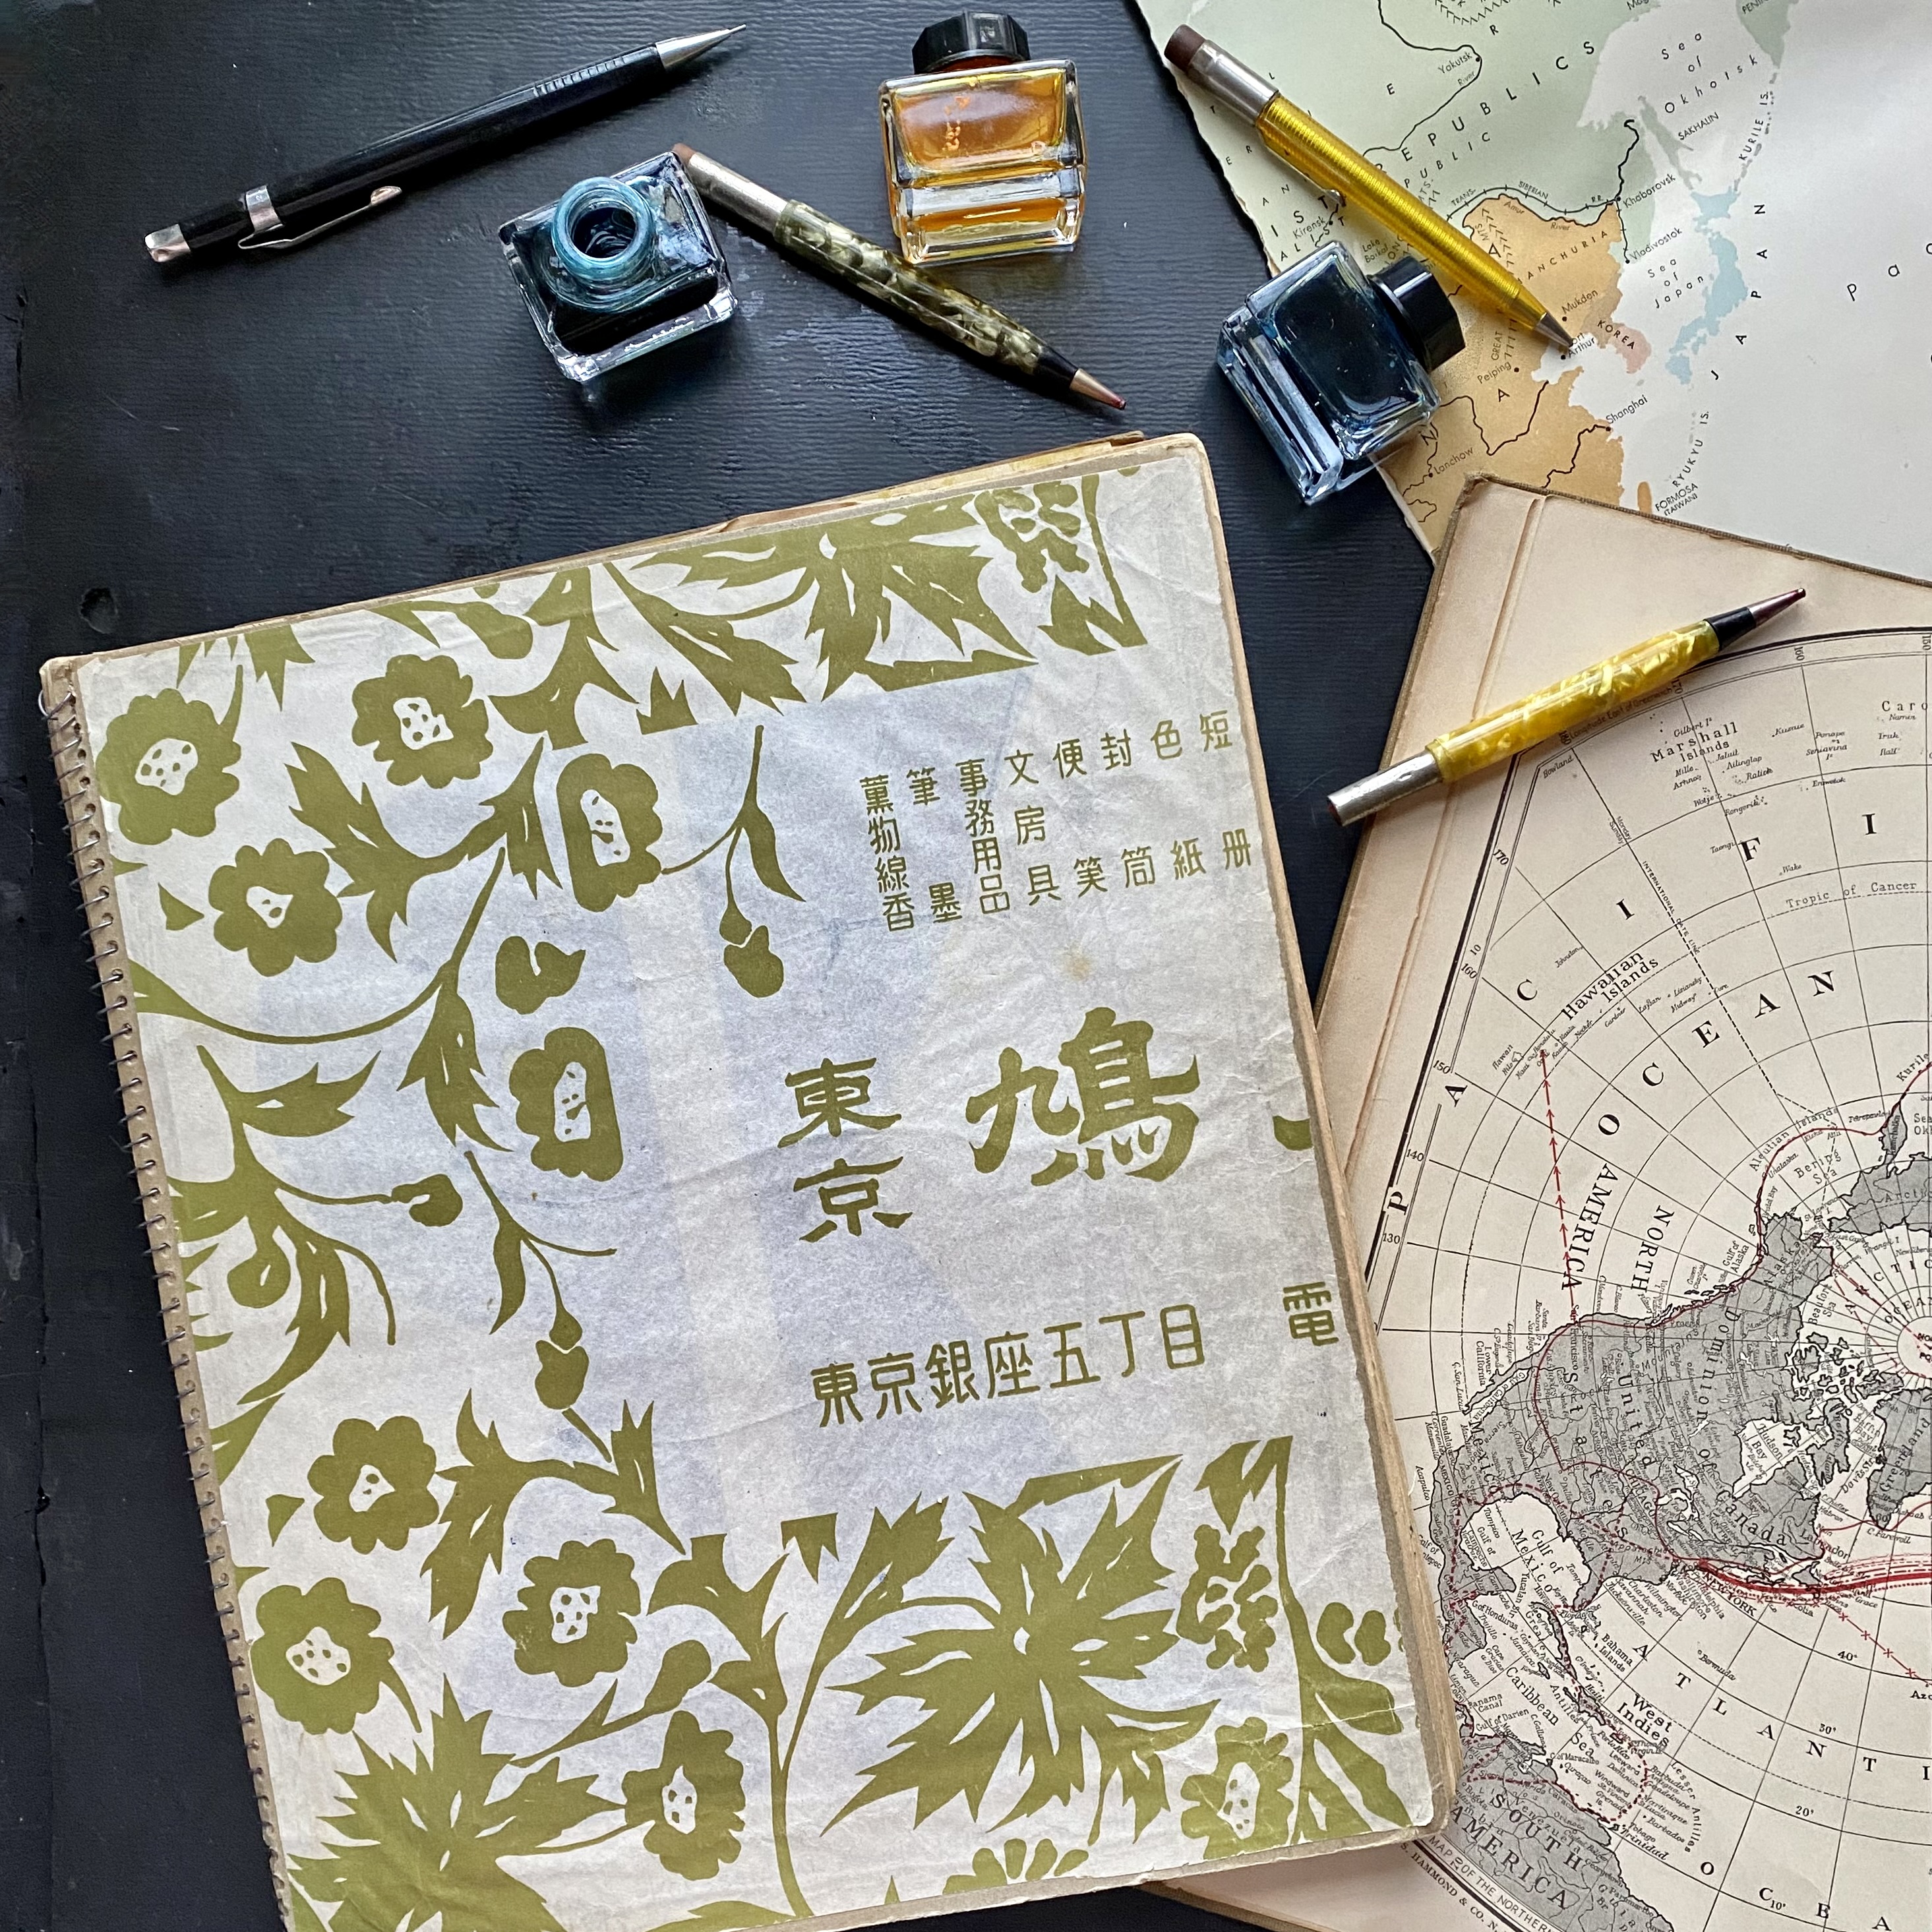
Truman packed his Dacron. Millie packed her day dresses. Together, they hauled over 60 pounds of luggage to the Portland International Airport, got on a plane, and flew to Hawaii. Destination number one of their 35-city tour around the world. The year was 1954. The month – February. Truman documented the entire trip in real-time, as it unfolded city by city, in a spiral-bound notebook clad in Japanese rice paper.
I didn’t know Truman, and I didn’t know Millie, but their notebook showed up on my doorstep in late February. Exactly 72 years, almost to the day, that this jet-setting couple departed for Hawaii.
There’s no rhyme or reason as to how interesting stories from history find their way here to the blog or to the shop. I mention the word serendipitous an embarrassing amount of times in previous posts, but this is how things seem to go when it comes to storytelling around here. Timing is the key to my kitchen. Especially when linked to forgotten heirlooms from centuries past.
In the case of Millie and Truman, the notebook arrived courtesy of a blog reader named Candace in Oregon. She thought it might be of interest. This bound-together scrapbook with its magical assortment of midcentury travel history…

had been tucked away in Candace’s library for over 20 years. After striking up a lovely friendship with her via email over many months in 2025, and in the midst of downsizing her collection of Japanese antiques, Candace performed the most generous of acts. She passed the scrapbook along to me, a lover of vintage travel ephemera and a collector of vintage travel stories.
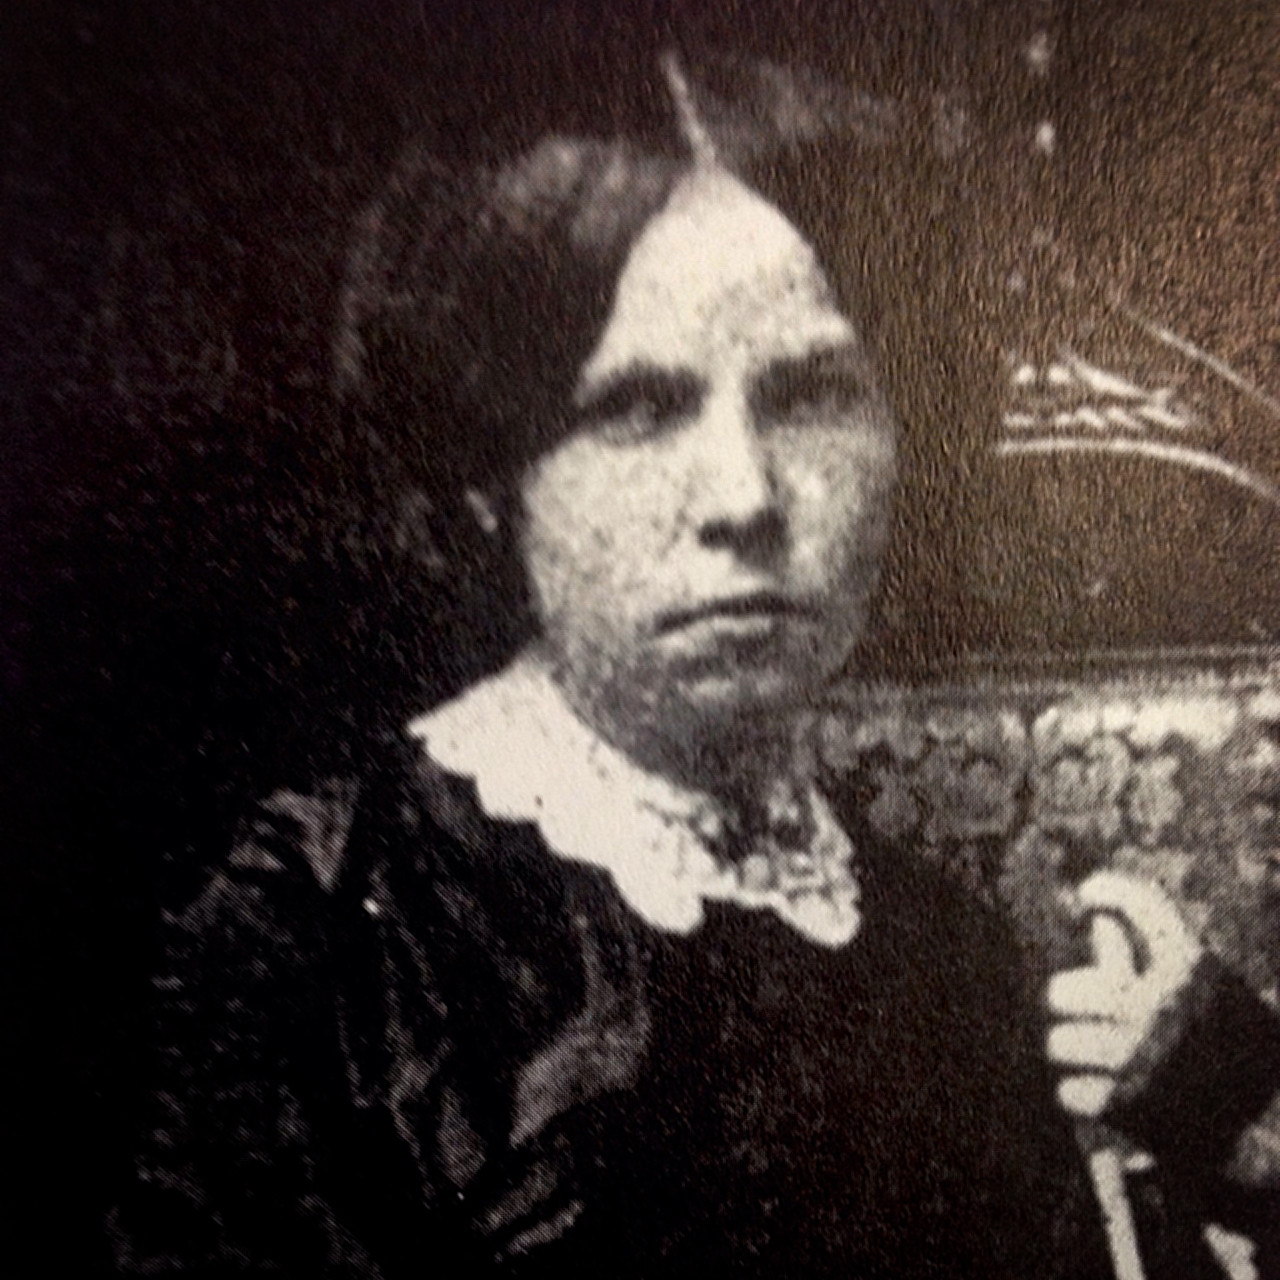
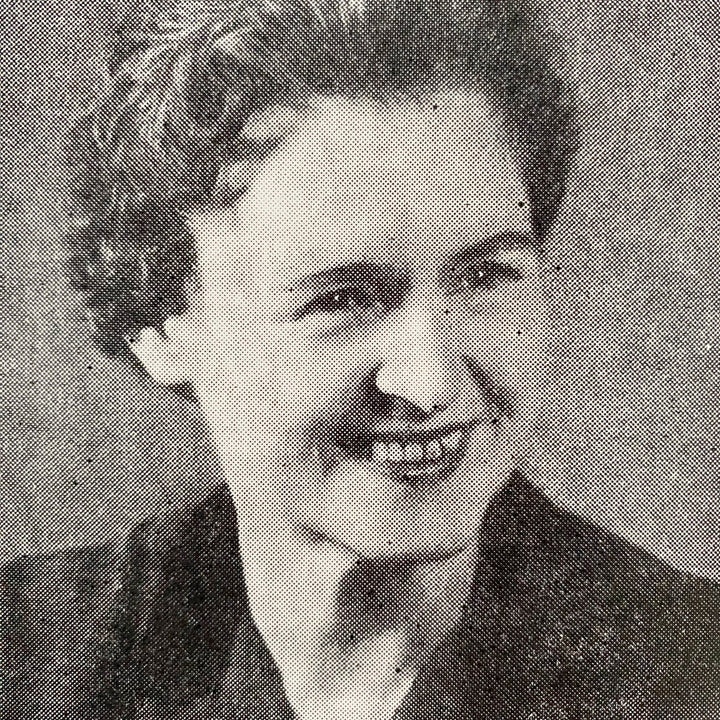
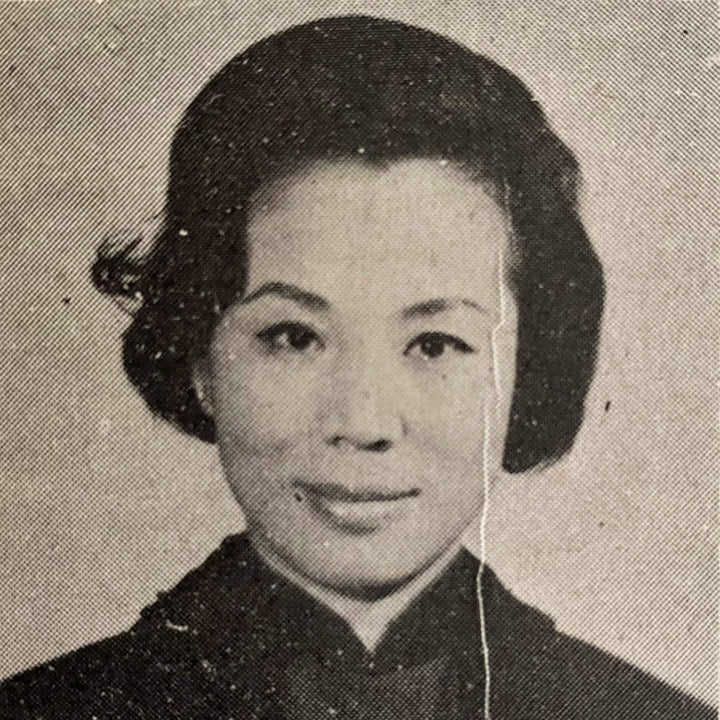
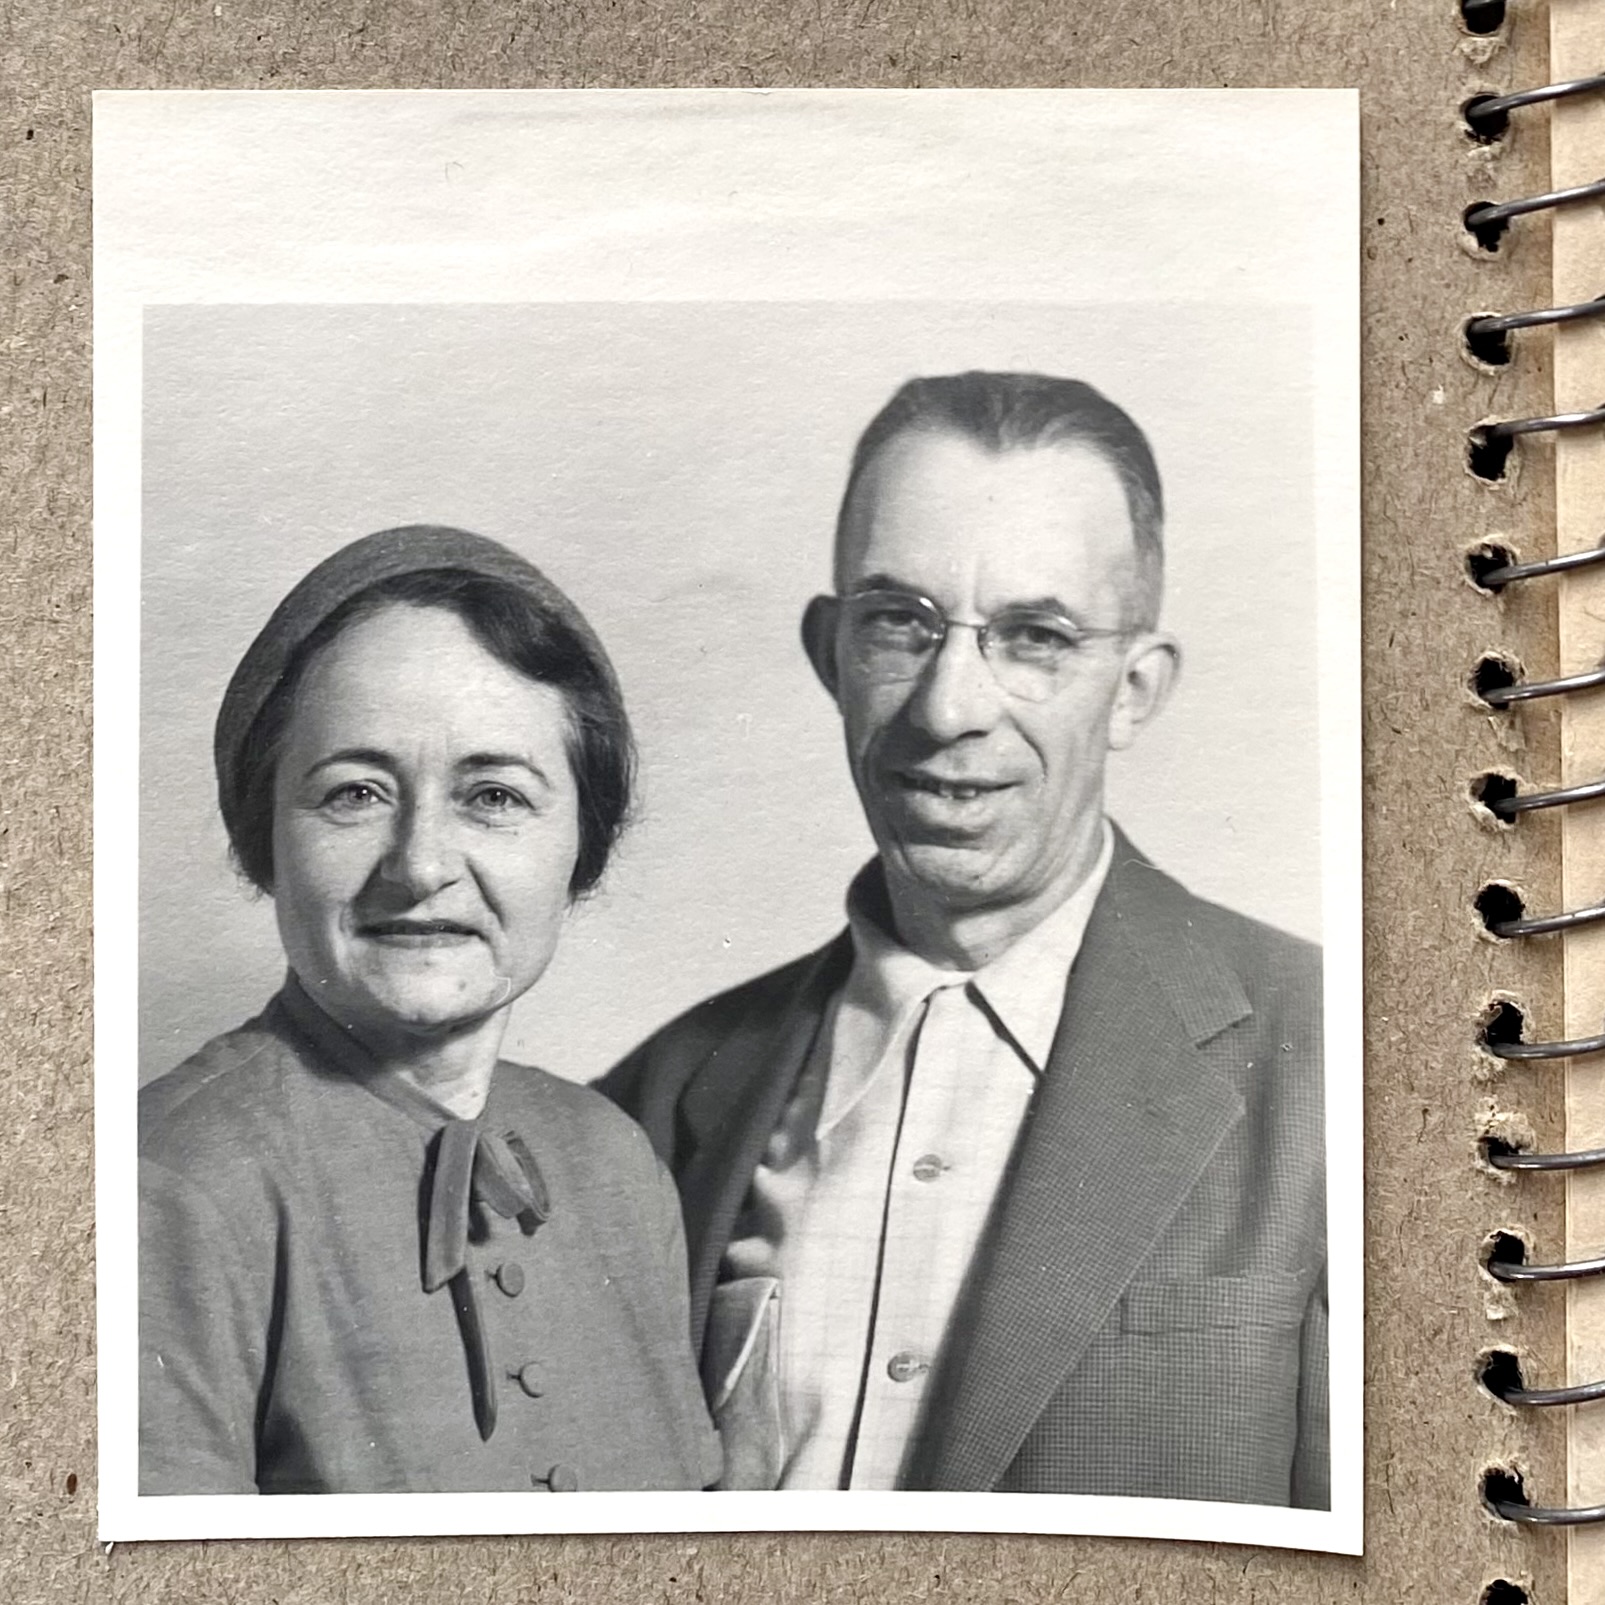
Candace didn’t know Truman or Millie either. She came to own their book via a box lot of Japanese sheet music that she had purchased from an Oregon antique auction in the late 1990s. The notebook, located at the very bottom of the box, was completely covered over by all the music and wasn’t discovered until she arrived home. When she opened the front cover, these two faces greeted her. Meet Truman and Millie.
Although Candace didn’t know at the time, or actually ever for that matter, that these two people were named Millie and Truman, this is where the art of collecting takes an interesting and unique turn. Candace is a daydreamer with a wonderful imagination and a true passion and appreciation for Japanese culture. As she turned the pages of the scrapbook, she noted all the cities they visited. The finely detailed sketches of people and places, the pasted-in currency from each foreign country, and the paper ephemera that hinted at sites seen, people encountered, and menus, hotel tickets, and telegrams exchanged all along the way.

Putting together all these pieces of information, Candace’s imagination began working out a possible story. She made up her mind that this couple, with their friendly faces and middle-aged years, were galivanting around the globe on a once-in-a-lifetime trip. A splurge, perhaps, or a saved-up dream that cemented and celebrated a special milestone in their lives. Their scrapbook, in Candace’s mind, was the souvenir story of their adventure. And imagining this couple in that light was joy enough.
Like many antique collectors, myself included, Candace is a romantic who appreciates the creativity, the nostalgia, the sentimentality required to imagine the past life of an inanimate object and the people who may or may not have played a role in its making. Sometimes that simple act is more fulfilling than discovering an actual history.
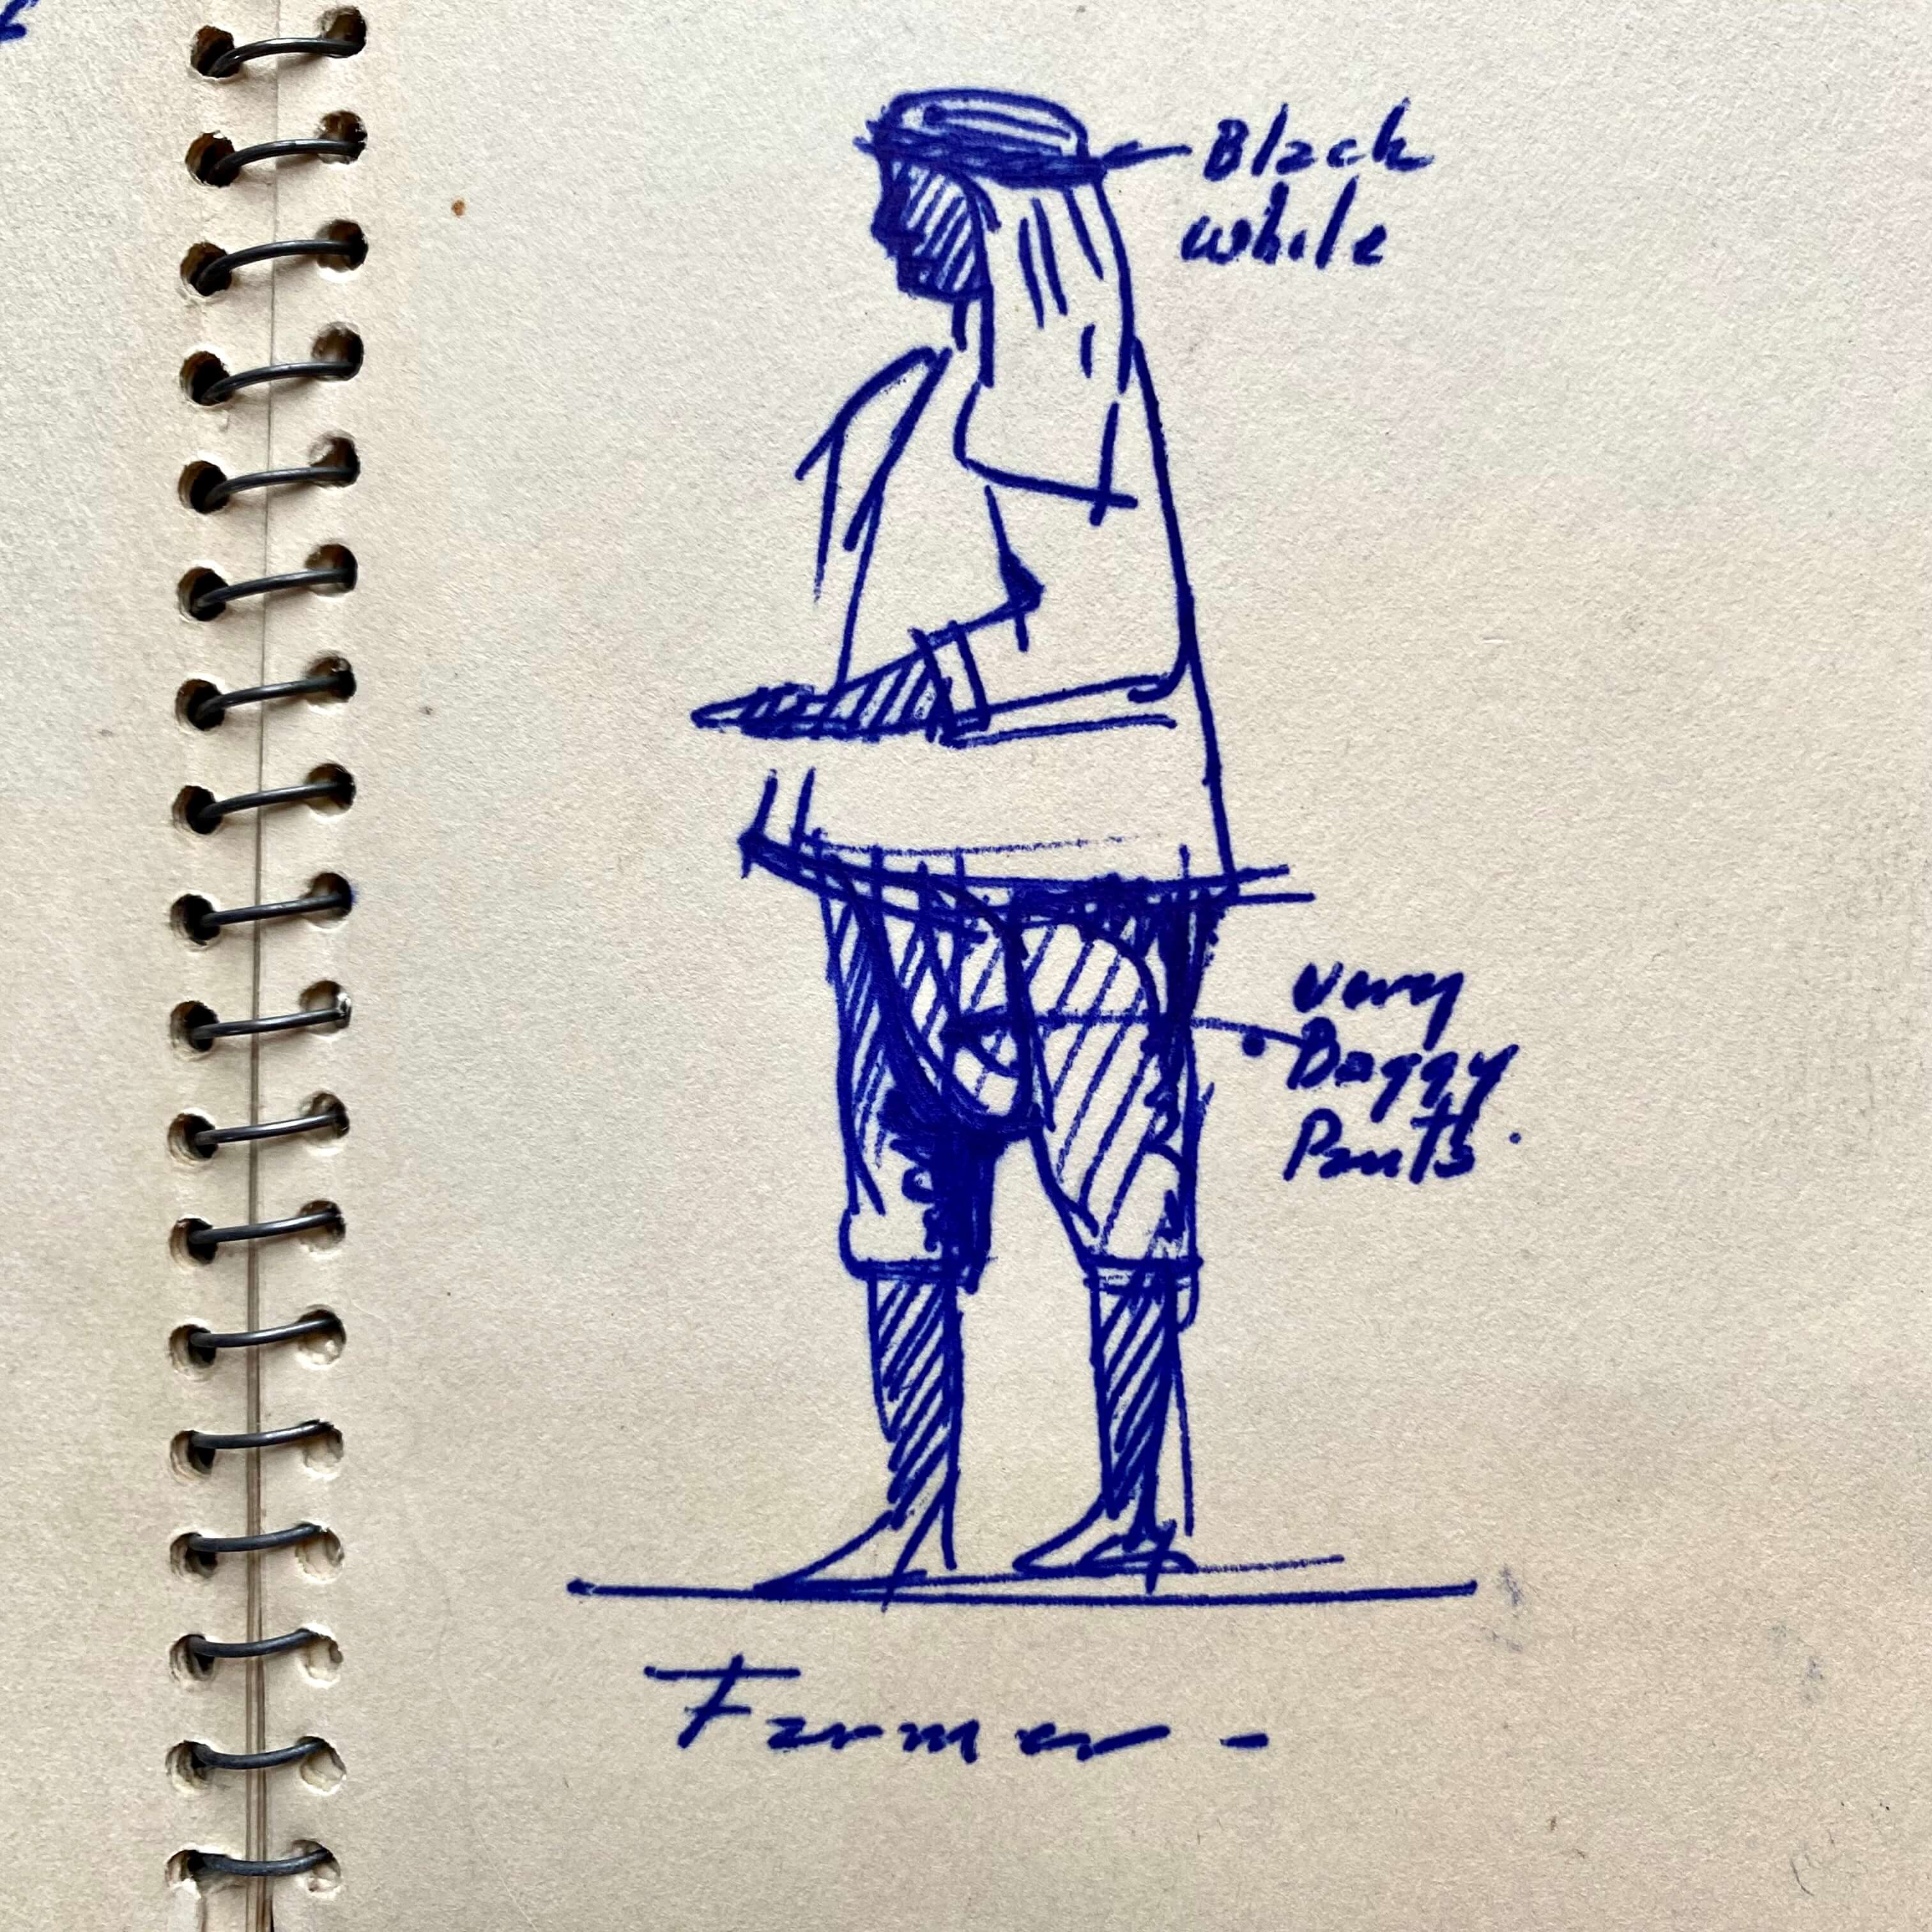
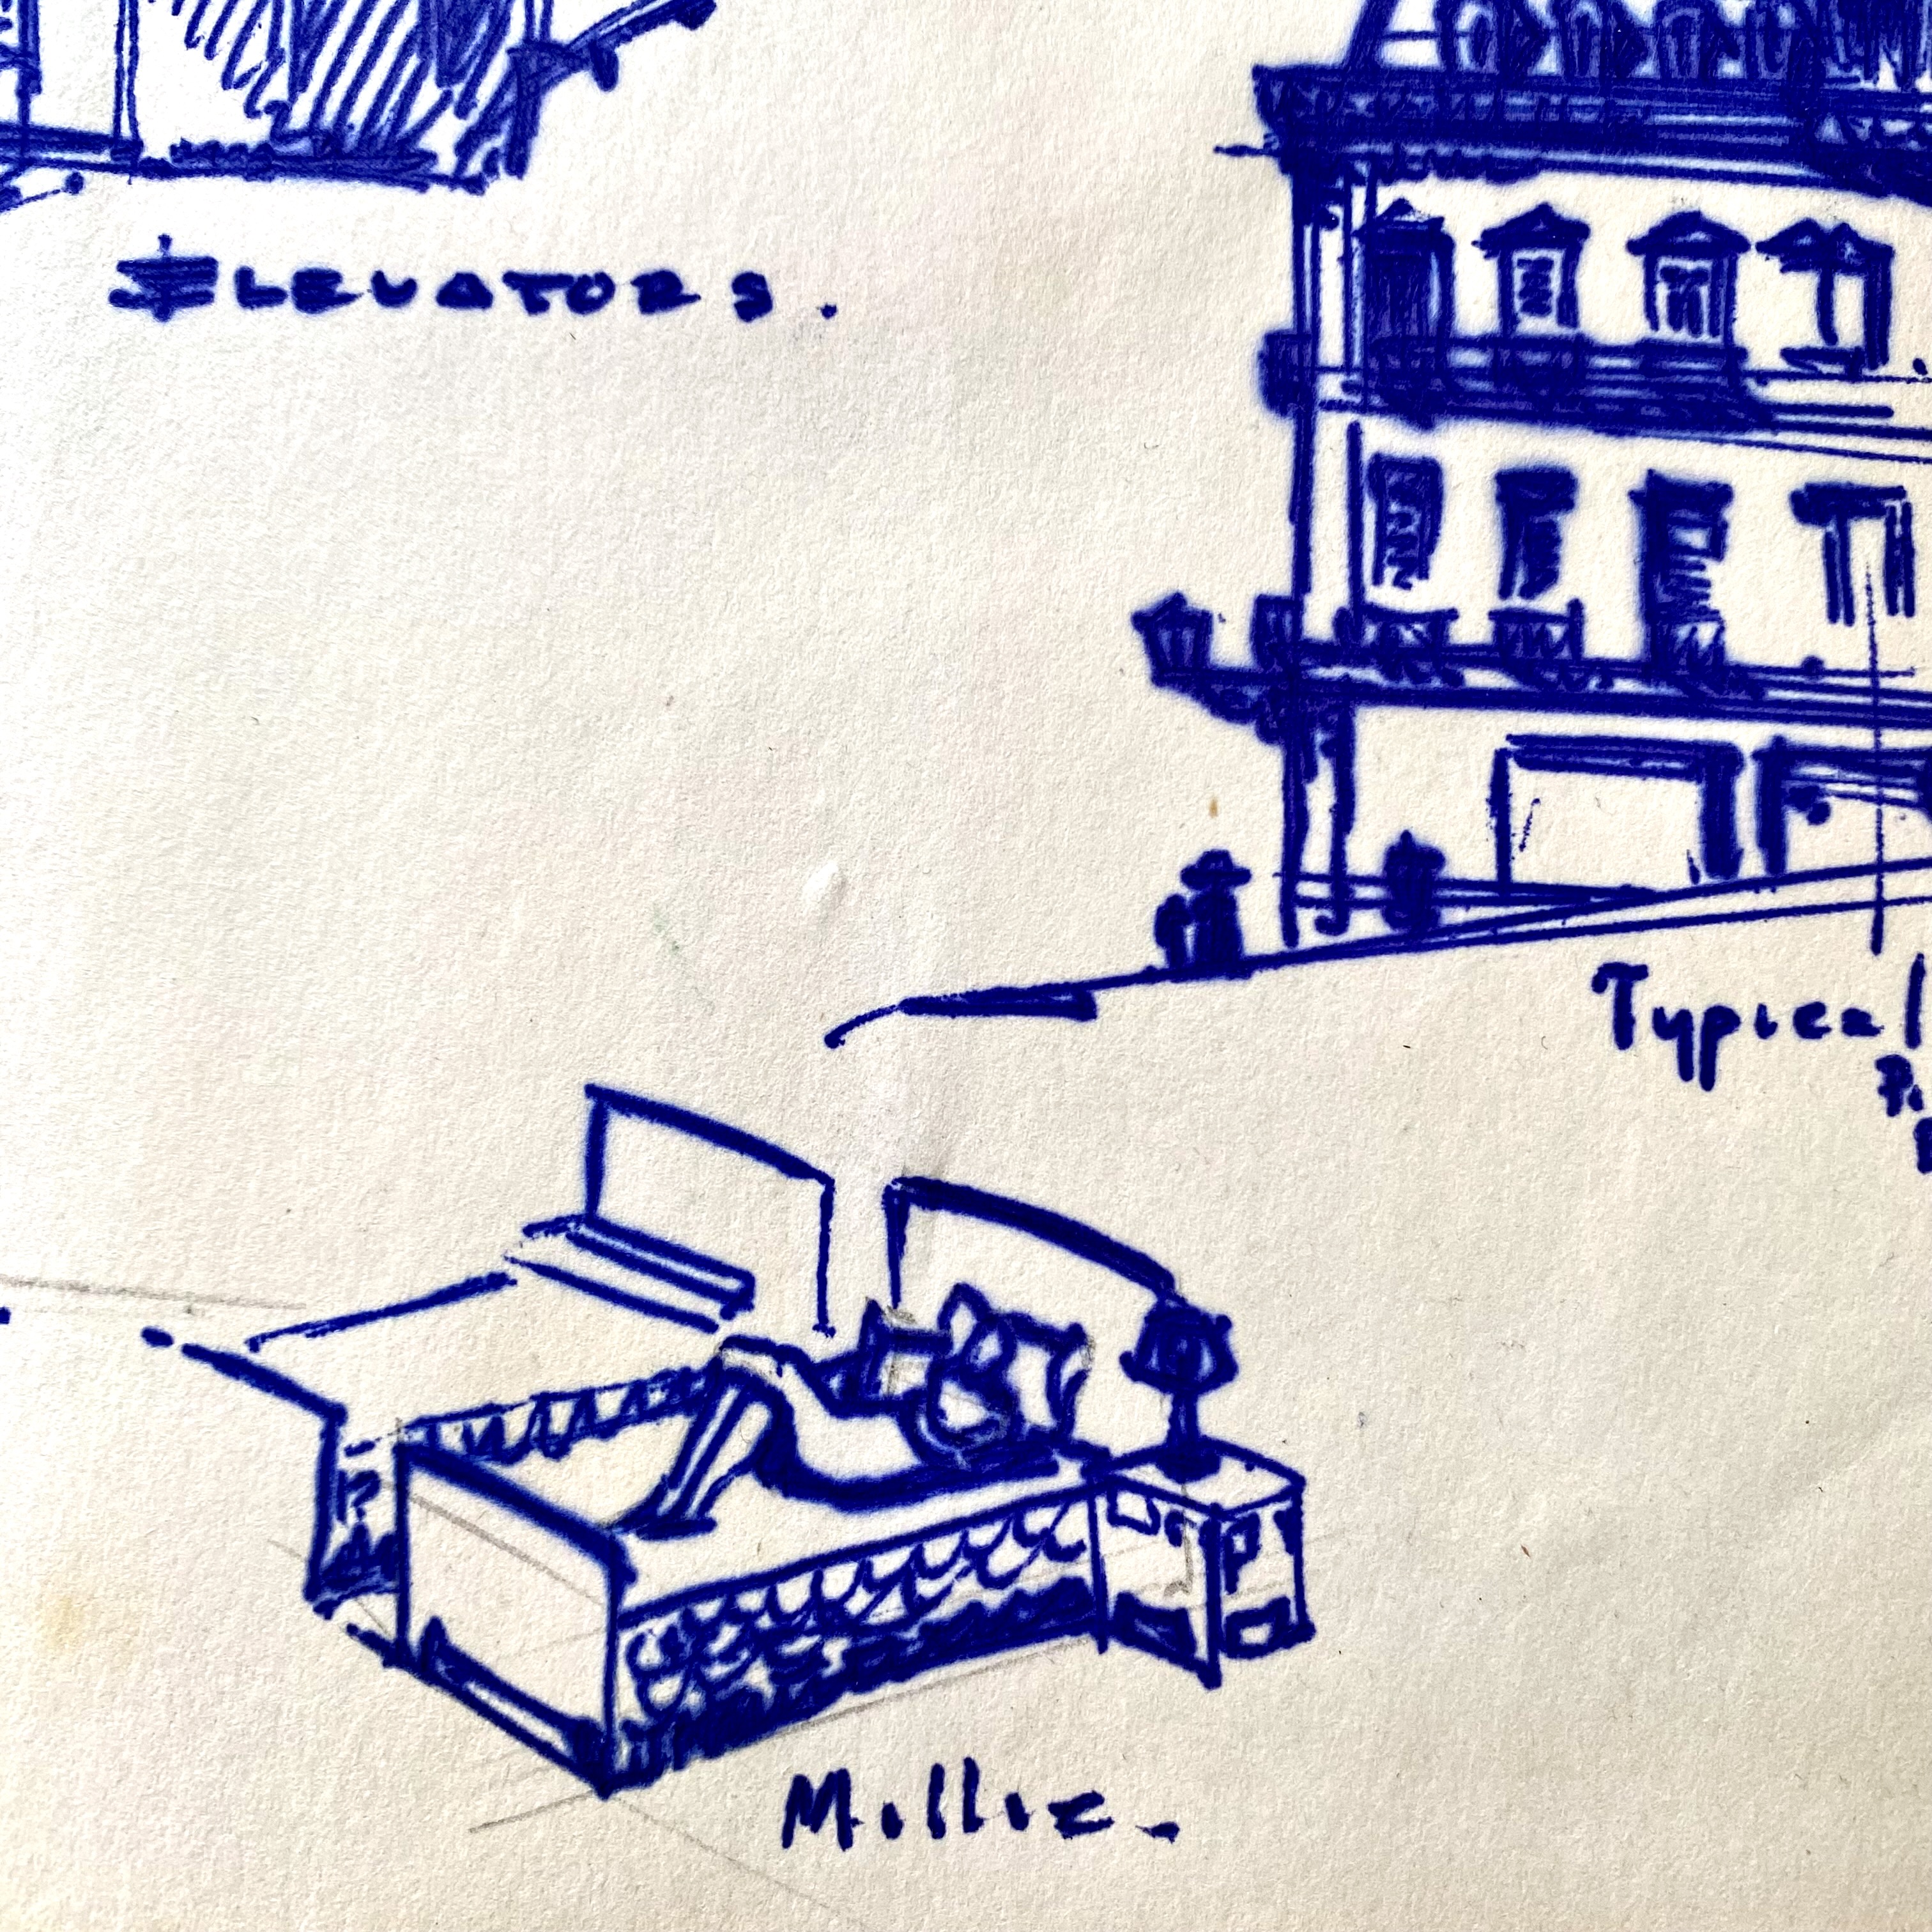
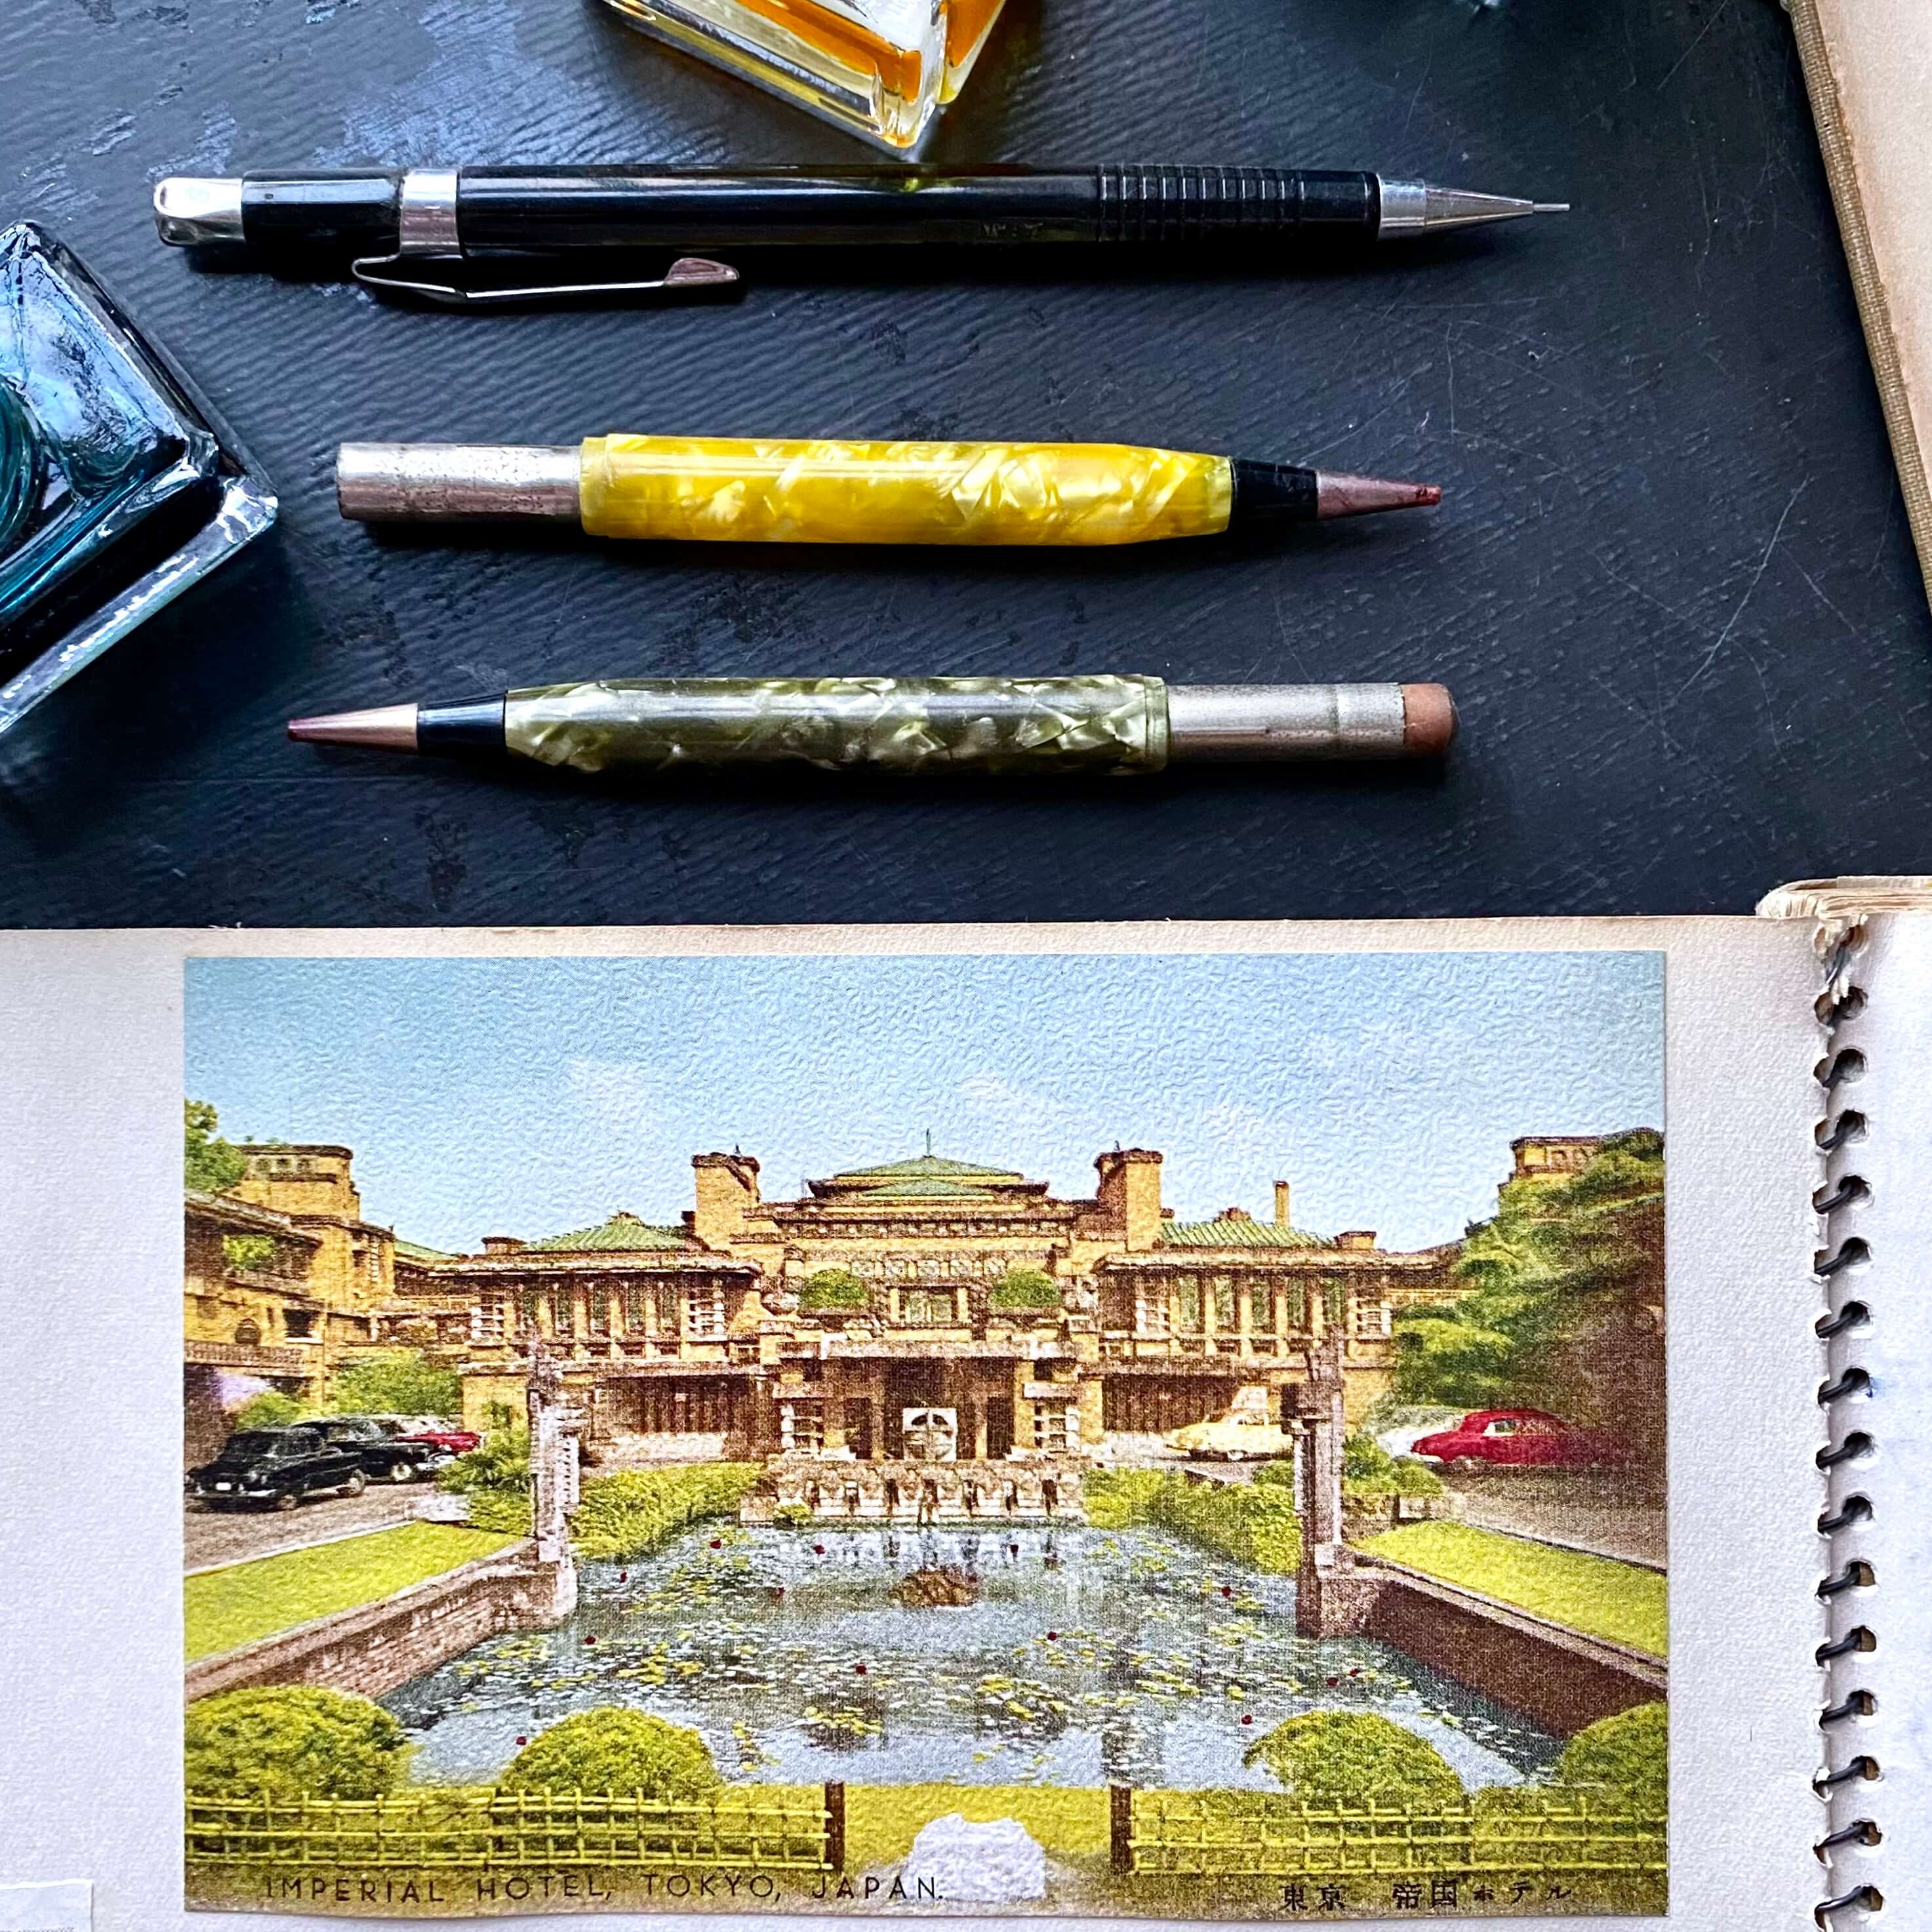
When the scrapbook came to me, I could feel the weight of the trip in its pages. In the way the blue ink and fervent handwriting swept across the paper. Across cities. Across cultures. In the way the pages sounded as they turned. How the tissue-thin receipts and airmail itineraries crinkled and crackled, bonded with 70-year-old paste that was brittle and slow to waken. I could feel the weight of the trip in the sketches of buildings, faces, cars, animals. In the way the book was carefully organized, documented, and arranged in linear fashion for future consultation and consideration. I could feel the weight of a story underneath this story.
On first glance through the book, I didn’t know Candace’s theories yet about the couple and who they might be. She shared that in a later email. But like Candace, I had my own thoughts and speculations on who this couple could be and what this notebook might be all about.
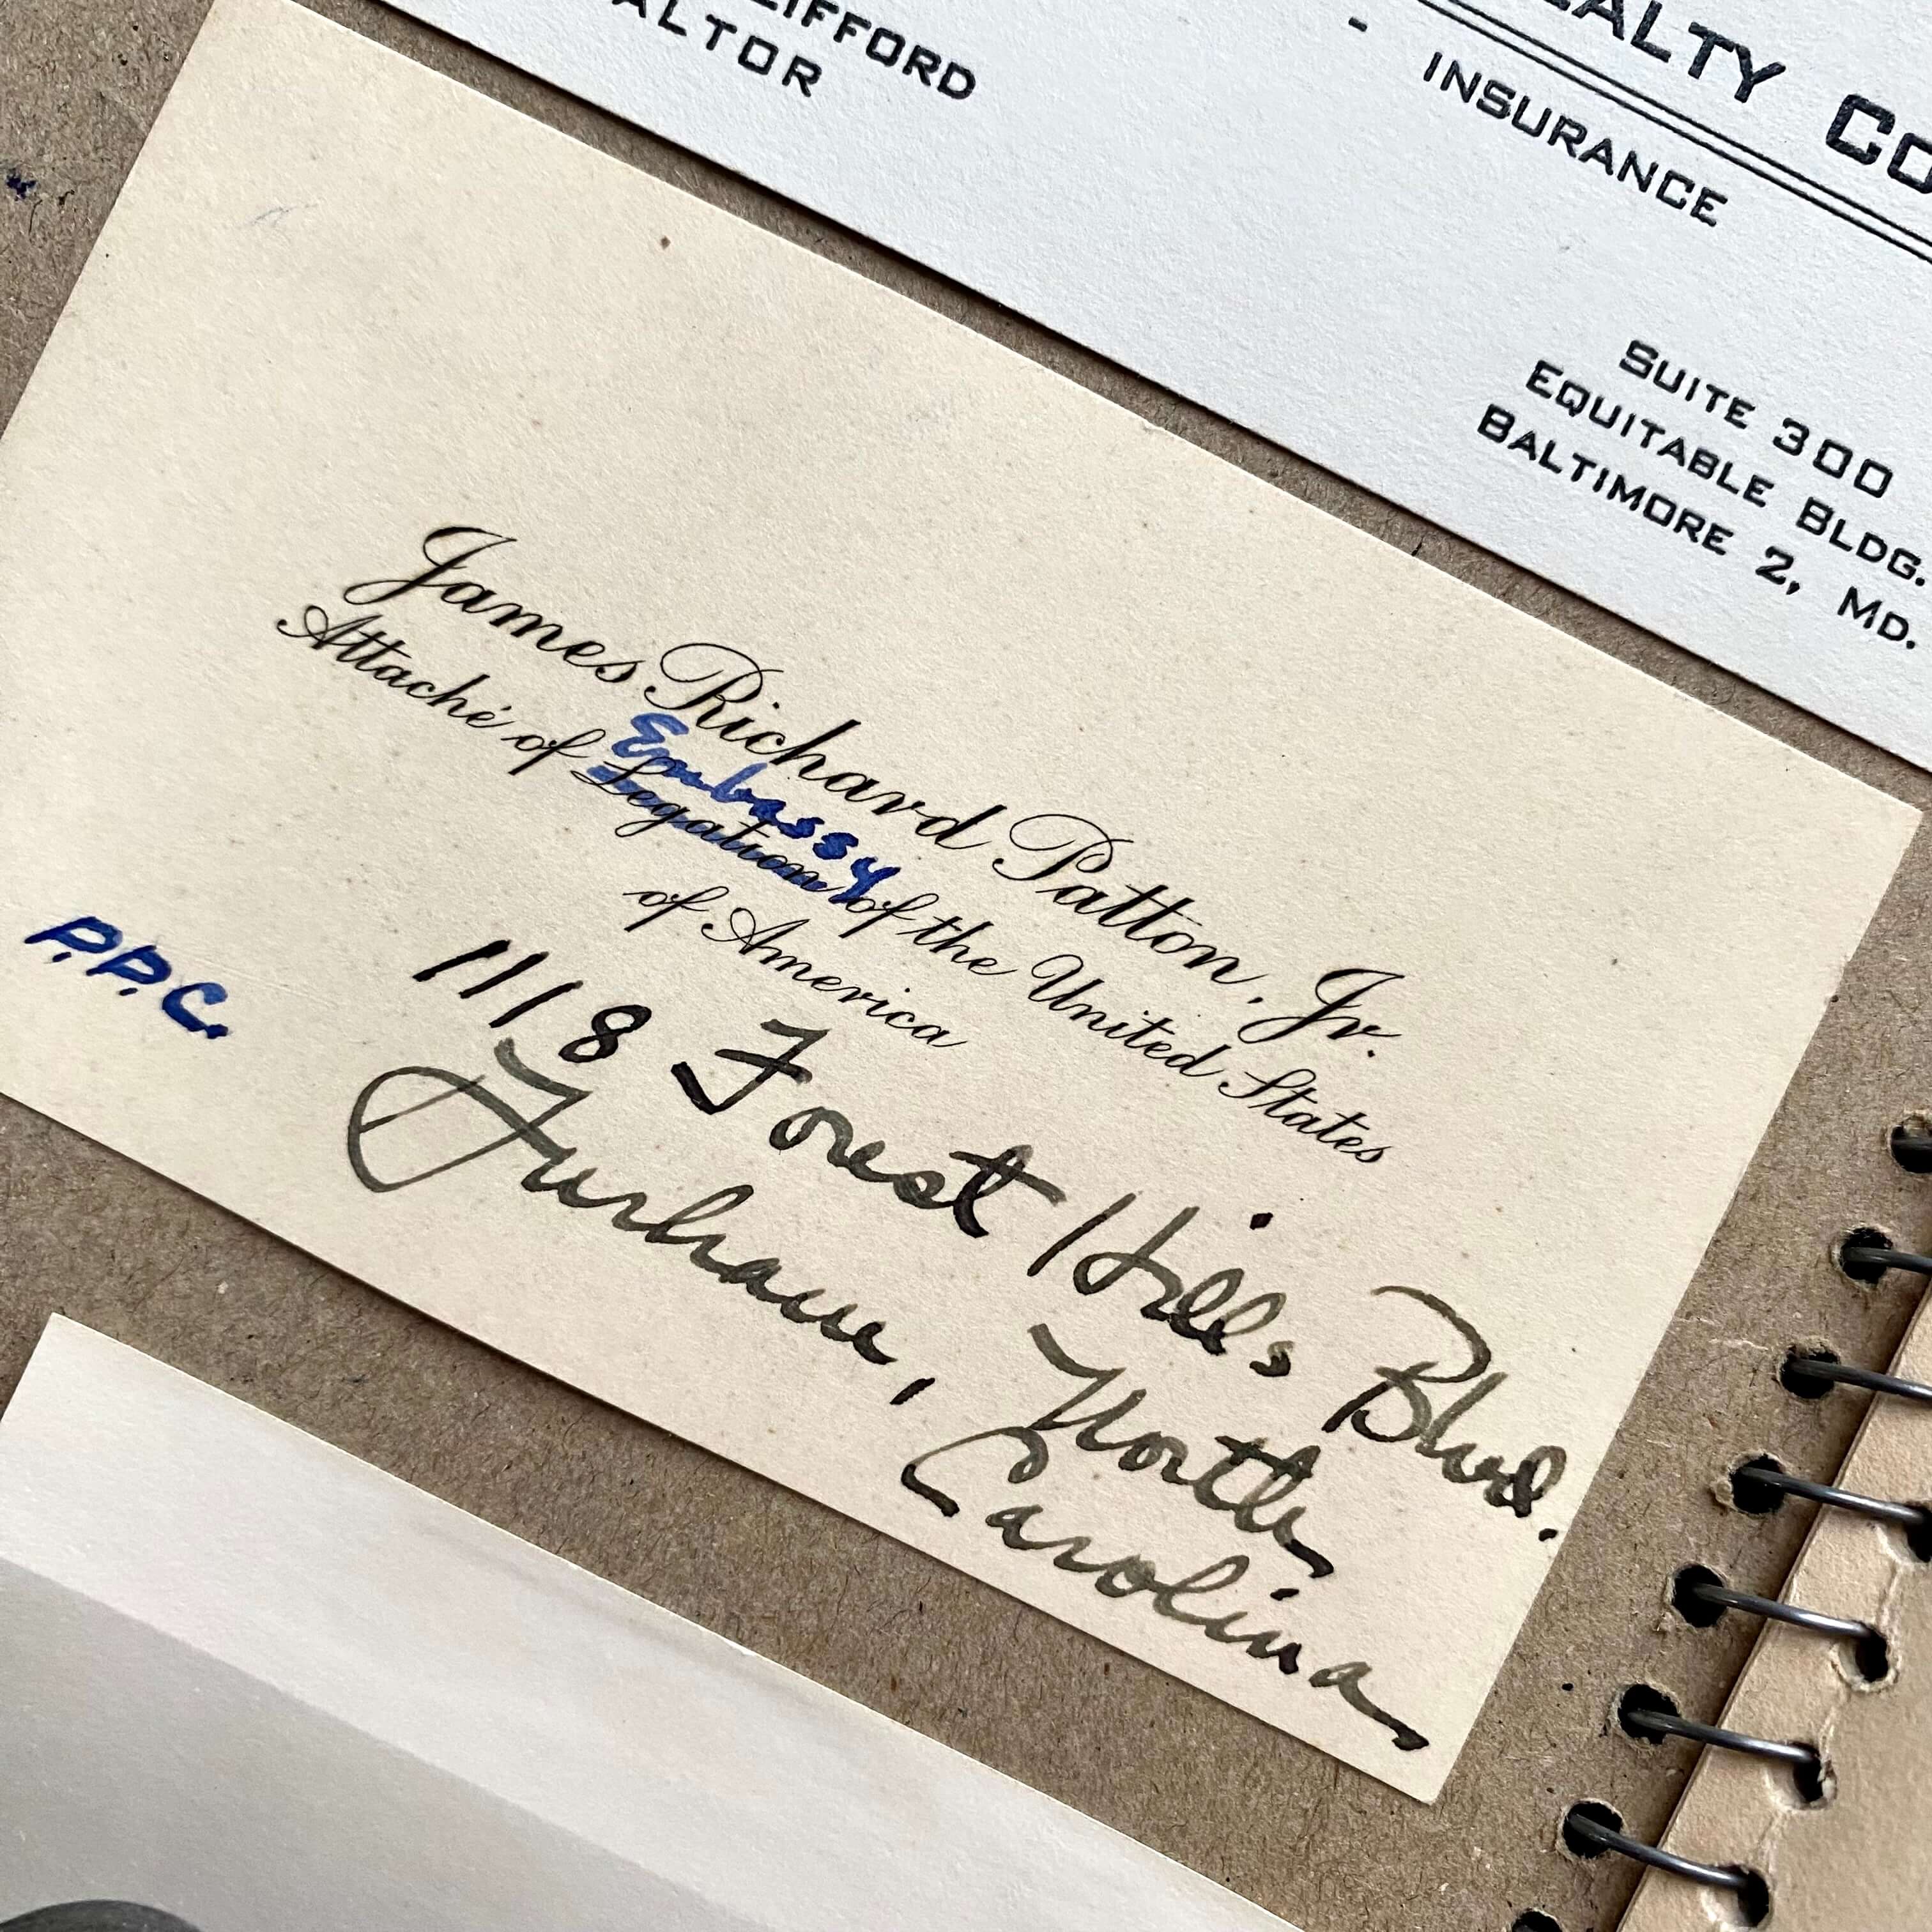
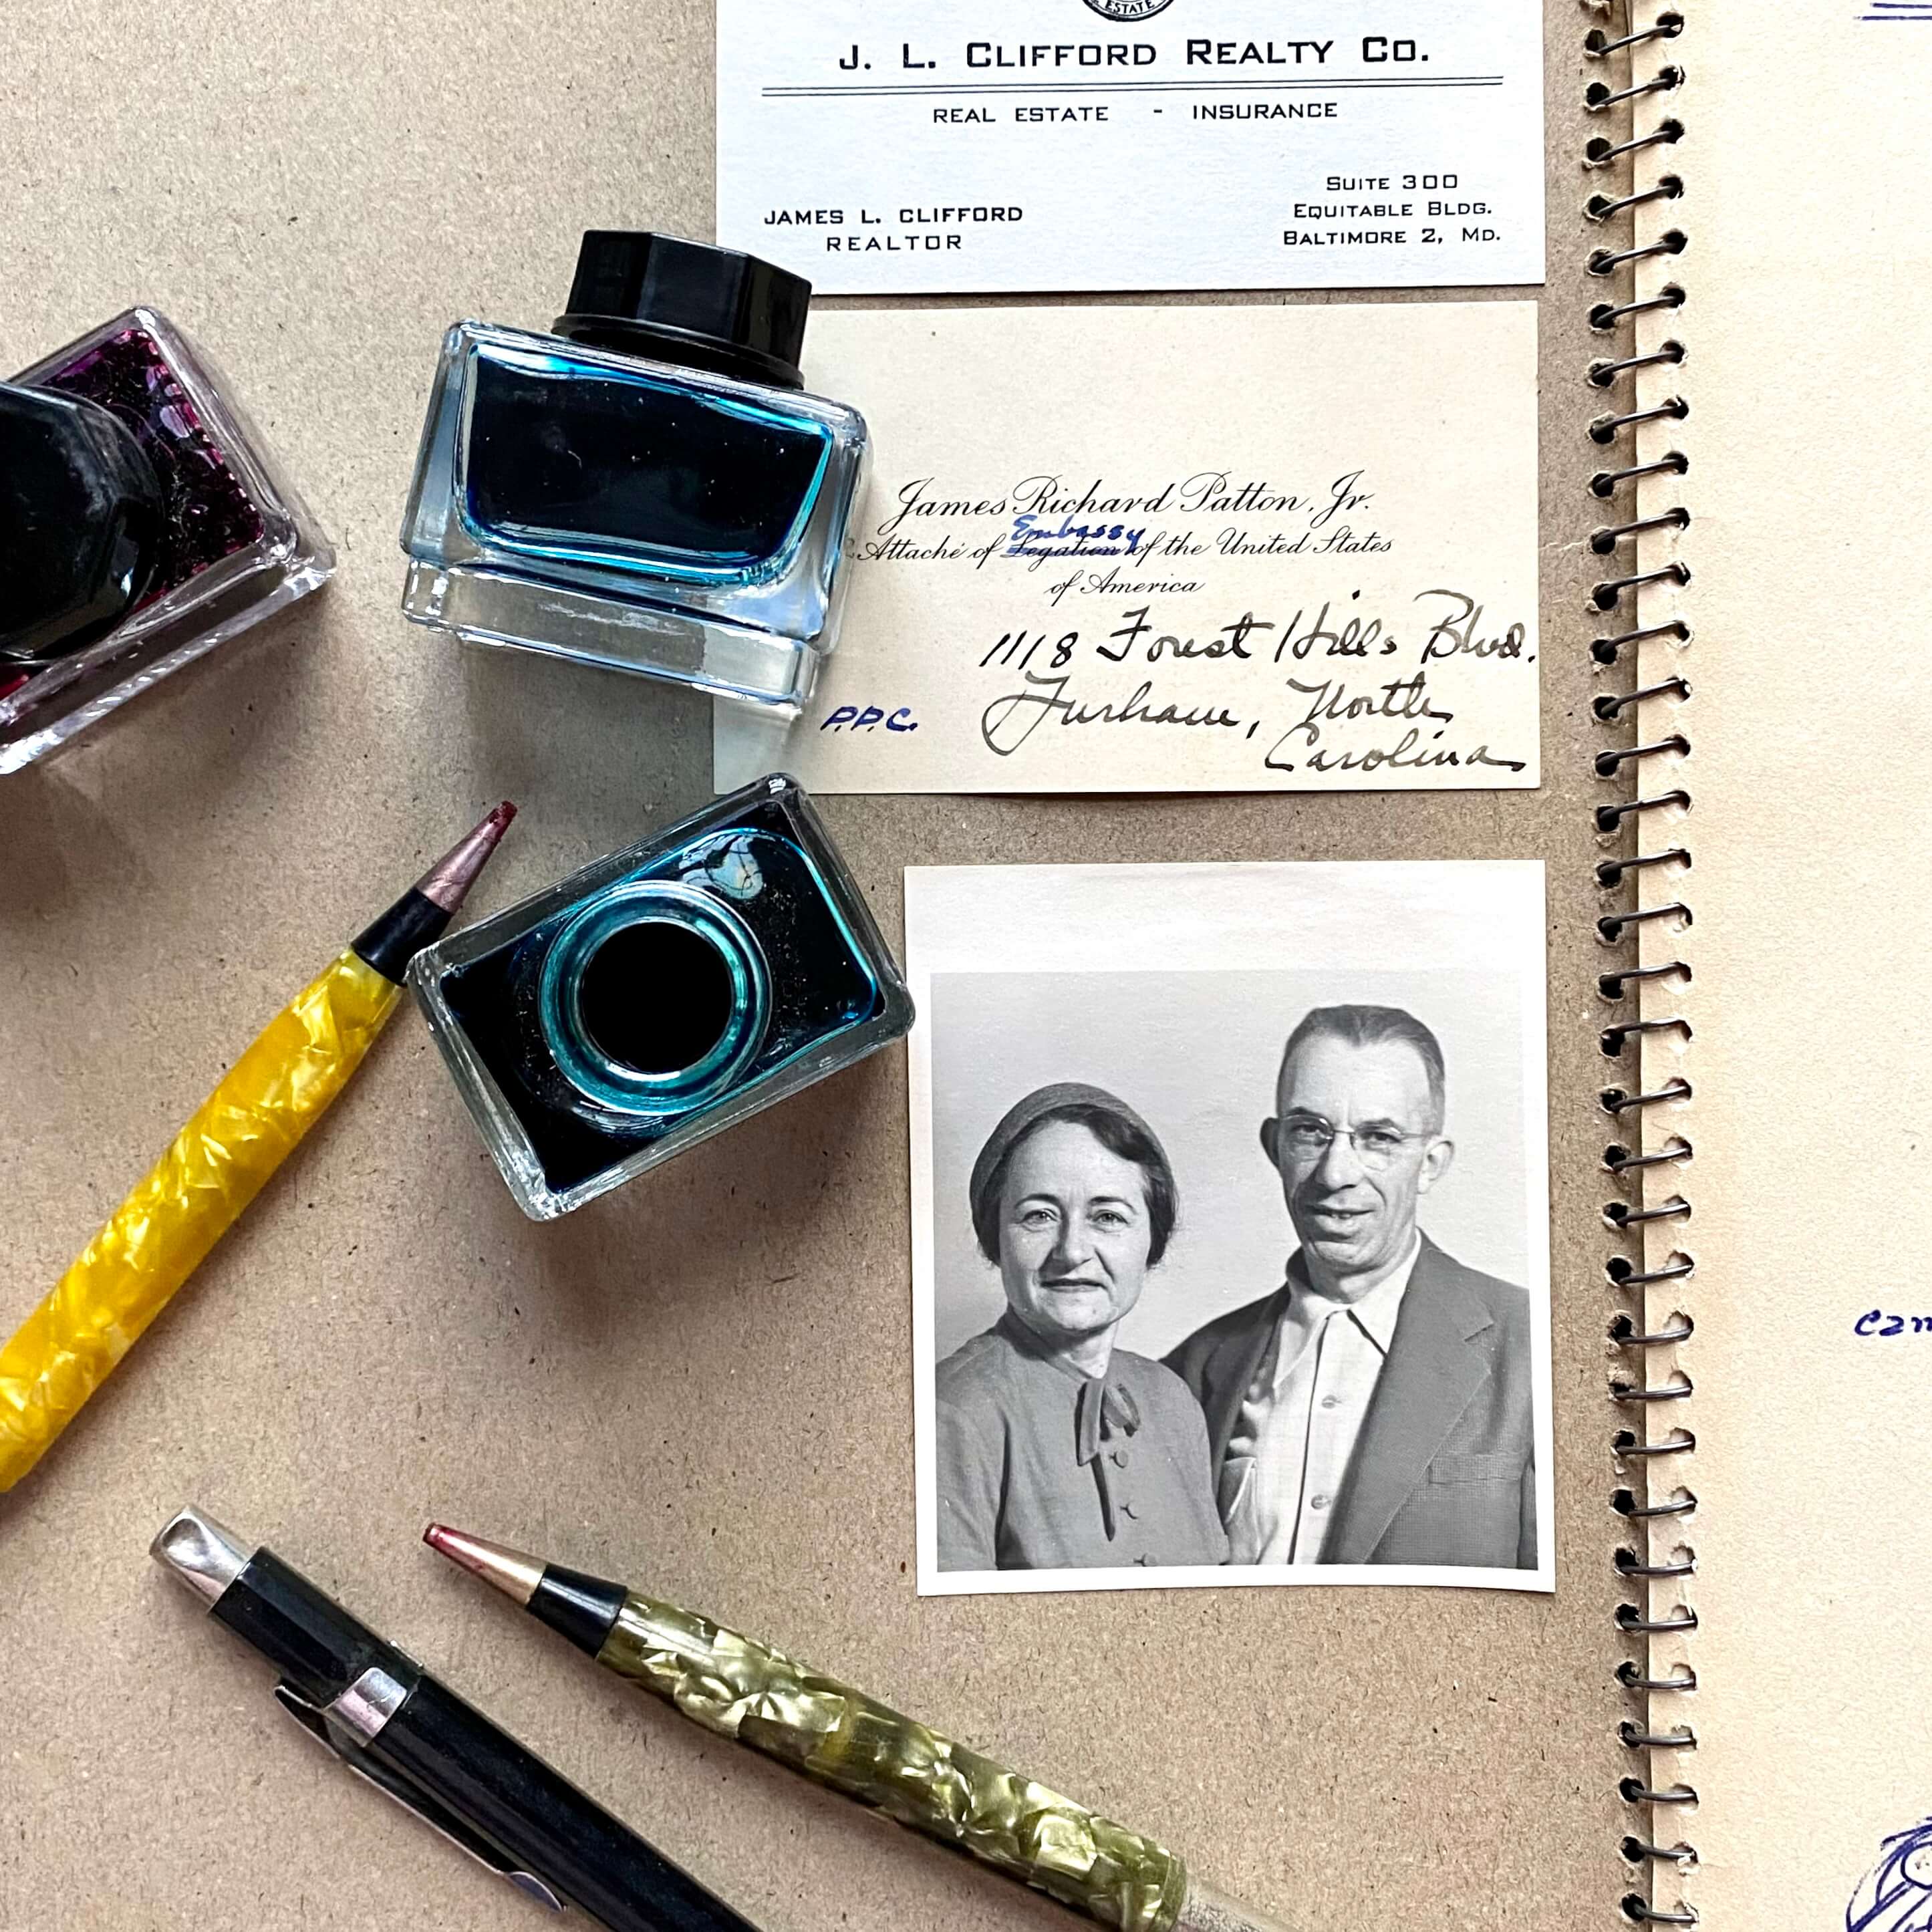
Pasted on the inside cover, a business card belonging to an American embassy attache was positioned above Truman and Millie’s photo. Spotting that first thing right after their portrait, I thought perhaps the couple and the Embassy attache were connected.
That these two smiling faces below the business card might have been diplomats or ambassadors on some sort of goodwill tour or perhaps building a cultural education program for the government. For a brief moment, I thought that perhaps Truman was the actual attache, James Richard Patton Jr, and that he had attached his business card in case he lost the notebook or left it behind somewhere along the journey.
But after seeing a different last name repeated many times on multiple receipts, I knew the photograph of the buttoned-up guy in glasses was not James Richard Patton Jr. I still liked the government idea, though. To me, that made sense of the careful note-taking, the candid observations, the sightseeing brochures, the drawings, the photographs, the business cards of hotel managers and travel representatives, of presidential tour guides and interpreters.
Unlike Candace, though, my mind couldn’t rest with this imagined life alone. Curiosity got the better of me. I had to know the real story about the couple in the photograph. Just exactly who were these two?
A few hours later, I found out that Candace and I were both wrong with our presumptions and assumptions.
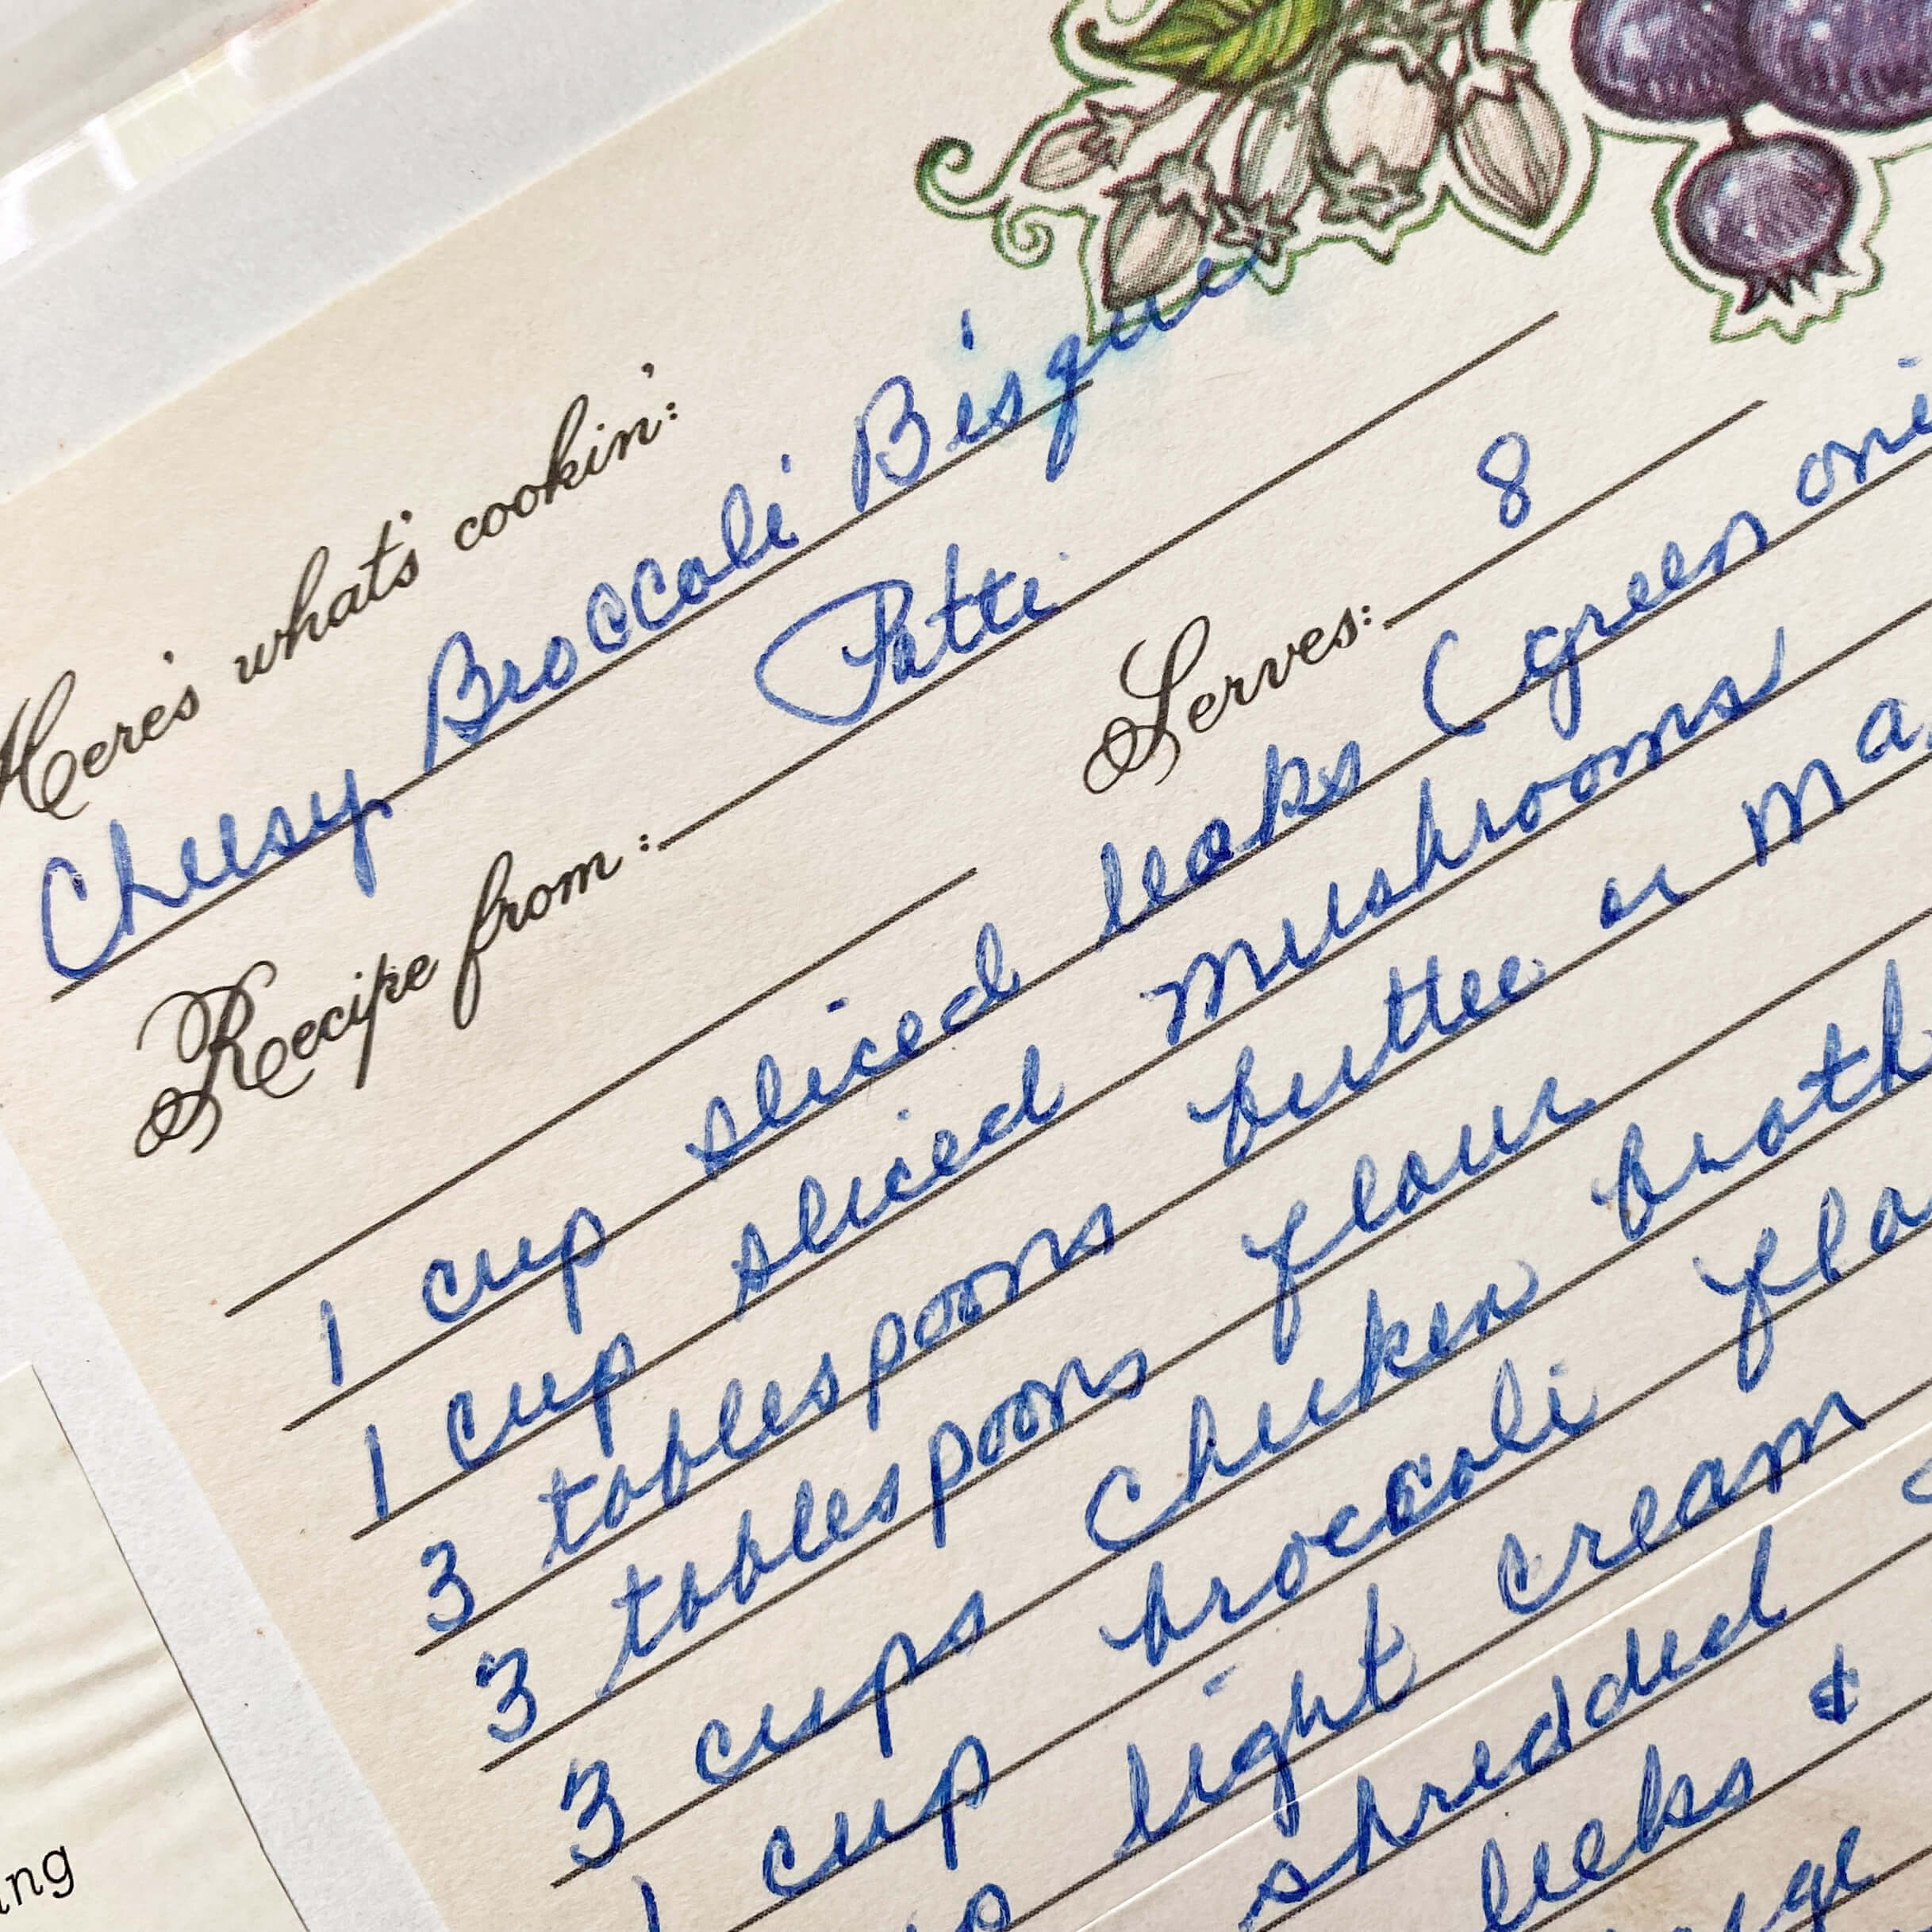
As it turns out, the names on the receipts, the ones that varied from The Phillips to Mr. & Mrs. T. E. Phillips to Wolff Zimmer & Phillips to Mr. Truman E. Phillips to Thomas Phillips to Sr. Truman Eugene Phillips to Phillip Truman to Mr. T all eventually led to Truman Eugene Phillips of Tigard, Oregon. As I came to learn, Truman was not a diplomat. He was not an ambassador. He was not a government worker. Truman was an architect. And a somewhat well-known one at that.
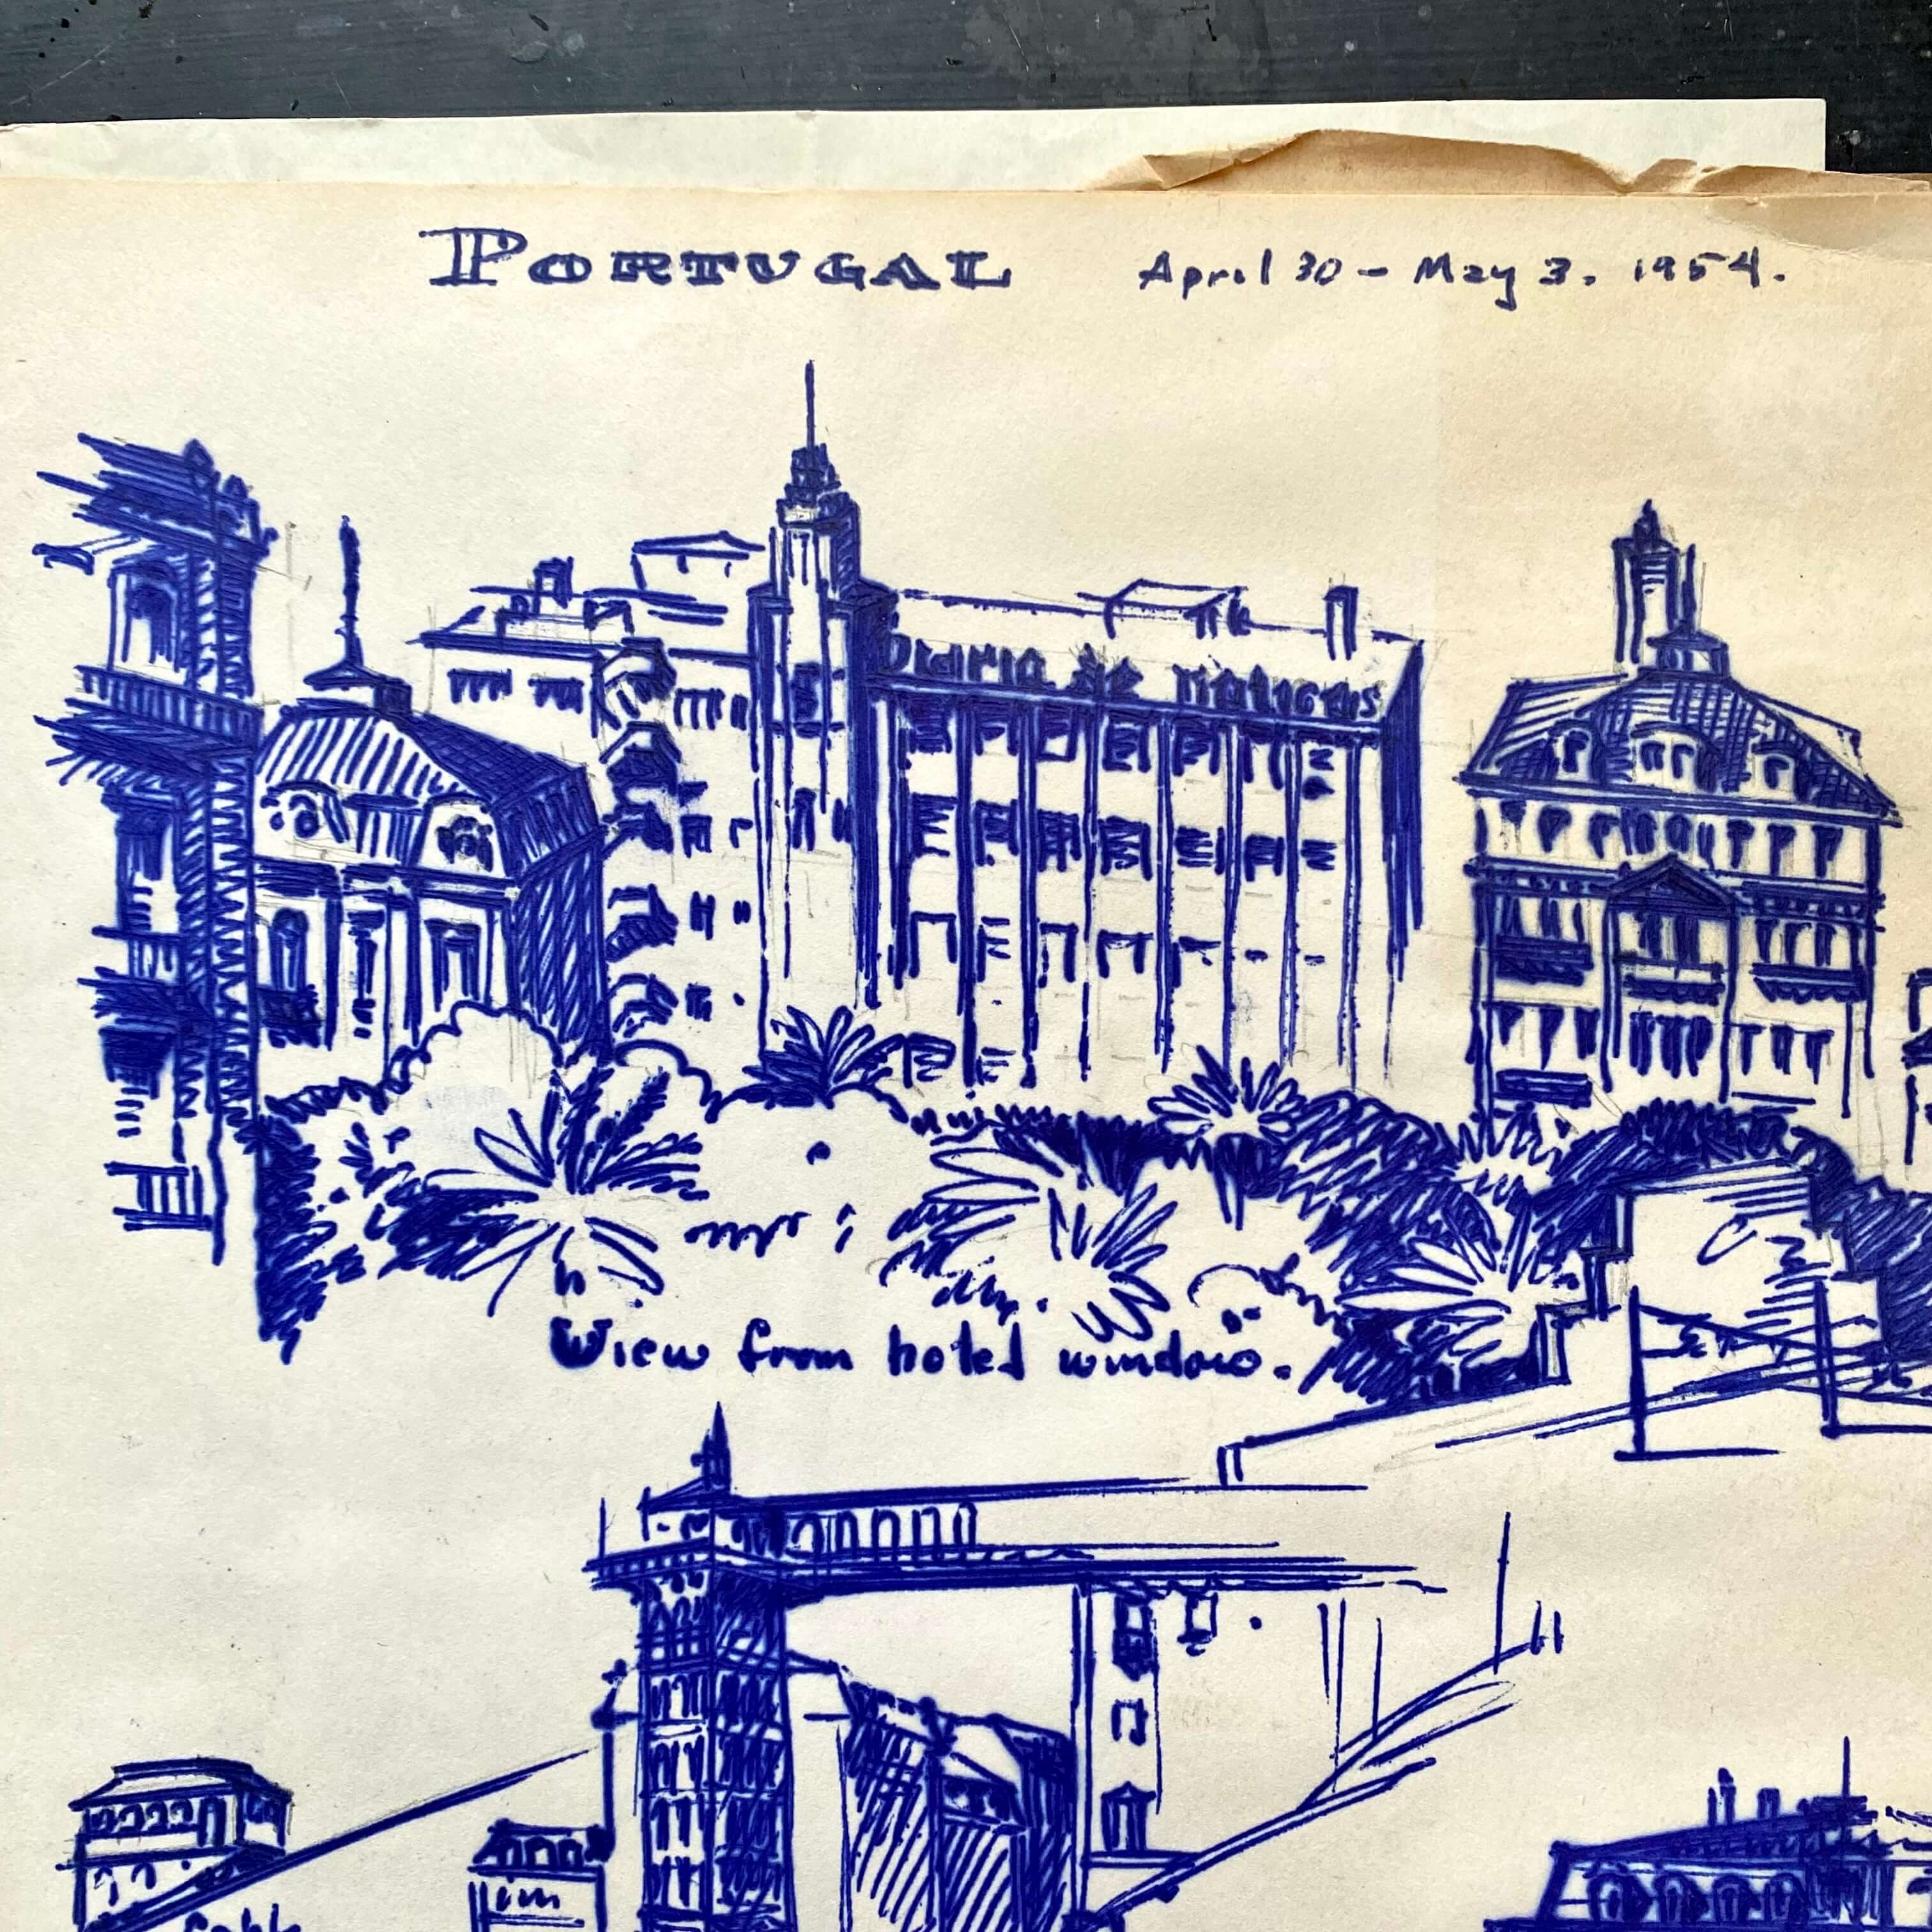
Millie’s name would be discovered later on in the scrapbook in a tiny drawing of her reading a book on a hotel bed in Portugal, as sketched by Truman.

That was the only portrait of Millie in the book, and the only mention of her by actual name. Otherwise, it was “we” and she” in the travel notes. After doing some research online, I found a photo of Millie in a newspaper article connected to Truman, but it only referred to her as Mrs. Truman Phillips – no first name. Eventually, further research confirmed both her nickname, Millie, and her full maiden and married name, Mildred Strong Phillips.
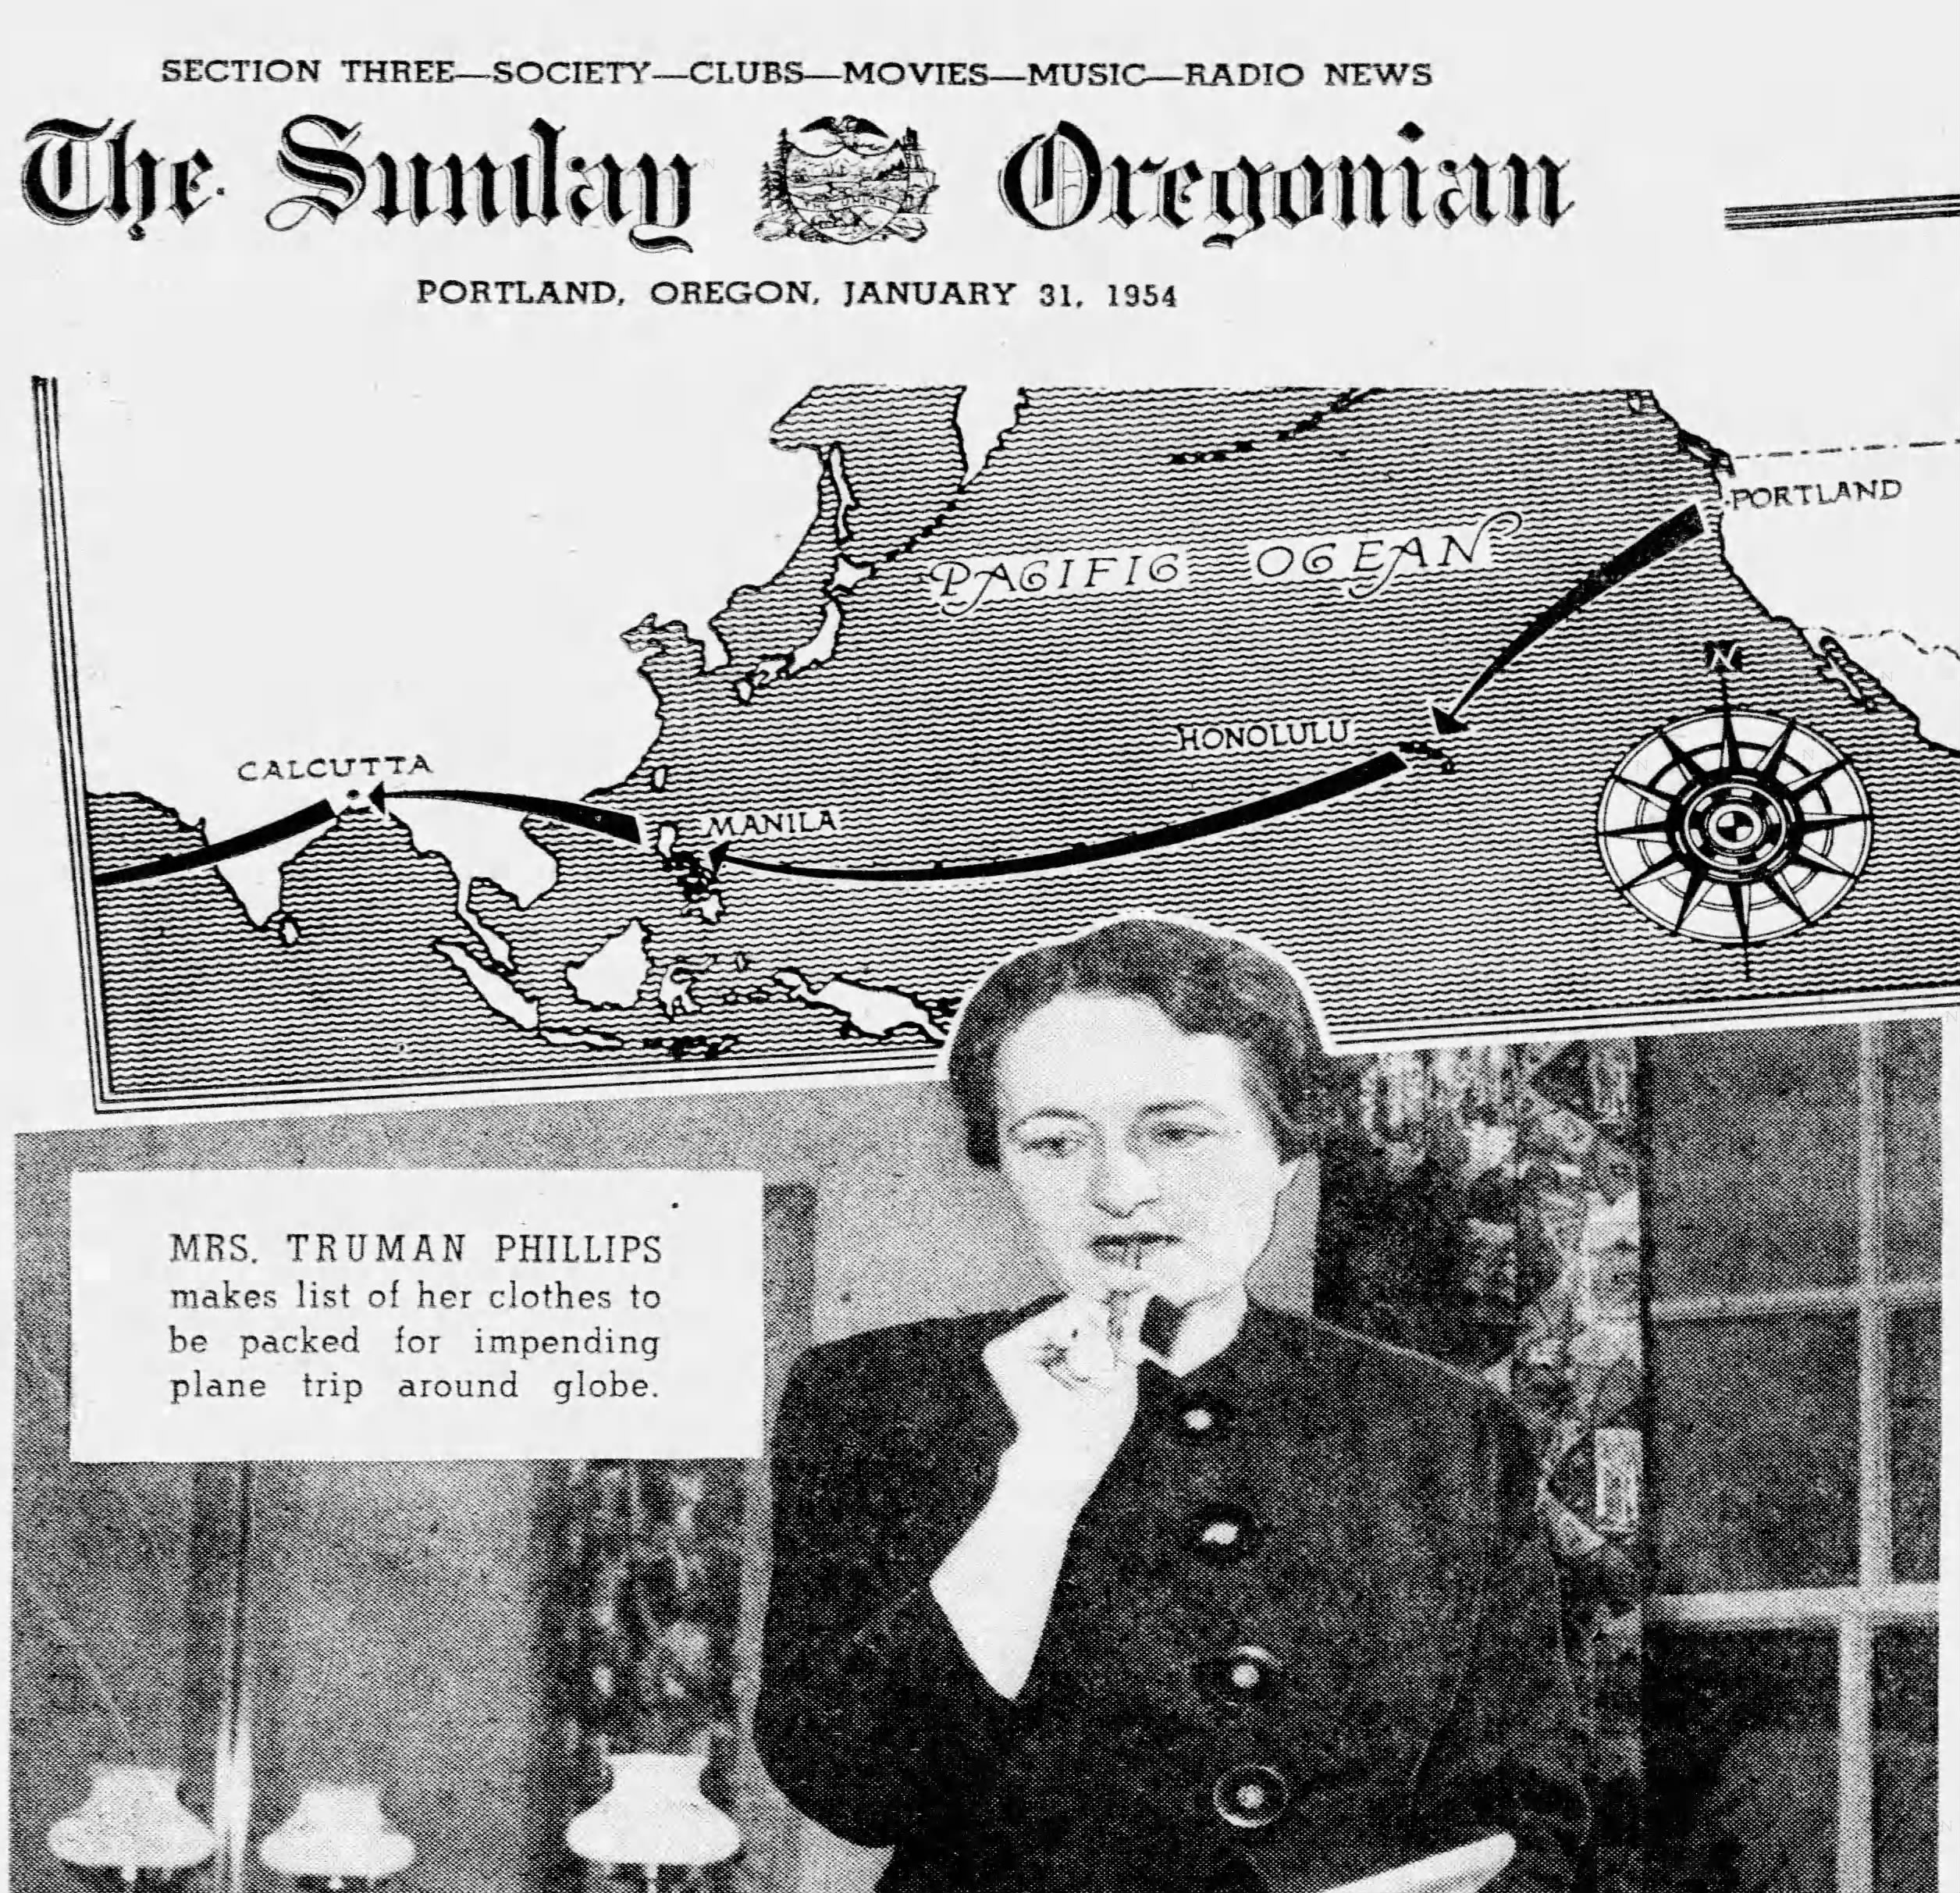
As is the fate of many women throughout history, there’s not much more info about Millie beyond that, with the exception of the newspaper article published in the January 31st, 1954 edition of The Sunday Oregonian. A full-page feature, complete with multiple photographs on the dynamics of how Millie and Truman were packing for their three-month-long international escapade, it turned out to be the perfect preface to the scrapbook. It detailed the clothing they were packing and how, and in what type of luggage. It mentioned the importance of each item’s weight and how that was both a critical and consequential factor in determining a well-packed bag. Photos included Truman washing a shirt in the sink, Millie fastening straps on a packed bag. Another set showed Truman fiddling with a movie camera he was bringing along, and Millie looking over a pile of clothes with her packing list in hand. It was such a personal piece, I thought for sure I would encounter at least one more follow-up article when Millie and Truman returned home to share how the trip went. But this was not the case. This pre-trip packing article was a one-time claim to fame, and Millie was never mentioned in the paper again until her obituary was printed in 1986.
Truman, on the other hand, was well- documented. A Pacific Northwest native, in the 1920s, he was a noted architect on the rise, winning an international design competition in Buenos Aires while a student at the University of Oregon’s School of Architecture. He went on to lead a distinguished and productive career working on the West Coast, particularly in Oregon, where he designed hospitals and schools, corporate campuses and airfields, shipyards and maritime buildings, race tracks and residential homes, and a number of commercial office buildings in the Portland area. Working in the modernistic style, these are some of his designs…

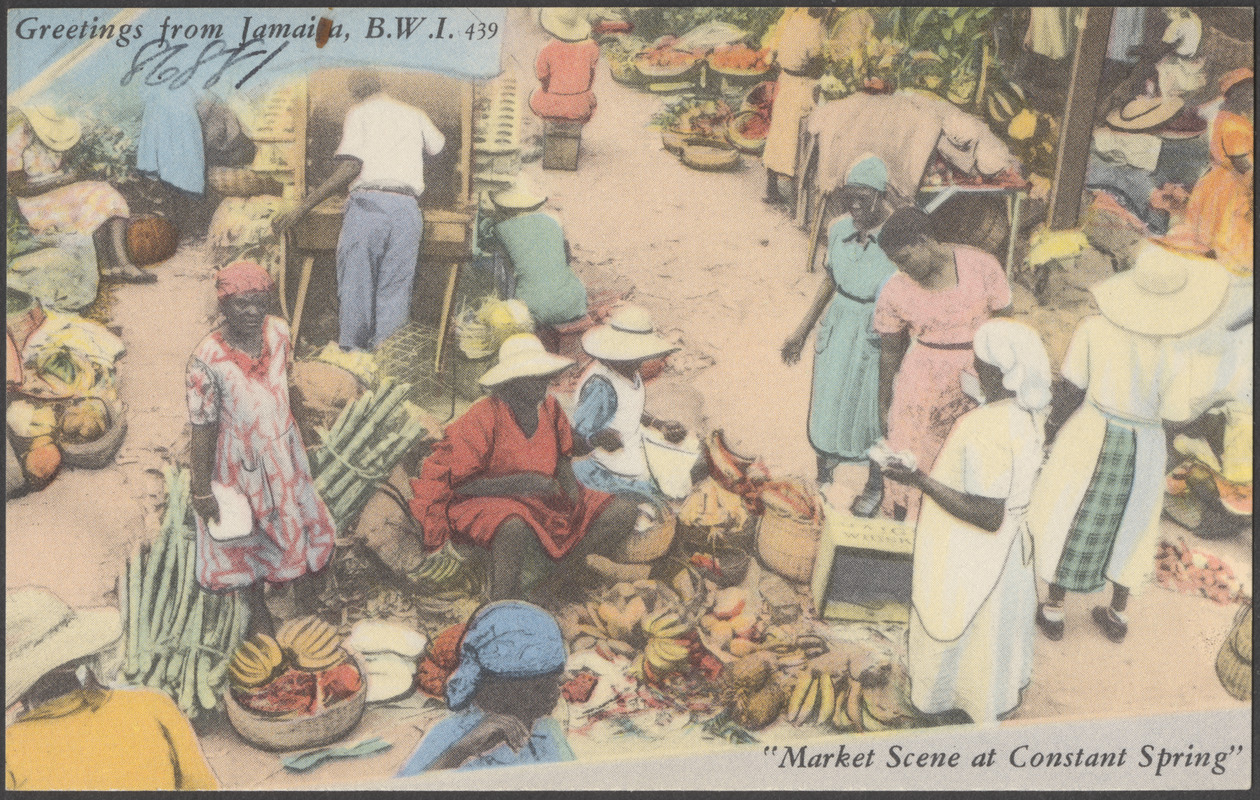
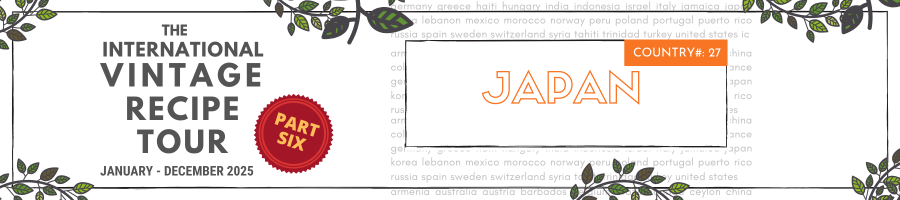
At the same time the scrapbook arrived, I was working on writing the 27th blog post for the International Vintage Recipe Tour. The featured destination for this 27th post was Japan, a country that has so many incredible cultural touchpoints to discuss, I was finding it difficult to pick just one. If you are familiar with the Recipe Tour, you’ll already know that every Tour blog post includes a cultural tie-in to help give historical color and context to the featured country and the food being prepared. In Haiti, we discussed historic gingerbread architecture. In Dahomey, the cakewalk dance. In Armenia, the true story of one family’s local ancestry. In Canada, the Comfort Tree. In China, the Hungry Ghost Festival. In Australia, the role of the Queen Mother Elizabeth I and the cake she inspired. In Greece, the Durrells of Corfu.
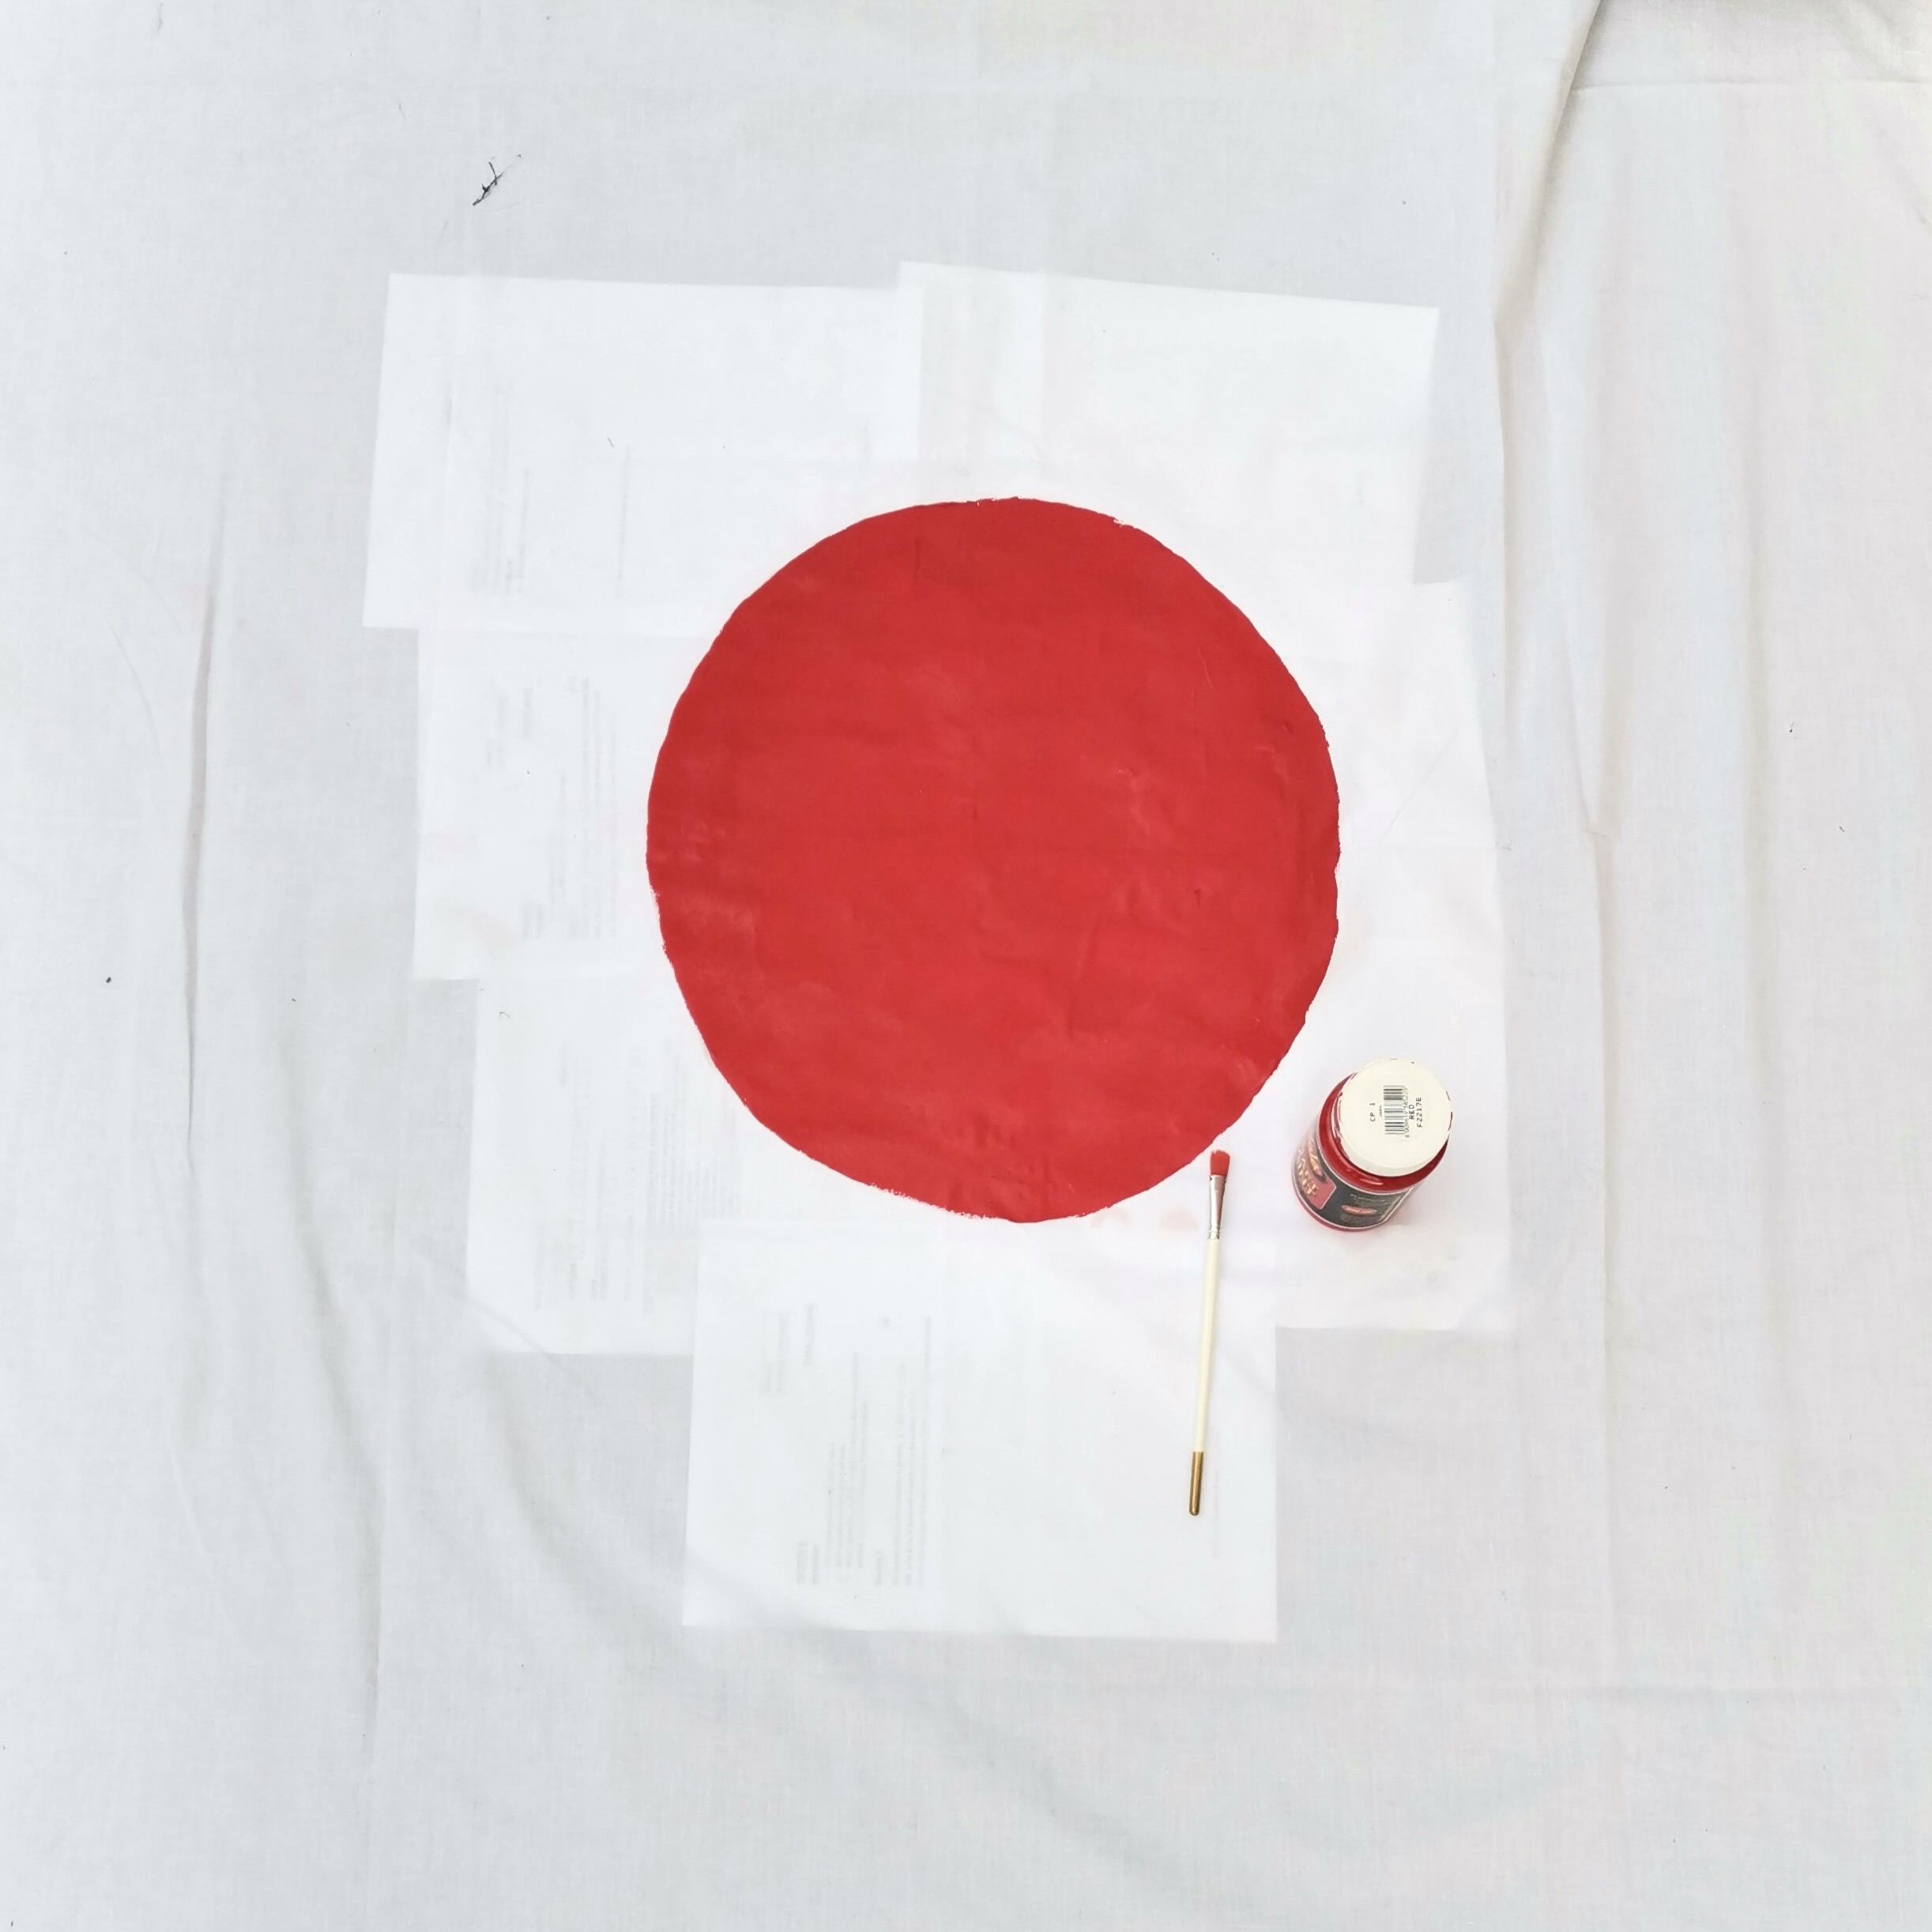
All throughout the holiday season of 2025, I scouted cultural tie-ins for Japan before finally settling on the symbolism of the Rising Sun, which in Japanese culture has long represented new beginnings. I thought this was a nice tie-in to kick off the first international recipe of the year. A simple sunrise, to highlight a simple teriyaki beef and rice dinner.
On New Year’s Day, I was going to head to the beach to photograph the sunrise – an annual Japanese tradition – known as Hatsuhinode – but a snowstorm and a cold prevented the 4:30am drive to the beach. Next, I attempted a craft project, making an origami sun with the thought of discussing this beautiful paper art form, but the origami version of the sun that I liked best and attempted to make four different times turned out to be pretty tricky to execute. It didn’t seem fun to start off the new year sharing a challenging craft project that might lead to frustration for our readers, too. So I went down the research road again to uncover all the different ways the sun is symbolic in Japan via food, art, and design.
But Millie and Truman had other ideas when they showed up at the door. In the scrapbook, after Truman packed his Dacron and Millie packed her day dresses, after they carried 60 pounds of luggage through the Portland International Airport, and after they flew to Hawaii, their next stop on their around-the-world tour was Tokyo, Japan.
In this post, to complement the traditional vintage Japanese recipe of Beef Teriyaki, our cultural tie-in features Truman and Millie’s visit to the Land of the Rising Sun in 1954. It’s a trip back in time to see how a midcentury American architect viewed the Far East with fresh eyes. What did Tokyo look like in the 1950s? Where did Truman and Millie stay? What did they eat? What did they do? Thanks to their unique one-of-a-kind scrapbook, we have the chance to experience a unique one-of-a-kind perspective of what Japan looked and felt like 70 years ago, all through the eyes of an artist who appreciated form, function, and first impressions.
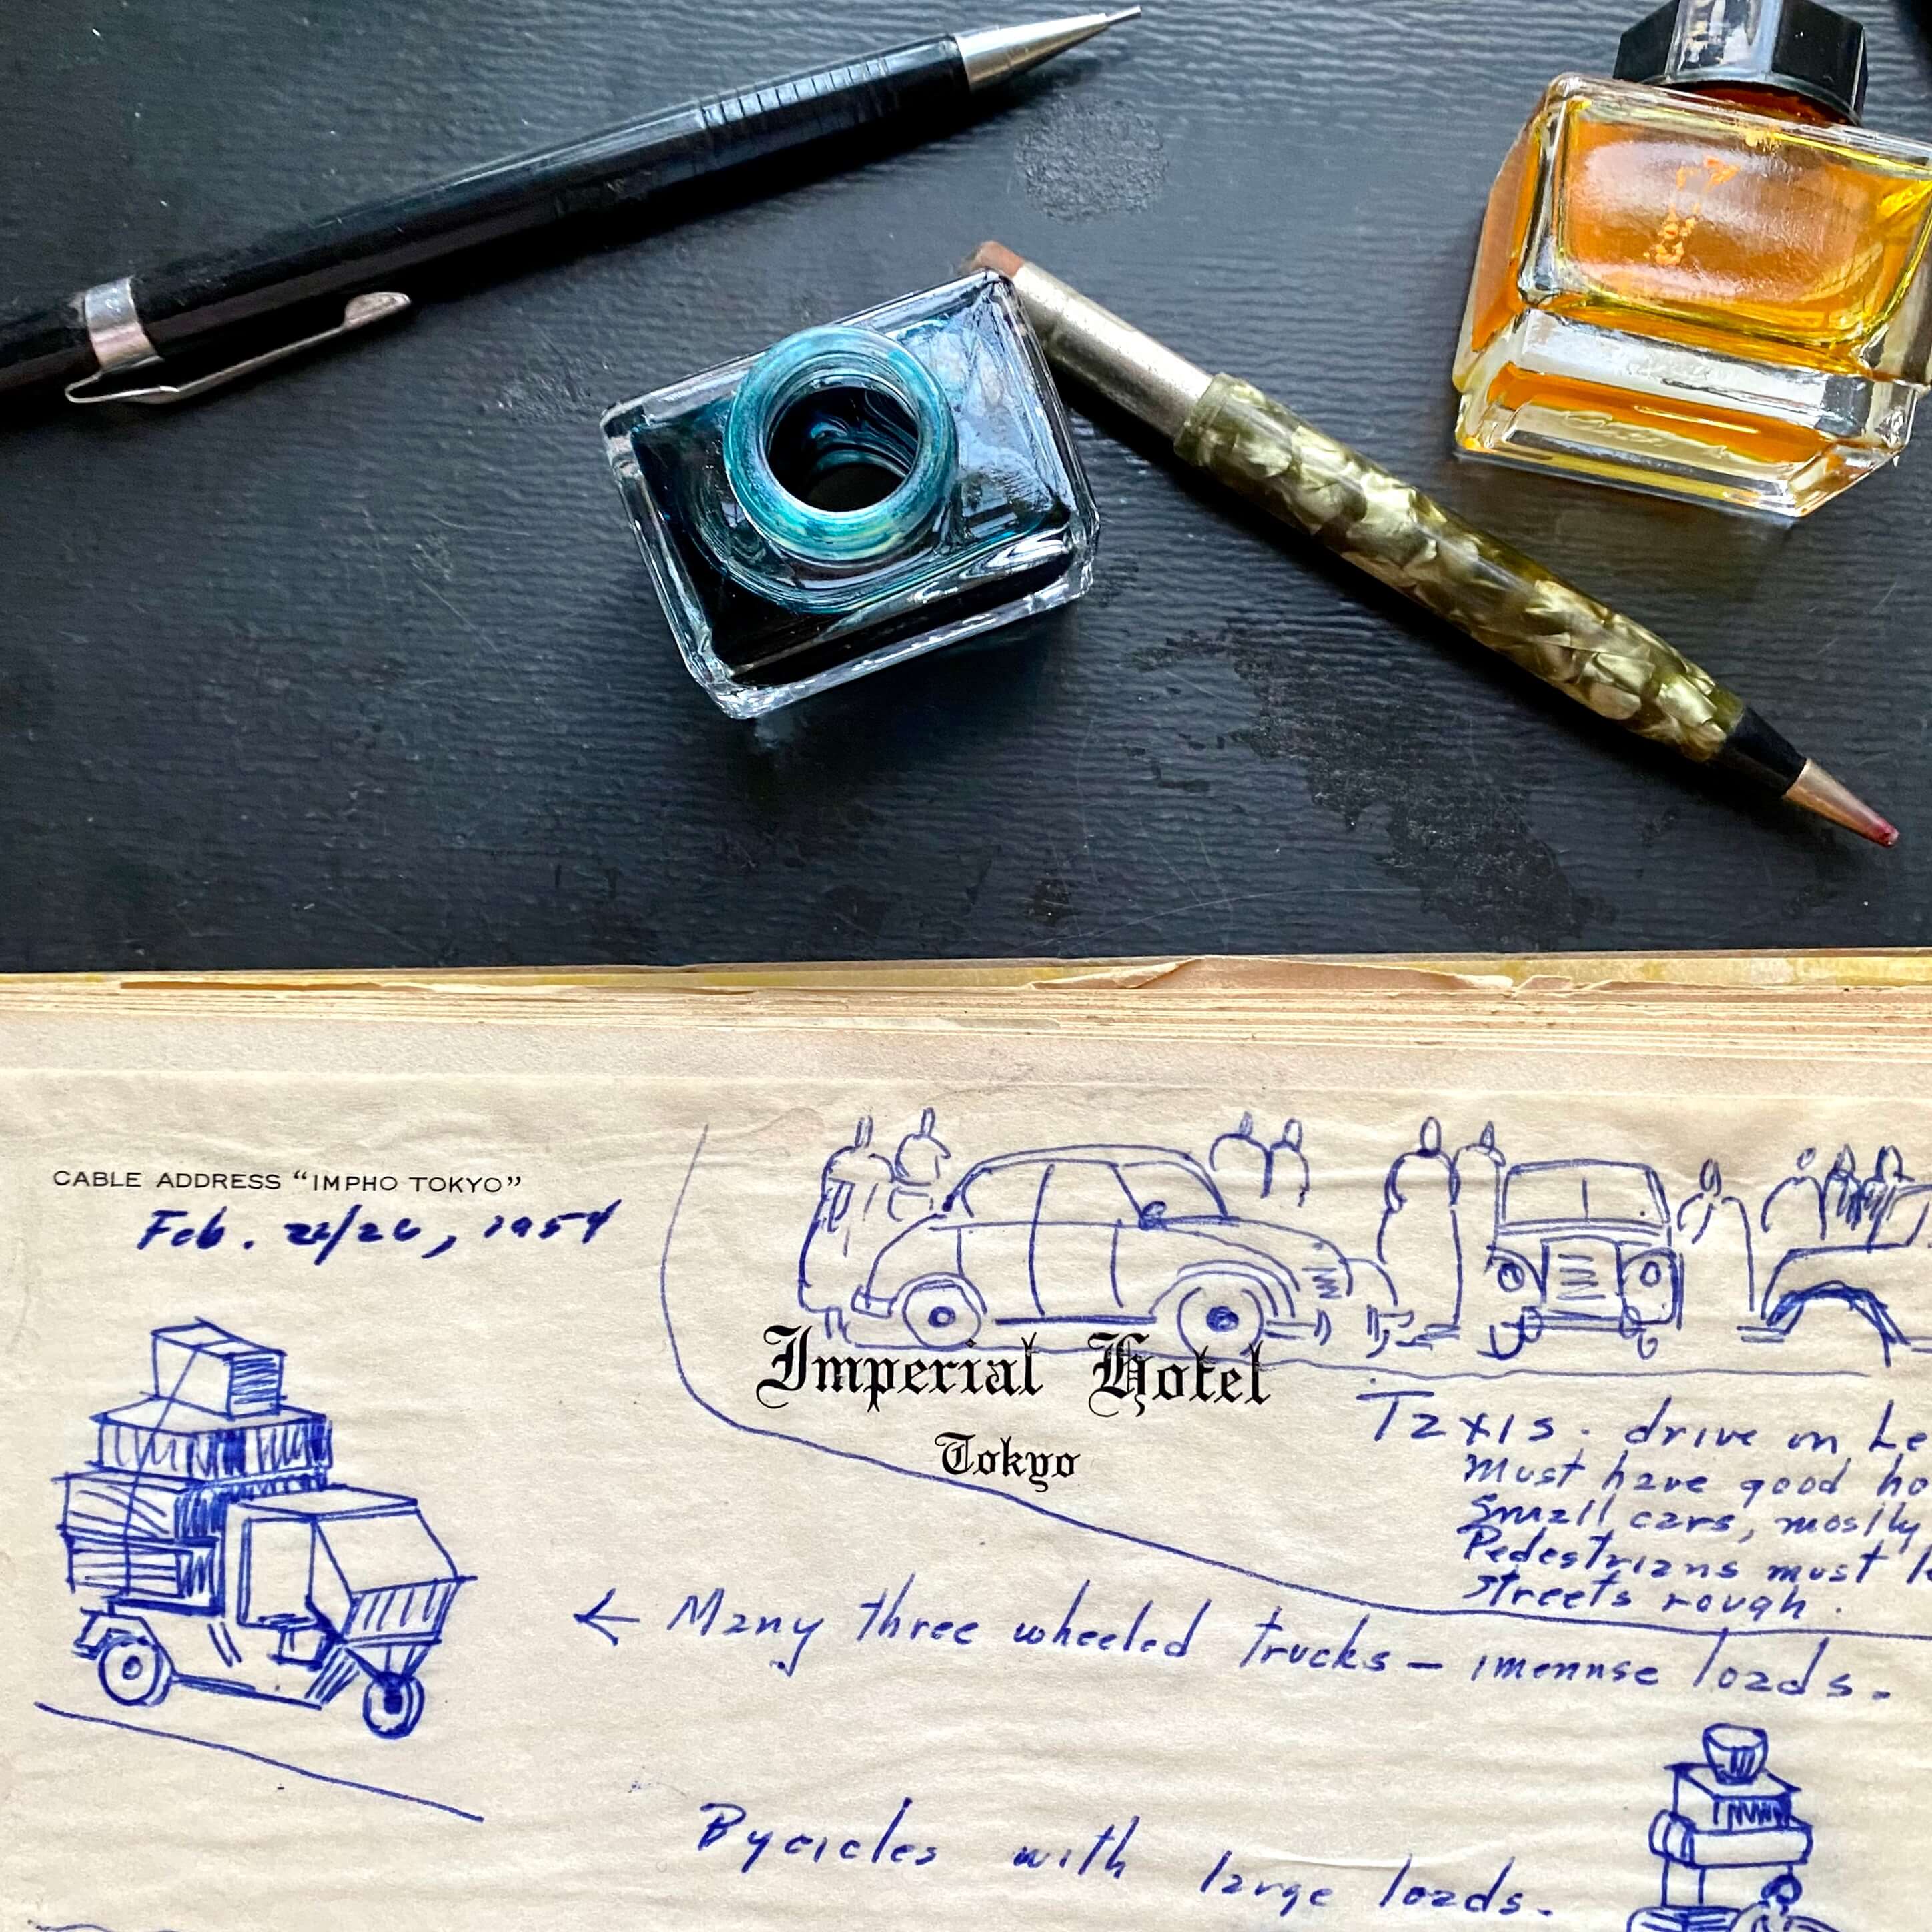
THE 1954 ITINIERARY: Stop No. 2. Tokyo, Japan
DATE VISITED: February 22nd -26th, 1954
WEATHER
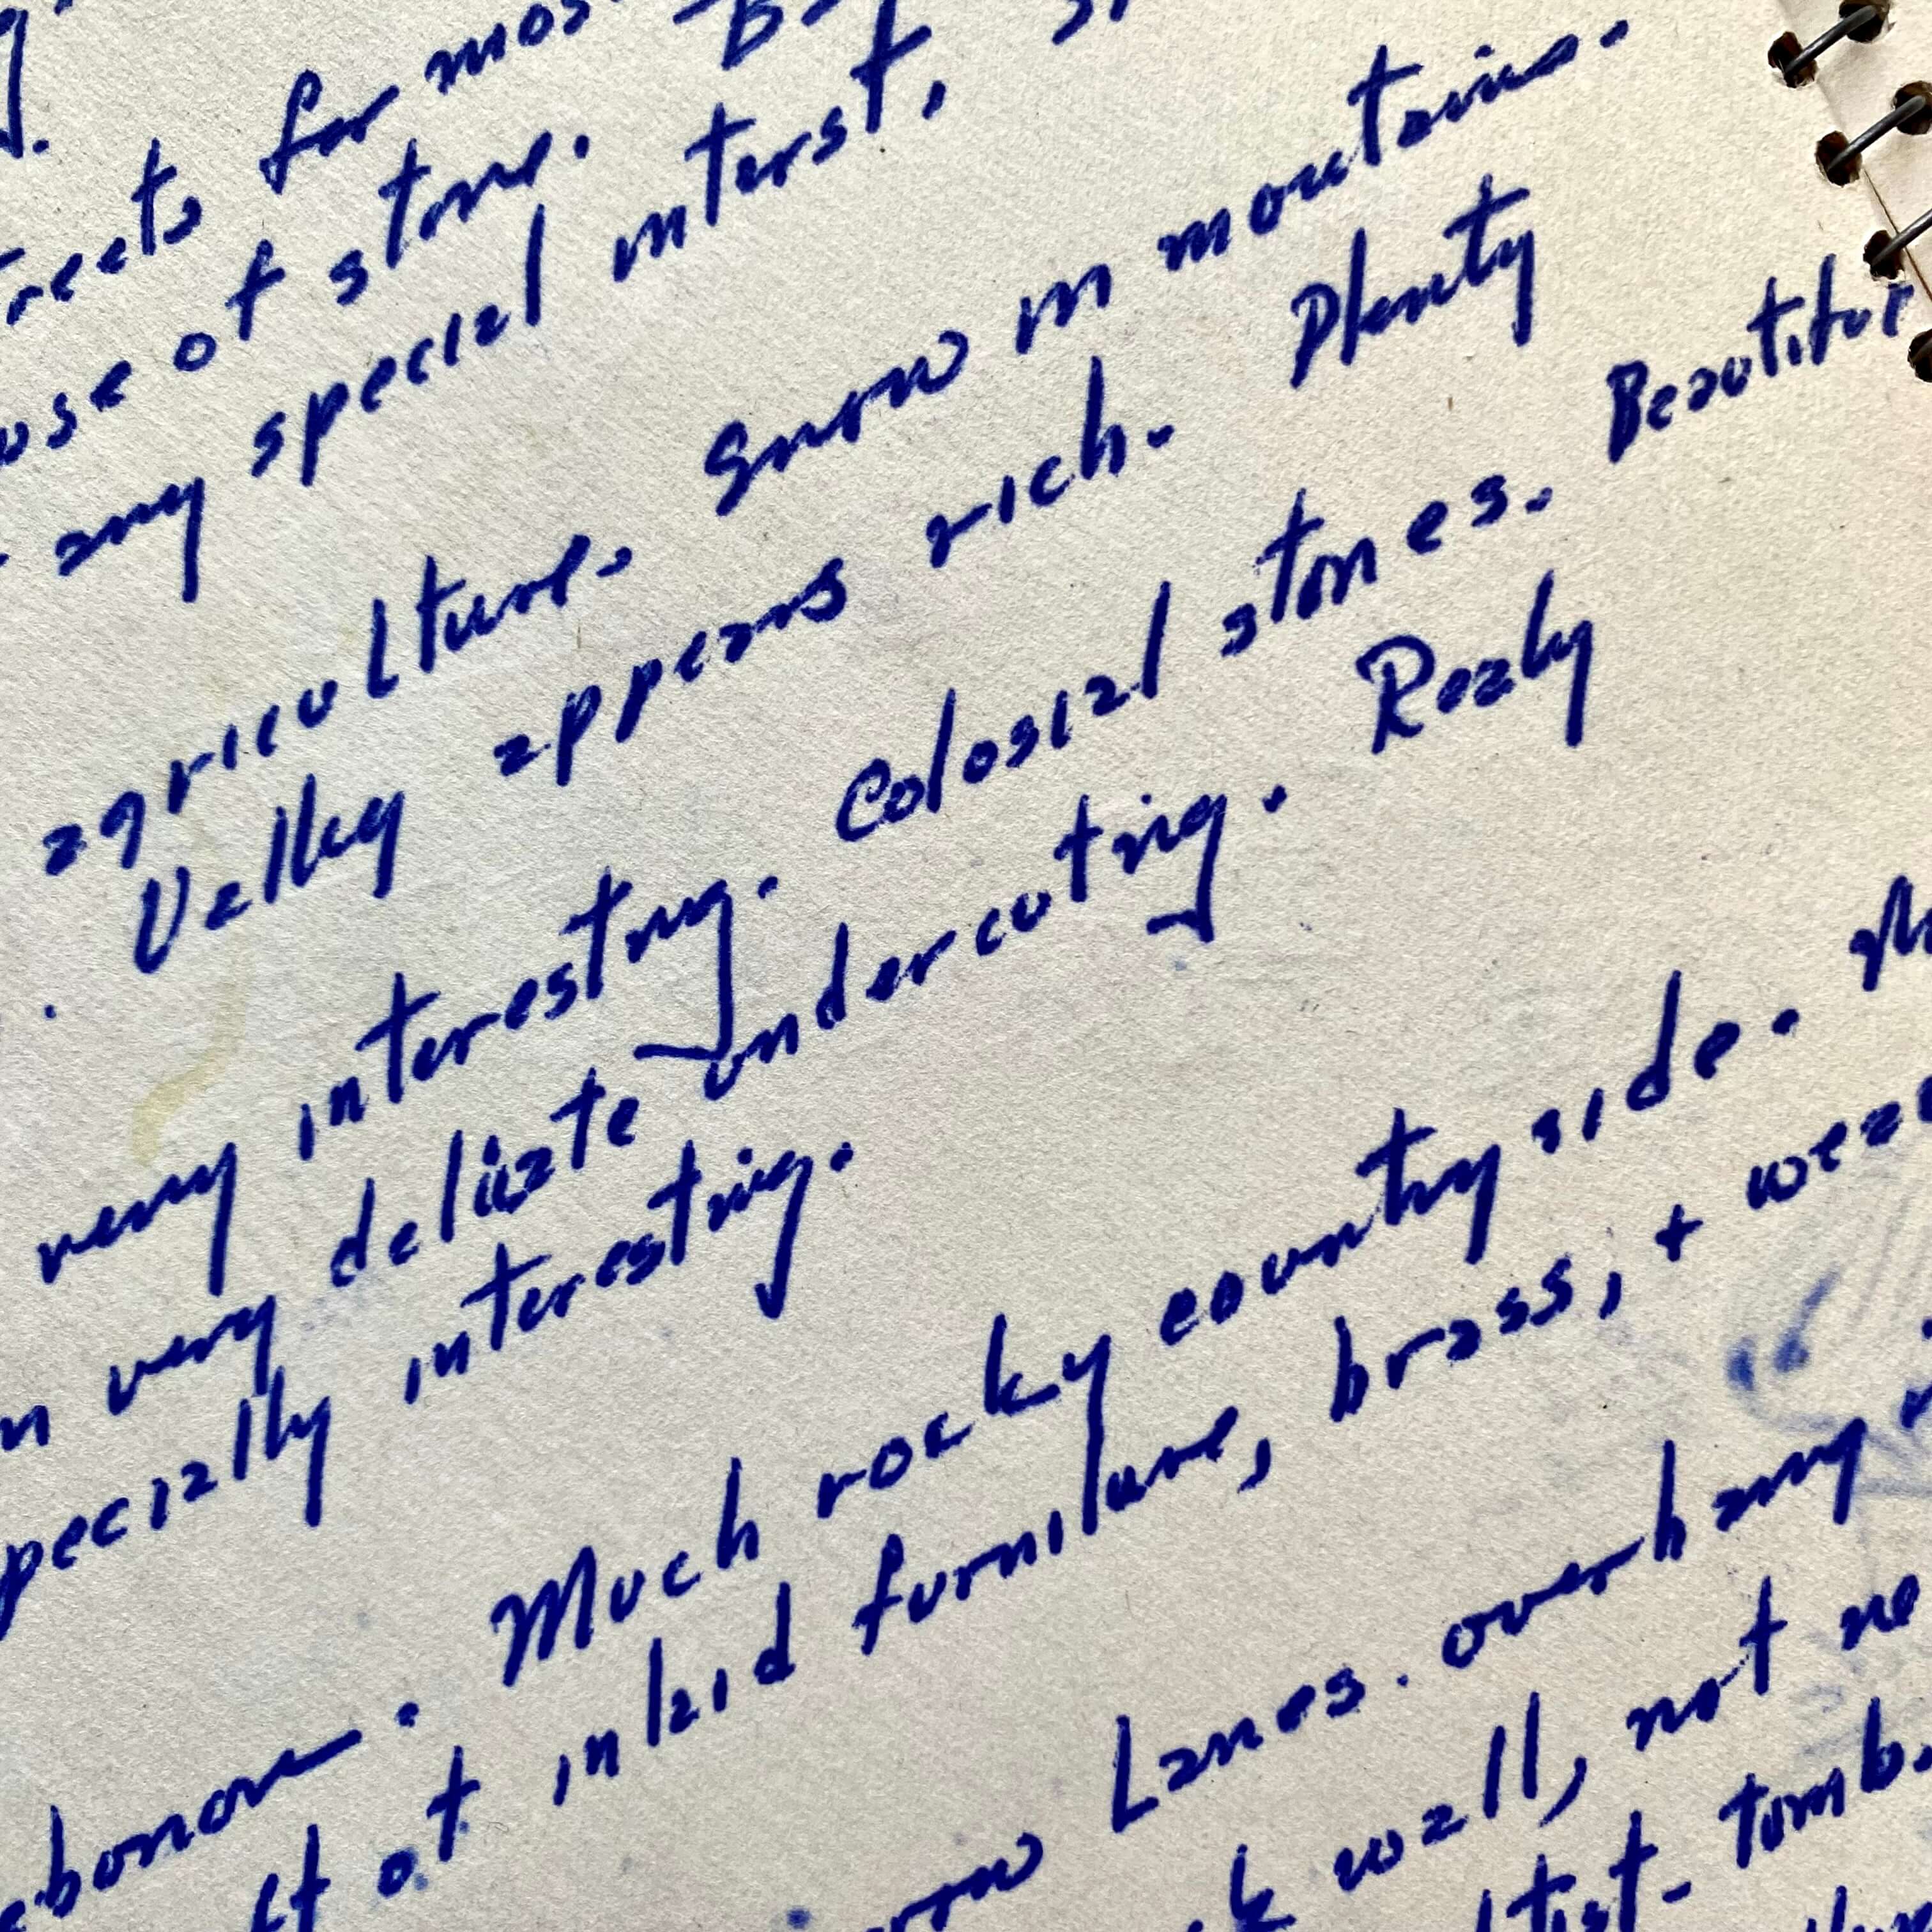
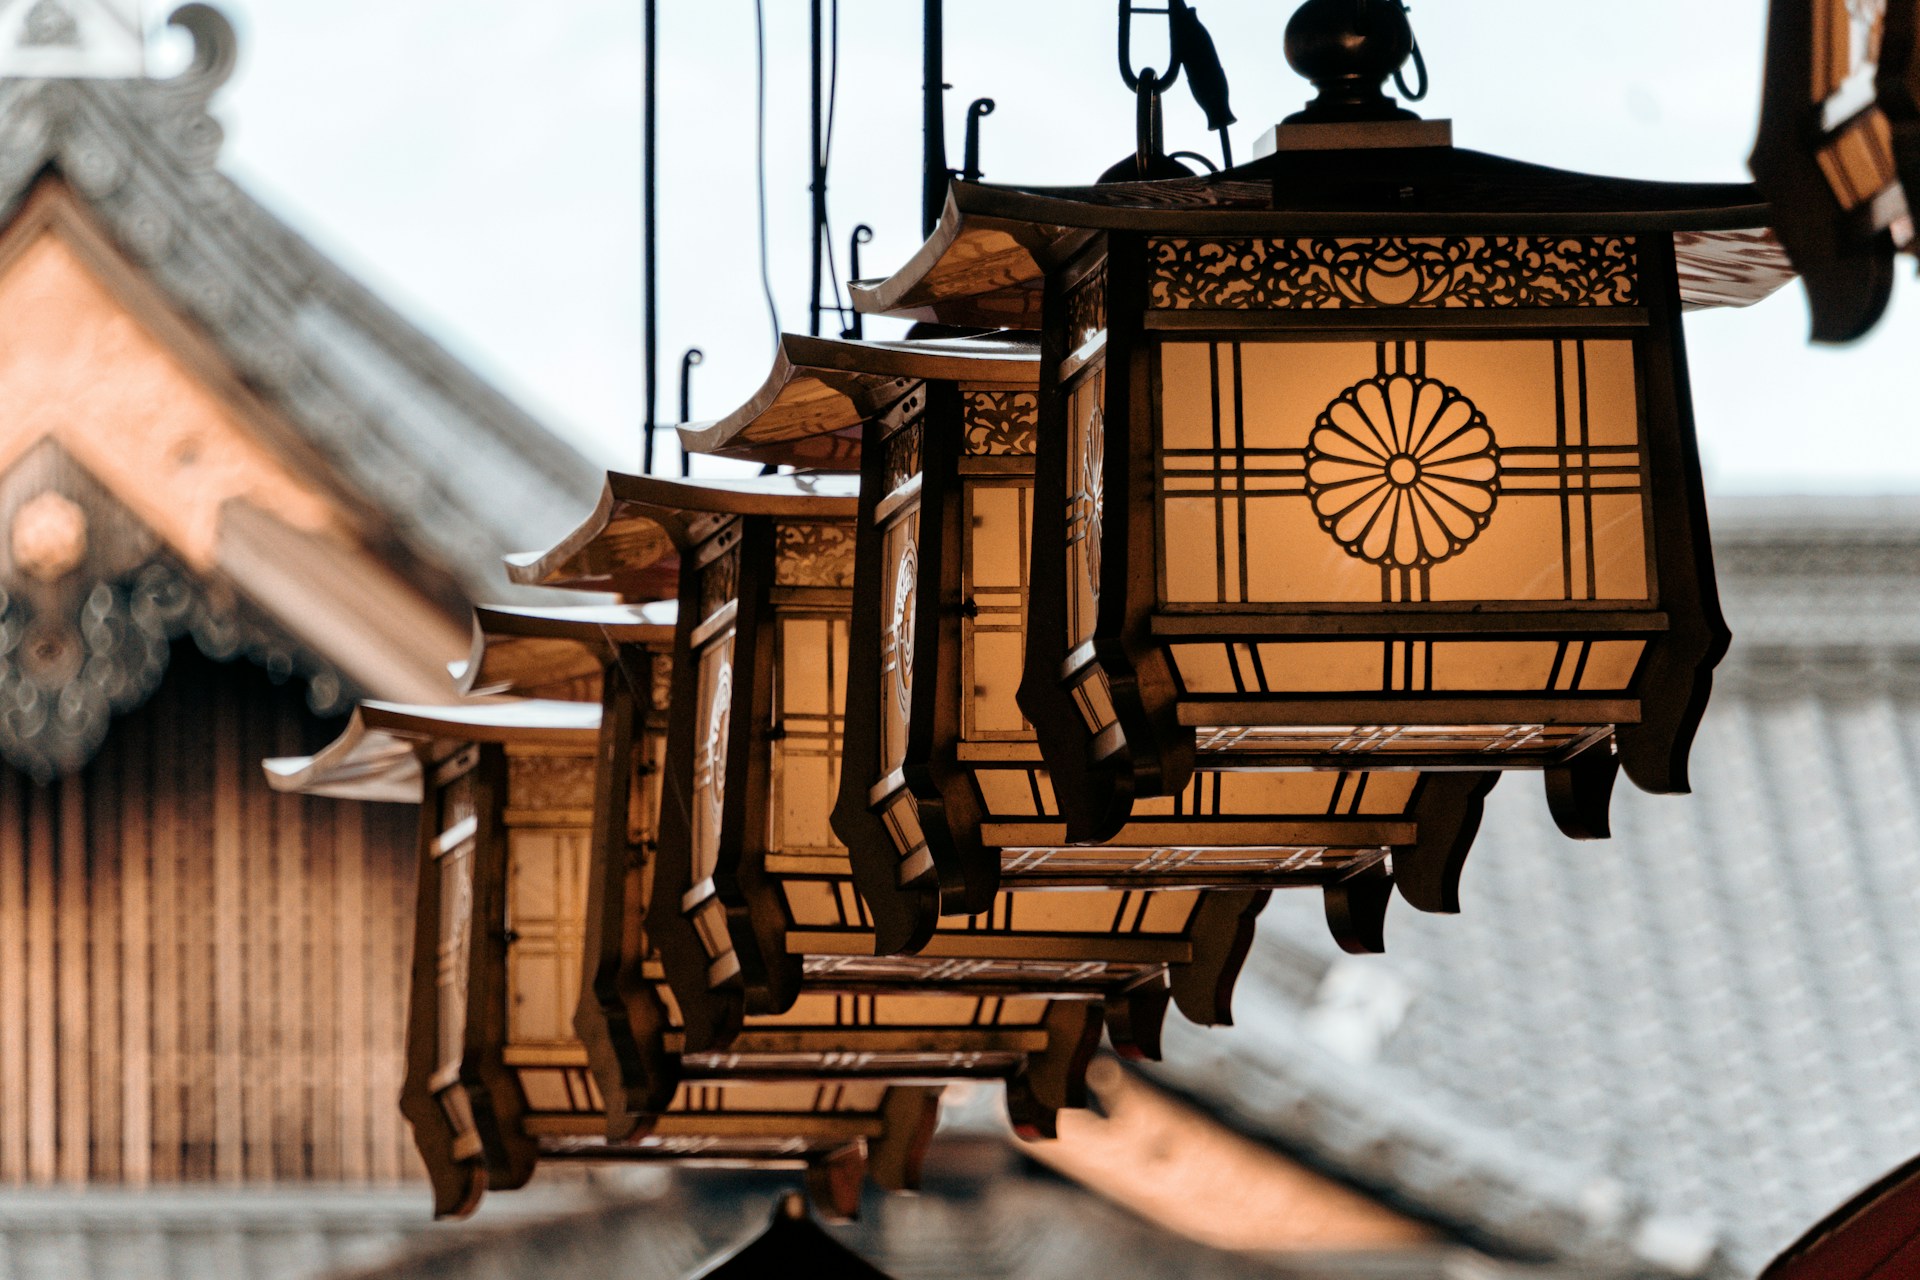
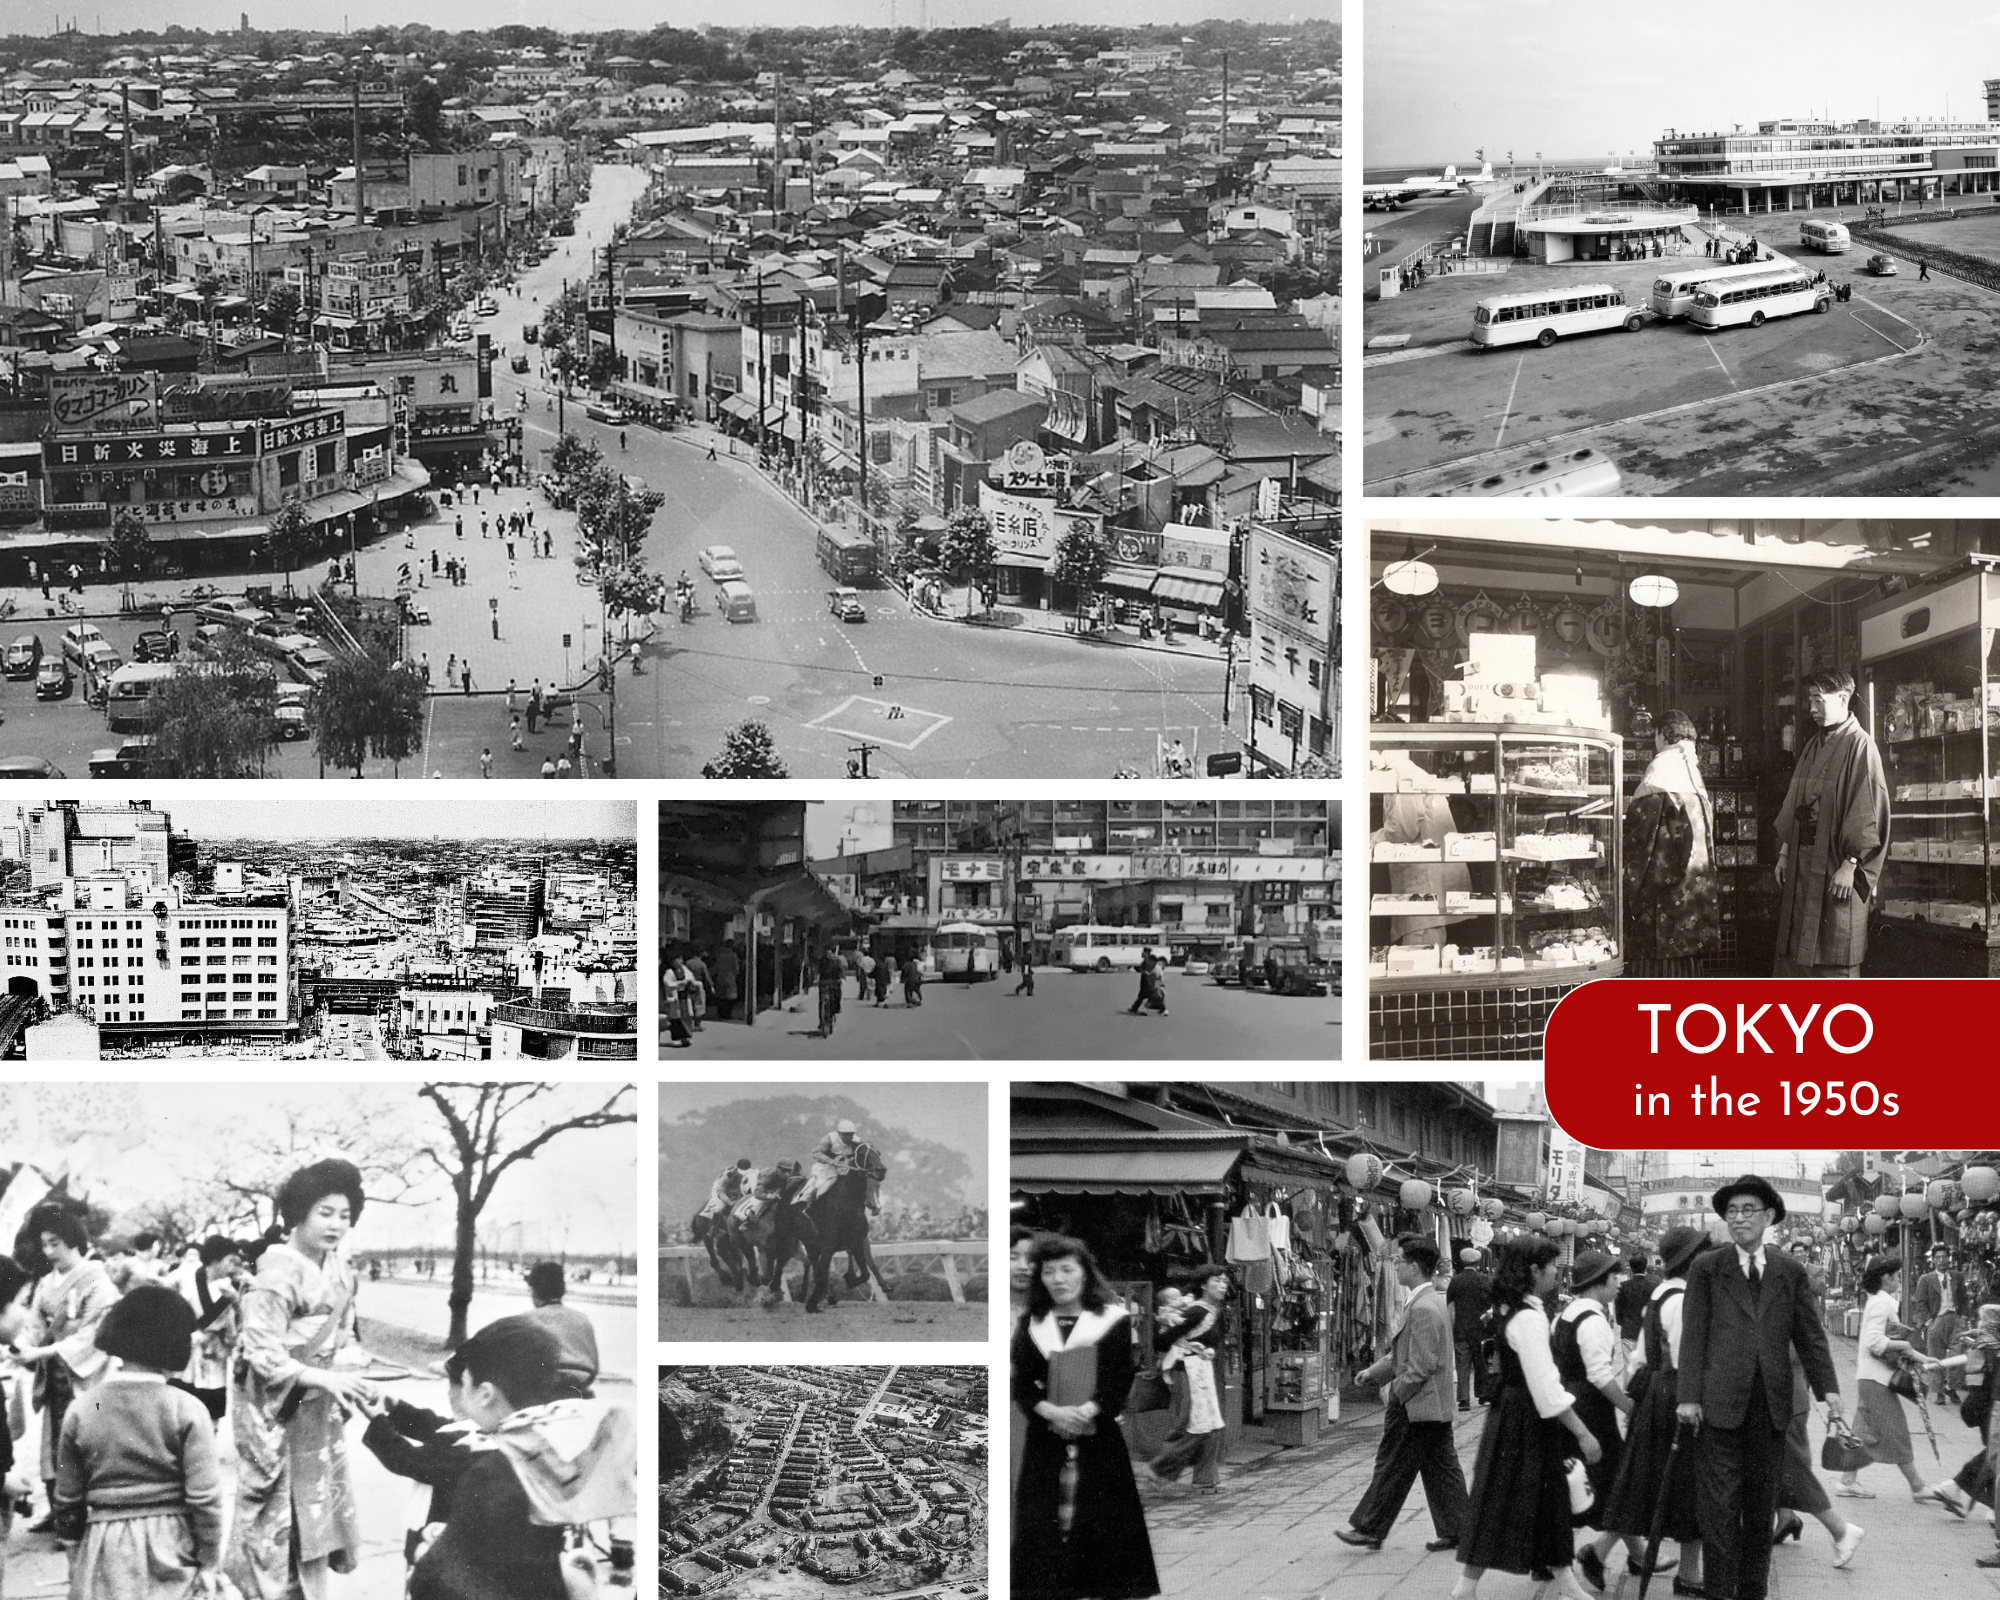
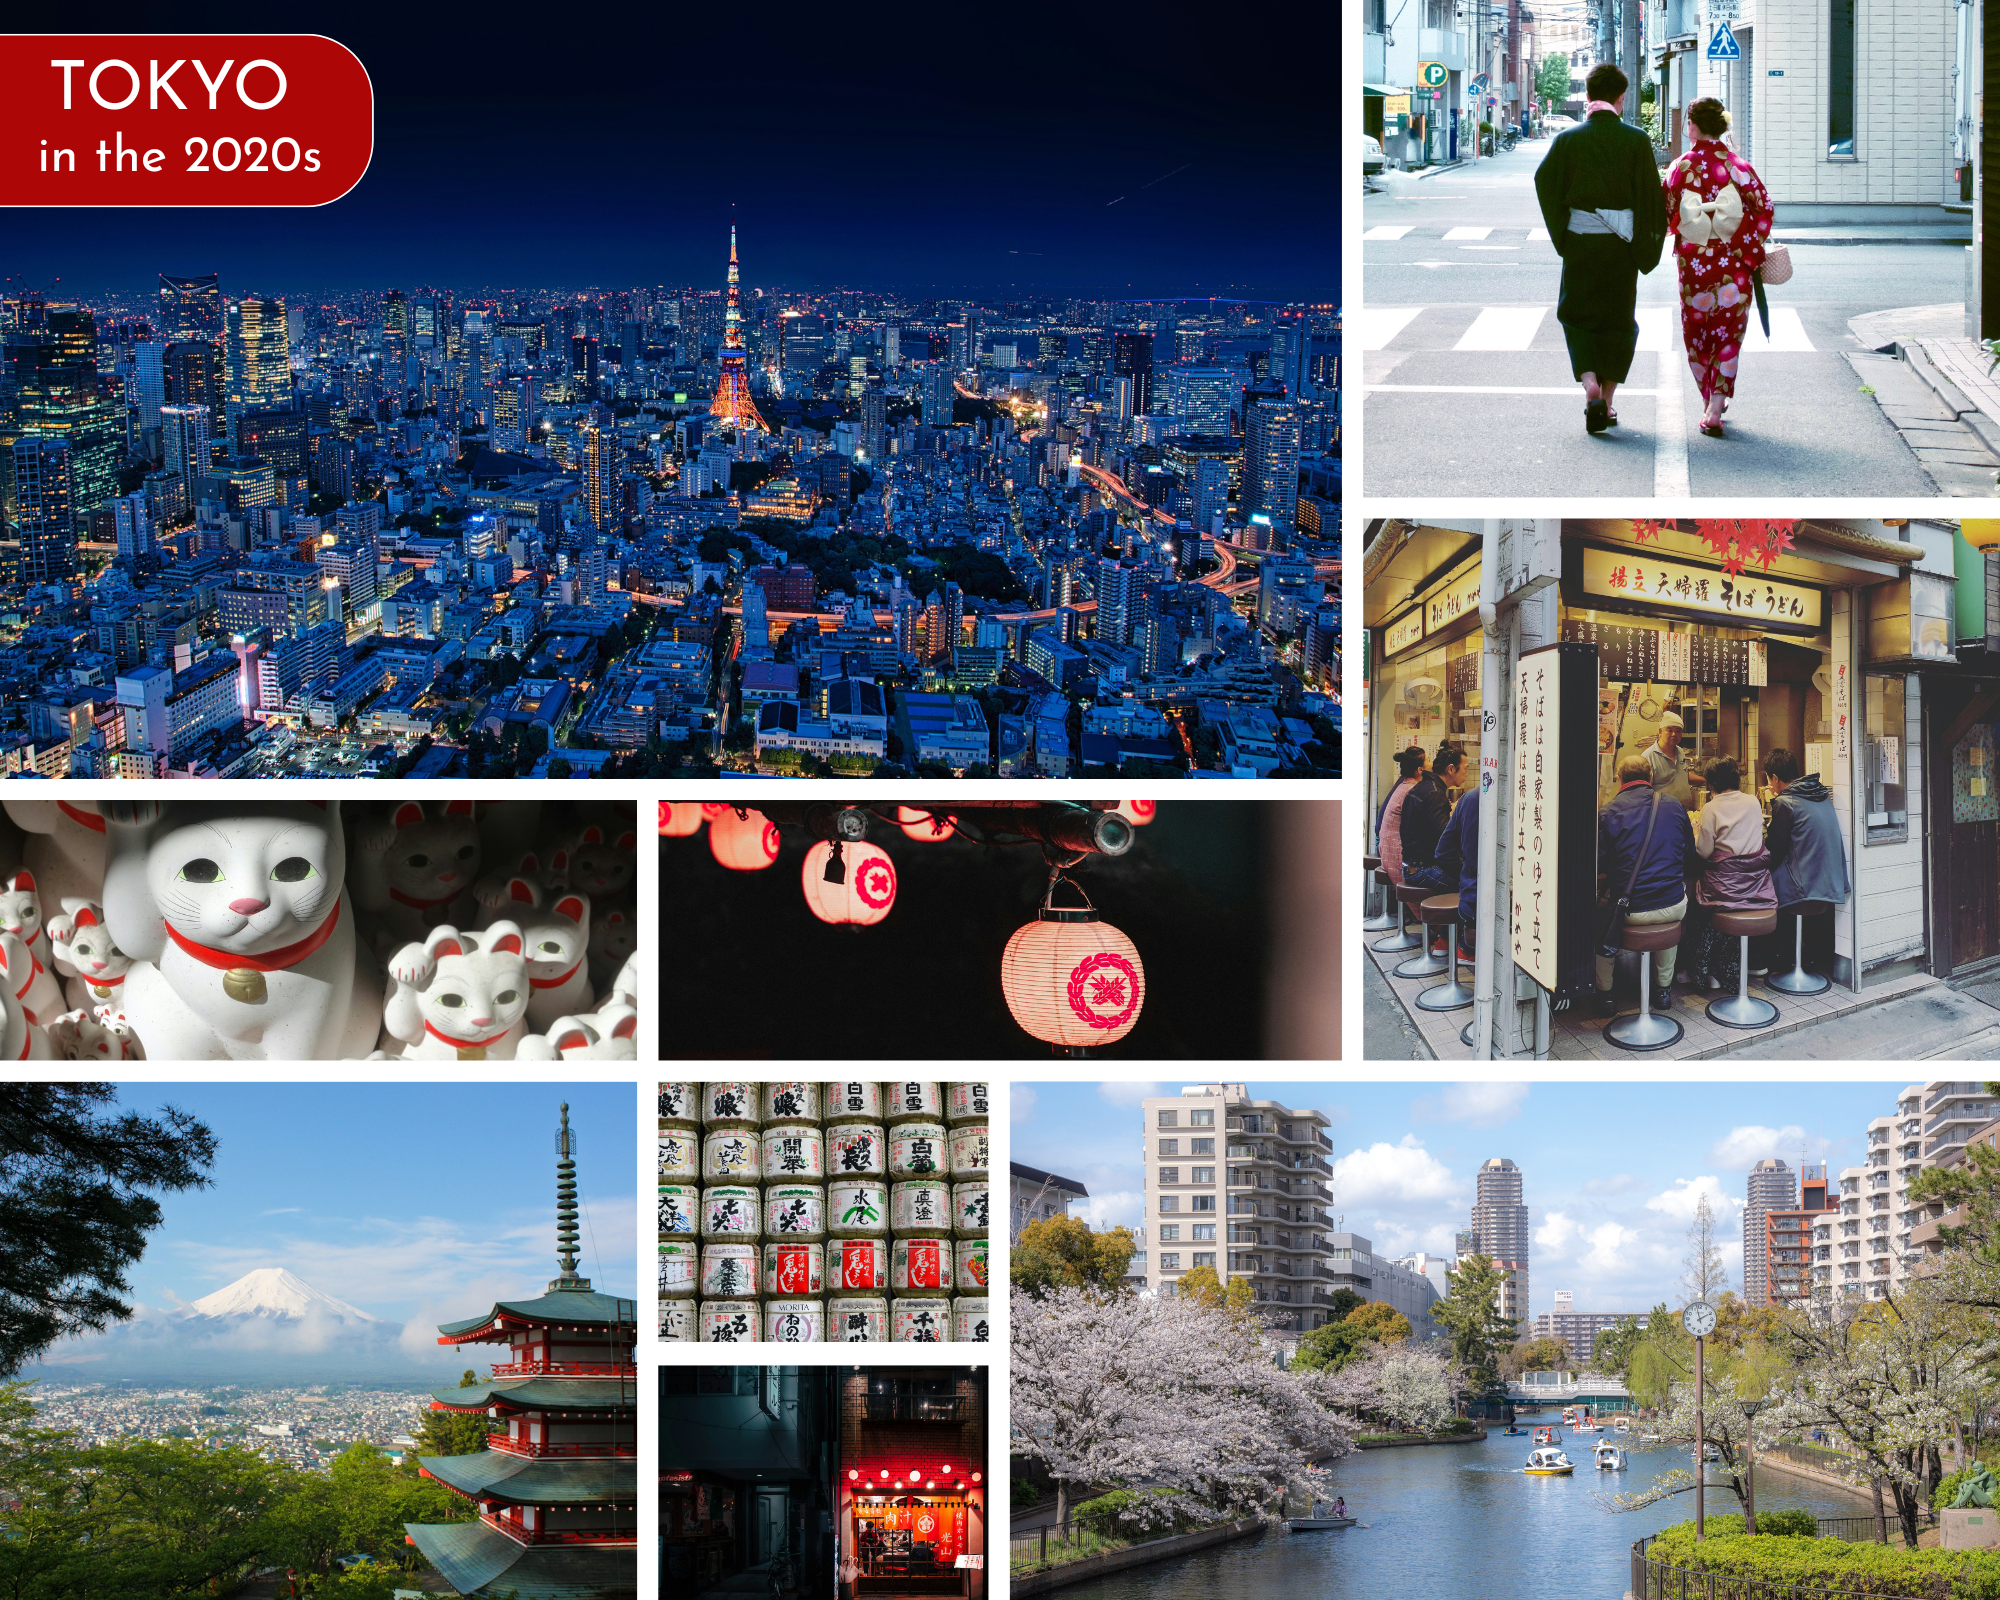
(In Truman’s words) Weather is cold but clear. Much outdoor living but must be used to it and warmly dressed. Very little heat except for tourist. The average temperature in Tokyo in February 1954 was 47 degrees during the day. Truman and Millie had just missed a very snowy January in the city, and they were visiting about a month and a half before the spring cherry blossoms would be in bloom. Truman used the word “colorless” four times in his description of the city and the people throughout the four pages featuring the Tokyo leg of the trip. Understandably so, considering that the city was in the final stretch of winter, Truman and Millie were seeing Tokyo at its most grey. It would be decades before technology lit up the skyscrapers year-round with a kaleidoscope of bright lights during the day and the night. Today, it is a vibrant city where contemporary life meets age-old traditions…
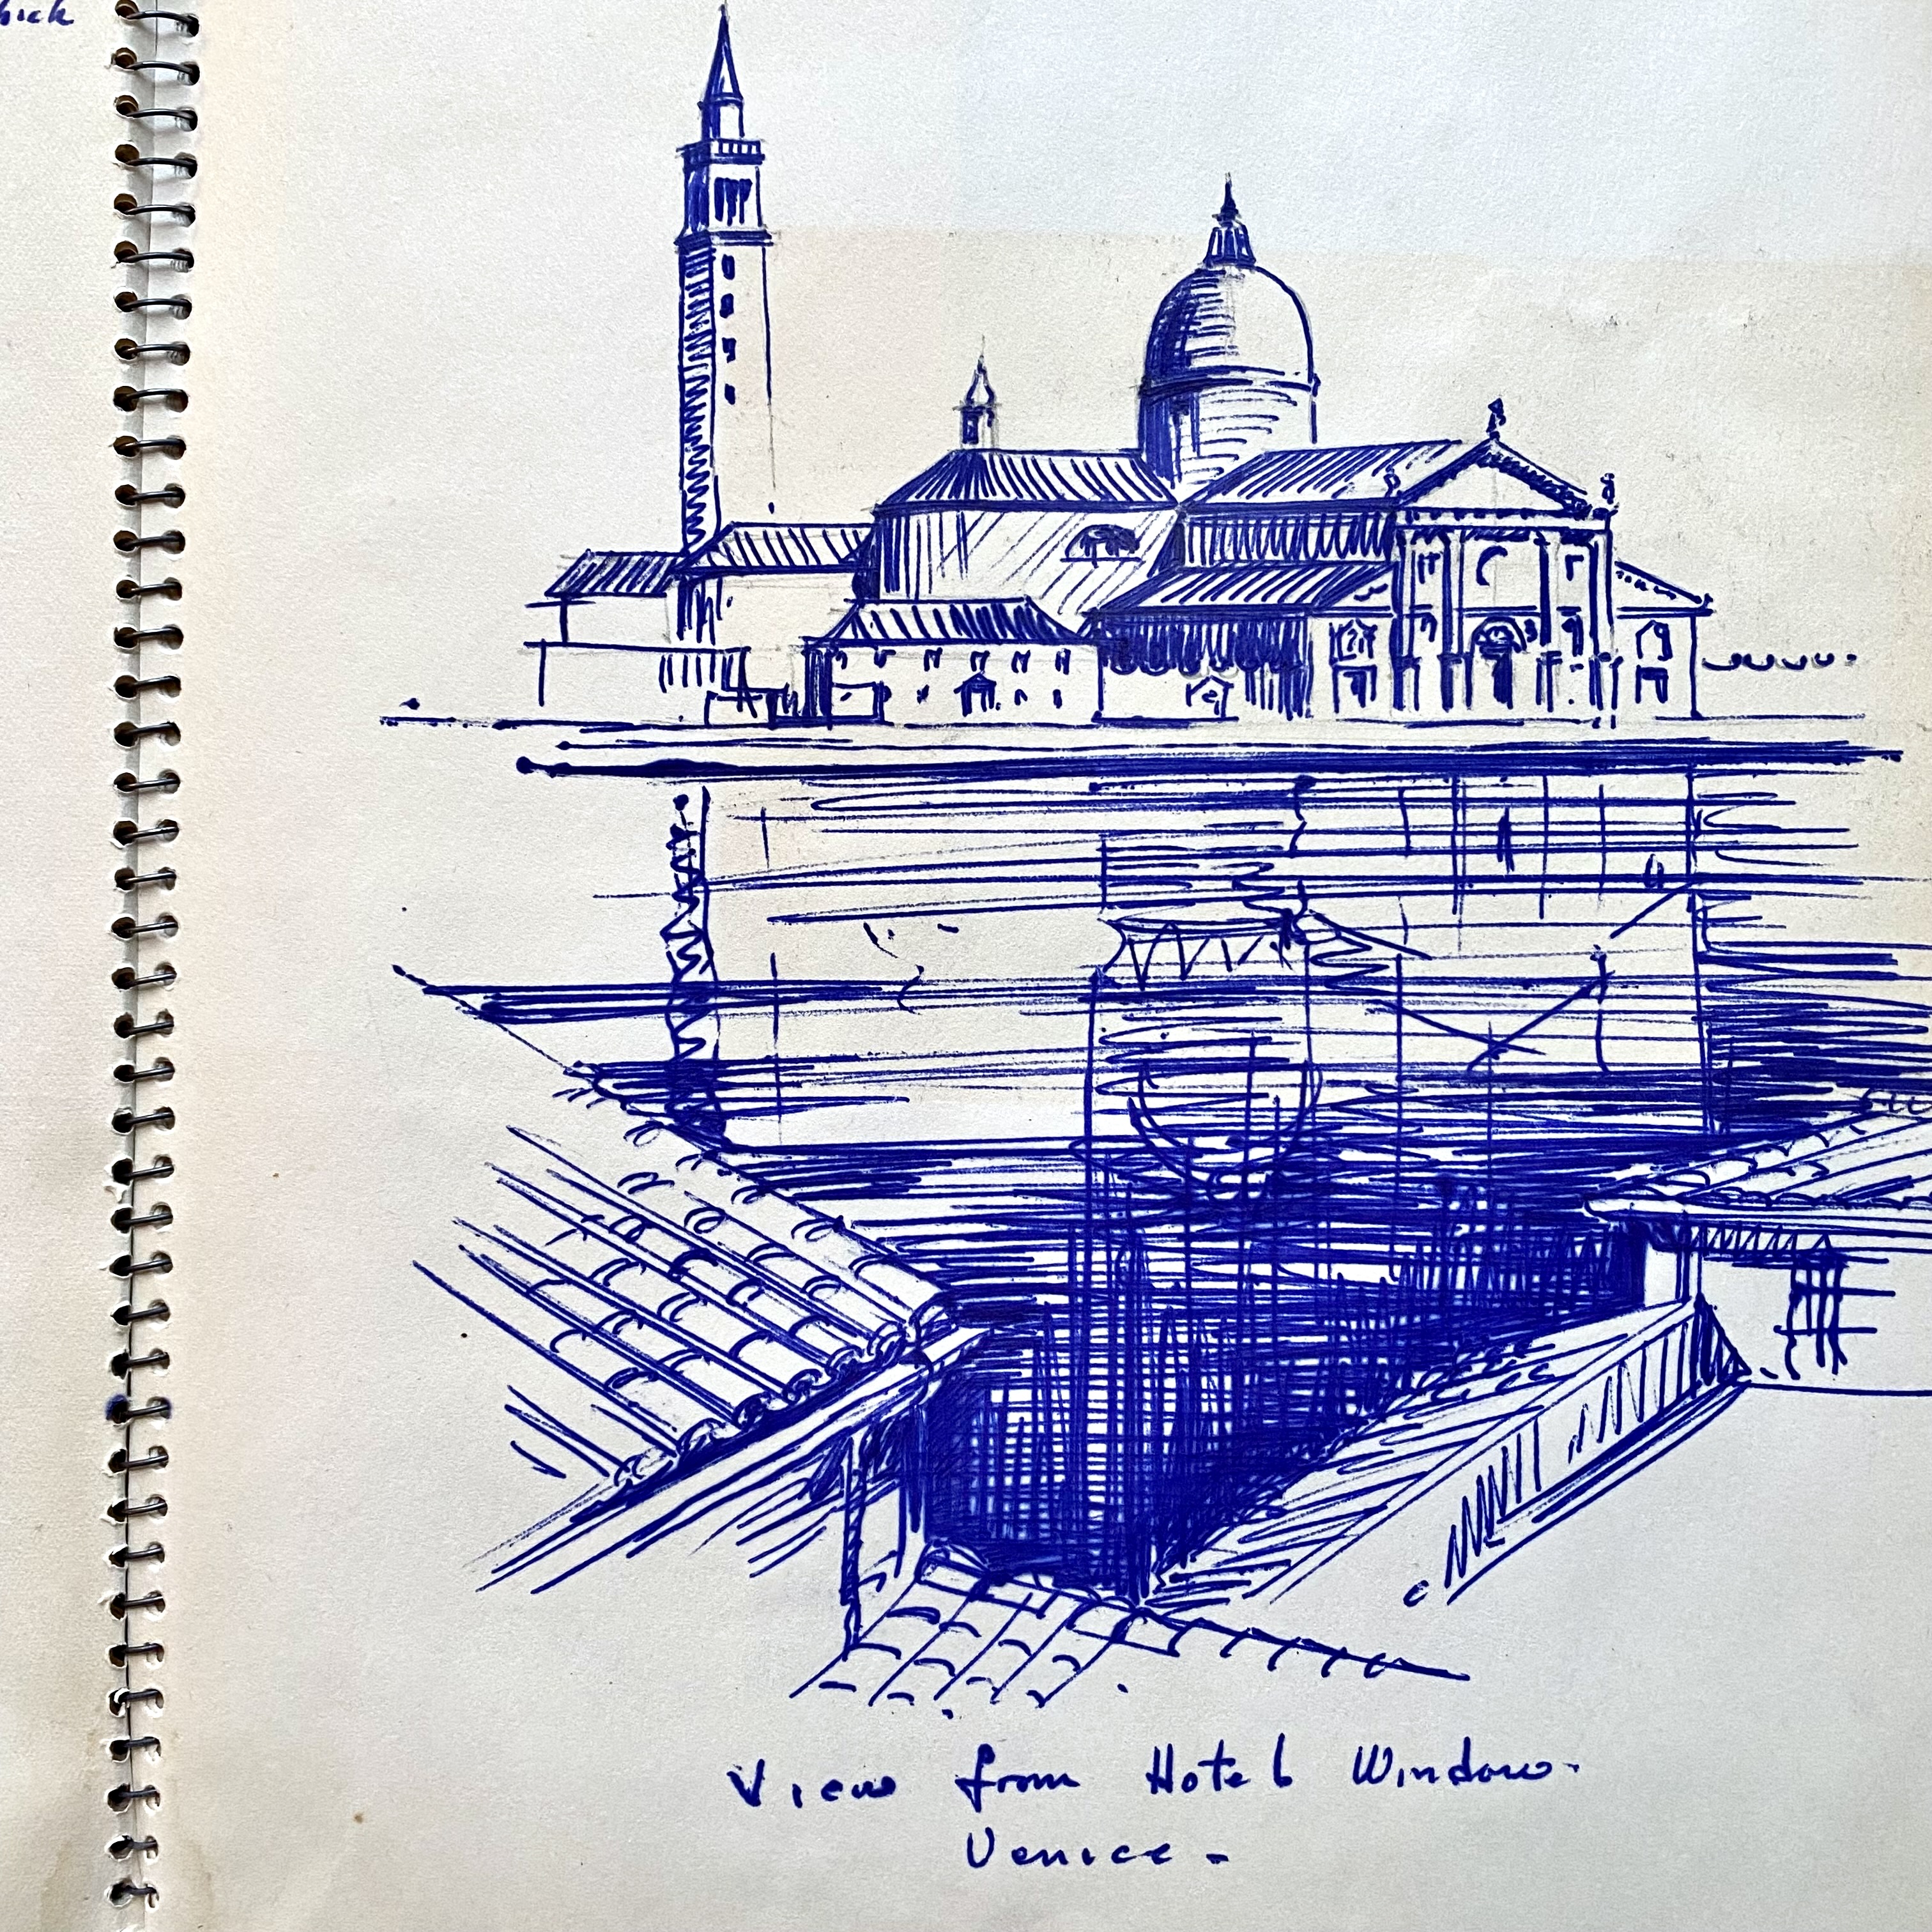
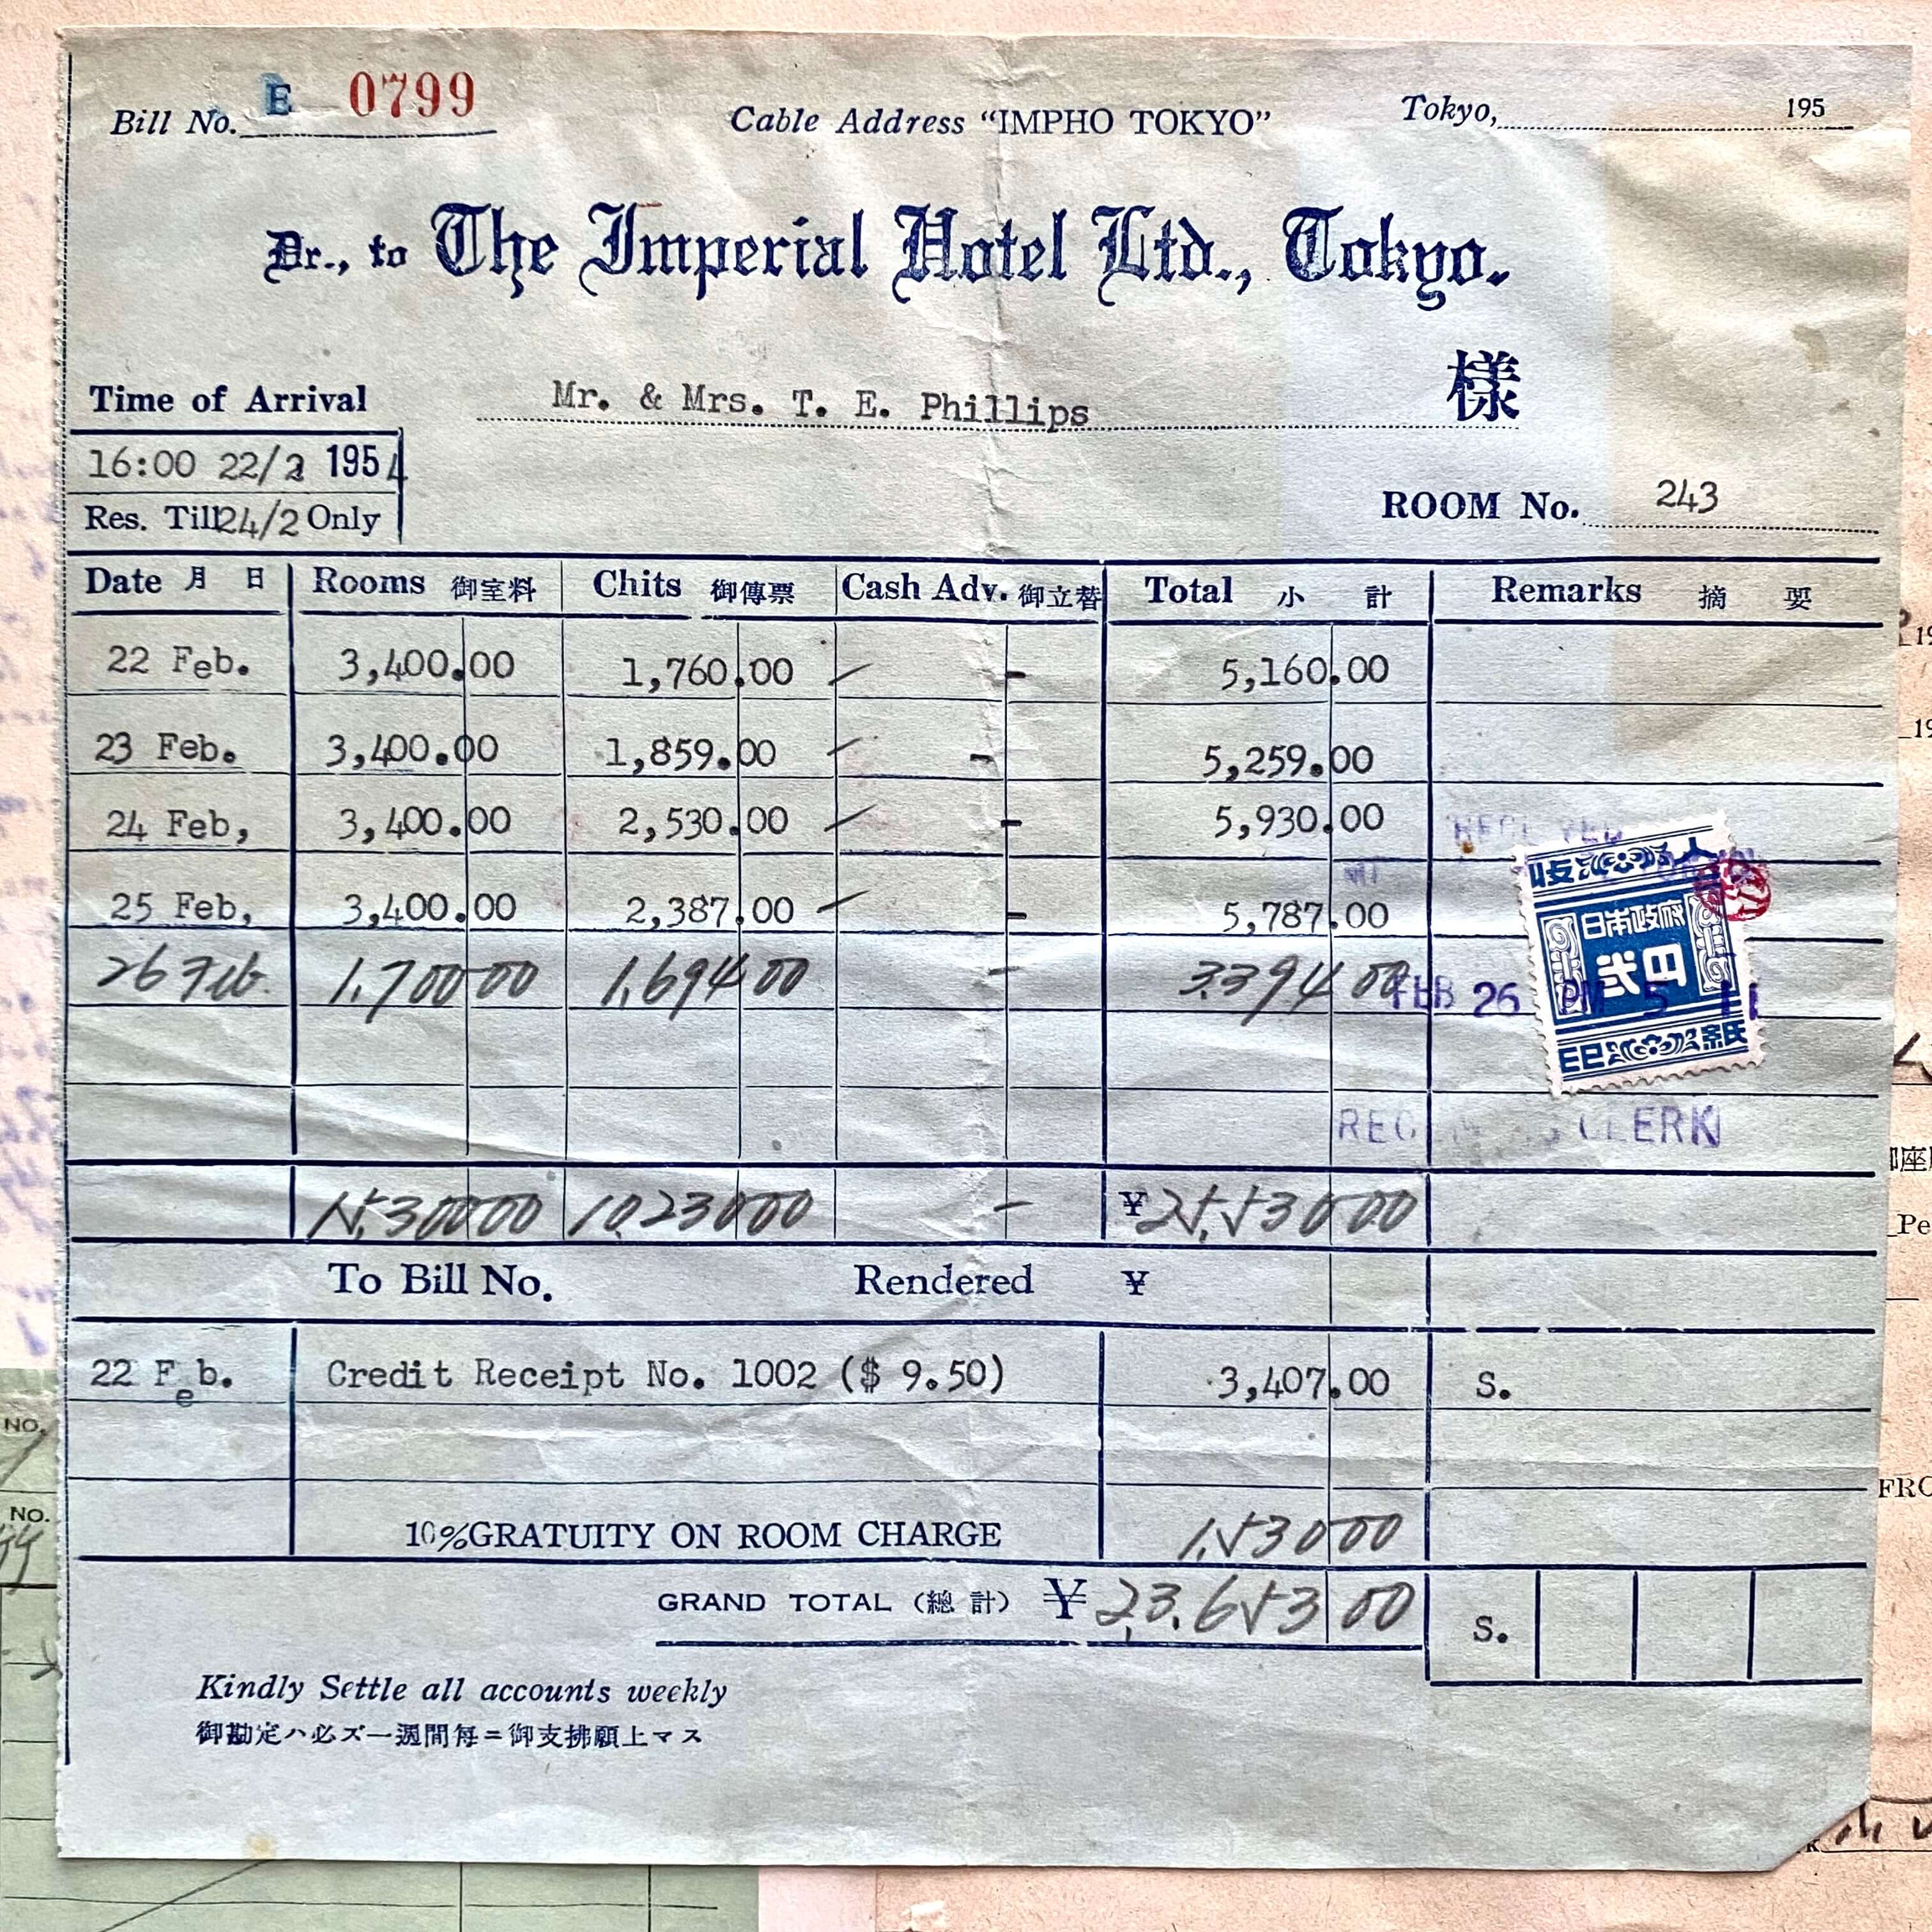
ACCOMMODATIONS: The Imperial Hotel, Tokyo
Truman didn’t record any impressions of the Imperial Hotel stay, but he did include a pale blue receipt and a linen postcard featuring its portrait. Built in the 1880s as a guest house for the government’s international travelers, this hotel, located in the Chiyoda ward of Tokyo, has long remained a bustling hospitality venue for the past 140 years.
Still open today, the building was designed at various stages by architects Yuzrou Watanabe and Frank Lloyd Wright and has been altered over the course of a century to contend with earthquakes, modernization, and cultural shifts within the hospitality industry. In 1954, Truman and Millie stayed in room 243 for four nights at a total cost of 25, 530 yen (about $70.00 US dollars).
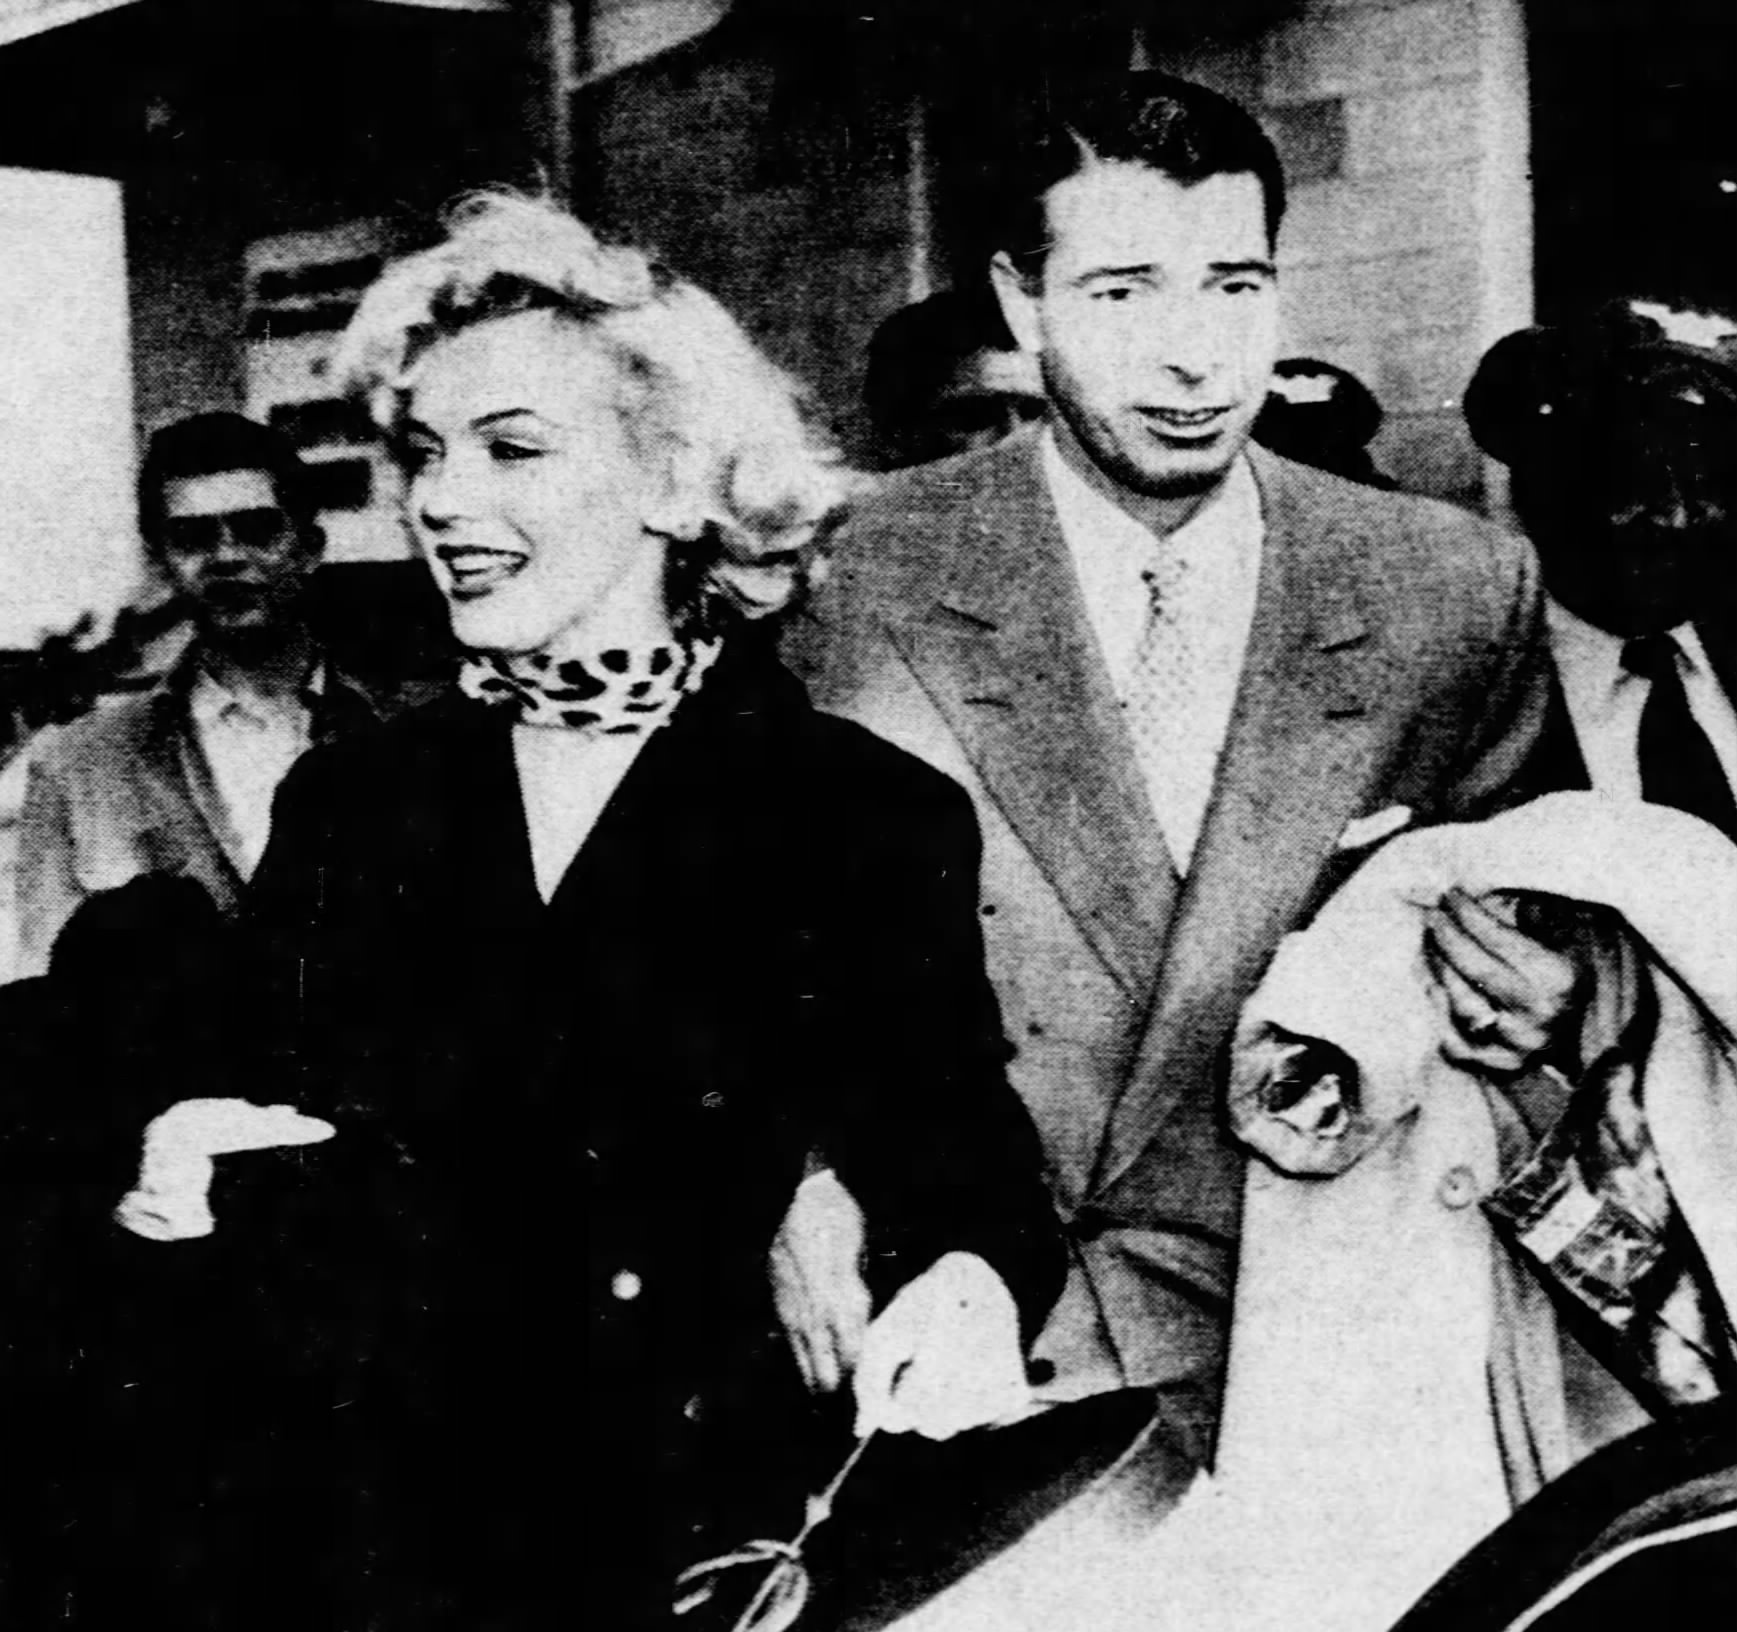
Two weeks prior to Truman and Millie checking in, famous guests at the hotel included Marilyn Monroe and Joe DiMaggio on their honeymoon.
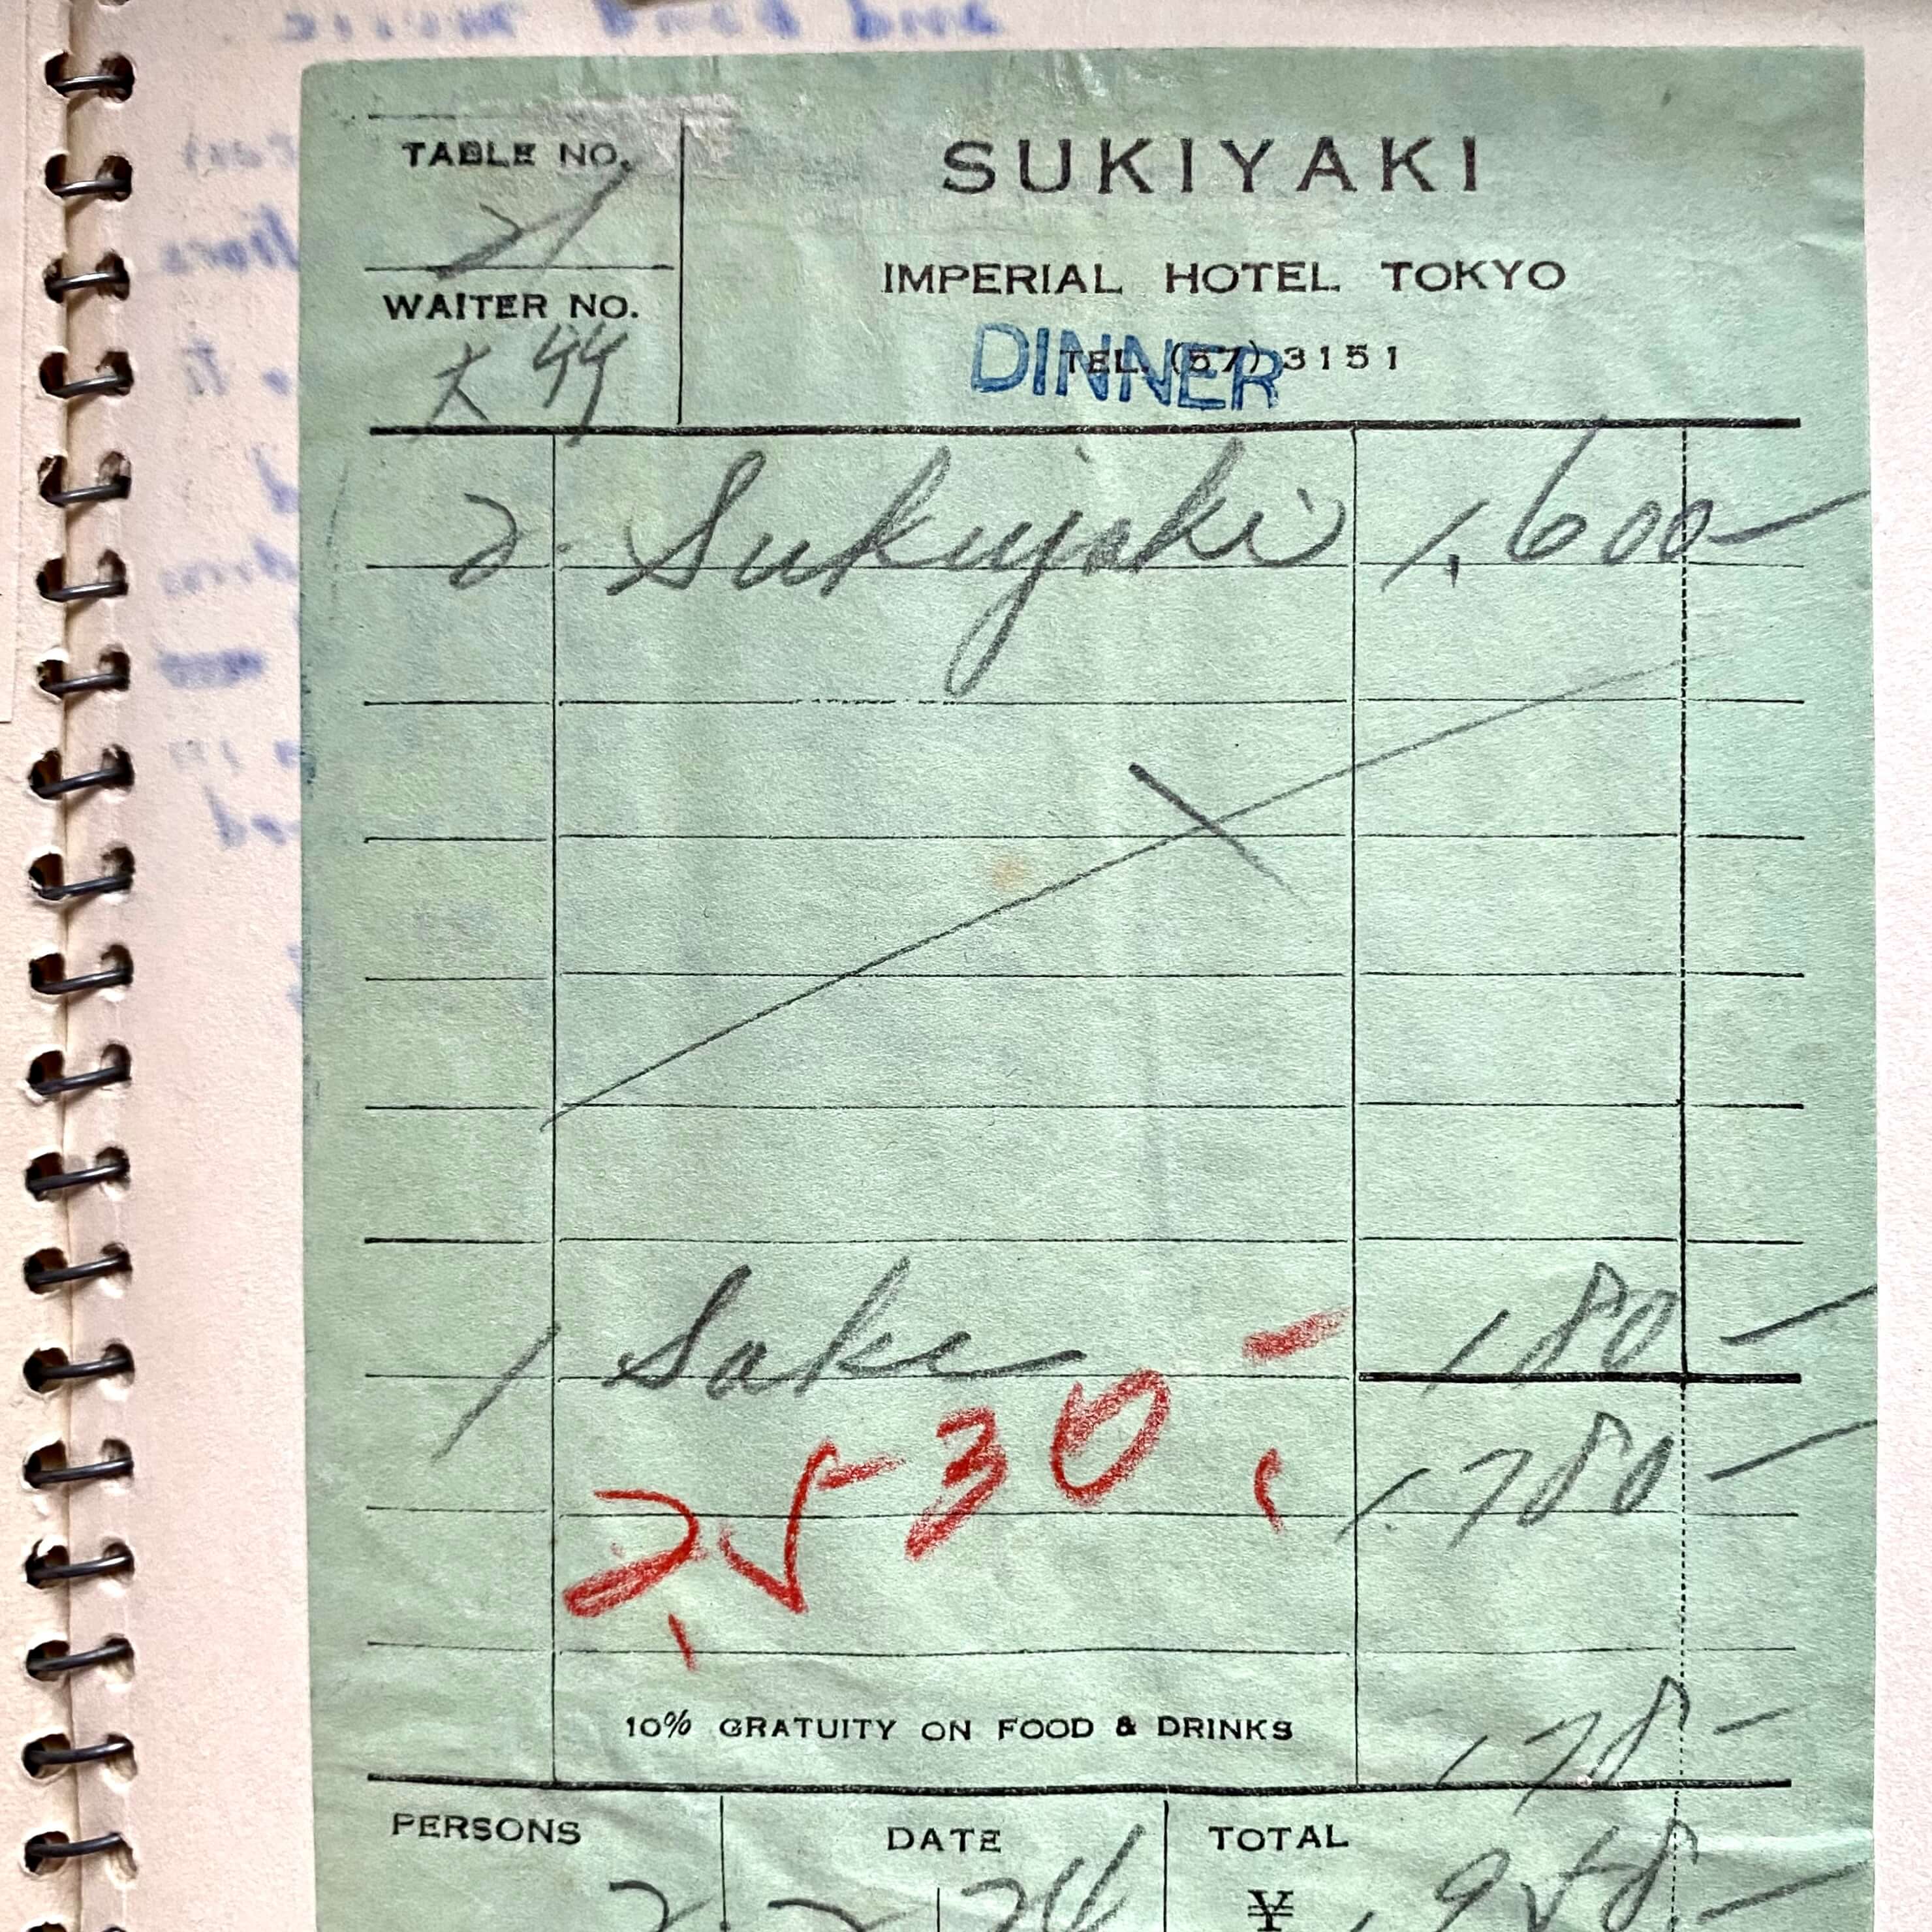
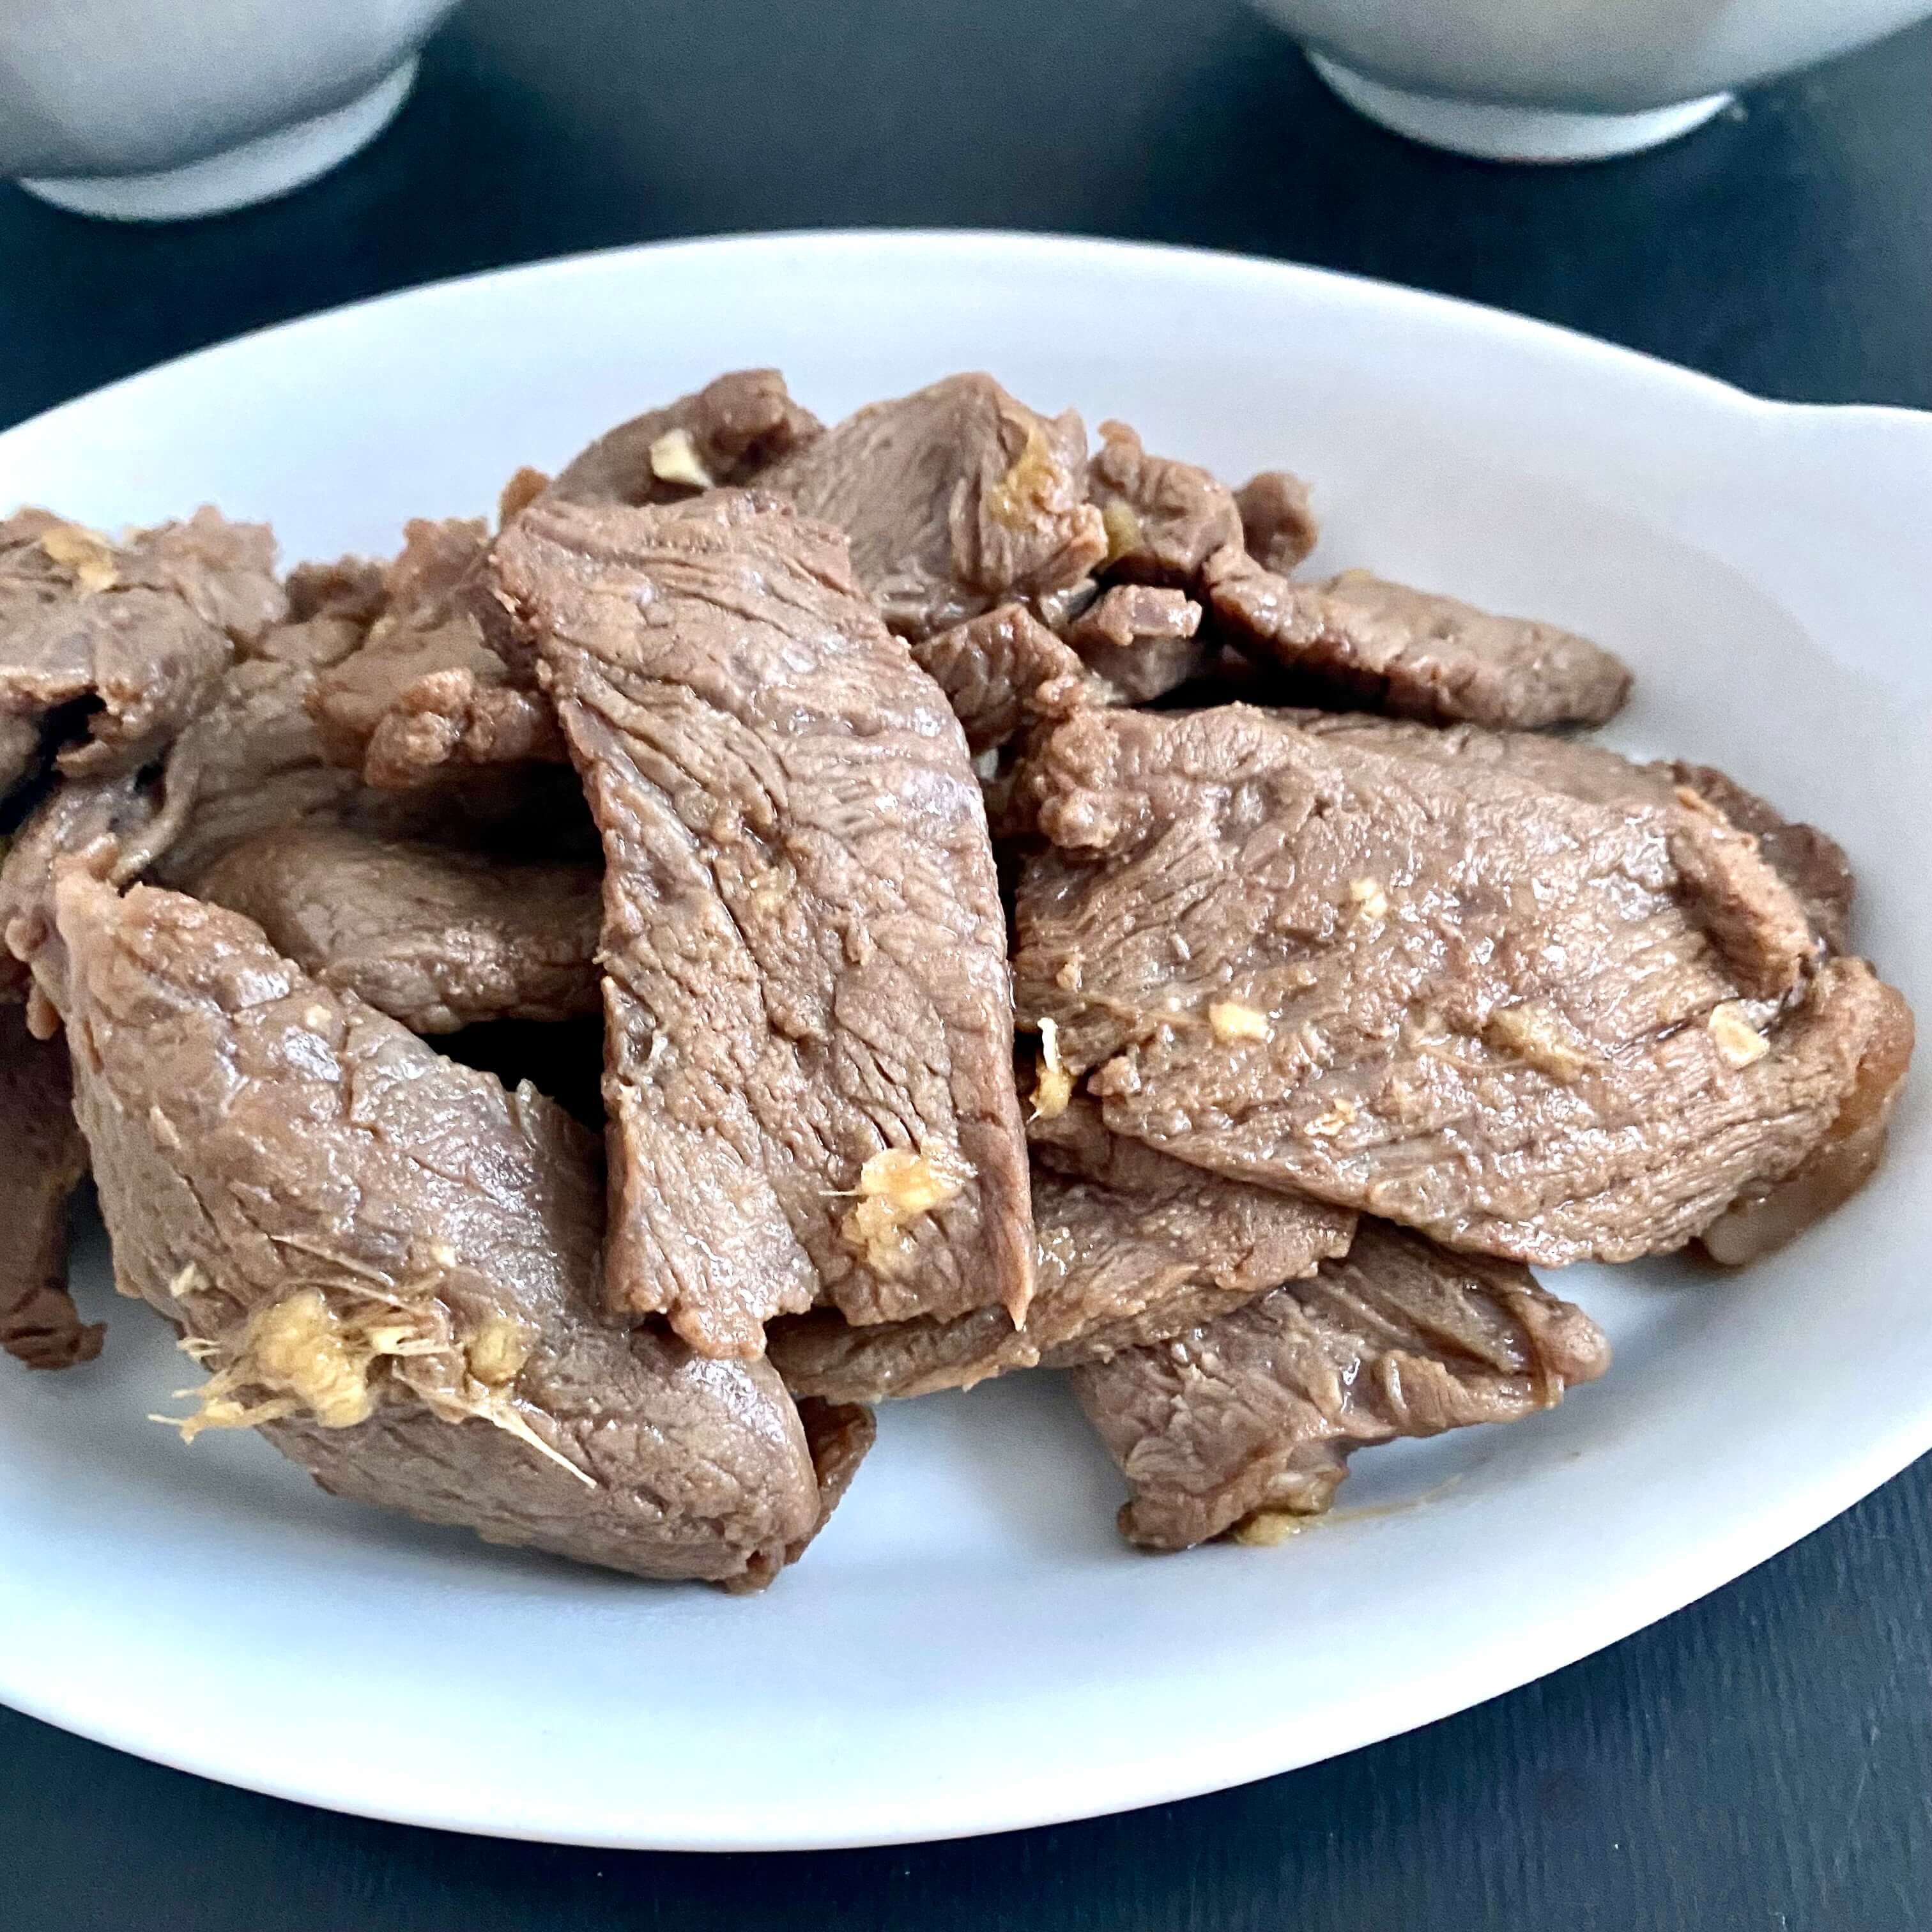
While there are no specific notes from Truman on their hotel stay, there is another receipt pasted under the hotel bill that documents a dinner at the hotel restaurant one night. There, Millie & Truman ordered sake and sukiyaki, a traditional beef and vegetable hot pot.
SITESEEING
Clipped from a brochure and pasted into the scrapbook…
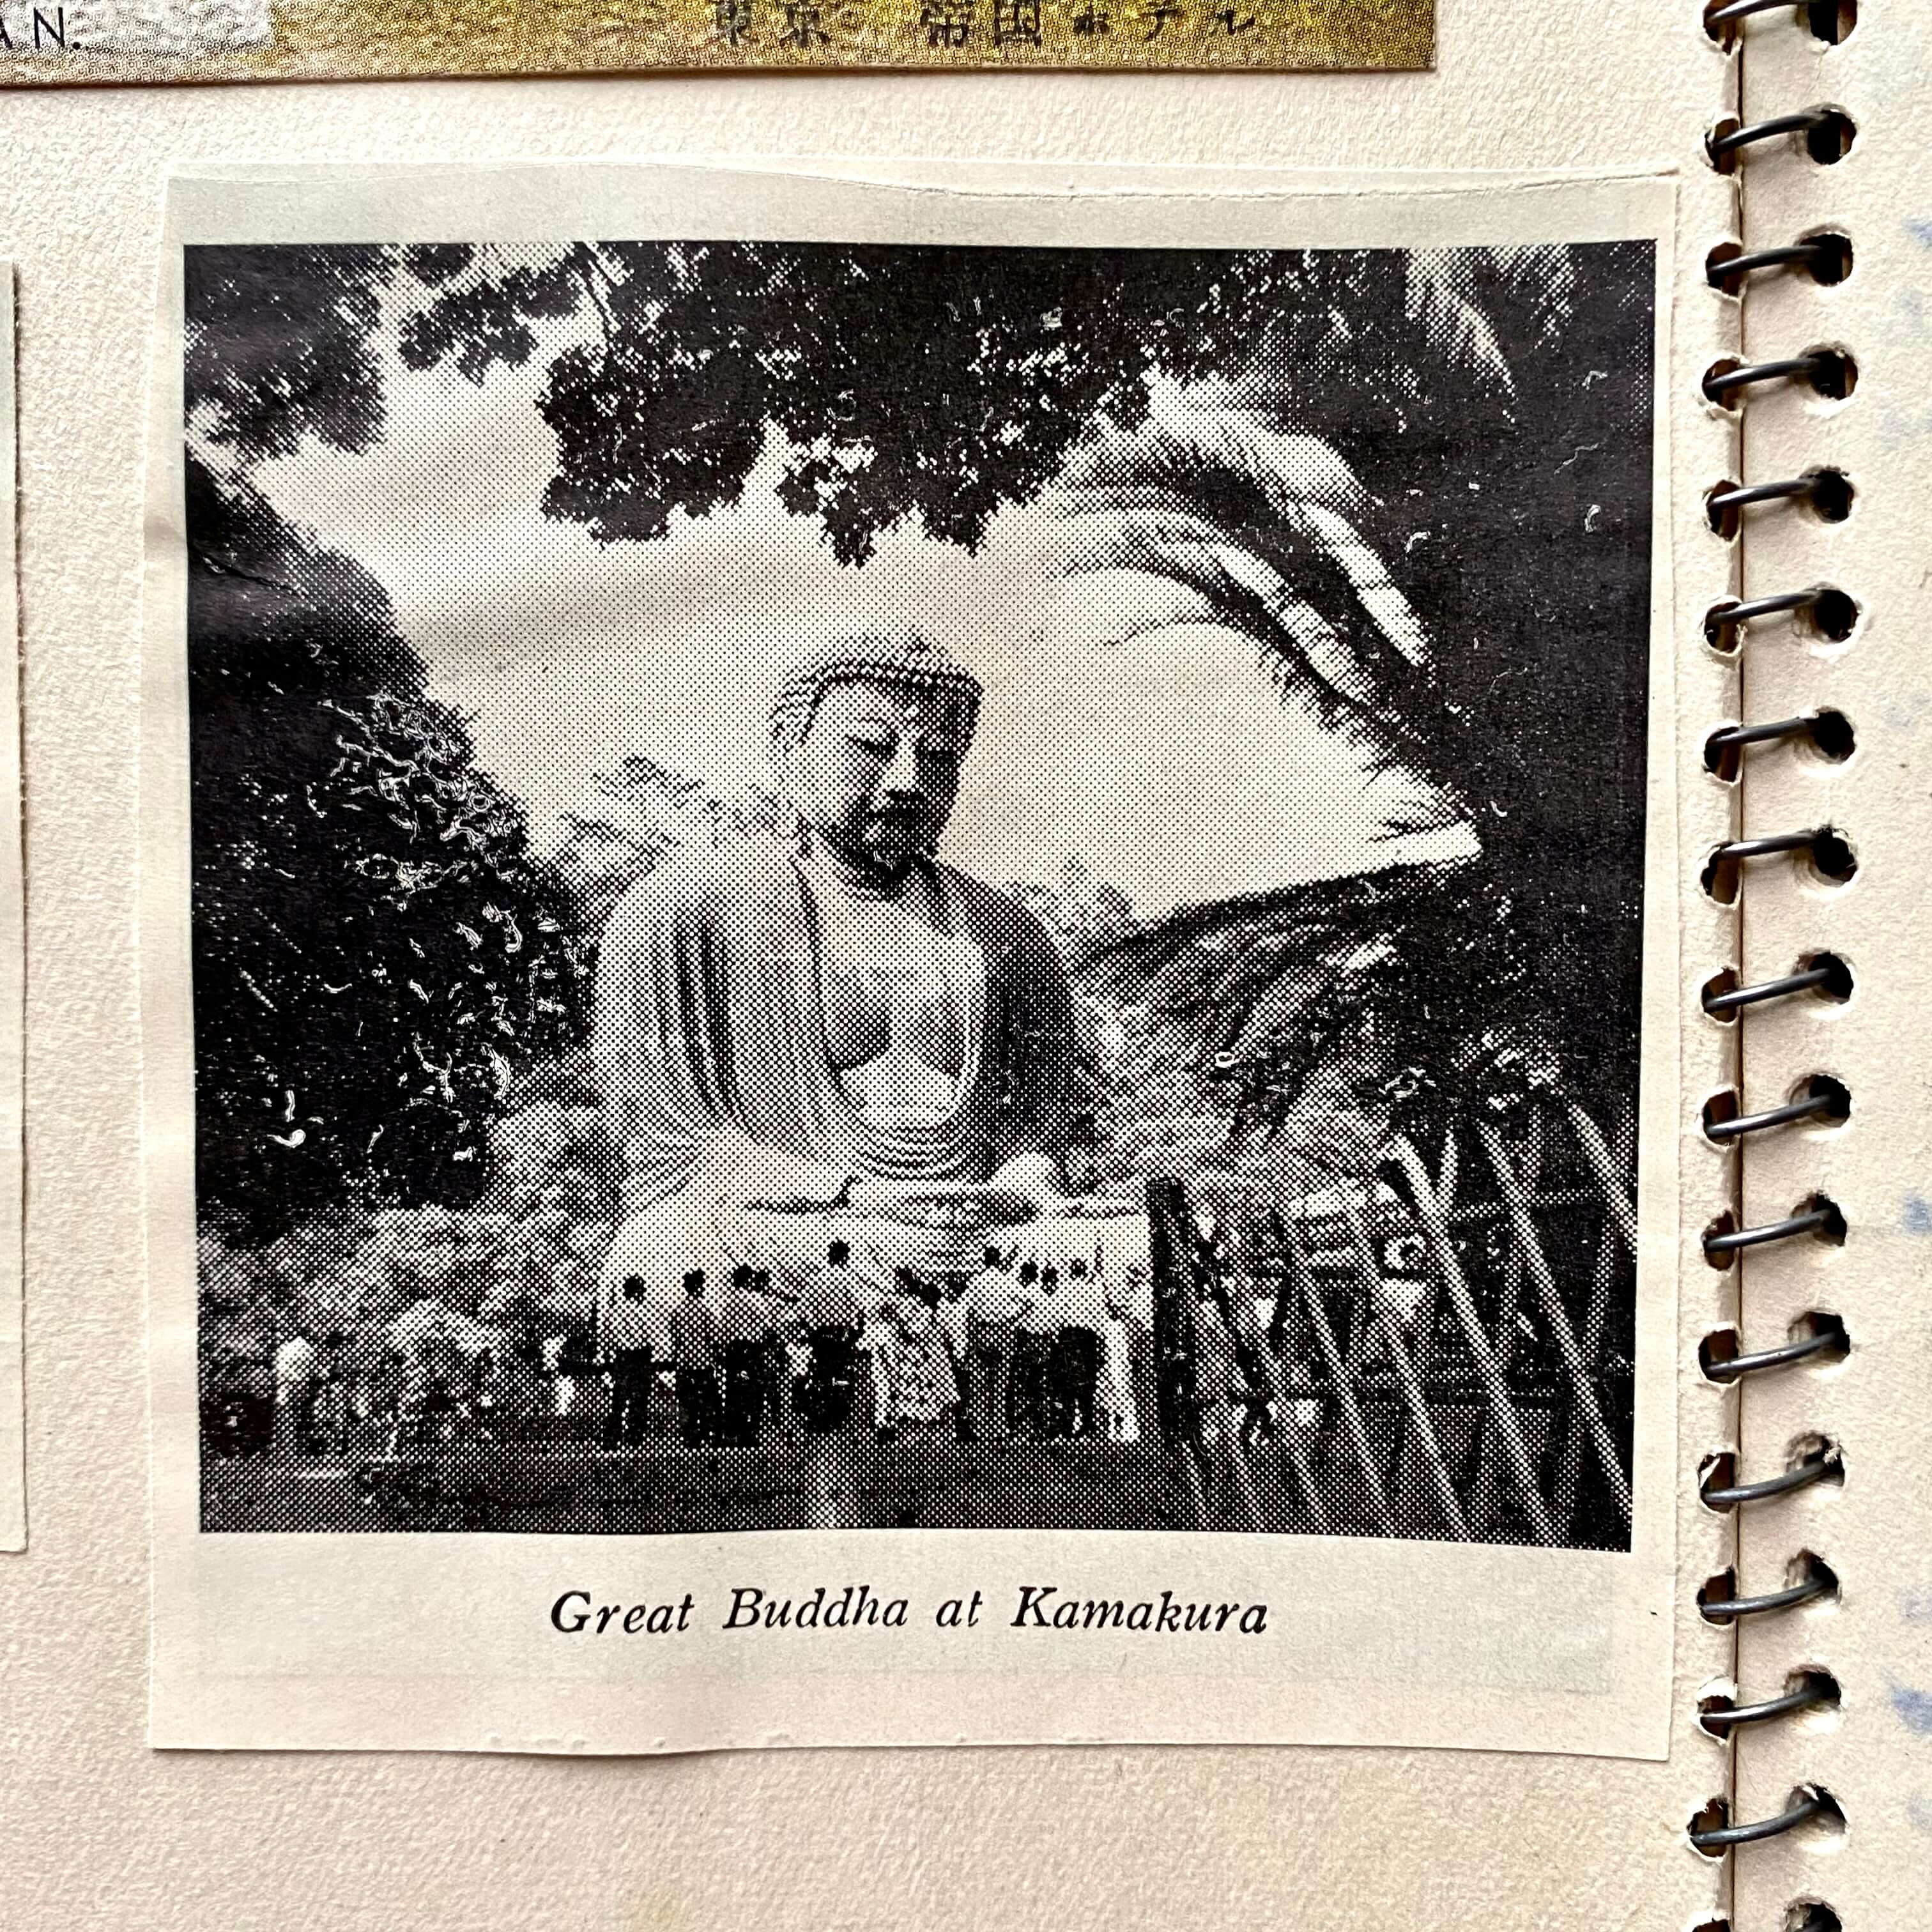
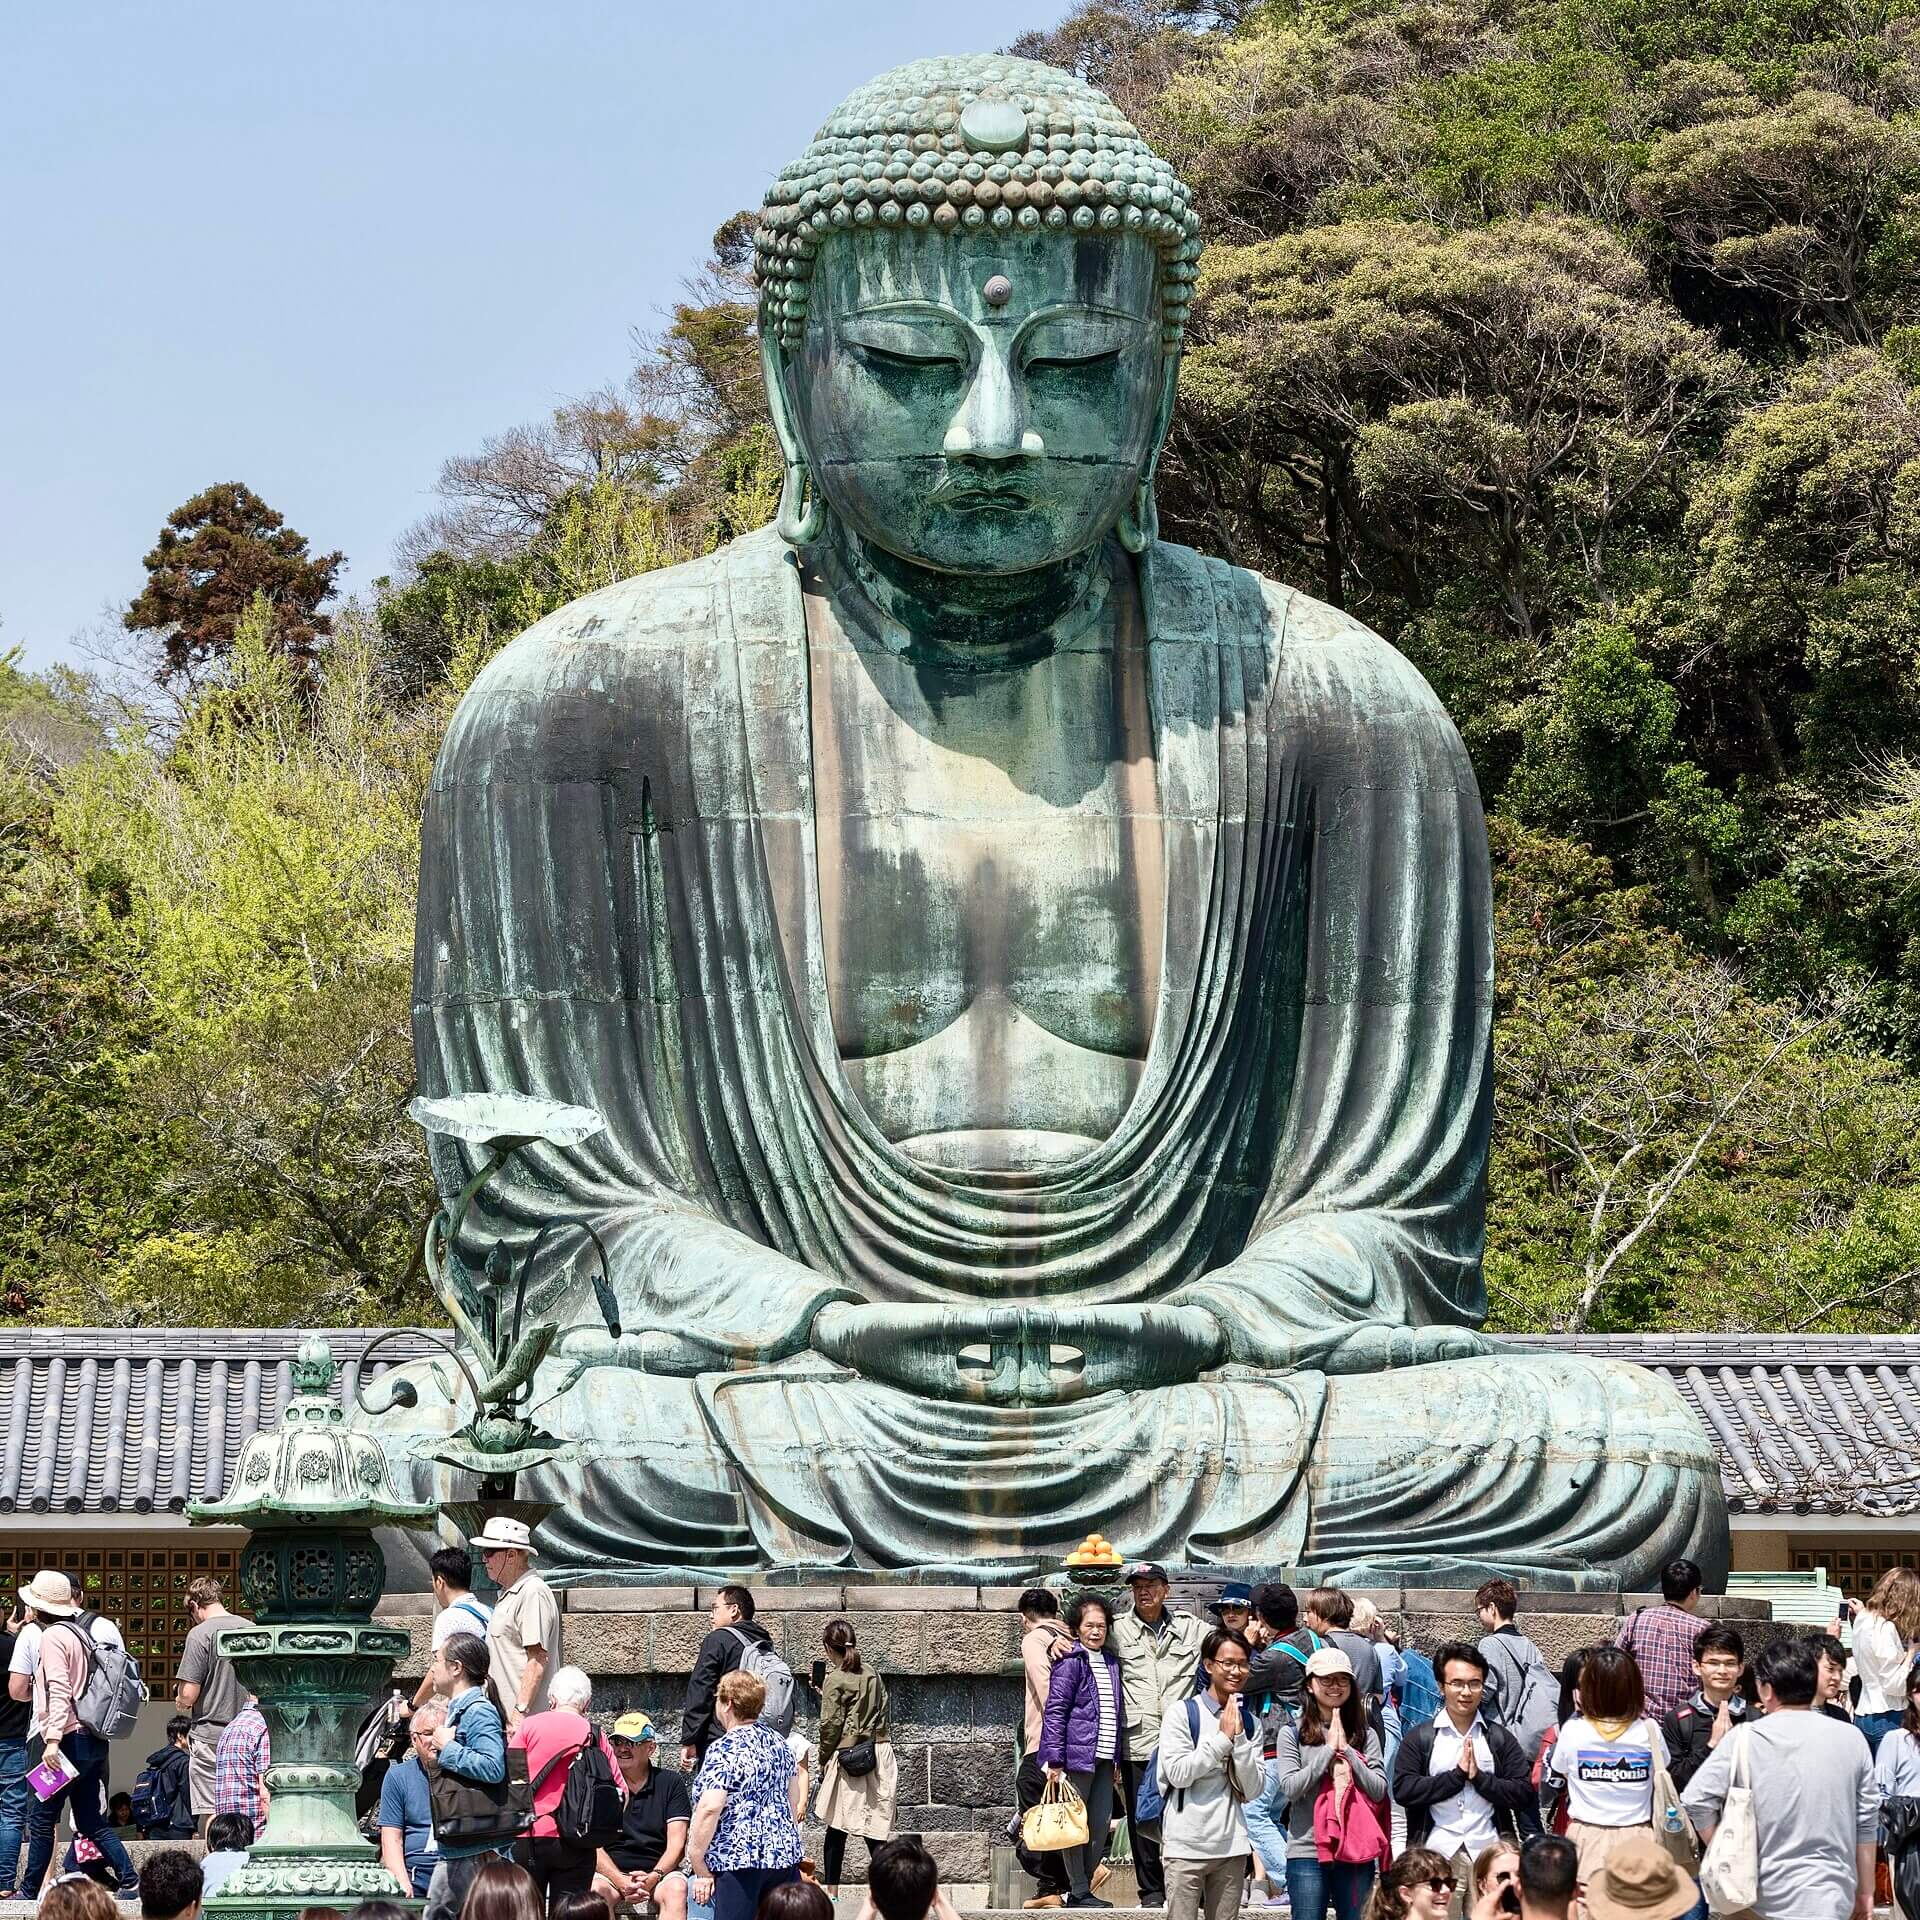
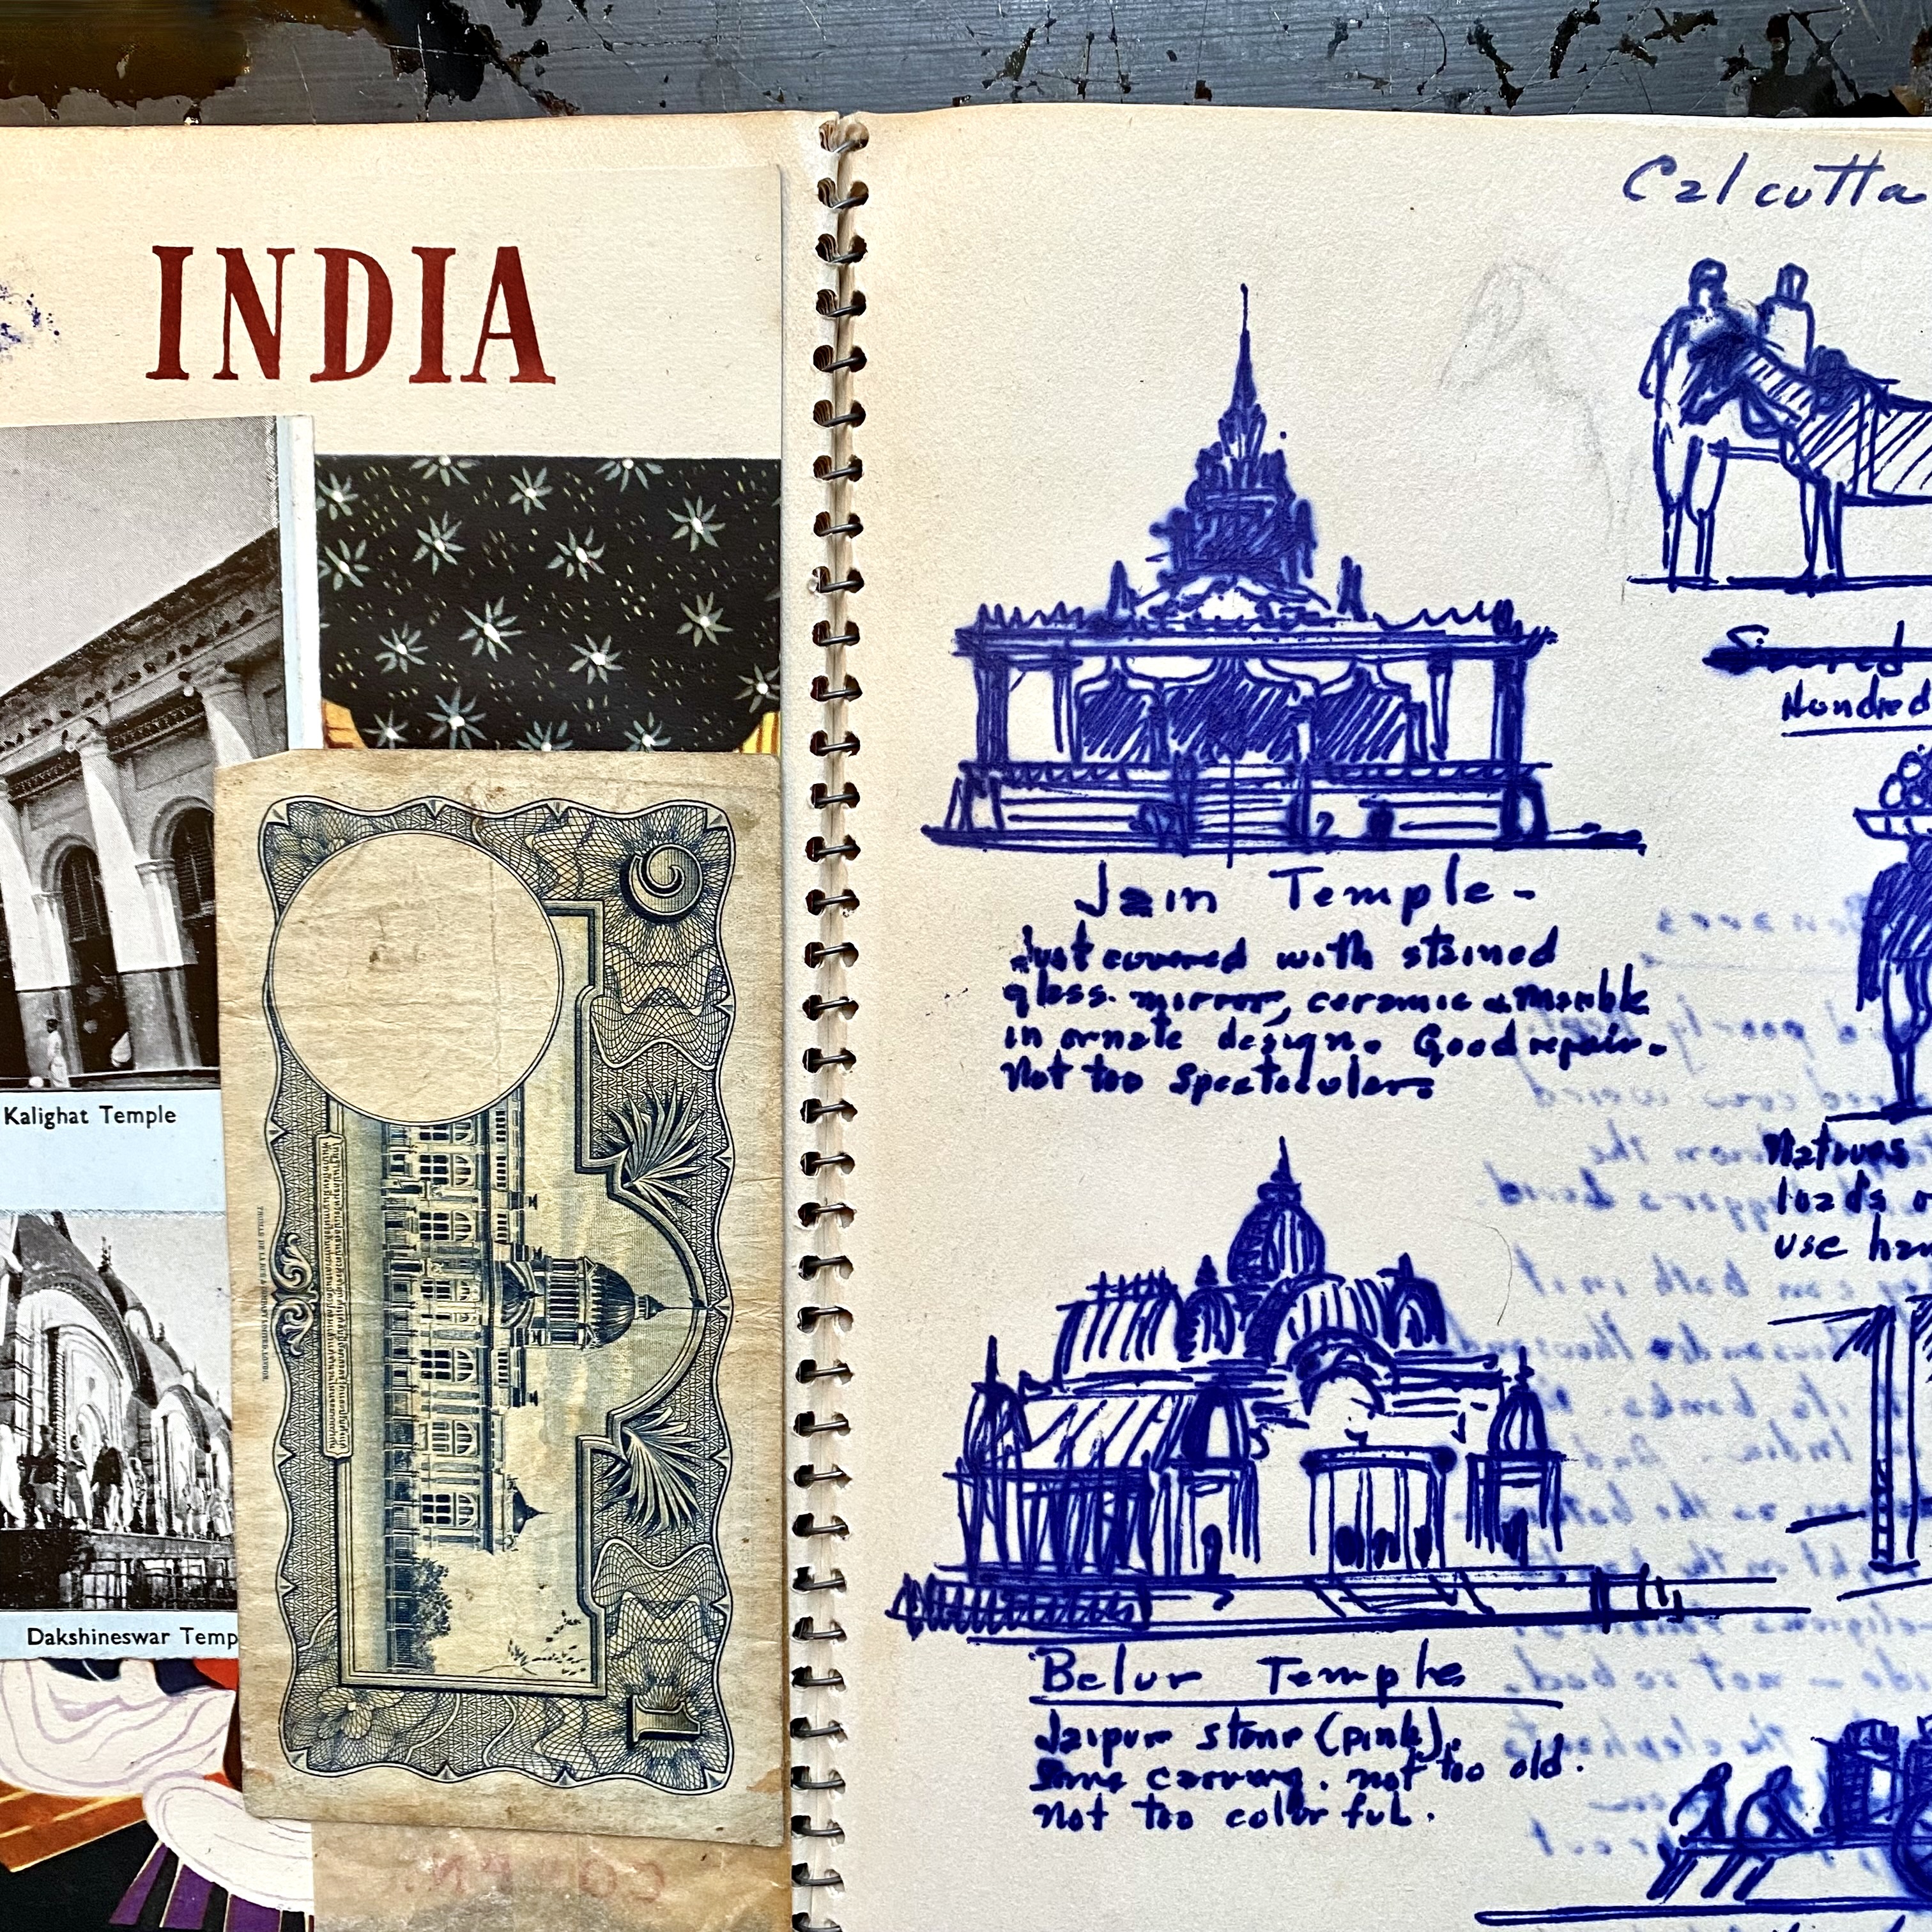
THE GREAT BUDDHA (Kamakura) About an hour outside of Tokyo, Truman and Millie visited The Great Buddha in Kamakura, which dates back to 1252 and is the second-tallest Buddha statue made of bronze in Japan. A longtime source of creativity, it is forever immortalized in the Rudyard Kipling poem Buddha at Kamakura. The statue, which still stands today, represents divine light, worldly wisdom, and compassion. In 1954, Truman noted that Kamakura was “a very interesting small city with a population of only 8,500 strictly Japanese residents.” Today, it boasts a population of 173,000.
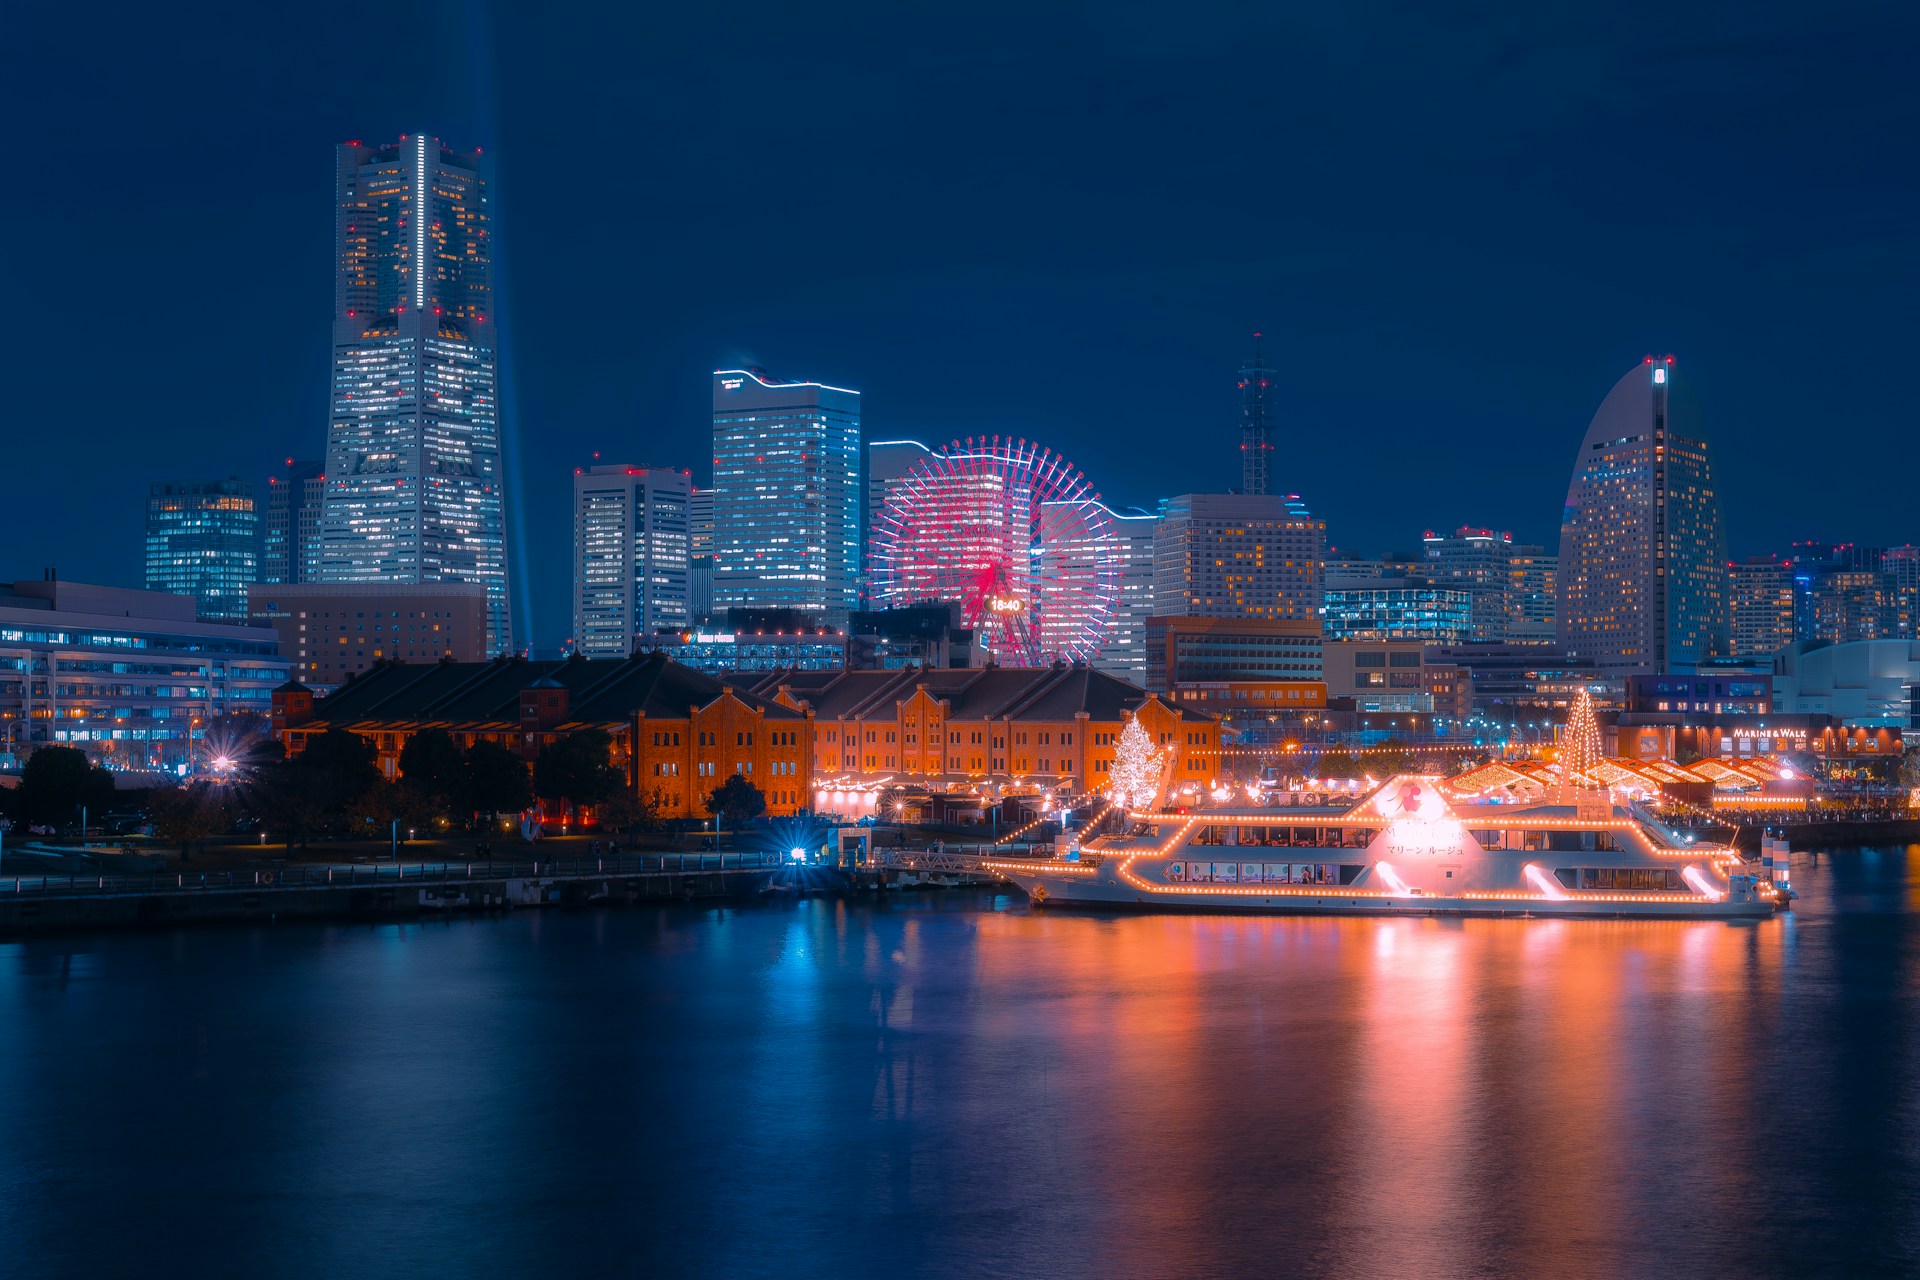
YOKOHAMA Located an hour south of Tokyo, Yokohama was the first major port town. It was established in the mid-1850s and remains an important industrial hub in the country to this day. Originally considered the gateway to Japan and the birthplace of the country’s first ice cream, Yokohama was heavily bombed during WWII. Truman and Millie were visiting while the city was in the early phases of reconstruction. Today, Yokohama is a bustling and energetic city boasting Japan’s second-largest population, and includes a popular Chinatown district. In 1954, Truman noted the “interesting streets, the amount of US occupation settlements, the open-air shops, the large import port, and the one Western hotel.“
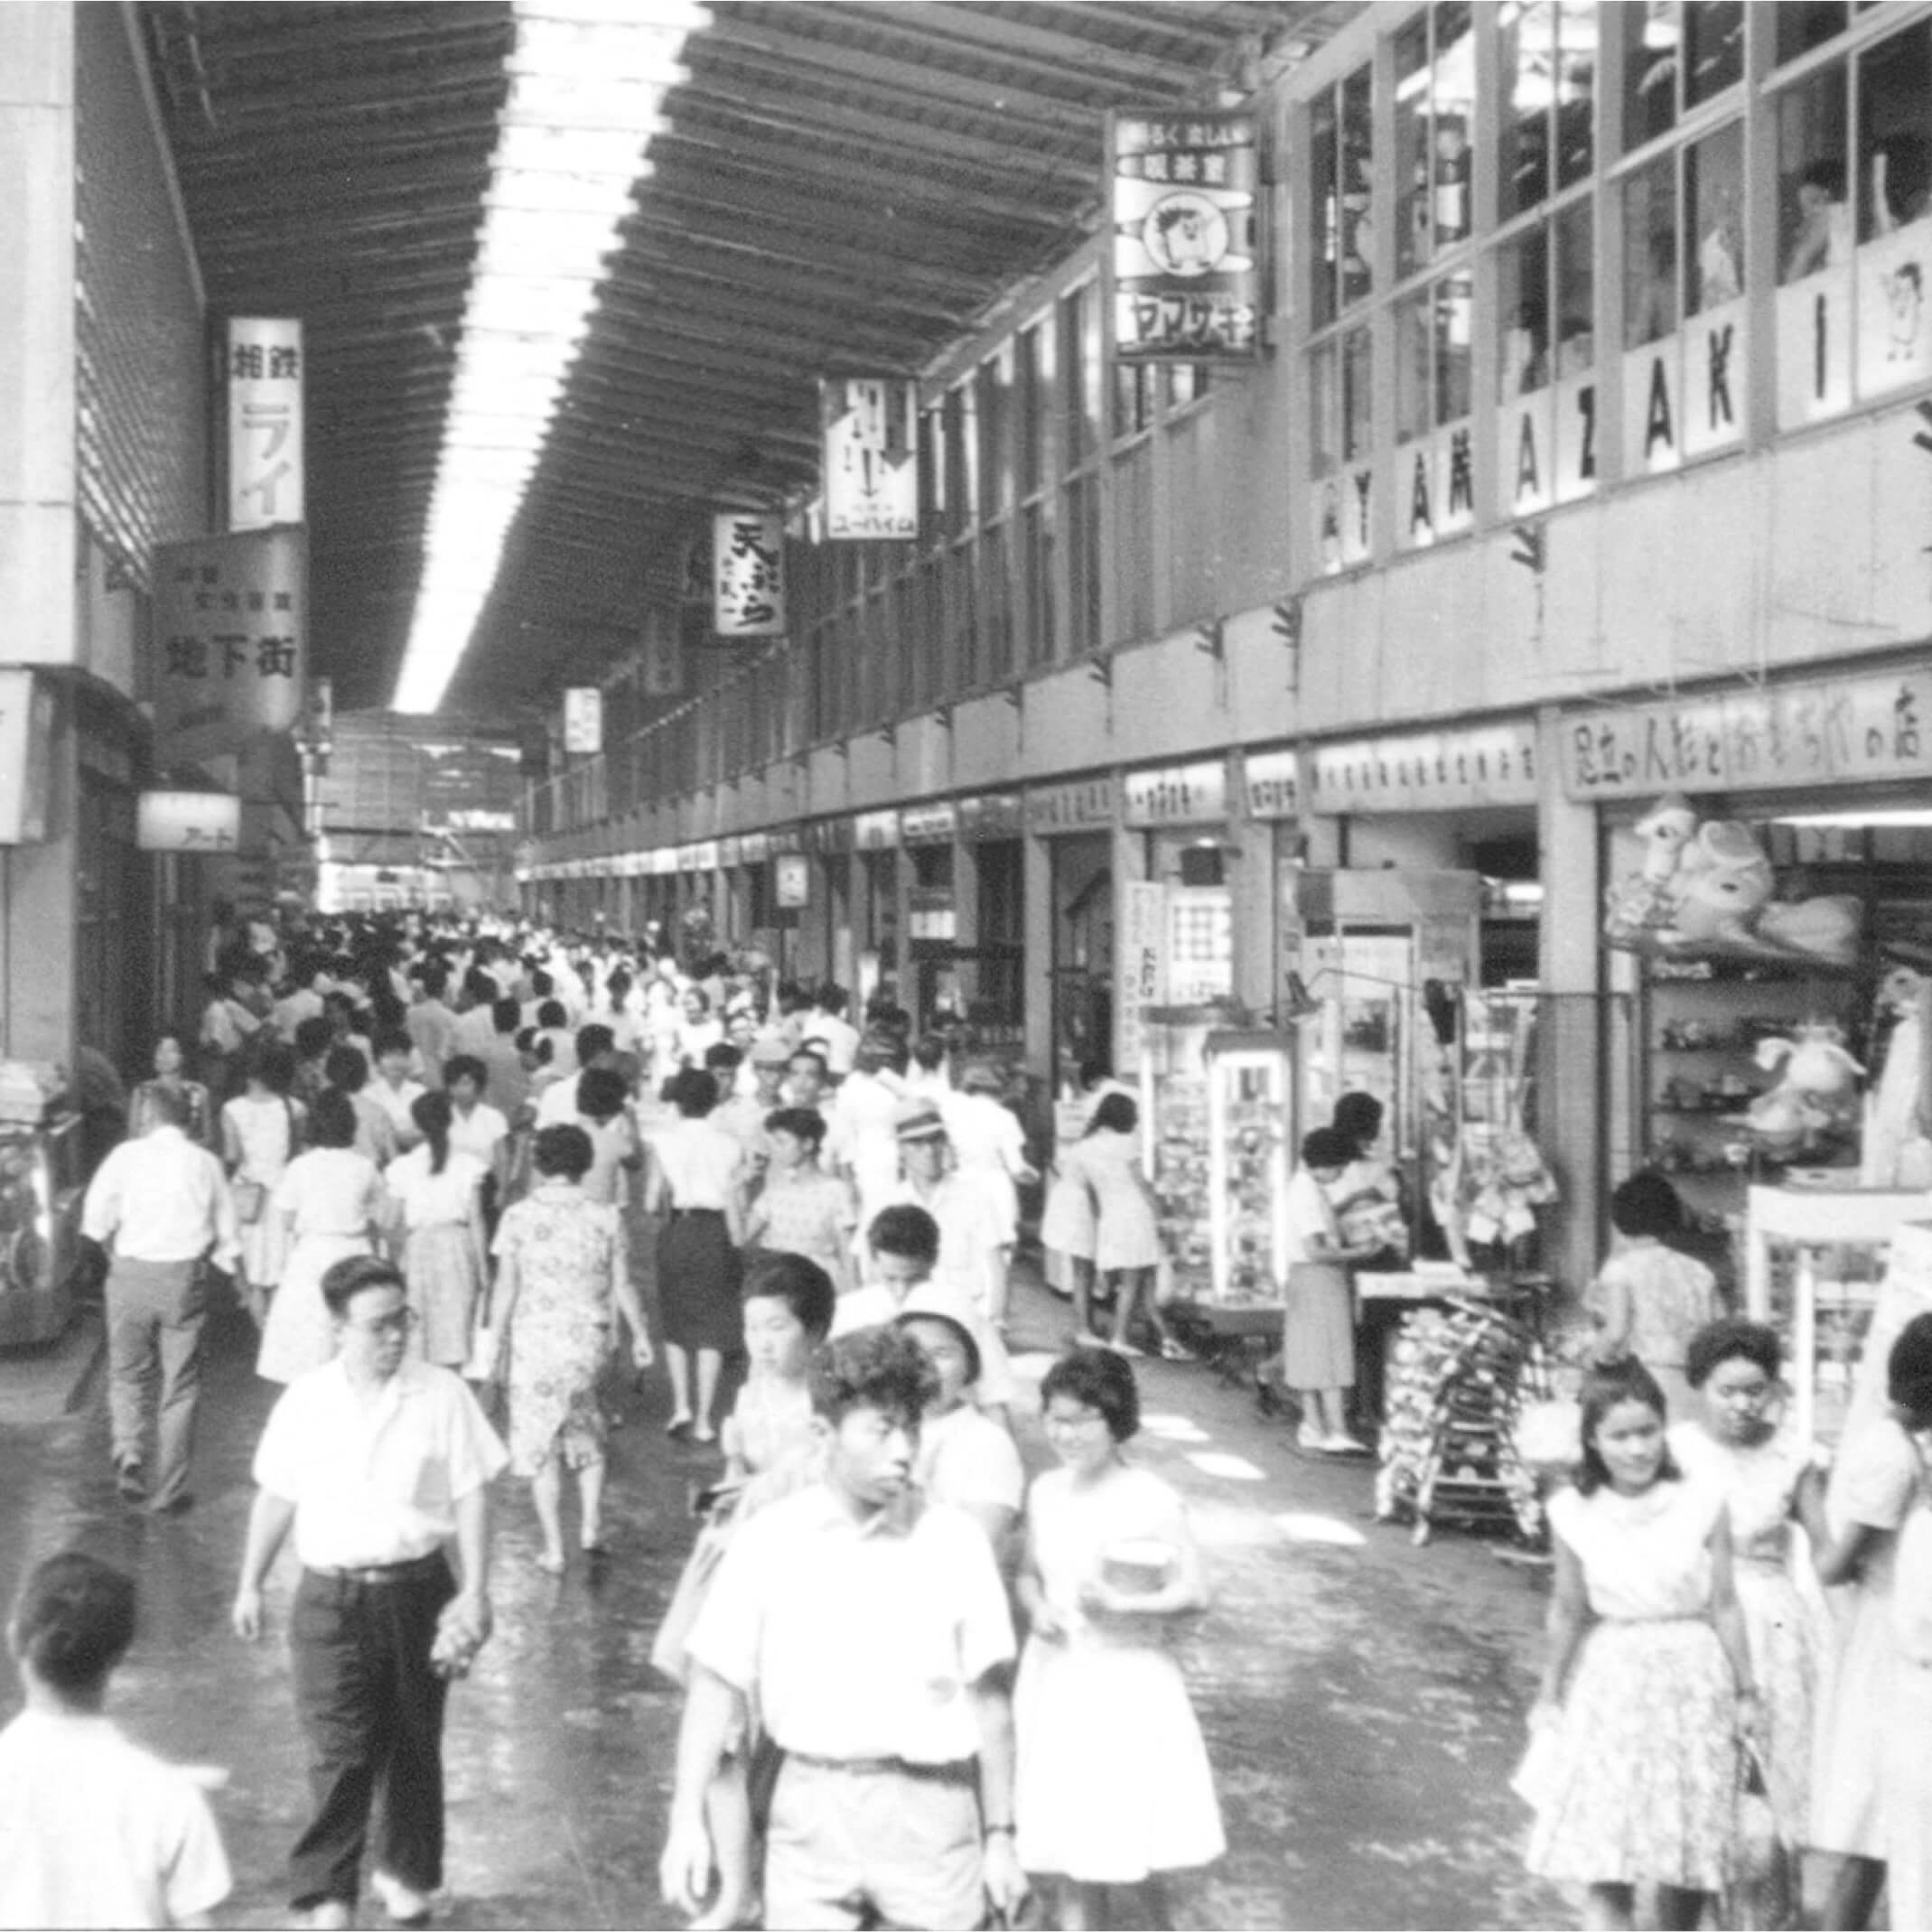
Three years after Truman and Millie’s visit, Yokohama would play an important role on America’s West Coast when it became a sister city to San Diego. Sister cities were created during President Eisenhower’s administration in an effort to build supportive relationships between countries by encouraging friendship, cultural understanding, and international camaraderie. This sister city relationship is still very much alive today, with active members participating in several clubs and organizations that celebrate this unique historical relationship between San Diego and Yokohama.
EARTHQUAKE
On their second-to-last day in Tokyo, February 25th, 1954, the city experienced an earthquake at 8:45pm that lasted seven minutes and sent shockwaves to nearby neighborhoods Kanto, Tohaki, and Chabu. While it rattled doors and windows and shook buildings, luckily, there was no damage or casualties reported. Truman clipped a newspaper article detailing the event, but it didn’t seem to impact their trip in any way.
OTHER MISCELLANEOUS OBSERVATIONS FROM TRUMAN circa 1954
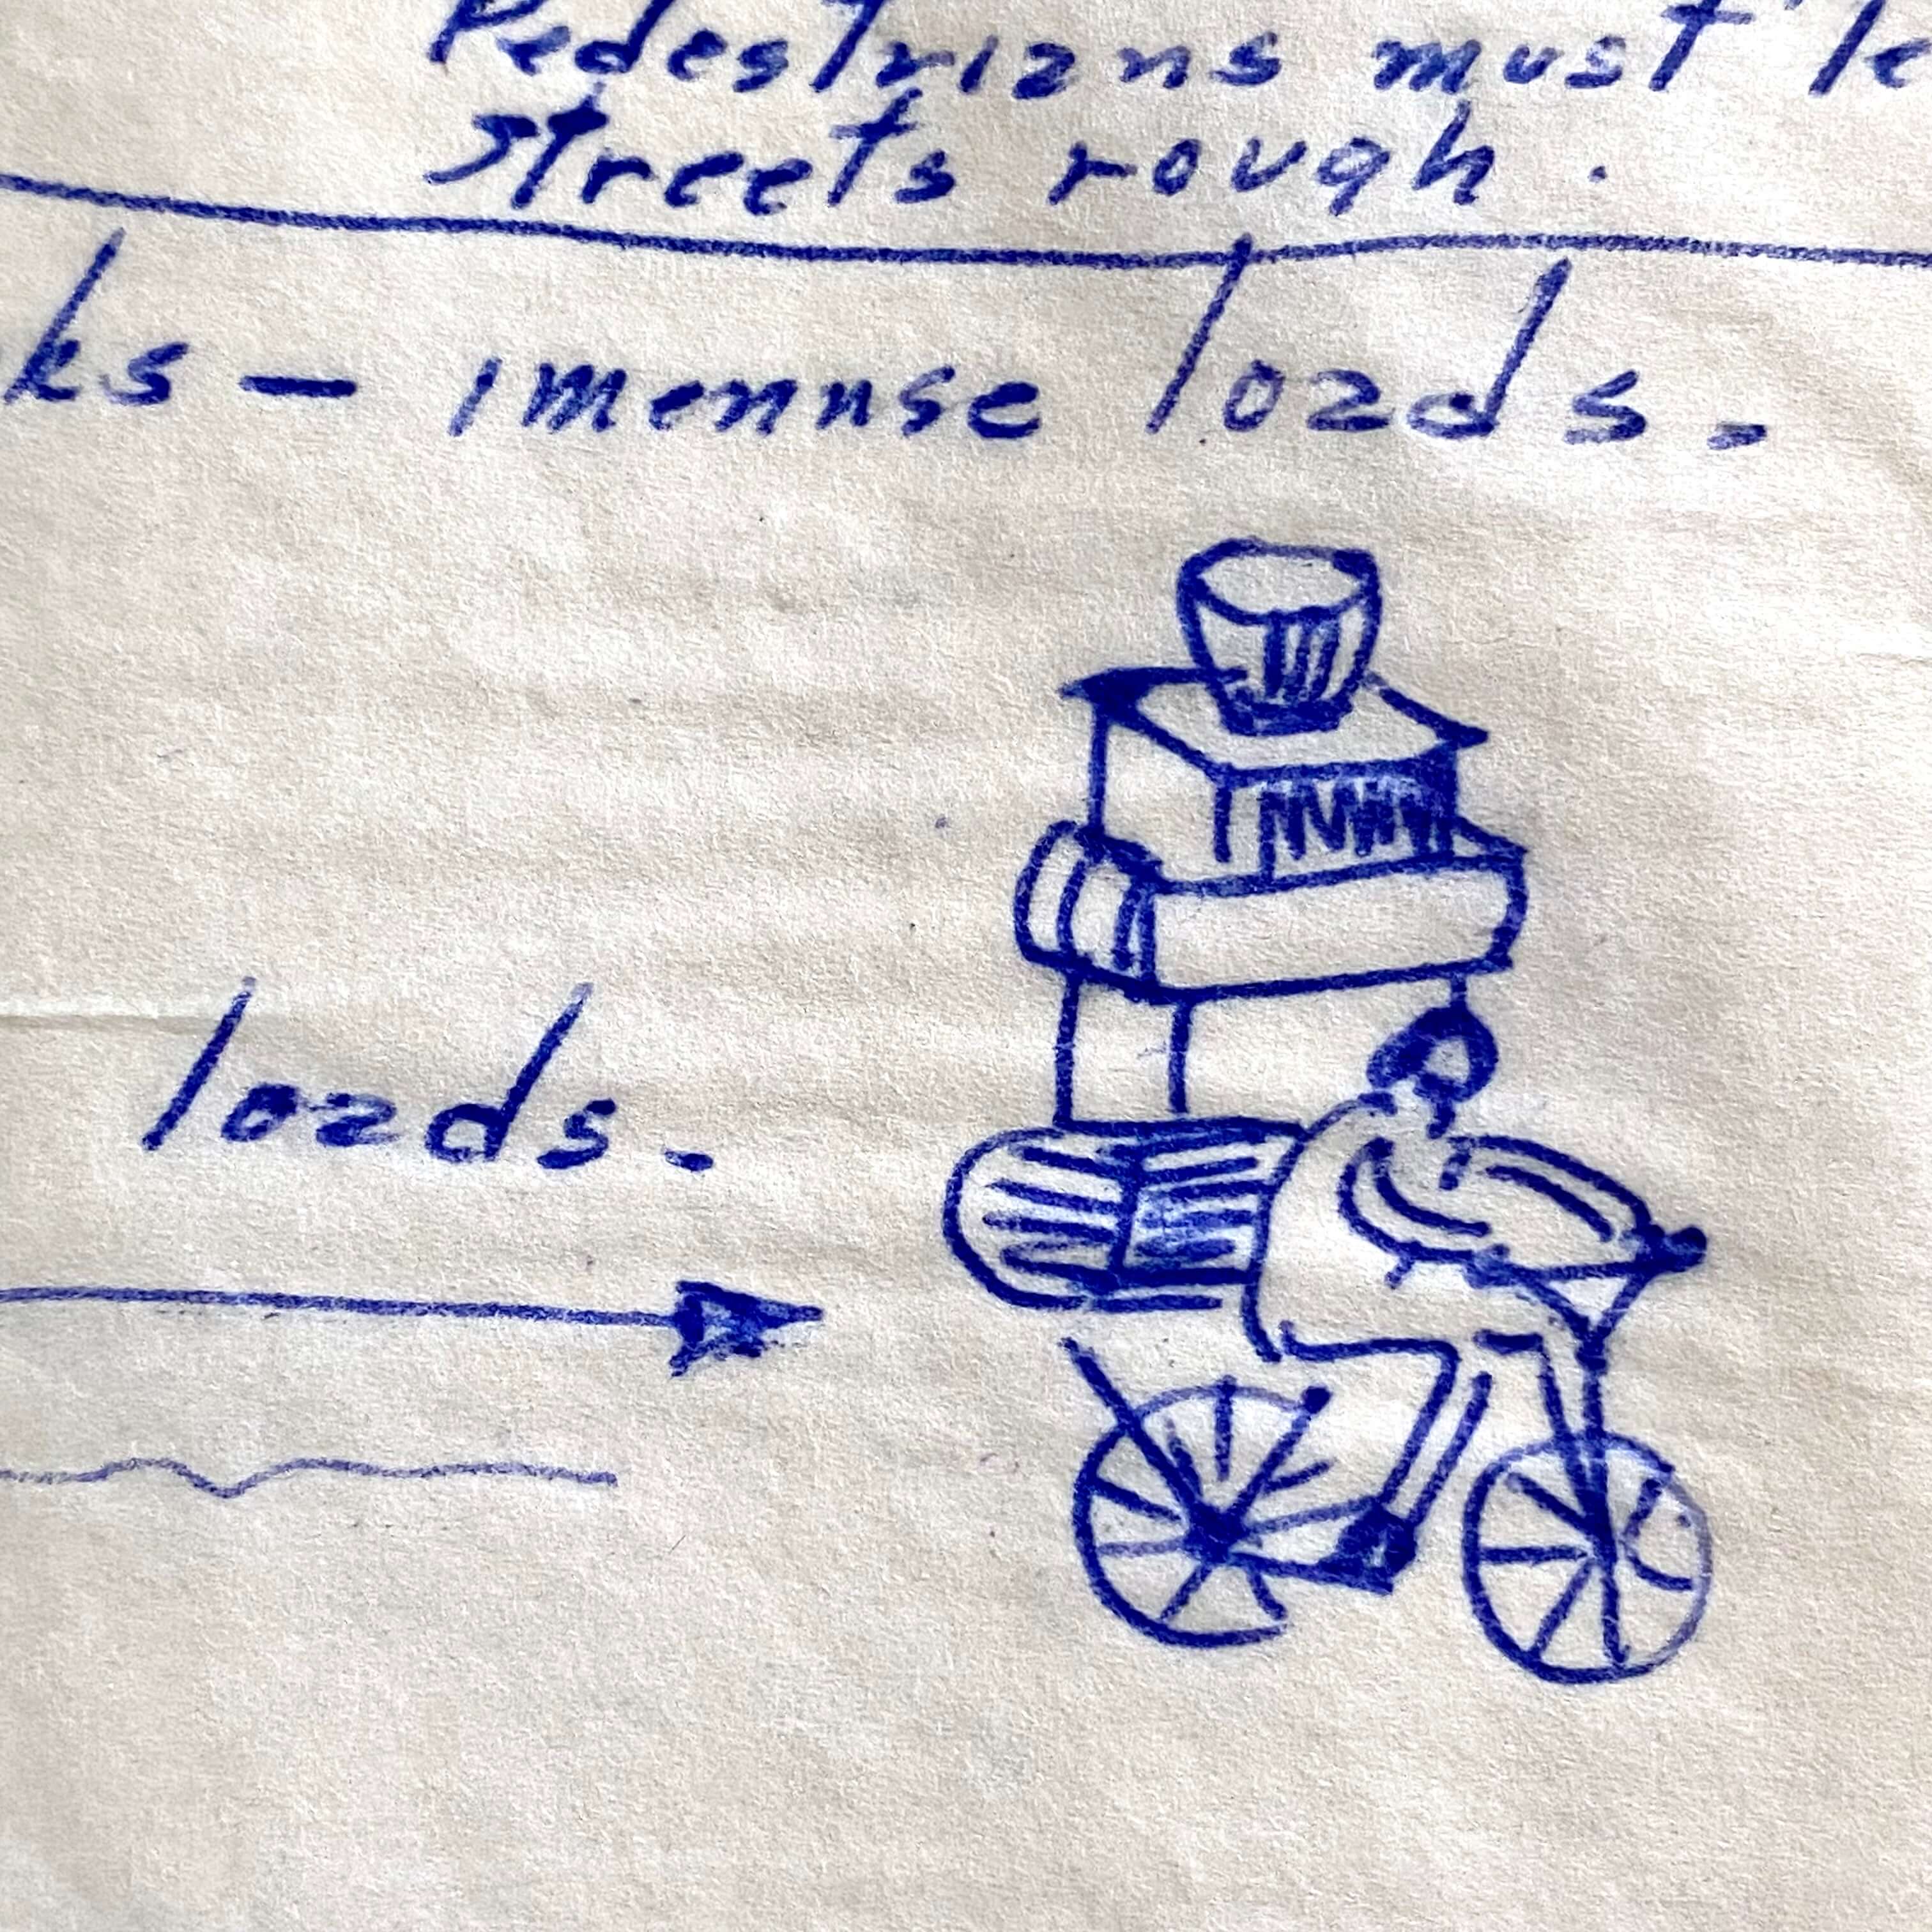
- Autos & taxis drive on the left side of the street. Must have horn in usable order and is used.
- Roads and streets are rough – pedestrians must be nimble to stay alive.
- Very few stop lights.
- Trucks are three-wheeled, and motorcycles, bicycles, put puts, and walkers carry immense loads mostly wrapped in matting or straw
- The railroads were wonderful, speedy, and overcrowded.
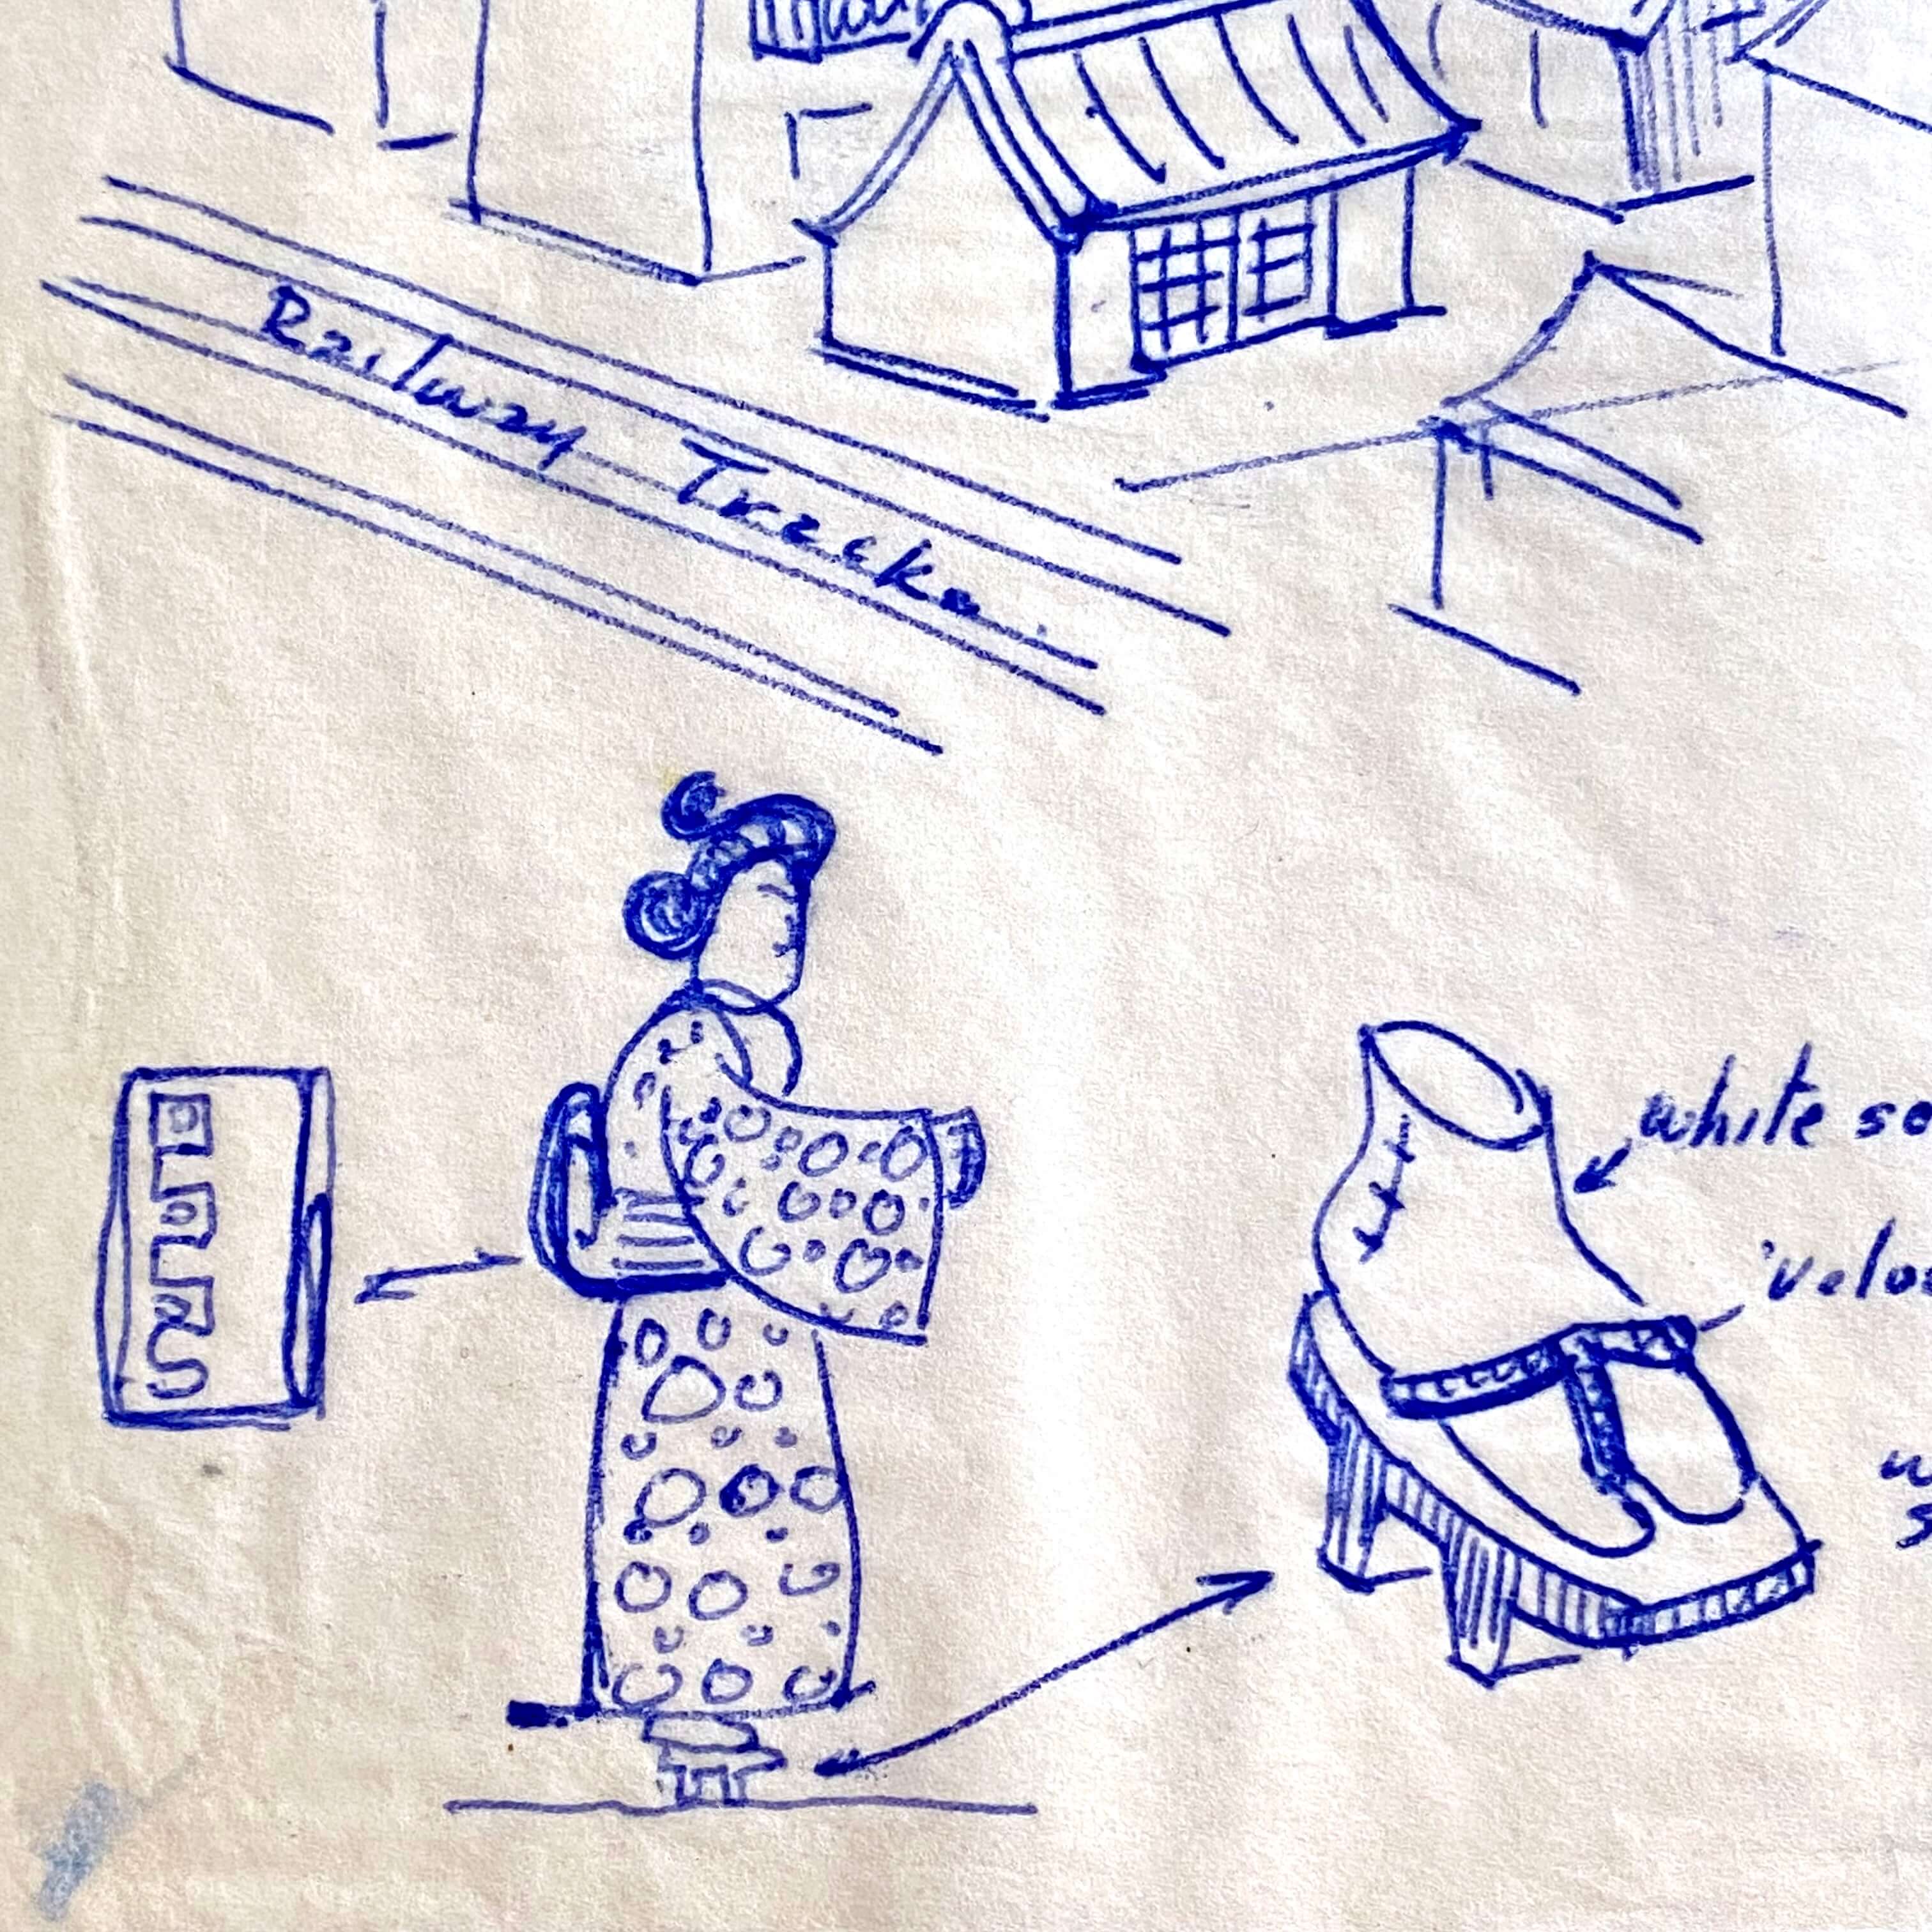
- People: Small, overly polite to tourists. Only few speak English and those that do are hard to understand. Great imitators. The majority wear Western-style clothes. Typical Japan dress interesting and colorful. Geisha girl very polite , done up with wig and lots of powder – not vulgar or suggestive.
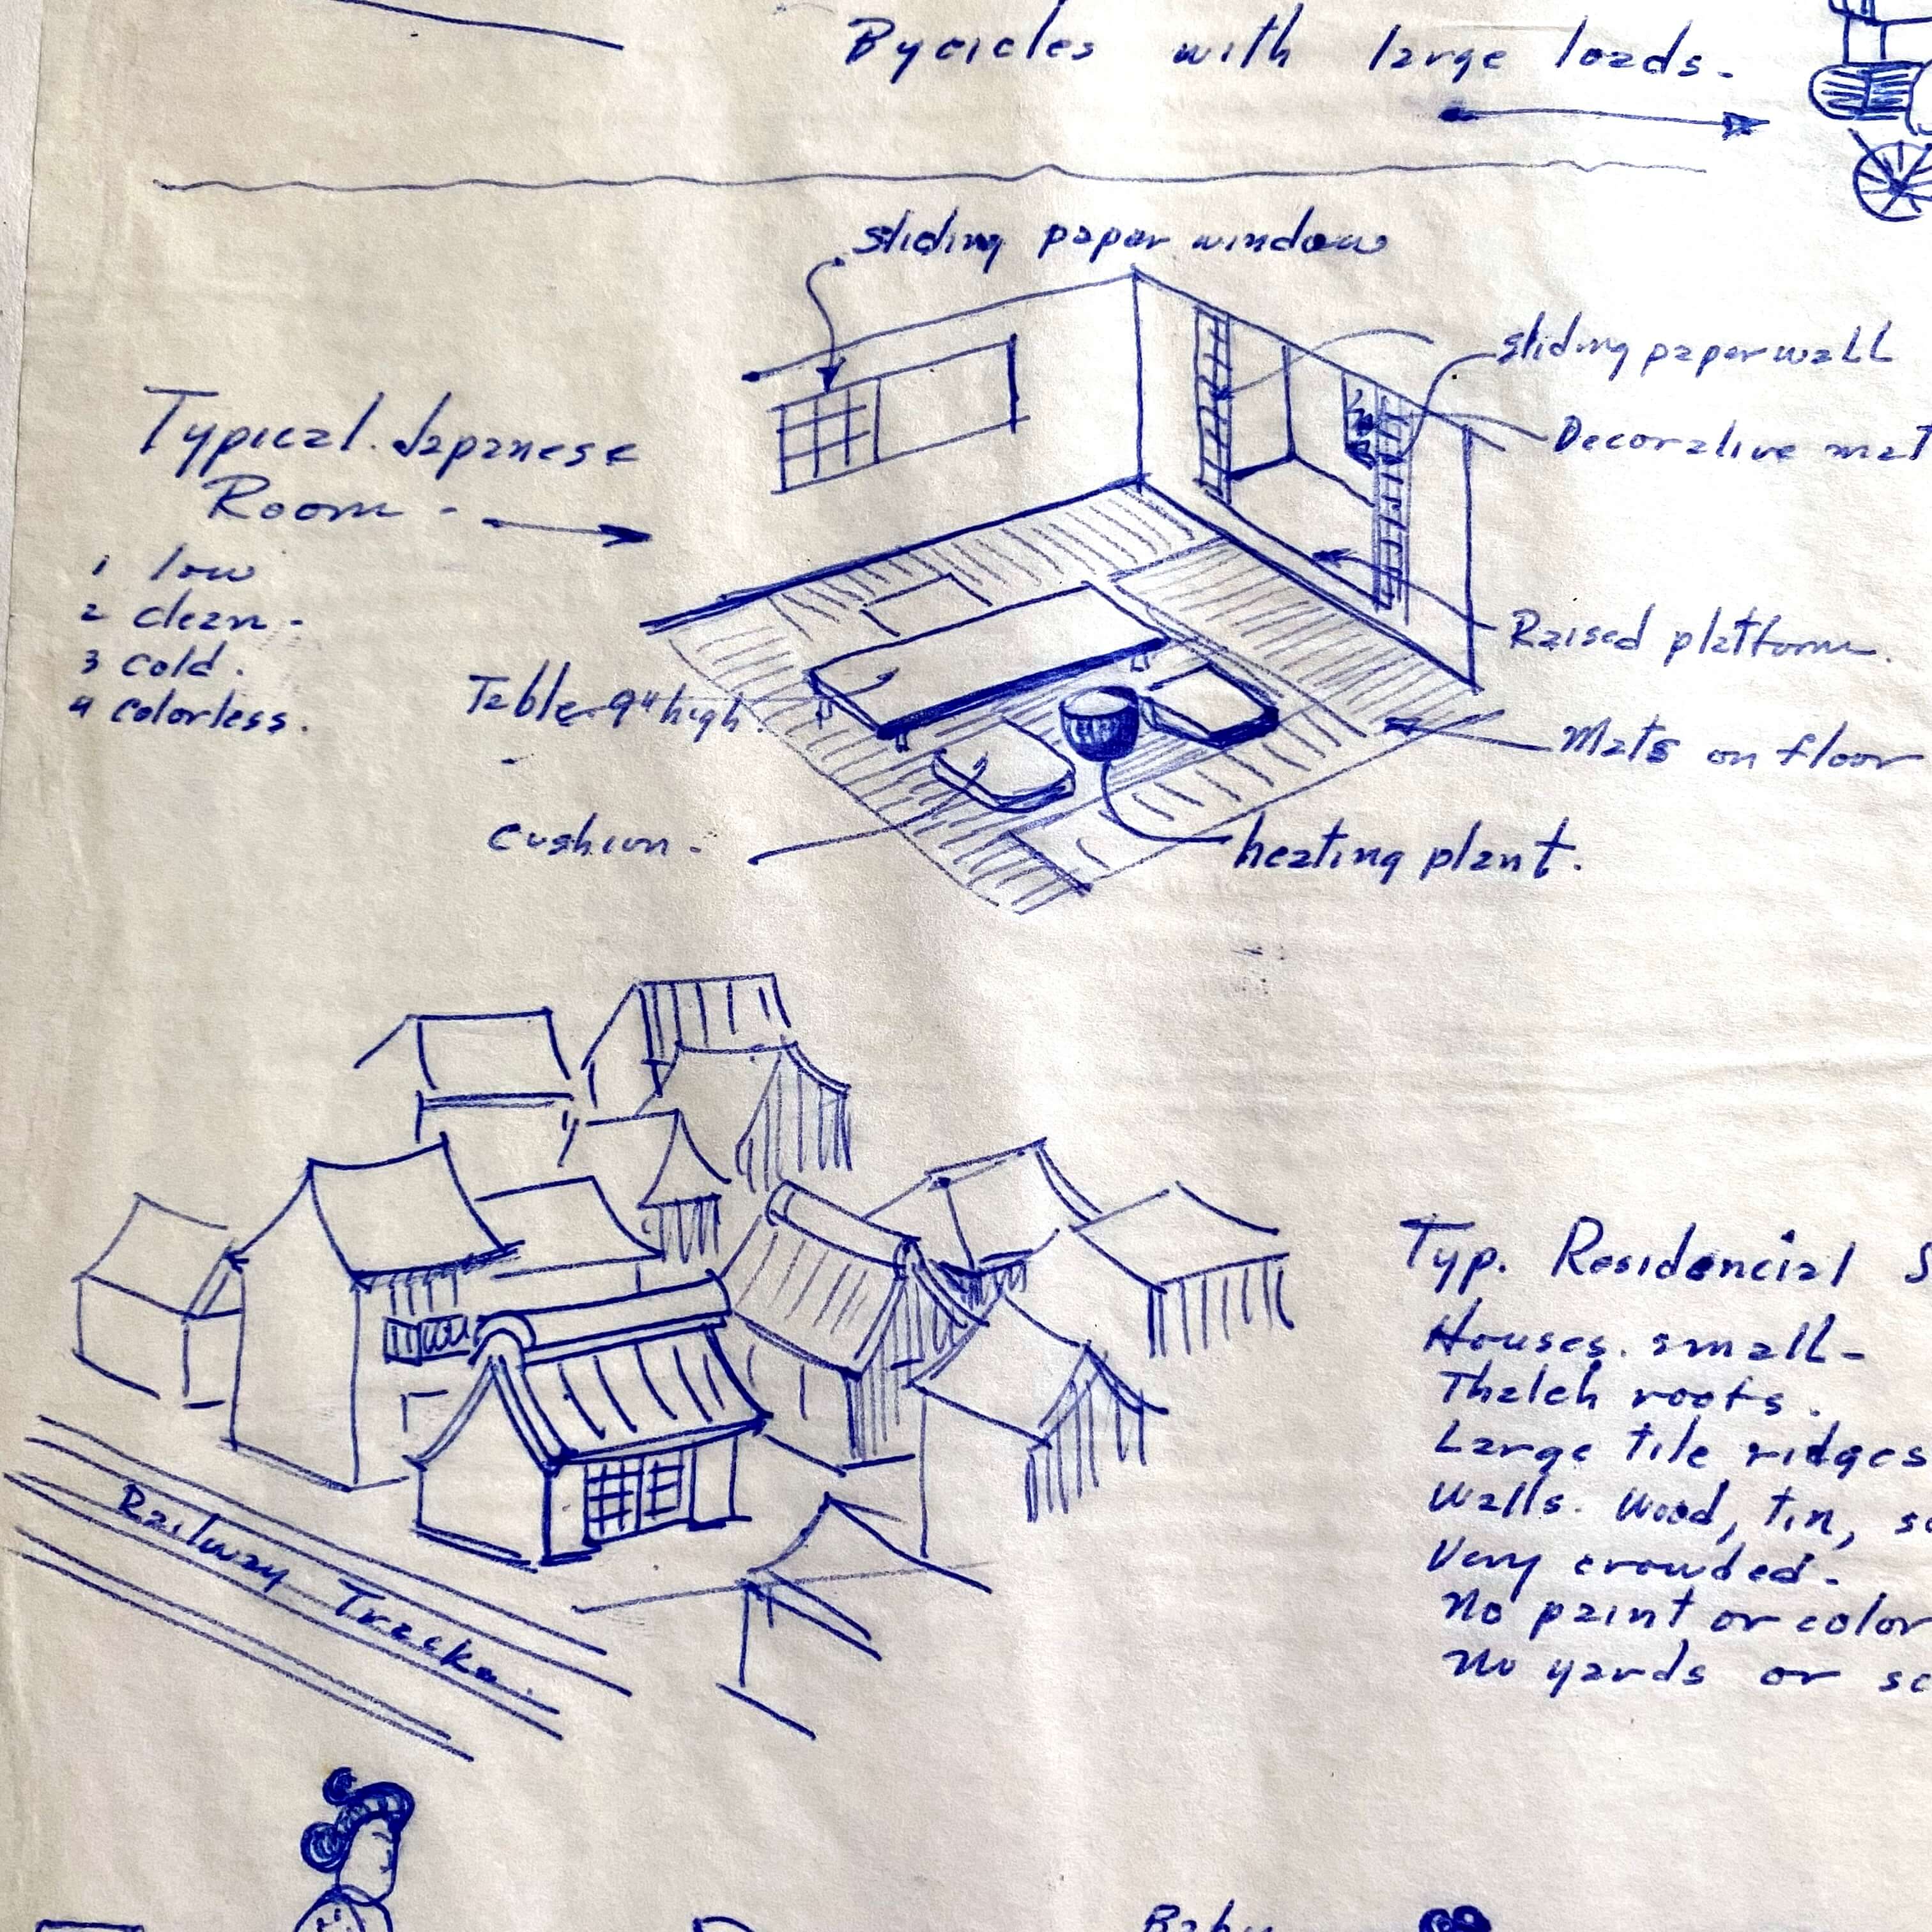
- Countryside: Lots of signs. Many small factories. Houses very small and crowded. Lots of small farms – rice paddys – hills and usable ground covered with pine – some cedar.
- Houses small. Thatch roofs. Large tile ridges. Walls: wood, tin, scraps of anything. Very crowded. No paint or color. No yards or shrubbery.
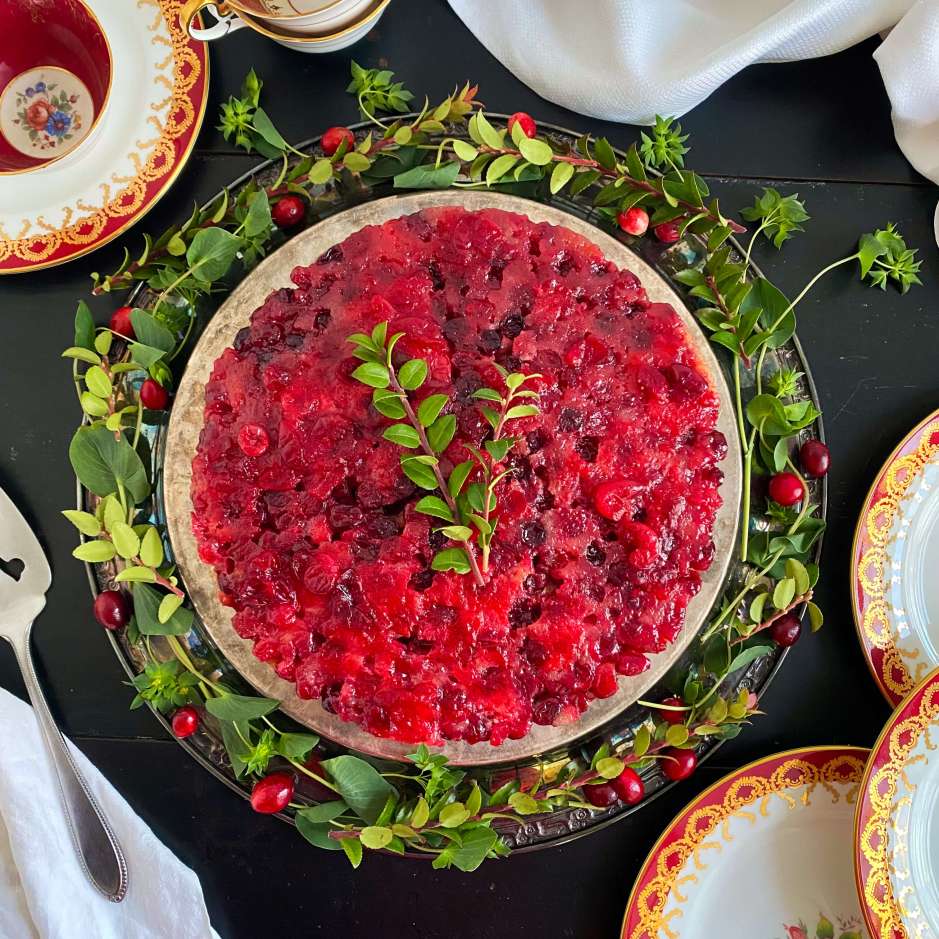
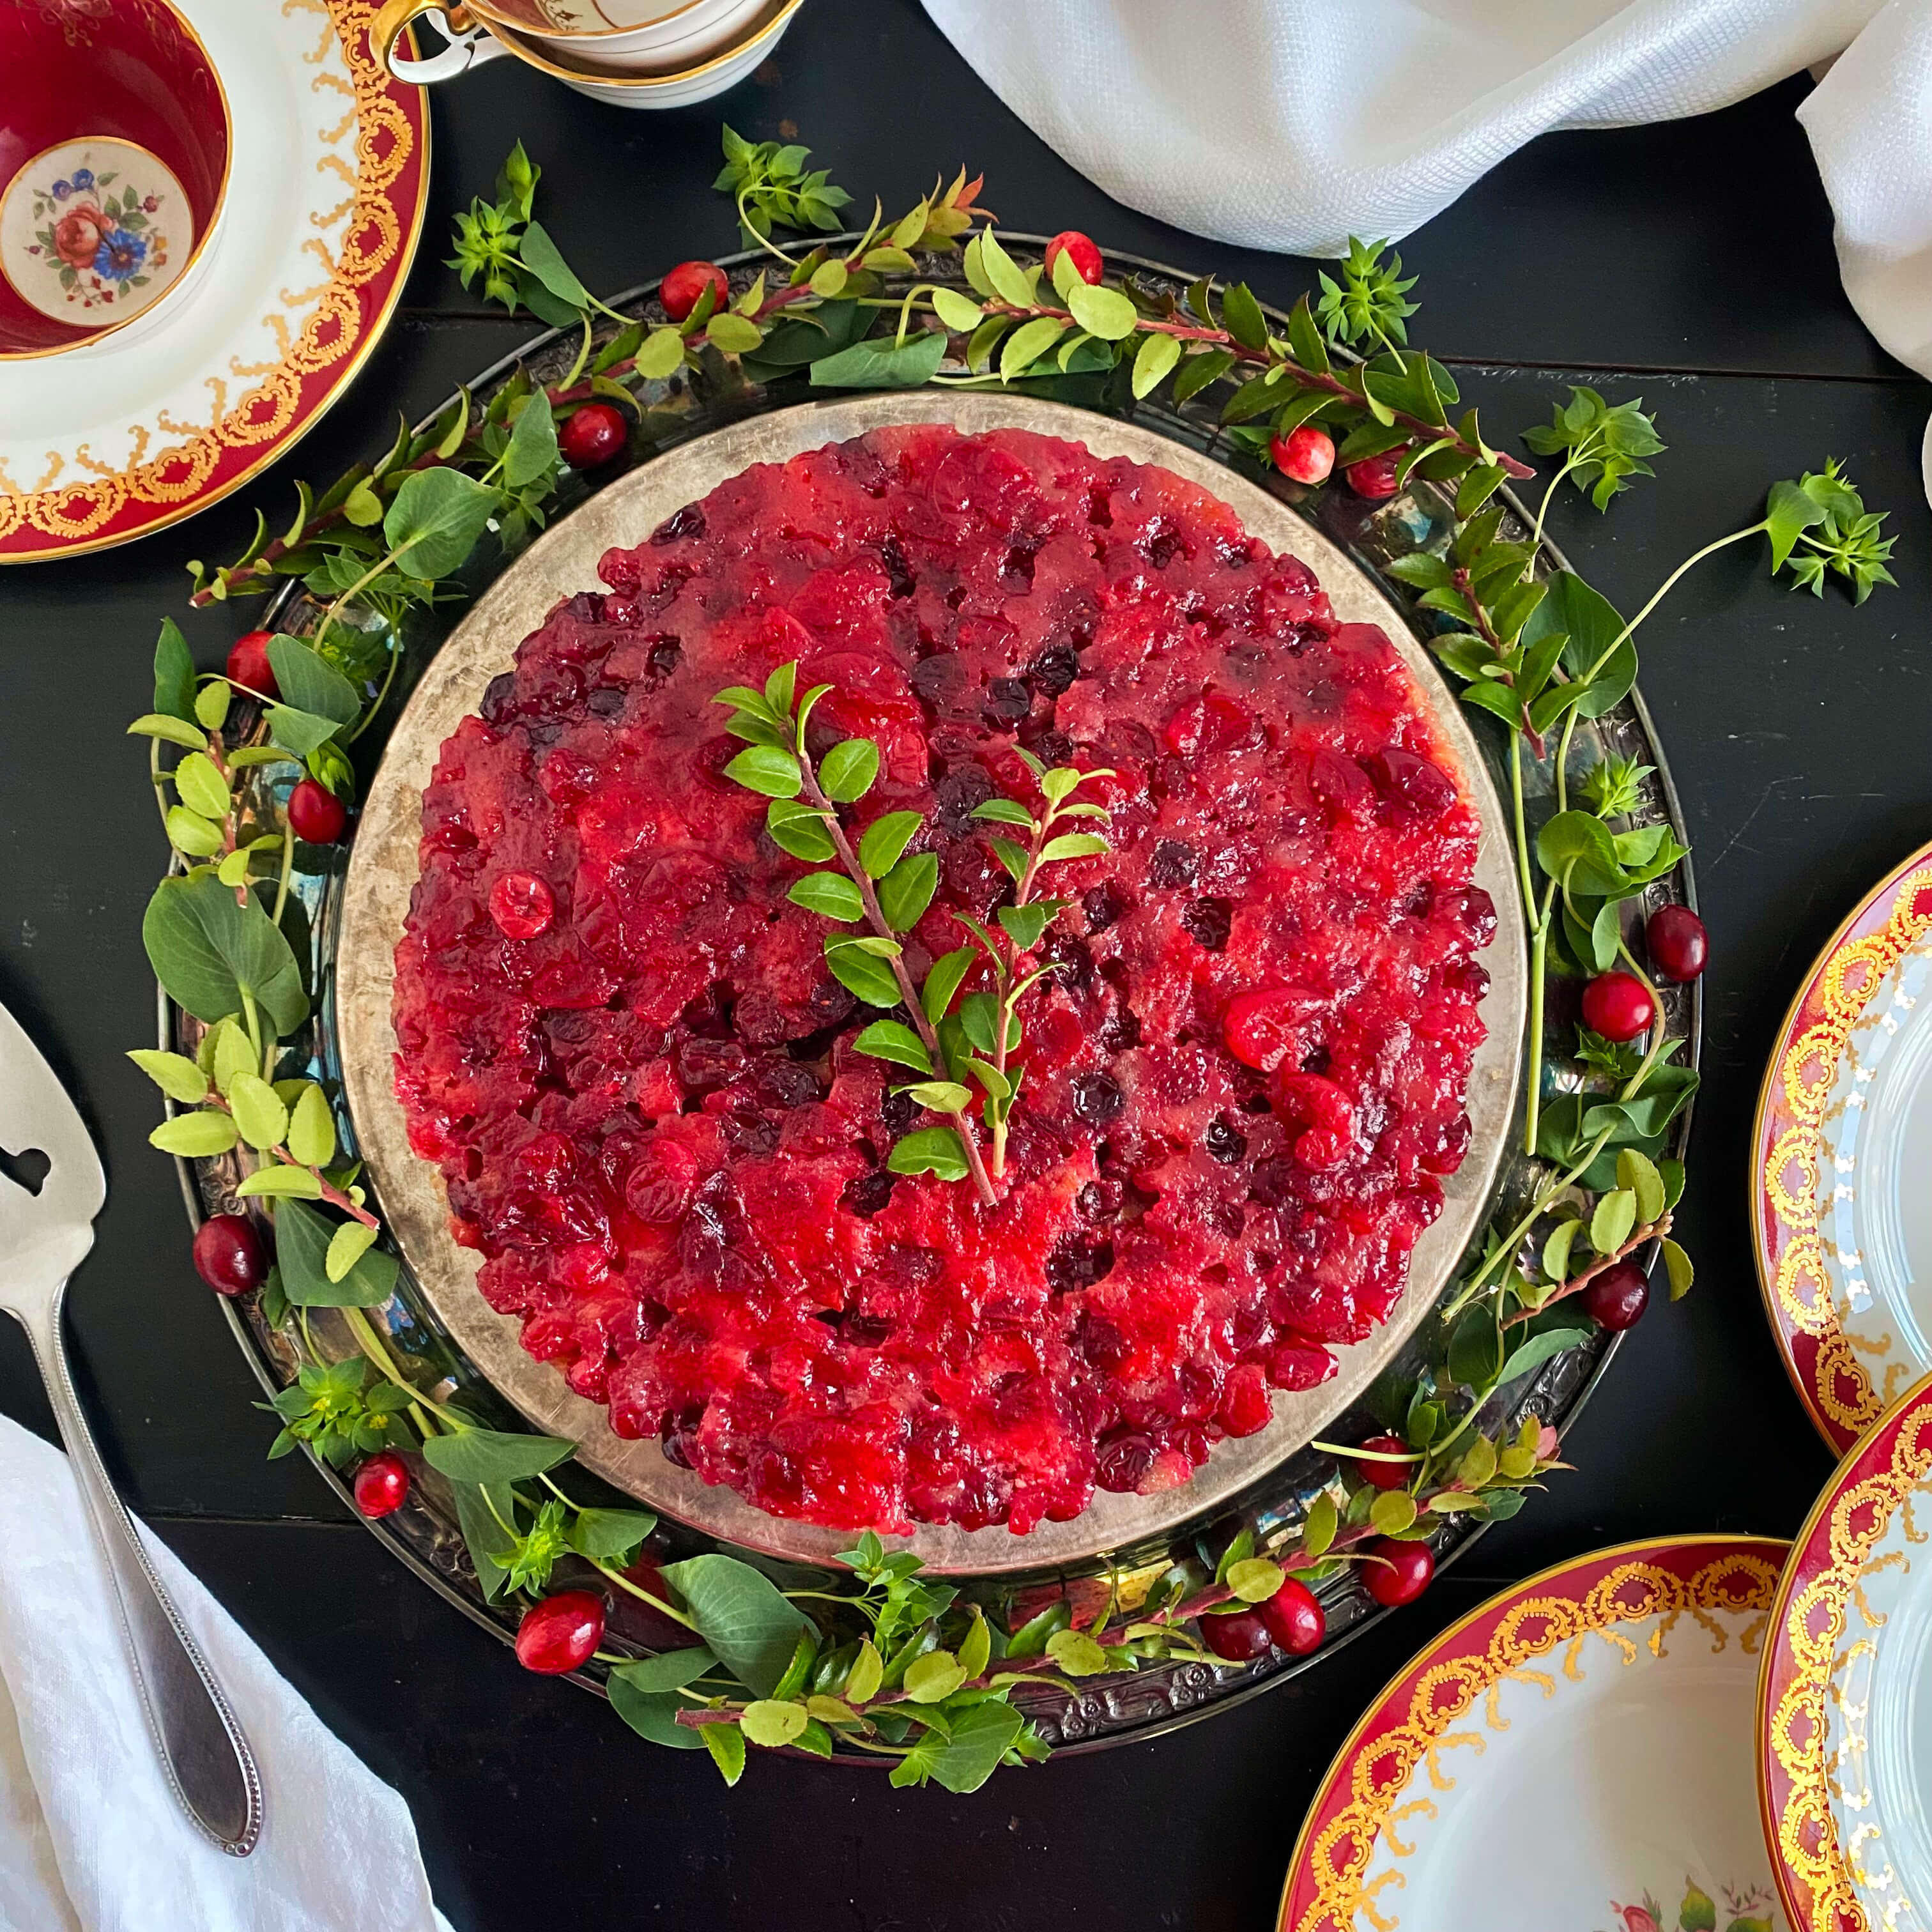
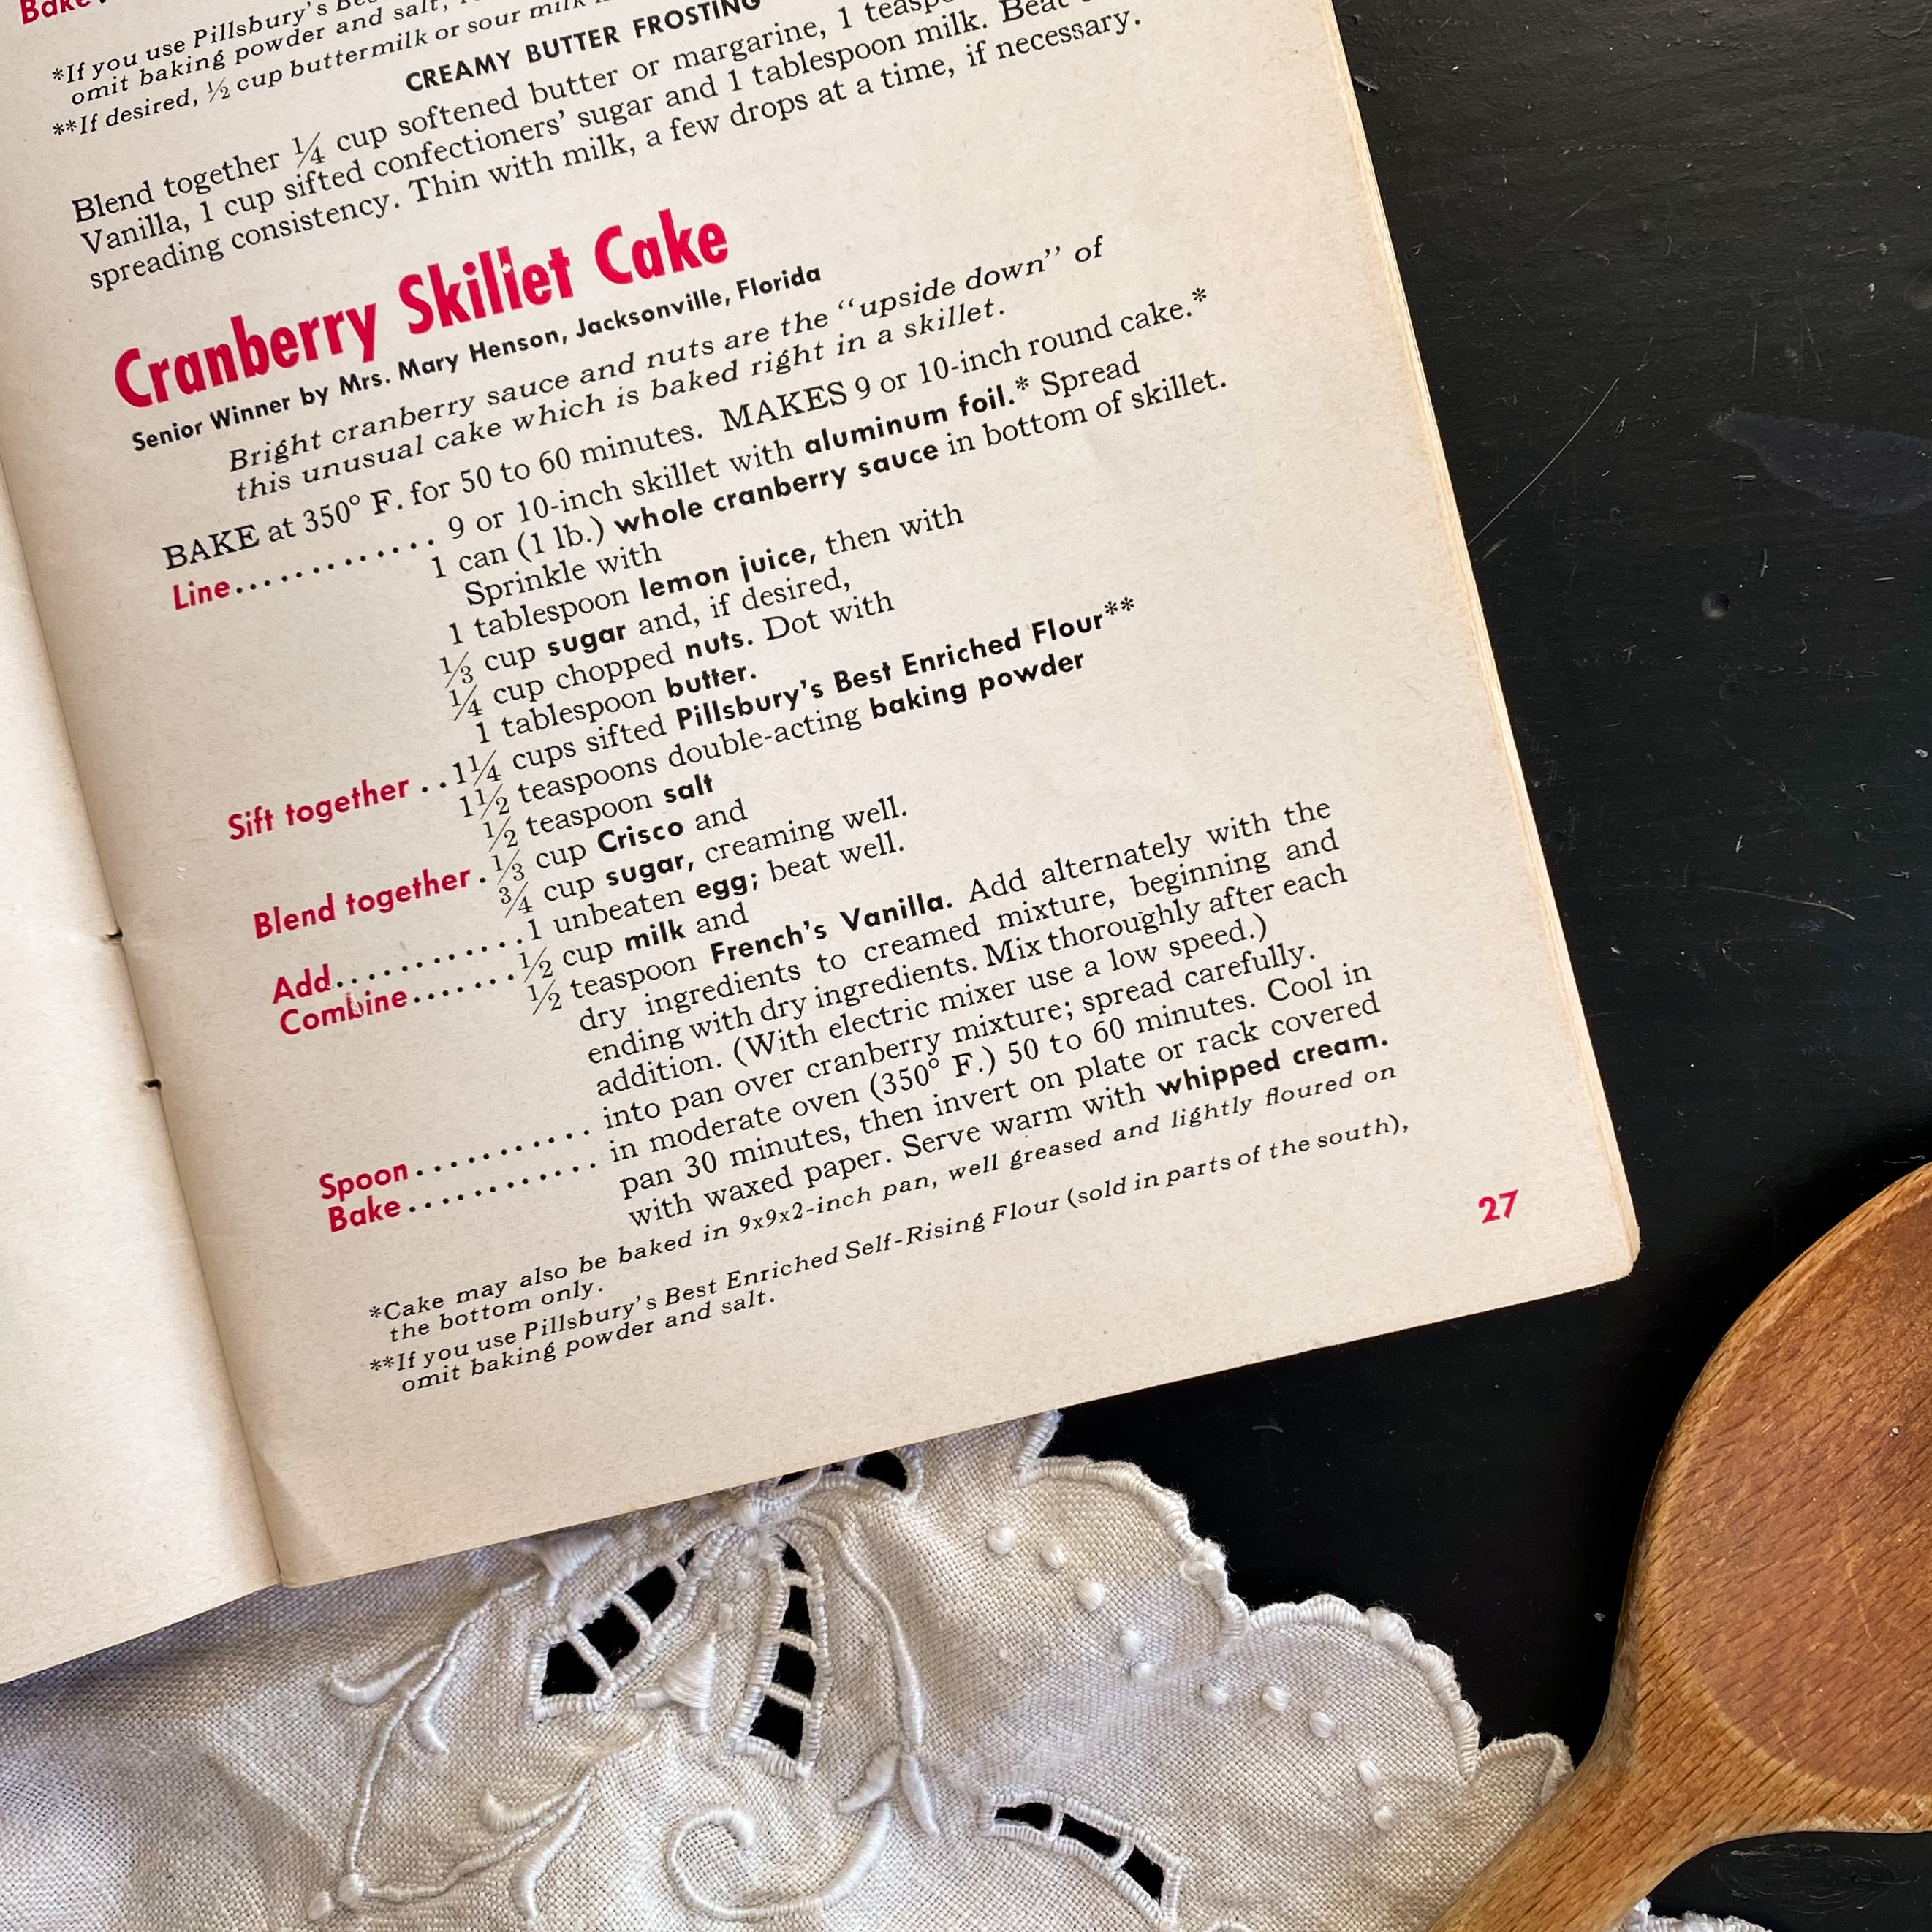
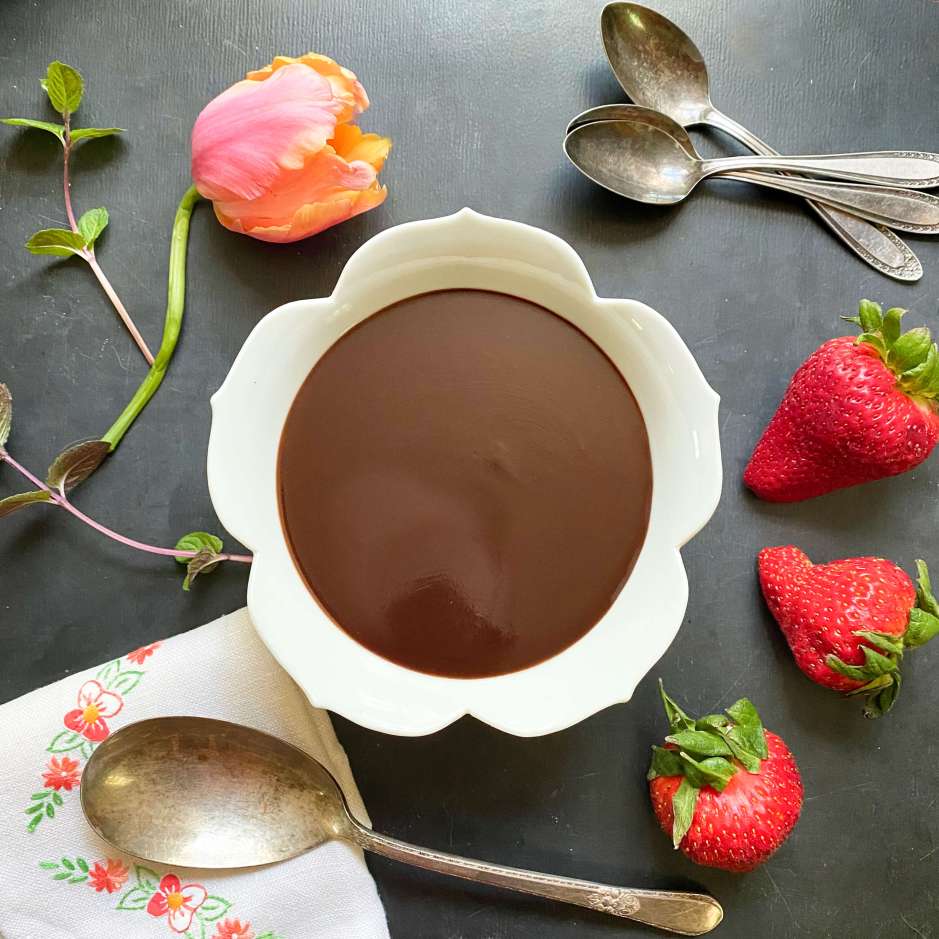
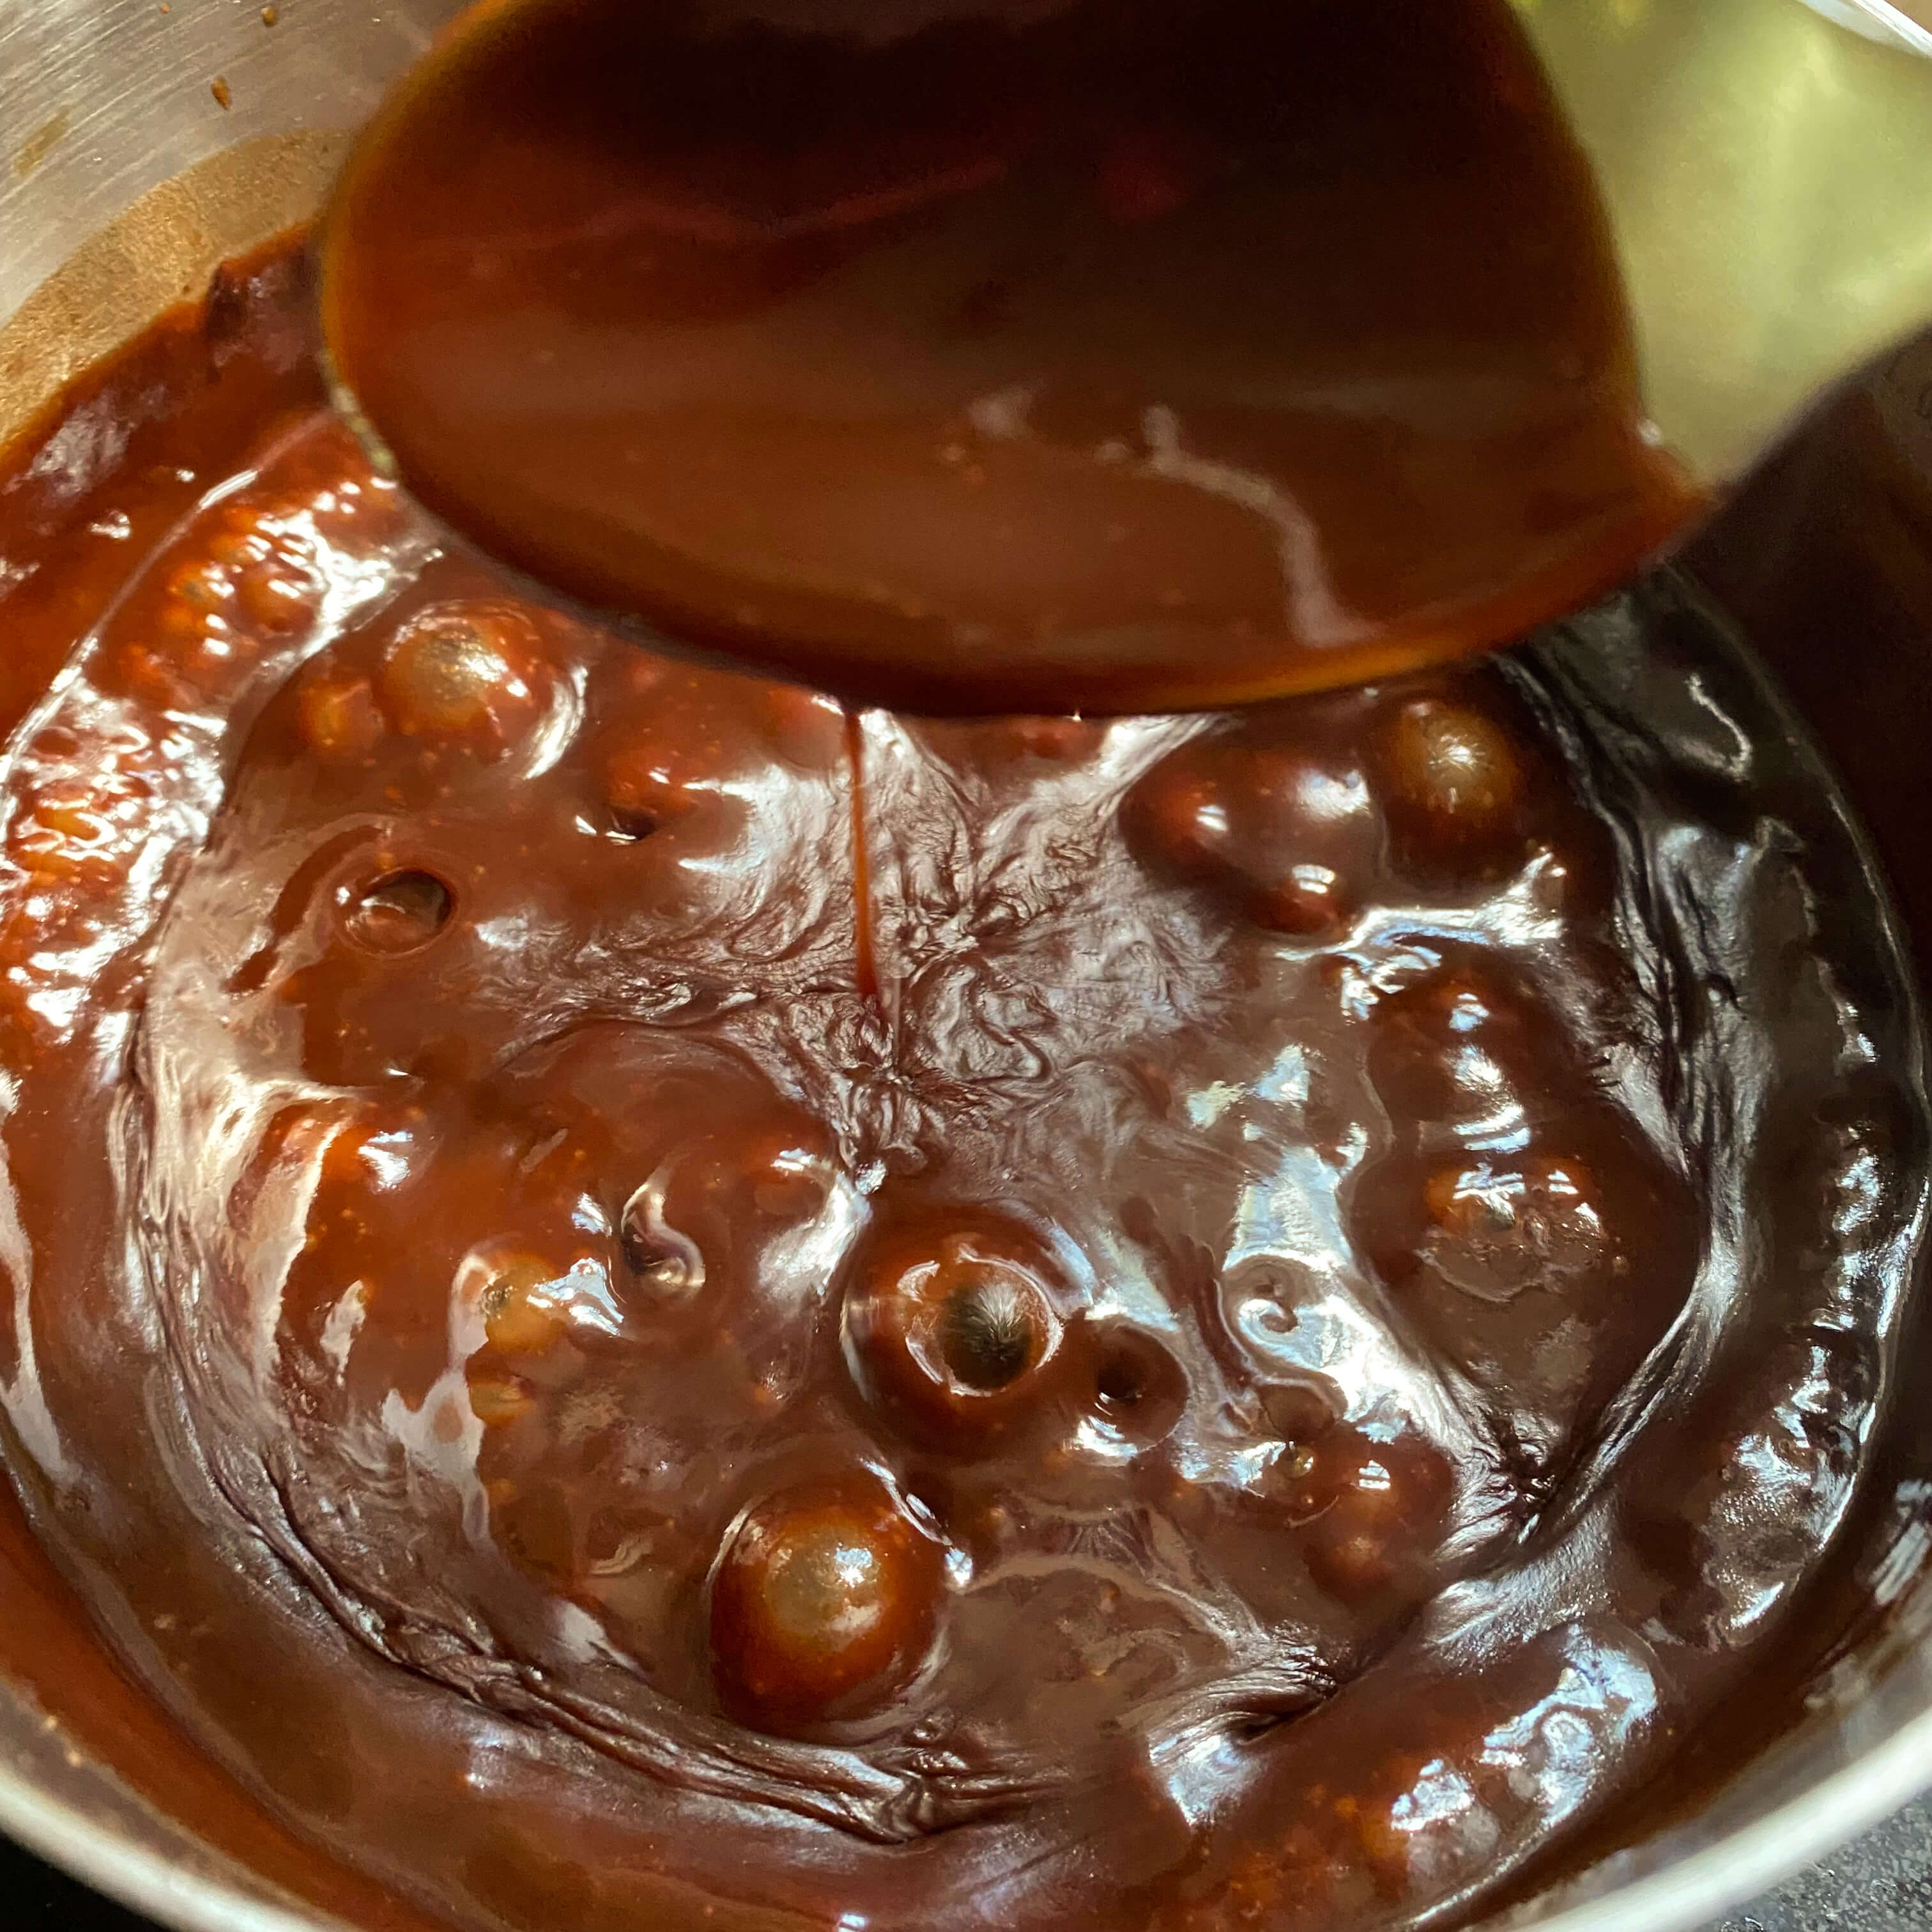
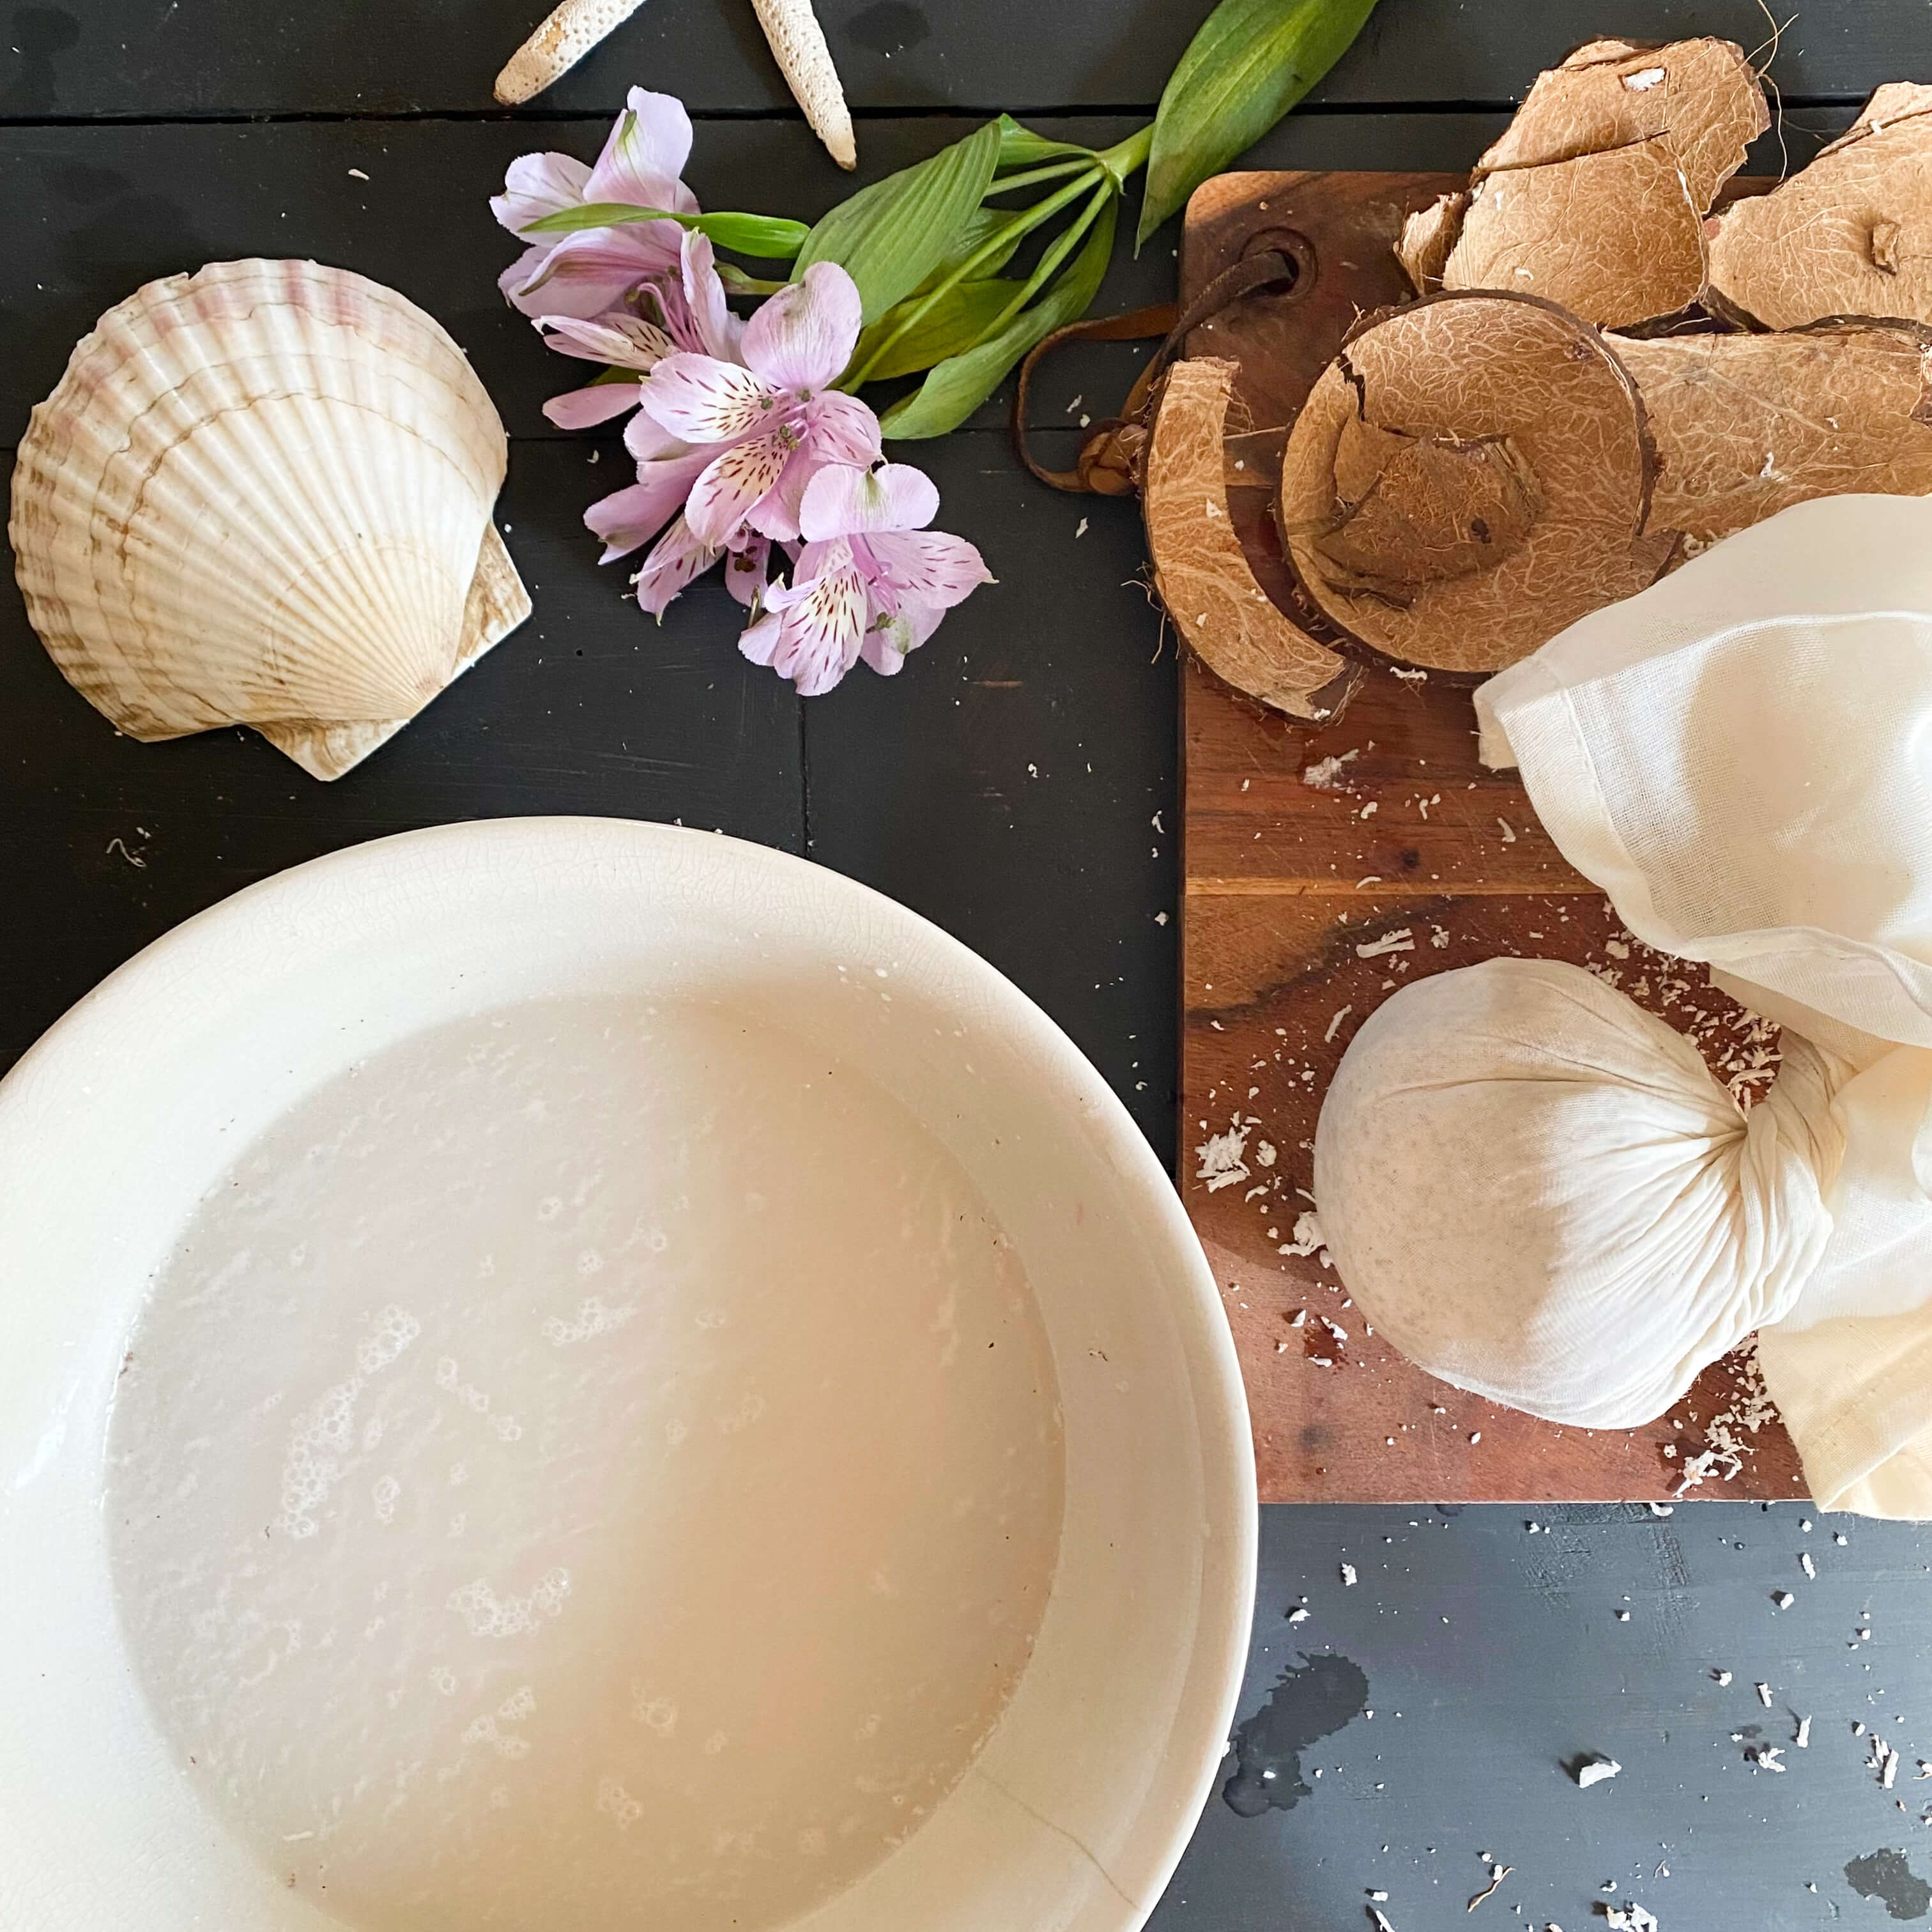
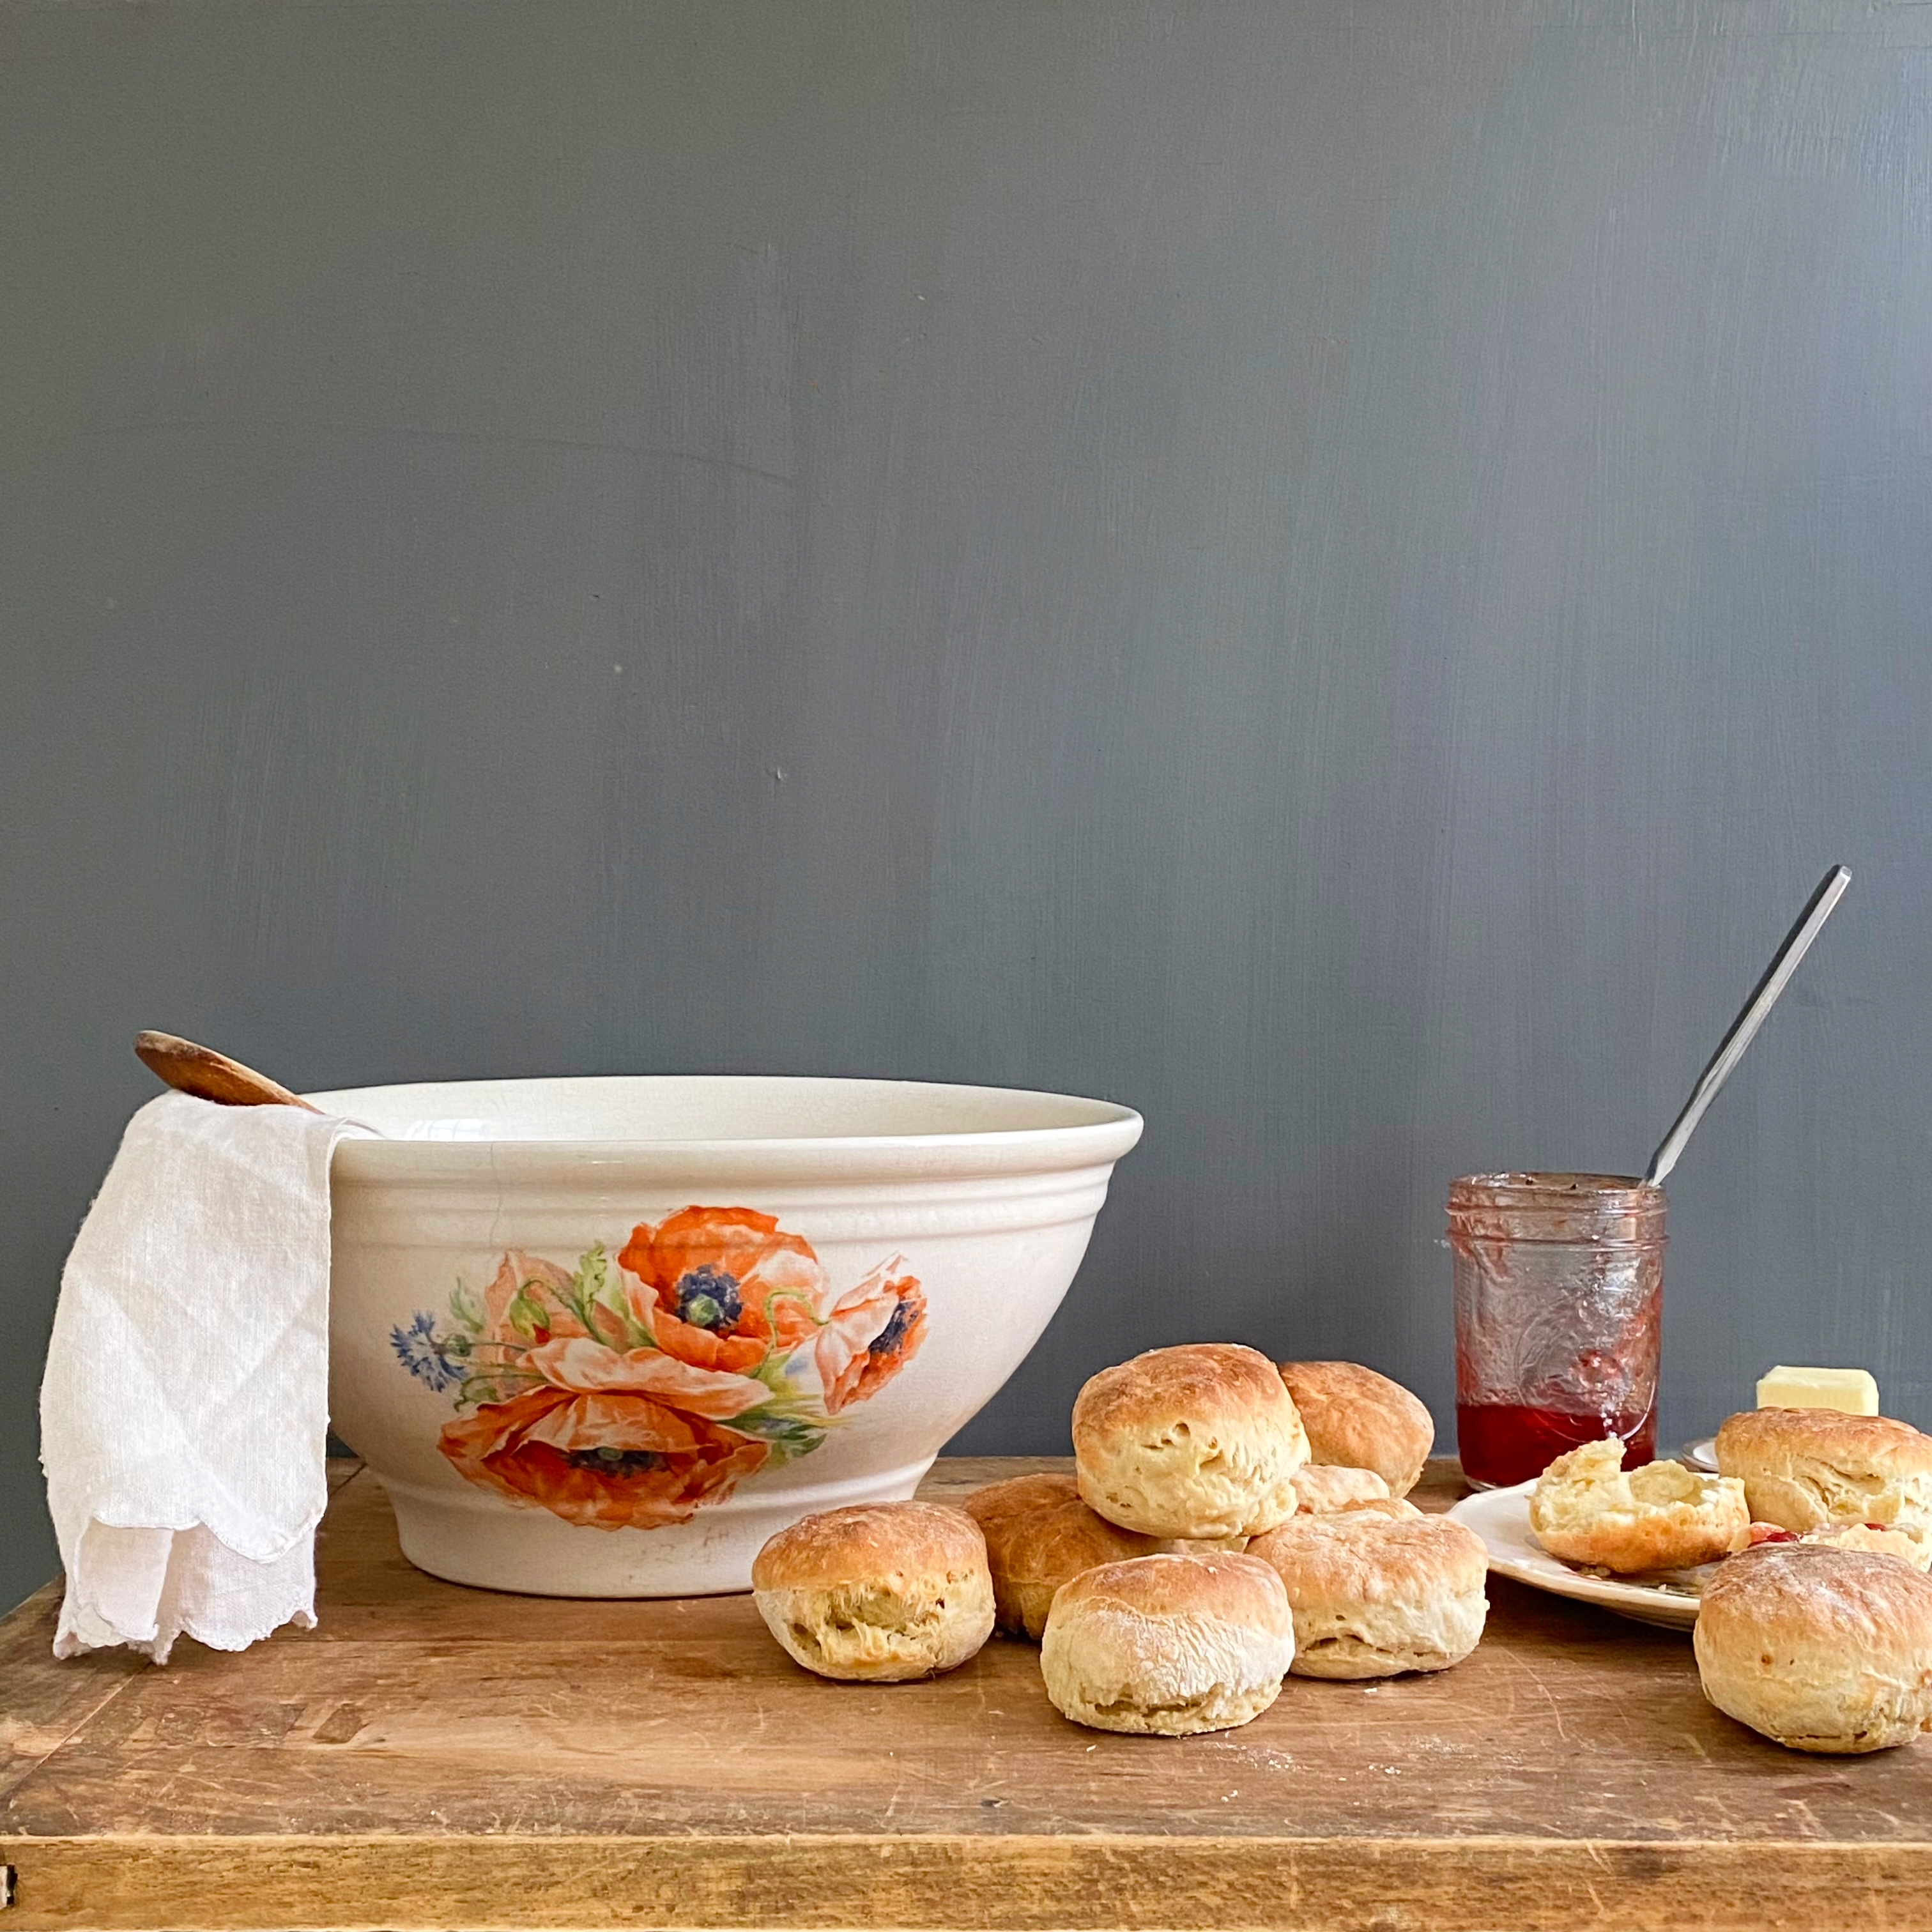
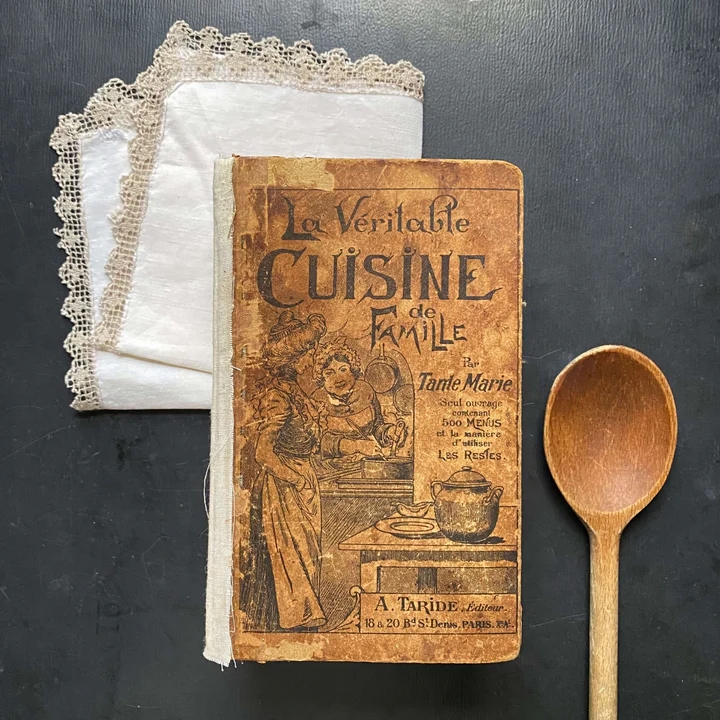
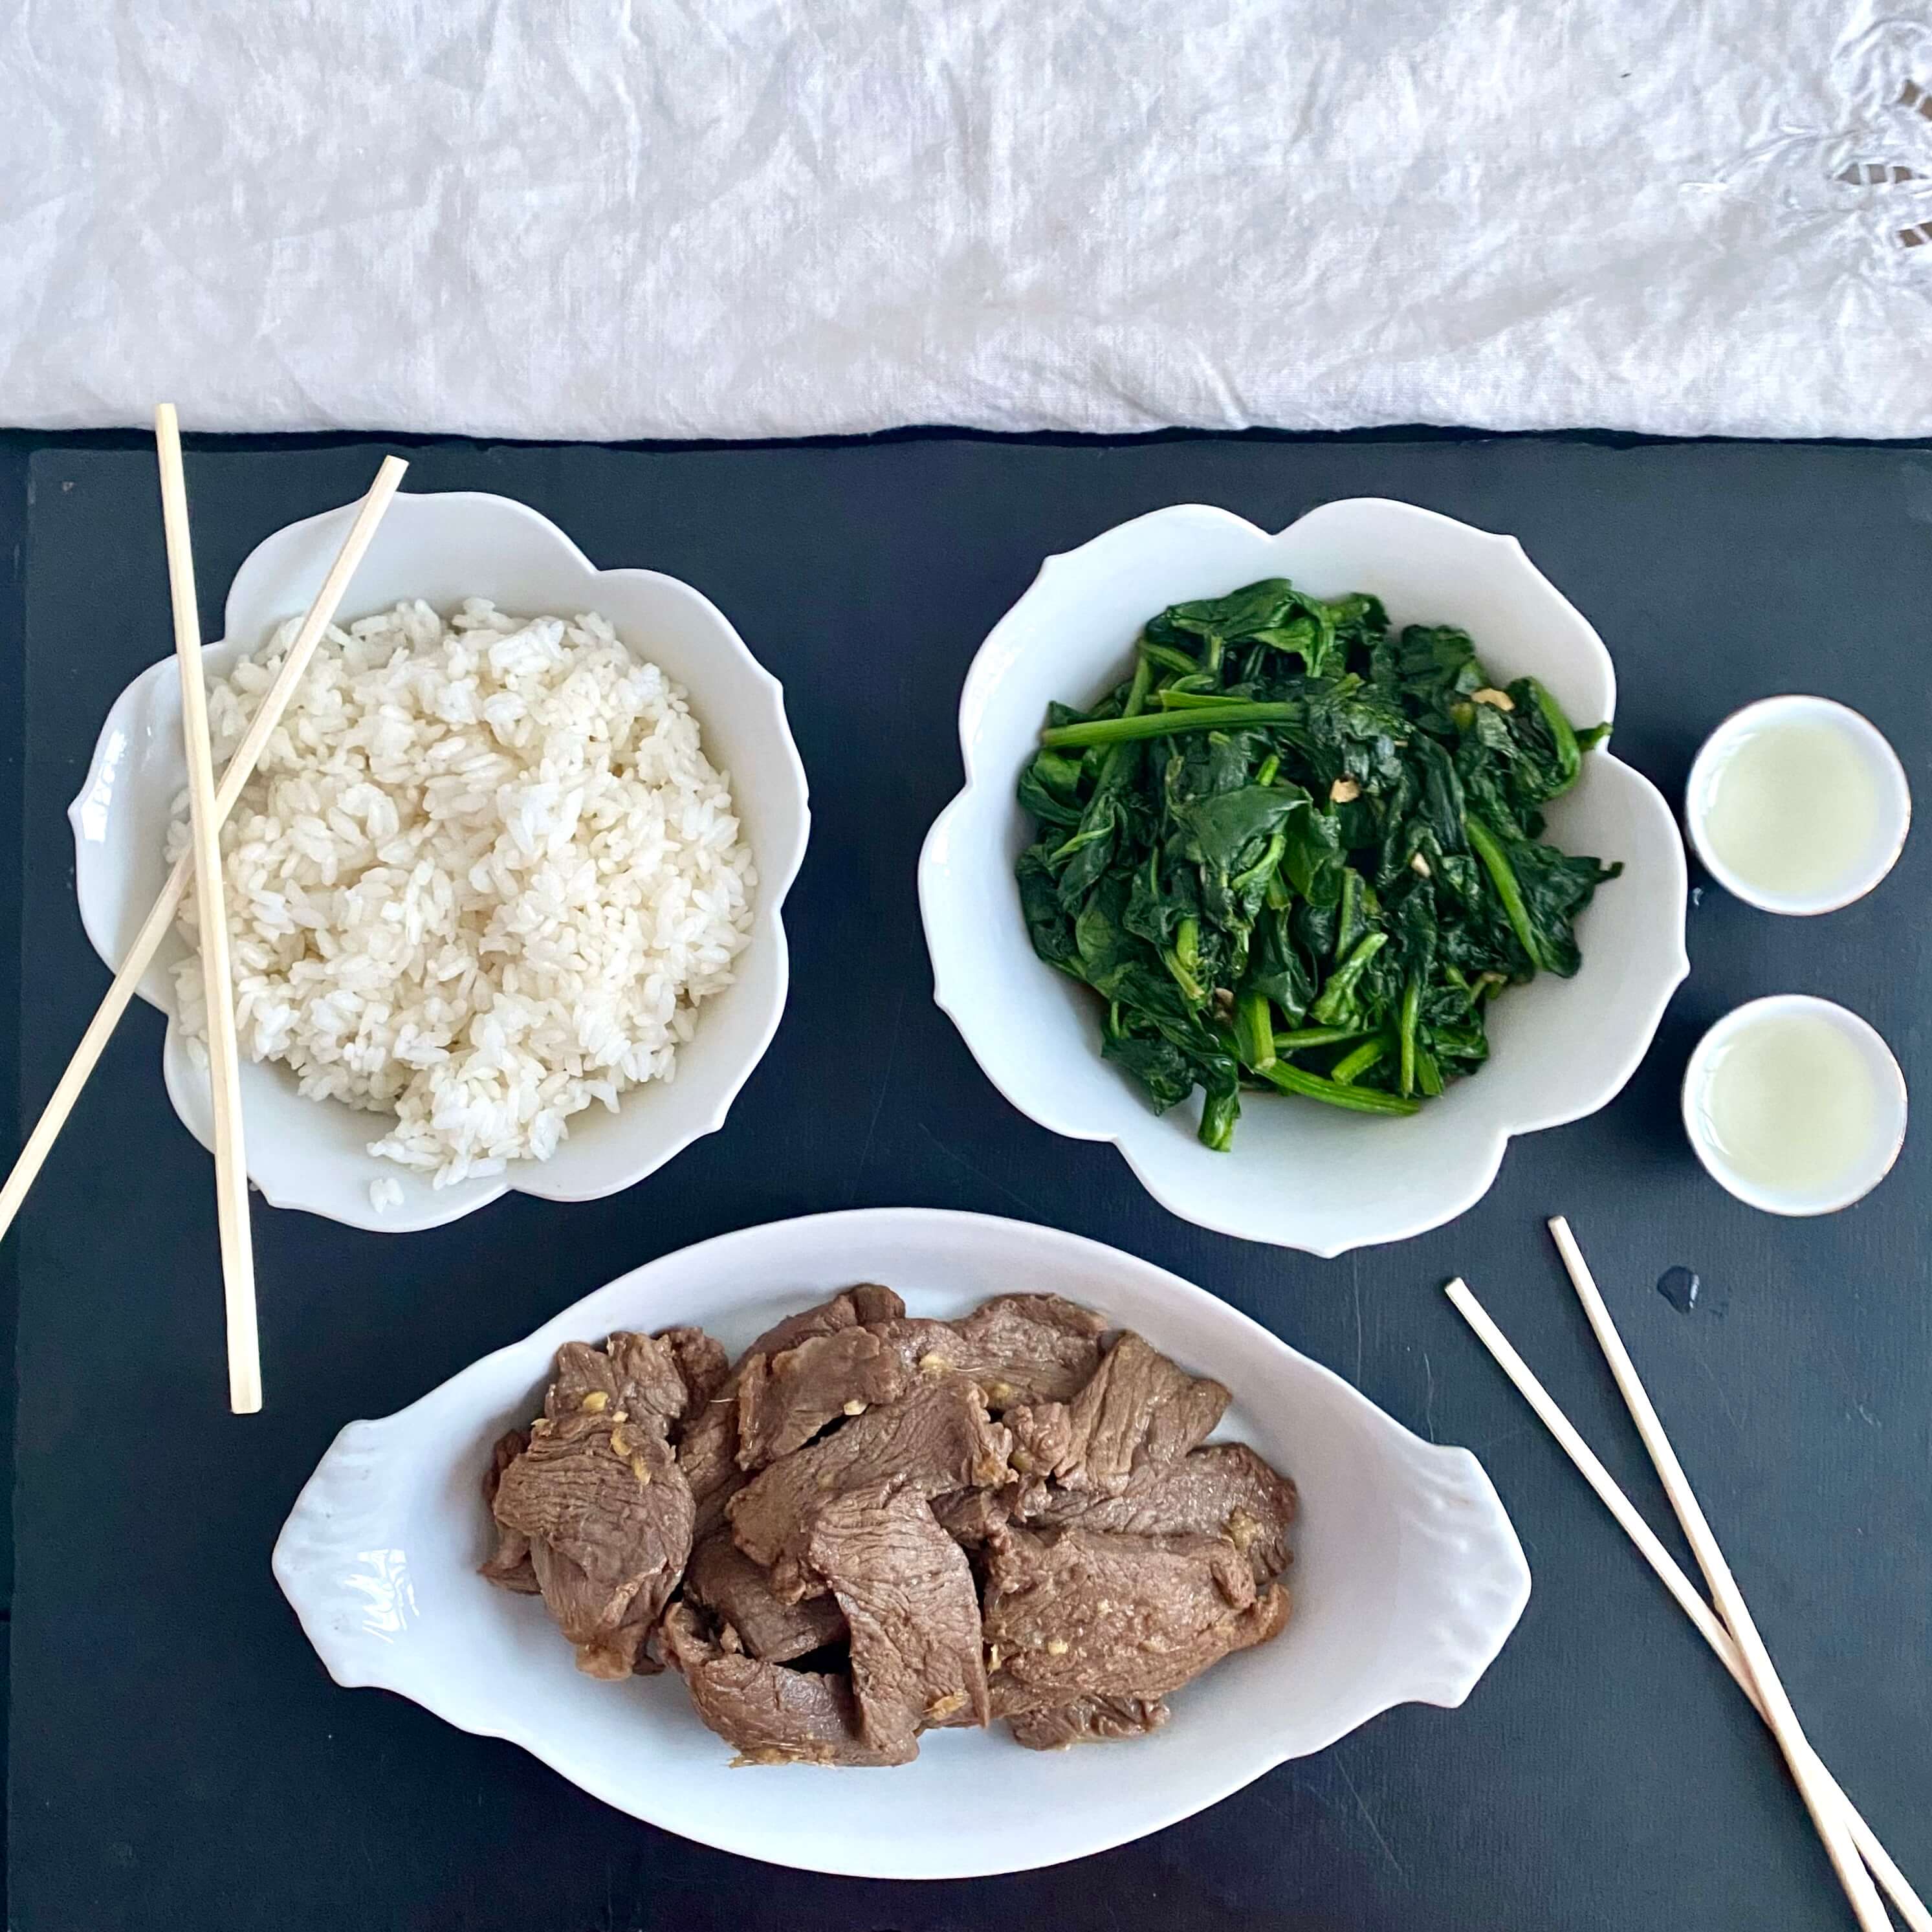
Truman didn’t document any thoughts or impressions about his sukiyaki and sake dinner at the hotel, but since he included the receipt for the meal, it must have been memorable in some way. Sukiyaki is a traditional recipe featuring slices of beef and vegetables simmered in a soy sauce broth. It differs from teriyaki in the manner of preparation. Sukiyaki is simmered while teriyaki is cooked quickly in a pan, grill, or broiler. Since both styles feature beef and soy sauce, the teriyaki recipe we are making in this post today is somewhat similar to what Truman and Millie would have enjoyed. It was fun to see how food bridged the distance between 1954 and 2026. Simple and easy to make, this recipe turned out to be one of my most favorites of the International Vintage Recipe Tour so far.
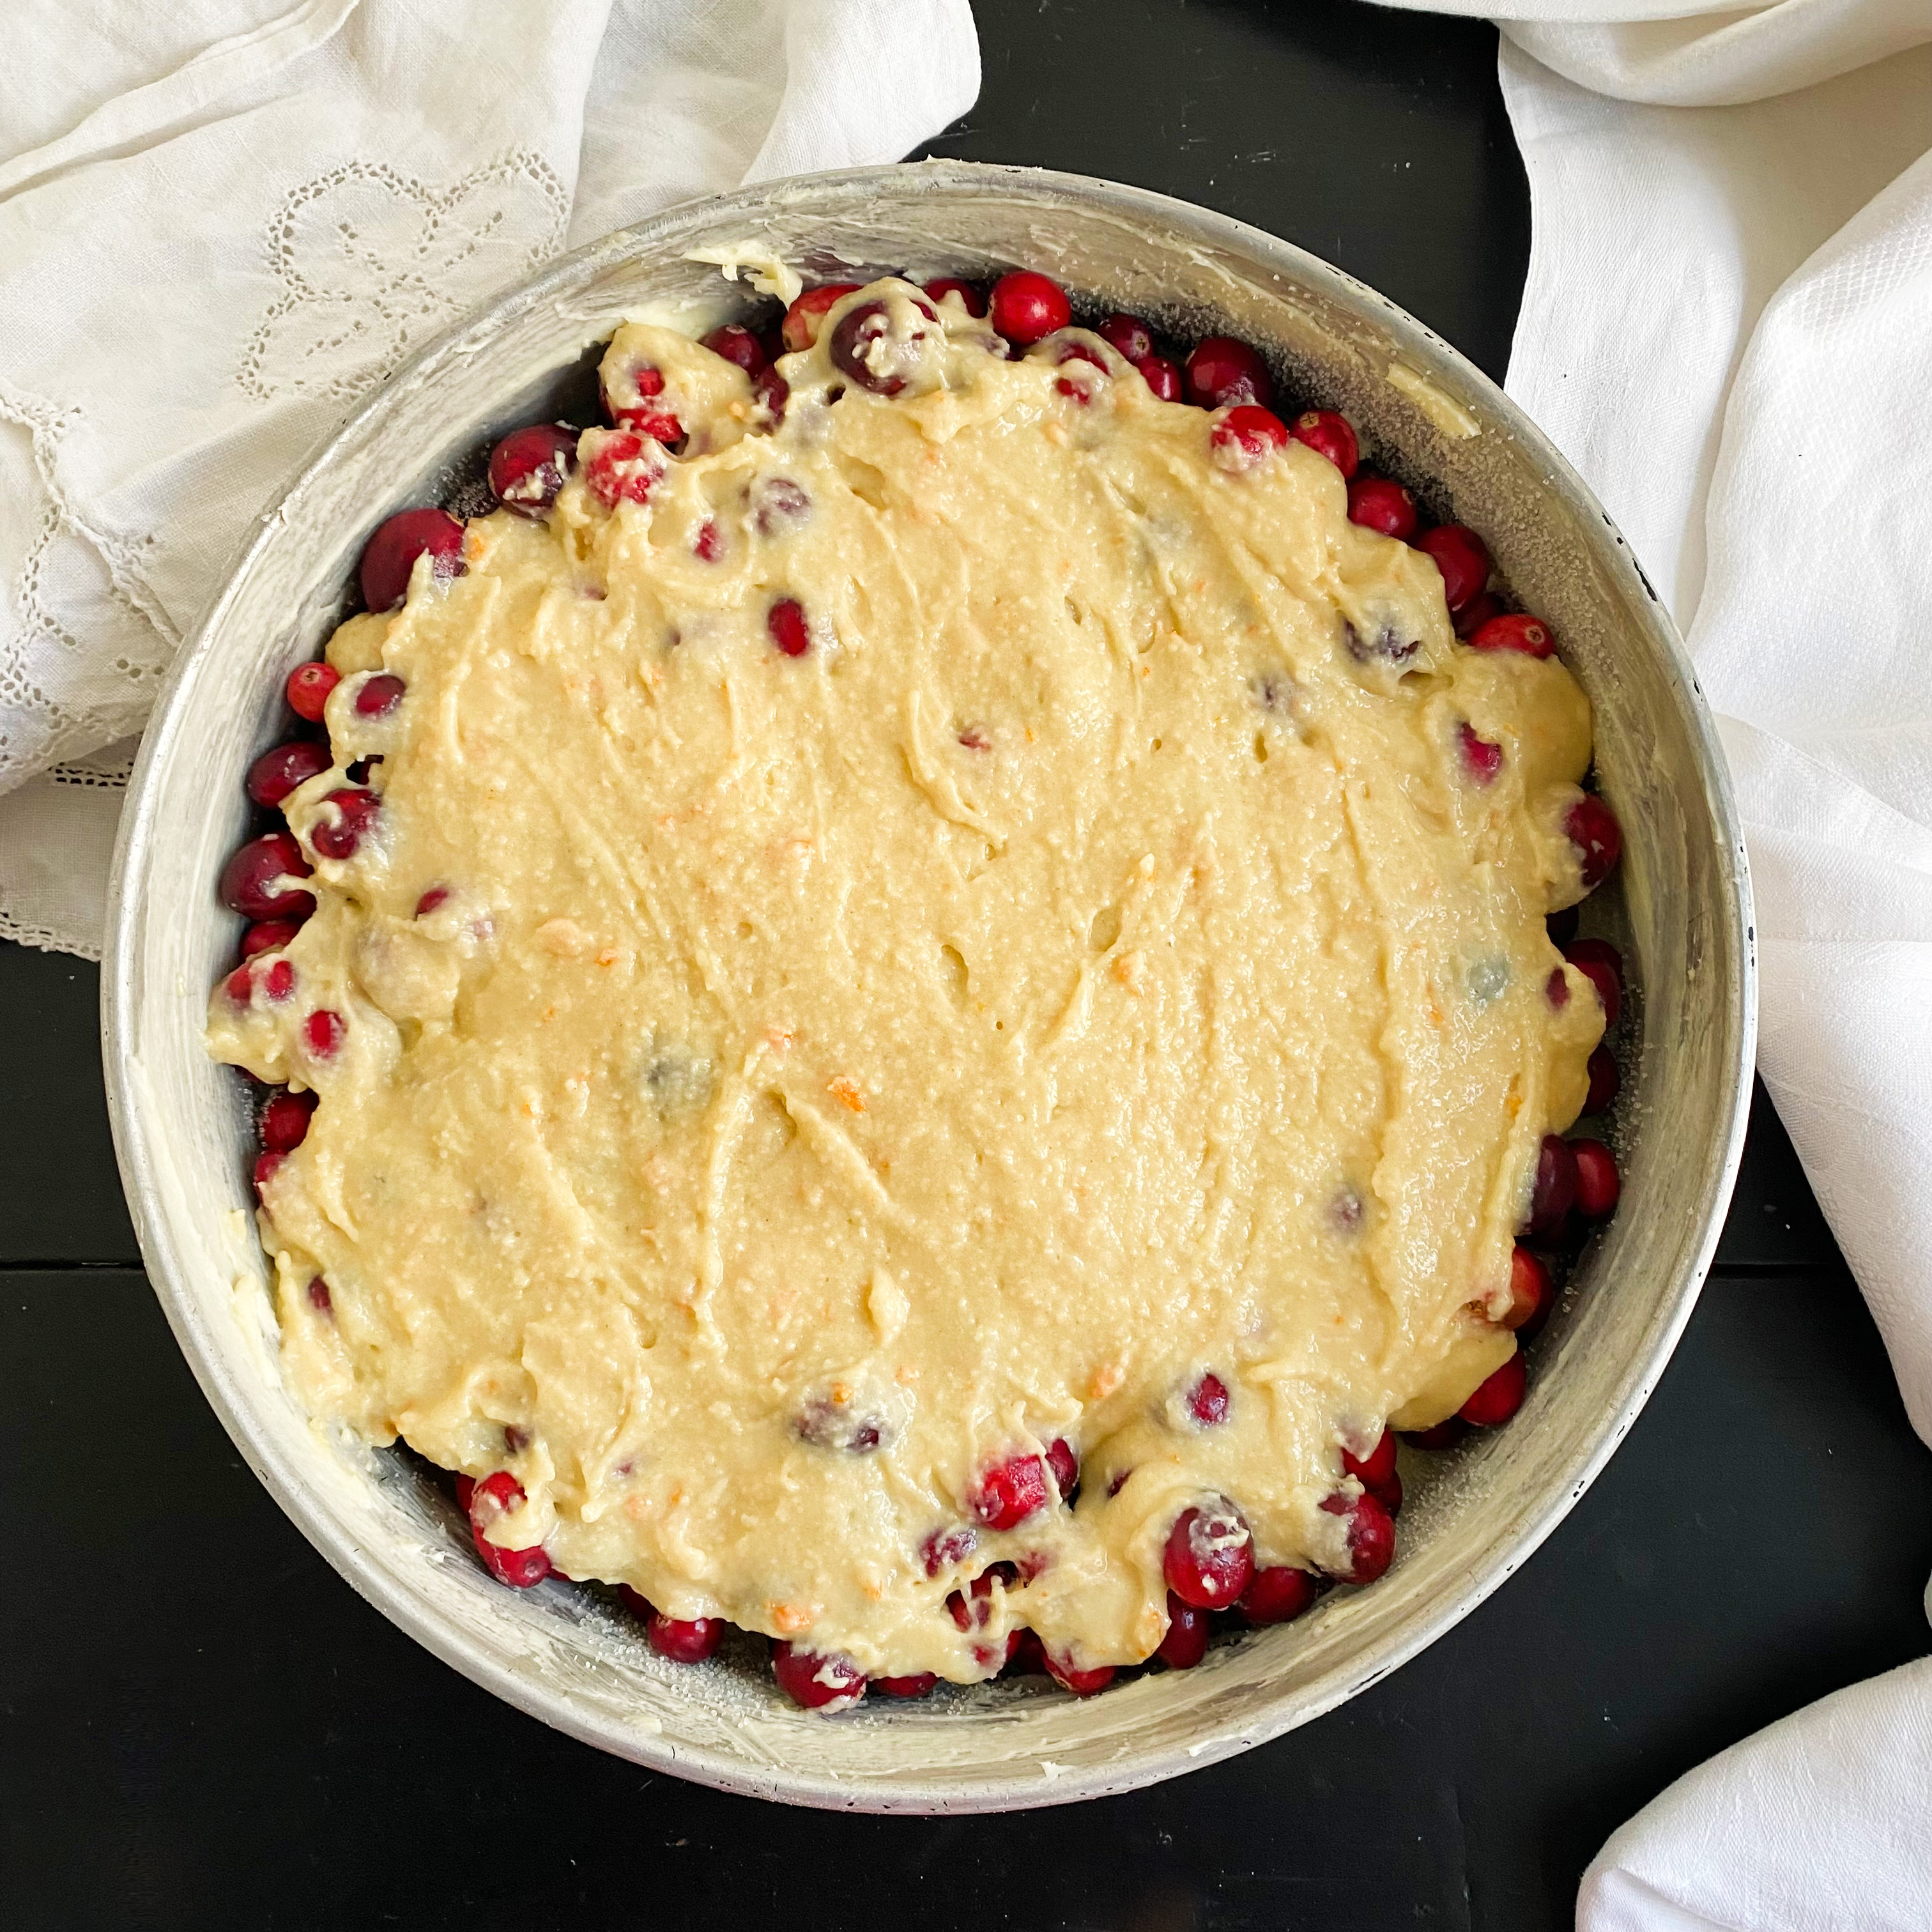
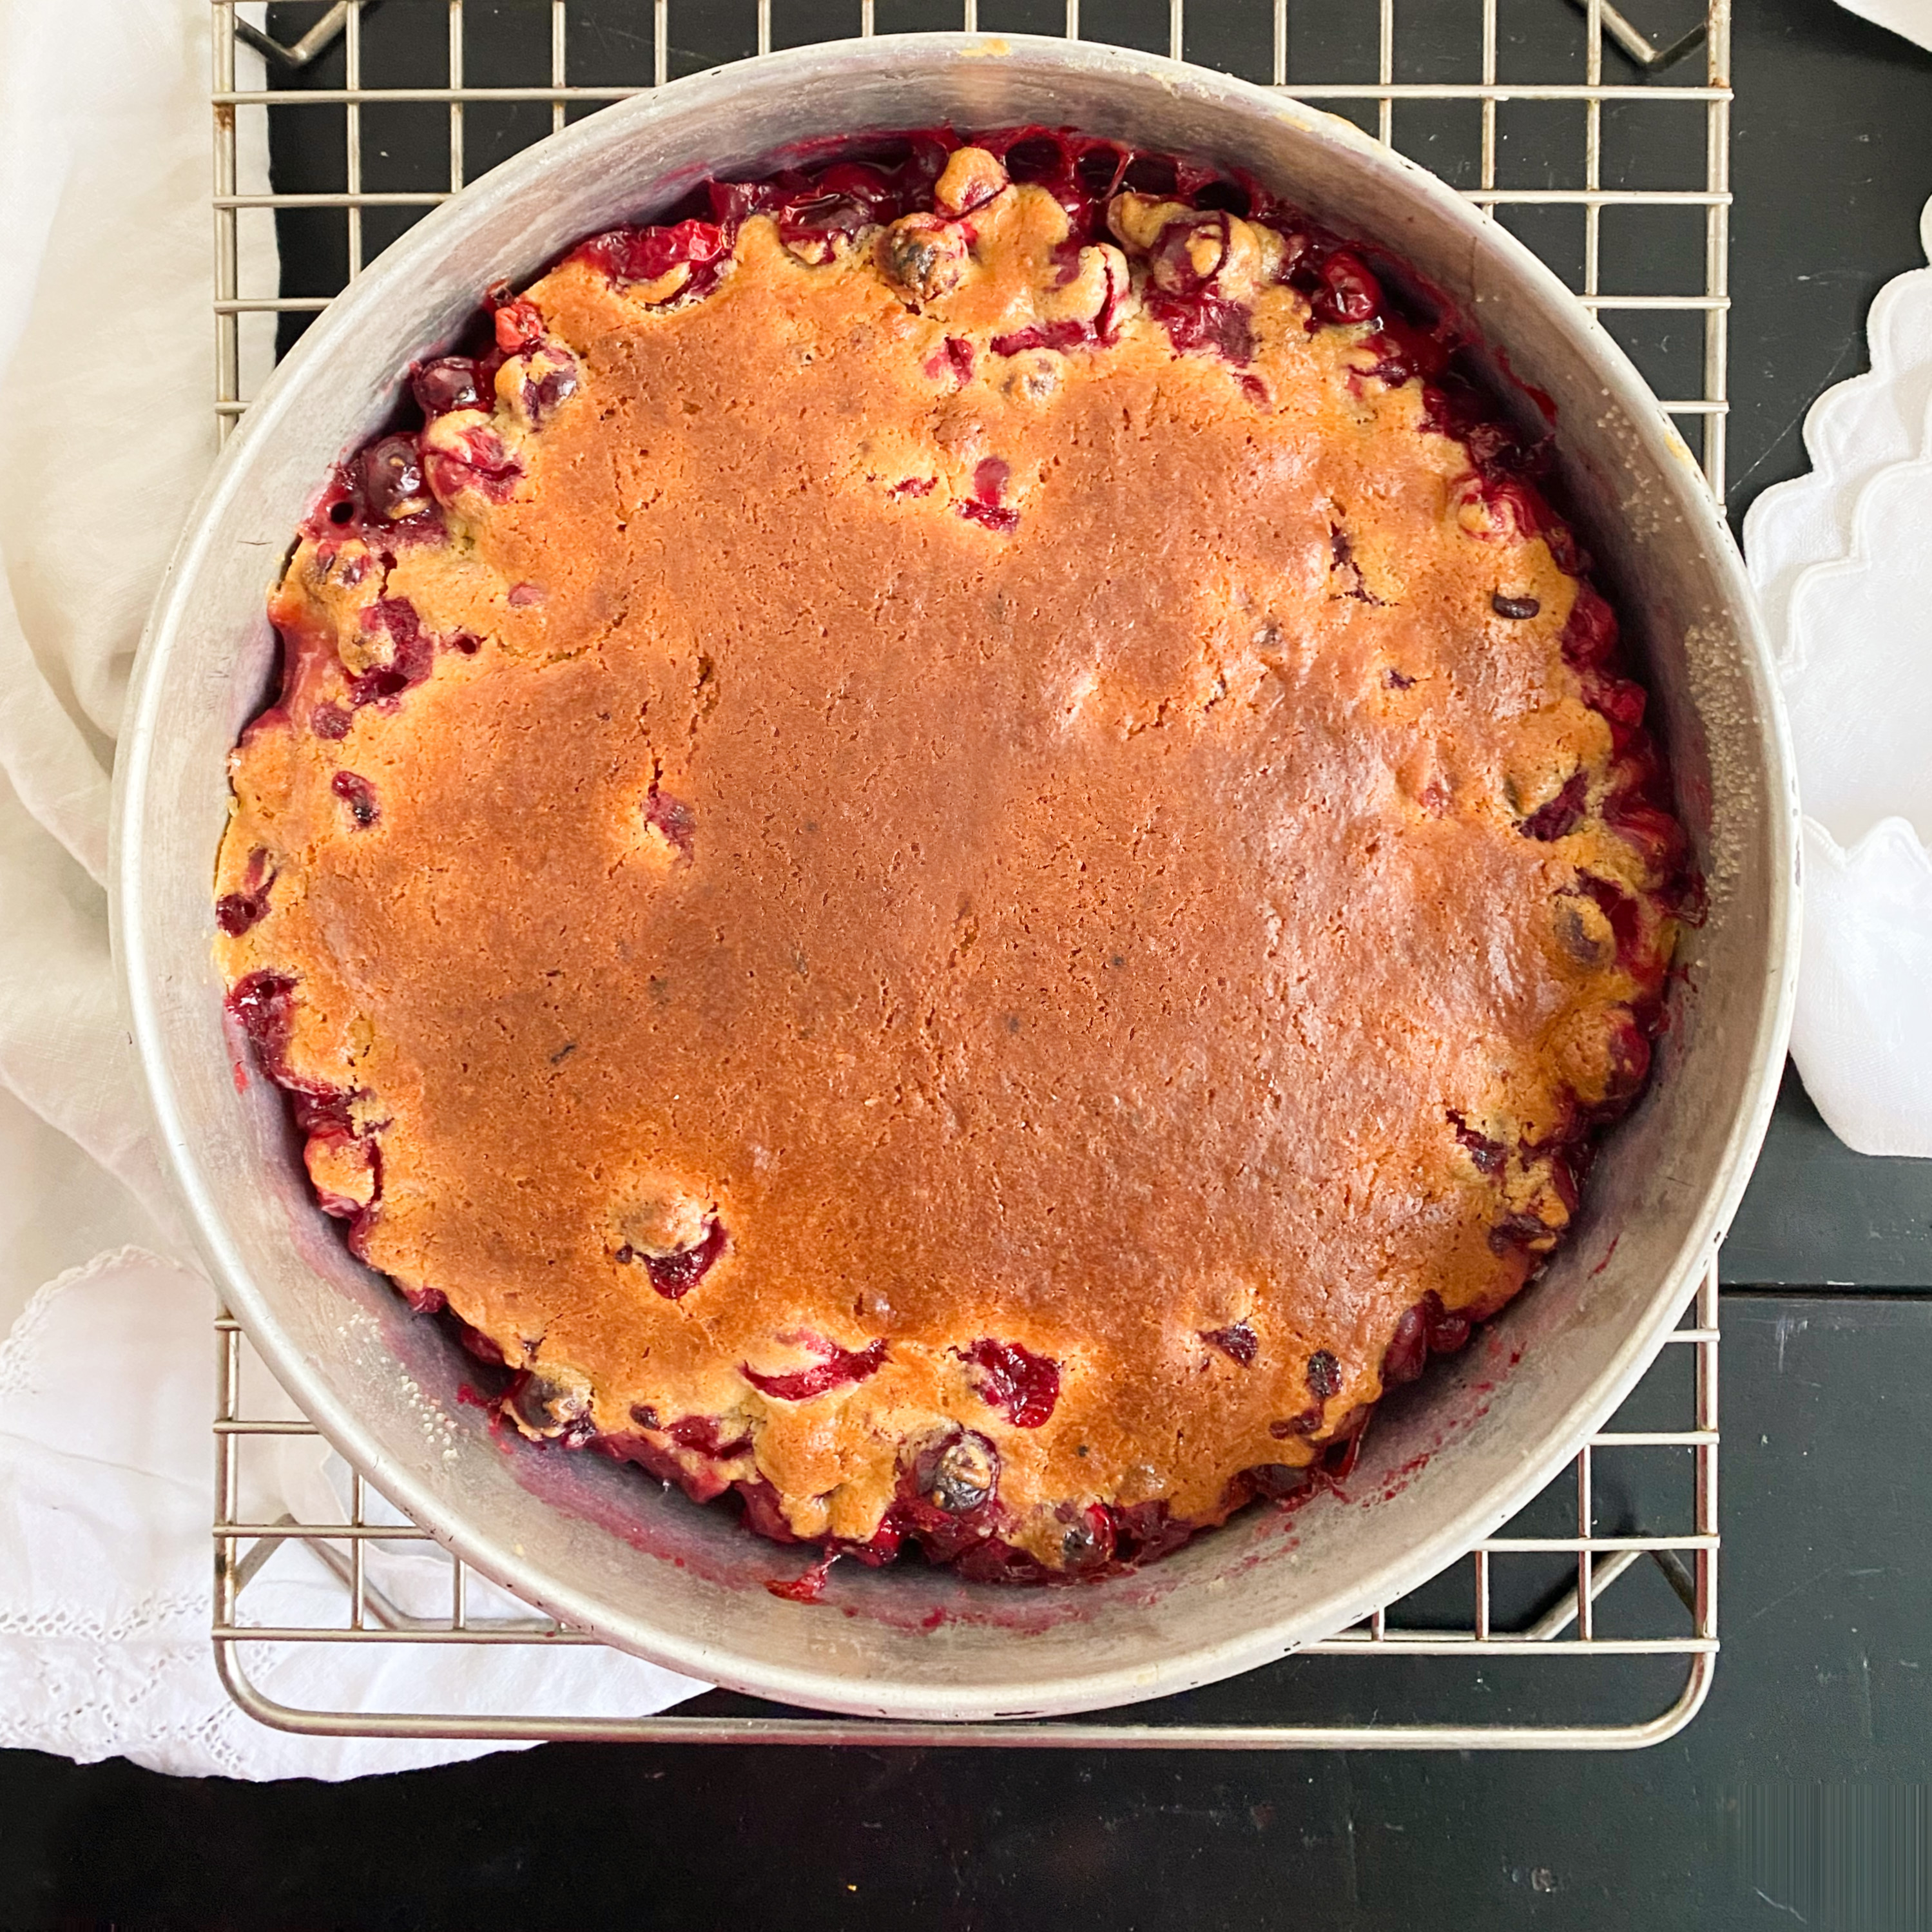
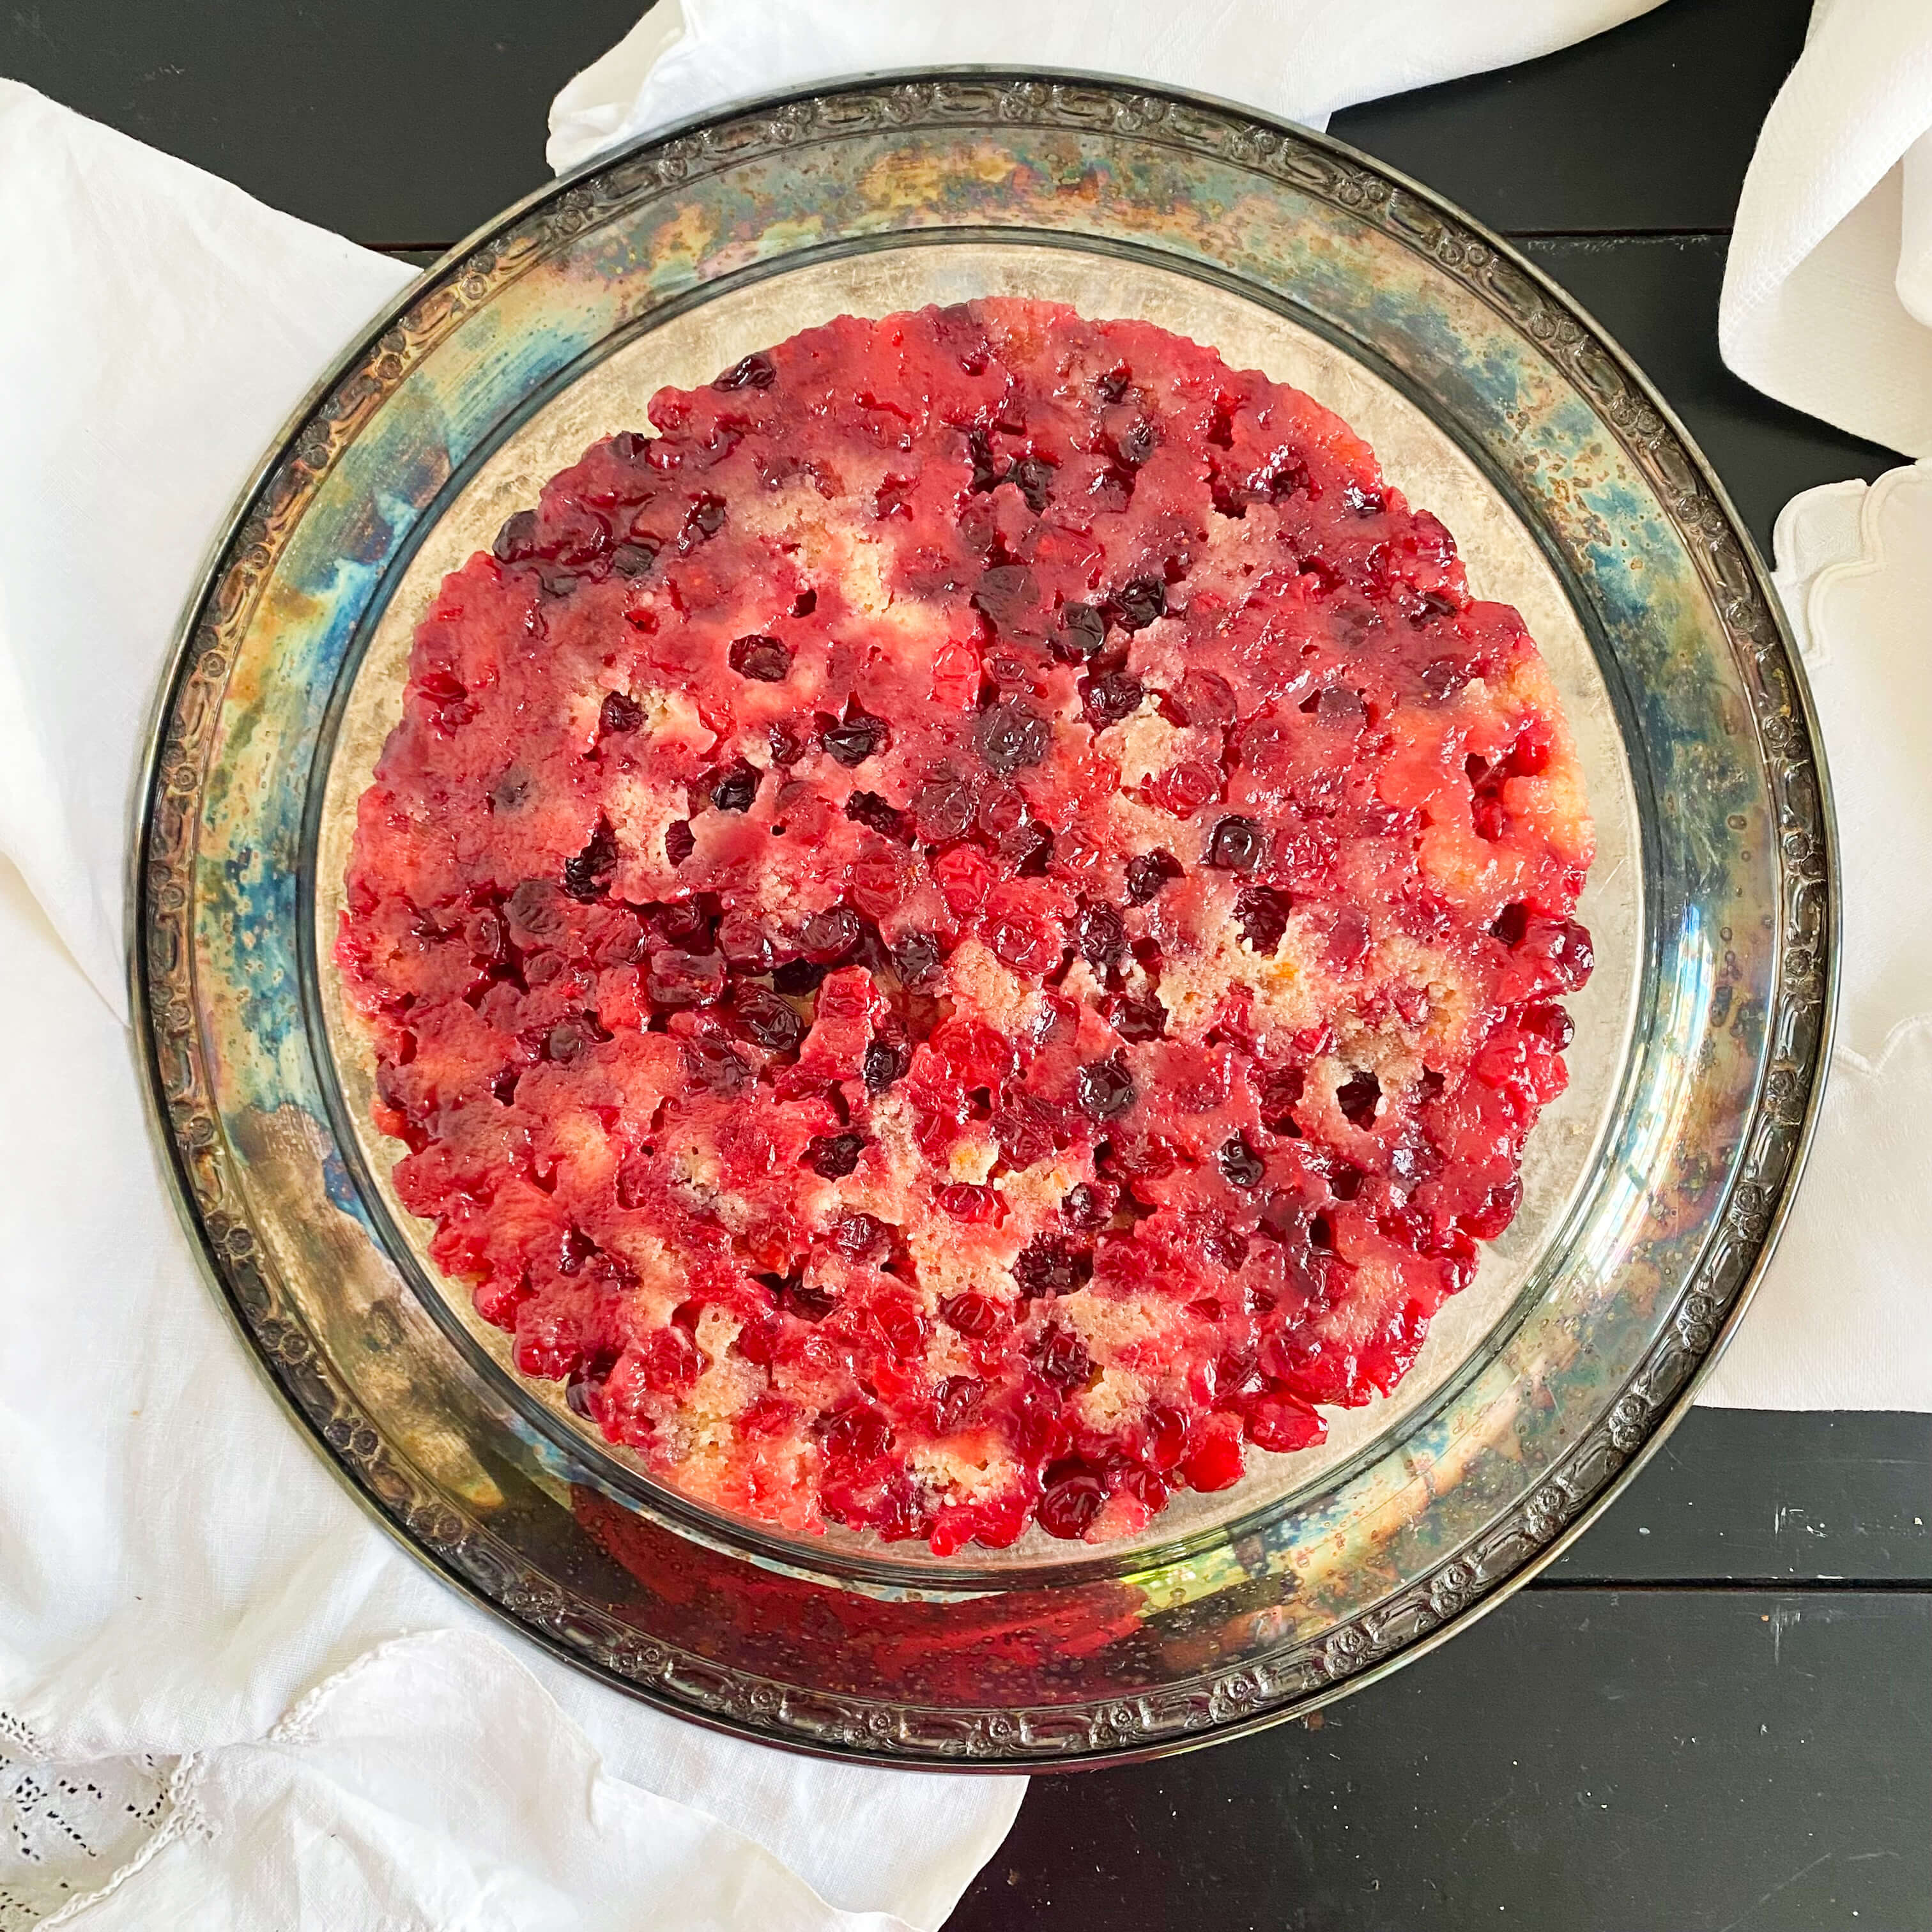
Containing just a handful of ingredients, a majority of the prep work is done in the fridge via a simple marinade that is very amenable to a variety of time schedules and constraints. The beef can be marinated in the fridge for as short as 15 minutes or as long as several hours, making it a great choice for quick weekday meals and also more relaxed weekend fare. I wound up marinating the beef for about three hours, which made it very tender and flavorful.
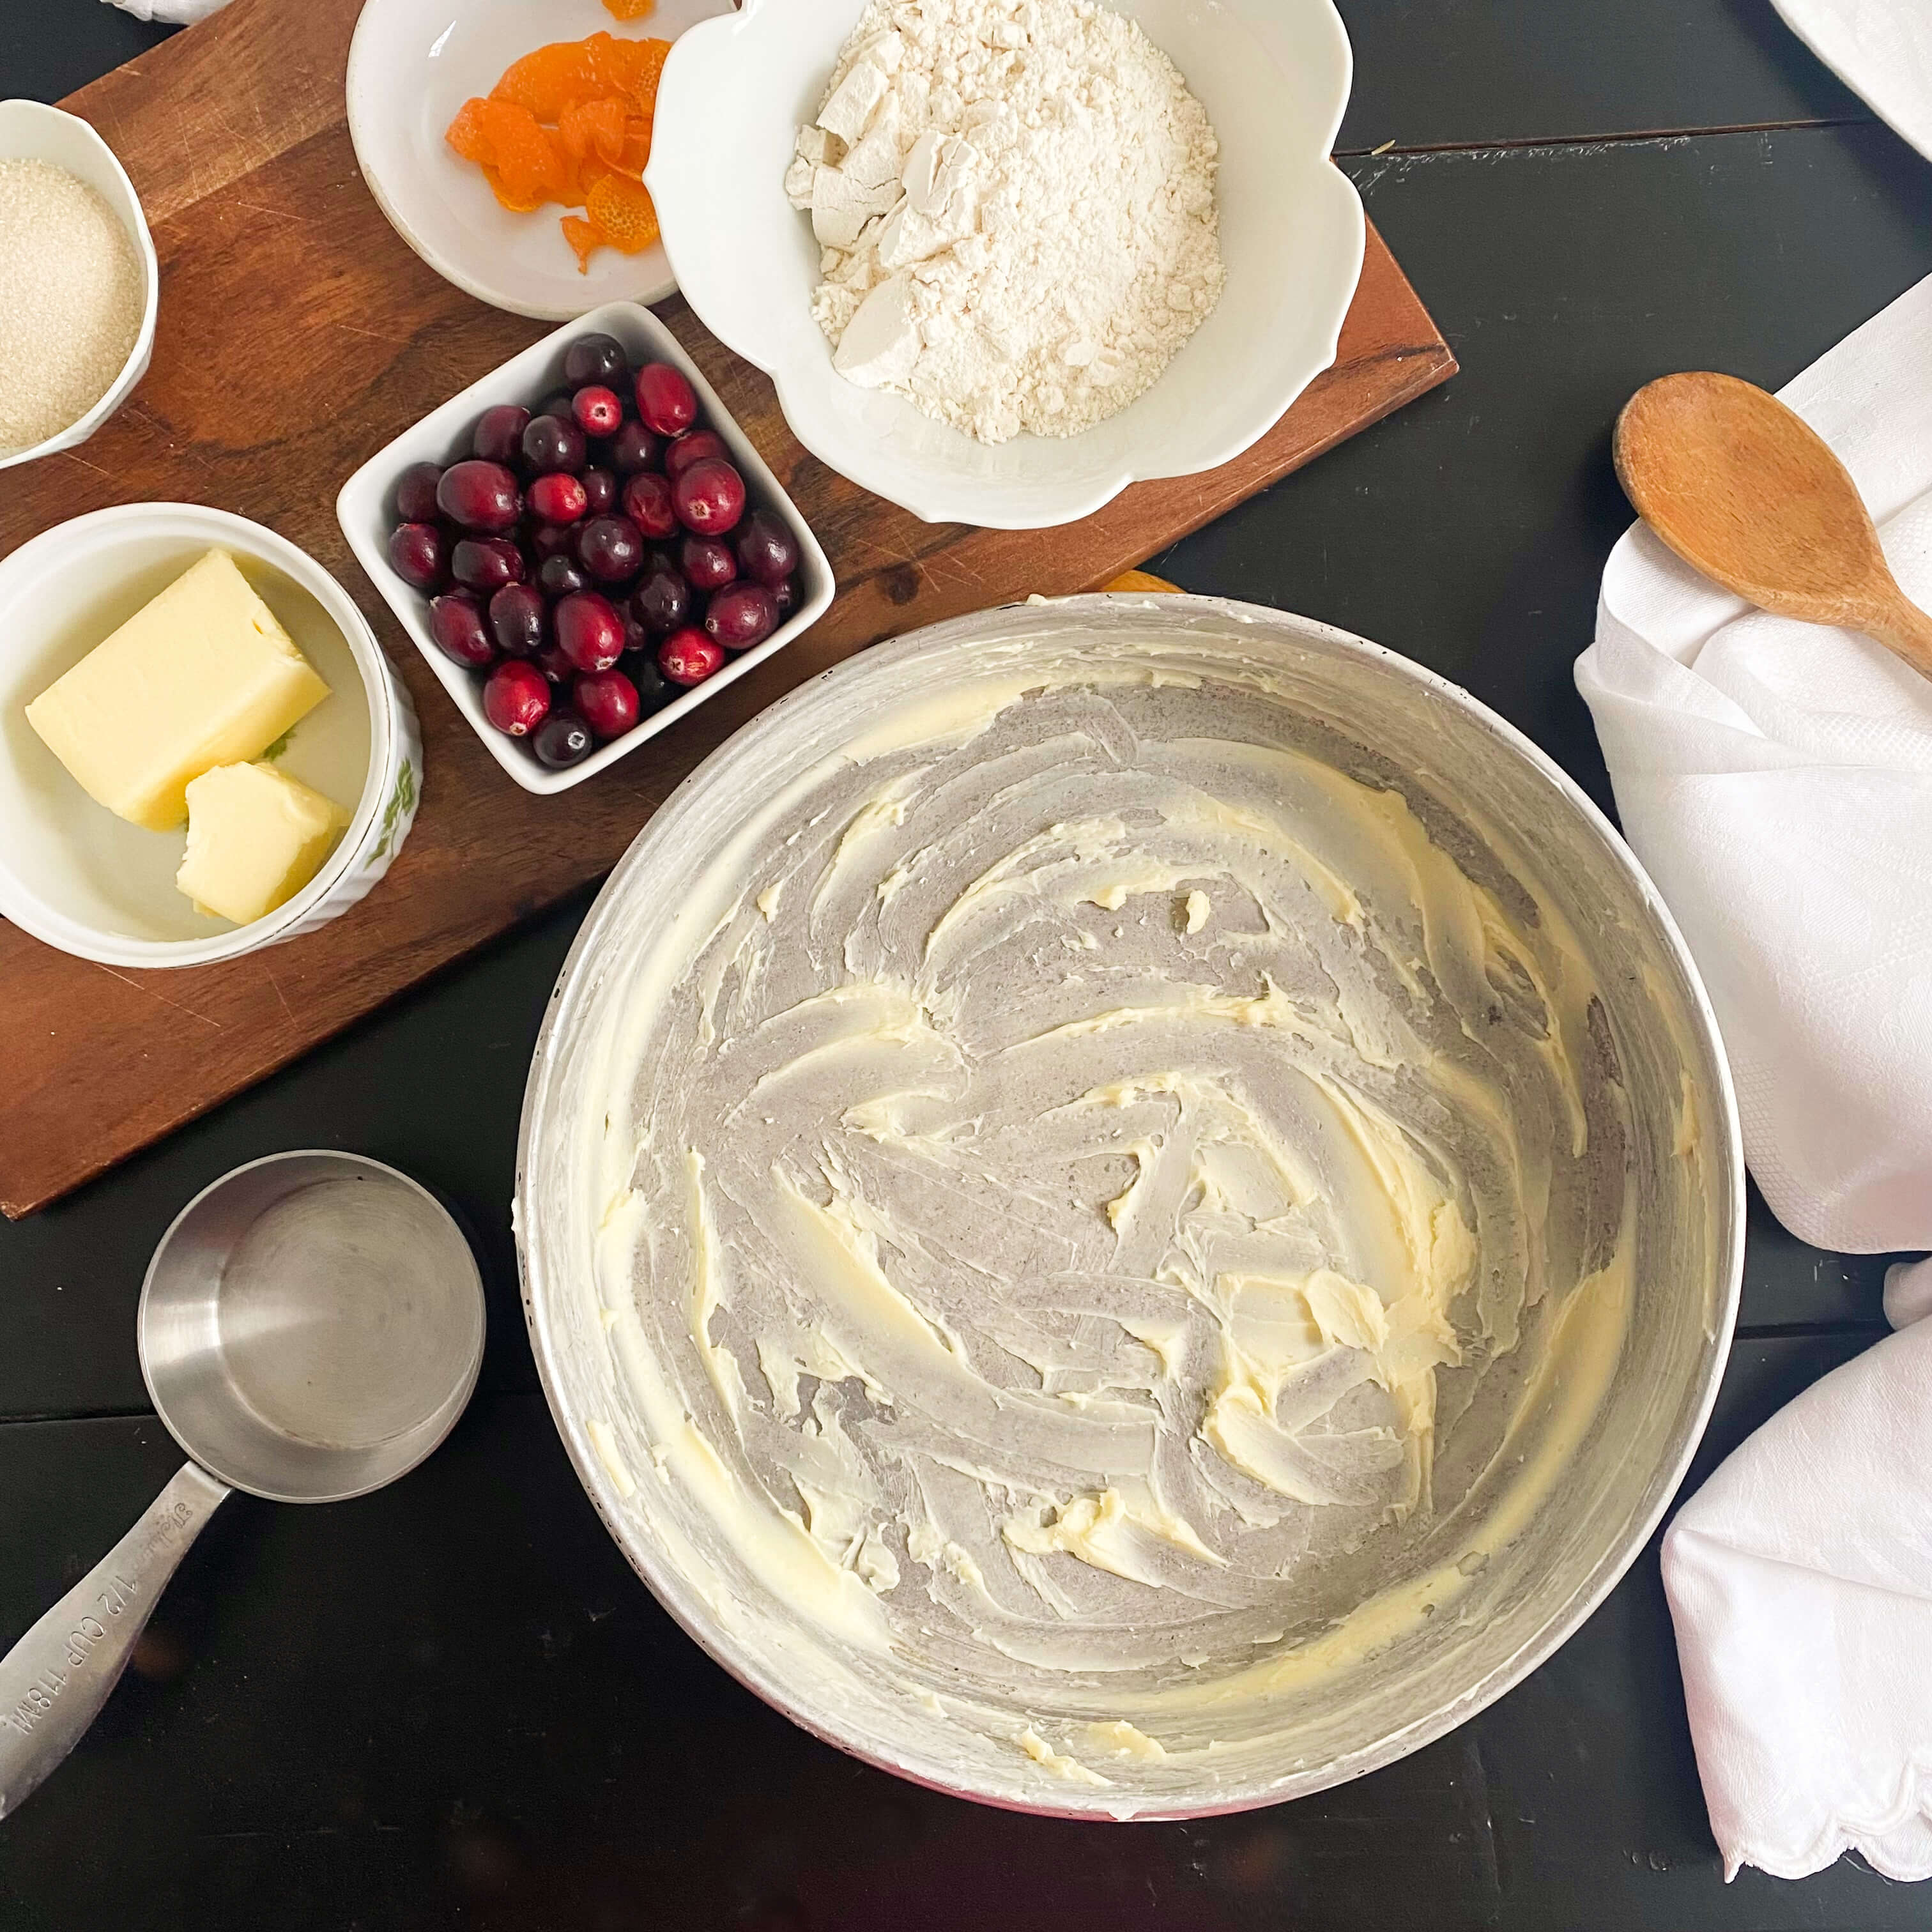
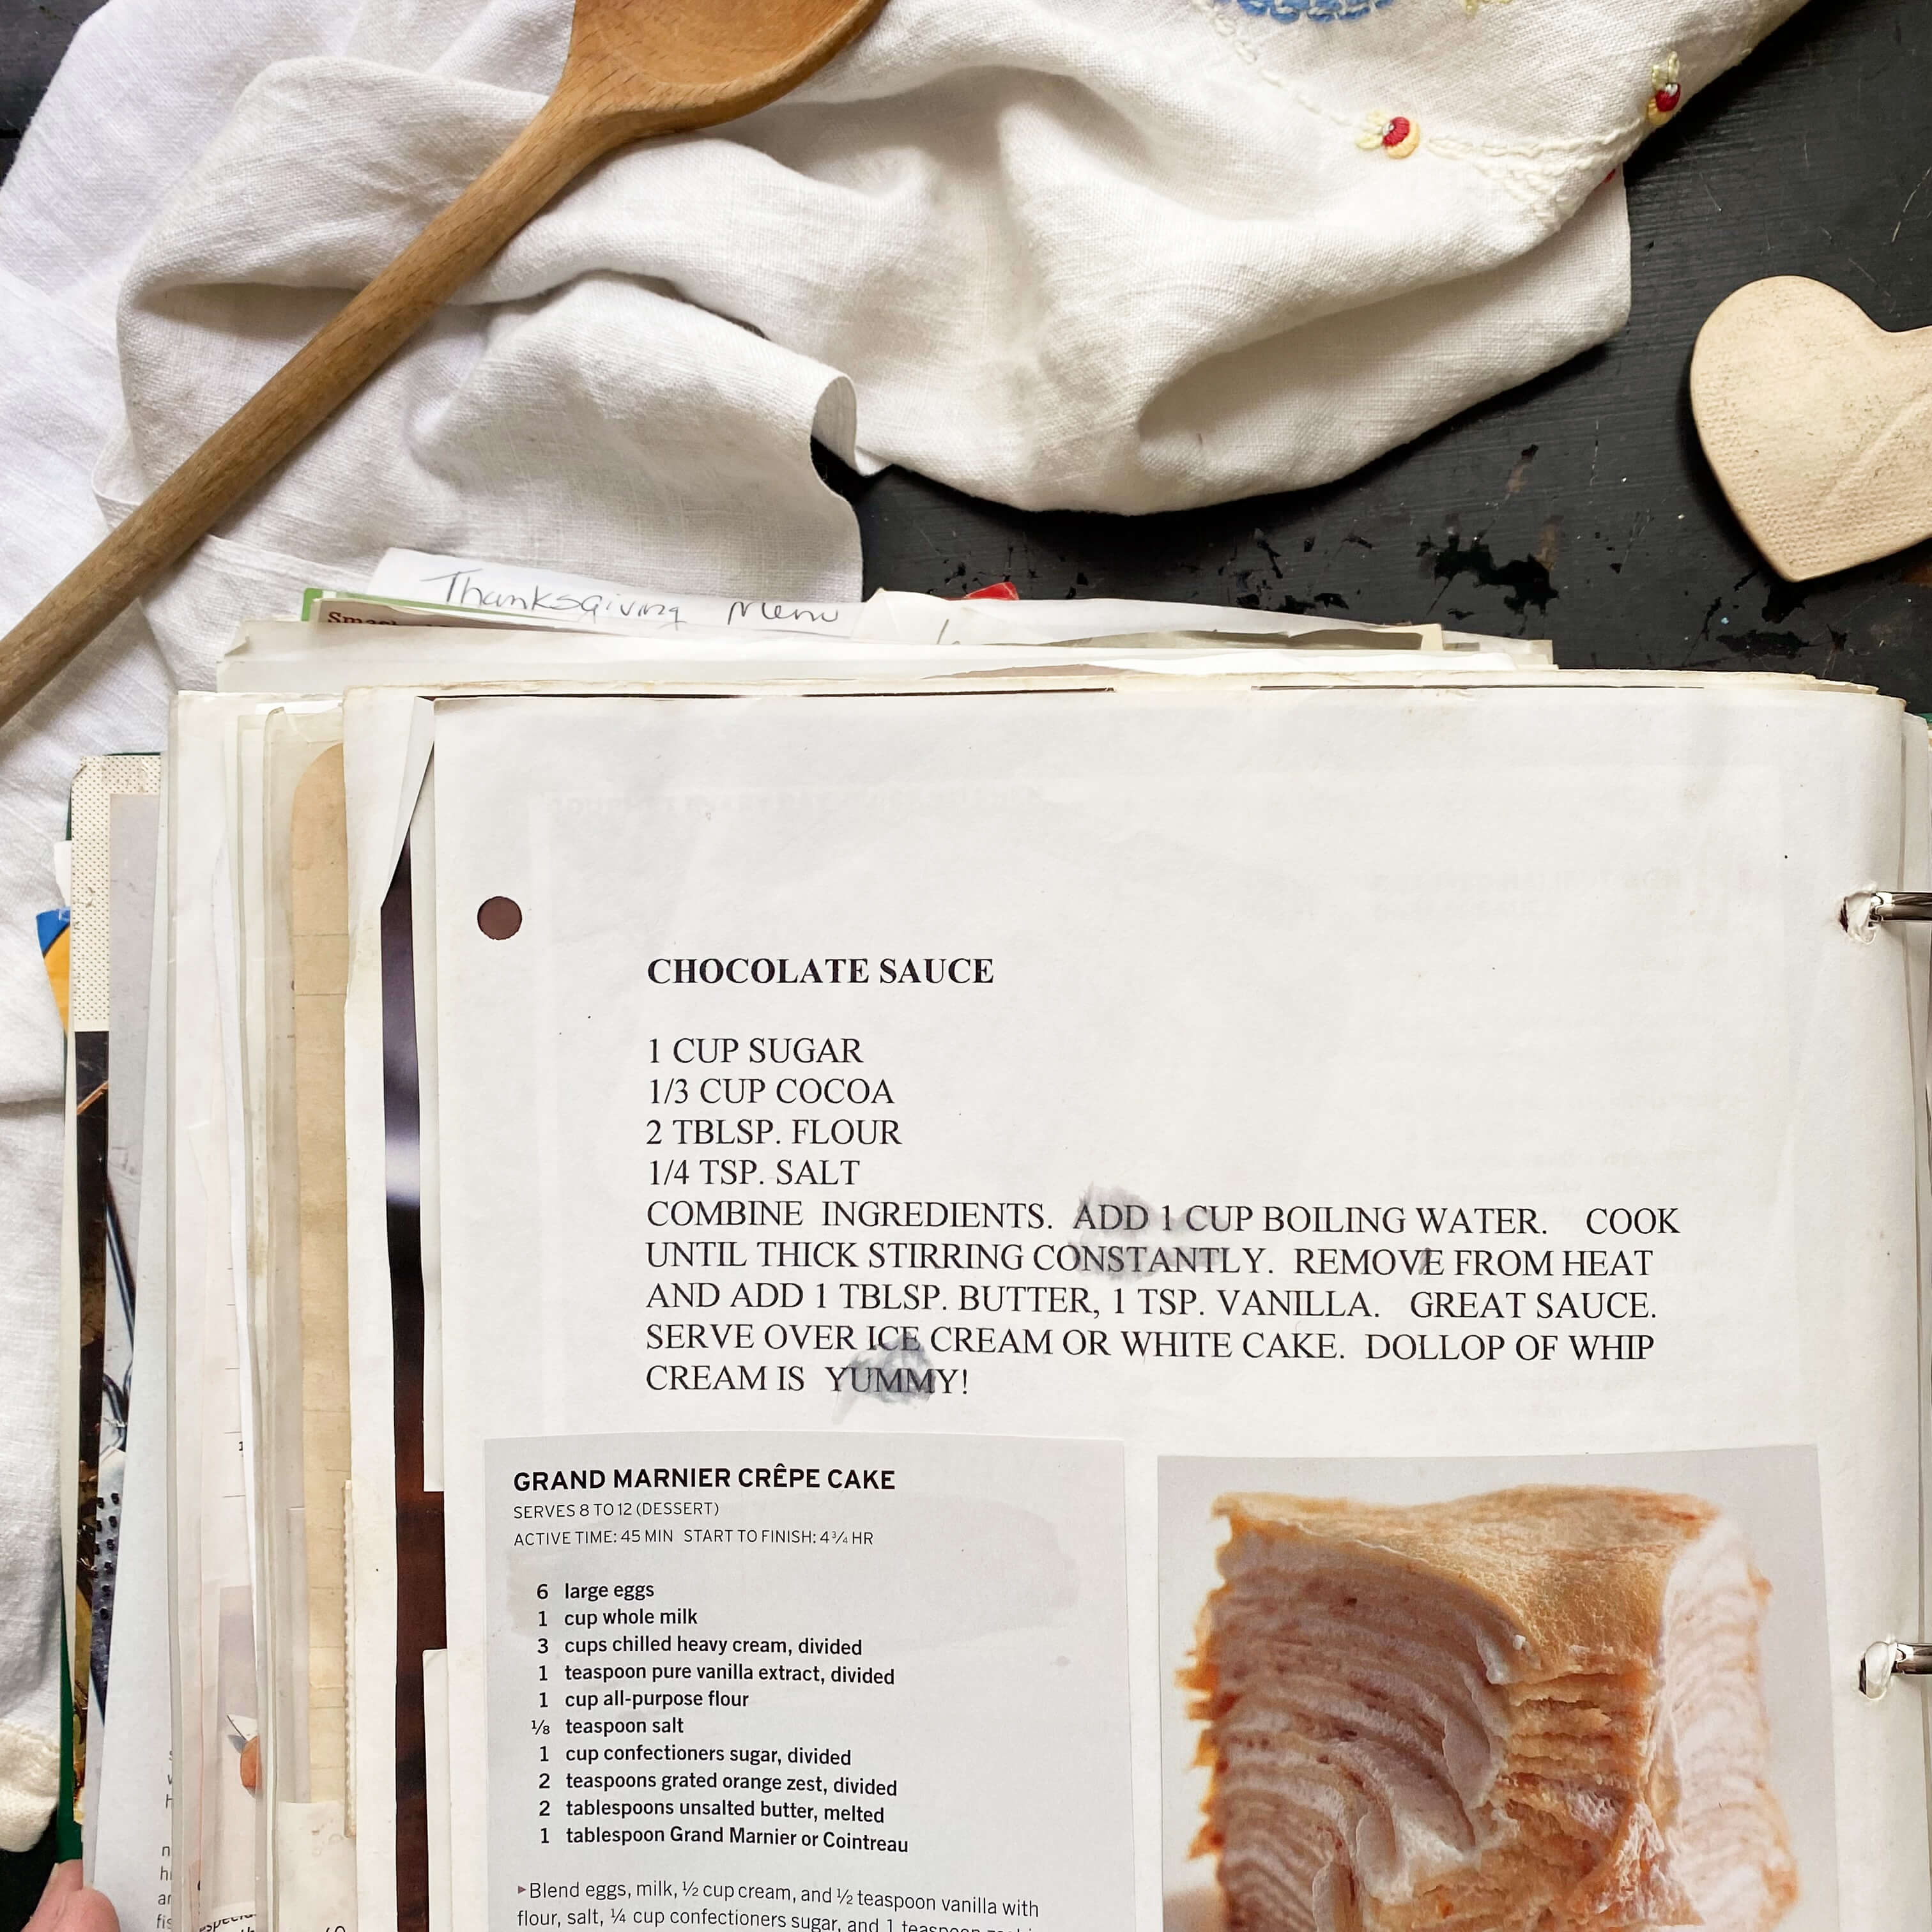
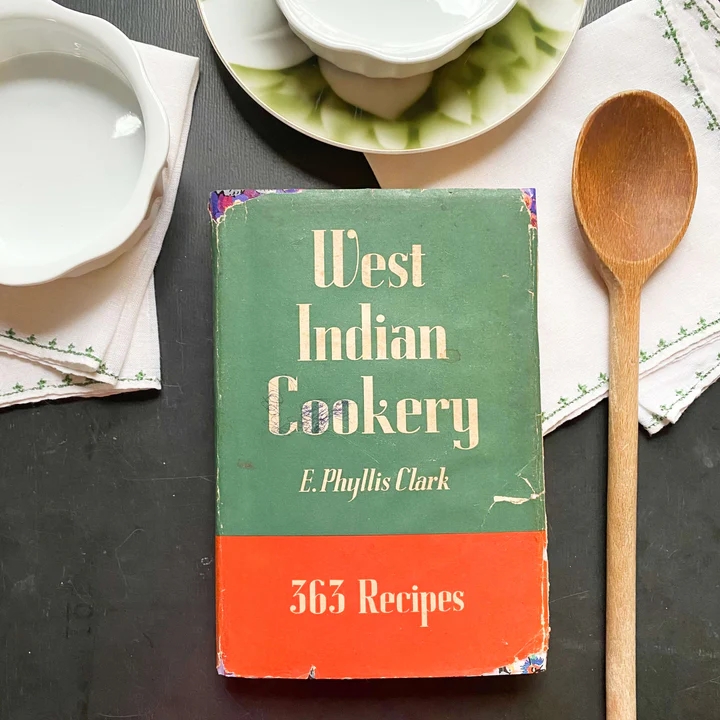
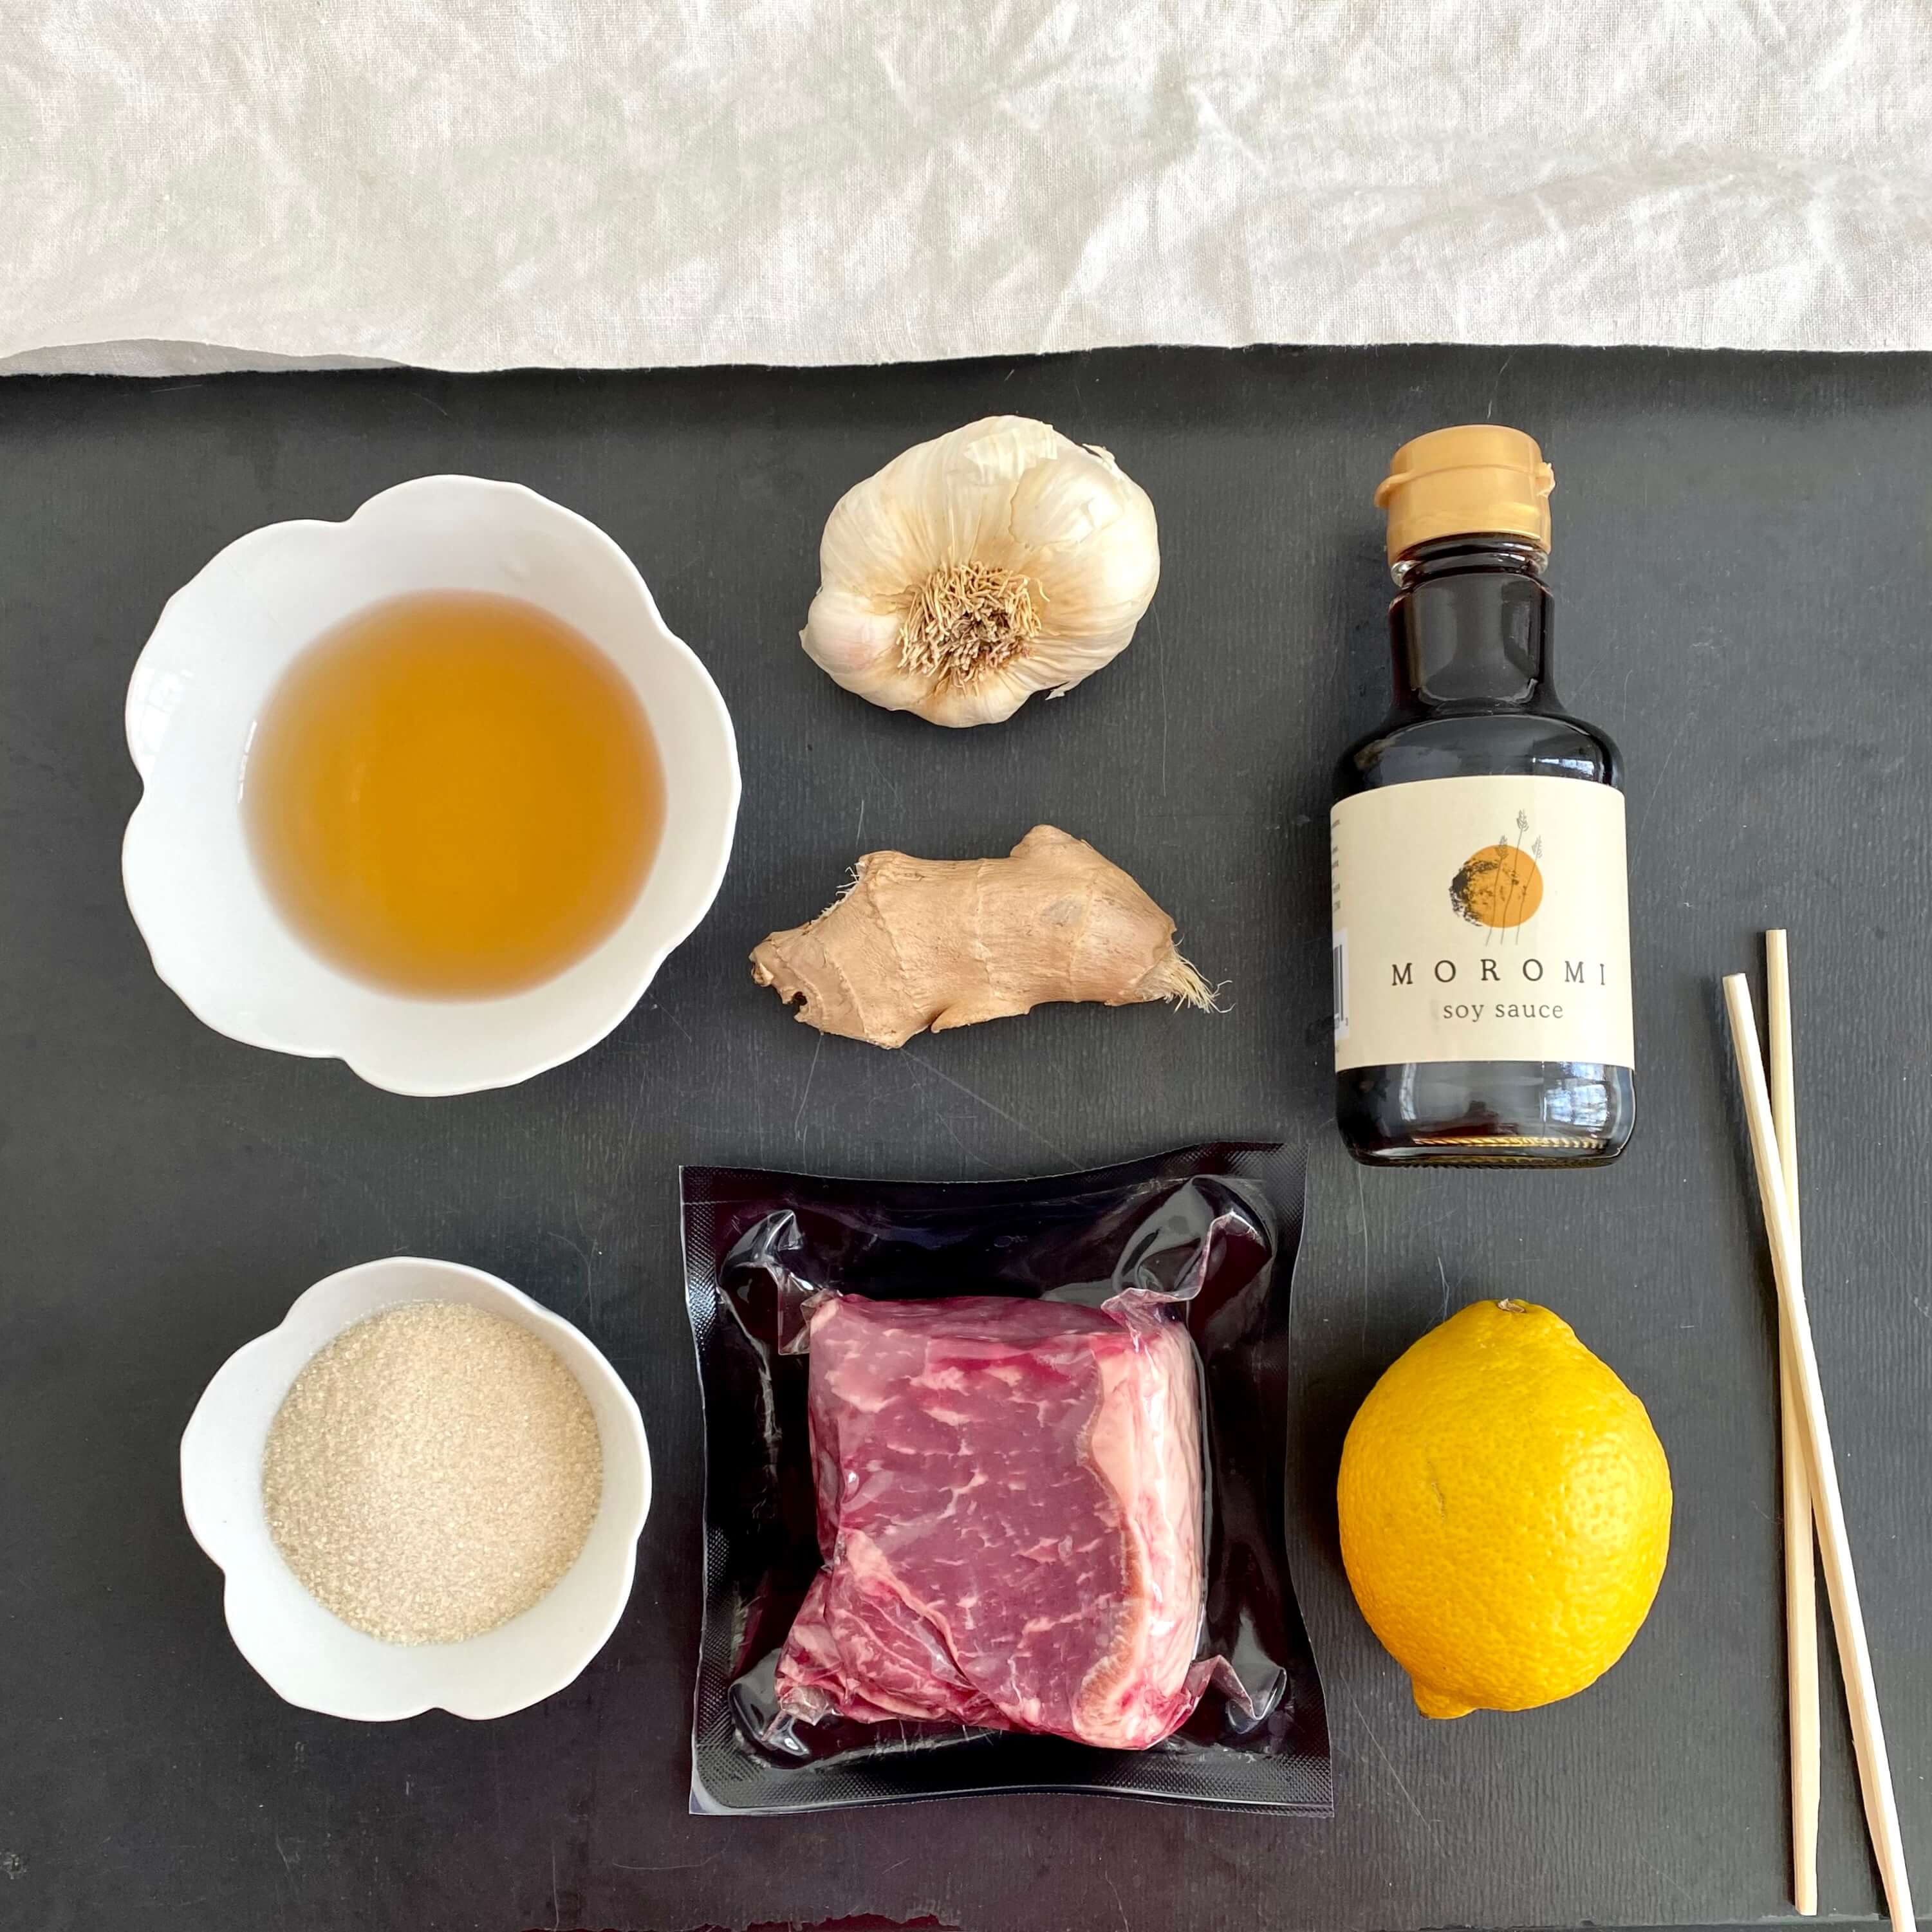
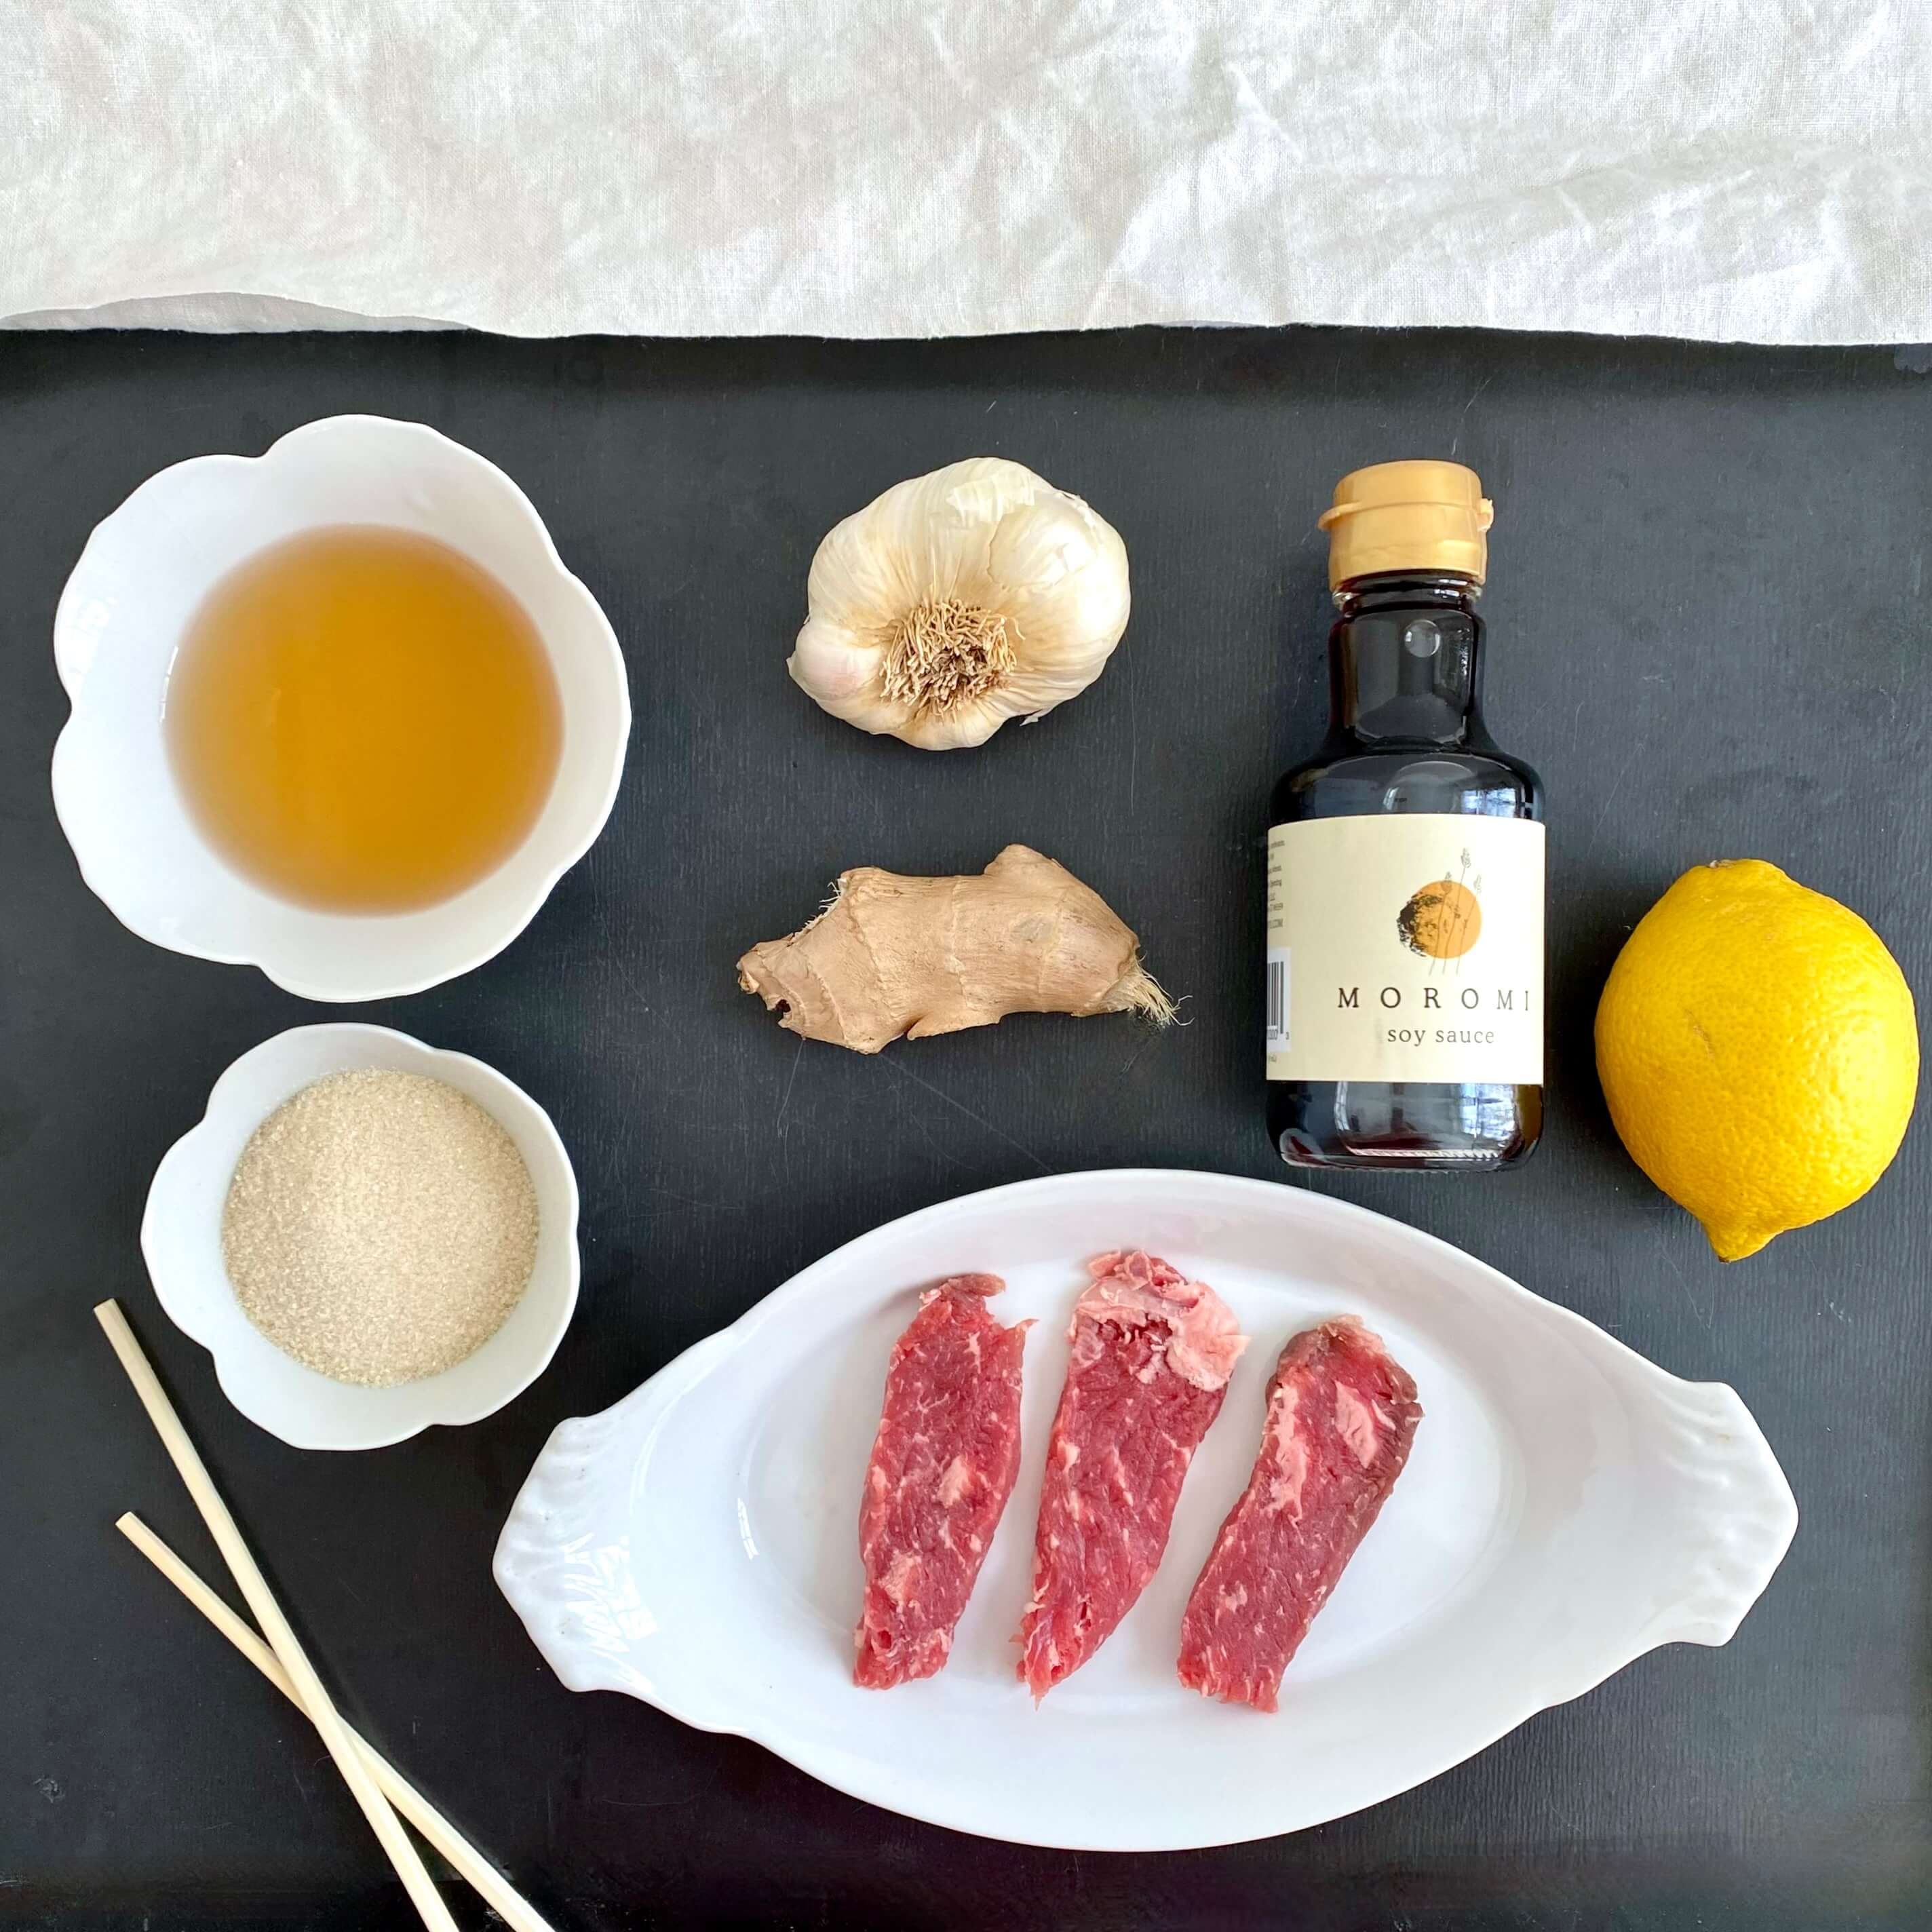
As is true with all memorable food thoroughly enjoyed while traveling, the more local the ingredients, the more delicious the meal. The same goes for home cooking, too. With just seven ingredients, this recipe, Beef Teriyaki I, as it is called in the 1971 edition of the New York Times International Cook Book, is easy to shop for, easy to prepare, and serves four.
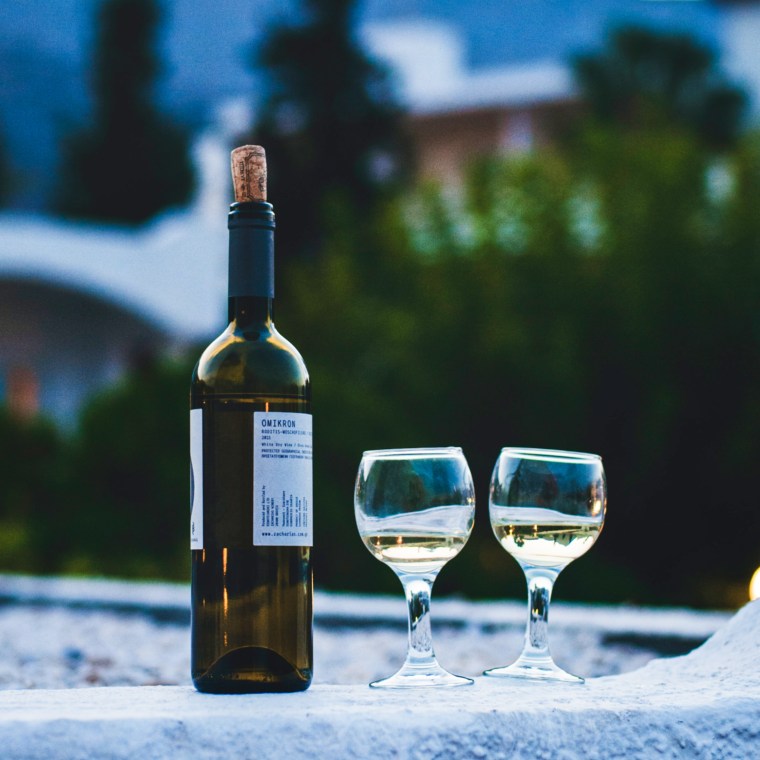
Since the key ingredients are beef and soy sauce, if possible, I would recommend sourcing both as locally or as regionally as you can in order to create a dish with the most flavor. We are lucky here in Connecticut to have a locally made small-batch soy sauce producer, which I purchased for the first time specifically for this recipe. I also used a local grass-fed NY Strip steak, Sushi-grade rice, and locally grown spinach. Just like Truman and Millie in 1954, sake was the companion of choice to accompany this lovely meal.
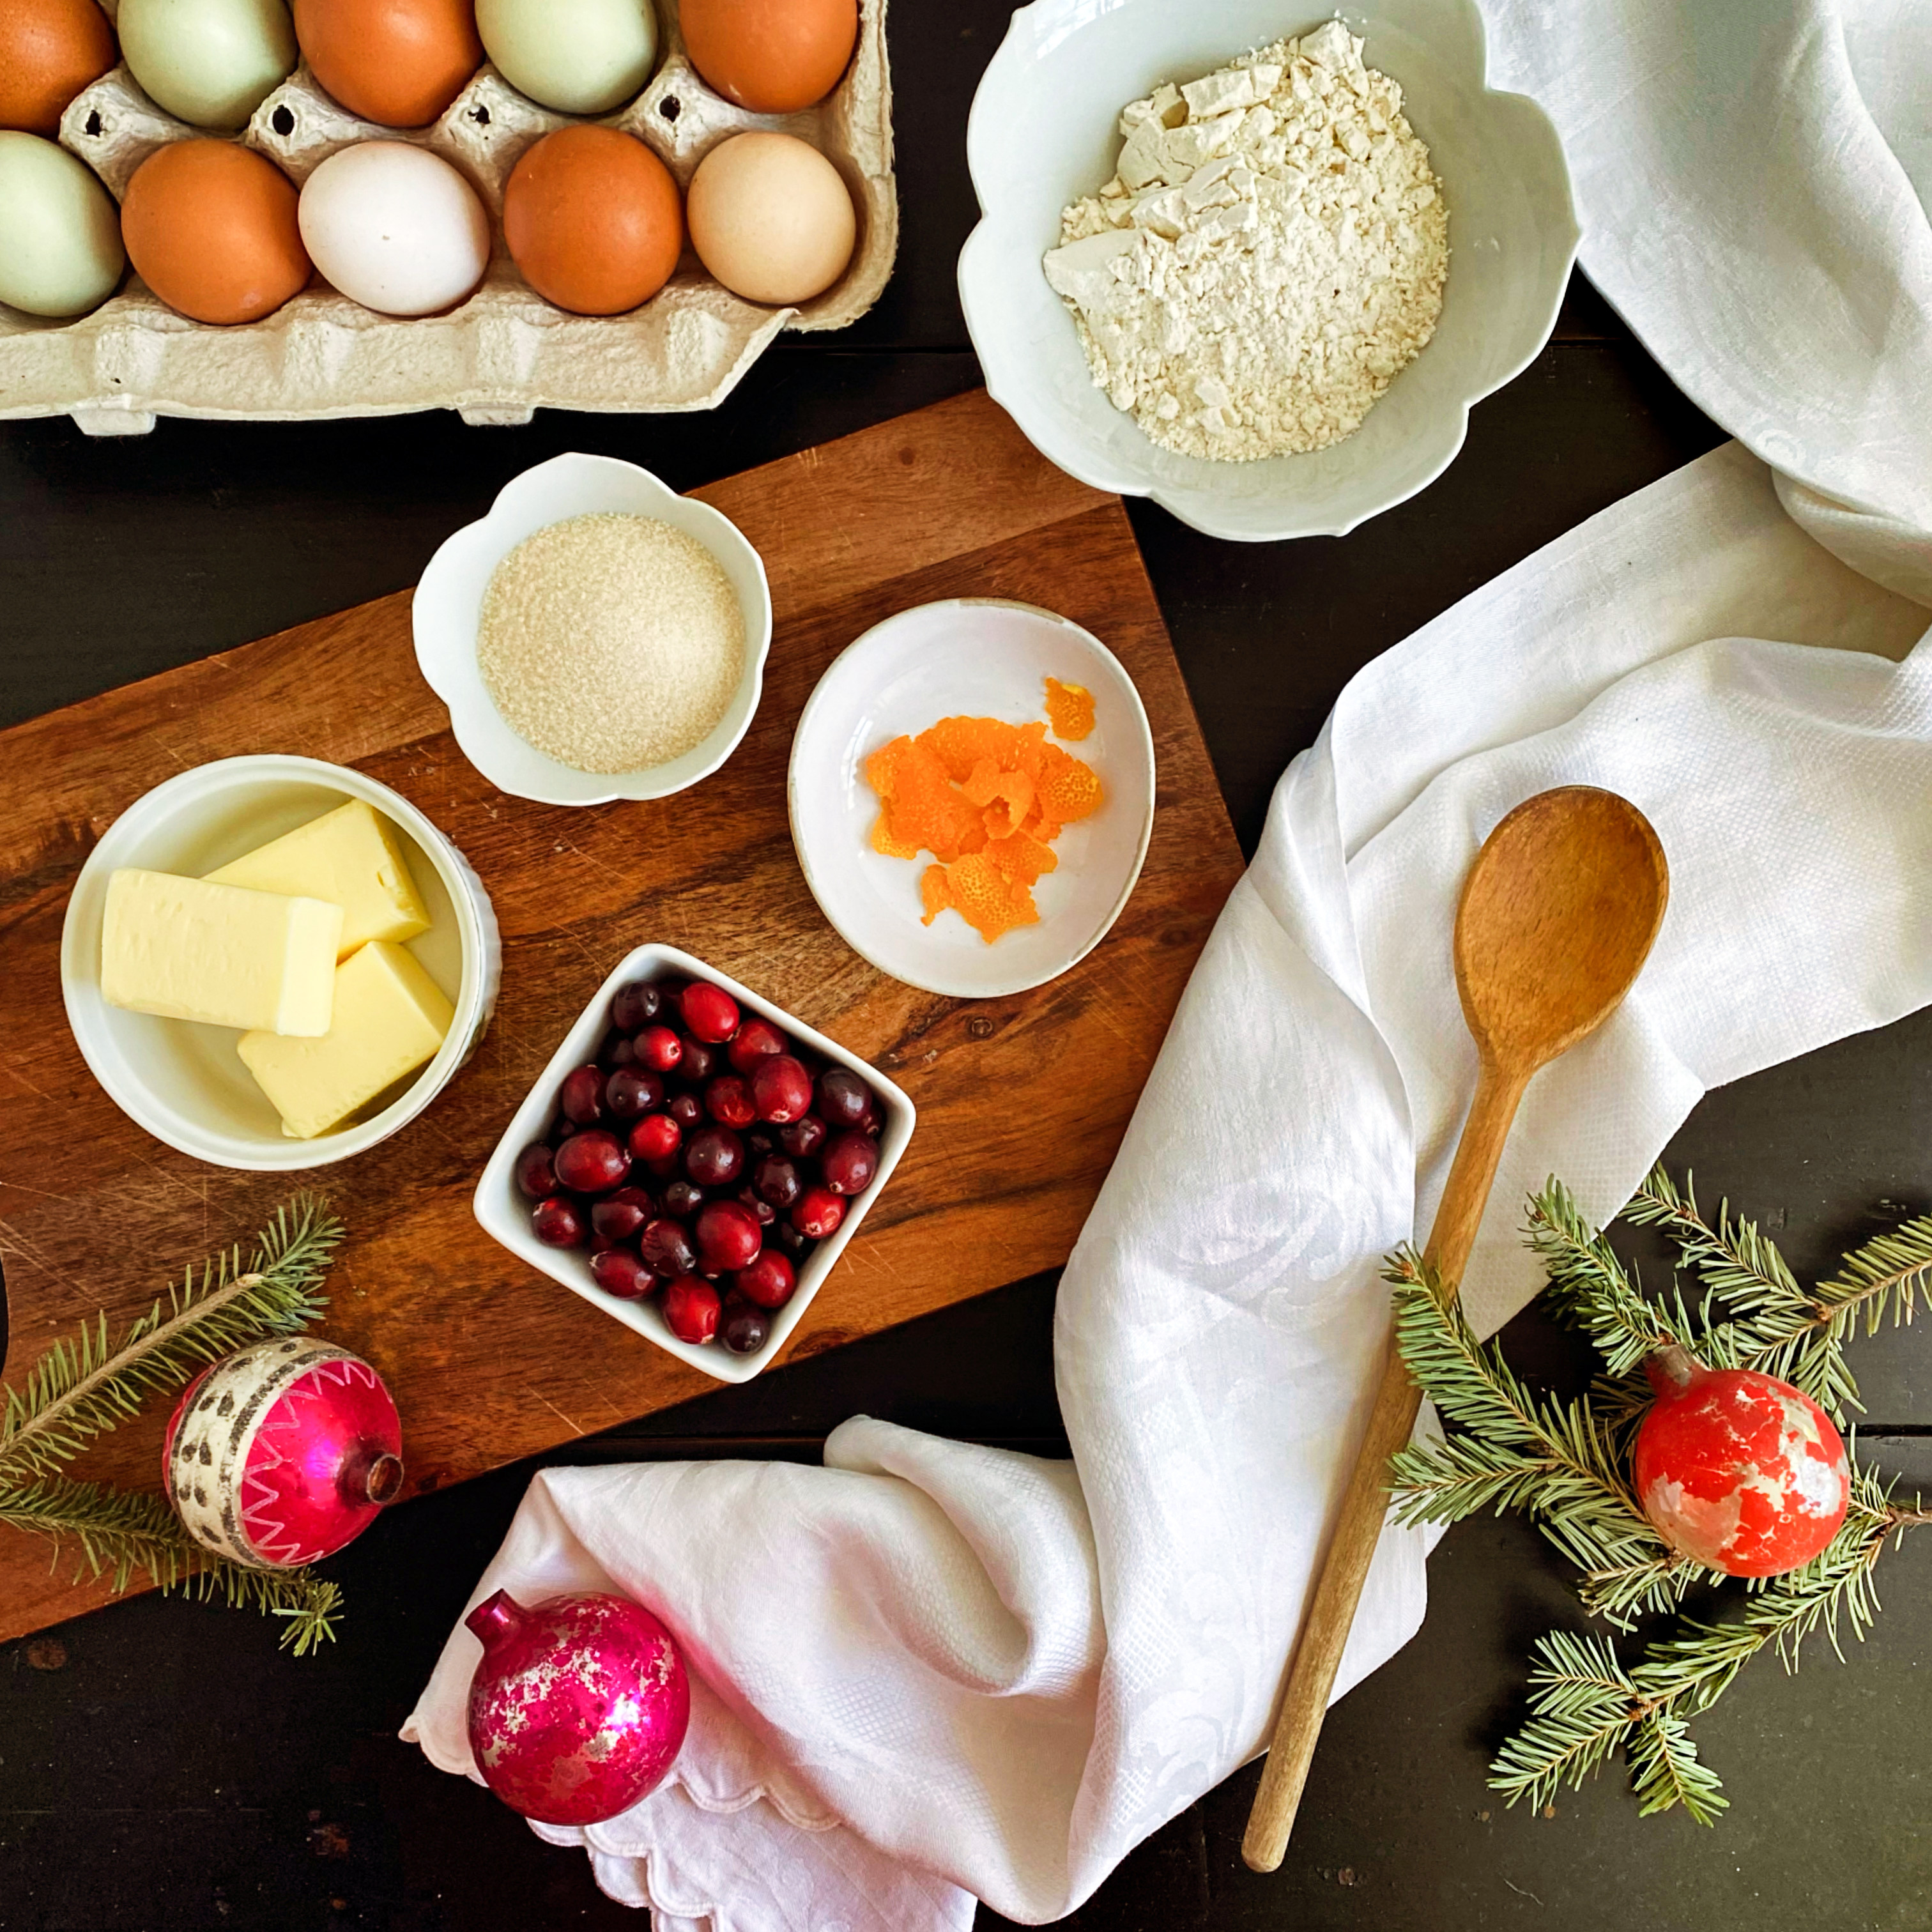
JAPANESE BEEF TERIYAKI I with SAUTED SPINACH & SUSHI RICE
Serves 4
1/3 cup sake or dry sherry
1/3 cup soy sauce
1/4 cup granulated sugar
1 teaspoon grated fresh ginger
1 clove garlic, finely minced
1/4 lemon finely sliced
1 pound lean beef, preferably shell steak or NY strip steak
20 oz of fresh spinach
2 gloves garlic, finely minced
2 tablespoons of water
1 splash of soy sauce
1 pinch of sugar
Sushi rice
Sake
This Beef Teriyaki I recipe originally appeared in the 1971 edition of the New York Times International Cook Book. The spinach and rice component was my own addition, brought together to make a traditional Japanese meal. If you would just like to prepare the teriyaki beef portion, all the ingredients for that part of the recipe are in bold type.
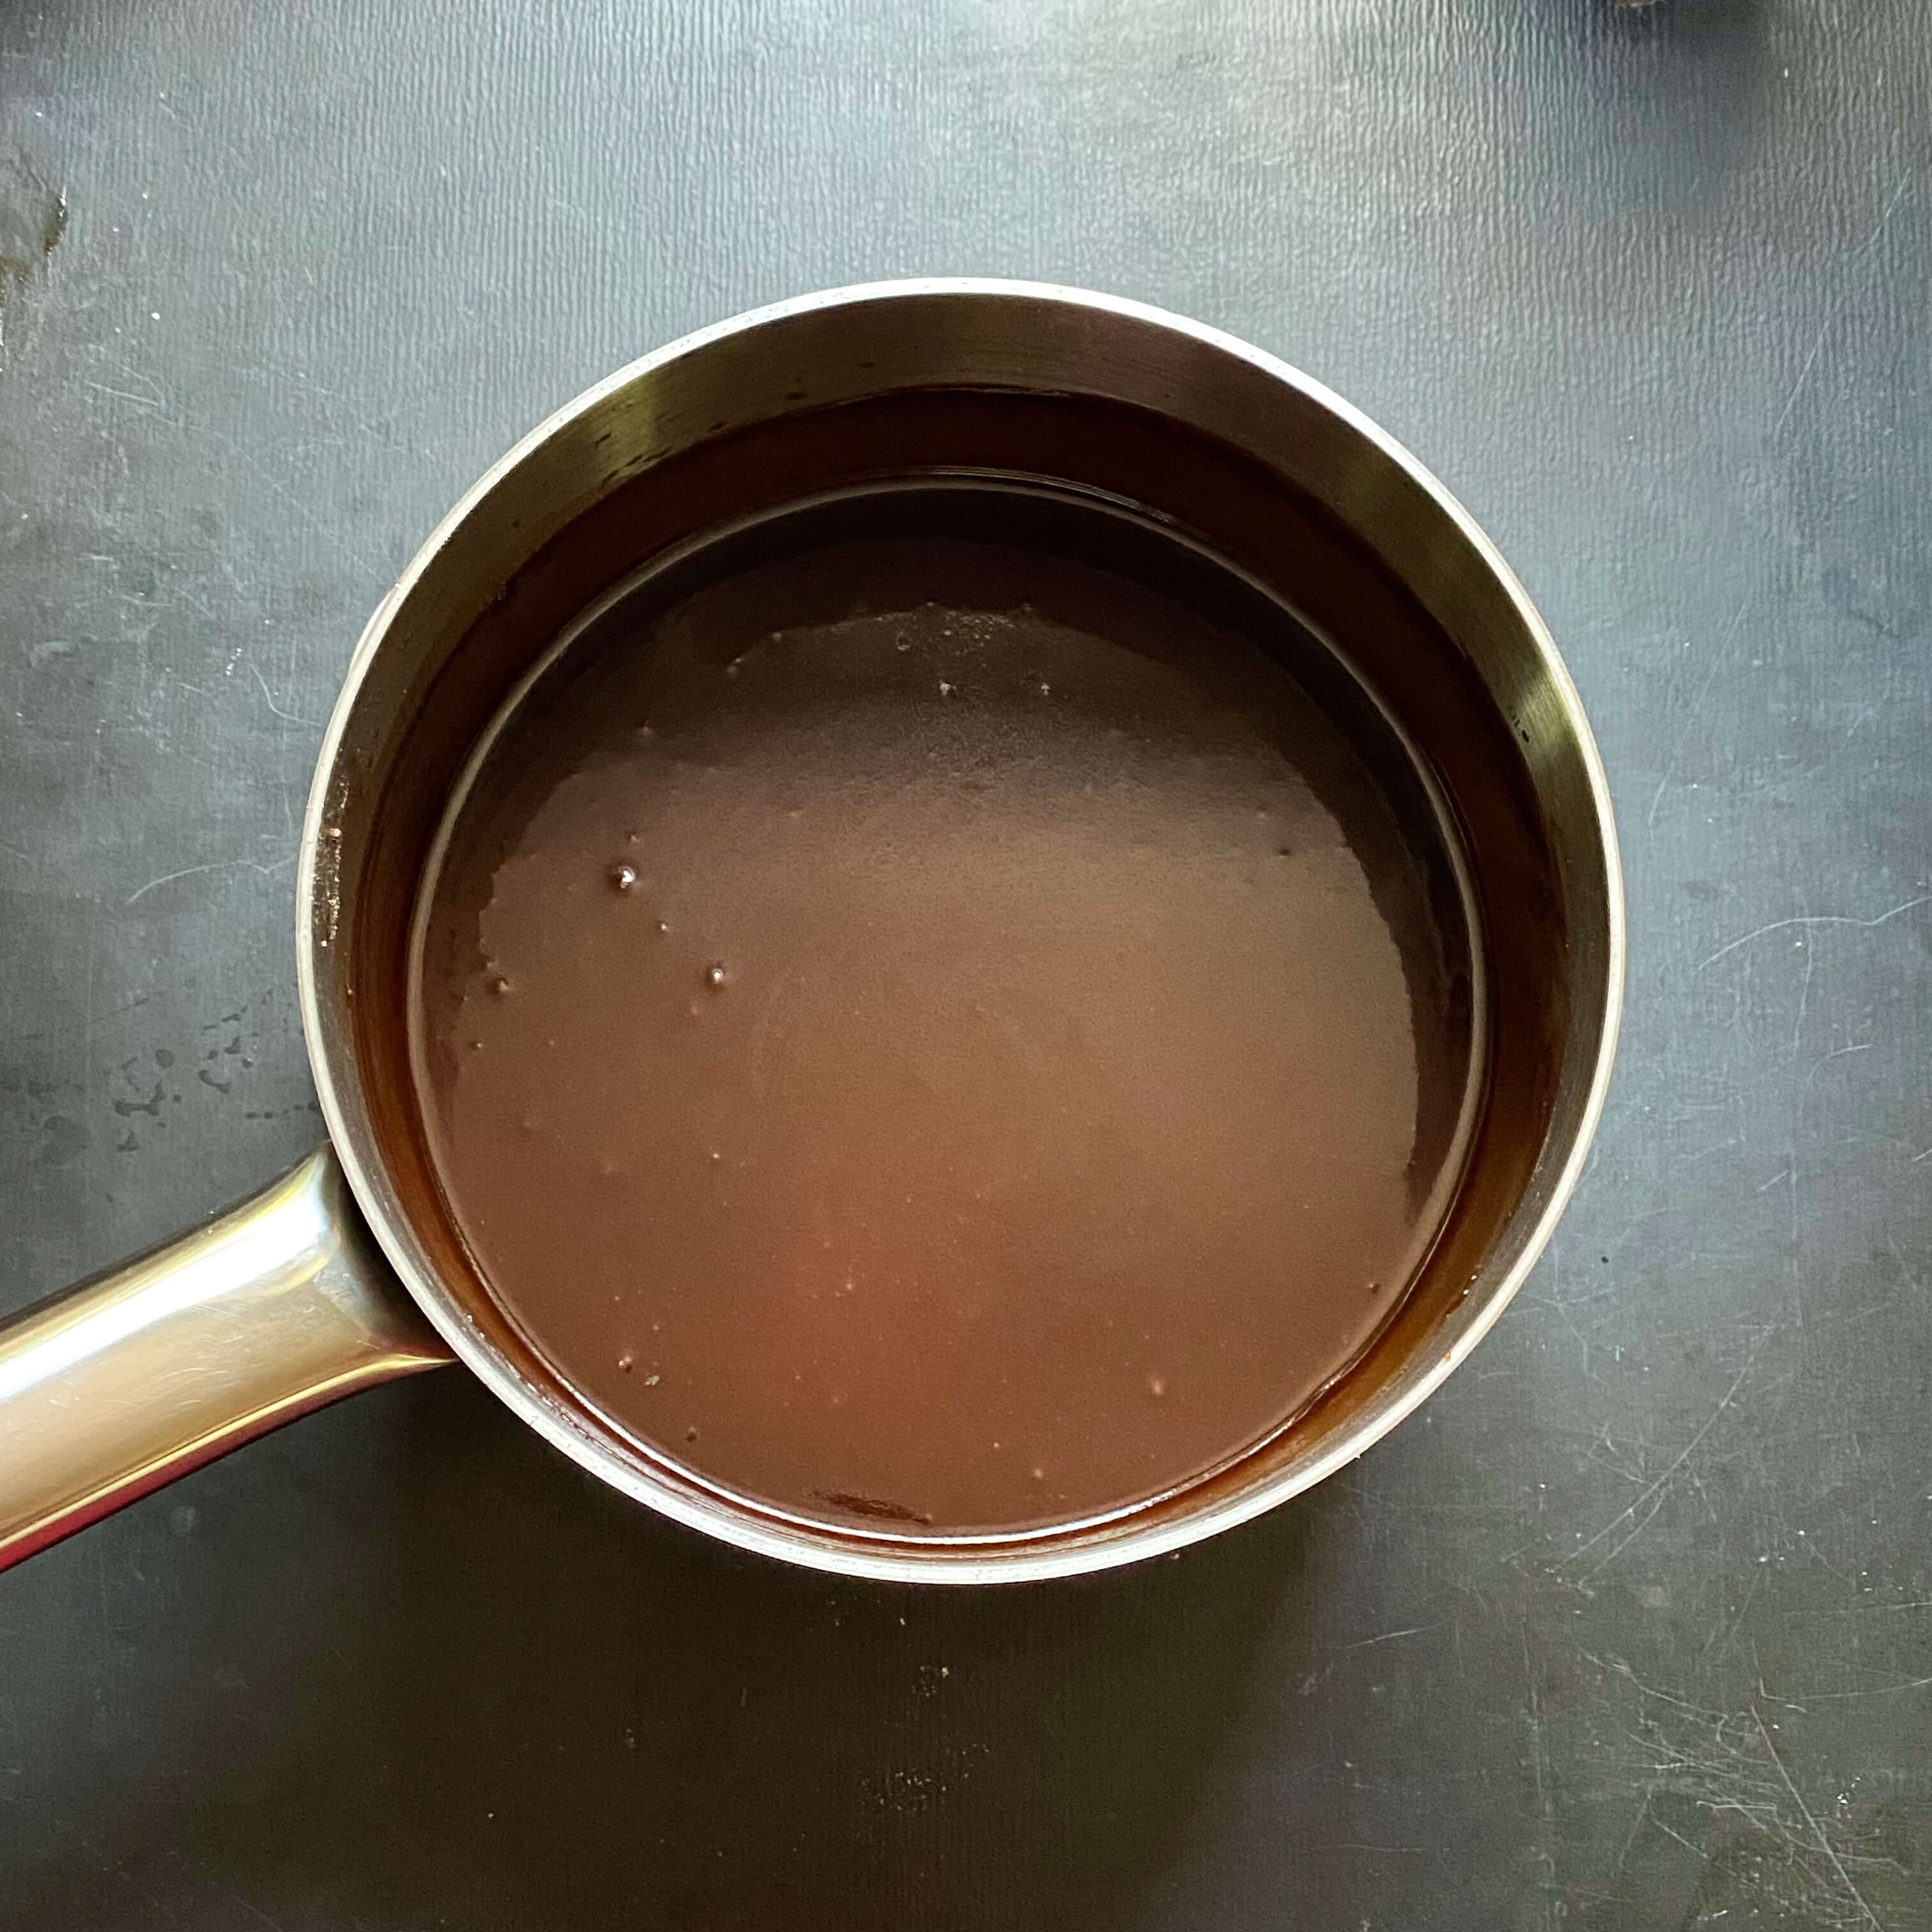
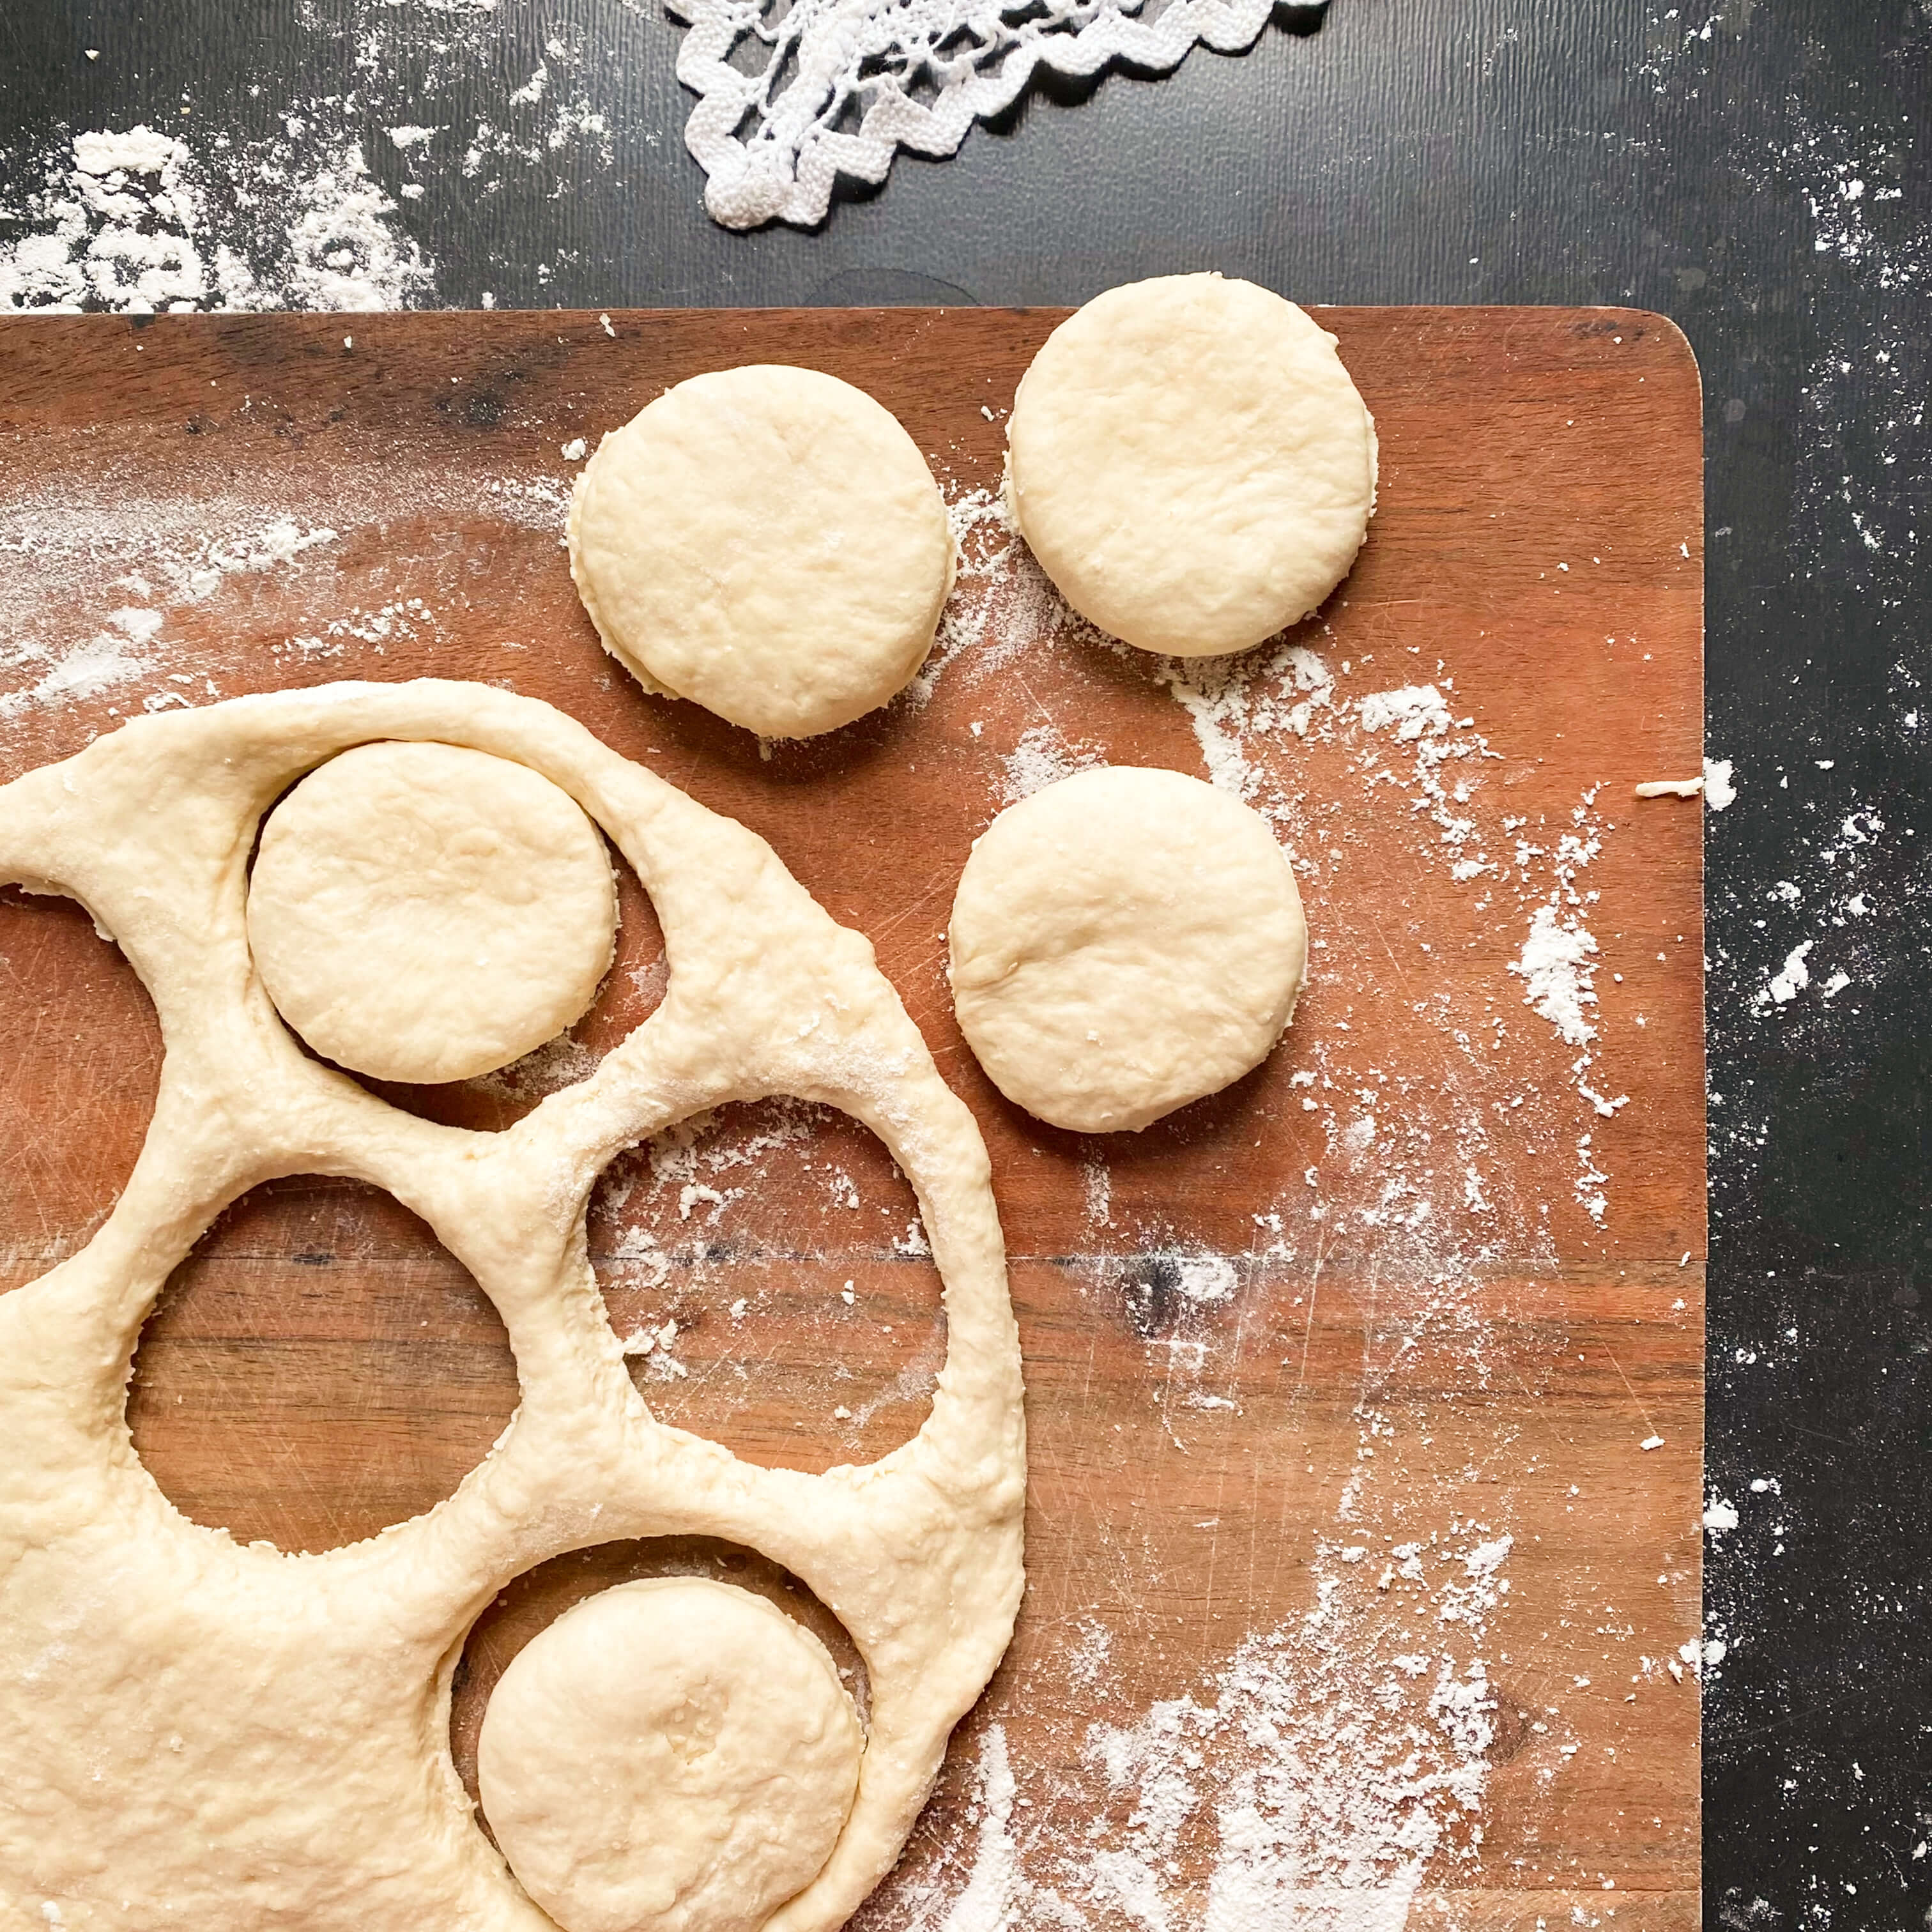
Combine the sake, soy sauce, sugar, ginger, garlic and lemon, in a medium bowl and stir until sugar dissolves.

Cut the meat into thin strips and add to the marinade.
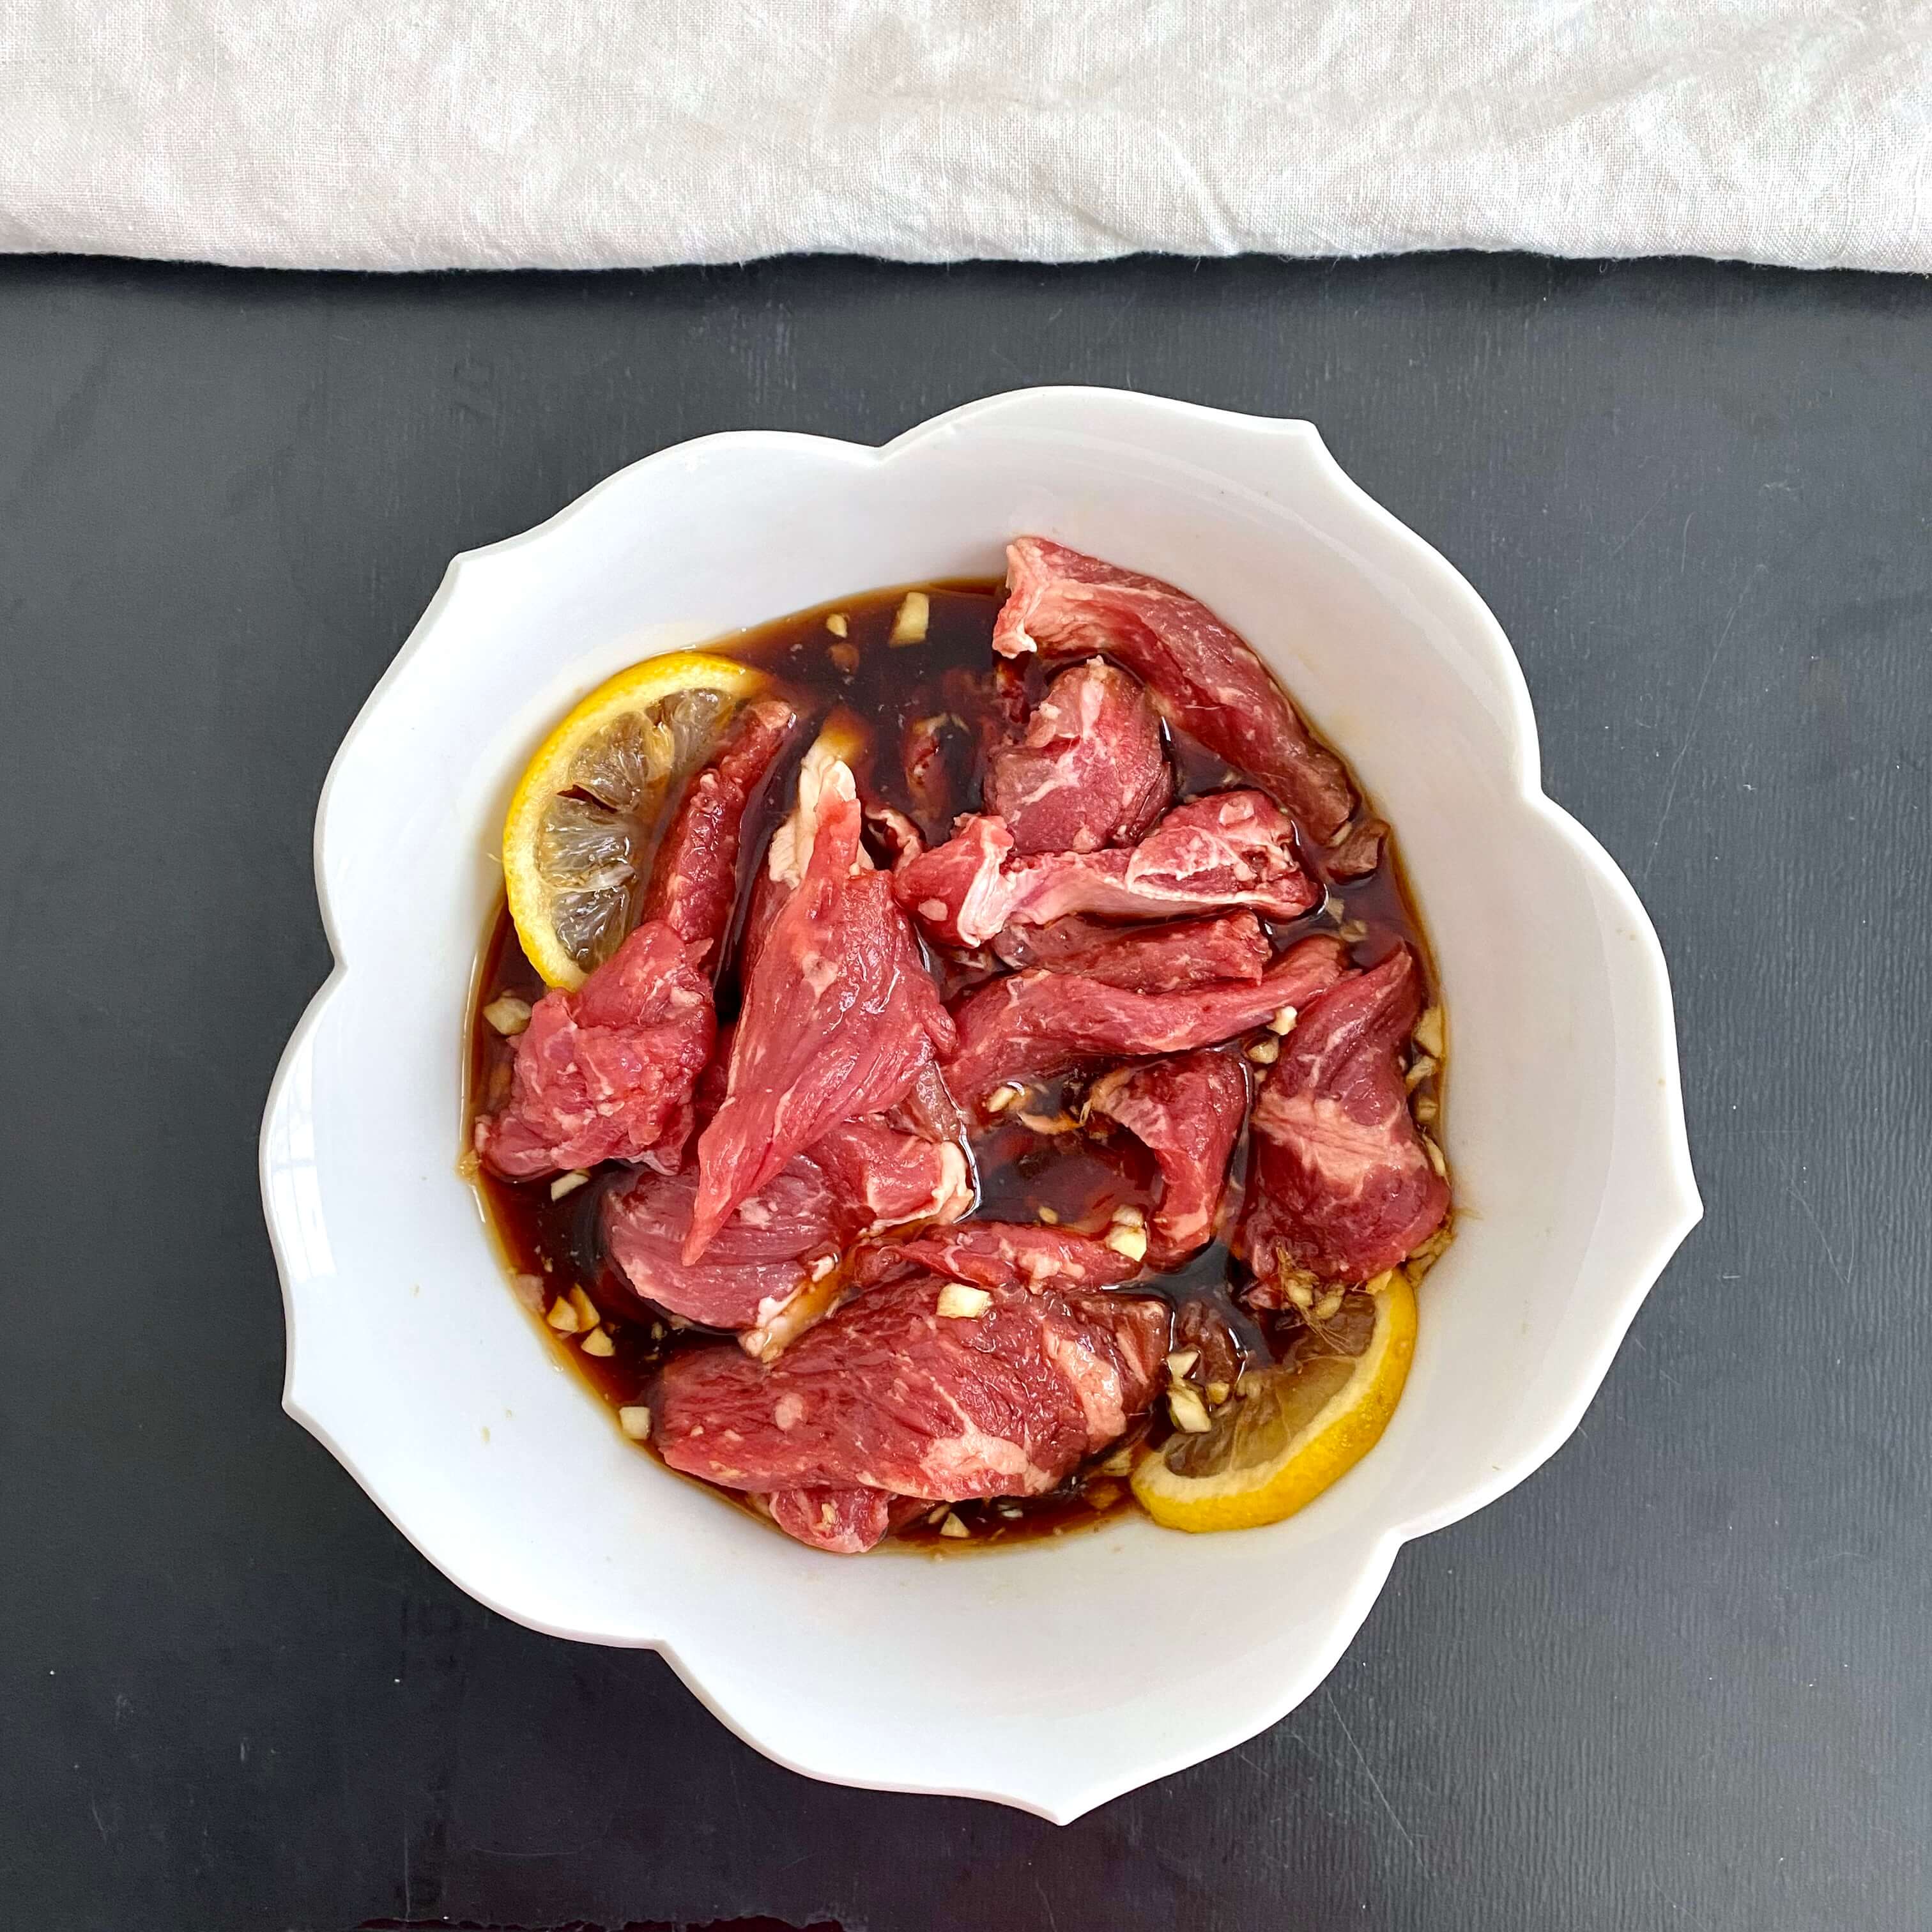
Marinate for 15 minutes or up to several hours.*Note: If you are marinating the beef for longer than 15 minutes, cover the bowl with plastic wrap and put it into the fridge. About 30 minutes before cooking, remove the bowl from the fridge to let the beef warm up to room temperature.
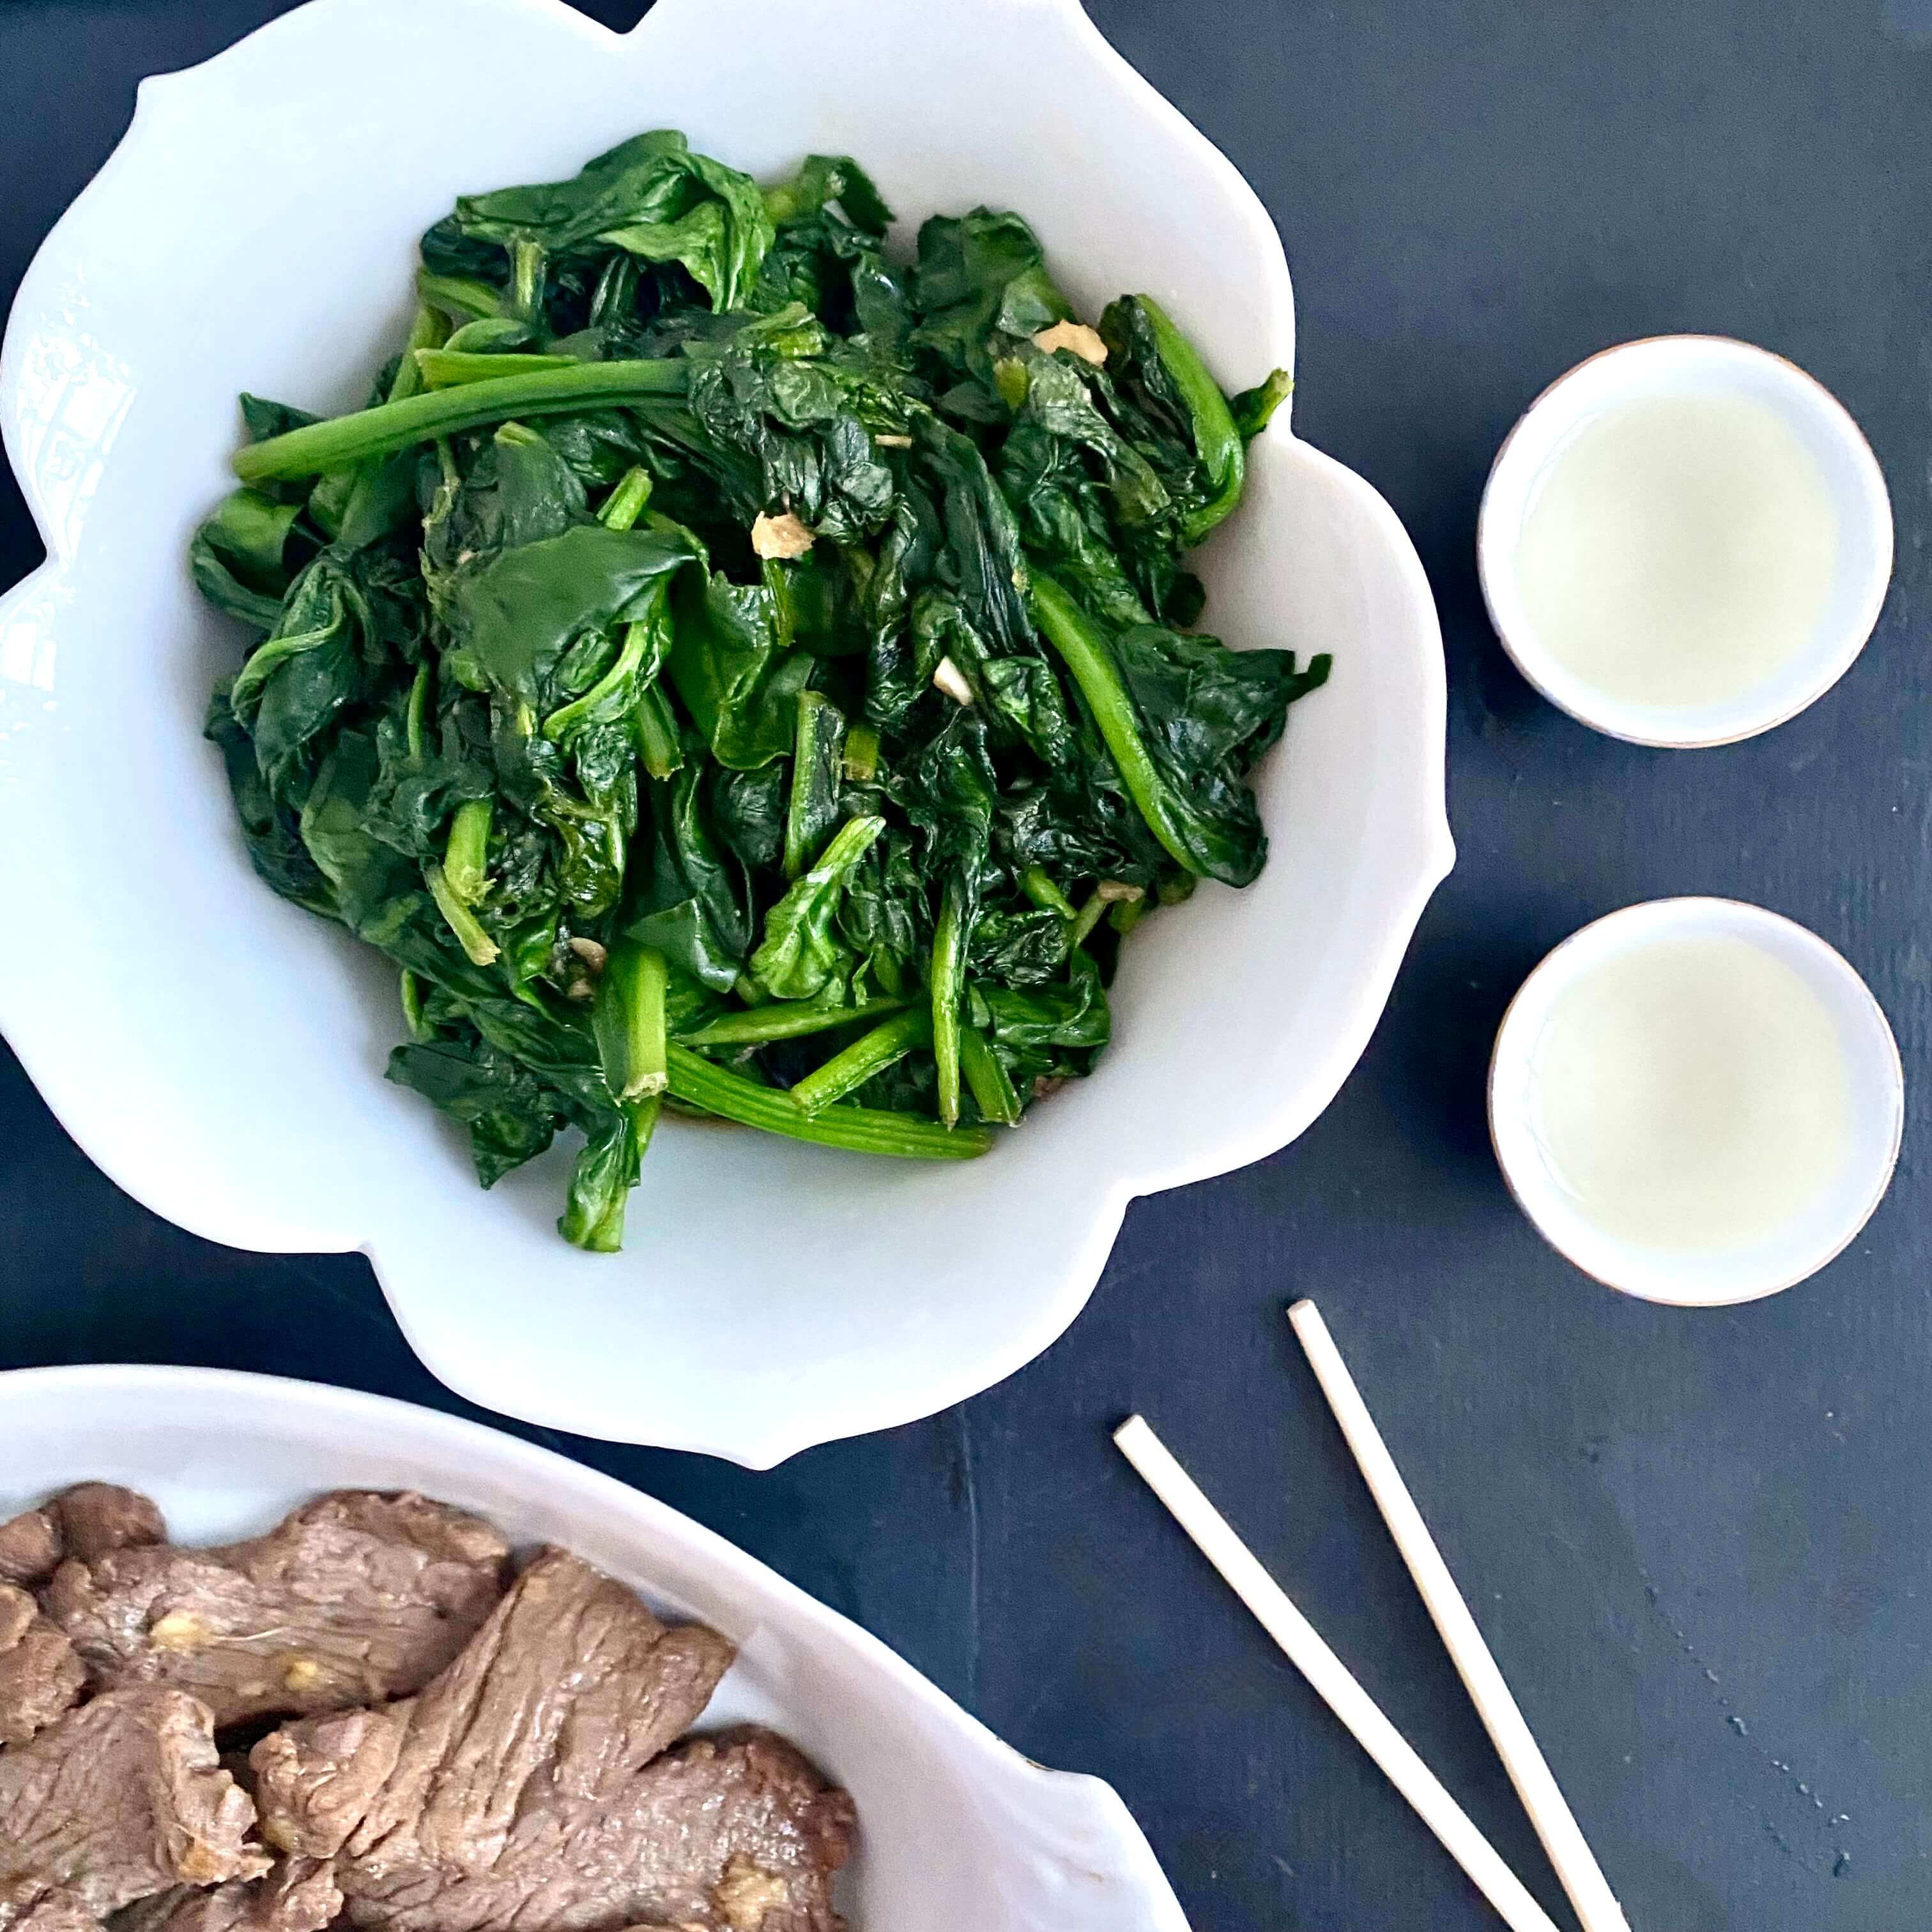
While the beef is marinating, make the rice according to package directions. Set aside and keep warm. About five minutes before you are going to cook the beef, combine the spinach, two cloves of minced garlic, and two tablespoons of water in a large saute pan over medium heat. When the water evaporates, add a splash of soy sauce and a pinch of sugar and toss the spinach. Once the spinach has just wilted, remove the pan from the heat, cover and keep warm.
Remove the beef from the marinade. In a large, hot saute pan over high heat, add the beef in a single layer and cook in a for about 3 minutes per side.
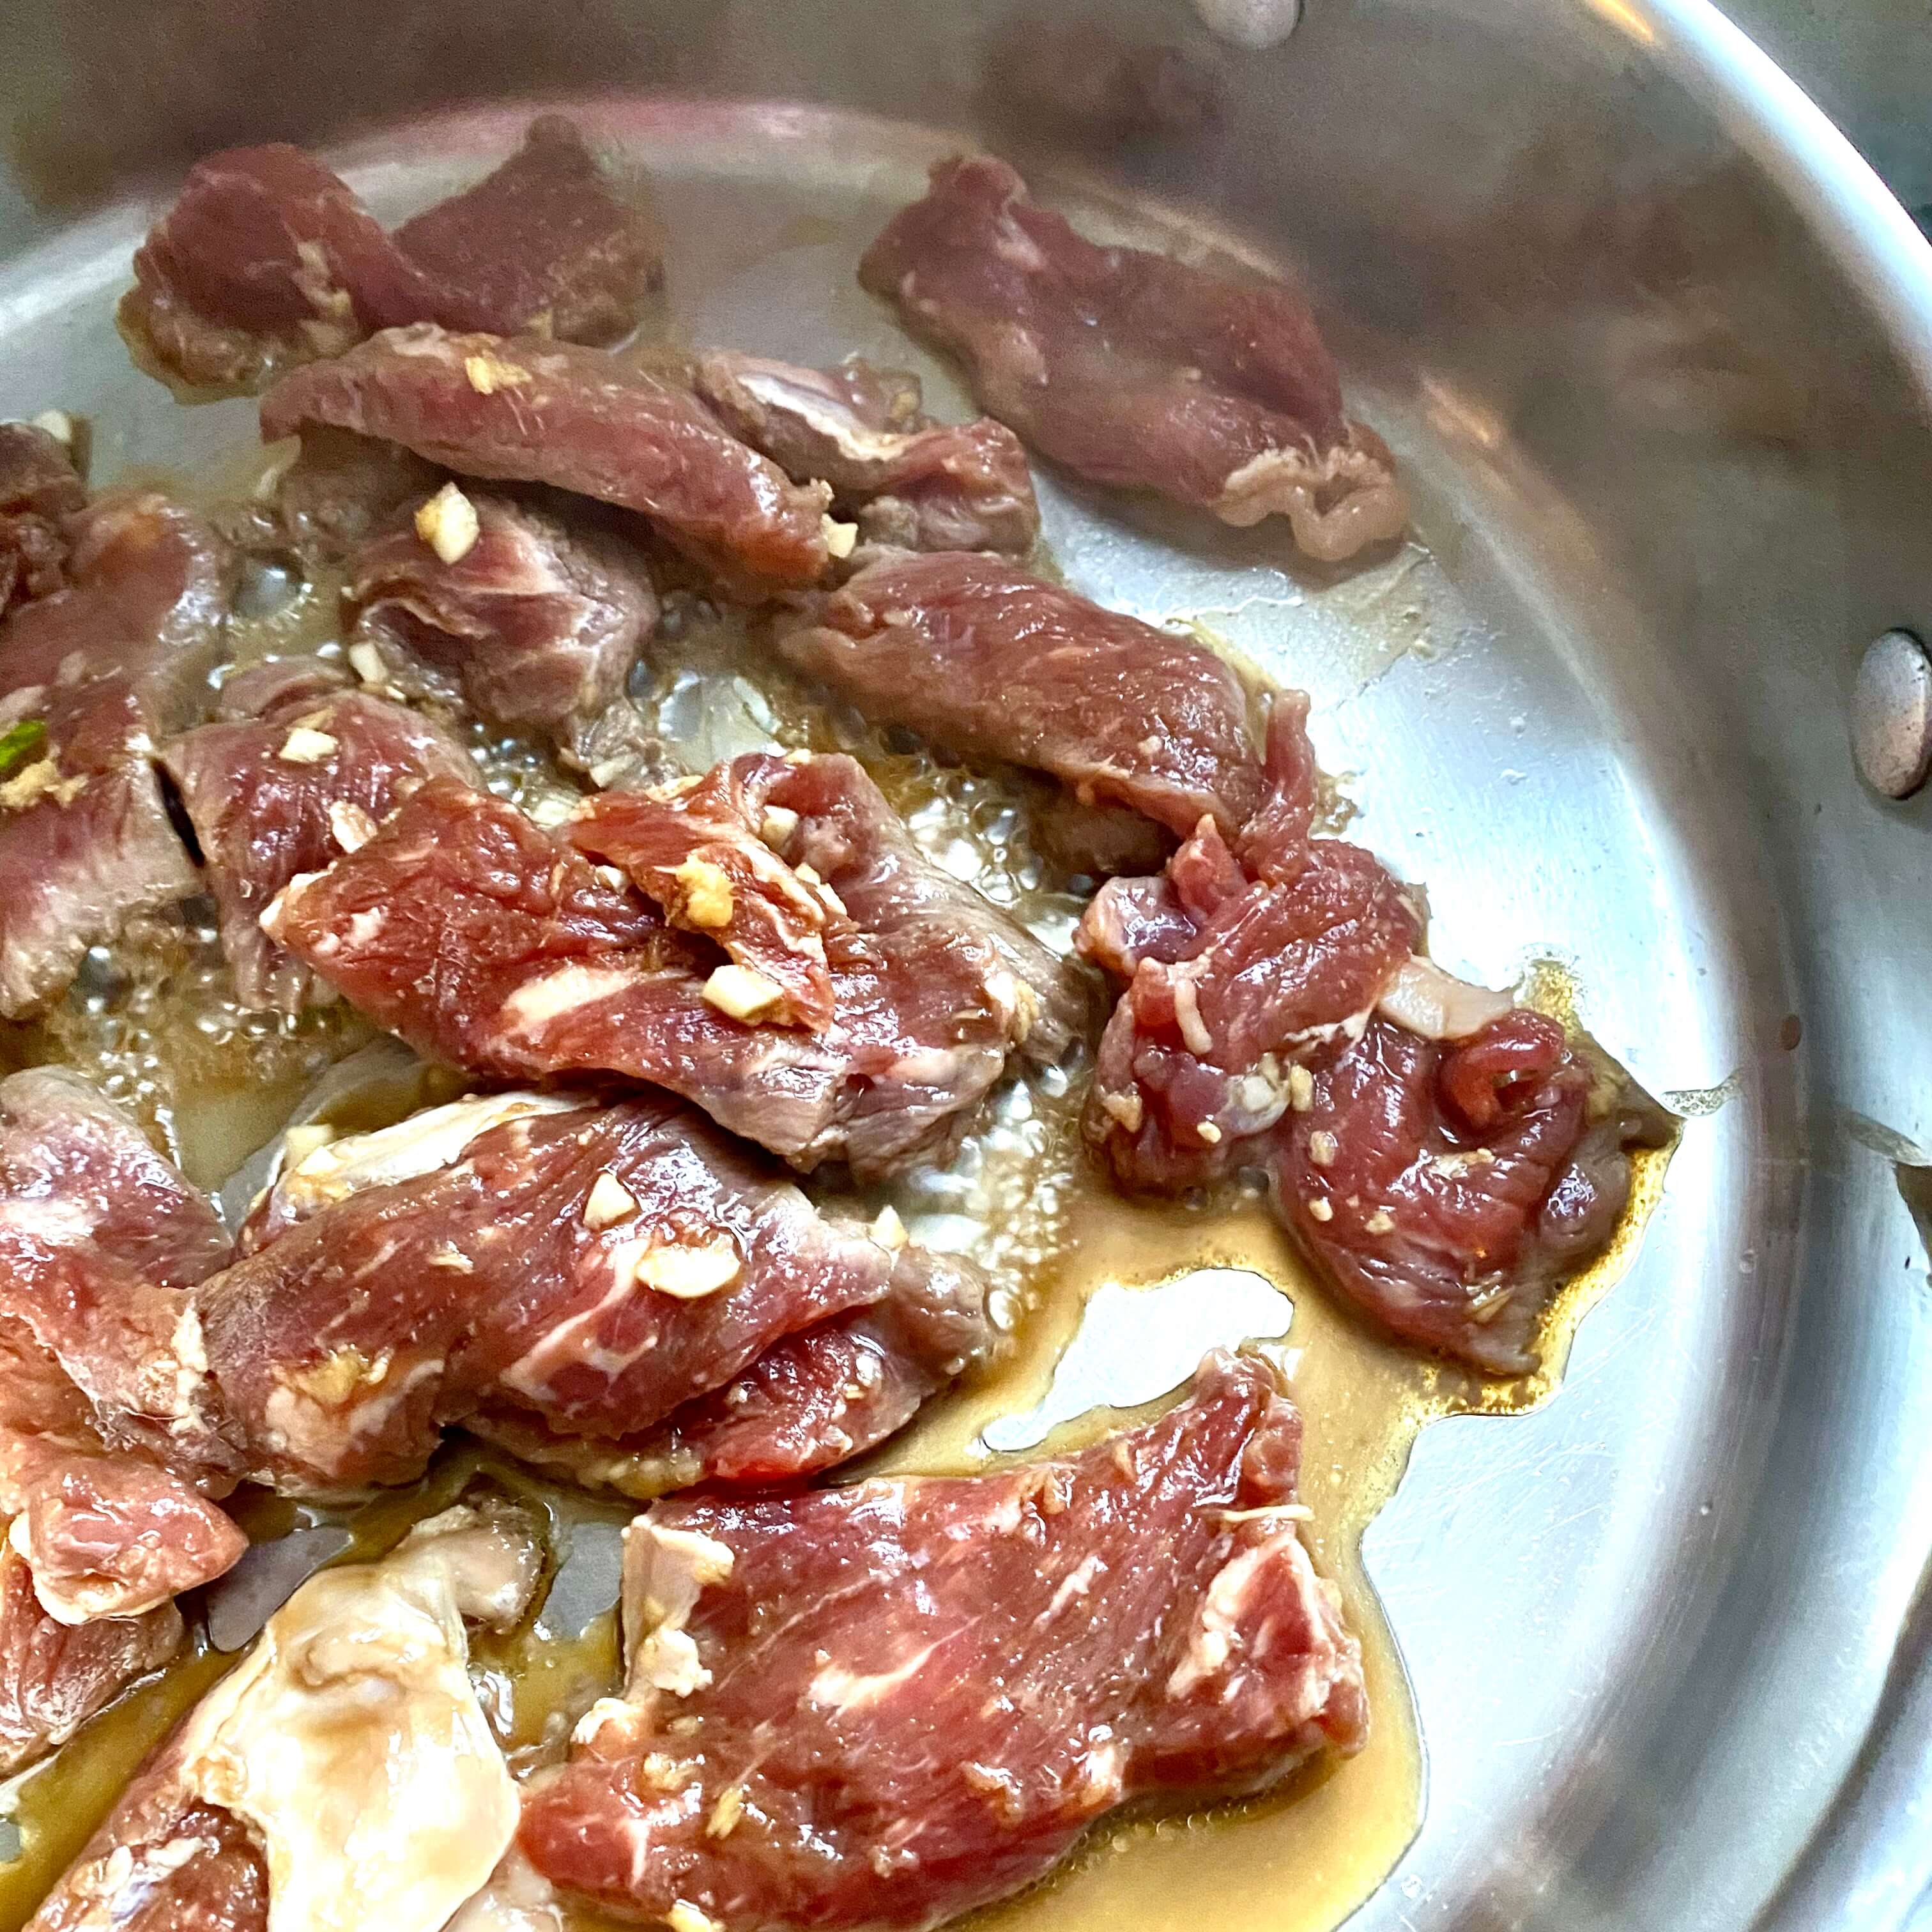
Only flip the beef once during the cooking process. Ideally, the beef should be slightly rare in the center. Remove from heat…
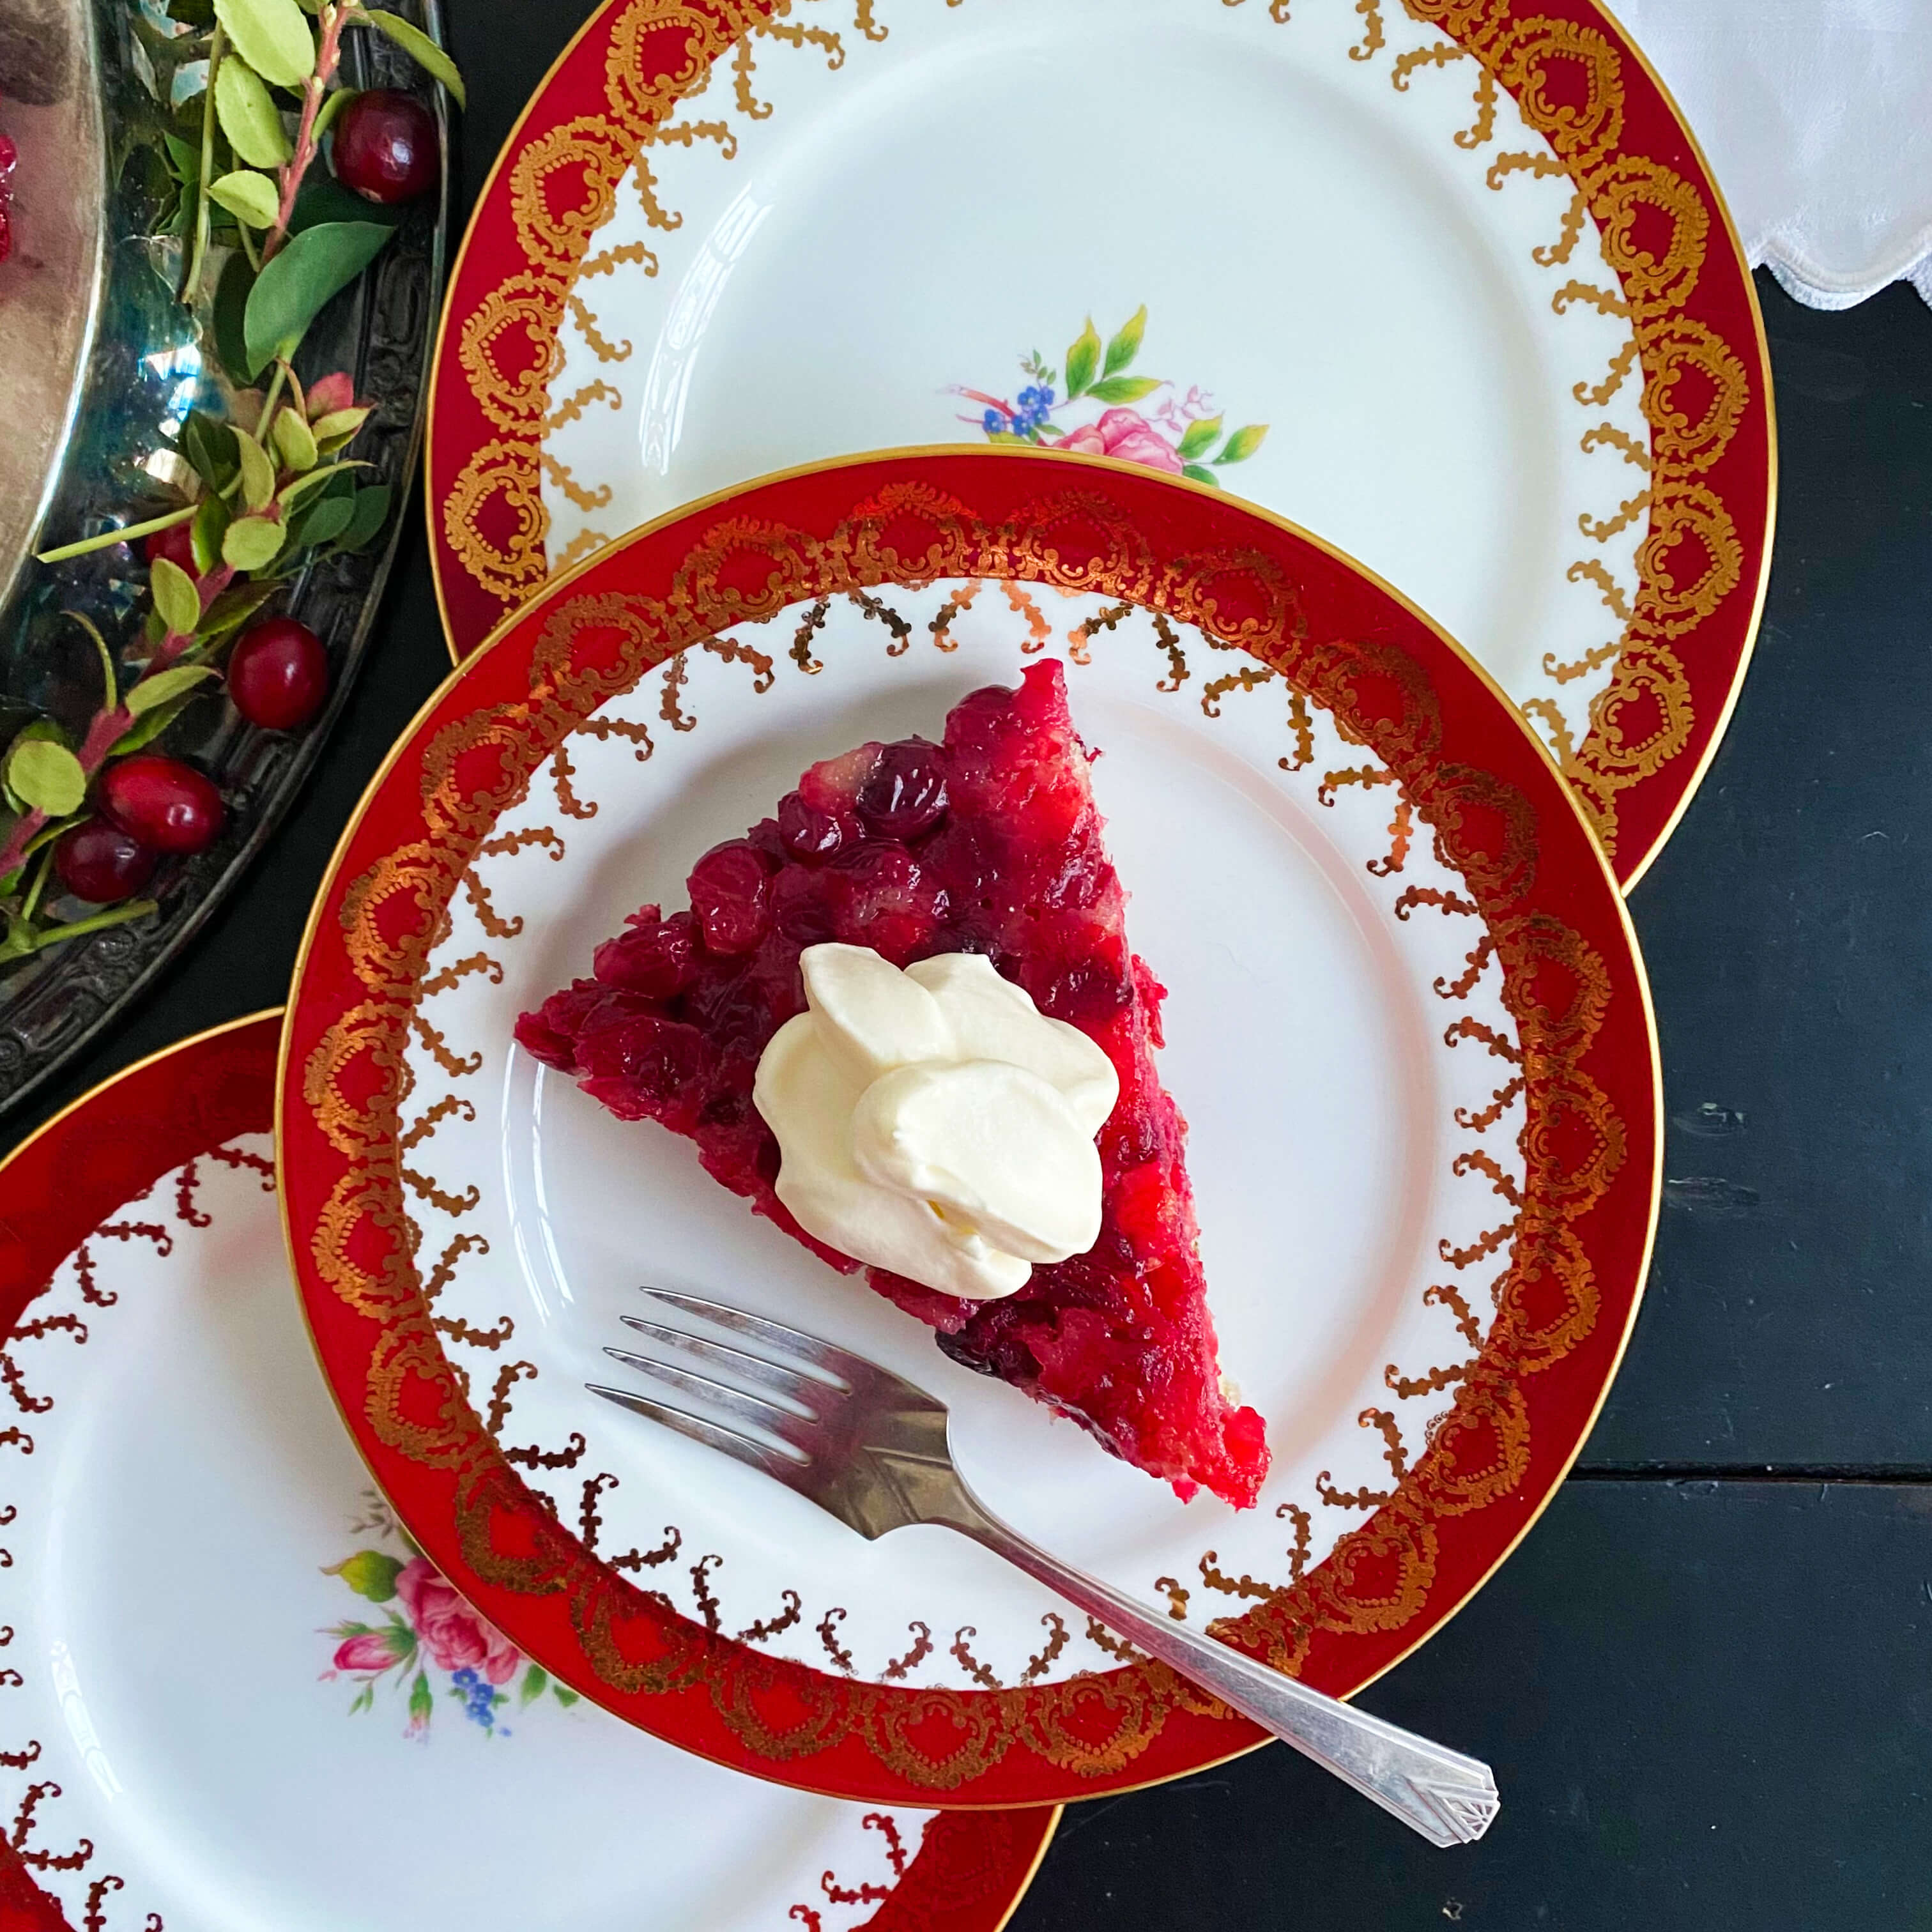
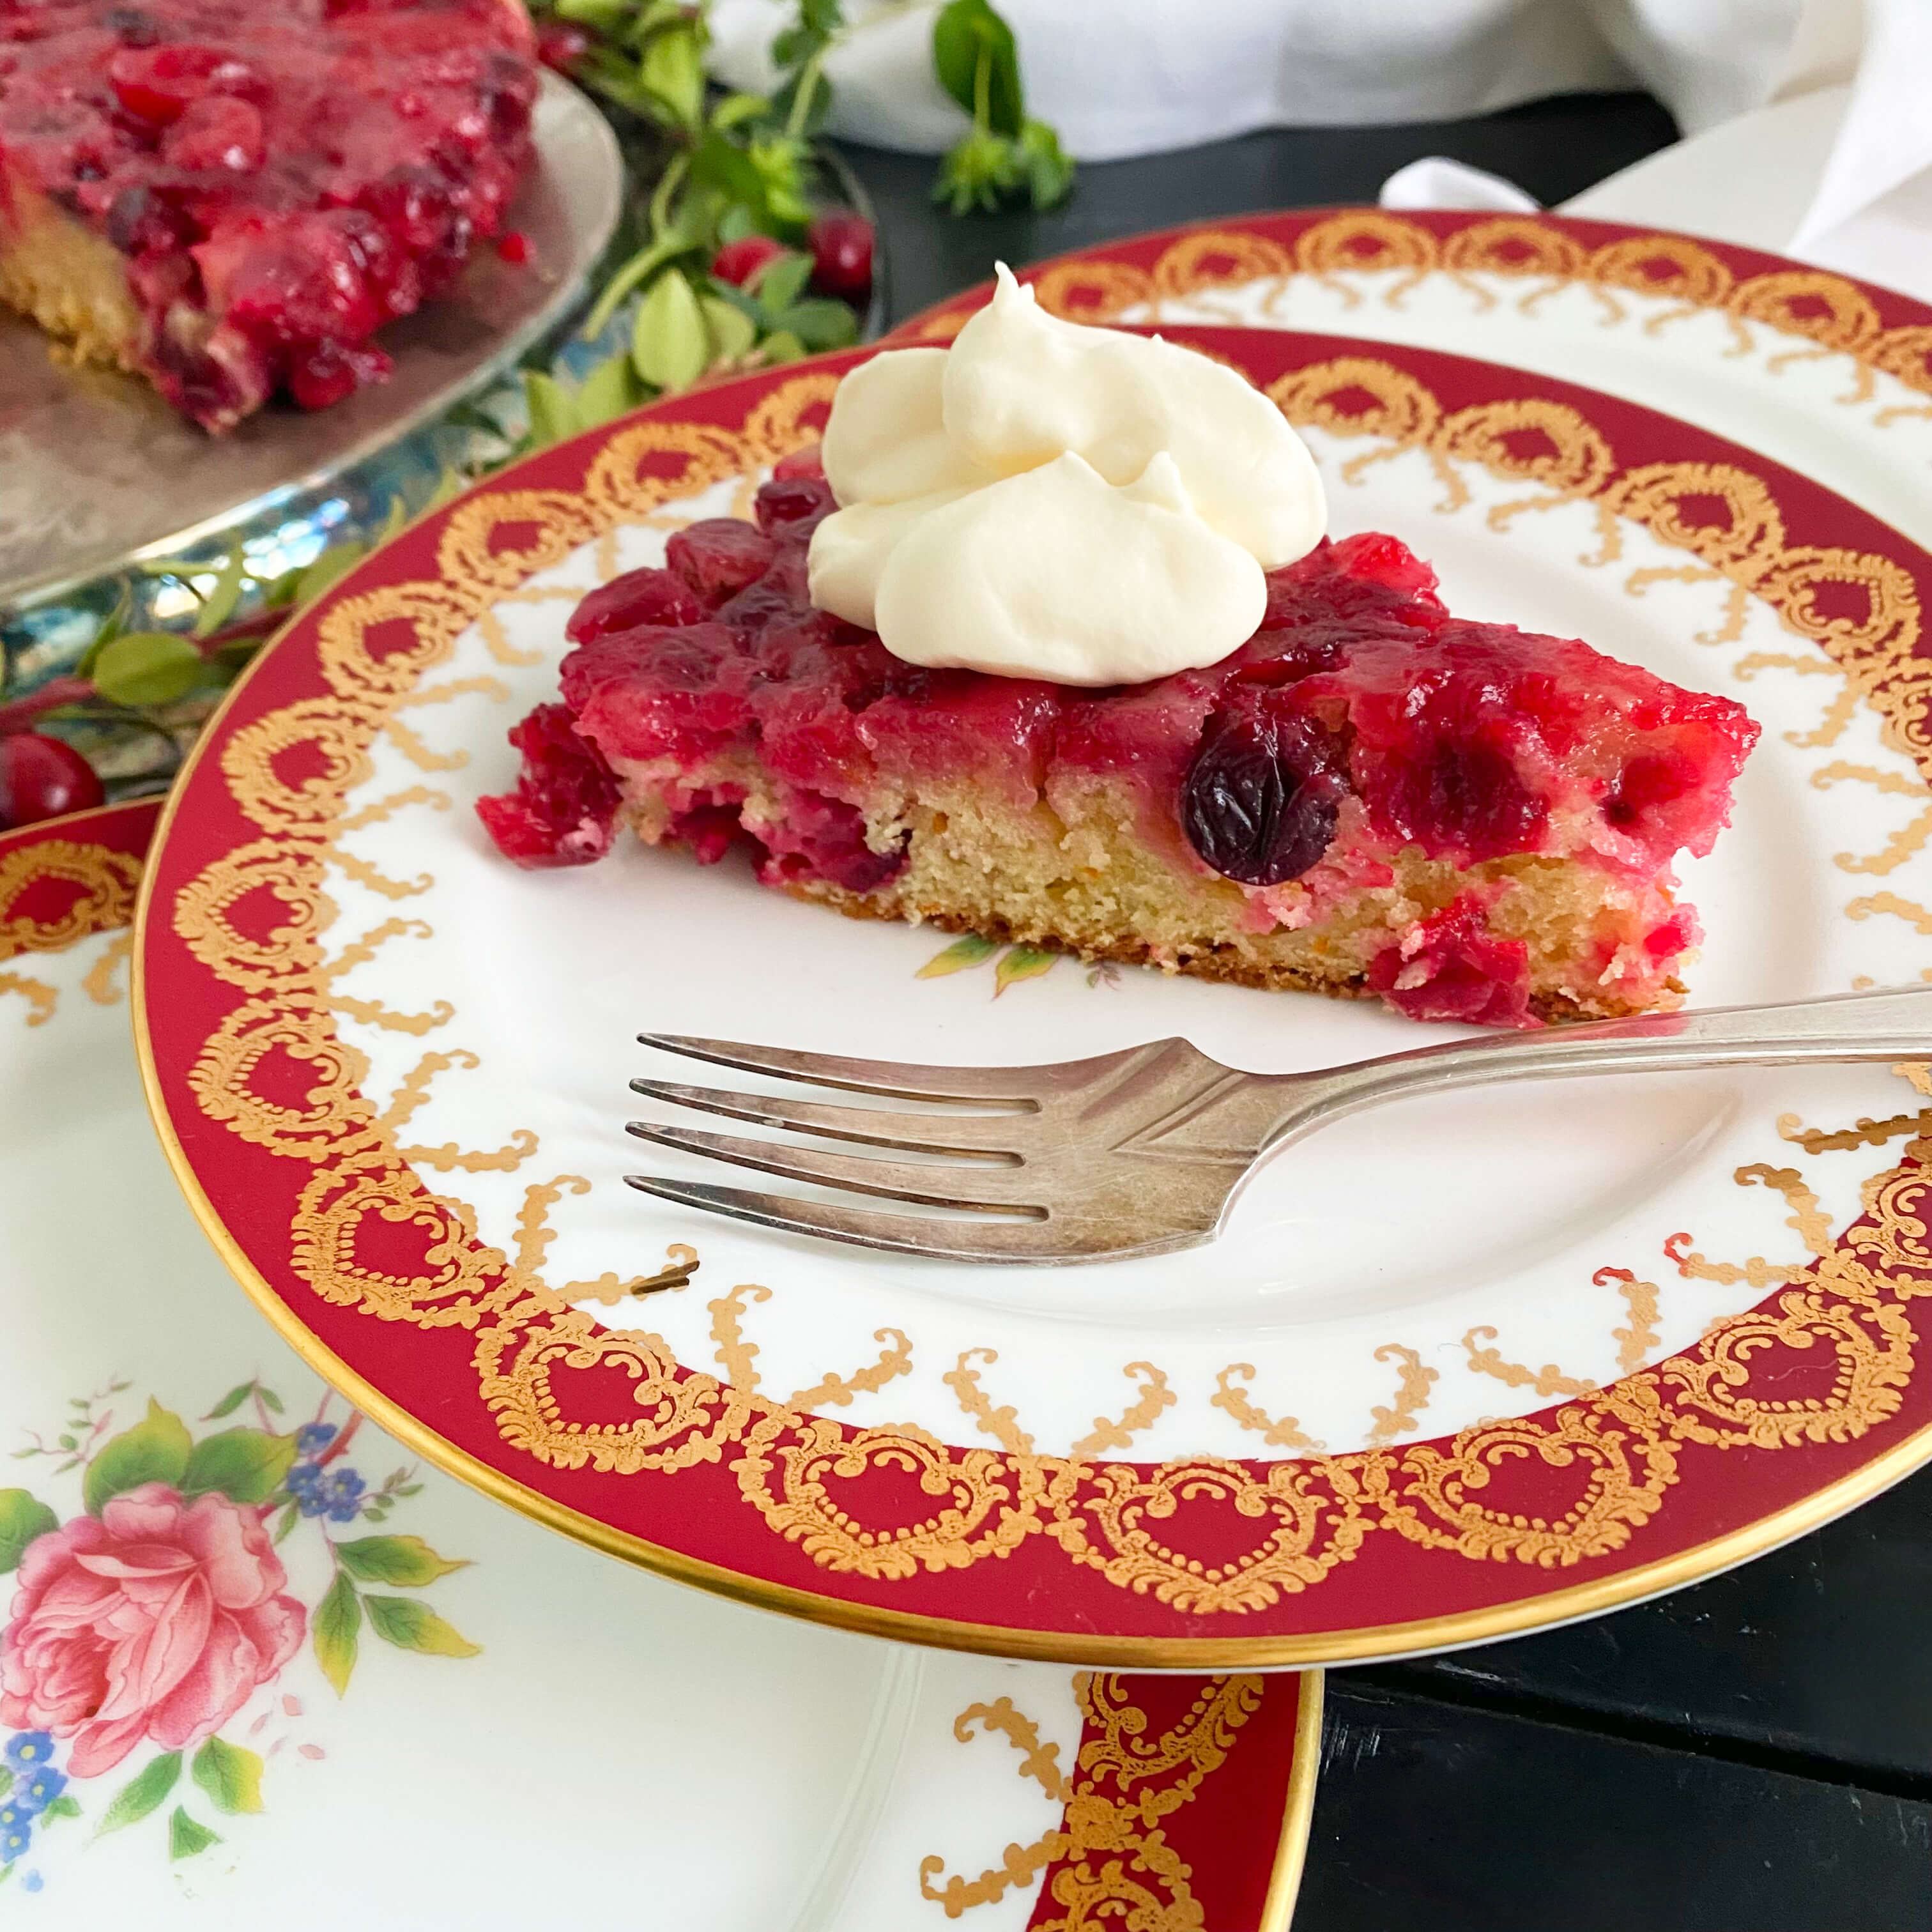
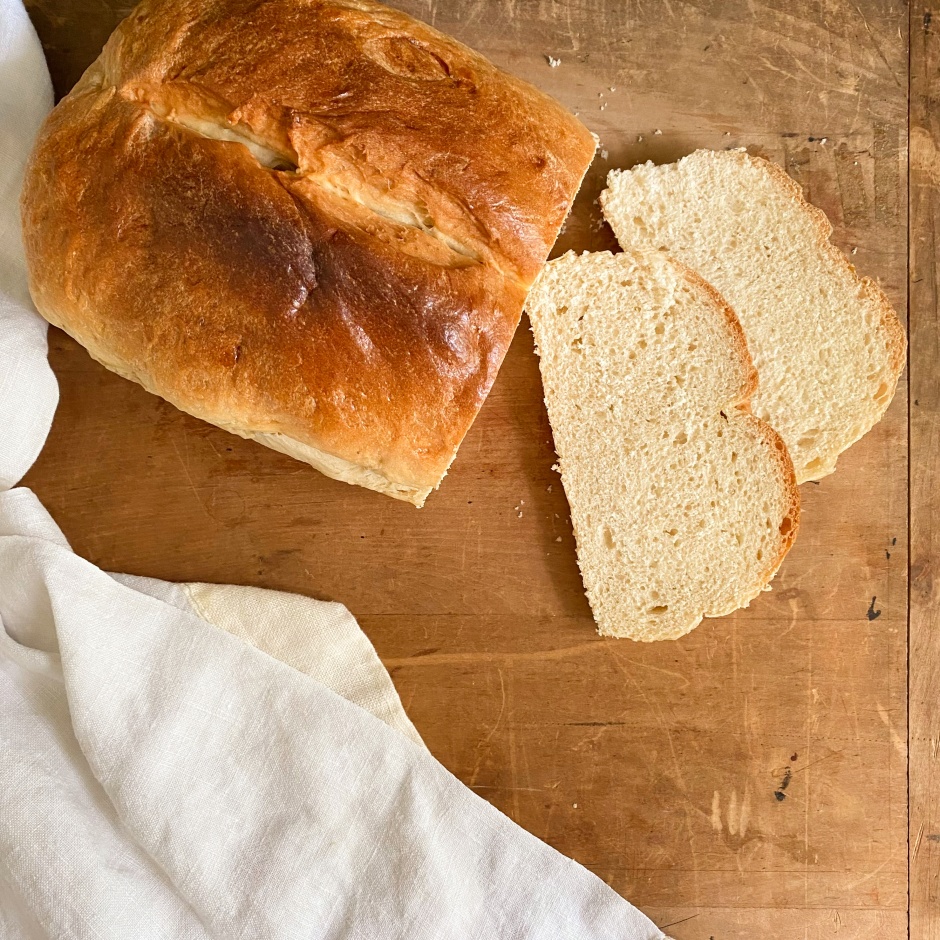
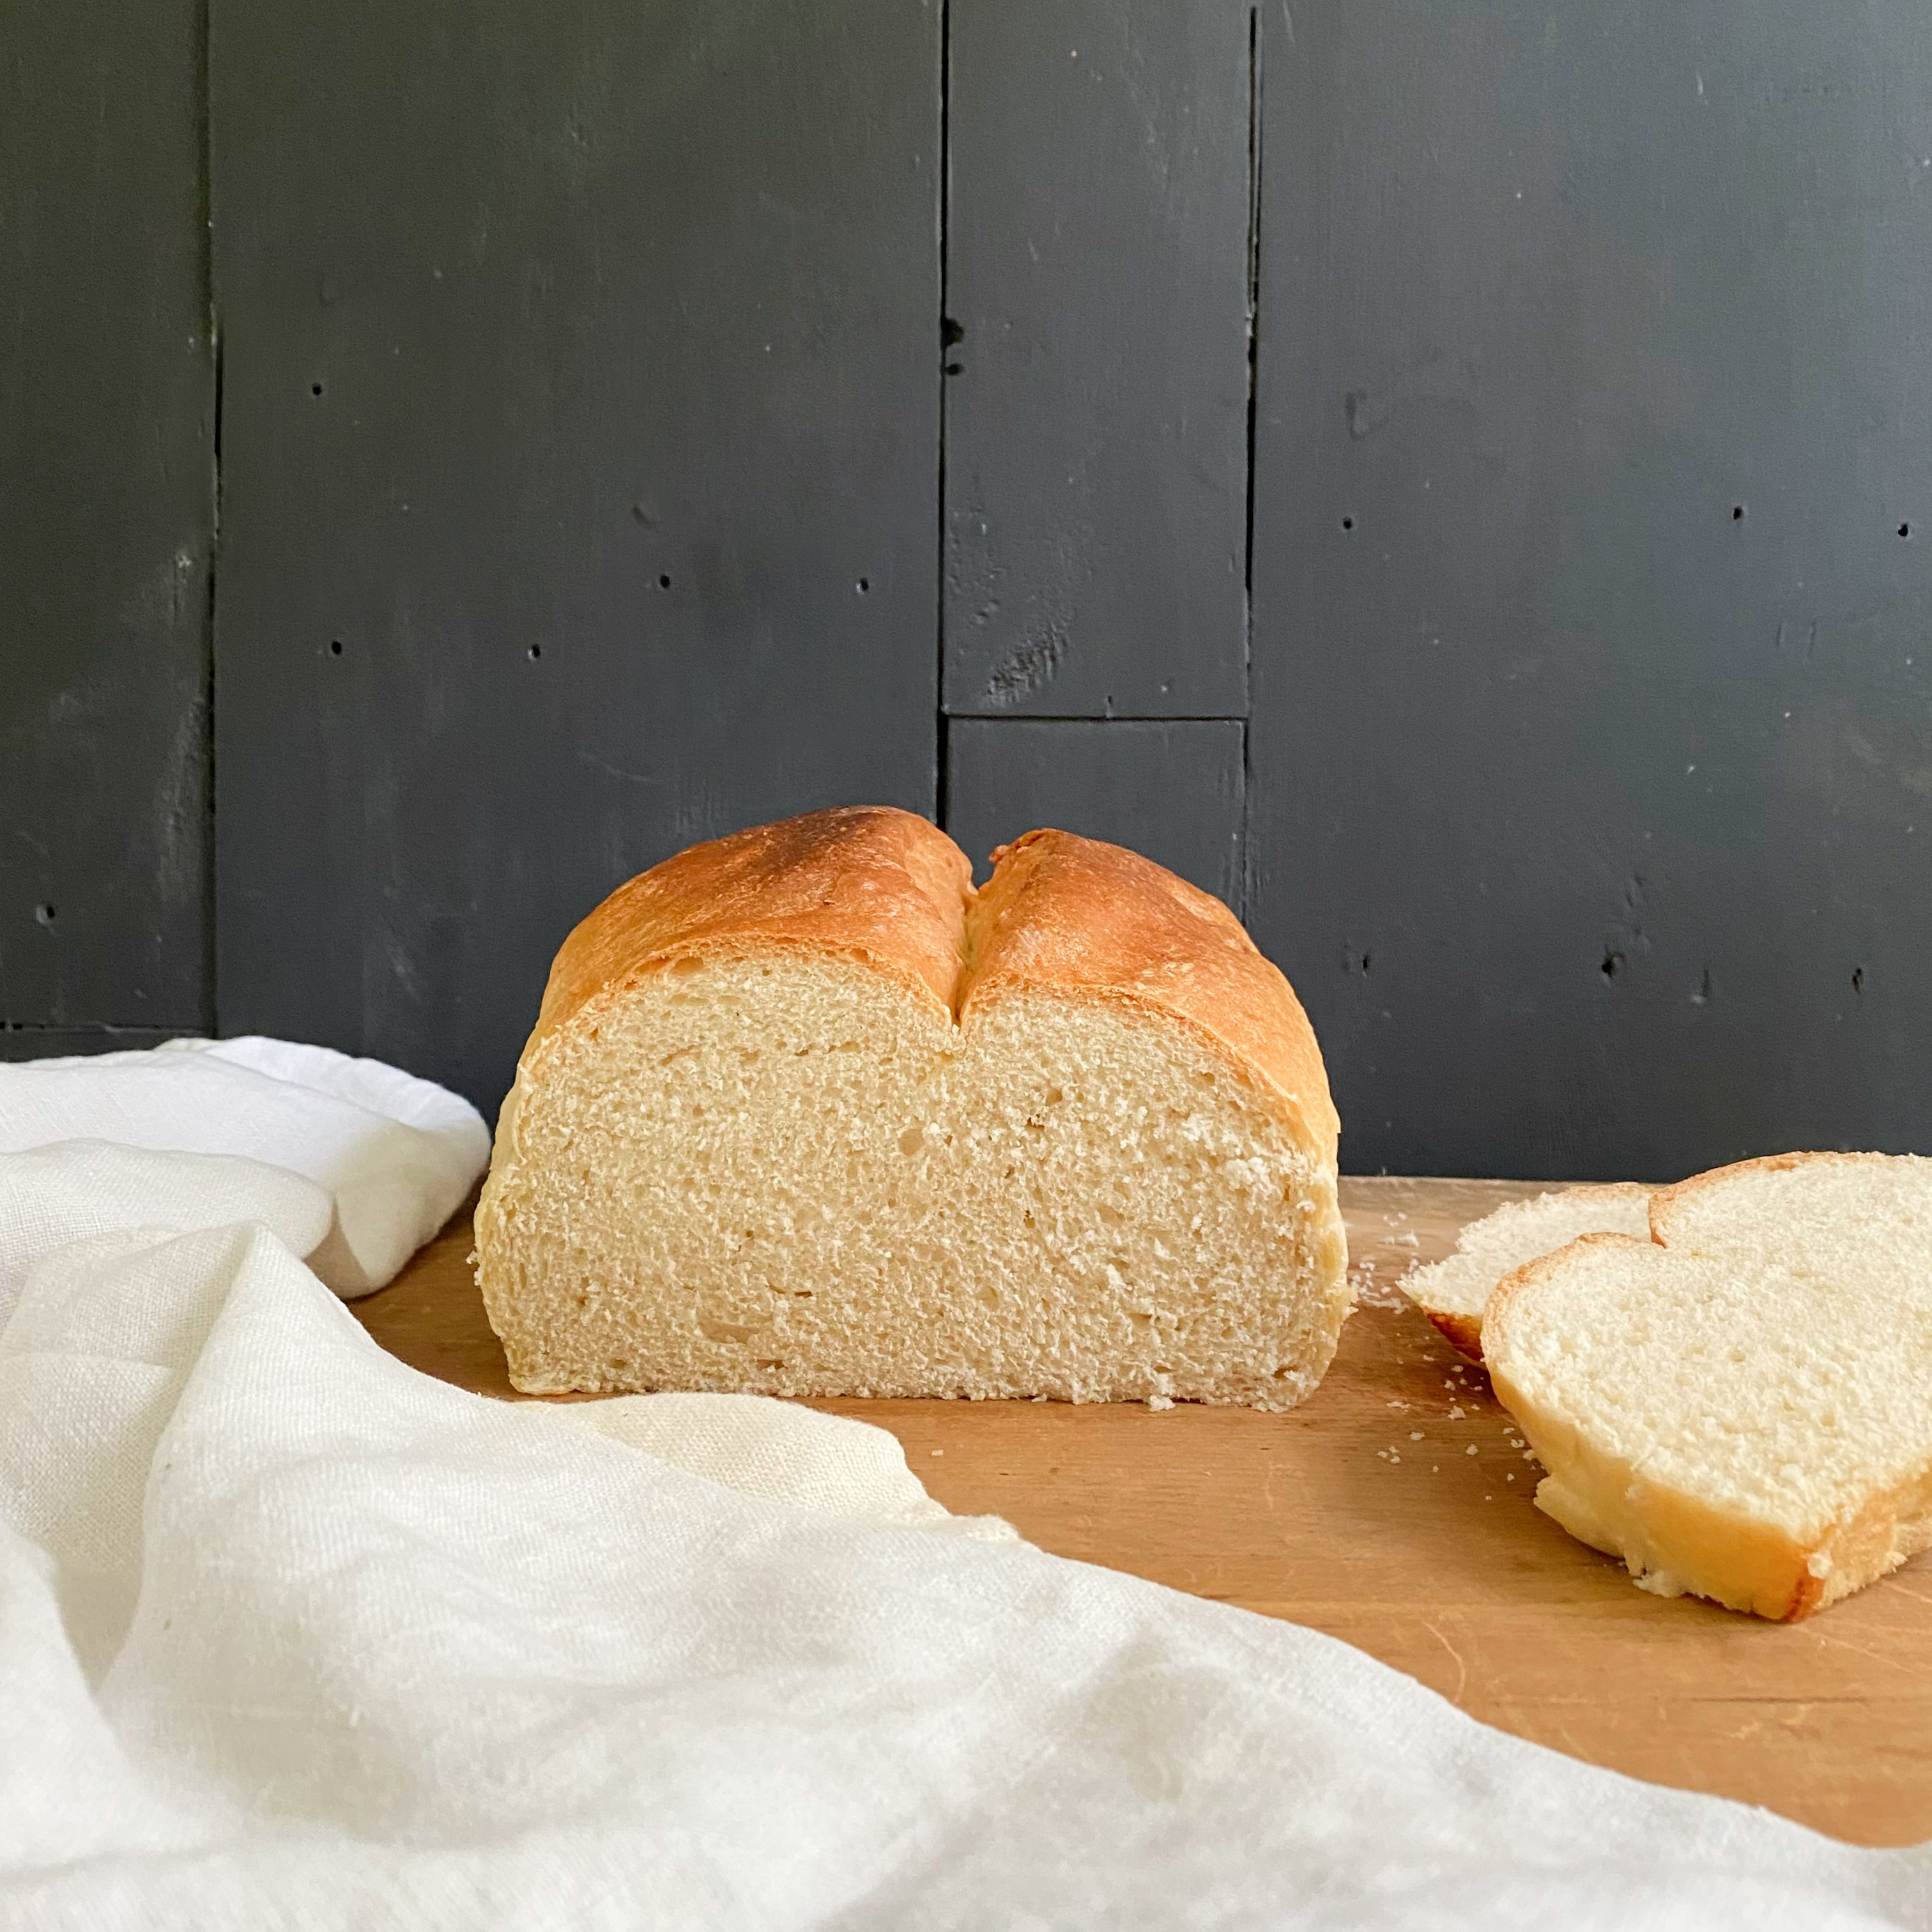
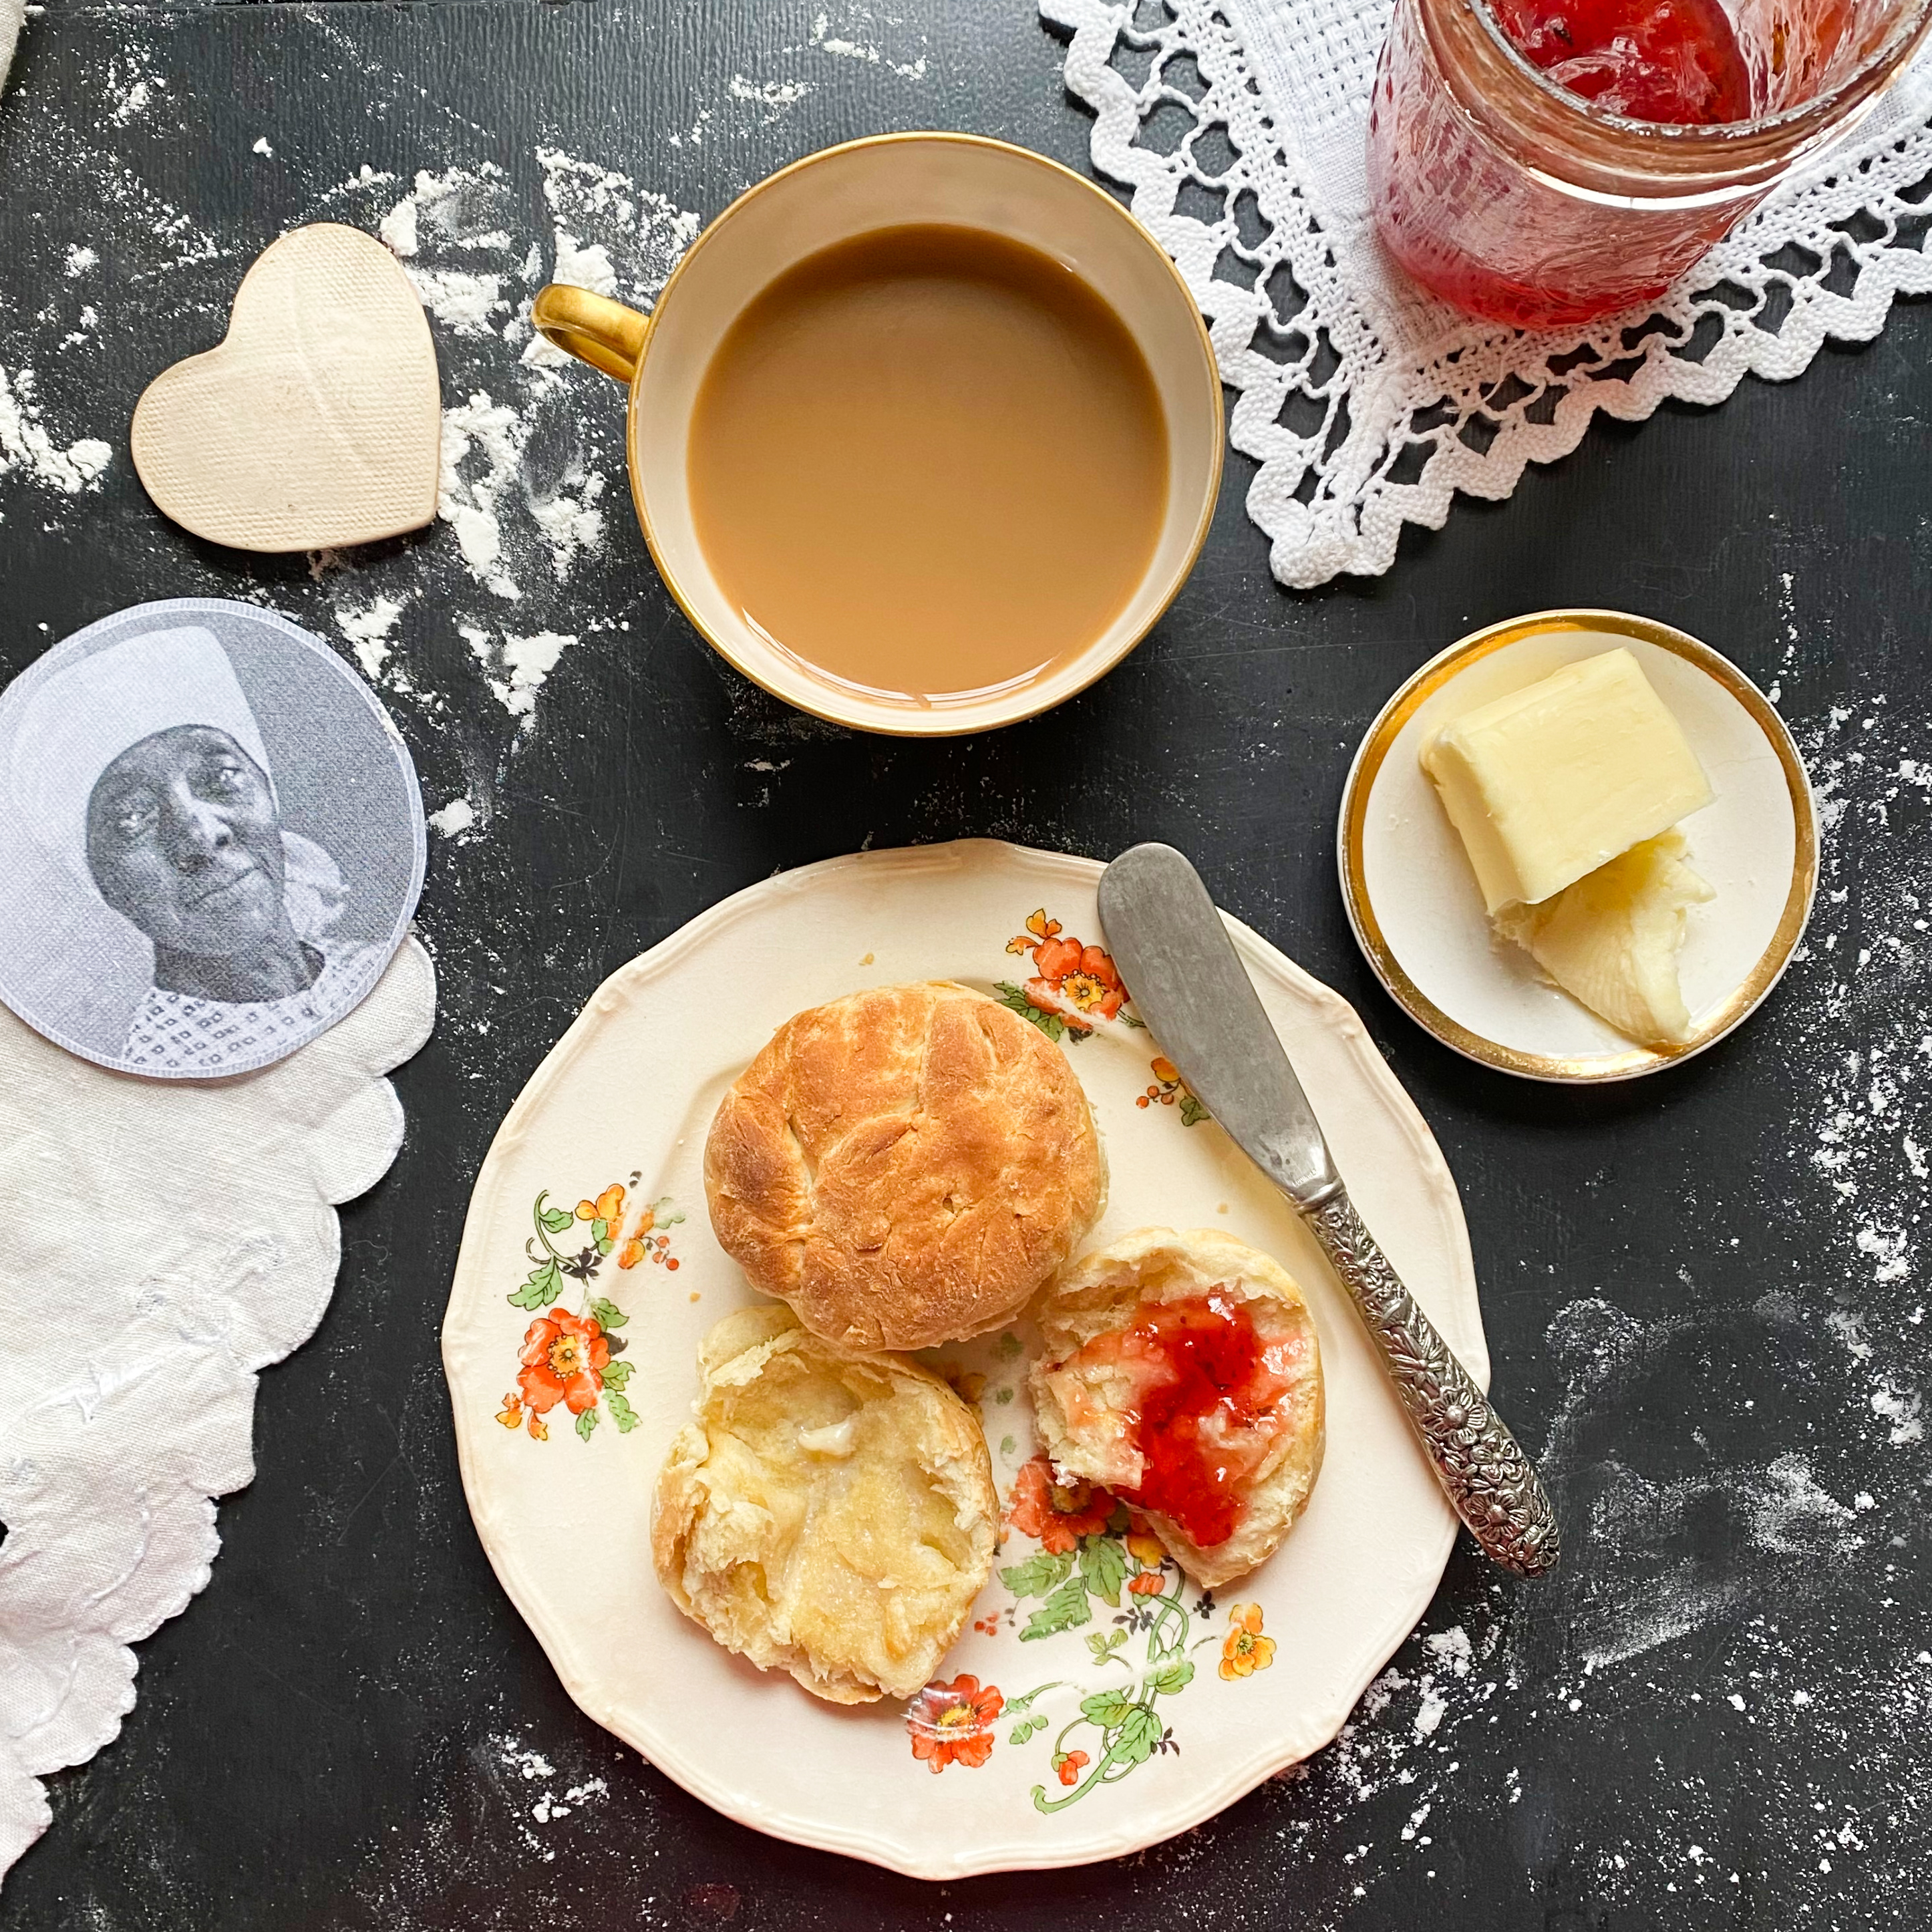
and serve immediately alongside the rice, spinach, and small servings of sake. For presentation, I recommend serving this meal family style on large platters. Or you can also serve it in individual bowls in a layered fashion, starting with rice at the bottom of the bowl, then spinach, then beef.

As I mentioned above, this turned out to be one of my most favorite recipes on the Tour so far. Tender, aromatic, and full of flavor, the marinade with its essences of ginger and lemon, soy, and sugar creates a lovely savory flavor that makes every bite a little bit sweet, a little bit salty. The spinach echoes a similar profile. There’s enough flavor in both beef and greens to leave the sushi rice unadorned, but if there is any extra juice left over from the pan after cooking the beef, pour it over the arranged layers and it will find its way down to the rice. Also, I highly recommend not skipping the sake with this meal. It wraps up and rounds out all the flavors in the most delightful of ways.
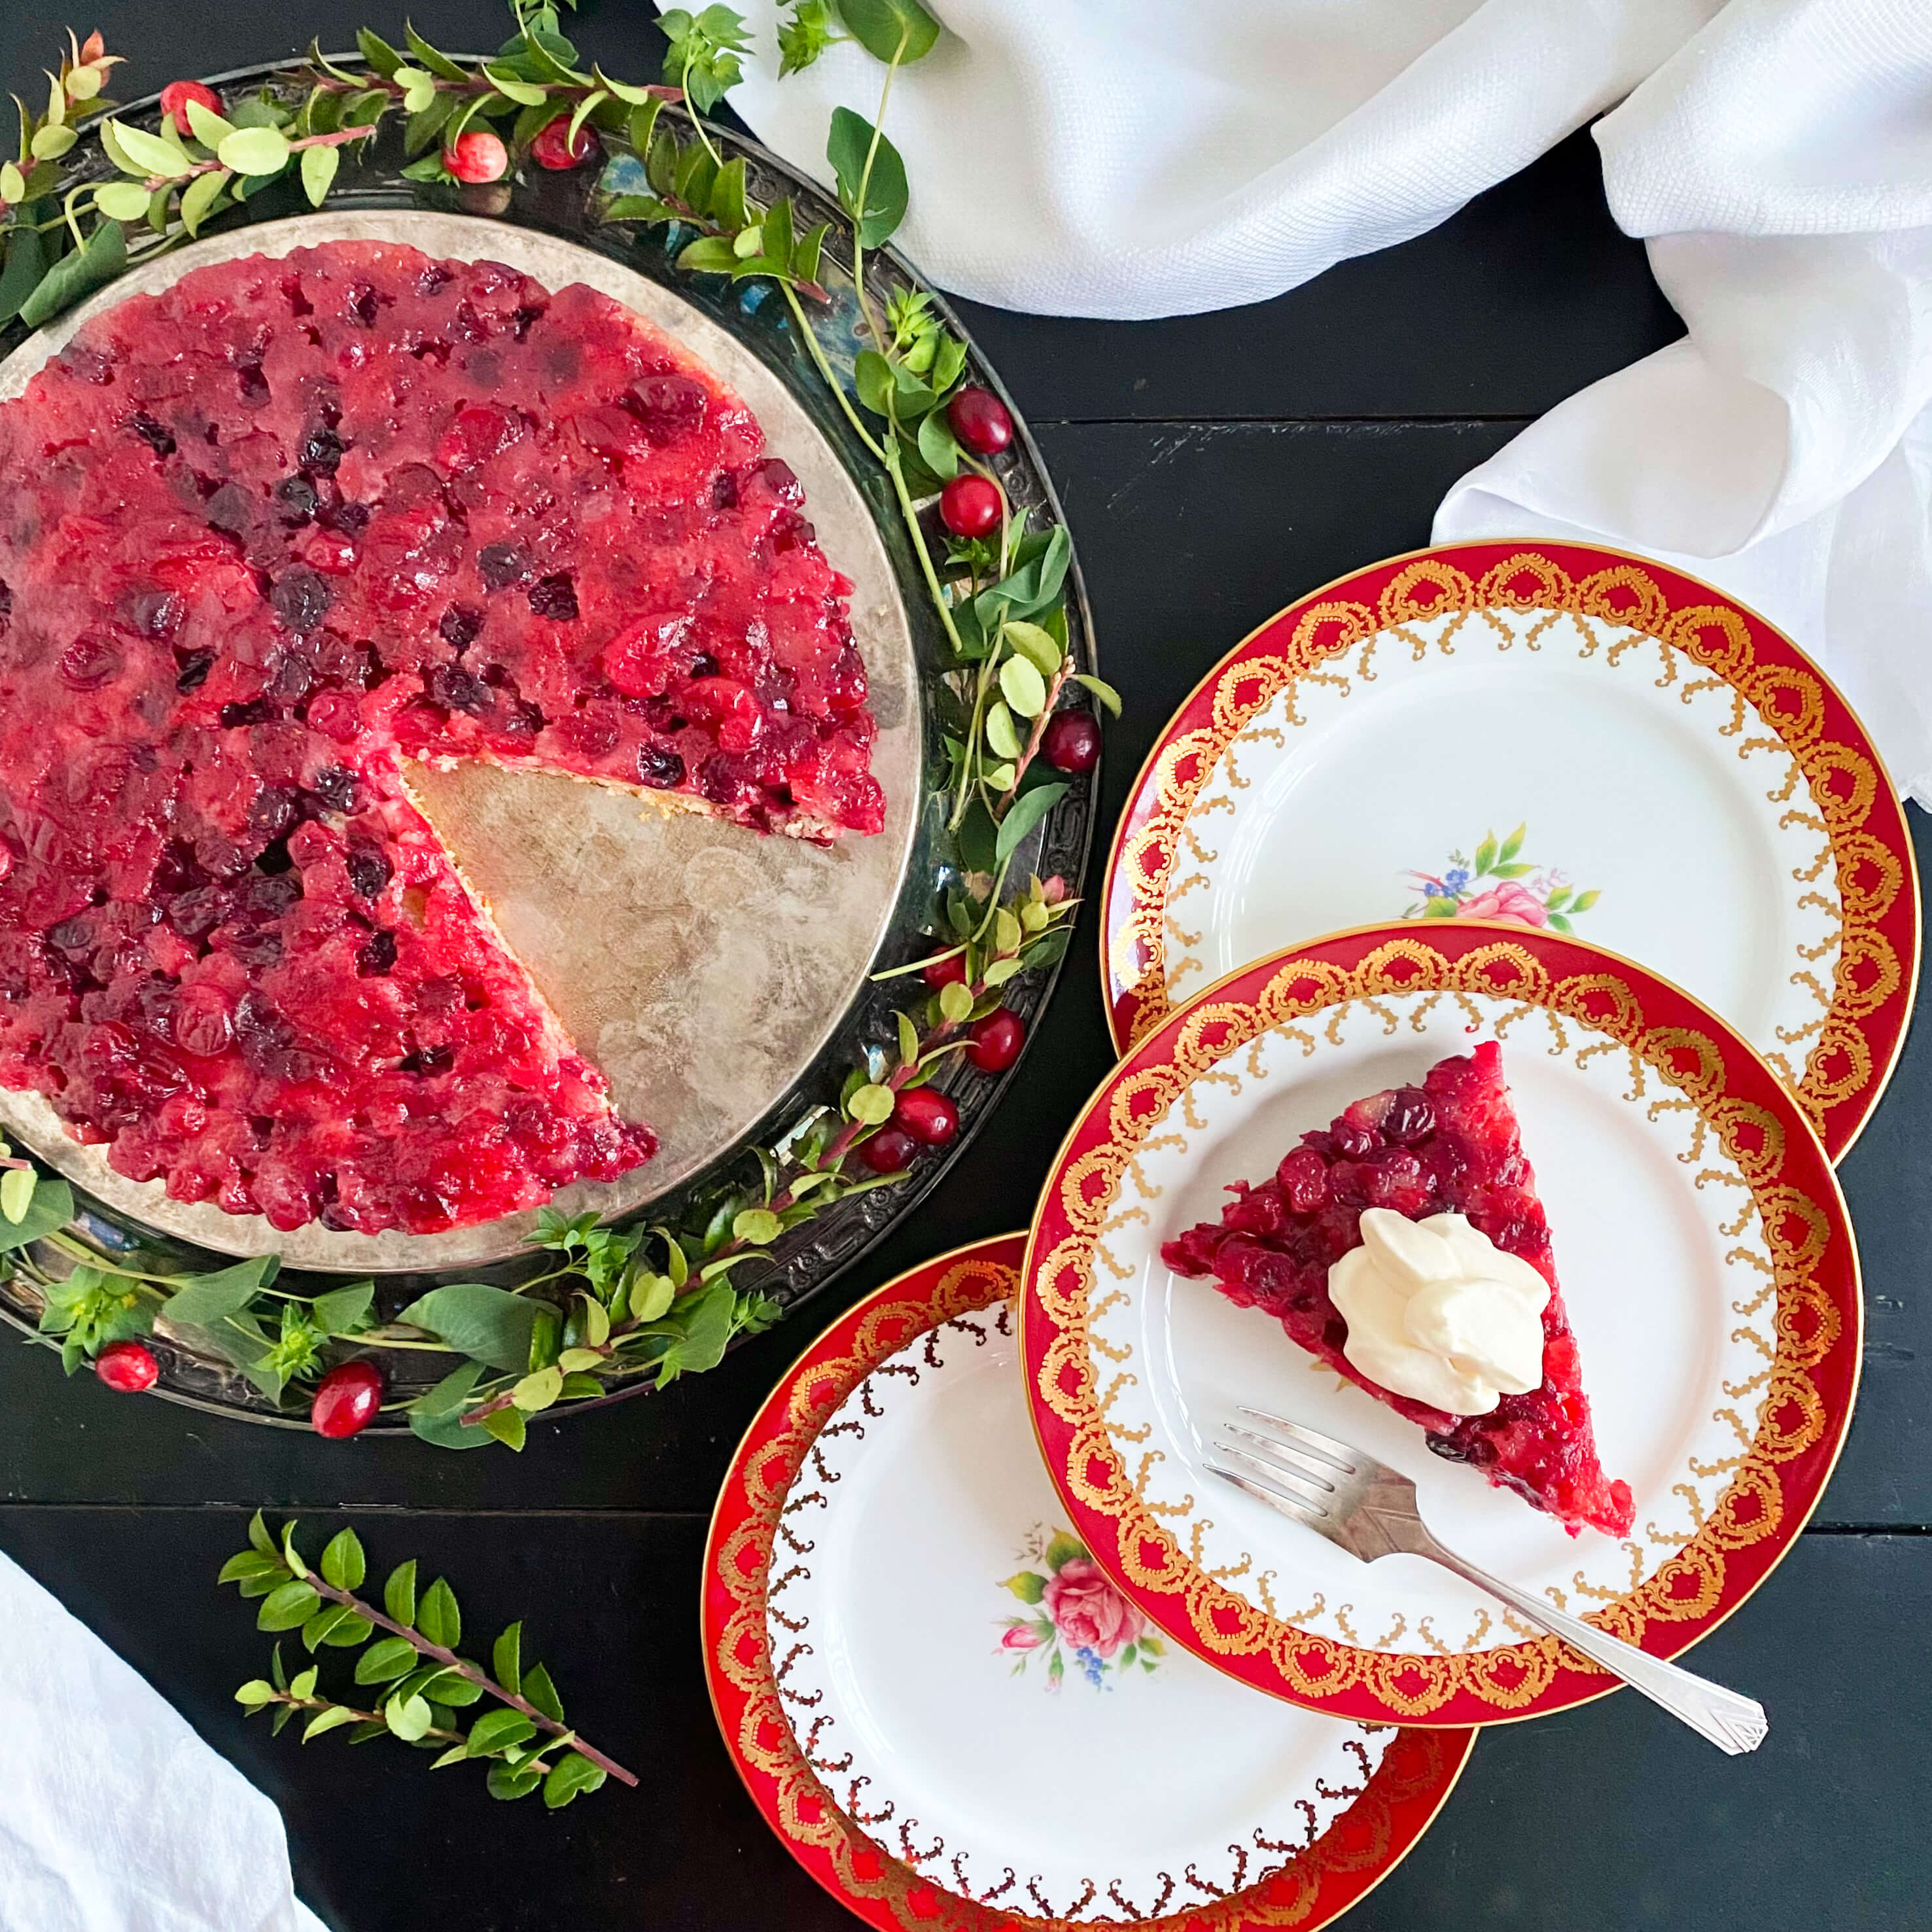
The portion size of this recipe may seem on the petite side at first, but I found it to be perfectly filling and satisfying by the time the last grain of rice was plucked from the bottom of the bowl. If you wanted to serve larger portions or are feeding a crowd, simply double or triple each part of the recipe, and you’ll have a feast in the making. Also, the spinach can be swapped out or enhanced with other vegetables, yielding plenty of future creativity in the kitchen.
In the case of leftovers, all three components (beef, spinach, rice) reheat beautifully the next day if kept in an airtight container in the fridge. The leftover beef on its own is also lovely served on a hard roll, sandwich-style, or added to a green salad.
There’s a term for fortuitous timing in Japanese called ii taimingu. It means perfect timing, good timing, right timing. And it seems that this whole blog post and all the characters in it depended on such a phrase. It was not that unusual for midcentury couples to take extended trips in the mid-20th century. And it was not unusual to create travel scrapbooks of the adventure. But what is unique about Truman’s scrapbook is the beautifully executed drawings combined with the handwritten travel notes and all the paper ephemera that create a complete story, a true time capsule of each city.
Had Candace never found this notebook, Truman’s artistry and his perspective on foreign architecture and design might have faded away or fallen into obscurity. Although he was influential in American architectural design during the 20th century, there is not much current conversation about Truman’s work, so this scrapbook serves as an intimate record of his thoughts, designs, and observations. That being said, it took 70 years to bring the story of Millie and Truman to my desk here at 1750 House. It took many months to grow a friendship between Candace and me, and an equally long time for local producers to grow the ingredients required for such a flavorful recipe. A batch of traditional Japanese soy sauce requires anywhere from six months to four years to make. Sake takes two months to mature. The recipe was published 55 years ago, and it took me, after a terrible bout of writer’s block, almost three months to put together this whole post. It literally took a community full of people, and a lot of ii taimingu to get this story and this recipe, launched into the world in the new year of 2026.
As far as I can tell in my research to this point, Truman and Millie never had any children, which is possibly one reason why their travel scrapbook wound up in an antique shop in the first place. Truman was two years into retirement when he and Millie went on their around-the-world adventure in 1954. He continued his creative pursuits in a new format in his later years, but I’ll share more about that in a future post. This won’t be the end of Truman and Millie and their adventures here on the blog. We’ll meet up with them again in five future International Vintage Recipe Tour posts to see what they have to say and see about those destinations. In the meantime, our next stop, number 28 on our culinary tour is Korea, where we’ll be learning about one Korean family’s ancestral food history and making a traditional shrimp dish.

Cheers to Candace for her incredible gift and her treasured friendship, to Truman and Millie for showing us such a personal glimpse into exotic travel history, and to all the local farmers and artisans who made this recipe absolutely delicious.
To catch up on previous International Vintage Recipe Tour posts, visit this link here.