Here we are on the eve of the Fourth of July and America’s big birthday. The outdoor temps have risen to the occasion. 97 degrees with a feels-like temp of 100 can be an intimidating atmosphere for any cook in any decade, let alone any century, but a short-term heat spell doesn’t mean that you have to shy away from cooking something festive for the hot holiday weekend ahead.
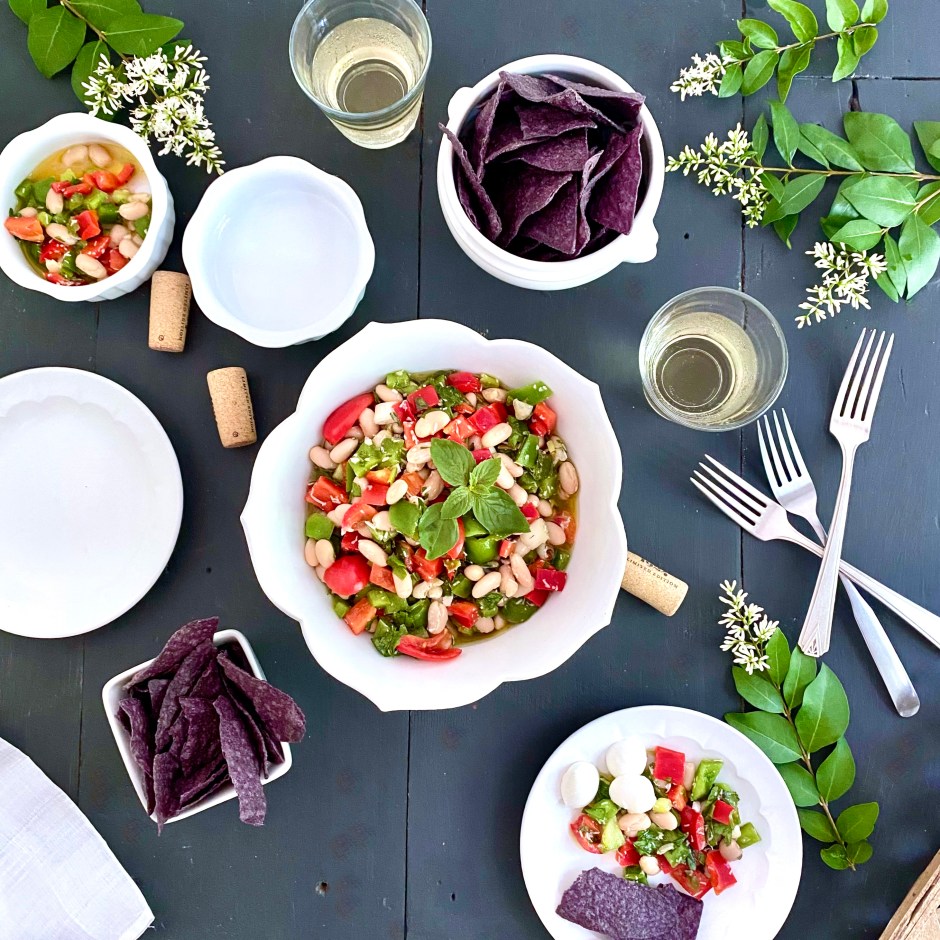
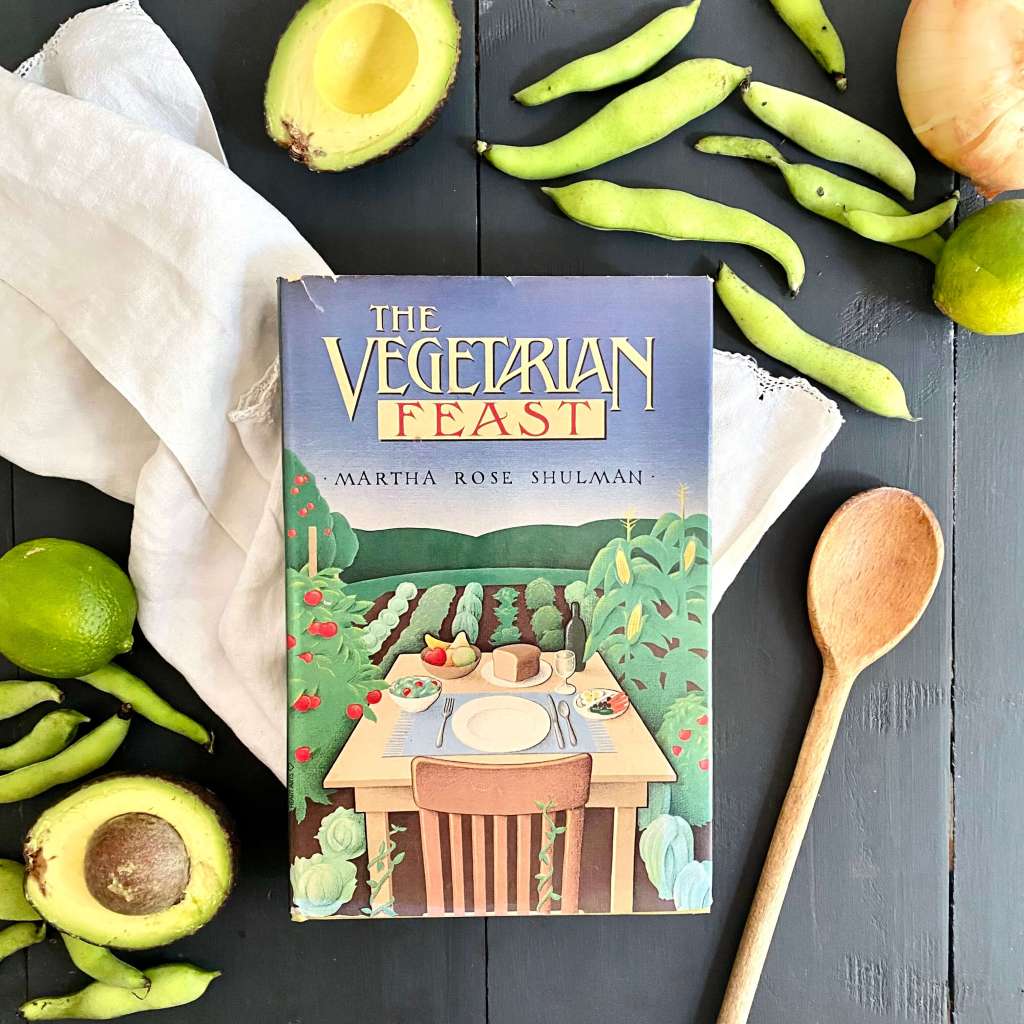
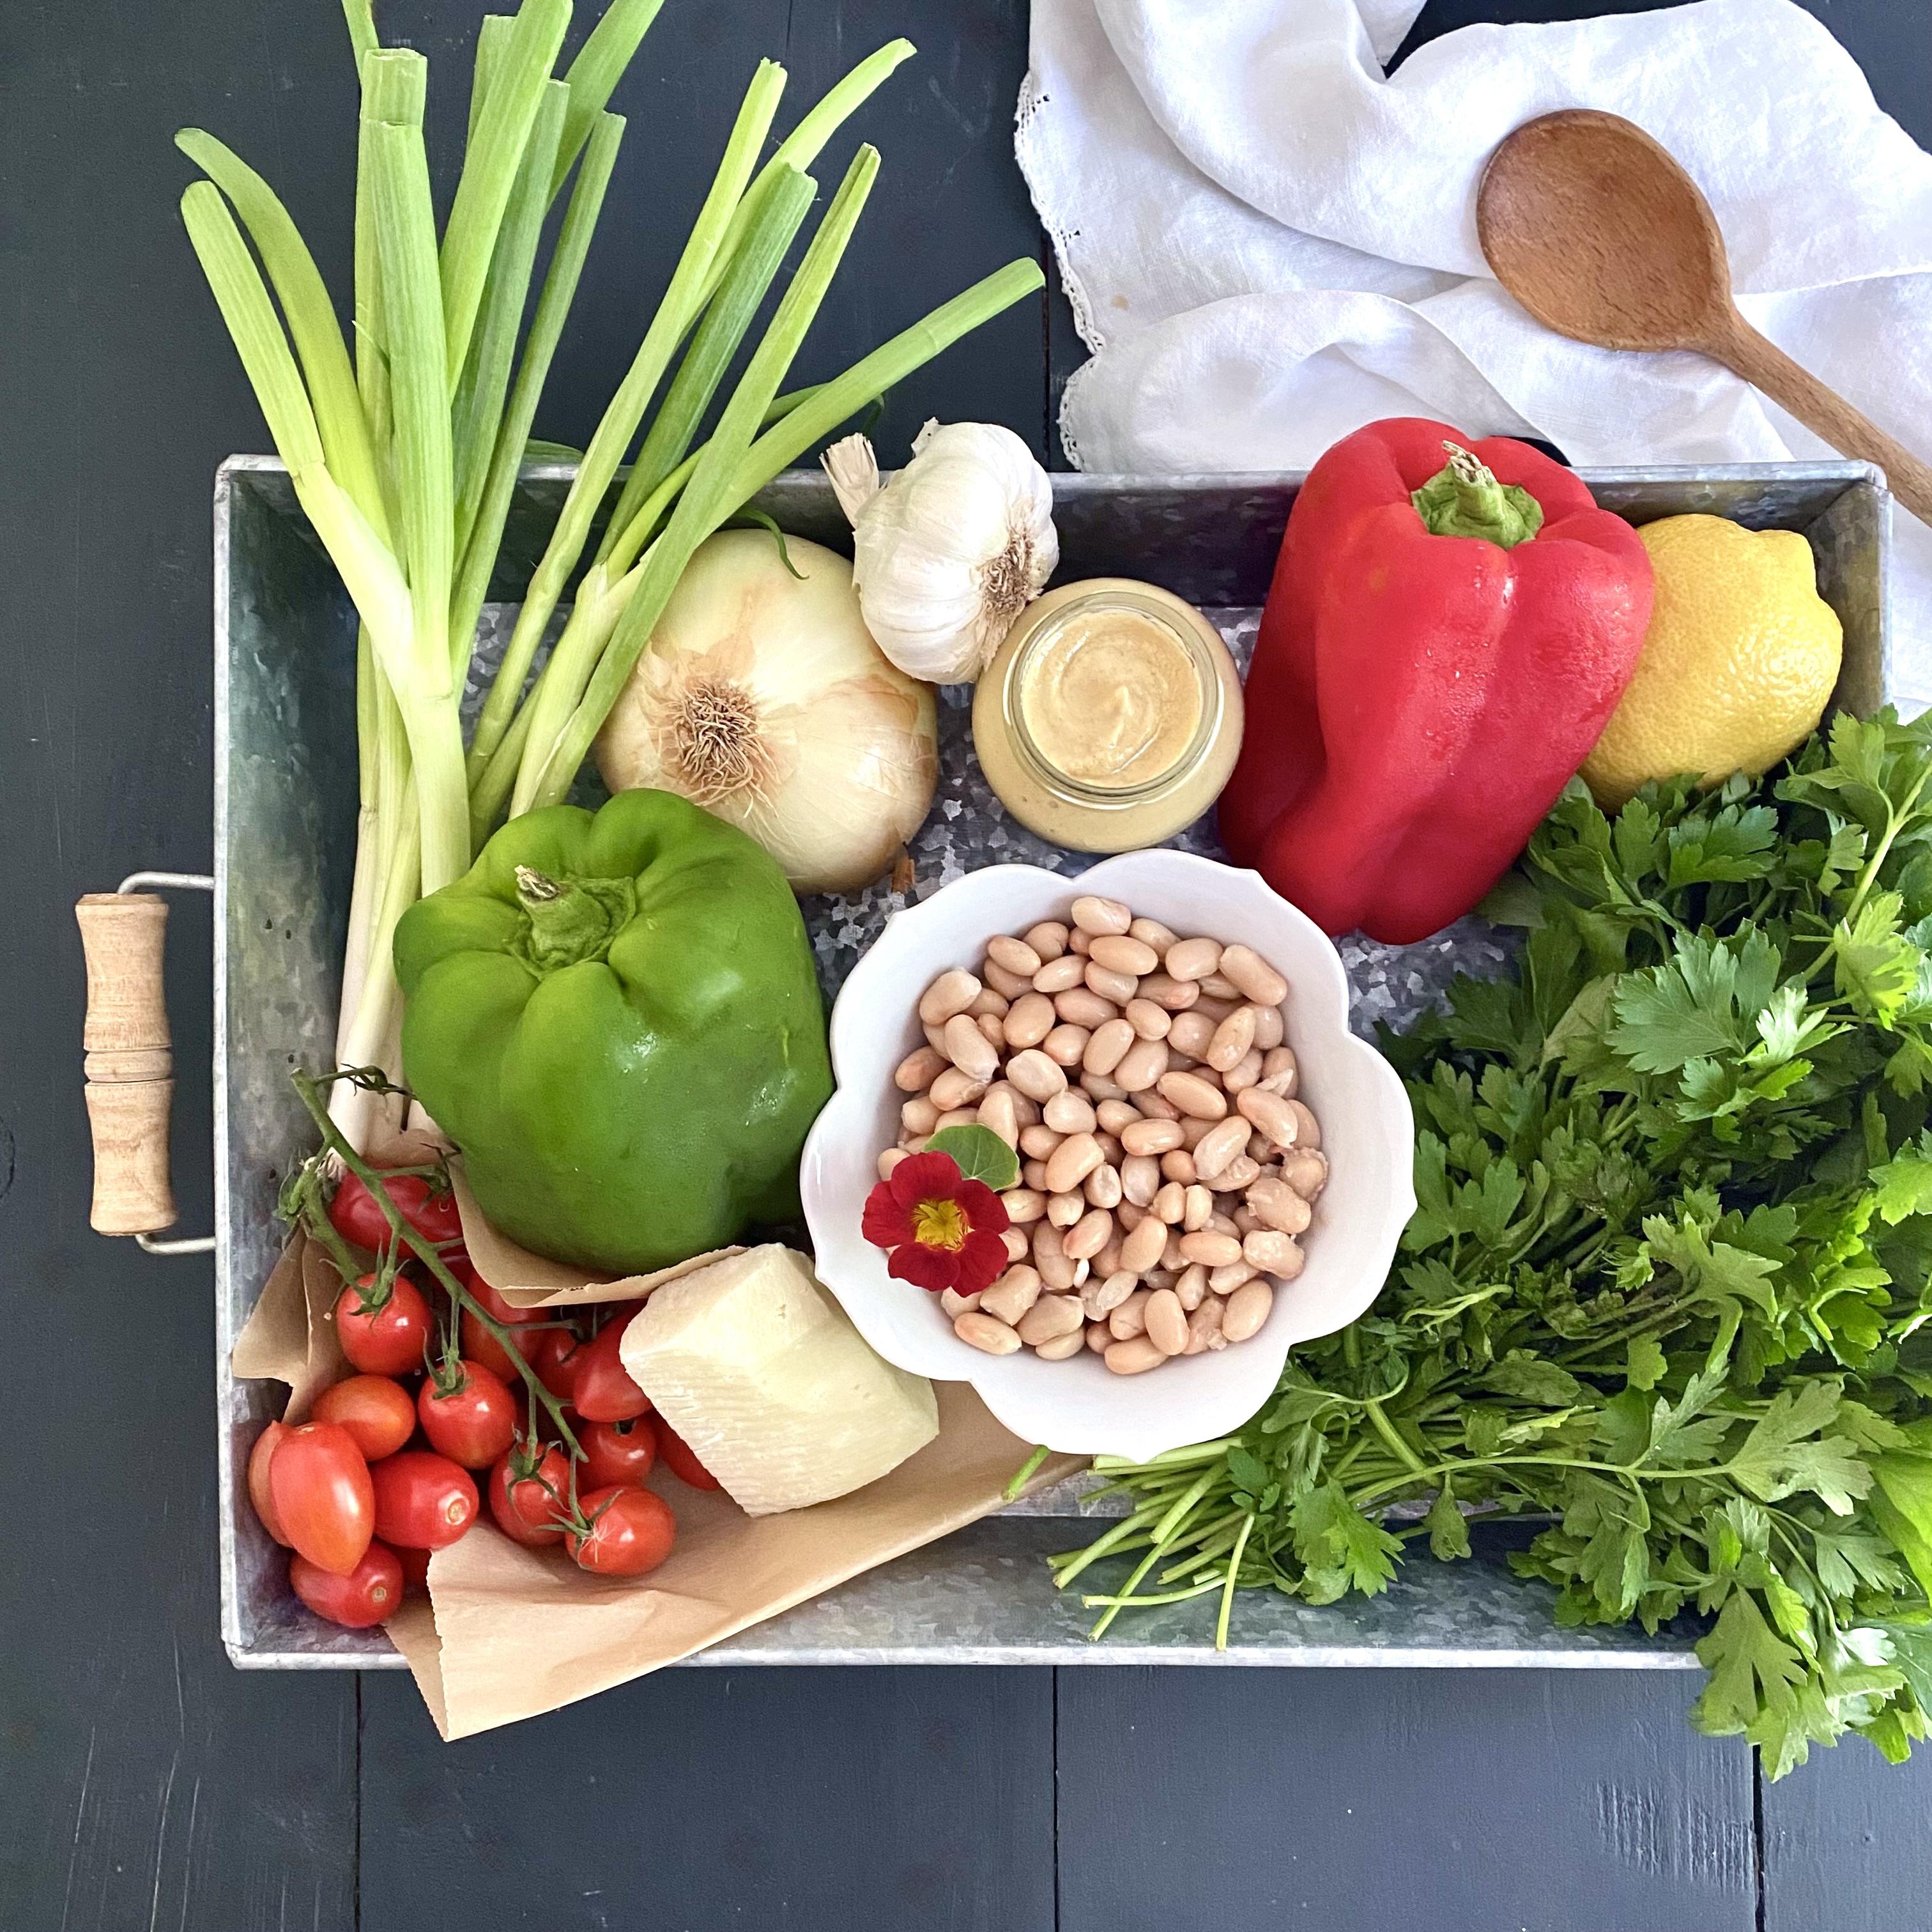
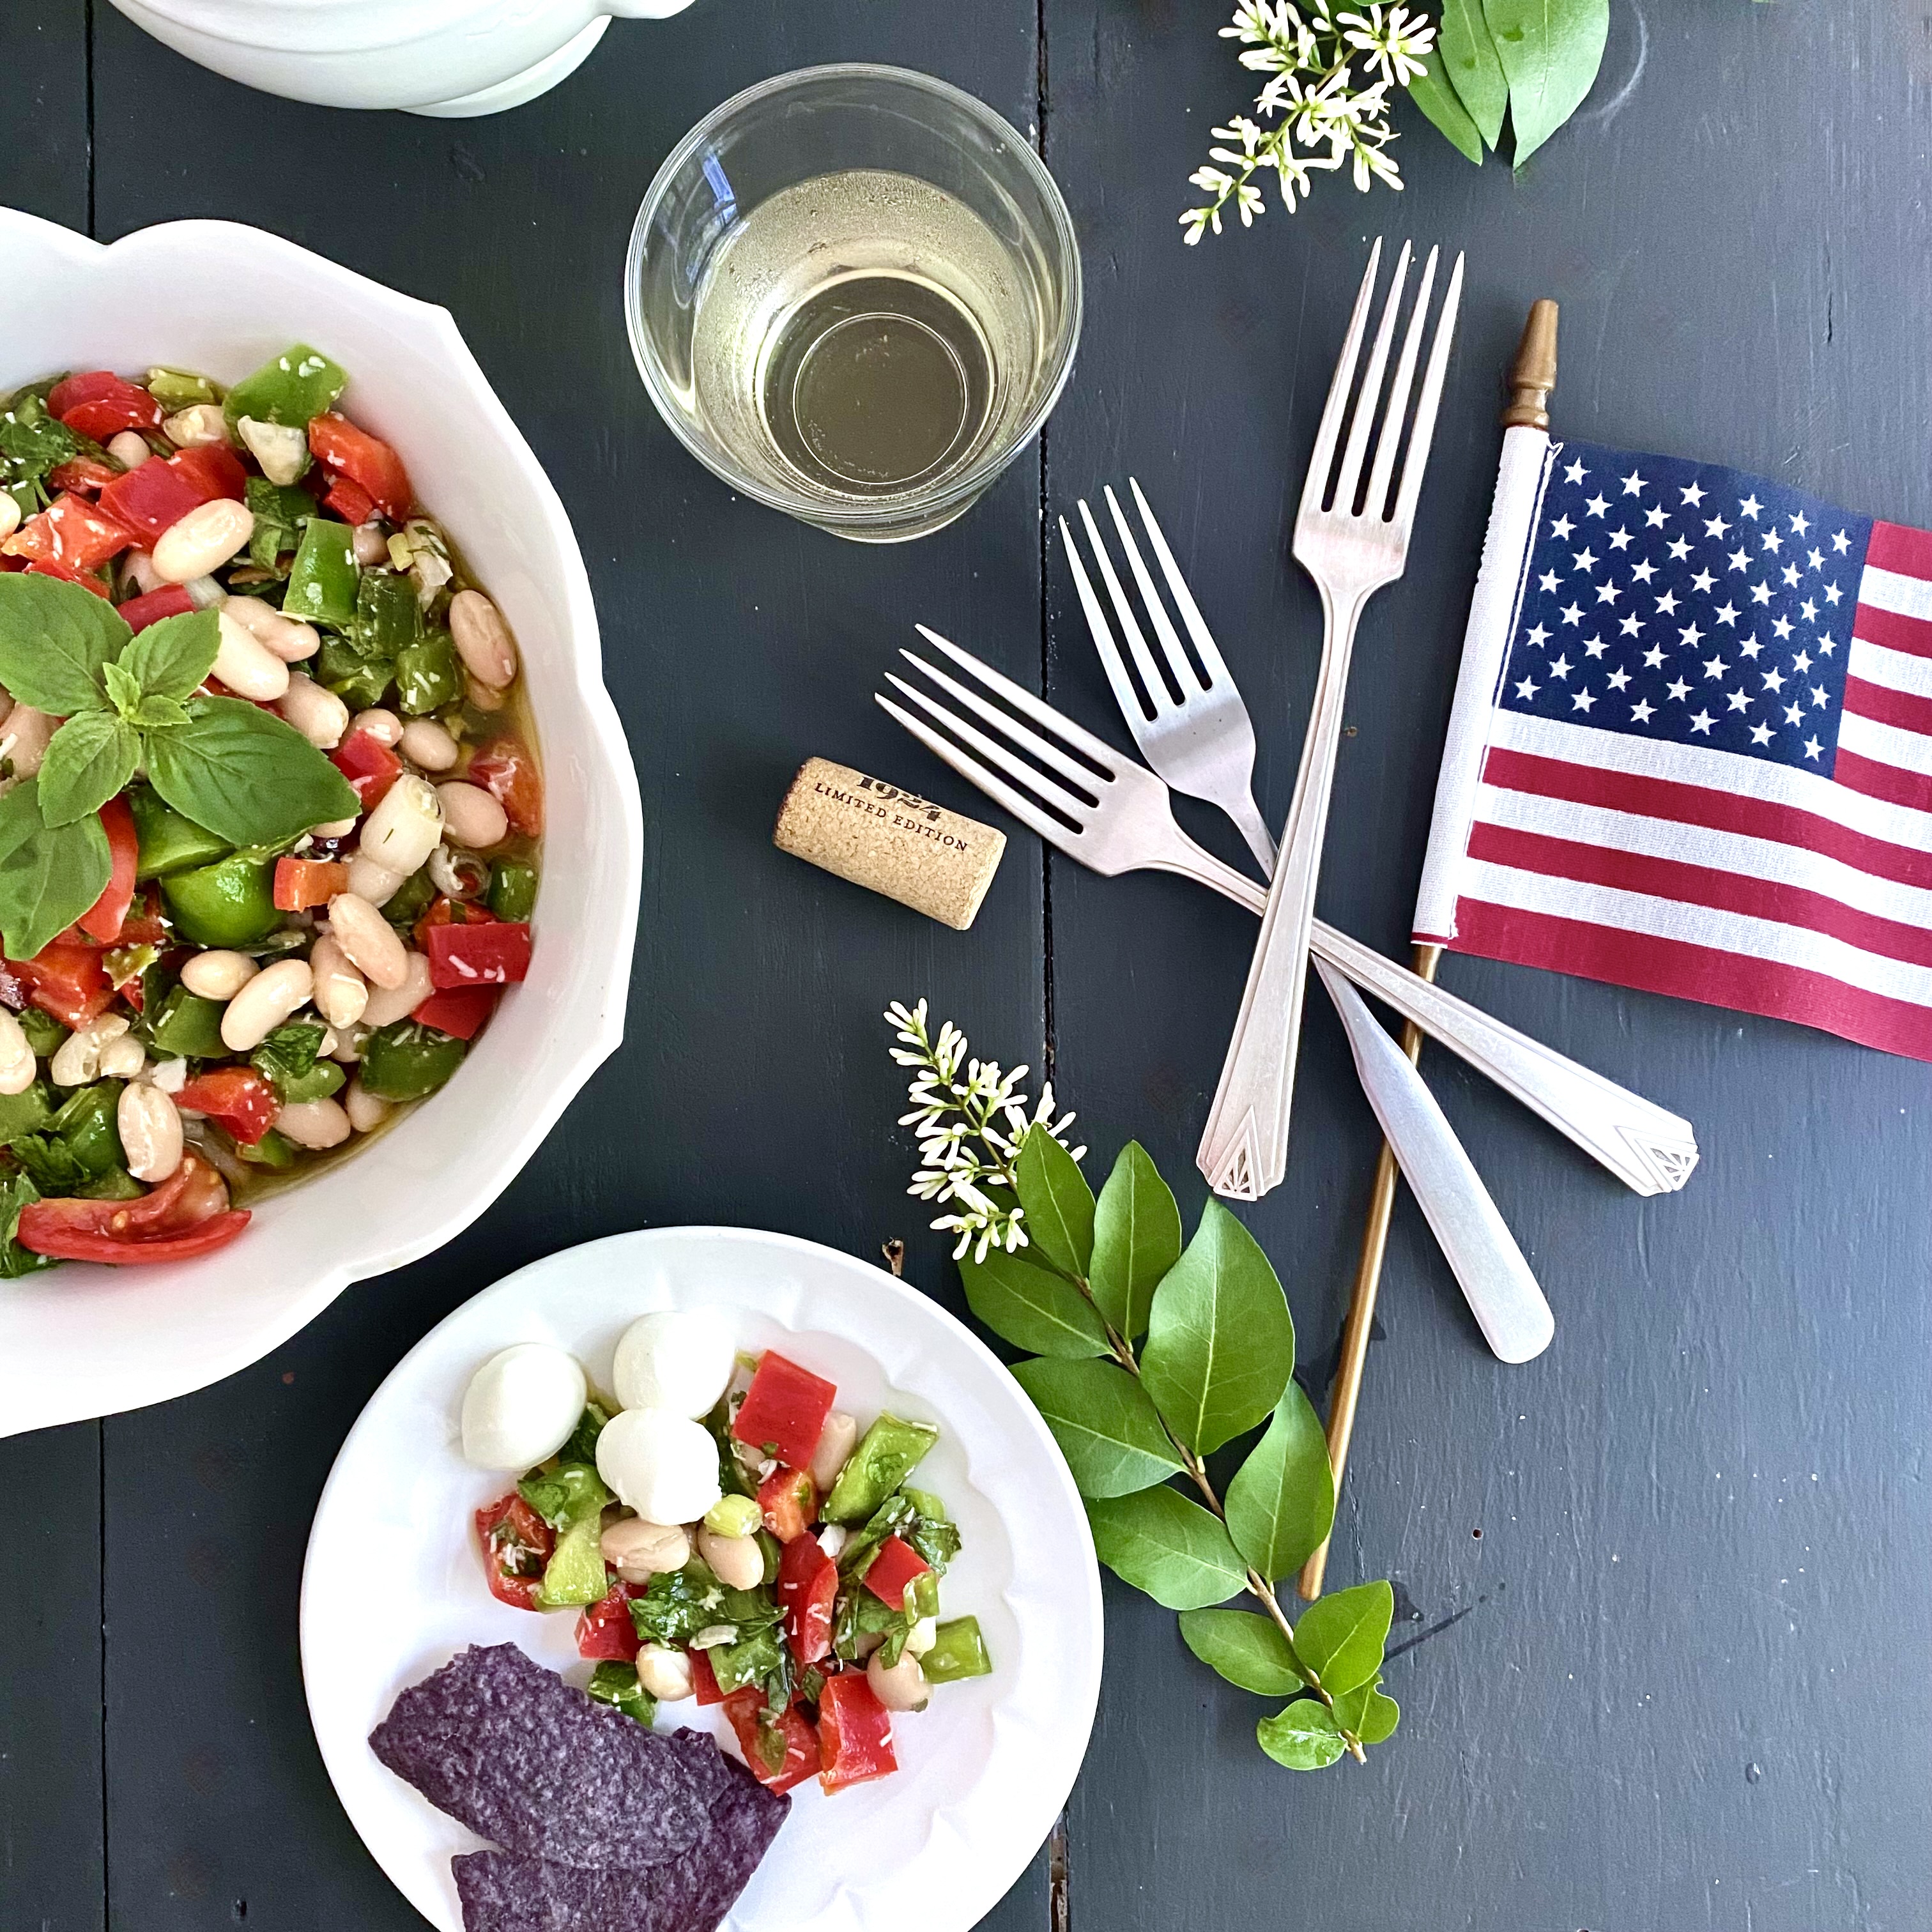
Today’s post features a 1970s vegetarian summer salad that’s been marinating in the fridge for the past two days. Loaded with garden vegetables and fresh herbs, it’s a quintessential easy breezy summer salad packed full of flavor, protein, and color. Light yet filling, it offers the opportunity to serve it in a handful of different ways and in a handful of different situations. From backyard barbeques and potluck parties to beach picnics and road trip car fare, it’s the type of recipe that packs easily, presents well, and only gets better the longer it marinates. On the menu for this hot holiday weekend, it’s Marinated White Beans, a colorful cold salad of chopped vegetables, Great Northern beans, and fresh herbs tossed in a zesty lemony vinaigrette. The recipe comes courtesy of Martha Rose Shulman’s first cookbook, The Vegetarian Feast, published in 1979.
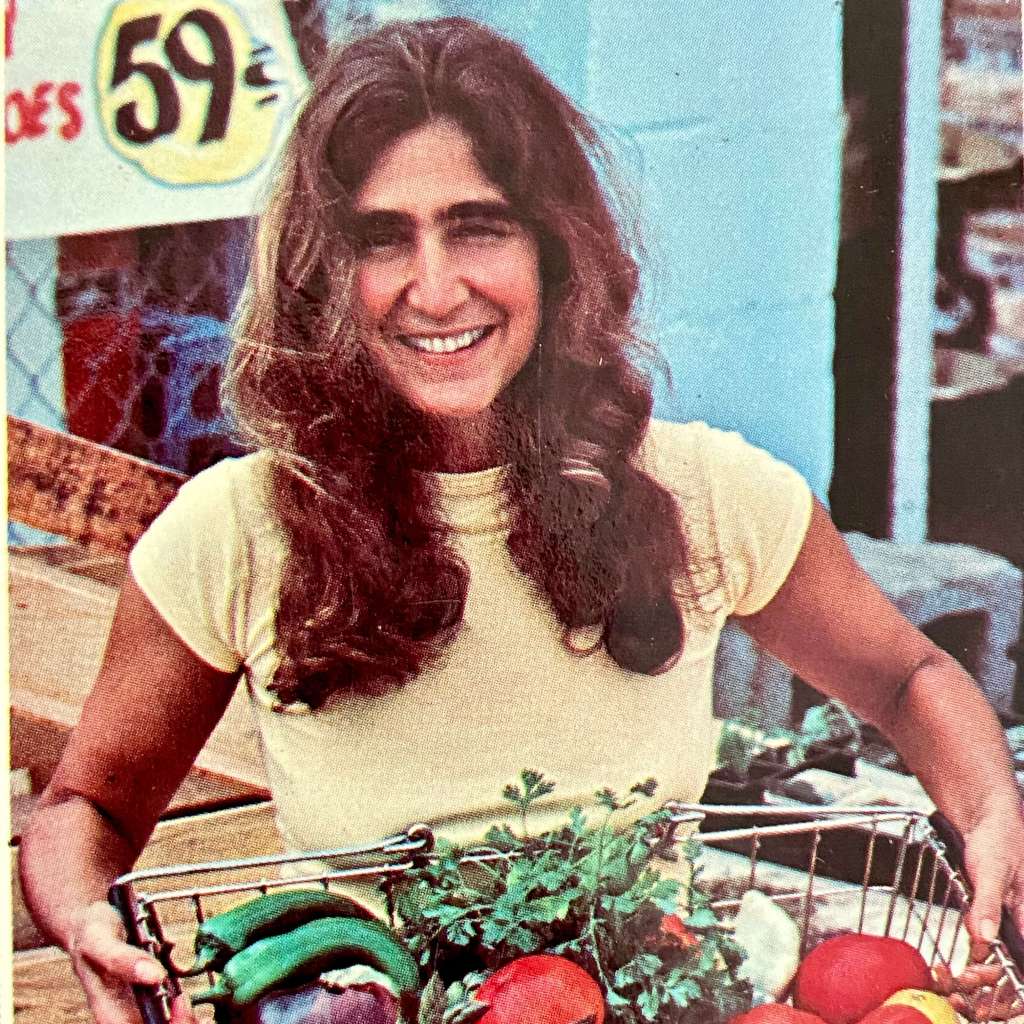
You might already be familiar with Martha’s name today. She’s written over 25 cookbooks and contributed over 1500 recipes to the New York Times Cooking section, mostly on vegetarian cuisine. But before all that, back in the very beginning of her career, Martha found her footing in the landscape of Austin. Texas, in the 1970s, where she was running a catering company and a supper club, teaching vegetarian cooking classes, and writing a food column for the Austin American-Statesman. At the time, she was in her late 20s, nurturing a love of cooking that she first fully embraced as a teenager growing up in New England.
Attune to the early vibrations of the fresh food movement that was just beginning to bubble up in the 1970s, Martha, although not strictly a vegetarian herself, preferred a vegetable-laden diet and a style of cooking that combined fresh local produce with her two favorite international cuisines – Mexican and Mediterranean. As a self-described “chubby child,” she appreciated the health benefits that a plant-based diet yielded in her adult years, but she was too interested in all kinds of food to limit herself to a strictly vegetarian diet. She also liked to socialize and connect with people over meals, preferences aside. If that meant being invited to someone’s house for dinner where steak was on the menu, she’d happily eat it. Such experiences were fuel for her kitchen and her creativity.
As the host, creator, and cook of a supper club, Martha naturally loved to entertain and surprise her guests with unexpected vegetarian dishes that traditionally might have included meat, fish, or poultry. It was this sort of intriguing exercise that tantalized the appetites of her guests and eventually formed the basis of her cookbook. Needless to say, the supper club was booked for two years straight, and Martha had a keen audience happily willing to try out her new recipe creations.
Upon debut, The Vegetarian Feast won the Tastemaker Award (an equivalent to a James Beard Award today) and set Martha on the path to a lifetime career talking, writing, and teaching her three favorite things… vegetables, Mexican food, and Mediterranean cuisine.
I love that Martha never veered from her favorite types of food and, in doing so, has engineered thousands of recipes throughout the past 40 years, all blended into her signature trifecta of cooking styles. It’s a testament not only to her creativity but also to the wide array of possibilities that a vegetarian diet enhanced by flavors and ingredients from other global cuisines offers. Over the course of her career, she has dispelled two common myths over and over again. One being that vegetarian food is bland and unappetizing-looking. And the other being that vegetarian recipes are chock-full of unusual, hard-to-find ingredients that tend to get used once and then go to waste. What is wonderful about Martha’s recipes is that they are primarily simple, elegant affairs containing ingredients that are both visually appealing and easily accessible via the grocery store, the farmers market, or your own garden. The marinated summer salad featured here is a lovely example. It’s uncomplicated, easy to make, and full of classic summer vegetables and herbs.
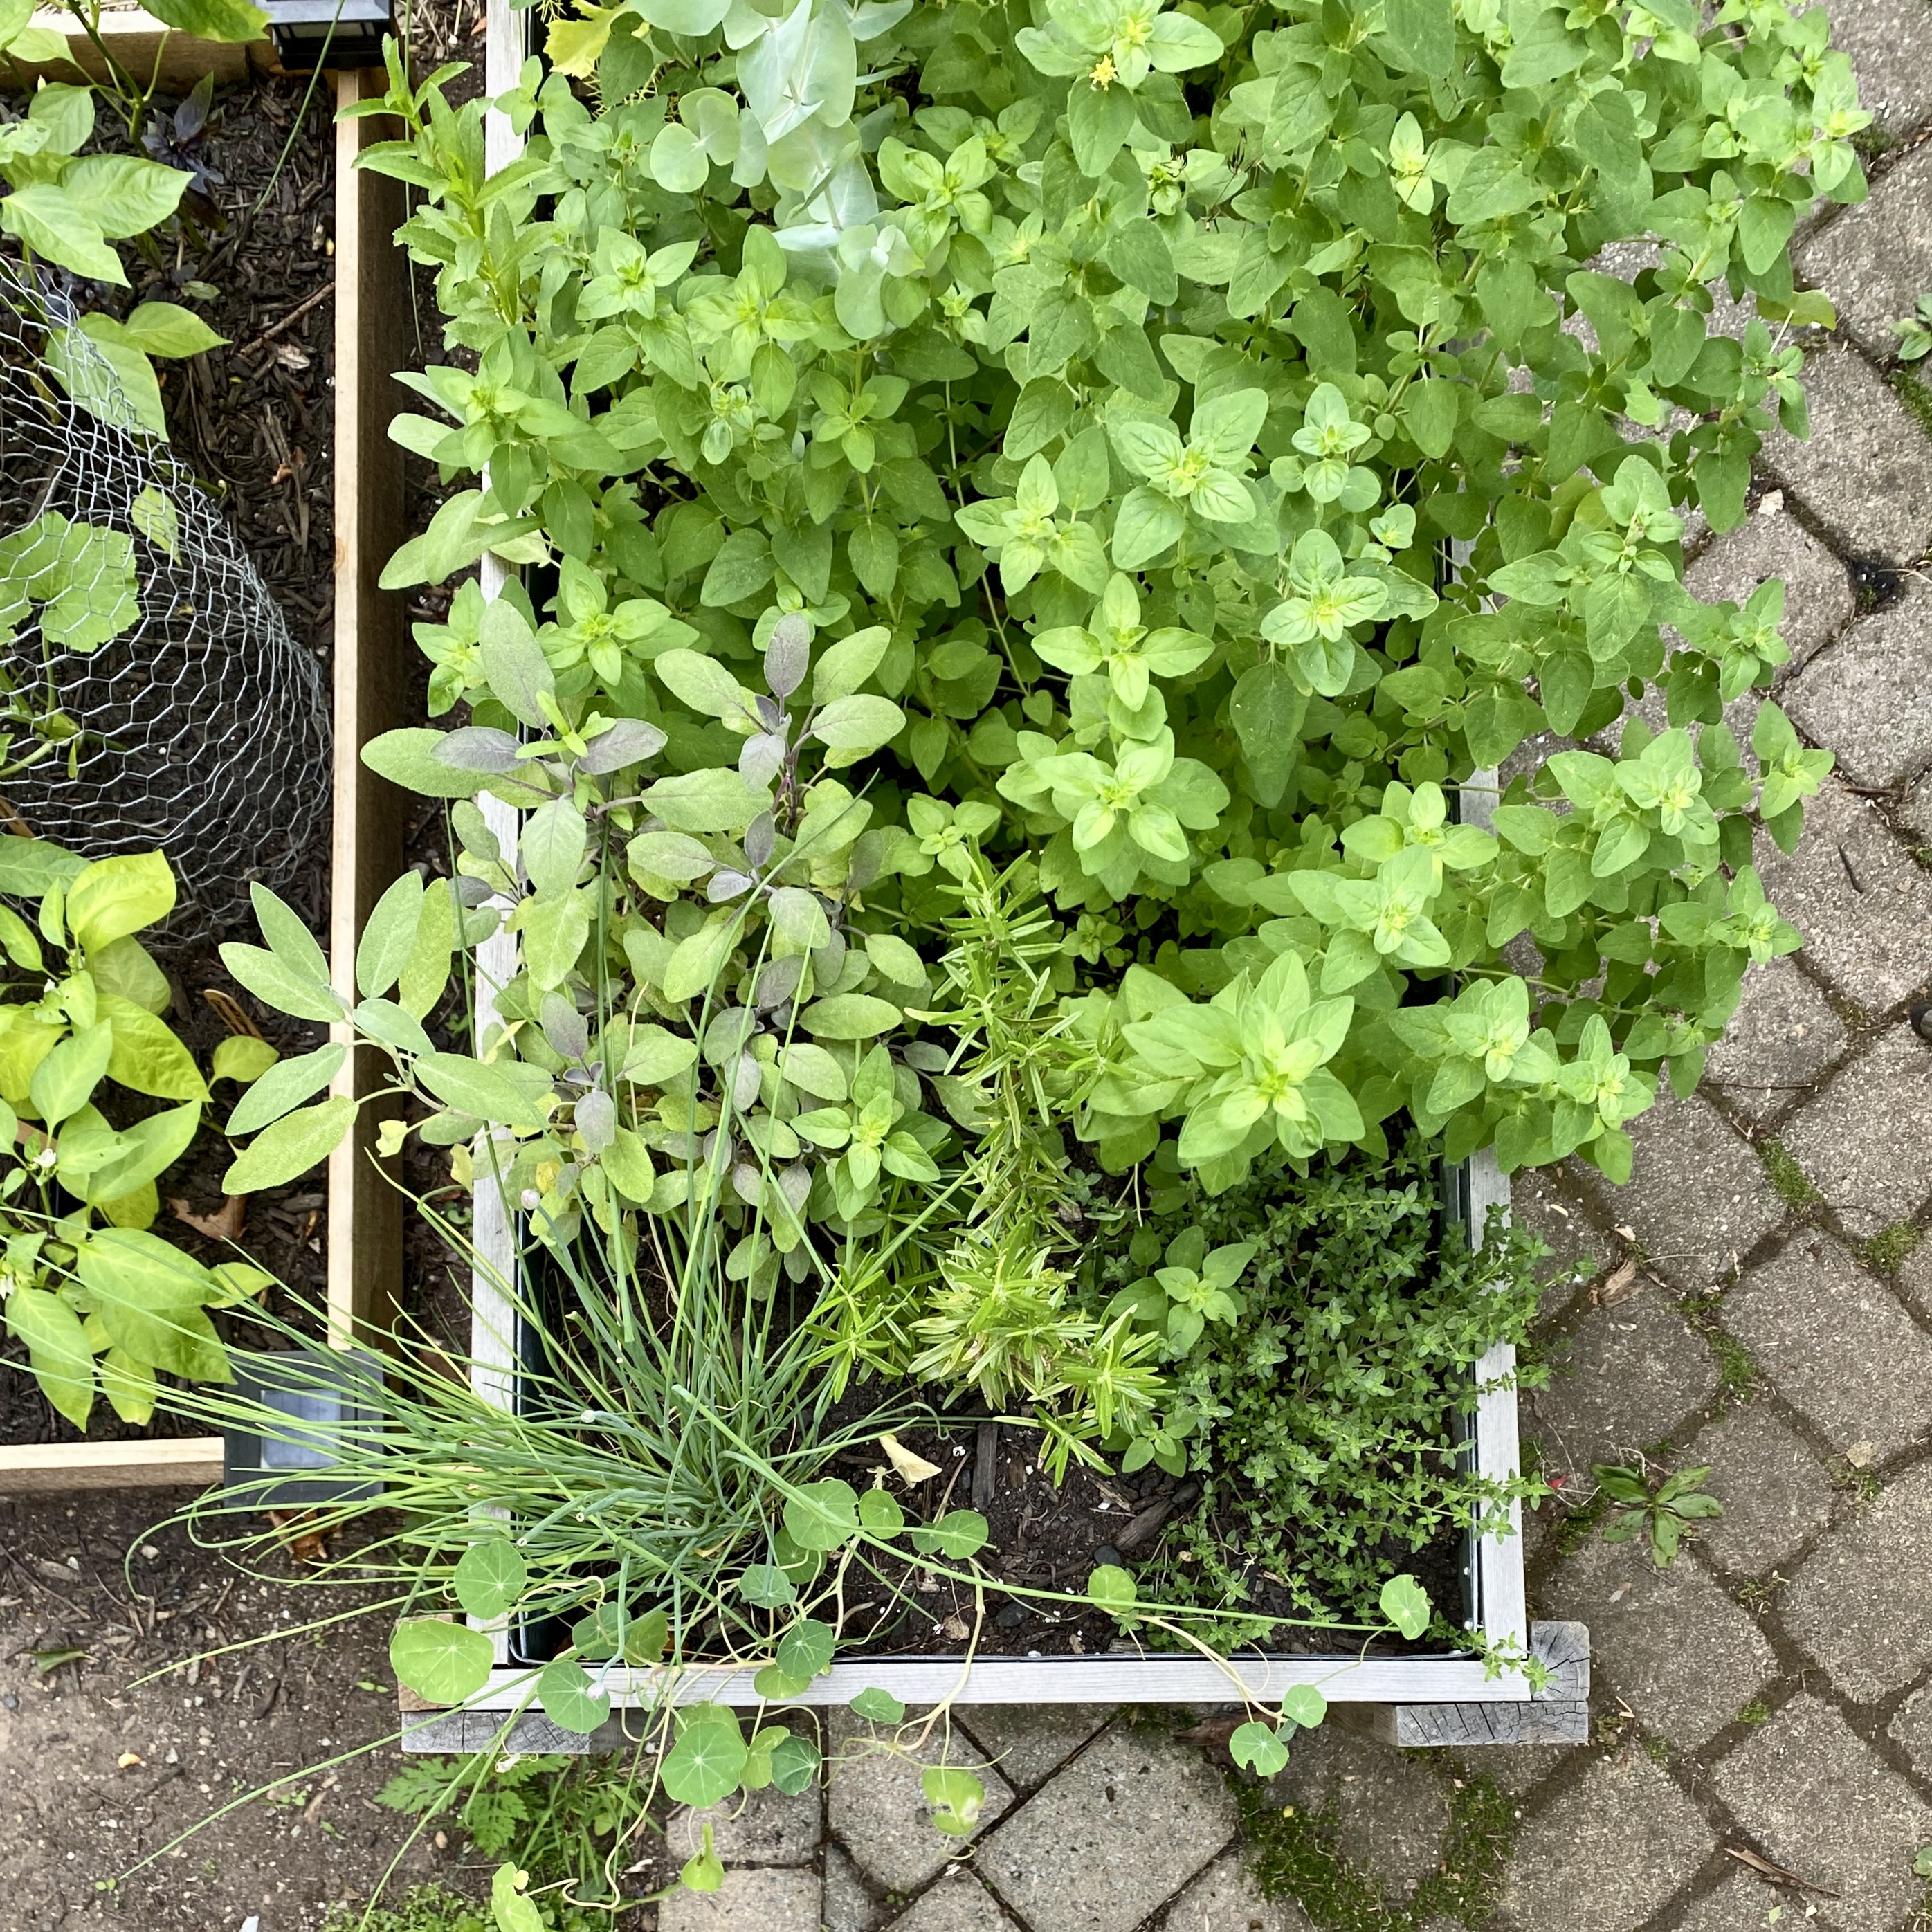
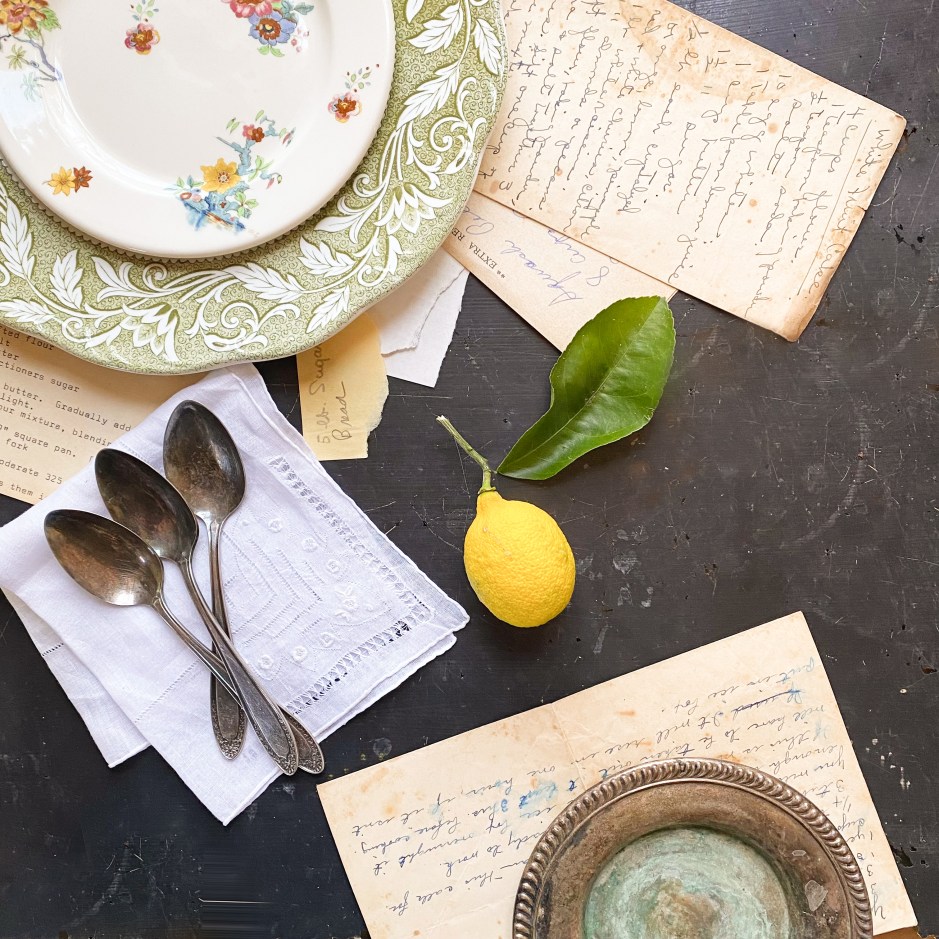
Five herbs for this recipe were picked right from the garden.
Featuring fourteen ingredients in a three-step process, it might seem like a lot of work at first glance of the recipe, but don’t be dissuaded. Once the beans are cooked, the whole salad comes together in less than 30 minutes and marinates in the fridge for a few hours or overnight if you want to plan ahead. And if you don’t have time to soak and cook dried beans, you can skip that whole step and substitute canned beans instead.
Marinated White Beans
from The Vegetarian Feast by Martha Rose Shulman, 1979
Serves 6-8
For the Beans:
2 cups small dried white beans (ex., Navy beans or Great Northern beans)
1 1/2 quarts water
2 tablespoons olive oil
1 onion chopped
3 cloves garlic, minced
1 bay leaf
1 teaspoon sea salt
Or – eliminate all of the above and substitute two 15 oz cans of Great Northern beans or Navy beans, rinsed
For the Salad:
1/4 -1/2 cup choppd fresh parsley
4 green onions including white and green parts, sliced
1 green pepper, seeded and chopped into bite size pieces
1 red pepper, seeded and chopped into bite size pieces
1/4 cup freshly and finely grated parmesean cheese
Cherry tomatoes (optional)
For the Marinade:
Juice of 1 lemon
1/4 cup vinegar
1 clove garlic
1 teaspoon Dijon mustard
1/2 teaspoon oregano
1 teaspoon chopped fresh basil or 1/2 teaspoon dried
1/4 teaspoon drid tarragon or 1 teaspoon fresh tarragon
Sea salt and freshly ground pepper to taste
3/4 cup olive oil
If using dried beans… wash the beans and soak in water overnight. In a heavy-bottomed flameproof bean pot or Dutch oven, heat the olive oil and sauté the onion and garlic until the onion is tender. Add the beans, water, bay leaf, and salt. Bring to a boil, then cover, reduce the heat, and cook for one to two hours until the beans are tender but still firm. Remove from the heat, drain, and remove the bay leaf.
If using canned beans…. rinse beans in a colander or strainer and set aside.
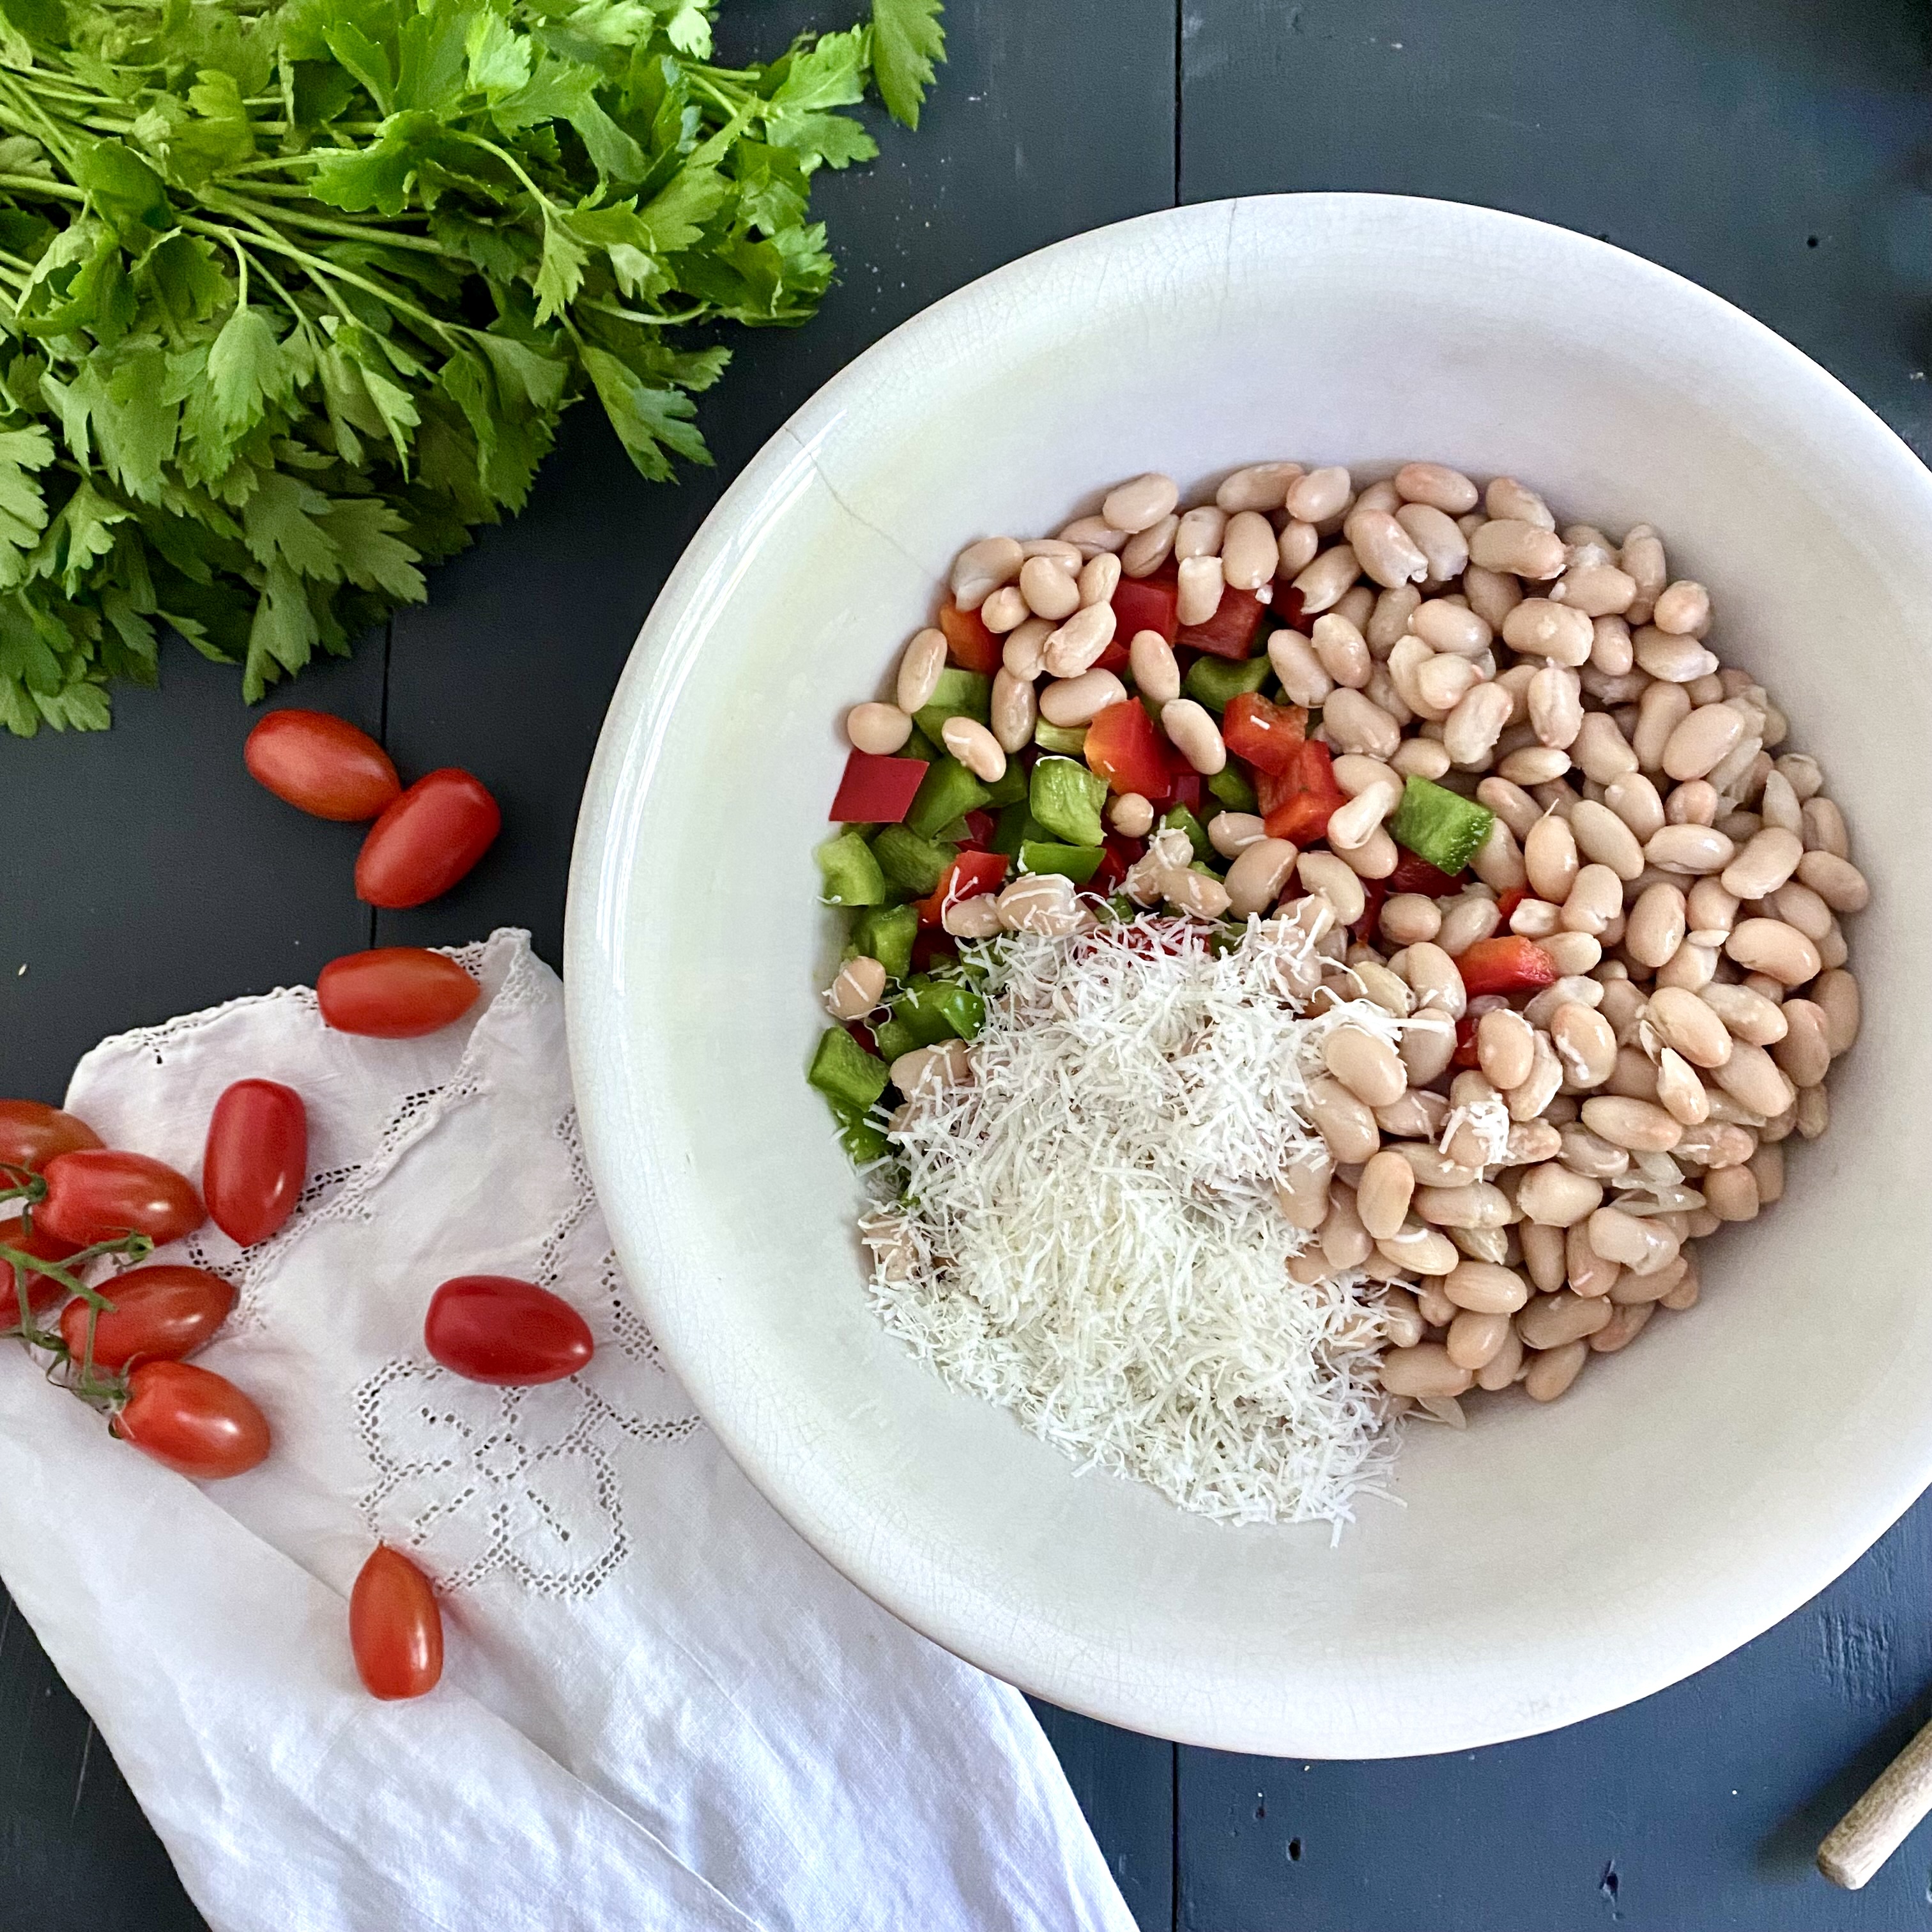
In a large mixing bowl, combine the parsley, green onions, herbs, green and red peppers, and the Parmesan cheese. Mix together. Add the beans and lightly combine so that the beans don’t get crushed or broken. Set aside.
In a small bowl, combine the lemon juice, vinegar, garlic, mustard, and the seasonings. Stir in the olive oil, then toss with the bean mixture and refrigerate for several hours or overnight.
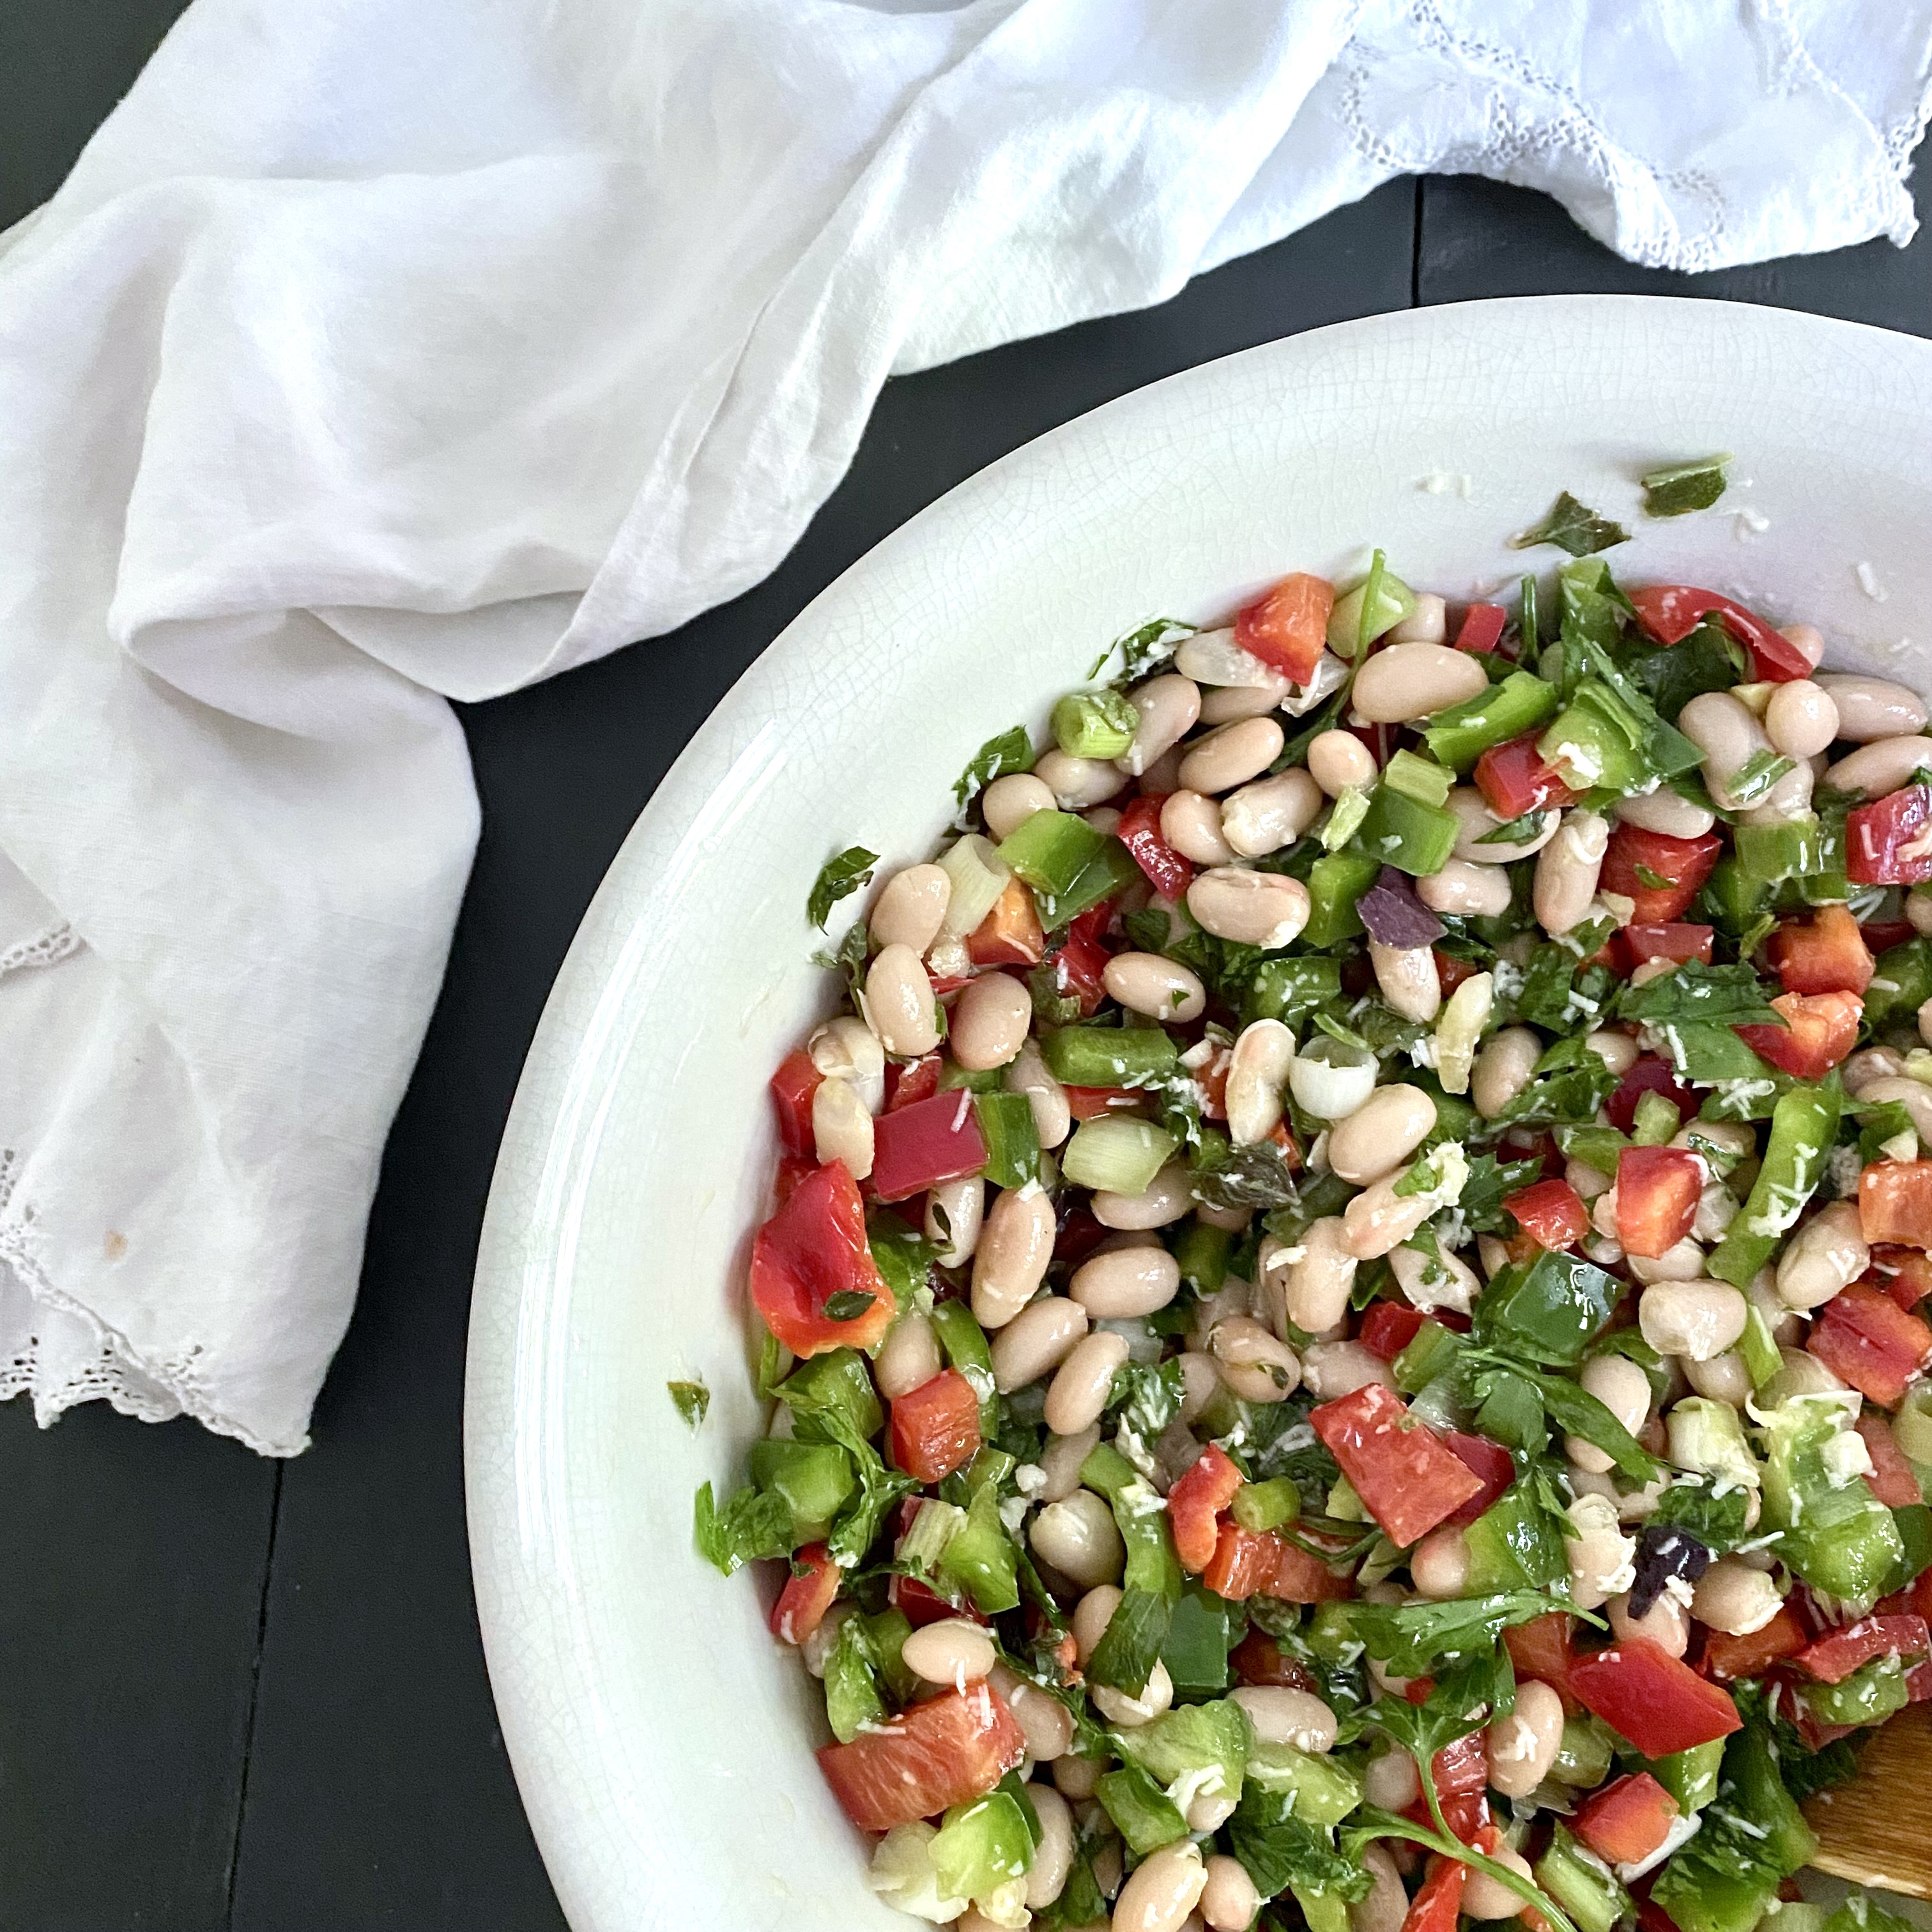
Just before serving remove the salad from the fridge and let it stand at room temperature for a few minutes to loosen the olive oil. Toss once more before garnishing with fresh cherry tomatoes and a basil sprig or two.
Bright, colorful, and full of flavor, this salad is a lovely meal on its own or a zesty side dish that complements a wide array of other foods, including all the traditional holiday grill favorites… chicken, fish, sausages, and burgers. Many of Martha’s recipes in The Vegetarian Feast are foundational building blocks ready to let your own culinary creativity shine.
The green and red peppers add a lovely crunch while the lemony mustard vinaigrette offers an extra bit of dressing that could be soaked up with additional toppings of diced chicken, homemade croutons, sliced avocado, or hard-boiled eggs. Other complimentary sides include grilled corn, hummus and pita chips, guacamole, fish tacos, cheese quesadillas, slices of peasant bread or baguettes, tortellini, devilled eggs, BLT sandwiches… you get the idea.
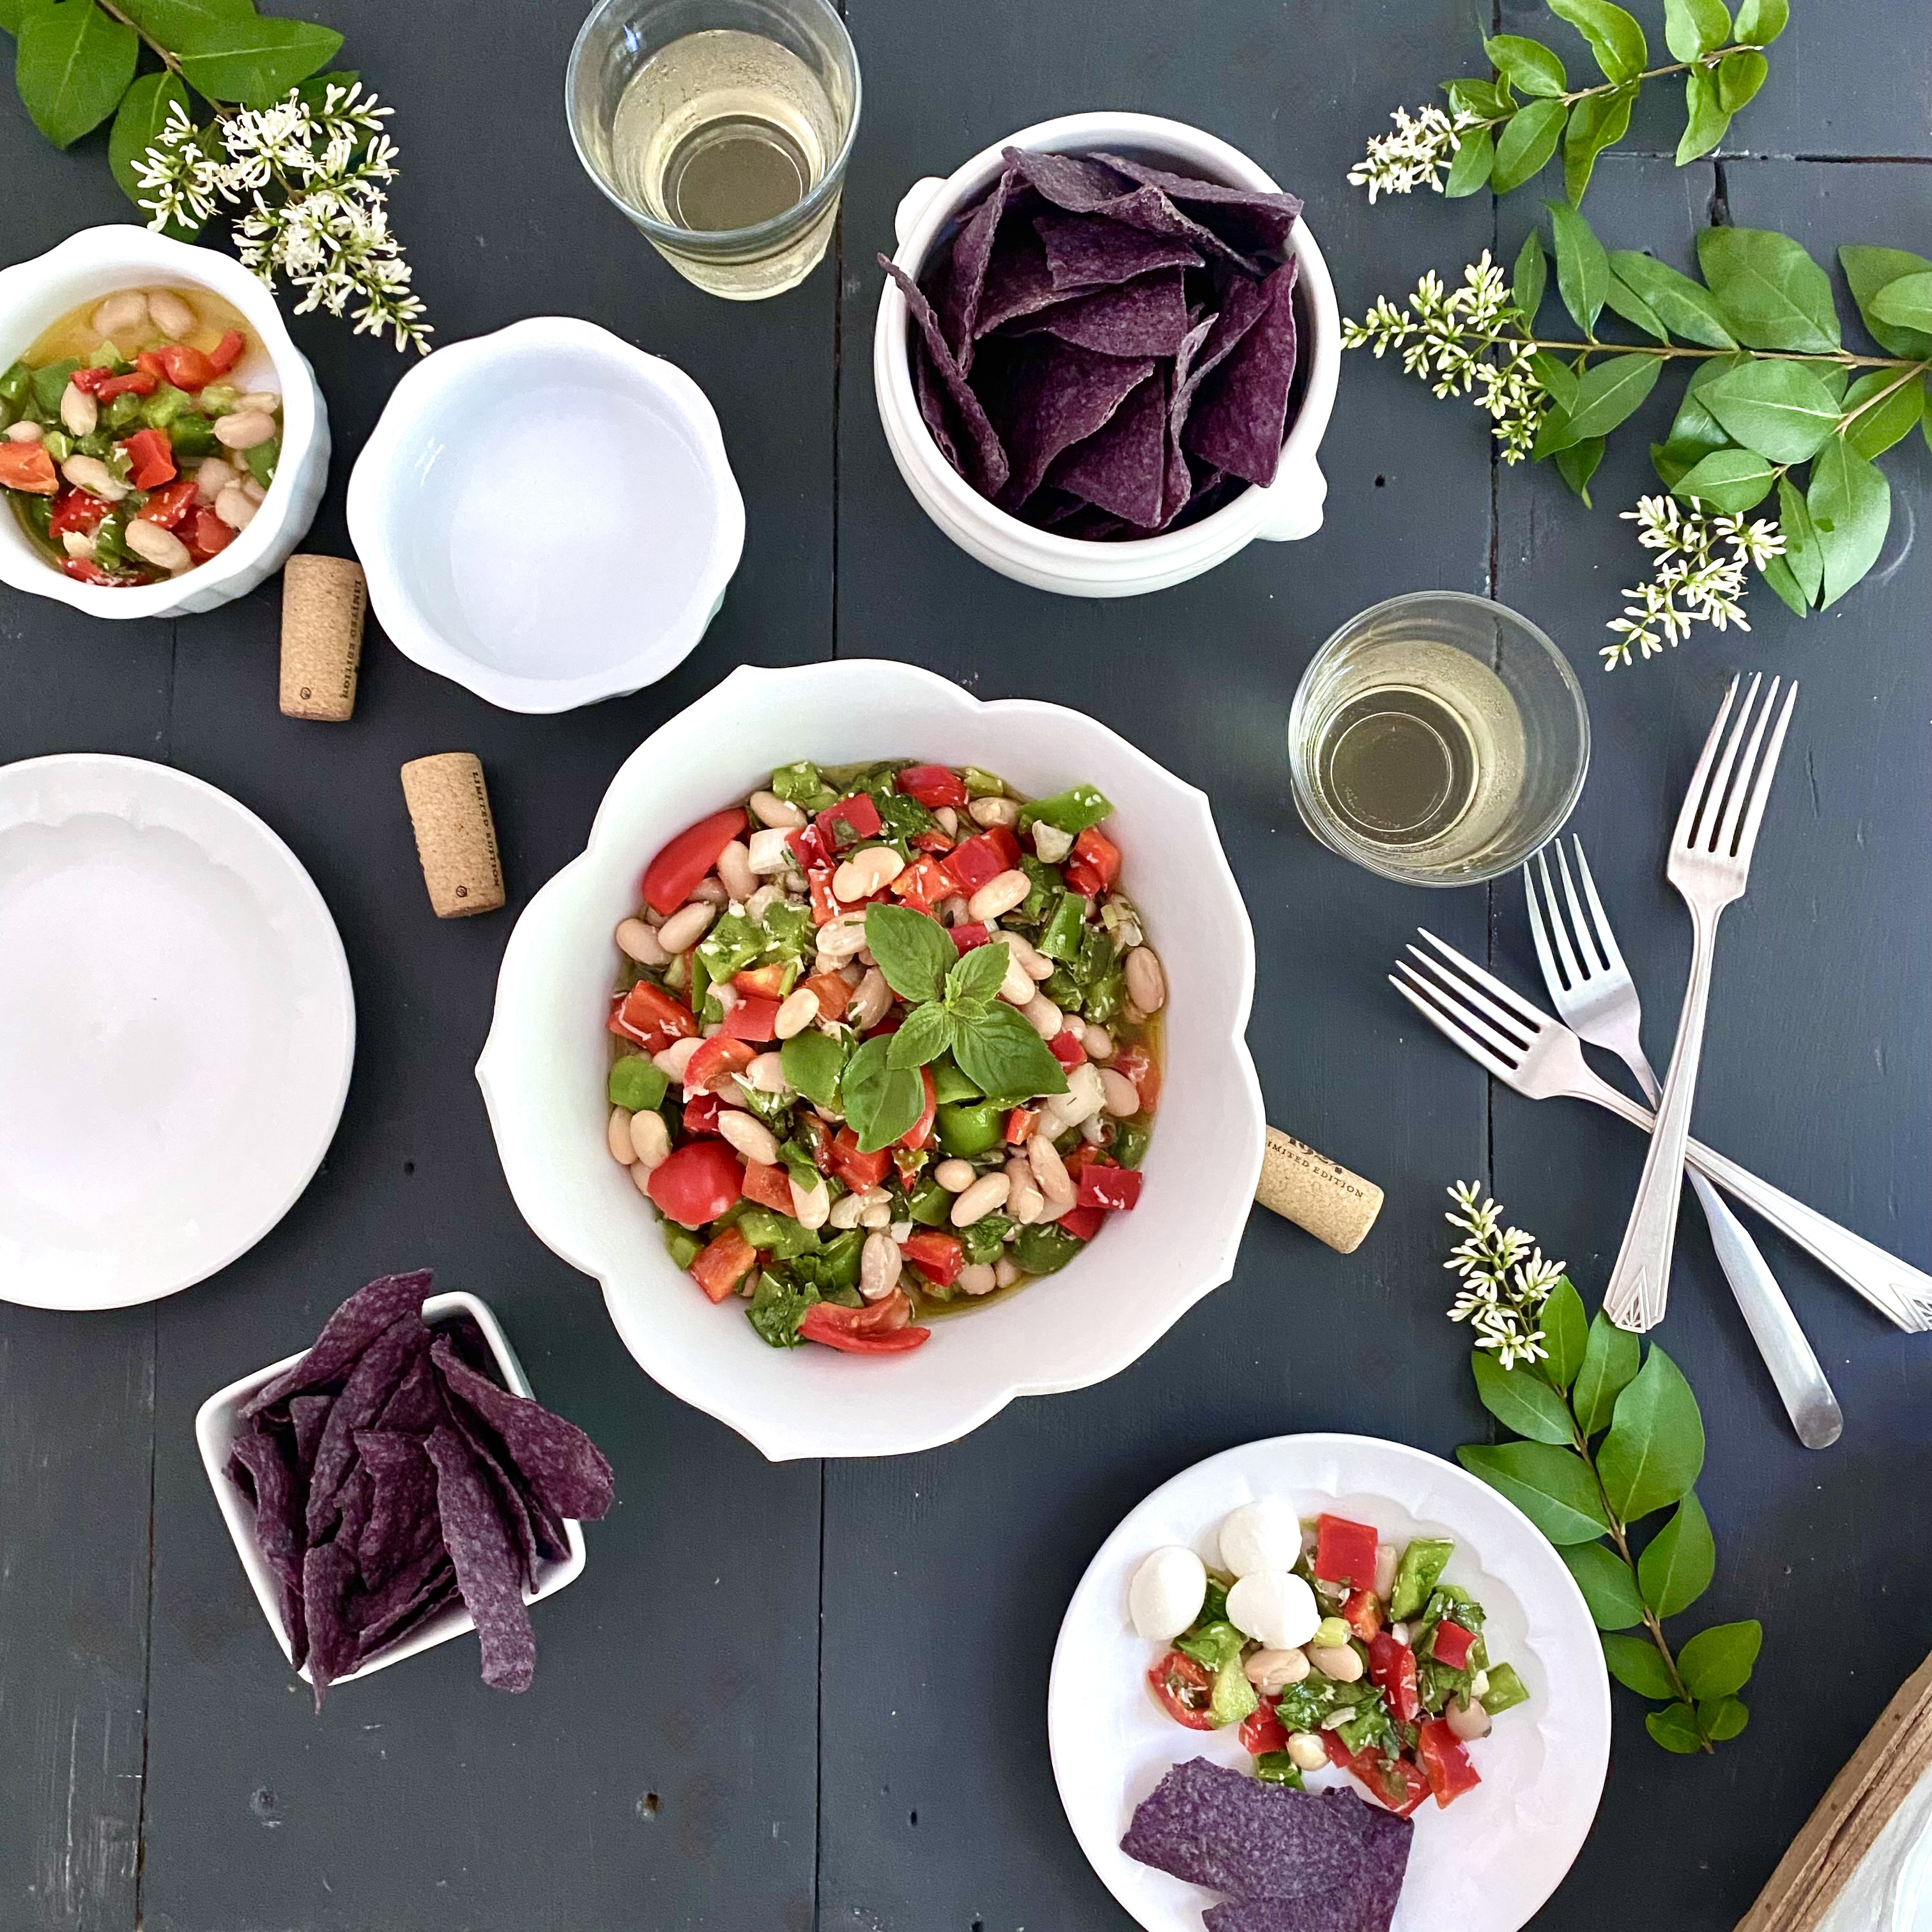
If you wanted to add a bit of Fourth of July flair to this recipe, serve it with blue corn chips and bite size mozzerrella balls for a red, white, and blue palette that celebrates the colors of the day.
Lovely served as part of your holiday hors d’oeuvres table, as an appetizer, or as a main dish, it’s a refreshing snack as much as a picnic component or the main meal of the party. Whether you are staying home or traveling around the country, this salad is easy to pack up and tote along on any sort of summertime adventure. It also stores well in the fridge in an airtight container for up to five days.
When it comes to the history of the United States and food, Martha is a prime example of our country’s dynamic and diverse culinary landscape, one that has been influenced by a wide range of cultures. She was born in Connecticut and educated in Massachusetts. She started her career in Texas, traveled extensively throughout Mexico, lived in Paris for a dozen years, and currently resides in California, where she continues to cook in her beloved Mediterranean, Mexican, and vegetarian style. All along the way, she’s espoused the value of sourcing fresh, local fruit, vegetables, and herbs that are so abundant in our country. That’s something to celebrate. For every American cook, there’s a story. And for every American recipe, there’s an influence inspired by someone else, somewhere else. Good food brings us altogether.
Cheers to simple summer cooking, to the heatwave that inspired this post, to Martha for sharing four decades worth of recipes, and to America on turning 250.
When it comes to dessert at Christmastime, an infinite loop of baking options never fails to greet us at every source. From chocolate to candy canes, cookies to confections, the holiday peppers its sugar plums and santas with all the sweet-natured hallmarks of the baking season. Every year, we are spritzed and sprinkled, fluffed and frosted, whipped and whirled into a cacophony of holiday creativity that delights the eye and feeds the algorithms until it seems like the world might just burst from an overload of sugar-fueled enthusiasms.
Amidst all this intrepid merry baking and decorative dalliances, there’s a favorite holiday cake that stands out. One that’s traveled time and trend for over 100 years, it’s a humble unsung hero of holiday celebrations that requires little effort but packs a lot of flavor and a festive color palette.
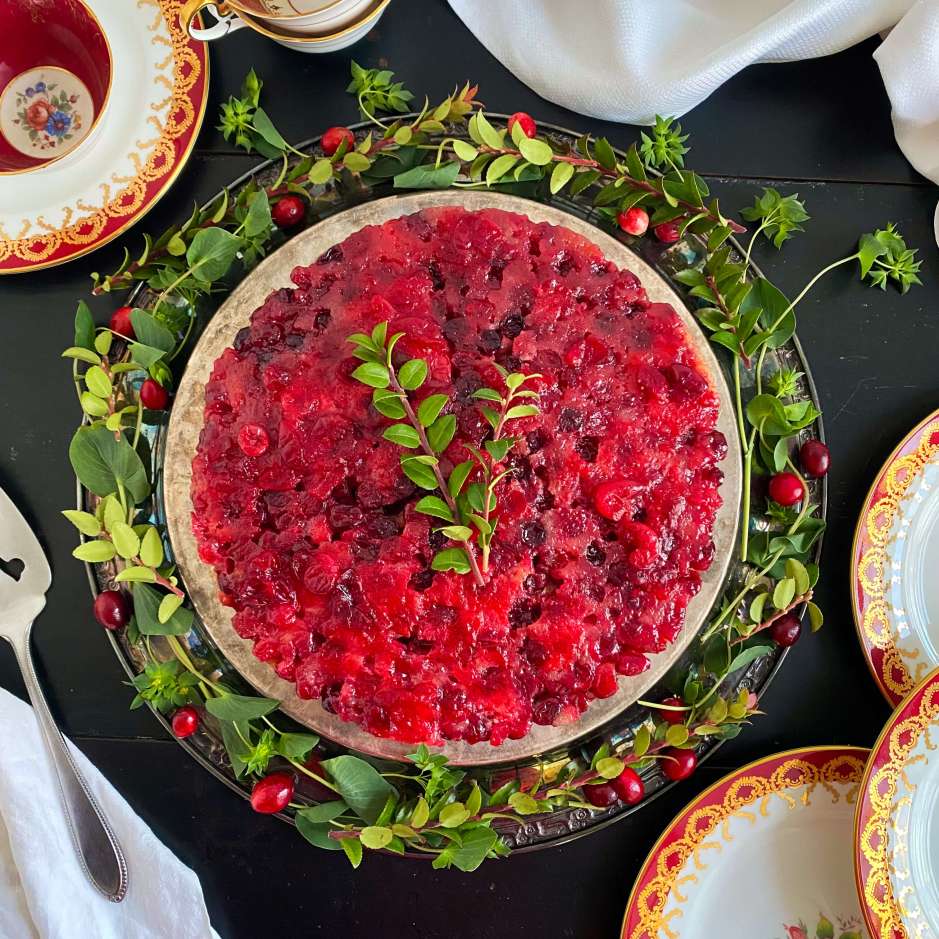
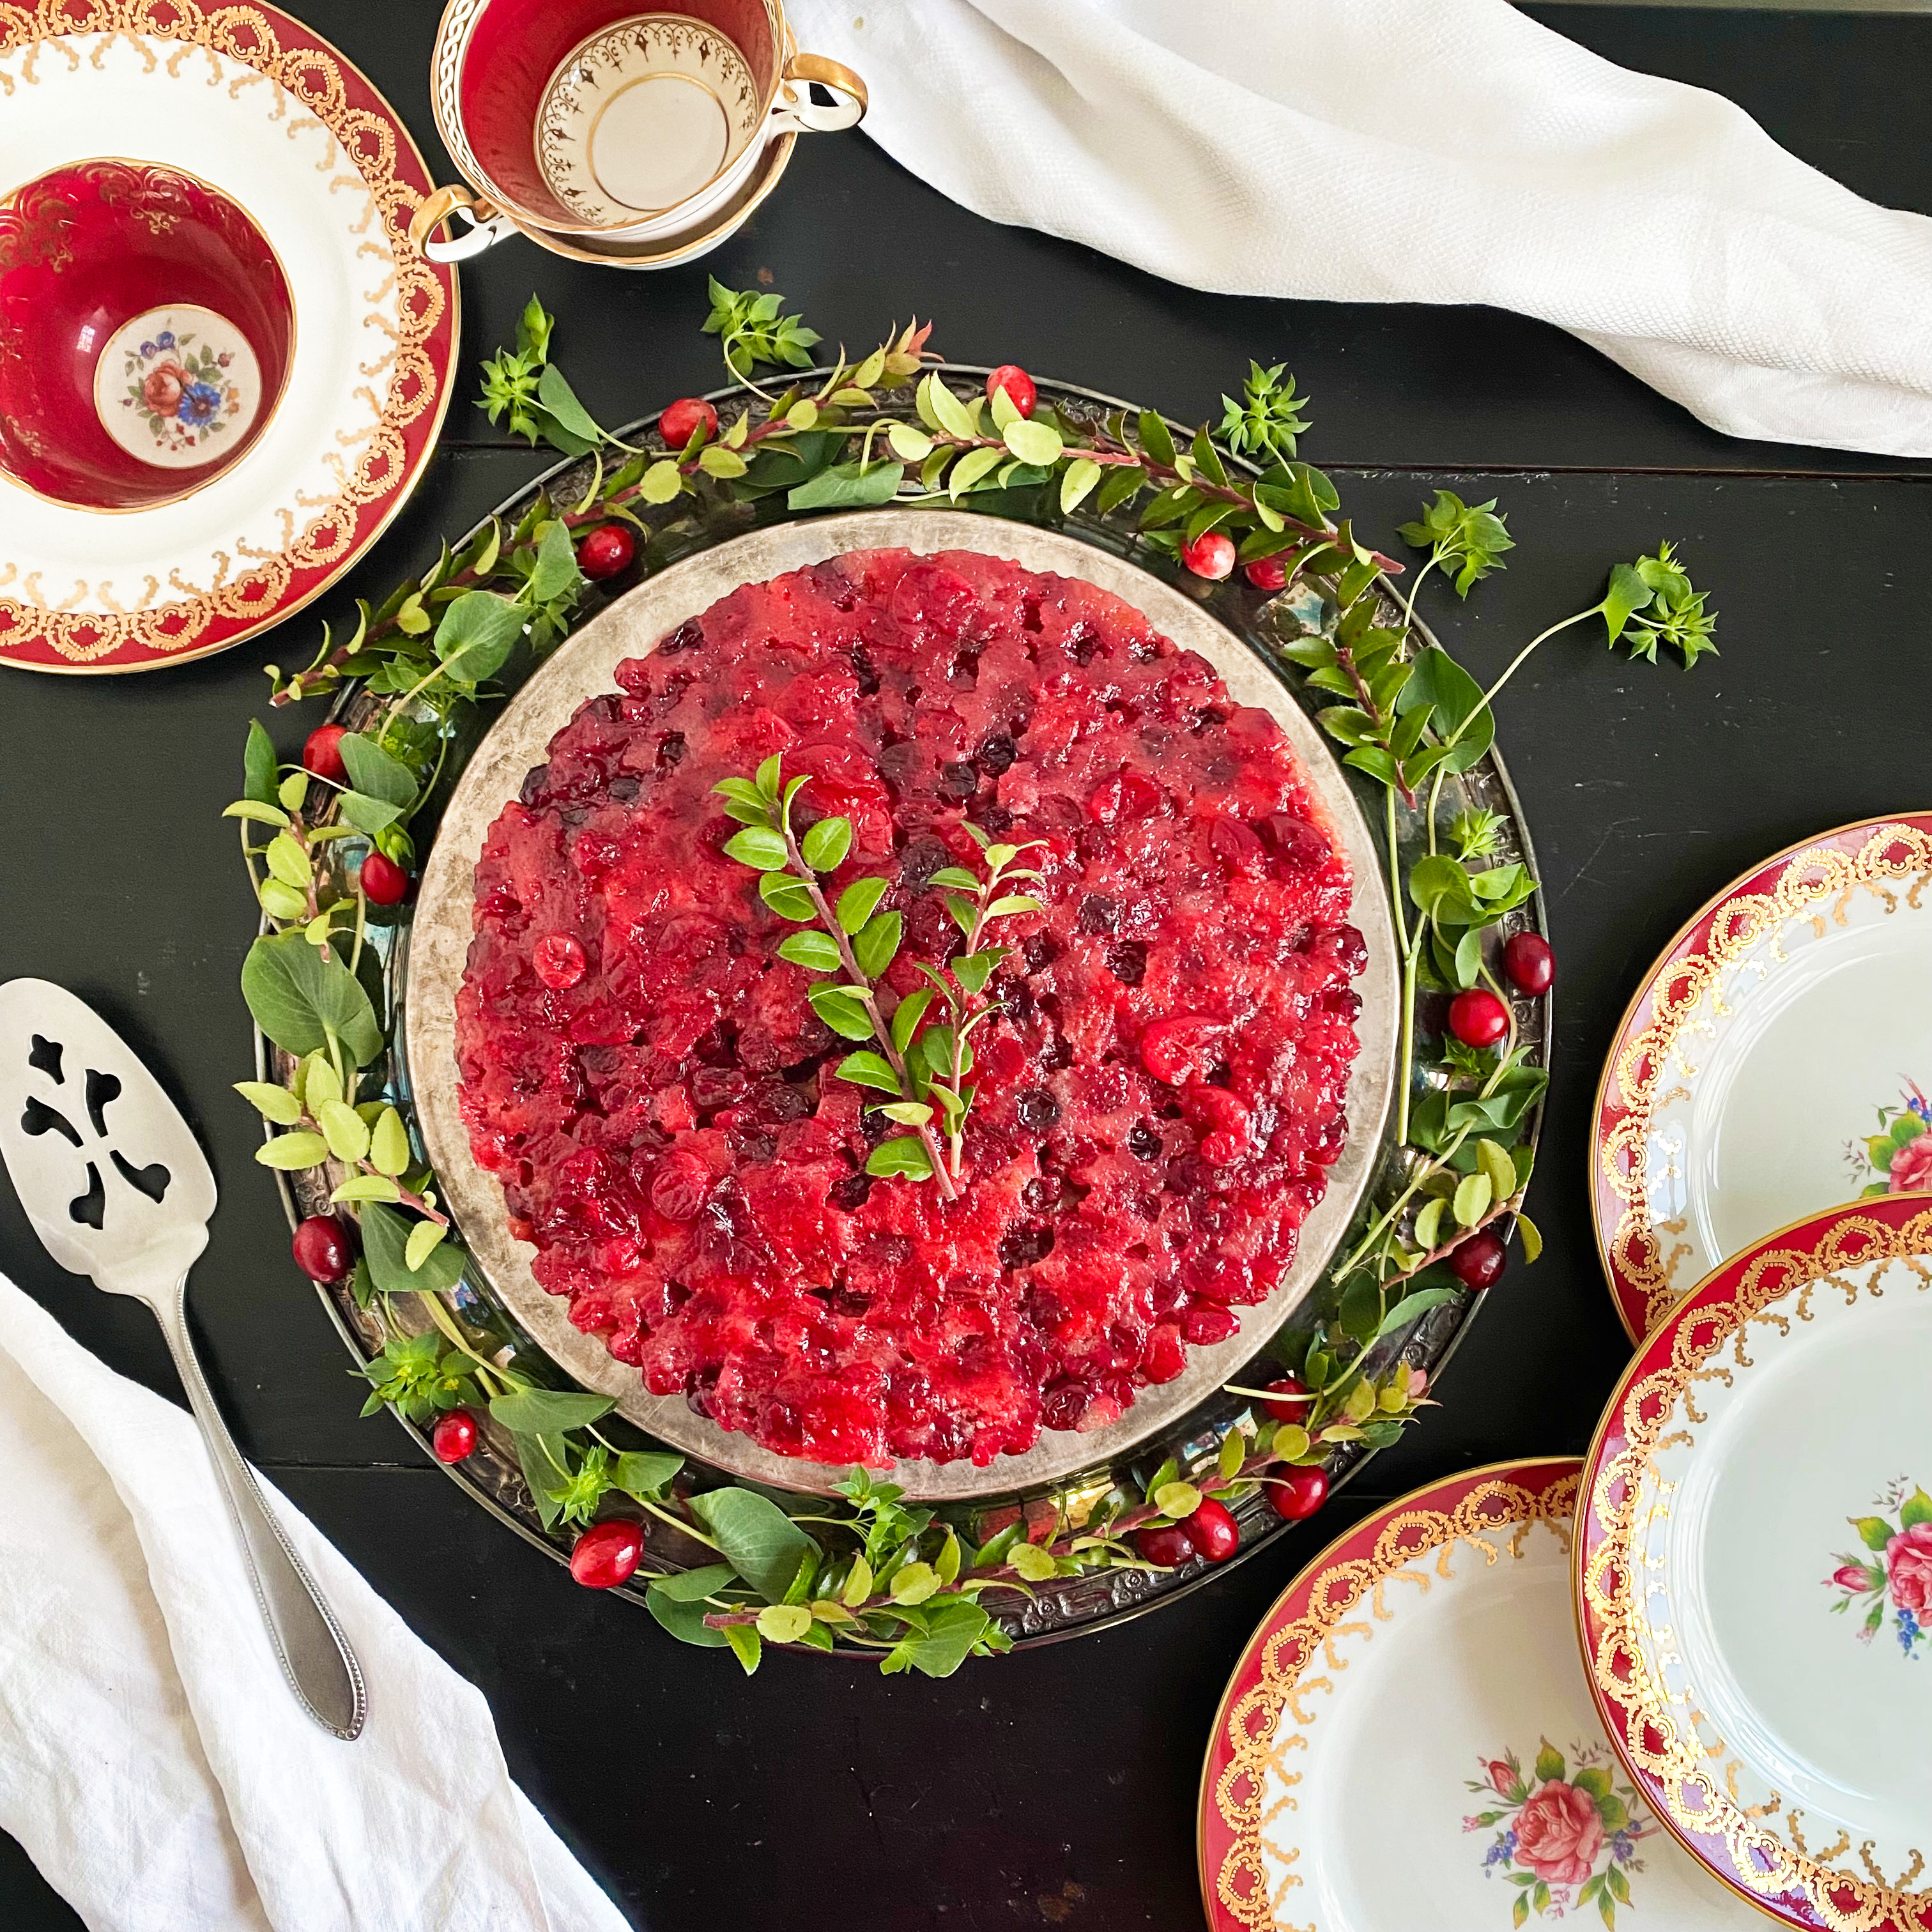
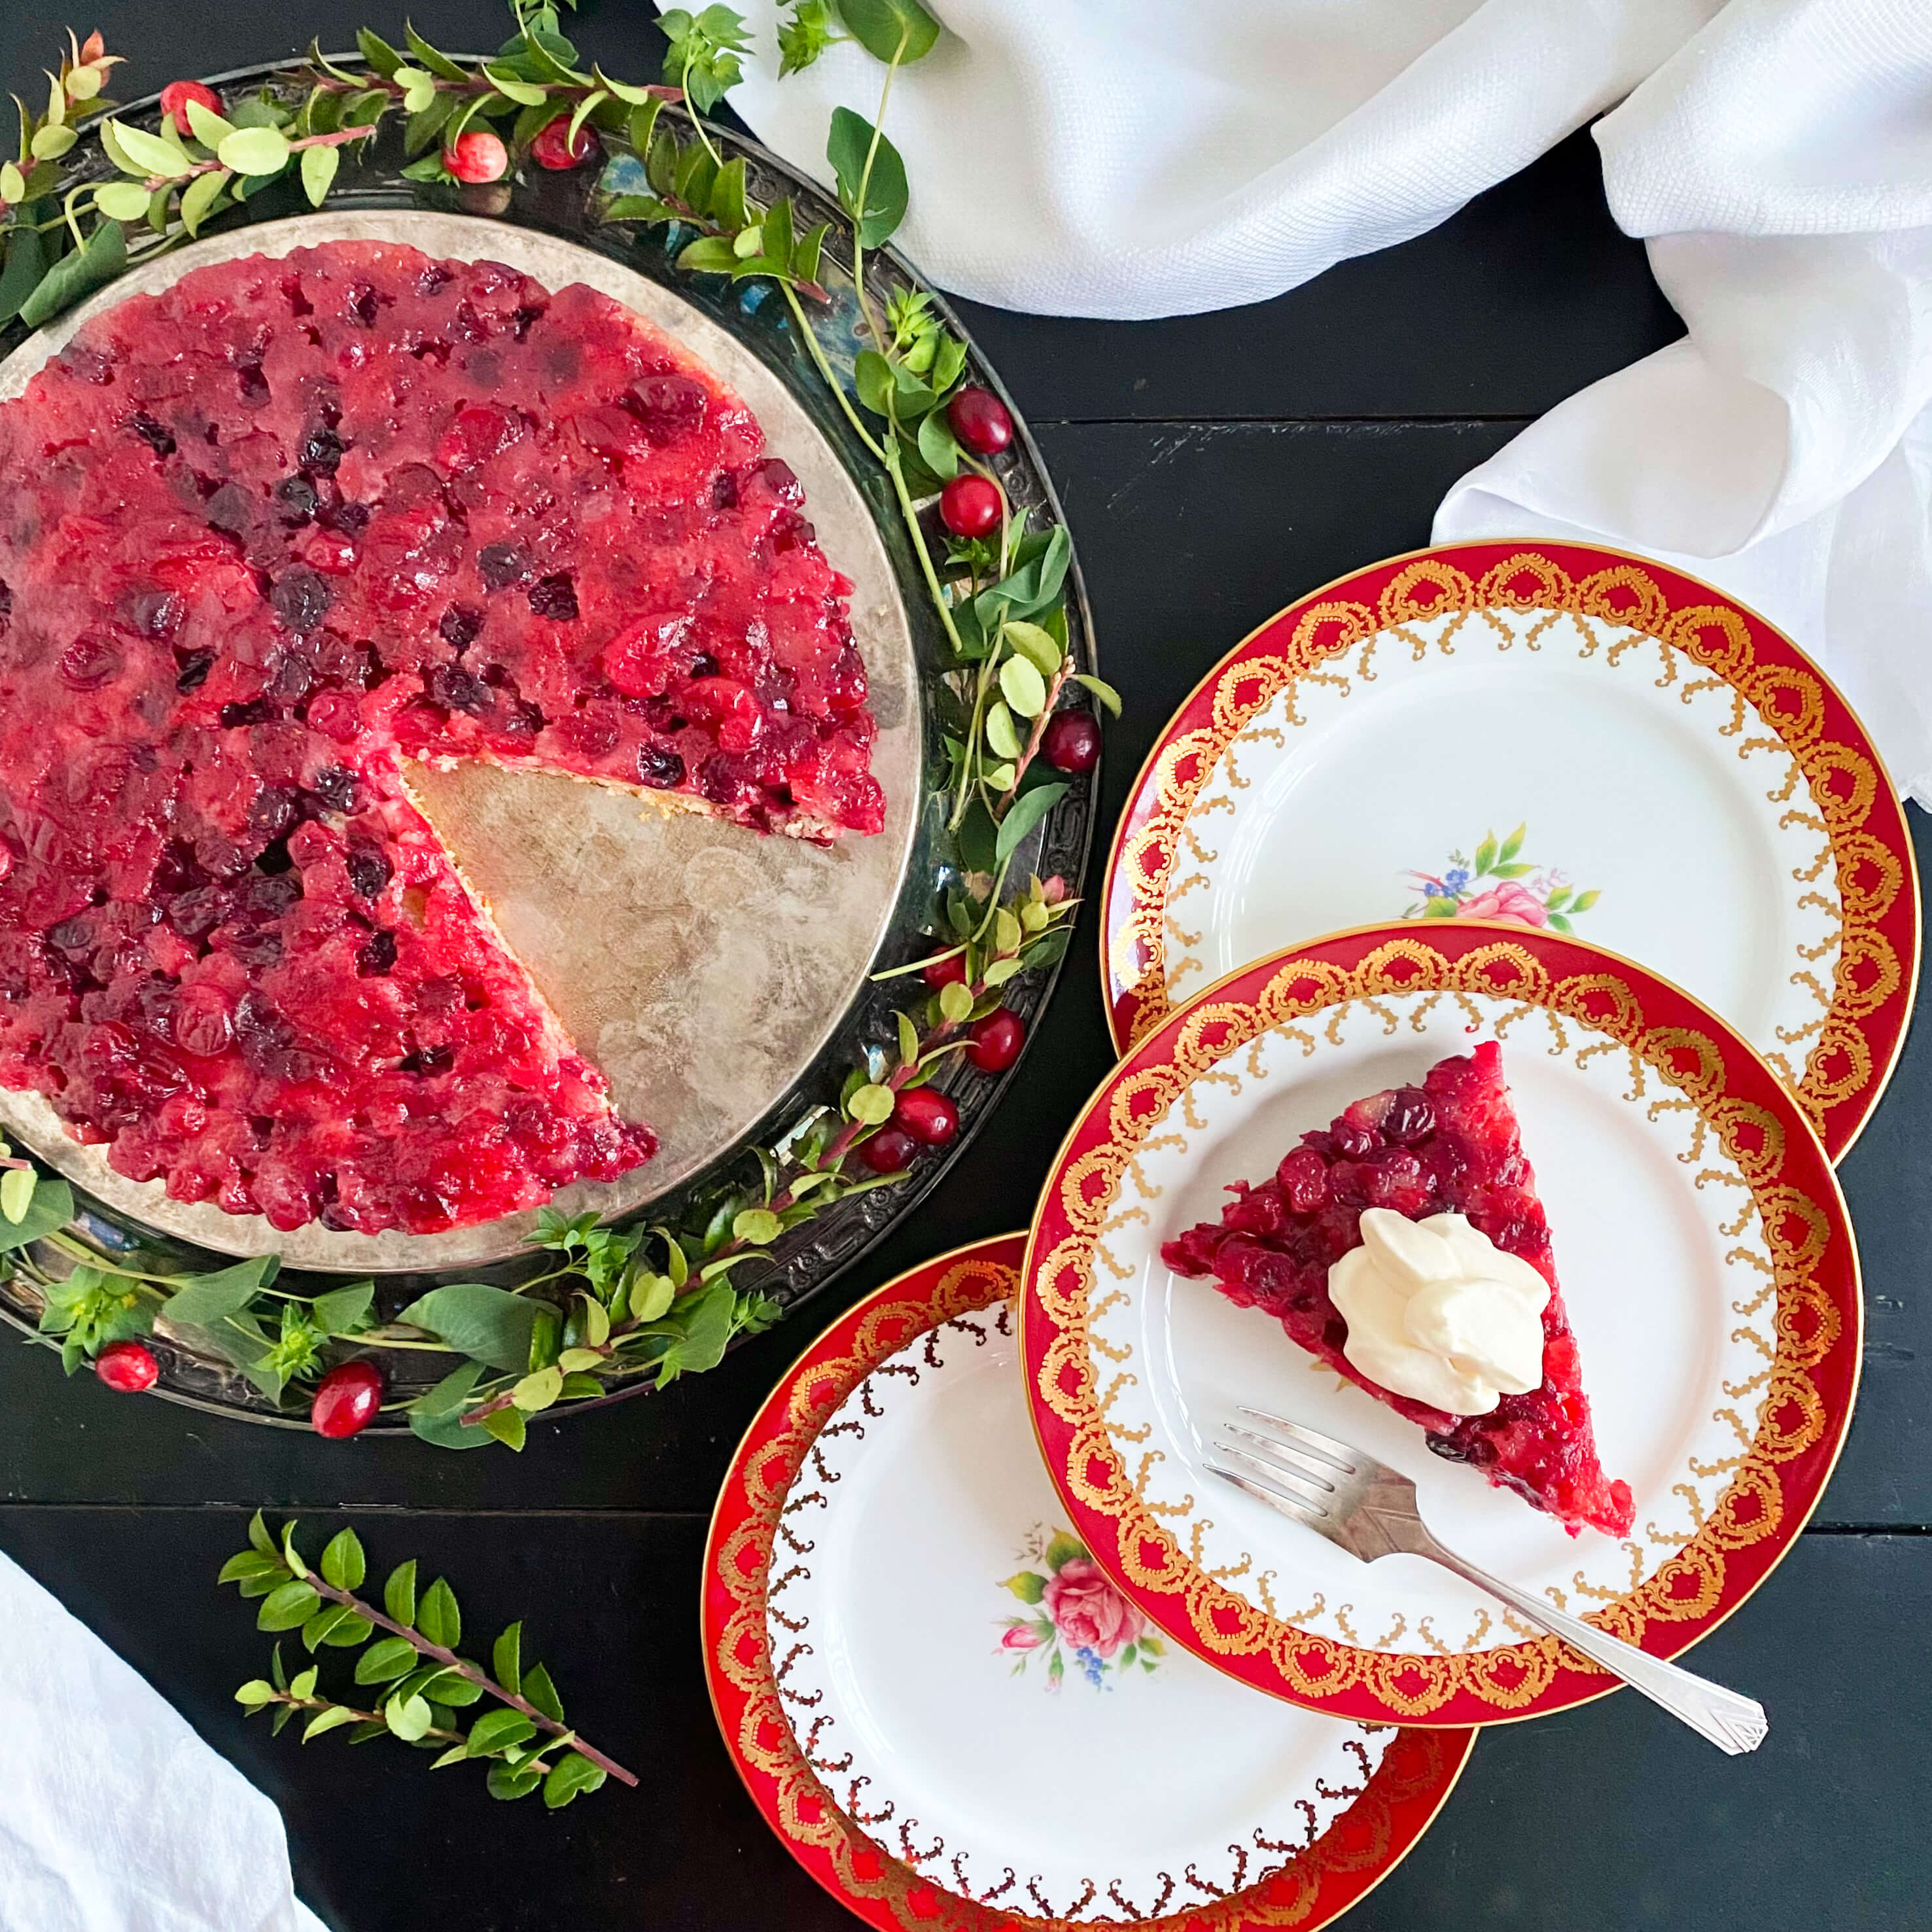
In today’s post, we are making a vintage recipe for cranberry upside-down cake. It’s a cousin cake to the more well-known Pineapple Upside-Down Cake which has graced dessert tables for most of the 20th century. But unlike that golden-circled and amber-shaded citrus cake, the cranberry upside-down version is a deep red, a fitting choice for the colors of the season.
Growing up my mom made this recipe almost every Christmas, or if for some reason she missed serving it over the holidays, it would appear on the dessert table further along in winter for Valentine’s Day or a special dinner or event. Traveling around all the kitchens of my family, both on the East Coast and the West Coast, it’s been a favorite for two generations, and usually makes the list each year when discussing options of what to make and bake for the holiday season. Part of the reliable tried and true batch of recipes that my mom included in a homemade cookbook that she made for me and my sisters and my brother many years ago, it’s got her firm seal of approval for holiday baking.
This note of praise doesn’t come lightly. My mom is very particular when it comes to scrutinizing a recipe. In order for her to recommend one, it has to continuously perform well, time and time again before it makes her tried and true list. The first time she made this cranberry upside-down cake recipe, she loved it for its presentation and its bright red color on the Christmas table. Years into making it, beyond its delicious taste, she loved it even more for its reliability, its sense of the unusual in that not many guests at her table had had it before, and she loved it for the fact that it traveled well in the car so she could easily tote it along to a party. As a kid, I loved this recipe for its sweet tart taste and its syrupy sticky top. I thought it looked beautiful on the table too. As an adult, I still love it for all those same reasons. But now I also appreciate the complimentary marriage of its flavors that blend so well with many lunch, brunch, and dinnertime menus. Especially ones that stretch from Thanksgiving all the way through the end of winter.
Recently, when I asked my mom where she found the recipe, she couldn’t remember. It was over 40 years ago that she first made it and in her defense she’s tried thousands of recipes between then and now. But my sister thinks, she may have pulled it from the pages of Gourmet magazine sometime in the late 1970s or early 1980s. I couldn’t find any reference online linking Gourmet and this recipe together, but the exact origin story of upside-down cakes in general is a bit elusive, so perhaps it is fitting.
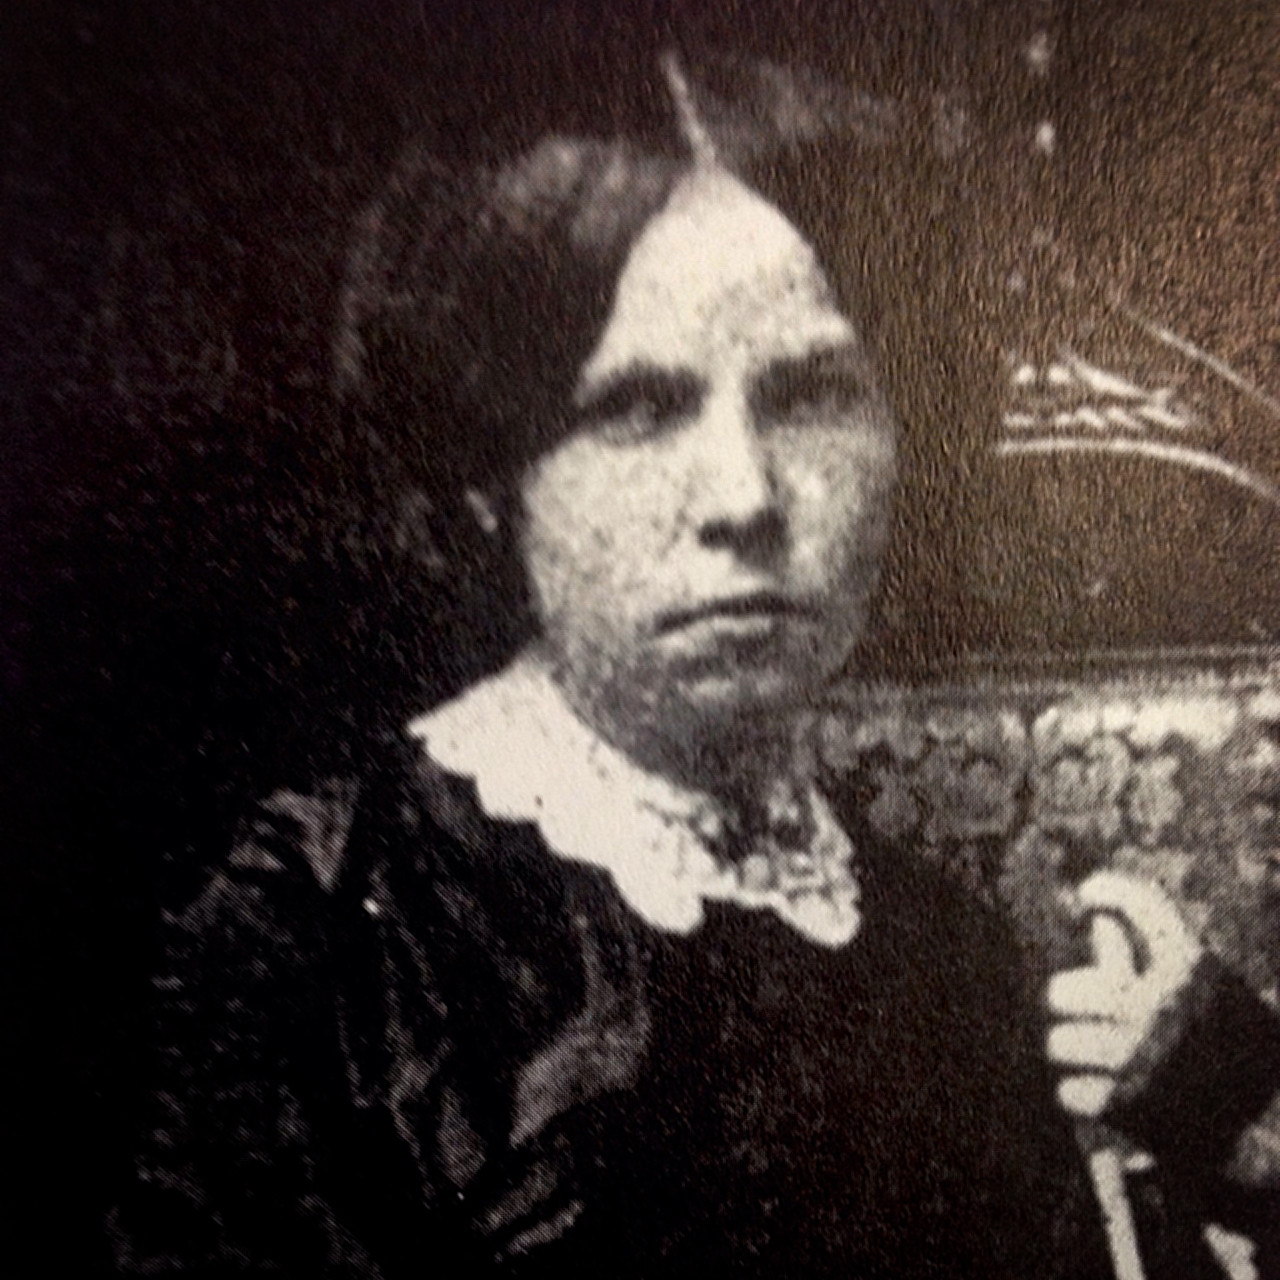
As far as its vague history goes, the earliest mention of an upside-down cake recipe dates back to the late 1800s, the decade when flipped and fruited cakes started creeping into the popular dessert category in kitchens and cookbooks. Sometimes called spider cakes or skillet cakes, they were thought then to possibly have originated from pioneer days when much American cooking was done in a skillet or a frying pan over an open fire or on the stove top. Some culinary historians by-passed this notion and attached upside-down cakes to menus of the Middle Ages, when fruit laden desserts were part of feast days and banquet dinners. Another source, a journalist in the 1920s, credited this style of cake baking to Gail Hamilton (aka Mary Abigail Dodge), a 19th century New England journalist, feminist, and suffragette. But I couldn’t find any correlation to Gail and cooking.
Mary Abigail Dodge aka Gail Hamilton photographed in 1860.
Regardless of when and where upside-down cakes came from, this one pan wonder has always been a marvel for home bakers. Since it had already contained a jam like top, there was no need for frosting or additional decorating. One flip of the cake pan after cooling, and your baked masterpiece was ready to serve.
The Anderson Herald, October 19,1928
The 1920s proved to be a pivotal decade for the upside-down cake launching it into popularity again by touting its enticing apperence, as well as its economy and effortlessness to a whole new set of bakers. In that decade, apple, peach, apricot, and pineapple were the precursor fruits to cranberry upside-down cake, with each one having their own singular moment in the spotlight. Although upside-down cakes have remained popular every decade since, it was the pineapple version that’s had the most longevity and garnered the biggest fan base.
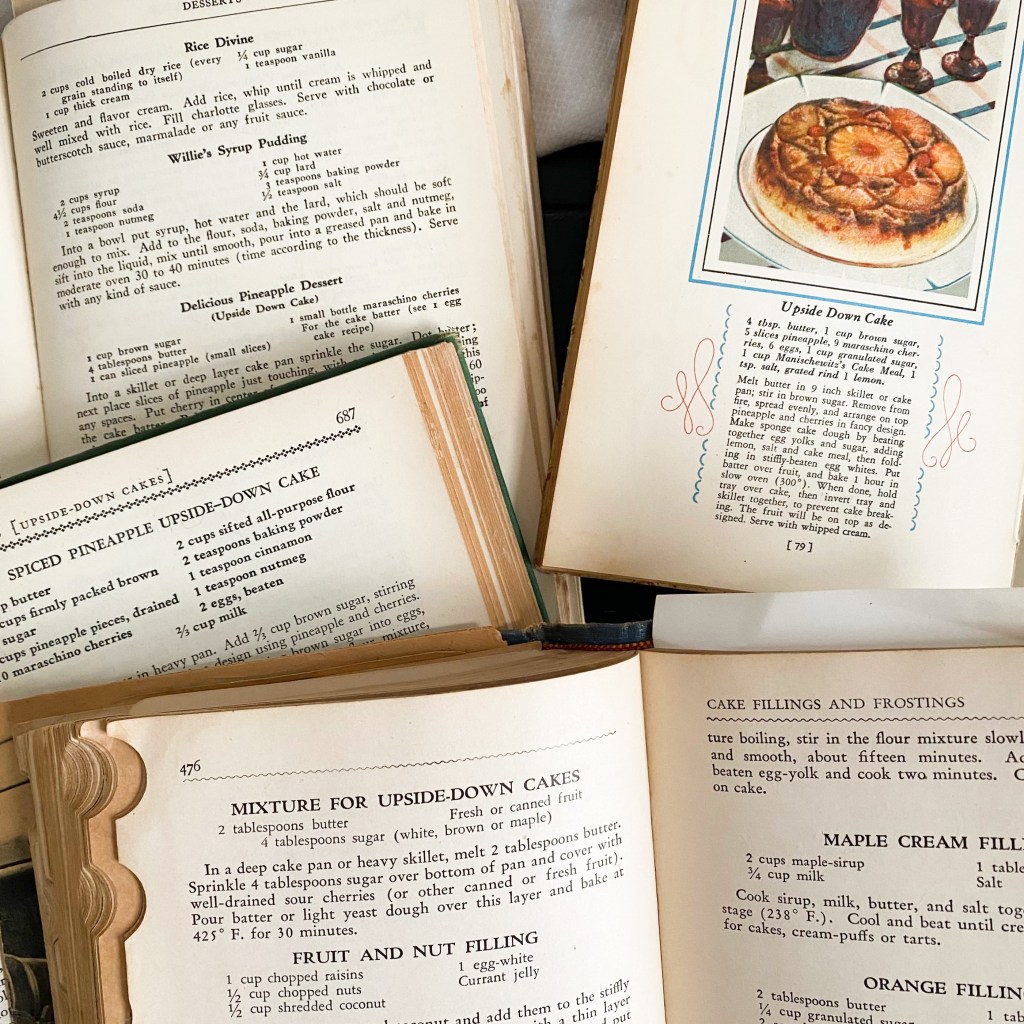
Recipes for Pineapple Upside-Down Cake dating from the 1920s-1940s. Clockwise from top left: Delicious Pineapple Dessert (Upside Down Cake) from Southern Cooking by Mrs. S.R. Dull (1928); Upside Down Cake from Tempting Kosher Dishes by the B. Manischewitz Co (1930); Mixture for Upside-Down Cakes from The American Woman’s Cook Book (1949); and Spiced Pineapple Upside-Down Cake from the Herald Tribune Home Institute Cook Book (1947)
Not as expensive to make as a multi-tiered layer cake, not as heavy to eat as pie, and not as time-consuming to bake as cookies, upside-down cakes are an ideal, elegant, no-fuss wintertime dessert, especially at Christmas when schedules can be harried and baking tasks multiplied. The coming together of this simple dessert requires no more than 90 minutes in the kitchen from gathering of ingredients to finished product.
Over the past century, there has been many different recipes for creating an upside-down cake, each with their own twists and tweaks, but the main cooking principles are always the same: a layer of butter on the bottom of the pan, then a layer of sugar, then fruit, then cake batter. Once finished and flipped, the result is a buttery cake topped with caramelized fruit jam.
The Stockman’s Journal, April 7, 1927
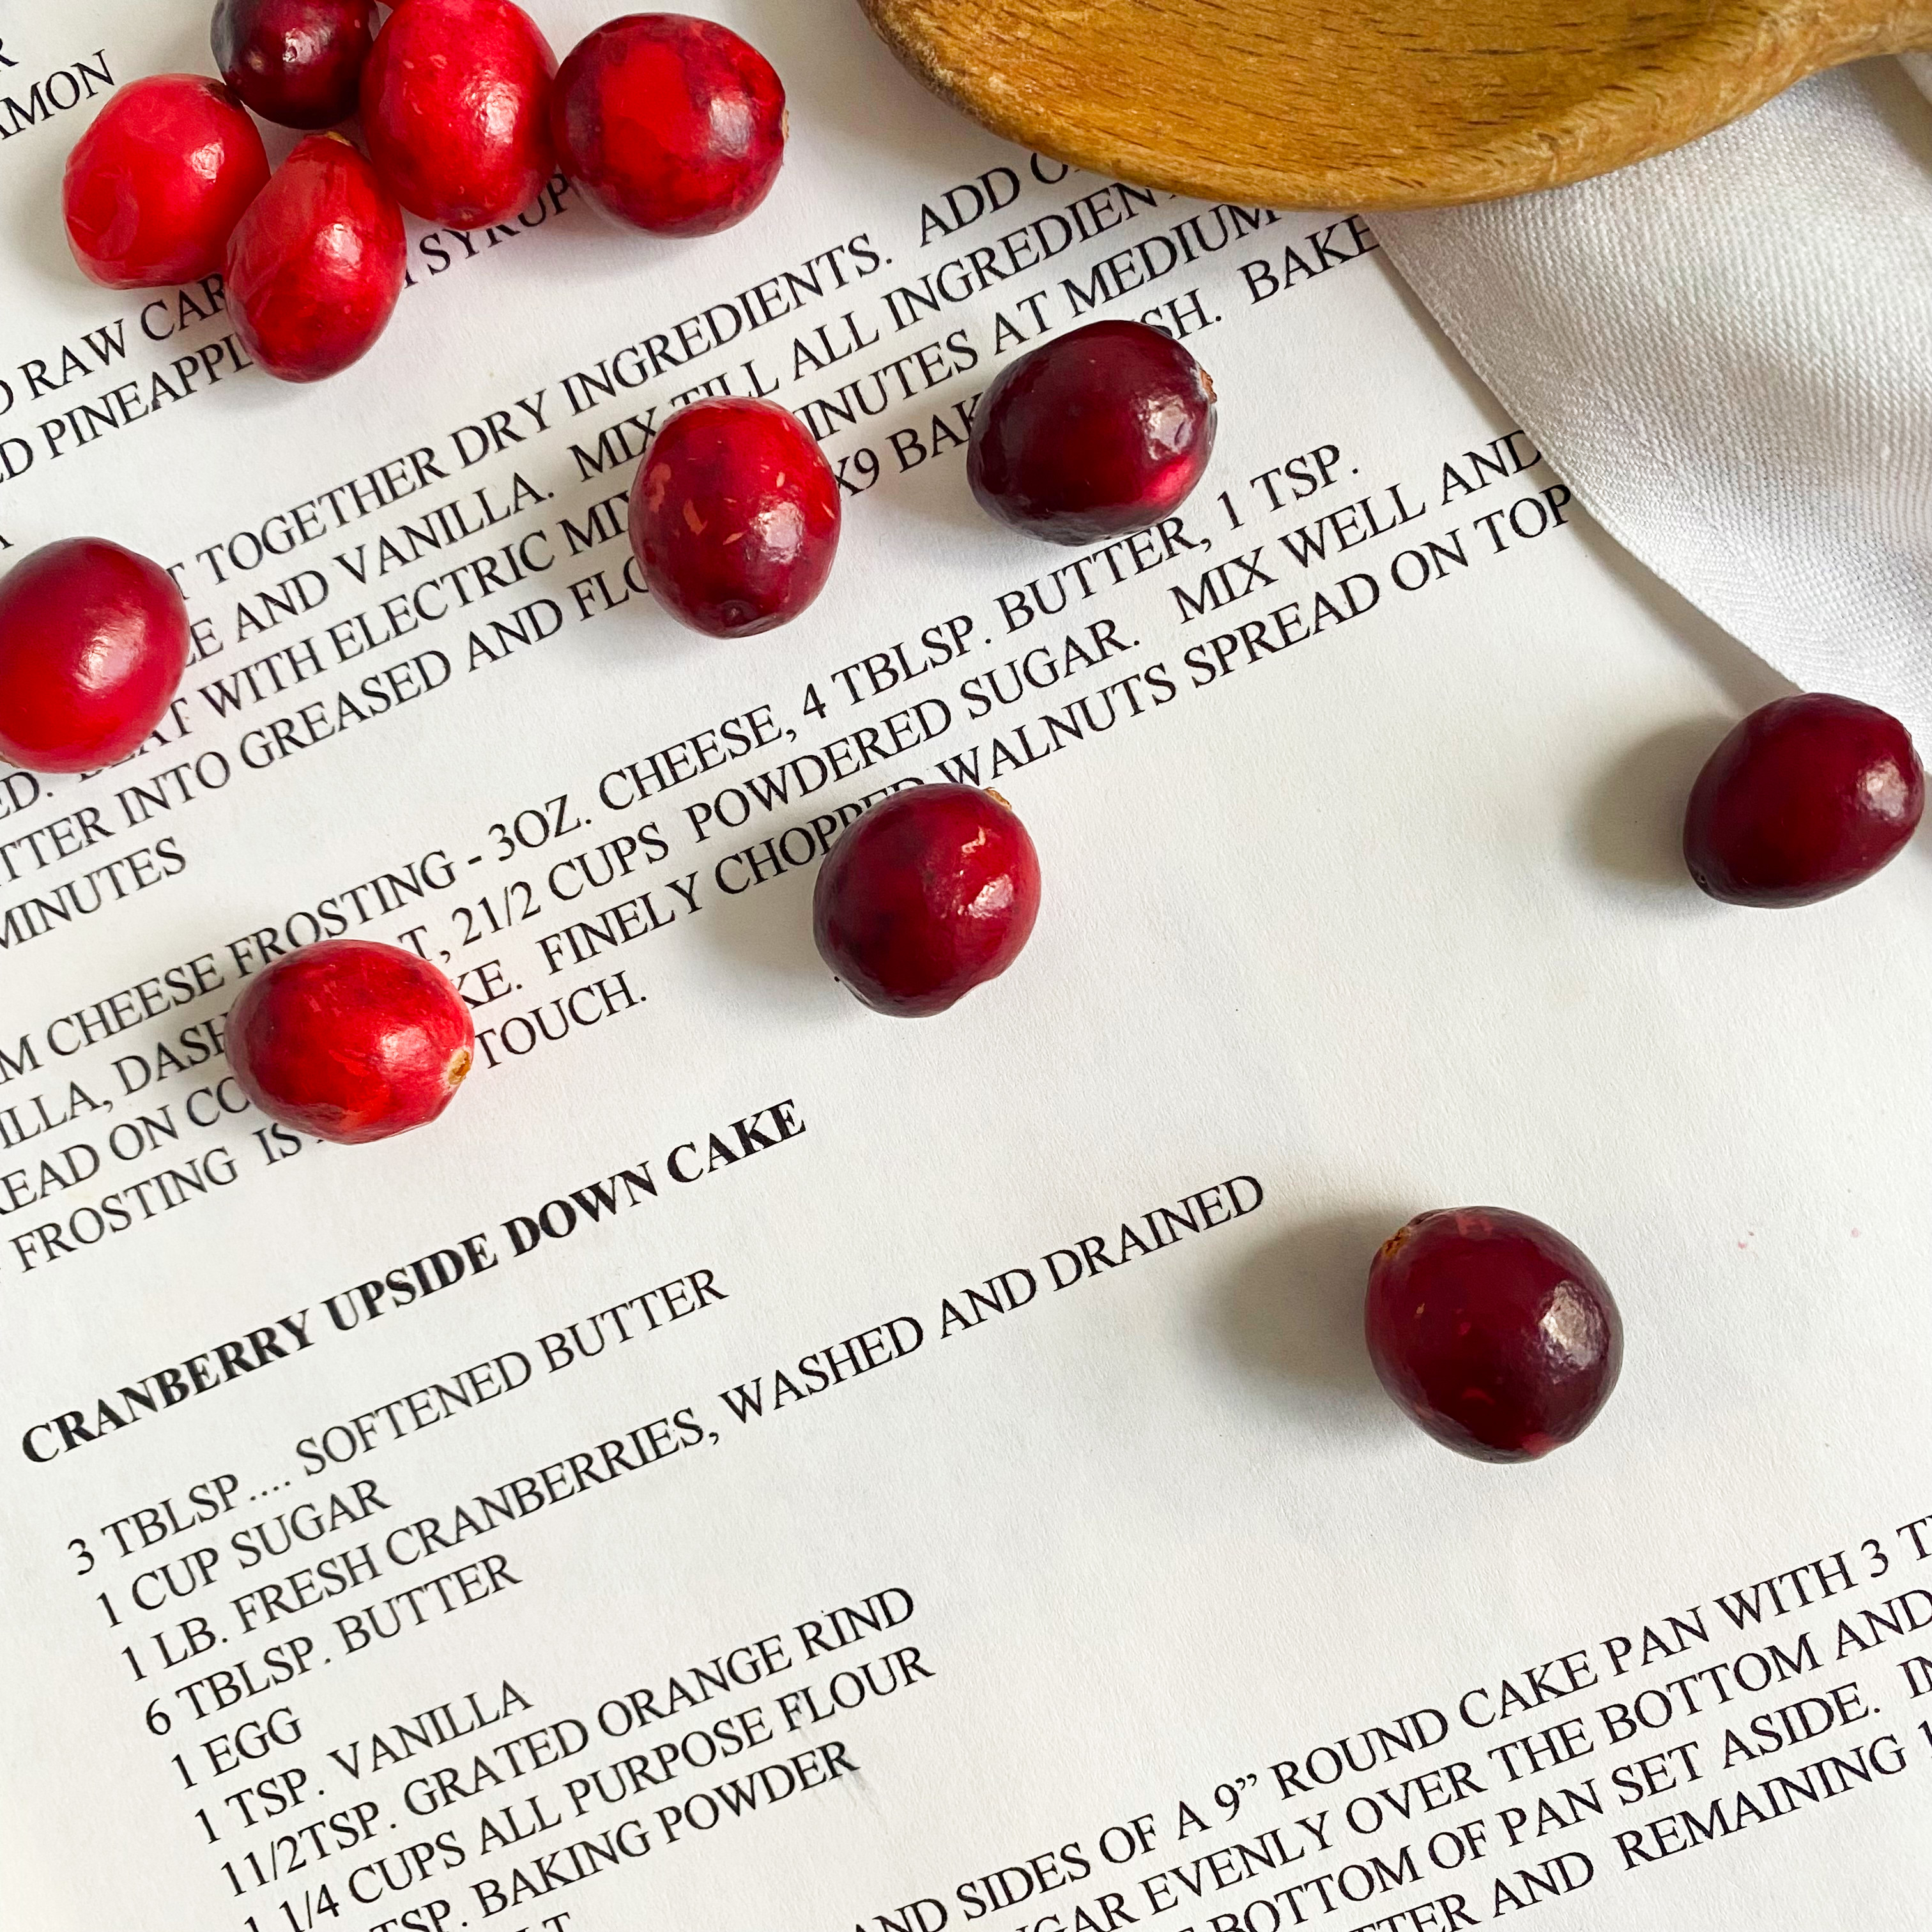
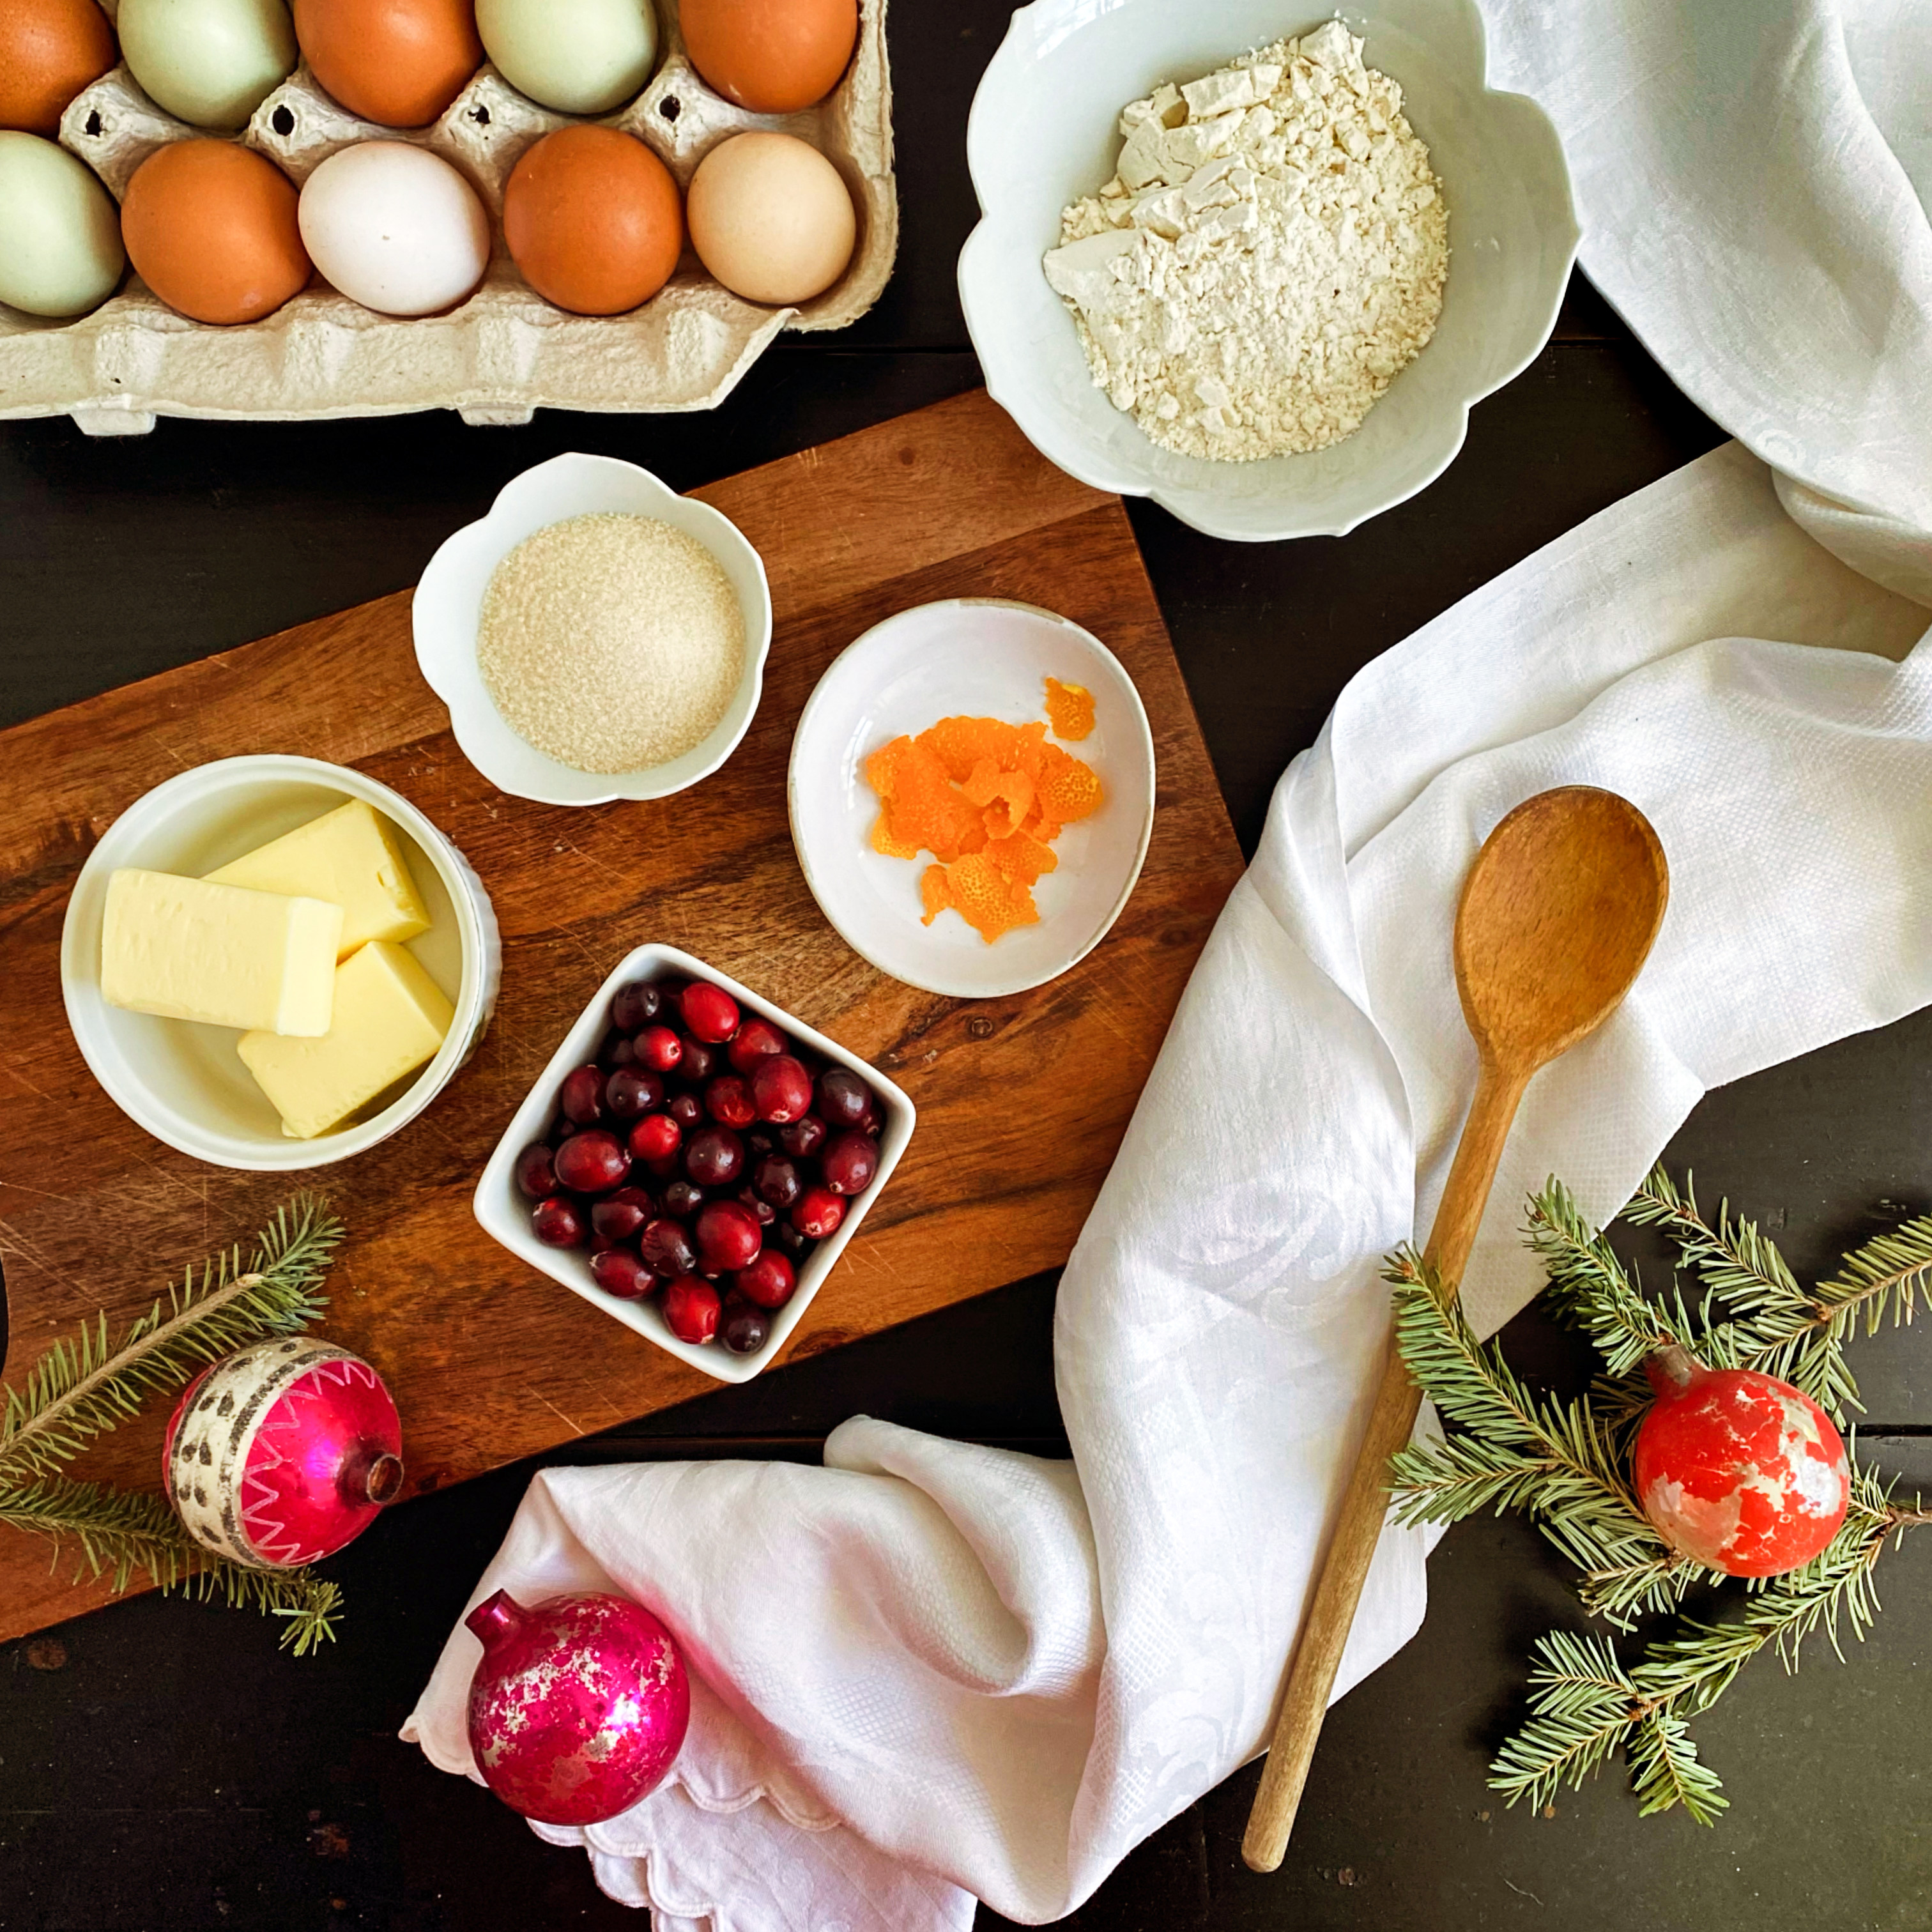
Ideally, the fruit is fresh and either added whole or halved, but the cake part of the recipe can be made many different ways. Some recipes call for boxed cake mixes, some add extra spices like cinnamon and nutmeg, or a boozy bit of rum or fruit liqueur. And some recipes incorporate canned fruit or fruit filling. The cake consistency varies too. Some cakes yield textures that are spongy, springy, crumbly or dense in texture. Some cake batters call for cornmeal, whole wheat flour, pulverized oatmeal, all-purpose flour, or the inclusion of crushed almonds or citrus peel. I’m sure all who love cranberry upside-down cake have their own favorite ingredient combinations, as it is easily adaptable to creative cookery. The one my family likes best includes fresh orange rind in the batter, fresh cranberries on the bottom, and a dollop of homemade whipping cream on top prior to serving.
In making this recipe for the blog, I used a 10.25″ inch cake pan. The recipe calls for a 9″ inch pan which will yield a slightly taller cake than what the photos show here. Although not by very much. Similar to a tart, the cake portion of this upside-down creation is a compact layer, not tall and fluffy like a multi-layered birthday cake. Instead, this dessert is thin and delicate with concentrated flavor. A single slim slice offers just the right amount of everything.
Cranberry Upside-Down Cake
Serves 8
9 tablespoons butter (divided)
1 cup sugar (divided)
1 lb fresh cranberries (plus extra for garnish)
1 large egg
1 teaspoon vanilla
1 1/2 teaspoons freshly grated or minced orange rind
1 1/4 cups all-purpose flour
1 1/2 teaspoons baking powder
1/4 teaspoon salt
1/2 cup milk (either whole or 2%)
Fresh whipping cream
Optional garnish step (please see note below)
1/2 cup fresh cranberries
1/3 cup water
2 tablespoons sugar
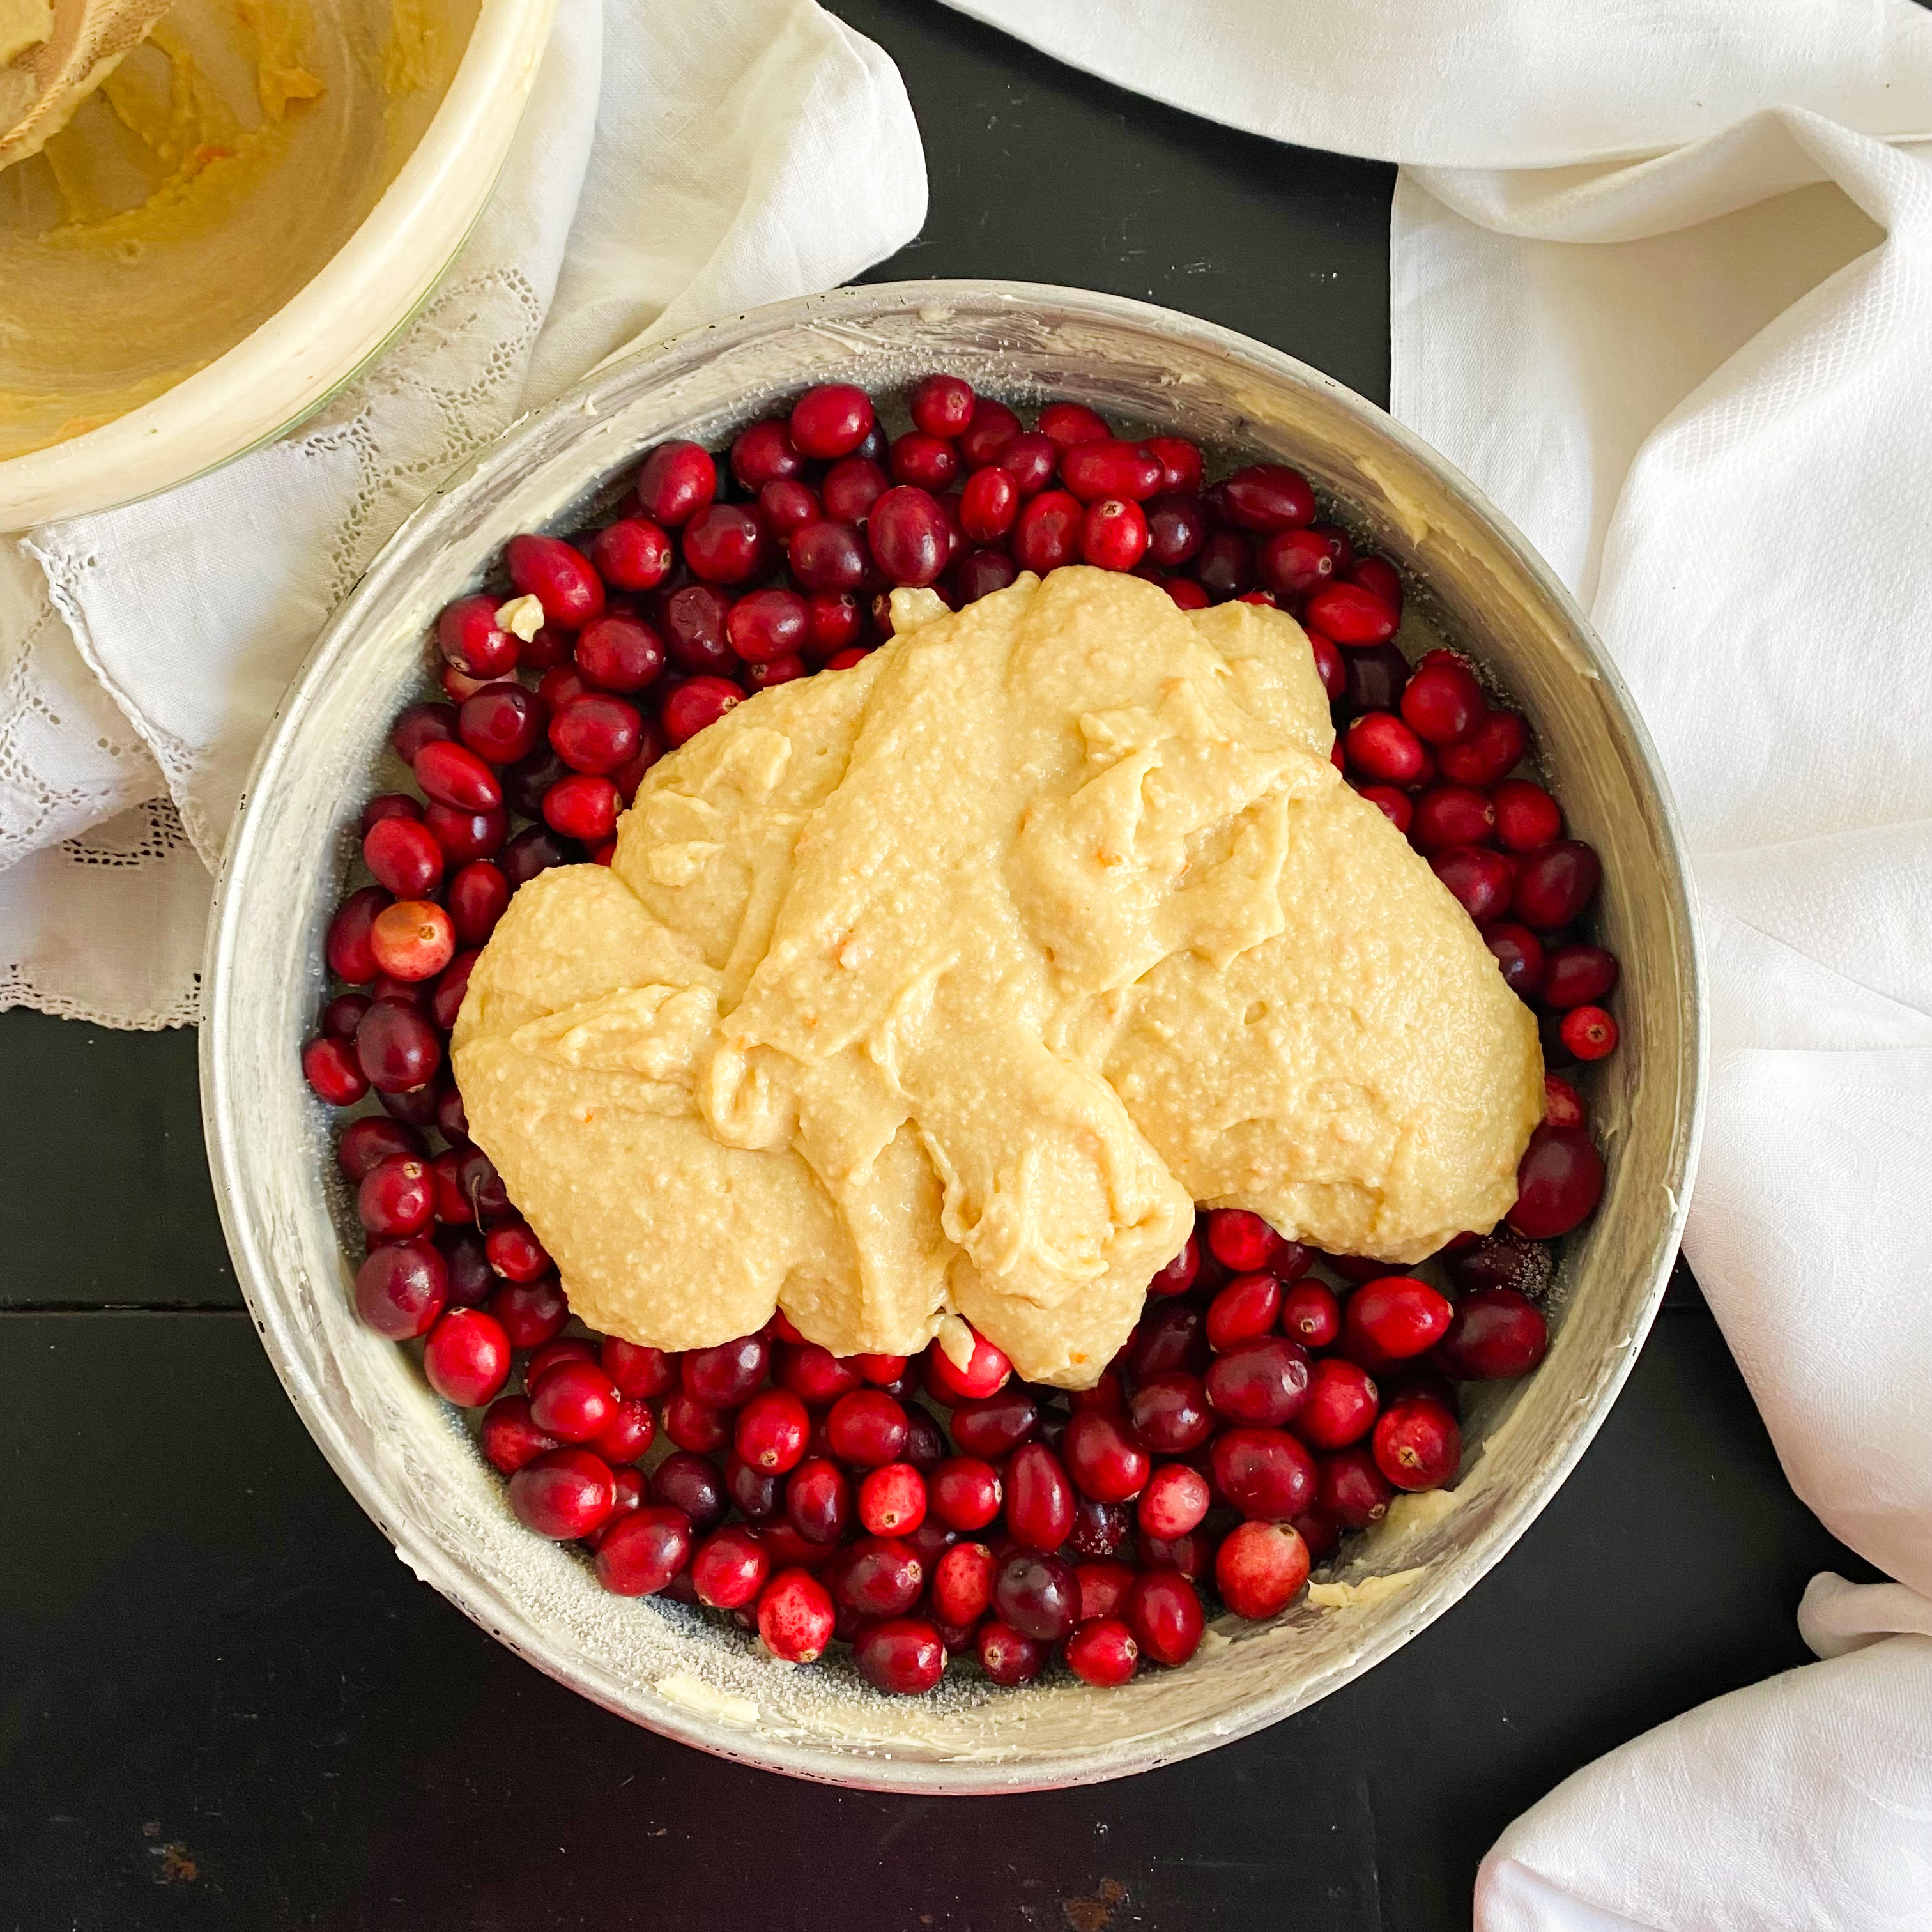
Preheat the oven to 350 degrees. Butter the bottom and sides of a 9″ inch round cake pan with 3 tablespoons of butter. (Note: this is going to seem like an excessive amount of butter but be sure to use all 3 tablespoons).
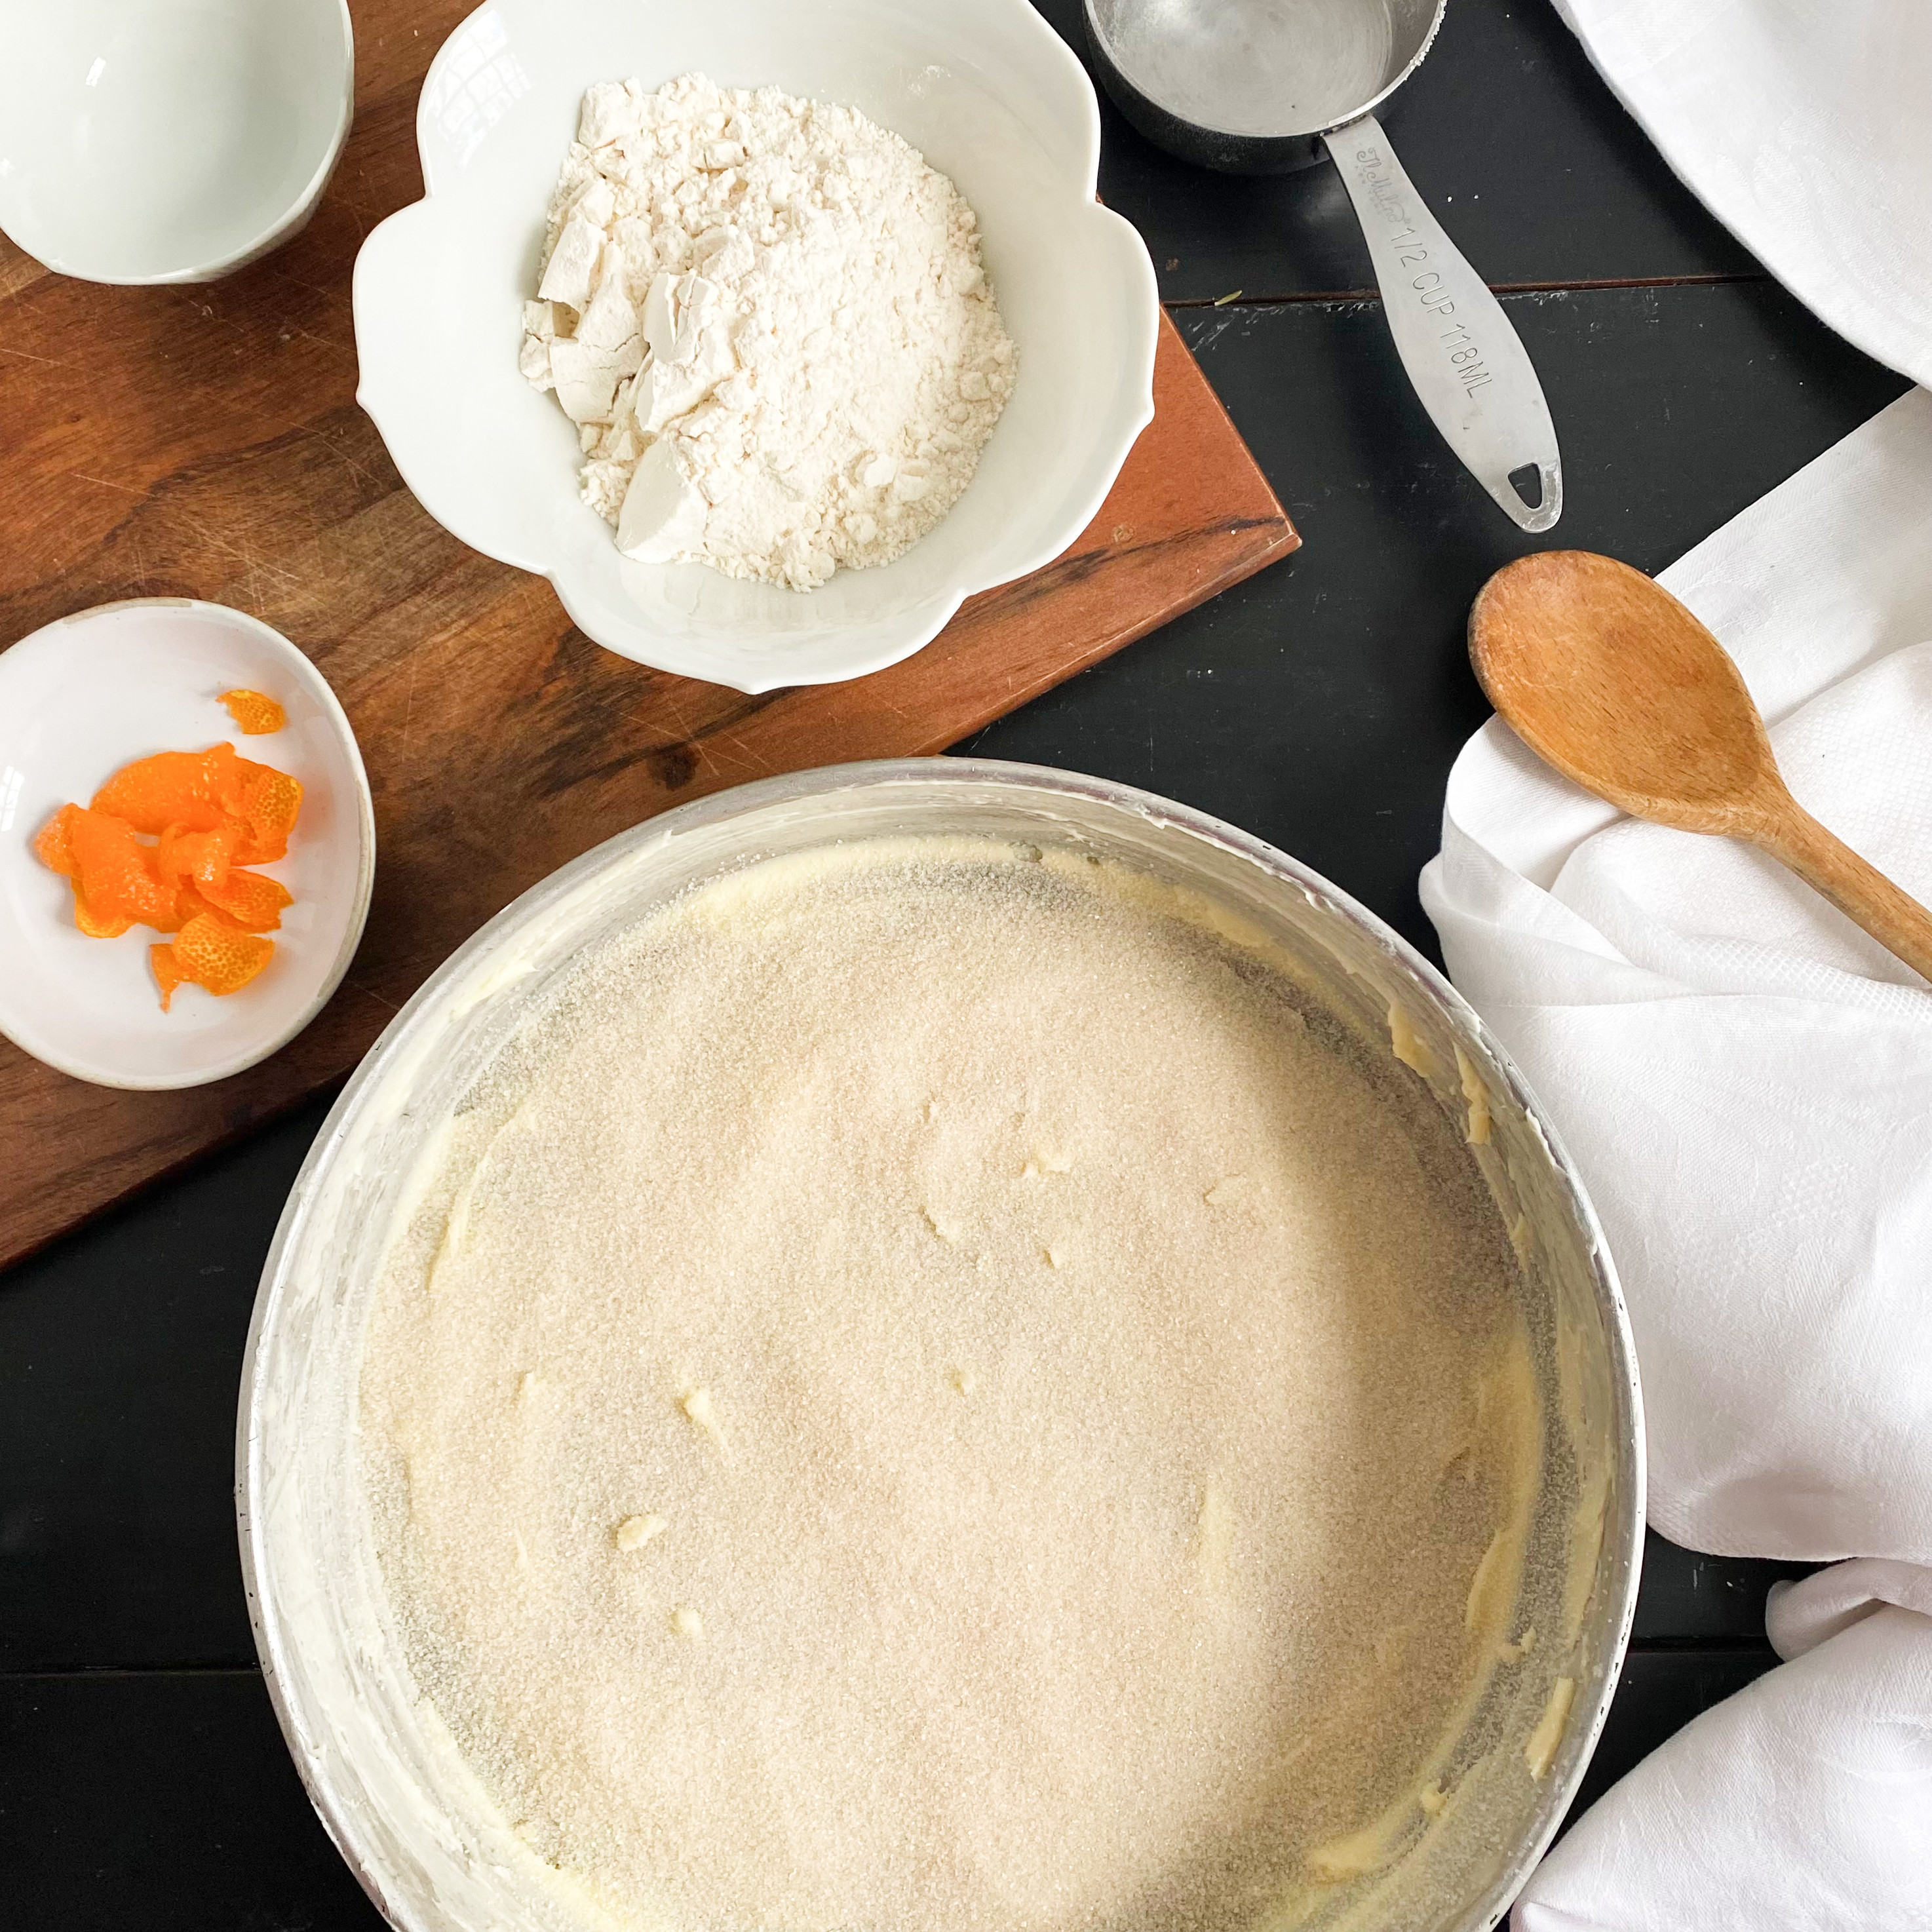
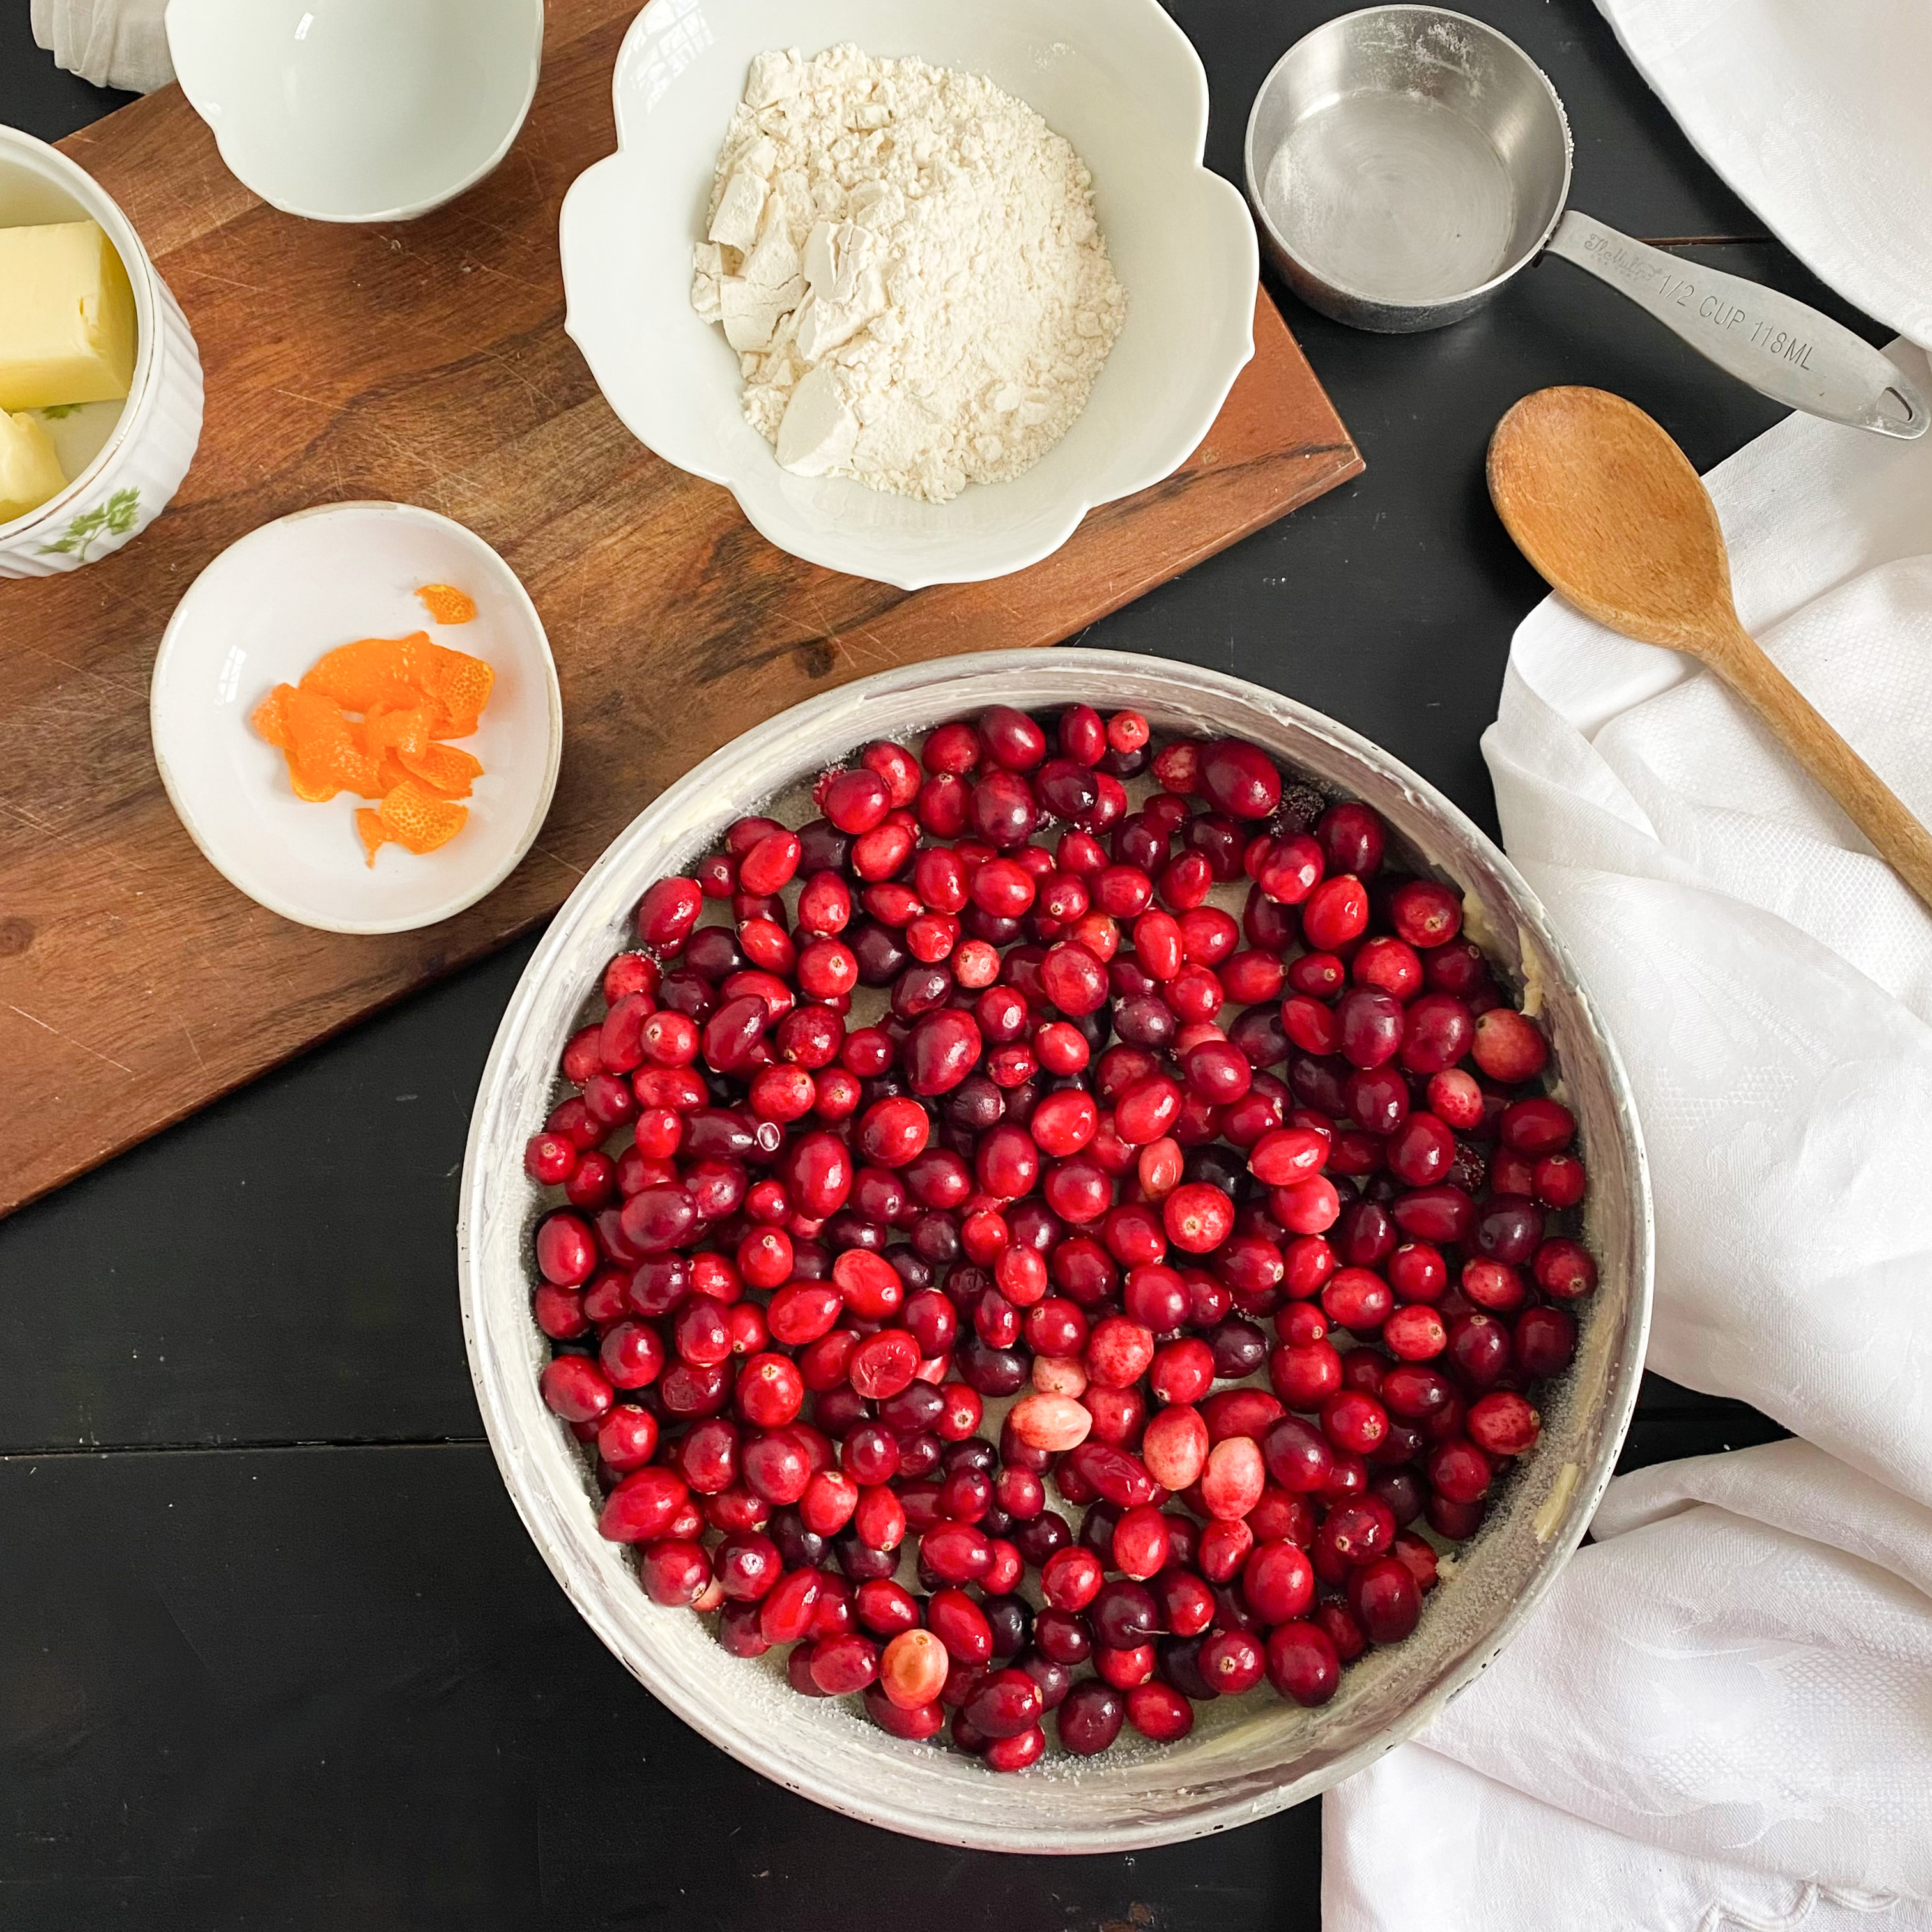
Sprinkle 1/2 cup of sugar evenly over the bottom and pour the cranberries on top, making sure they are evenly settled in the pan.
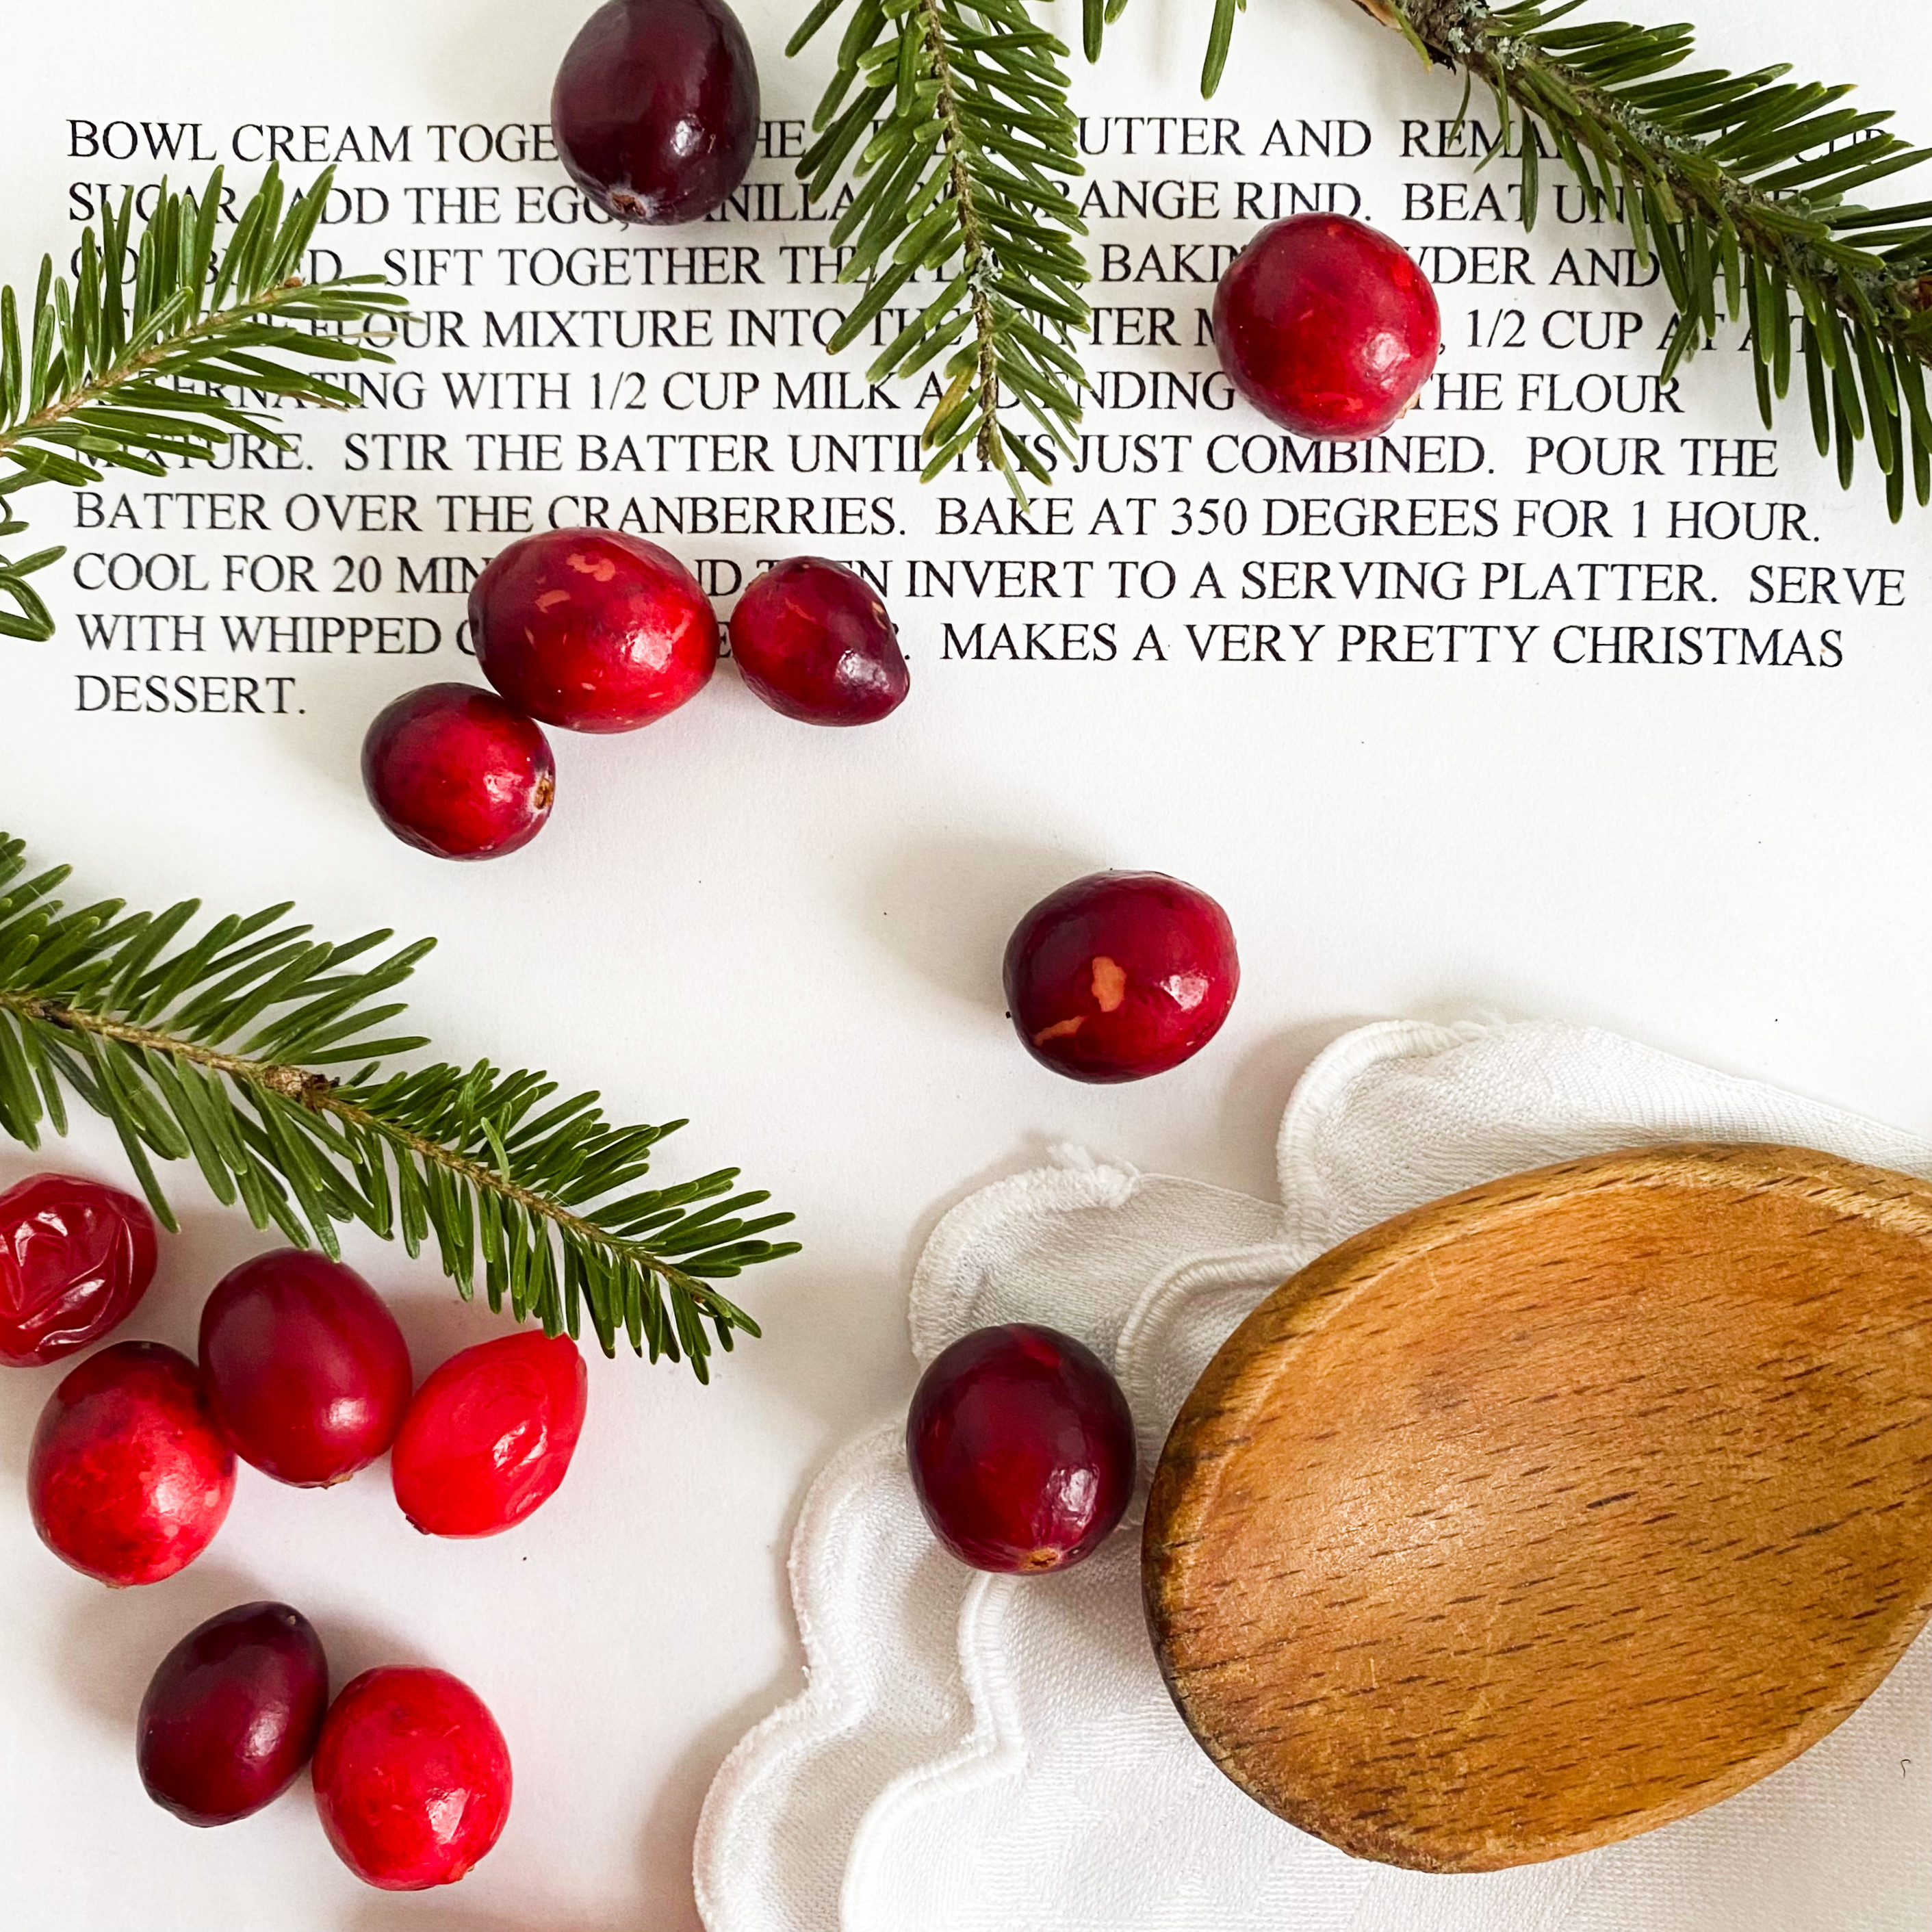
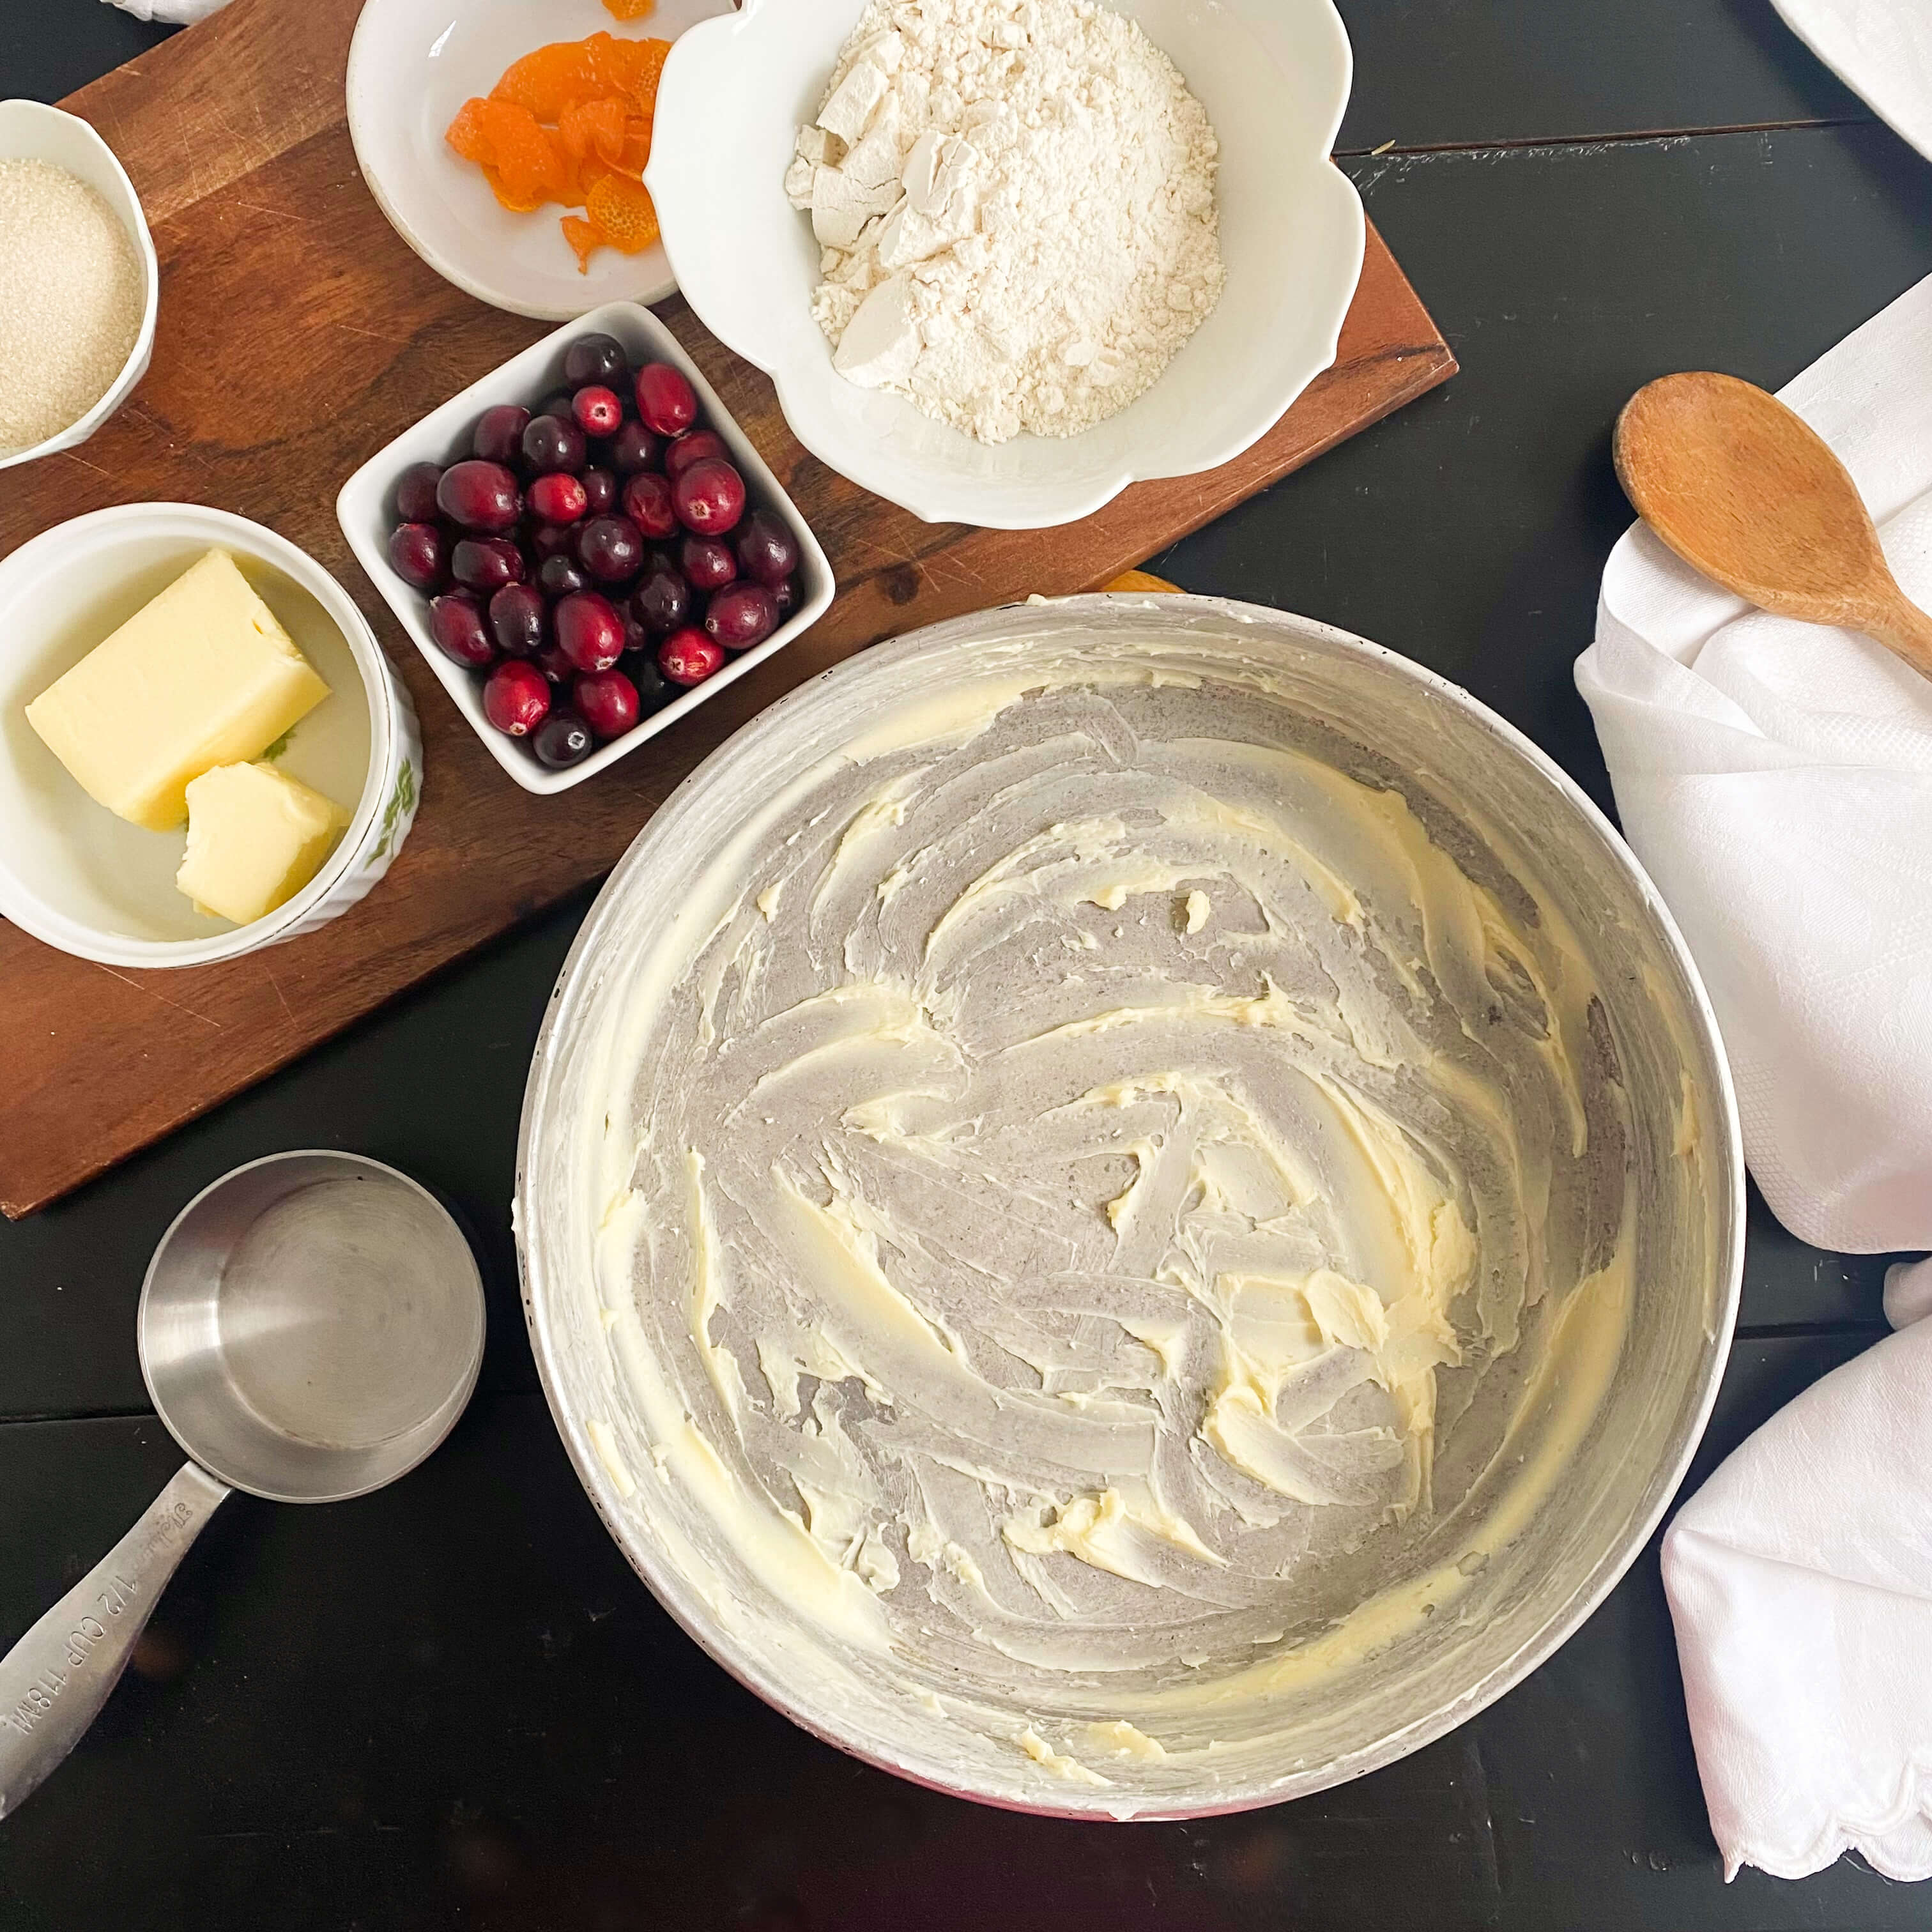
In a bowl, cream together the remaining 6 tablespoons of butter and the remaining 1/2 cup of sugar. Add the egg, vanilla and orange rind. Beat until well combined.
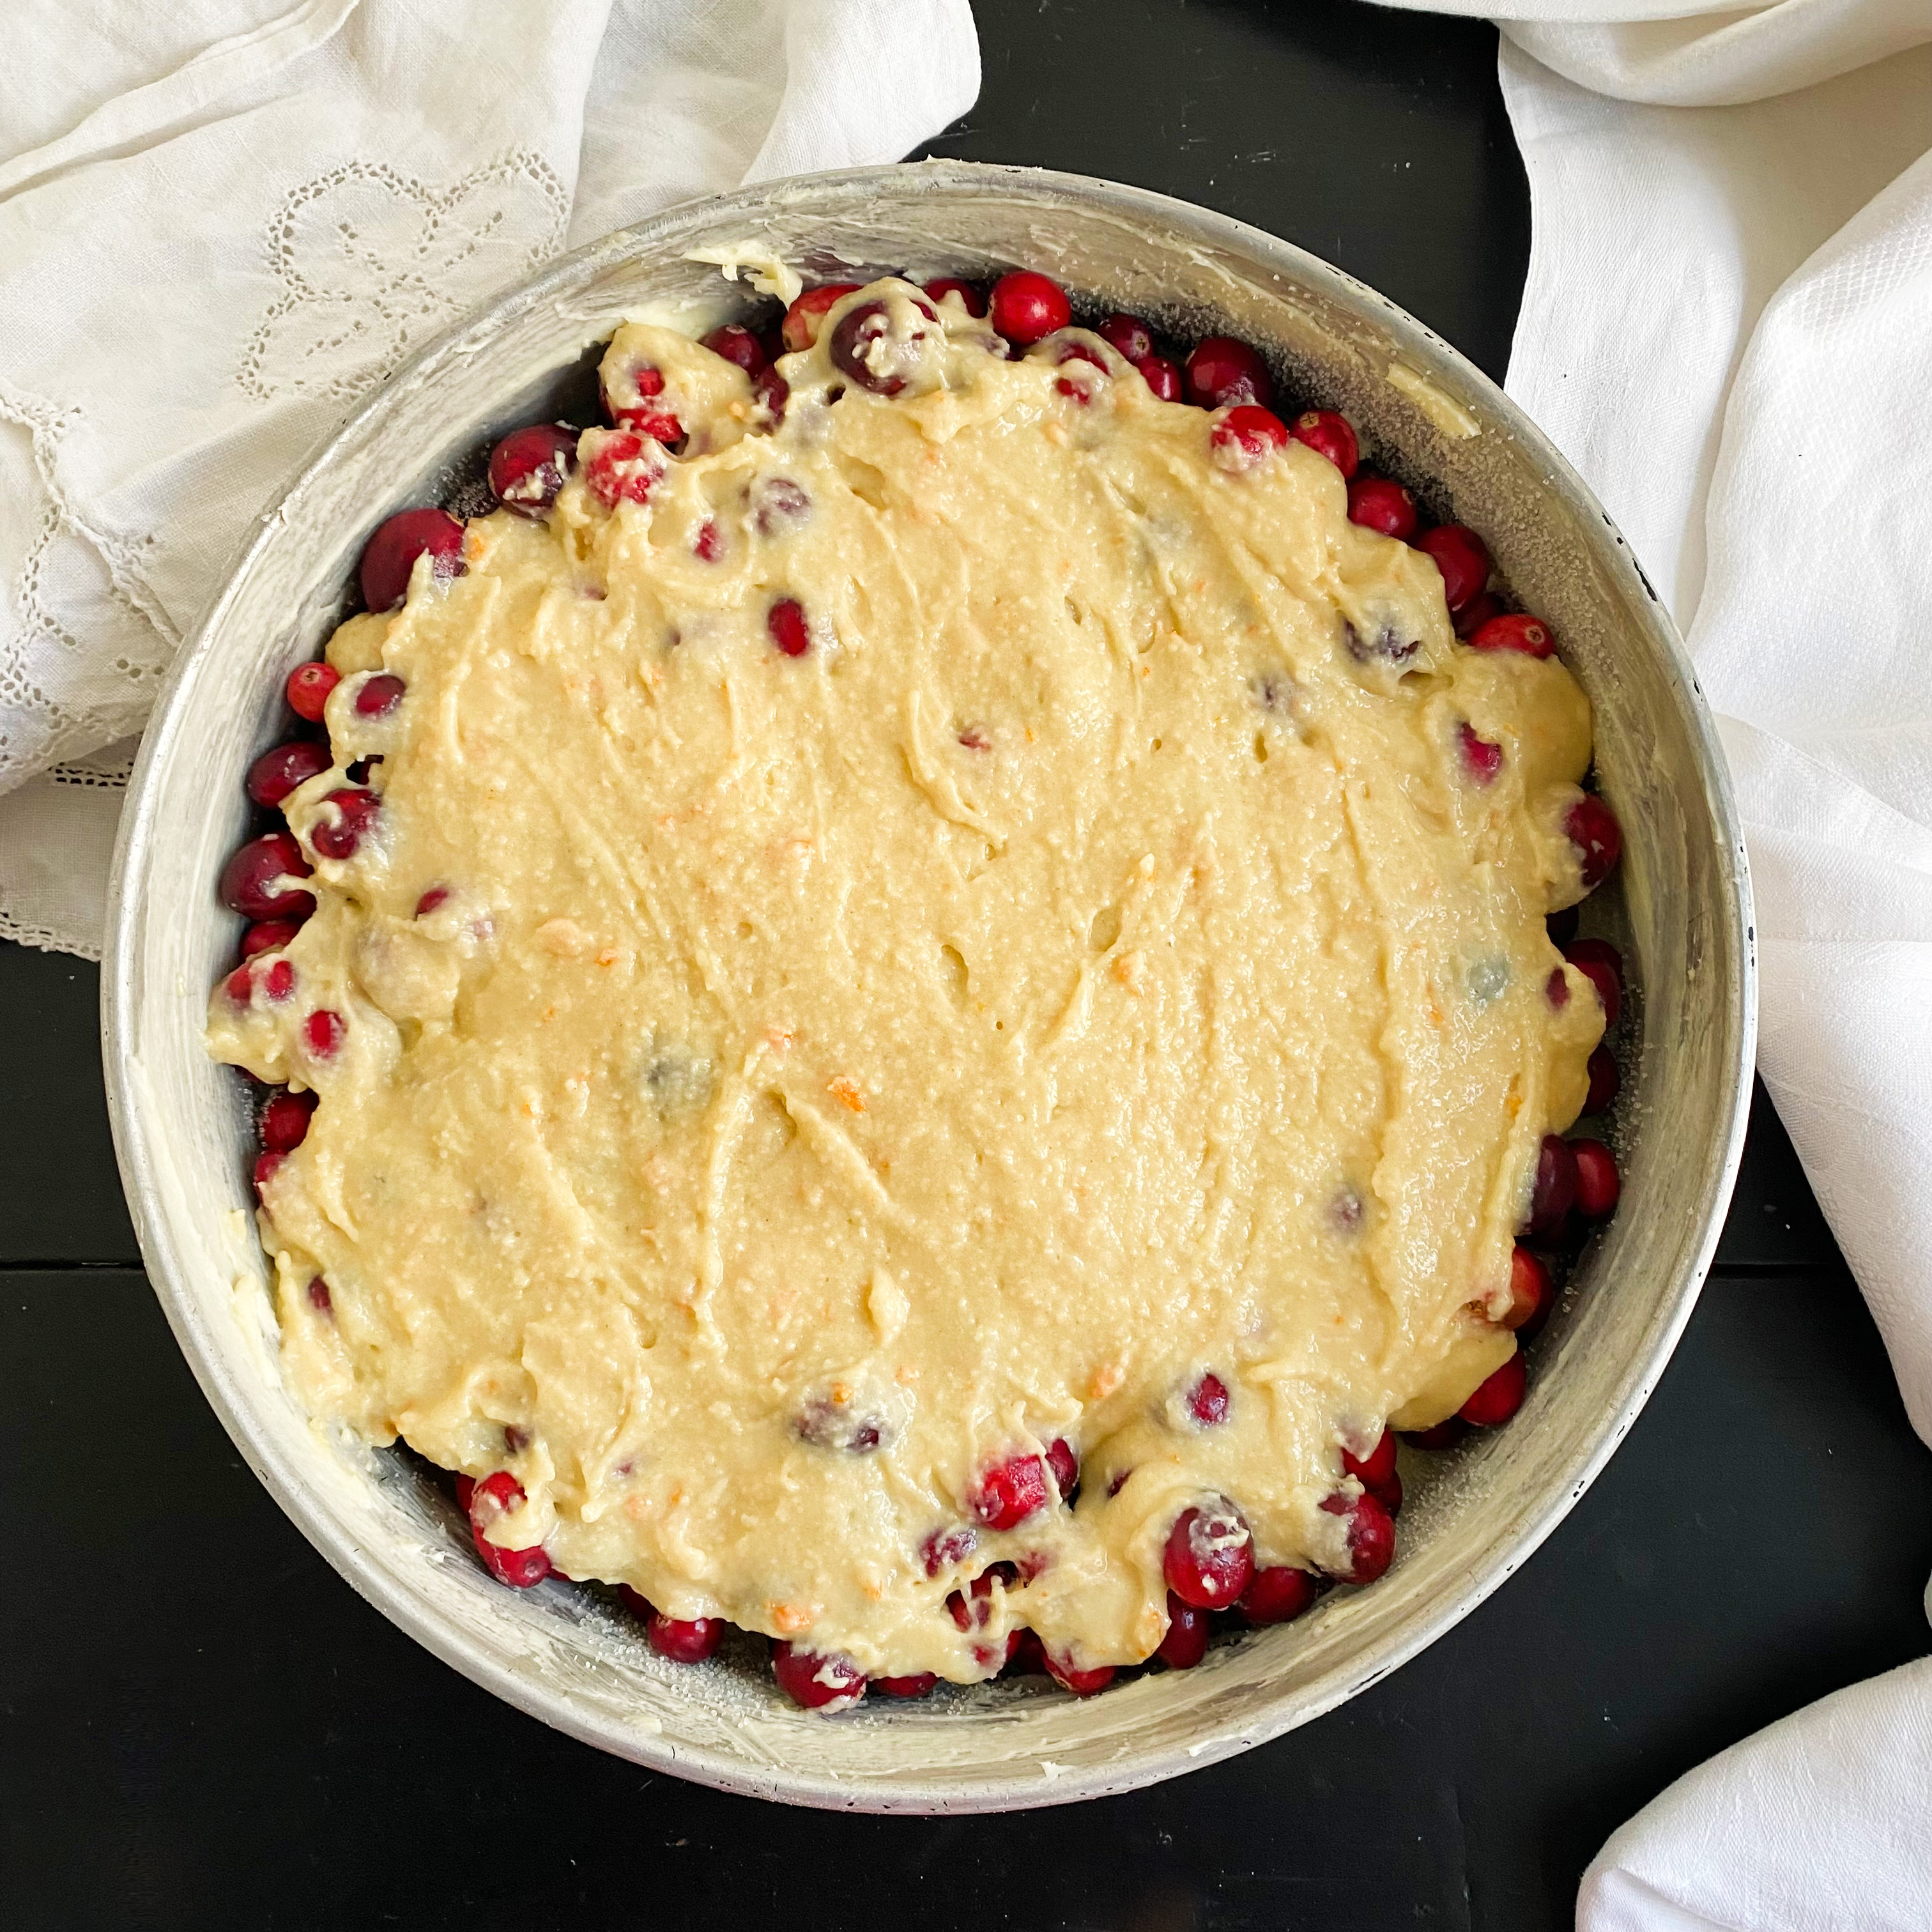
In a separate bowl, sift together, the flour, baking powder, and salt. Stir the flour mixture into the butter mixture 1/2 cup at a time, alternating with 1/4 cup of milk at a time, and ending with the flour mixture. Stir the batter until it is just combined. Pour the batter over the cranberries, spreading and smoothing it around the pan with the back of a spoon.
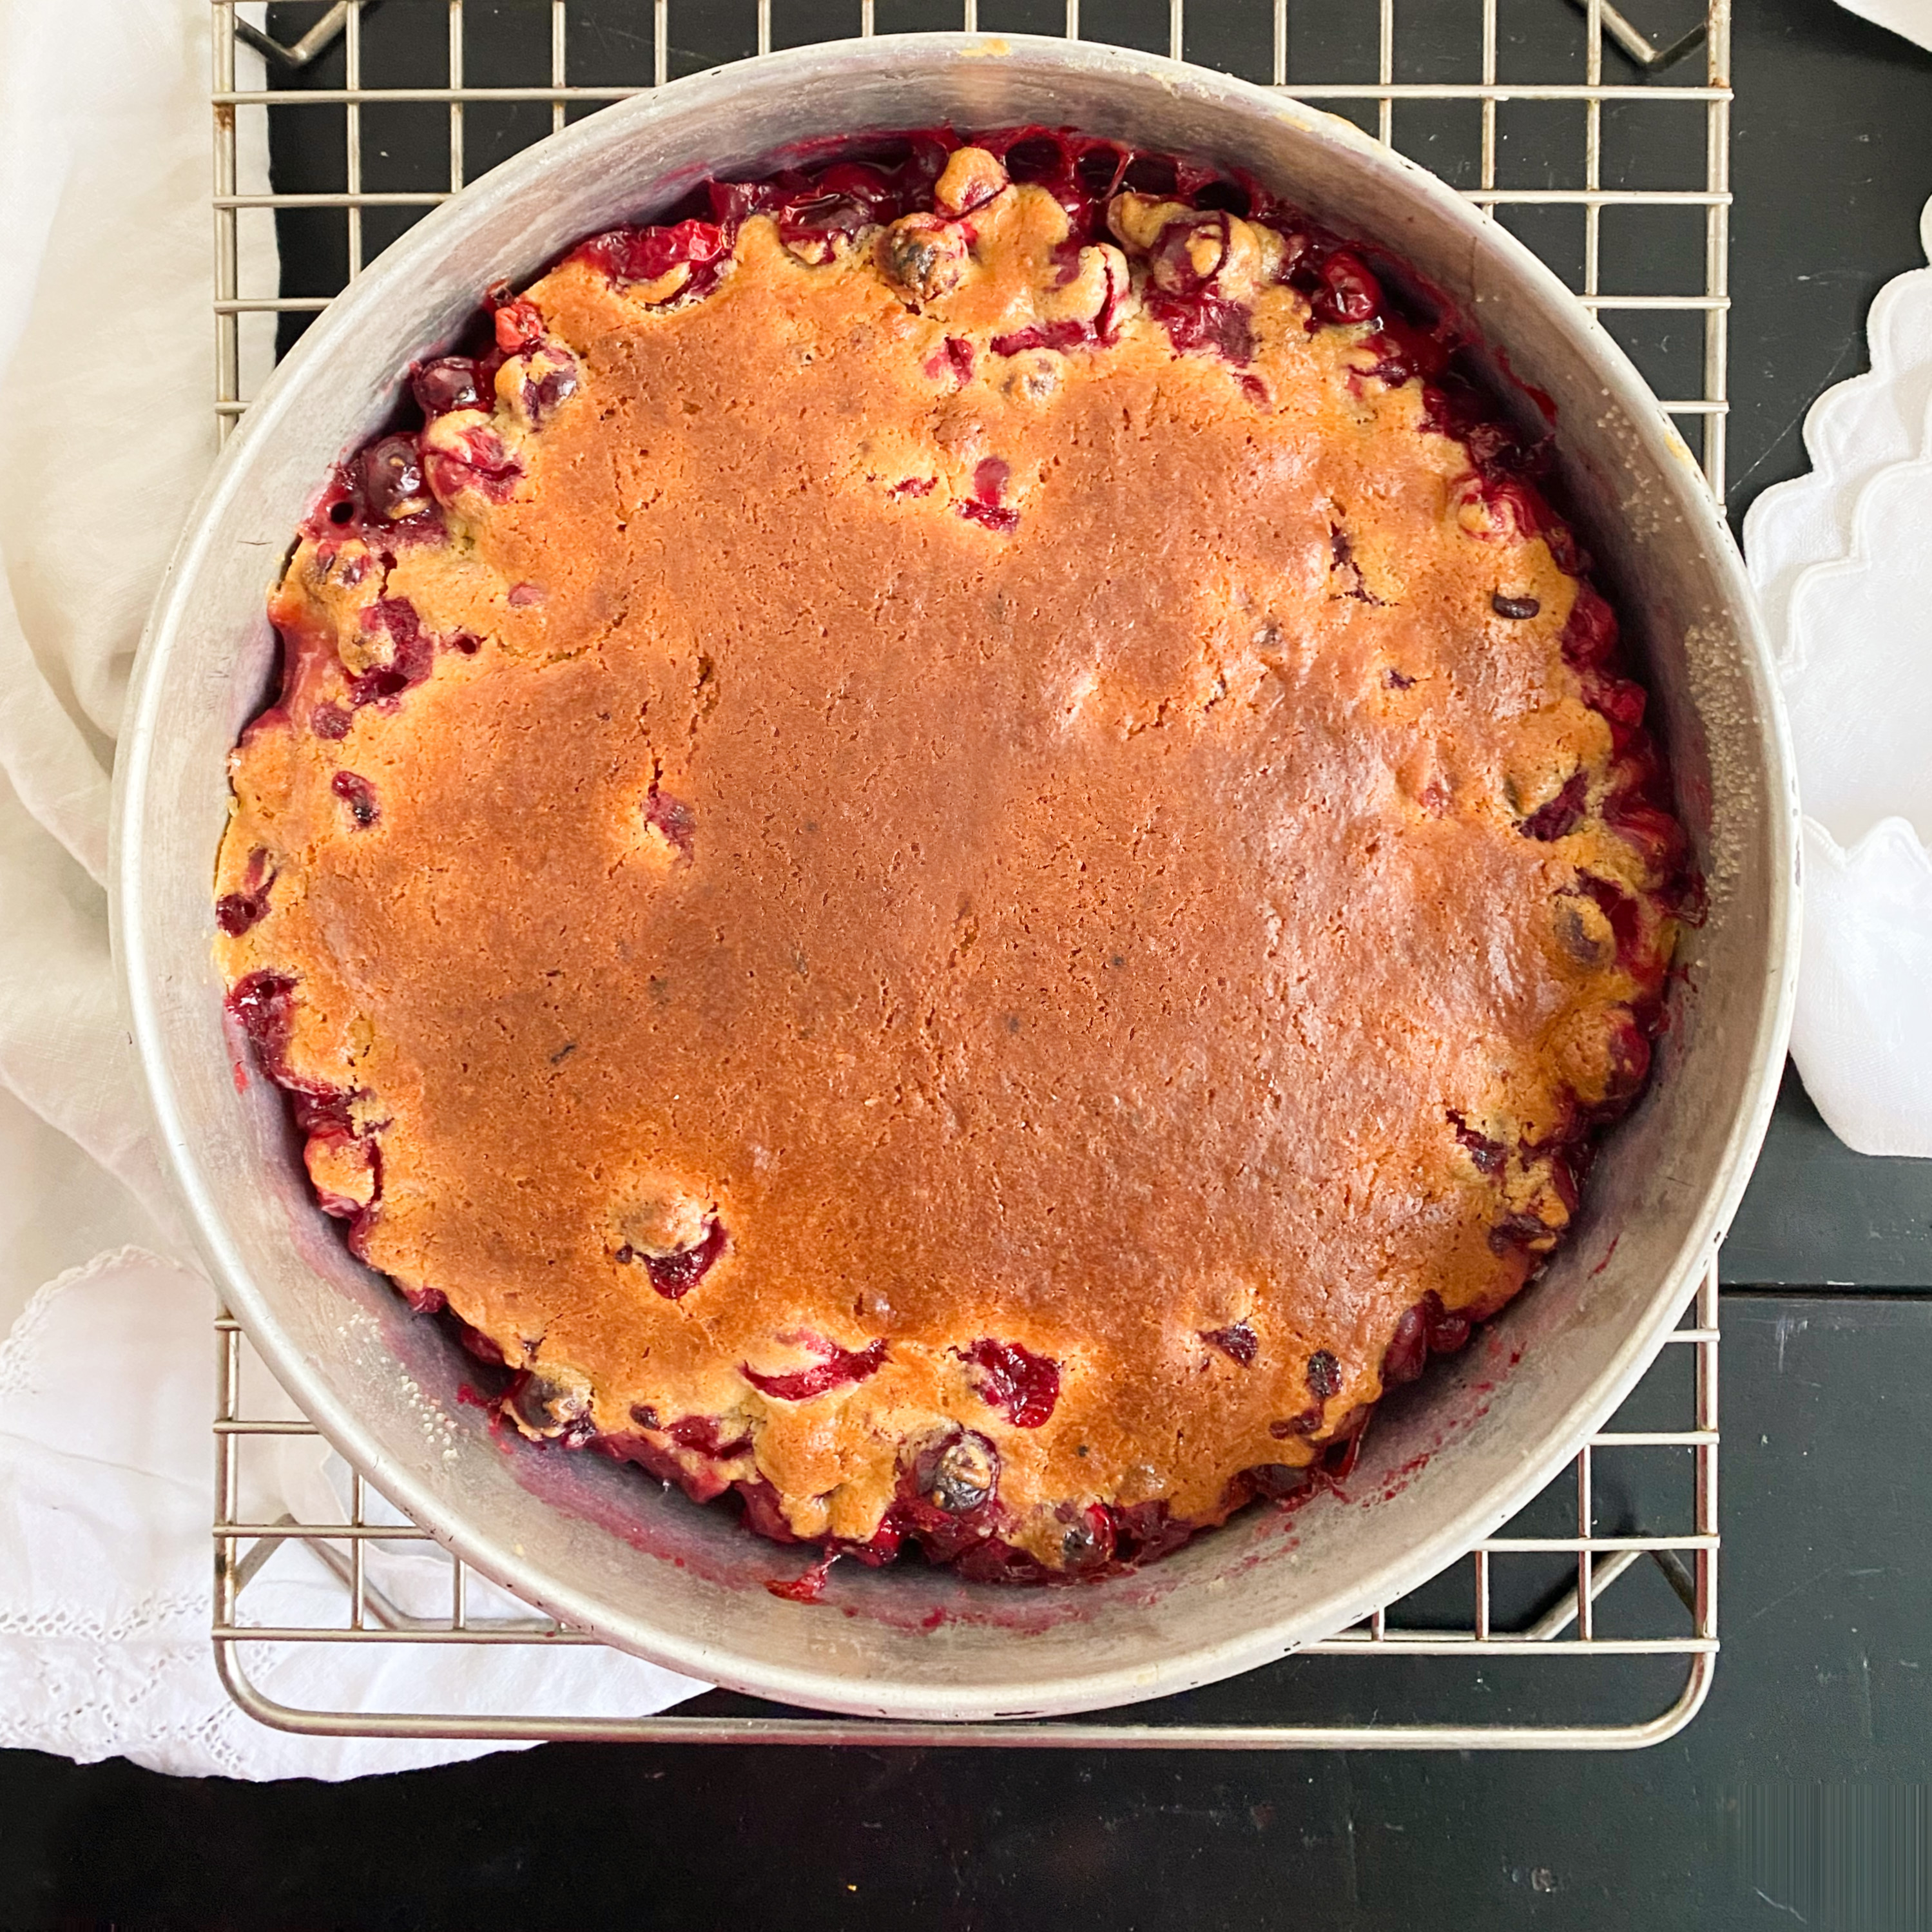
Place the pan in the oven and bake at 350 degrees for 1 hour.
Remove from the oven and let cool on a baking rack for 20 minutes, and then invert the cake pan onto a serving platter in one quick motion.
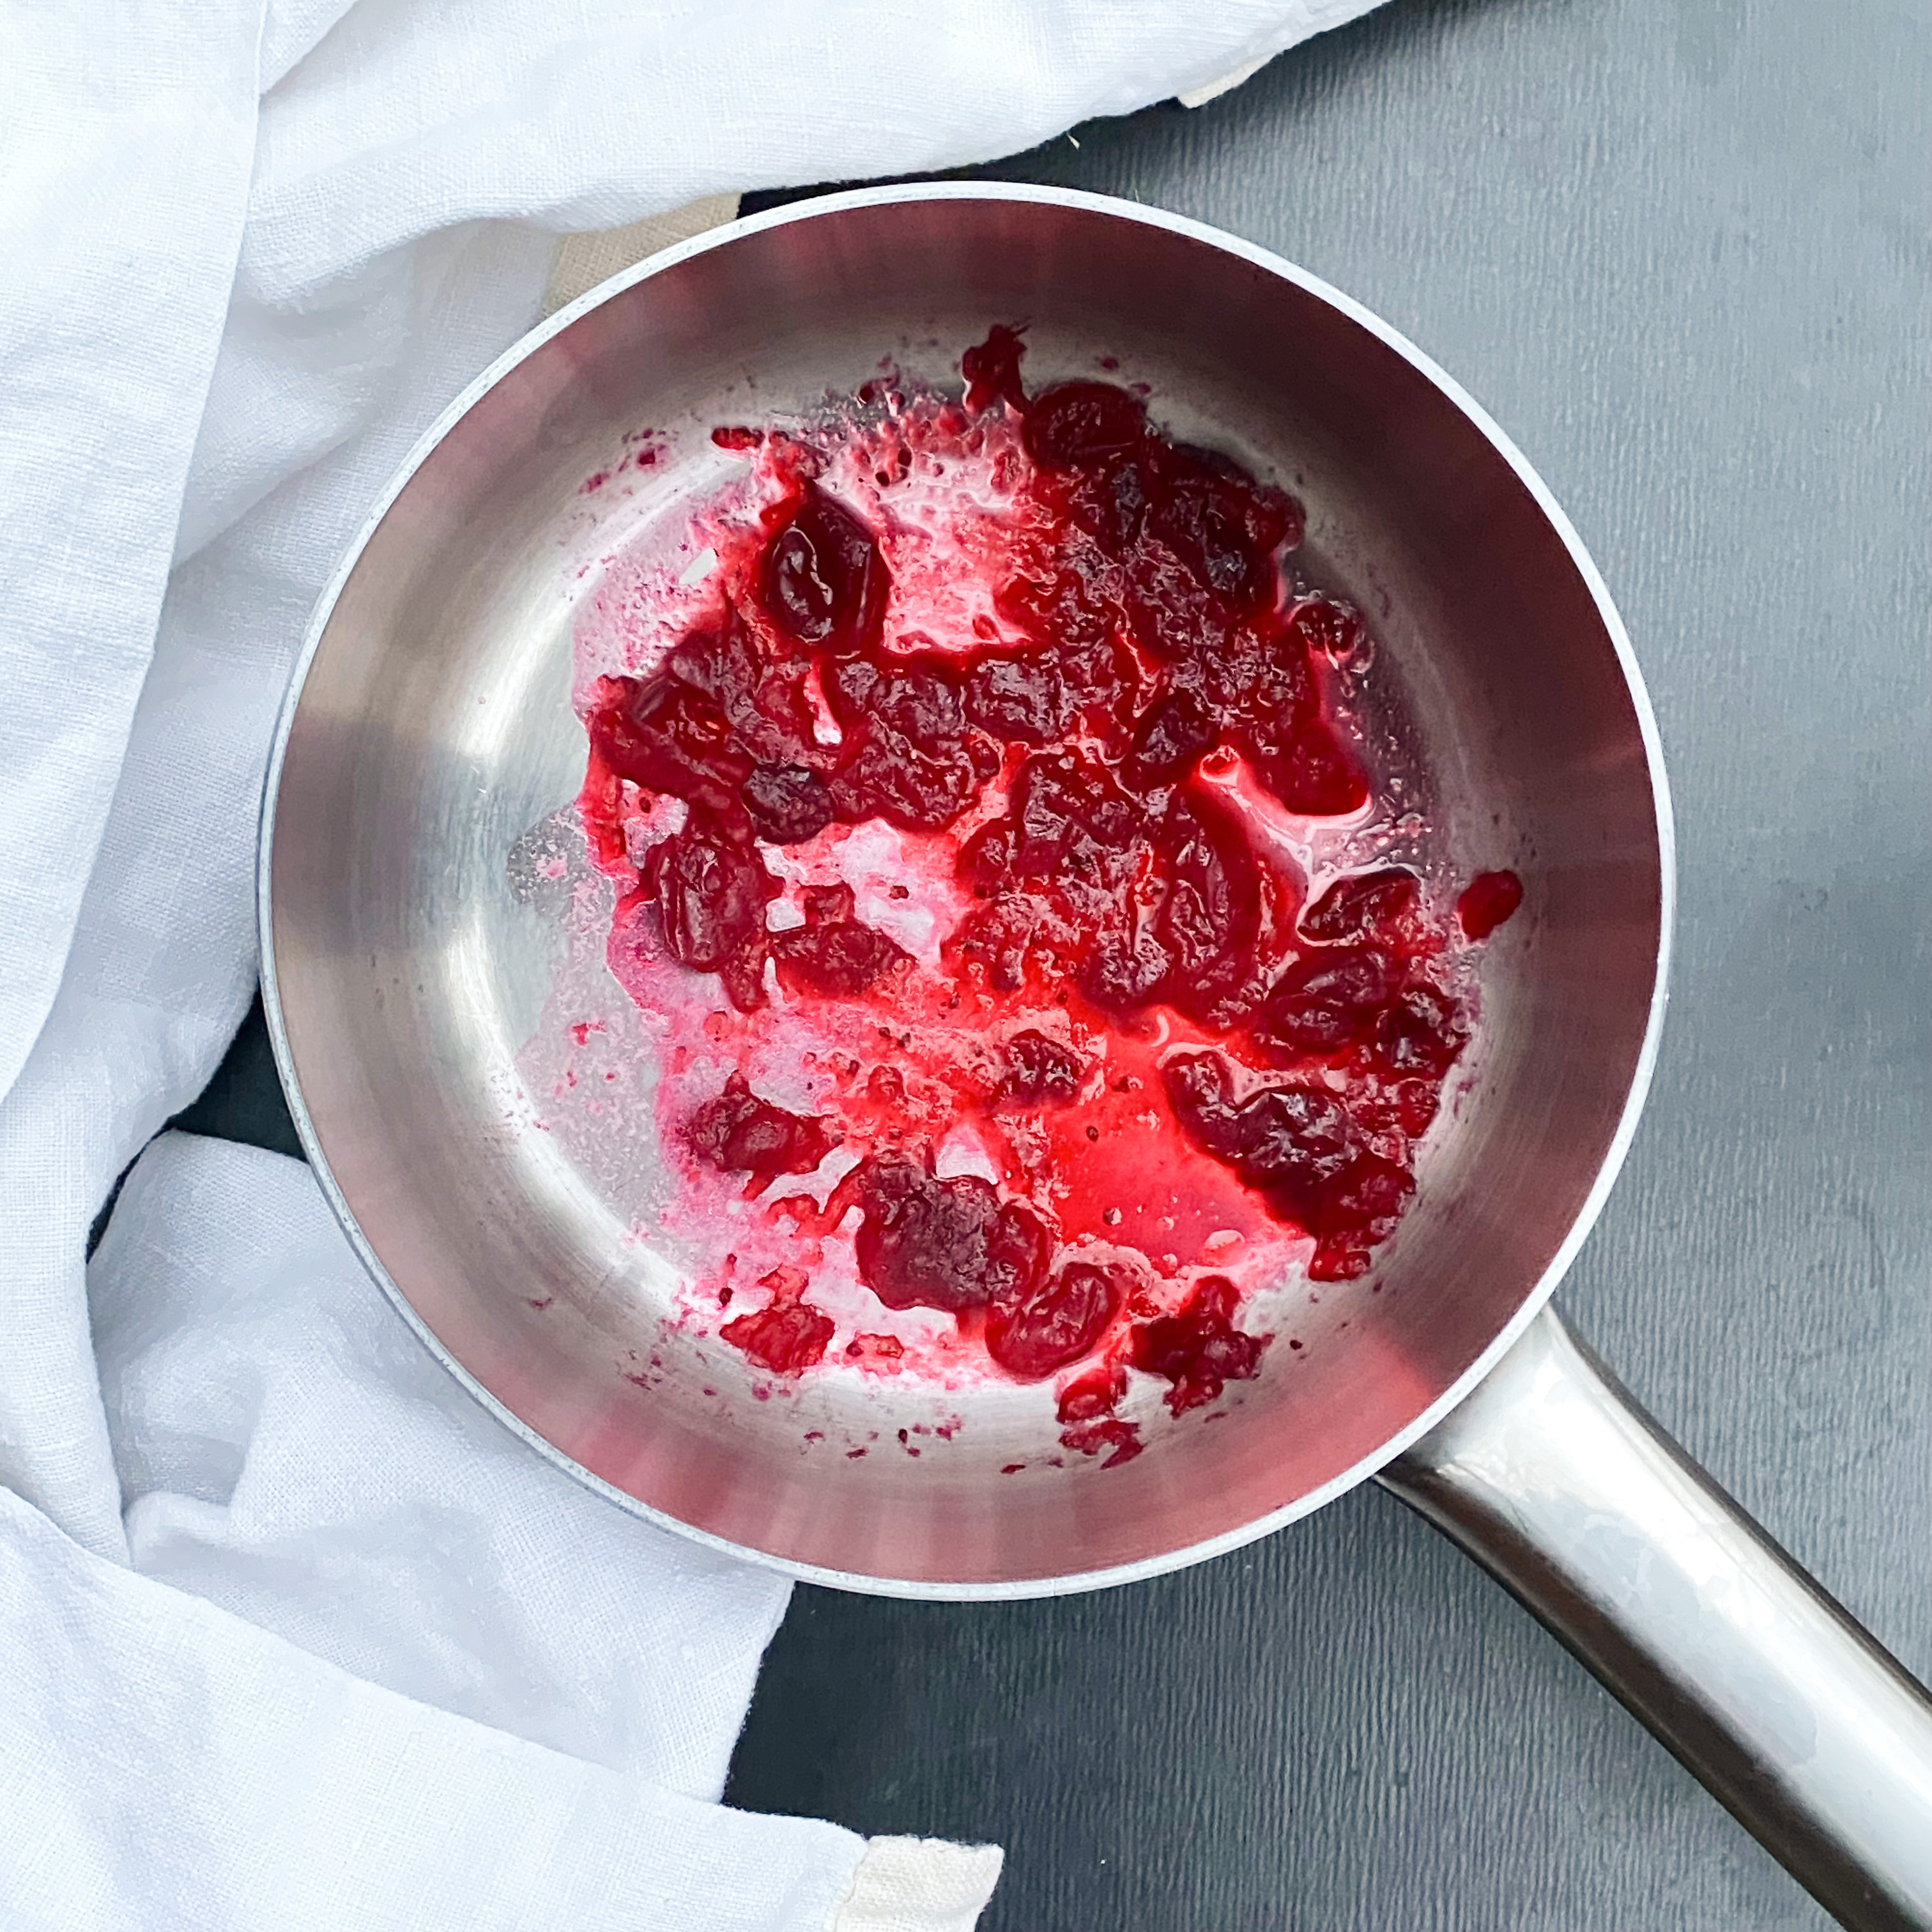
Sometimes, during the baking process, the cranberries will leave little pockets of empty space as they settle and reduce in the oven, as seen above. This is perfectly normal. The cake batter naturally fills in those gaps and forms a completely flat top when flipped over.
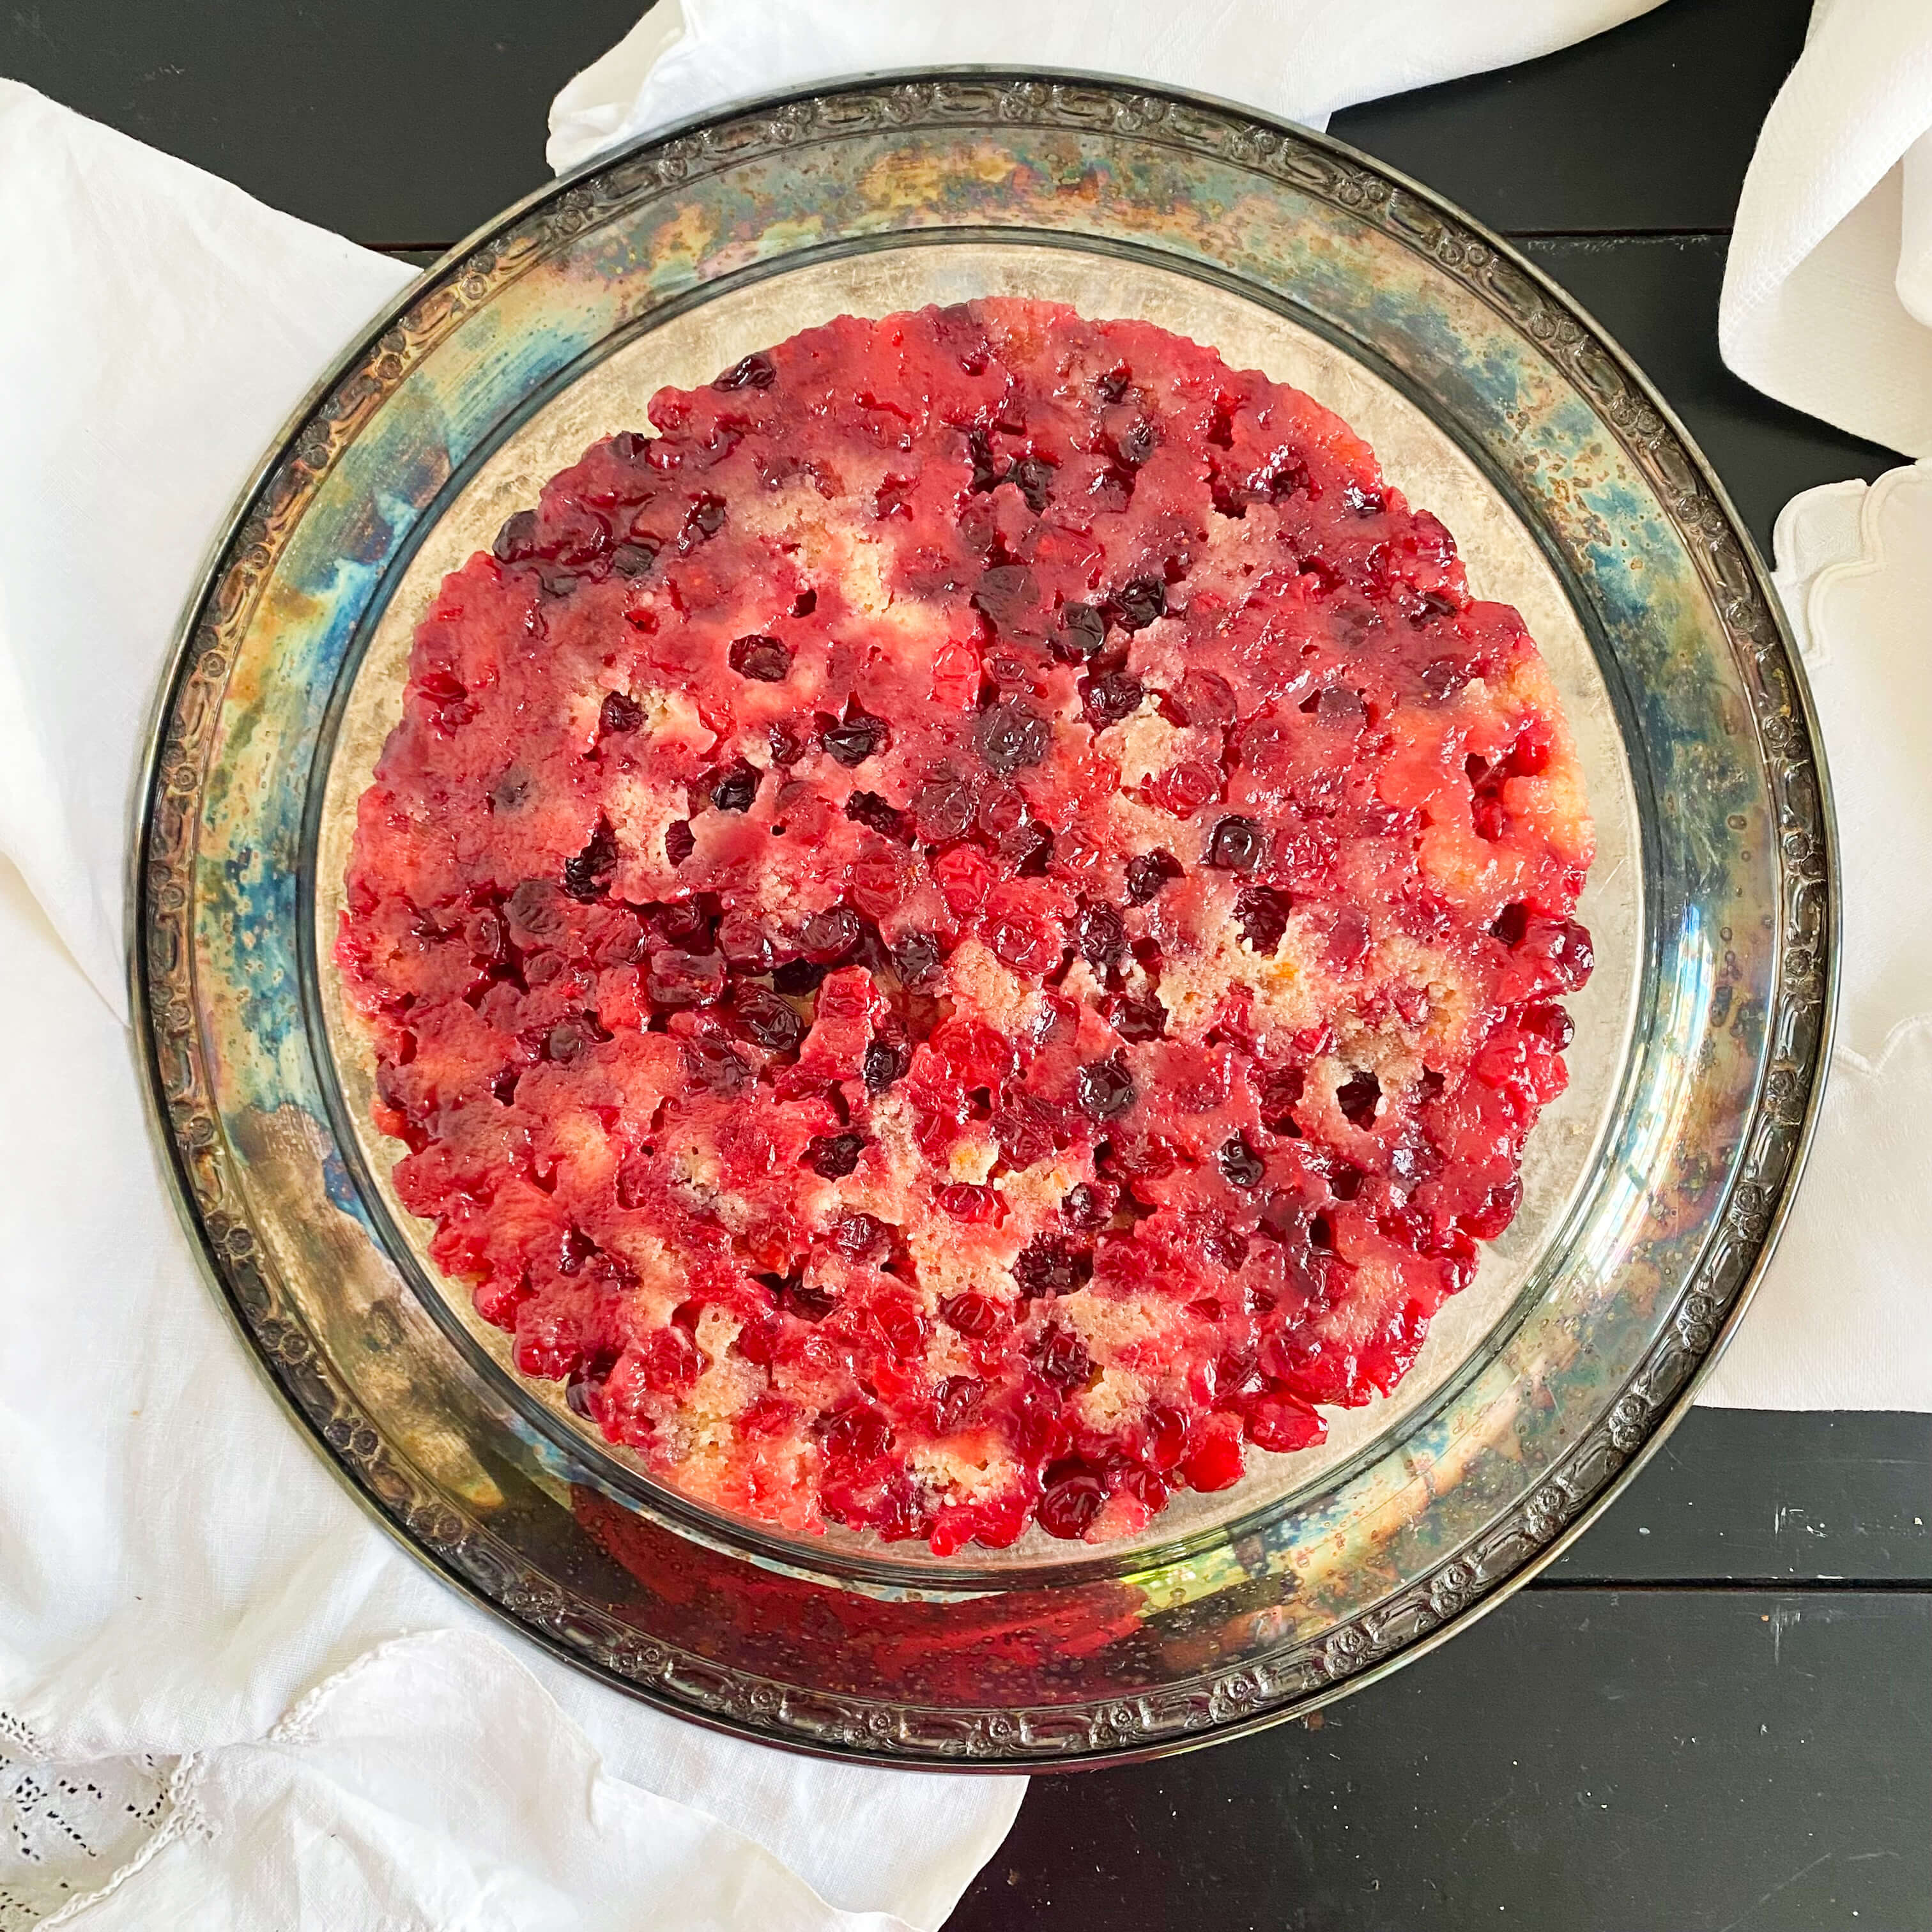
You can serve the cake just like this and it will taste great, but if you want to fill in those bare spots with a little more cranberry color, follow the simple steps below to make your cake extra rosy.
Special note: This extra step takes no longer than 15 minutes.
Add 1/2 cup fresh cranberries to a small sauce pan along with 1/3 cup cold water. Bring to a boil and simmer until cranberries begin to pop and soften. Add in 2 tablespoons of sugar and continue to simmer until enough liquid evaporates to form a syrupy consistency with the soft cranberries still somewhat intact or in a semi-crushed state. Remove from heat and let cool for 5 minutes. Then fill in the bare areas on the cake using a soup spoon.
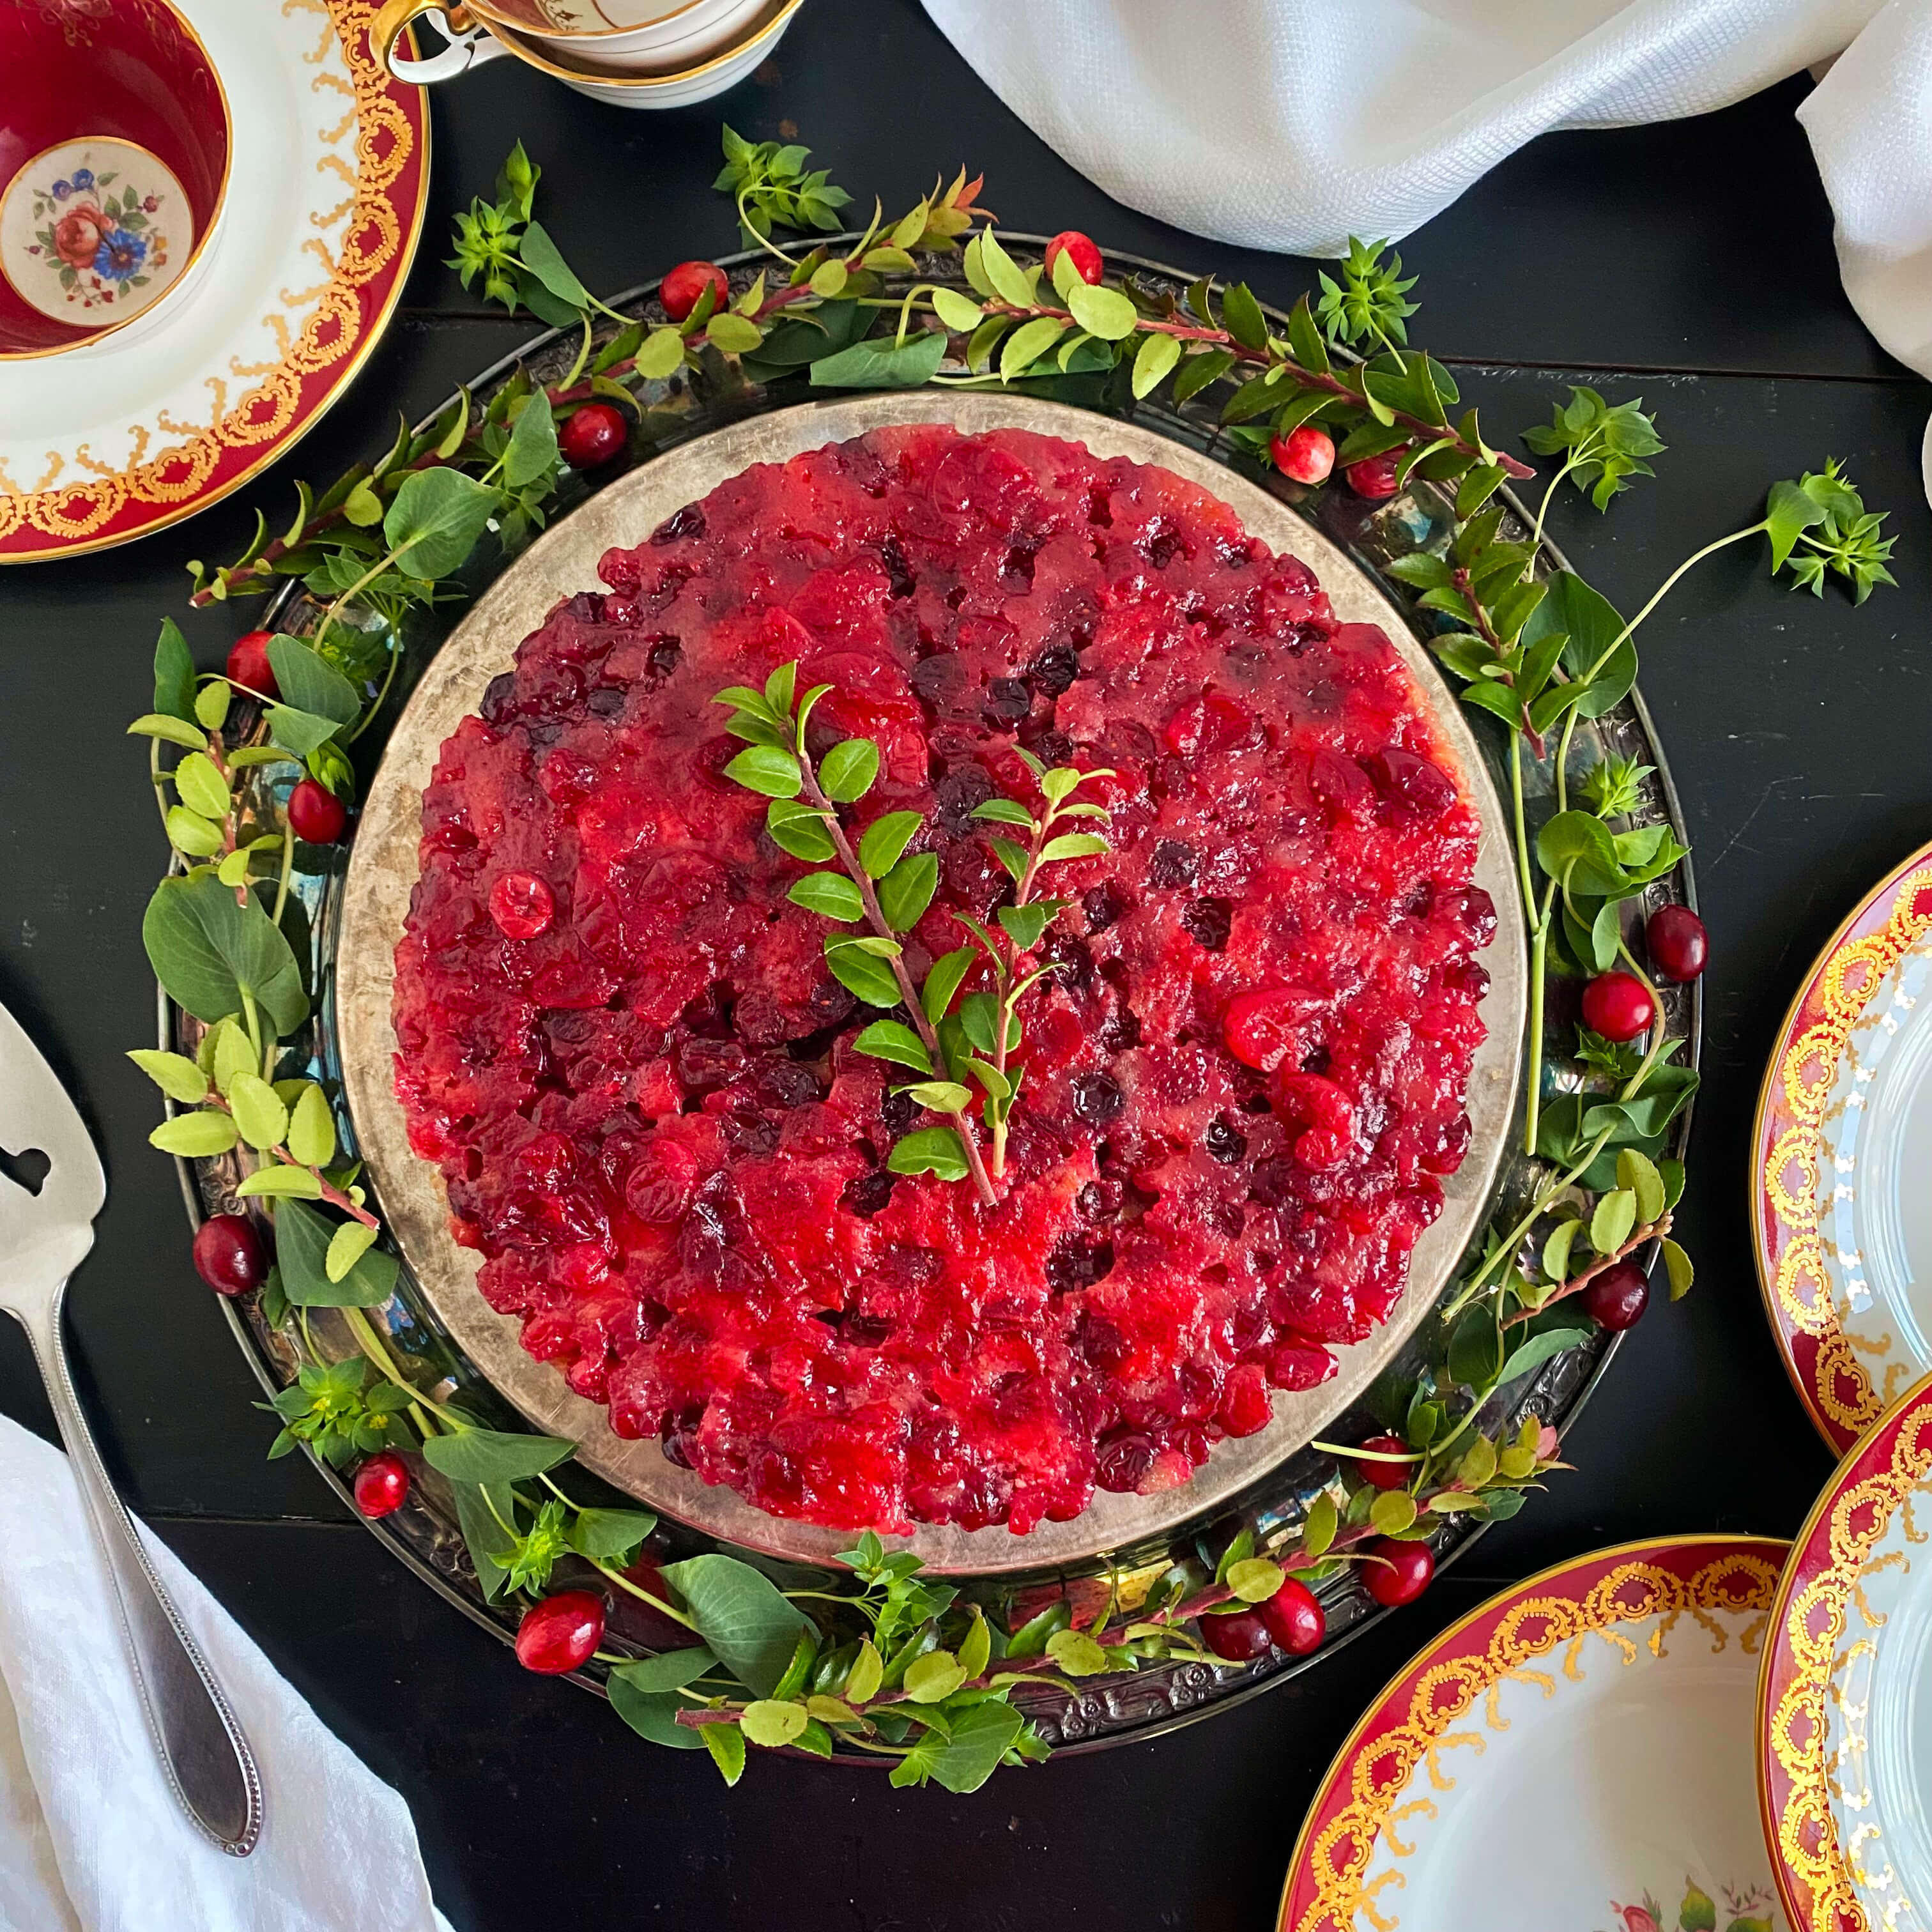
I always like to garnish the platter with a bit of greenery and fresh cranberries for centerpiece presentation at the table. Slice and serve each piece of cake with a dollop of freshly made whipped cream.
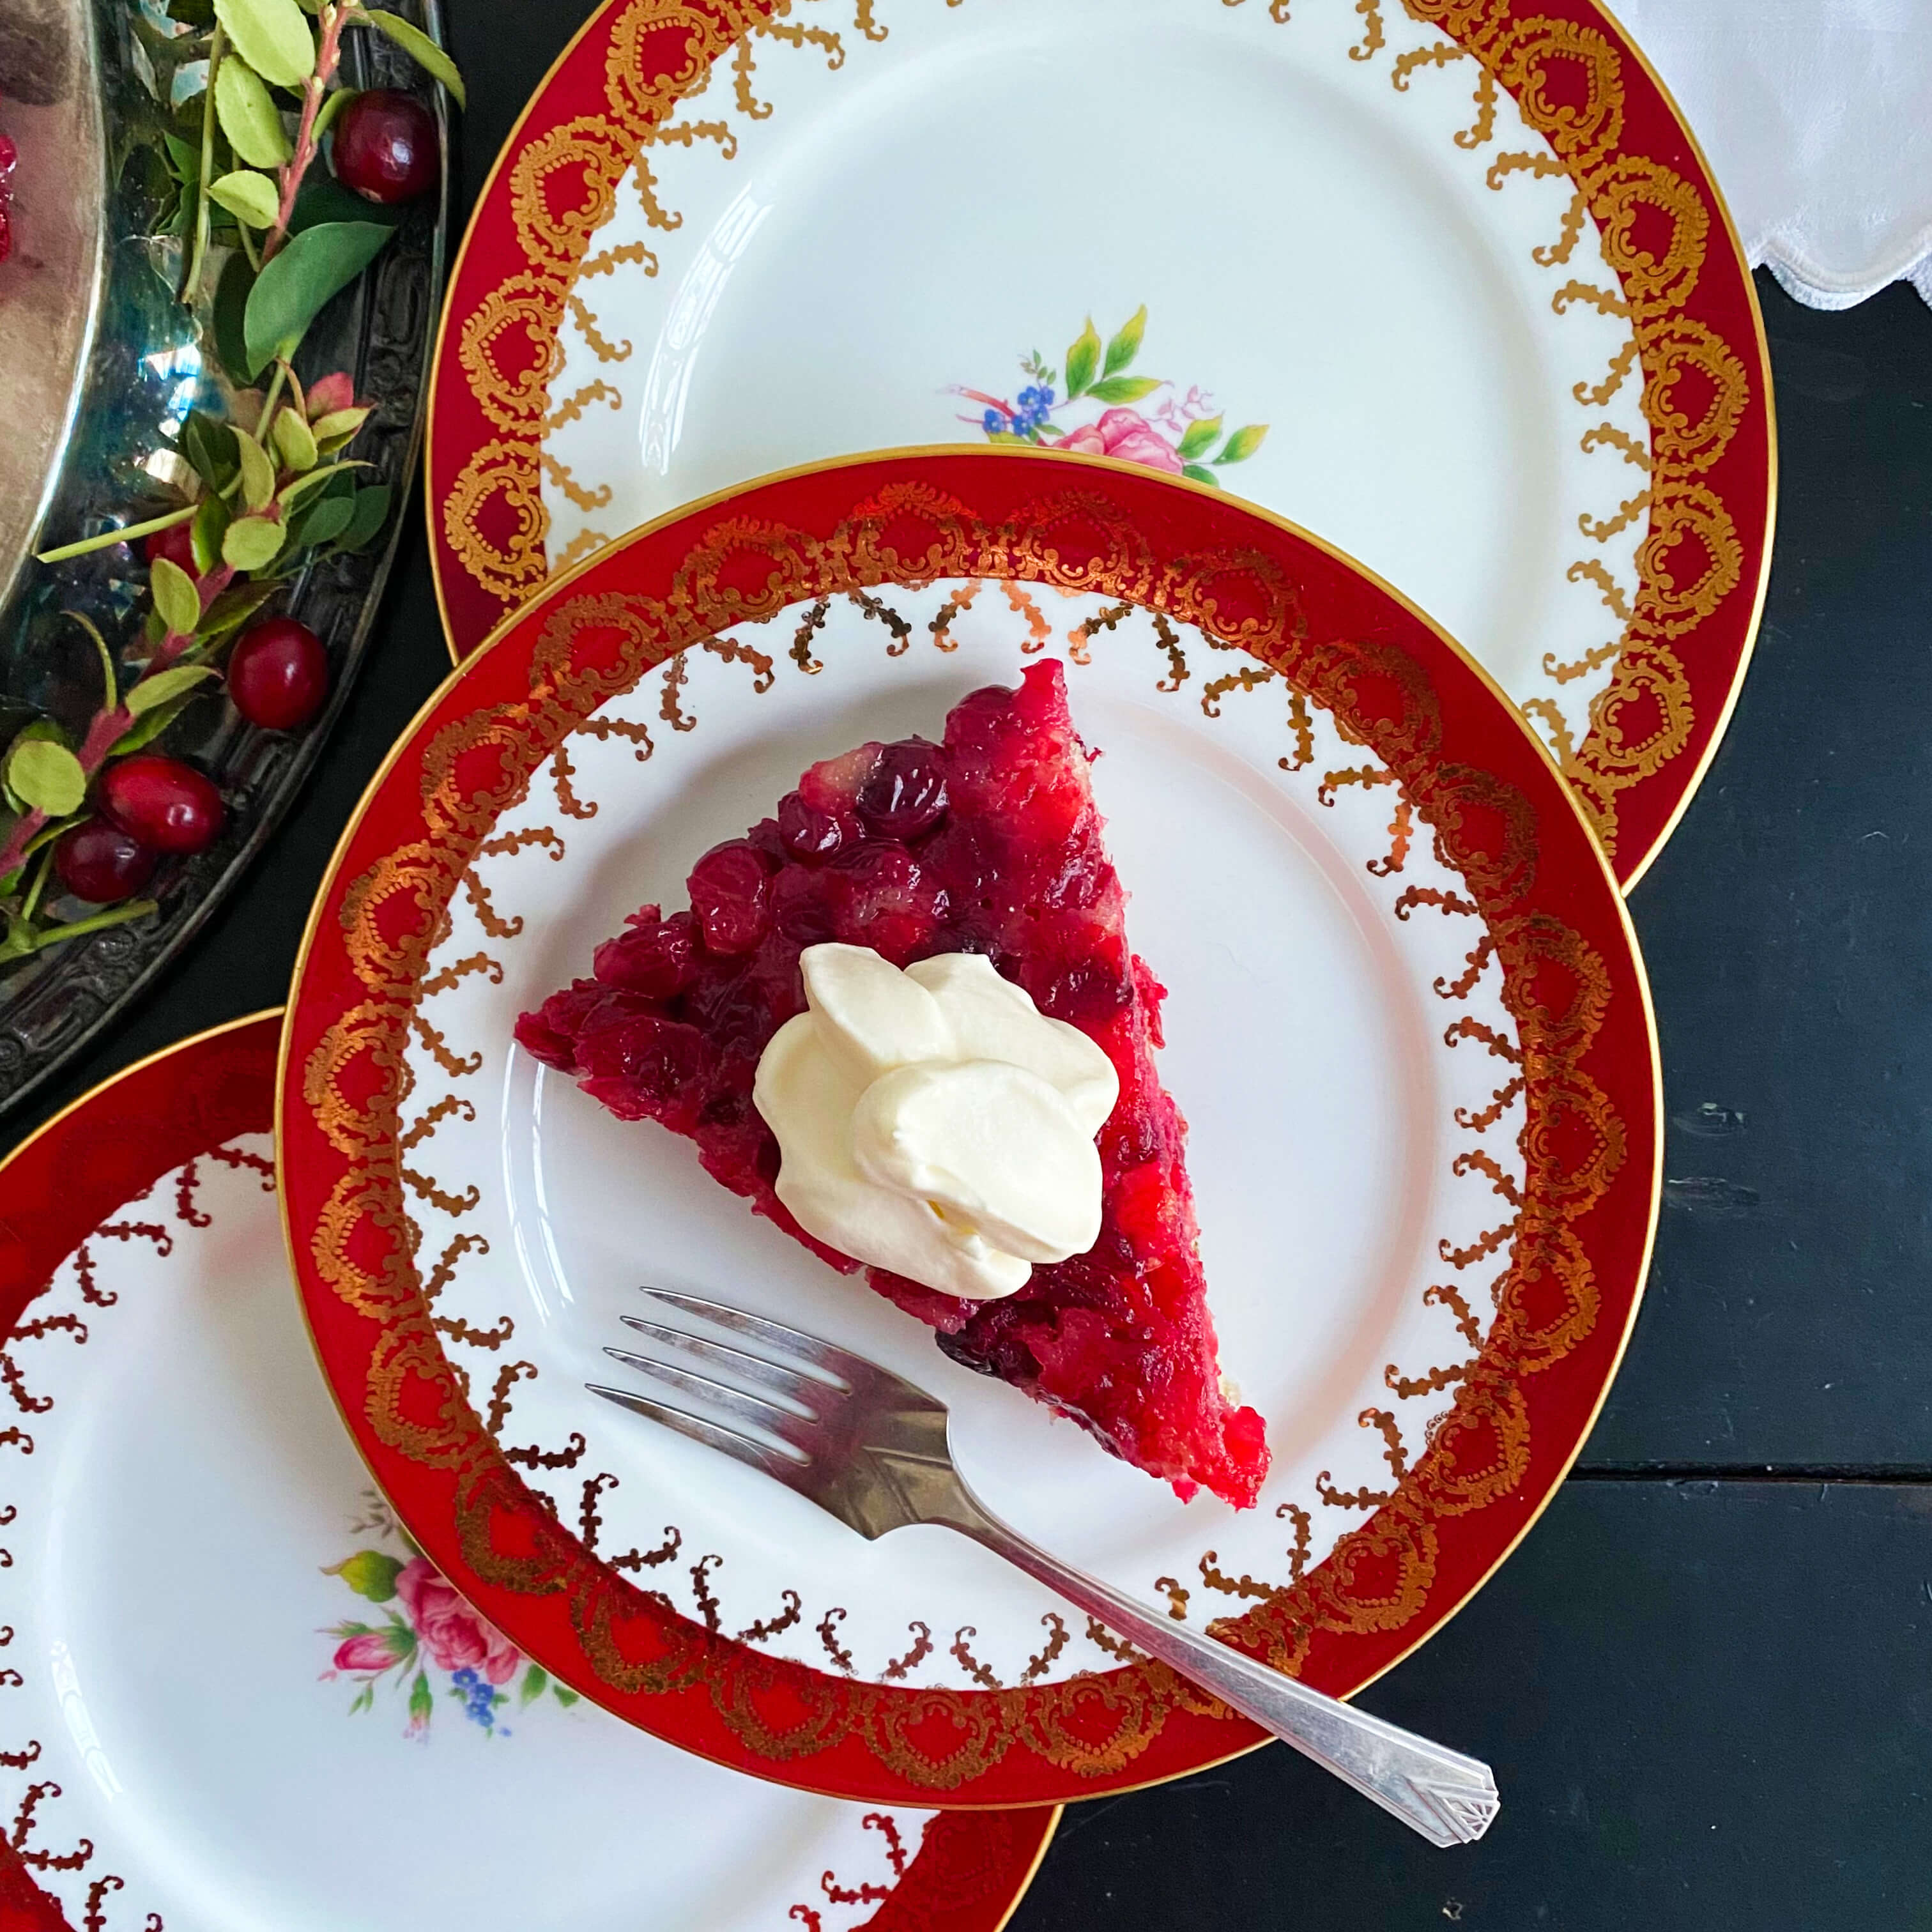
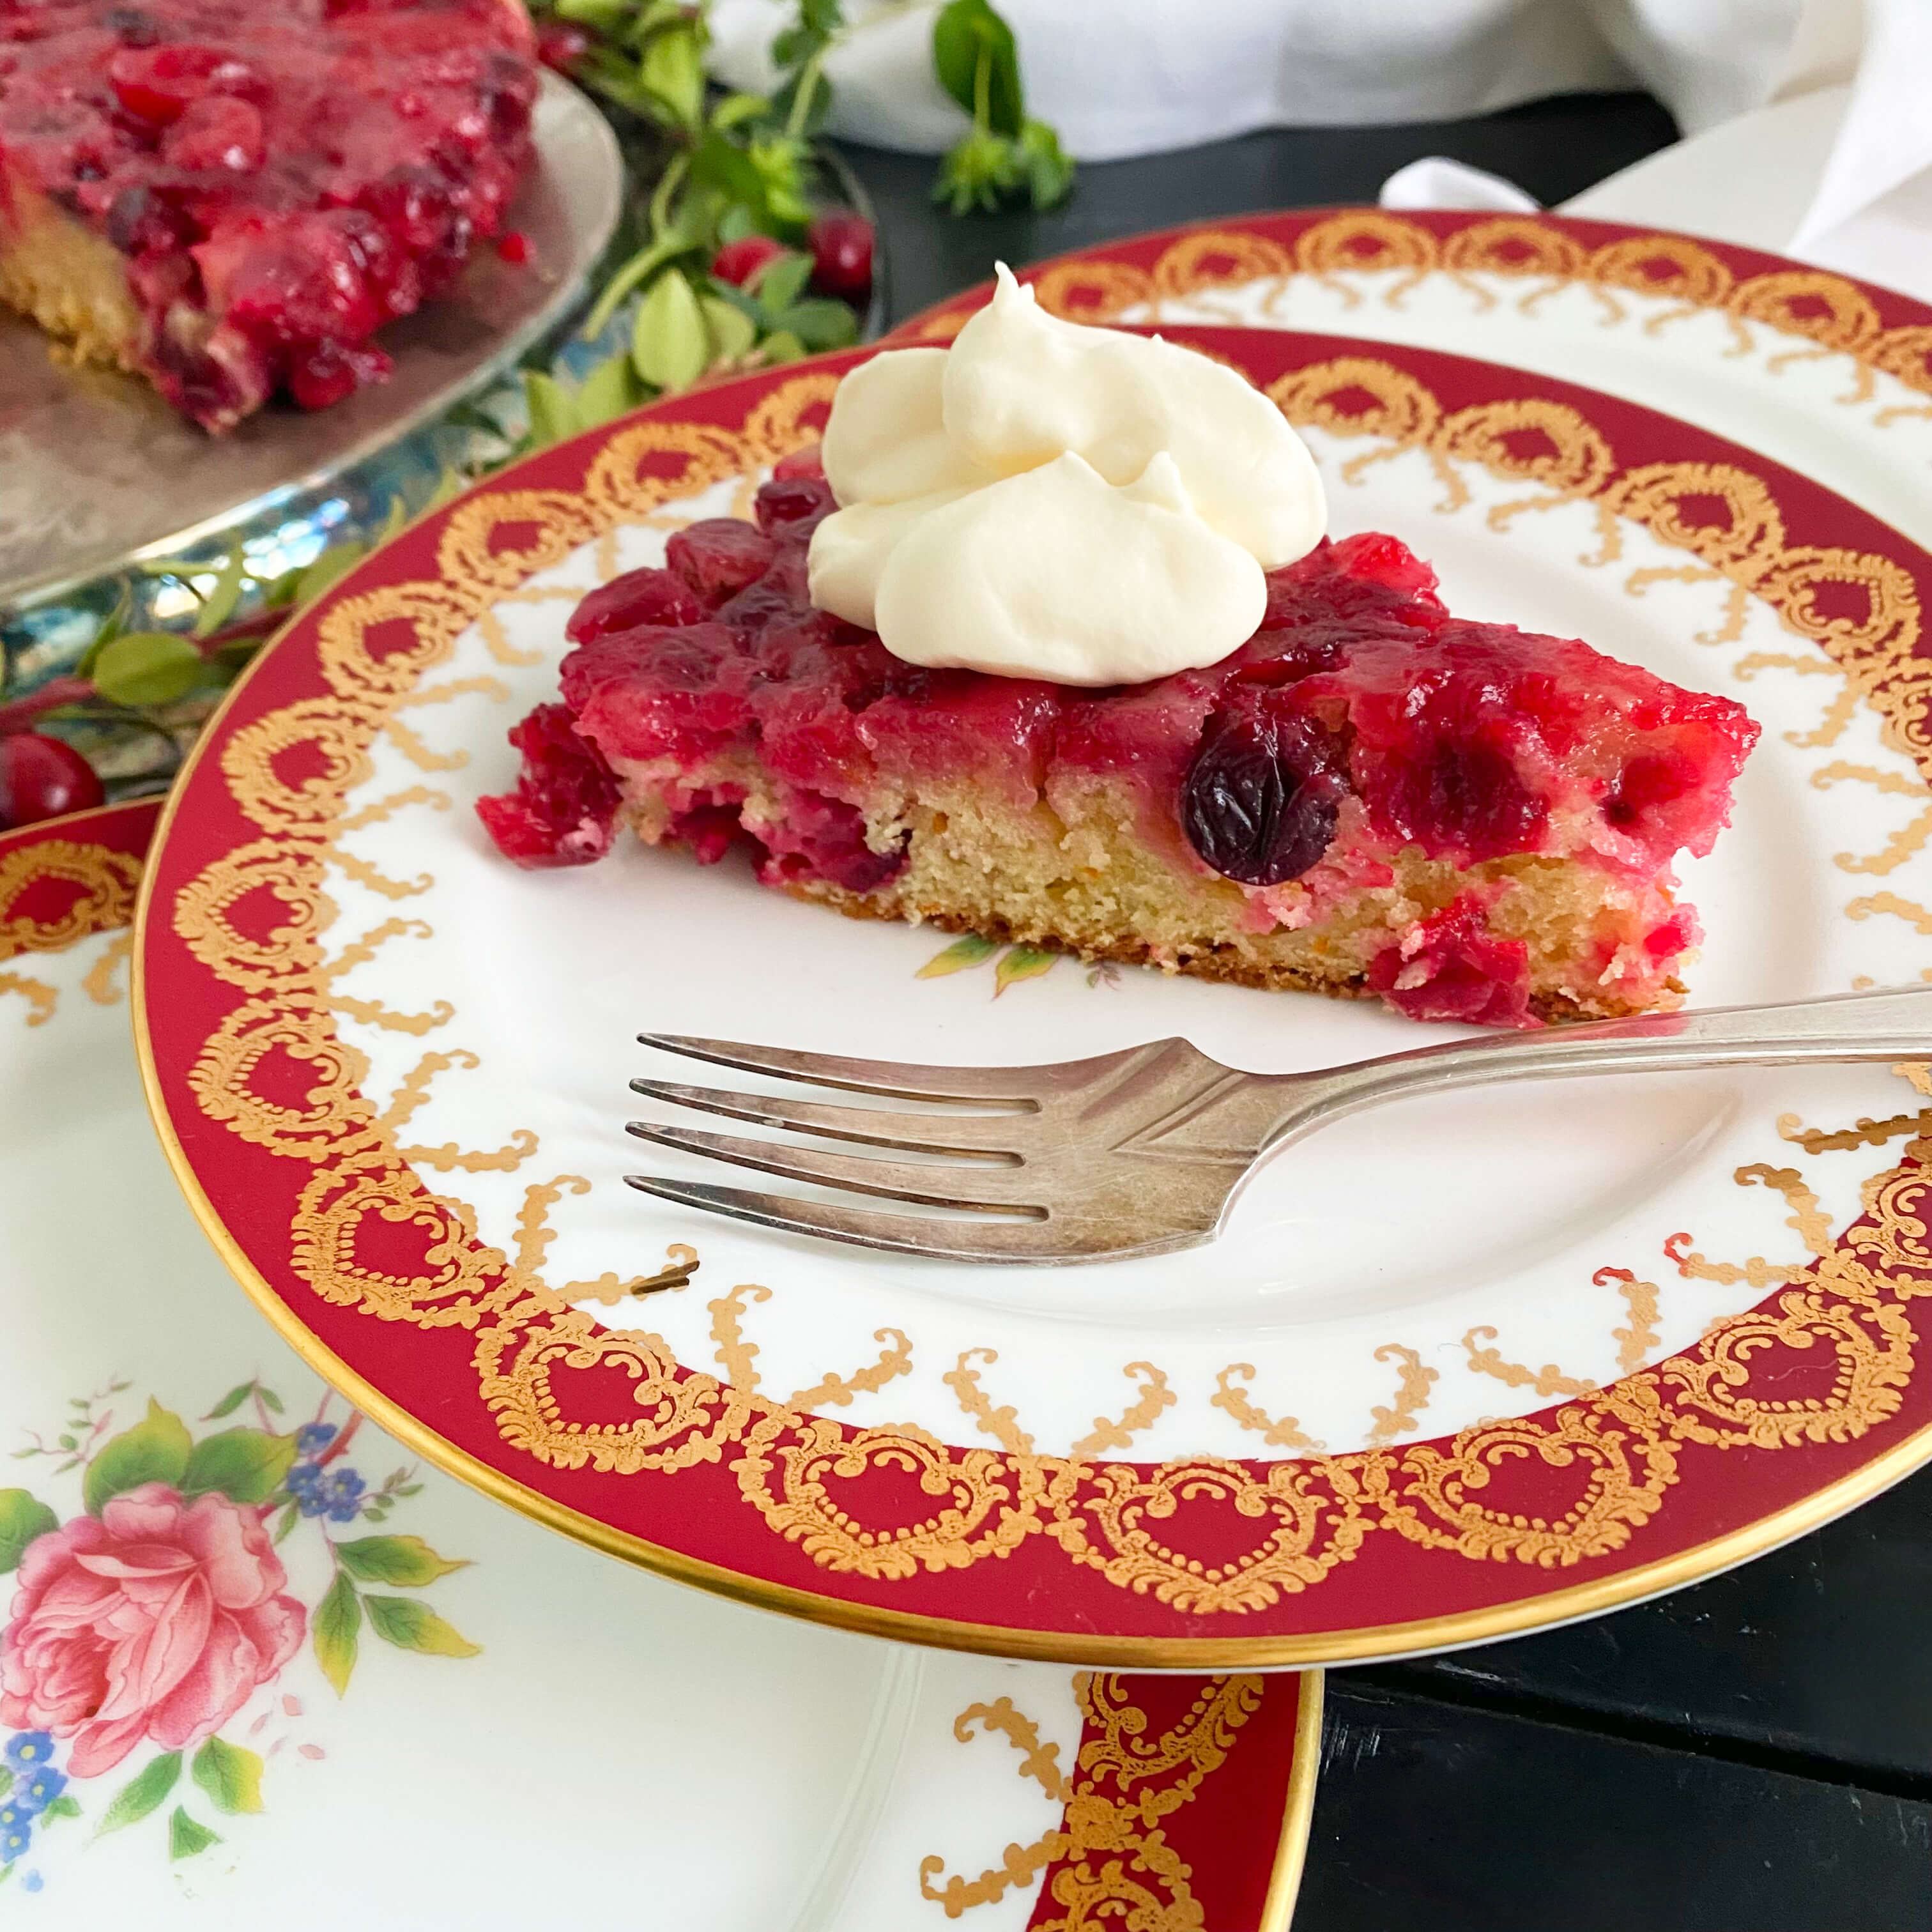
The texture of my family’s version of this recipe is thin on thre cranberry topping with a more substantial cake, similar to the density of banana bread or the top of a muffin that is chewy with a slight crunch to it. Since this recipe does not call for a lot of sugar, it offers a lovely sweet-tart flavor profile thanks to the cranberries. The orange rind adds a delicate dose of fresh citrus to brighten the flavor of the fruit and balance the butter. Definitely do not forget to serve it with homemade whipped cream. I like to whip the cream to a consistency of soft peaks rather than firm peaks for this recipe, so that the cream lightly sits on top of each slice of cake like a cloud.
Although Cranberry Upside-Down Cake is the simplest of desserts, it carries intense flavor. If you can find local cranberries, eggs, butter and milk, all the better. Living in New England, I was able to source local Connecticut cranberries and eggs for this recipe, but grocery prices being what they are today, one of the distinct joys of this dessert has always been its economy, so incorporate the best ingredients that you can afford. It will turn out wonderfully regardless of budget.
This cake easily serves eight people, but you can also stretch it to 16 if you slice the pieces thinly. When it comes to a flavorful cake like this one, a petite slice can sometimes feel even more indulgent than a big slice. Portion size aside, it’s great served warm, at room temperature, or cold straight from the fridge, and it is especially lovely when paired with a cup of hot coffee or tea.
A centuries-old symbol of peace and friendship, cranberries were an important part of life amongst the indigenous tribes of early America. I like to think they still carry that same power via recipes we make today. I couldn’t think of a more symbolic fruit to wrap up the end of the year with than this small, sweet, tart, hearty, and humble marble of a bright red berry. I hope this recipe brings a sense of calmness and ease to your holiday kitchen and delight to your dining table and all the companions that surround it.
Cheers to a lovely holiday, to the new readers we have welcomed to the blog this year, to my mom for introducing this favorite, and to our entire culinary community. May peace, friendship, and memorable meals swirl around your kitchen throughout all the days of the new year to come.
Happy Holidays!
UPDATE – January 2026
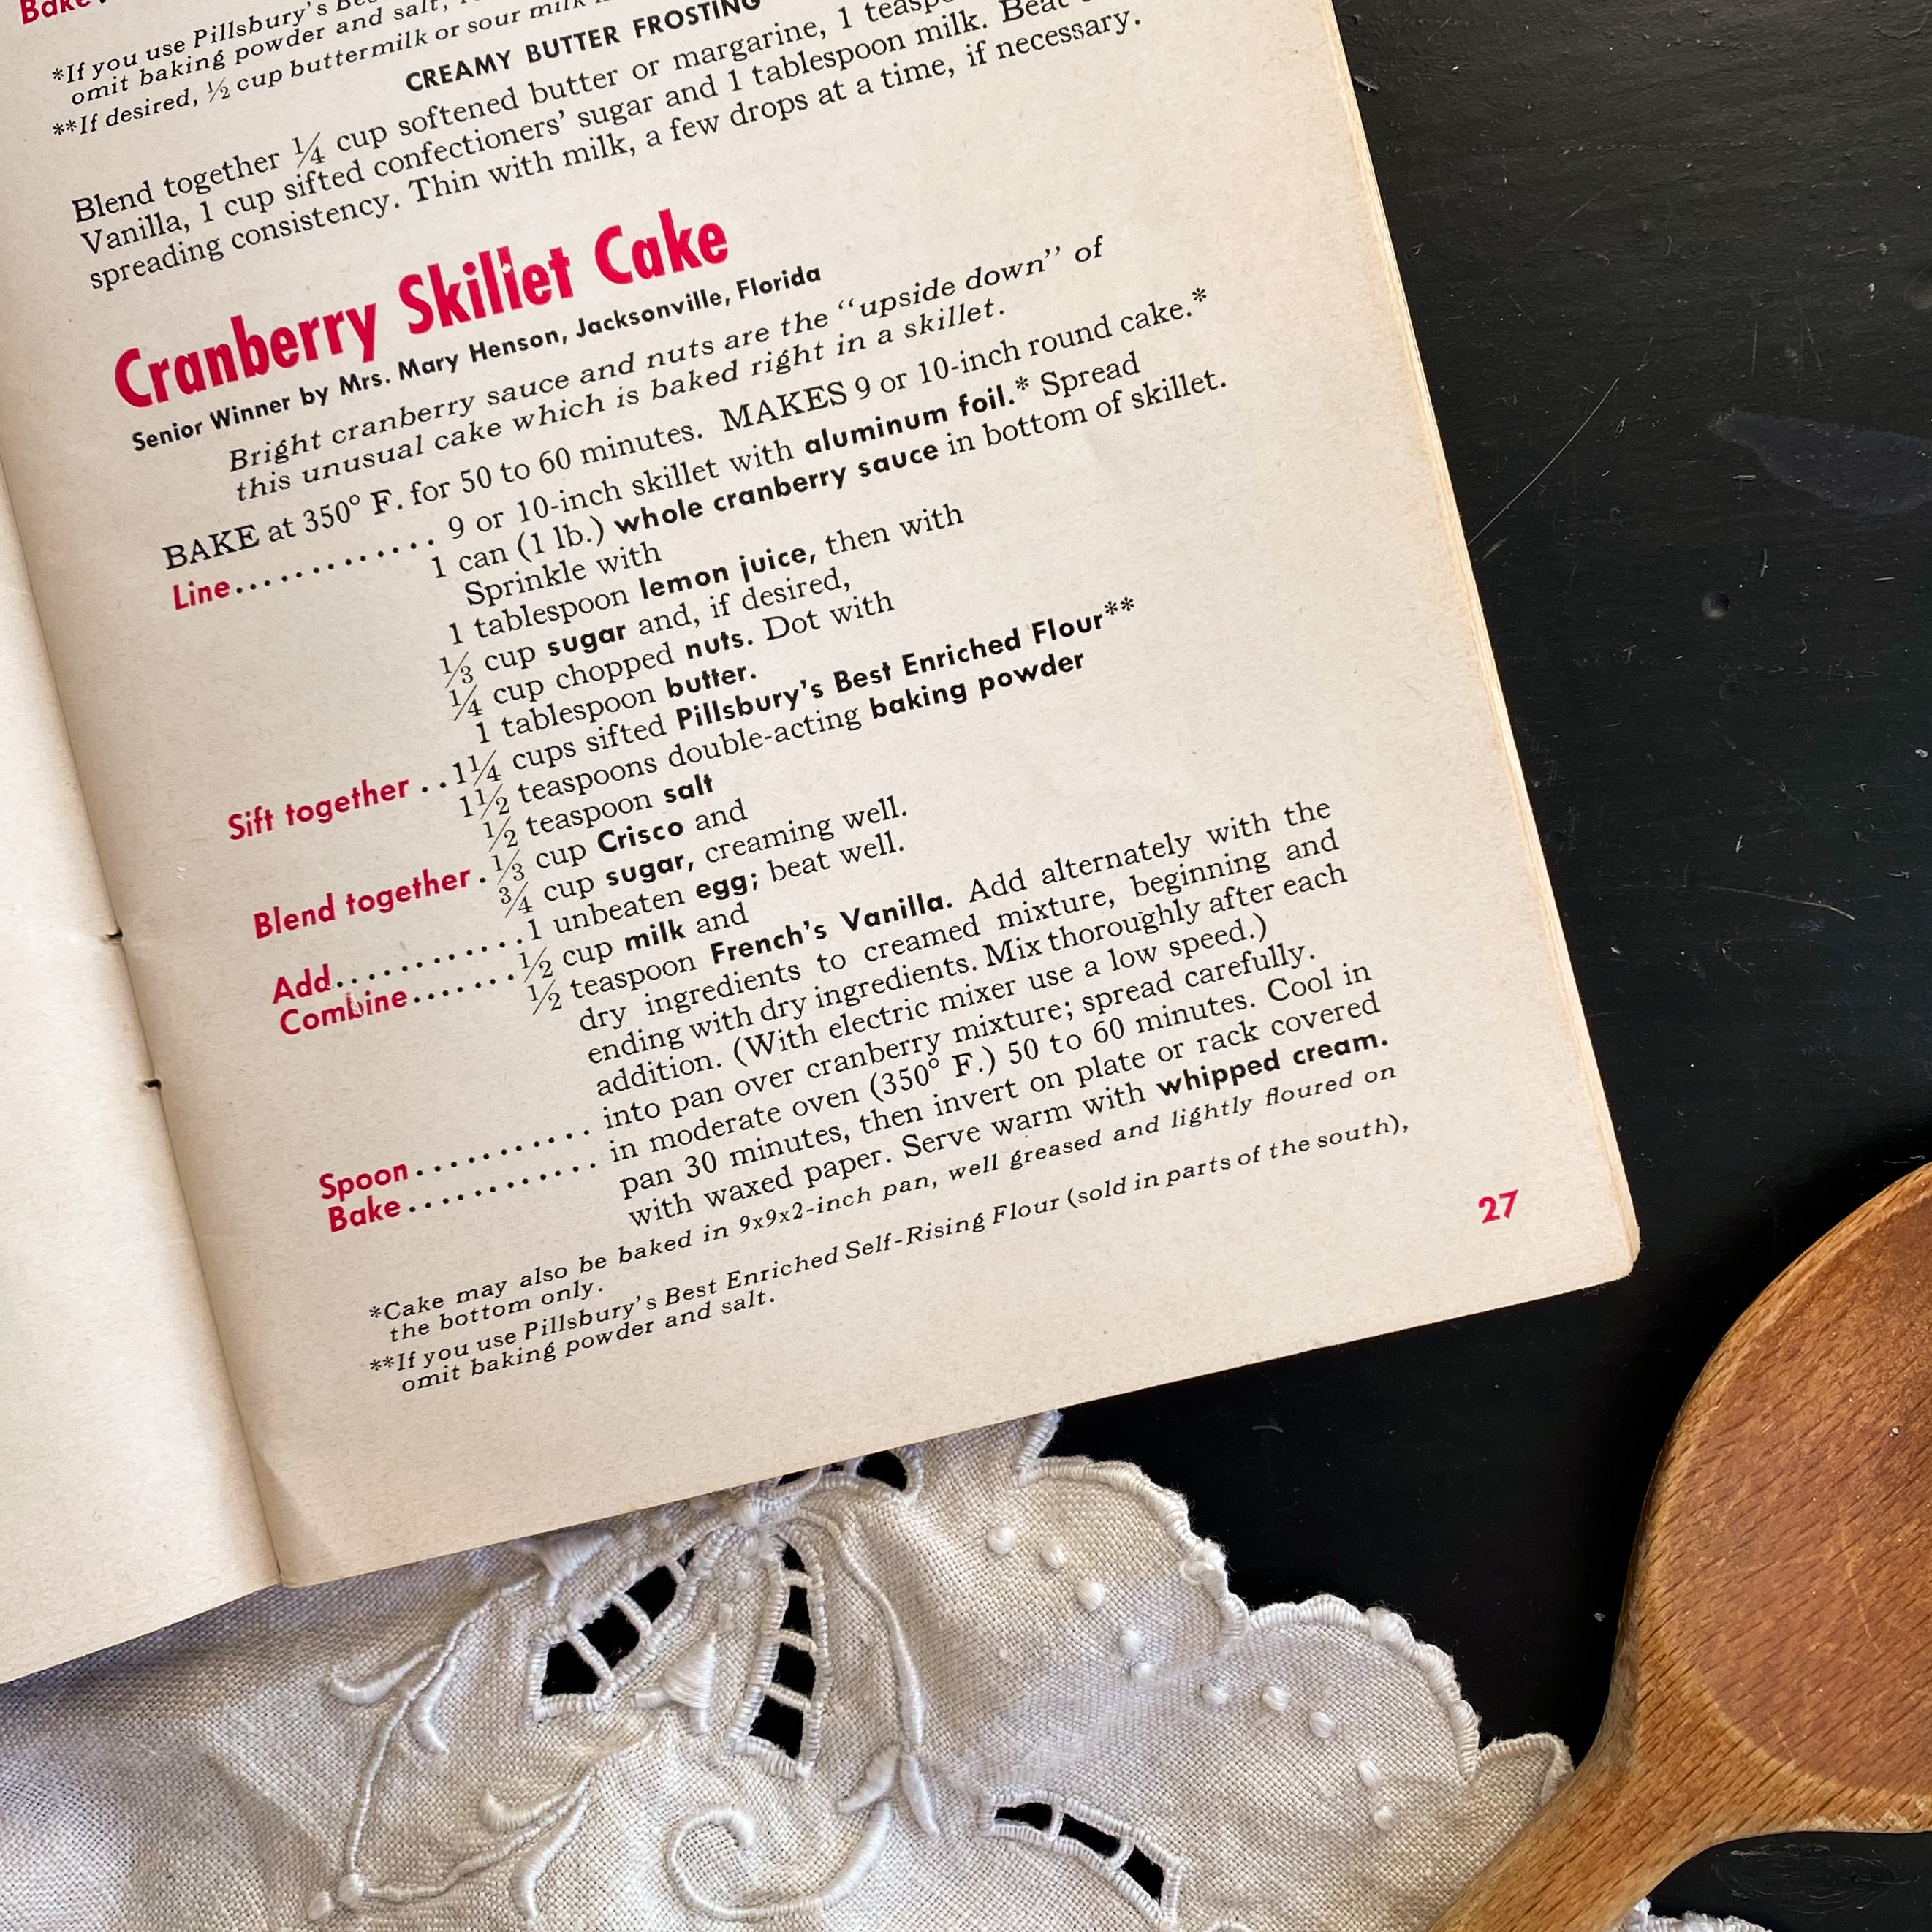
Thanks to a comment from one of our readers, we were able to find a similiar 1950s recipe for Cranberry Skillet Cake – a prize winning recipe by Mrs. Mary Henson of Jacksonville, Florida, who won the senior cake category of Pillsbury’s 6th Grand National $100,000 Recipe and Baking Contest in 1955.
We couldn’t find any additional information about Mary or her origin story of the cake, but we are including her recipe here for comparison. Similiar to our Cranberry Upside Down cake, Mary’s cranberry cake was baked in a skillet and utilized canned whole cranberry sauce, chopped nuts, and shortening in place of butter.
From Pillsbury’s 6th Annual Prize-Winning Grand National Recipe Contest booklet circa 1955.
When it comes to describing great bread recipes, they tend to take on a variety of accolades based on specific attributes. Best flavor. Best texture. Best no-knead. Best whole wheat. Best no wheat. Best gluten-free. Easiest to make. Fastest to bake. Biggest loaf. Smallest effort. Best. Fastest. Easiest. Again and again, over and around, brilliant bakers everywhere boast.
No one that I’ve encountered yet, though, has ever described their favorite bread recipe as the kindest. There’s no Google search for the best kindest bread. Kind isn’t really the type of word that generally pairs well with food descriptions and a you-have-to-make-it recipe. Baking or otherwise. But the recipe I’m sharing here in this post today can really only be, first and foremost, described that way. It is, of course, delicious and healthy and not complicated to make and contains simple ingredients, but above all, the best part of this recipe is its core, standout attribute… its kindness.
Without fully embracing that trait, you won’t be able to make this recipe as intended. And in not being able to make this recipe as intended, you’ll miss out on a truly delightful experience. One that is calming, relaxing, and joyful. You don’t need to be an expert baker or a seasoned bread maker to enjoy the fruits of this labor. You don’t even need to be a well-versed cook. In order to achieve the desired outcome of this recipe, you just need to be kind to it. To treat the ingredients and the process gently from start to finish.
Yeast is a living, breathing, growing life. Therefore, in order to make a marvelous loaf of bread, you need to treat the yeast gently and handle the dough tenderly, in the same way you would handle a newborn baby. This recipe is not about rushing or shortcuts or pre-made, pre-packaged substitutes. You don’t want to begin this culinary adventure with a scattered mind, an irritable mood, or perfection-induced pressure and motivation. This recipe is about showing kindness to yourself, the baker. It’s about showing respect for the ingredients involved, and about showing genuine care and consideration for the process of turning piles of fine and powdery specks into two golden loaves of substantial, nourishing bread.
Simply called Yeasted Bread, the recipe comes from The Tassajara Bread Book, first published in 1970 by Edward Espe Brown. At the time of publication, Edward was in his mid-20s, newly married and running the kitchen at Tassajara, a Zen spiritual center located in the remote Ventana Valley in Central California.
Edward Espe Brown
Opened in the 1960s, Tassajara was the first Zen spiritual center in the United States, and also the only Zen monastery outside of Asia. There in the Los Padres National Forest, students and guests from all over the world came to practice Zen philosophies and Buddhist principles in order to gain a more gentle approach to life. One that focused heavily on kindness, compassion, and thoughtfulness.
Los Padres National Forest. Photo credit: National Fish & Wildlife Foundation.
Due to its remote location, food for the guests, students, and staff was grown on-site at Green Gulch Farm, part of the Zen Mountain Center campus. Edward saw firsthand the time and care it took to grow the vegetables and fruits that eventually wound up in Tassajara’s kitchen for him and his helpers to prepare. With every chop and slice, simmer and slow roast, he continued that same level of care and attention in his cooking. He looked at every single ingredient as if it were a gift that he in turn would make into another gift of a satisfying meal for his friends, family, and guests at Tassajara to enjoy.
The kitchen at Tassajara. Photo credit: Bradley Allen.
“When I cook, I feel nurtured, sustained, like there’s energizing going on. It makes me feel the preciousness of life,” Edward shared in a 1985 Peninsula Times Tribune interview.
It’s that level of care and appreciation for the act of cooking and baking that established Edward’s reputation as a helpful coach in The Tassajara Bread Book. In this cookbook, as well as the other Tassajara books that followed, Edward wasn’t interested in telling home cooks how to make perfect food. He knew the act of cooking itself was too frenetic and ever-changing to prescribe a set of strict rules and guidelines that would be automatically applicable each and every time you came to the kitchen. Instead, he was interested in offering an understanding on how to approach cooking. He was interested in placing focus on intention and gratitude. Appreciating the life of the vegetable, the sharpness of the knife. Appreciating the aromatic steam from a bubbling broth, the flavors created when one ingredient combined with another, and the presence of the people sitting around the table. Good food would follow via the care put into its preparation.
Apart from being the first kind bread recipe that I’ve ever encountered, Edward’s bread book was also the first cookbook I’d ever run across that opens with a two-page poem of sorts that he wrote himself about working in the kitchen. It reads more like a spoken word piece than a traditional poem, but it has lovely sentiment and turns of phrase and sets the whole tone for the Tassajara cooking and breadmaking experience. Here’s an excerpt about mid-way through…
Each thing, asking to be seen, heard,
known, loved, a companion in the dark.
“Take care of the food, it is said,
“as though it was your own eyesight,”
not saying oh that’s alright, we
have plenty, we can throw that away.
Table, teapot, measuring cups, spoons:
the body within the body,
the place where everything connects.
The place where everything connects. That’s how Tassajara’s Yeasted Bread can best be described. A combination of person, plant, preparation, and product. Rest assured, you are following a recipe with step-by-step instructions and a definitive end result, but you are also following your heart, your intuition, and your awareness of the process in equal measure.
Coming from the earth, coming from the air,
a cool breeze, a spark, a flame, a go ahead:
Cook, offer yourself, hold nothing back.
Cooking is not like you expected, not like
you anticipated. What is happening is unheard
of, never before experienced. You cook. No mistakes.
You might do it differently next time, but
you did it this way, this time.
The end result is what it is.
– Edward Espe Brown
Breadmaking can be tricky. There are a lot of factors that can intervene and mess with the process – humidity, air conditioning, hard water, soft water, oven temperatures, inactive ingredients, bacteria, a hot atmosphere, a cool environment. All components that may or may not be within your control. I found it to be very calming to read about a breadmaking process that begins by telling you, first and foremost, to relax.
An excerpt from The Tassajara Bread Book.
This was the first sandwich bread recipe I have tried to make since moving to New England. I didn’t know how my oven was going to act, or if our coastal air would make a difference, or if the summer heatwave temperatures on the day I first made it would help or hinder the process. Was it luck that made the bread turn out so well on the first try? Or was it the recipe and Edward’s call to action to treat every step along the way with care and kindness?
Edward called this recipe the basis from which all other bread recipes in the book are created. A springboard for later adding in additional flavorings or flours, as well as a solid resource for further experimentation and exploration of your own making. I’m not an expert breadmaker in any sense of the word and have had many failed experiments using other recipes from other places over many years, but none of those recipes ever mentioned baking with kindness and appreciation, nor stated anything close to Edward’s it-is-what-it-is philosophies. That might just be the winning equation to a good loaf of bread.
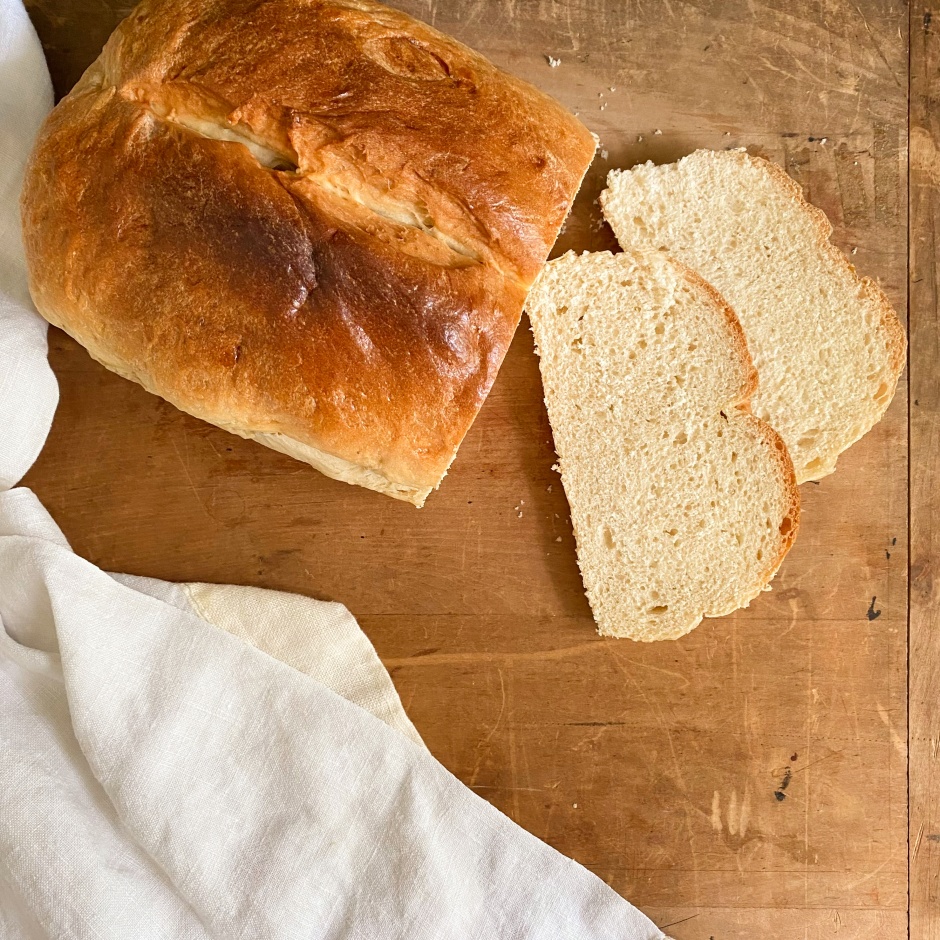
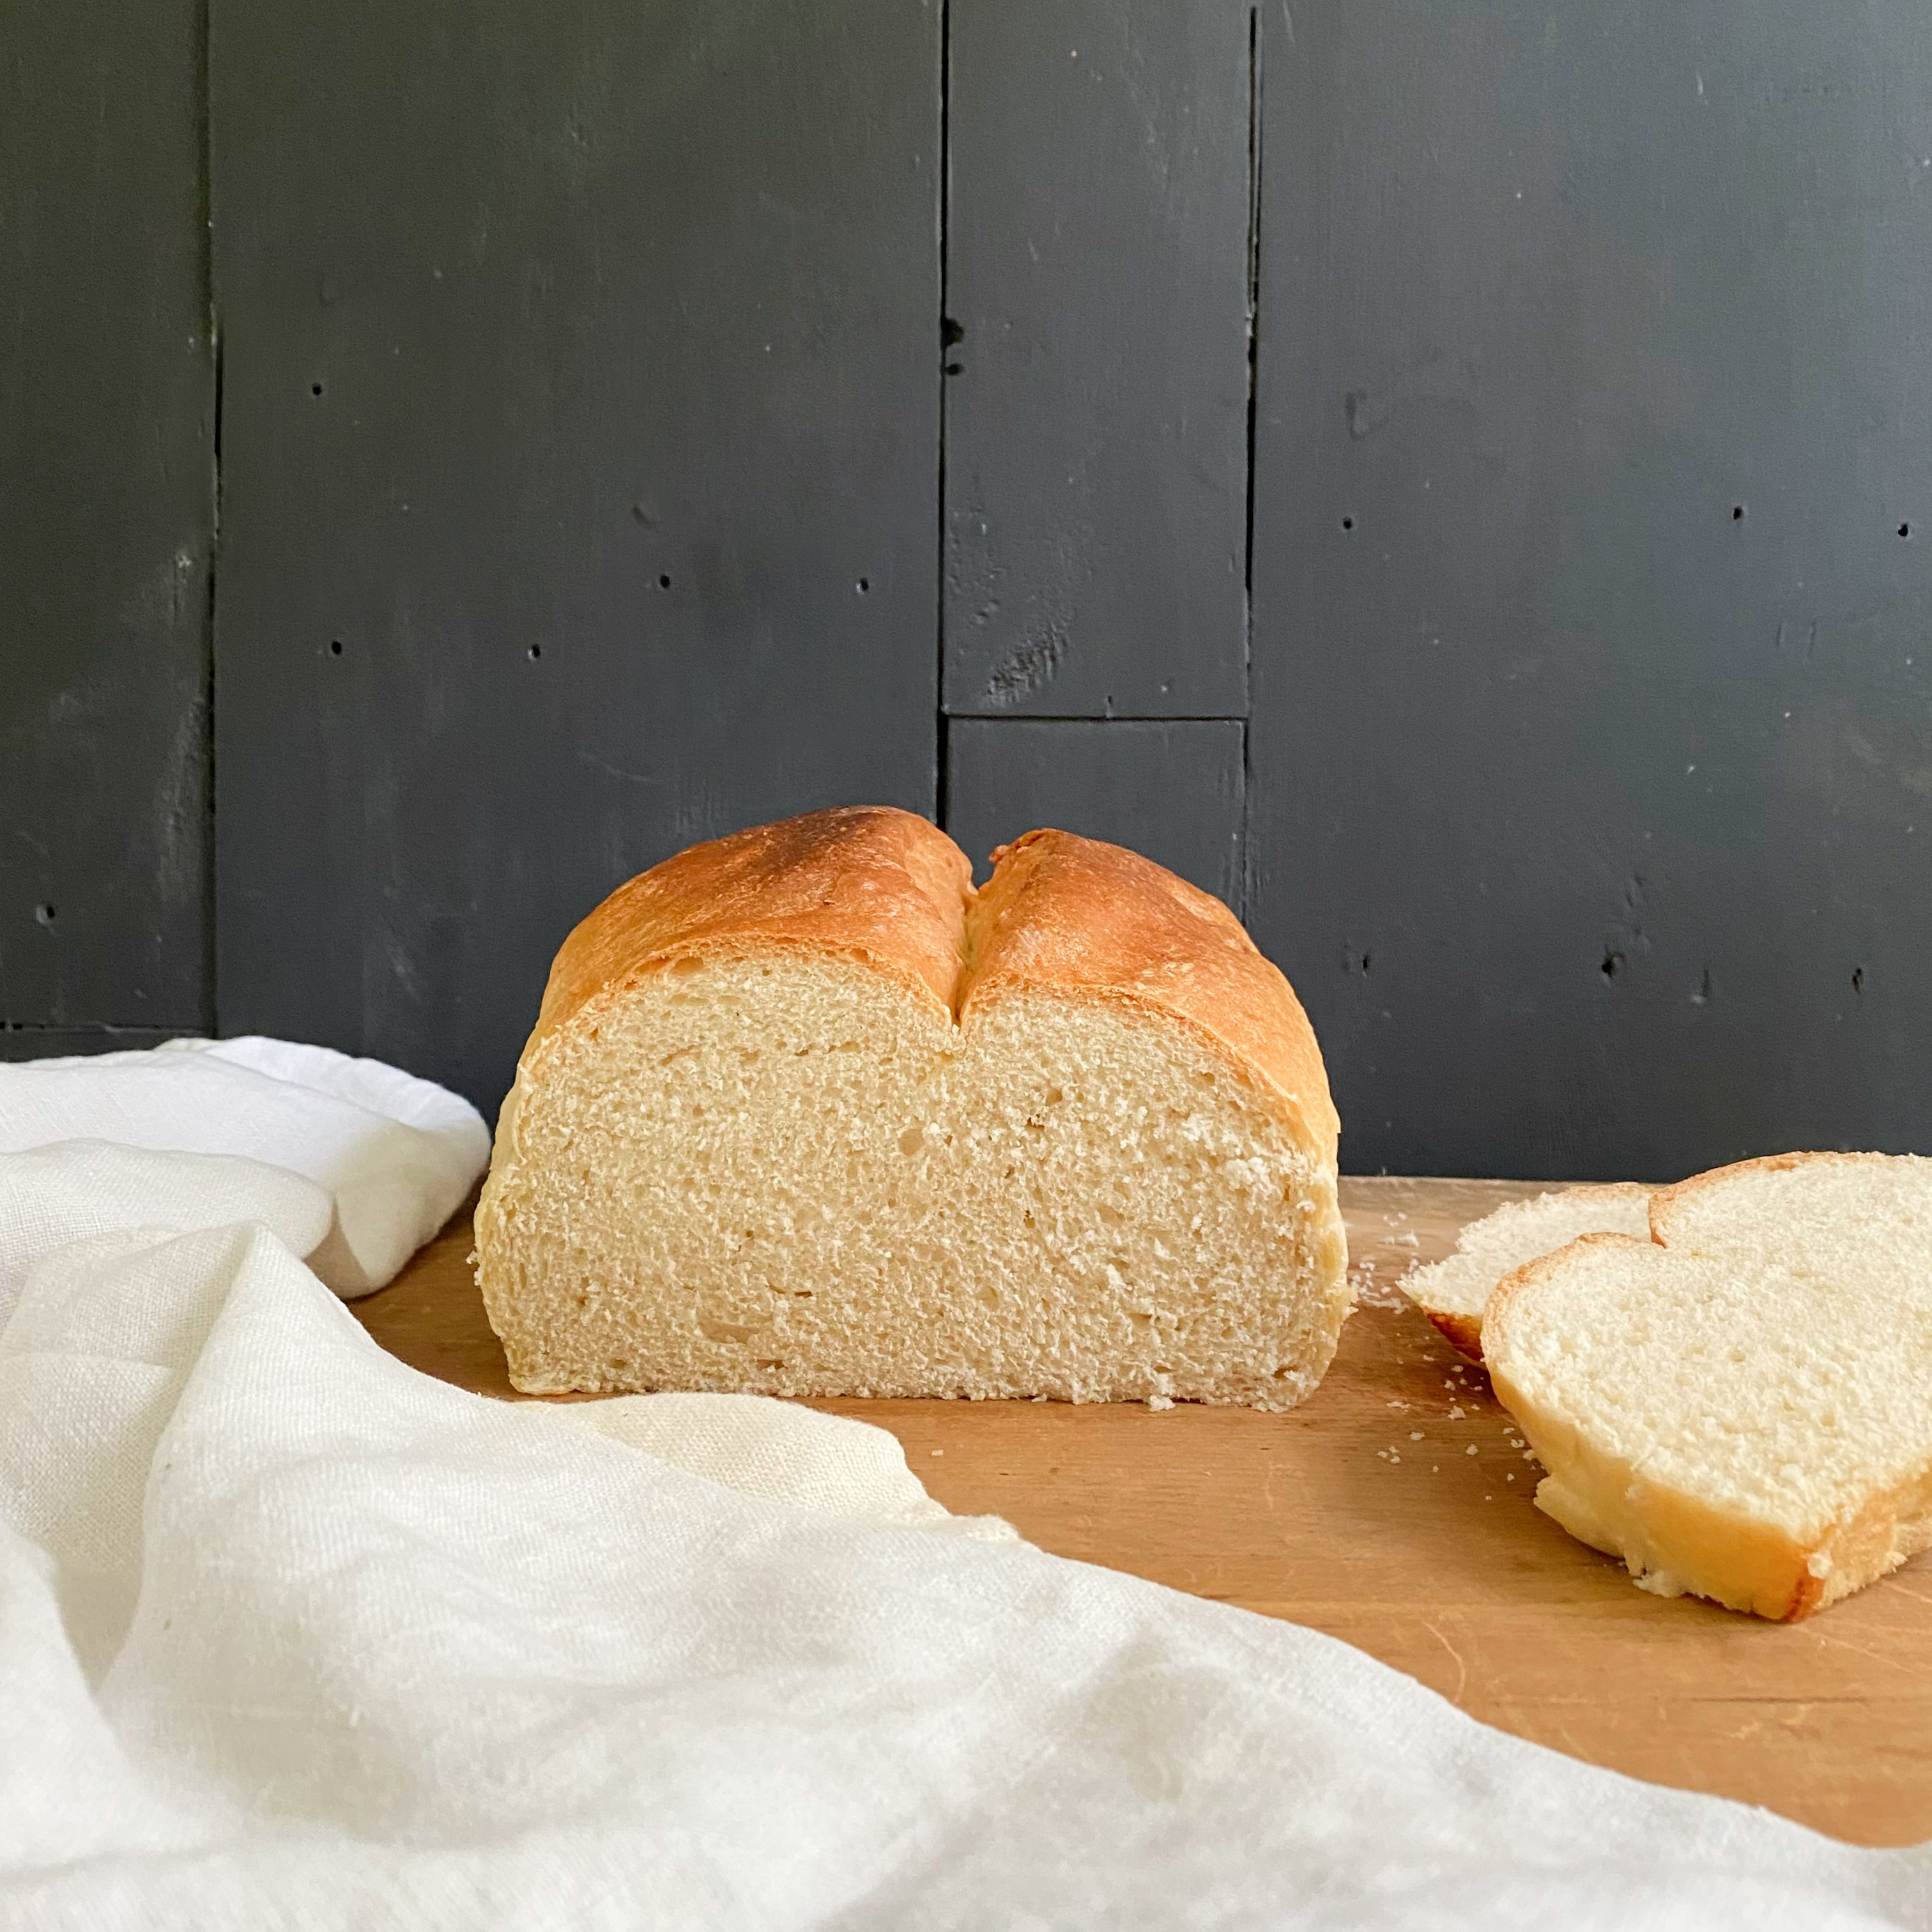
In case you have ever struggled, like me, with making homemade bread that winds up turning out flat, flavorless, or weighing twenty pounds, then this recipe will show you how to avoid all three. There’s a small amount of brown sugar that adds a hint of sweetness to the dough and also helps feed the yeast, but other than salt and butter, there are no other flavor enhancers. It produces two simple loaves that are ideal for sandwiches or toast with butter and jam. And it makes the type of bread meant to work in collaboration with other toppings, not compete with them. The loaves are of medium density with a light but substantial weight that makes you feel like you’ve eaten something nutritious, packed with good-for-you carbs and protein on a level that will sustain you for hours instead of just a few minutes. It’s not light and fluffy like a croissant nor is it hard and heavy like a peasant loaf. It’s somewhere in between. Spongey but firm with a texture that holds it shape and won’t fall apart when you cut it. I found it to be such a great, delicious, simple all-around bread. A best bread. Baked with kindness.
By 1973, three years after The Tassajara Bread Book was published, Edward had gained quite a following. The book at that point had sold over 150,000 copies, and racked up accolades from food critics, professional chefs and home cooks around the country. Edward went on to write Tassajara Cooking and then The Complete Tassajara Cooking, each featuring vegetarian recipes along with favorites from the bread book. In 1995, The Tassajara Bread Book celebrated its 25th anniversary with a reprinting and emphatic praise from the Washington Post, deeming it “the bible of breadmaking.” As it turns out, there is something about baking with kindness and gratitude, after all. Edward was right. The good food follows.
I can see why breadmaking is such a fulfilling form of baking. It’s a calming act. An encouraging endeavor. A delicious result. In our busy modern-day world that is grappling with so much unrest, noise, and difficult situations, it’s the serenity of this baking endeavor that I found to be most appealing. Baking in this Tassajara way is an act of love on all accounts…. thoughtfulness, acknowledgment, gratefulness, gratitude, and not just for the food but for yourself in the present moment too.
Tassajara Yeasted Bread
(makes 2 loaves)
3 cups lukewarm water (Note: lukewarm registers between 85 degrees F – 105 degrees F and does not feel warm or cold when splashed on the inside of your wrist).
1 1/2 tablespoons dry yeast (2 packets)
1/4 cup sweetening (honey, molasses or brown sugar) (I used brown sugar, loosely packed.)
1 cup dry milk (optional) ( I did not use it)
4 cups whole wheat flour or substitute unbleached white flour
4 teaspoons salt
1/3 cup oil or butter
3 cups additional whole wheat flour or unbleached white flour
1 cup additional flour for the kneading process
Dissolve the yeast in the water. Stir in sweetening and dry milk, if using. Stir in four cups of flour, one cup at a time, stirring briskly after each addition to form a thick batter. Scrape down the sides of the bowl occasionally as you mix. After the fourth cup of flour is incorporated, mix well with a wooden spoon for 100 strokes until the batter is very smooth.
Cover bowl with a damp cloth and let rise for 45 minutes in a spot that is between 85-100 degrees in temperature. If the spot is cooler than this temperature the dough will take longer to rise.
After 45 minutes, fold in the salt and oil or butter. Fold in the additional three cups of flour, mixing until the dough comes away from the sides of the bowl.
Using the final fourth cup of flour spread out on a board, knead the dough for about 10 minutes or until it no longer sticks to the board. Knead the dough by flattening it with your hands and then folding it in half by pulling the top half down to meet the bottom. Use the heels of your hands to push the dough down and forward, rocking your whole body forward with each push, not just your hands and arms. Rotate the dough a quarter of the way around and repeat each previous motion, flattening, folding down, and pushing the dough forward. Keep rotating and repeating these steps for the entire 10 minutes until the dough is smooth.
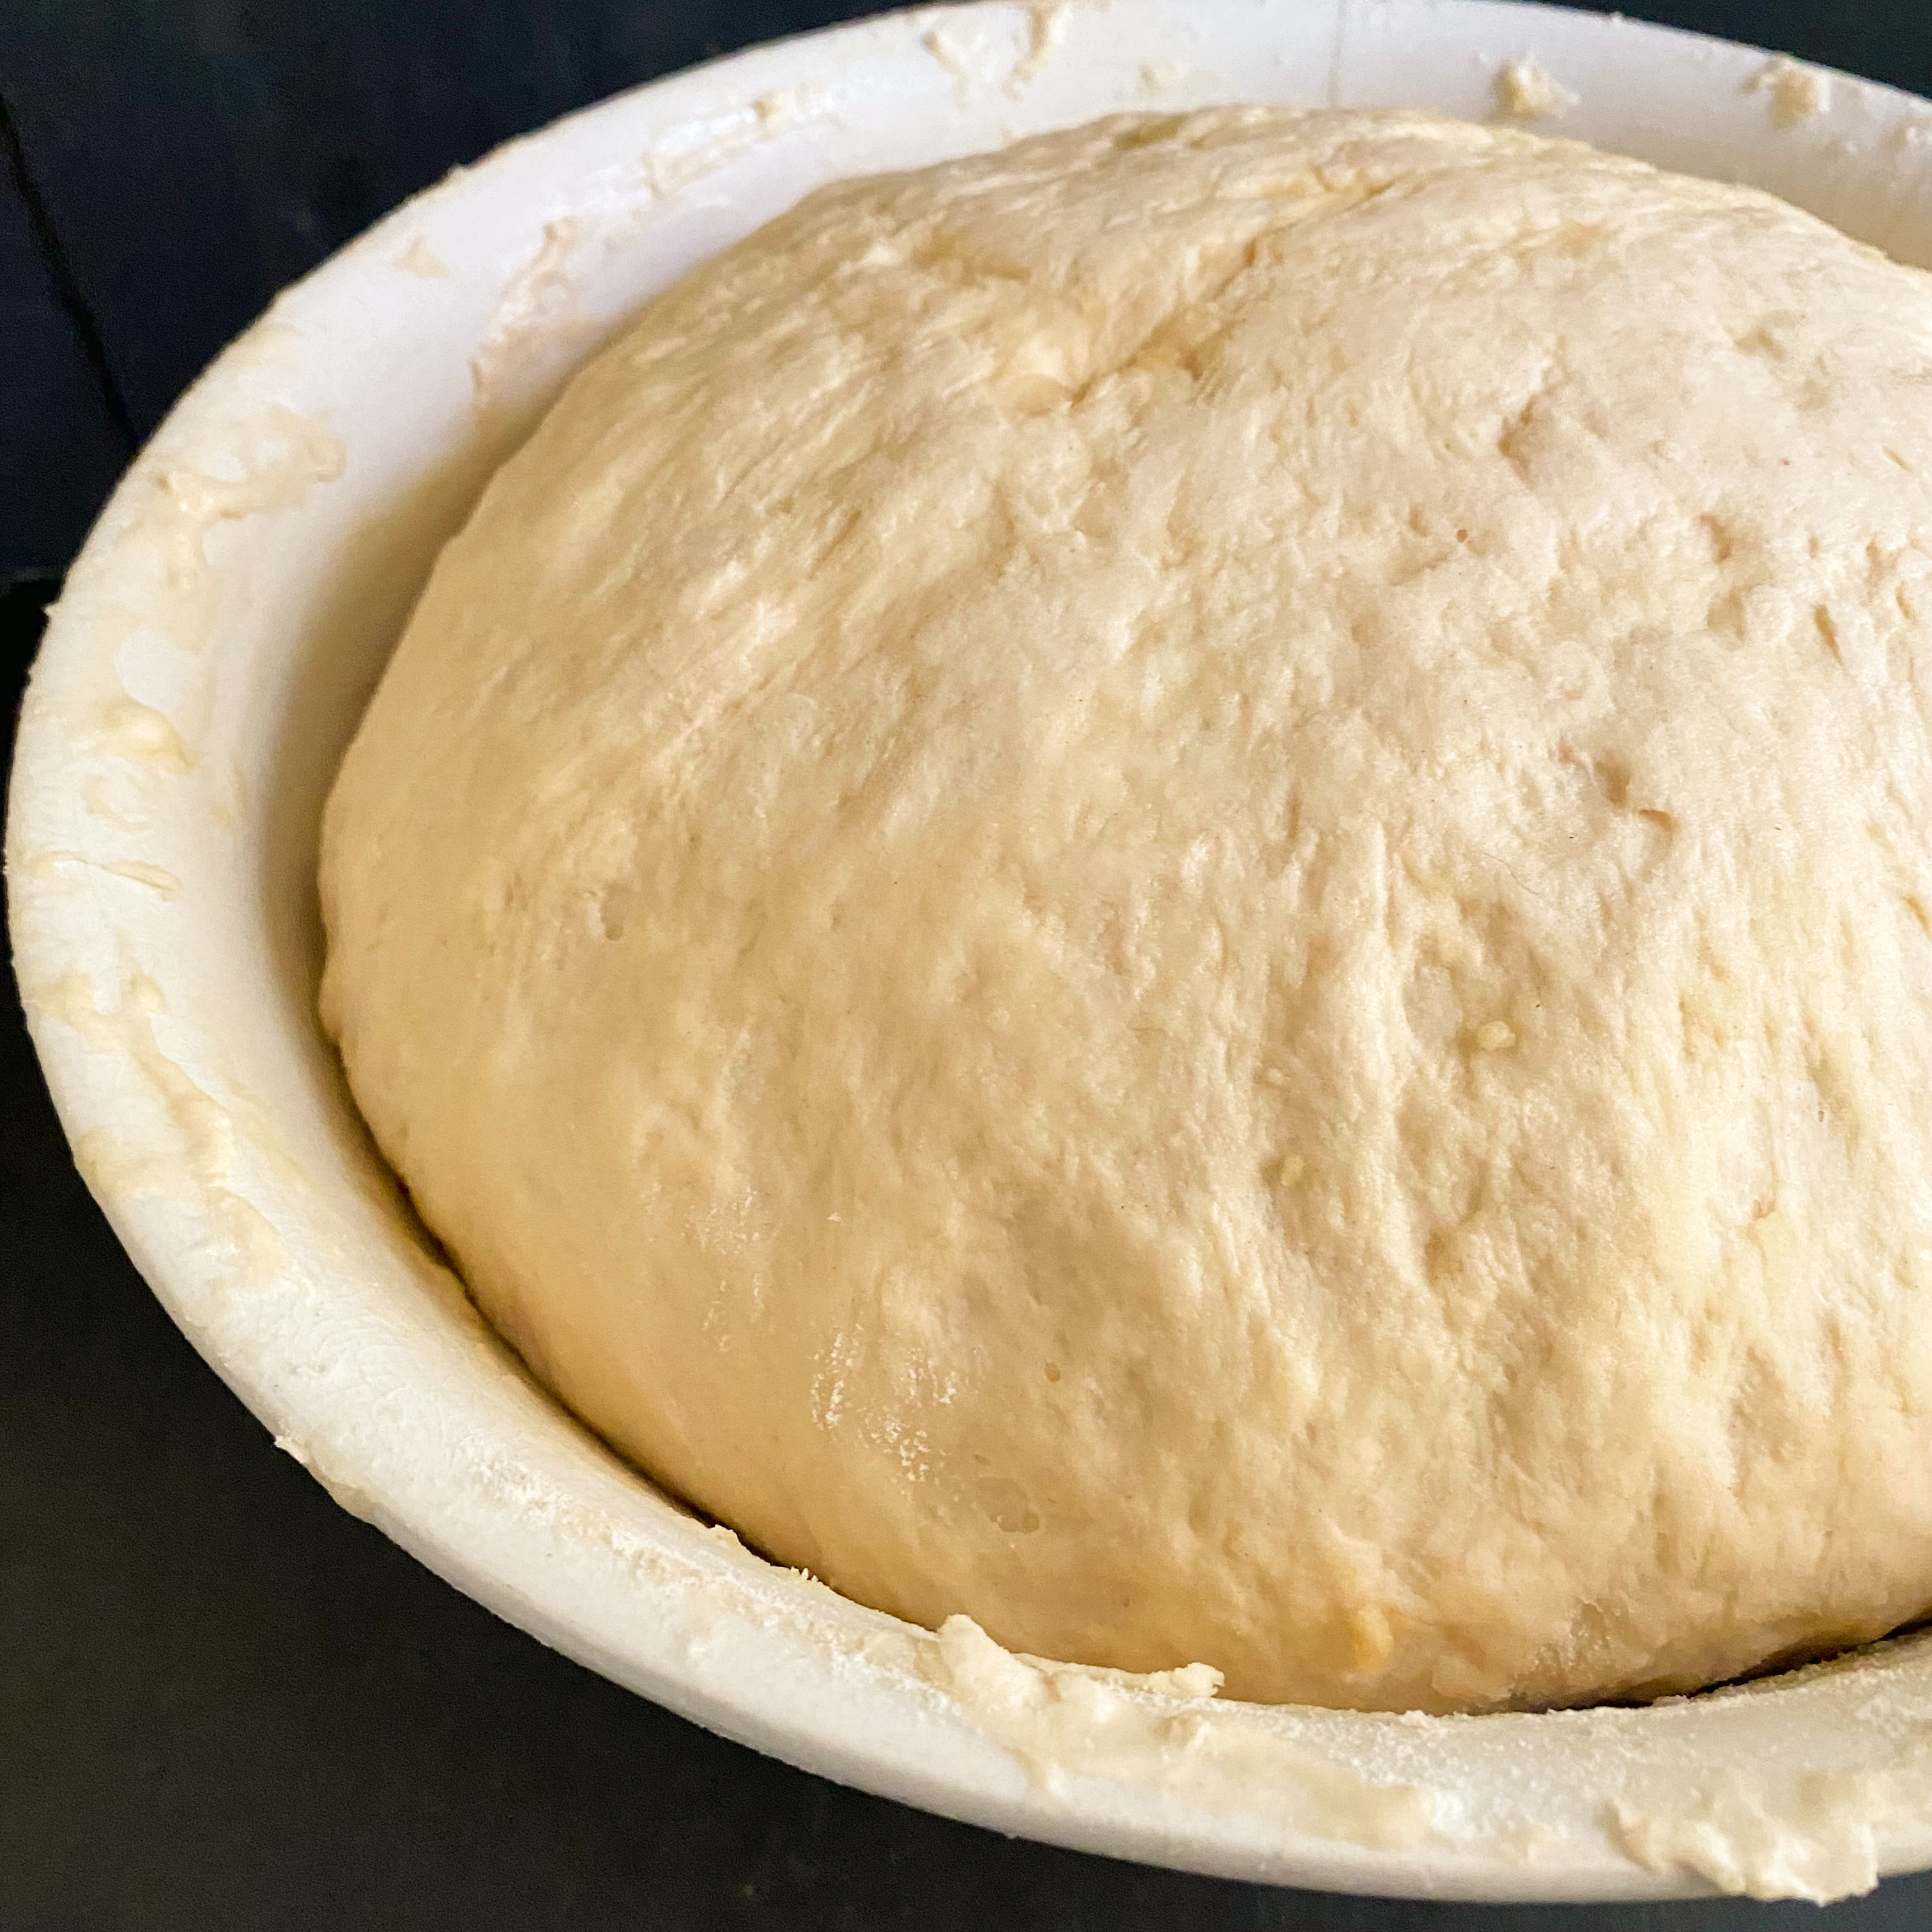
Put the dough back in the bowl, cover it with a damp cloth, and let it rise 50-60 minutes until doubled in size.
Punch down the dough by placing your fist into the center of the dough and then all over it about 15-20 times.
Let it rise in the same bowl for 40-50 minutes again until doubled in size.
Preheat the oven to 350 degrees. If using an electric oven, preheat it to 325 degrees.
Shape the dough into a round ball and cut into two equal pieces. Shape each piece into a ball and let them rest for 5 minutes.
Knead each ball in your hand five or six times. Shape the dough into logs. Oil two bread pans and then place a dough log in each pan.
Let the dough rise 20-25 minutes in the pans.
Cut the top of each loaf with a 1/2″ inch slit to allow steam to escape. For a golden brown, shiny top, brush the surface of each loaf with an egg wash made of 1 egg beaten with 2 tablespoons water or milk. (I used milk.)
Bake for 50-60 minutes or until golden brown.
Remove from the pans and let the loaves cool on a rack.
Although it took about 6 hours to make from start to finish, the time passed quickly and was peppered with little moments of surprise and delight as the dough bubbled and popped, rose to magical heights, and filled the house with the warm, inviting scent of a bakery. It’s pretty lofty to say that a slice of homemade bread can cure the world of all its harms, but cooking with kindness, appreciation, and an open heart is a good start.
Delicious enjoyed still warm from the oven, at room temperature the next day, or toasted slice by slice, I didn’t encounter any situation in which this bread did not taste wonderful. The only thing I haven’t tried yet is freezing it. As fast as I can make the loaves, they seem to disappear pretty quickly. I’m making a new batch this weekend though, so I’ll freeze a loaf and update the post with details on how that turned out.
In the meantime, if you find yourself stressed out or overloaded this summer, take a break, bake this bread and think about all the wonderful things there are to be greatful for in this world starting with your own two hands, the mixing bowl you’ll use, and the yeast and the sugar that will you get you started. By activity’s end, you’ll feel like you have embarked on a mini-vacation.
Cheers to Edward for helping us focus our intentions on kindness and gratitude in our cooking, instead of fast-made food and pressure-filled perfection. Cheers to the yeast, flour, butter, sugar, water, and salt. To the antique bread board, the 1930s mixing bowl, and the modern-day oven that made this post possible. And cheers to the beautiful, delicious loaves they produced. I hope you love this best kindest bread recipe just as much.
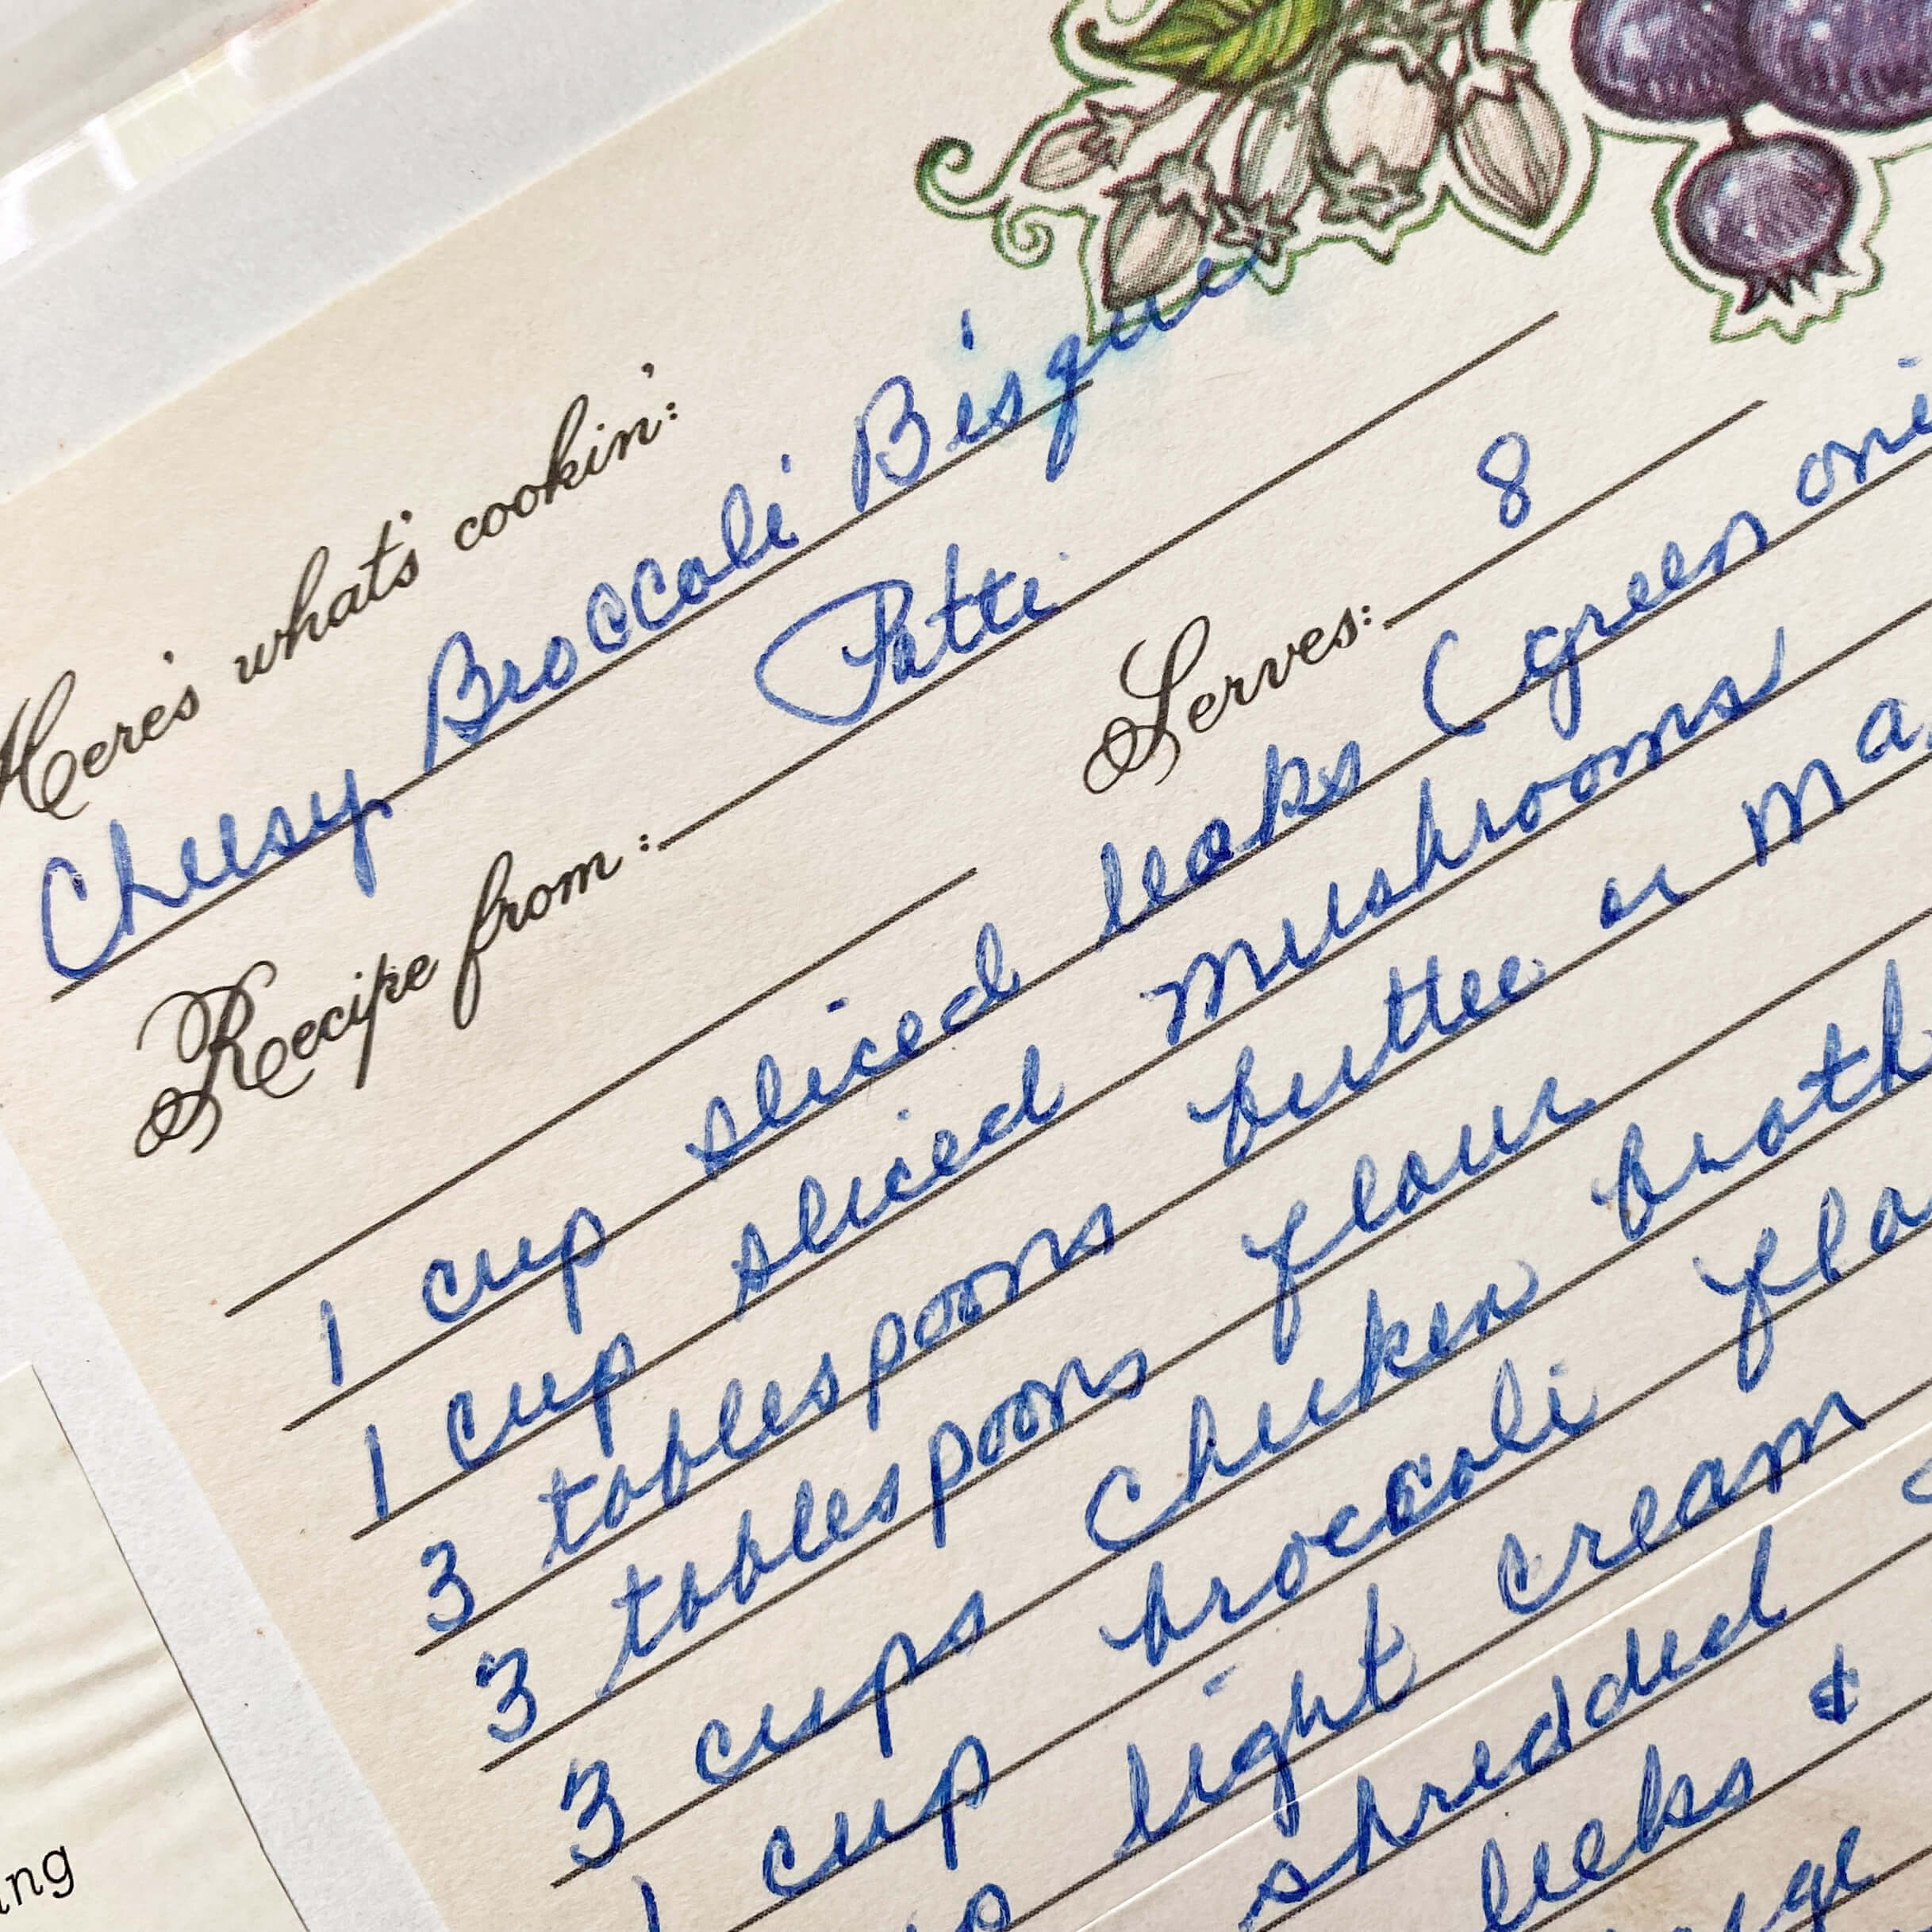
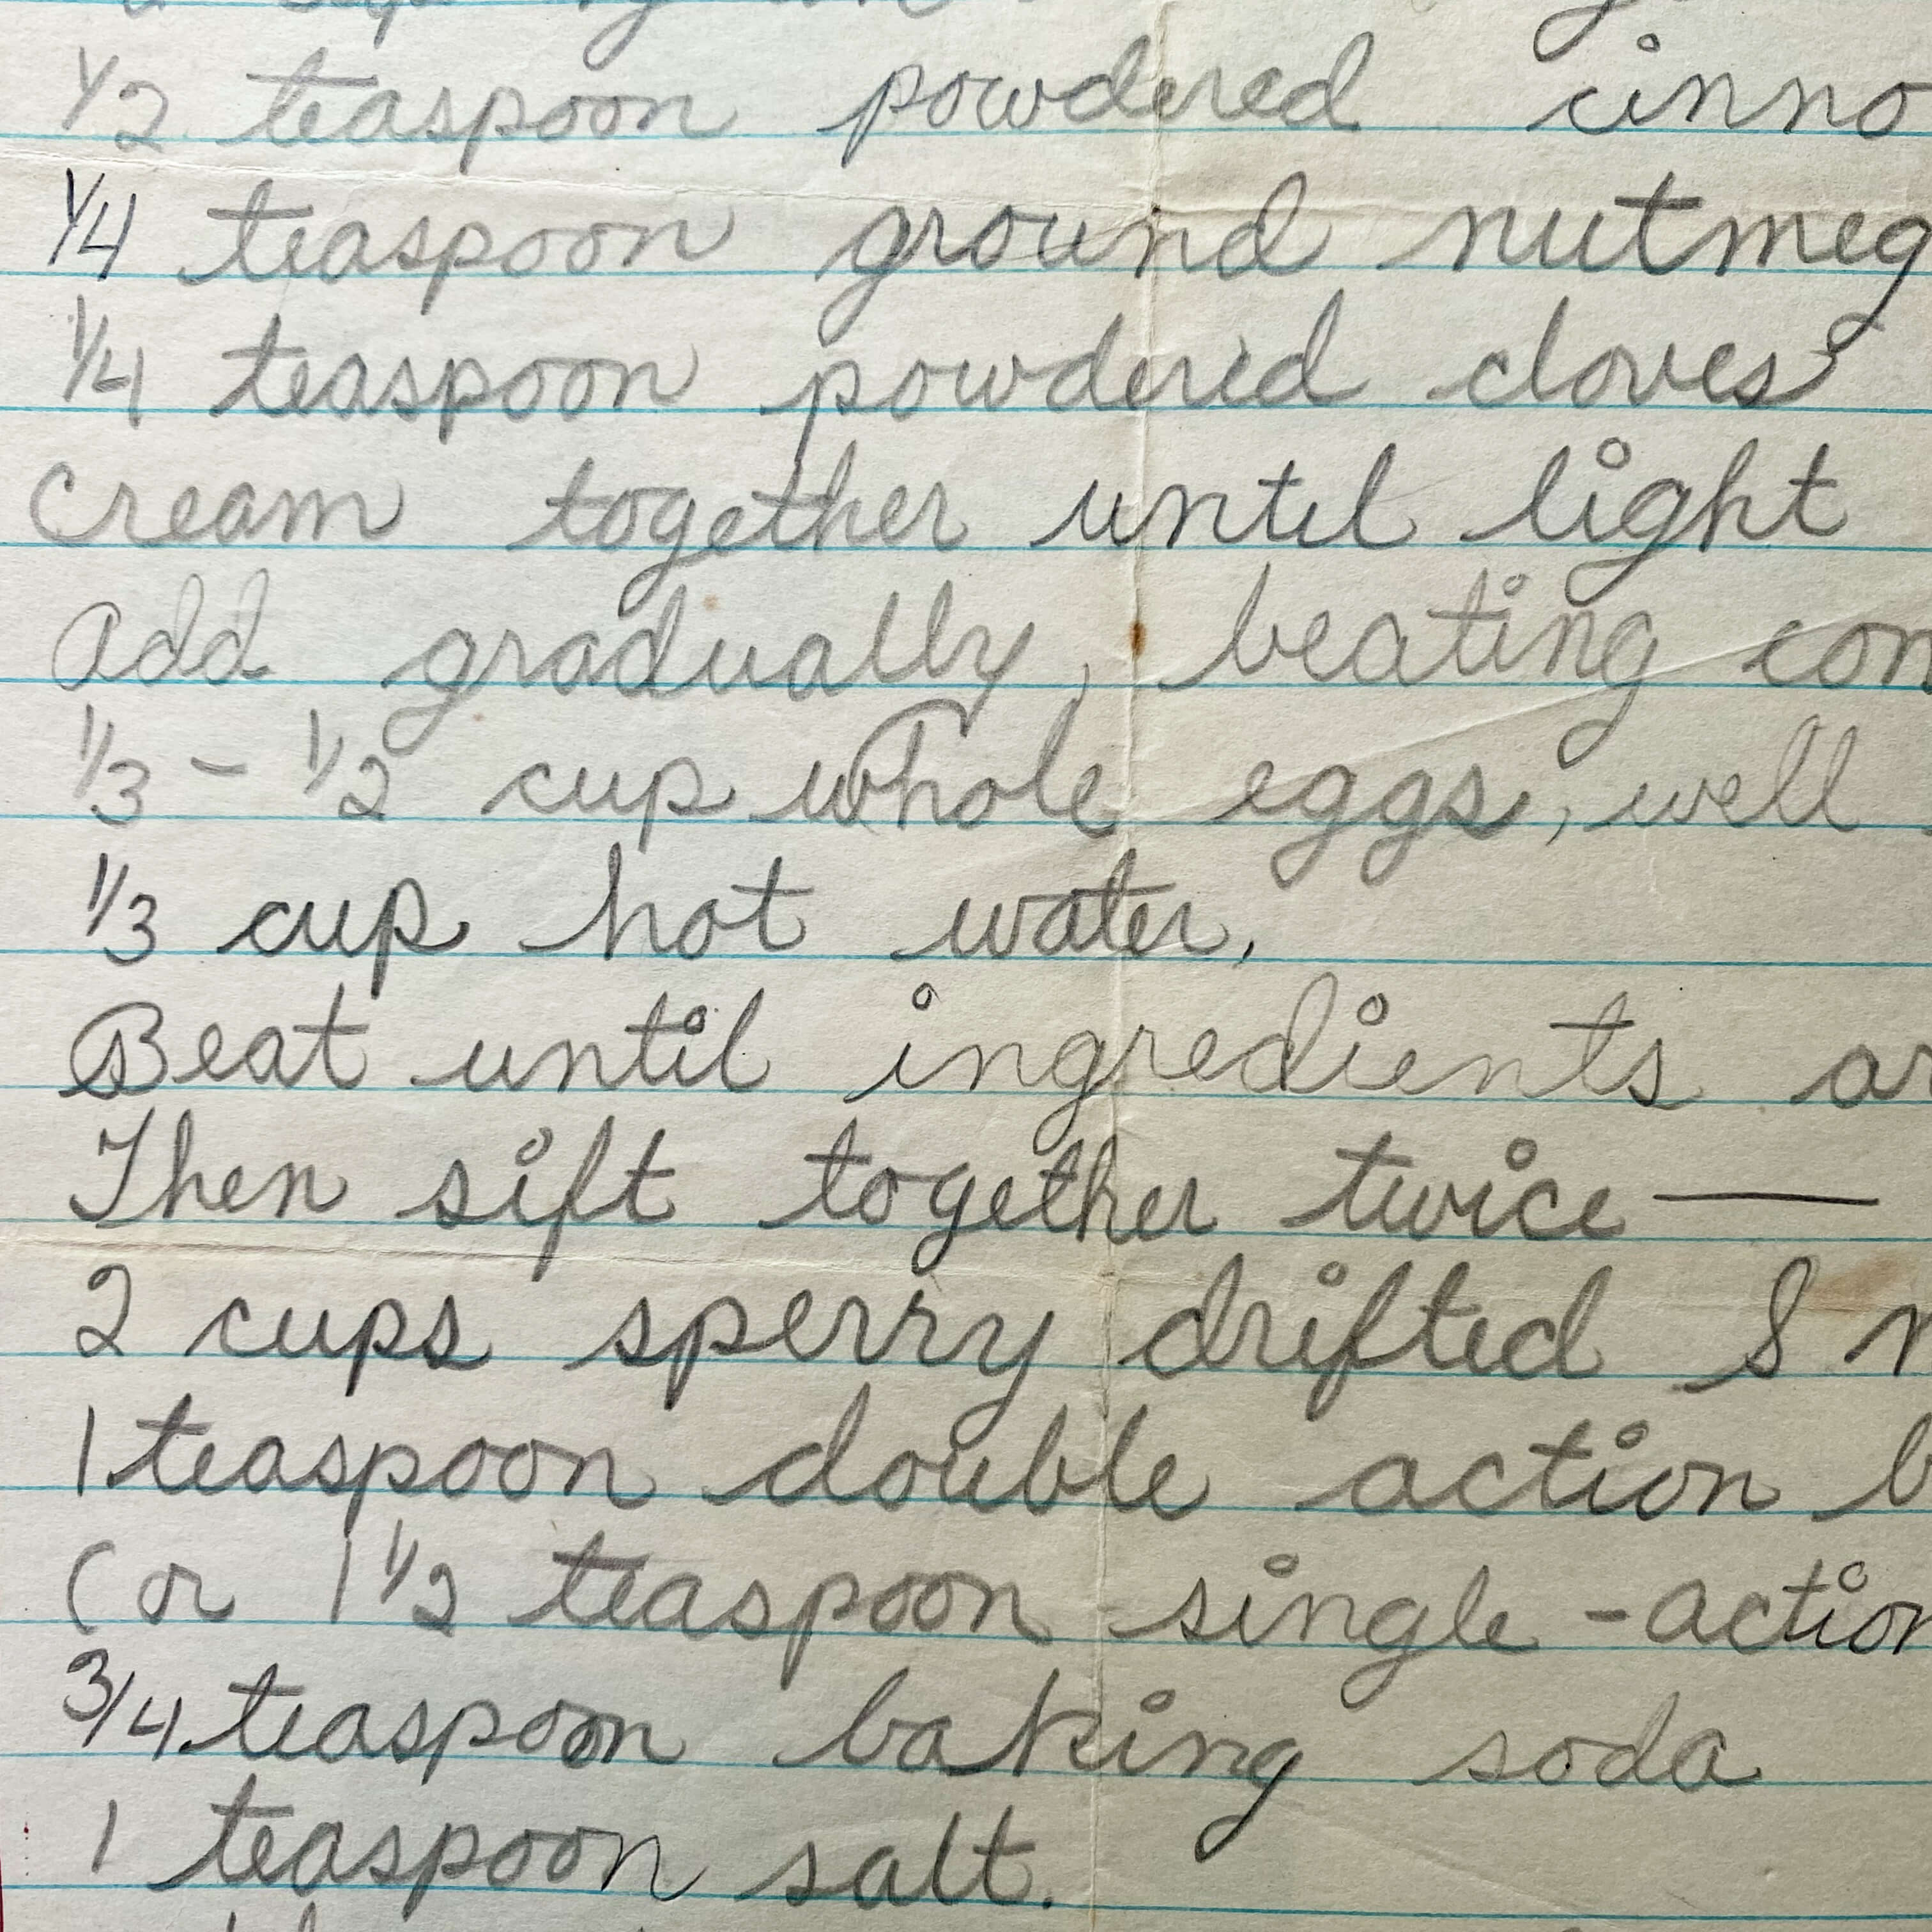
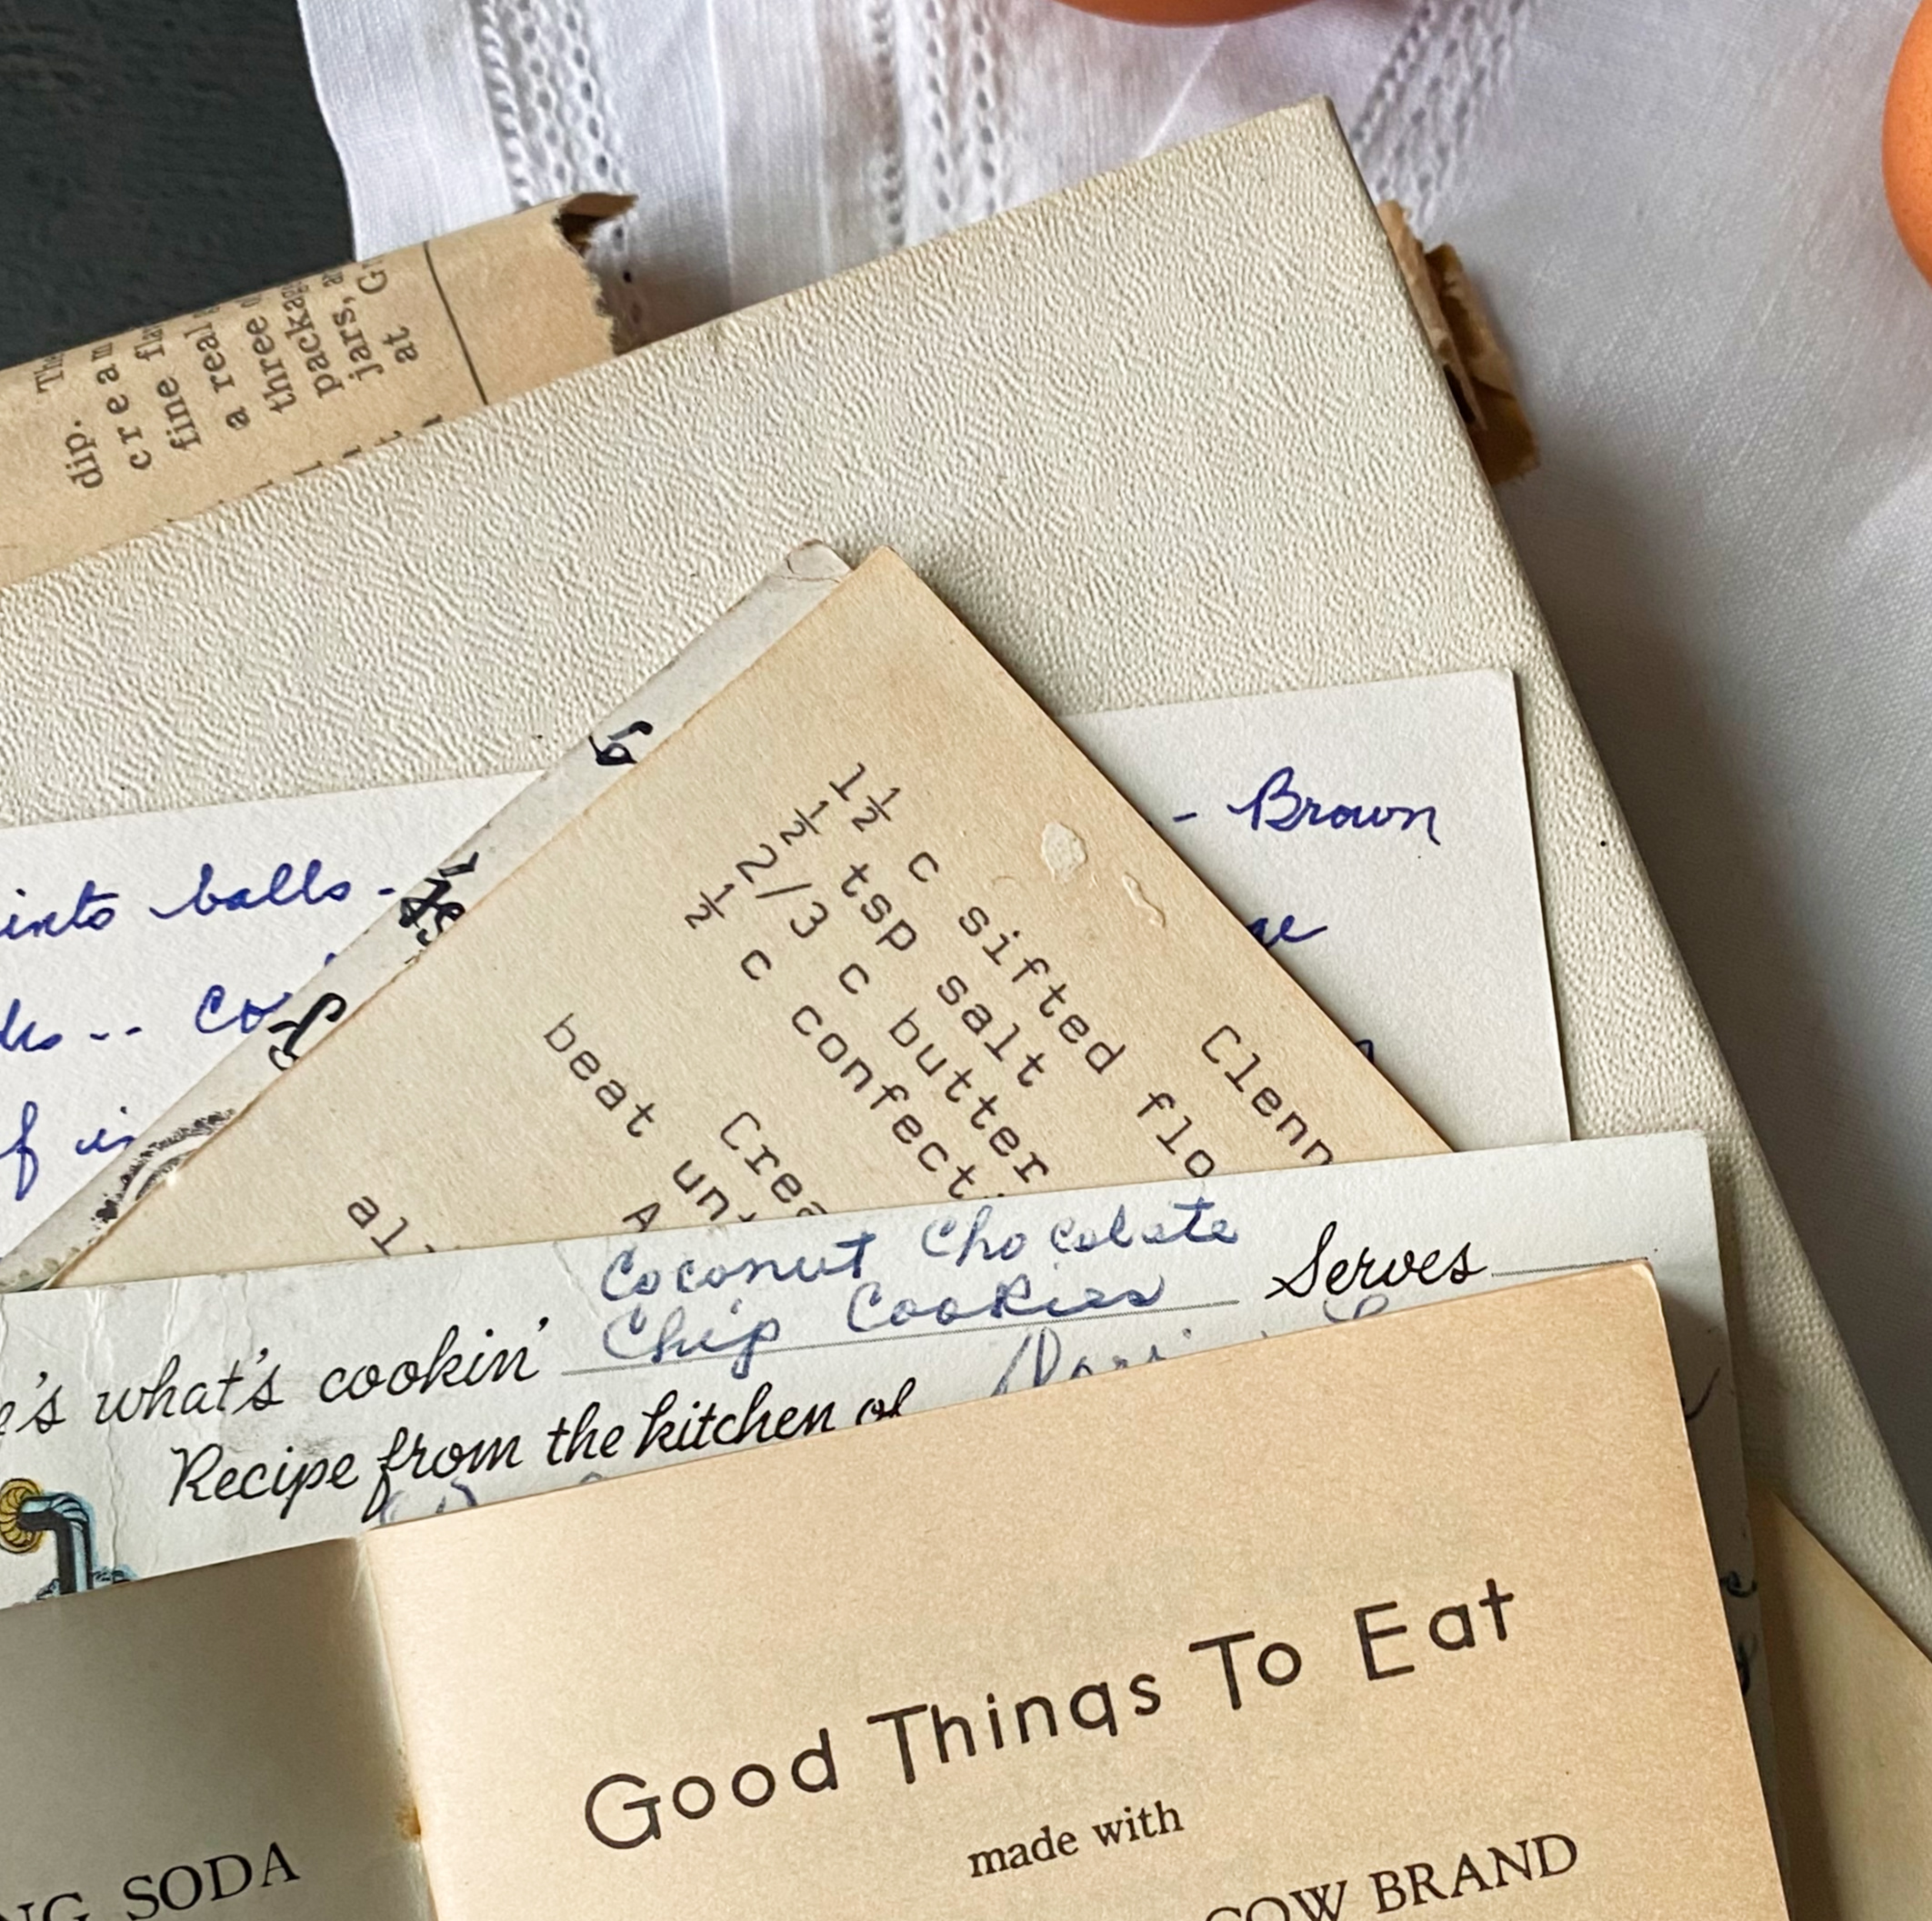
There it is. In all the swoops and swirls, the dips, the flourishes, the misspellings, the slanted letters, the shaky hand. There’s the story and the memory. There’s the cook. There’s the guy, the gal, the friend, the aunt, the spouse, the sister, the dad, the mom. There’s the he, the her, the who, the what, the when. There’s the life.
Handwritten recipe cards and cooking scrapbooks are the heartbeat of the kitchen. They are the record keepers of culinary explorations. The physical testaments of good times and good food. The guardians of memories that ensure that loved ones long gone remain present and that favorites stay afloat.
On a handwritten recipe card, no one ever dies or moves away or leaves the friendship or the family. With every dot of an i, cross of a t, loop of an o, handwritten measurements, ingredient lists, and instruction guidelines pass over illnesses and arguments, ignore long distances and intermittent communications, rise above world events and traumatic upsets. They defy decades and borders, cities and languages, personality clashes and cultures. Hands down, there is no better way, and definitely no more delicious way, to get closer to a memory or a person than through food made from a recipe that has been passed down from one cook to another.
Whip up Aunt Louisa’s banana bread, Grandpa Gordon’s hot fudge cake or Cousin Camilla’s corn chowder soup. Put on a pot of Paula’s poblano chili or Theresa’s heirloom tomato sauce. Mix up a casserole of Betty’s baked brown rice or Sarah’s cheesy egg souffle, and these cooks suddenly appear in exactly the way you remember them. It doesn’t matter if the recipe is two years old, 28 years old, or 200 years old; magic still surrounds the very foods that once made the making of them so memorable.
In the late 1990s, my mom made a slim binder for each of her kids filled with all of our favorite family recipes. At the time, she was just learning how to use a computer, so instead of handwriting each one, which she normally would have done if there wasn’t so many recipes and four sets of copies to be made, she typed them out page by page, category by category, and printed them out. One copy for each binder.
I don’t recall how long it took her to type these recipes into the computer, nor exactly how many she included, but I do remember the excitement that I felt when the binder arrived. My mom grew up in a small town in the Pacific Northwest during the 1940s and was raised on food she often describes as wholesome and nutritional. Her parents valued hard work, resourcefulness, outdoor activities, and homemade food always made from scratch.
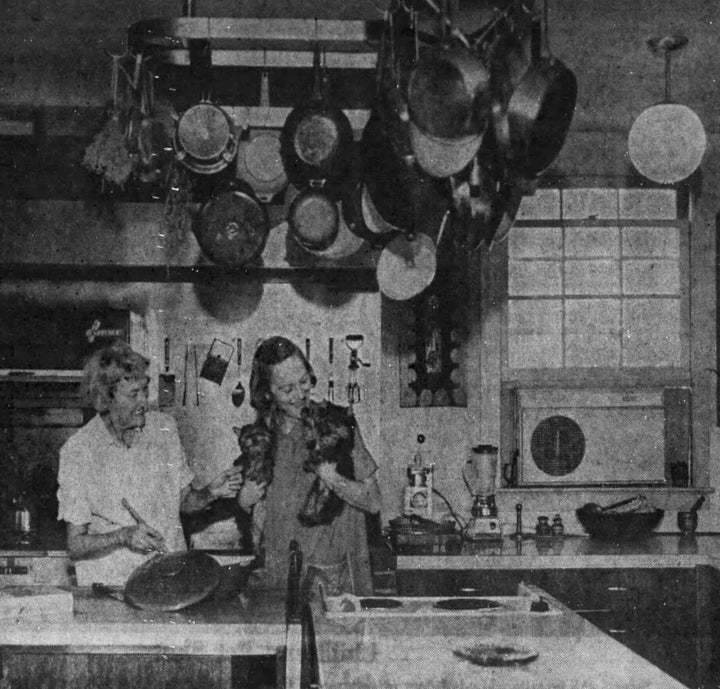
My mom and grandmother.
My grandmother would be the first to say that she did not think of herself as a great cook, but everything she ever made that I remember was delicious. Pot roast, twice-baked potatoes, homemade bread… those were some of her specialties. My mom learned the basics of cooking not so much from her mom but from her home ec class in school. When my mom became a mom herself and moved to California, my oldest sister remembers simple recipes and a lot of health food coming from the kitchen while she was growing up in that same from-scratch manner that my grandmother championed too. Fifteen years later, when I came along and the whole family was living in New York, my mom was traveling the world with my dad, courtesy of his airline executive career. Her culinary palate and pursuits expanded to include more international cuisine from the places she was often visiting. France, Italy, Germany, Egypt, Greece, Africa, Asia, the Mediterranean all influenced what she was making at home in one way or another.
My mom in Monte Carlo in the 1980s, shortly before we enjoyed a spectacular dinner of homemade risotto aboard our friend’s boat. Sadly, much to my whole family’s disappointment, we never collected that recipe to share.
Like my grandmother, my mom wouldn’t openly boast that she herself is a great cook. Even though the food she prepares has always been, and still is, undoubtedly delicious, and she’s well known among her friends and family for making lovely meals. But what she lacks in confidence or personal recognition, she more than makes up for in wholeheartedly promoting a good recipe when she sees one.
While I was growing up she was a devout reader of magazines like Sunset, Food & Wine, Bon Appetit, and Gourmet. My parents entertained quite a bit, often treating their NYC restaurant-regular-eating friends to a home-cooked meal at our family house located in a sleepy suburb along the Hudson River. And because my dad did a lot of dinnertime/cocktail party networking, my mom was always trying out new recipes on us kids that would be suitable for party fare or hosting my dad’s European colleagues.
So when her slim binder arrived in the mail just after I finished with college and was ready to start throwing my own dinner parties, it felt like the best, most dependable gift in the world. Thanks to her binder, I had all the good recipes in hand. The ones that always brought comfort, the ones that always received rave reviews, the ones that traveled well for potlucks and picnics, and the ones that looked especially pretty on a plate. The ones that came from her sister’s kitchen (also a wonderful cook) and the ones that came from her mom and dad and their parents. And the ones that my mom had perfected over years of revisions. In the binder were all my favorites… Thanksgiving stuffing, Grandma’s casserole, all the fruit pie recipes, the Israeli chicken, Aunt Patti’s chocolate layer cake, the tortellini summer salad, the three bean casserole, the German-style chicken with the creamy noodle sauce, the much-loved potato salad.
Not long after the binder arrived, my grandmother passed away at the age of 97. One of the things I asked my mom if I could have was some of my grandmother’s handwritten recipes from her recipe box. Back home, I taped each one, a little over two dozen in total, into the blank areas that separated one typed recipe from another in the binder. Those early additions of Grandma’s recipes led to further cutting and pasting inclusions as I, too, discovered and collected recipes from various sources. Friends, food magazines, newspapers, on-loan cookbooks, my brother and sisters, their spouses, their families, my husband, his family and a whole host of people I’ve had the joy of sharing a meal with along the way over these past decades all have a presence via a recipe or two or twenty in the binder.
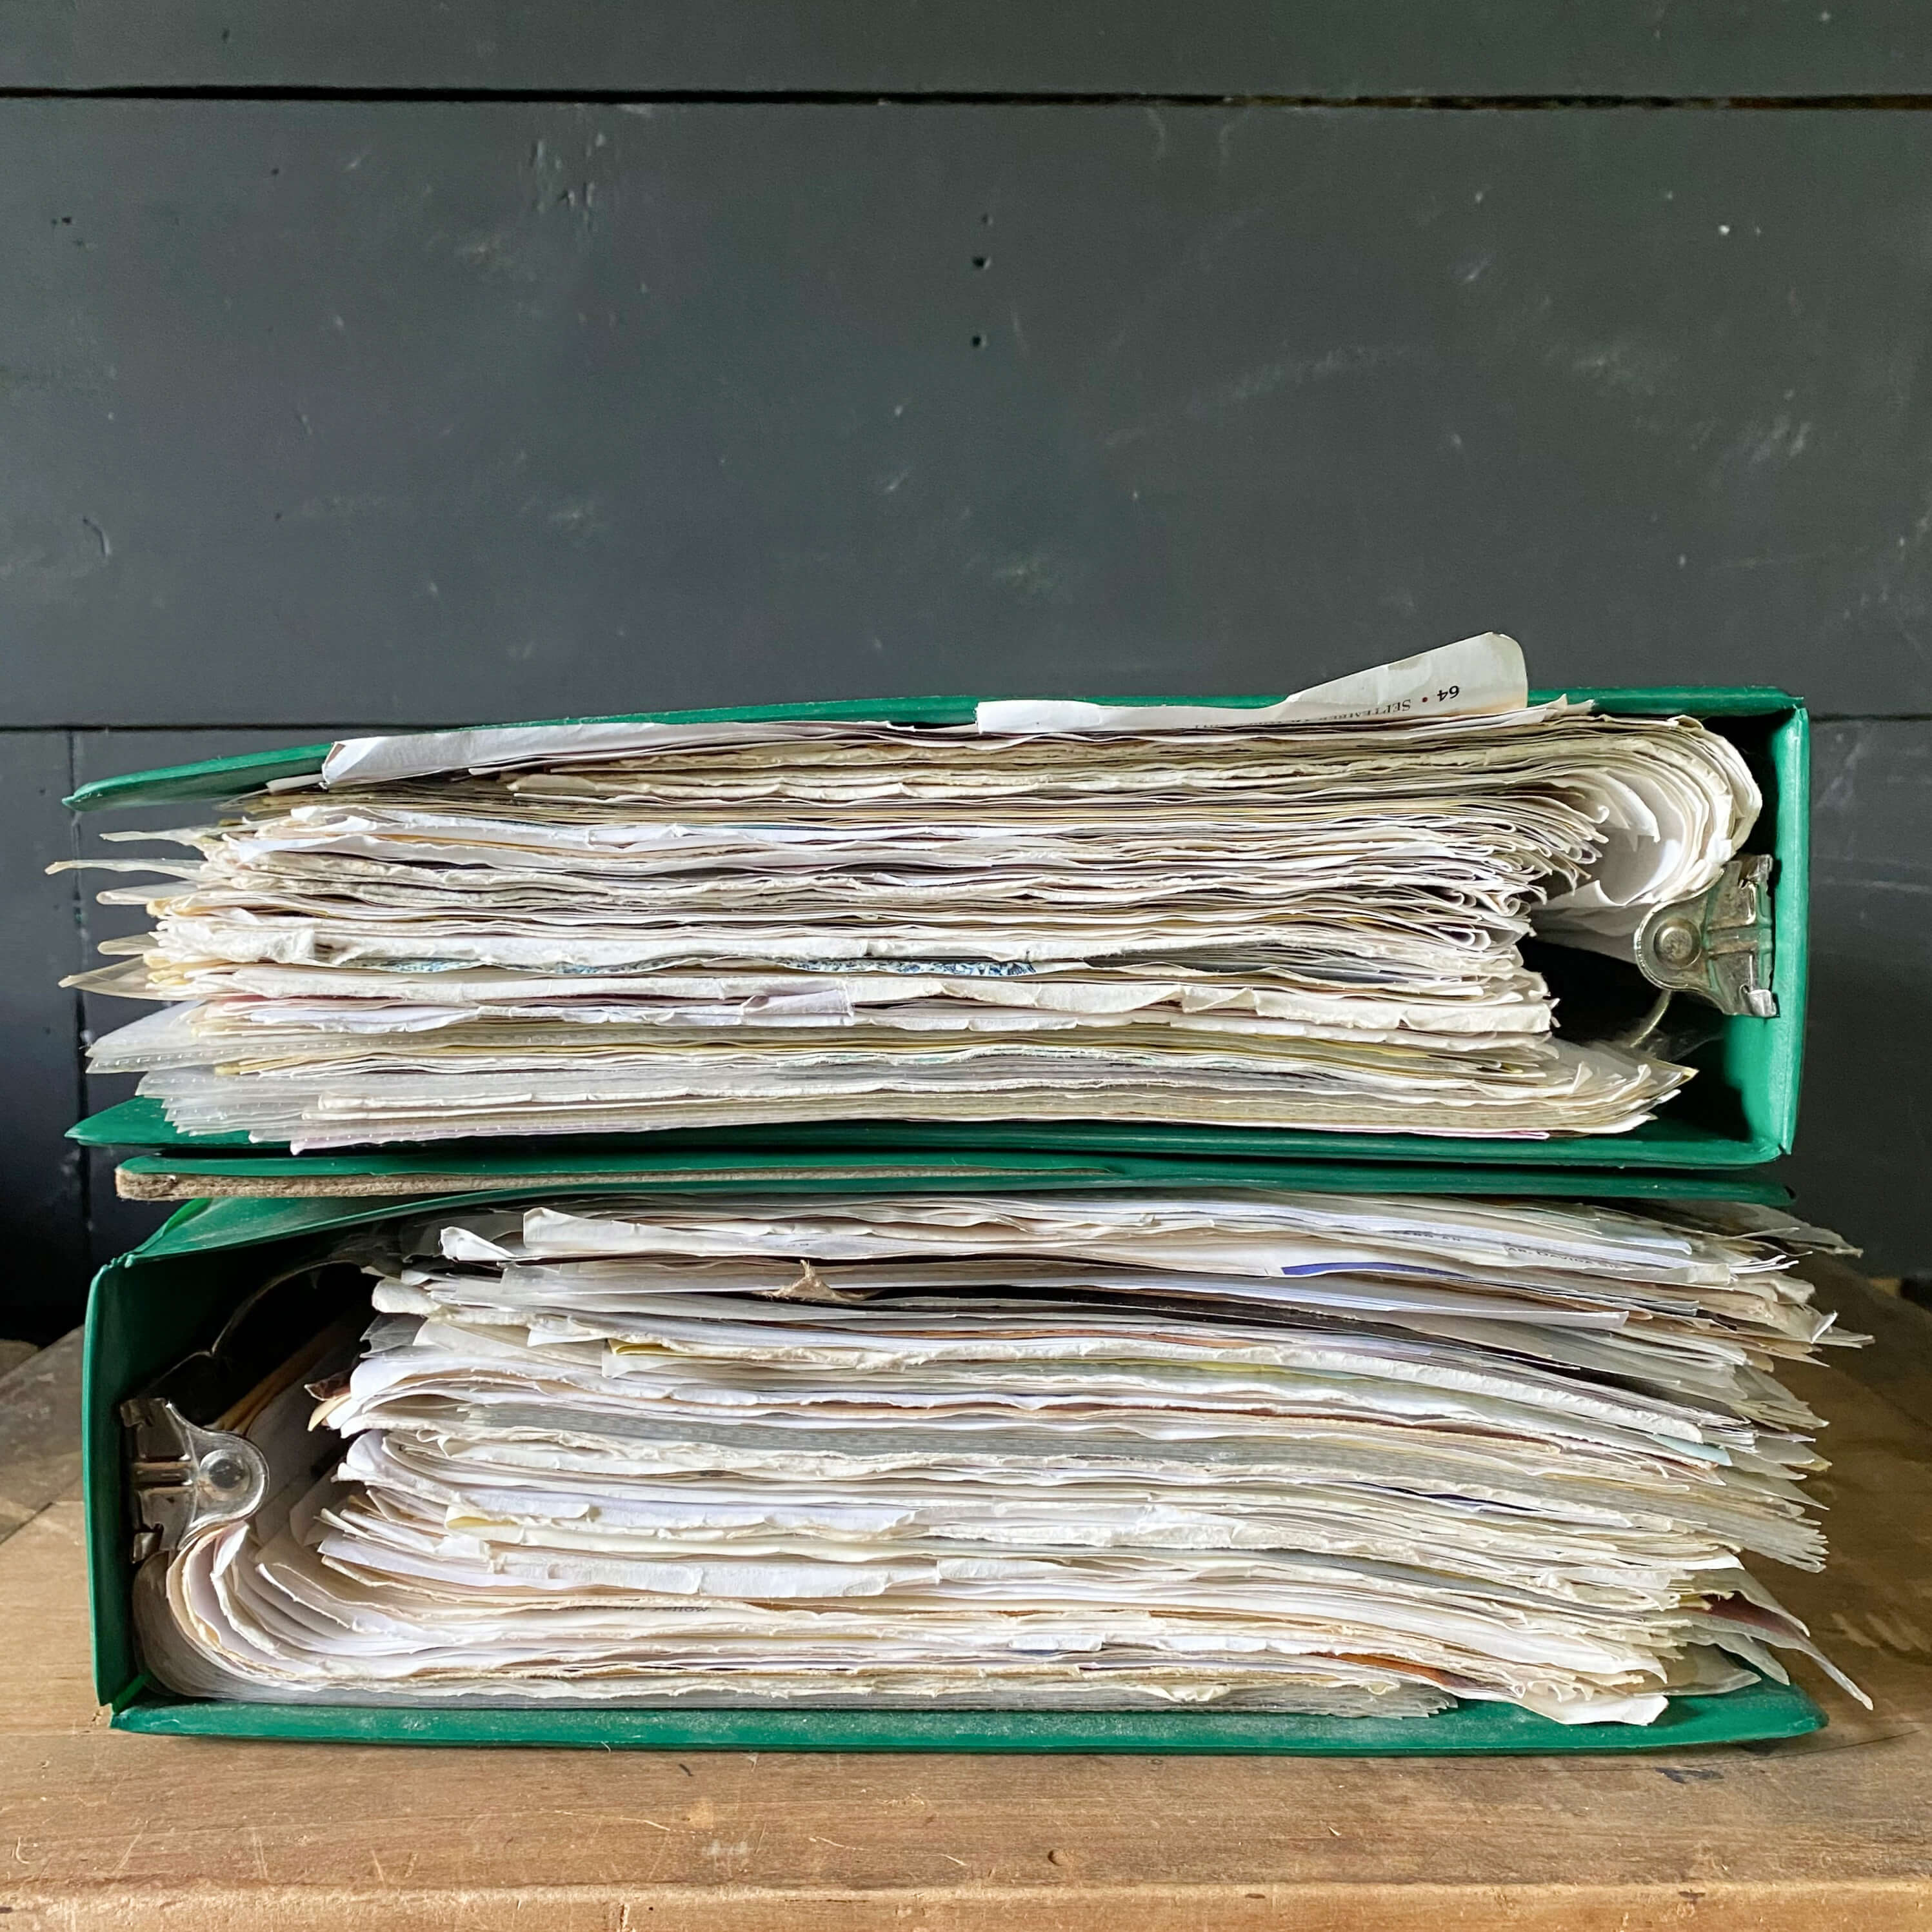
With each new recipe addition, my enthusiasm for cooking grew and grew. The binder grew and grew too. Eventually, it outgrew the slim size that my mom initially packaged the favorites in, and I transferred everything to an extra-large 3-inch binder. Quickly enough, that one filled up and overflowed, too. So a second extra-large 3-inch binder was acquired, and I divided half of my mom’s original categories into one binder and the other half into the second binder, thinking that I had arrived at the ultimate storage solution. But my enthusiasm for cooking and recipe collecting has yet to calm down, and the two binders are now stuffed full to bursting once again.
Despite their stuffed sausage appearance, now when I flip through these two binders, I see nothing but joy in years and years of memories. I see my mom’s handwriting in the original recipe category tabs.
I see my husband’s handwritten recipes for his pork pie inventions.
I see my sister-in-law’s slightly charred recipe card for baking powder biscuits that accidentally got stuck to the bottom of the baking sheet and cooked right along with the biscuits. I see the handwriting of my dearest friend, whom I’ve known since kindergarten, on a recipe for oven-roasted leeks that marks the first Thanksgiving that we cooked together.
There’s a recipe from my dad’s ex-wife written on his airline office stationery taped into the casserole section. There’s my grandmother’s delicate and lacy penmanship, my aunt’s large and loopy handwriting, midcentury recipe cards, tanned newspaper clippings from up-and-coming chefs featured in the New York Times, and hundreds of hand-cut recipes from all the great cooking magazines before they went online, before they created paywalls to access them, or before they folded for good. Recipes from Saveur, Bon Appetit, Gourmet, Southern Living, Cooking Light, Martha Stewart Living, Food & Wine all fill these binder pages, making them like my own homemade version of epicurious.com
The gift that my mom gave me years ago is the gift that has literally and figuratively kept on giving day in and day out. And it just keeps on encouraging more cooking and more collecting. That’s the power of a good passed-down recipe. I have my mom to thank for all this collecting and curiosity. For my love of old recipes and the memories they represent. My mom and I don’t always see eye to eye on everything, but when it comes to cooking, we have a shared interest and a mutual understanding surrounding food and meal-making that can always bring us together.
A lot of people inspire me when it comes to cooking, but it’s my mom’s slender binder of a book that was the original muse that started all this recipe collecting to begin with. I don’t think she could have known the depths to which I would eventually come to love her gift while she was typing away at those recipes on the computer all those years ago. How much her act of recording them would come to mean so much to my culinary journey. But now those recipes are among my most prized treasures. So it’s with a sincere heart on this Mother’s Day, that I wanted to say thank you to my mom for the joy she created in passing down our family favorites.
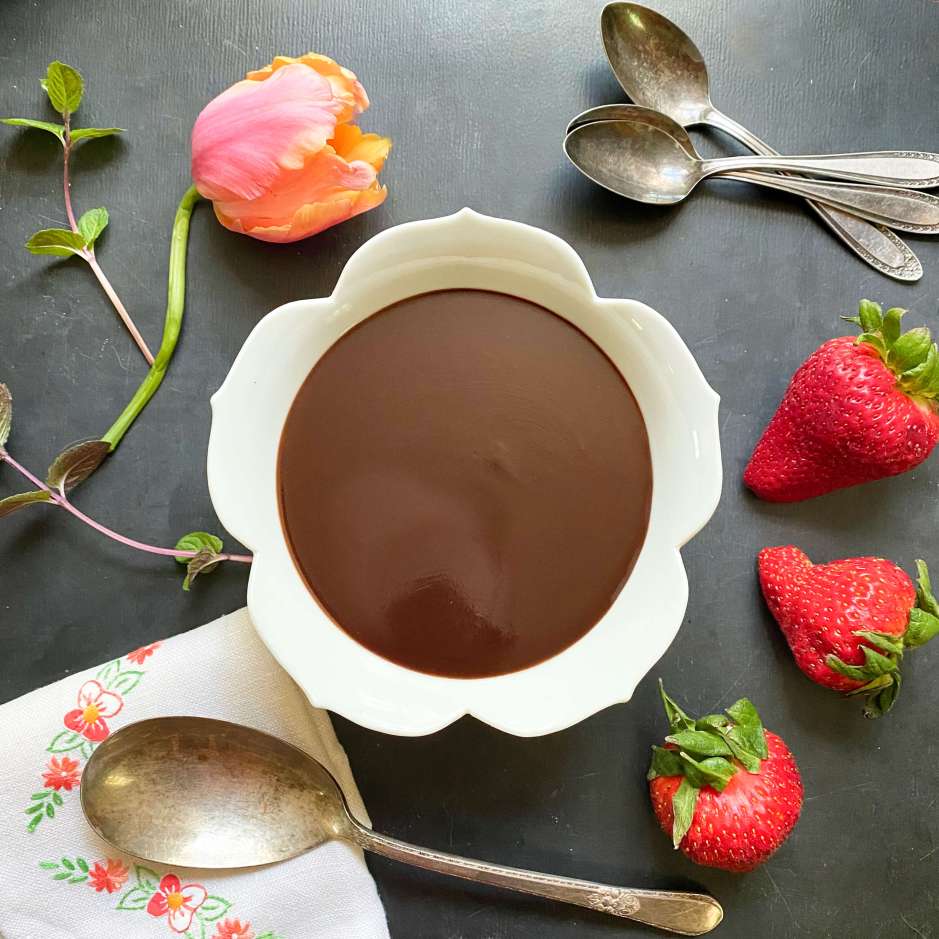
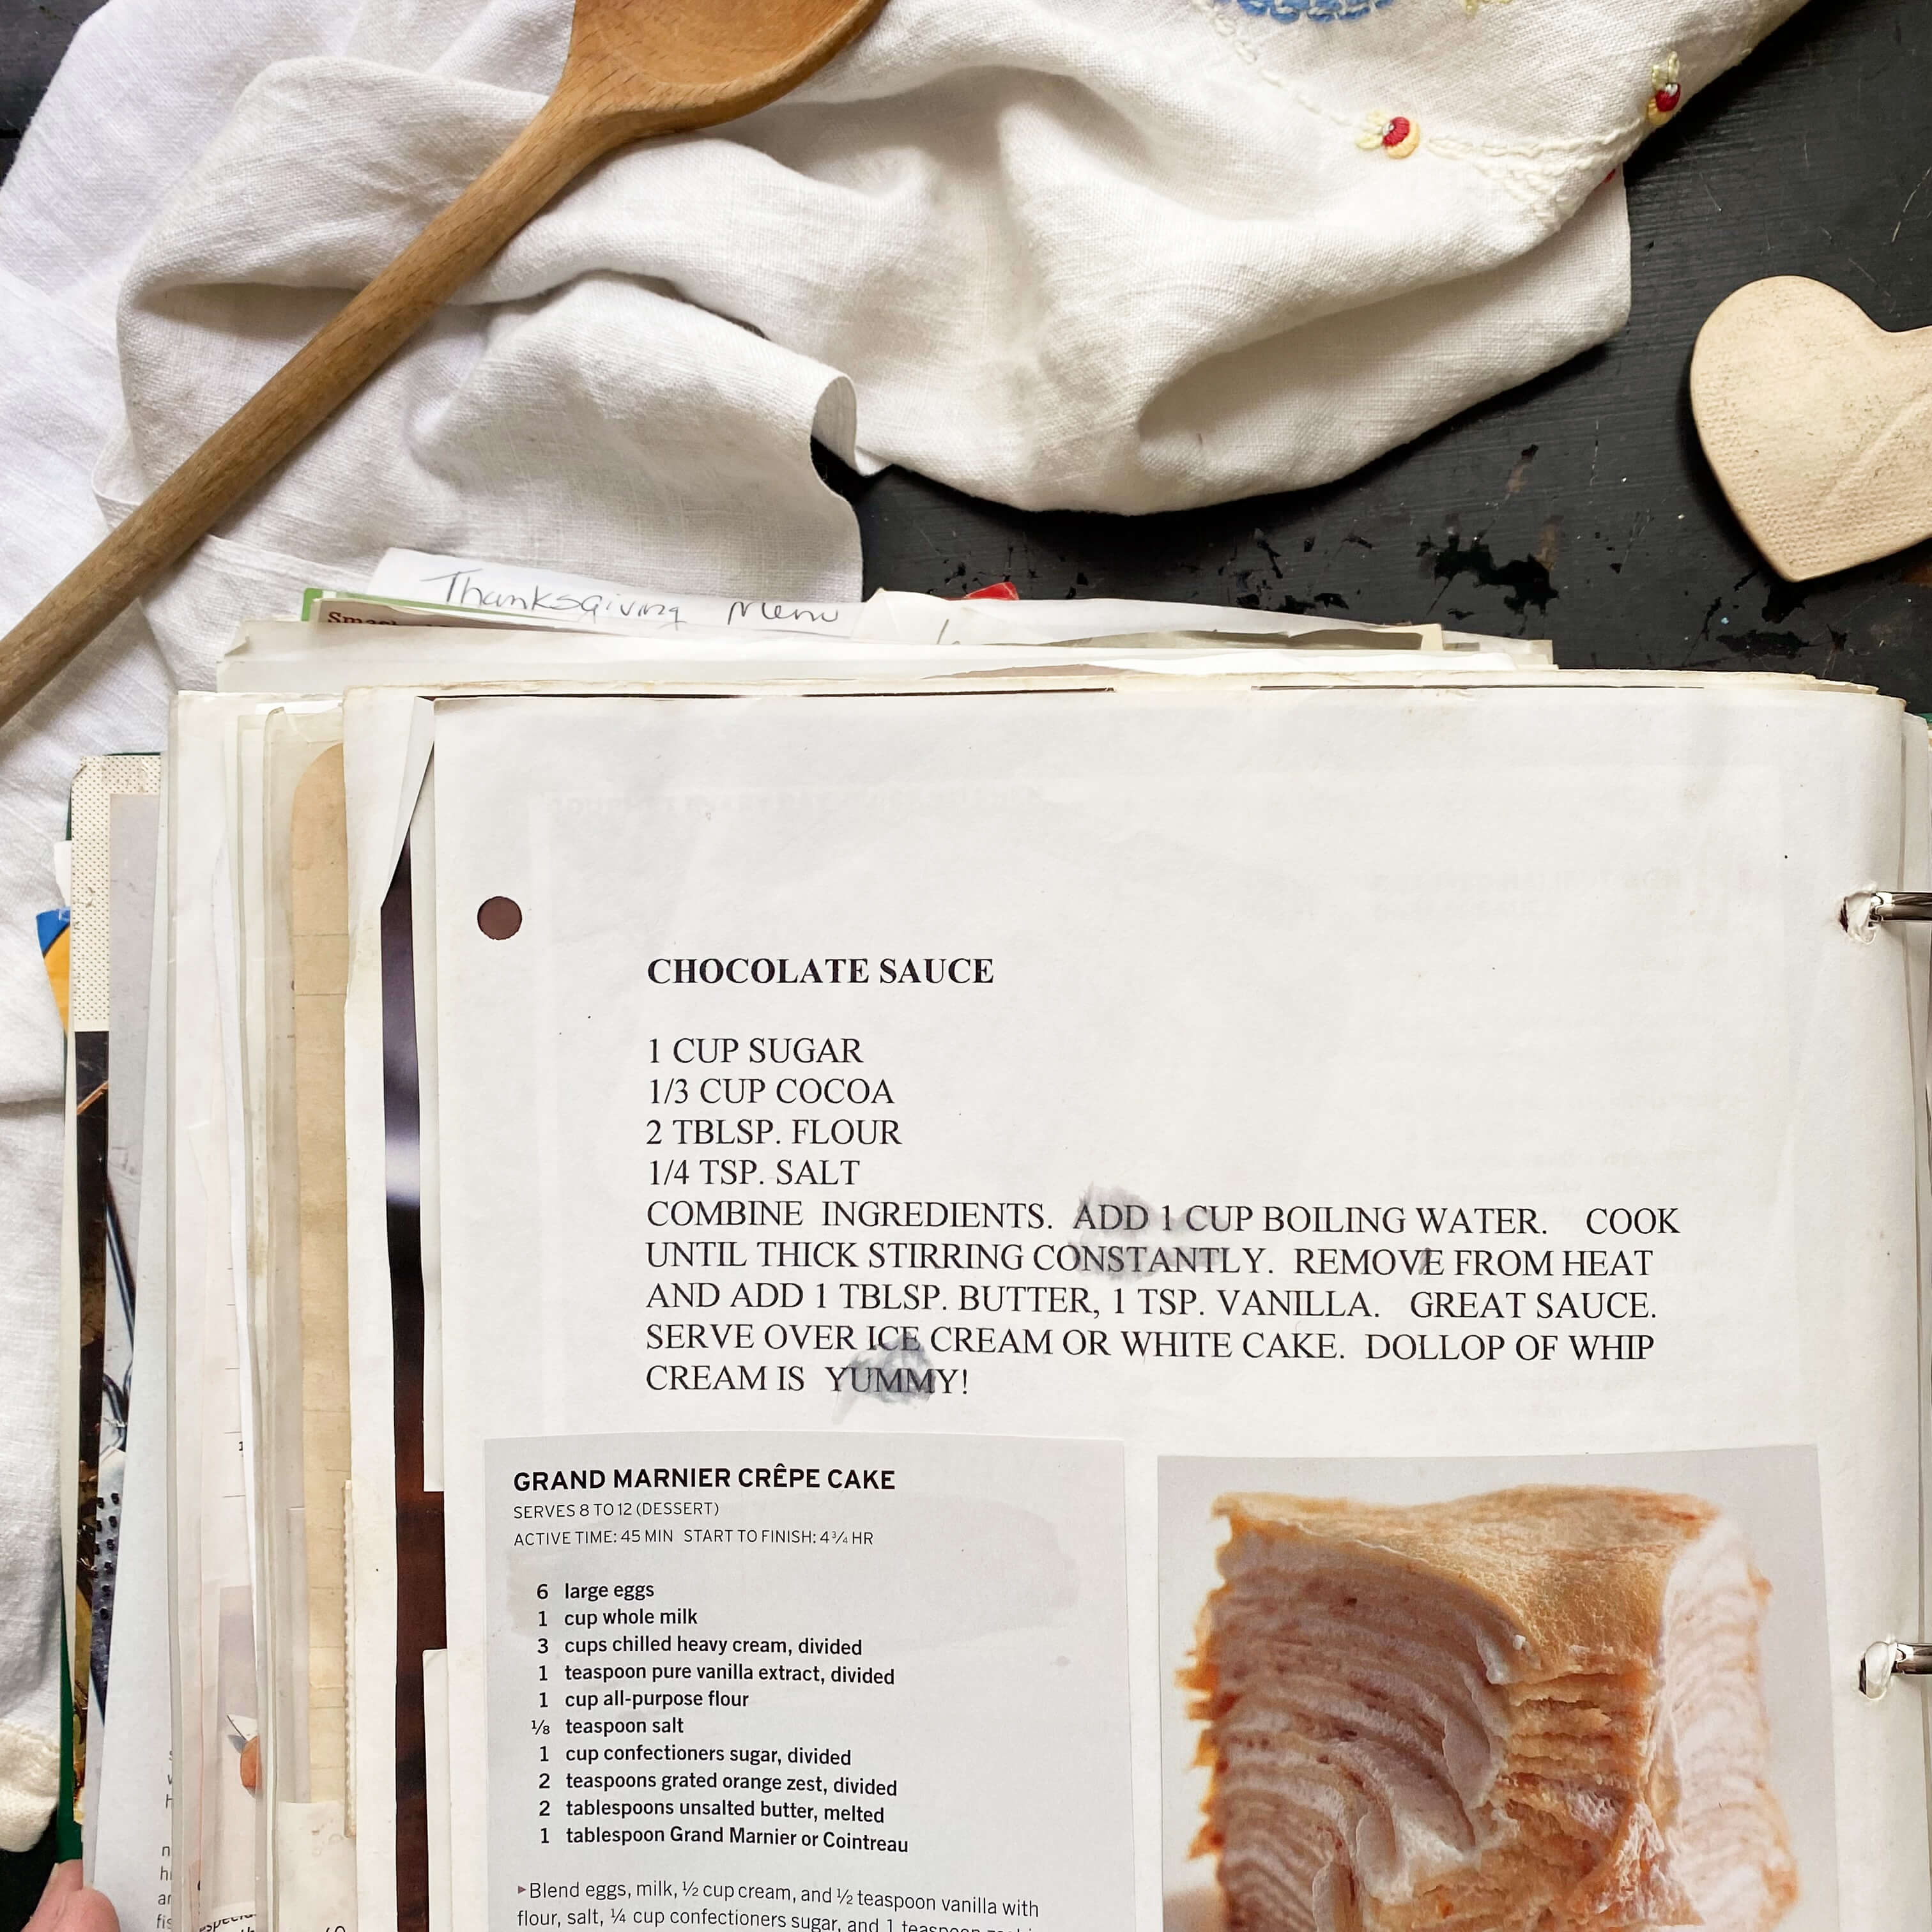
To celebrate the day and the occasion, I’m so happy to share one of the recipes from my mom’s family favorites collection. The recipe is for homemade chocolate sauce. A sweet treat companion that both inspires and complements so many other desserts.
Quick to make (less than 15 minutes) and lovely for all sorts of foods, it is thicker than syrup, yet thinner than frosting in consistency. It can be poured over ice cream like a hot fudge sundae, drizzled over a simple sheet cake like frosting, layered in clear glass stemware for parfaits, or served like a dipping sauce for fresh fruit.
Always a winner in my book, I have made this recipe so many times for so many different holidays from Valentine’s Day to Christmas and every season in between. I’m not sure where my mom got the recipe from – if it was truly a family recipe that was passed down to her or if it was just a favorite that she picked up somewhere along her culinary adventures. I could Google these ingredients and probably find the source pretty quickly, but for once, the provenance doesn’t interest me. I’ll always think of it as my mom’s homemade chocolate sauce. And in turn, whenever I make it, I always think of my mom and her gift of good food. Tried and true.
Chocolate Sauce
Makes 2 cups
1 cup sugar 1/3 cup unsweetened cocoa powder 2 tablespoons flour 1/4 tsp salt 1 cup boiling water 1 tablespoon butter 1 teaspoon vanilla
Mix together the sugar, cocoa powder, flour, and salt in a medium saucepan.
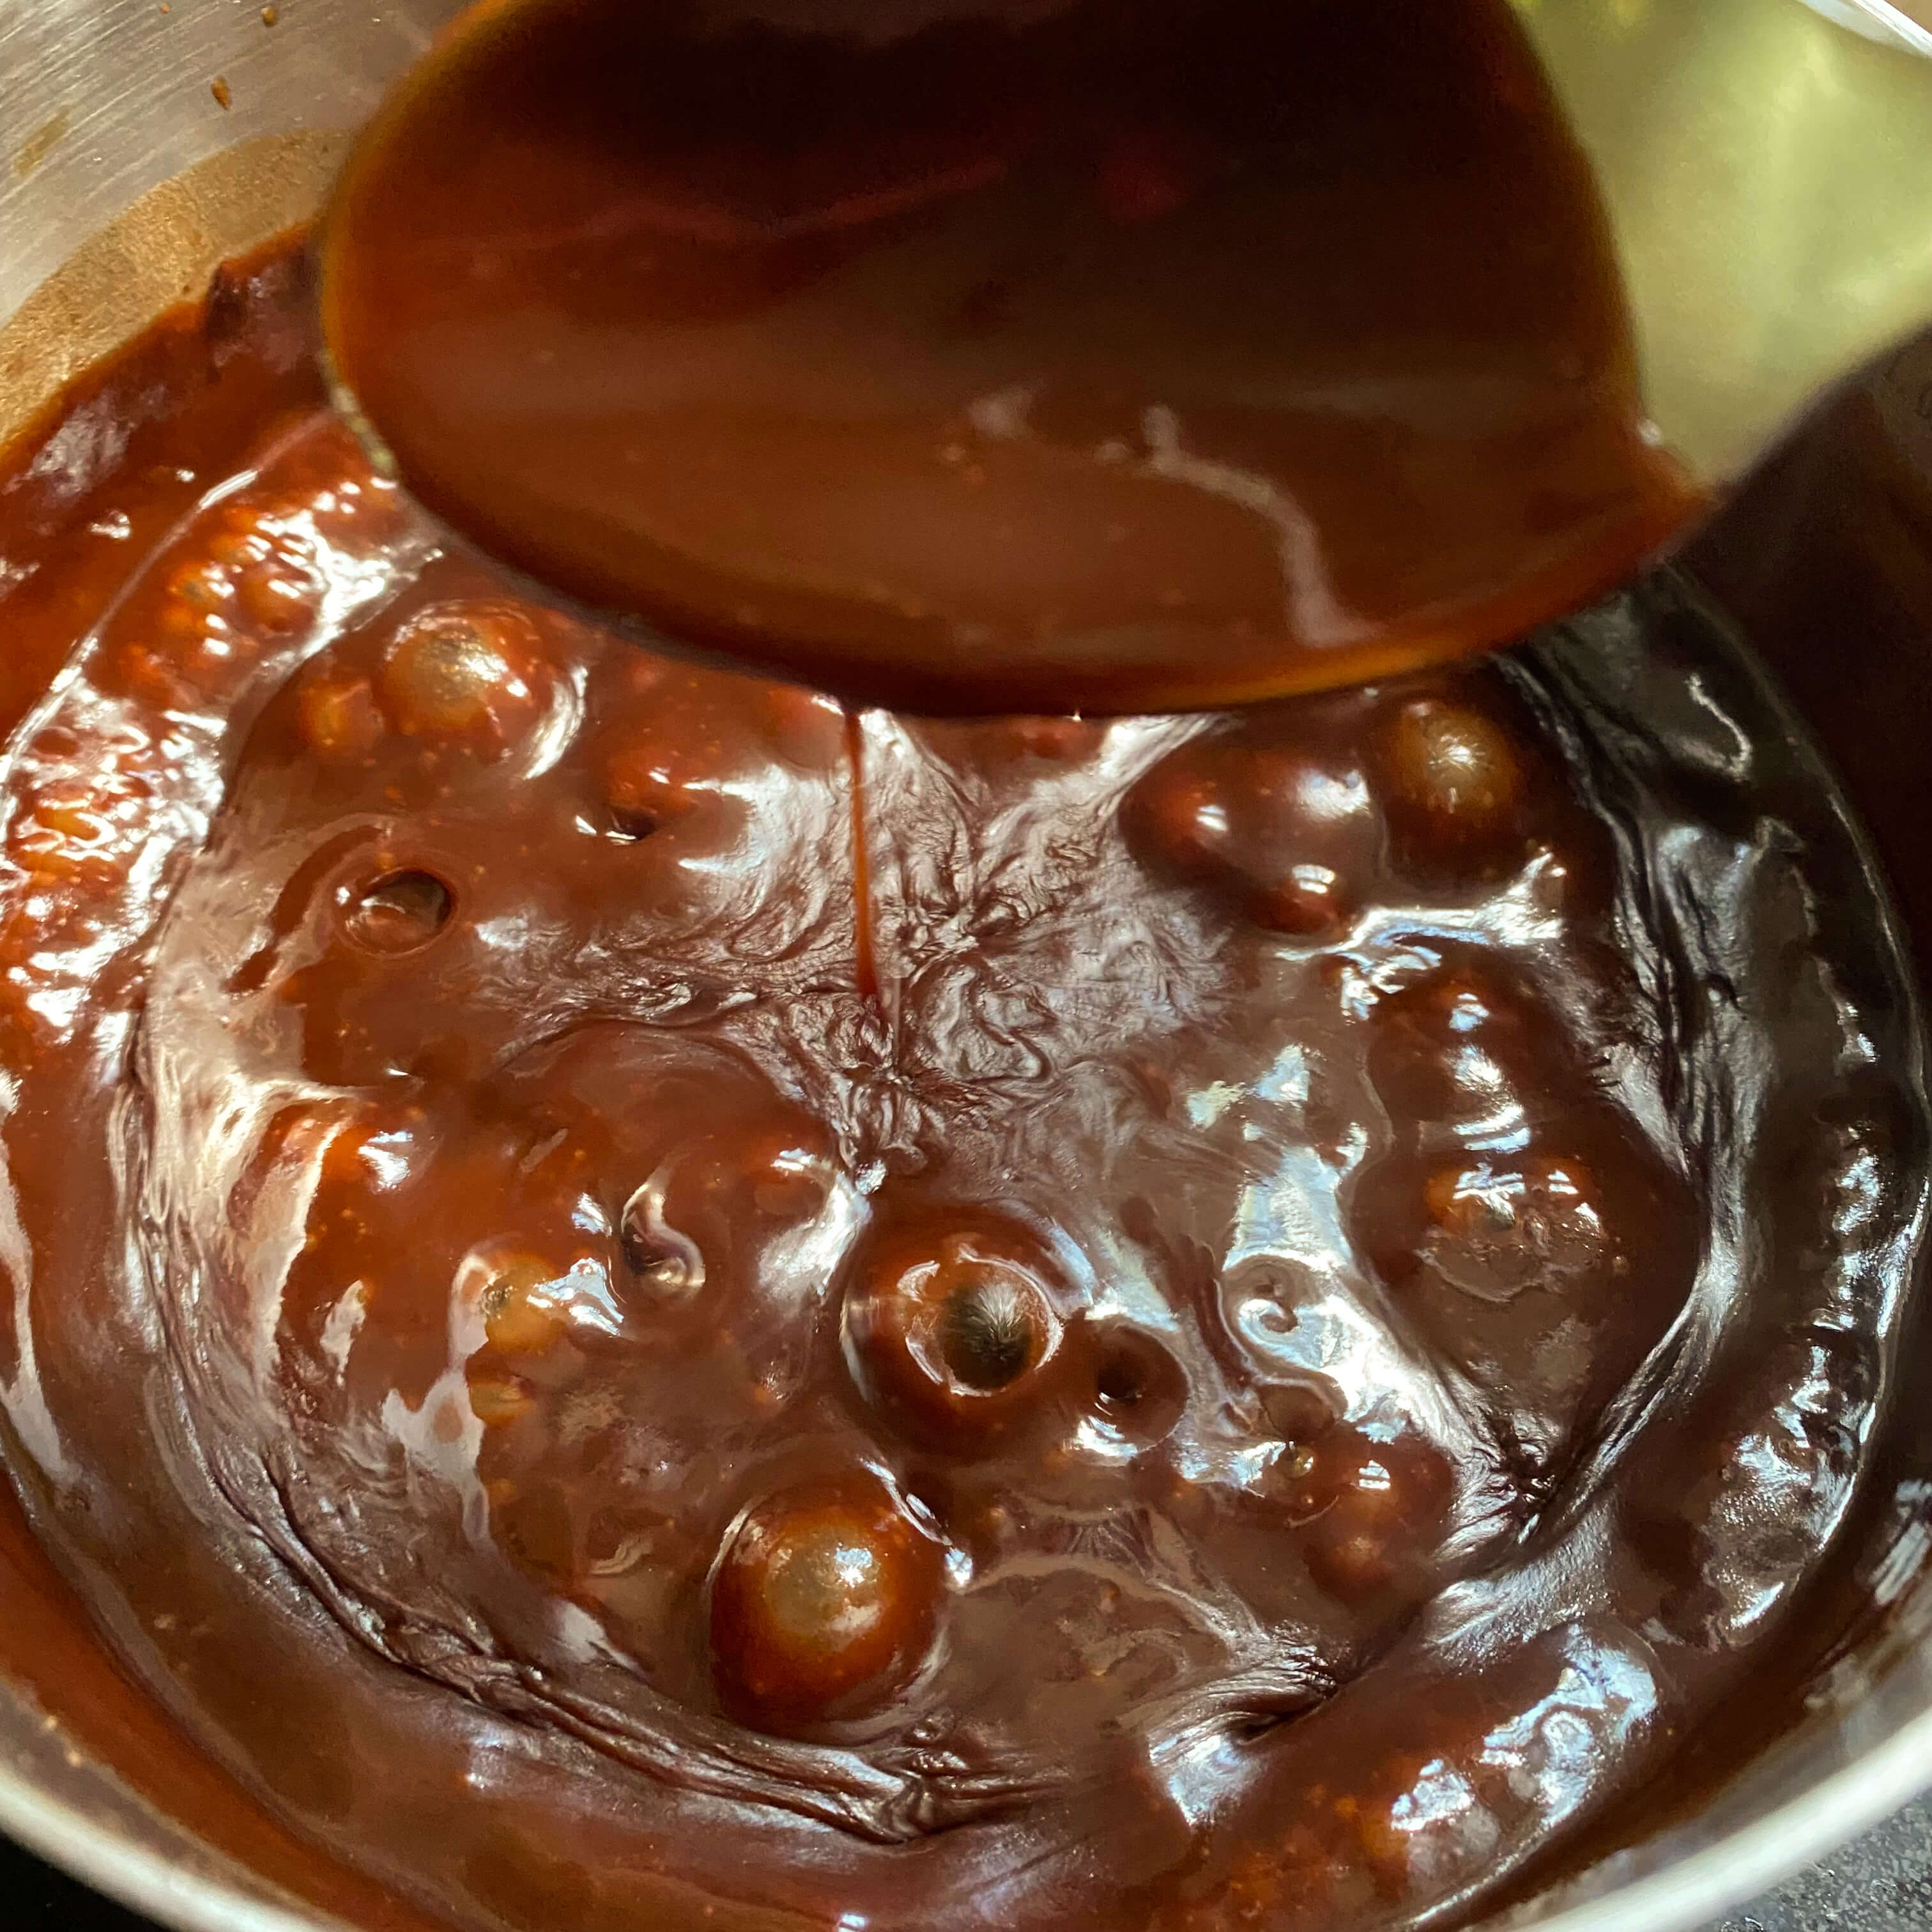
Add in 1 cup of boiling water and stir constantly over medium-high heat while the mixture comes to a slow boil.
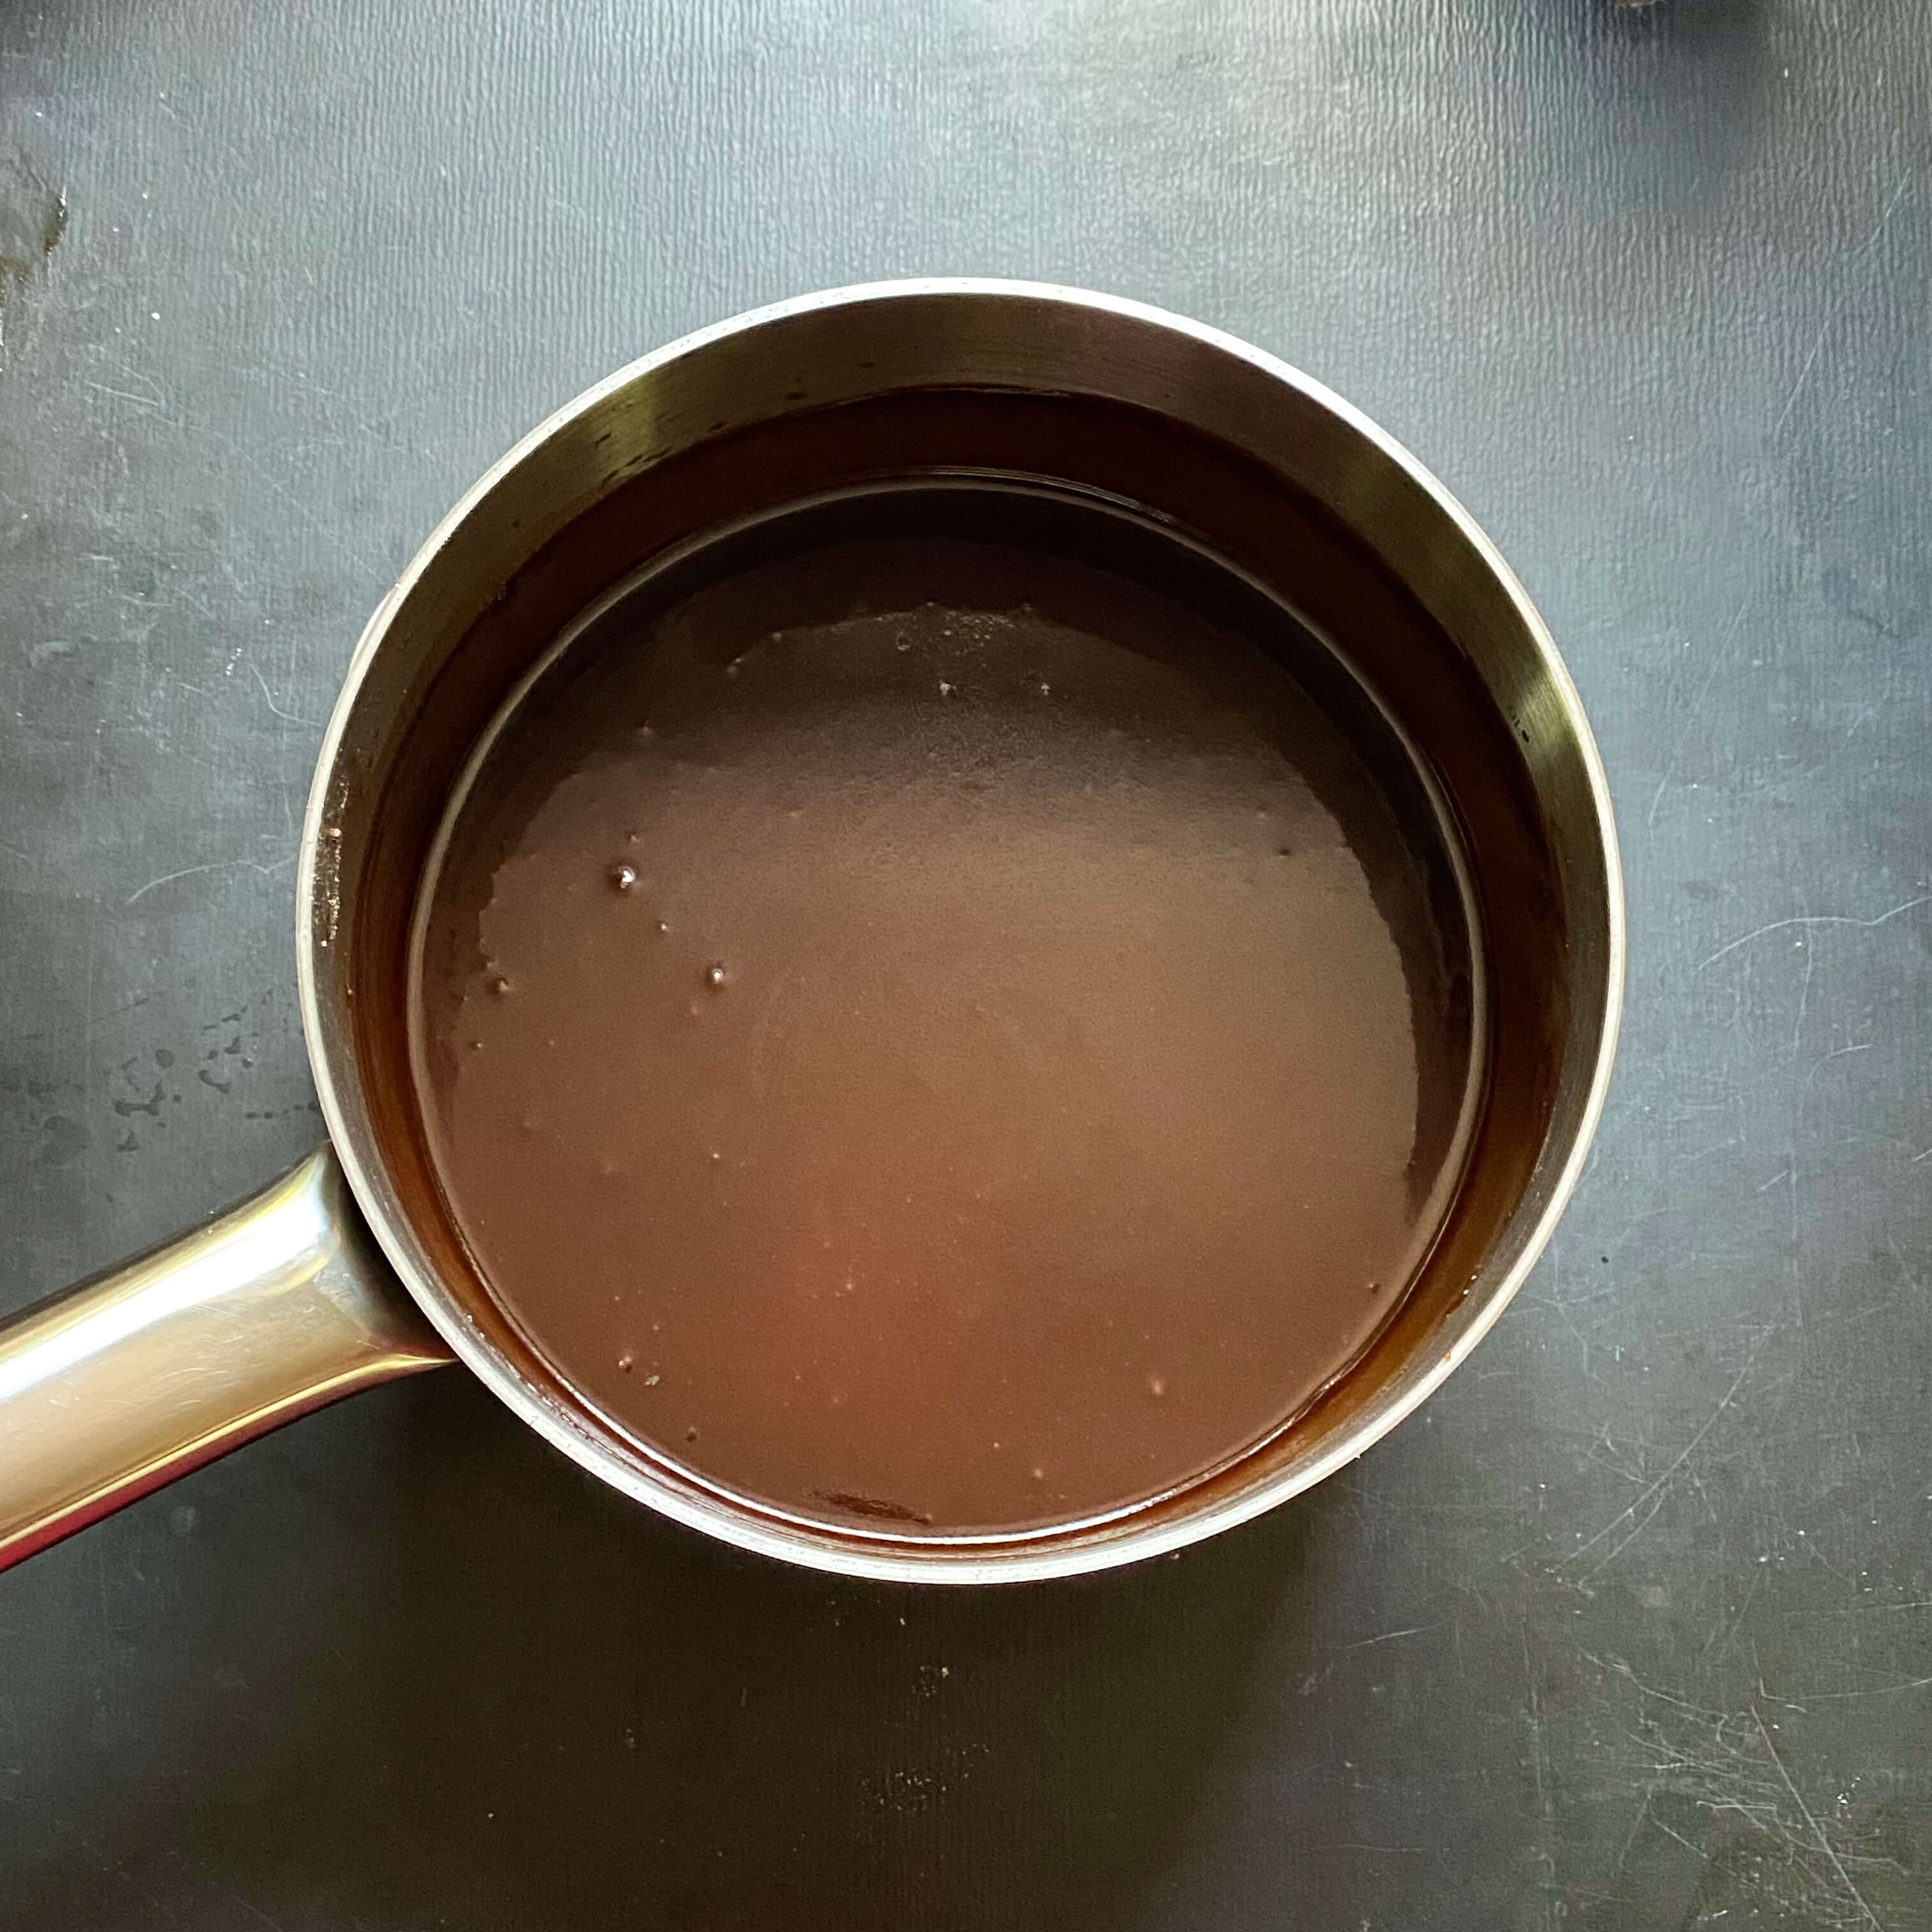
When the consistency thickens enough to coat a spoon but still drips off the spoon in a slow, steady stream, drop by drop, it’s ready to be removed from the heat. This consistency level usually takes about five minutes to achieve. Stir in the butter and vanilla. Serve hot or let cool to room temperature. If you have any leftovers, it stores well in the fridge in an air-tight glass jar for up to five days.
If you serve this as a dipping sauce with fruit, in a parfait, or over ice cream, let it cool to room temperature. If you are serving it over cake, serve it hot. There’s also room to add your own additional accompaniments too in the form of chopped nuts, coconut flakes, or a dollop of whipped cream as my mom suggested in her original recipe. However you choose to enjoy it, I hope it becomes a new favorite family recipe in your kitchen too.
Happy Mother’s Day to all the moms out there who inspire kitchen adventures in more ways than one. And cheers to my mom, for every single home-cooked meal, every single shared recipe, and every single family favorite that was recorded in the marvelous, magical gift that has now become my most treasured memory-keeper in the kitchen.
Welcome back to the International Vintage Recipe Tour. When we last left off on our around-the-world culinary adventures, we were in Italy cooking up Chicken Canzanese and spotlighting the artistic and culinary career of Edward Giobbi and his talented family.
Chicken Canzanese A painting by Edward Giobbi
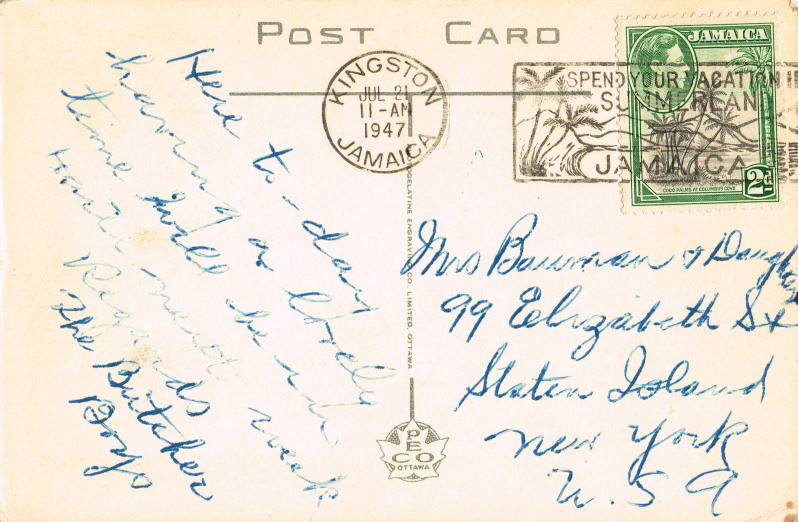
This time, our international itinerary takes us to Jamaica, where we are cooking a traditional heritage food, Jamaican Rice and Beans, making milk from a fresh coconut, and exploring the island 1940s-style via a 1948 Pan Am travel film and a selection of first-hand observations experienced by visitors to the island post-World War II.
A vintage recipe for Jamaican Rice & Beans1940s Kingston Jamaica postcard
It’s easy enough nowadays to see what a modern-day Jamaican holiday could look like thanks to the internet, but can you imagine what it looked like 80 years ago? This throwback travel post draws attention to the excitement of a tropical holiday experience in the 1930s and 1940s during the golden age of travel, back when Jamaica was a newcomer to the tourism industry.
Jamaican Tourism Guide circa 1937. Image courtesy of jamaicahotelhistory.com
Back when hats, heels, suits, and dresses were staples of vacation wardrobes…
1940s Resortwear Fashion Trends
and when airplane travel looked like this…
Pan American Airways Caribbean Clipper postcard circa 1931
Back when flight attendants provided an array of services akin to that of a luxury hotel concierge…
The role of a flight attendant in the 1940s
and when a trip to an exotic Caribbean island was considered a dreamy, decadent, once-in-a-lifetime experience.
Vintage 1930s Jamaica travel guide to Montego Bay. Image courtesy of jamaicahotelhistory.com
It’s an escapist getaway for certain, to a time and a place so steeped in hospitality that its national tourism slogan is “Jamaica: The Heartbeat of the World.” Heartbeat indeed. This post is a swoonworthy one for all of our vintage travel aficionados complete with a delicious heritage recipe to match. Welcome to country number 26 on the International Vintage Recipe Tour. Welcome to Jamaica.
Prior to the 1930s, Jamaica’s tourism population was a small, subdued bunch made up mostly of elderly retirees, the medically infirm, and the ultra-wealthy. Travel to the island during the first part of the 20th century was difficult, expensive, and lacked a suitable infrastructure that could readily accommodate a large influx of guests. But by the mid-1930s, Jamaica was tourist-ready.
The hospitality industry as it started to bloom and blossom in the 1920s and 1930s in Jamaica
The hotels were built, the staffing was in place, and a slew of leisure activities awaited guests. Vacationers were ready too. They were more mobile, there were more flights to New York and Miami (the gateway cities to the Caribbean) and airlines were expanding service to the islands offering faster transportation than ship-to-shore travel.
Unfortunately, the excitement was short-lived. World War II put a pause on all travel to Jamaica. But following the end of the war, an exuberant sense of adventure and wanderlust, especially from the American market, caused Jamaica’s tourism numbers to rise from less than 5,000 per year in the 1920s to close to 100,000 visitors per year by the late 1940s. Today, Jamaica welcomes over 1.4 million visitors annually.
One of the most well-known hotels on the island was The Myrtle Bank Hotel in Kingston which operated from 1870-1964. It’s featured here in a 1940s brochure courtesy of jamaicahotelhistory.com
Credited with being the first country to actively promote tourism in the Caribbean, the post-WWII introduction of Jamaica was exciting on all fronts. Media campaigns began rolling out in creative ways that highlighted the island’s beautiful beaches, turquoise-colored water, engaging cities, tropical climate, jungle-rich flora and fauna, and friendly faces. Aside from those show-stoppers, the other attractive and important component to Jamaica’s successful promotion was its convenient location in the Caribbean Sea. Just a short 90 minute flight Miami, it offered almost instant gratification. Paradise was close.
I thought discussing Jamaica’s early rise in tourism would be a fun cultural touchpoint to pair with this international vintage recipe because it’s emergence as a true destination vacation occurred over 90 years ago and travel on all fronts today is so different than what it was then. Today, we slog through airports and plane travel to get our destinations as quickly as possible in the most comfortable clothes possible. We consult the internet for practically every detail of our vacation from lodging to sightseeing to restaurants. We read reviews online, we look at ratings. We take into account a stranger’s bad experience as well as their good ones. We juggle safety concerns, security threats, disease outbreaks and world events. And for most travelers today, it’s a comfort to be able to see and know exactly what we are getting into when we take a trip abroad.
In the 1940s, travel was different. It was more carefree, less planned. Travelers knew where they were going, but they didn’t necessarily always know what they were going to see. Curiosity and discovery led the adventure. To get a sense of what traveling to Jamaica was like in the 1940s, I’ve included this fun and insightful 24-minute travel short that was produced by Pan American Airlines in 1948. It whisks viewers along on the adventures of Ms. Dale, an American traveler who is exploring the Caribbean on a two-week vacation aboard Pan Am’s propellered clipper ship, courtesy of a custom itinerary prepared for her by a whimsical, animated character named Clip, the Spirit of Travel.
Meet Clip!Meet Ms. Dale!
Presented as an enticing tourism piece to highlight Pan Am’s newly expanded routes to the West Indies, Central and South America, and Mexico, this travel film made its rounds, often accompanied by a representative from Pan Am, at libraries, museums, civic organizations, schools, and travel agencies around the United States beginning in January 1948. Showcasing the warm and sunny climate Jamaica offered during a time of year when almost all of America was wrapped up in a cold blanket of winter weather was alluring marketing at its best. The film received rave reviews around the country for its beauty, interest, and excitement in depicting the history and culture of this exotic string of islands floating in the Caribbean Sea.
To give you an example of the type of reception the film received… on October 11th, 1948 at the Lincoln School Auditorium in Kalamazoo, MI, nine hundred tickets were available for a nighttime showing of Wings to Cuba and the Caribbean. 900 tickets! This illustrates not only the level of interest in the subject matter but also the attraction of movies in the 1940s.
In the film, Ms. Dale island hops around the Caribbean beginning in Cuba. She arrives in Jamaica at the 13-minute mark. If you wanted to skip ahead, you’ll find her en route to the island at 13:27.
I found this travel short to be captivating in so many ways. Not only was it fun to see vintage film footage of the tropics but I loved how it combined flight, fashion, fun facts, music and history into a compact story that gave you an immediate sense not only of what life was like in the Caribbean but also what life was like in the 1940s too.
Watching Wings to Cuba and the Caribbean in 1948 provided many viewers with a first-time glimpse of the islands from a cinematic perspective. At the same time, equally enticing tourism promotion for the Caribbean began appearing more and more frequently in newspapers, and magazines too. I pulled some snippets from vintage archives and combined them with vintage postcards of the era to showcase exactly how, in mid-century America, you would have been introduced to this exotic island.
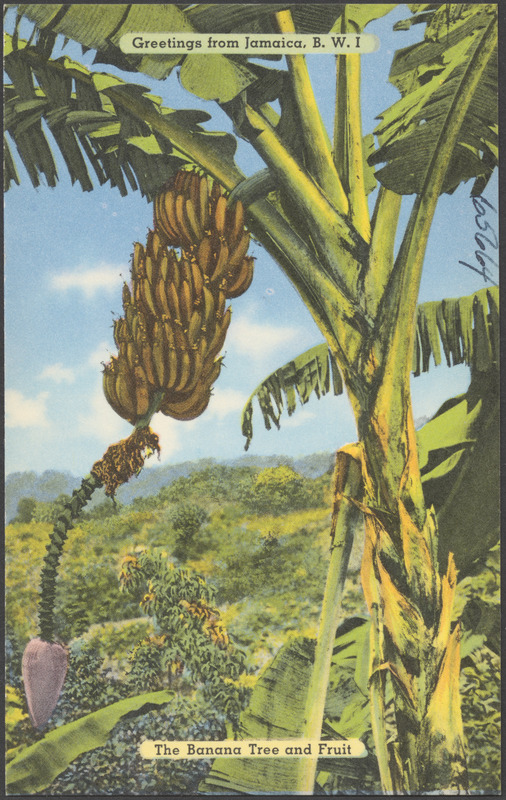
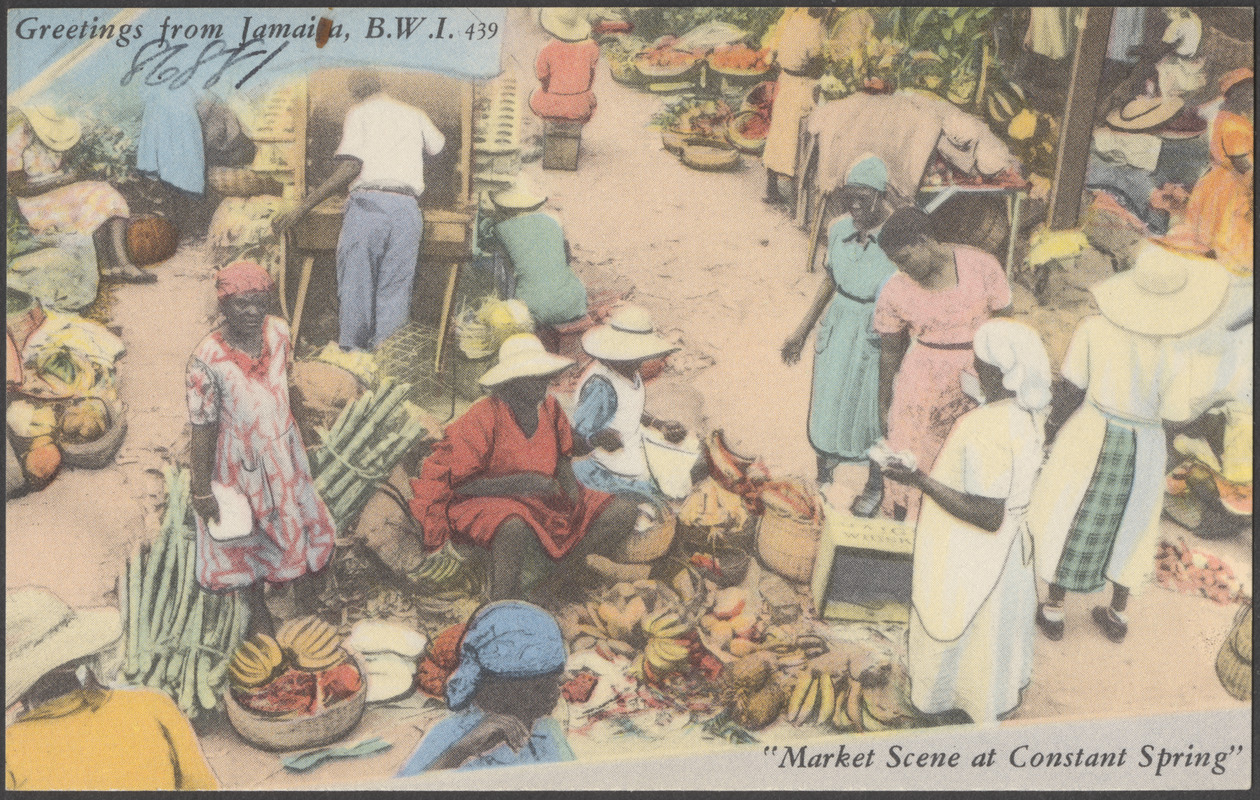
A vintage travel postcard circa 1930-1945, Greetings from Jamaica, B.W.I. A beautiful Jamaican peasant girl. Jamaica, B. W. I.: Photo by Cleary & ElliottVintage travel postcard of Kingston, the capital of Jamaica circa 1930-1945Vintage Jamaica travel postcard… The Banana Tree and Fruit circa 1930-1945Vintage Jamaican travel postcard, Market Scene at Constant Spring circa 1930-1945
Since its emergence on the tourism scene in the 1930s and 40s, Jamaica has become a treasured and popular resort destination, winter getaway, and honeymoon haven for travelers around the world. Even if you have never visited yourself, you are still familiar with it. You’ve seen photos, watched a video, read a book, heard stories from someone else who has been there. We are all familiar with the beautiful, bright smiling faces of local residents. We know the palm studded beaches, the gorgeous blue water, the relaxed vibes, the music, the pretty hotels. But in the 1940s it must have been magical to experience the island for the first time as a brand-new destination. To experience the talcum-powder soft beaches, the two mule carts, the afternoon tea hour, the mountain of cotton trees, the gay and leisurely atmosphere. It must have been awe inspiring to see it in its pristine form overflowing with a proud, fresh-faced enthusiasm. Jubilant with a happy-you-are-here hospitality. It must have been magical to see the island barely touched by the trappings of tourism. Unaffected yet by repetitive foot traffic caused by the millions of travelers that would eventually come to it, mold it, define it, shape it into something influenced a little bit here and there by something else from somewhere else. In the 1940s, Jamaica felt new to the world to a new set of travelers unlike any other place in the world.
We are all spoiled these days with an overconsumption of information and an in-the depth understanding of the world on just about every topic under the sun. Sometimes, when everything is at our finger tips that leaves little room to ever discover something truly new. But imagine, for a moment that it’s the 1940s. You don’t own a television, but you do read the newspaper. There’s a movie theater in your town, a globe on your desk, and a stack of travel magazines on your bookshelf. You long for far-flung adventures and travel to exotic places but you’ve yet to ever leave your home city. A showing of Wings To Cuba and the Caribbean comes to your town.You fall in love with the islands. You begin to read more and more stories about Jamaica in the newspaper. You see tourism ads start to appear in the travel section. Your favorite magazine features it in a multi-page spread. You take Ms. Dale’s lead and you book a trip through a local travel agent. Finally, the day arrives and you board the propellered plane with the the Pam Am logo. It’s your first international adventure. Your first tropical vacation. Your first real-life glimpse of the world beyond anything you have ever known.
While it’s impossible to return to the excitement of Jamaica’s early tourism days of the 1930s and 1940s, we can at least return again and again to a vintage recipe from this beautiful country via the kitchen any time we want. It may not physically plunk you down on a sandy beach, but it will carry you away to a Caribbean state of mind. Nothing transports you to the tropics quite like a coconut.
This vintage recipe for Jamaican Rice and Beans calls for coconut milk made from a whole, fresh coconut. You could possibly substitute it for canned coconut milk as a shortcut, but I wouldn’t recommend it. Especially if you are longing for an escape of mind these days. I wholeheartedly recommend making this recipe as is, fresh coconut and all. It’s not only a fun meal to prepare but you’ll have a little bit of extra coconut water left over to make a rum cocktail while you cook, further embracing a vacation vibe.
If you have never cracked open a coconut before, rest assured, it is easier than you think. Look for a whole coconut in your local grocery store or market that is heavy in weight, pre-scoured, and sloshes with the sound of liquid inside when you shake it. This ensures that the coconut is fresh and easy to crack.
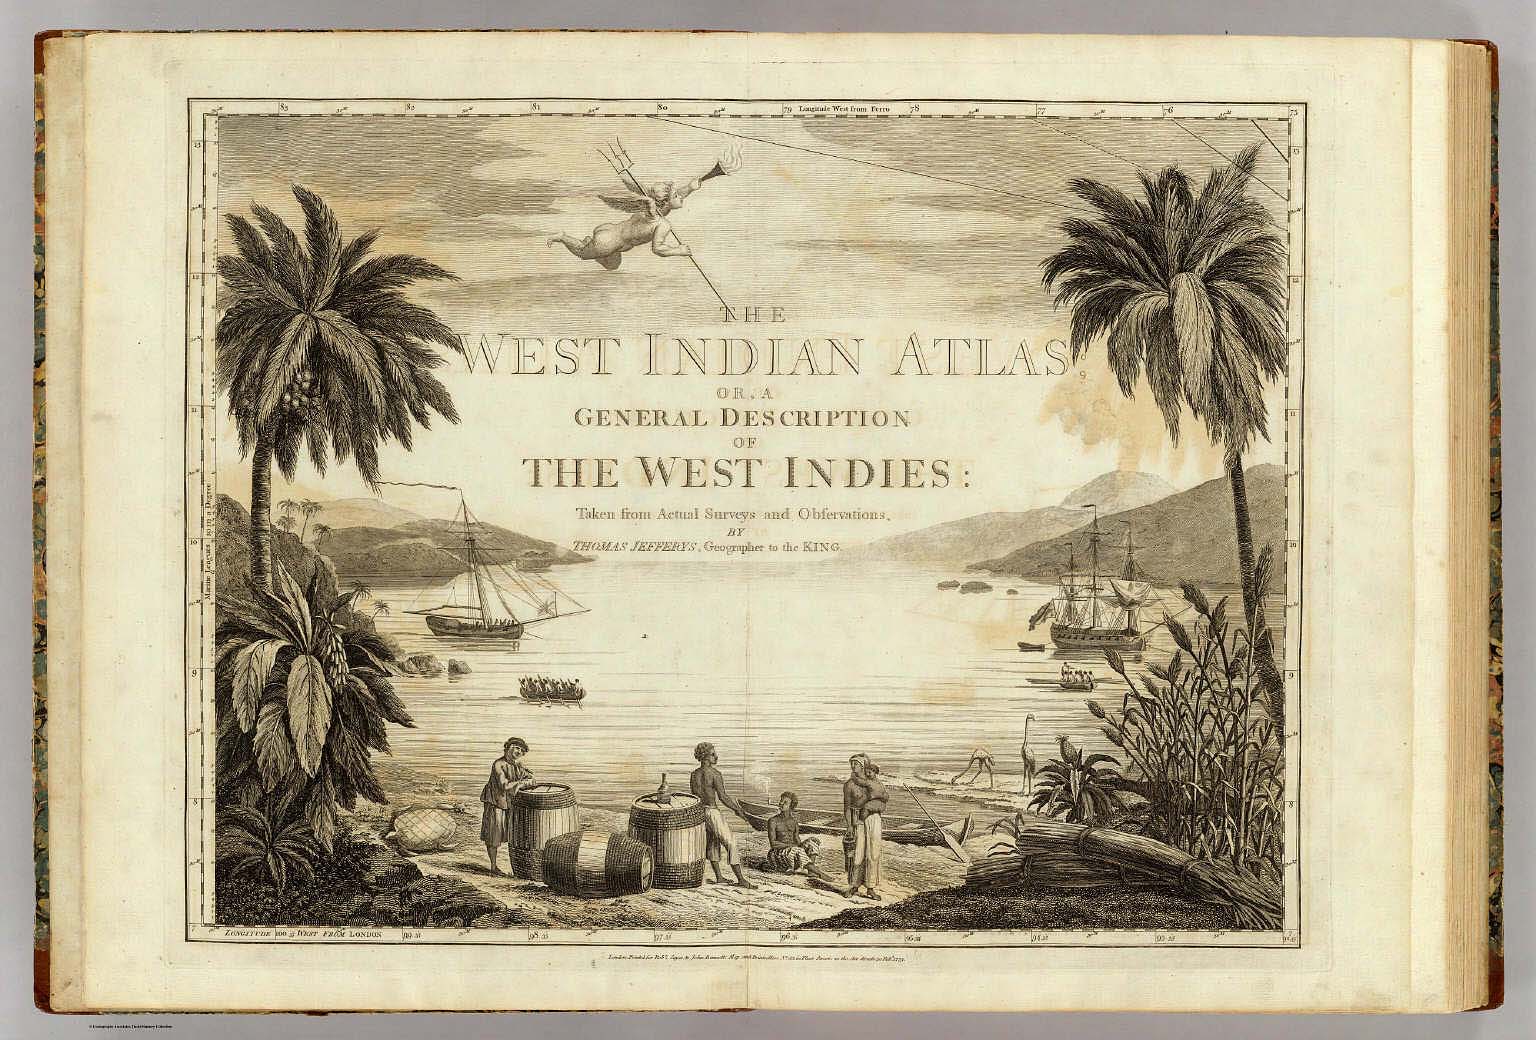
The West Indian Atlas circa 1775. Image courtesy of The New York Public Library Digital Collections.
The history of this rice and beans recipe is rooted in the slave trade which began in Jamaica in the 1500s by way of Africa and Spain. Over the course of the island’s history, the dish’s unique blend of grains and legumes morphed into different variations using different spices and came to be known by different names. The most traditional and widely accepted name is Jamaican Rice and Peas. But not peas of the round, green sort that we often think of as vegetables. It was originally made with small round red peas, also known as pigeon peas, also known as gungo peas.
Cajanus cajan aka pigeon peas aka gungo peas.
At some point, gungo peas became more expensive and harder to find in Jamaican markets and kidney beans were substituted in their place, which is how this dish also became known as Jamaican Rice and Beans. Technically a pea is a bean as they are both members of the legume family so both names are correct, but we all know green peas are not kidney beans, and kidney beans are not red peas. Each has its own unique flavor profile, color, consistency, and shape. Nonetheless, today in Jamaica when it comes to this recipe, gungo peas and kidney beans are both accepted ingredients and it’s left up to personal preference as to which is the better bean/pea.
Aside from the extra bit of attention given to the coconut preparation, this recipe is easy to make and very economical. It serves 10-12 as a side dish and costs less than $15.00 to make. Equally enjoyable as a full meal on its own, this dish also freezes well, reheats beautifully, and acts as both a comfort food and a vegan meal. Since it contains both carbs and protein, it’s especially lovely for this time of year as we start spending more hours and energy outdoors. But most importantly, this is a dish that will transport you to another era, a mental mini-break from the malaise and the momentous events of the modern world.
Jamaican Rice and Beans
(from the New York Times International Cook Book circa 1971)
Serves 10-12 as a side dish
1 cup dried red kidney beans
1 rib celery, cut in half
1 small wedge of green pepper (about 1/4 of a whole bell pepper)
1 large coconut
6 cups water
Salt to taste (I used 3 teaspoons)
1/2 teaspoon dried thyme
2 1/2 cups uncooked rice
Place the beans in a large kettle and add water to cover to a depth of one inch. Add the celery and green pepper, cover and bring to a boil.
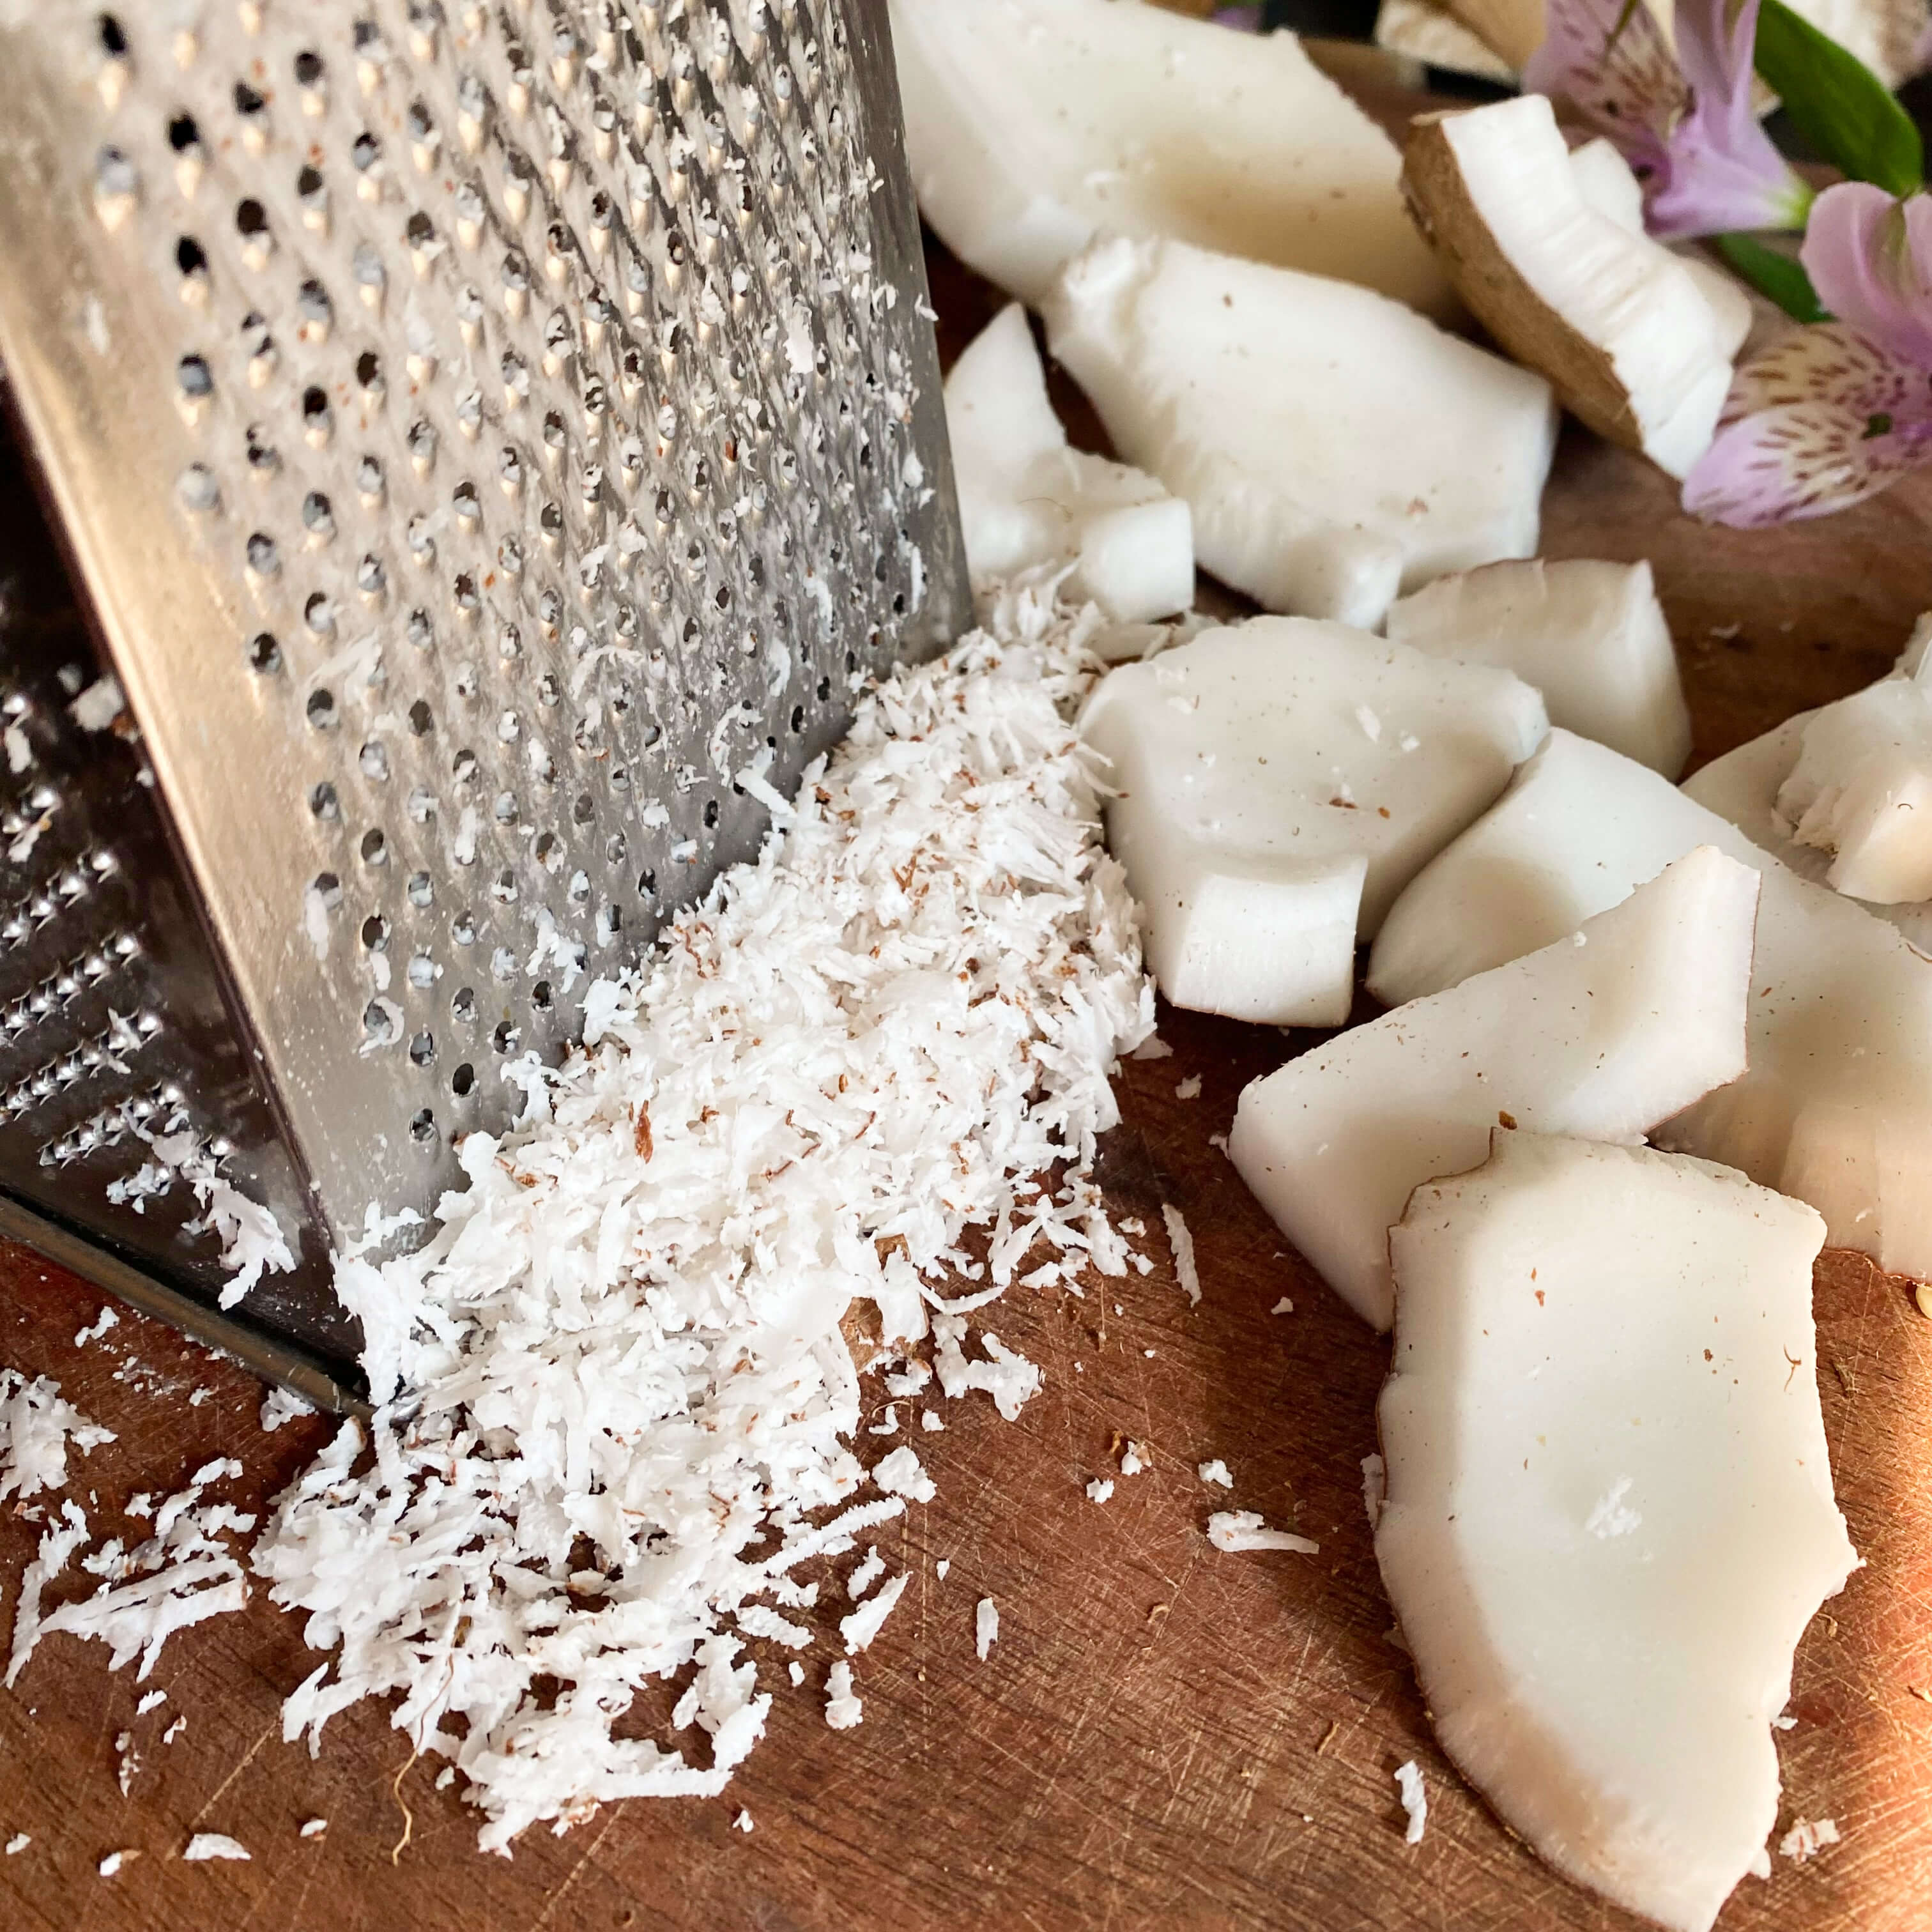
As the beans cook, prepare the coconut. There are three eyes on the coconut. One of them is soft enough to pierce. I like to use a corkscrew for this job but you can also use a shape paring knife or a Phillips-head screwdriver. Pierce that one eye and drain the coconut water from the interior into a large glass or mason jar. Once drained, with a heavy mallet, hammer, or the back of a butcher knife crack the coconut shell in several places, and using a paring knife, remove the meat from the shell in large pieces.
Once broken into pieces, do not bother to cut away the thin brown skin from the coconut flesh. Grate each piece of coconut using a fine grater.
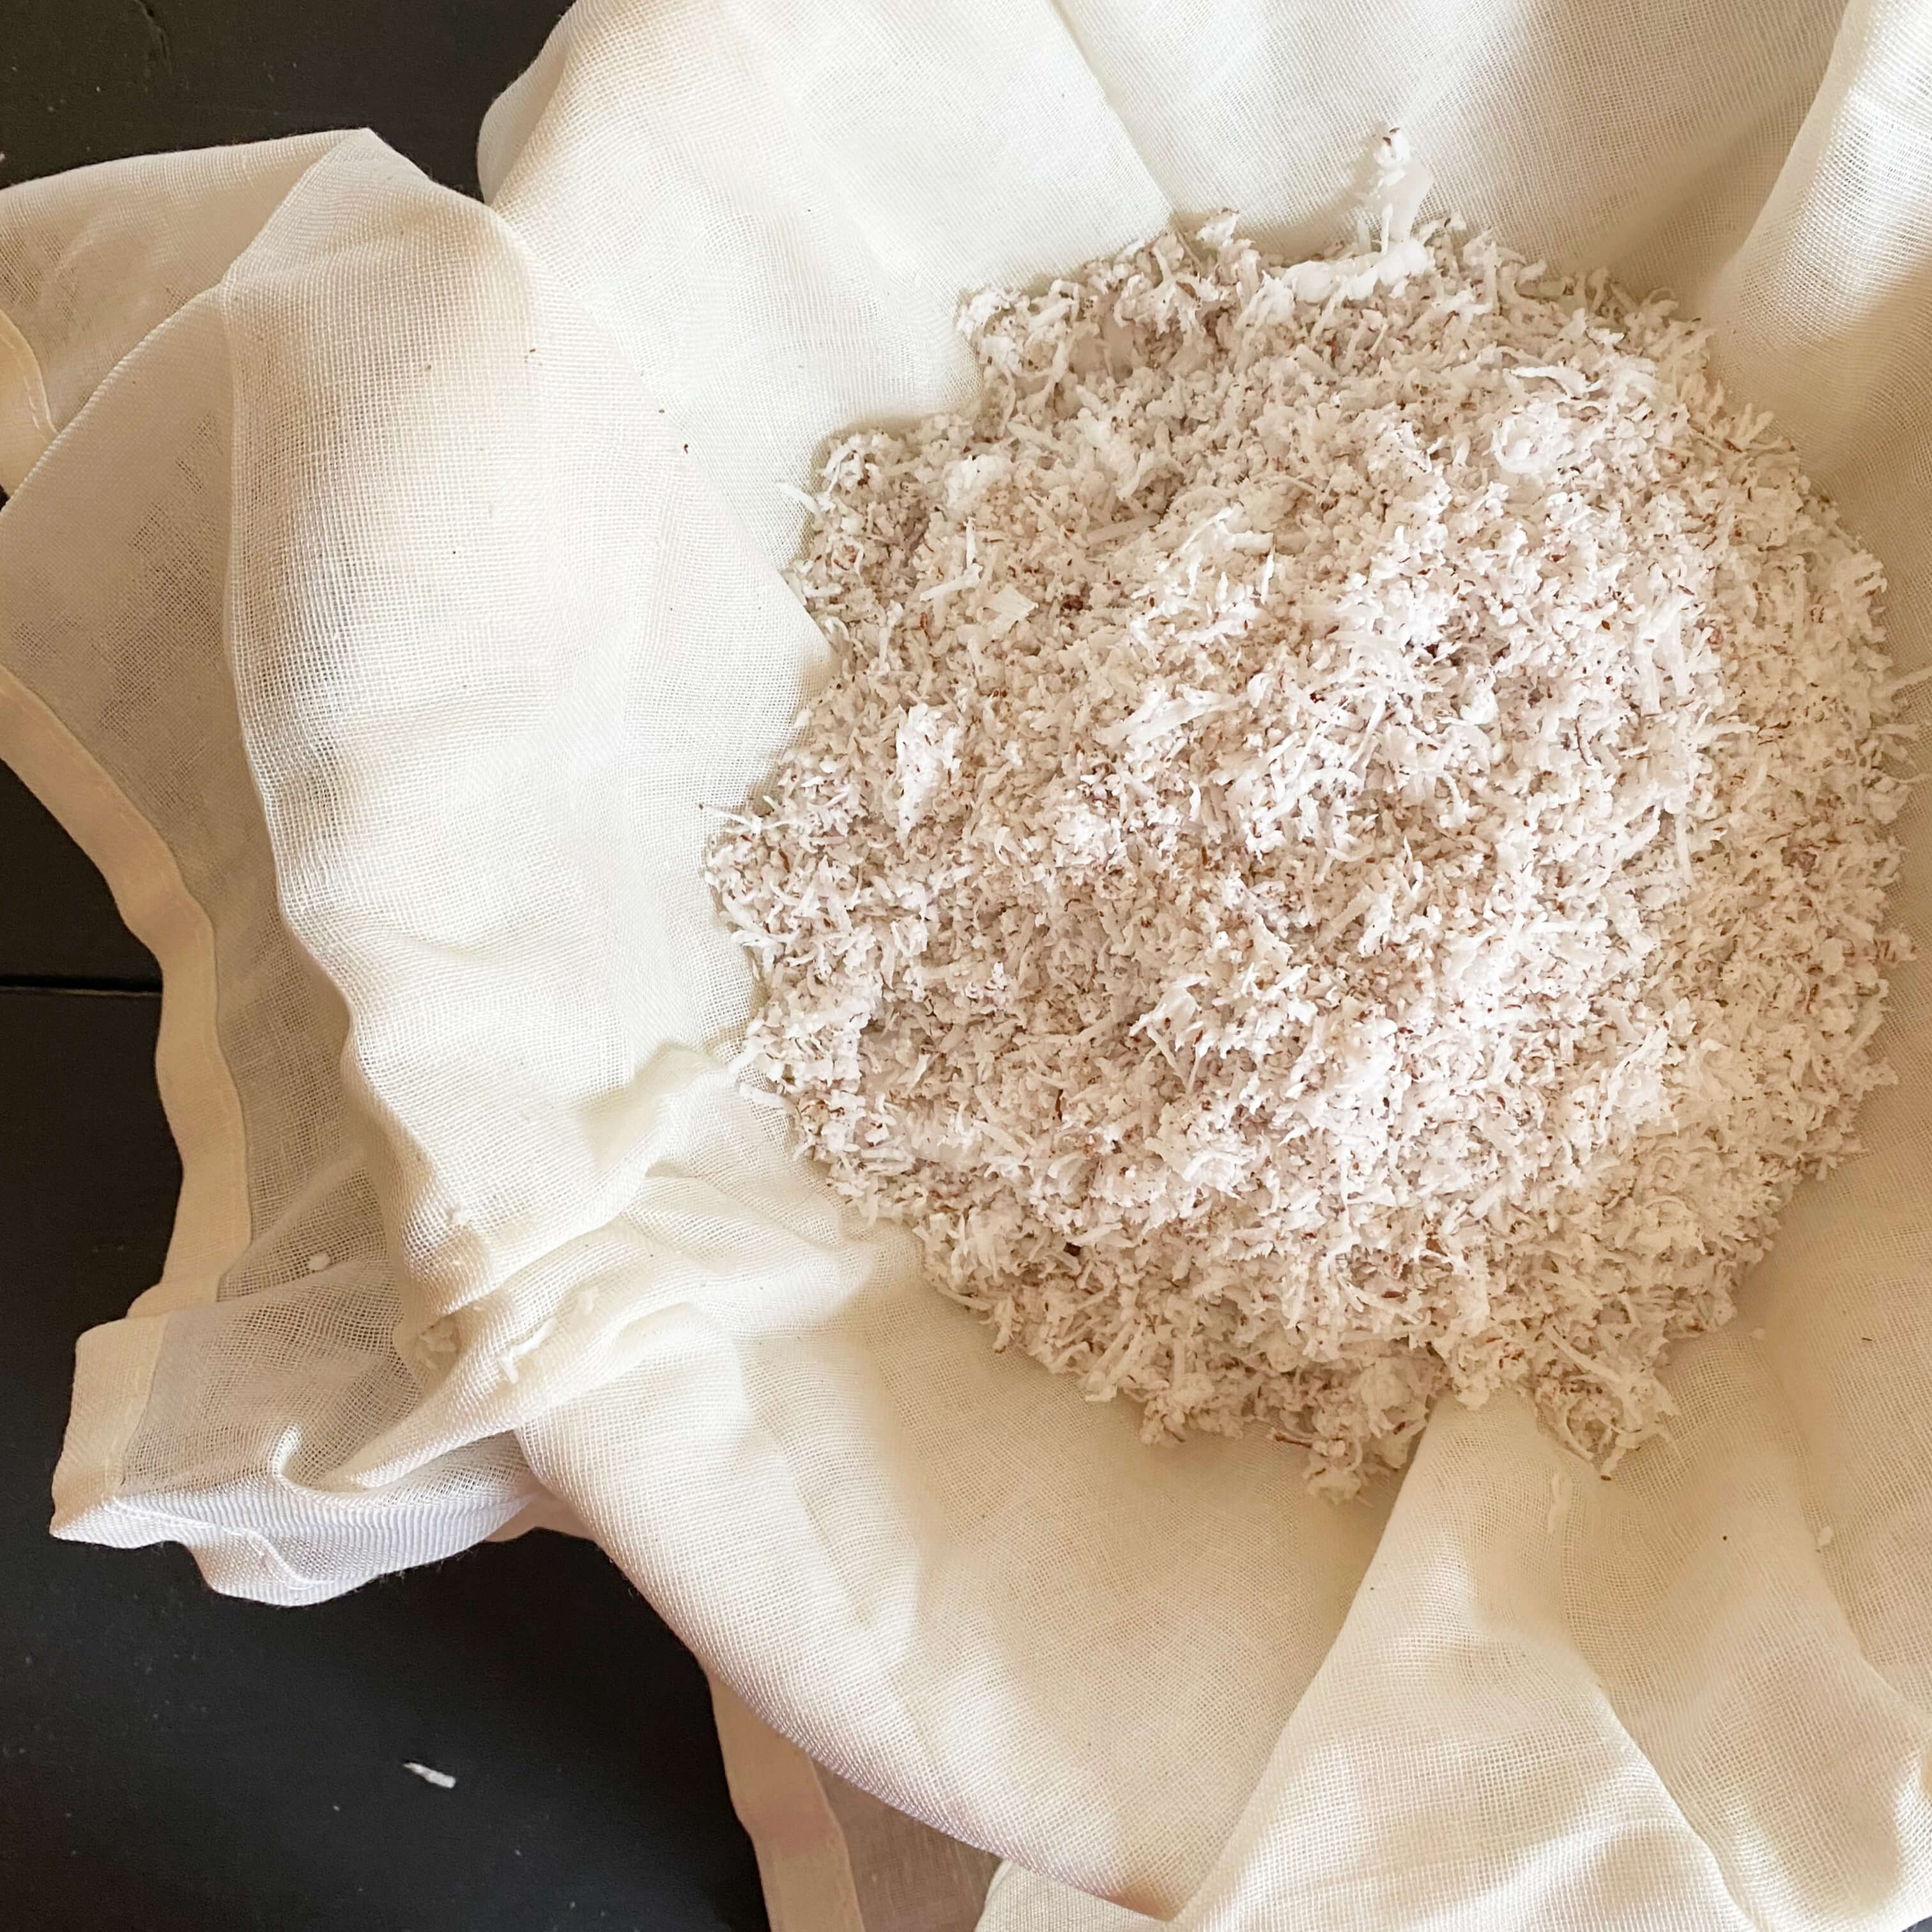
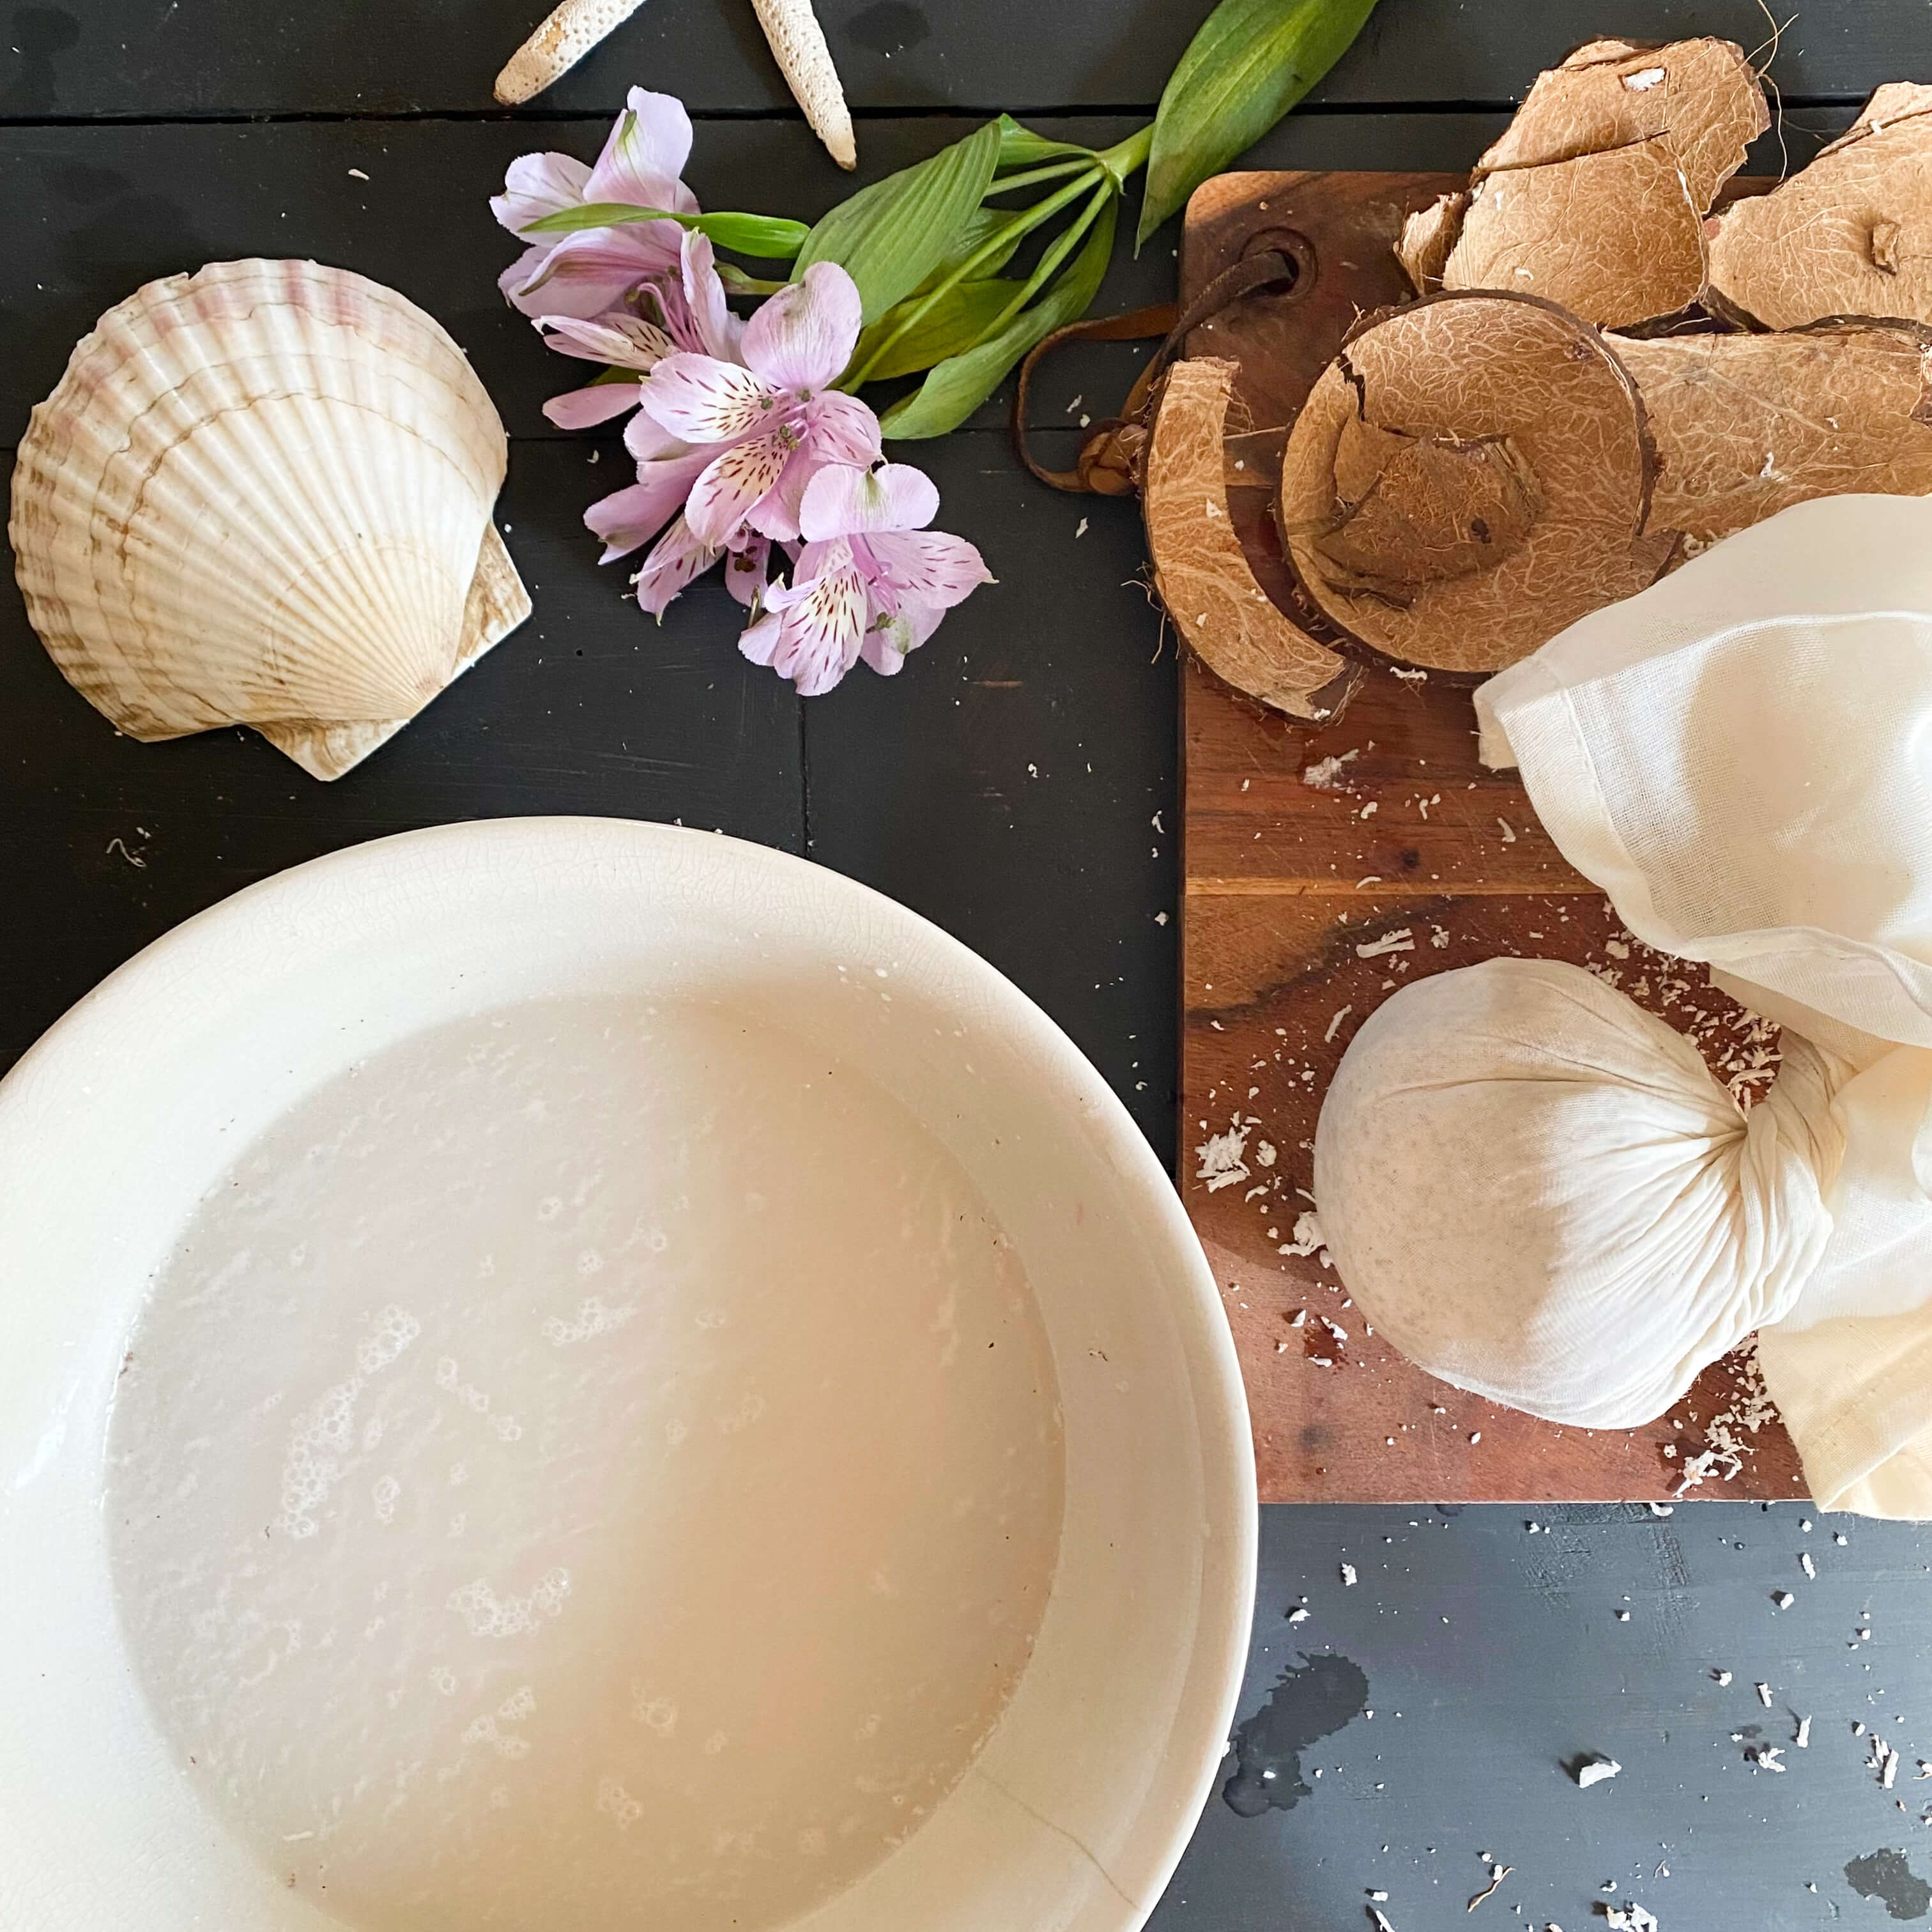
Line a mixing bowl with cheesecloth and add the grated coconut. Add two cups of cold water and squeeze to extract the white liquid. This is coconut milk. Add two more cups of water and squeeze, then add the last two cups of water and squeeze again. This should yield roughly six cups of coconut milk.
Add all six cups of coconut milk to the simmering beans. Cover and cook until the beans are tender, about 1 and 1/2 hours in all. Stir frequently to prevent the beans from burning.
Add salt to taste, thyme, and the rice. Stir once and cover. Continue to cook until the liquid is absorbed by the rice, about 20 – 30 minutes.
When done the rice should be tender and all the liquid absorbed. Remove the cooked celery and green pepper. Fluff the rice. Serve as a side dish or as a vegetarian meal.
I garnished the beans and rice with finely chopped fresh green pepper just before serving. The contrast between the crisp green pepper and the soft rice and beans was lovely, almost like serving a chopped salad on top. I thought the coconut flavor might be more pronounced than it was but to my surprise no one ingredient overpowered the other. Instead, they all blended together to create a warm, comforting combination of flavors that is easily compatible and very complimentary with so many other types of food.
If you were serving this as a side dish, other traditional Jamaican accompaniments would include Jerk Chicken, Salted Fish or Curried Goat. I wouldn’t hesitate putting it in a taco or topping it with grilled shrimp or steak either. Or simply enjoy this one as is – a simple meal of rice and beans with a hint of tropical flavor to warm your spirit on these chilly days of early Spring. I hope by the time you sit down to the table to enjoy this meal, you’ll feel like you’ve had a little adventure.
Cheers to Jamaica for extending so much hospitality out into the world in the form of a beautiful place and a beautiful recipe. Join us next time on the International Vintage Recipe Tour as we head to Japan, our 27th country via the kitchen. See you there!
To catch up on previous International Vintage Recipe Tour posts visit here.
Every year in the shop, while researching vintage and antique cookbooks, I discover an array of fascinating stories about 19th and 20th-century women who made an impact on the global culinary landscape. Sometimes these cookbooks are fueled by immigration stories. Women relocating to a new land only to realize a visceral homesickness for foods left behind in their old country. Other times they are written from travel adventures. Escapades to far-flung places that inspire a life-long interest in an exotic culture and a cuisine. And sometimes they are the scholarly pursuits of teachers, scientists, or home economists educated in food and nutrition intent on improving the overall health of men, women and children.
Today is International Women’s Day. To celebrate, I thought it would be fun to share a glimpse into the personal lives of some of the international cookbooks and their authors discovered within the past year that highlight a unique perspective on global food history and culture.
Some of these women are famous, long-lauded for their culinary achievements throughout the 20th century. But others in this list have almost all but been forgotten despite the impact they once made on the international food landscape. In an effort to collect unique food stories from around the globe and a cookbook from every country, it’s always inspiring to learn how the love of cooking experienced by one person can unite cultures, cross borders, and bring together many people all in the pursuit of a good meal.
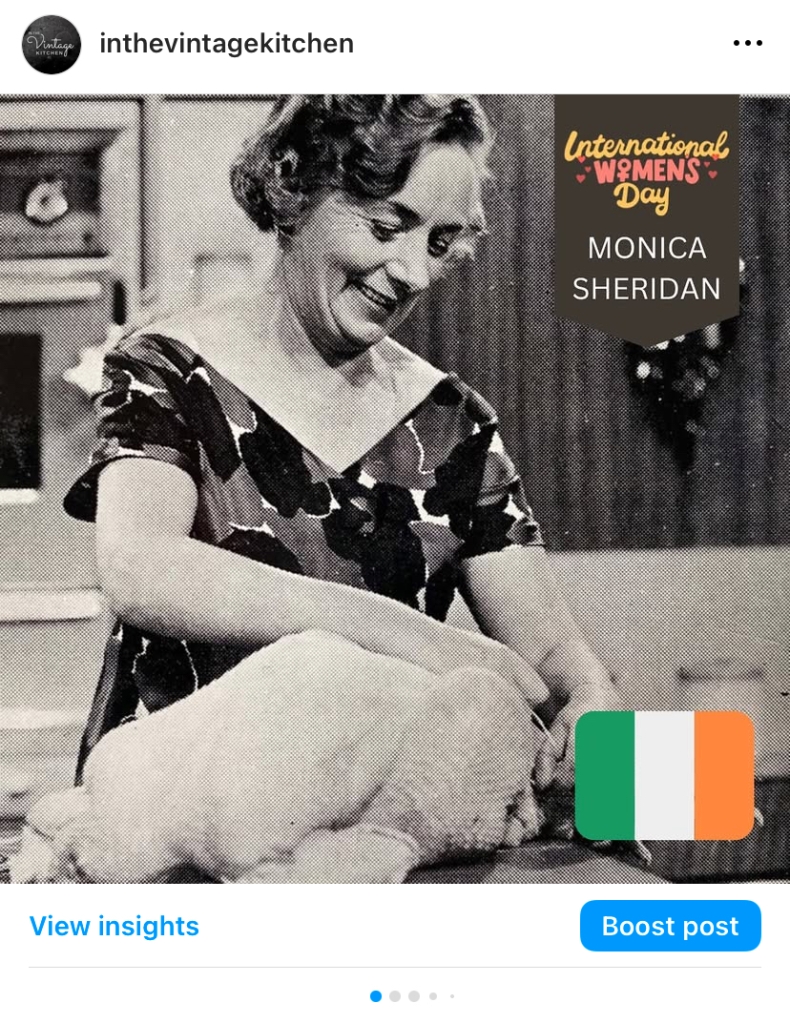
2024’s International Women’s Day Instagram post featured Monica Sheridan, Wadeeha Atiyehh, Perla Meyers, Madeleine Kamman, Mrs. Balbir Singh, Amy Vanderbilt, Claudia Roden, Ada Boni, Paula Wolfert, and Countess Corry Van Limburg Stirum
Each year on International Women’s Day over on Instagram, I compile the list of the international vintage cookbook authors that were newly discovered in the previous year via books curated for the shop. It’s one of my most favorite posts of the year since it highlights not only heritage recipes but also draws attention to the achievements of women that may have slipped from the spotlight.
For whatever reason, I’ve never thought about incorporating the International Women’s Day Instagram post into a blog post too, but this year, I’m starting a new tradition and celebrating the ladies here as well. These ten women represent a range of life stories that extend beyond recipes, beyond food. They come from India, Ireland, and the Ukraine. They write of France, the US, and the UK. They tell stories of entrepreneurship, of immigration, of cultural preservation, of censorship. They are not only writers and cooks but social activists, suffragists, school teachers, and television personalities. But most importantly, they are reporters and recorders of life lived via the kitchen. Let’s look…
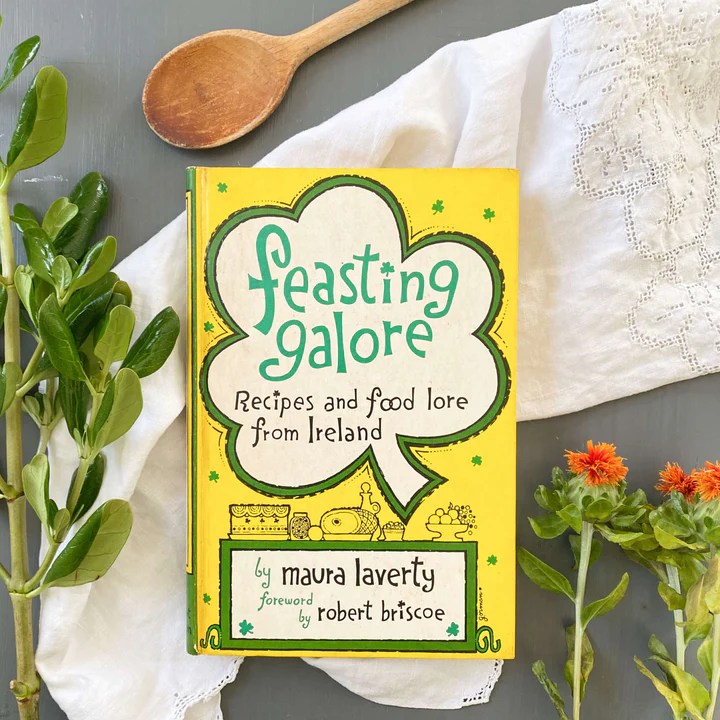
1. Maura Laverty – Feasting Galore (1961)
The first American edition of Feasting Galore: Recipes and Food Lore from Ireland was published in 1961. It was written by celebrated Irish novelist, playwright, journalist, and cooking authority, Maura Laverty (1907-1966) and debuted at a time in American culture when travel to Ireland and interest in Irish culture was newly on the rise.
Packed full of recipes, anecdotes, and folklore from the Emerald Isle, Maura’s cookbook featured 200 recipes interspersed between colorful stories about Irish culture and food. With an enchanting way of weaving storytelling into recipes that then transitioned back into stories again, Maura’s cookbook was unique in that it read like both a recipe book and a storybook all in one.
Growing up in County Kildare, Maura’s love of cooking began in childhood and was both encouraged and influenced by her maternal grandmother with whom she spent a lot of time. That relationship eventually formed the plot of a fiction book titled Never No More, published in 1942, which became a bestseller in Ireland and put Maura on the path to becoming a popular Irish writer. Despite the fact that her next three novels were banned by Ireland’s Censorship of Publication Board for obscenity (a stigma that has since been lifted) Maura pressed on writing plays, television shows, books on cooking, and children’s stories.
In and out of marriage to a fellow journalist, Maura supported herself and her children via her writing throughout her life. Known for her humor, captivating storytelling, and tenacity to continue working at her craft, despite falling victim to Ireland’s repressive book-banning policies, Maura’s perseverance, talent, and cooking expertise deemed her a national treasure. Introduced to America via several short stories she wrote for Women’s Day magazine in the 1950s, when Feasting Galore was published in New York by Holt, Rhinehart & Winston in 1961, it was to the delight of American book critics. “Looking into Maura Laverty’s book is like opening an old brown box and finding a real emerald,” noted food columnist Sylia Windle Humphrey of the Lexington Harold in 1961.
Interesting recipes from Feasting Galore include Fairy Rings, Potato Scones, Carrot Marmalade, Boxty on the Griddle, Elderflower Lemonade, Puddeny-Pie, Emerald Sauce, Baked Limerick Ham, Wexford Sole in Cider Sauce, Bread and Cheese Panada, Dunmurray Rice, Crab Apple and Bramble Jelly, Pickled Gooseberries, Friday Manglam, Golden Vale Pudding, Nested Eggs, Whiskey Pie, Oat Cakes and Columcille Cookies.
Photo of Maura Laverty courtesy of The Evening Star, March 16, 1947
2. Savella Stechishin – Traditional Ukrainian Cookery (1957)
When Ukrainian-Canadian home economist Savella Stechishin (1903-2002) first published her book, Traditional Ukrainian Cookery in 1957, there were about 450,000 Ukrainian immigrants living in Canada. That was a large increase from the 10,000 that initially immigrated to the Great White North in the early 1900s. Savella’s mission was to keep Ukrainian heritage alive by celebrating the traditional foods of her homeland and by teaching second and third-generation Ukrainian-Canadians the unique customs and culture of their Eastern European heritage.
Ukrainian Immigrants in Canada circa early-mid 20th century. Images courtesy of the City of Vancouver Archives
An educational force, Savella’s pride in her heritage fueled her entire life in Canada. After immigrating from West Ukraine with her family as a young girl, Savella received a teaching degree in home economics from the University of Saskatchewan in the 1930s, went on to help establish the Ukrainian Women’s Association of Canada, taught cultural classes to students at the St. Petro Mohyla Institute, wrote a cultural column for the Ukrainian Voice for over two decades and was involved in work for the Ukrainian Museum of Canada. Perhaps most notable were her contributions on the culinary front with the publication of her cookbook in 1957.
Published when Savella was 55 years old, it took her half a dozen years to complete the cookbook, which highlighted over 650 traditional recipes mostly gathered from pre-WWII Ukrainian recipe books. The challenge was not in finding wonderful Ukrainian recipes but in adapting them to modern-midcentury Canadian kitchens with proper measurements and ingredients equal in taste and flavor to that found naturally in the Ukraine. As Savella learned, foreign recipes don’t always translate easily in foreign lands and much testing had to be done. Luckily, chapters of the Ukrainian Women’s Association across Canada helped test and retest all the recipes to ensure they were true representatives of traditional Ukrainian cuisine.
Upon debut, Traditional Ukrainian Cookery became the first Ukrainian cookbook ever published and was an instant bestseller. In addition to recipes, it featured notes on Ukrainian history, culture, holiday customs, and food presentation. In print through the 1990s, Savella’s cookbook sold over 80,000 copies worldwide making it not only a classic, go-to resource in both Canadian and Ukrainian kitchens but around the globe as well.
Interesting recipes include Stuffed Pork Tenderloin, Savory Roast Beef, Smetana Sauce with Green Onions, Lokshyna, Linyvi Holubtsi, Stuffed Onions, Potato and Cheese Casserole, Puffy Pampushky, Layered Sweet Nalysnyky, Sour Rye Bread, Babka with Pumpkin, Economical Perekladanets, Pyrih with Cabbage Filling, Uncooked Cheese Paska, Horikhivnyk, Caraway Krendi Pretzels, Crunchy Nut Rurky, Crackling Korzhyky Biscuits, Apple Pastila, and Dried fruit Candy plus so many more!
A hard-to-find cookbook these days, the sixth edition published in 1973 is available in the shop here.
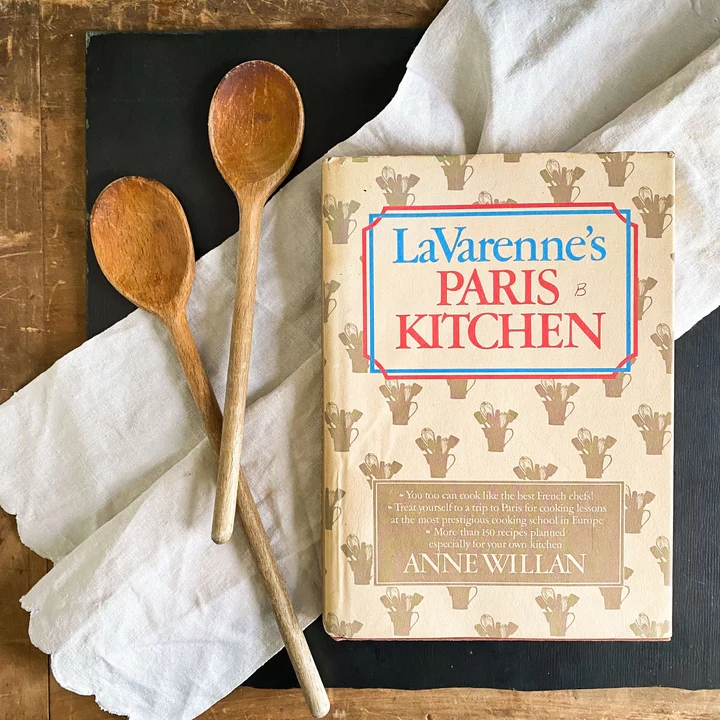
3. Anne Wilan – La Varenne’s Paris Kitchen (1981)
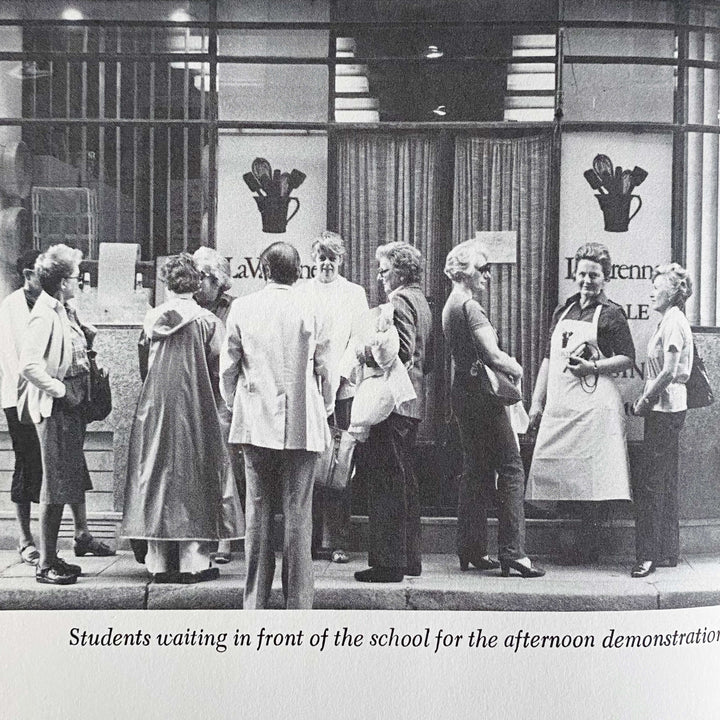
Founded by Anne Wilan in 1975 in an old Parisian building that once housed a neighborhood cafe, L’Ecole de Cuisine La Varenne quickly became a preeminent culinary school for anyone wanting to learn traditional French cooking. For the next 15 years, culinary students from around the world would flock to this Paris school to learn all the foundational techniques that made French cooking so esteemed. With instruction in both English and French, students graduated with professional culinary degrees, and many went on to pursue careers in the food industry in all its facets from catering to restaurant ownership, line cooks to food writers and everything in between.
The popularity of the school saw branch programs open in rural France; Venice, Italy; Santa Monica, California; and at the Greenbrier Hotel in White Sulpher Springs, West Virginia. Due to high food costs, the Paris location closed in 1990 and the last of the satellite programs closed in 2017 in California.
The experience of running such an acclaimed enterprise led Anne, a decorated and beloved cook herself, to publish several books about her La Varenne experiences that not only shared details about the operation of the school but also included recipes too.
Published in 1981, La Varenne’s Paris Kitchen offered a course of study for home cooks in America who didn’t have the opportunity to attend class in France. Laid out in syllabus fashion, each of the seven instructors at the school, including Anne, provided sample menus and recipes of varying difficulty which home cooks could tackle chapter by chapter. By the end of the book, the goal was to be skilled in the foundational principles of French cooking.
Interesting recipes from La Varenne’s Paris Kitchen include Asparagus in Puff Pastry, Bearnaise Sauce, Chicken Breasts with Port, Tangerine Tart, Volcano Salad, Coffee Bavarian Cream, Veal Paupiettes with Lemon Stuffing, Light Apple Tart, Orange Chanteclaire, Stuffed Tomatoes and Eggs Maintenon.
Find a 1981 First Edition Copy of this book in the shop here.
4. Fu Pei-Mei – Pei Mei’s Chinese Cook Book (1969)
Fu Pei-Mei (1931-2004), undoubtedly the most beloved and famous Chinese/Taiwanese cook of the 20th century, came to her culinary pursuits like many women of the 1950s. As a young wife who wanted to impress her husband with her cooking prowess and tempting dishes, Fu began married life in Taiwan with her heart set on being a wonderful cook for her family and friends. But desire alone doesn’t make an excellent chef and Fu struggled in that newlywed period through the preparation of each and every dish that she set on the table for her discerning husband.
Frustrated with her own lack of ability, Fu paid local professional chefs to teach her the skills of good Chinese cooking. Over a two-year period, she mastered all the classics of her Chinese homeland and its distinct regions. She dazzled her husband and children with delicious food, becoming so confident in her abilities that she started teaching Chinese cooking lessons to women living in Taiwan. Those lessons led to cooking classes offered to US military personnel stationed in Taiwan along with their spouses. From there, her teaching courses climbed from in-person to on-camera as she hosted her own cooking show for Taiwan television. The cooking show would become a staple program and continue for forty years turning Fu Pei-Mei into a household name and a trusted authority on Chinese and Tawainese cooking well beyond her Taipai community.
The trajectory of Fu Pei-Mei’s career is often compared to that of Julia Child’s in that she came to cooking following marriage, lived in a country different than her homeland where she learned from experts how to cook, and then became an expert herself. Just like Julia, Fu had a charming personality that won the hearts of women who found her accessible and relatable – an un-intimidating and encouraging presence in the kitchen.
In 1969, Fu published her first cookbook, Pei Mei’s Chinese Cook Book, a 265-page collection of traditional recipes written in both Chinese and English. Two other volumes would follow along with numerous reprintings. Eventually, Fu would publish over 30 cookbooks throughout her career.
To say that her influence on Chinese cooking was immense is an understatement. In Chinese culture, her recipes are iconic and her cookbooks are proudly passed down between generations. Still to this day, she remains the most trusted authority on Chinese cooking and her books are considered classics in the kitchen.
Interesting recipes from Pei-Mei’s Chinese Cook Book include Dry Cooked String Beans, Chicken and Cucumber Salad, Shark’s Fin in Brown Sauce, Mongolian B-B-Q, Meat Balls with Sour Sauce, Flowered Chicken Soup, Sweet and Sour Cabbage, Ma-Po’s Bean Curd, Camphor and Tea Smoked Duck, Egg Fu Yung, Sweet and Sour Pork, Steamed Chicken with Green Onion, Shrimp with Cashew Nuts, and Stewed Chicken with Pineapple Sauce.
Find a rare 1969 bi-lingual edition of her cookbook in the shop here.
5. Jane Grigson – Jane Grigson’s Vegetable Book (1978)
Just like all the famous greats in the kitchen… Julia Child, Elizabeth David, Madhur Jaffrey, Claudia Rodin… British cookbook author and food writer Jane Grigson (1928-1990) holds high court in the kitchens of the 20th and 21st centuries.
An epicurean powerhouse who first found her way to cooking from art gallery and editorial translation work, when it came to writing about and preparing food Jane’s influence on the culinary landscape rounded the globe in her efforts to bring forth interesting recipes and interesting stories. Combining world history, farming practices, cultural identity, gardening, home cooking, and travel stories, Jane’s food writing has the ability to sweep you up on a culinary adventure and push you into the kitchen for an engaging, colorful, and delicious experience.
The author of ten much-lauded cookbooks throughout her career, Jane published Jane Grigson’sVegetable Book in England in 1978. Covering 75 vegetables in alphabetical order across 600+ pages, Jane gathered recipes from history, from kitchens around the world, from other cooks and their books, and from her own kitchen to create this large-scale compendium chockful of veggies of all varieties.
When Jane Grigson’s Vegetable Book debuted, it won several awards including the Glenfiddich Food and Drink Writer of the Year and the Andre Simon Memorial Book Fund Award. It still remains one of the most favorite of all Jane’s cookbooks, inspiring professional chefs and home cooks of all ages and skill levels.
Interesting recipes from Jane Grigson’s Vegetable Book include Gratin Savoyard, Chicken Gumbo, Palestine Soup, Pancakes with Carrot Filling, Sauerkraut Salad, Aubergine Slippers, Baked Avocado with Crab, Asparagus Fricassee, Letil and Pork Stew, and Sicilian Stuffed Peppers.
Find a 1979 First American edition in the shop here.
Photo of Jane Grigson courtesy of Tarrytown Daily News, Nov. 28 1992
6. Sarah Field Splint – The Art of Cooking & Serving (1926)
First published in 1926, The Art of Cooking and Serving was a modern take on meal planning, nutrition, and cooking techniques for the modern 1920s woman who didn’t want to spend the entire day cooking in the kitchen.
Containing just under 200 recipes, it was written by American Sarah Field Splint (1883-1959), a popular women’s magazine editor, suffragette, and domestic science expert, and produced in partnership with Crisco – a vegetable shortening product that Sarah endorsed as an alternative to butter.
First introduced in 1911, most home cooks relied on Crisco for cooking and frying but by the 1920s, it started to be marketed for baking as well. Sarah’s cookbook helped highlight the wide variety of recipes that could be achieved using Crisco. Everything from cakes to muffins, breads to breakfast foods, sauces to souffles could all be perfected with the help of this reliable vegetable shortening. By the time the 1931 edition of The Art of Cooking and Serving was published, over 540 recipes were included, which suggests not only the popularity of the book but the enthusiasm for Crisco as well.
Crisco aside, what’s especially interesting about this Depression-era cookbook, is the focus on getting the most value both physically and emotionally from each meal as possible. Highlighting nourishing foods, the reuse of frying oil, and the repurposing of leftovers for additional meals signaled the sign of trying economic times. A chapter on servantless households details the changing roles of women when it came to food preparation. And emphasis was placed on good taste, both in food and presentation, with the mission to make both as hospitable and alluring as possible. As Sarah advised… a pretty china pattern added just as much fortitude for the spirit as did a steak dinner for the body.
7. The Women of St. Paul’s Church – The Art of Greek Cookery (1963)
The recipes in The Art of Greek Cookery were compiled in 1958, by 16 first-generation Greek women who were part of the congregation of St. Paul’s Greek Orthodox Church in Hempstead, New York.
First formed in 1944, St Paul’s Church by the late 1950s was thriving. Needing to expand as its membership grew, the ladies of the congregation started a recipe committee as part of the Church’s social organization known as the Mr. & Mrs. Club. The goal of the committee was to gather traditional Greek heritage recipes and compile them into a book for American cooks as a fundraiser to help pay for construction on a new building. With true grit and determination, these ladies got to work gathering, testing and adapting hundreds of recipes representative of their Greek culture.
After two and half years of laboring, they published a simple spiral-bound cookbook entitled, The Grecian Gourmet. Both The New York Times and the New York Tribune published articles about the women and their book project, which caught the attention of home cooks all across the country. Book orders poured in. The recipe committee was humbled and amazed that their little cookbook had become such a sensation.
The cookbook also caught the attention of New York publishing giant Doubleday and Company, who wanted to republish it under their “Art of ” cookbook series. And so The Art of Greek Cookery was born in 1963.
Containing a wealth of recipes ranging from appetizers to desserts, this cookbook also contained information on Greek wines, traditional feast days, customs, suggested menus, and a lovely forward by the then pastor, Father George Papadeas. To say that he was not only proud but impressed by the hard work and determination of these women was an understatement. Just by reading the forward, the preface, and the introduction of this cookbook, you can tell that so much love and good cheer was behind this project. 100% of the proceeds from the book sales went into the church construction fund, which provided the congregation with more than enough money to undertake the expansion project. Both the Church and the recipe club are still going strong today.
Interesting recipes include Stuffed Grapevine Leaves, Cocktail Meatballs, Yogurt Dip, Stuffed Mussels, Buttermilk Soup, Chicken with Dill Sauce, Codfish Stew, Chicken Stefado, Roast Lamb with Artichokes, Fresh Ham Macaronada, Moussaka ( 3 versions!), Pastichio (also 3 versions!), Stuffed Cabbage Leaves, Zucchini Souffle, Squash Fritters, Rum Cake a la Grecque, Ravani, Butter Cookies, Halvah, Caramel Custard, Eggplant Preserves and Quince Puree.
8. Madhur Jaffrey – A Taste of India (1986)
Long before Madhur Jaffrey (b. 1933) became a culinary icon, she was a wife, and a mom, and an actress living in New York City. A strong sense of nostalgia and a desire to share some of her heritage foods with her American friends led Madhur to communicate with her mother via letters about the recipes she missed most from her homeland of India. For 15 years, the two women corresponded back and forth. That communication via mail led to Madhur’s first cookbook, An Invitation to Indian Cooking published in 1973.
Next, Madhur was off on a seven-year East Asian culinary adventure visiting Japan. Thailand, Indonesia, the Philippines, Korea, and her own homeland of India to collect and record authentic vegetarian recipes from those cultures. The result of all that travel was a second cookbook published in 1981, Madhur Jaffrey’s World of the East Vegetarian Cooking.
By the time A Taste of India, her fifth cookbook was published in 1986, Madhur’s culinary reputation for outstanding authentic Indian cuisine was firmly established. Exploring India’s diverse food customs and heritage, complete with a plethora of travel photographs, A Taste of India reads as much like a visitor’s guide as it does a recipe book, giving home cooks the chance to fully immerse themselves in the history and culture of fourteen distinct regions throughout India.
Madhur was not a new face to the shop this year but A Taste Of India was, and it was so insightful regarding both the visual and practical art of food in India, that it’s included this year as a true heritage companion to Indian cooking.
A photo from A Taste of India
Interwoven with family stories, atmospheric memories from Madhur’s childhood and historical context surrounding each recipe, this cookbook was packed with fascinating information about what, how and why Indians eat the way they do and how home cooks could capture the essence of authentic Indian cuisine in their own American kitchens.
Exploring a vast array of different culinary foods, each prepared according to the customs and traditions found in a myriad of diverse topographical locations around the country from mountains to deserts to tropical lowlands and coastal areas, A Taste of India highlighted recipes from Delhi, Punjab, Haryana, Uttar Pradesh, Rajasthan, Madhya Pradesh, Gujarat, Maharashtra, Kashmir, Bengal, Hyderabad, Tamil, Nadu, Karnataka and Kerala.
Interesting recipes included Potatoes Cooked with Ginger, Chickpea Flour Stew with Dumplings, Steamed Savoury Cakes, Walnut Chutney, Kashmiri Spinach, Chicken with Fresh Green Coriander, Fish in Bengali Sauce, Shrimp Cooked with Coconut Milk, Vegetables Cooked with Split Peas, Eggplants with Apple, Rice with Tomatoes and Spinach, Punjabi Black-Eyed Peas and Rice Cooked in Aromatic Broth.
9. Elizabeth Kander – The Settlement Cook Book (1901)
First published in 1901, The Settlement Cook Book was created by Mrs. Simon Kander, aka Elizabeth Black Kander (1858-1940) to help give immigrant families, mostly of Jewish descent, a proper start in America as they relocated from Eastern Europe to Wisconsin. Lizzie, a college graduate and lifelong community activist taught cooking classes at a social service agency called The Settlement. Helping Milwaukee’s economically challenged immigrant communities, gain valuable skills in the kitchen, The Settlement helped acclimate its new residents to a more modern American way of life.
Containing traditional foods from their homeland (included for comfort) as well as foods popular in America during the turn of the 20th century (included for practicality and social acceptance), Lizzie’s desire was to give all families a successful start in America from the inside out via good food, nutrition, information and sanitary kitchen care.
Part of Wisconsin’s assimilation movement in the early 1900s, Lizzie first published The Settlement Cook Book in 1901, prompted by a fund-raising effort for the Settlement House. A runaway success, it was in continuous print for the next 90 years and became one of the few cookbook brands that accurately tells the story of Jewish American food evolution, eating habits, and appetite preferences over the course of the entire 20th century. Even after Lizzie passed away in 1940, this cookbook continued to make a valuable mark on the culinary landscape.
Interesting recipes from The Settlement Cookbook include Sour Cream Kolatchen, Almond Pretzels, Iced Coffolate, Homemade Vinegar, Matzos Charlotte with Apples, Red Cabbage with Wine, Koenigsberger Klops, White Wine Soup, Eggs a la Tarcat, Apricot Nut Bread, Matzos Sponge Roll, Banana Cake, Potato Chocolate Torte, Cardamon Cookies and a host of fun cocktails.
10. Ann Seranne – The Complete Book of Home Preserving (1955)
A former food editor at Gourmet magazine, a food columnist at the New York Post, and a prolific author, Ann Seranne was the pen name of American cook and writer Margaret Ruth Smith (1913-1988).
On an educational trajectory to become a medical doctor, Margaret instead turned to food science after she was expelled for setting lab cats free during her college years. Writing about food was more in line with her beliefs than animal testing, so when she started developing a keen interest in kitchen science and food chemistry in the 1930s, she adopted the name Ann Seranne as her nom de plume. Twenty-five books later, Ann was a leading expert and trusted resource in the culinary industry.
In 1955, she published The Complete Book of Home Preserving. Leaving no food preservation method untouched, from canning fruits and vegetables to freezing meat to drying herbs and smoking fish, this cookbook was a treasure trove of history, food prep, and recipes ideal for kitchen gardeners, off-grid lifestylers or anyone interested in a self-sustainable food system.
Incredibly thorough as far as information, with recipes included to guide home cooks along the way, Ann offered all sorts of helpful assistance when it came to preparing food now to eat later. From equipment to dos and don’ts to selecting the right packaging and the right containers, no stone was left unturned. Techniques for drying herbs, preserving fish (ie rackling – an ancient Nordic style of fish preservation) and smoking meats included tried and true methods that were utilized in other countries too.
Lauded by food critics, home cooks, and columnists alike, many cookbooks throughout the 20th century focused lightly on canning but Ann’s book became a kitchen bible for self-sustainability.
Interesting recipes from The Complete Book of Home Preserving include Green Tomato Pickles, Cherry Marmalade, Strawberry Rhubarb Jelly, Watermelon Plum Conserve, Carrot Butter, Cantaloupe Orange Jam, Preserved Coconut, French Brandied Fruits, Ginger Root Preserve, White Grapes in Cognac, Canned Baked Beans, Pate, Meat0Vegetable Stew, Crab Soup and Gumbo,. Canned Spiced Salmon, Artichoke Relish, Hot Dog Relish, Apple Chutney, Pickled Blueberries, Apple Ketchup, Smoked Country Sausage, Corned Beef, Dried Apples, and Velva Fruit.
Photo of Ann Seranne (left) in her kitchen courtesy of The Hamilton Spectator Dec. 11, 1968
I hope you found this list of cooks and their books just as interesting as I did. And that it not only piques your interest in learning more about the women included here but also inspires your own cooking journey and all the possibilities that await. You never know where a good recipe might lead.
Cheers to Maura, Savella, Fu, Jane, Elizabeth, Sarah, the ladies of St. Paul’s Church, Madhur, Anne, and Ann for sharing their kitchen journeys via books and recipes. Our modern-day meals would not be as delicious without your contributions. And cheers to all the millions of women around the globe who continue to cook, feed, create, dream, innovate, and inspire the culinary landscape of history, day in and day out, year after year. Because of your too often under-appreciated and overlooked cooking endeavors, we thrive.
On August 28th, 1963, Martin Luther King Jr. delivered his I Have a Dream speech in Washington D.C. Four decades earlier in 1921, a southern domestic cook named Malindy Walker, locally known as Aunt Malindy, delivered her own inspiring words in Fayetteville, Arkansas. Unlike MLK Jr., Malindy’s words weren’t spoken on a national stage, nor did they reach thousands of admirers. Malindy’s platform was her kitchen and her audience was just a handful of people involved in the publishing industry. But like Martin Luther King Jr., Malindy’s words managed to change the status quo when it came to equality in the kitchen. And she did it with food.
Malindy Walker aka “Aunt Malindy.” Photo courtesy of Good Housekeeping, January 1921
As a longtime domestic cook for the family of Rena Buchanan Shore Duncan, Malindy’s reputation for good cooking was well-known in the Fayetteville, Arkansas area. Featured in the January 1921 issue of Good Housekeeping magazine, in an article written by Rena, Malindy shared cooking secrets for some of her best-loved recipes including Corn Dodger, Southern Chocolate Cake, Fried Chicken, and Buttermilk Biscuits. Enhancing the article was a portrait of Malindy herself, looking confidently at the camera.
At the time, it was unusual for magazines to feature African-American cooks, especially with a portrait included. When Good Housekeeping suggested photographing Malindy at home in her cabin, she said absolutely not. She wanted to be photographed portrait-style just like all the other white cooks had been photographed in previous issues. Malindy was proud of her recipes and she wanted to be treated no differently than any other good cook regardless of her gender or ethnicity.
Good Housekeeping granted Malindy’s request and her portrait was featured front and center in a two-page spread surrounded by her best recipes. I found this little snippet of a story to be so inspiring on several different fronts. First, there was Malindy’s insistence on being treated like everyone else. Second, there was the magazine’s recognition and approval of her request. And third, there were the recipes themselves – examples of beloved southern foods perfected by an African American woman who represented a large swath of kitchen workers that all too often received little to no recognition for their own contributions to the American culinary landscape. In celebration of Martin Luther King Day, we are celebrating Malindy Walker and her courage to dream for an equal place in the kitchen.
This insistence surrounding a specific photography setup might seem like a small win in the big fight for equal rights, but Malindy’s request did set a tone for how she wanted to be viewed and respected. And it made an impact. So much so that the editorial team noted the story surrounding Malindy’s photograph in the article, forever recording in print, her desire for equal treatment.
Apart from the handful of recipes included in the article and bits and pieces of information learned in census records and newspaper archives, details about Malindy’s life are vague. It was believed that she was between 80 and 90 years old when her portrait was taken for the magazine. On her death certificate, her date of birth along with her parent’s names is simply marked unknown. But at the time of her death in 1931, she was rumored to be over 100. She was married and then widowed. At the time the article was published, Malindy lived in the Spout Spring area of Fayetteville. This neighborhood, also referred to as Tin Cup, was established following the American Civil War by formerly enslaved African Americans.
A view of South Fayetteville circa 1890. the Tin Cup neighborhood where Malindy lived is unseen but located just below the rolling hill in the foreground. Photo courtesy of FayettevilleHistory.com
There are so many facets of Malindy’s life that raise curiosity and questions including interest in understanding her own possible enslavement story, her loyalty to Rena’s family, her cooking journey, and whether or not she had children of her own.
Rena Buchanan Shore Duncan (1887-1978)
Following the publication of the Good Housekeeping article, Rena went on to write more about Malindy in future pieces for the Saturday Evening Post in which she received praise for writing in the dialect in which Malindy spoke. Although at the time, this style of storytelling made Rena’s writing popular, her stories would be considered offensive and insensitive today. That makes Malindy’s recipes and the publication of them alongside her portrait all the more important. They mark her place in time, in the world, and in history during a century that saw so much change in the lives of African Americans living in the South.
In that spirit, I’m so pleased to share Malindy’s antique recipe for buttermilk biscuits. Spend any amount of time below the Mason-Dixon line – a day, a week, a lifetime – and you’ll quickly learn that each homemade batch of biscuits has its own way of coming together. All Southerners have their own unique take on what the best biscuit is made of and Malindy was no different. Some recipes call for lard, others call for butter. Some contain a small amount of buttermilk and a large amount of baking powder or a large amount of milk and a small amount of baking soda. There’s yeast, no yeast, double rise, no-knead, flavored, plain, dense, doughy, puffed, pillowy, and light-as-a-feather varieties that come in all shapes and sizes.
Malindy’s recipe features a small amount of lard, several cups of flour, a pint of buttermilk, and equal amounts of baking powder and baking soda. Although so many home cooks in the south attest to the fact that lard makes a better biscuit, I substituted butter in place of it in this recipe since it calls for so little fat. I wouldn’t be doing much cooking with lard post-recipe, so it would it seem like a waste to buy an entire package of lard just to use two tablespoons. Other than that I made Malindy’s recipe exactly as she suggested and the biscuits turned out beautifully, with a satisfying crunch on the outside and a soft, flaky texture on the inside. Depending on the size of your biscuit cutter, this recipe makes up to two dozen biscuits, which can be stored in the fridge for up to a week and reheated for five minutes in the oven at 350 degrees. Malindy recommended always serving them hot, and I would totally agree, as their composition becomes more dense when they are cold.
Malindy Walker’s Buttermilk Biscuit Recipe circa 1921
4 1/2 cups flour
1 teaspoon baking powder
1 teaspoon baking soda
1 1/2 teaspoon salt
2 tablespoons lard (or butter)
1 pint buttermilk (two cups)
Sift the flour, baking powder, baking soda, and salt together. Mix the lard or butter in well and add the buttermilk.
Knead until very smooth, roll to a half inch in thickness and bake about 15 minutes in a hot oven (450 -475 degrees).
Best when enjoyed straight from the oven, the top and bottom of the biscuits have a nice crunch to them, like toast, but the inside is flaky and pulls apart in lovely little layers. If you are interested in a complete Southern experience, you could serve these with a side of gravy and thinly sliced ham or pile them high on a platter and serve them for breakfast alongside bacon and eggs smothered in cheese. I recommend serving them with butter and jam or a drizzle of honey. On a cold winter’s day, paired with a cup of coffee or tea, it’s a little meal unto itself.
When Malindy passed away in January 1931, her obituary was printed in the St. Louis Argus. In it, they referred to Malindy as a “famous character” and it was noted that she was buried in the “white cemetery” in Rena’s family plot. Tracing African American lineage in the South is such a challenging endeavor when you know few facts about a person. I think that is what makes Malindy’s story so fascinating though. There were actually quite a few details recorded about her life including a portrait of her and information that provided insight into her character. Her love of cooking reached people far beyond her own kitchen and became the tool that helped her feel empowered enough to stand up for herself and what she deemed fair treatment. It would be wonderful to uncover more information about Malindy’s long life, so I’ll keep researching her throughout the year and share any new news I find with an update on this post. In the meantime, we have her biscuits.
Cheers to Malindy for sharing her best recipe and for standing up for equality in the face of marginalization. Martin Luther King Jr. was born just two years before Malindy died, but had he known her in his lifetime, I bet he would have been so proud of her.
Thousands of lives spend time in our kitchens. Every day, every week, every year. Even if your living situation is made up of just one or two people, dozens more move about your cooking space, unseen, whispering stories of history and heritage, of comfort and cooking secrets, of design and innovation, of hopes and dreams. I’m not talking about ghosts here, although maybe if you are an old home dweller you have a few of those too, but I am talking about the neverending inspiration brought forth by generations of cooks, inventors, gardeners, and artisans from years past that have made your kitchen and your cooking experience what it is today.
Hello and Happy New Year! There are so many exciting stories to share this year here on the blog, spanning centuries of history gathered from around the globe, that I can’t wait to get started. As the old adage goes, we have to look back in order to go forward, so despite challenging events occurring in the world on what feels like an overwhelming scale, this year, here in the Vintage Kitchen we are doubling down on sharing good stories about good cooks, making vintage recipes that provide comfort, connection and community, and highlighting moments from history that embrace the joyful celebration of food, friends, family and flowers. This inspiration to pack the year full of joy is thanks to an unlikely source who set the tone for the year on Day 1 of 2025.
Just as the sun was rising over our cold and frosty New England landscape on New Year’s Day, Liz, our seven-year-old potted lemon tree, presented her first, fully formed, sunshine-yellow Meyer lemon in four years. A major feat considering the many trials Liz has faced during much of her life, this gift of a sizeable, perfectly formed, perfectly ripe lemon was just the kind of joyful symbolism needed to set the Vintage Kitchen on the path to positivity and optimism heading into the new year.
Since she first became part of our plant family, I’ve written quite a bit about the life of Liz and the problems she’s encountered, but if you are new to the blog, here’s a quick recap. In 2018, Liz was a young sprout new to the world…
Fast forward a year later and Liz was happily growing bigger and more beautiful by the month, living the metropolitan city life in a sunny window down South. Her first harvest produced not one lemon, but three.
A year later in the spring of 2020, Liz suffered major wind damage from a tornado that blew through town not only breaking apart dozens of buildings in our neighborhood but also breaking a portion of Liz’s main branch and ripping apart 2/3rds of her underground root structure. She survived the ordeal, but just barely…
Not long after, she had a scale outbreak and just after that, she embarked on a South to North move that introduced her to an entirely new climate. By the time she landed in New England in 2022, Liz was looking pretty beleaguered.
Once the greenhouse was constructed in April of that same year, Liz was the first resident to call it home. Even though she was just a mere whisper of a tree at that point, my fingers were crossed that the warmth and the sun and the bright light, plus additional food and fertilizer, would be just the combination of care that she needed.
It took two full years and staying put in the same spot in the same pot, but Liz finally found her footing again thanks to the security of the greenhouse. Now measuring in at over 32″ inches in height, she’s made a substantial comeback.
She might not be back up to 2019 shrub-like status yet, but as you can see, she’s on her way to a full recovery. Over the course of last year, she flowered and formed baby lemons but none stayed on the vine long enough to grow weight and promise. Except two. A raccoon grabbed one of the lemons for a late-night snack but the other we watched grow bigger all summer as Liz herself grew bigger with larger leaves and longer branches. When the winter frost warnings came in late October, I brought Liz inside for the extra warmth and over the Christmas holidays, she rewarded us with clusters of citrus-scented flowers and the slowly ripening lemon.
After watching it turn from lime green to chartreuse to citron and then yellow, last Sunday, in a moment of long-anticipated celebration, I clipped this lovely little fruit from its branch and said a big thank you to Liz.
It takes a long time for a lemon to ripen on the vine. Liz in her entire seven-year life span so far has only brought five lemons to maturity. But the fruit isn’t really the joy of her, nor the point of this story. In the beginning, when she was a young sprout, I may have imagined future lemons by the boxful, but over the course of Liz’s life so far, the thing that I have come to love most about her is her resilience. Her continual attempt to reach towards the light. To keep going, keep growing despite difficulties and disasters. Emily Dickinson wrote the lines… hope is the thing with feathers… but in our case, here in the Vintage Kitchen hope is the tree with lemons.
2025 has started off on a global scale with dramatic, traumatic events – more than we can comprehend these days given the quick succession in which they’ve been happening. While we witness and recognize all these upsetting situations and process them right alongside you, here in the Vintage Kitchen in this new year, we are determined to look beyond the day-to-day news cycles and stresses, and focus our attention on cultivating and creating a space that brings joy, insight and interest to cooks around the globe via culinary storytelling. Following Liz’s lead, I hope the blog this year provides comfort, encouragement and positivity for anyone who needs an extra boost of cheer in the face of challenging times.
Throughout 2025, you’ll find more frequent posts surrounding topics our kitchen community likes most – cooking, collecting, history and gardening. We’ll share recipes and links, highlight favorites of all kinds, recommend good books and new techniques and dive into stories about people and artifacts from the past that have influenced how we approach life in the present. Here are some of the regular subjects we’ll be sharing more of on the blog this year…
The Greenhouse Diaries
The Greenhouse Diaries return with a new vintage gardening book serving as inspiration and instruction for the next 12 months. Poor Leonie and Helen didn’t get as much attention last year in the Fragrant Year series as Katharine Sergeant Angell White did in the first year. I ran into all sorts of troubles with the practicalities of building a scented garden month-by-month, mostly on the ordering and acquisition sides. In the festivity of the series, we were working out a collaboration with a national grower, which in the end didn’t wind up working out at all. As we learned, most growers won’t ship any plants to our neck of the woods before late spring or after early autumn in order to ensure a successful growing experience. That left a very slim window of attempting to add in a year’s worth of plantings in just a few months. This year, we’ve changed direction, revised the garden map, and are working with more achievable goals. I can’t wait to share the new plans and the vintage book that helped inspire it.
Vintage Recipes
It’s setting up to be a delicious year here on the blog with a big batch of vintage recipes that will be rolling out in more seasonable fashion. Throughout the year, we’ll also continue with new posts in the ongoing International Vintage Recipe Tour (year six!) and the Quick Cooking Chronicles.
To ease into 2025, after the hustle and bustle of holiday cooking, we are kicking off the first culinary adventure today with an easy uncomplicated classic – a vintage British recipe for a simple banana bread. The recipe comes from the 1987 edition of The Afternoon Tea Book by Michael Smith. In addition to being one of England’s most well-known food historians and an experienced cook himself, Michael was referred to as “the doyen of English cookery” by the New York Times.
Michael Smith
The recipe, simply titled Banana Bread, is soft and sweet and manages to achieve that perfect balance between banana and spice. Ready within an hour, it comes out of the oven the color of chestnuts with a consistency that is smooth and springy in the cutting thanks to the addition of both cream and butter. Enjoyable any time of day, it makes a great breakfast treat or an afternoon snack. And of course, Michael recommends pairing it with a warm cup of tea.
Heirloom Kitchen Stories
Since the blog and the shop work in tandem, you’ll find heirloom kitchen stories in both spots. But the shop tells shorter stories on a more frequent basis (daily) and the blog tells more long-form stories on an intermittent basis (weekly or bi-weekly) so whichever appeals to you, you’ll have one or both to enjoy. Some of our most favorite, most memorable stories turn out to be the humble, relatable ones about everyday home cooks and the recipes, books, and heirlooms that have been a part of their personal culinary journey. Thanks to information shared by a few families around the US in 2024, we have several new personal cooking stories to highlight this winter. One is an exotic love story wrapped around this book…
Another surrounds this 1940s Hamilton Beach milkshake machine…
1930s-woman-mixing-flour-in-bowl
and another introduces us to this mid-20th-century cook whose culinary journey took her from Kansas to California with a collection of recipes in tow…
Other bits of fun culinary history floating around the shop this winter include stories about a beloved 1970s Greenwich Village restauranteur…
the ancestry of a 1950s West Indian cookbook…
and the life of a famous New York City celebrity hotspot that first opened in 1927…
That of course is just the start. There will literally be hundreds more stories to share in the shop and dozens more to share on the blog throughout the year all highlighting little-known or forgotten people, places, and foods from the past.
1750 House & Garden Updates
This year 1750 House turns 275 years old. We are doing our best to get all the renovations completed before the end of the year so that we can throw a big party to celebrate this big birthday. As projects get finalized over the year, I’ll share updates on the progress we’ve been making since we first arrived in 2022, including new information on the genealogy of the house dating all the way back to the 18th century.
It’s a big year with a lot on the agenda and most likely a few surprises tucked in between the topics listed above. We can’t predict how the world will change in 2025, but we can say that at least here in the Vintage Kitchen, these next twelve months will keep you well-fed and blissfully in touch with stories that focus on kindness, joy and positivity by way of the kitchen. Before, I sign off, I just wanted to note one more thing…
A Note on AI and Our Promise To You
In light of all the current discussion surrounding AI, while it might be influential and important in some areas of modern life, there is no room for it in our storytelling in the Vintage Kitchen shop or on the blog. Last year we had some personal experience with the darker sides of it. I hesitated sharing this information then simply because it was a disheartening situation and definitely did not do anything to improve our creative endeavors, but it ties into my promise to you now, so I’ll share a brief version of what happened for context and clarity going forward.
In April 2021, two big boxes arrived by mail from Europe carrying our first order of French market bags for the shop. I was so excited to include these bags in the shop, not only because I had personally used and adored the same exact bag for many years and could well attest for its competency, but also because I couldn’t wait for other people to experience the bag’s effortless ease and style. Once the bags were all unpacked, in preparation for the photoshoot, I shopped at the farmers market, selecting items that I typically purchased and carried in my own market bag during personal shopping trips in order to illustrate the capabilities of the tote.
Early spring herbs, vegetables, wine, and bread were all gathered from the market for the shoot. When it came to the flowers, initially, I had my heart set on grabbing a couple of bouquets from a vendor who sold locally grown ranunculus in this gorgeous color palette of pink, peach, and coral. But the ranunculus weren’t available at the market that day, so the next best choice was a bouquet of pale purple-pink peonies. With all the market foods and flowers set and styled in place, I photographed the bags from all angles, both empty and filled to the brim with the farmer’s market items so that shoppers could see it in all its various situations as market bag, beach tote, picnic basket and all around shoulder bag. Here’s a sampling from the shoot…
On May 2, 2021, the bags launched in the shop in an air of excitement and joie de vivre. I was so excited to see that our ITVK shoppers found the bags to be equally as useful and they became a lovely staple in the shop. Unfortunately, sometime in late 2023, I was alerted to the fact that my market bag photographs were showing up in other retail places online. The photos were copied from our website, without our permission, and used online to sell similar products by other retailers on other sites. Throughout 2024, my photos popped up on Etsy, Amazon, Faire, Pinterest and a slew of independent shops all selling the same style bag. These are some examples of where they are currently being used by other retailers as of January 2025…
We’ve tried our best to eradicate as many as possible, and many retailers did take them down from their sites at our request, but for all the ones that were removed more kept popping up. All this turned into a very time-consuming endeavor, which in and of itself is a whole other frustrating story for another day.
I wanted to share this information, not to highlight this disappointing act of copyright infringement but to highlight the Wild West atmosphere that AI generates in our current marketplace. This copying of our photographs was not the fault of AI, just lazy sellers and bad business practices, but someone recently mentioned to me that a food photograph I had taken just a few weeks ago was so nicely arranged that it looked fake. Like something AI would have generated.
In telling you all this I just wanted to let you know that we do not, nor will we ever in the future incorporate AI into the Vintage Kitchen when it comes to writing or photography. You can rest assured that everything from the photos we take, to the stories we tell, to the heirlooms we sell are all 100% authentic. They are real items, photographed and written about by real people, that reflect real history.
That’s our promise to you as a shop and my promise to you as a writer and a photographer. All of our heirloom origin stories and blog posts are highly researched – sometimes for days or weeks at a time, and we consult only trusted archives and institutions that have been collecting verified information for decades or even centuries. The kitchen is too full of unique stories, intimate details, and interesting perspectives to leave it up to bots to try to decipher personal human experiences in any meaningful way.
That means periodically you might see a typo, or a misused comma, or an impassioned thought that ran away with proper sentence structure. Even though those writing missteps might not be correct grammatically, we’ll sometimes leave them in the final edit. That’s how you’ll know these posts and our shop stories were written by humans for humans. Here in the Vintage Kitchen, we are not fearful of AI, we just love people and history too much to leave compelling real-life storytelling up to machines who have never fried an egg or baked a cake or curated a collection of favorite objects in the pursuit of personal passion and joy.
Now that that is out of the way, a whole new year of exciting discoveries await here in the Vintage Kitchen. I’m so glad you are here to join us in what I think is the best little community on the internet. Thank you so much for being a part of it.
Cheers to the new year, and to Liz Lemon for being the bright light that leads the way in 2025.
In 2008, Kim Sunee published a memoir called Trail of Crumbs. It’s the captivating true story about the first 28 years of her life as she moves in the world from being a three-year-old toddler abandoned by her mother in a Korean marketplace to being the adopted daughter of an American family living in New Orleans to becoming an independent, international traveler wandering the world in search of home and self.
I discovered Trail of Crumbs just this fall and found it so interesting that I included it in my list of favorite books to recommed for 2024. Full of compelling questions about cultural identity, the long-term effects of abandonment, and the universal desire to find a place that naturally feels like home, Kim’s memoir is full of luck, loss and the awkawrdness of becoming your true self. The recommended book list post has a much more in-depth review of Kim’s journey, so if you’d like to learn more about the book catch up here first.
In addition to sharing her coming-of-age story, Kim also includes a collection of recipes peppered throughout Trail of Crumbs that represent her international identity. Korean Kimchi Soup, Swedish Potato Temptation, French Fry Po-Boys with Horseradish Creme Fraiche, Croque-Madame Sandwiches, Whispery Eggs with Crabmeat and Herbs, Peaches Poached in Lillet Blanc and Lemon Verbena are just a few examples. In her book, food, acts like a second storyteller defining the way in which Kim moves about the world. These recipes are her confidence, her calling card and also her comfort blanket.
I tagged about ten different recipes in Kim’s book that I can’t wait to try. Given the winter weather, the merry season, the busy time of year when easy dinners are appreciated, and the larger crowds that come to the table for holiday celebrations, I thought it would be ideal to highlight her recipe for Chicken Thighs with Cinnamon and Dates. It’s easy to make, feeds up to eight people and fills the kitchen with tantalizing aromas.
This chicken recipe with its fruit and its spices appears in the middle of the book when Kim is living in France and is involved in a passionate love affair with the French founder of a well-known cosmetics company. Just like the recipe itself, this European romance is sweet, tender, and stuffed full of exotic appeal but it’s also very complex with lots of moving parts, outside influences and Kim’s own internal stops and starts. It winds up defining her life in ways she couldn’t have anticipated. This love affair is central to the whole entire book, so in case you haven’t already read Trail of Crumbs, I won’t say anything more so as not to spoil the story for you. Instead, we’ll begin our own little romance with this lovely recipe. Let’s get to cooking.
An easy, spice-infused one-pot meal that slow simmers for an hour and a half, Chicken Thighs with Cinnamon and Dates is a cozy and colorful recipe perfectly paired for the wind-chilled winter months. With its aromatic combination of oranges, onions, cinnamon, cumin, ginger, cilantro, paprika and garlic plus two proteins, it is a flavorful ensemble fit for a feast. Once the onions start swimming in the olive oil and the spices are incorporated one by one, the kitchen warms with the scent of holiday cooking. Similar to a wonderful recipe my mom used to make when I was growing up, one that she simply called Israeli Chicken, Kim’s recipe is a savory blend of Middle Eastern and North African flavors punctuated with a bit of Indian spice. For added convienence and a bit of trans-continental flair, in addition to cooking it in the oven, this recipe can also be made in a tagine or in a large pot on the stovetop slow simmered over medium heat.
Before we dive into the recipe, just a quick note. I followed Kim’s ingredient list exactly as written with the exception of a few minor substitutions based on local availability. I used skin-on chicken thighs in place of skinless and purple raisins in place of golden. I used a locally made spicy Italian pork sausage, and Dole brand whole pitted dates. In the last step, just before the chicken heads into the oven, I used homemade chicken broth. Other than that, this recipe was made as is, and it came together beautifully. Here, I’ve posted Kim’s original recipe as published in her book so that you’ll have the first-hand ingredient list that she intended.
Chicken Thighs with Cinnamon and Dates
from Trail of Crumbs by Kim Sunee
serves 6-8
1 teaspoon olive oil
2 sausage links (such as Merguez, spicy Italian pork, or lamb) about 1/2 lb.
6-8 skinless chicken thighs
1 1/4 teaspoonssalt, divided
3/4 teaspoon fresh-ground black pepper
1 large onion, thinly sliced
3 garlic cloves, smashed and coarsely chopped
1 tablespoon fresh grated ginger
1 teaspoon ground cinnamon
1/2 teaspoon ground cumin
1/2 teaspoon hot paprika
1 1/2 cups low-sodium chicken broth or water
1/2 cup fresh orange juice
1/3 cup golden raisins or currants
2-3 carrots cut lengthwise and halved on the bias
1 large orange cut into eight wedges
12 to 15 dates (preferable Medjool) pitted or 12 to 15 large prunes, pitted
2 to 3 tablespoons chopped fresh cilantro
Garnish of fresh cilantro, toasted almonds, or pine nuts
Heat olive oil over medium-high heat in a large ovenproof pan or Dutch oven. Cut sausage links in halves or thirds, depending on length, remove casings if desired. Add sausage and chicken to pot in one layer. Sprinkle with half of the salt and pepper. Let cook about 5 minutes. Turn meat over, season with remaining salt and pepper and cook 5 more minutes. Remove chicken to a plate.
Add onion to pot (if brown bits are stuck to bottom, add about 1 tablespoon white wine, water or orange juice, scraping to loosen bits) and let cook about 5 minutes.
Add garlic, ginger cinnamon, cumin and paprika. Stir and let cook about three minutes.
Add chicken broth and orange juice, raisins and carrots and stir. Place chicken and sausage back in pot. Add orange wedges and dates.
Stir, cover and bake at 350 degrees for about 1 hour and 30 minutes or until chicken and carrots are fork tender. Taste sauce and adjust seasoning as needed. Top with cilantro and serve.
Kim recommended serving this dish with hot buttered couscous, but since it was so saucy I served it with a batch of plain white rice flavored with just a pinch of salt. Warm and hearty, there was something new and delicious to discover in every bite. The dates took on the flavor of the orange juice. The garlic found its way to the raisins and formed little pockets of savory sweet pillows. The carrots were tender but not mushy. The onions and spices soaked into the chicken, which fell off the bone at the slightest nudge of the fork. All of it was lovely and very delicious.
I’d highly recommend this recipe for both everyday dining as well as special occasion dinner party fare. Its vibrant color palette, layered flavors and long cooking time offer plenty of opportunity to set a pretty table, socialize with friends and family, or read a few chapters from Kim’s book while you wait for it to finish.
If you have a small household and think six to eight chicken thighs is too much, make them all anyway. This recipe lasts in the fridge for several days so you’ll have leftovers. Like any good casserole, curry or homemade sauce, it only gets better the longer it sits.
Cheers to Kim for sharing her story and this wonderful recipe. Hope you love it just as much.
To learn more about Kim Sunee and her cookbooks visit her website here.
When December comes around every year, I always love compiling the book list. This month marks the end of 2024, and also the start of the wintertime reading season with the release of the annual Vintage Kitchen recommended book list. Blog stories were a bit sparse this year due to many unanticipated factors, but I’m happy to say that they haven’t hindered this annual tradition of posting a collection of favorite books discovered throughout the year.
If you are a long-time reader of the blog, you already know that these lists are made up of books that were serendipitously found over the course of the year while doing research for Vintage Kitchen blog posts, shop stories and recipes. Every year, they cover a range of subject matters and time periods, and span a range of publication dates from new releases to books written decades or even centuries ago. As an avid reader, averaging about 30 books a year, I save the most beloved ones for this list. The ones that left an indelible mark, or sparked some new inspiration, or offered a different perspective on a subject matter already familiar. These are the books I couldn’t put down. The ones that I still continue to think about long after the last page is read.
This year’s selection is varied in content but they do have an underlying connective theme of gratitude and appreciation. There’s a book about nature, a book about a summer vacation house, and a book about American life lived three hundred years ago. Three of the books this year are memoirs, one book contains recipes, and unlike last year’s list, all five of these books are non-fiction. They tell bittersweet stories of friendship, of being present in time and place, of establishing traditions, and of searching for meaning in everyday life. These five take us around the world from coastal Massachusetts to New Orleans to New York City to Paris, Stockholm, South America, and to our own backyards. One book even helped solve a mystery about the floorboards of 1750 House. Interesting adventures await on all fronts.
Let’s look…
To The New Owners – Madeleine Blais (2017)
A love story to summer. To family. To a seasonal beach house on the shore of Martha’s Vineyard. To the New Owners is one long anticipated string of summer sequels highlighting vacation life spent in coastal Massachusetts. Written by Pulitzer prize-winning journalist Madeleine Blais, who married into the enigmatic and literary Katezenbach family, this memoir starts off with news that the beloved beach house, the family vacation compound for five decades, is going up for sale.
You might suspect with a topic like this that what could follow is a sappy cliche. A backward look at a family home where frivolity, relaxation, and low expectations were the driving force behind each summer. A book chock-full of events and experiences only interesting to the people who actually experienced it. That’s not the case here.
While there is certainly sentimentality and a true loyalty to the land and its residents, both seasonal and year-round, this memoir reads like an engaging conversation shared over a lengthy dinner party. It is full of quirky characters, funny stories, interesting history, and an undying love of the written word.
From record-keeping log books to island newspaper articles to Madeleine’s own accounts of house repairs, family dinners, environmental changes, historical events, and all the people and pups that marked their time on the island, this is a memoir of Martha’s Vineyard not from the glitzy, multi-million dollar mansion perspective, although there is mention of that too, but from a rowdy, vivacious, thrifty, unpretentious contemporary family viewpoint. The type of living that represents the true spirit of the island and its origins. And in the case of the Katezenbach family, a lifestyle that respected the power of words over the power of the pocketbook.
Gay Head Cliffs – Moshup Public Beach – Martha’s Vineyard – Boston – USA.
When she first shows up to the Vineyard, Madeleine doesn’t exactly know what to expect. She knows nothing of the island, or the people she’s going to stay with, or the type of lifestyle that requires a summer residence and a winter residence. But she does have an imagination. And what she pictures in her mind on the way to her first visit to the summer house is not the almost dilapidated shack that she encounters. Rustic is what her husband called it, a far cry from the multi-million dollar estates that dot much of the M.V. coastline. Intrigued by the island’s humble roots and the glamour it was later associated with, Madeleine explores the history of the island, her new family, and the literary-loving community that it reflected all through the lens of the summer house.
Martha’s Vineyard in the 1800s
Funny, wise, poetic, and relatable whether you’ve ever had the experience of summer beach house living or not, Madeleine’s memoir is about love, loyalty, nature, pride of place, and acceptance of what is, as it is. A look at an island that boasts extremes from all directions including wealth, prestige, celebrity, notoriety, and eccentricity, but also sandy kitchen floors, wet dogs, leaky roofs, fishless-fishing trips, thwarted dinner invitations, spectacular sunsets, faulty wiring, stunning beaches and the whole mess with the nearby pond that affected everybody.
At the heart of the story are the log books – the fortuitously started notebooks that hold random journal entries of all the small, everyday details that make up life at the beach house for fifty summers. Sporadic and eclectic, with contributions by family members and visiting guests, the log books were available to anyone staying at the house who wanted to note something, anything. The first log book started what would become a tradition and then ultimately a treasure trove of notes and musings on recipes, house improvements, weather, linguistic games, family health, poems, housecleaning tips, recommended book lists, pet antics, children’s drawings, island events, and conversational interactions with town locals. No one particularly thought that the first log book was going to turn into something special, but when it was full and there were no pages left to record anything else, another book was ordered and filled again, and over and over it went for five decades.
Having that kind of family detail available helped Madeleine paint such an intimate look at life on Martha’s Vineyard that by book’s end you’ll feel like a local yourself. What’s particularly lovely is how everyone truly appreciated the house, the parcel of land it sat on, and the exposure to nature that it provided them. Across all the fifty years, any one guest, family member or otherwise, who couldn’t appreciate this slice of paradise or didn’t see the charm of it all wasn’t invited back the following year. So the summer house became a club-like haven of love and joy and appreciation and fulfillment even on the leaky roof and the fishless fishing trip days. It chronicled the years of a couple’s marriage and embraced the outpouring of their offspring. It sheltered three generations, countless friends, family pets, and invited guests. And then the inevitable happened. Life changed. And with it, the bittersweet goodbye to fifty years of what once was.
Grief Is For People – Sloane Crosley (2024)
Just as there are many stages of grief there are many things in the world to grieve. In this book, Sloane Crosley grieves two real-life events simultaneously… the suicide of her best friend and the theft of family jewelry from her NYC apartment. Both incidences occurred within 30 days of each other. Both were a shock to the system. And both left Sloane at a loss confronting major thoughts and feelings about each situation.
You might suspect that the death of her dear friend would take precedence over the theft of jewelry she inherited from a grandmother that no one really liked, but Sloane is an incredible storyteller and manages to give equal emotional weight to both scenarios while also offering an interesting behind the scenes look at the publishing industry that she and her friend were very much a part of for over two decades.
Grief Is For People is, yes, a book about grieving but it’s also a memoir of a specific time period in Sloane’s publishing career, a portrait of a friendship, a writer’s coming-of-age in the big city of New York, and the emotional value of inherited objects. It’s humorous and insightful, smart and sincere. It’s full of grit and determination to right the wrong of burglary while also bravely sorting through what it means to love, rely on, appreciate, and remember someone who was here one minute and gone the next.
Sloane shares this story in a captivating timeline of events. So as not to spoil the pacing, I won’t say anymore other than that if you are new to Sloane Crosley and her work, I’d also highly recommend her 2008 book of essays I Was Told There’d Be Cake.
The Comfort of Crows – Margaret Renkl (2023)
Stop and look. Those are the first three words of Margaret Renkl’s ruminations on nature and her year-long accounting of it in The Comfort of Crows. Written from the vantage point of her backyard in Nashville, TN and a friend’s nearby vacation cabin in the mountains, Margaret writes about the sights and sounds of nature witnessed firsthand over the course of a calendar year. In brief vignettes accompanied by her brother’s beautiful illustrations, Margaret draws attention to common occurrences happening with the birds and the squirrels, the trees and the bees, the plants and the pollinators, week by week, while also reflecting on her own life and the parallels these natural encounters draw.
Part nature study, part memoir, part call to action, I would recommend The Comfort of Crows to anyone who wants to unplug from the outside world for a weekend, a week, a month, a year. If you need a break from social media, the news, the what-ifs, and the how-to’s, this book is easy to fall into. Calming, thought-provoking, and comforting, it offers a gentle reminder that in nature there’s a plan, a purpose, and a resourcefulness that is indefatigable, adaptable, and inspiring.
Stop and look. Stop and listen. Stop. Look. Listen. See. Hear. These are simple words that yield powerful insight into the dramas, destinies, and determinations going on in everyday life around us. Whether it’s the backyard, the city park, the country meadow, the forest, the beach, or the planting strip in the parking lot of your local grocery store, there’s insight to be gained from the creatures that inhabit these parcels of place.
Starting on Week One, the first of January, Margaret shares in her lovely, poetic voice how nothing is actually dead even in the dead of winter. “Everything that waits is also preparing itself to move,” she notes. “The brown bud is waiting for its true self to unfold: a beginning that in sleep has already begun.”
I can’t really describe this book as anything other than an experience. It’s heartwarming and serene, playful and curious, sentimental and sad. It is fun facts and first-hand observations. It’s a love letter to what is and a longing to change what might become. It’s a book. It’s short stories. It’s prose and it’s poetry.
Conscious of global warming and human impact on the natural world, Margaret is hopeful that we can right the ship and learn how to cohabitate with plants and trees, insects, and animals in order to encourage a beneficial landscape for all instead of just some. In acknowledging that we have collective work to do in that regard, this book carries its own bittersweet narrative – an appreciation of what is here now but a realization that it might it not be here in the same way tomorrow. That viewpoint automatically sets the tone for awareness which is the overall theme of Margaret’s year. To be aware of one’s natural surroundings. To be aware of what is in one’s natural surroundings. To be aware of the wild in the world. It’s that recognition that Margaret hopes will propel you out into the greenspaces of your life. To look and to see. To hear and to help. All, so that we can continue to hope.
Trail of Crumbs – Kim Sunee (2008)
Abandoned in a Korean marketplace when she was three years old, Trail of Crumbs follows the real-life of Kim Sunee from toddlerhood through her late twenties via place, people, and passion. Adopted into a well-meaning American family and taken to live in New Orleans, Kim’s presence in the world from the beginning never quite clicks. Seesawing between feelings of gratitude and abandonment, she grows up out of place as an Asian American in the Deep South. Carrying the emotional baggage of a person who has been left behind, Kim is too young to put words to her lost person emotions.
As a child, the only place she finds real comfort is in her grandfather’s kitchen, watching him and helping him cook an array of Southern specialties. This early introduction to the internal power of food becomes Kim’s barometer, her measurement of what feels right and wrong in her life, of what is fitting and falling apart around her. Cooking becomes the bridge that connects her with a cast of characters that come in and out of her life, leading her around the globe over twenty years in search of the definition of home, both internal and external.
With every new person she meets, every new relationship she begins, her life pivots. She makes friends with artists and writers. She teaches English classes to foreign children. She writes poetry. She translates business brochures. She runs a bookshop. All the while searching for her true self.
In all these people, all these places, all these jobs, Kim tries to move on from being left behind. She tries to make peace with her past and the mother who left her on a bench in a market with just a fistful of crackers. She goes to Paris. To Sweden. To South America. She eats, drinks, and cooks in new kitchens of new friends, new lovers, new neighbors. In France, she meets and falls in love with a high-profile businessman who is determined to give her everything she ever wanted. For a time, this romance is ideal. A fairy tale in the making with affable rom-com pacing. She’s finally met someone who is ready to unclasp her fingers from the tight grip that carries her emotional suitcases. He wants to give her everything she never had. A fresh start. A new life. Her own making.
But as much as they love each other, and as passionate as their relationship is, it’s also fraught with complications. Kim questions this knight-in-shining-armor and her worthiness of him. She wears the invisible letter L for leaveable like a badge that defines her. And in believing that she’s leaveable she can’t ever truly stay anywhere. That creates a restlessness that no amount of kindness, no amount of money, no amount of love, or attention, or security can cure until she learns to love herself for herself.
Along with this search for peace and family, Kim’s memoir is dotted with recipes throughout, each one representing a different aspect of her physical and emotional journey from childhood to adulthood. There are recipes that reflect her Korean heritage, her Southern upbringing, and her love of French food. There are recipes for snacks, comfort foods, fancy dinner parties and elegant desserts. Each one, a place marker of her growth and development. They represent comfort in times of unease and joy in times of safety and security. There are so many truly lovely-sounding recipes in Kim’s book that I practically tagged each and every one. In the next blog post, we’ll be delving into one of her recipes from Trail of Crumbs – Chicken Thighs with Cinnamon and Dates – which appears about halfway through her story when she’s in the middle of her French love affair. Stay tuned for that post coming shortly.
The Writer’s Guide to Everyday Life in Colonial America from 1607-1783 – Dale Taylor (1997)
This is pretty niche reading, and I realize not everyone may be as curious about colonial life as we are here at 1750 House, but this book provides so much interesting, little-known information on domesticity in the 17th and 18th centuries, it will appeal to history lovers of all sorts on all levels. Covering architecture, clothing, occupations, gender roles, homekeeping, agriculture, professions, education, religion, and government, I came to this book initially interested in reading the chapter on architecture in hopes of learning some new information about 1750 House, but the whole book turned out to be captivating and I flew right through it.
Brimming with all sorts of very fun fun facts, historical interpreter Dale Taylor wrote this book specifically for writers so that they would have an accurate understanding of the all details that made up real life in the colonial era. With that audience in mind, Dale includes an array of anecdotes that help bring history alive in a relatable way. It’s also a great resource when solving floorboard mysteries.
Wide plank floors upstairs
Upstairs in 1750 House, the original wide plank wood floorboards which are made of solid 3″ inch thick chestnut, measure between 9.5″-15″ inches in width per board. But downstairs, the wood floors are much narrower in width, about 3.5″ inches on average.
Narrow-width floorboards downstairs
This has always led to curious conversations about why the floorboards aren’t the same on each floor. We suspected that the downstairs floors were replaced at some point later in time, possibly in the mid-1800s when the kitchen room was added. But come to find out, according to Dale, in colonial days, wide plank boards were less expensive to mill, so they were often used for flooring in the more private rooms of the house, which tended to be on the second floor or at the back of the house on the first floor. The narrow-width floorboards were laid in the front of the house on the first floor in the parlor rooms. These narrow boards acted as a status symbol letting visitors know that the family who lived there could afford such luxury. In the case of 1750 House in particular, this newly learned information makes a lot of sense.
Not long after we moved in, we learned about the architectural significance of the front door, which is also original to the house. In the photo below, you’ll notice four small windows that are built in at the top of the door. During the colonial era, that was another bit of luxury – to be able to afford glass in your front door. The panes not only allowed extra light to illuminate the interior but there was also religious symbolism attached to them too. Religious colonists believed that by installing windows at the top of the door, it allowed God a peek down from the heavens to make sure there was nothing improper going on indoors. Just like the original H-Hinges found throughout, it’s another little bit of unique symbolism that lives here. And thanks to Dale’s book, it now gives us a better understanding of the economic status of the original owners of the house.
Windows on the original front door c. 1750
Architecture notes aside, other types of fun facts that can be found in Dale’s book include these little marvels…
Pets during the colonial era included dogs and cats, but not birds. Birds would not be kept animals until the Victorian era. However, squirrels and deer were also common pets in colonial days and the deer were allowed free reign both inside and outside the house.
Bearskin rugs were the first indoor fire alarms. In the 17th and 18th centuries, they were laid out in front of the fireplace in case an errant ember flew or a log rolled out into the room. At night, after the household had gone to bed, if an ember sparked or a log rolled out, the rug was the first point of contact. It would begin to smolder, emitting the smell of burnt hair. That smell would awaken people in the house and signal that there was a fire near the fireplace which could be easily and quickly be put out because of the rug.
25% of women’s deaths in colonial days were due to life-threatening burns caused by cooking in an open fireplace. That led women to start hoisting up their skirts and tucking them into the waistband of their dresses in order to avoid catching the hems on fire. From that point forward, the kitchen was viewed as an indecent place to spend time and the staff that worked in them were viewed as having low repute.
Since cloth was one of the costliest items in colonial America dresses were made to last for 15 years which means that some women owned only about 2-3 dresses in their lifetime.
Wigs were commonplace for men and women in colonial times, but the super tall and lofty wigs were only worn by women in big cities like Philadelphia. These wigs were so elaborate in design, style, and augmentation that they were often worn even at night while sleeping. This full-time, overnight headress necessitated arrangement in such a way to accommodate mouse traps since they were made of natural nesting materials.
In 1752, the celebration of the new year was moved from March 25th to January 1st, which of course, has stayed the same ever since.
Reading is so subjective when it comes to personal preference. Everyone has their own favorite styles, writers, and genres, but I hope by sharing my list of favorites, you’ll discover some new favorite ones too. Stay tuned for a recipe I just made from Kim Sunee’s memoir coming up next on the blog. It’s an aromatic, cozy, wintertime dinner that is absolutely lovely for the holidays. Here’s a sneak peek…
Chicken Thighs with Cinnamon and Dates from A Trail of Crumbs by Kim Sunee
Until then, happy reading! And a big cheers to Madeleine, Sloane, Kim, Margaret, and Dale for making 2024 such an interesting one.