Adelaida from Mexico & Her Lasting Impact on America {Plus Two of Her Recipes!}

Adelaida Cuellar photographed in 1901 with three of her children. photo courtesy of D Magazine.

In 1892, two young lovers crossed the border from Mexico into the United States and got married in Texas. They spoke no English but were very fluent in the language of love. They were dreamers yearning for better opportunities then their home country could provide, and they were determined to work hard to create a beautiful life that would bring them all  they desired.

The newlywed years of Macurio and Adelaida Cuellar led them through a myriad of jobs on ranches around the Texas countryside. For five years they moved about before they settled down in Kaufman, Texas, a suburb of Dallas, where Macurio started sharecropping and Adelaida started a family. As the seasons passed, their family grew, eventually producing twelve babies.

This is an unidentified farm photo from the Cuellar collection. It may have been the farm where Adelaida and Macurio raised their family. If not, it gives an interesting perspective on what farm life looks like in Texas during the time Adelaida and Macurio lived and worked there.  Image courtesy of the University of North Texas Digital library.

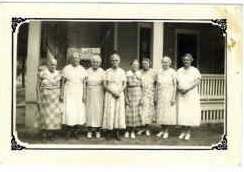
Ranch and farm work weren’t the most profitable of jobs, so Adelaida took a stall at the Kaufman County Fairgrounds in 1926 selling two things…  chili and tamales. It was her hope that her homemade recipes, so loved by her family, would bring in a little extra income to help support her children.  To her surprise, the food stand was an instant success.  The profits she made from her entrepreneurial endeavor were much larger than farm or ranch work earnings, so Adelaida kept at it, turning her stall into a tidy little family business.  Some of her children helped her cook while others formed a family band playing Mexican music to entertain the eaters.

During the 1920’s, Tex-Mex cuisine was a new style of cooking that combined traditional recipes from Mexico and Spain but with toned down spice factors which were more appealing to American palates. Adelaida’s chili and tamales debuted at just the right time – exotic enough for adventurous eaters and flavorful enough without being too spicy to dissuade repeat business. With every taste of tamale and every cup of chili, Adelaida’s reputation for preparing delicious Mexican food began growing.

Adelaida’s Cafe – simply called Cuellar Cafe – opened in  1928.  Image courtesy of the University of North Texas Digital library.

In her mid-fifties, Adelaida opened her own restaurant which did well until the Great Depression hit and she was forced to close due to the terrible economy.  Each of her grown boys inspired by their mother’s own entrepreneurial spirit opened their own independent Mexican restaurants in different cities throughout Texas, Oklahoma and Louisiana using the recipes that Adelaida made for them growing up.

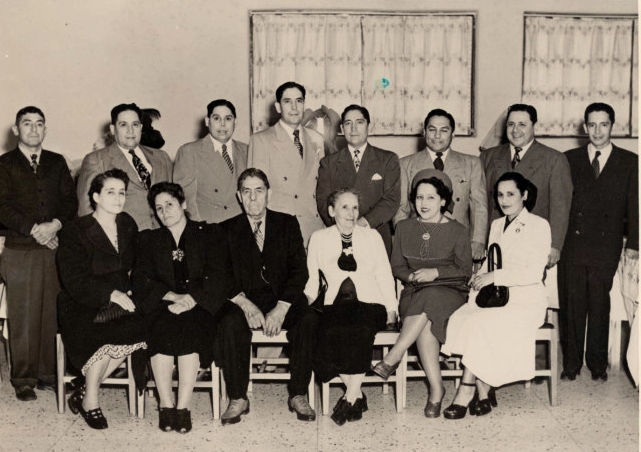
Each of the sons, enamored with cooking just like their mom, quickly realized there was something missing from their independent ventures… family love and support. From the beginning, in the county fairground days, the Cuellar family was successful at the tamale and chili stand because they all worked together towards one common goal. But now the family was spread over many cities, and their restaurants couldn’t be as successful because they all weren’t working together.

This is one of the original porcelain neon signs from the first El Chico restaurant in Dallas. It’s now for sale on ebay here.

So in 1940, five of the brothers banded together to form one restaurant in Dallas, which they named El Chico. The entire family and extended family worked there together, each bringing their own unique talents.

Opening night of El Chico featured a Mariachi band to entertain the crowd. Image courtesy of the University of North Texas Digital library.

Everyone who worked at the restaurant was fluent in Adelaida’s style of perfection when it came to selecting quality ingredients and blending the spice mixtures in the correct way, so the food was authentic and consistent, which kept customers coming back. And the Cuellar family was proud of what they were accomplishing.  At the heart of their restaurant lay the heart of Adelaida and all that she stood for.  Her children wanted to extend that same level of love and devotion with all who dined at El Chico.

A popular dining place indeed! This photo was taken in 1945. Image courtesy of the University of North Texas Digital library.

Just like Adelaida’s chili and tamale stand, El Chico became phenomenally successful, making the Cuellar family and the El Chico brand one of the greatest American success stories. They went on to open more than 40 restaurants throughout the country, built a successful packaged food division for the retail market, and offered franchise opportunities for budding entrepreneurs. By the 1970s, they were the largest full-service Mexican food company in the world. They cooked for United States presidents at the White House, for princess Grace Kelly at her palace in Monaco and entertained movie stars like John Wayne in Dallas. The family stayed together through all these years and all this growth, never veering from what they knew – good food taught to them by Adelaida.

A Cuellar family portrait with Adelaida and Macurio in the front row center. Image courtesy of the University of North Texas Digital library.

Adelaida passed away in 1969 at the age of 97, not before experiencing the overwhelming success of her family and seeing how her humble tamale and chili stand at the Kaufman County fairgrounds grew into a multi-million dollar corporation over the course of forty years. The Cuellar children credit both their mom and their dad with teaching them about the value of working hard (and quickly) toward their goals and the importance of taking chances.

In 1970, El Chico published a small, spiral bound cookbook of some of the family recipes that they used in the restaurant, along with some others collected from their travels. Hailed as one of the most authentic Tex-Mex cookbooks ever published, it’s now a hard-to-find treasure.  It is in fact, so special and represents such an importantand  integral part of the ethnic American food landscape, that it’s held in special collection at the Smithsonian’s National Museum of American History. We are also very pleased to offer a copy in the kitchen shop. 

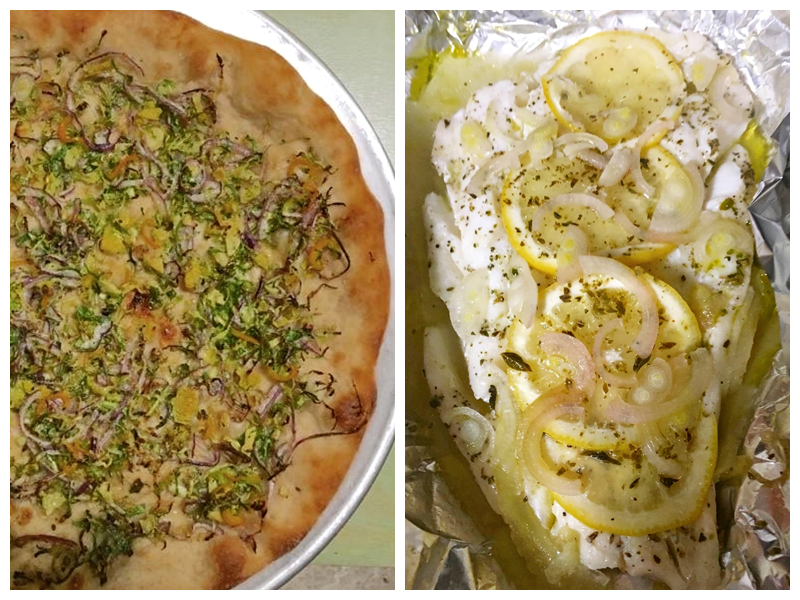
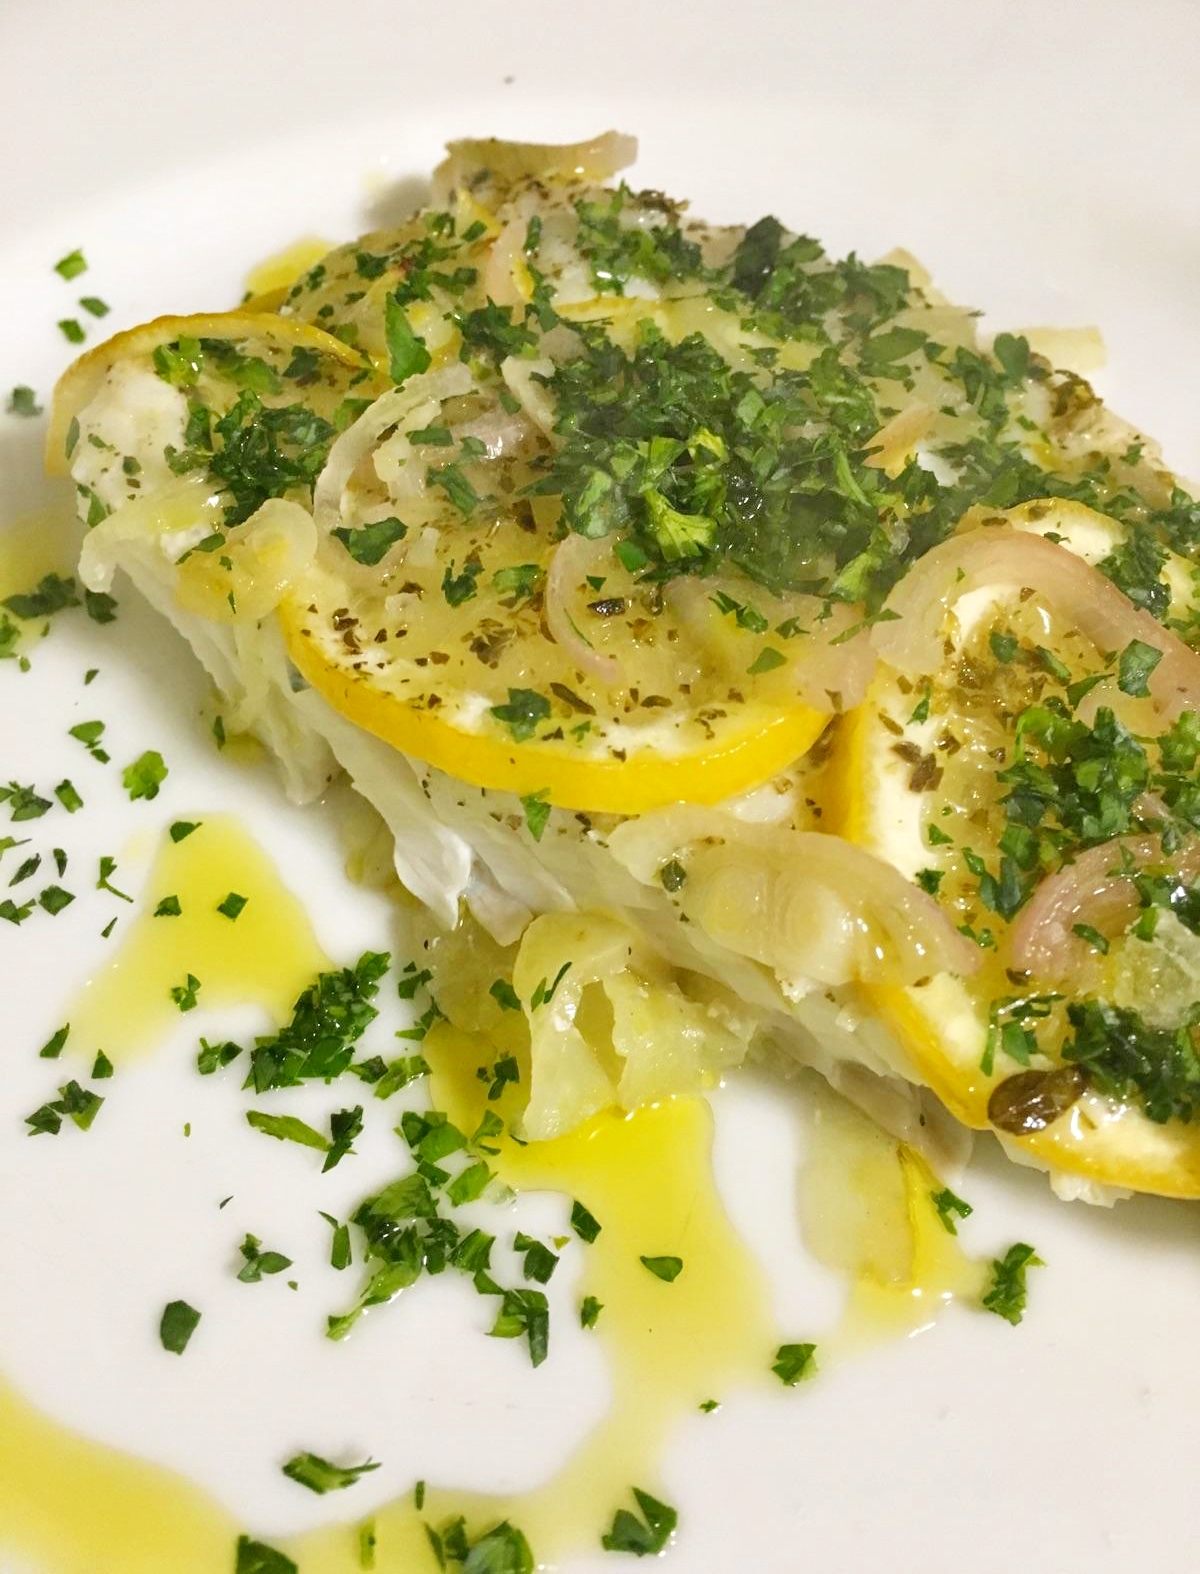
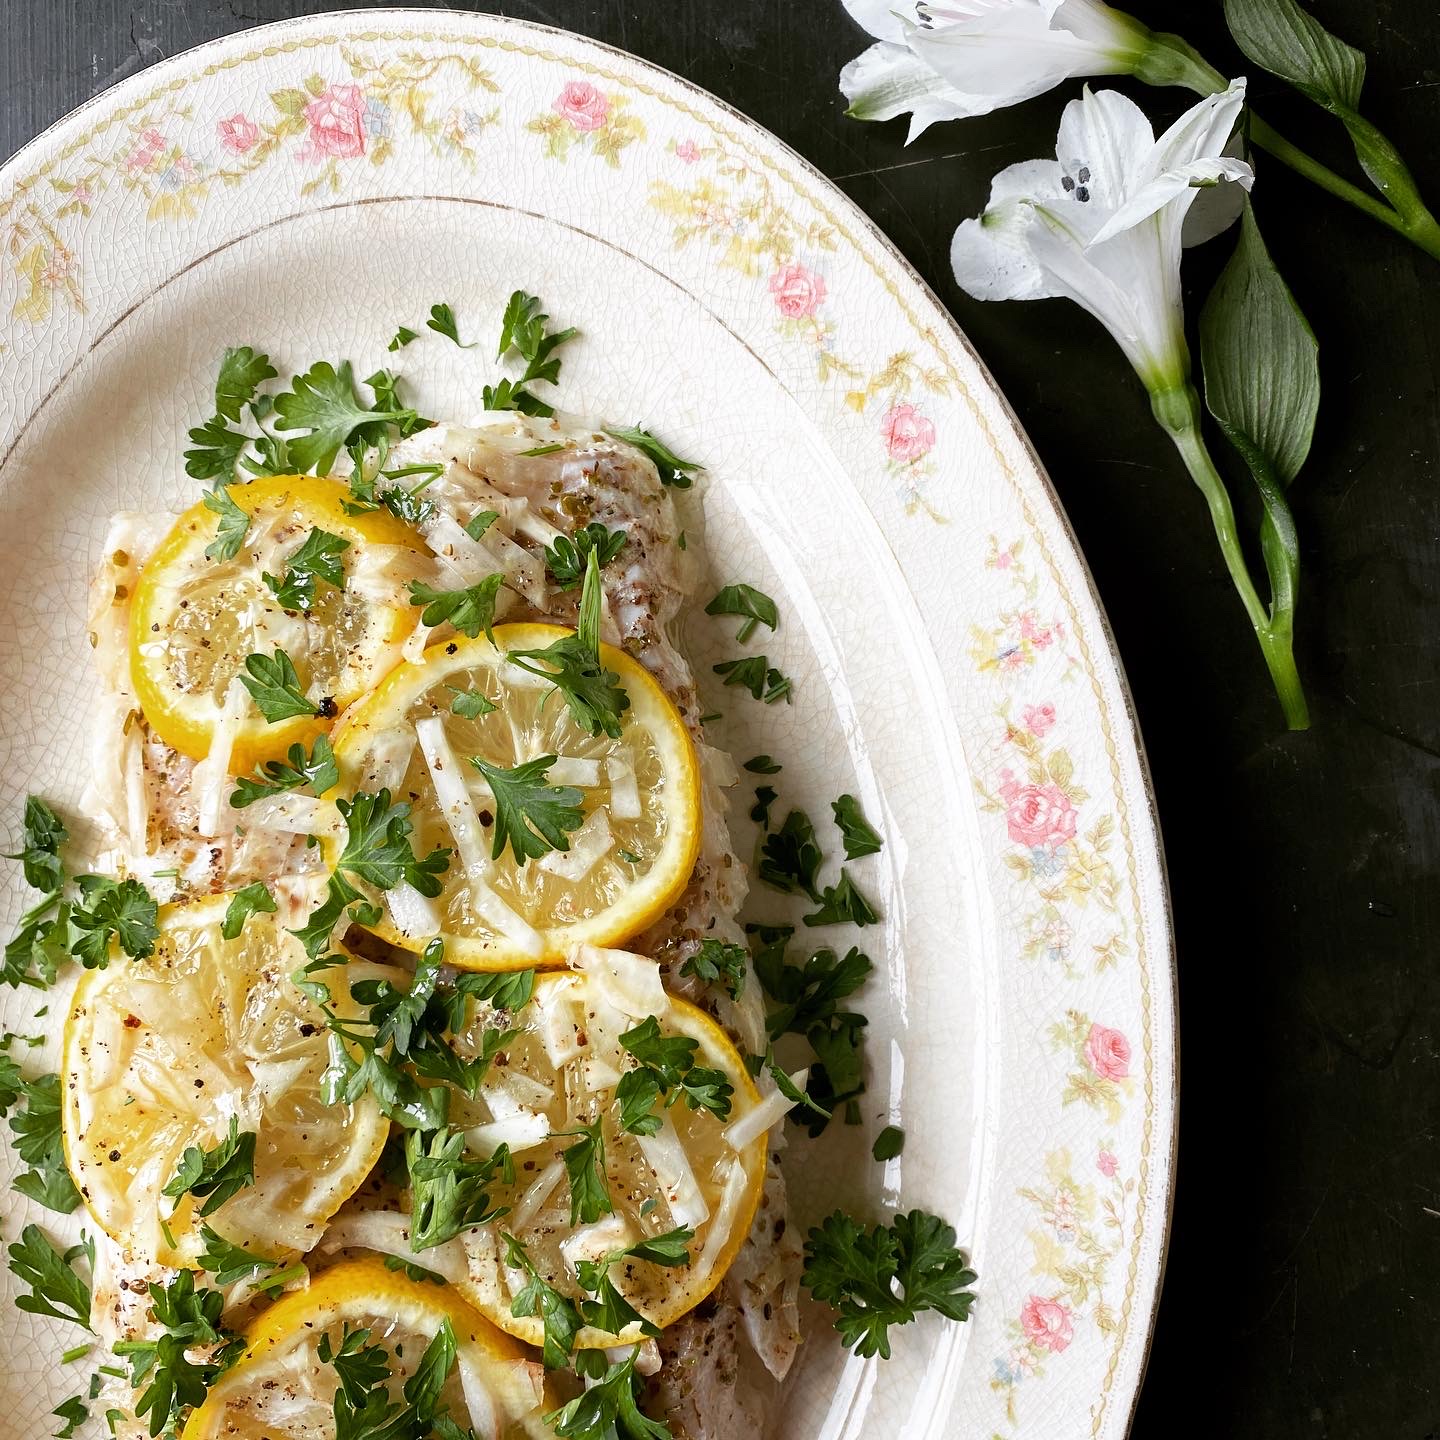
Since Cinco de Mayo is coming up this Saturday, on the same day as the Kentucky Derby, we thought it would fun to highlight two vintage recipes from the El Chico cookbook to ring in the festivities. A general crowdpleaser with a ton of creative toppings, these recipes are fun party foods so whether you are celebrating Mexico or Kentucky, or both this weekend, there will be something edible for everyone.

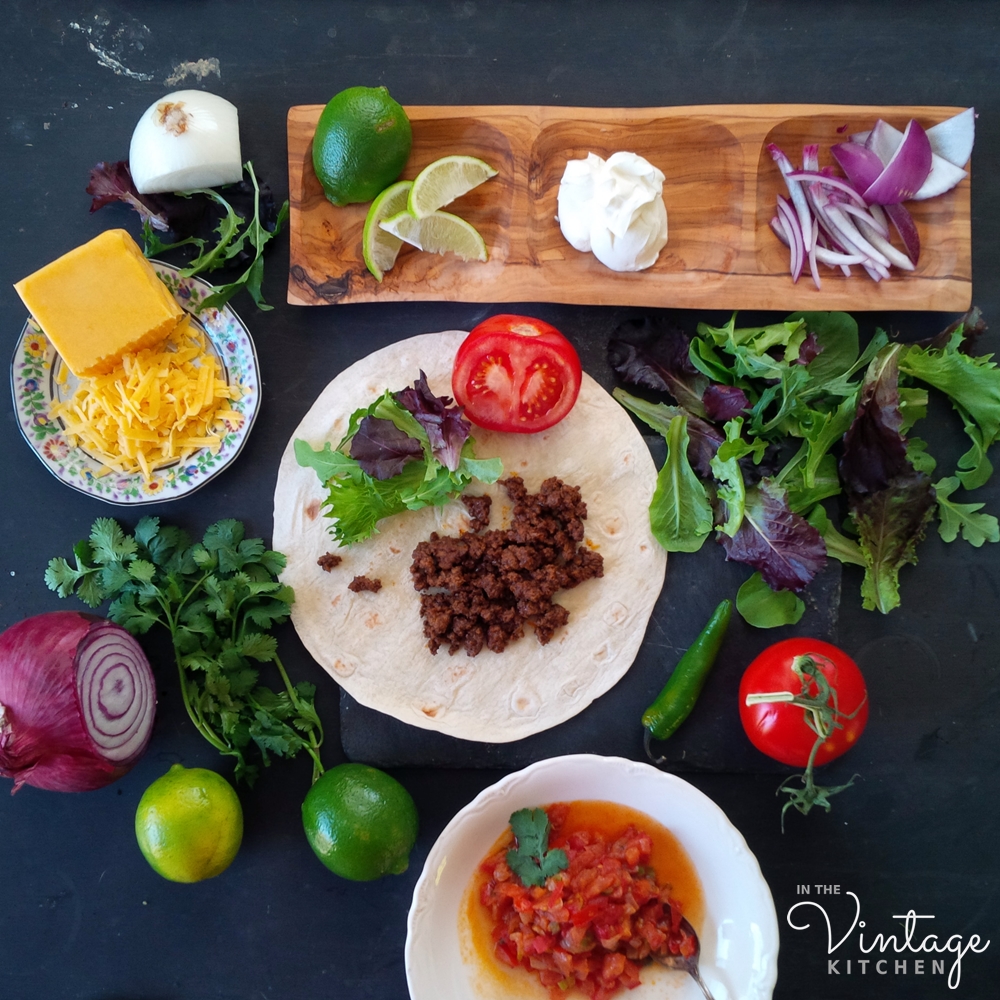
On the menu it’s El Chico’s Homemade Beef Burritos & Ranchera Sauce. Both are really easy to make. You’ll have the whole thing whipped up in under 30 minutes. Each recipe features fresh ingredients with generous amounts of spices, so you can skip buying the taco seasoning packages and the taco sauce at the grocery store. There’s plenty of flavor between the two recipes.  In addition to ground beef, you could also incorporate ground pork, turkey or chicken if you wanted to offer multiple variations.

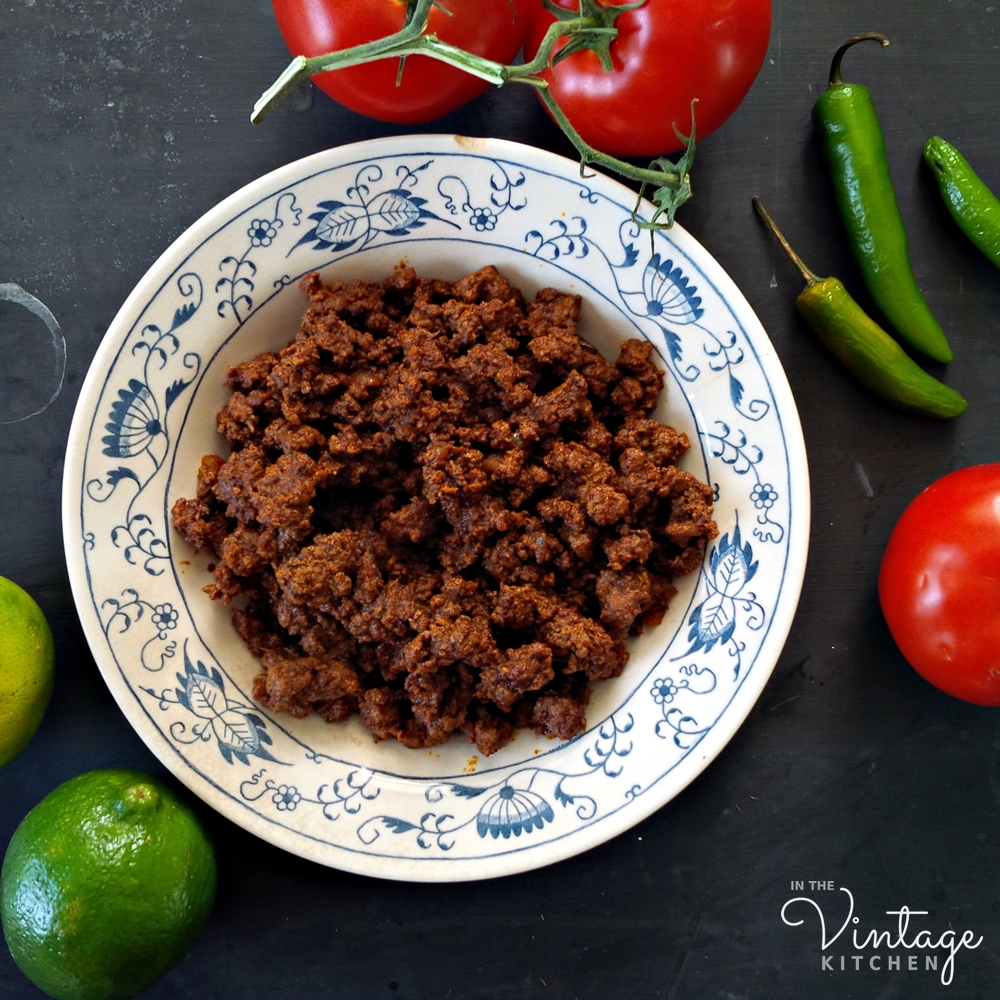
What’s especially great about the Carne Mexicano recipe is that it includes vinegar which gives it a little bit of tang and de-greases the pan all at once so you don’t need a thickening agent like cornstarch or flour which is included in most commercial taco seasoning packets. As with many vintage recipes, we cut down the salt by 2/3rds, so we recommend starting with our measurement first and adding more to taste if you feel it needs it.

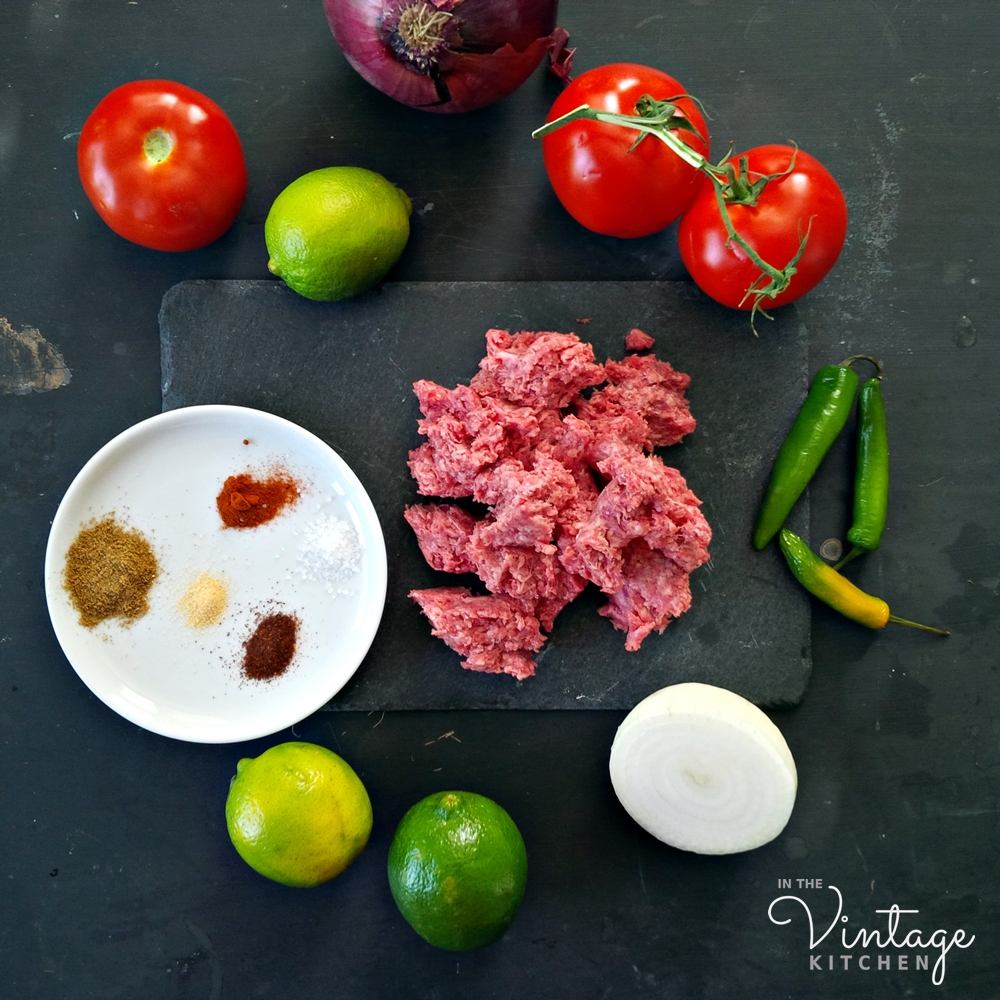
Carne Mexicano for Burritos

2 lbs. ground beef (we used grass-fed beef)

2 tablespoons chili powder

2 tablespoons paprika

2 tablespoons salt (we used only 2 teaspoons)

1 teaspoon garlic powder

1 teaspoon ground cumin

1/2 cup vinegar

1/4 cup chopped onion

In a cast-iron pan over medium-high heat brown the beef and onions until cooked through. Add the spices and cook for 1-2 more minutes. Add the vinegar, scraping the bottom of the pan to deglaze it. Remove from heat and serve immediately or store mixture in a covered dish and keep warm until ready to serve.

El Chico’s Ranchero Sauce (A La Caballero)

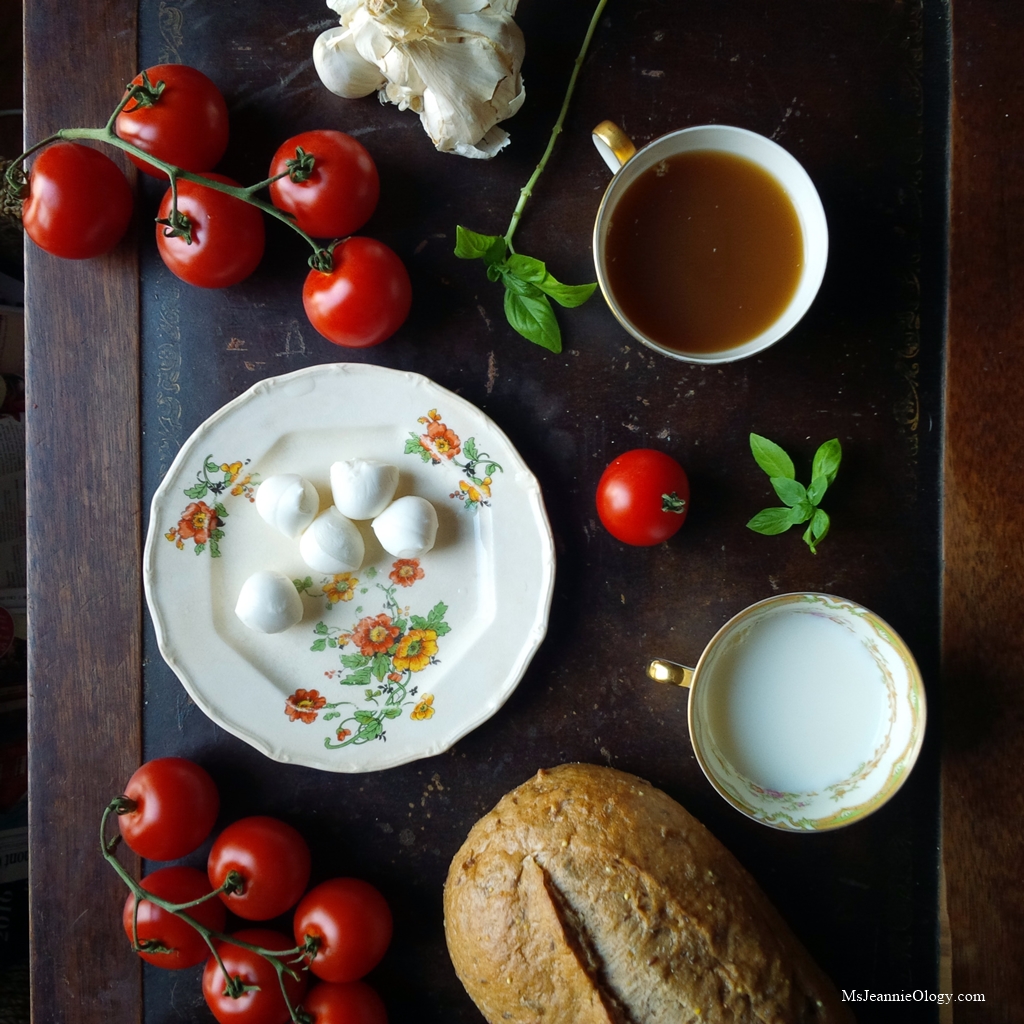
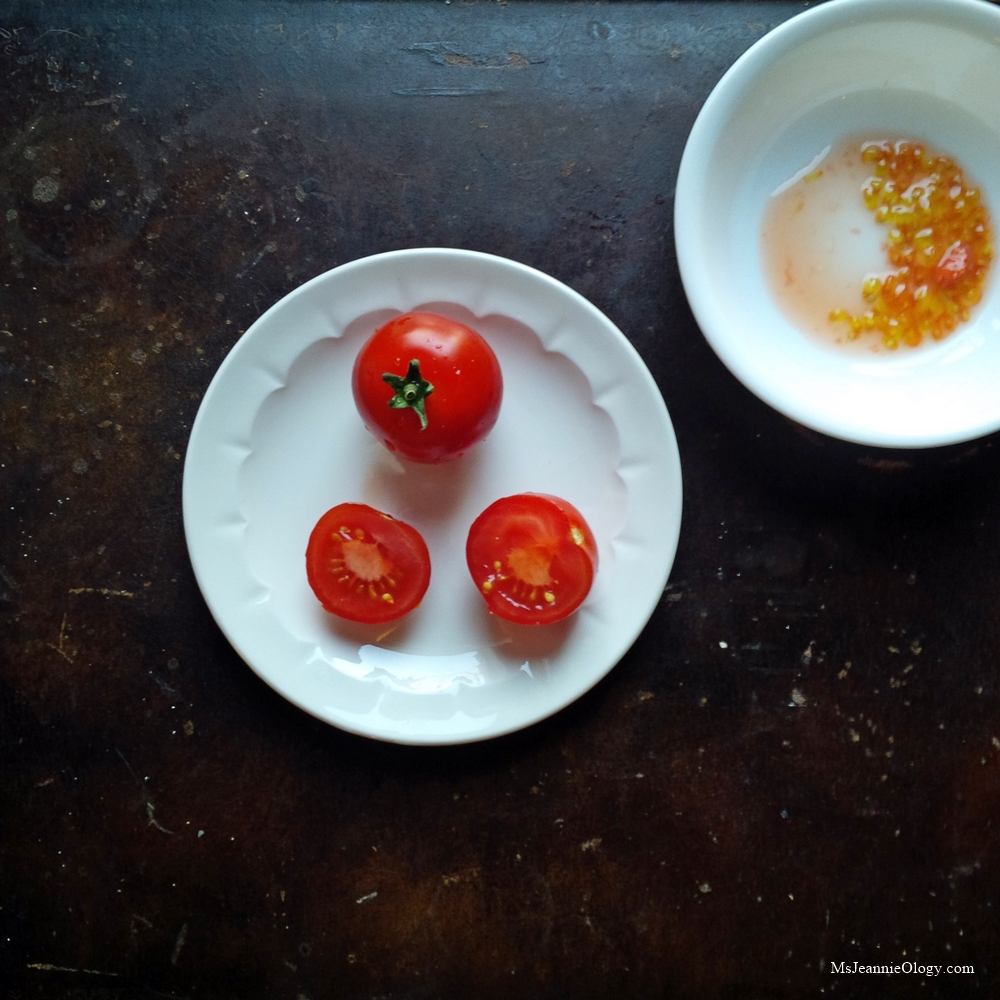
2 cups fresh chopped tomatoes

1/4 cup chopped onions

1/4 cup chopped hot green peppers (we used serrano peppers)

2 tablespoons shortening (we used olive oil)

Salt and Pepper to taste

Saute the onions and peppers in shortening (or olive oil). When the onions are translucent add the tomatoes and simmer over a low fire for five minutes.  Serve it immediately or at room temperature.

Obviously, the hotter your peppers, the spicer your sauce is going to be. This recipe makes about 1/2 cup of sauce so if you are cooking for a crowd you might want to double or triple the recipe. We used serrano peppers which were quite hot so a little bit spooned on top of your Carne Mexicano goes a long way!

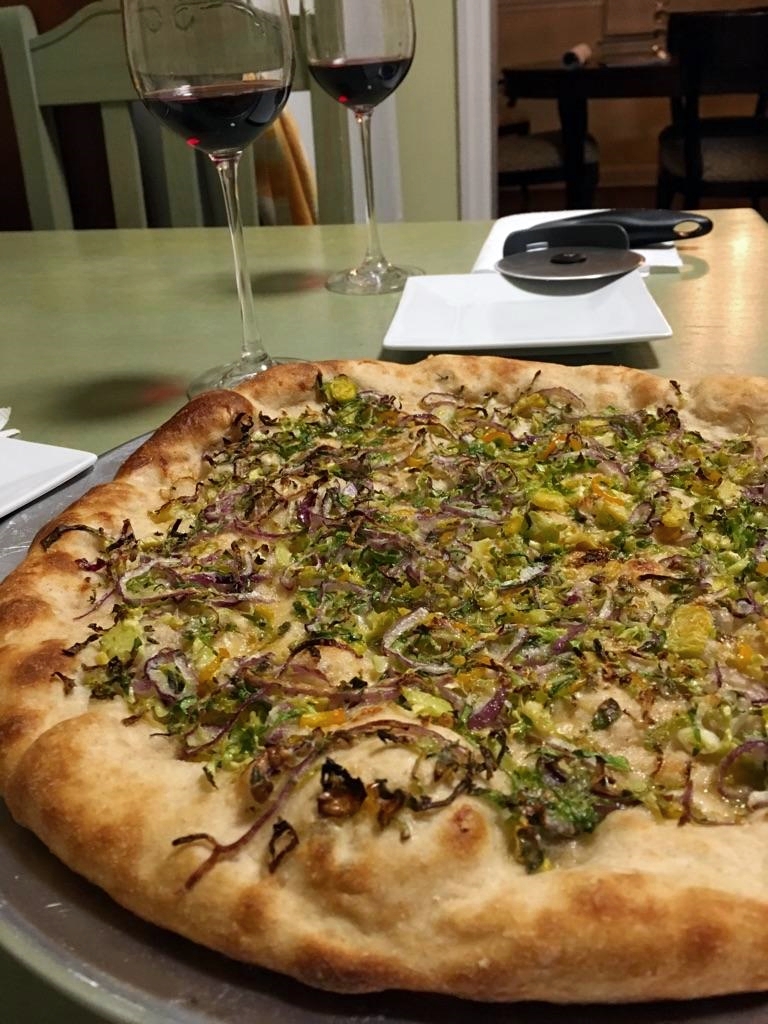
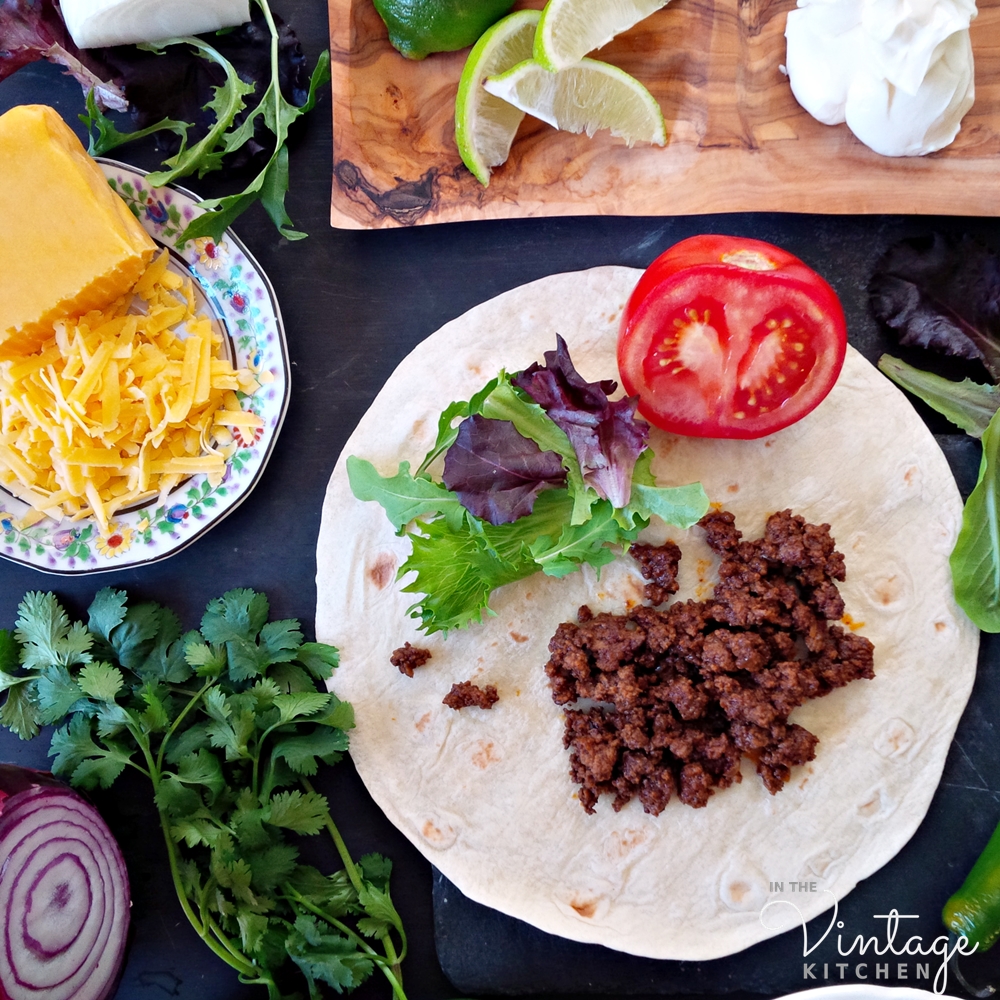
There are so many topping options when it comes to burritos, so your creativity can really shine here based on your preferences.  El Chico suggested that their burritos include only cheese, refried beans, Carne Mexicana and the Ranchero Sauce. But we added a bunch of our favorite toppings too which included sour cream, spring lettuce, red onion, mango, tomato, cilantro, avocado and lime juice.  Other possibilities re guacamole, green olives, rice, etc etc. The sky is the limit. Can your burrito ever really have too much stuff?

Coming up tomorrow on the blog, we’ll be sharing our picks for the Kentucky Derby winner, as well as our table decorations for the Derby Party, which tie together both the Mexican theme and the horse theme. If you are planning a party for either event, we’d love to hear how you are celebrating.

In the meantime, cheers to Adelaida and the Cuellar family for sharing their long-time favorite family recipes with all of us. We will definitely be sending a toast their way on Saturday!

Explore more information about the El Chico cookbook here. And learn more about the restaurant chain, still in operation, here. 

Advertisement

Celebrations Big and Small and Lucky!

Happy Happy St. Patrick’s Day! Welcome to The Vintage Kitchen and the new re-design of the blog! Today is definitely a cause for celebration around here both for the festive holiday and for the bevy of changes occurring around this place.  Nothing says celebration more than a glass of sparkly champagne, so we are kicking off the first official post from The Vintage Kitchen with an old Irish cocktail featuring champagne and Guinness and we are serving up a recipe that stems from this  17th century castle in Ireland…

Adare Manor County Limerick, Ireland

Before we dive into dinner you’ll have noticed that there is a bright new look here on the blog which officially launches The Vintage Kitchen. While Ms. Jeannie is away on her extended travels (read more about that here) everything has been switched over to the Vintage Kitchen including all social media platforms, so if you have followed Ms. Jeannie in the past on pinterest, instagram and twitter you’ll still be connected to the same account – it just has a different user name now. A few more changes will be unfolding here on the blog in the weeks to come including a dedicated spot for correspondence from Ms. Jeannie while she is away. So stay tuned in that department.

The vintage Black Velvet – the spritzer for beer drinkers!

In the meantime, we are popping corks and pouring a rich dark drink that was popular on the British mid-century cocktail scene.  Named the Black Velvet, it is a half and half combination of Guinness beer and extra dry champagne.

guinness_champagnecocktail

The combination of the two flavors tastes like a smooth, creamy, light and airy molasses which is lovely if you fall into the camp of people who think that Guinness is too heavy a beverage on its own.  If you are enjoying this cocktail on the home front and therefore not having it on tap from the pub, you’ll see the fun retro artwork on the Guinness cans. This one features a toucan and is an image snippet from one of their early 20th century advertising campaigns back in the day when everyone thoroughly believed that Guinness was good for you.

This was the whole picture of the original campaign. So cute!

There is no doubt that the interior of Adare Manor has seen it’s fair share of Guinness drinkers. Perhaps visitors have even enjoyed a Black Velvet or two while strolling among the grounds. The country castle that makes up Adare Manor was originally part of the Earls of Dunraven lineage and managed to stay in the family from the 17th century through 1986. When expenses and upkeep got to be too much for family members to shoulder it was sold to a hotelier who turned the former home into a luxurious beacon of upscale tourism.

Like The Vintage Kitchen, Adare Manor is currently undergoing a transformation in the forms of upgrades and remodels, which is why a dinner menu from a former executive chef at this hallowed estate seemed so fitting for the launch of our first official Vintage Kitchen post. From way down in the belly of this beautiful building comes an outside of the box St. Patrick’s Day menu that eliminates the crock-pot and brisket and sets aside the cabbage for a light and lively springtime meal that looks at traditional Irish ingredients in a nontraditional way.

Smoked Salmon and Goat Cheese Roulade with Champagne-Chive Dressing

On the menu tonight it is Smoked Salmon and Goat Cheese Roulade with Spring Greens and a Champagne-Chive Dressing.

Capitalizing on all things seasonal, this recipe is great for this time of year because it features chives, spring lettuce and scallions all which are now in season at the farmers market.  A little note about prep time:  while this recipe is fairly easy to make and contains basic easy-to-find ingredients, the roulade requires seven hours of refrigeration time before cooking so you may want to get this recipe ready in the morning if you want to plan on having it for dinner. That being said, the finished dish is well worth the wait and all that extra fridge time.

We’ll start with the roulade recipe since that takes the most time to prepare…

Smoked Salmon and Goat Cheese Roulade  (serves 6)

2 tablespoons butter

2 large white skinned potatoes, peeled and very thinly sliced

4 ounces goat cheese

4 ounces thinly sliced smoked salmon

In a medium saute pan heat one teaspoon butter over medium heat and saute the potatoes (turning regularly with a fork so they don’t burn) until tender but not browned (about 2-3 minutes).  Note: You’ll see as you are cooking the potatoes that they will go from white to translucent. When you can see your fork tines underneath the potato slice that is when you know they are ready to be removed from the heat.  Place cooked potatoes on a sheet of parchment paper to cool.

Cooked potato slices.

Continue working in batches adding more butter by the teaspoonful when needed until you all potatoes are cooked.

When all the potatoes have cooled to room temperature, lay them out on a new sheet of parchment paper in a square shape with slices slightly overlapping.

Cheese on top of potatoes.

Next add the goat cheese on top of the potatoes – spreading it in a layer all over the potatoes. Note: this is much easier if your goat cheese is also at room temperature. A frosting knife works well for this task or your fingers!

On top of the cheese place the layer of smoked salmon slices.

Salmon on top of cheese.

Using the edge of the parchment paper as a guide, carefully roll up the potato cheese salmon mixture to form a log. Twist the edge of the parchment and stick the whole roll in the fridge for 7 hours.

This is what the roulade roll will look like once you unwrap it from its 7 hour rest in the fridge.

While the roulade is in the fridge, make the dressing for the salad, it can sit for as long as you like before serving…

Champagne Chive Dressing

Champagne Chive Dressing

2 tablespoons champagne

3 tablespoons olive oil

Minced fresh chives to taste

1 scallion, sliced

A pinch of sugar (I used organic cane sugar )

Sea salt and fresh pepper to taste

6 handfuls of mixed baby greens

In a small bowl whisk all the ingredients together except the baby greens. Set aside the dressing and the greens until just before serving the roulades.

After the seven hour rest in the fridge, remove the roulade roll and unwrap it. It should feel very cold and firm. Cut the roulade into one inch thick slices . Heat a saute pan over medium high heat and add a half teaspoon of butter to coat the pan.

Warm up the roulade!

Quickly saute the slices until crisp and bubbling brown on both sides (about 3-4 minutes). Remove the pan from the heat. Toss the dressing with the spring greens and place a handful of salad on each plate. Top with roulade slices and a dash of salt and pepper and serve immediately.

Smoked Salmon and Goat Cheese Roulade with Champagne Chive Dressing

Keep the festive atmosphere going by indulging in a glass of champagne with your dinner and you’ll discover a nice savory sweet pairing of subtle spring flavors here. Both the roulade and the baby greens offer a satisfying crunch but if you’d like to include some fresh crusty bread with your meal that would also be delicious. Next time, you make this you could even experiment with other ingredients like replacing the smoked salmon with thinly shaved corned beef brisket or ham and replacing the goat cheese with blue cheese or baby swiss. The possibility for extra creativity when it comes to this Irish dinner is vast and varied, which makes it endlessly interesting.

Cheers to a most celebratory St. Patrick’s Day night, dear readers! May you laugh as much as you breathe and love as much as you live.


Anna Clellan and the Love Apple Soup circa 1928

Tomato Soup circa 1928

There has been a lot of talk about recipes here on the blog as of late but so many interesting food-related topics have been popping up recently in the historic land of Ms. Jeannie, it seems a shame not to share them. So here we are back in the vintage kitchen with a newly discovered almost 100 year old recipe that came from Ms. Jeannie’s great -great Aunt.   This week’s post takes us to the heartland of America – a middle state where young newlyweds ventured via covered wagon in the the 1860’s and set up life, spreading their roots so deep in the soil they practically built up the foundation of a small township.

Albert, Martha, their children and grandchildren
Albert and Martha (pictured on each side of the flower arrangement)  in Vinton, Iowa surrounded by their children and grandchildren.

We have talked about the Edwards’ family a few times previously on the blog so if you are a regular reader you’ll remember the adventurous Albert and his wife Martha who married in Johnson County, Indiana in 1865 and then immediately (the very next day in fact!) got into a covered wagon and headed west towards a new frontier. Three months later, Albert and Martha settled in Benton County, Iowa in a small town east of Cedar Rapids.

If you are familiar with Little House on the Prairie and are up on your John Travolta movies you’ll know Vinton, Iowa for two reasons. It is where Mary Ingalls  attended the Iowa School for the Blind (also known as the Iowa Braille and Sight Saving School) between 1881-1889 and it is where they filmed many scenes of the movie, Michael, (including the final courthouse scene) starring John Travolta, Andie MacDowell, William Hurt and Oliver Platt.

Vinton, Iowa is faomus for these faces and places.

Known primarily for its burgeoning agricultural opportunities in the mid-1800’s, Martha and Albert had two goals when they moved to Vinton – farming and family. In true pioneer spirit they  got down to business right away working out their farmplace and starting a family dynasty that would eventually produce 11 children and 45 grandchildren.  Their first baby, Anna was born during the crispy days of October 1866 just 19 months after their arrival in Iowa.

As the oldest of her 10 brothers and sisters, Anna learned a  lot about farm life, babies and family relationships. By the time she was 4 she saw the birth of two brothers  and then the sad death of one those brothers who was in her life for just 7 short months. The next five years brought three new sisters and then the death of her remaining brother Cornelius. So by the time Anna was nine years old she had already witnessed the death of two of her siblings.

When Anna turned 18 in 1885 and married Selmon T. Whipple she had six sisters in total ranging in age from 2-14. Immediately following their wedding Anna and Selmon set up their own farm in Benton County and got to work on their own family. At this point  in the late 1880’s and early 1890’s, babies were coming into the family from all directions.

Anna’s mom, Martha was still having her own kids and Anna was just starting to have hers, which means mom and daughter were preganant and giving birth at the same time.  So the the first few years of Anna’s marriage went something like this… a baby boy for Anna, and then a baby brother for Anna, a baby girl for Anna and then a baby sister for Anna. It’s a whirlwind of confusion and name sharing where all the aunts and uncles are close in infantile age to their nieces and nephews but brothers and sisters have almost two decades between them. And then add in the fact that Anna’s six sisters were starting to marry and have their own families and it was just kids everywhere.


Selmon and Anna's house in Vinton Iowa, built in 1906
Selmon and Anna’s house in Vinton, Iowa.

Basically for the first twenty years of Anna’s marriage she was pregnant and raising babies. Her fifth son Frankie died the day he was born but all the other little ones made it through to adulthood.  A year and a half  after her last baby, a little girl named Nellie, was born, Anna’s husband Selmon fell off a shed and became paralyzed.  For three long months he lay immobile at home before he died  leaving Anna, aged 45, the entire responsibility of managing the farm, twelve kids and her large house.

Death notice printed in the Vinton Eagle, 1912
Selmon’s death notice printed in the Vinton Eagle, 1912

But Anna was a strong woman and she came through this tragic circumstance with courage and a loving heart still intact. In addition to all this newly placed responsibility she even managed to take on the  care and raising of her infant grandson, whose mother (Anna’s daughter-in-law) died from tuberculosis.

As the wife of a farmer with over a hundred acres in crop production and the mother of thirteen children Anna knew her way around the vegetable garden and the kitchen. In 1928 she submitted a recipe to the Vinton Cook Book which was compiled by the First Division Pastor’s Aid Society of the Methodist Episcopal Church. With a little help from the ladies at the Vinton Historical Society, Ms. Jeannie was able to acquire a copy of the recipe that Anna submitted.

cookbook

cookbook2

cookbook3

The recipe is for tomato soup. It is a very simple one with few components but it does contain one unusual ingredient – baking soda. Today in the vintage kitchen we are recreating this 89 year old recipe to see what cooking in the 1920’s tastes like and to see if it still appeals to our modern palettes.

Tomato Soup circa 1928

Most likely Anna would have used previously canned summer tomatoes from her garden in this recipe or she would have made it fresh during the summer months and possibly canned the soup for winter consumption. Either way, it is February and Ms. Jeannie does not have any leftover summer tomatoes on hand nor does she have any fresh in the garden. So instead we are relying on fresh hot house tomatoes that were grown in Chile. Ms. Jeannie did not have high hopes for flavor with these guys even though they looked absolutely beautiful in the grocery store.

soup2

But she was very pleasantly surprised at both the sweetness and firm fleshiness of these traveling love apples. Anna served her soup topped with a sprinkle of crushed crackers, which most likely would have been soda crackers or saltines. But Ms. Jeannie wanted to pair her soup with something a little more exciting so she made rustic Caprese-style toast to partner. Look for that recipe following the soup. She also added 1/3 cup tomato paste at the end, which is not in Anna’s original recipe (as you’ll notice from the picture above) –  an explanation for that addition follows the final step. Other than that, the recipe was made as-is.

Anna’s Tomato Soup (circa 1928)

1 quart tomatoes (about 4 -5 cups)

1 pint milk (about 2 cups)

1 pint water (about 2 cups)

1/2 teaspoon baking soda

1 pint beef broth (about 2 cups)

2 tablespoons butter

1/3 cup tomato paste

4 crackers (optional- see second recipe)

Salt & pepper to taste

soup3

  1. Remove seeds from tomato (Note: there is no mention as to whether the skins of the tomato should be on or off – most likely they would be skinless, but Ms. Jeannie left them on and they rolled themselves into thin toothpicks which added a little bit of texture to the overall soup in the end. Next time she will try making it with the skins removed. So it is your preference on this aspect.)
  2. Add the tomatoes and water to a large pot over medium-high heat and bring to a boil.
  3. Add the baking soda and stir – like those lava volcanoes you used to make in third grade science class, this tomato /baking soda combo does foam up quite a bit, so keep stirring it until it comes to a boil. Then add the milk, butter and beef broth and bring to a boil again.

At this point, Anna mixed in some salt and pepper, called it done and ladled the soup into bowls, topping each with some crushed crackers. But the soup at this stage was very thin and tasted rather plain and uneventful so Ms. Jeannie added 1/3 cup tomato paste and let it simmer on low heat for about 20 minutes. By adding the paste it gave the soup a much more tomato-y flavor and thickened it up a bit. The purpose of adding the baking soda was to neutralize the acid in the tomatoes, which it did beautifully. By the time it was ready to serve this soup had a gorgeous, silky consistency, bright flavor and a rusty orange hue.

soup4

Garlic, Basil Cheese Toast (makes two slices of toast)

1 clove garlic, roughly chopped

6 fresh basil leaves, chopped

2 mini mozzarella balls, sliced thin

2 slices of multi-grain braed

2 teaspoons olive oil

dash of red pepper flakes

  1. Slice bread and smother each slice with one teaspoon of olive oil.  Add the cheese  in a polka dot style fashion and intersperse the garlic. Sprinkle the basil leaves, red pepper flakes and a dash of salt on top.
  2. Bake in a 400 degree oven for 8 minutes and then broil for  1-2 minutes until edges of crust start to brown slightly.

soup5

Back in the late 19th century and early 20th century farm meals were big because family members and workers needed sustenance to get them through their chores. Apple pie was often served at breakfast alongside eggs and bacon and fried chicken and casseroles and  fresh bread. Most likely this soup would have accompanied many other dishes on the table, which is why it is not made of heartier stock. In our modern world, this makes a lovely light lunch or quick snack if you are pressed for time. And like any good foundation recipe it can be augmented with lots of other elements including onions and fresh basil, garlic, sour cream, Parmesan cheese… you get the idea. It is quite lovely on its own but Anna wouldn’t mind at all if you wanted to add your own creativity to the mix.

After Anna’s husband died in 1912, she managed the farm for another 9 years growing corn and oats and reporting regularly in the newspaper as to their qualities and quantities. She raised her kids and grandkids and kept her house bustling with love and care. Eventually she said goodbye to farm life and moved into town to live with one of her daughters.  Active in various community organizations and  her local church  she was referred to as being noble, generous and kind. When she passed away in the 1940’s at the age of 81, she left behind a family dynasty that included 10 children, 31 grandchildren, 20 great-grandchildren and one great recipe.

Unfortunately this tiny photograph is the only identifiable image of Anna. Pictured on the far left, she is posing with her sisters in front her farmhouse when she was in her 70’s. Anna also appears in the family portrait at the top of this post but she is unidentifiable along with all the other women. One day soon hopefully we can place a name with a face!

Cheers to family cooks, the recipes they make and the love they pass on!

*** UPDATE 2/24/2017 *** One of our readers sent a question regarding measurements of pints and quarts and how many tomatoes actually made up one pint. Ms. Jeannie used all the vine-ripened tomatoes you see in the photos (12 in total) which were each roughly the size of a plum. If fresh tomatoes aren’t an option in your neck of the woods, substitute them with 4-5 cups of canned tomatoes (make sure the seeds have been removed).

Also to make things simpler, ingredients calling for pints and quarts have been measured out into cups as well (see ingredient list), since that is a more common unit of measurement in today’s world of cooking. These new updates will take out all the mathematical guess work making this recipe even easier and faster to make!


Culinary Creativity: Recipes From Our Prize Winner!

By day they are executives in New York City but by night (and most weekends too) they are culinary wizards adventuring their way around the inventive kitchen. Meet blog reader Michael, one of the winners in last month’s Spartan Souvenir giveaway and his lovely wife Renee.

reneemichael

As soon as their prize of Greek olive oil and wild mountain oregano hit their mailbox they started daydreaming about what they could make. Possibilities abounded of course, but it didn’t take very long before they settled on two Mediterranean-style dishes that highlighted their new winnings and captured the simple fresh flavors of their farmer’s market palates.  In a lovely spirit of community, these two home chefs not only sent back a follow-up note on their gift receipt but also included recipes and photos of everything they made with their Sparta samplings. Fantastic! Here is what they made…

greekdishes2
“The olive oil has such a nice fruitiness and the oregano is slightly floral and delicate,” shared Renee. “We love it!”

Long-time connoisseurs of make-it-yourself pizza they first prepared a Mediterranean style Greek pizza with homemade dough and an inventive brussels sprout topping. Next, (just in time for Fish Friday) they made a simple Greek-style baked cod using local fish and an array of herbs.

Michael and Renee’s recipes couldn’t have come at a better time in our calendar year. If you are still entertaining holiday house guests the Greek Pizza makes for a fun party pleaser and can be doubled or tripled in size to fit all appetites.  Or if you find yourself ready to put the heavy plates of the holiday season behind you then the Greek Baked Cod would be just the ticket for a light and refreshing meal. Both recipes highlight the unique flavor of the olive oil and oregano from Sparta, Greece which you can find at thespartantable.com All other ingredients can be locally sourced from your grocery or market.

pizza3

Greek Pizza

Note: Michael and Renee followed Jim Lahey’s lead on the pizza dough preparation. You can find a step-by-step guide here which includes a casual video on the making of it all. If you have never made homemade pizza dough before don’t feel intimidated, it’s very easy and this is a no-knead recipe which makes it even easier. If you can’t sacrifice the time for the dough, start out simple with a pre-raised dough ball from Trader Joe’s or the fresh bakery department at most supermarkets.

(for the dough)

3.5 cups all-purpose flour ( M&R veered slightly from the dough recipe and incorporated some whole wheat flour as well. This recipe reflects their version.)

1/2 cup whole wheat flour

1/4 teaspoon active dry yeast

2 teaspoons fine sea salt

1 1/2 cups water

(for the topping)

1/2 red onion, thinly sliced and placed in a bowl, covered with water for at least 30 minutes, then drained and dried

1 Serrano chili pepper, thinly sliced (remove the seeds and veins if you are averse to heat or if your chili is super strong)

8-10 raw brussels sprouts, shaved

1/4- 1/3 cup (plus more for topping) Parmesan cheese, freshly grated

1/2 teaspoon Spartan Table wild mountain Greek Oregano

5 ounces Spartan Table Extra Virgin Greek olive oil

Salt and Pepper to taste

Prepare dough as directed. Preheat oven to 475 degrees. Add pizza stone about one hour prior to baking. Mold the dough into a circle on a pizza peel lined with semolina flour to prevent sticking and for easy sliding.

Place all topping ingredients together in a bowl and mix in olive oil and salt and pepper to coat.

pizza2

Scatter your toppings evenly on top of the dough. Bake until bubbly and slightly browned about 10-12 minutes. Depending on your oven, this could take more or less time. Finish with olive oil,  sea salt, and extra Parmesan cheese.

pizza1

In The Vintage Kitchen UPDATE! August 2021 – The sky is the limit when it comes to experimenting with this homemade pizza recipe.  Greek olive oil and wild mountain oregano pair beautifully with an array of toppings… 

including mushroom meatballs, fresh basil, cherry tomatoes and this heirloom Italian sauce recipe.  Featured here are (clockwise from top) Greek Pizza; Italian Cherry Tomato; and Meatless Mushroom Meatball.

Greek Baked Cod (serves 2)

Fresh, local cod  (enough for two portions)

1/2 teaspoon Spartan Table Greek oregano

5 ounces Spartan Table Greek olive oil for drizzling and finishing

1  quarter of a large organic lemon, thinly sliced

1 half of a medium shallot, thinly sliced

1/4 quarter cup of thinly sliced fresh fennel (from the bulb)
 
Salt and pepper to taste
 
1/2 tablespoon fresh parsley, finely minced, for finishing

Preheat oven to 425 degrees.

Add cod to two pieces of foil paper (doubled so that it doesn’t leak) placed on a baking sheet. Drizzle fish with the olive oil, oregano, and salt and pepper. Arrange the shallot slices on the bottom of the foil, place the cod filet on top with the fennel and lemon slices.

fish1
 
Close the foil (like a packet) and bake for about 20-25 minutes, depending on your oven and size of the cod. Ours took about 20 minutes to cook. Finish with an extra drizzle of the oil, sea salt and parsley.
 
fish3
 

In the land of the Vintage Kitchen, it is very exciting to have such an enthusiastic (and delicious!) response to a blog post. Hopefully, Michael and Renee’s recipes will help pave the way for more culinary adventures discovered by our readers. Having come full circle with an interview that originated months ago in the faraway, mystical olive groves of Greece and ended up finally on the kitchen table of two New York foodies, this post feels a bit like magic. Even though a zillion miles separates us from Sparta and  Nashville and New York we now share a commonality in the history of a food. And our cross-culture community feels a bit more close-knit.  As Homer said, “the journey is the thing.”

Again, a big thank you to Jehny and George for carrying on the family tradition of olive-growing in Greece and to Michael and Renee in New York for inspiring us with two new recipes fit for a feast.

 
If you missed the interview with Jehny and George from The Spartan Table find it here.  If you have any questions regarding Michael and Renee’s recipes post them in the comment box and we’ll get them answered ASAP.
 

Cheers or opa, as they say in Greece, to the final days of 2016. May they be both merry and bright.


kitchen prep