Dinner and a Date: Grecian Style!

gree1

This week, Ms. Jeannie is taking you on a little dinner date! From the look of things above you may think that her adventures have taken her abroad on an exotic travel vacation steeped in ancient history. If you guessed the destination to be time-traveled Greece, then you are correct! Sort of.

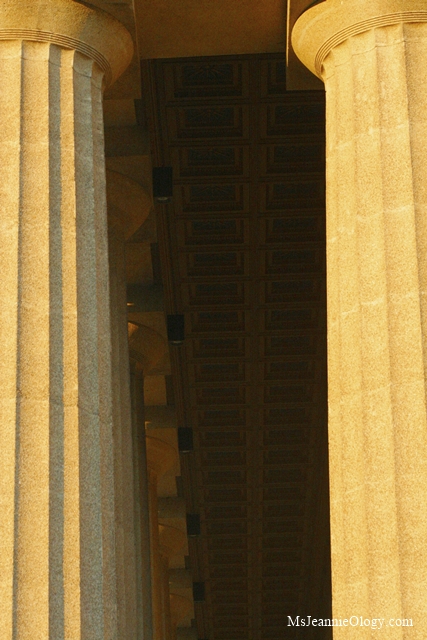
While the view looks like this…

gree2

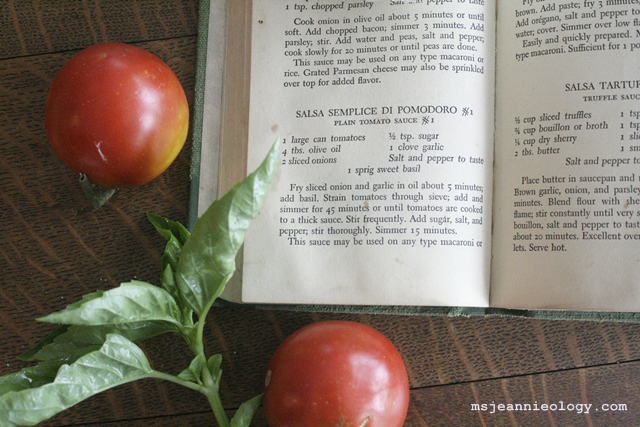
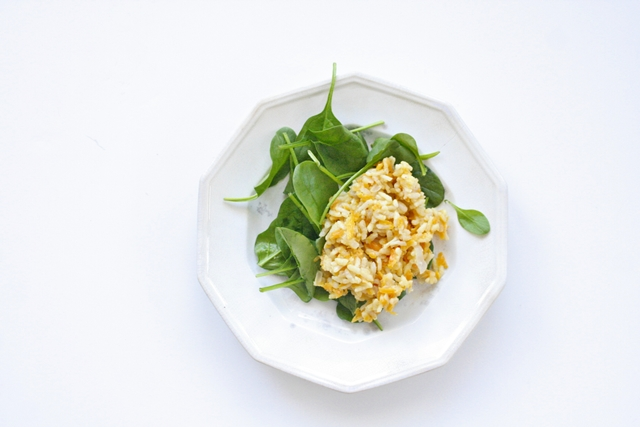
and the menu looks like this…

gree3

Ms. Jeannie is excited to inform you that she has never actually left the U.S.. In fact she never left her city. That’s right dear readers, Ms. Jeannie is visiting Greece while never leaving Nashville. Let’s see how…

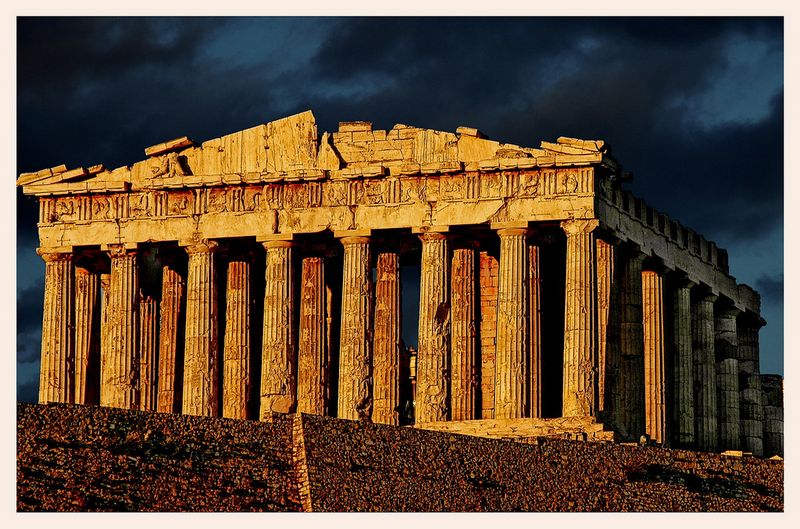
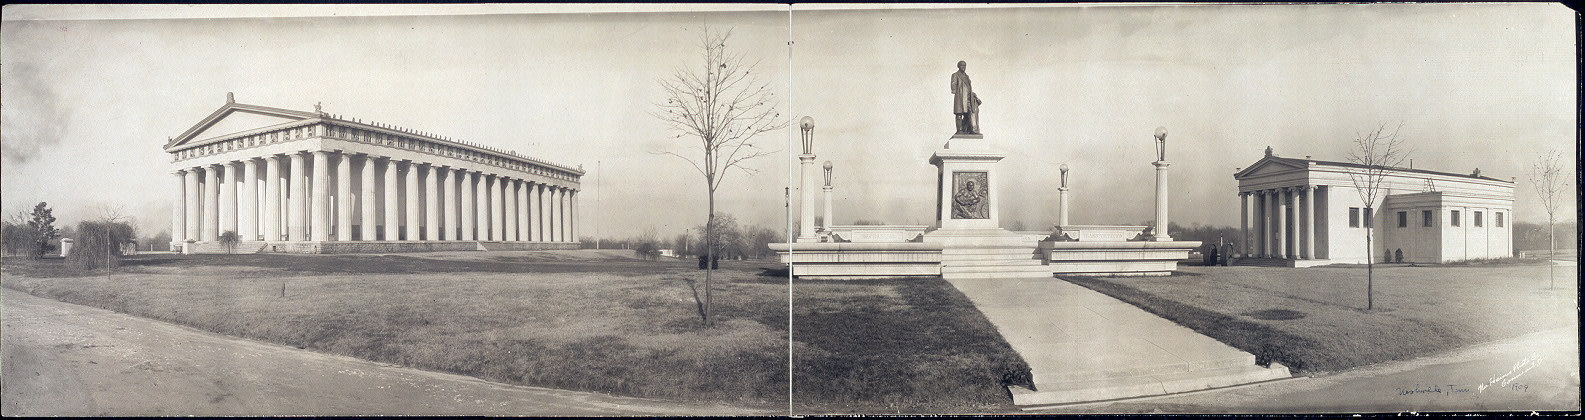
During other day explorations of her new city, Ms. Jeannie delightfully happened upon the United States’ only full scale replica of the Parthenon that famous historic ruin in Greece that was built in the 430’s B.C.  In case you need an art history refresher, this is what the original looks like …

The original Parthenon as it stands in Greece among all its ruined glory.

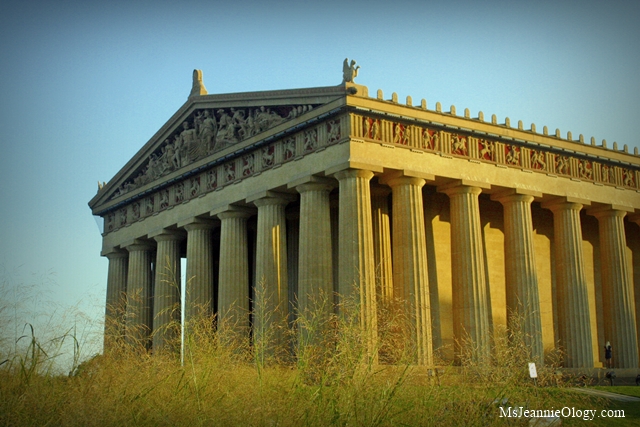
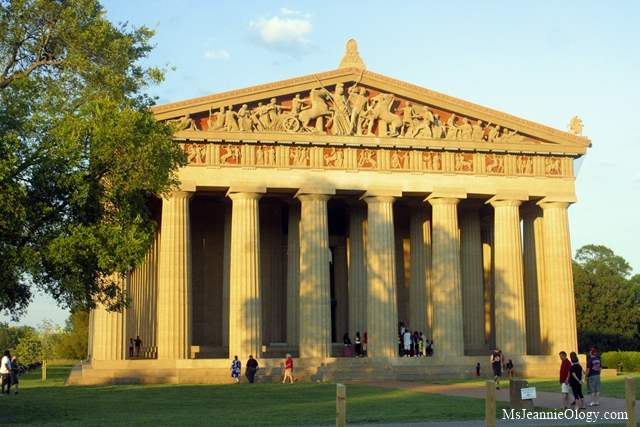
And this is the American version…

greek13

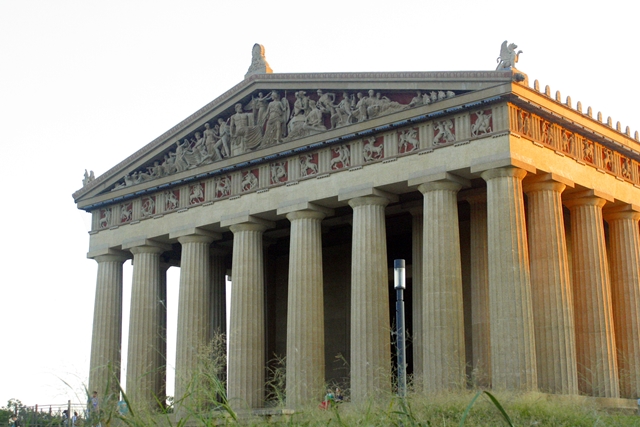
Standing elegantly (and so massively) in the city limits of Nashville’s Centennial Park, this American Parthenon is incredible in size, scope and detail.

gree4

greekpart9

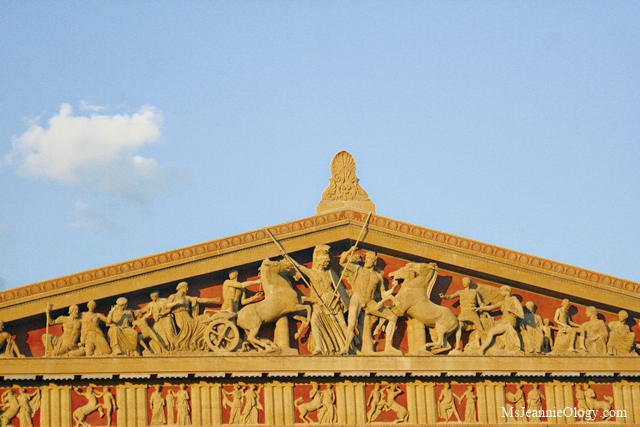
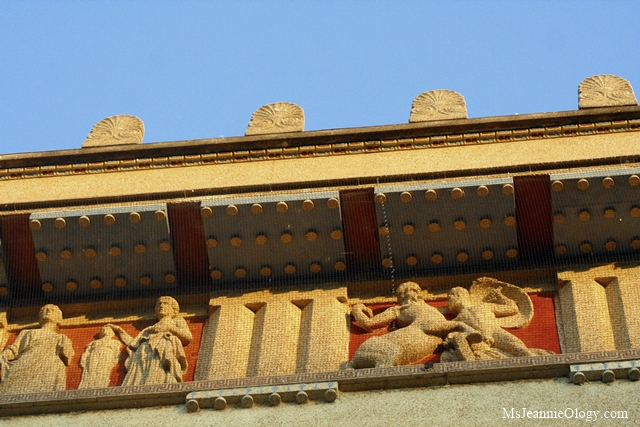
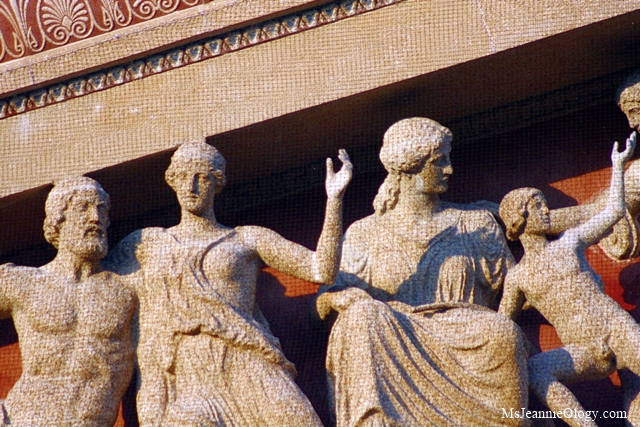
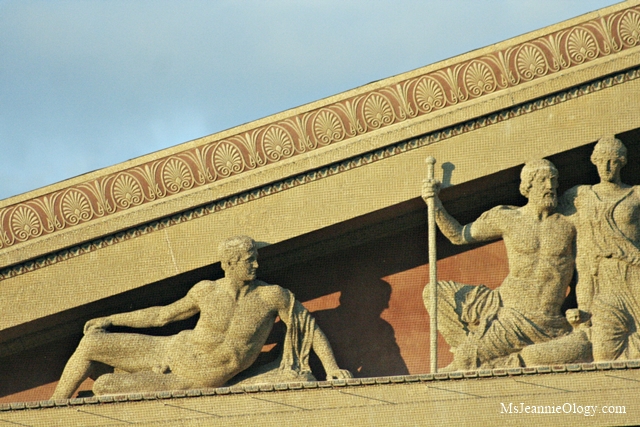
While it is not quite as old as the original (this one dates to 1897) it is a true work of art from all angles with the stories of Greek heroes and gods running all around the facade…

gree8

gree5

gree9

gree10

Built in 1897 to celebrate the 100th anniversary of the state becoming part of the union, Nashville’s Parthenon was built by Southern architect and Civil War veteran William Crawford Smith for a special event exposition that included several other copies of ancient ruins.

parthenon_original
This original photograph of the Nashville Parthenon was taken in 1909. Photo courtesy of the Library of Congress.

With no intention of making a permanent structure, the Parthenon was built as a whimsical folly, fully expecting to be dismantled shortly after the celebrations ceased. But as an instant favorite among locals and visitors the Parthenon became a part of the permanent Nashville landscape in the 1920’s when it was completely rebuilt in more solid form. What was once the original wood and plaster model became much more weather resistant concrete. Now it is hard to imagine anything getting in its way.

gree6

gree11

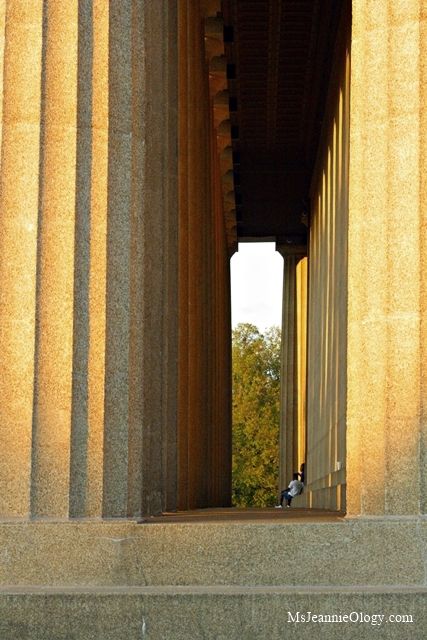
There is nothing petite, frail or breakable about this beauty. It is difficult to get a sense of size or scale from photographs but this father and son pictured below hint at the sheer size of both the steps and the columns…

greekpart8

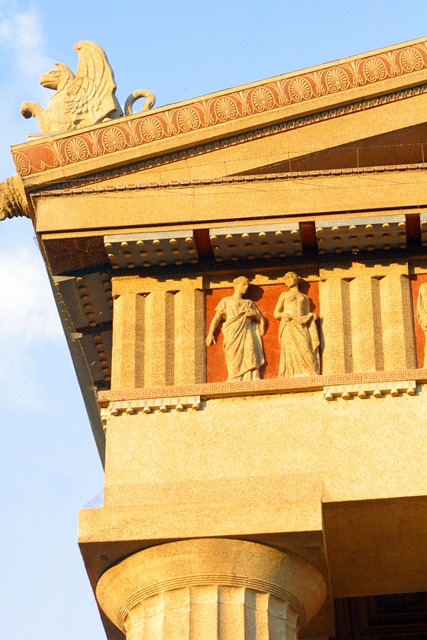
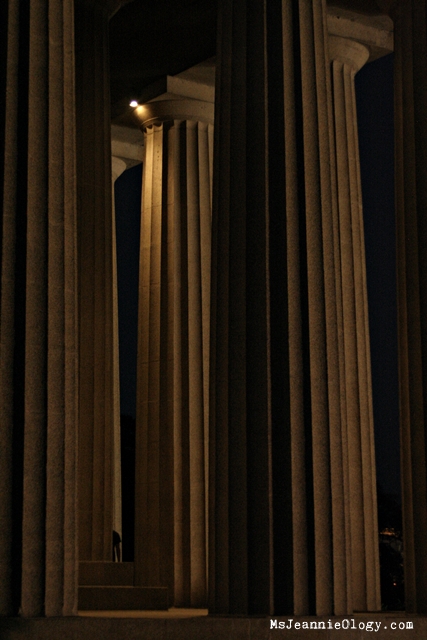
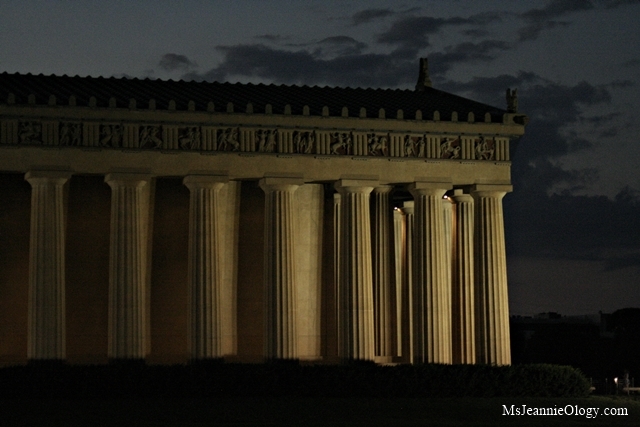
As the sun travels across the sky, the colors, shapes and shadows morph from sand shades to cinnamon to sweet potato to gold. And then the night sky darkens. The spotlights come on. And the Parthenon lights up in the most spectacular of ways…

greekpart18

It is no wonder that the park stays open until 11:00pm. With wide sweeping lawns, a small meandering lake complete with floating geese and ducks and plenty of shade trees, the Parthenon makes an ideal romantic backdrop for a late summer/early fall picnic. Ms. Jeannie spotted lots of hand holders among all those columns!

greekpart19

greekpart17

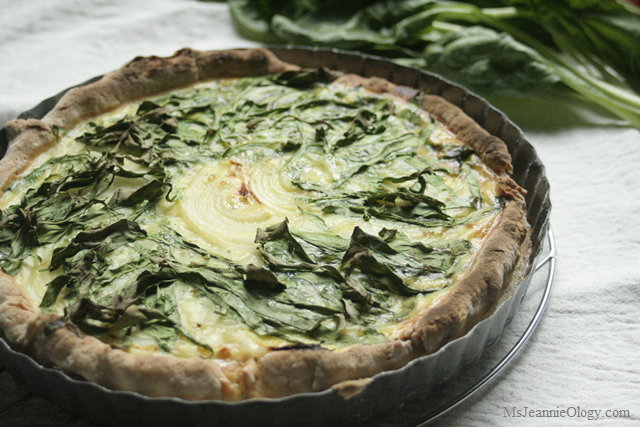
In celebration of the beauty and timeless appeal of the Greek culture Ms. Jeannie is including a recipe here for a Mediterranean meal that works great for brunch, lunch or dinner. Or perhaps that romantic picnic in the park! Pulling a traditional Greek recipe from a 2010 cookbook, Greek Revival by Patricia Moore-Pastides, Ms. Jeannie put her own spin on a classic recipe that could be served in a number of situations – hot out of the oven at home, room temperature straight from the picnic basket or cold out of the fridge for instant next day left-over gratification.

While the recipe is classified technically as a tart, it is more on the fluffy side like a crust-less quiche then a dense whole ingredient tart. Traditionally it is served as side dish but it can be easily adjusted serving size wise to accommodate hungrier appetites. Serve it with some toasted crusty bread drizzled with olive oil and garlic, or a simple side salad and a glass of a wine or honey smothered fresh fruit and you have some magical combinations of savory flavor pairings that could take you from morning to night.

greektart7

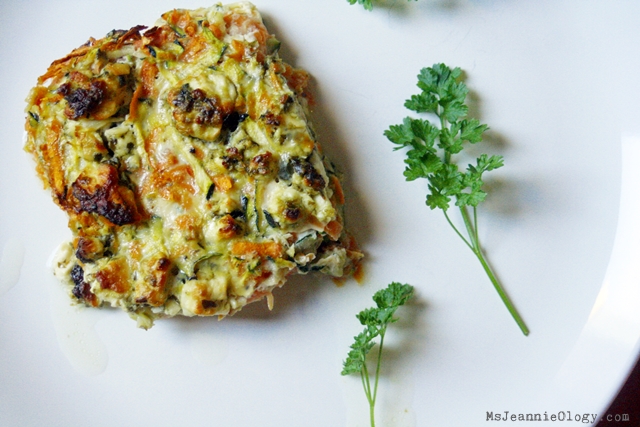
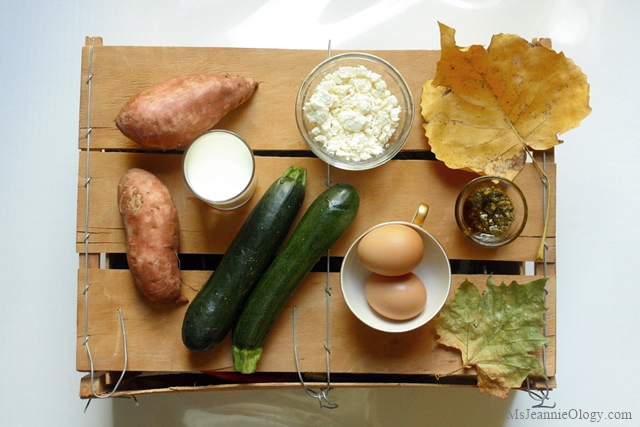
Sweet Potato, Zucchini and Feta Tart

1.5 tablespoons olive oil

1 large sweet potato

2 medium zucchini

8 oz. feta cheese

1 tablespoon + 1 teaspoon pesto (you can make your own or buy a small jar already prepared)

2 eggs

2 cups milk

2 tablespoons flour

1/4  teaspoon pepper

  1. Preheat oven to 375.
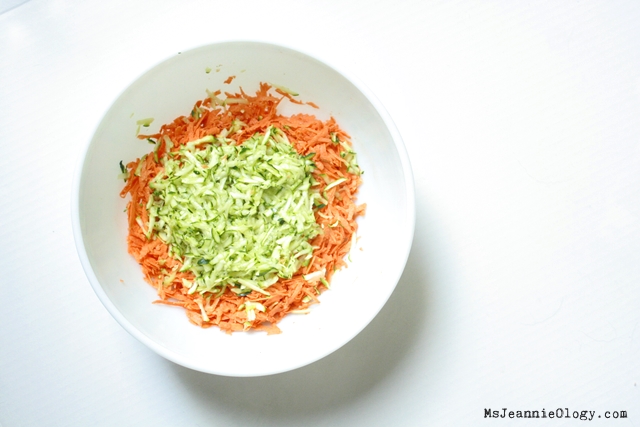
  2. Oil the bottom of a 9 x 11 inch baking dish. Grate the sweet potato and zucchini on the large hole section of a traditional box grater – this  should yield about 3 cups of each.  Toss both vegetables in a large bowl together…

greektart3

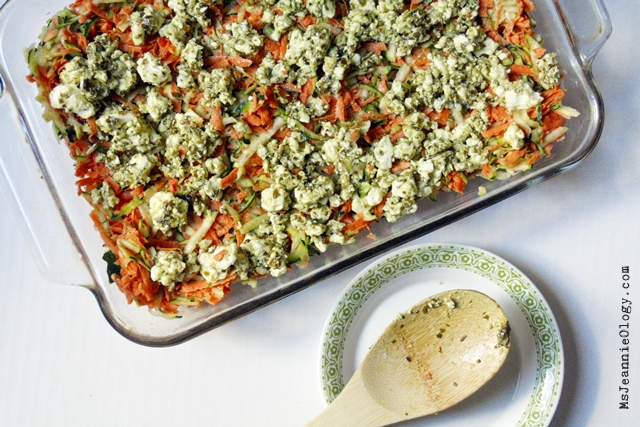
3. Spread in the bottom of the prepared baking dish.

4. In a medium size bowl mix the feta and pesto and then sprinkle over the sweet potato and zucchini mixture.

greektart4

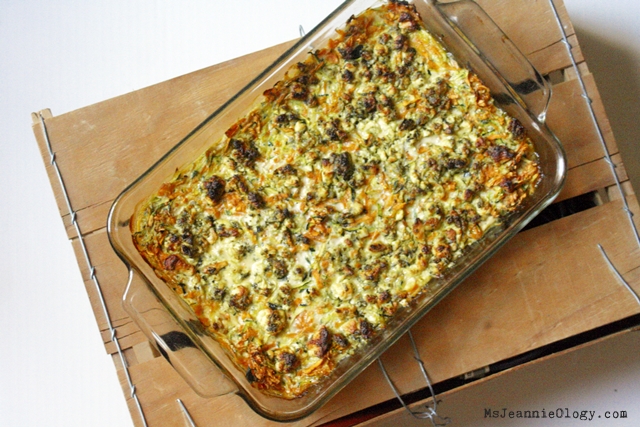
5. In a blender mix together the eggs, milk, flour and pepper. Pour over the the top of the cheese/vegetable mixture and bake in the oven for 1 hour or until well set and golden brown on top.

greektart5

The original Parthenon was built in Greece as a temple to honor Athena – the goddess of reason, intelligence, inspiration, art and literature. The American Parthenon was built to honor and represent the intelligent and cultured community of Nashville.. And this blog post was designed to honor you, dear dedicated readers of this blog for so many years now. Food and history go hand-in-hand, Ms. Jeannie sends a big cheers your way for encouraging and supporting both!

For more Greek recipes please visit this previous post here.

Advertisement

Dinner with Downton Abbey

Camembert, Sweet Onion & Spinach Tart

It’s not every day that a woman receives a castle for Christmas, but indeed that is just exactly what happened to Ms. Jeannie last December. That’s right dear readers, a castle! It might as well have been a box full of magic that’s how excited Ms. Jeannie was with her gift!

Downton Abbey Christmas Ornament

Gold, glittery and delicate, Ms. Jeannie hung her magical manor house on a nail above her kitchen doorframe, where it remains year–round as a symbol for whimsy, wonder and unexpected surprises. Passing underneath it every day, she is inspired by the stories it symbolizes and by the possibilities of passion. Without Julian Fellowes interest in history and his love of storytelling we would have never known Downton Abbey and in turn we would have never known this blog post.

the cast of downton abbey

This week Ms. Jeannie is featuring a twist on a recipe from the 2014 coffee table book, A Year In the Life of Downton Abbey by Jessica Fellowes (Julian’s niece!). This is one of several Downton Abbey coffee table books that has been released throughout the series, but by far this is Ms. Jeannie’s favorite. It breaks down Season 5 specifically month by month as far as story lines and contains a lot of behind the scenes info on costumes, hair and makeup and cast/crew interviews. It also contains recipes of the types of fare that the Crawley family would have enjoyed with each passing season.

A Year in the Life of Downton Abbey by Jessica Fellowes

On page 132 in the middle of the month of May, you’ll find this elegant recipe…

Asparagus Tart - Downton Abbey style!

tucked amidst the stories swirling around Rose’s coming out season. Her presentation at Court signifies her debutante status for the season, and the chapter is filled with the proper attire, mannerisms and preoccupations that such a lady would have experienced during this exciting time in the mid-1920’s. In all its behind-the-scenes glory, the chapter is also filled with the challenges the crew faced in filming the stand-in location for Buckingham Palace (which was actually Lancaster House in London) and the massive undertaking of outfitting and making up the large ensemble cast of extras at the debutante ball.

Rose as a debutante!

While the scenes in the book (and on film!) were quite elaborate for the month of May, the recipe was quite simple… Asparagus Tart. Ideal in the eating seasonably chart, asparagus is at its peek of flavor in late Spring and can be enjoyed in any dish ranging from breakfast to dinner. It is also party perfect because of its straight-lined style and a lovely way of being quite adaptable to artistic displays of culinary wonder.

There was only one slight problem with all this.  After discovering the recipe,  Ms. Jeannie had just returned from market with a basketful of two other shooting stars of the spring season – sweet onions and spinach and sadly, no asparagus. So she improvised, playing a little game of surprise with Mrs. Patmore. By switching out some ingredients for others but retaining the same tart crust and the same measurements of additional ingredients, Ms. Jeannie made a similar tart that would have served all party-goers just as well during the season. This is what she made…

Simple Ingrediants for a simple spring tart

Spinach, Sweet Onion & Camembert Tart

1 1/2 cups all purpose flour, plus extra for dusting

Salt and Pepper to taste

5 tablespoons butter

1/4th cup ice water

A handful of fresh spinach

½ of a large sweet onion, very thinly sliced

4 eggs

1 1/4th cups organic vanilla soy milk (or light cream if you prefer)

4 tablespoons of chopped Camembert cheese

One pinch of nutmeg

  1. Preheat the oven to 350 degrees.
  2. Sift the flour in a mixing bowl with a large pinch of salt. Cut up the butter in small chunks and incorporate it into the flour until you get a crumb-like texture. Add the ice water and mix together with your hands until you can form a ball of dough.
  3. Dust your workspace with flour and roll dough out in all directions so that it becomes large enough to fill an 8”inch tart pan. Place the dough in the pan, trim the extra edges with a knife and prick the dough all over with a fork. Insert baking beans into the tart shell and place in oven for 20 minutes. If you don’t have baking beans, which help weight down the dough and keep it from puffing up, you can place a pan on top of the dough – just make sure that the pan is oven friendly and fits the entire inside dimension of the tart.
  4. While the crust is baking, rinse the spinach and thinly slice the onions (so thin that they are almost transparent!). Set both ingredients aside.
  5. In a bowl beat together the eggs, milk and nutmeg. Season with salt and pepper. Set aside.
  6. Remove the tart crust from the oven. Remove the baking beans or the weighted pan and return the tart crust back to the oven for 5 more minutes.
  7. Remove the tart crust from the oven and fill it with the egg mixture until it is about ¾ full. You might have extra egg left over. Evenly sprinkle the cheese in the egg mixture. Gently float the onions in a circular pattern on top of the eggs and cheese. Then add the spinach on top of the onions in the same circular fashion. Bake in the oven for 40-50 minutes checking often to make sure that the tart is not bubbling over or browning too quickly. Serve immediately right out of the oven!

Camembert, Sweet Onion and Spinach Tart

Depending on the time of day that you enjoy this tart, additional accompaniments that would work great alongside it include:  a mixed fruit/berry sampler or a vegetable salad, potato pancakes, buttered rolls with jam compote, a juice smoothie or sliced chicken for a more protein packed affair. Or just embrace your inner purist and serve it as is!

Just like the pretty presentation of Rose’s debut, this tart also makes perfectly wonderful party food for modern day May. Whether you are surprising Mom with brunch on Mother’s Day, hosting a bridal shower for your best friend or just getting together for an informal event, this recipe promises easy and effortless entertaining.

Camembert, Sweet Onion and Spinach Tart

*If you’d like to make the asparagus version simply omit the spinach, onion and camembert and replace them with 8-10 stalks of asparagus, 4 tablespoons of parmesan cheese and a sprinkling of fresh thyme.

Cheers and happy Downton daydreaming!

Downton Abbey Christmas ornament

And as a final side note: new items were added to the shop last week all with an “F’ theme: french books, fire hoses and florals! Stop by for a peek!

Clockwise from top left:
Clockwise from top left: Vintage rubber lined fire hose fabric, 1960s French mystery novel, Le Juane Chien by Georges Simenon, Vintage fire hose coupling, Vintage 1970′ s French theater book, L’Avant-Grde Theatrale, Collection of six vintage fire hose couplings, Vintage Fire hose fabric, 1950s botanical Azalea flower bookplate, 1960’s French phrase book 

In the Vintage Kitchen: Eggplant Pizza

Eggplant Pizza

Pizza has been a favorite in the U.S. since the early 1900’s with the first of its kind debuting in New York City in 1905. Popular right from the start, pizza wars started popping up all over the city, then the region then the country as Italian immigrants spread across America with their claims of making the best pizza in town.

G. Lombardi's the trendsetter on the american (pizza) frontier.
G. Lombardi’s on Spring Street in New York City was the trendsetter on the American (pizza) frontier.

And while bravado and traditional recipes may have fueled the pizza craze initially, creativity, with its variations on a theme, has kept it going ever since.

Strolling through 19th century pizza signs
A walk through 20th century pizza signs…

By the 1960’s American home chefs were experimenting with the complimentary trifecta of tomato sauce, bread and cheese in new and spectacular ways.  By thinking beyond the boundaries of size, shape and similarity, pizza was elevated to a nouveau cuisine that could incorporate a host of  ingredients from the humble to the exotic appealing to palates both simple and sophisticated.

One such experimenter determined to add a new twist to the traditional pizza pie was food editor, critic and chef Craig Claiborne.

craigclaiborne2

In his 1963 Herb and Spice Cookbook, he capitalized on the subtle yet dynamic flavor pairings of basil, oregano and garlic and came up with a dough-less version of eggplant pizza.

An Herb And Spice Cookbook by Craig Claiborne

Craig was no slouch in the cooking department. He knew his way around a home kitchen just as much as he did a commercial kitchen and he knew what and how people liked to eat. As the The New York Times food and restaurant critic for 29 years from 1957-1986, he pretty much pioneered food journalism in the Unites States at a time in the mid-1950’s when such editorial posts were primarily held by women for the female homemaker audience. But Craig was different, he was interested in casting wider nets, reaching more diverse audiences and bridging a relationship between restaurants, patrons and cultures.

craigclaiborne1

The author of over twenty cookbooks throughout his career, Craig’s Herb and Spice Cook Book is marvelous in both content and presentation. Organized alphabetically by spice or herb name it is a great reference cookbook when you have ten pounds of basil ready to harvest in your garden or you are craving a specific spice like curry or cinnamon… or marjoram!

marjoram

The eggplant pizza recipe fell under the oregano section which included recipes for Eggplant Antipasto, Chicken Napolitana, Herb-Broiled Swordfish and Creole Cabbage among four others. Excited by the possibility of giving her indoor oregano plant a hair-cut, Ms. Jeannie was happy to try this new version of pizza which turned out to be really delicious.

pizza1

It is a fun recipe for a few different reasons: 1} you make a quick version of homemade tomato sauce that takes little time and tastes great; 2} the “pizzas” can range in a variety of customizable sizes depending on the girth of your eggplant… if you have a skinnier eggplant you could serve those as appetizers or hors d’ouevres  for a party (maybe this weekend’s Super Bowl?!) or if you have a more rubenesque eggplant that would be a perfect size for dinner entrees; and 3} the breadcrumbs add a fabulous bit of crunch to the whole package just like a traditional pizza dough would.

So without further ado, here’s the recipe…Ms. Jeannie hopes you love this magical version of pizza just as much as the tradtional.

Eggplant Pizza (serves 6)

2 tablespoons cooking oil (Ms. Jeannie used olive oil)

1 small clove of garlic, minced

3/4 cup finely chopped onion

3/4 cup finely chopped green pepper

4 1/2 tablespoons tomato paste

3 tablespoons water

1 teaspoon oregano

3/4 teaspoon basil leaves

3/4 teaspoon sugar

2 3/4 teaspoons salt* (Ms. Jeannie thinks this might be a typo as it seems like a lot of salt for this size recipe so please use caution and your own sensibilities with this ingredient. And remember you an always add more salt but never take it away.  Ms.Jeannie used about 1 teaspoon total but you might adjust that according to your taste).

1 medium eggplant

1 egg

1 tablespoon milk

1/2 cup bread crumbs (Ms. Jeannie used plain panko-style bread crumbs)

1/4 cup freshly grated Parmesean cheese

1/4 teaspoon freshly ground pepper

flour for dredging

Oil for frying (Ms. Jeannie used olive oil)

Toppings of your choice: whatever  you normally like on a pizza ie: mozzarella cheese, fresh basil, olives, etc.

Directions:

1. Heat the oil in a one quart saucepan. Add the garlic, onion and green pepper. Cook, stirring, three minutes or until the onions and green pepper are limp.

pizza3

2. Add the tomato paste and water. Cover and cook, stirring frequently, over low heat until very thick, about ten minutes Add the oregano, basil, sugar and 1/2 teaspoon of salt* before the end of cooking time. *Salt to taste here. If you think the sauce needs more add a little bit, just keep in mind you’ll be adding salty parmesean cheese and possibly salty toppings later).

3. Remove sauce from heat and set aside while preparing the eggplant.

4. Wash, peel and cut eggplant into cross-wise slices one half inch thick.

5. Beat the egg with the milk and set aside. Mix bread crumbs with the remaining cheese, 1/2 teaspoon salt and the pepper.

6. Dip the eggplant slices in the flour, then in the beaten egg, then in the seasoned bread crumbs.

7. Saute the eggplant in the hot oil until golden, turning to brown on both sides. Remove from the pan and drain on paper towels. Repeat until all eggplants are cooked.

pizza4

8. Place the cooked eggplant slices on a cookie sheet and spread them with the cooked tomato sauce. Top with mozzarella cheese and your desired toppings . Place under a broiler until the cheese has melted and is lightly browned. Serve immediately.

pizza6

Ms. Jeannie kept her pizzas simple and just topped them with mozzarella, capers, basil and garlic but other ideas include prosciutto, pineapple, mushrooms, pepperoni, olives, figs, etc. So many possibilities!

Happy experimenting dear readers! With love from Ms. Jeannie and Craig Claiborne

You can find Craig Claiborne’s Herb and Spice Cook Book here and a host of other vintage recipes Ms. Jeannie has blogged about previously here.

Want to know what it is like to run a real-life modern day pizza kitchen? Check out the recently published book Delancey by Molly Wizenberg – it is completely entertaining. And if you are not craving pizza by the end of all this, you are extraordinary:)

mollywizenberg


In the Vintage Kitchen: How To Make Healthy Refried Beans From Scratch

beans1

Happy New Year dear readers! Ms. Jeannie is sending you bucketfuls (it’s been raining a lot here) of good wishes, good fortune and good health for this new year.

This week we are back in the vintage kitchen with a healthy recipe that features a food staple held high in the luck department for January. Beans! They also made the news this past week as something we Americans should be eating more of (poor unfortunate sugar just got the worst rap) so we are conquering two bright and shiny wish you well tidings with one post here – good health and good luck.

If you are anything like Ms. Jeannie you might never have thought much about refried beans…how they are made, what exactly they are made with and how you might possibly make your own better version at home. In the store they come canned in two varieties, vegetarian and traditional and most contain hydrogenated oils and preservatives which are not the healthiest of options. But refried beans are great on tacos, burritos and nachos and are a great source of protein so Ms. Jeannie was excited to come across a from-scratch recipe in this vintage cookbook recently listed in her shop

bestrecipes1
Best Recipes from the Cook Book Guild published in 1972

Published in 1972, The Best Recipes from the Cook Book Guild is actually a compilation book of hundreds of recipes from other note-worthy cookbooks published between the 1940’s and the 1960’s. Each recipe comes with source notes and sometimes a story about where the recipe came from and who made it originally, which of course opens the door to a myriad of culinary adventures to pursue.


mexicancooking

The refried bean recipe came from the 1967 edition of The Complete Book of Mexican Cooking by Elisabeth Lambert Ortiz (1915-2003), who was an award-winning  British food writer and the wife of Mexican diplomat Cesar Ortiz Tenoco.

elisabethlambertortiz

Through extensive travels in South America (and perhaps a few helpful lessons from Cesar’s family!) Elisabeth became an expert at preparing and instructing others on the art of Mexican cooking. The author of numerous international cookbooks, she is credited primarily with introducing Latin American cuisine to home cooks in both the U.S. and her native England during the 1960’s singing it’s flavor-packed praises in the forms of books and articles for Gourmet magazine and various food-related periodicals.  So what we have here dear readers is a fresh approach to an ethnic recipe from  a woman who learned her way through the culture. In Ms. Jeannie’s opinion, this is the best kind of cooking – learning through curiosity, love and experience .

Part One: Cooking the Beans

Refried Beans (Frijoles Refritos) serves 6

2 cups dried pinto, black or red kidney beans (Ms. Jeannie used black beans for her recipe)

cold water

2 onions, chopped

2 cloves garlic, chopped

1 bay leaf

2 serrano chiles, chopped or 1 teaspoon dried chilis, crumbled (Ms. Jeannie used one teaspoon red pepper flakes since fresh chiles aren’t in season yet here in the South)

11 tablespoons lard or oil (Ms. Jeannie used olive oil)

salt

freshly ground pepper

1 tomato, peeled, seeded and chopped ( if tomatoes aren’t in season yet you can substitute 1 can of diced tomatoes, drained of juice)

  1. Wash the beans and place in a saucepan, without soaking, with enough cold water to cover, 1 of the chopped onions, 1 of the garlic cloves, the bay leaf and the chiles.
  2. Cover, bring to a boil, reduce heat; and simmer gently , adding more boiling water as it evaporates from the pan. {Note: Using black beans, this process took about one hour and 30 minutes with about a cup of additional boiling water added halfway through.}
  3. When the beans begin to wrinkle (or become sift as in the case of the black beans) add one tablespoon of lard or oil and continue to cook for an additional 30 minutes over the same heat. Do not add anymore water.
  4. Heat the remaining lard or oil in a skillet, and saute the remaining onion and garlic until limp. Add the tomato and cook for an additional 2 minutes.
  5. Remove the pan from the heat and working in small batches add beans to the onion/garlic mixture mashing them together to form a paste. Repeat this step until all beans have mashed with the onion and garlic.
  6. Heat 2 tablespoons of lard or oil in a large skillet, add the beans in small batches and mash over low heat, forming a creamy heavy paste. Add two additional tablespoons of lard or oil intermittently throughout this process.
  7. Repeat step six again with the last 4 tablespoons of oil, once the beans have all been initially pureed. (This is the re-fried part in the name refried beans!) It should look like this when finished…
Homemade Refried Beans
Part Two: Mashing and Frying the Beans

This recipe is a great one because, once you understand the principles of refried beans  you can really change things up and add your own flair if you like. Spice it up, experiment with different herbs or chopped vegetables like leeks or scallions or different types of cheese.  If you like your refried beans a little bit more loose, you can add a little water to the pan after step 7 and mix it into the beans until you get the desired consistency. Likewise you can use the beans as part of lots of different dinner options from hors d’oeuvres to appetizers to main courses.

beans5

Ms. Jeannie made chicken tostados with her refried beans.  Quick and easy, she prepared them with the same whimsical, spur-of-the-moment method she uses for making tacos.  This one featured layers of tostado with chicken breast, green olives, lettuce, onion, avocado, cheddar cheese, tomatoes and the warm refried beans.

There are so many beans left over, Ms. Jeannie’s already hatching new recipes in her head about how else she can use them in her cooking this week ahead.  It looks like luck will continue spilling forth across many days this week in the kitchen department. If you want to save your luck for another day store it in an air-tight container and freeze it for later use:)

To embark on more culinary adventures using The Best Recipes from The Cookbook Guild as your spring board, please visit here. And as always, you can access dozens of other delicious vintage recipes on Ms. Jeannie’s blog using this link.

Happy cooking dear readers!


Bathe, Chop, Simmer: The Art of Italian Cooking, 1948

sauce1

All summer long, the garden tomatoes have ripened one or two a day – making an easy pluck, enough for a sandwich or a salad or an ingredient for dinner.  Now as the end of the season comes to a close, the bushes have reached their relaxed state of exhaustion. They are leggy, bald in some spots from clipping and pruning and dry in others  from months beneath the hot Georgia sun.

For all that they lack in fine appearance,  a curious event has been occurring over the past week or so. Suddenly,  it seems, the last little stragglers have joined together for one last hearty attempt to grow, ripen and red in abundance.

Over the weekend, Ms. Jeannie pulled 18 ripe tomatoes from her vines, with about 15 more “in the hopper” so to say that will be ready in the next couple of days.  My goodness! Their efforts seem valiant! Armed with her big basket full of beauties and under the spell of a cool rainy Saturday,  it seemed to Ms. Jeannie like the perfect time to make a new recipe from an old cookbook. The recipe is  Salsa Semplice Di Pomodoro #1, otherwise known as Plain Tomato Sauce #1 from the Art of Italian Cooking  by Maria Lo Pinto, circa 1948.

book1
The Art of Italian Cooking by Maria Lo Pinto, 1948

The cookbook is great. Hardcover, spotted, penciled, appreciated – every time she opens the cover, Ms. Jeannie feels like she is communicating with a dozen different women before her.  Their notes, their stains, maybe some sweat and tears all marked there on the pages. The author, Maria, bound all these recipes together because her friends kept asking how she did that, and this and that and this, again and again.  Just like the cookbook endeavor of the women of  St. Paul’s Greek Orthodox Church, the recipes contained in the Art of Italian Cooking have been passed down in Maria’s family for generations. Tried and true Italian, at it’s best!

sauce2

This is a really simple recipe with just 7 ingredients, which include basil, another overzealous  grower in Ms. Jeannie’s garden!  The recipe called for canned tomatoes, so Ms. Jeannie actually added a little bit of extra work to the whole affair by using fresh, but really that just meant a little bit of extra time preparing the tomatoes in a hot water bath.  So you could make this recipe either way depending on the amount of time you have.

sauce3

The hot water bath is easy – you just boil a big soup pot full of water  and once it starts bubbling drop your tomatoes in the water and let them bob about for 4-5 minutes. You’ll see the skins start to wrinkle and burst.  When that happens, they are ready to come out.

While the tomatoes are bobbing about you can chop the onions and garlic.  When the the wrinkles appear, lift each tomato from the bath (Ms. Jeannie likes to use a slotted spoon so that the excess water drains) you can put the tomatoes in a strainer to let them cool off a bit. Once cool enough to touch, you just peel the loose skin from the tomato, cut off any blemishes or spots and then set the tomatoes aside in a bowl.

Next,  warm the olive oil in a saute pan, add the onions and garlic, saute for 5 minutes and then add a sprig of basil and the tomatoes and sort of mash the tomatoes up with a wooden spoon in the pan.

sauce4

Simmer the whole pot on low for 45 minutes, stirring often. Next add the sugar and salt and pepper. Simmer for another 15 minutes and then it is ready!

sauce5

This batch makes about 3 cups of sauce (maybe a little more or a little less depending on the size of your tomatoes). According to the recipe it is enough for 1 lb. of pasta.  The consistency is thick with big chunks of tomato and onion, which works well with either a small pasta (shell, bow-tie, ziti) or the traditional spaghetti or fettuccine.

At the last minute, Ms. Jeannie decided to add two tablespoons of tomato paste and a cup of water, so that she would have enough sauce for an Eggplant Parmesan recipe she is going to try in October.  After simmering for another 15 minutes, those two additions increased the yield to 4 cups of sauce.

The great thing about this recipe is that you can tweak it however you like – add olives or mushrooms, oregano or a dash of red wine. In the introduction of the book, Maria encourages any and all experimenting – as she states – all these recipes are simple foundations of Italian cuisine – you can build up from them according to your palette.

Right now, it is still too warm for a heavy baked Italian dish, so Ms. Jeannie is freezing her batch. It is always seems fun to pull out little reminders of the summer garden when you are well into another season.

The next harvest challenge that needs to be tackled is the basil. Ms. Jeannie has plans to dry some and make a batch of pesto but there will still be lots to use before it starts going to seed, so if you have any suggestions please comment below!

In the meantime, here’s the tomato sauce recipe in full…

sauce7

Salsa Semplice Di Pomodoro #1 (Plain Tomato Sauce #1)

1 large canned tomatoes (or 15-20 small to medium garden tomatoes)

4 tbs. olive oil

2 sliced onions

1/2 tsp. sugar

1 clove garlic

1 sprig basil

Salt & Pepper to taste

Fry sliced onion and garlic about 5 minutes in oil. Add basil. Strain tomatoes through sieve; add and simmer 45 minutes or until tomatoes are cooked to a thick sauce. Stir frequently; add sugar, salt and pepper, stir thoroughly. Simmer 15 minutes.

This sauce may be used on any type of macaroni or boiled rice. Sufficient for 1 pound.  Also used with pizza recipe.

Mangia, dear readers! If you are unfamiliar with that expression, it means eat, in Italian!

Figs For All! How to Grow A Fig Tree In Your Garden

The two fig bushes in Ms. Jeannie's yard, as pictured last summer.
The two fig bushes in Ms. Jeannie’s yard, as pictured last summer.

In preparation for some spring gardening projects, our dear blog reader, Amy, sent in a gardening question about fig trees and whether or not she would be able to grow them from cuttings in her neighborhood, which happens to be arid Arizona.

Instantly, Ms. Jeannie thought sure, why not grow them in Arizona since figs first originated thousands of years ago in  Arabia. But she wasn’t sure about the cutting department, so she did a little investigation on Amy’s behalf.

Lucky for us, Ms. Jeannie learned that since they are one of the oldest fruit trees in the world, they have now been adapted and modified to grow in just about any climate. Which is good news for all fig lovers! So first order of business is to determine which type of fig tree that will grow best in your neck of the woods…please consult this list.

Next, once you’ve found the right variety, you can visit your local nursery or garden store and either buy a small fig tree that has already been started or you can order a cutting online and start your own.  Ms. Jeannie found this great video on youtube from the NewEnglandGardener which takes you step by step through the cutting process…

Ms. Jeannie was so inspired by the video – she decided to try her own clipping project, following the NewEnglandGardeners  helpful guide. Here is what Ms. Jeannie used…

1. Garden Scissors 2. Publix Grocery Flyer 3. Quart size Ziploc bag 4. 7' inch fig tree cutting
1. Garden Scissors 2. Publix Grocery Flyer 3. Quart size Ziploc bag 4. fig tree cutting (this one is 7″ inches)

She clipped a section that had a green sprout already (in hopes that it will encourage more!)

Close-up of clipping

Here’s the finished product. Now we wait for a few weeks and see what happens. Ms. Jeannie is going to keep the bag in her kitchen stairwell, which seems to collect all the heat in the house.

Grow big, little fig!

Please keep in mind, as noted in the video – growing trees does not happen over night. It will take a few years to get your cutting tree well established. However – they are fairly fast growers, so you’ll see changes over the course of months instead of years, like some other trees.

This is what the fig trees in Ms. Jeannie’s yard look like now, in the middle of winter (aka the dormant season, as the NewEnglandGardener refers to in the video)

A picture of the fig trees taken today. Stickily looking things in winter, but they still retain a nice shape.
A picture of Ms. Jeannie’s fig trees taken today. Stickily looking things in winter, but they still retain a nice shape.

If you look closely, you can see they already have buds emerging even though it is only January. This is a perfect stage now, to take a clipping.

You can see two of last year's figs now dried on the twig. Ms. Jeannie wonders if this is inspiration for the new shoot!
You can see two of last year’s figs now dried on the twig. Ms. Jeannie wonders if this is inspiration for the new shoot!

Isn’t it amazing that this little sprout will grow from a tiny little wonder into this, in only about 3 short months…

figs2

The fig trees in Ms. Jeannie’s  yard are over 12 years old and reach about 10′ feet high x 8′ feet wide. They’ve been pruned every once in awhile but otherwise, are incredibly low-maintenance. You may recall, last summer, the two fig bushes in Ms. Jeannie’s yard had a banner production season. There must have been hundreds of figs that plumped up from July thru September.

Mostly she passed buckets along to her friends, ate a few cups each day and froze gallon bagfuls for a jam lesson that never quite came into fruition. No problem though, as of late, Ms. Jeannie has been enjoying the frozen figs in her morning yogurt shake.  Why add ice cubes when you can add some frozen figs instead?!

All you do is just pick, rinse and air-dry the figs and then pop them into a freezer bag and stick them in the freezer.

Ms. Jeannie tosses these little frozen delights right  into the blender, straight out of the freezer in this state.  They make the shake cold and add extra vitamins to the start of her day.  Figs are high in vitamin K (good for blood clotting), vitamin E (protection from cell damage) and vitamin B6 (good for the nervous system, the breaking down of glucose and for cell energy).

They also contain the minerals manganese (good for your bones) and  potassium (good for your blood pressure)  and  are also really high in dietary fiber.  A delicious superfood!  This is Ms. Jeannie’s recipe for her morning shake, if you are so inclined to try it…

Yogurt Fruit Shake

Makes two 8oz. glasses

1/2 cup organic 2% milk

6 whole frozen figs

1 banana (broken into 4 sections)

1 cup fat free vanilla yogurt

1 quarter fresh cantaloupe (rind removed and roughly chopped)

Add all ingredients in the blender and pulse on low until all the figs break down into pieces (about 30 seconds). Then put the blender on crush and let it mix for about a minute, which blends all the fruit and incorporates air to make it light and fluffy. If the shakes seems too thick, you can add more milk. Otherwise pour and enjoy!  You can also add different types of fruit if you like. This is a really basic recipe and can be modified eighty million different ways!

Ms. Jeannie hopes this mini fig lesson will blossom into something wonderful for Amy and anyone one else with figgy aspirations.  If you decide to start a fig tree from a clipping, keep us posted on how your progress goes. Ms. Jeannie in turn, will keep you updated on hers as well.  Happy growing!!!

Carrots at Christmas? It’s Wednesday in the Kitchen: Parmesan Carrot Risotto

If you have been a part of Ms. Jeannie’s blog since the summer, you’ll know that Ms. Jeannie enjoys the fun of gardening (minus April’s poison ivy outbreak, of course!).  Her small summer crops were full of crunchy cherry tomatoes, crispy green peppers, snappy garden peas, buckets of sunflowers and more jalapenos then Mr. Jeannie Ology knew what to do with!

After she had harvested all her plantings and tilled her garden back down to the soil again, Ms. Jeannie half-heartedly decided to plant a fall garden in a neighboring patch that was overwhelmed with weeds. She says half-heartedly, because after the zealousness with which she approached her summer garden, (designing her own patch,  layout and fencing) Ms. Jeannie felt sort of confined working in the perimeters of this already established bed. It was a funny shape too. Sort of like a squashed trapezoid or a flattened kidney bean, and was flanked on both ends by azalea bushes. But it did back up to garden fencing (ideal for fall peas!) and had a pretty brick border, so…

She carried on anyway and planted two rows of peas, several rows of alternating onions and carrots and a border of zinnias.  She was using old seeds, some over five years old as an experiment of sorts to see if they would actually still grow.

The weeds returned almost instantly. Some of the seedlings started to sprout. Fire ants began to picket. Apparently, being fond of the neighborhood, they were not keen on Ms. Jeannie’s idea to relocate their home.  And then there were the mosquitoes – so big and so bold, Ms. Jeannie began to think she, herself,  was  their only source of sustenance.

For weeks Ms. Jeannie battled nature. But, as it turns out 5 year old seeds in combination with weeds, fire ants and mosquitoes does not make for a garden great. The peas bloomed then promptly withered, the onion shoots sent up green antennas from the ground, surveyed the location and then disappeared – never to be seen again.  And the zinnias nevr even showed up at all.  Ms. Jeannie was depressed.  Halfhearted gardening was no fun. No fun at all.

But there was one bright spot among all this sad state of affairs. The carrots! Dear readers, the carrots…the carrots gave it their all! They sprouted, they grew long lacy foliage, they hummed happily. All autumn. Growing, growing, growing in the ground undisturbed. Like a bad mother, Ms. Jeannie paid them absolutely no attention. She didn’t  water them, she didn’t weed around them or cover them on frosty nights, she didn’t even visit them on a weekly basis. Frankly, my dears, she just sort of forgot about them.

Until yesterday.  When a faint memory tickled her mind.  A long lost thought…plantings in the fall…carrots for Thanksgiving dinner (Ms. Jeannie’s original idea for the garden in the first place)… vegetables throughout the winter. Dreamy eyed, Ms. Jeannie wondered what might have become of those carrot seeds from so long ago…

So with shovel in hand, she headed out to the garden to investigate. Expectations were low – incredibly low. After all they’d been in the ground for 5 months. There had been many, many handfuls of cold 30 degree weather. There had been times of drought and times of flooding.  And there had been that issue of lackluster attention.

But alas! The carrots didn’t care! No worries, they shouted.  The green lacy sprouts greeted her like a long lost friend. They practically sang to her as she pulled them, one by one out the ground. Here’s a picture of the chorus…

Garden Carrots pulled in December!

Full fledged carrots! Maybe a bit on the small side, some, but with such low expectations, Ms. Jeannie was practically overjoyed with the perfection of them all:) Such beauties they seemed!

Who would have thought you could enjoy such pretty vegetables in December? And with absolutely zero effort. Carrots may just very well be Ms. Jeannie’s new favorite vegetable.

carrots2

This event called for celebration, so Ms. Jeannie found herself  in the kitchen last night making a parmesan and carrot risotto. It was a chilly night – in the mid 30’s – and this was a warm, filling dinner full of autumn sunshine (thank you carrots!).

The ingredients!
The ingredients!

A lot of people shy away from making risotto because they think it is tedious or complicated, but really it couldn’t be a more simple recipe. The often thought tedious part just means you have to stay by the stove for about 20 minutes and stir frequently so the rice doesn’t stick. If you haven’t ever tried risotto, it is an Italian style rice based dish, that is filling like pasta and can be cooked a million different ways but always includes 3 ingredients: parmesean cheese, white wine and chicken broth.

Ms. Jeannie always likes to use homemade chicken broth but you could used canned or carton broth as a substitute too.

Here’s the recipe, which was adapted from a Martha Stewart recipe that had called for long grain rice in place of risotto. This is a picture of Ms. Jeannie’s finished product with a serving suggestion (see bottom of recipe for details).

Ms. Jeannie's Parmesean Carrot Risotto served on one of the antique ironstone plates from her collection.
Ms. Jeannie’s Parmesean Carrot Risotto served on one of the antique ironstone plates from her collection.

Parmesan Carrot Risotto (serves 4)

Ingredients

  • 3 1/2 cups homemade chicken broth
  • 2 tablespoons butter
  • 1 medium red onion, finely chopped
  • 6 medium carrots, grated
  • Coarse salt and ground pepper
  • 1 1/4 cups arborrio rice
  • 1/2 cup dry white wine
  • 1/4 cup grated Parmesan

Directions

  1. In a saucepan, bring broth and 2 cups water to a bare simmer over medium.
  2. In a large saucepan, melt 1 tablespoon butter over medium. Add onion and carrots; season with salt and pepper. Cook, stirring occasionally, until softened, 5 to 7 minutes. Stir in rice. Add wine; cook, stirring, until absorbed, 1 to 2 minutes.
  3. Add 2 cups hot broth; simmer over medium-low, stirring frequently, until mostly absorbed, 10 to 12 minutes. Continue to add broth, 1 cup at a time, stirring occasionally, until absorbed before adding more. Cook until rice is creamy and just tender, about 20 minutes (you may not need all the broth).
  4. Remove risotto from heat. Stir in Parmesan and 1 tablespoon butter, and season with salt and pepper.

Ms. Jeannie served her risotto on top of a bed of raw baby spinach. She just grabbed a handful of spinach for each plate. The heat of the rice wilts the spinach a touch and adds a bit of bright color to the plate.  Ms. Jeannie paired her dinner  with Smoking Loon Sauvingnon Blanc, which complimented the sweetness of the carrots. She could have also served this with a crusty baguette too – had she not forgotten to get one at the store!

Here’s a close-up so you can see the texture…

Risotto close-up!
Risotto close-up!

Thank you sweet carrots for growing so great over all these months!!! See you again this spring for sure!

Wednesday in the Kitchen – Simple Tomato Basil Tart

Ms. Jeannie is thoroughly lucky to have come from a family of cooking adventurers. Her parents, her sisters, her husband all love to cook and enjoy experimenting with new flavors and diverse ingredients.

When she was small, Ms. Jeannie’s mother taught her the “old-fashioned” way of baking, with recipes handed down from generation to generation. Which meant everything, always, was made by scratch. Cookies, cakes, pies, puddings, chocolate sauce, whipped cream,  every decadent delight was made by our  hands with real, whole ingredients.

Ms. Jeannie’s great grandfather, William Earle aka Grandpa Bumpy, was an excellent baker. It’s his pie recipes that we still use today in our family.

As Ms. Jeannie grew and started her own experimenting, this love of building creations from the mixing bowl up stemmed out into other aspects of the palatte: homemade tomato sauce, chicken broth, pasta, salad dressings, soups, breads…it was thrilling to know that she could indeed make anything she wanted.

One of her most favorite things to make is pie crust. There is something about lumping a few, simple ingredients together in a bowl,  mixing it about and then rolling it out into a delightful sheet of smooth paper-like dough.

There are challenges still though – even after all these years… like that wonderful flip of the thumb that makes a beautiful scalloped edge around the rim of the pie crust.Ms. Jeannie cannot seem to master this for the life of her. Instead she opts for the more rustic, “provincial” style of folding over the extra dough, which creates a very humble look.

Gorgeous scalloped pie crust (not made by Ms. Jeannie!). You’ll see Ms. Jeannie’s rustic style further down the blog. Apple Pie photograph by Summer Owens.

Ms. Jeannie was consistently taught by her mother that  using good ingredients was just as important as using good equipment. Which meant having a good set of mixing bowls, rolling pins , flour sifters and a pastry cloth.  Necessities. Each and every one of them.

Vintage Kitchen Tool Collection from JodysVintage

When Ms. Jeannie was off to college and on her own, she tried to cut a few corners in the equipment department. Using an empty wine bottle as a rolling pin, the wooden cutting board as a pastry cloth and a fork in place of a dough cutter, Ms. Jeannie was off and baking to somewhat satisfactory results.  Sometimes the dough would be tough and difficult to work, flour would get all over everything (almost always on the floor!) and the dough never rolled out perfectly on the square cutting board – usually lopping off one side, making it thicker in that section then all the others.

For years she baked like this – improvising and substituting, working with what she had at hand instead of getting the proper tools.  A pastry cloth – that is really what Ms. Jeannie desperately needed. But she always seemed to overlook this one neccessity when she was out shopping.

Until…two months ago! When she FINALLY she purchased a pastry cloth at the kitchen supply store. It cost $5.00. What are on earth was she waiting for all this time? It was indeed a jubilant and monumental day:)

Ms. Jeanne’s new kitchen darling!

Now, whatever Ms. Jeannie rolls out onto this magic carpet comes out lighter, flakier and more evenly consistent. It is completely marvelous! As it turns out – pastry cloths have been in use for over a century. Because they are made usually from unbleached cotton and/or oilcloth they provide a wonderful non-stick work environment. Seasoned with a little flour and carefully stored, pastry cloths can last for years. Marvelous, says Ms. Jeannie, since it took her years to acquire!

Here is Ms. Jeannie’s latest creation using her lovely kitchen helper… (note the rustic crust!)

Ms. Jeannie’s Simple Tomato Basil Tart

Simple Tomato Basil Tart – Serves 4

1 cup flour

1/4 tsp. salt

6 tablespoons of vegetable shortening

1/4 cup ice cold water

1/2 lb. Farmer’s cheese

4 large handfuls of fresh basil, washed and torn in pieces

2 lbs. organic home-grown cherry tomatoes, washed and cut in half

3 tablespoons olive oil

Salt & Pepper to taste

1. Preheat the oven to 350 degrees. Place the halved tomatoes in a medium size bowl and toss in 3/4 of the fresh basil.  Add the olive oil, salt and pepper and mix to combine. Set bowl aside and let tomatoes marinate while you make the dough.

2.  Now onto the dough. In a large mixing bowl, combine the flour, salt and shortening.  Using a dough cutter (or a fork – in Ms. Jeannie’s case)  mash the shortening into the flour until it forms small crumb-like bits. Add the cold water and combine until dough forms.  Knead it lightly into a ball with your hands. Just until it is no longer sticky. Be careful not to overwork the dough – then it will become tough.

3. Sprinkle a small handful of flour on your work surface (aka the pastry cloth!)  and roll the dough out  as thinly as possible. Place crust in a round cake pan and bake in oven just until the crust is firm but not brown. About 20-25 minutes.

4. Remove crust from oven, add the tomato/basil mixture. Take the farmers cheese and slice in thin chunks on top of the tomato mixture. Carefully mix cheese and tomatoes together with a spoon, making sure not to scrap a hole in the bottom crust. Top with the remaining 1/4 basil.

5. Return the tart to the oven and bake for 20 minutes. Broil for an additional 5-6 minutes until the cheese starts bubbling and turns golden brown.

6. Let rest for 10 minutes before serving.

Serve this with a simple side salad and a glass of white wine (Ms. Jeannie chose a Pinot Grigio) and you have a lovely, light, late-summer dinner!