Tuesday In the Kitchen – The Art of Greek Cookery

Opa! It's international dinner night!
Opa! It’s international dinner night!

Today, dear readers, we are going on a wonderful culinary adventure that is taking us from Greece to Long Island, New York  to Ms. Jeannie’s kitchen in Georgia.  The subject of our adventure is a recipe from this Greek cookbook…

The Art of Greek Cookery circa 1963

The recipes in The Art of Greek Cookery were compiled in 1958, by 16 first generation Greek women who lived in Hempstead, New York and were part of the congregation of St. Paul’s Greek Orthodox Church.

St. Paul's Greek Orthodox Church, Hempstead, NYPhoto courtesy of rohlfstudio.com
St. Paul’s Greek Orthodox Church, Hempstead, NYPhoto courtesy of rohlfstudio.com

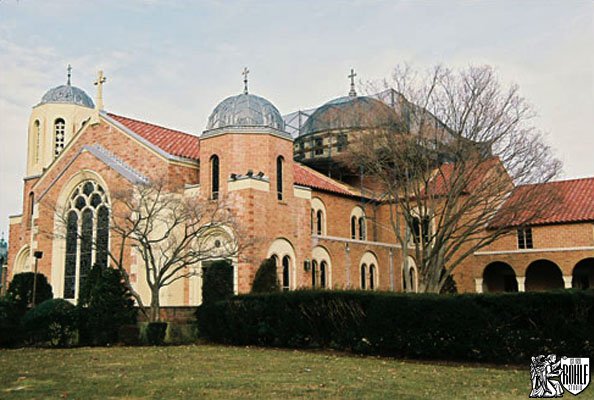
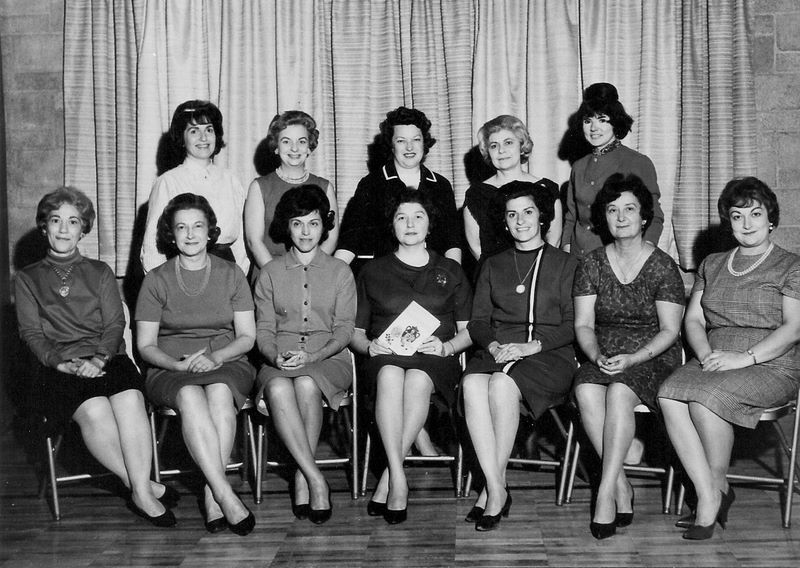
The Church, which was formed in 1944, needed to expand as their congregation grew, so the ladies of the Church formed a recipe committee, which was a segment of the church’s social organization, the Mr. & Mrs. Club (so cute!). The intention of the recipe committee was to gather traditional recipes from their homeland into a book for American cooks and then to sell the books as a fundraiser for the new building construction. In true Julia Child spirit,  these ladies got to work gathering, testing and and adapting hundreds of recipes that were representatives of their Greek culture.  This is a picture of some of the original members of the recipe club…

Photo courtesy of stpaulhempstead.org

After two and half years of laboring,  they published a simple spiral bound cookbook entitled, The Grecian Gourmet, which turned out to be a runaway success. Both the The New York Times and the New York Tribune published articles about the women and their book project, which caught the attention of people all across the country and book orders poured in.

The recipe committee was humbled and amazed that their little cookbook had become such a sensation.

“It was a book that had immense appeal for all food conscious people. For gourmets and experimental cooks of all kinds; for tourists who upon returning from Greece, wished to duplicate  in their own kitchens some of the interesting and exciting dishes they had tasted in Greece on the Grecian islands. It was a work of love and a great pleasure for all of us.” – Theodora Lourekas, Chairmen of the Recipe Committee, 1963.

The cookbook also caught the attention of New York publishing giant Doubleday and Company, who wanted to republish it under their “Art of ” cookbook series. And so the Art of Greek Cookery was born in 1963.

greek9

Containing a wealth of recipes ranging from appetizers to desserts, the cookbook also contains information on Greek wines, traditional feast days, customs, traditions, suggested menus and a lovely forward by the then pastor, Father George Papadeas. To say that he was not only proud but impressed by the hard work and determination of these women was an understatement.  Just by reading the forward, preface and introduction of this cookbook you can tell that so much love and good cheer was behind this project.

100% of the proceeds from the book sales went into the church construction fund, which provided them with more than enough money to undertake the expansion.  Both the Church and the recipe club are still going strong today!

So in true spirit, Ms. Jeannie embarked on a new cooking challenge and made one of the recipes from the book. Ideally, she would have liked to have chosen a lamb recipe, since that is so traditional, but Ms. Jeannie feels bad for the little lambs and doesn’t know of a local, ethically sourced lamb company, so she chose a chicken dish instead. It had five ingredients and was ready within an hour. And it was DELICIOUS (with a big capital D!). Here’s the recipe…

All the ingredients you will need!
The ingredients!

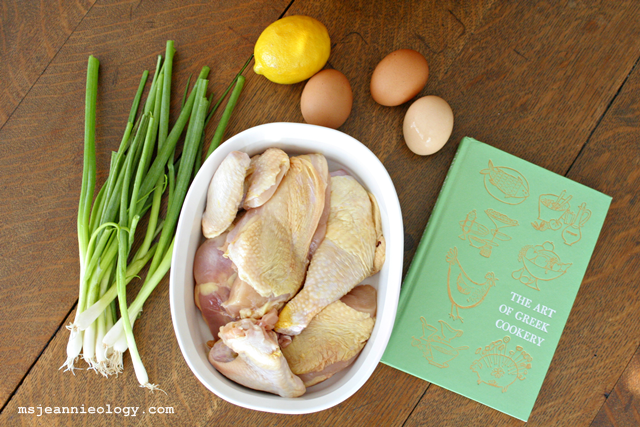
Chicken with Scallions (also known as Kotopoulo me Kremidakia Freska)

3-4 lb. organic chicken, cut into 6 pieces

5 tablespoons butter

Salt & Pepper to taste

1 cup hot water

6 bunches organic scallions, rinsed and ends trimmed

3 organic eggs

1 lemon, juice of

Rinse chicken pieces and pat dry with paper towels. In a Dutch oven (or you can use a large soup pot) melt the butter, add the chicken pieces and brown until golden on all sides. Sprinkle with salt and pepper. *Add hot water and scallions. Cover and cook over low-heat for one hour.

In a medium bowl, beat eggs. Incorporate lemon juice slowly into egg mixture while constantly stirring to prevent curdling. Add some broth from the pan (about 1/2 cup), again constantly stirring to prevent curdling. Stir actively for about a minute.

Remove chicken from pan and place on a plate. Add the egg mixture to the pan broth and stir constantly for another minute to avoid curdling. Add the chicken back into the pot to soak up the sauce. The heat under the pan must be on low and the sauce must not be allowed to boil. Let the chicken rest in the sauce fora few minutes before removing from heat and serving.

* Special note – Ms. Jeannie doesn’t have a Dutch oven so she used a large soup pot. After she browned the chicken and before she added the water and scallions, she de-glazed the pan with 1/4 cup of white wine just because her pot tends to burn easily. If you are using a Dutch oven you might not need to add that step at all.

.. cook2

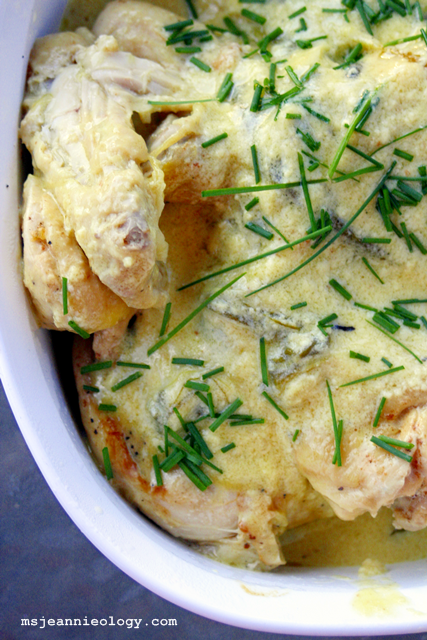
Once Ms. Jeannie placed the chicken and sauce in a serving dish she sprinkled it with some chives from her garden. This of course is optional. She served the chicken with a simple homegrown tomato basil salad which was marinated in olive oil and garlic for an hour, a crusty baguette and a glass of sauvignon blanc. Enjoying an authentic Greek dinner outside on the patio with Mr. Jeannie Ology made Ms. Jeannie feel like she was on a little vacation!

cook3

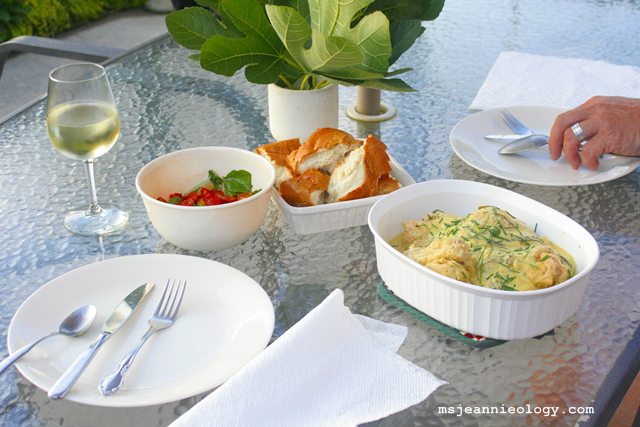
It is armchair traveling at its best and most delicious! Cheers or Opa (as they like to say in Greece)!

Carrots at Christmas? It’s Wednesday in the Kitchen: Parmesan Carrot Risotto

If you have been a part of Ms. Jeannie’s blog since the summer, you’ll know that Ms. Jeannie enjoys the fun of gardening (minus April’s poison ivy outbreak, of course!).  Her small summer crops were full of crunchy cherry tomatoes, crispy green peppers, snappy garden peas, buckets of sunflowers and more jalapenos then Mr. Jeannie Ology knew what to do with!

After she had harvested all her plantings and tilled her garden back down to the soil again, Ms. Jeannie half-heartedly decided to plant a fall garden in a neighboring patch that was overwhelmed with weeds. She says half-heartedly, because after the zealousness with which she approached her summer garden, (designing her own patch,  layout and fencing) Ms. Jeannie felt sort of confined working in the perimeters of this already established bed. It was a funny shape too. Sort of like a squashed trapezoid or a flattened kidney bean, and was flanked on both ends by azalea bushes. But it did back up to garden fencing (ideal for fall peas!) and had a pretty brick border, so…

She carried on anyway and planted two rows of peas, several rows of alternating onions and carrots and a border of zinnias.  She was using old seeds, some over five years old as an experiment of sorts to see if they would actually still grow.

The weeds returned almost instantly. Some of the seedlings started to sprout. Fire ants began to picket. Apparently, being fond of the neighborhood, they were not keen on Ms. Jeannie’s idea to relocate their home.  And then there were the mosquitoes – so big and so bold, Ms. Jeannie began to think she, herself,  was  their only source of sustenance.

For weeks Ms. Jeannie battled nature. But, as it turns out 5 year old seeds in combination with weeds, fire ants and mosquitoes does not make for a garden great. The peas bloomed then promptly withered, the onion shoots sent up green antennas from the ground, surveyed the location and then disappeared – never to be seen again.  And the zinnias nevr even showed up at all.  Ms. Jeannie was depressed.  Halfhearted gardening was no fun. No fun at all.

But there was one bright spot among all this sad state of affairs. The carrots! Dear readers, the carrots…the carrots gave it their all! They sprouted, they grew long lacy foliage, they hummed happily. All autumn. Growing, growing, growing in the ground undisturbed. Like a bad mother, Ms. Jeannie paid them absolutely no attention. She didn’t  water them, she didn’t weed around them or cover them on frosty nights, she didn’t even visit them on a weekly basis. Frankly, my dears, she just sort of forgot about them.

Until yesterday.  When a faint memory tickled her mind.  A long lost thought…plantings in the fall…carrots for Thanksgiving dinner (Ms. Jeannie’s original idea for the garden in the first place)… vegetables throughout the winter. Dreamy eyed, Ms. Jeannie wondered what might have become of those carrot seeds from so long ago…

So with shovel in hand, she headed out to the garden to investigate. Expectations were low – incredibly low. After all they’d been in the ground for 5 months. There had been many, many handfuls of cold 30 degree weather. There had been times of drought and times of flooding.  And there had been that issue of lackluster attention.

But alas! The carrots didn’t care! No worries, they shouted.  The green lacy sprouts greeted her like a long lost friend. They practically sang to her as she pulled them, one by one out the ground. Here’s a picture of the chorus…

Garden Carrots pulled in December!

Full fledged carrots! Maybe a bit on the small side, some, but with such low expectations, Ms. Jeannie was practically overjoyed with the perfection of them all:) Such beauties they seemed!

Who would have thought you could enjoy such pretty vegetables in December? And with absolutely zero effort. Carrots may just very well be Ms. Jeannie’s new favorite vegetable.

carrots2

This event called for celebration, so Ms. Jeannie found herself  in the kitchen last night making a parmesan and carrot risotto. It was a chilly night – in the mid 30’s – and this was a warm, filling dinner full of autumn sunshine (thank you carrots!).

The ingredients!
The ingredients!

A lot of people shy away from making risotto because they think it is tedious or complicated, but really it couldn’t be a more simple recipe. The often thought tedious part just means you have to stay by the stove for about 20 minutes and stir frequently so the rice doesn’t stick. If you haven’t ever tried risotto, it is an Italian style rice based dish, that is filling like pasta and can be cooked a million different ways but always includes 3 ingredients: parmesean cheese, white wine and chicken broth.

Ms. Jeannie always likes to use homemade chicken broth but you could used canned or carton broth as a substitute too.

Here’s the recipe, which was adapted from a Martha Stewart recipe that had called for long grain rice in place of risotto. This is a picture of Ms. Jeannie’s finished product with a serving suggestion (see bottom of recipe for details).

Ms. Jeannie's Parmesean Carrot Risotto served on one of the antique ironstone plates from her collection.
Ms. Jeannie’s Parmesean Carrot Risotto served on one of the antique ironstone plates from her collection.

Parmesan Carrot Risotto (serves 4)

Ingredients

  • 3 1/2 cups homemade chicken broth
  • 2 tablespoons butter
  • 1 medium red onion, finely chopped
  • 6 medium carrots, grated
  • Coarse salt and ground pepper
  • 1 1/4 cups arborrio rice
  • 1/2 cup dry white wine
  • 1/4 cup grated Parmesan

Directions

  1. In a saucepan, bring broth and 2 cups water to a bare simmer over medium.
  2. In a large saucepan, melt 1 tablespoon butter over medium. Add onion and carrots; season with salt and pepper. Cook, stirring occasionally, until softened, 5 to 7 minutes. Stir in rice. Add wine; cook, stirring, until absorbed, 1 to 2 minutes.
  3. Add 2 cups hot broth; simmer over medium-low, stirring frequently, until mostly absorbed, 10 to 12 minutes. Continue to add broth, 1 cup at a time, stirring occasionally, until absorbed before adding more. Cook until rice is creamy and just tender, about 20 minutes (you may not need all the broth).
  4. Remove risotto from heat. Stir in Parmesan and 1 tablespoon butter, and season with salt and pepper.

Ms. Jeannie served her risotto on top of a bed of raw baby spinach. She just grabbed a handful of spinach for each plate. The heat of the rice wilts the spinach a touch and adds a bit of bright color to the plate.  Ms. Jeannie paired her dinner  with Smoking Loon Sauvingnon Blanc, which complimented the sweetness of the carrots. She could have also served this with a crusty baguette too – had she not forgotten to get one at the store!

Here’s a close-up so you can see the texture…

Risotto close-up!
Risotto close-up!

Thank you sweet carrots for growing so great over all these months!!! See you again this spring for sure!