
Russian Tea Cakes… those dense little snowy bundles of sweet confectionary sugar, butter, flour, and nuts is a classic Christmas cookie that has been a staple in our holiday baking since I was a little kid. One of the most simple of cookies to make, it has other aliases as well…Mexican Wedding Cakes, Rolling in the Snow, Holy Rollers and the plain Jane, practical name… Pecan Balls.
The history behind these guys is muddy but a popular theory is that they originated in Europe as a tea time snack (hence their name Russian Tea Cakes) and migrated to Mexico with European nuns where they became a popular cookie served at weddings (Mexican Wedding Cakes!). A friend who grew up in Canada knew them as Rolling in the Snow cookies (how very fun!) and at a church-sponsored flea market in the South, I once saw them advertised as Holy Rollers on the food and beverage table. That could have been someone’s clever name made up just for that day, so I’m not sure if this one has actual traction, but it does pay homage to the nun theory anyway. And of course, for all the literal lovers out there, the Pecan Ball needs no explanation as to how that name came about since indeed these cookies are ball-shaped and can contain pecans.
Traditionally they look something like this…

and can contain any nuts you like – pecans, walnuts, peanuts, pistachios, macademia, etc. My mom always used walnuts and favored the recipe from the Betty Crocker Picture Cook Book printed in 1950…

so that became my family tradition as an adult too. Some other recipes include additional ingredients of cinnamon or loose tea, lavender or lemon zest but Betty Crocker’s version is the one we like best.
Russian Tea Cakes
1 cup soft butter
1/2 cup sifted confectioner’s sugar (plus additional following baking)
1 tsp. vanilla
2 1/4 cups sifted flour (Betty recommended Gold Medal flour back in the day)
1/4 tsp. salt
3/4 cup finely chopped nuts
Mix butter, sugar and vanilla together in a medium-sized mixing bowl. Sift flour and salt together and mix into butter. Stir in nuts and then cover the bowl with plastic wrap and chill in the fridge for about 20-30 minutes. Preheat oven to 400 degrees. Remove dough from fridge and roll into 1″ inch balls* using your hands. Place 2.5 inches apart on an ungreased baking sheet and bake until set but not brown (between 10-12 minutes).** While still warm roll in confectioner’s sugar. Cool and then roll in sugar once again.

* To make snowmen: You will need to form three balls per snowman ranging in size from big (base) medium (middle) small (head). Roll each ball in your hand to shape it into a typical snowball shape and then flatten the big and medium balls on the top and bottom with your hand so that that they will sit on top of each other without rolling off. The smallest ball (the head) should only be flattened on the bottom (so that your snowman will have a round head on top). The snowmen pictured here are three inches in height, so use your judgment when shaping as far as ball sizing. If you want to make bigger snowmen, baking times will need to be extended.
** If you are making snowmen – Bake all the big bottom base snowballs together on one sheet and then the medium and small balls on another sheet since the smaller balls usually take 1-2 minutes less baking time then the big balls. Your snowball sizes will look something like this…

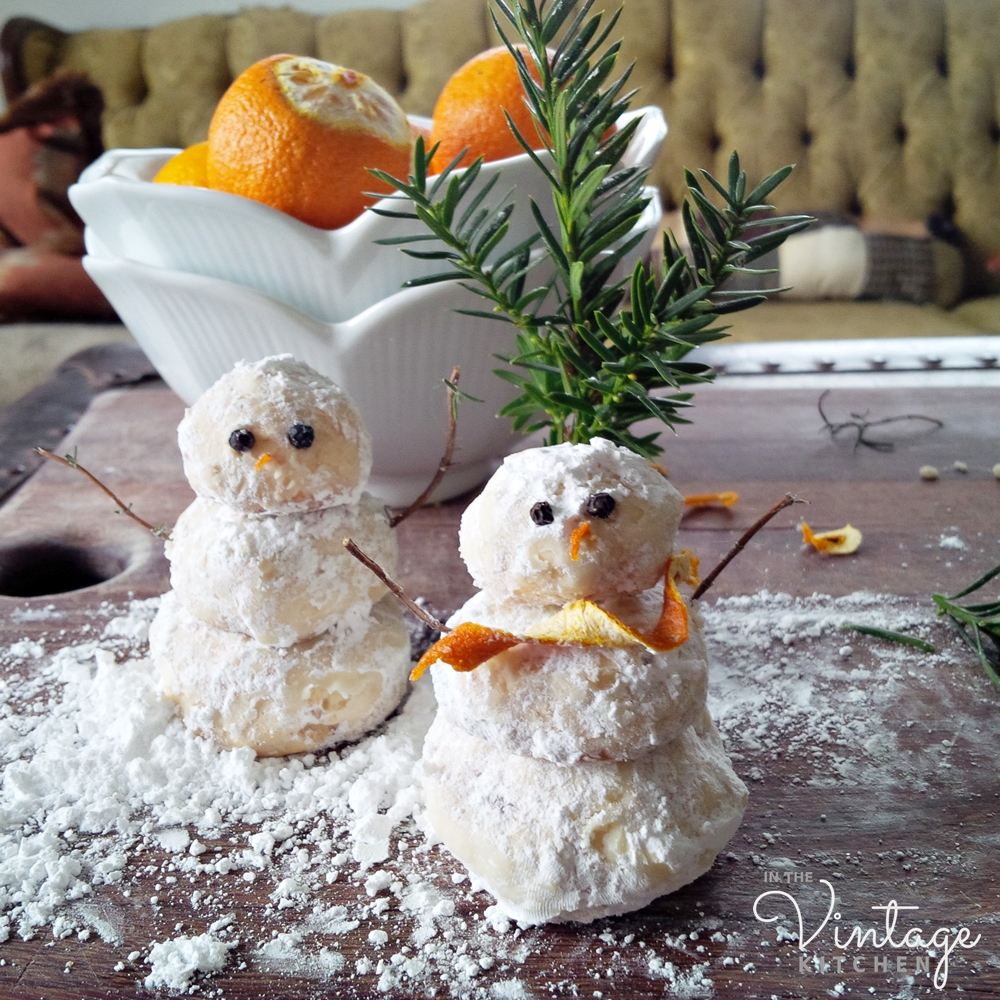
After you’ve baked and sugared all your cookies, now you are ready for the fun part of decorating. This is what I had on hand in the “props” department…

Orange rinds for the scarf and nose, black peppercorns for the eyes and rosemary branches for the arms. To make the scarf and nose just take a vegetable peeler and peel about 3 inches of rind in one long continues piece. Trim with a sharp paring knife to your desired scarf thickness and curl the rind around your fingers to shape it like a scarf (once the rind dries out it will hold the shape perfectly). Wedge the scarf into the section where the head meets the body.

Press the peppercorns into the head gently. They will stick on their own (this step might take a couple of attempts!).
Cut a thin long triangle out of your excess orange rind (to mimic the shape of a carrot) and gently press into the head where the nose should be. The orange rind will stick to the cookie on its own but might take a couple of attempts too.
Cut rosemary branches to size and poke into each side of the middle ball.

And now your snowman has come to life! Just like the ones you make in your yard, each one will have his own little personality depending on how you style it. The sky is the limit when it comes to decorating your guy so feel free to get creative if you want to make a hat, a jacket or a corncob pipe. Additional mounds of powdered sugar help set the stage for a little wintertime scene, day or night…

Hope this project adds a little fun to your day! Cheers to a winter wonderland from the sweetest little snowmen in the Vintage Kitchen!

