Vanity and the Fig Tree: A Clipping Update

Just as Ms. Jeannie said the other day “it’s amazing what a month can do” … well, it is equally amazing just to see what a a week can do when it comes to the wonderful workings of Mother Nature.

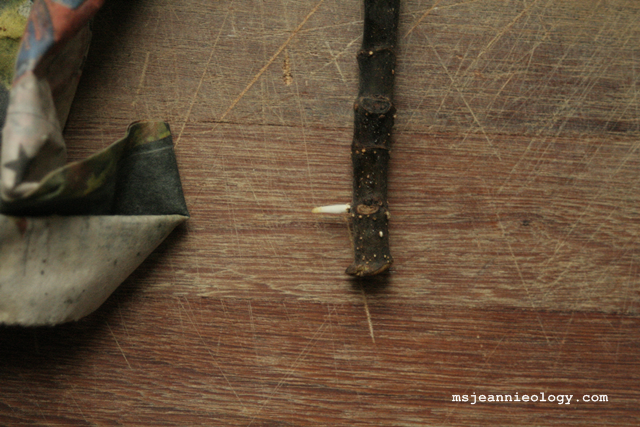
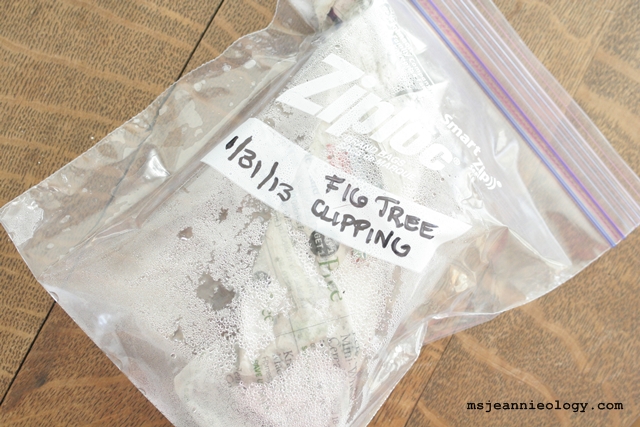
This was a picture of our fig tree cutting 11 days ago, having been snuggled into a moist grocery circular and tucked in a plastic Ziploc  bag for just under a month…

After 4 weeks in a ziploc bag!

Do you see the little the root sprout jutting out there near the base?! A good sign that our fig clipping was getting a new start! Ms. Jeannie was so proud of little fig. She thought it might be best to wrap him back up into the Ziploc for another week or two to see if he could grow some more shoots. After that he was going to be transplanted to a plastic cup filled with vermiculite, as recommended by the NewEnglandGardener.

Well, wouldn’t you know dear readers, as Ms. Jeannie was showing off her new gardening feat to a friend – she somehow managed to break off the new sprout. That’s right – completely broke it off – right at the base. Ms. Jeannie thought this was a reminder about vanity. Had she not been showing off – she would have had a strong and sturdy sprout!

Oh well. Back to the Ziploc the clipping went. If Fig could grow one sprout – surely he grow another!

Back to bed...
Back to bed…

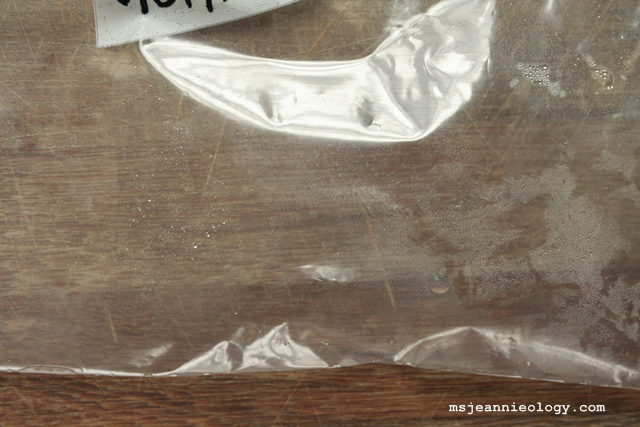
For 10 days, Ms. Jeannie left it untouched. Yesterday, on Day 11, she (carefully this time!) unwrapped her clipping to see what , if anything was going on with it. This is what she saw…

clip2

Sprouts! Not just one but FOUR!

clip3

How exciting! The fig tree is on its way!

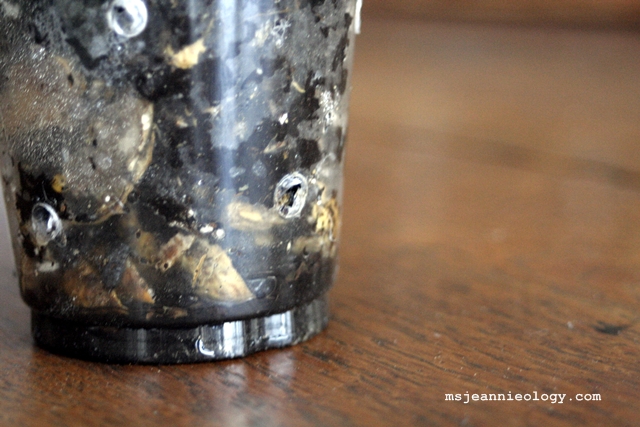
So the next step, according to the NewEnglandGardener, was to transplant the clipping to a plastic drinking cup filled with vermiculite.  Ms. Jeannie allocated a plastic cup, Mr. Jeannie melted a few drainage holes in it, and Ms. Jeannie prepared for the transplant.  Only there was one slight problem.

Ms. Jeannie didn’t have any vermiculite on hand. No problem, said the NewEnglandGardener. Thanks to his video, he also mentioned that you could use perlite. But, drat, again. Ms. Jeannie didn’t have any of that either.

So she she went online and found a potting soil/peanut shell alternative. She had both of those!  She shelled about 10 peanuts, and mixed those shells with a handful of potting soil and made a new home for her clipping…

trans1

The NewEnglandGardener recommended using a clear plastic cup so that you can see the roots as they start to grow long and wrap around the inside of the cup.

trans2

Peanut shells act as lightweight soil aeration chips since they are big and cavernous.

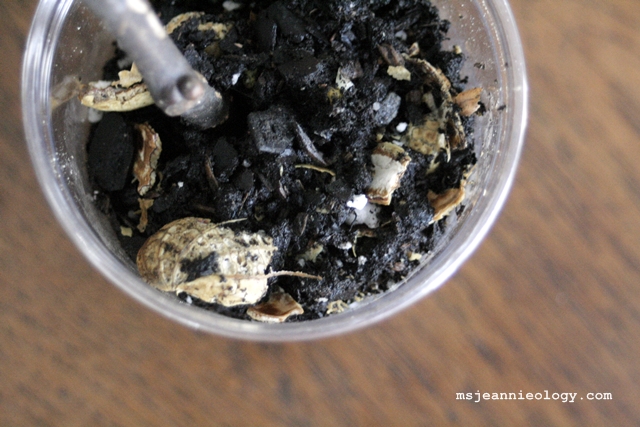
Hope you like your new house, Fig! Now it is back to the shelf, where you’ll sit (out of the direct sun, of course!) for quite a bit of time while you grow roots and eventually leaves.

“I never saw a discontented tree.  They grip the ground as though they liked it, and though fast rooted they travel about as far as we do.  They go wandering forth in all directions with every wind, going and coming like ourselves, traveling with us around the sun two million miles a day, and through space heaven knows how fast and far!”  ~John Muir

Happy Growing!

To follow the fig tree clipping journey from the beginning, start here.

Advertisement

Fig Clipping Update! What a Month Can Do!

Here’s an update from the January blog post: Figs for All: How to Grow a Fig Tree In Your Garden

After carefully cutting, wrapping, storing and dating (January 31st, 2013) her fig cutting as the NewEnglandGardener instructed, Ms. Jeannie was a little disappointed when she checked the clipping a week ago, only to see that nothing happened.

For three weeks the clipping had been tucked inside it’s plastic Ziploc, stored in a warm spot (on a shelf in the stairwell) and left unbothered to grow, grow, grow.  But as of last week, the twig still looked exactly the same as when she started. No sprouts, no new green, no shoots.  In the NewEngland Gardeners video, he already had sprouts after three weeks, so Ms. Jeannie worried that, perhaps, she had done something wrong and that she may have led her readers down a rocky garden path.

In speaking with a friend of hers about this matter, Ms. Jeannie learned another way that you could grow a fig clipping.

Method 2: Rooting a fig twig in a container of water.

In water! So Ms. Jeannie went out, cut another twig and placed that one in a jar of water and set it on her sill away from the sun.

This morning, she checked the status of both the Ziploc bag and the jar. This would now now be week 4 for the Ziploc bag and week 2 for the jar.

She was delighted to find this in her bag:

After 4 weeks in a ziploc bag!

Look closely and you’ll see a sprout at the very base of the twig…

A sprout!
A sprout!

Yey! Ms. Jeannie must have been a little impatient last week. This is a good reminder that you can’t rush Mother Nature. She is ready, when she’s ready!

The grocery circular that Ms. Jeannie wrapped the twig in is still moist, even though she has never added any more water since the start, and it is a little spotted with mold…

Still damp!
Still damp!

The Ziploc bag also contains condensation…

Condensation of bubles
Condensation bubbles

…so essentially, Ms. Jeannie created her own little greenhouse!

Nothing’s happening with the twig in the jar of water yet, but now Ms. Jeannie knows just to give it time!

So what’s next for the sprouted twig? Well, Ms. Jeannie is going to keep it in the Ziploc for one more week to see if any new shoots will form and then transfer it to a shoe-box size plastic container with potting soil as the NorthernGardener suggested.  In the meantime, she’ll keep her eye on the water twig to see what happens.

Until next time, dear readers,  grow fearless!

Grow Fearless Art Print by Feed Yor Soul Art on Etsy (click the photo for more info about this print)
Grow Fearless Art Print by Feed Your Soul Art on Etsy

And don’t forget! You have until midnight tonight to enter to win this photograph (click on the ladies for contest information)…

Win this vintage photograph!