All That Was Learned in a Season of Herb Gardening

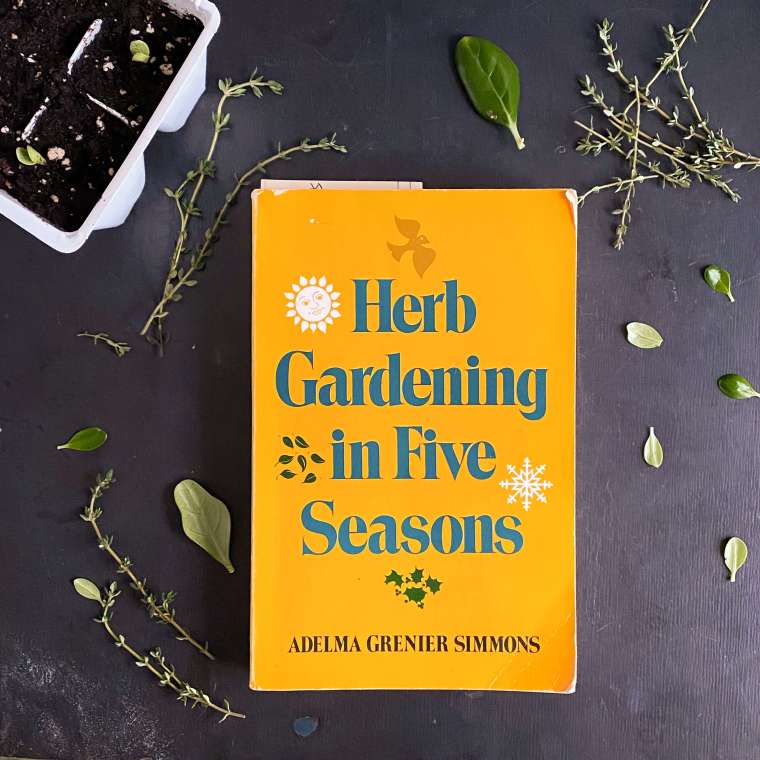
Adelma did not let us down. In her 1964 book, Herb Gardening in Five Seasons, she assured readers that certain types of herbs would grow in sun-dappled shade gardens. And she was not wrong. Herbs did grow. Flowers did form. And I did clip and cook my way through the summer. Just not quite in the way that I had anticipated.

If you are joining us for the first time, this post is part of a series started back in January 2025, about building an herb garden from scratch inspired by the horticultural wisdom of New England herbalist, Adelma Grenier Simmons (1903-1997). Catch up here for a proper introduction to Adelma and the inspiring gardens that she built at her Connecticut home, Caprilands over the course of the 20th century.

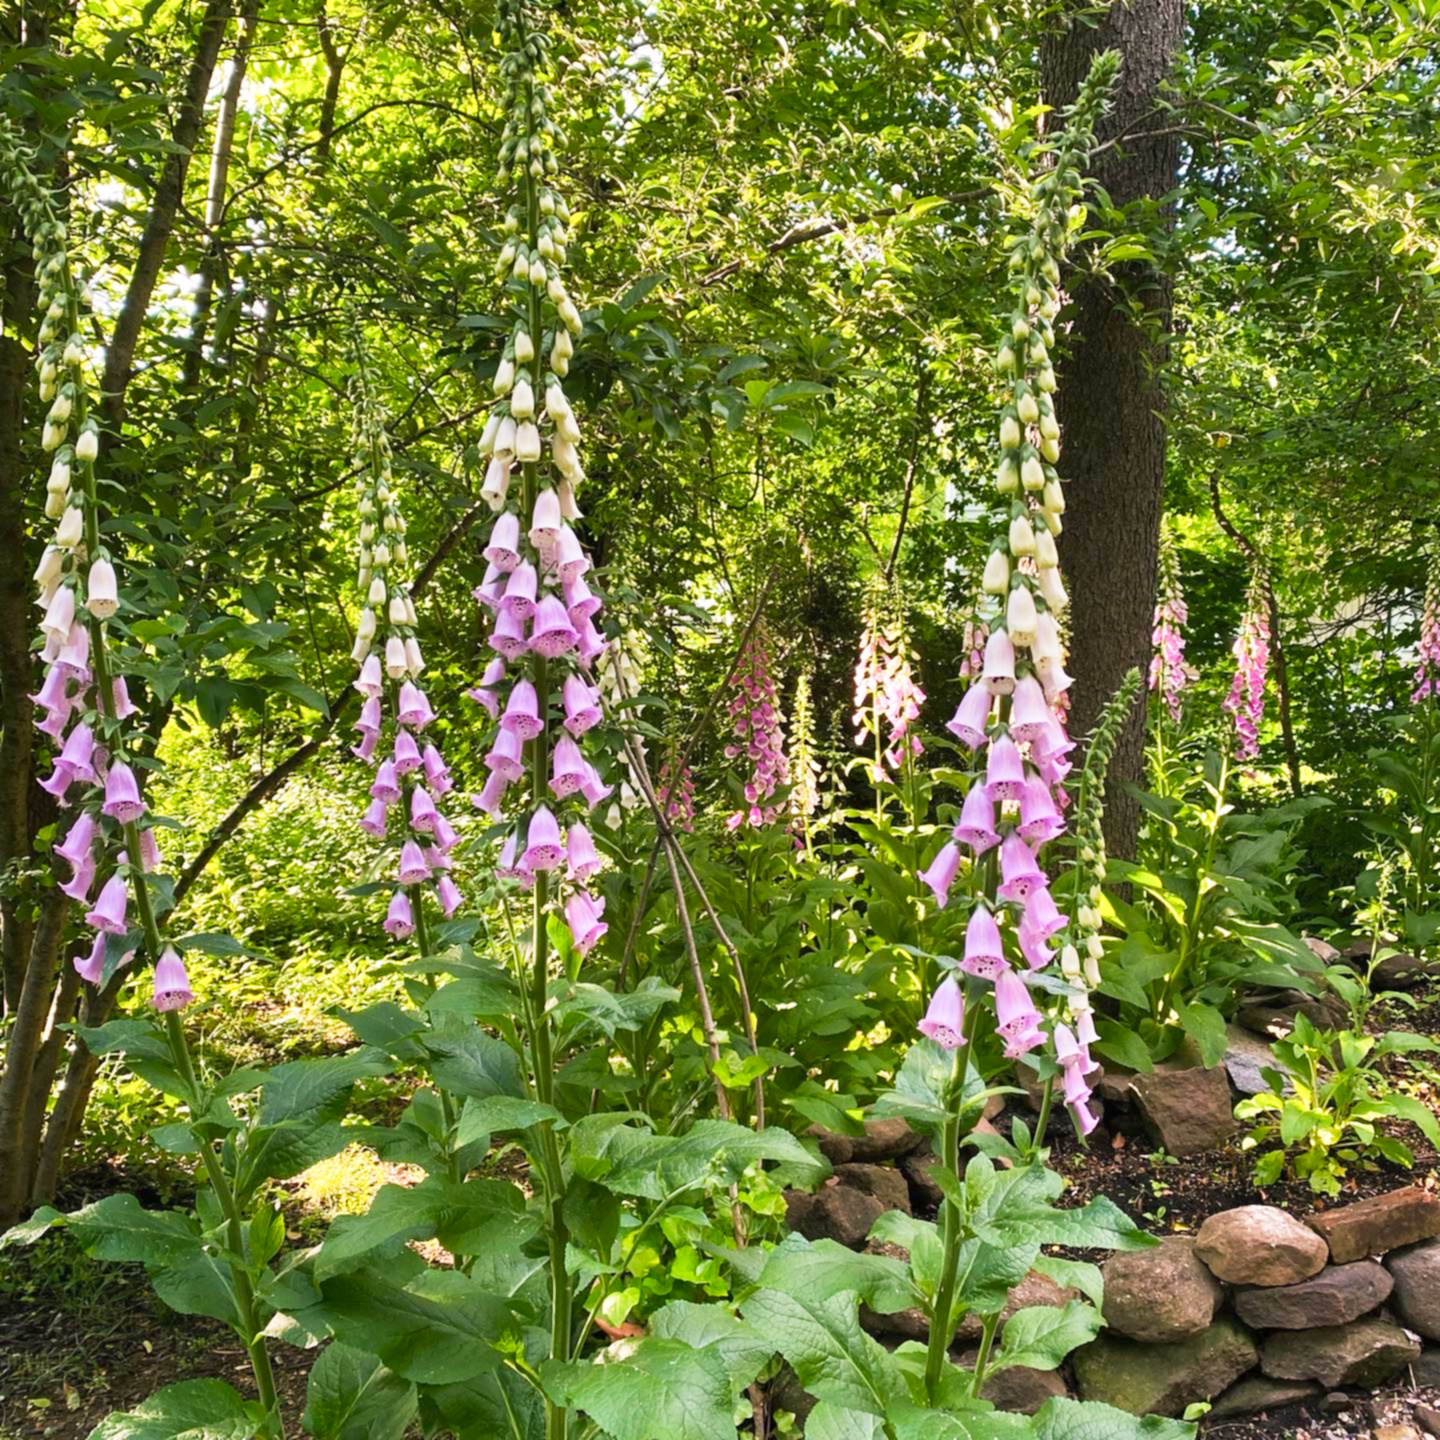
In January, when planning and preparations were underway for the start of our first-ever herb garden at 1750 House, I had visions. As I sketched out the location map of what herbs would go where and which companion plants would best be suited side-by-side, in my mind, the herb garden of summer 2025 would be eye-high. Right in step with the 5-foot tall foxglove success story of past gardening endeavors.

Foxgloves from the 2023 -2024 garden.

Emboldened by those towering giants of the woodlands that had been grown in the greenhouse from the smallest of seeds, I had visions that the herbs would grow equally tall. I had visions of their delicate petals swaying in the breeze. Of their foliage tinted in all the greens. I had visions that they’d make a home in and around the foxglove and create an undulating palette of soft colors. A cottage collection. A fully filled out bed.

The snow-covered greenhouse in January 2025

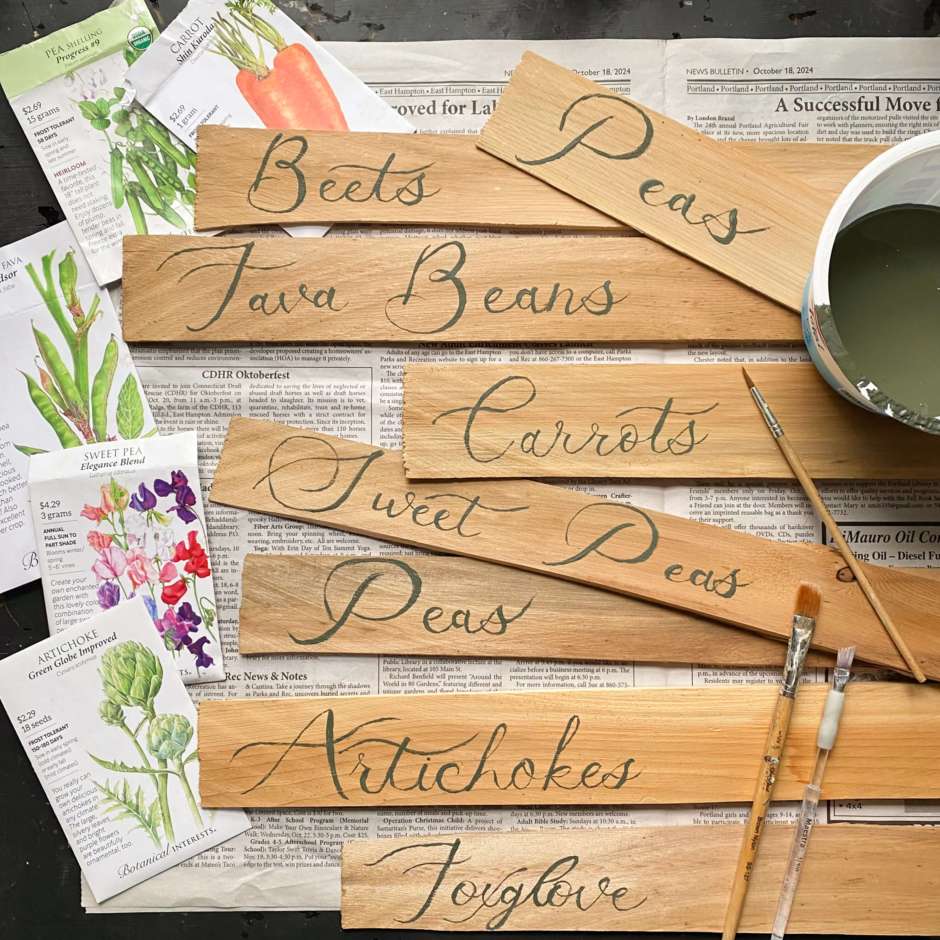
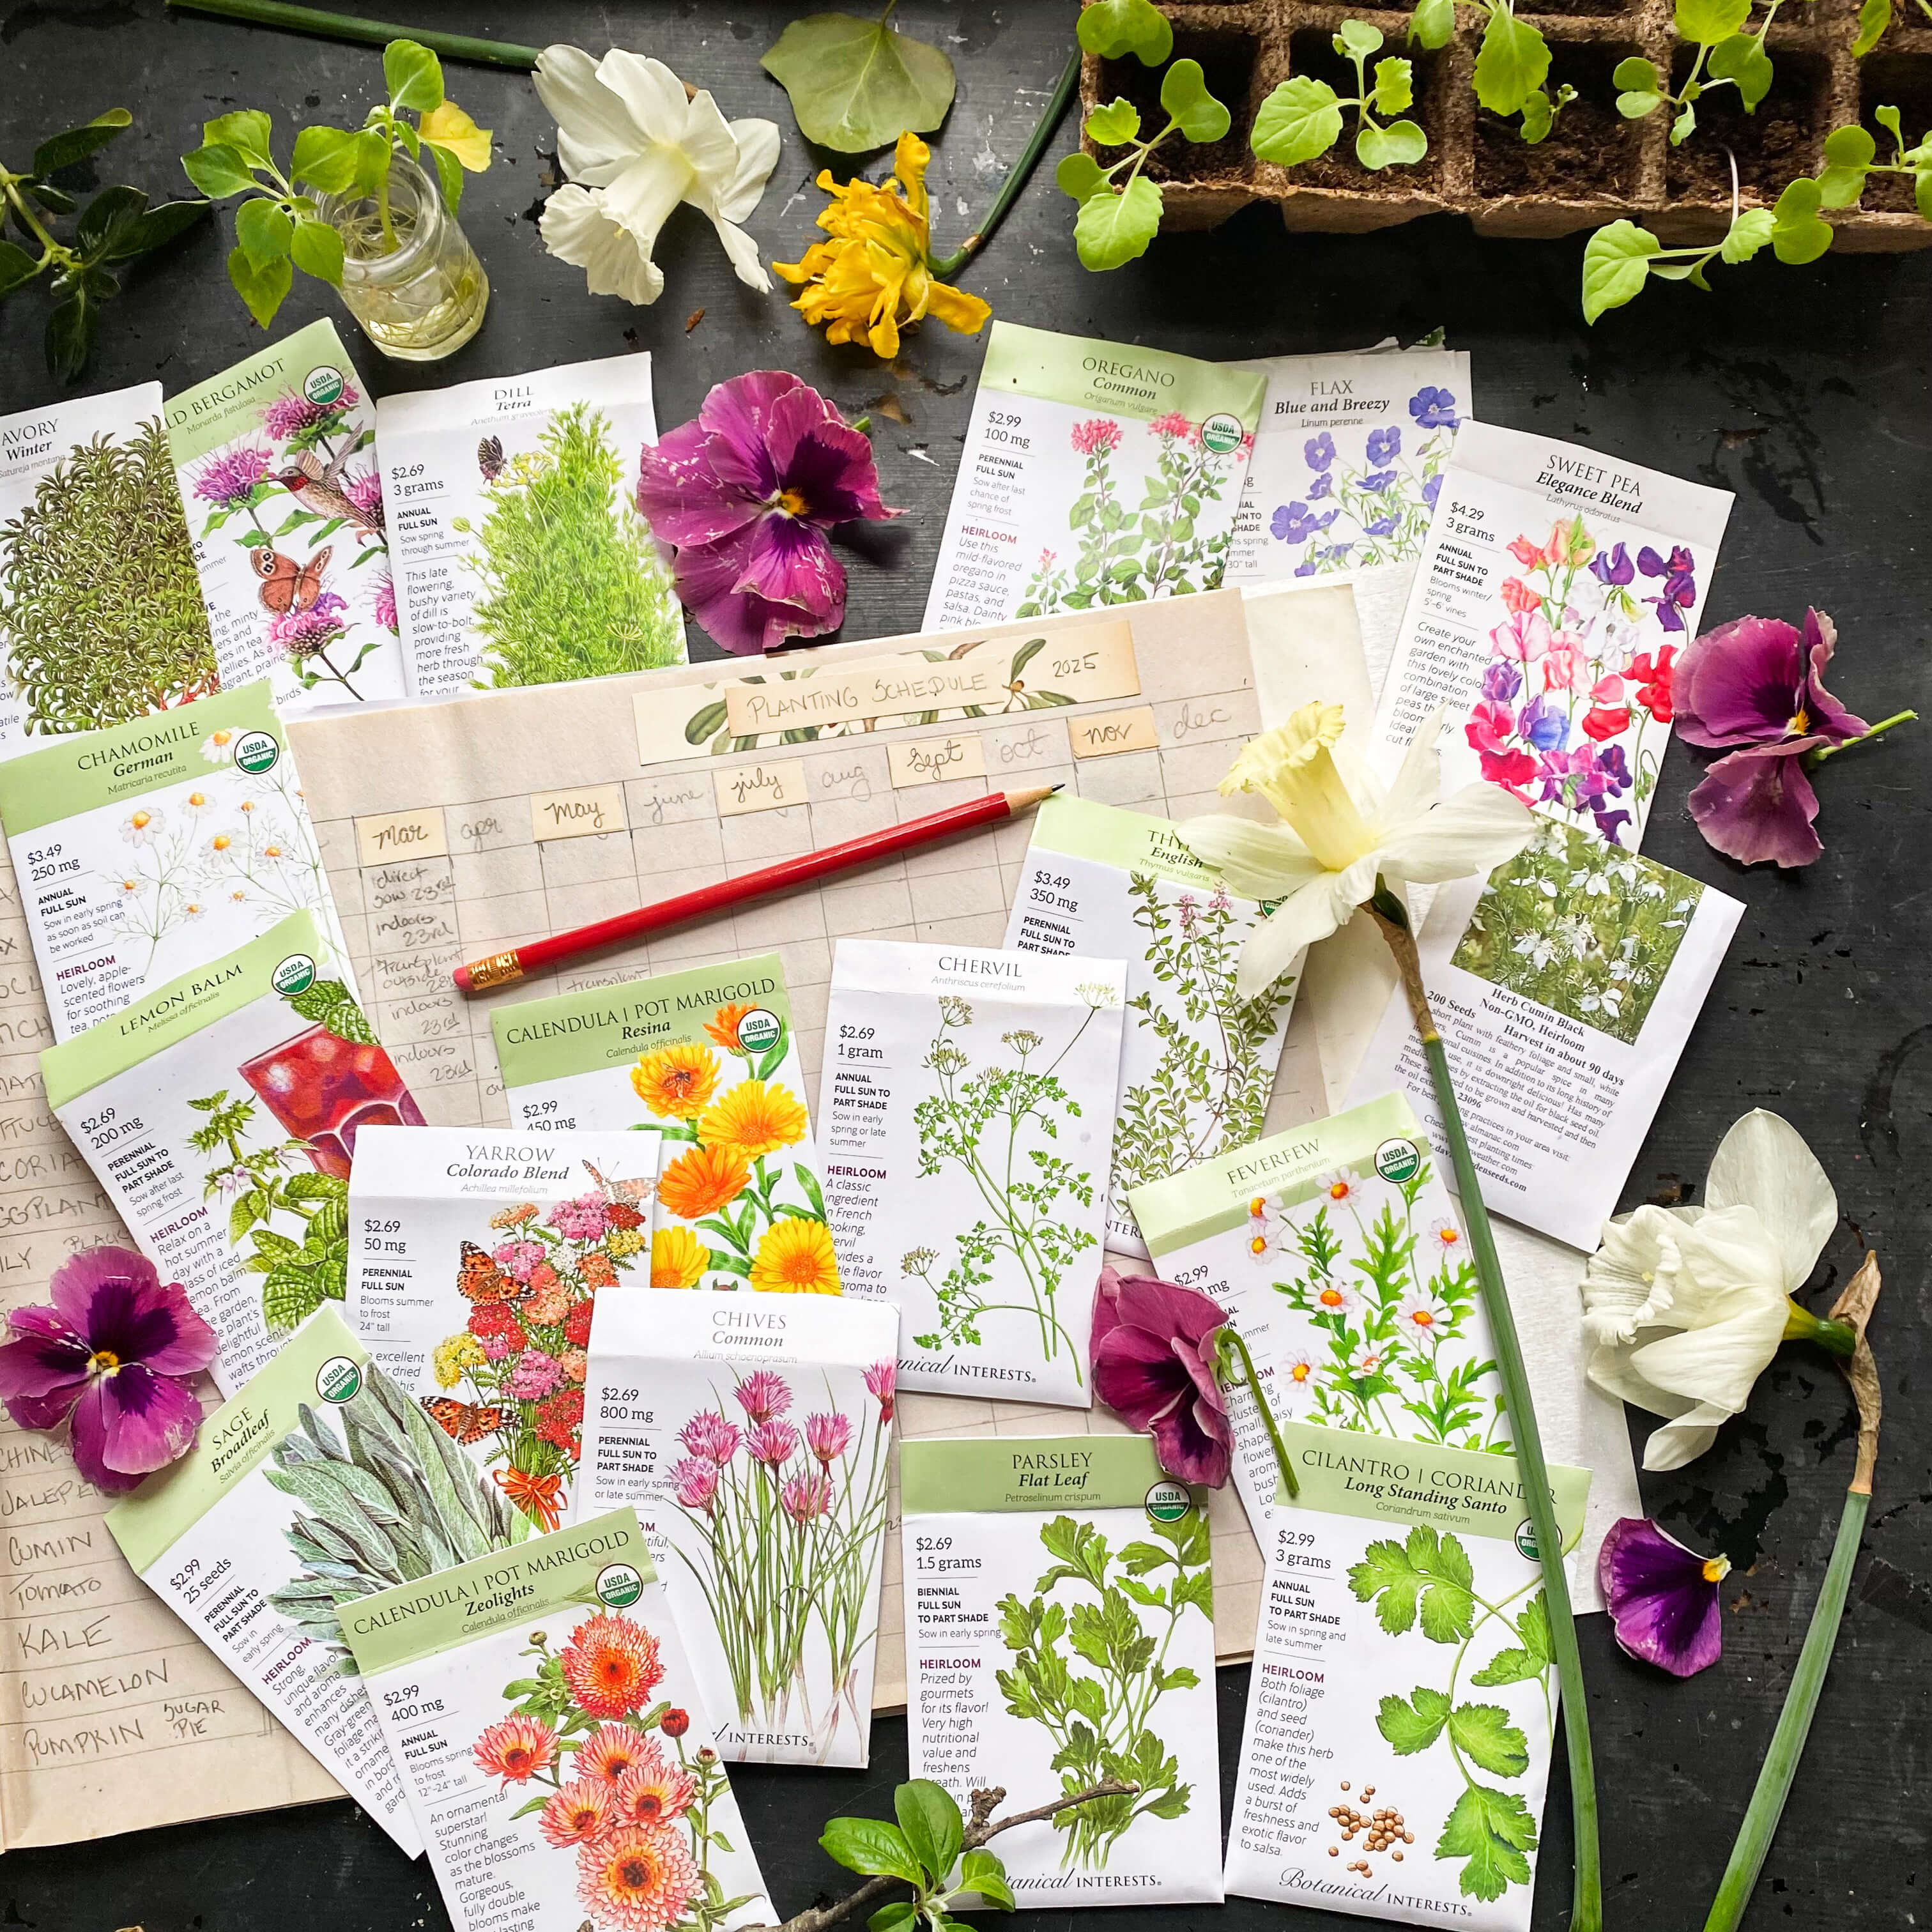
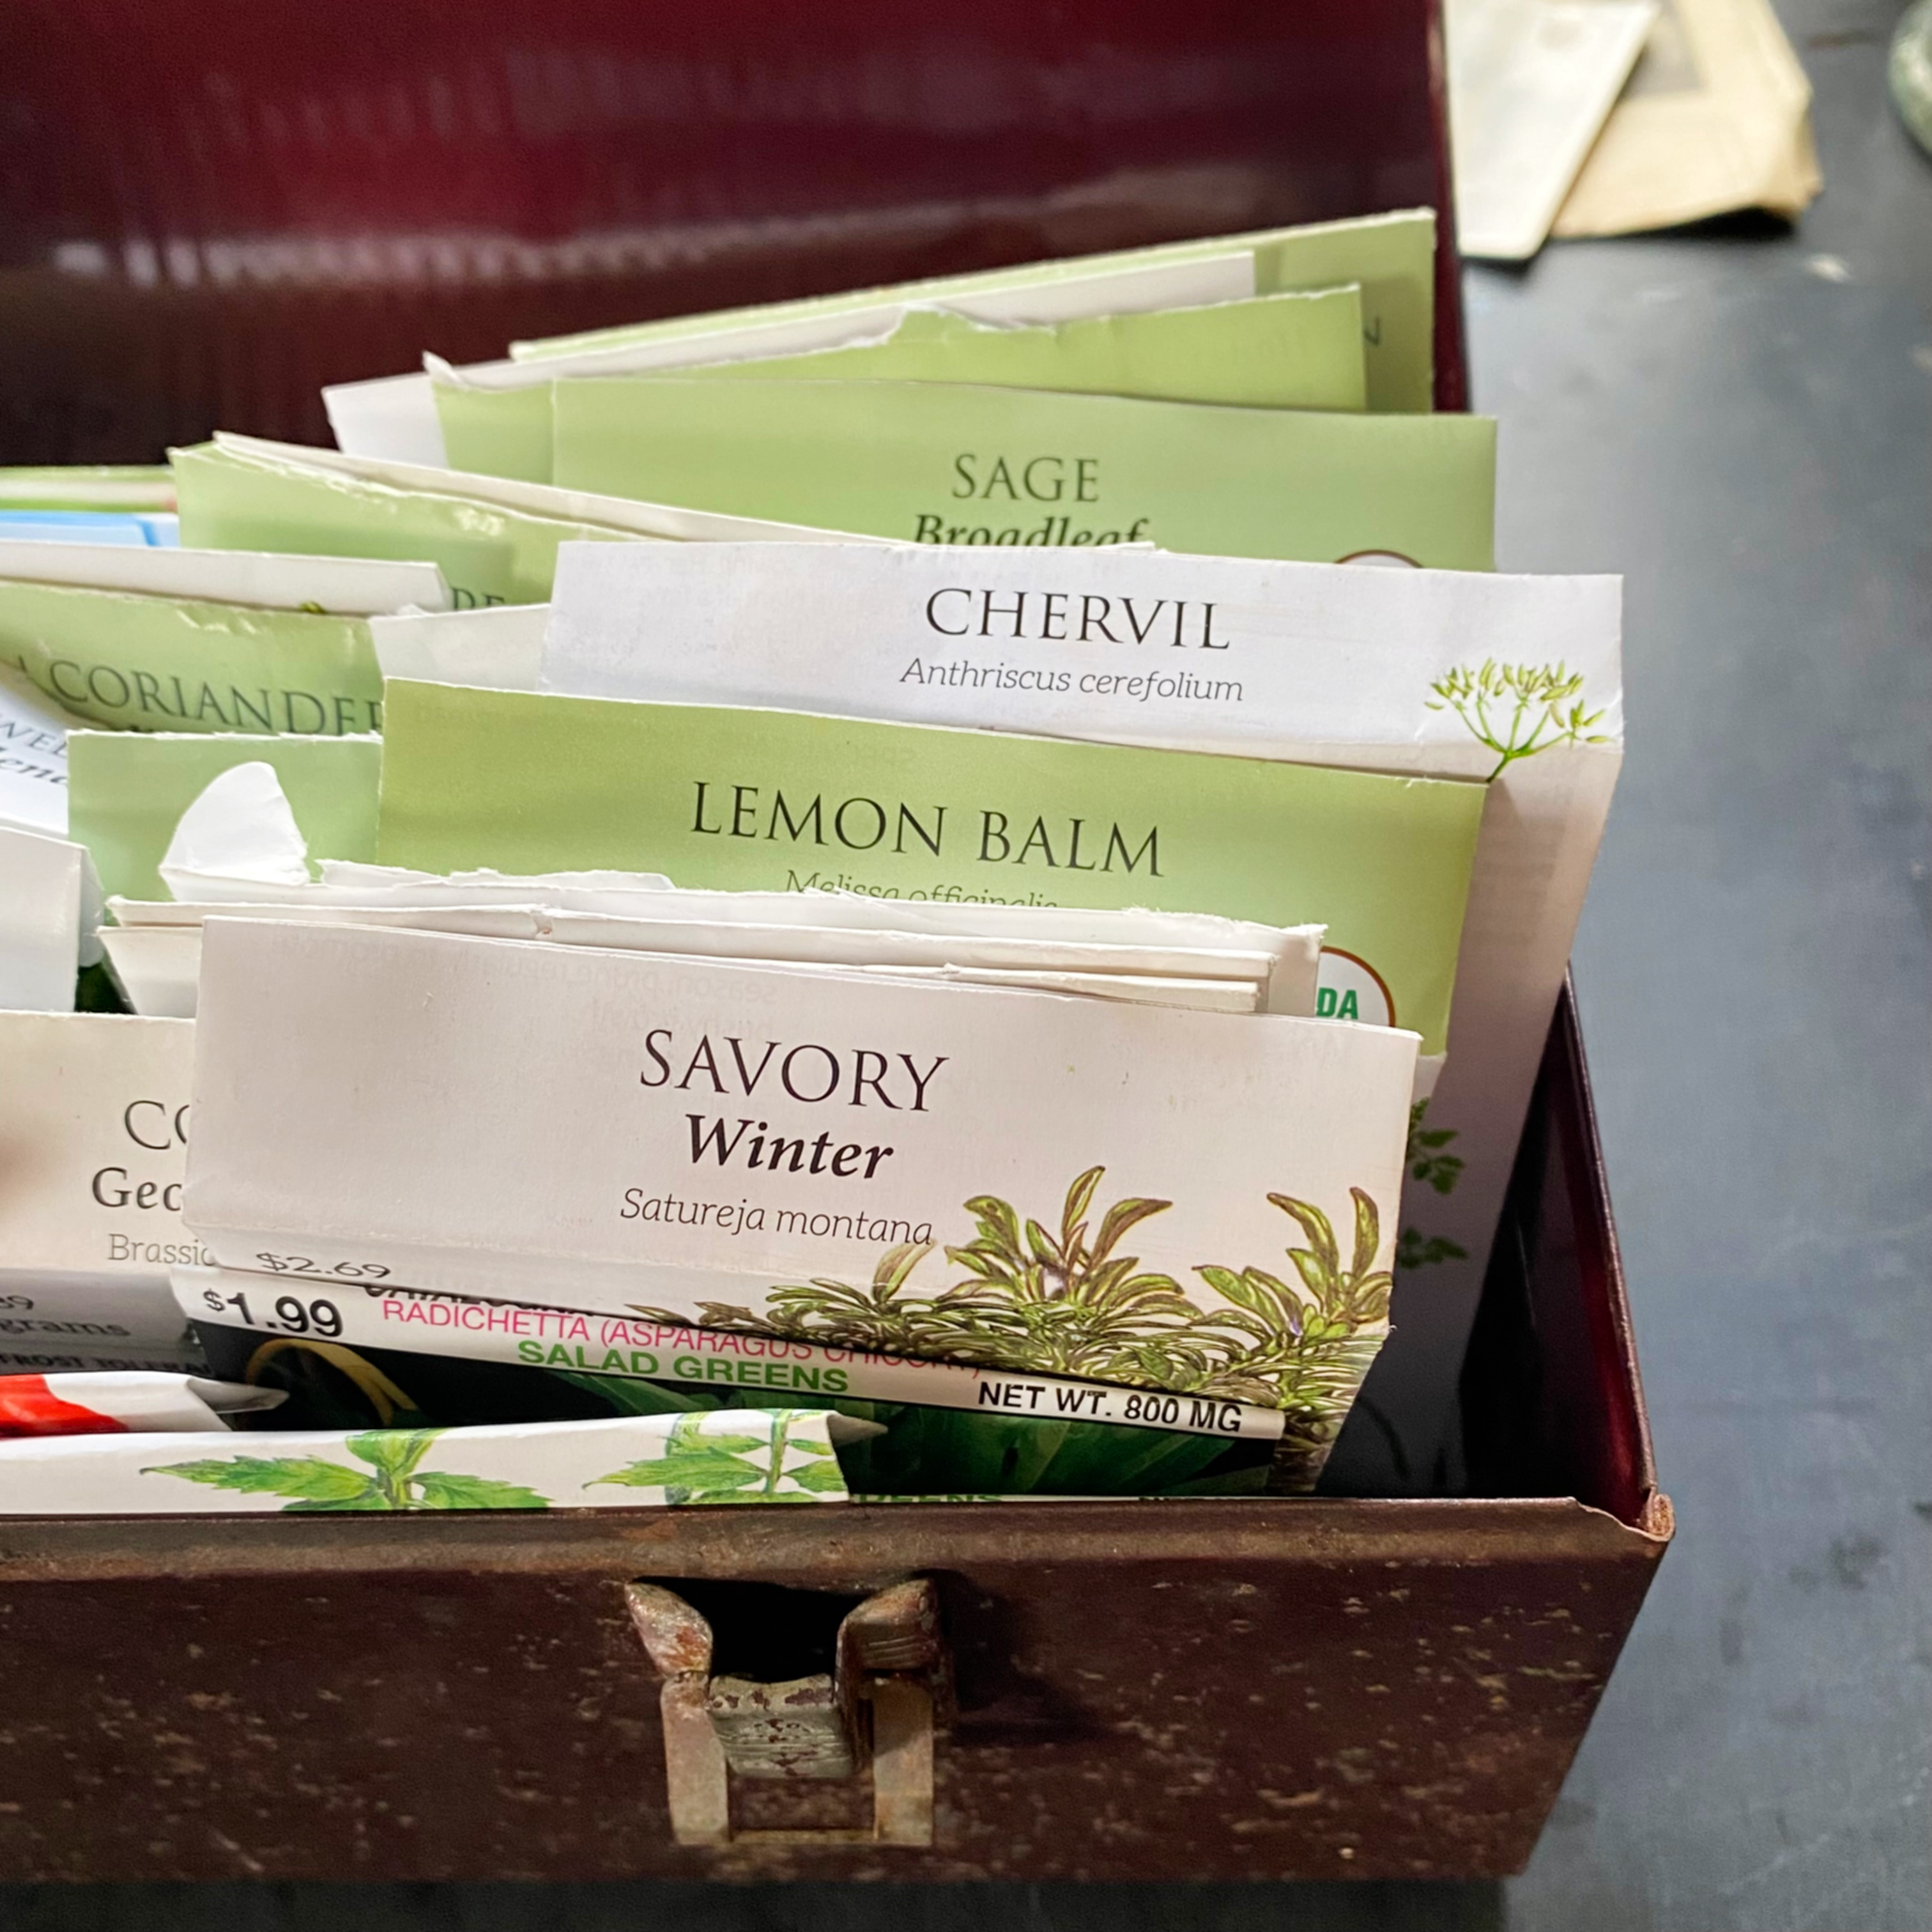
While the ground was still frozen and snow-covered, I could see a full garden, busy with birds and bees and butterflies floating here and there. I could see the feathery chervil, the wave of parsley, the white petaled chamomile, the flax, the forget-me-nots, the dill, the lavender, the calendula. When the garden was covered under an ice-slick snow sheet, and I was starting seeds indoors, I had visions of deep summer in the herb garden. Hazy light, hot temperatures, the greenhouse surrounded by a vibrant and verdant utopia racing skyward to meet its peaks. I could see the bee balm on the right, the nasturtiums climbing a trellis on the left, and the foxgloves trying to out-stretch them both. I could see the savory, the sage, the oregano, the thyme creeping and heaping their way around the garden floor. As I collected seed packets in my garden tote in the weak light of winter, I imagined, months later, collecting herbs in a kitchen basket slated for summer meals made possible by the summer garden.


Back in January, bundled up in sweaters and scarves, I could anticipate the warm-weather blog posts. The recording of each new herb as it is unfurled week by week, month by month, all summer long. The sharing of what things looked like, smelled like, tasted like. The chamomile, the dill, the calendula. The mint, the basil, the cumin, the thyme. The unfolding of each new flower, each new leaf, day by day. They’d be blog posts that would practically write themselves, not because of AI (something I never use here on the blog) but because the herbs made it easy under Adelma’s experienced guidance and thoughtful instruction. I had visions.

Wrapping up eight months of gardening experience in one blog post is a lot to ask of a reader’s attention. So, in order not to make this post eighty miles long, I’m going to truncate a lot of what happened during the growing season. This is not an attempt to skirt over the challenges, of which there were many, and only to shine light on the successes. But building an herb garden, as I have learned this summer, is a bit like watching a tree grow minute by minute. Not a lot happens. And to be completely honest, not a lot happened for months.

When the seedlings grew strong and hearty indoors all through cold, snowy, rainy February and March and April, I knew they were off to a good start. The calendula was spilling over the sides of the seed tray on one end, while chamomile was mounding so full and lush on the other end, it was difficult to see the individual cell blocks from which they sprouted.

Calendula and feverfew seedings

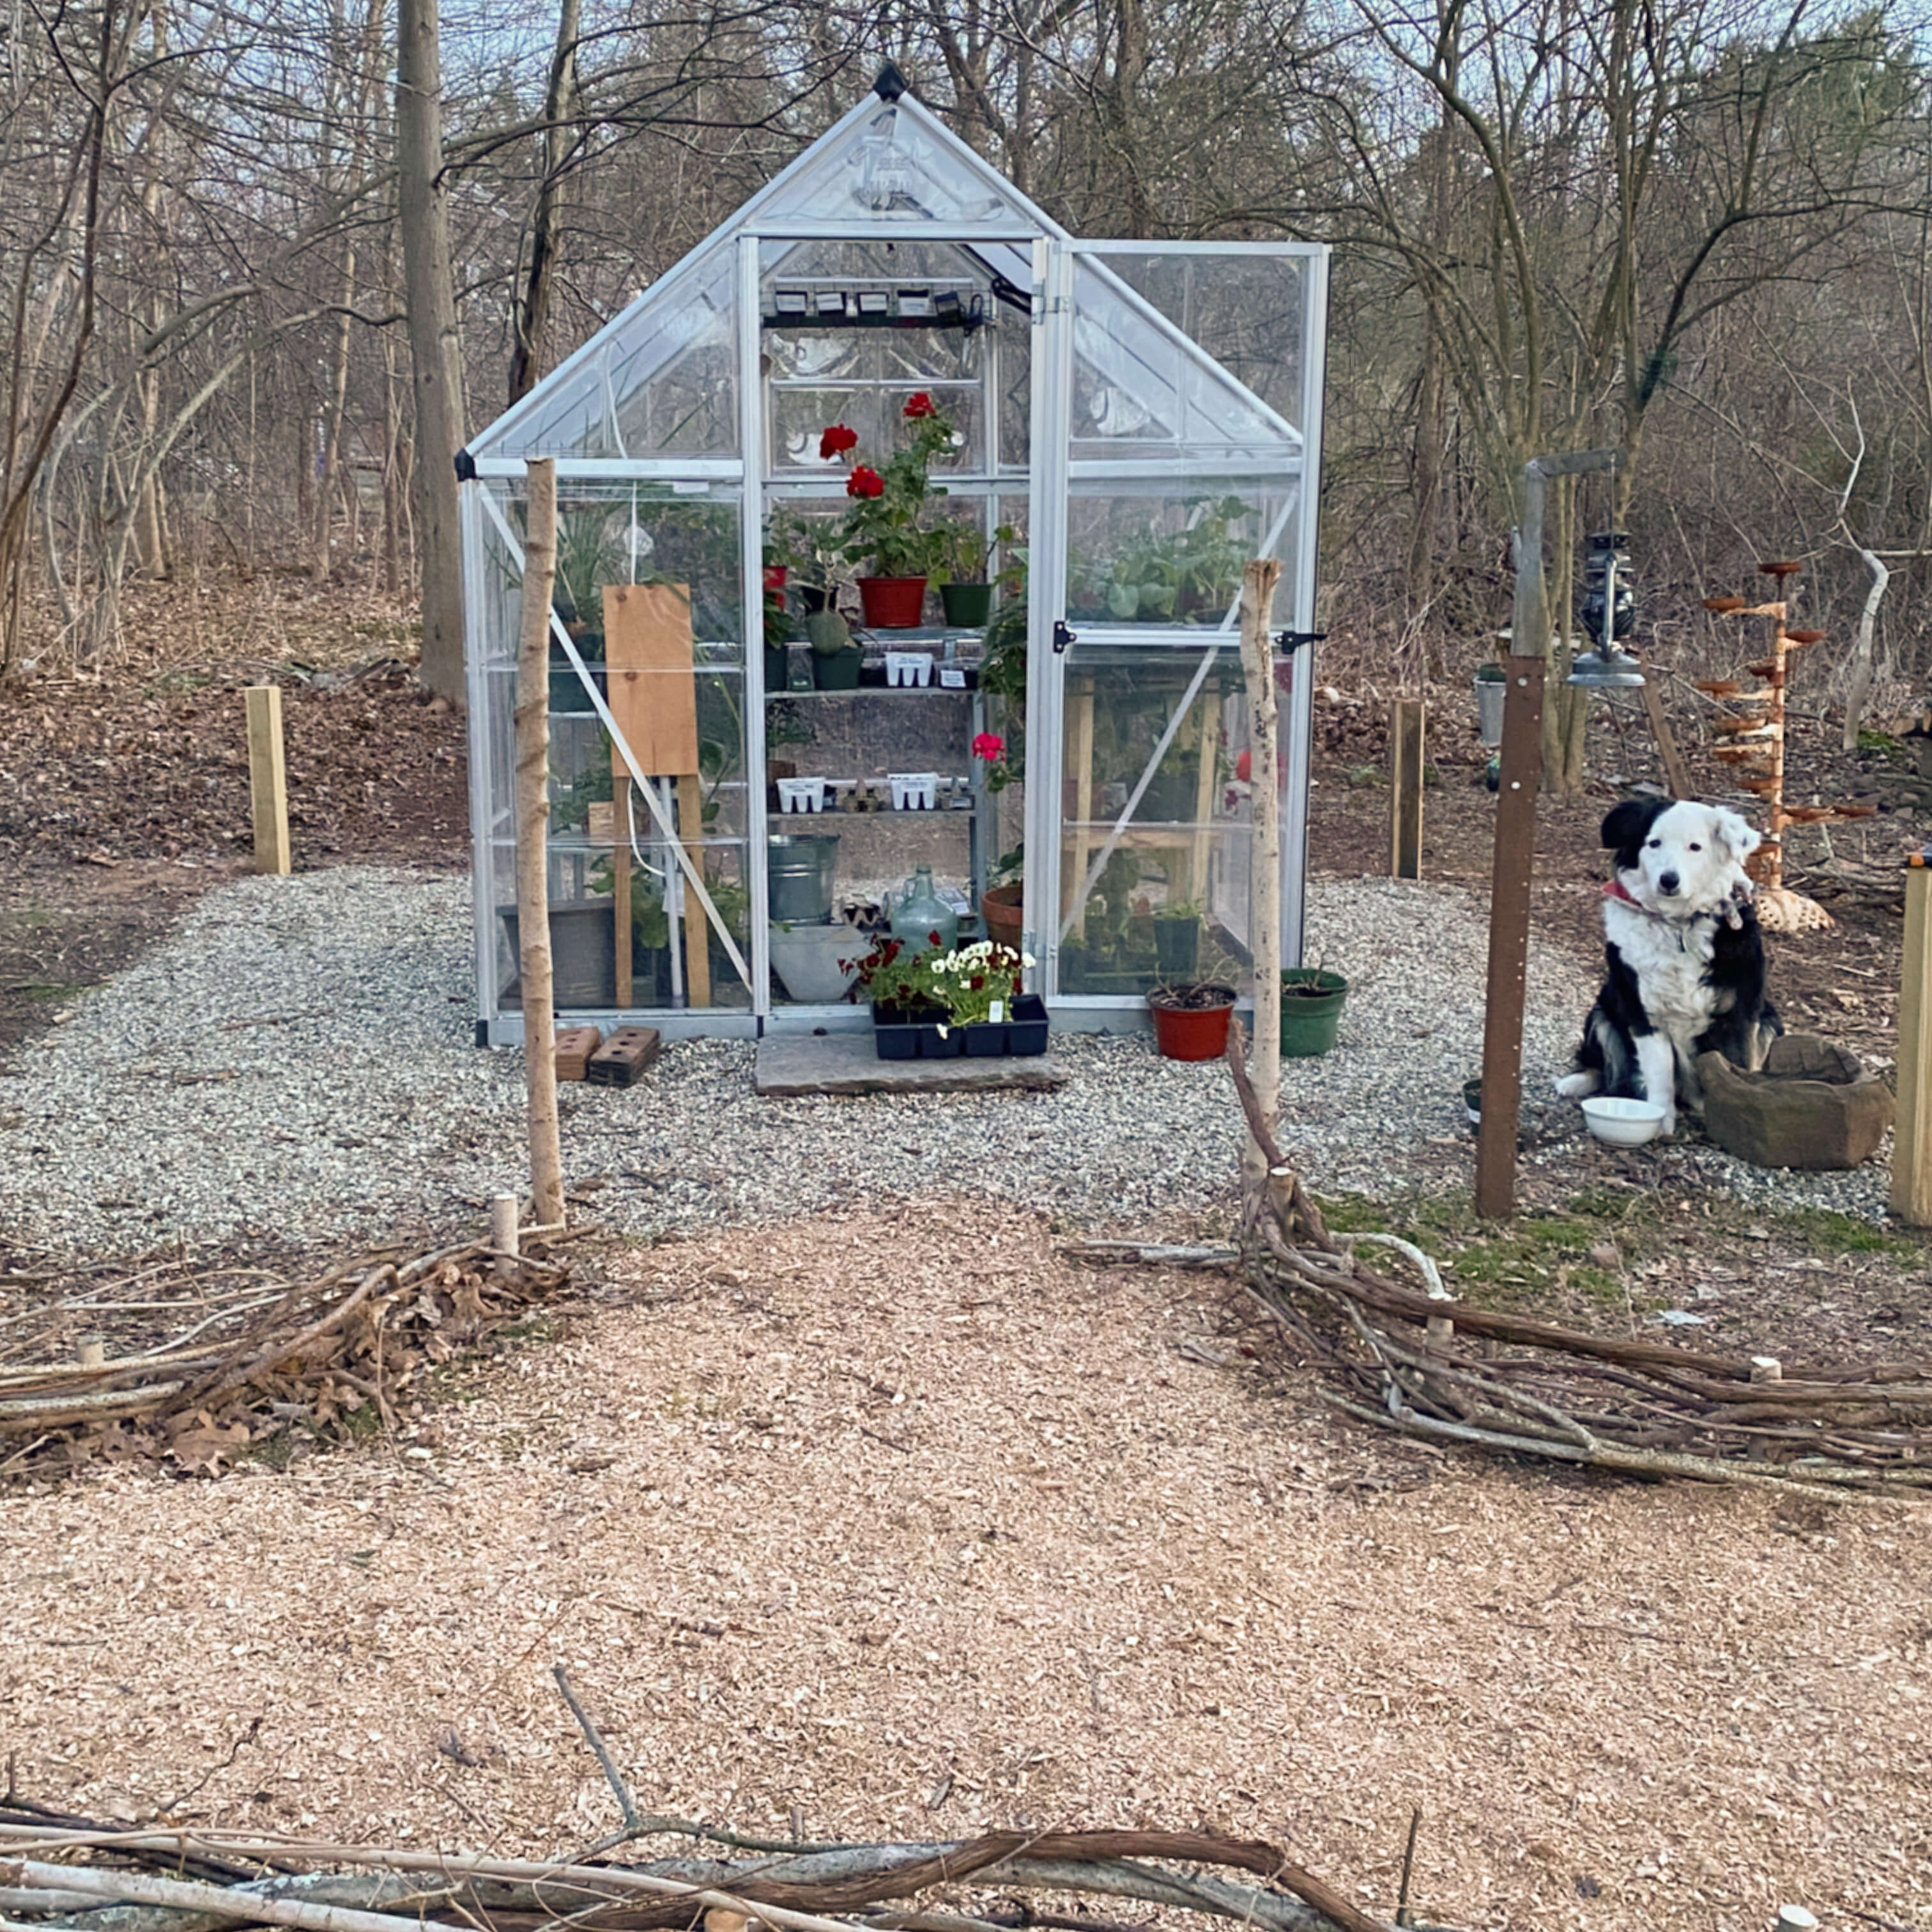
In May, everything headed out for planting. Optimism was high as all the seedlings were tucked into their pre-planned beds alongside their pre-planned companions. The summer garden visions were swirling with each dip of the spade into the soil. The cilantro next to the parsley, the flax next to the nasturtiums, the bergamot behind the feverfew, the oregano in front of the coleus, the echinacea before the fence. On and on, the digging and planting went all the way around the greenhouse. Three full sides layered in seedlings that would reach graduated heights of up to 5′ feet to match the foxglove. The shortest in front and the tallest in back.

Parsley seedlings adjusting to their new bed.


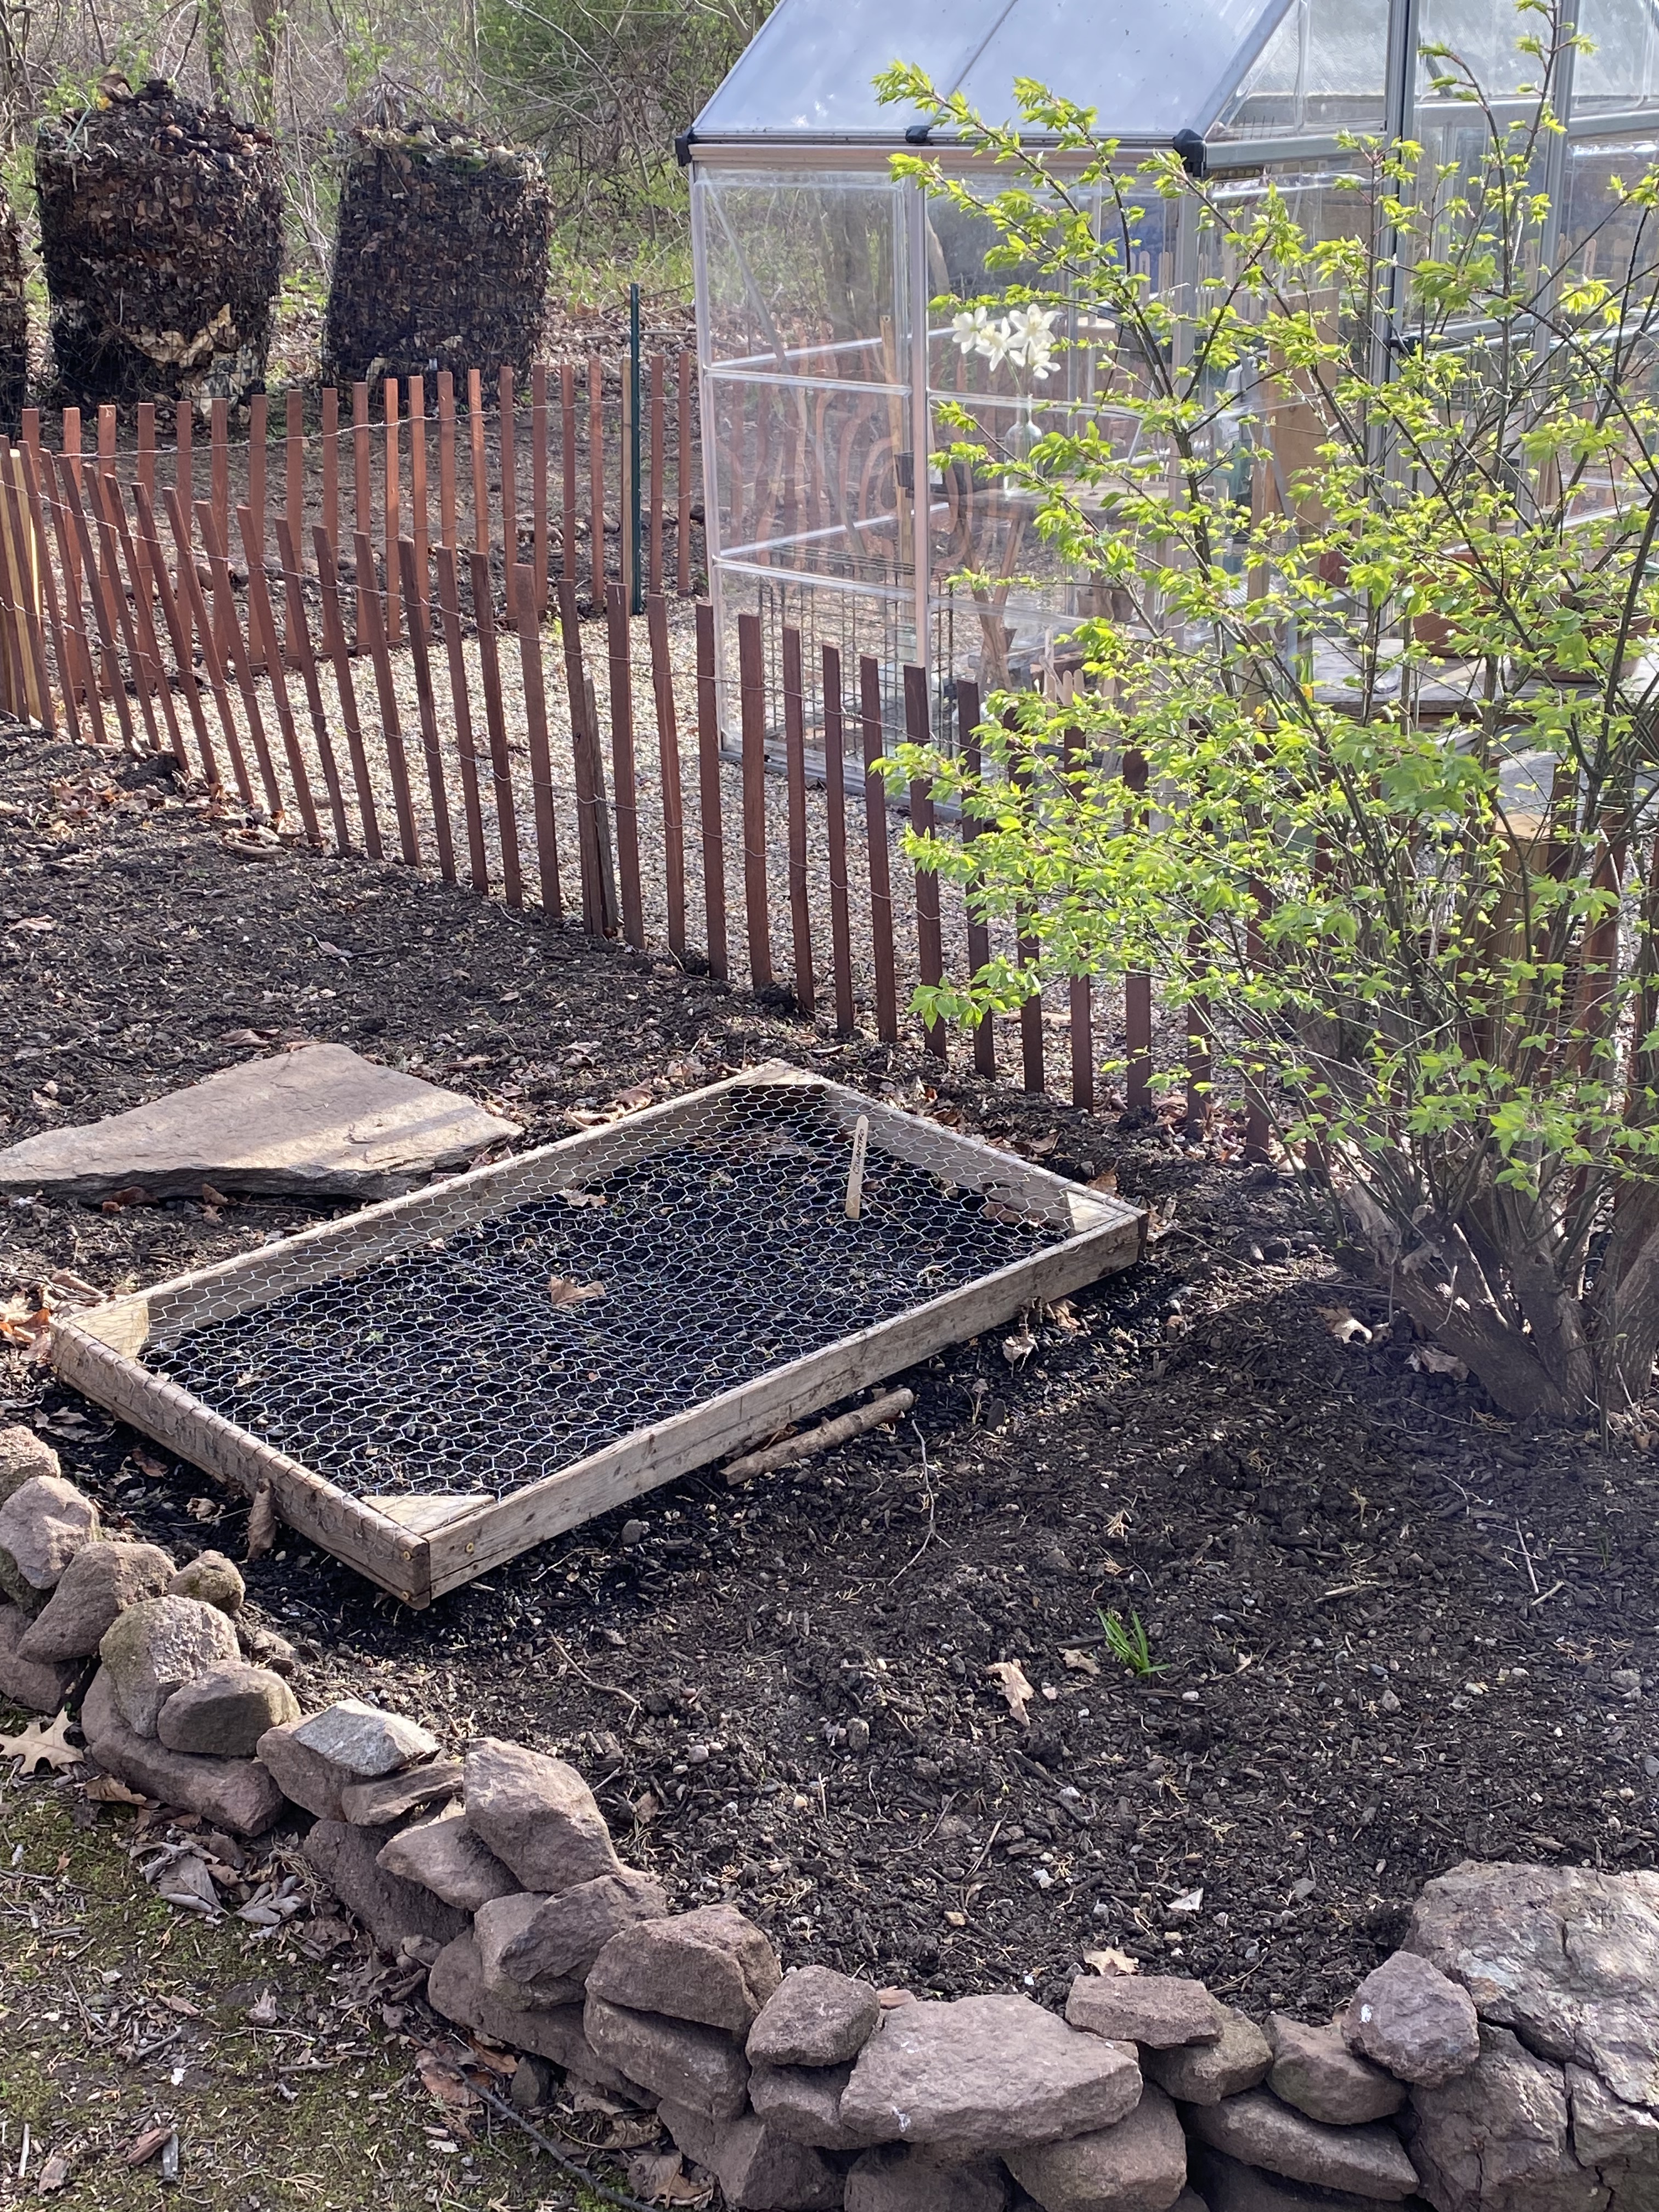
Once planted, every seedling got its own individually made wire cage for protection from rabbits, deer, squirrels, and other wild creatures that might find a newly planted herb garden especially enticing. For about a week, things were good. The herbs settled in and seemed to be happy in their new spots. The branches of the trees overhead were leafing out, and the sun was doing its dappled dance. The visions were coming to life.

Then the cold snap came. The weather turned wet and winter-like for weeks. Memorial Day weekend was rained out with a nor’easter, not bringing snow, but rain and high winds and 40 degree days. By Mid-June, I was still doing gardening chores wearing a wool turtleneck sweater and jeans.

Despite the unusually cool start to spring, the 22-foot tall Japanese maple unfolded in its normal fashion, but instead of last year’s canopy, it reached an extra 24″ inches in length this year. This sent branches half-way across the greenhouse on one side and further into the front yard on the other side.

This spring… the growth-spurt of the red japanese maple in the top left corner.

By July, a deep shade took over the whole left side of the greenhouse. The seedlings in that bed were the first to disappear. The nasturtiums, long and leggy already at just a month old, were eaten down to the ground in an afternoon’s timeframe. The cilantro, parsley, chives, and flax were next. All consumed by some mysterious creature, neither rabbit nor deer, but something smaller that could fit through the wire cages and snack away. My guess was that it was most likely the work of slugs, cut worms, and caterpillars who had made their presence known in other beds in years past, and who like to eat in the off hours when no one is watching. By the end of July, what was once a tender patch of steadily growing seedlings was now a framework of protective cages and bare dirt, with not an herb in sight.

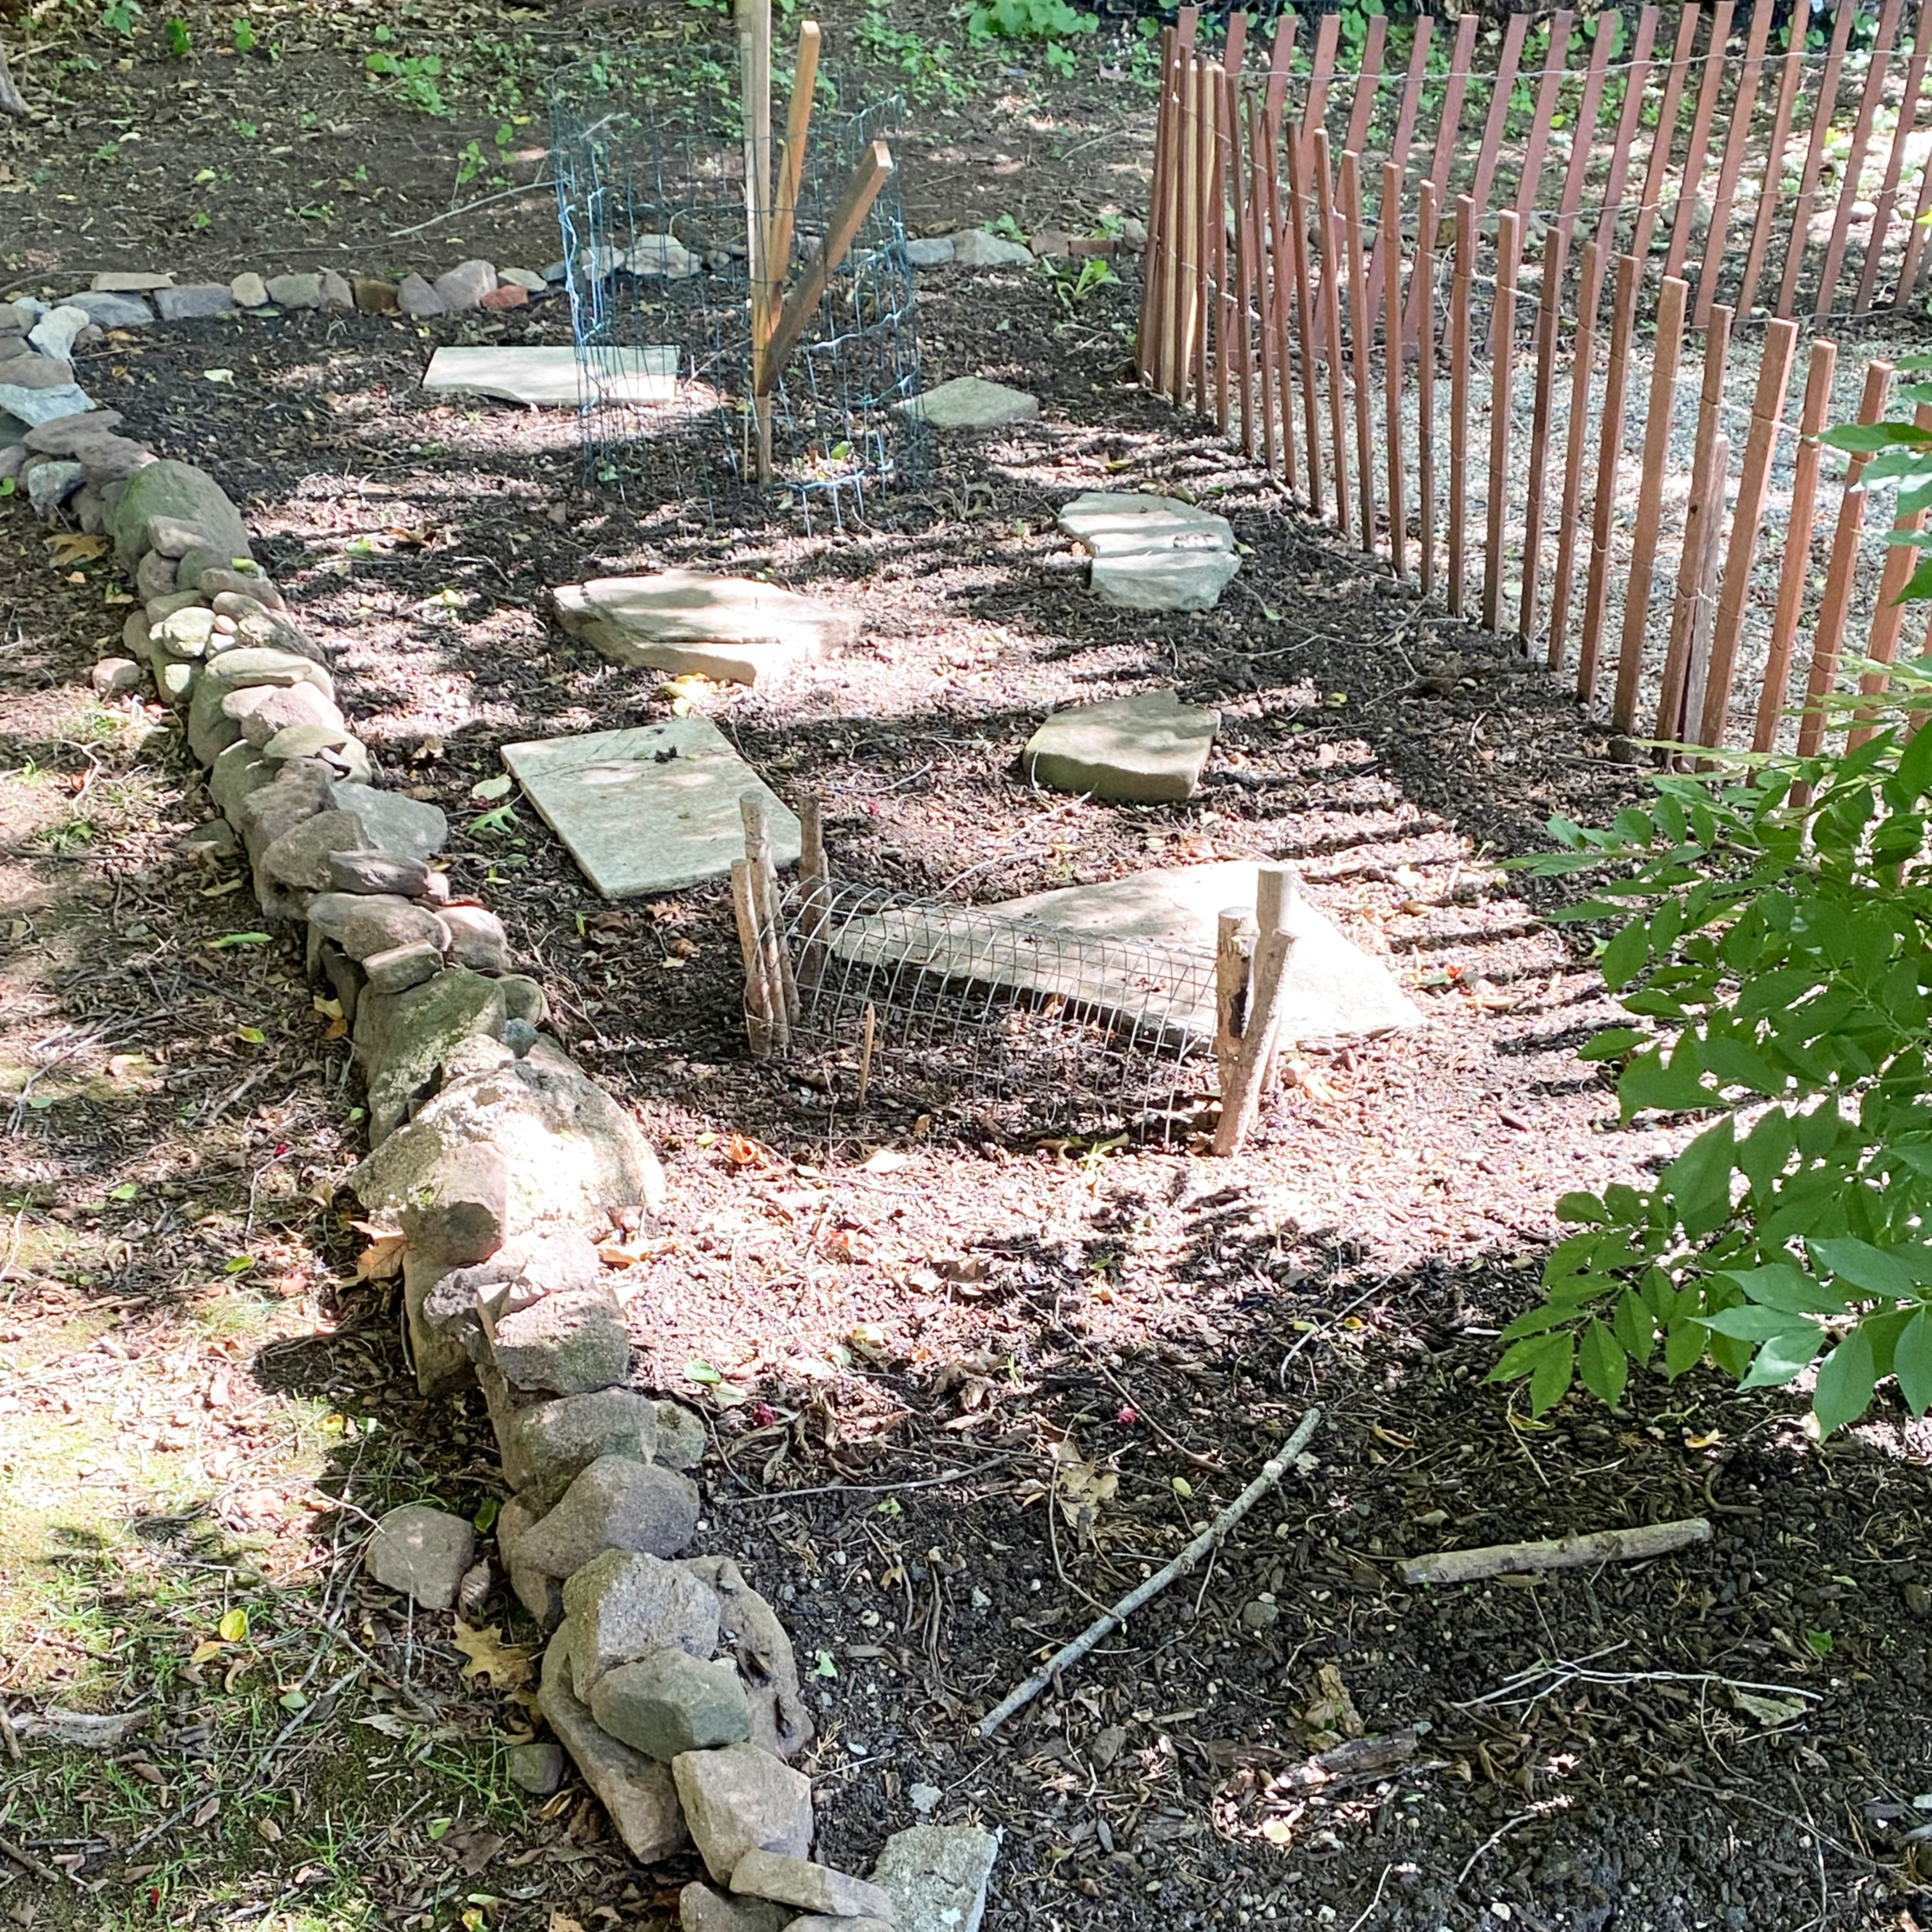
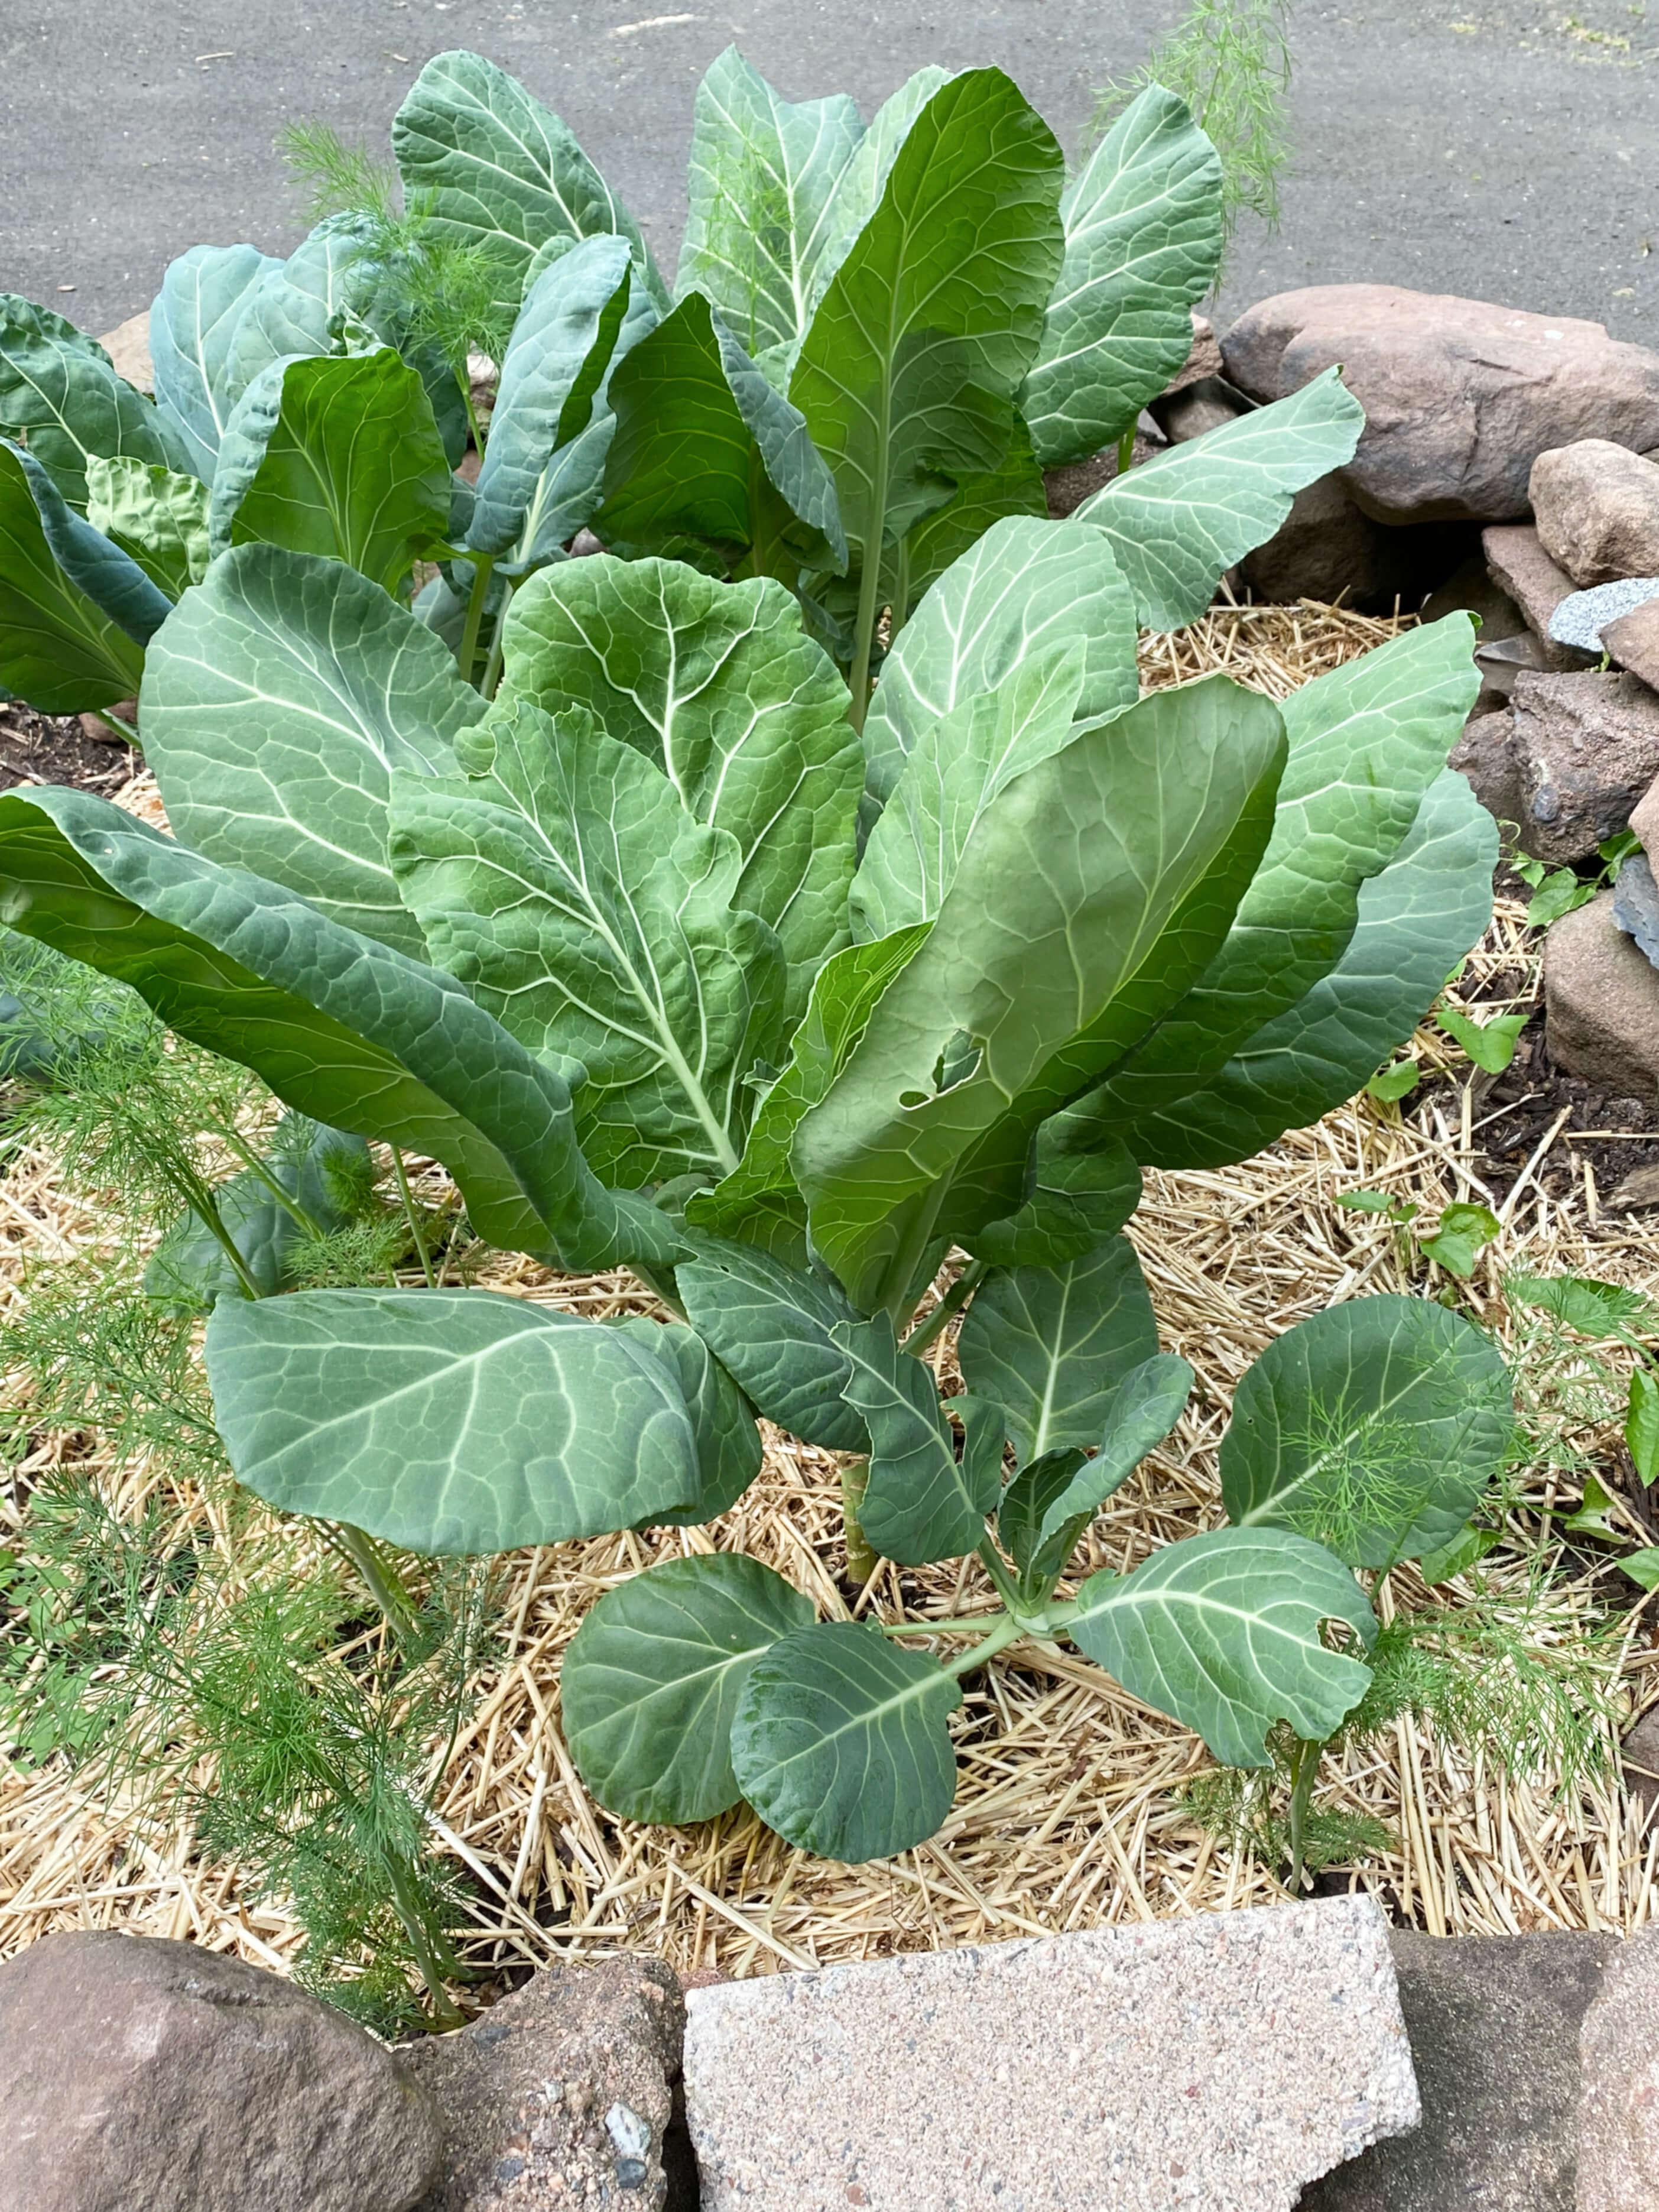
Luckily though, as an experimental year, I planted herbs in several places around the garden, not just the greenhouse, so that we could see in which areas they grew best with varying lights of shade vs. sun. The reliable foxgloves in the front bed of the greenhouse grew to 5 feet and bloomed in shades of pink, purple, and white.

The foxglove seedlings in the back behind the greenhouse were squashed and trampled over by squirrels enroute to the birdfeeder and eventually were crushed to a papery pulp. The herbs on the right-hand side of the greenhouse (with lighter shade and much more sun-dappled conditions) fared far better but remained short and seedling size for months.

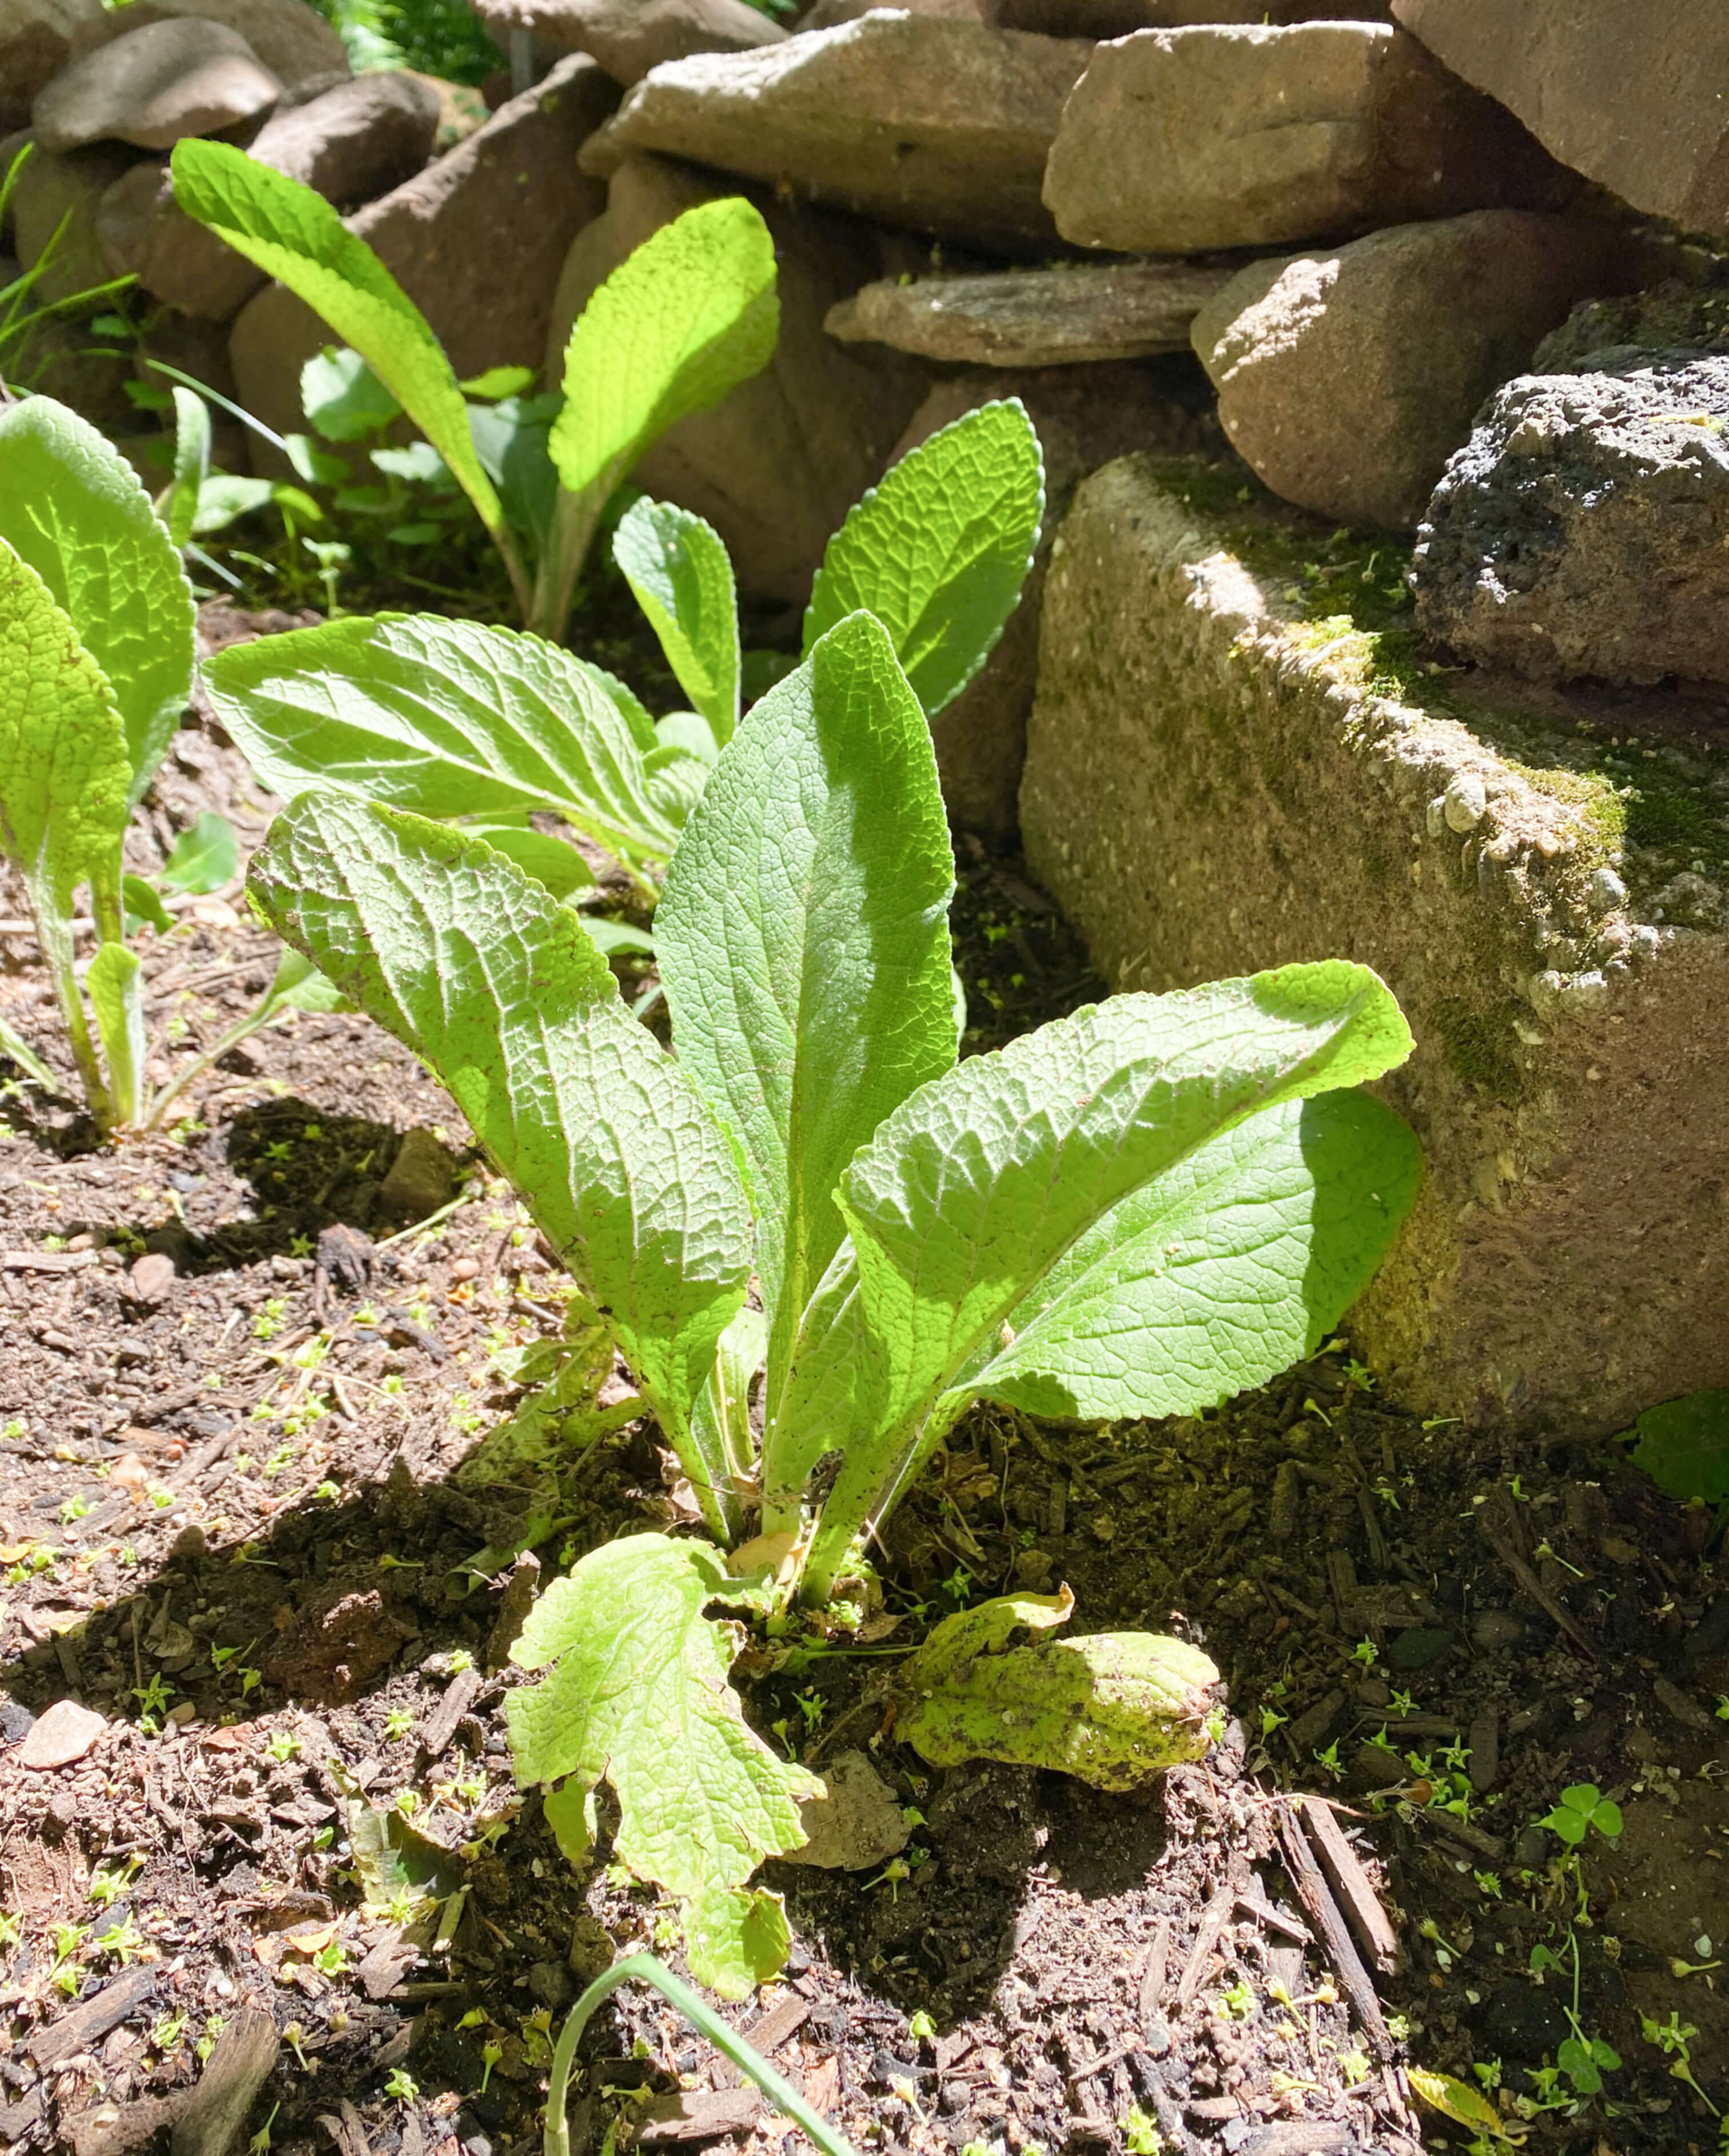
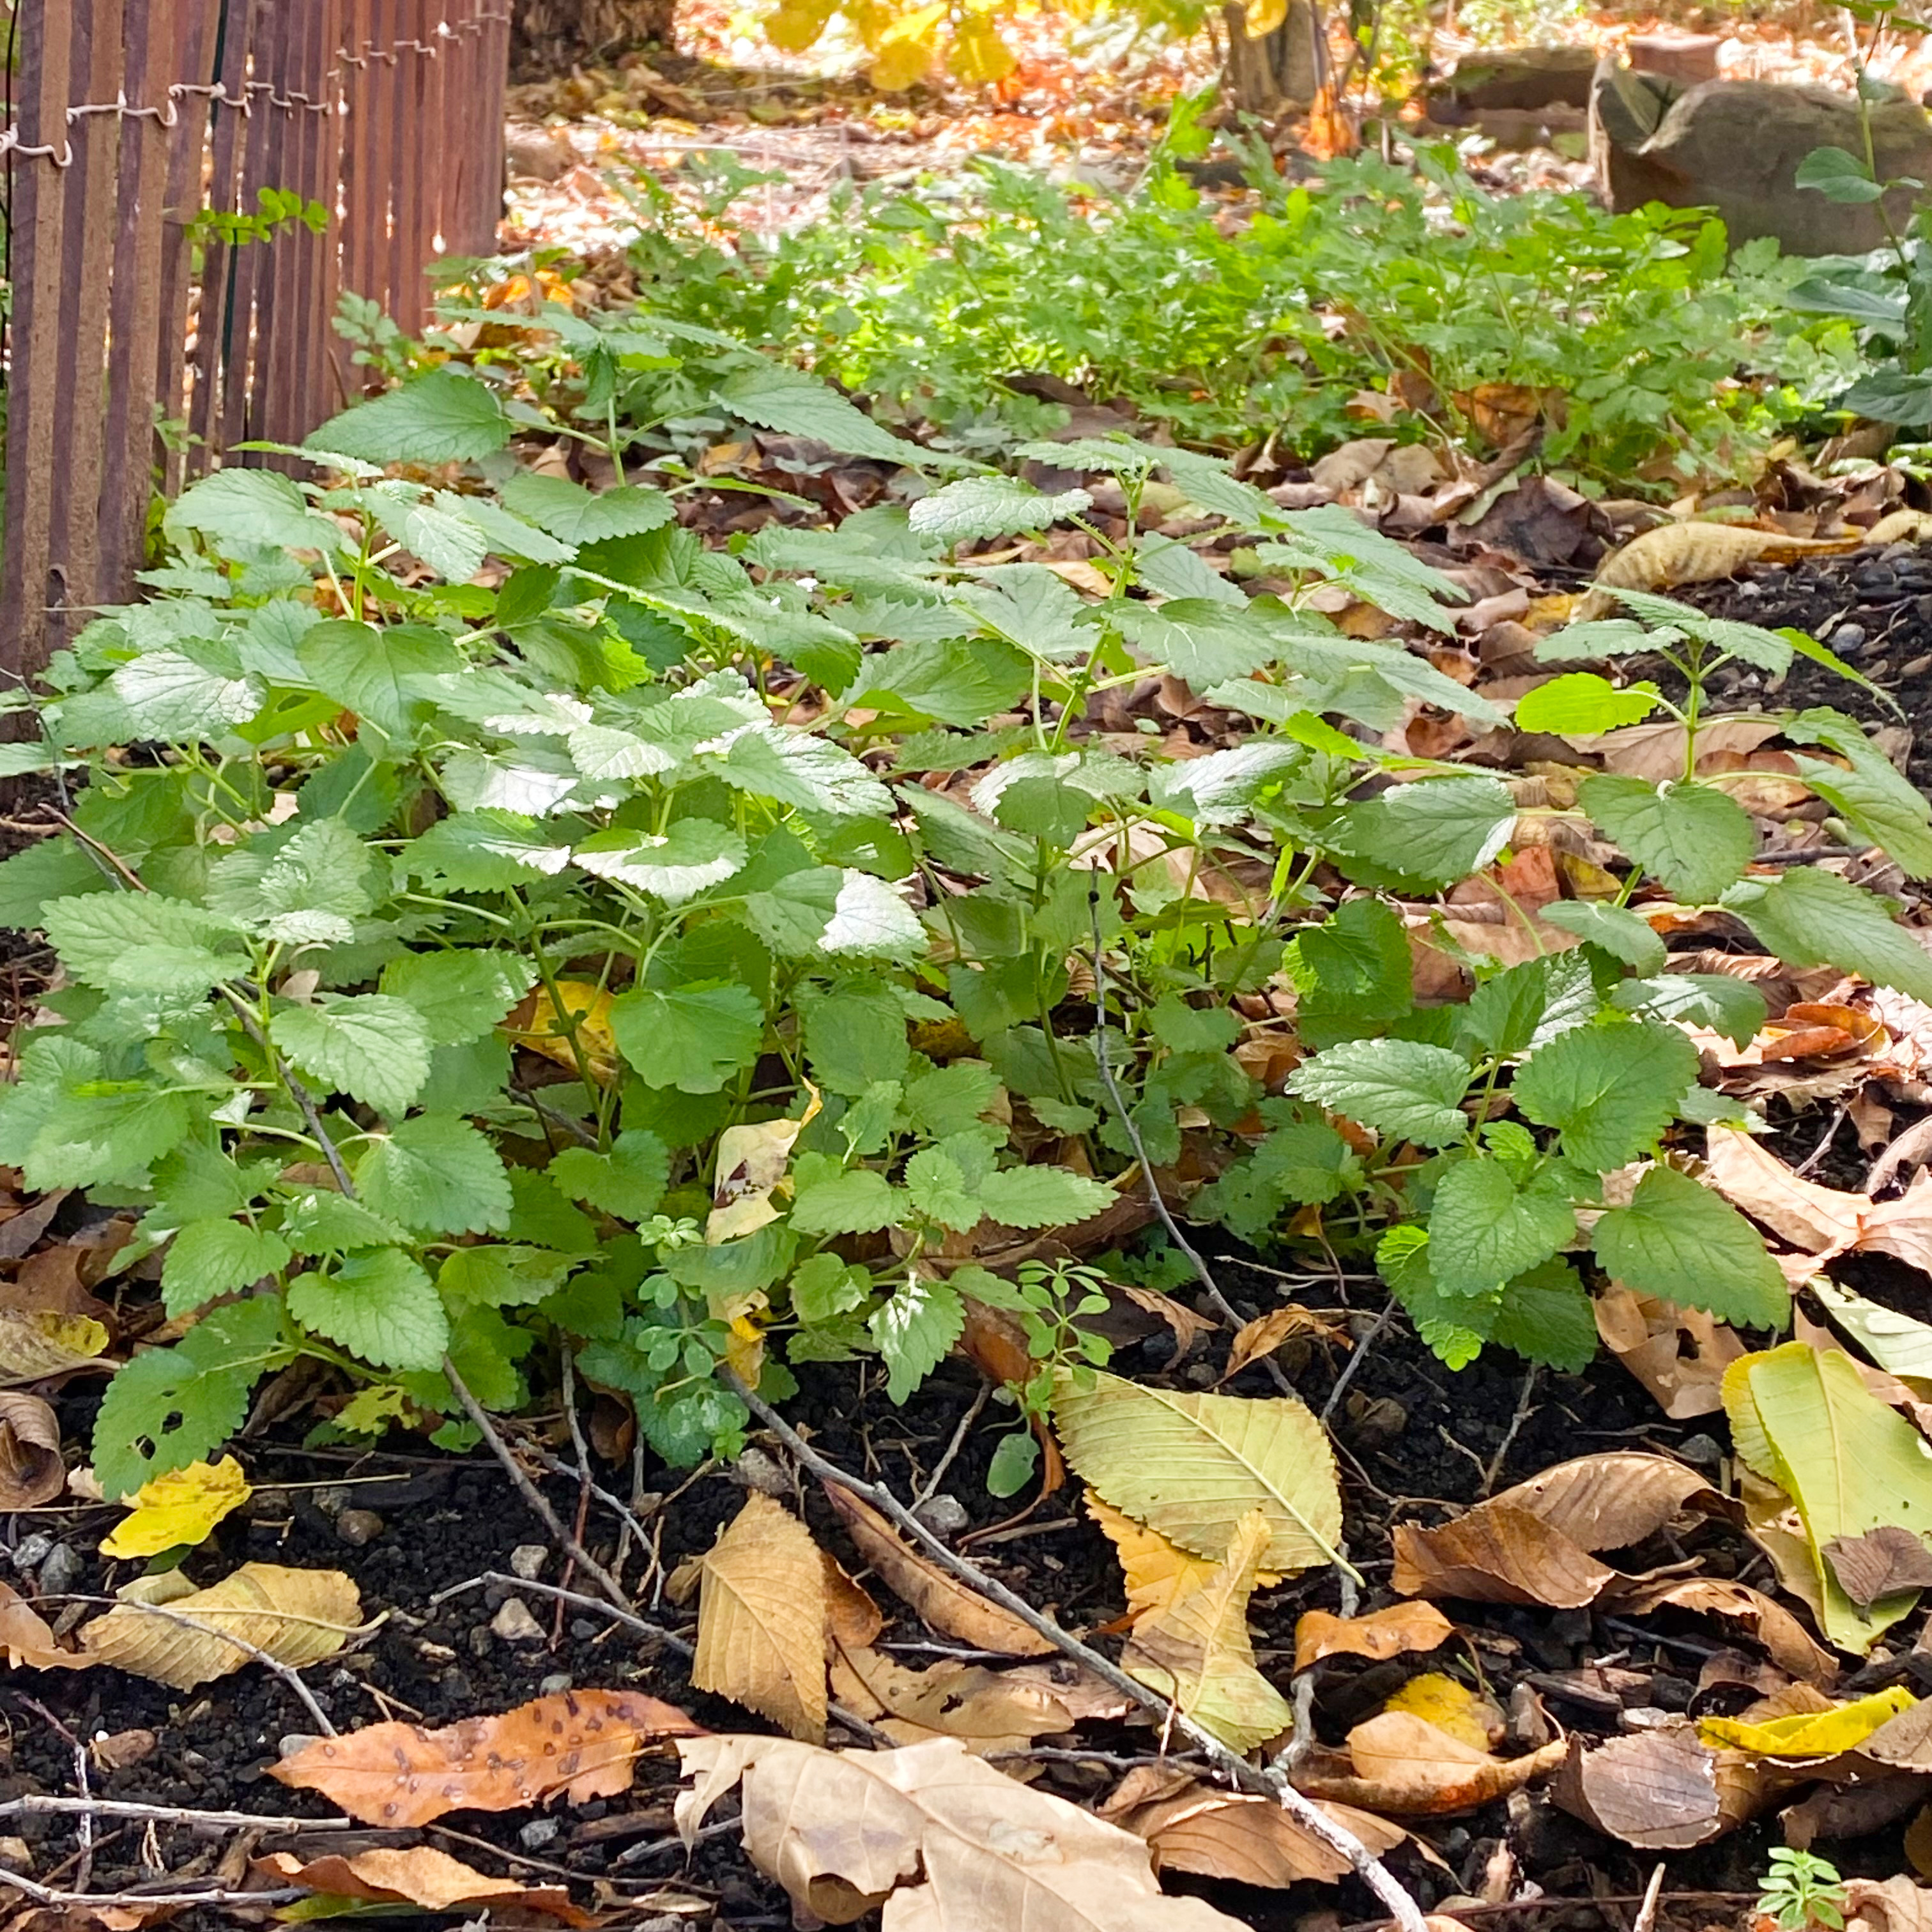
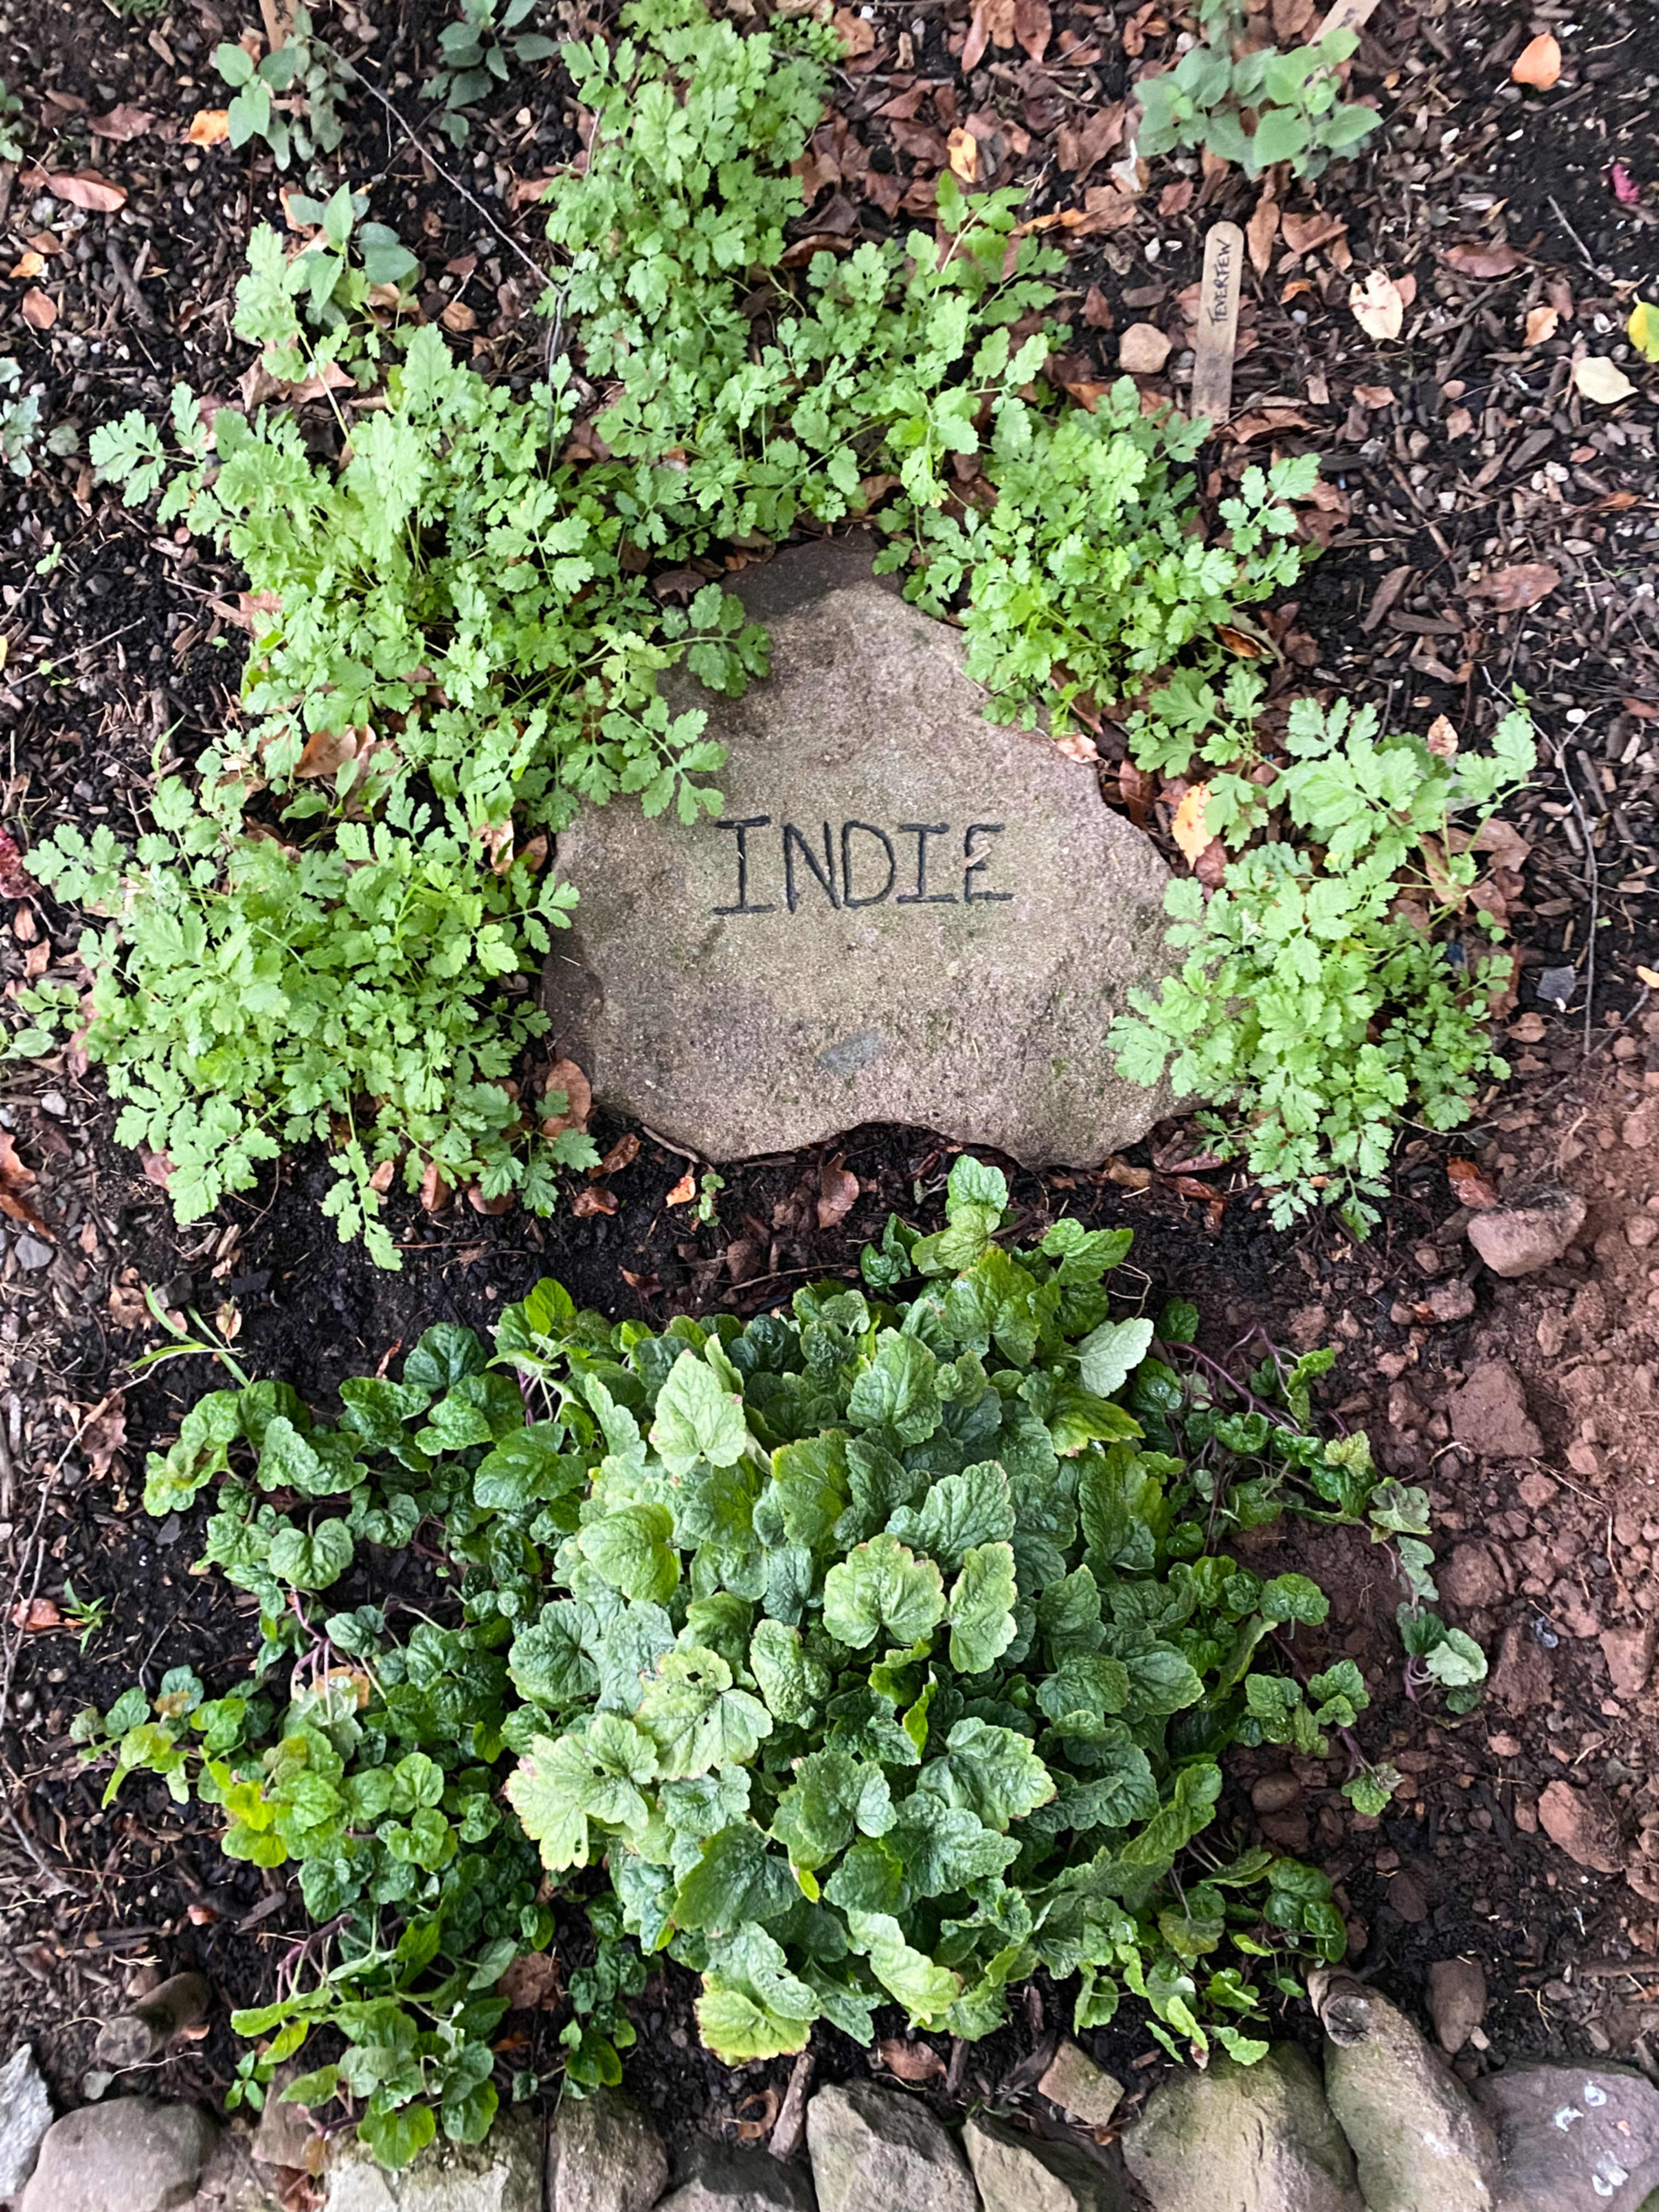
Although this photo above was taken in late June, the plants never really got much bigger than this over the next 60 days. Each formed their own little clump, but never branched out enough for one to meet the other, which was my initial idea in order to create a full garden. The mystery pest got the best of the herbs on the far edges of this bed too… the echinacea, the bergamot, the chives, and the chervil, but left the lemon balm, the oregano, and the feverfew alone. As an herb that symbolizes protection and new beginnings, I immediately loved the fortitude of the feverfew. Planted all around our pup Indie’s headstone, as a way to safeguard her spirit and to mark a new chapter, it was encouraging to see that it was now protecting the neighboring herbs too.

Feverfew

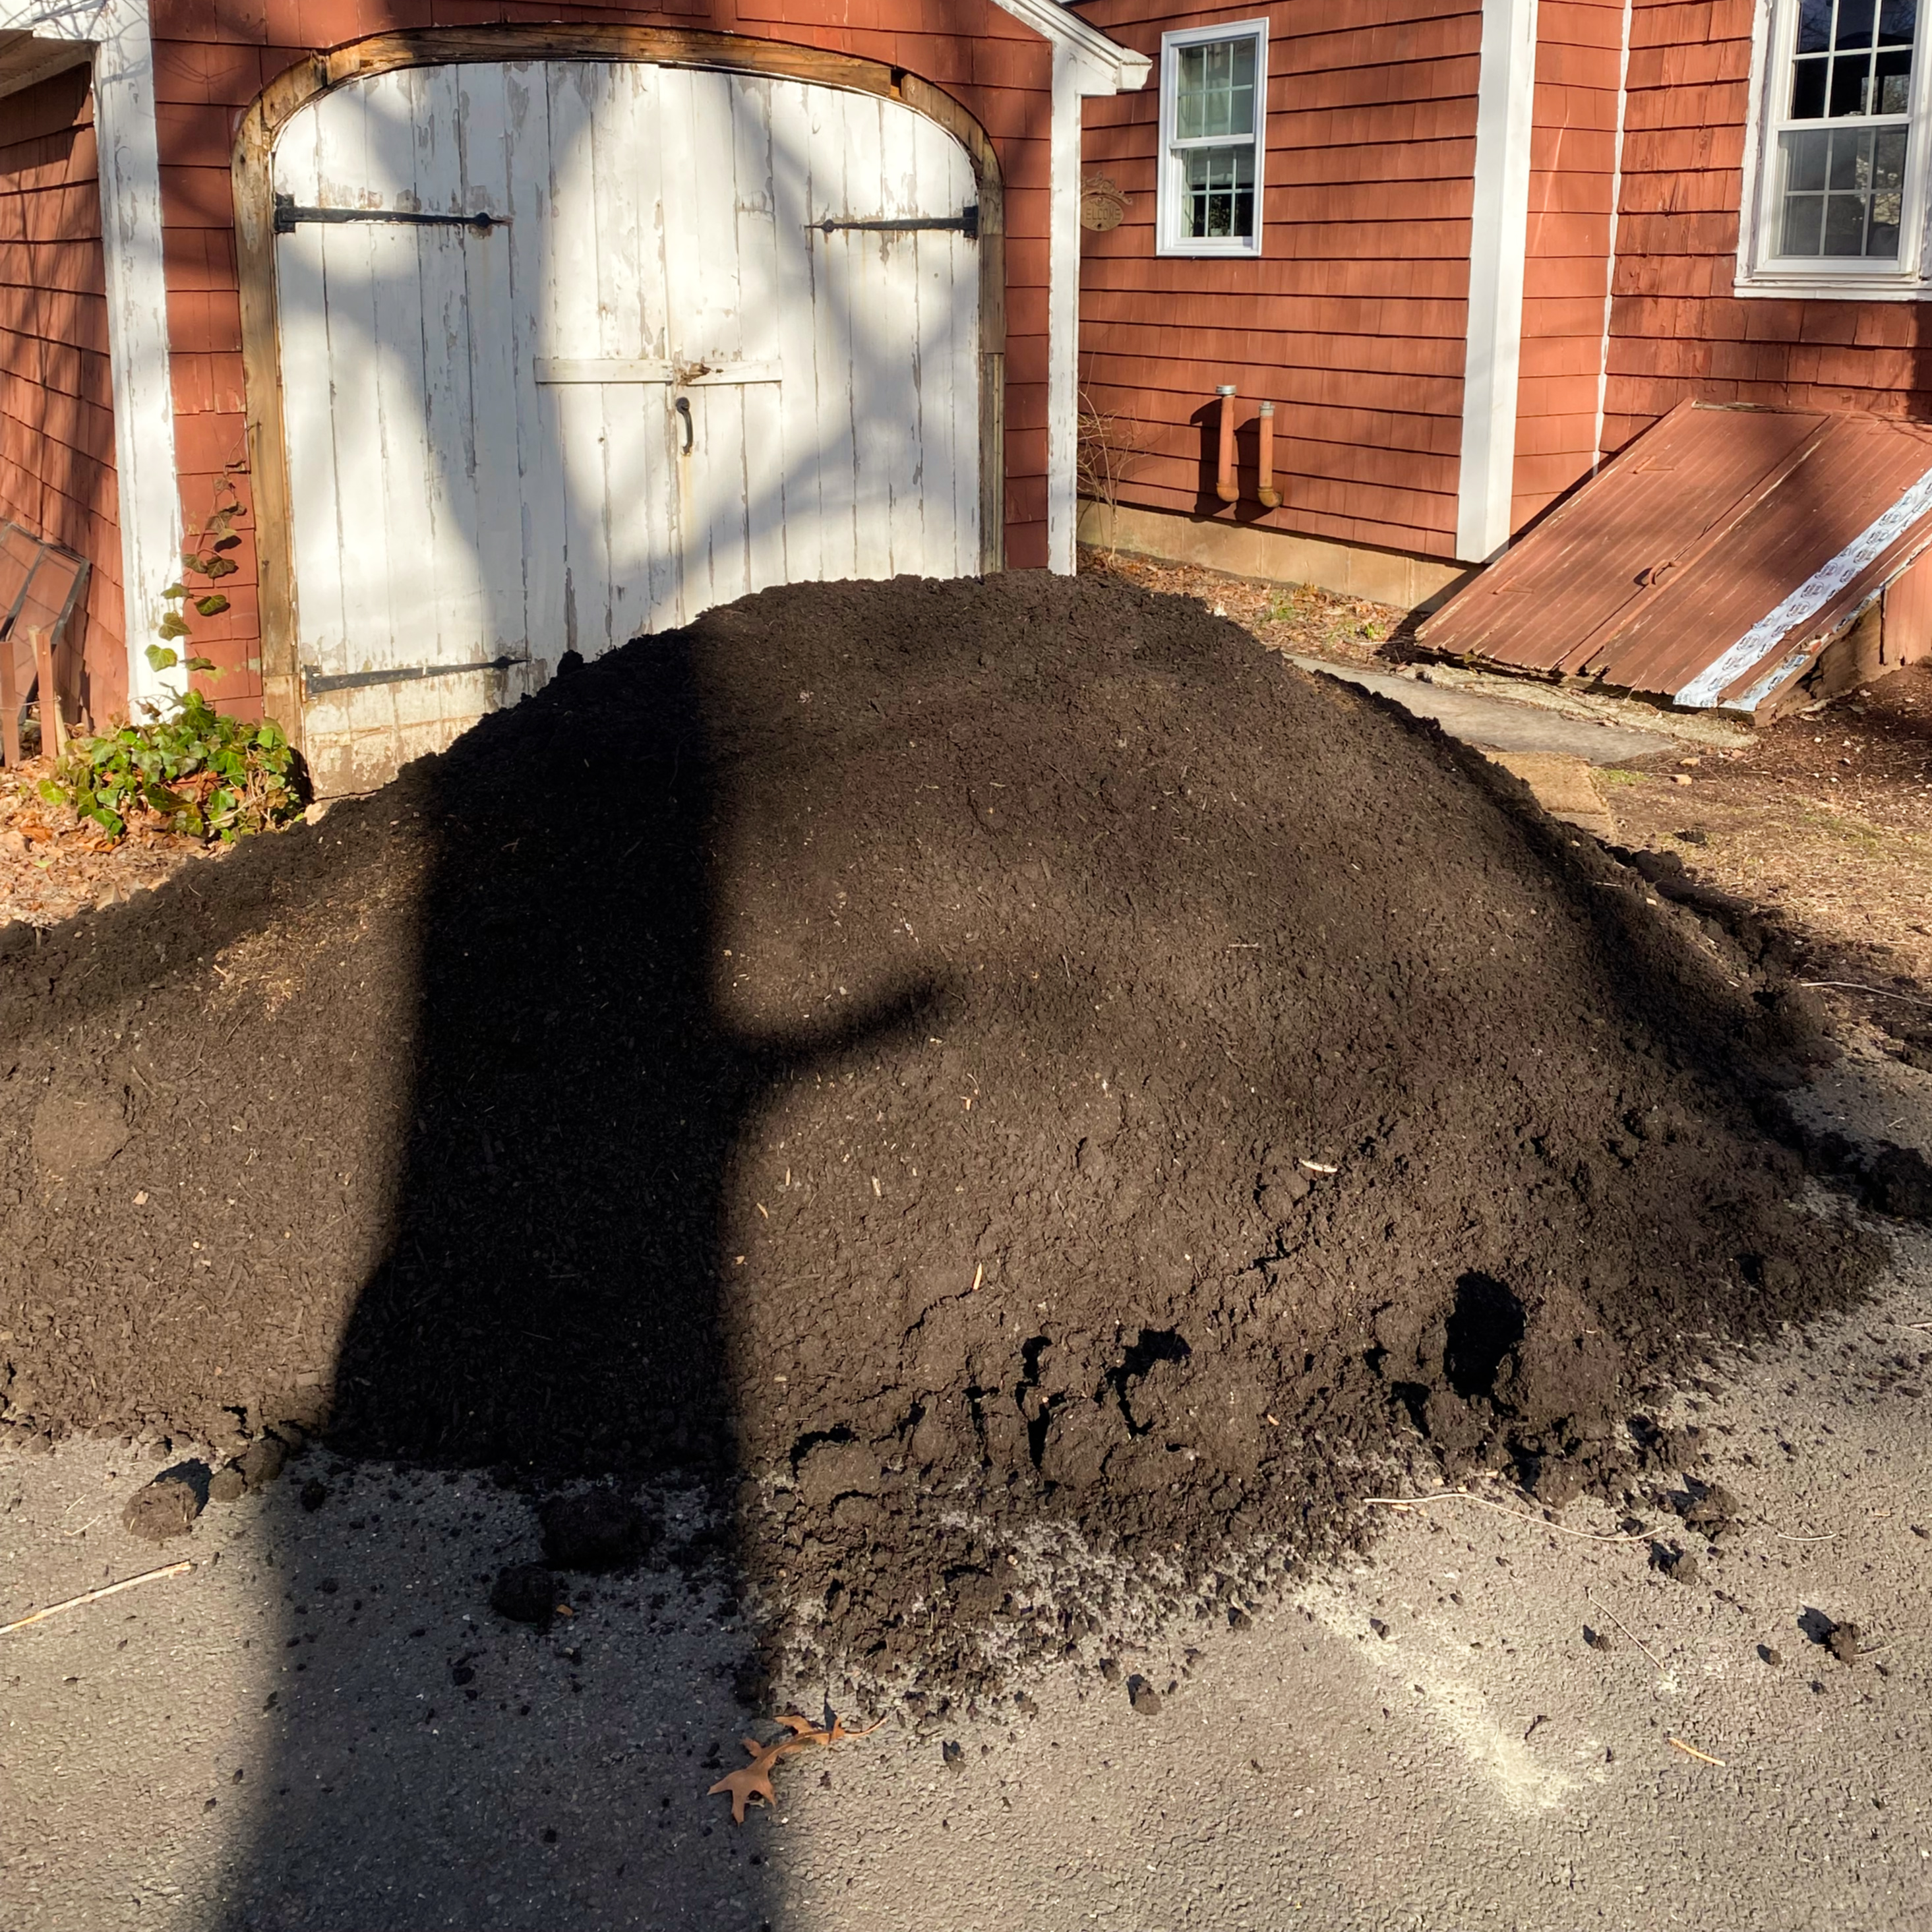
Every week, I kept waiting for something spectacular to happen: for something to catch a growth spurt and shoot up tall. But throughout the entire summer, all the seedlings that had been planted in early spring remained short and compact. Despite the organic compost laid in a thick blanket, despite the weekly waterings, and despite the regular fertilizer feedings, the herbs kept to a mercifully slow schedule. Meanwhile, the rest of the vegetable and flower gardens all around 1750 House flourished.

A small portion of the backyard vegetable garden in late July. This photo includes tomatoes, peppers, basil, corn, nasturtiums, winter squash, melons, beans, kale, artichokes, and collard greens.


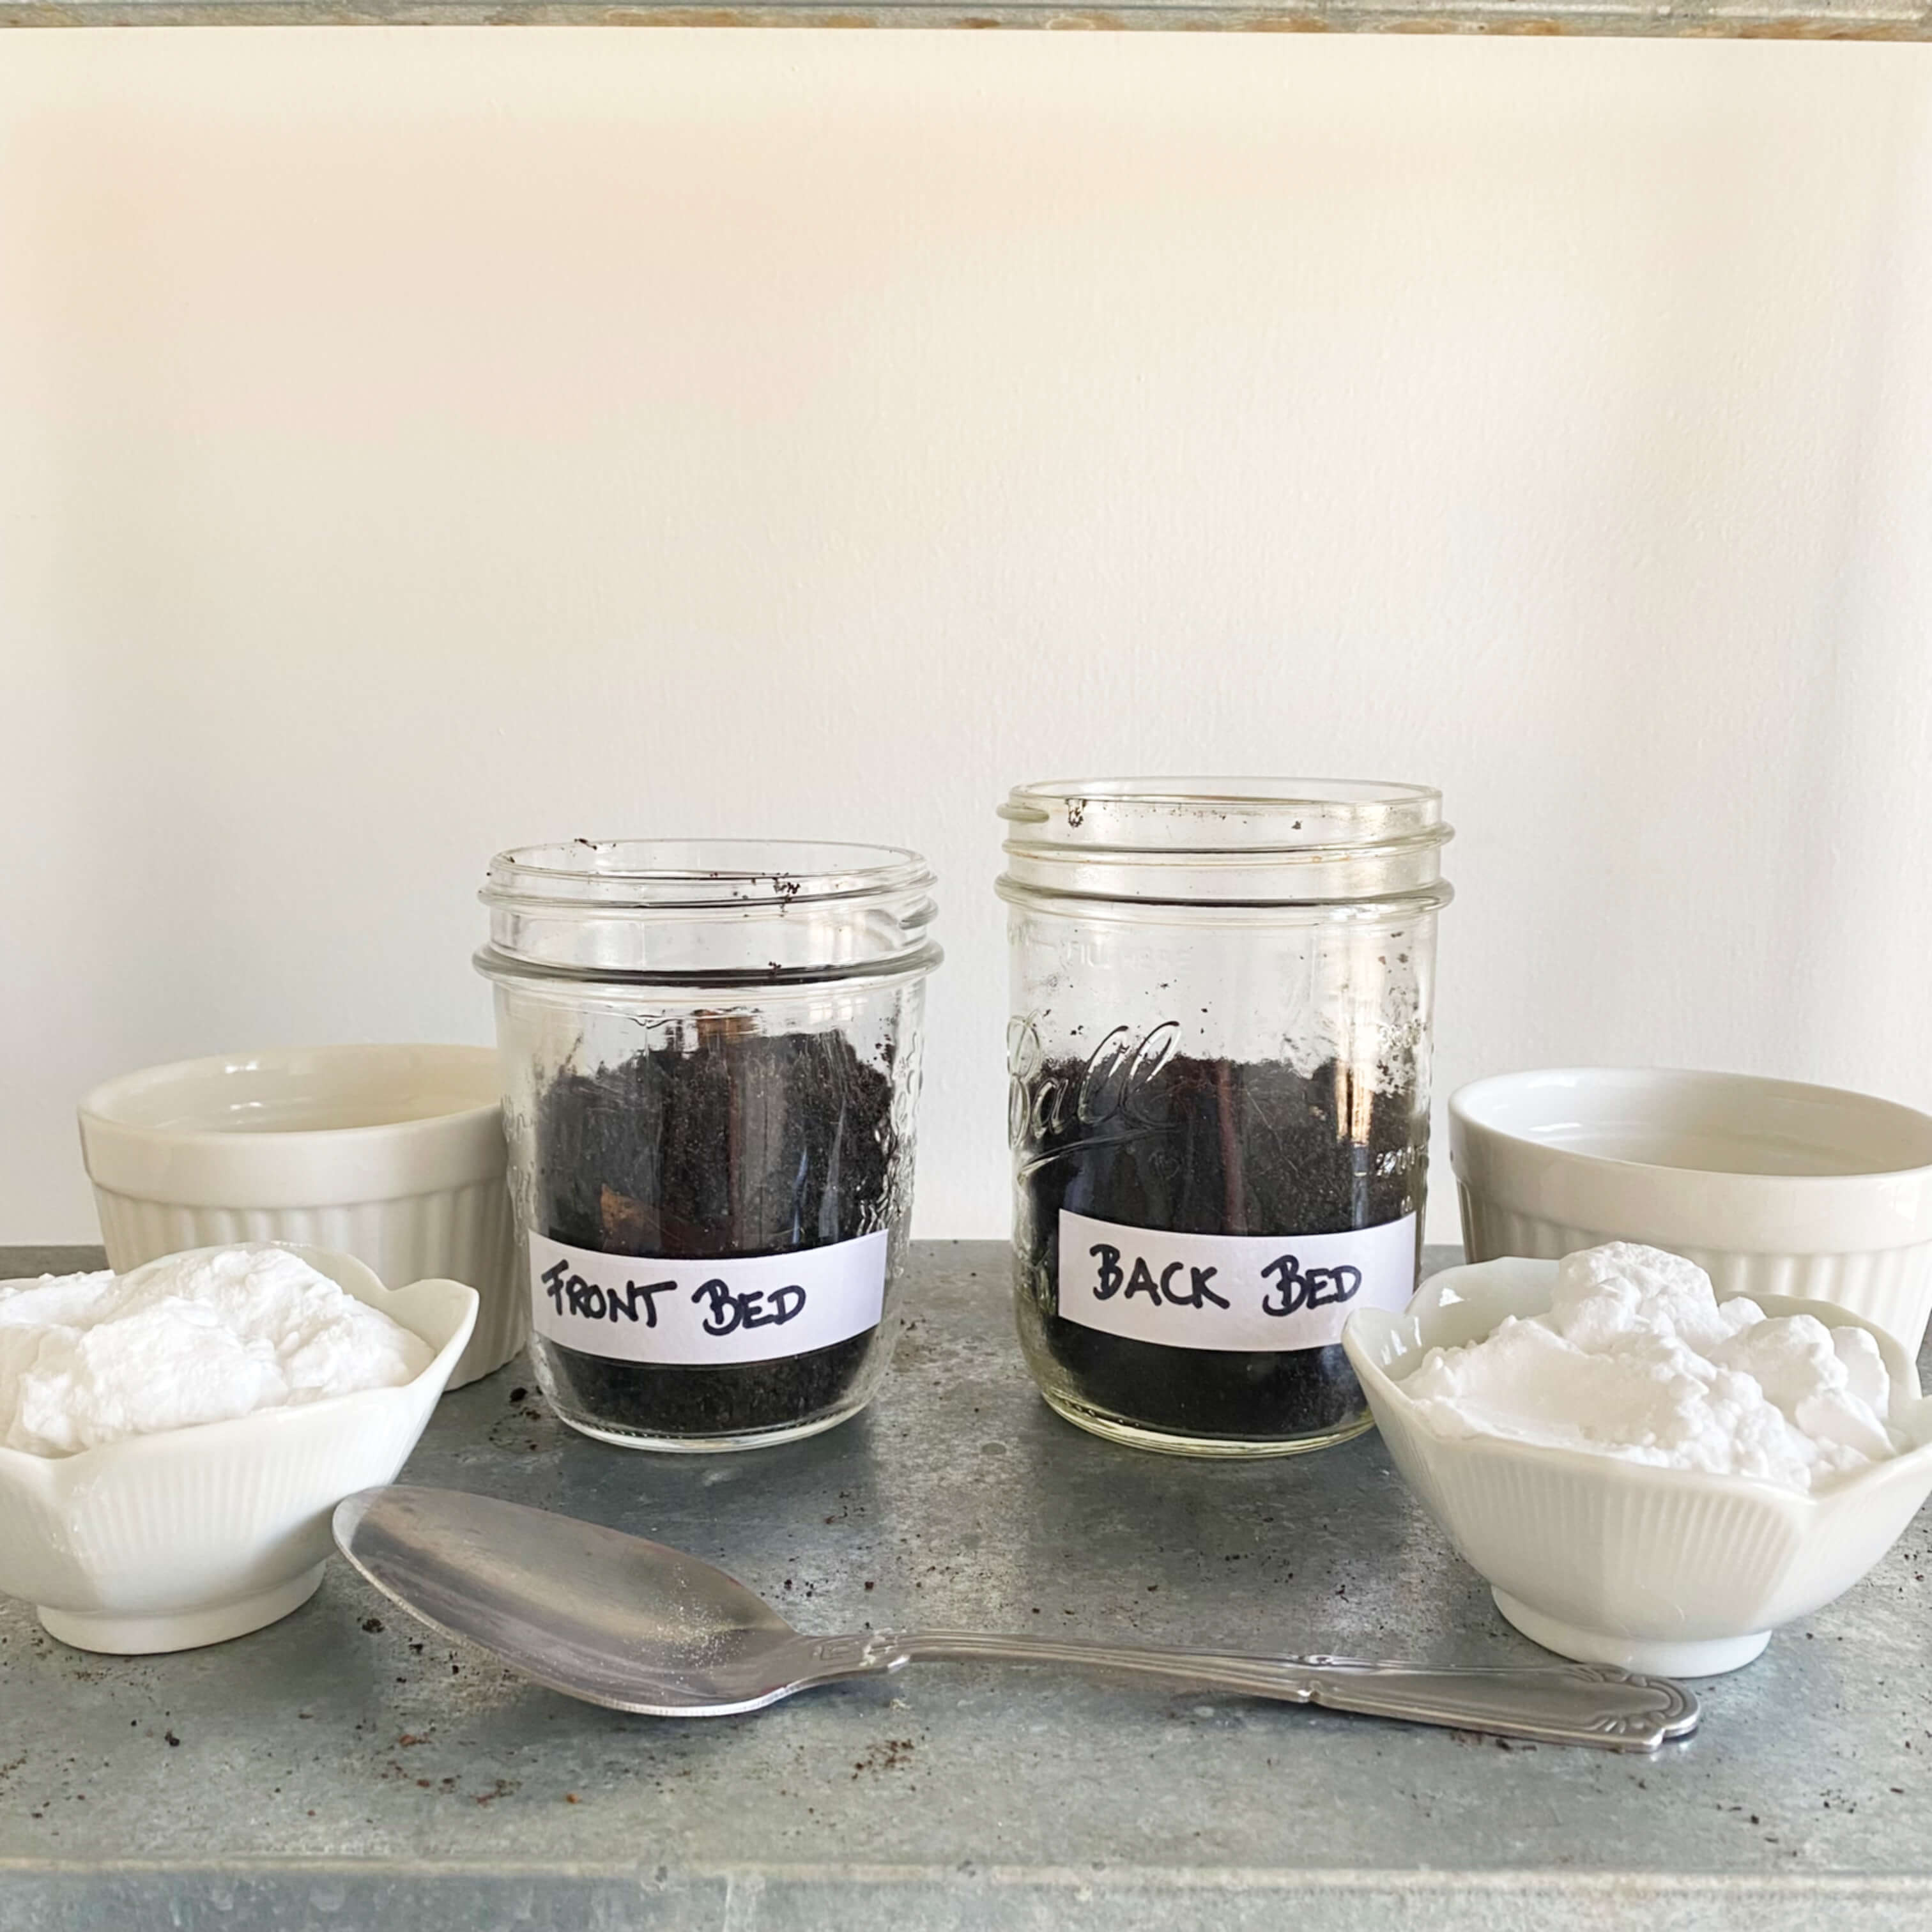
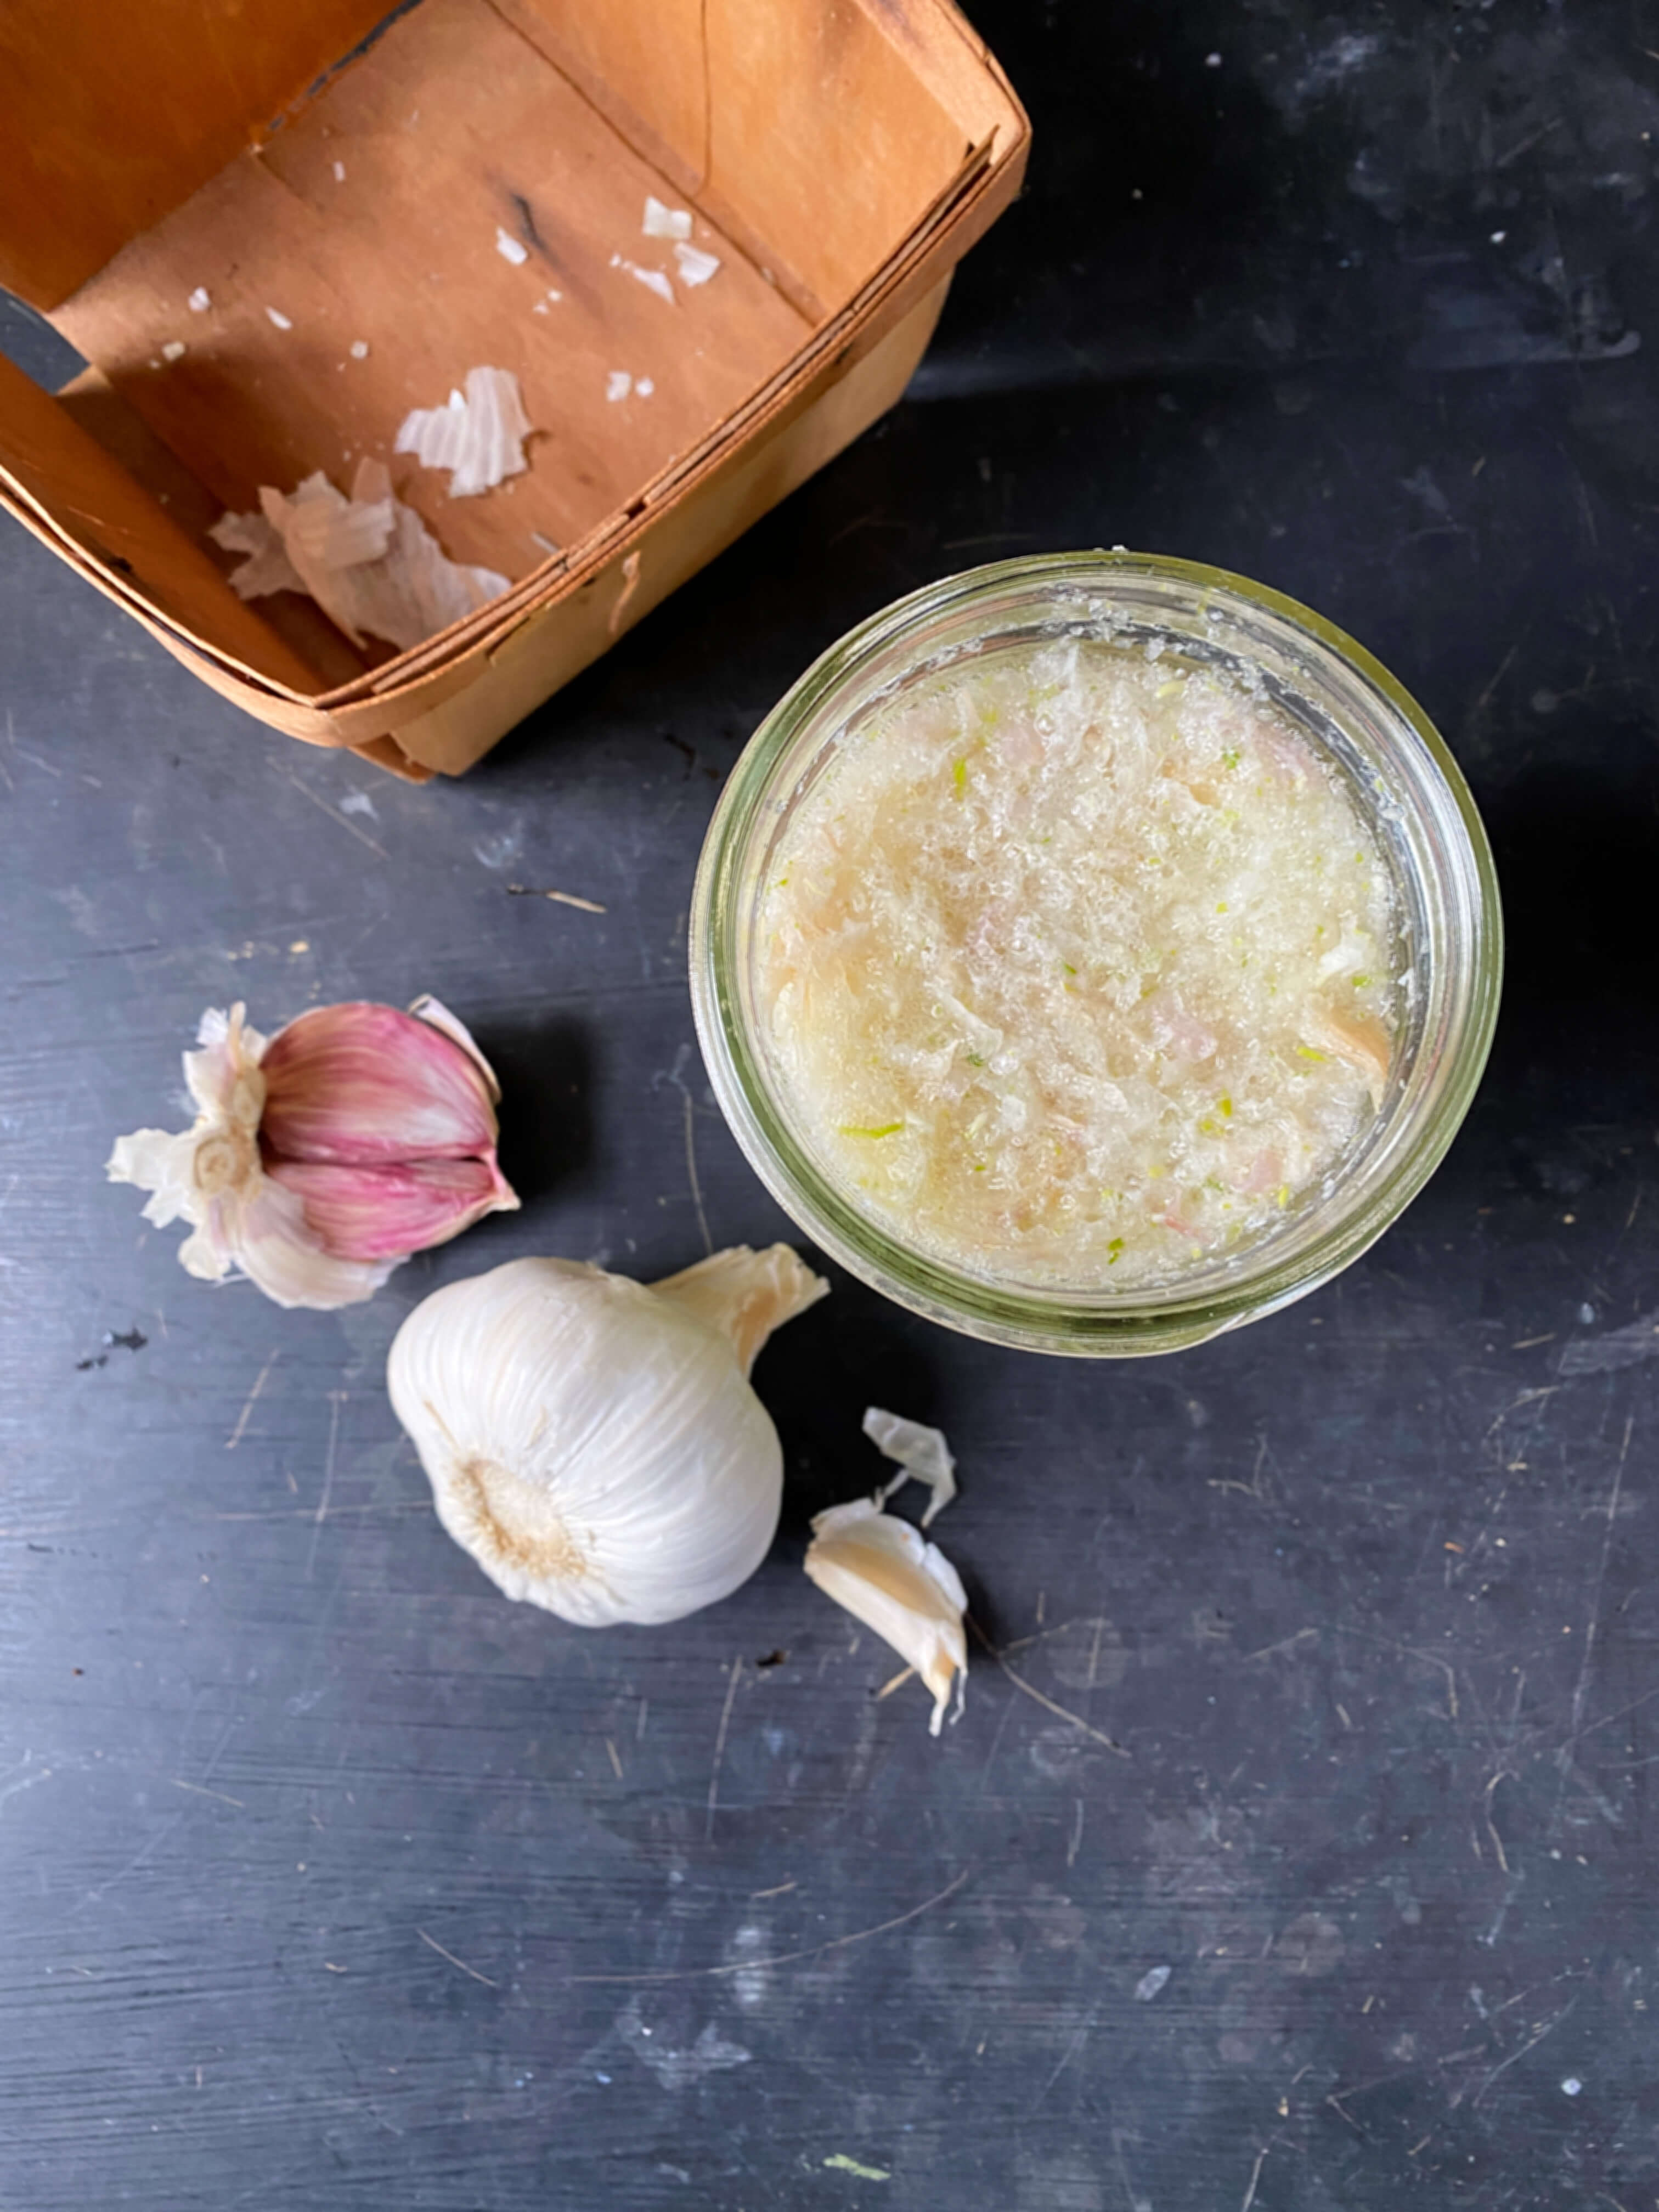
In Adelma’s summer chapter of Herb Gardening in Five Seasons, she recommended two options in regard to feeding herbs: a commercially available (mid-20th century) fertilizer containing a 23-21-17 ratio and a homemade version of manure tea. While there are several horse and cow farms in our surrounding area, I have yet to see if any of these farms offer organic manure for sale, so I opted for the latter. The exact makeup of the commercial fertilizer that Adelma had recommended, is no longer available in that specific configuration anymore. I wound up making my own fertilizer combination comprised of organic seaweed, bone meal and banana peel water which was the closest I could get to mirroring her nitrogen-phosphorus-potassium ratio.

Lemon balm in early September

Finally, when the end of August approached, a growth spurt occurred. The herbs in the greenhouse bed started spreading out wide, but not high. The tallest herb was the lemon balm, measuring in at 5 1/2 inches in height, about 19″ inches shorter than what it should typically be. So you can see that things were not exactly ideal in this area of the garden, but they were at least improving slightly.

At the end of summer, the feverfew filled out and a perennial foam flower plant was added to replace the forget-me-nots.

Just as the lemon balm and feverfew started fluffing out, the tiniest of forget-me-nots bloomed. It was one single flower of dainty proportions and the the prettiest shade of blue, a color not that common in the garden beds here. As a spreading perennial, it was a hopeful sign that they were establishing themselves. That the herb garden might be turning a corner towards long-lasting success. The photo is not so great, but the flowers really were lovely.


Later in the week, bunnies ate the anemone. The mystery pest came back too and ate the forget-me-nots, flower and all, and then ate the bergamot for dessert.

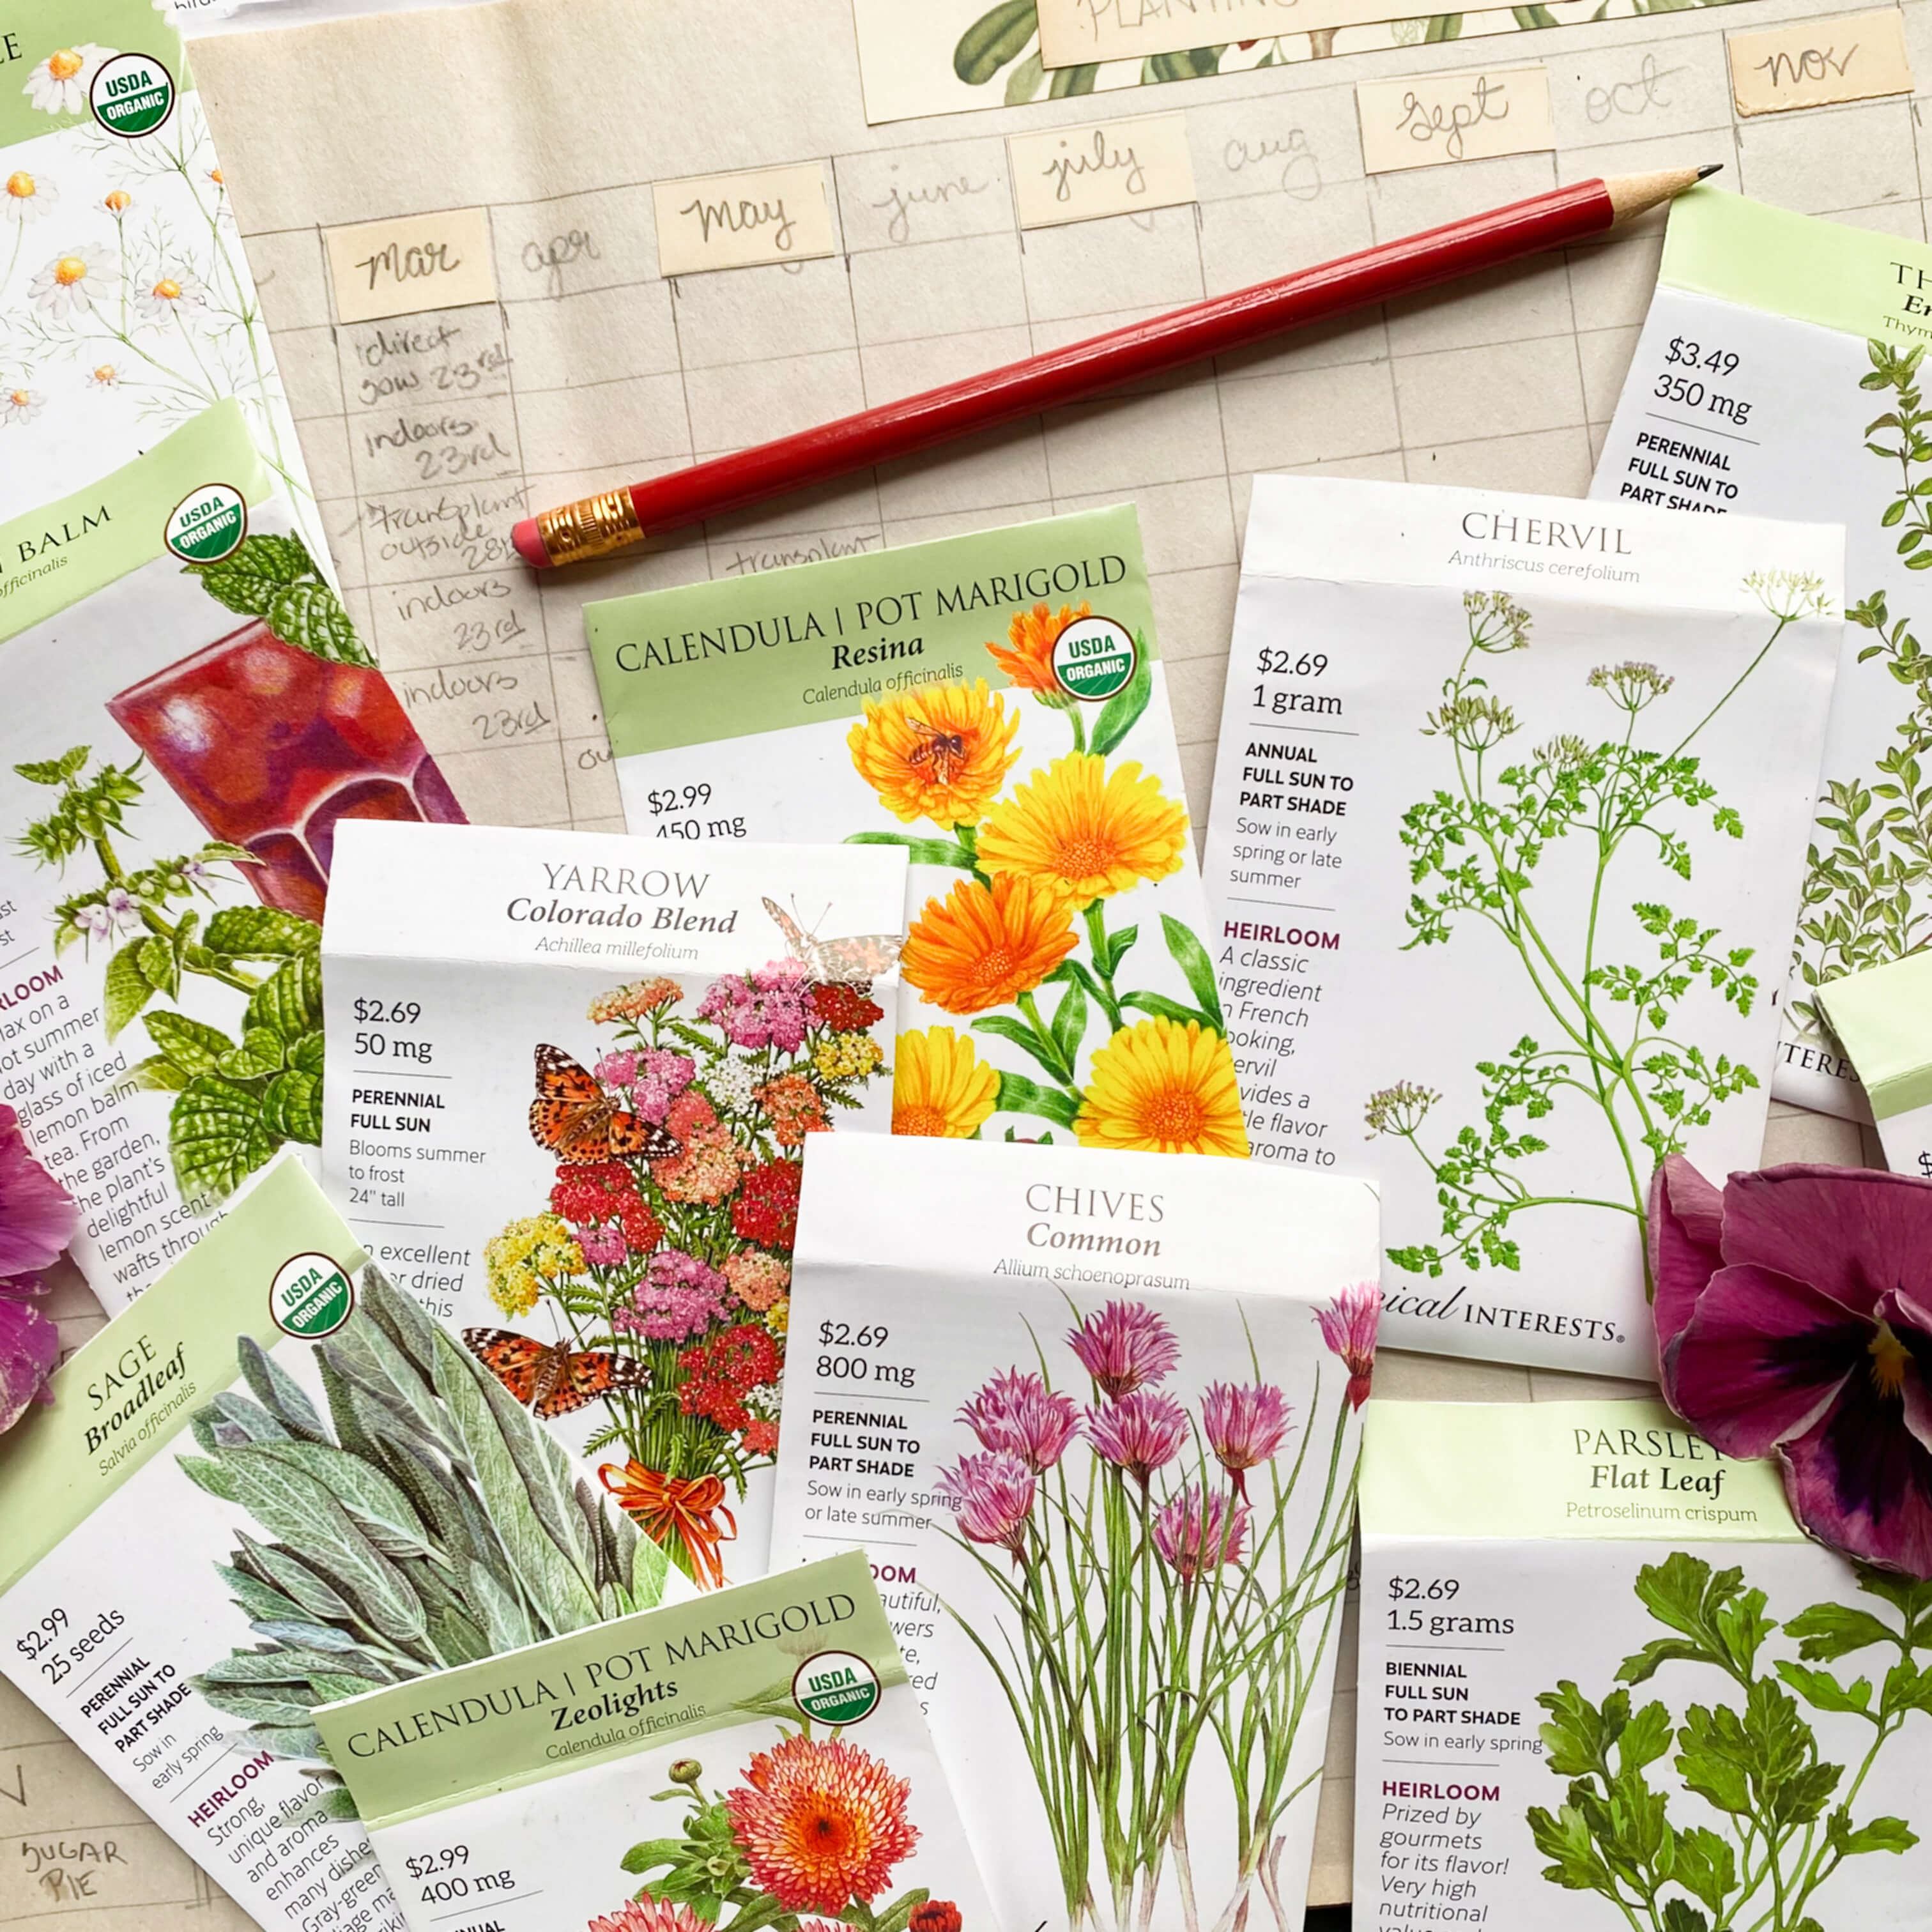
As a true experimental garden, I didn’t interfere with any of the plants, but just observed their progress, keeping notes, and taking photos on what survived and what didn’t and in what location with what amount of sun. When I sketched out the garden in January, I paired all the seedlings with their most ideal companion plantings based on compatibility, size, structural composition, and color so that everything harmonized and flowed together. When companion planting, there’s the added benefit that these specific pairings “help” one another, whether it’s underground adding additional nutrition via their roots or above ground adding protection or distraction from various pests. This step of the planning process is pretty intensive because many things can’t be planted next to each for lots of varied reasons. Add in additional factors like water, soil, and sun requirements, and this placement-of-the-herbs exercise turns into a puzzle on paper best executed with a pencil and a sizable eraser. It took many days to get the garden plan correctly mapped out over winter. What I didn’t plan for though was Santiago.

Santiago, the twenty-one-year-old wonder cat this summer.

In early September, on a beautiful sunny Sunday, Santiago, our 21-year-old cat, said a peaceful goodbye to life at 1750 House. Maybe nature worked in our favor over the summer leading up to the moment when we laid Santi to rest in the spot in the greenhouse garden where the anemone once stood. It was an ideal new home for Santi. Near his favorite rock with the hollowed out middle that became his outdoor water bowl, it was also close to his pal, Indie, with full view of the bird feeder and the woodlands and all the wild creatures that sparked his curiosity each and every day since he arrived a southern cat in a northern land.

Back in January, penciled in around the anemone were pink and white echinacea, foxglove, lemon balm, parsley, mint, chives, and oregano. Now in reality, in September, Santiago’s inclusion in the garden inspired something different. A new vision. One that transformed this side of the greenhouse into a brand-new kind of garden altogether. Instead of an entire bed filled with herbs with a foxglove end cap, a new celebration garden was coming into light. One that represented joyful memories in the form of plants. One that captured the engaging spirits of our long friendships with a ten pound cat and the most enthusiastic pup on the planet. The foxglove, feverfew, and lemon balm will stay, but in place of adding other herbs, next spring, I’ll be adding flowers and shrubs suited to shade that carry reminders of Indie and Santiago. Instead of a bed for scented herbs, it will become a bed of sentiment, which is not unlike how colonial gardens were built in America in the first place.

Always a helper in the greenhouse.

Faced with not much time left in the growing season to start something new, the winter offers the opportunity to think about the perfect plant to represent Santiago, this marvelous little friend we’ve known for two decades. I don’t know quite yet what companion will join him, but I do know that it will be a dramatic standout flower amongst the herbs, just like Santiago was a dramatic standout kitty amongst cats.

Two ideas I’m considering at the moment… black peppermint and the black aeonium called Zwartkop, pictured above.

In the other experimental herb garden beds, challenges and triumphs ebbed and flowed with the swell of the season. The second location was a full-sun bed in the front yard that surrounds a 100-year-old maple tree.

The bed was vacant when we moved in, except for three clumps of rusty-red daylilies planted years ago by a previous owner.

The daylilies – a gardener’s joy at 1750 House from year’s past.

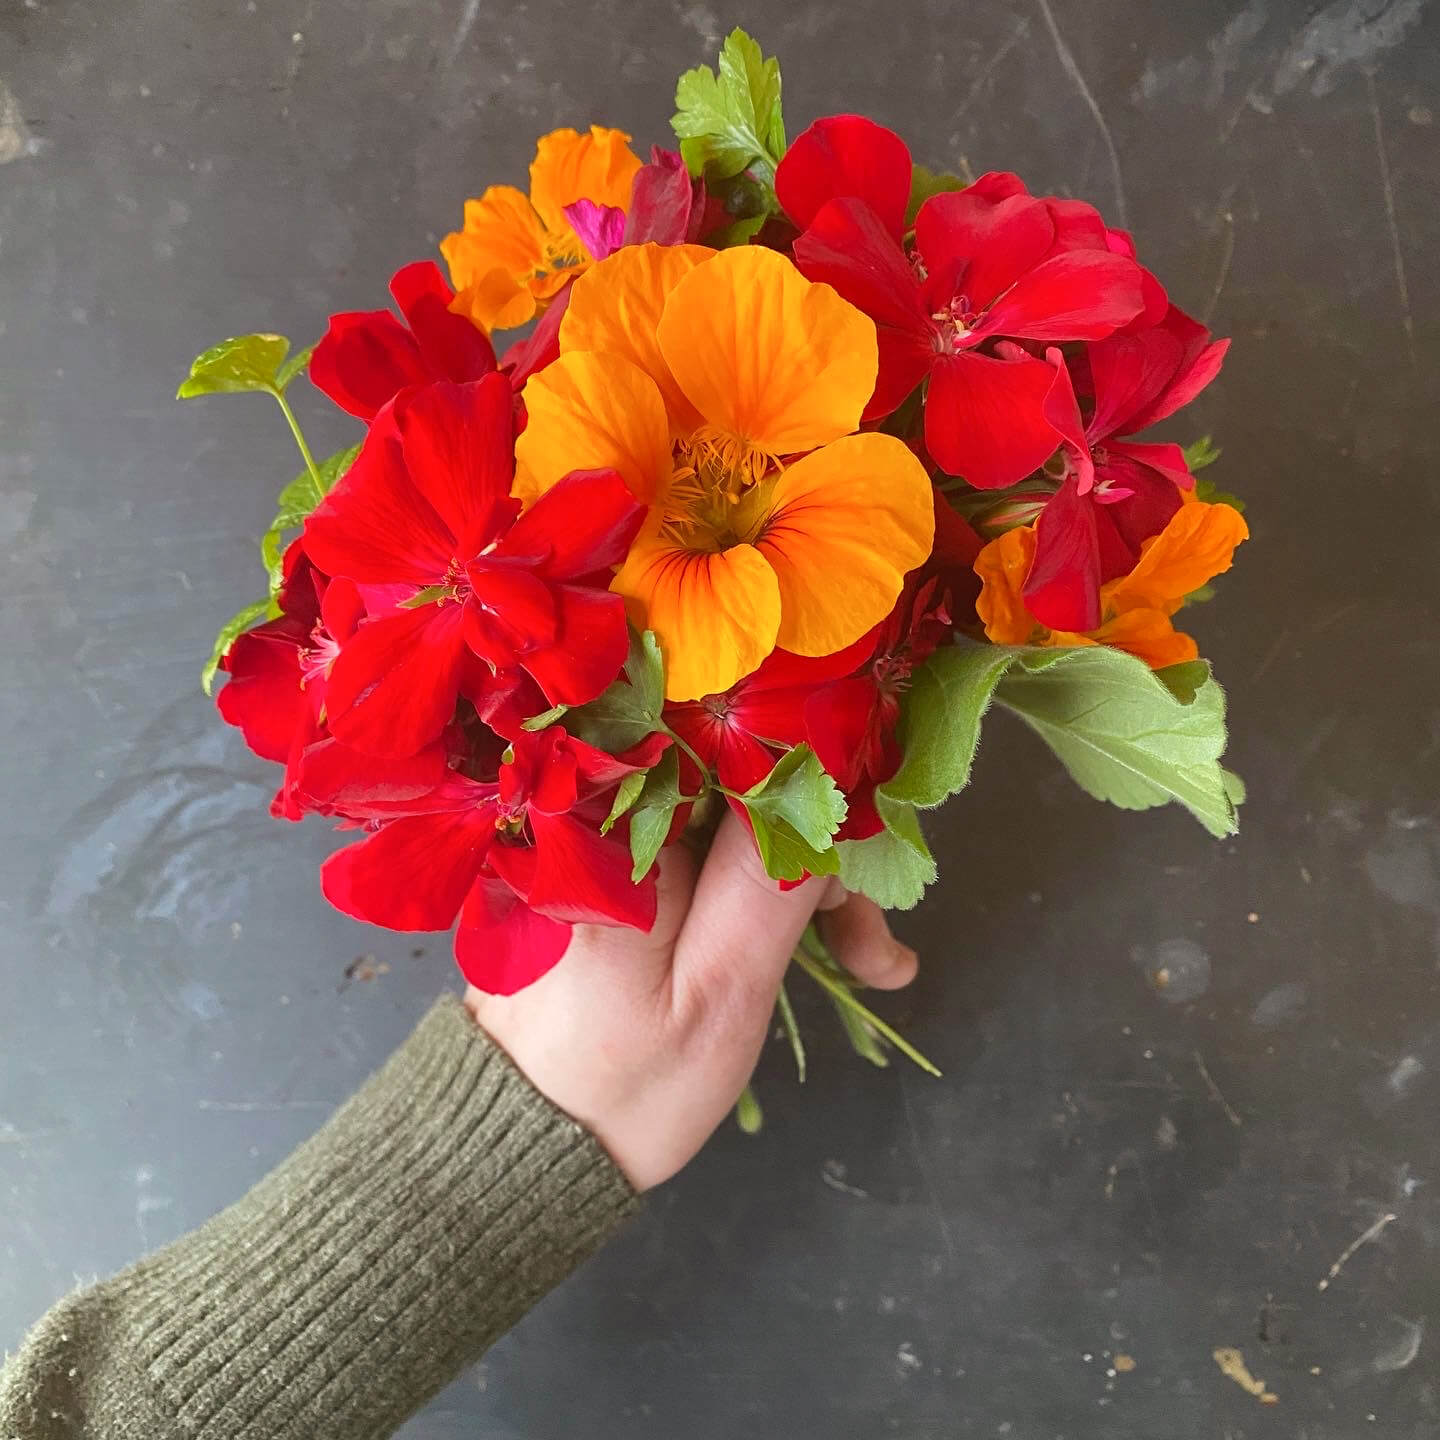
To celebrate the full sun location and to compliment the color palette of the daylilies, I planted the whole bed in shades of yellow and orange with a touch of pale pink. Calendula, yarrow, and blackberry lily seedlings were planted between coral bells, sweet potato vines, cosmos, and zinnias.

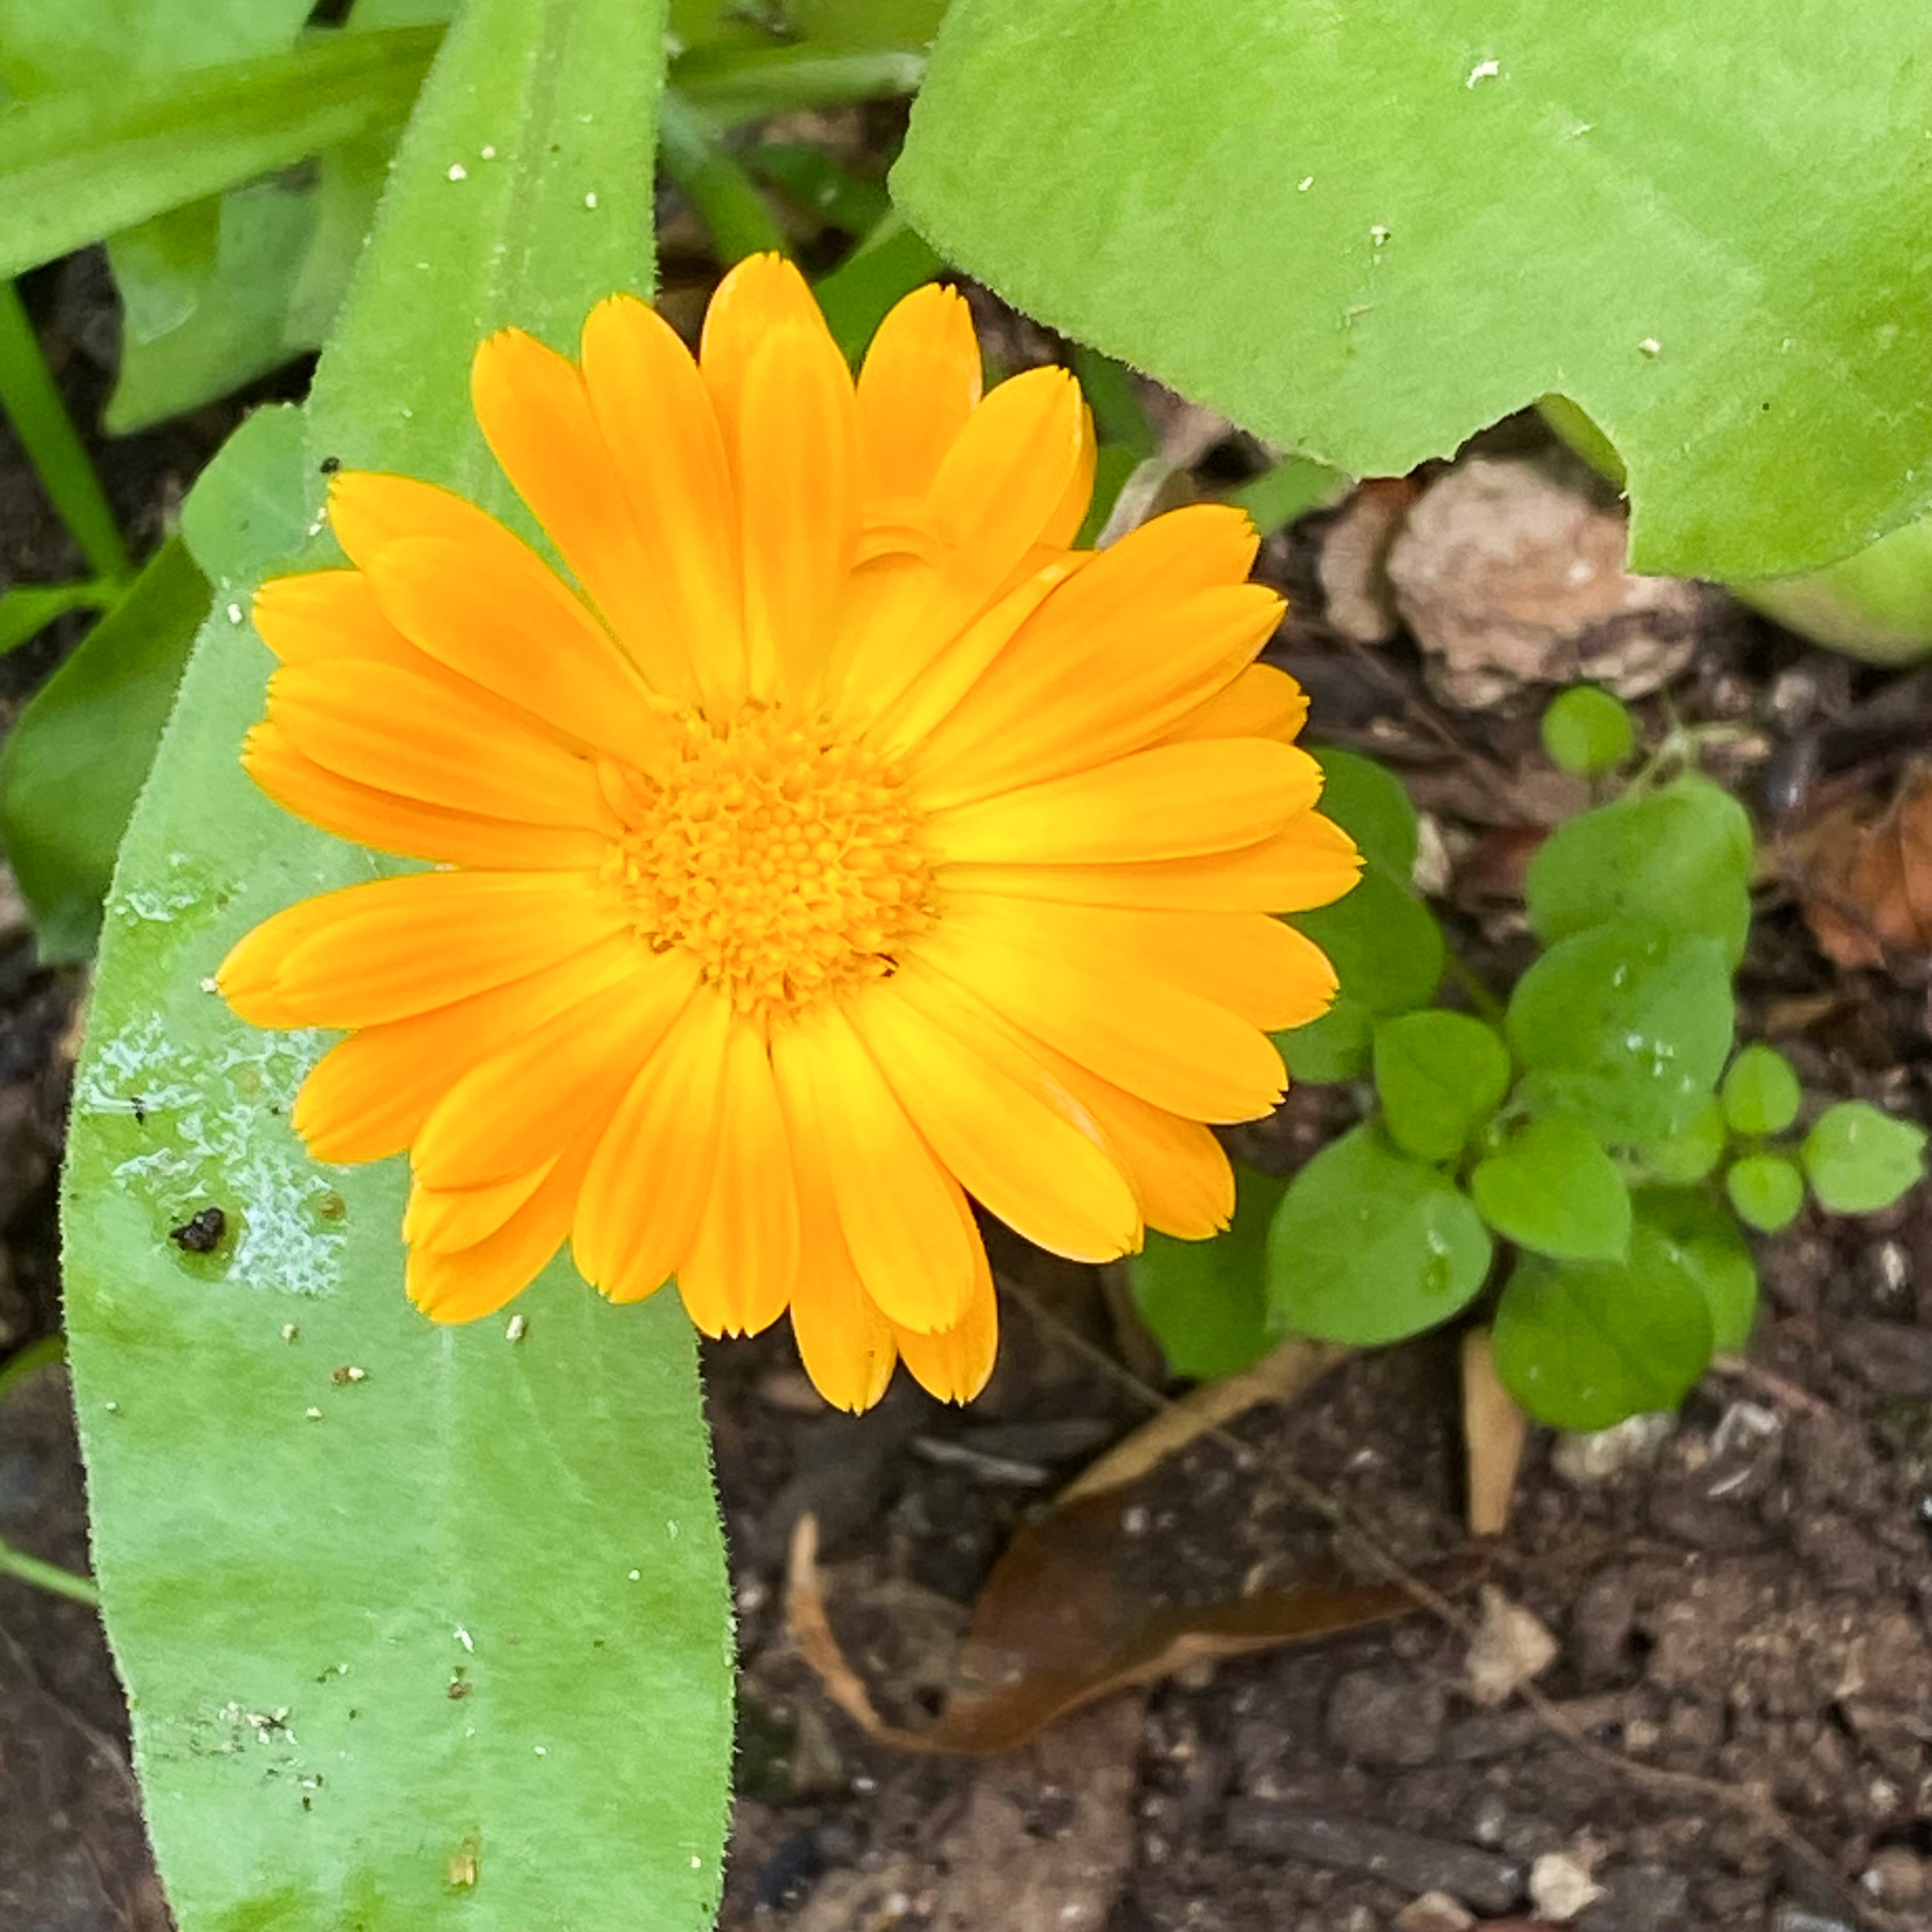
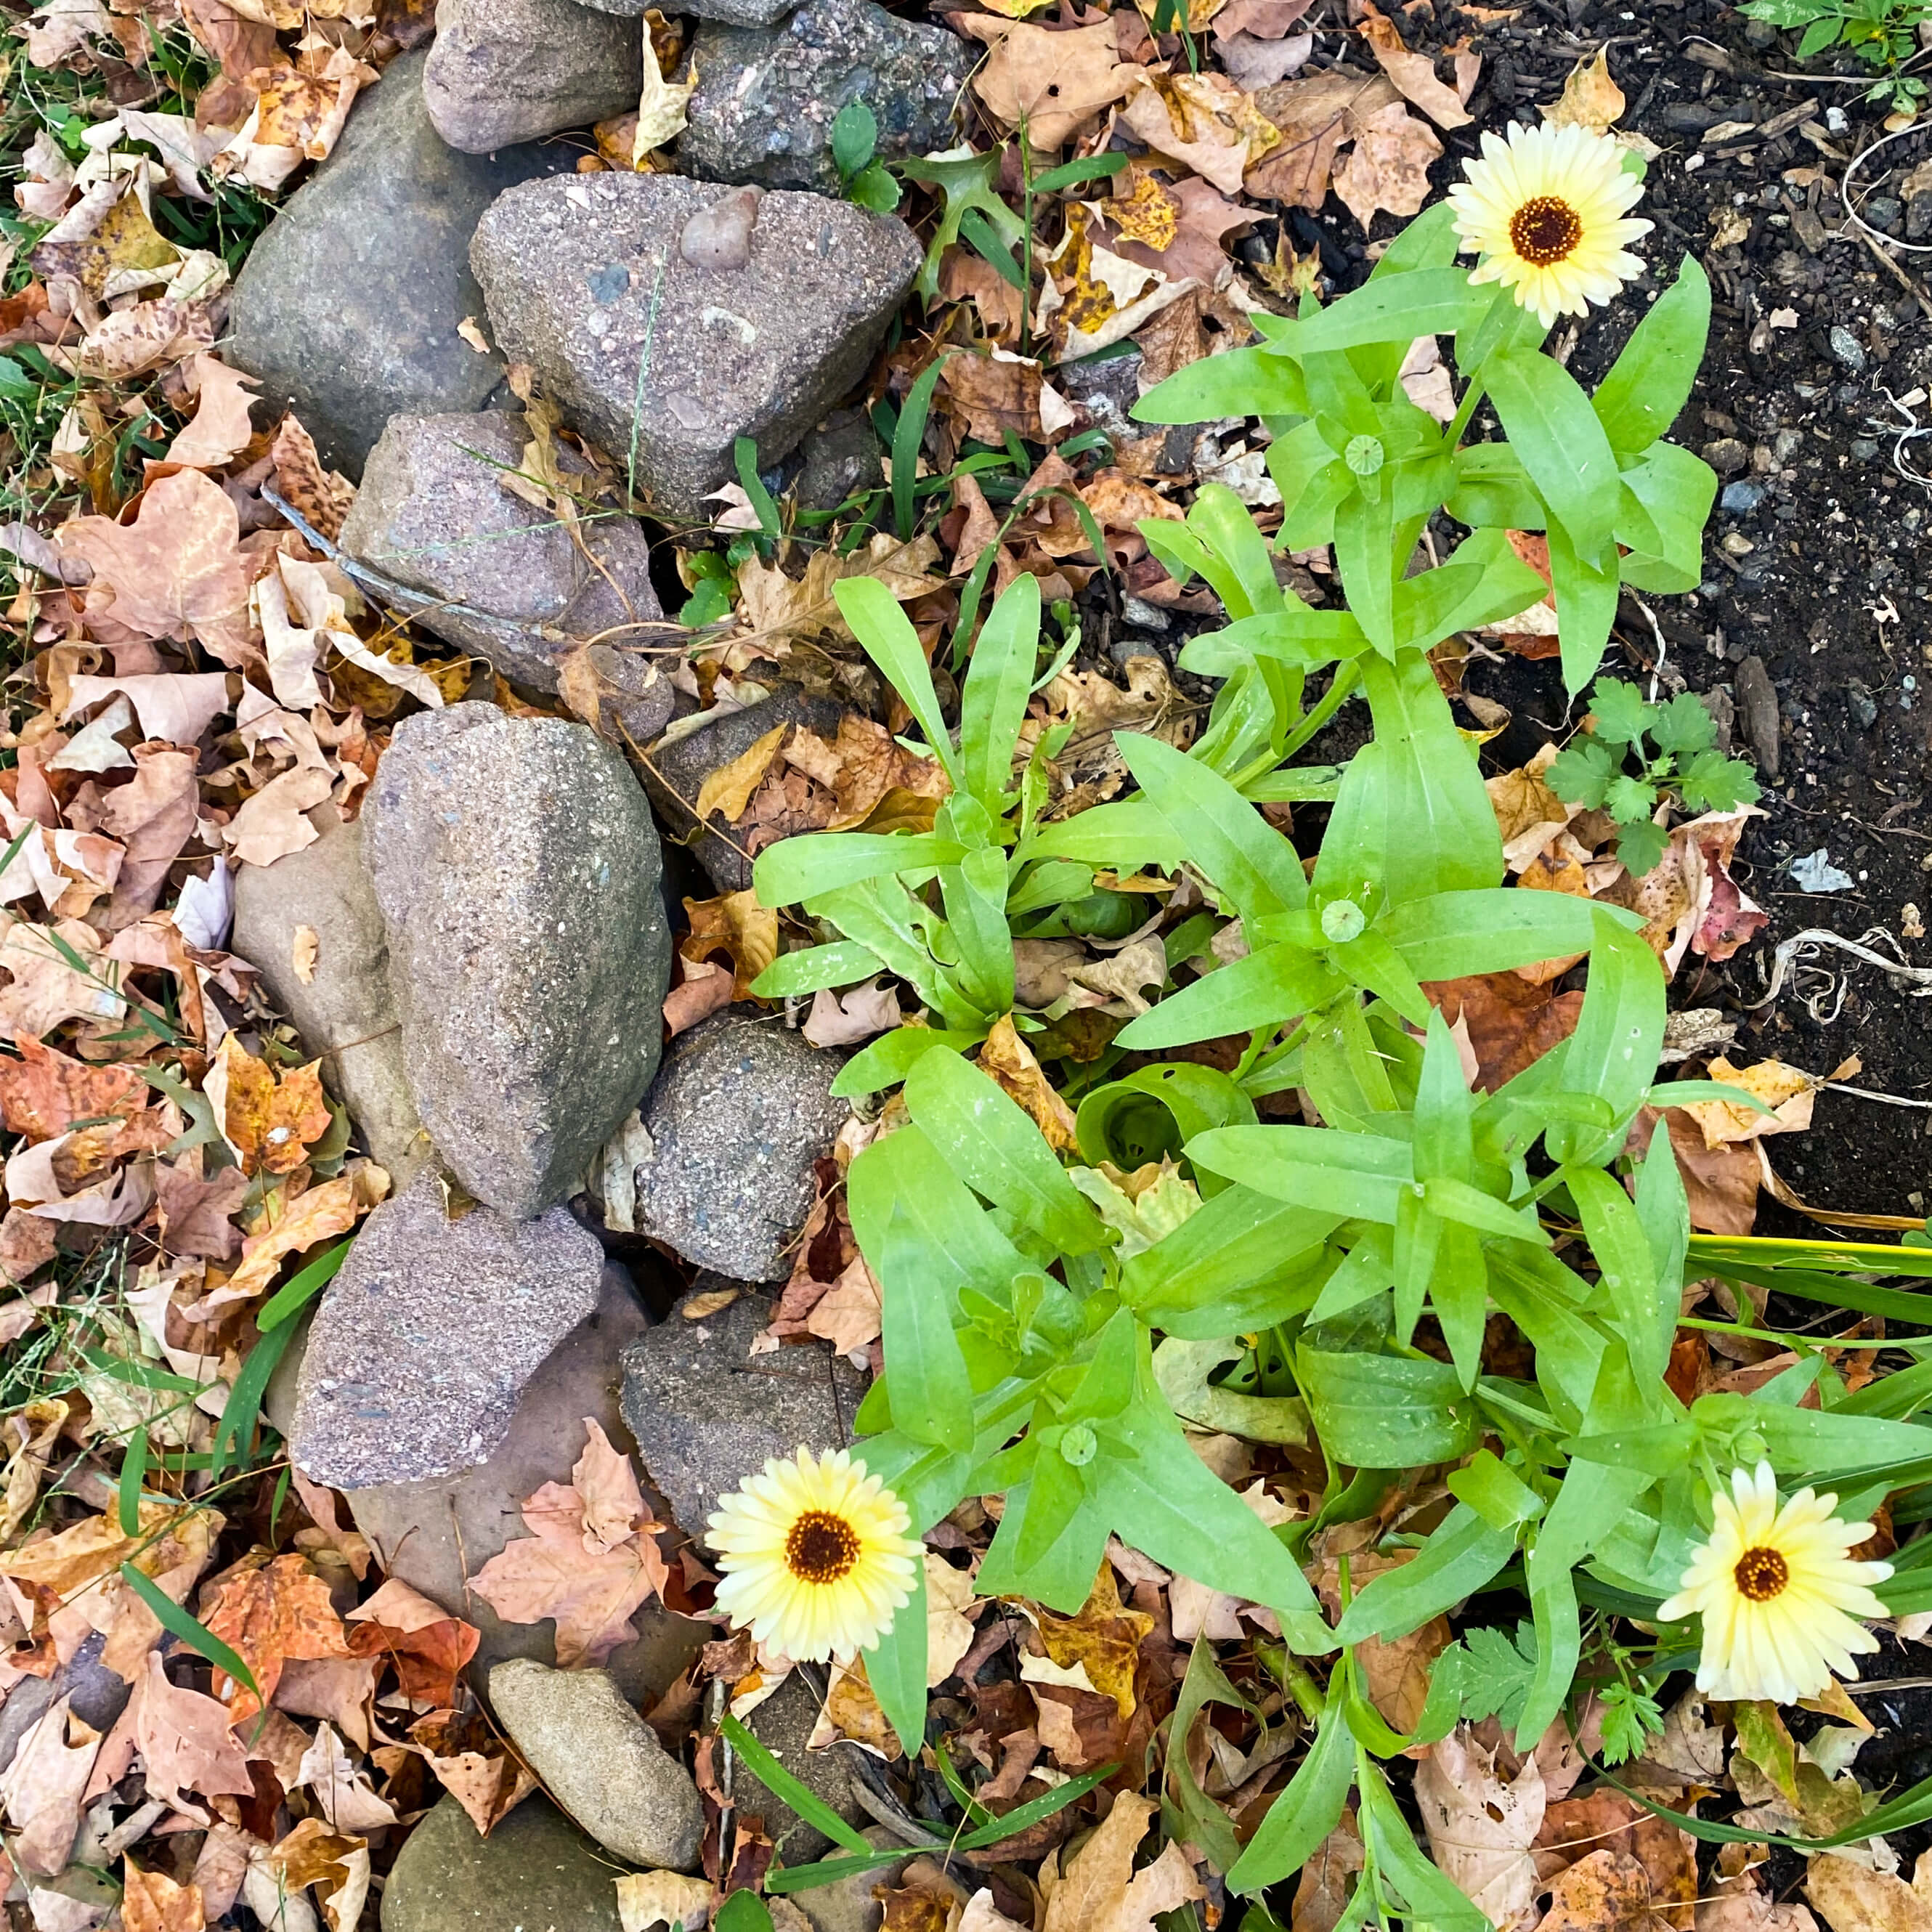
The calendula were the winners in this bed since they made it to full flower and kept flowering along with the cosmos and zinnia from June to November. The calendula formed little bushes of sticky leaves and multiple flower shoots. Had I planted about twice as many, they would have filled out all the bare spots in the bed completely. The yarrow and blackberry lily took the whole summer to establish themselves, but by September they both sported long leaves, so I’m hoping they’ll over winter with healthy vigor and really take off next year.

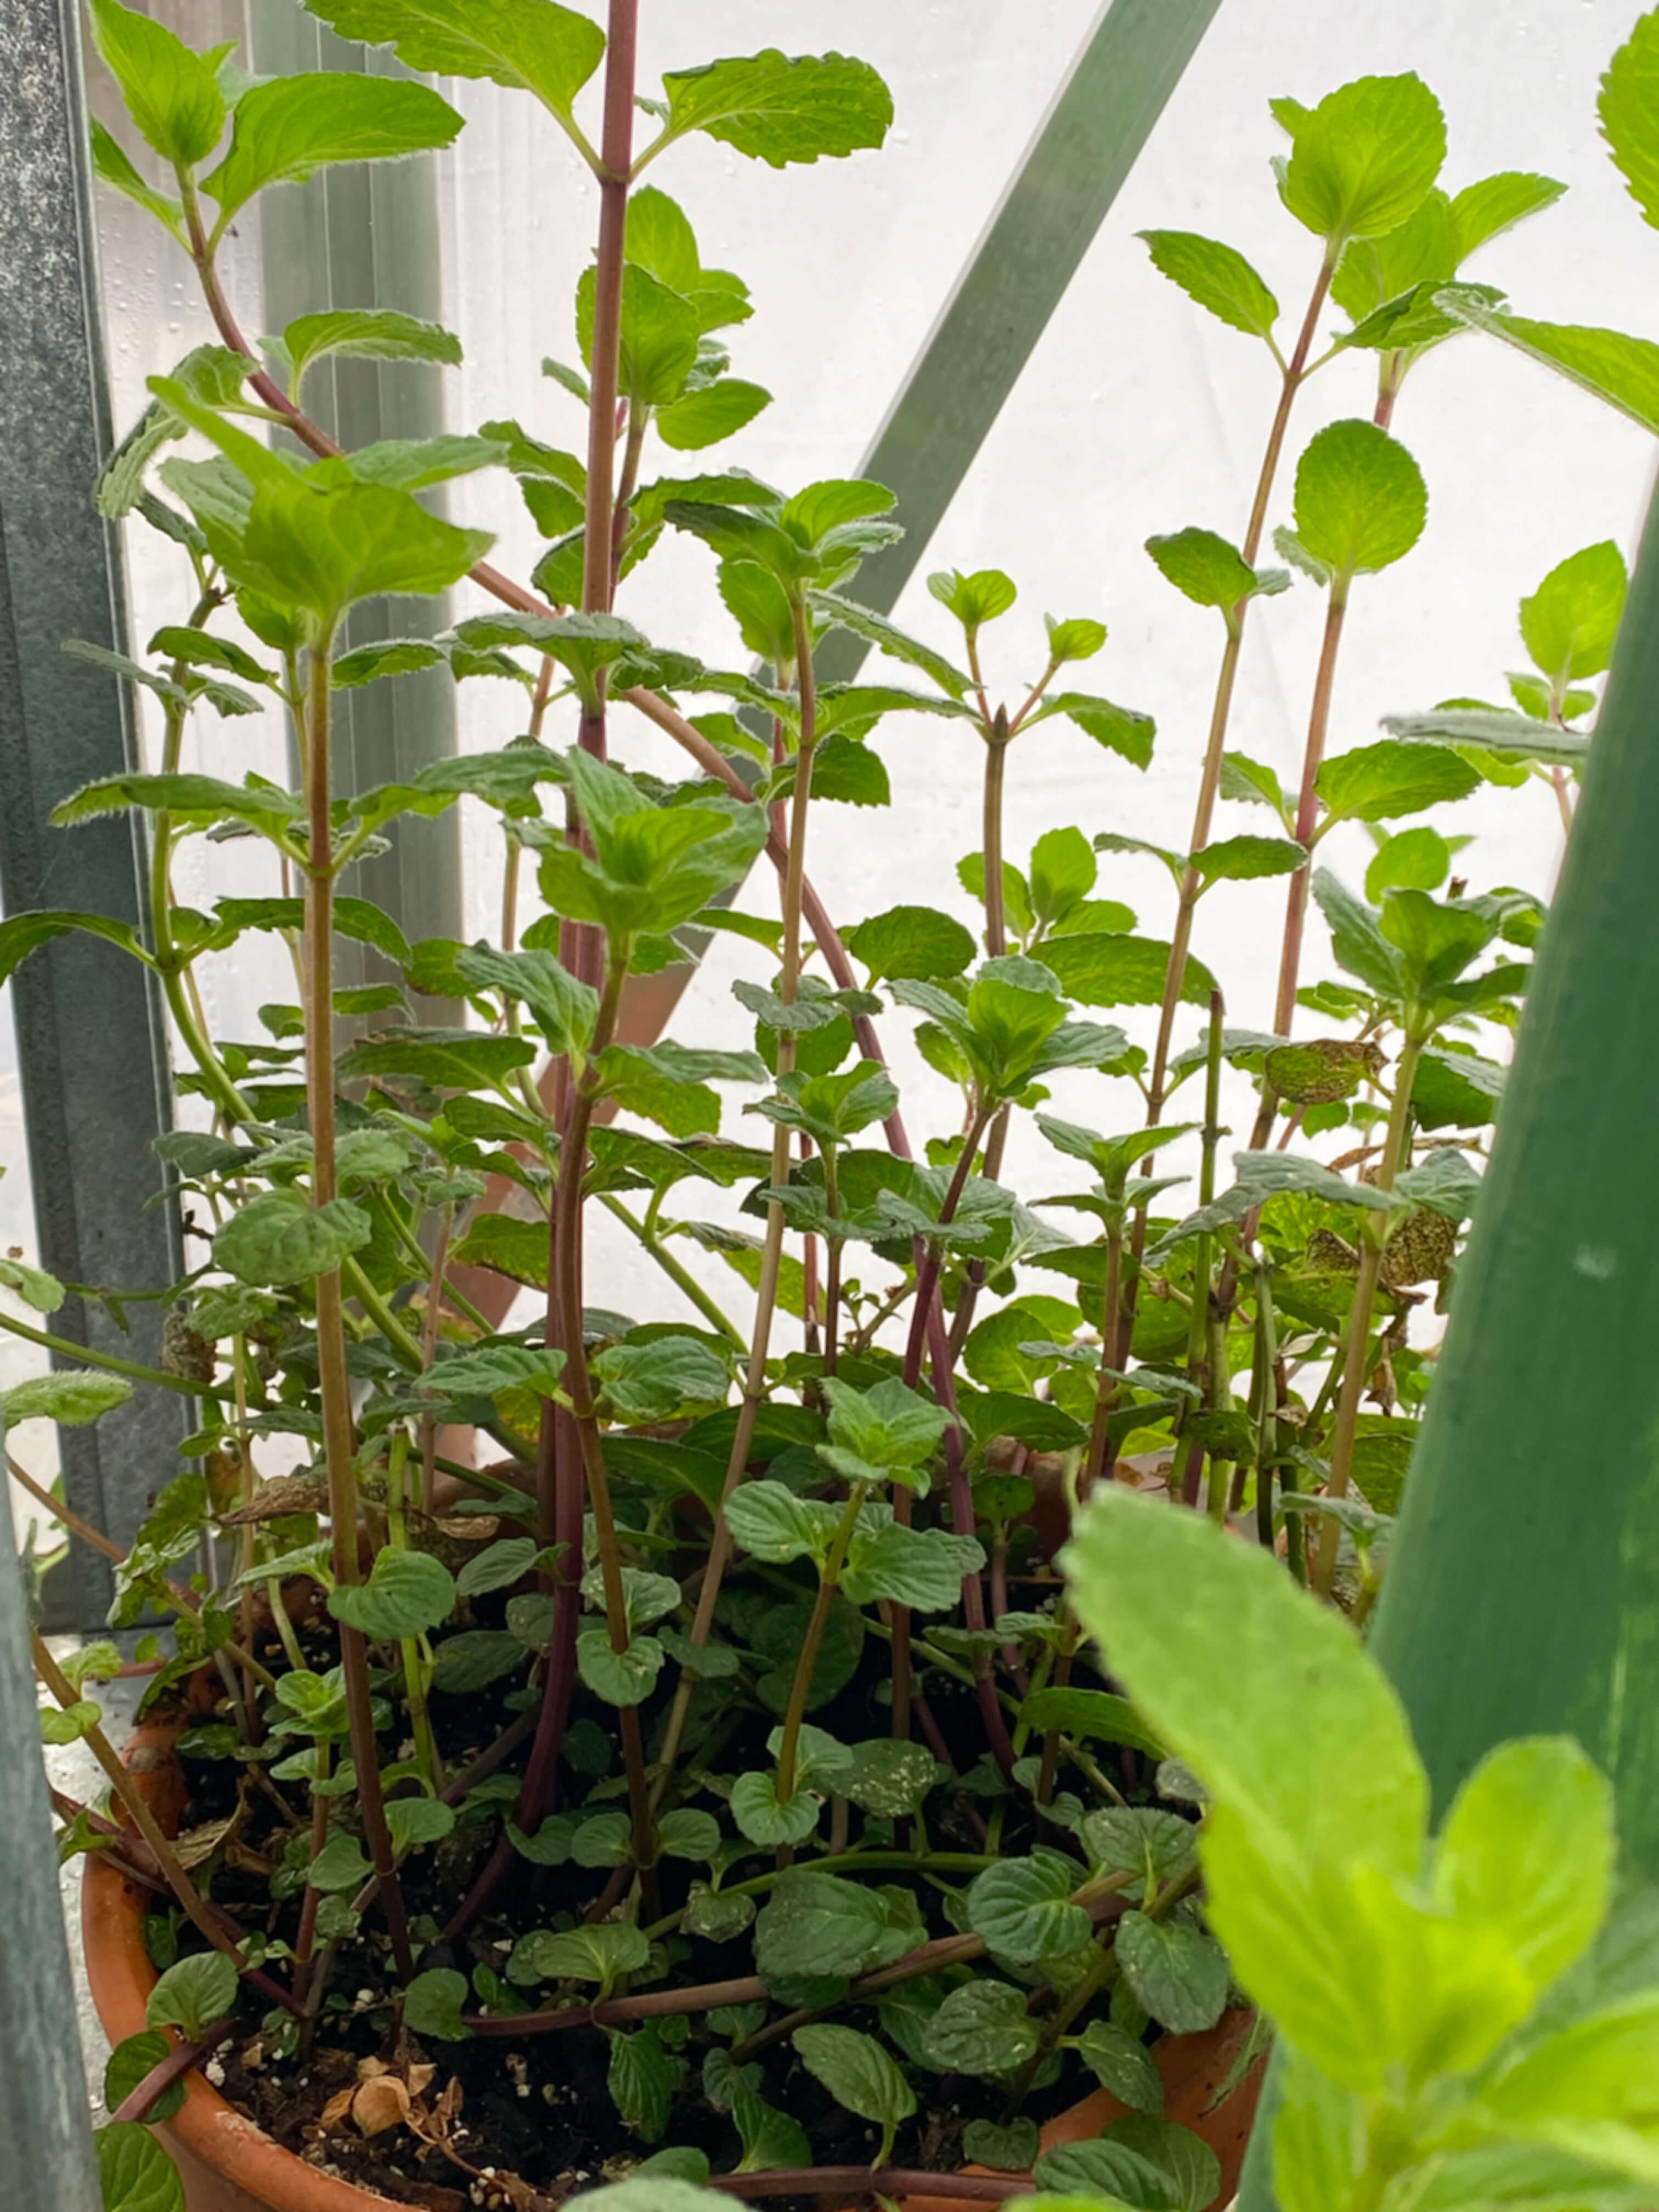
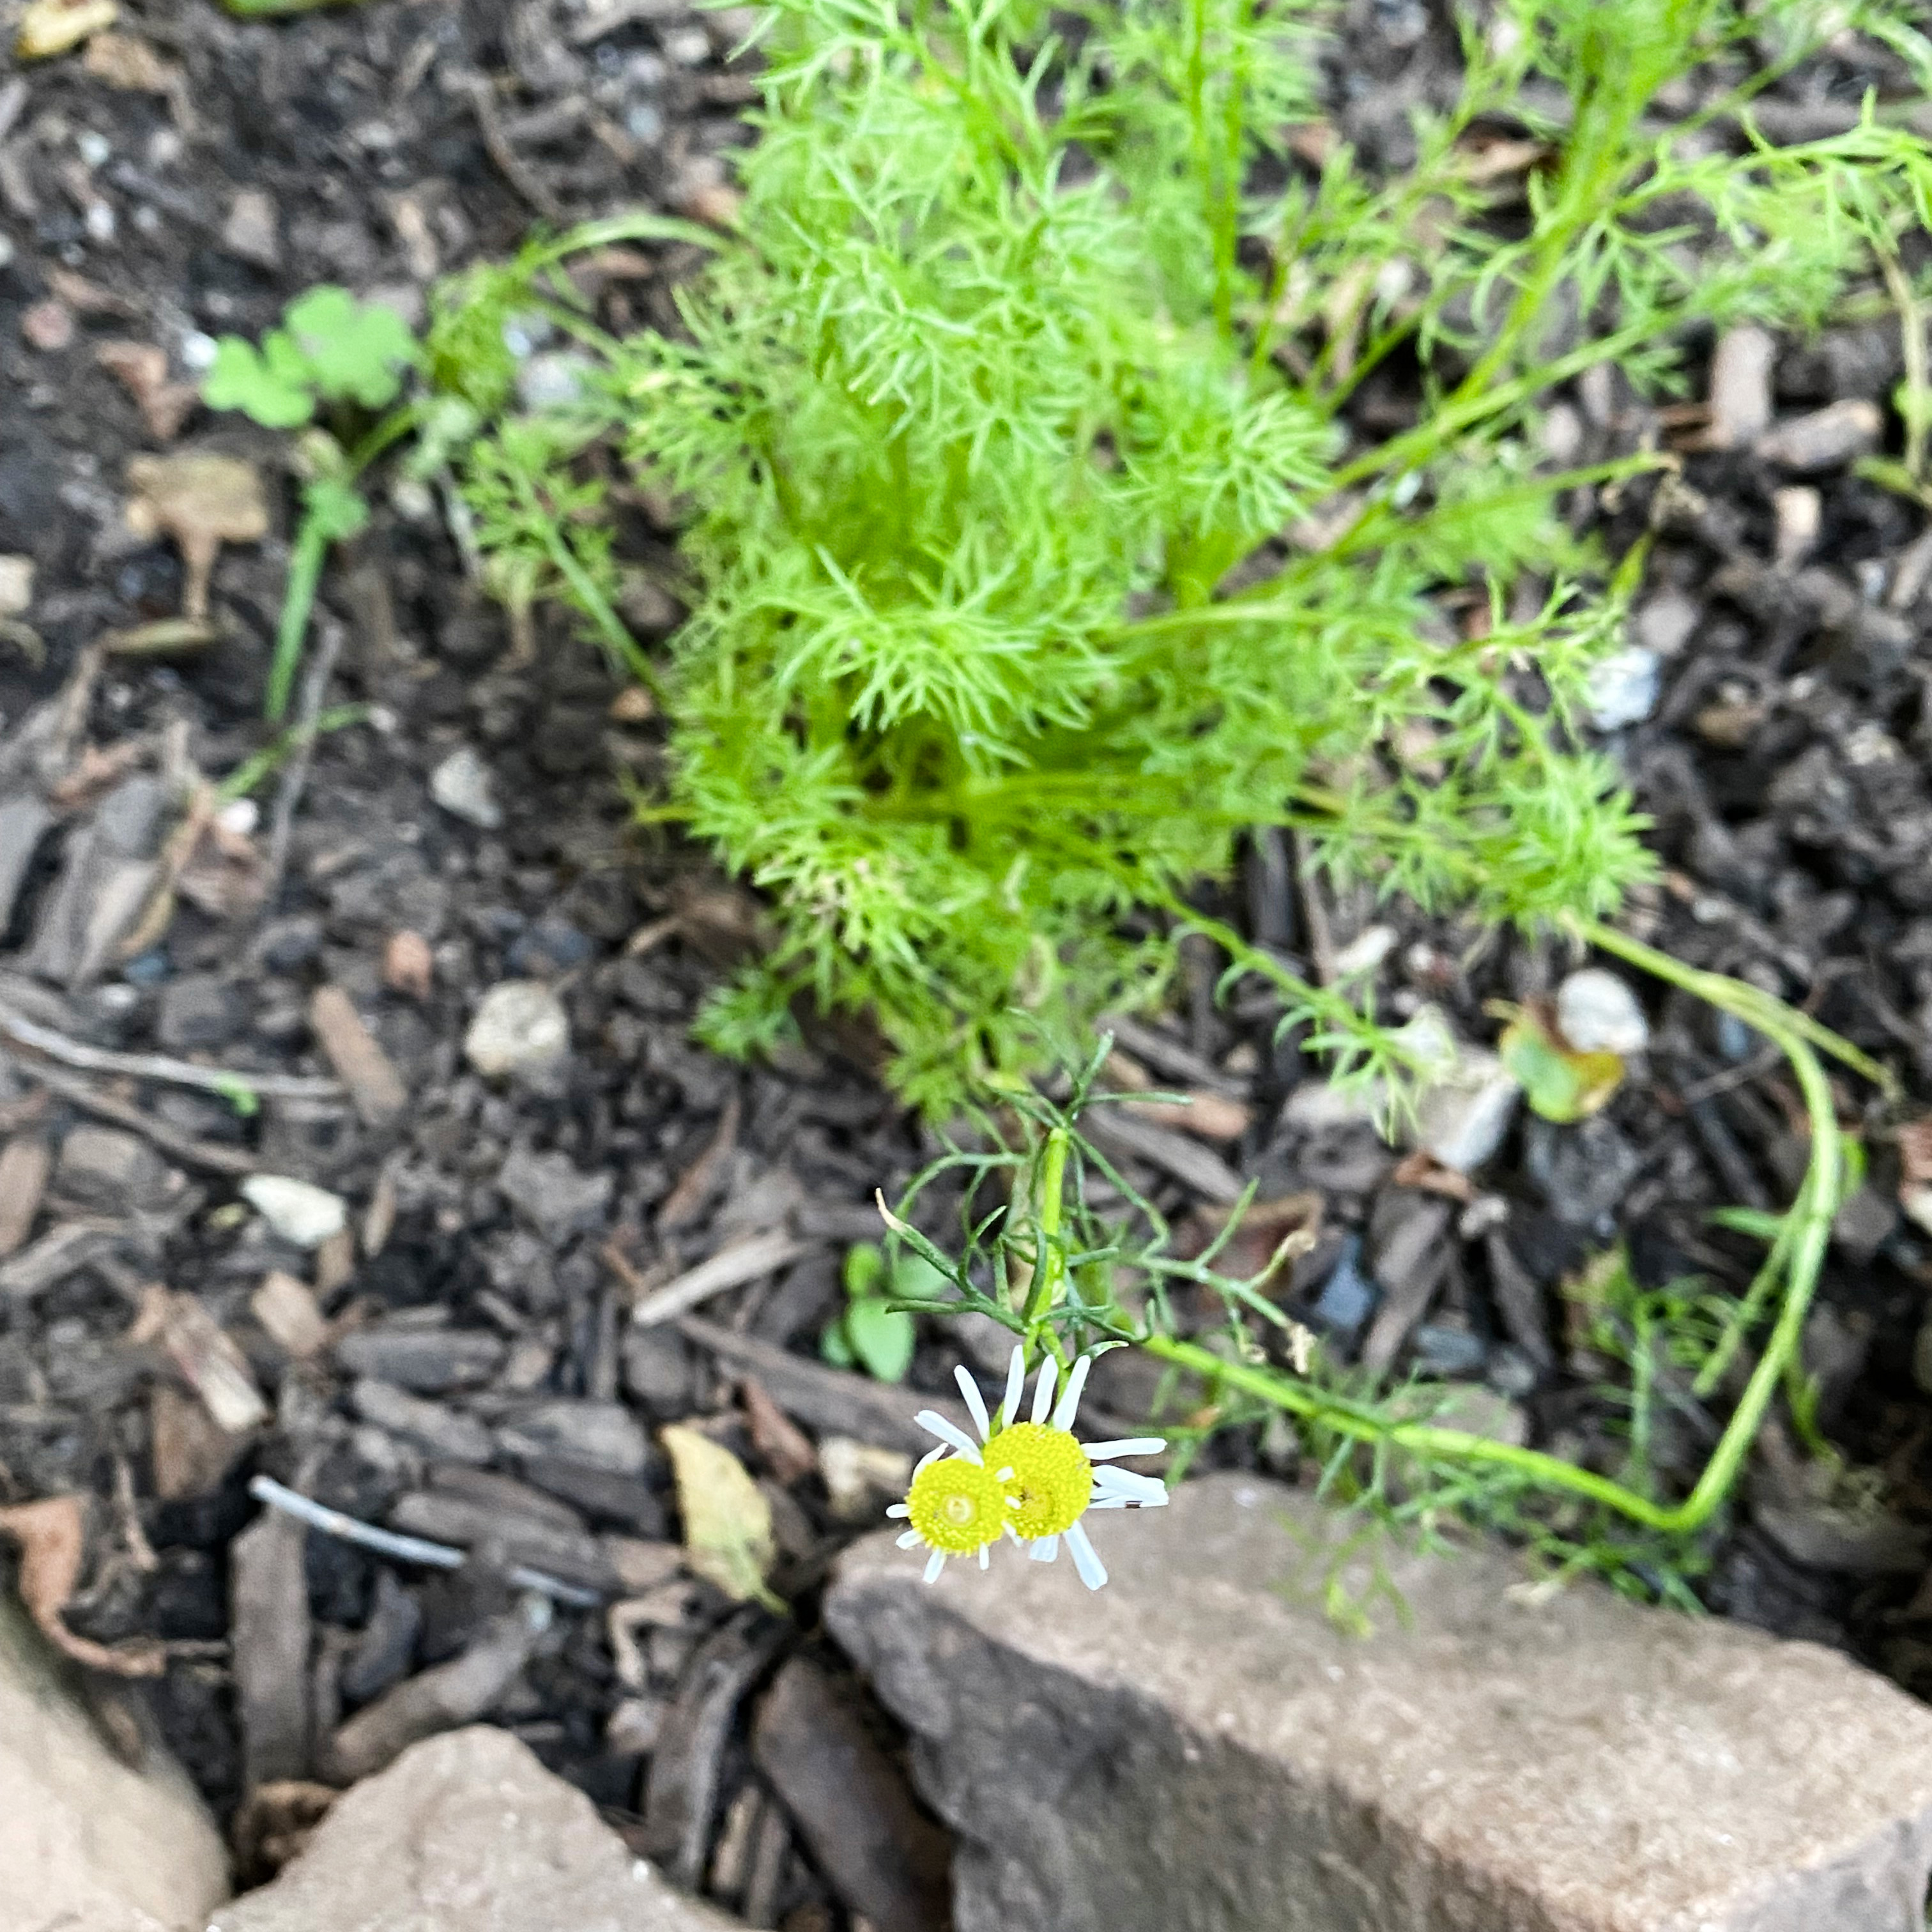
The third bed was also planted in full sun, but because of this year’s extending tree canopy, it turned out to be covered by partial shade once all the leaves unfurled in early summer. Since this bed, tends to dry out more quickly, it was the ideal spot for the Mediterranean herbs (lavender, rosemary, thyme, oregano, cumin, and sage) along with winter savory, dill, garlic, chamomile and one brussels sprout added for encouragement and nitrogen sharing. Most everything did well in this bed, except for the garlic which grew lovely, long green leaves but never formed actual bulbs, and the cumin which flopped over in the cold weather of spring and never really rallied after that. Like the greenhouse beds, everything planted here remained small and compact but looked healthy and happy. In August, the chamomile flowered for the first time, sending up two fragile little blossoms. Days later, in the early morning when I came out to water, all eight of the chamomile mounds and the dill were eaten down to nubs.

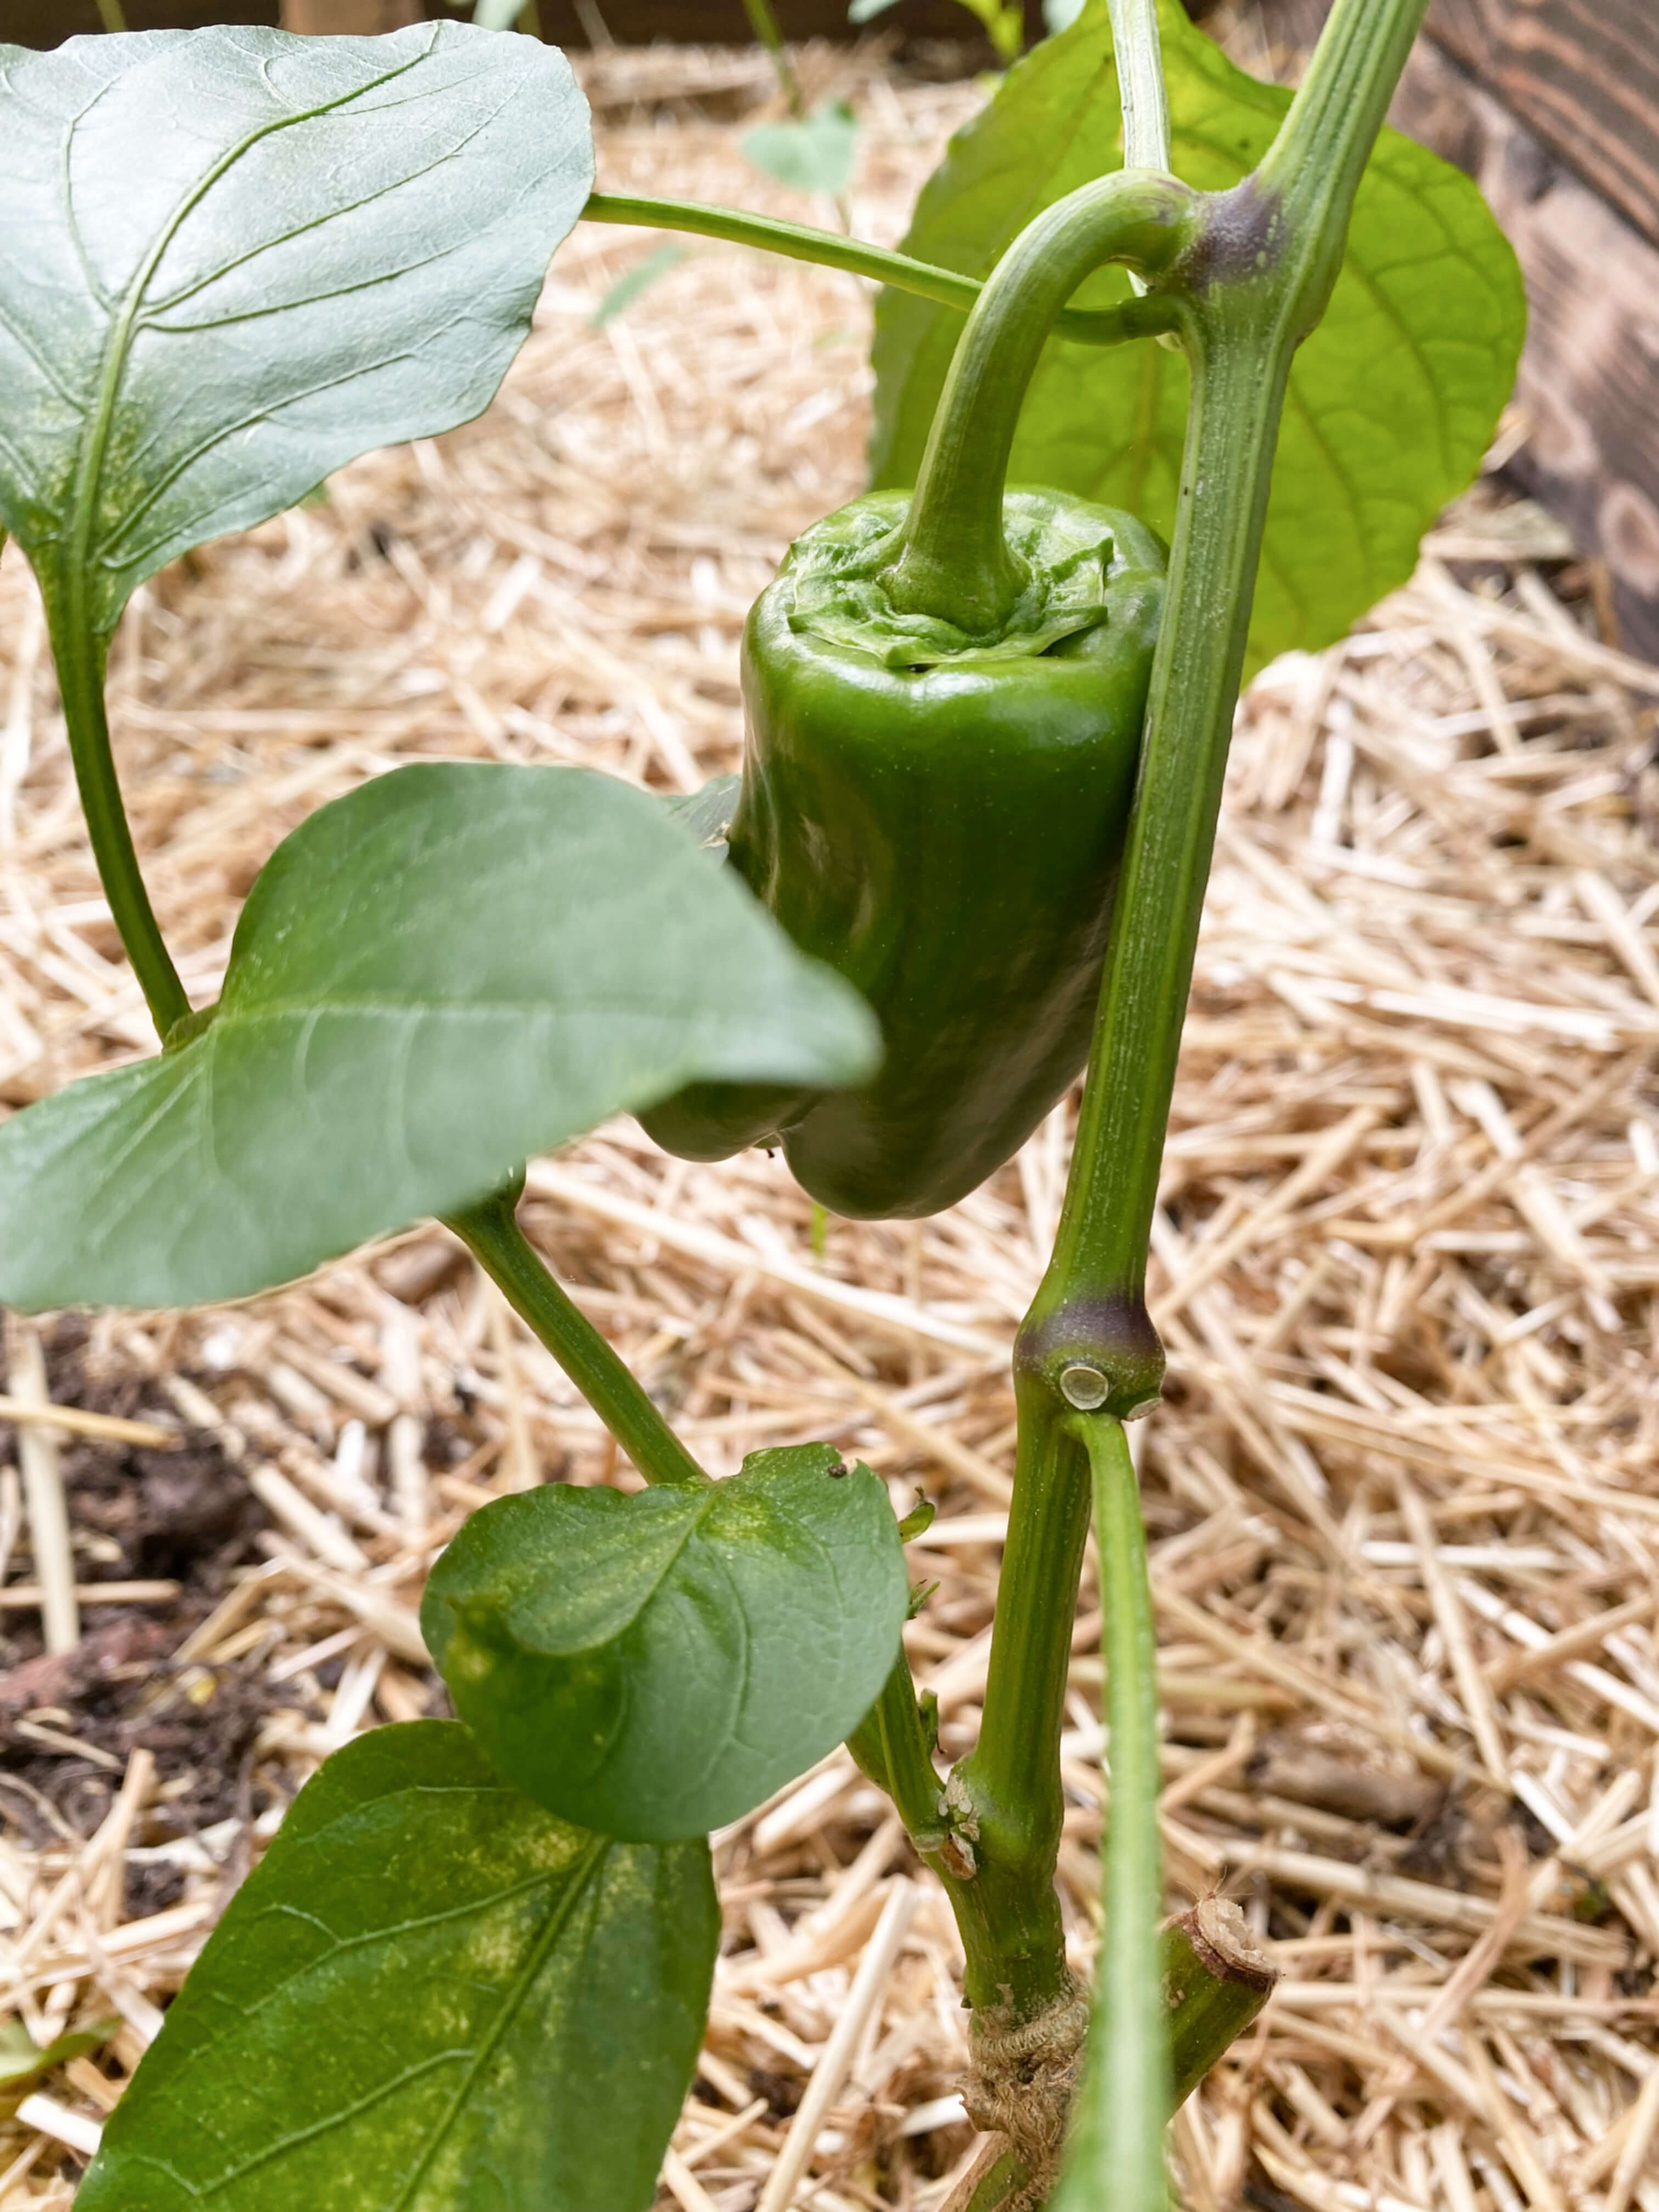
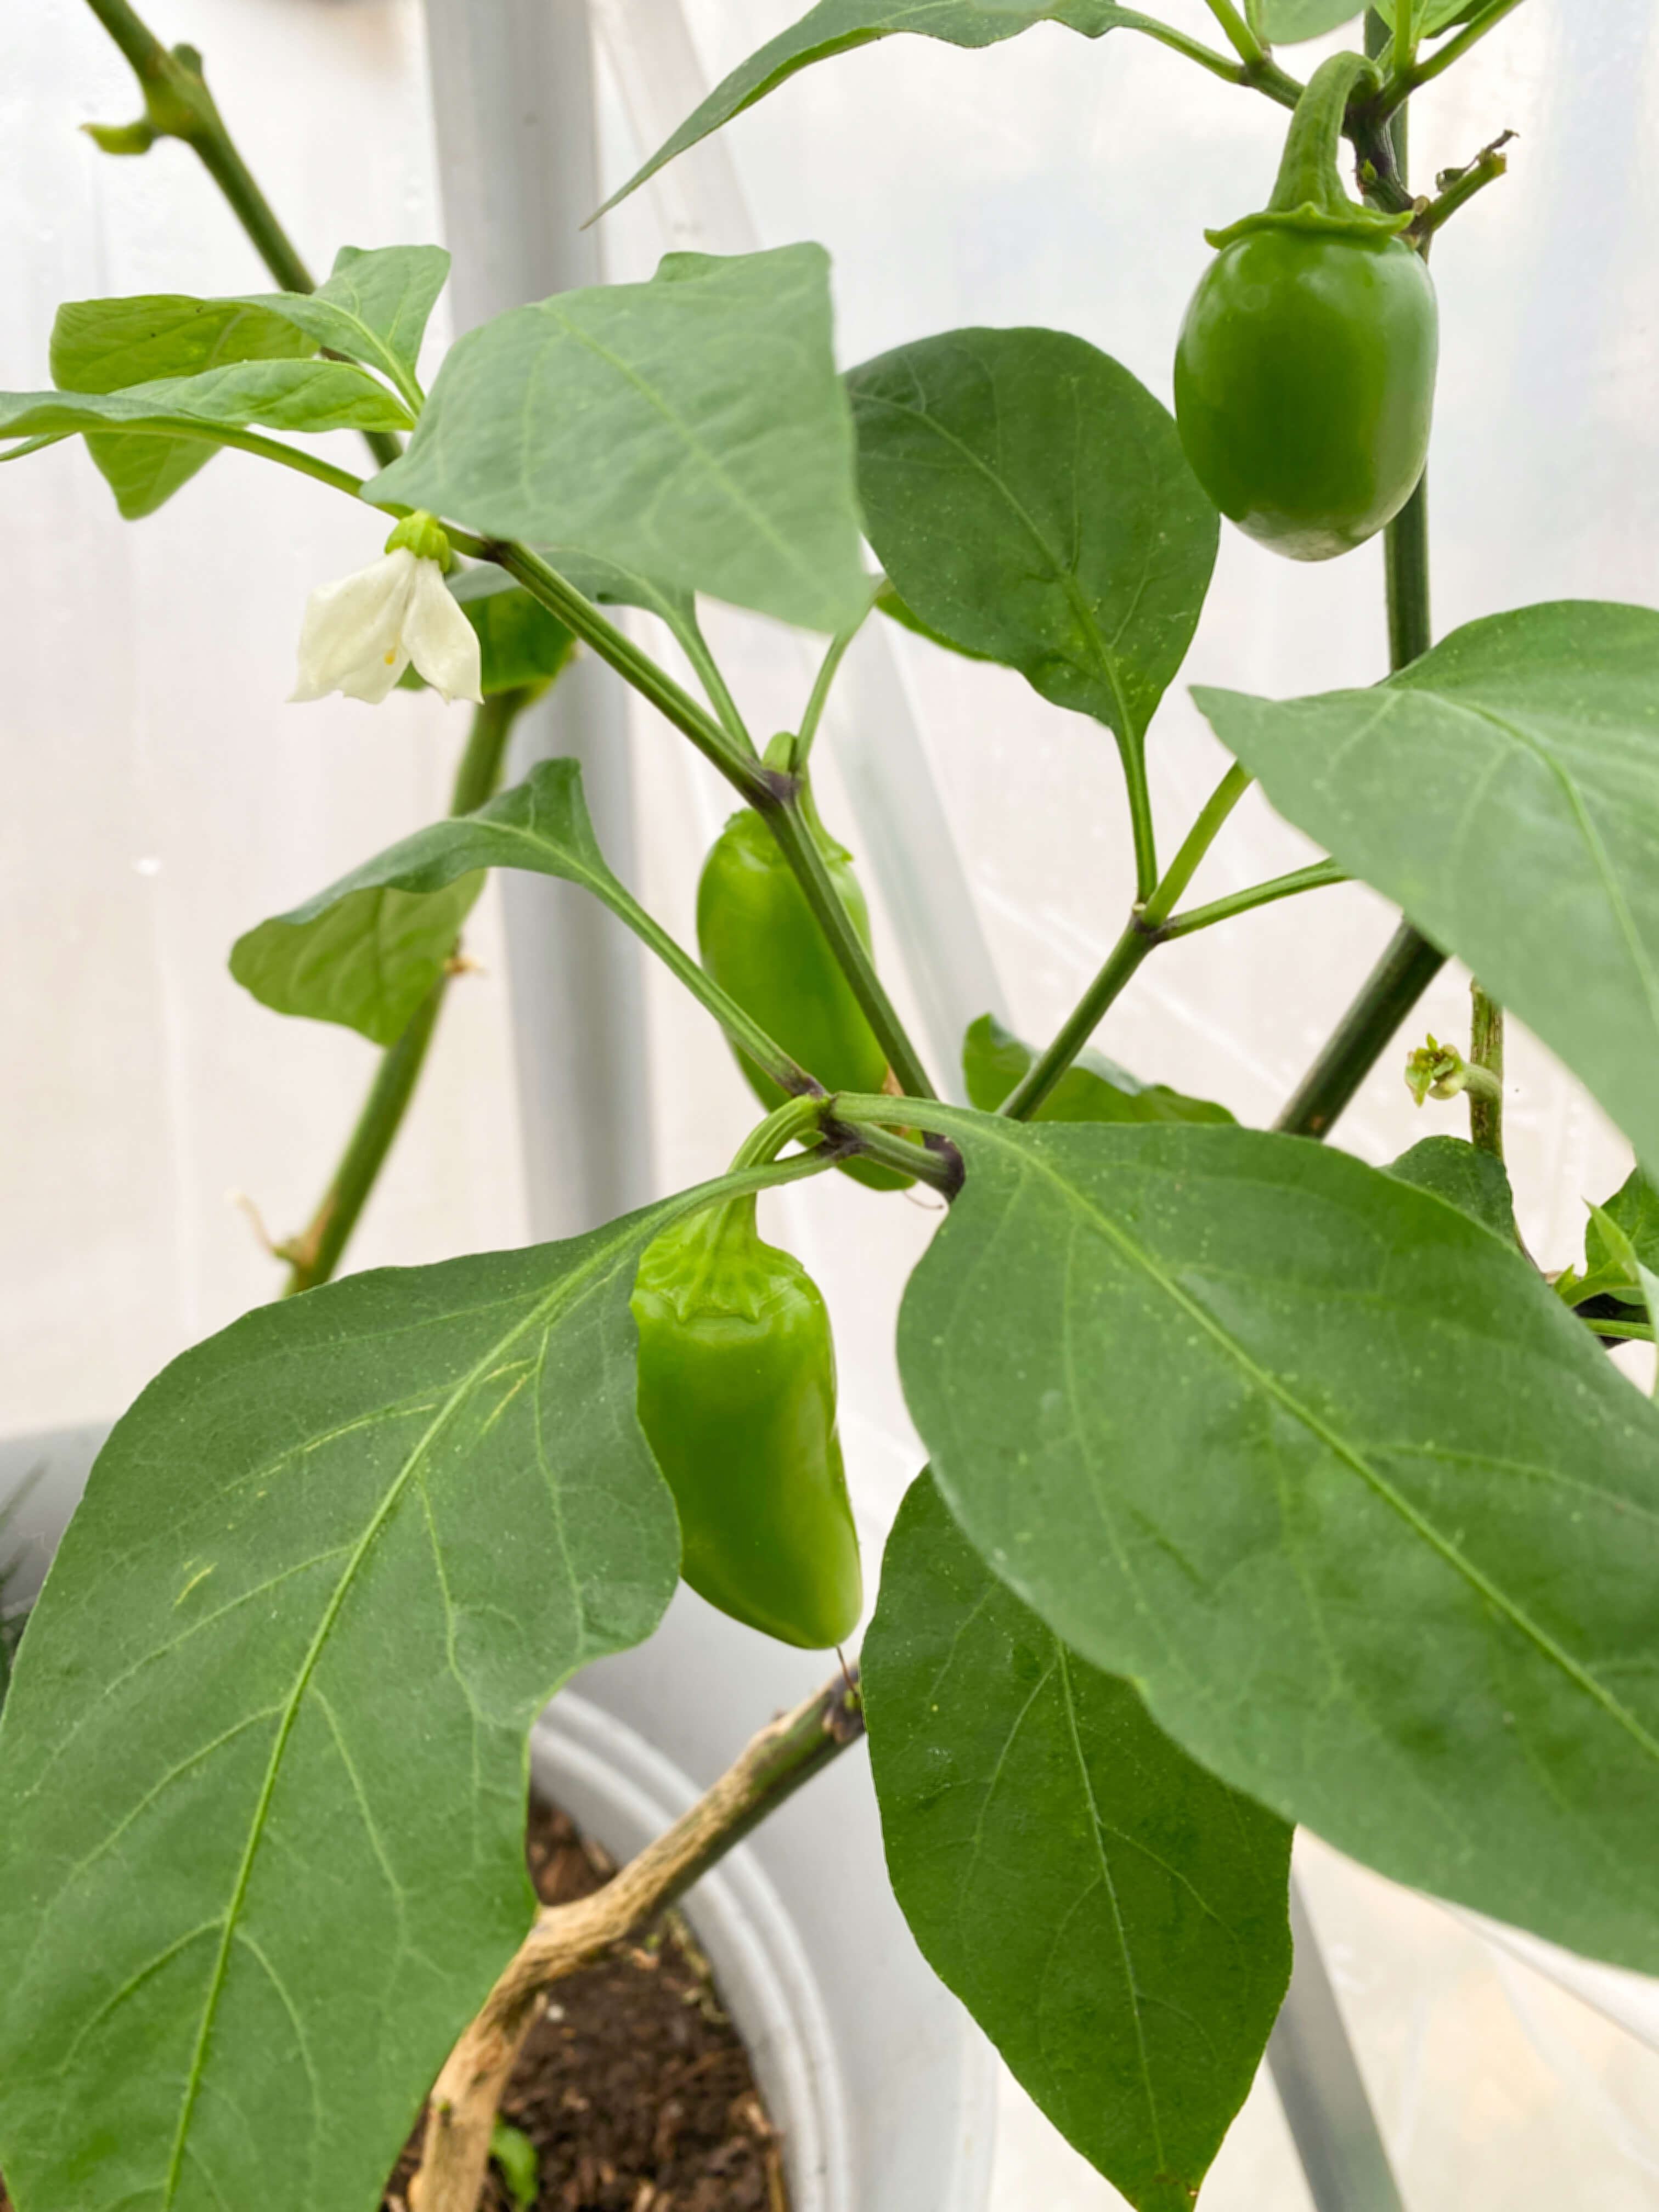
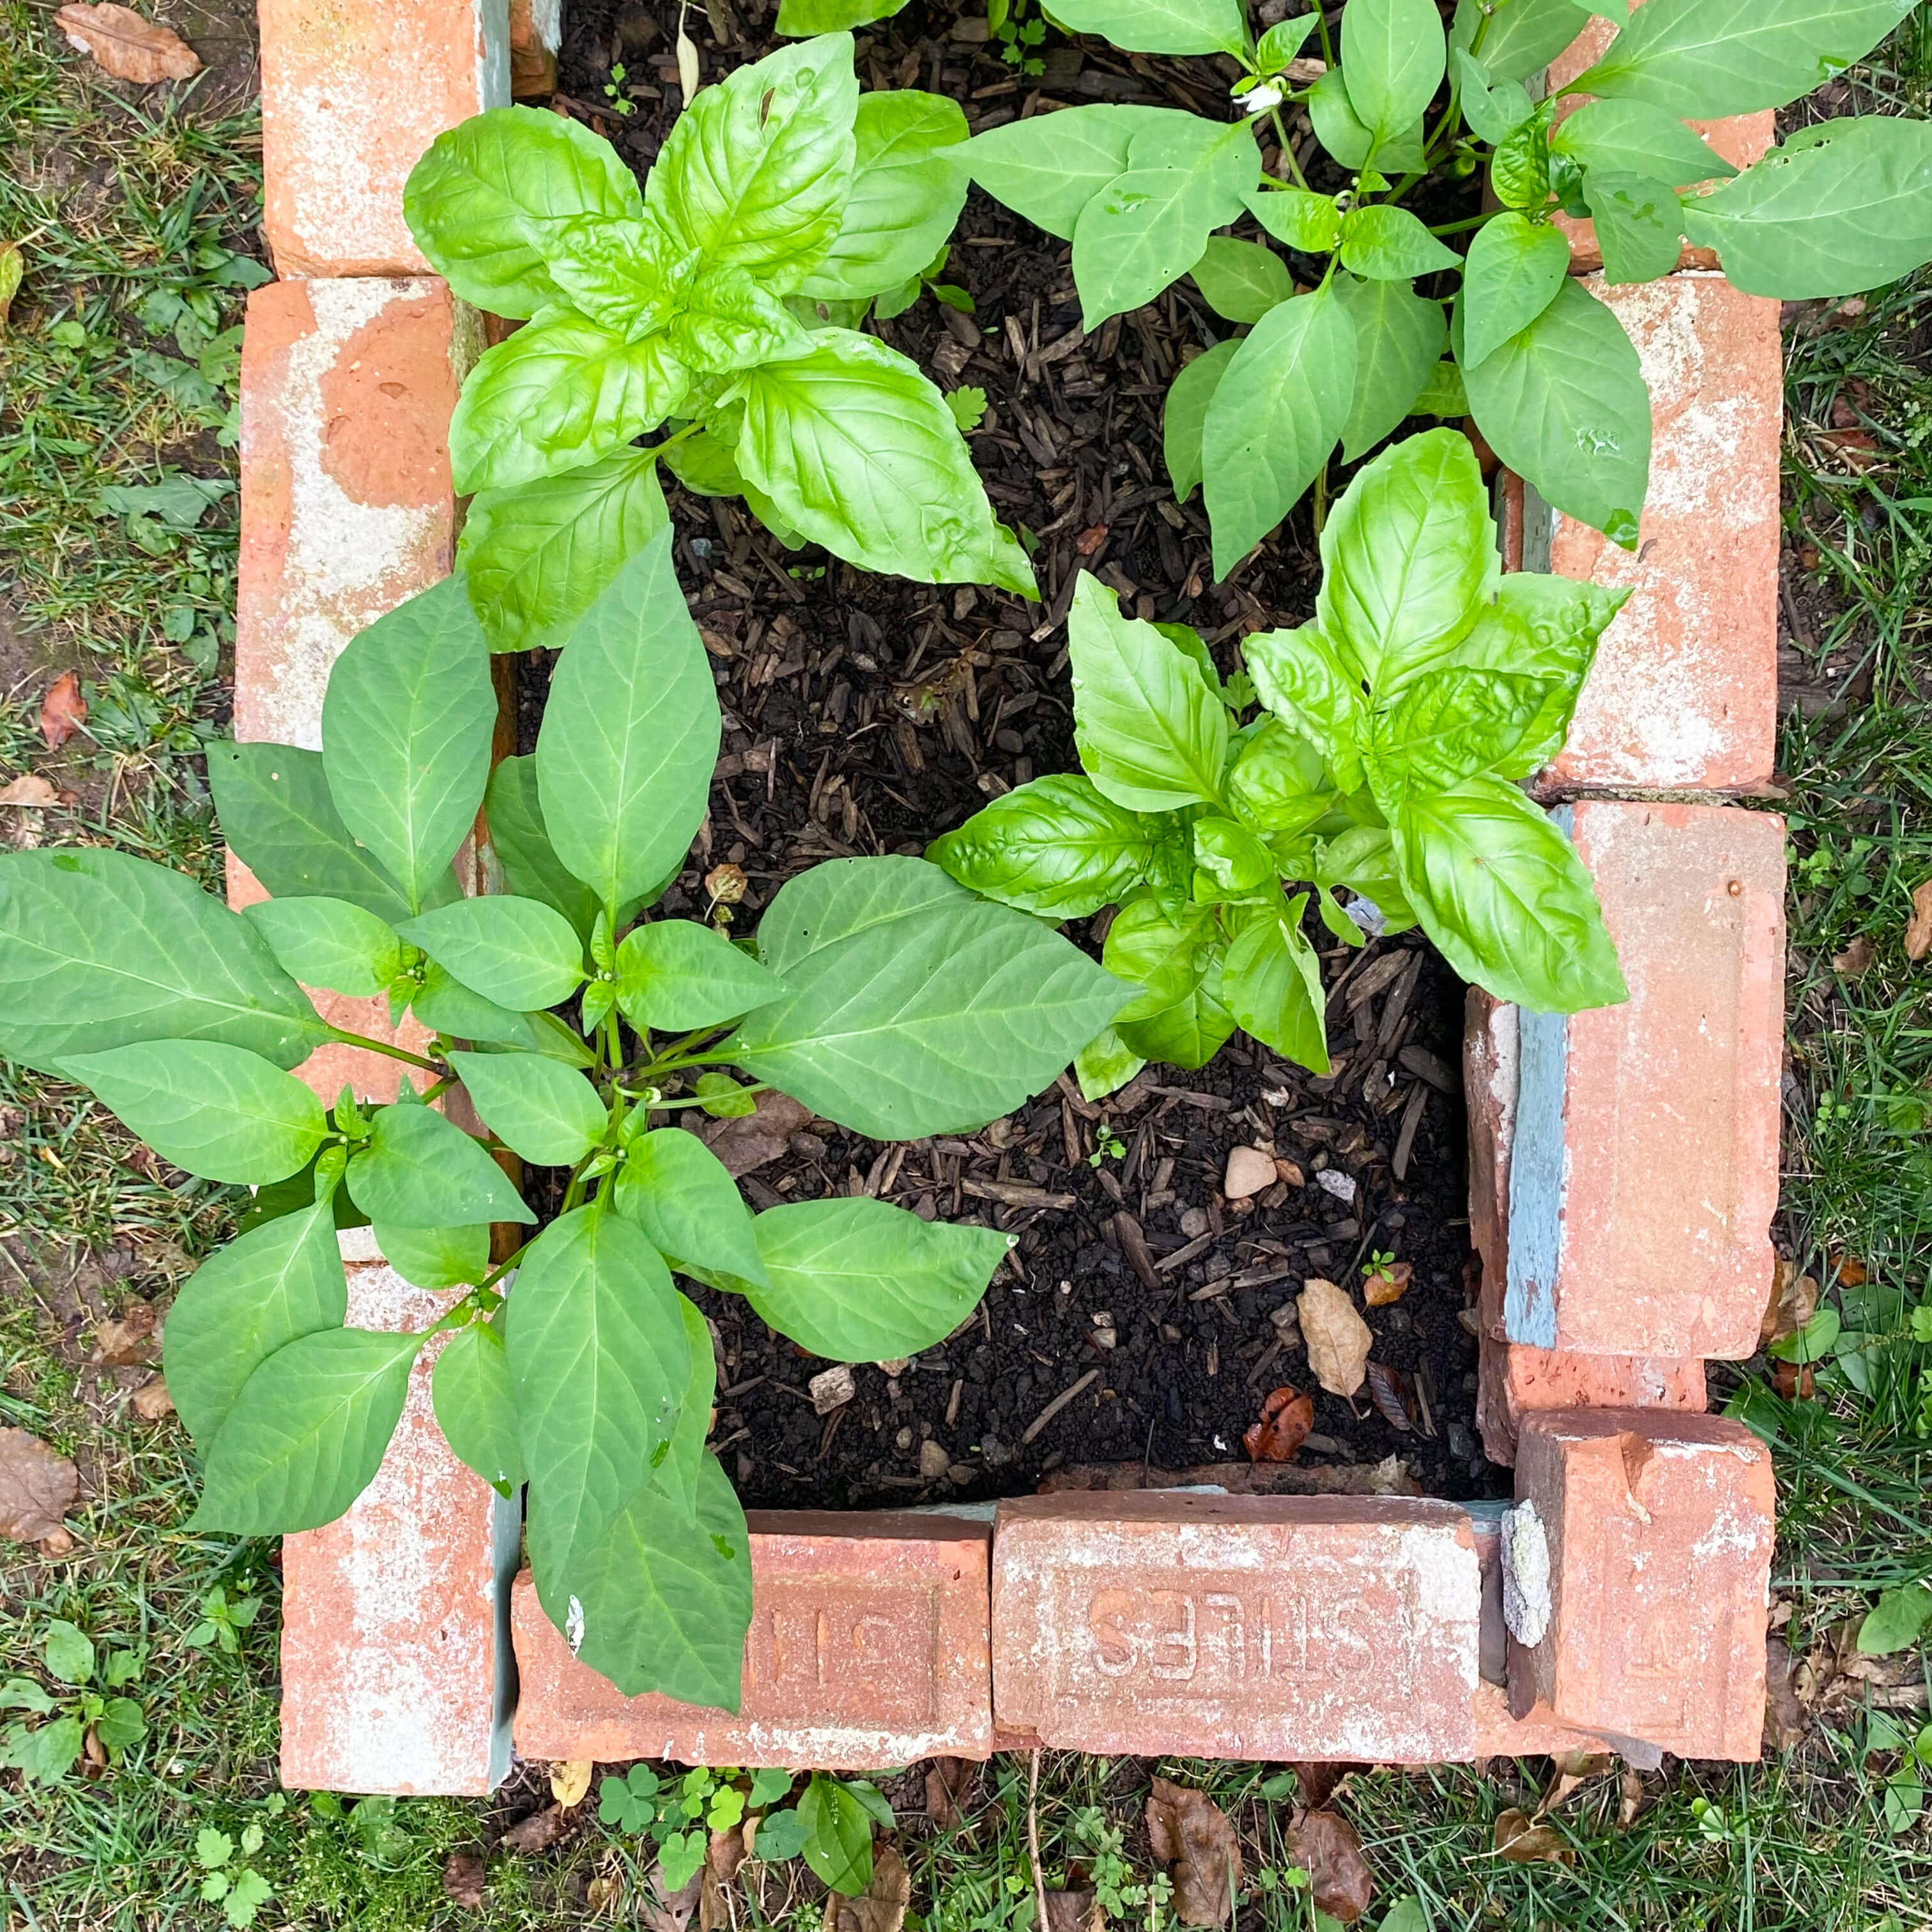
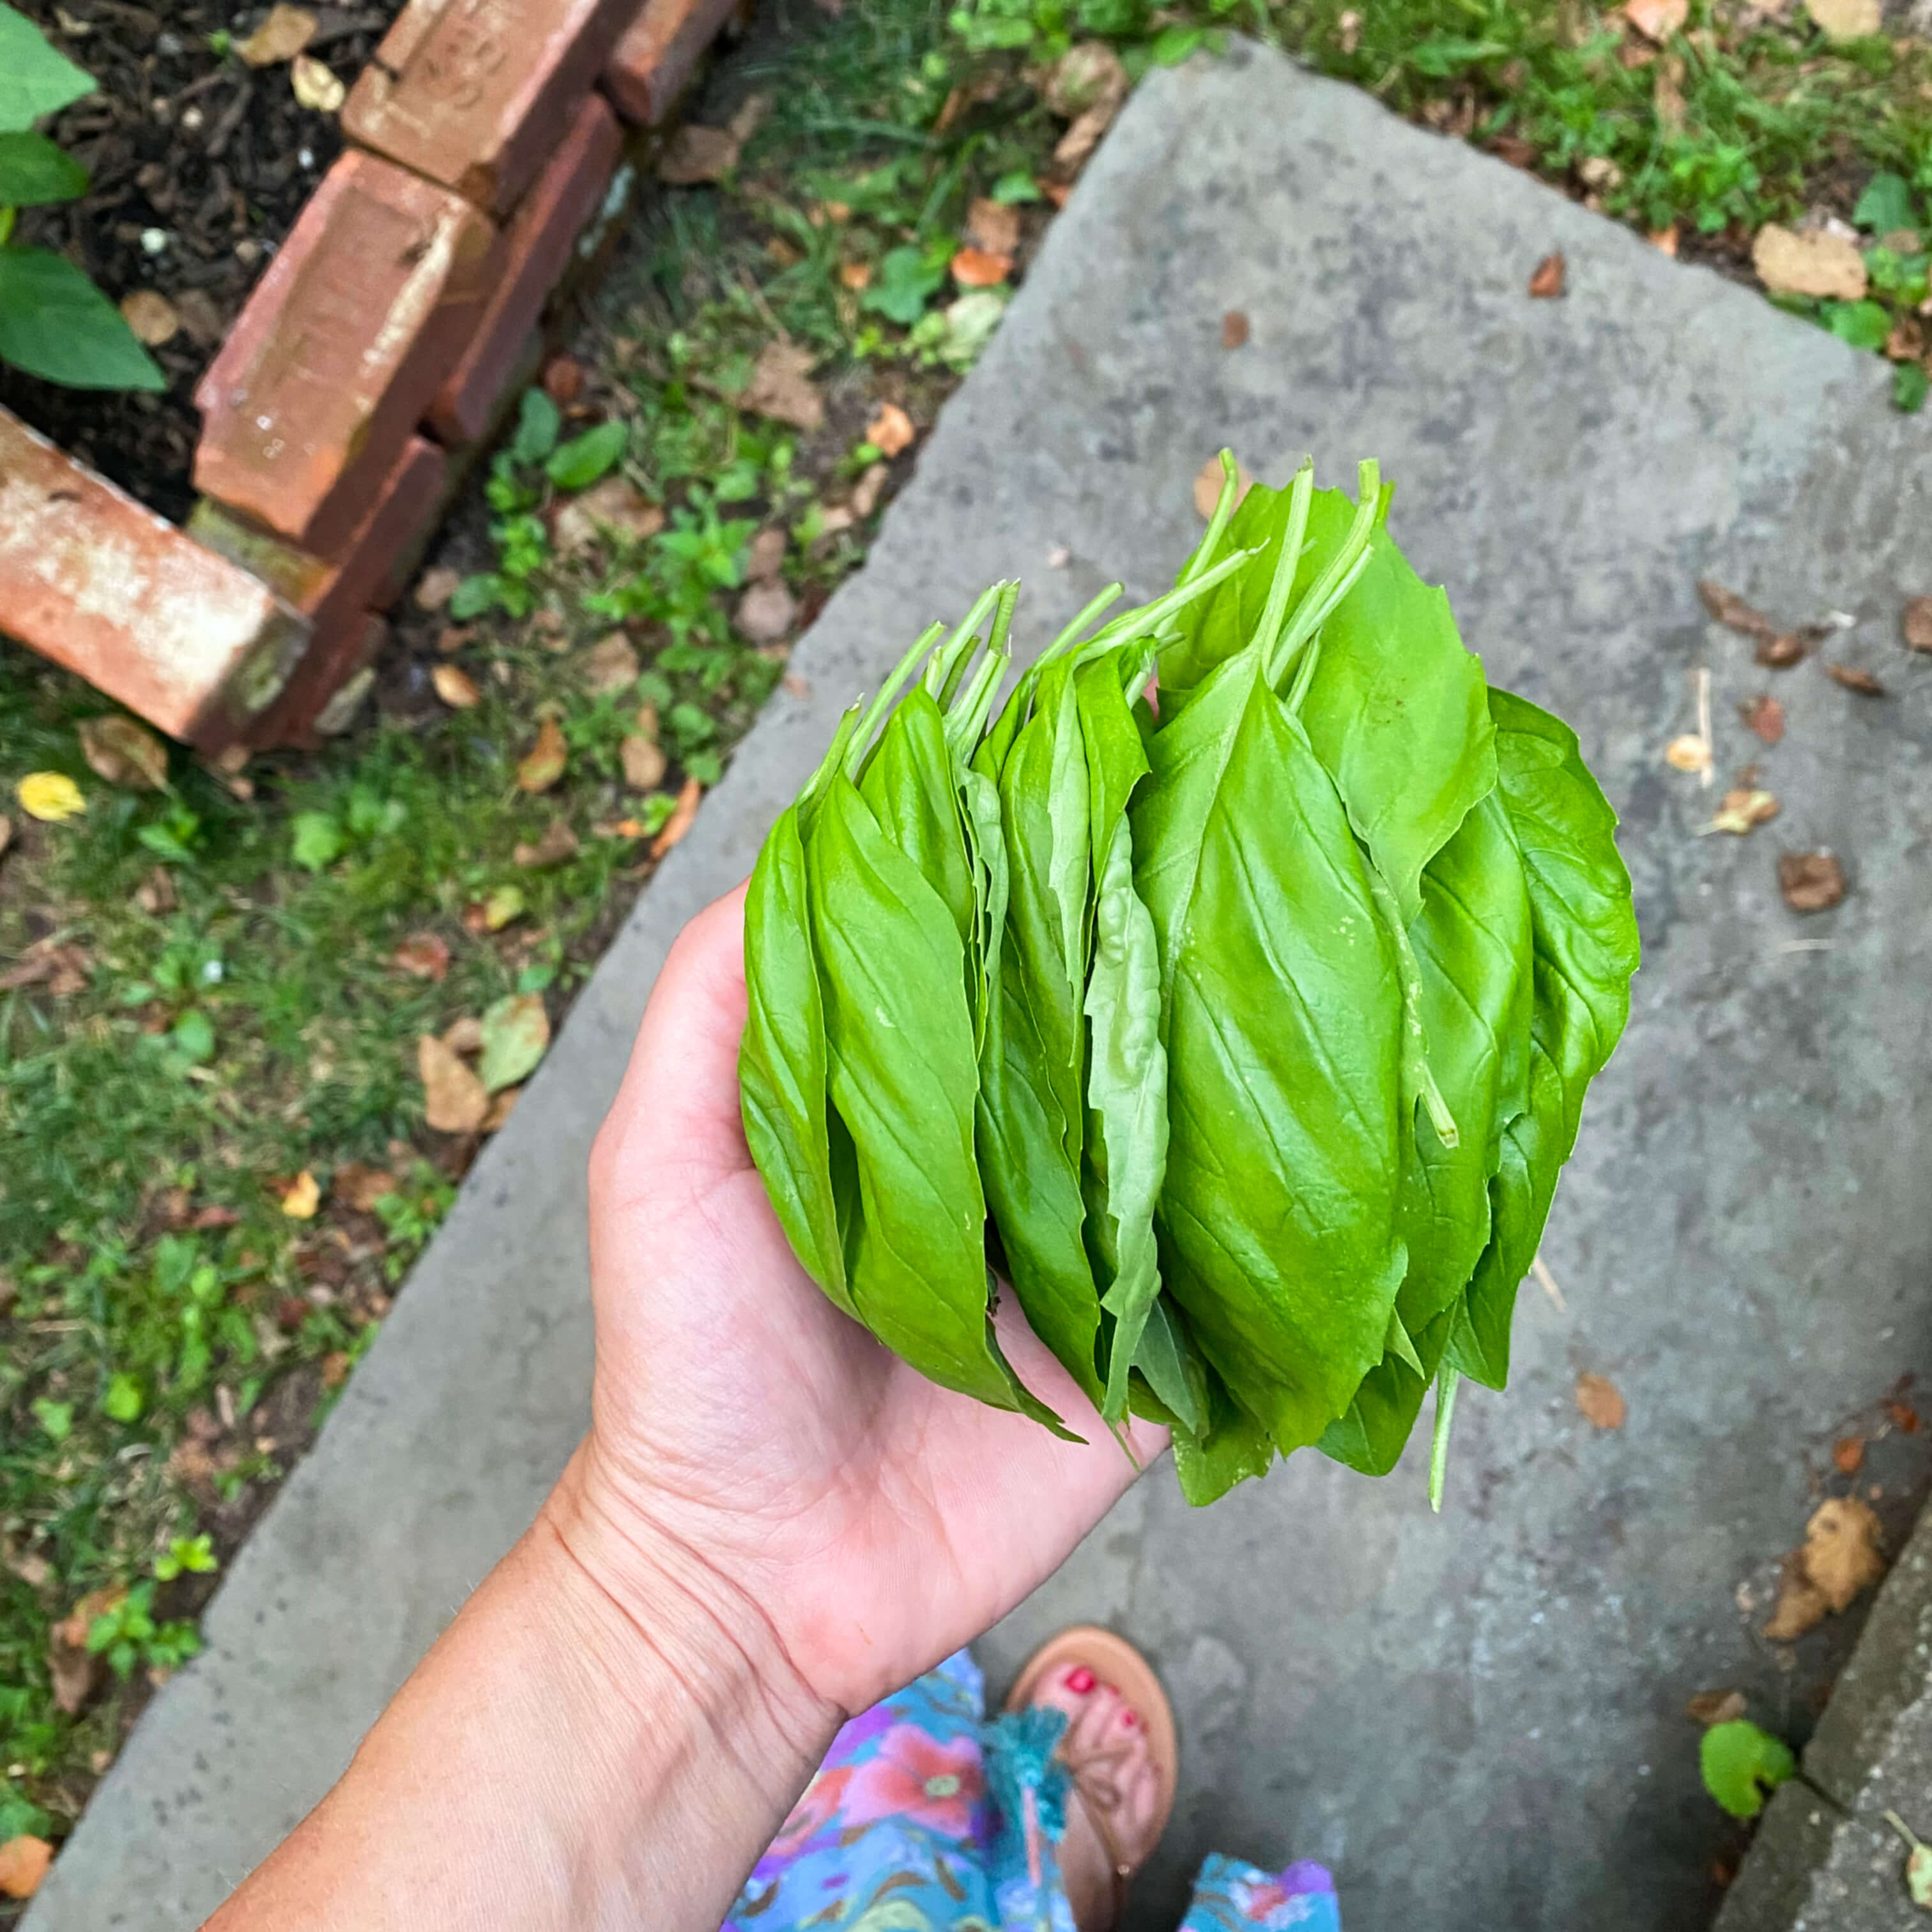
The last of the herb beds, located on the other end of the backyard from the greenhouse, contained basil and and another batch of nasturtiums. These beds were in partial shade last year, but turned out to be in full sun this year, due to a large tree that fell far back in the woods last autumn. That opened up a bit of a sun spot in the tree canopy overhead that was fortuitously in the direct path of our vegetable beds. Planting seedlings in spring when the trees were still bare, I had no idea this sun spot was going to be available, but it made it a banner year for everything growing in that section of the yard, basil included. Racing right alongside the pepper plants, the basil grew over two feet tall and produced leaves as big as my hand.

The nasturtiums, a reliable favorite for the past four years, thrived in the same way. Grown from seeds I collected from last year’s nasturtium harvest, this was the first time I had tried growing new flowers from the previous year’s stock, a recommendation from my fellow New England Instagram gardening friend, Karen. The vigor of the nasturtiums in this sunny bed, which bloomed and crawled for a full seven months, more than made up for the nasturtiums that were eaten by the mystery pest on the left side of the greenhouse in early spring.

This photo was taken early on in the season, but by October the nasturtiums were climbing all over the squash trellis, our lemon tree, the floxglove, the bush beans and the pea trellis

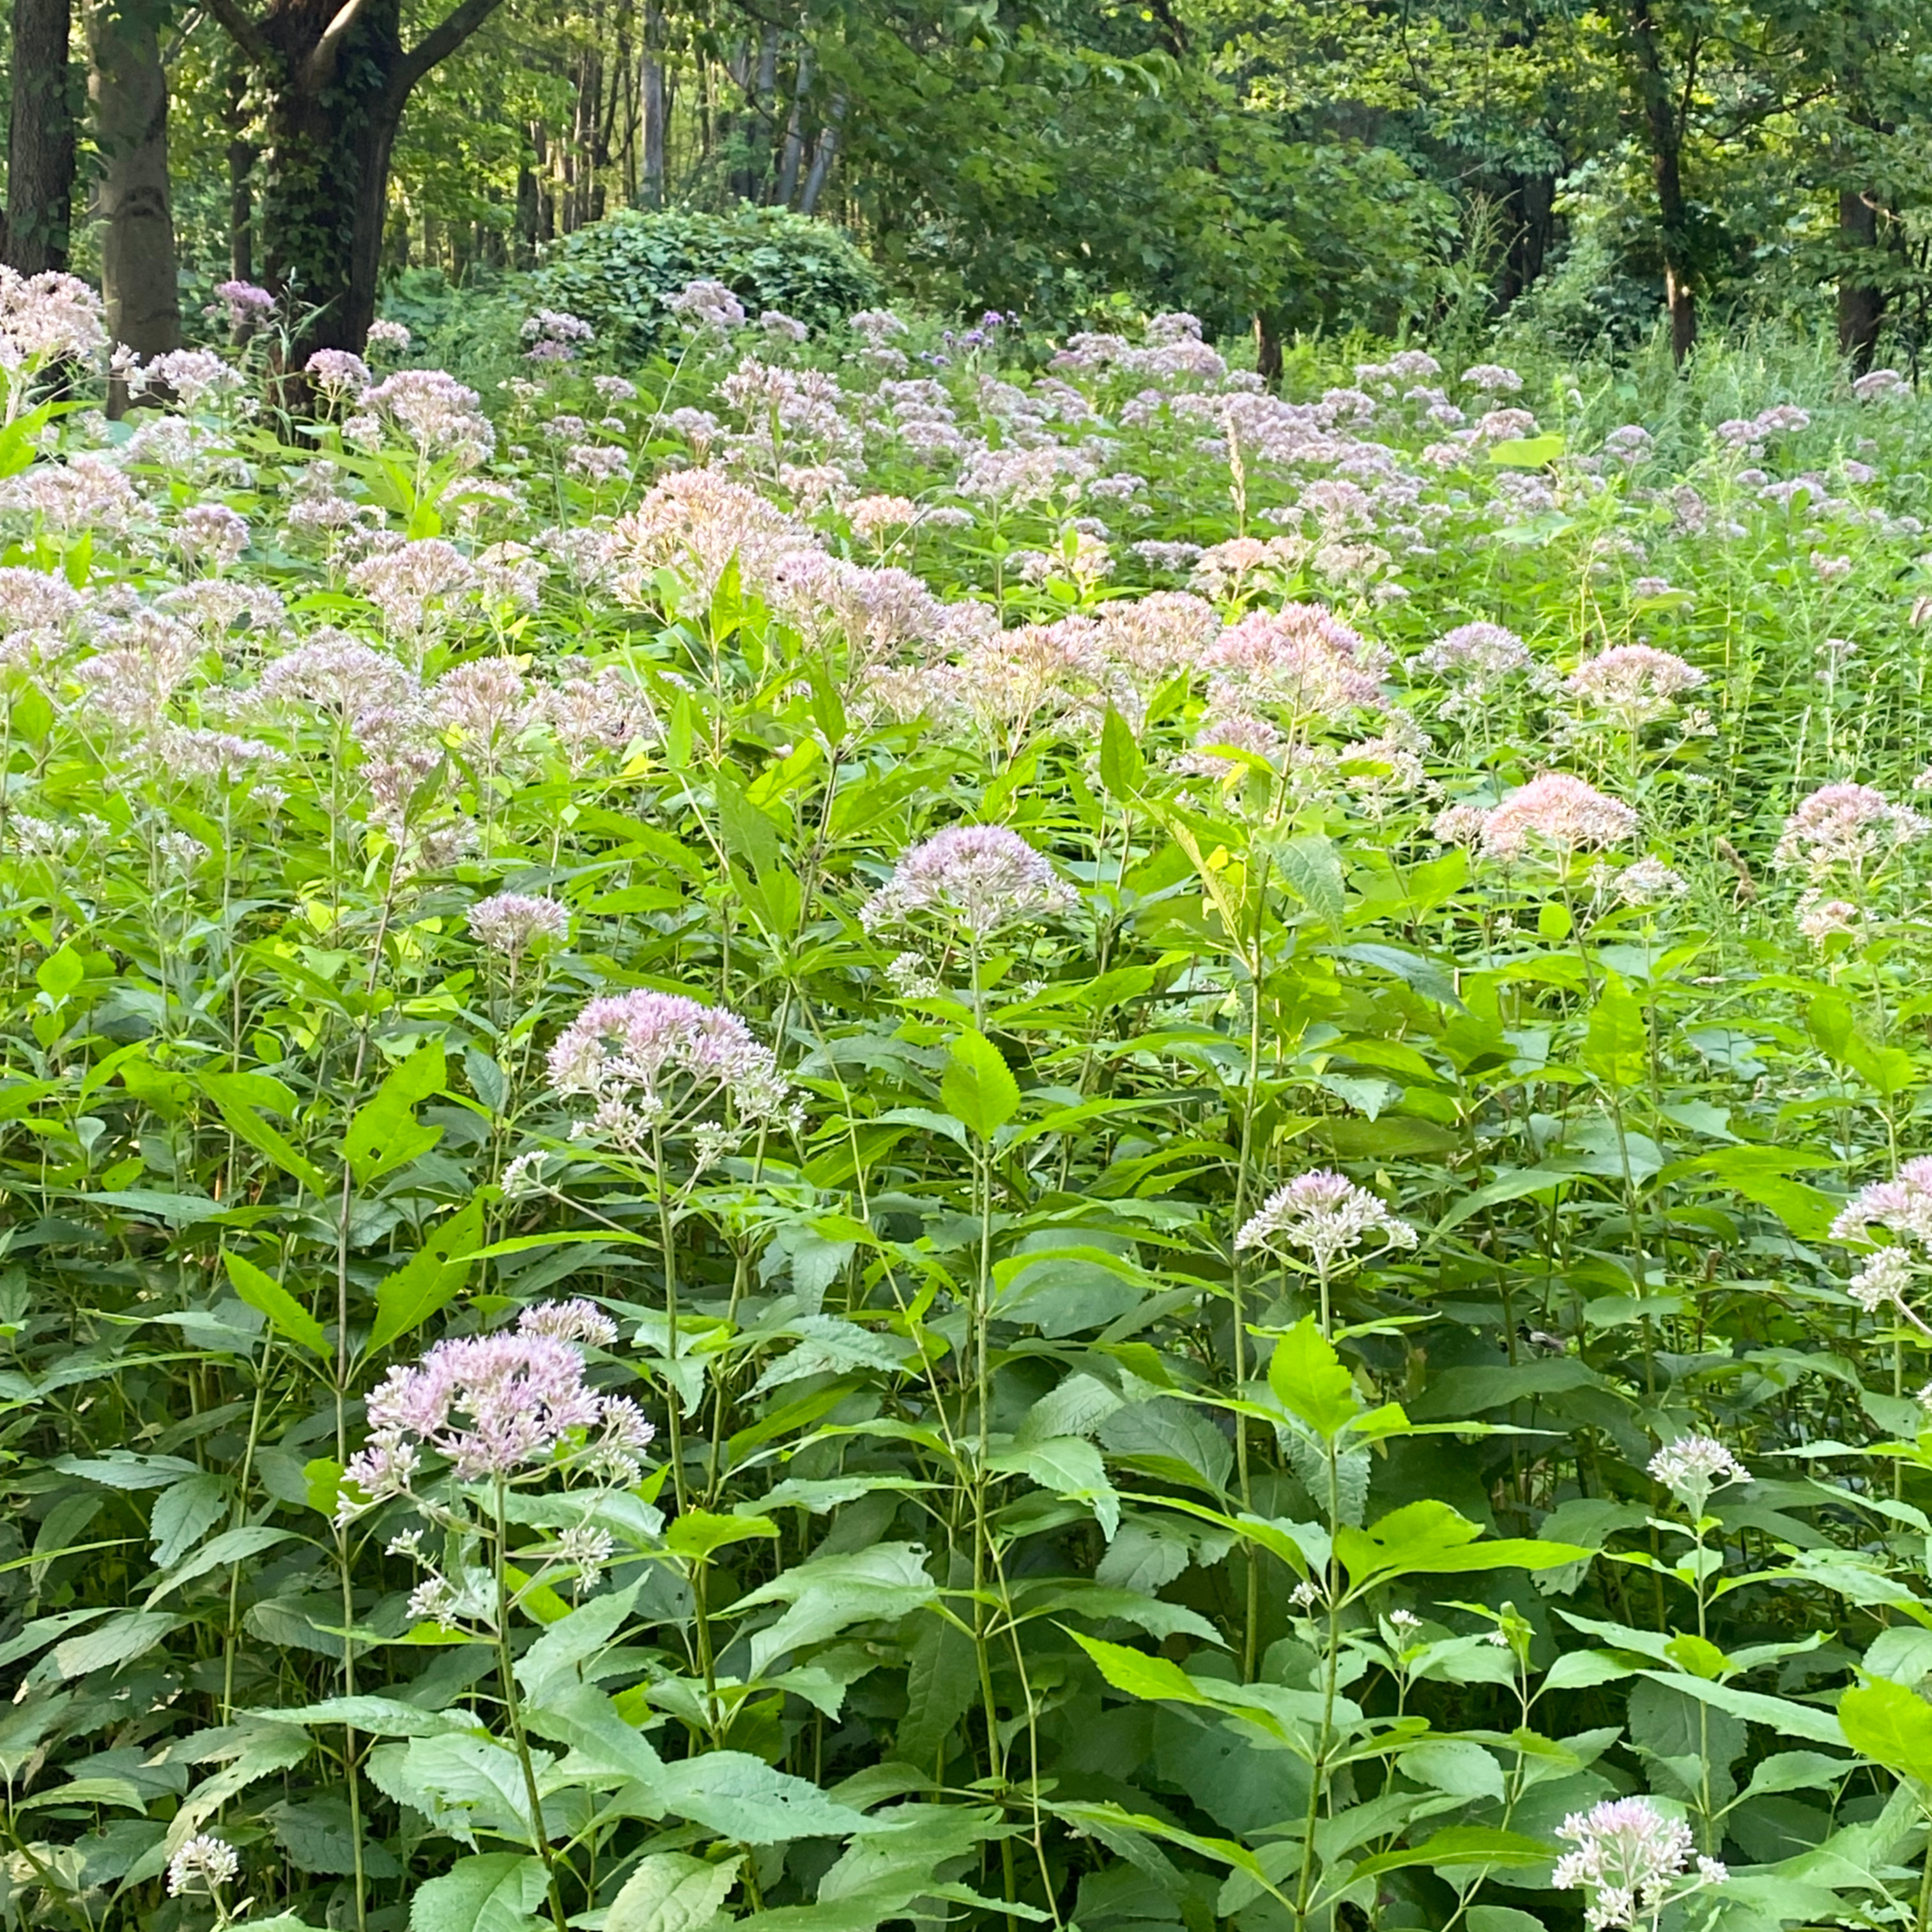
Their enthusiasm inspired more seed saving adventures. Not only from the nasturtiums again, but also from vegetables we grew this summer and from two native herbs, Joe Pye and Queen Anne’s Lace, collected from a neighborhood park. It’s going to be fun to see how (and if) these will grow here at 1750 House next spring.

Queen Anne’s Lace at our neighborhood park

A field of dreams… hundreds of Joe Pye not far from the Q.A. Lace

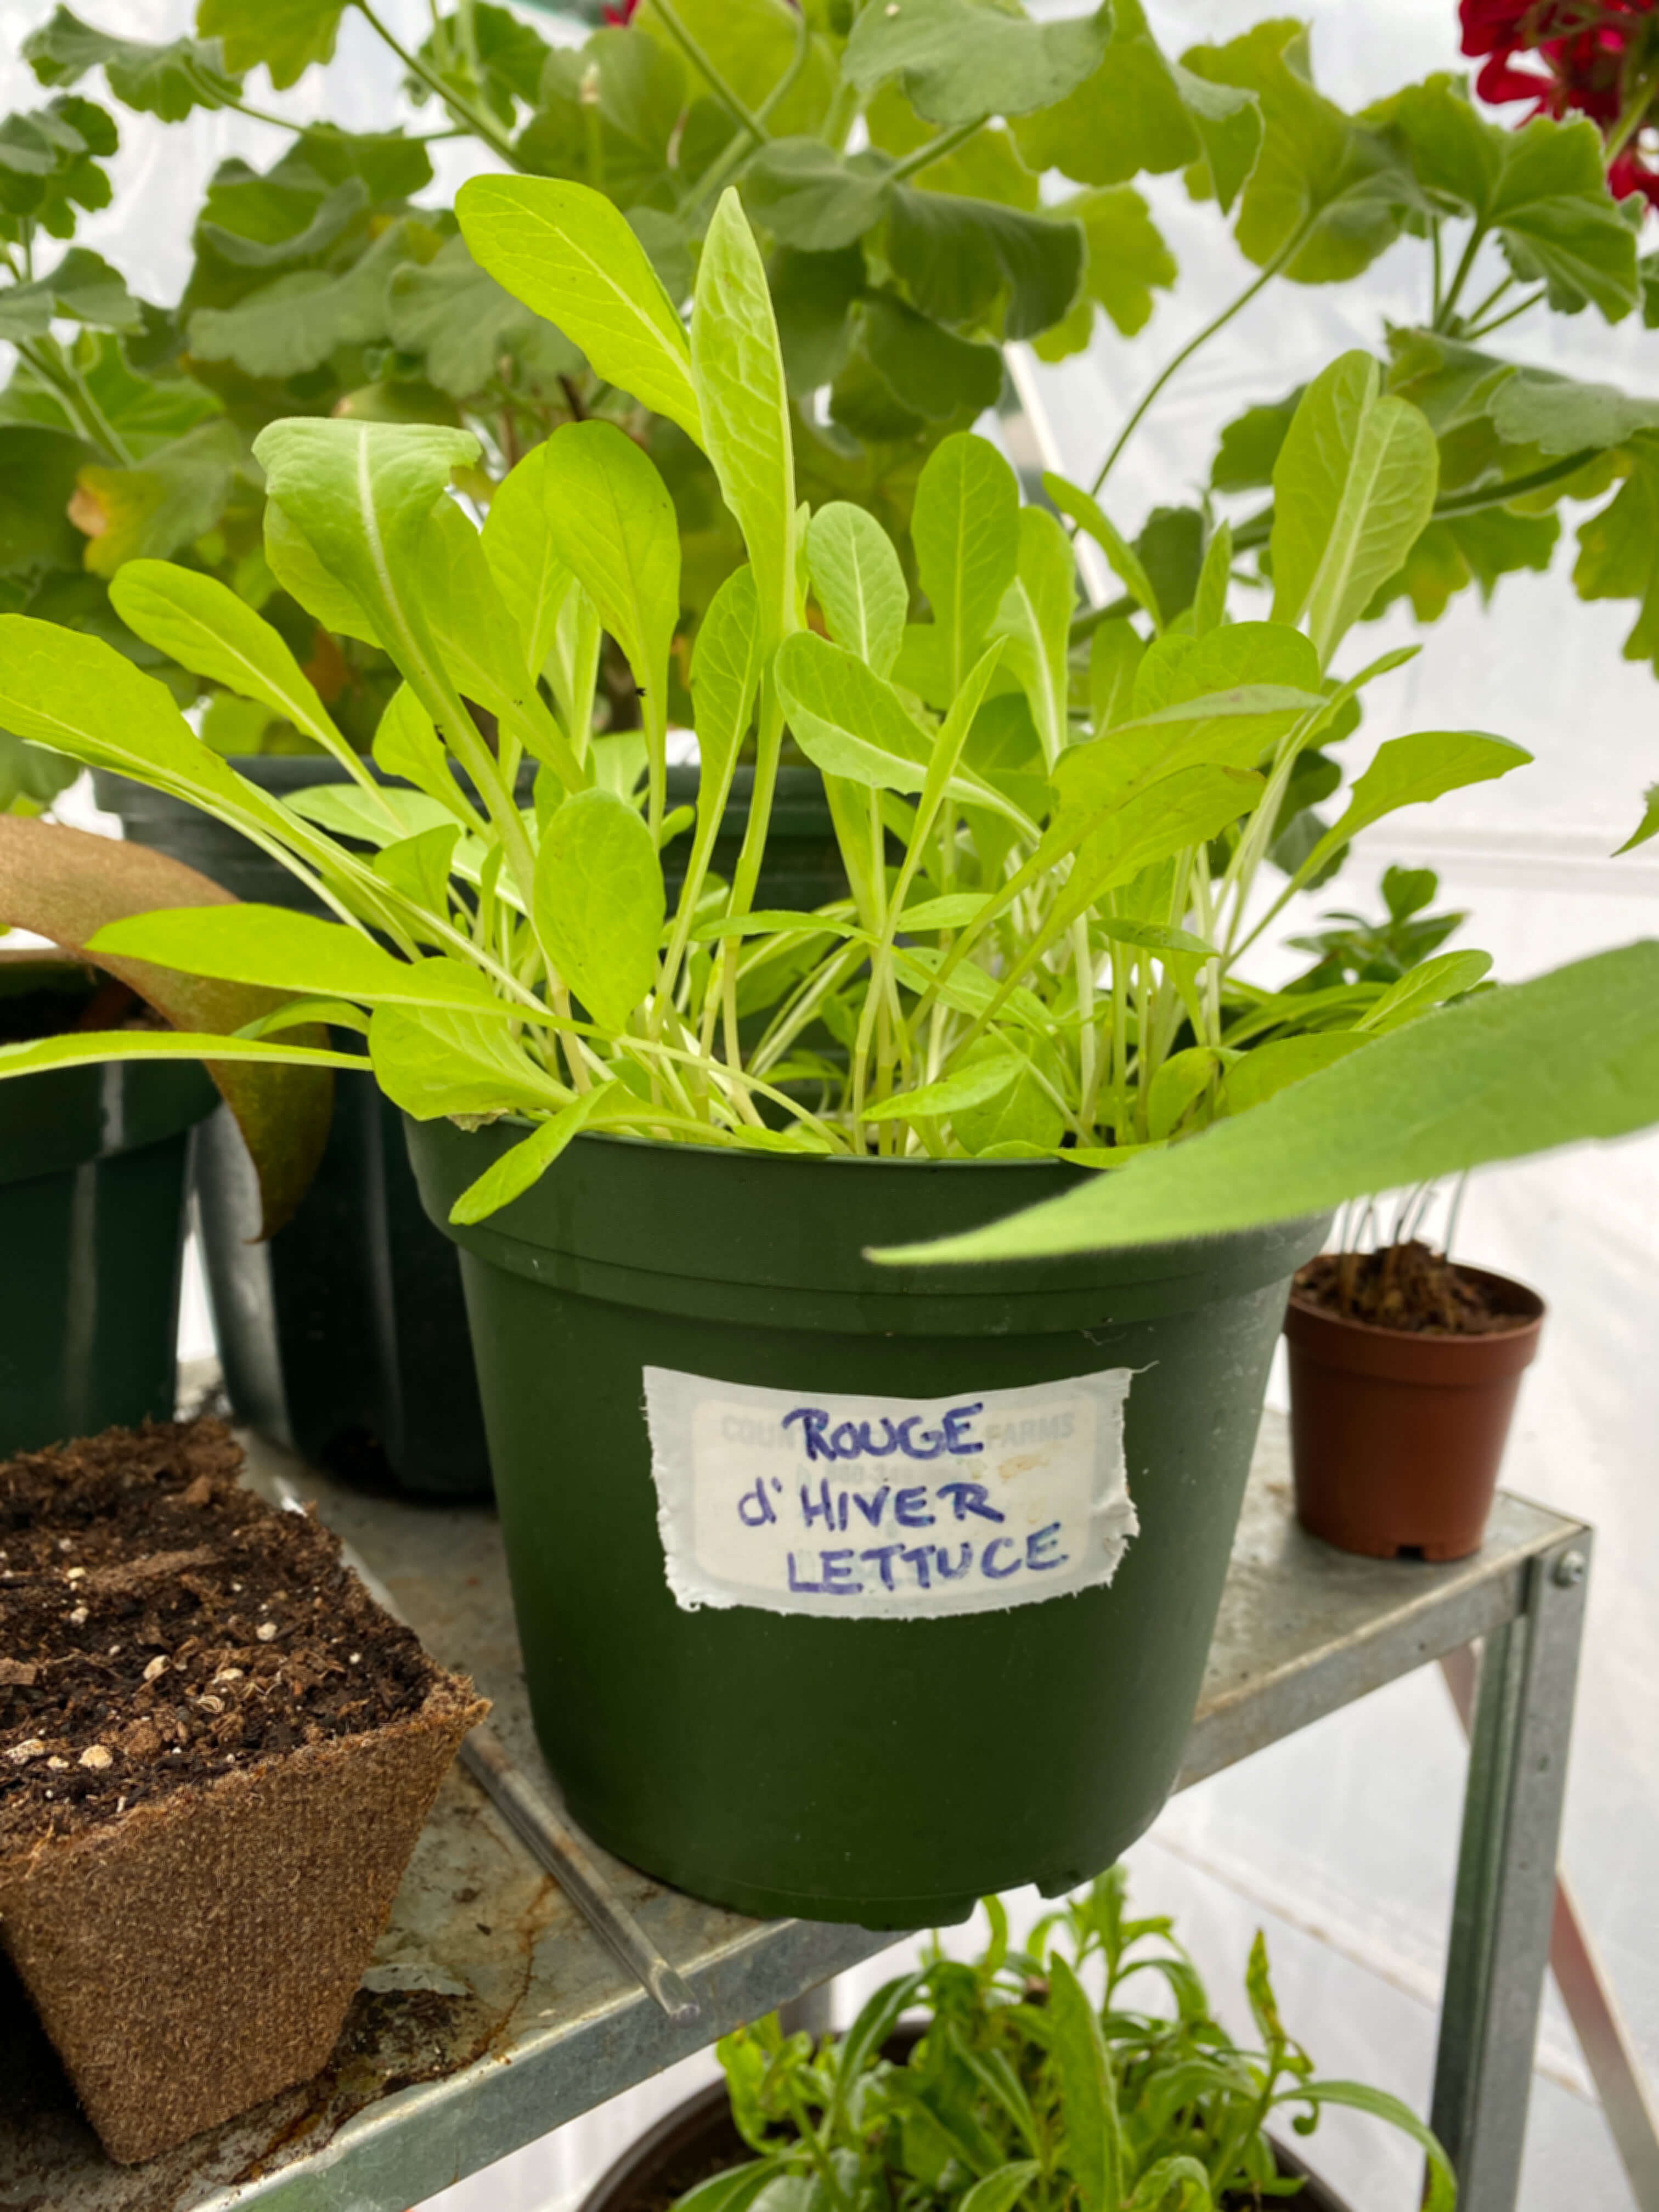
The final gardening trial in my experimental year involved starting four different types of herbs again in early September. This time, seeds were started in individual pots and in a raised bed, both placed in full sun locations in the back yard. I chose chervil, parsley, dill, and cilantro to experiment with since these are all cool weather lovers and since all four never made it to maturity in other in-ground areas of the garden. The chervil and parsley were planted separately in small pots, one plastic and one terracotta. The cilantro, dill, and a second batch of chervil were planted side by side in a raised bed that had previously been home to lettuce and mini melons, both of which thrived over the course of the summer.

Container experiment

I was interested to see if these containers and bins made a difference in the overall vigor of the plants and also interested to see what challenges might affect the herbs in this new arrangement. Within a week, all the herbs had sprouted from seed. The chervil in the garden pot made it to flowering stage, but still remained much shorter than its traditionally intended size. The parsley filled out its pot. The trio in the raised bed grew quickly too. All three spread out and up but the chervil and dill remained short and low. The cilantro grew taller and fanned out beautifully, like a bouquet. None of the herbs in the pots or the raised bed were affected by pests.

Raised bed with dill (left), chervil (center), and cilantro (right).

As of this first week in December… there are still green herbs in the garden: in every bed from the greenhouse to the front yard to the backyard. Already tucked in to their winter blankets (aka mounds of leaf mulch surrounding them but not covering them) they made it through their first snow/sleet/ice storm on Tuesday and look just as happy as they did on the days when the temperatures were 50 degrees and sunny. This makes me so hopeful that in starting an herb garden in 2025 with Adelma’s guidance, enough healthy groundwork has been laid for many of these herbs to overwinter and start anew again in 2026.


This experimental year proved to be so valuable in so many ways. Not only did I learn first-hand about the growing conditions for herbs at 1750 House, but I learned about how our landscape changes year by year. I learned that shade is good but sun is better. That parts of the garden need more protection from wildlife. That a sizable list of herbs will have a permanent home in the gardens here going forward. And I was reminded that gardening is a journey. That it takes not just one year, but many years and lots of patience and practice to establish a full, lush and vibrant herb garden.

This project also extended itself way beyond the landscape at 1750 House too. Throughout the course of the year, I connected with several new blog readers from around the globe who are also interested in herb gardening. I visited a very inspiring large-scale herb garden that’s about to celebrate its 30th birthday, and I received a lovely invitation to visit the Coventry Historical Society in Coventry, Connecticut, which houses a small collection of herbs from Adelma’s gardens along with some of her personal artifacts.

So while my winter time visions of early 2025 did not come to life in the exact way I thought they might, the herb garden bloomed in many other ways. Because this was just the starting point of what I hope will become a long-standing garden feature here at 1750 House, stories about Adelma and the herb garden adventures will be continuing on the blog throughout 2026 too. There’s so much more to discuss, including notes on caring for a batch of herbs that were brought indoors to overwinter, recipes from Adelma’s kitchen, a recipe for a homemade salve made from the calendula flowers that grew in the front bed, the neighborhood seed saving experiments, and features on both a trip to the Coventry Historical Society and the 30 year old herb garden. All these stories and more will be coming to the blog over the course of 2026.

In the meantime, our herbal education continues.

Cheers to Adelma for making this garden experience feel like a real experiment. Cheers to all the herbs for teaching us everything we needed to know when it comes to growing new life at 1750 House. And most importantly, cheers to Santiago, who gave us far more than just a mere 21 years together. Long live the garden you’ve inspired.

Advice from Adelma: How to Create an Herb Garden in Partial Shade

In the words of New England herbalist Adelma Grenier Simmons (1903-1997), “the most difficult garden to maintain is an unplanned one.” If you are joining us on this year’s Greenhouse Diaries adventures, you’ll recall that Adelma is our horticultural teacher, creative muse, and gardening inspiration for 2025 as we embrace her expertise in building and establishing an herb garden here at 1750 House.

Calendula seedlings.

Although I’ve never met Adelma, she passed away in 1997, and I’ve never had a chance to visit her beloved Caprilands Herb Farm, I do have several things in common with her that makes me feel like we are kindred spirits. We both purchased 18th-century houses in Connecticut that needed an extra bit of care and attention. We both embraced a desire to create heirloom gardens made from scratch. And we have both indulged our passions for history, cooking, and hands-on gardening.

Adelma’s 18th-century Connecticut home – Caprilands.

Ever since my husband and I moved into 1750 House, I’ve had my mind set on building a proper kitchen garden that includes plentiful bouquets of vegetables, fruit, herbs, and edible flowers. I laid out our initial plans in a 2022 post about colonial kitchen gardens, but as we keep digging and discovering, growing and gathering, year by year, we keep refining and expanding plans to fit our abilities, interests, lifestyle, and landscape. Every year, the garden design plans seem to get better and better.

Adelma Grenier Simmons circa 1935. Photo courtesy of the Hartford Courant, Aug 01, 1935

Always interested in tips and techniques that will make my endeavors more successful, when I first discovered Adelma’s book at a local library book sale last year, I had a feeling I was going to be in the good hands of an expert gardener. This is the 1964 book that inspired the project…

Read more about Adelma and her contributions to horticulture in our first post here.

In Herb Gardening in Five Seasons, Adelma lays out how to build, cultivate, create, design, grow, and care for an herb garden utilizing decades of practical, hands-on knowledge learned over her long, enthusiastic career as a gardener, herbalist, lecturer, and horticultural scholar.

Throughout the entirety of 2025, season by season, I’m taking her words to task and building an herb garden from scratch that I hope will continue to remain a stalwart and sustainable feature of the landscape at 1750 House for years to come. Since this is new gardening territory for me, both literally and figuratively, I thought it would be fun to share, along with my experiences, Adelma’s advice, in case you, too, might be interested in building an herb garden of your own. This way we can all experiment together.

In our first Greenhouse Diaries post of 2025, I introduced Adelma and her gardens at Caprilands, which attracted botanical enthusiasts from all over the world. The info I’ll be sharing here in the series this year, although based on my own Connecticut garden, will hopefully prove useful to all of our ITVK readers around the globe, too, who might face similar challenges when it comes to limited sunlight and space constraints. I’m excited to see how successful we can be using gardening knowledge from a 62-year-old book, and I’m also very interested to see just how bountiful a partial-shade herb garden can be.

There’s no way to find out unless we start, so here it goes. Advice from Adelma back then put into practice by me today.

Step One: Choose A Design and Figure Out What You’d Like to Grow…

Thoughts from Adelma: Whether the herb garden is small or large, it needs to be exquisitely neat and weedless, with wide paths and compact borders, the same plant often repeated to make a good showing. (Page 3)

In keeping with Adelma’s advice, I spent most nights in February and March studying stacks upon stacks of gardening books, in addition to hers, to gather ideas and inspiration from real-life examples – all so that our garden here at 1750 House would not fall into that aforementioned “difficult,” “unplanned” territory. Through the winter, I learned about prairie gardens, dry gardens, meditation gardens, bog gardens, dooryard gardens, shade gardens, kitchen gardens, formal gardens, cottage gardens, cutting gardens, woodland gardens, and native gardens in pursuit of coming up with some interesting layouts. What I kept admiring over and over again in book after book was a traditional square garden with pathways, some sort of architectural feature in the middle, and herbs arranged in a balanced fashion around the edges. A timeless design, I liked its simple and tidy scale, which is very much in keeping with our simple 18th-century colonial farmhouse.

In Herb Gardening in Five Seasons, Adelma also offered a variety of her own designs specifically tailored to herb gardens. There were eight in total, each ranging in theme and aesthetic. Had I the space and the sunlight, I would have replicated this one exactly…

Culinary and Knot Garden Design Layout – Adelma Grenier Simmons, 1964

The one challenge that presents itself at 1750 House is a limited amount of full sun spaces. Basically, we have two areas that receive about eight hours of sun a day and the rest is made up of dappled shade or towards the very back, deep shade of the woodland variety. Not every part of the full-sun area is appropriate for garden beds, so our limited sunshine spots are reserved strictly for growing vegetables and flowers in those areas.

One of our full sun spots is a raised bed that we built from rocks collected from around the property. Pictured growing here are peas, tomatoes, pole beans, zucchini, basil, and spinach from the summer 2023 garden.

While a shady garden is a challenge for growing many types of plants, the thing that first drew me to Adelma’s book last year was that she included a long list of herbs (29 of them) that grow well in sun-filtered shade. This was inspiration enough to start thinking about a new gardening experiment in 2025 to see what was possible in the way of a partial-shade garden using her expert advice.

The only compromise to a somewhat shady garden, Adelma noted in her book, is that some of the herbs might grow taller than they would normally in a sunny location, and that they might not be 100% as flavorful as their sun-bathed counterparts. Tall plants are my favorite kind, and while I am growing these herbs for cooking and, of course, would want them to be as flavorful as possible, I figure it’s best to understand their growing conditions and flavor intensity first in order to see what we can improve later.

Step Two: Determine The Location

Thoughts from Adelma: I think of the “perfect” herb garden as about 12 x 18 feet. Well organized, it will not require back-breaking labor once the soil has been prepared, walks laid, a center motif clearly stated, and borders planted with favorite but often miscellaneous plants set out in orderly beauty. (page 4)

The location of the 2025 perennial herb garden

Eight hours of full sun is ideal for herb gardens, but if that amount of sunlight is not possible when it comes to choosing a site, Adelma at least recommends situating your garden in a well-drained location with a slight slope so that plant roots are not swimming in puddles long after it rains or the garden is watered.

Our greenhouse sits in a southwesterly quadrant in the side yard on a natural slope. It’s bathed in sunlight from October through the end of May, but then, due to tree cover becomes partly shady in the summer. This is not ideal for sun-loving Mediterranean herbs like thyme, oregano, and basil, so they’ll have a designated bed near the veggies up front in full sunlight. But this area around the greenhouse gets all sorts of dappled light throughout the day, and I’ve always envisioned the garden beds in this spot to be full of flowers and native plants.

The 2023/2024 foxgloves on the opposite side of the yard measured between 3′ – 5.5′ feet tall.

There are already a few permanent residents in-ground at the greenhouse – last year’s foxglove starts, two Windflower anemones, a newly established hydrangea, and a burning bush. The burning bush was here when we moved in, and the hydrangea was propagated last summer via a clipping from a friend’s garden. Given how well the foxglove seeds grew on the opposite side of the yard throughout 2023-2024, they’ll be a mainstay in the herb garden too to help attract pollinators and add some overall height to this rather flat patch of ground. Otherwise, it’s a blank canvas to cultivate.

Step Three: Decide What To Plant and Gather Your Seeds…

Thoughts From Adelma: For you, herbs will be green medicines, fragrances, seasoning magic, soft tones and muted colors, textures pleasant to the touch, and names that are good to hear and bear much repeating. (page vi)

Location and personal preference will determine your selection of seeds, of course, and climate will determine your timing of when to plant what where. Since we are focusing on a larger shady herb garden with a much smaller full-sun patch and generally would like to grow herbs for cooking and drying, I followed Adelma’s list for shade-tolerant varieties.

This year our herb garden will include forget-me-nots, feverfew, wild bergamot, lemon balm, flax, dill, basil, nasturtiums, chervil, cilantro, parsley, oregano, echinacea, winter savory, English thyme, German chamomile, sweet peas, chives, sage, rosemary, yarrow, lavender, phlox and two different varieties of calendula. Everything highlighted in bold will go in the shade garden, the rest will be tucked into the full sun spots in the garden bed up front. Half of this list is a new, first-time growing experience for me, which makes this gardening project an exciting one on all fronts.

Step Four: Create a Planting Map

Thoughts from Adelma: Let the herb garden throughout look old, peaceful and nostalgic with quiet colors and soft textures. (page 17)

When it comes to the planting decisions of what goes where, I recommend sketching all this out on paper with a pencil. At this stage, there is a lot of penciling in and erasing out, second-guessing and revising, dreaming and deciding. Color, size, height, light, and soil requirements are all things to be considered as well as companion plant pairings and general overall garden aesthetic, plus any decorative items or accessories you may want to include. After months of fiddling on paper, my garden layout finally came together. Adelma can rest assured now. I have a plan.

Ideally, I’m striving for a cottage-style herb garden that is full, colorful, and graduated in size. The greenhouse will act as the central focal point, the pea gravel between the fence and the greenhouse will act as a pathway and giant field stones will become stepping stones in the garden beds. To make it visually interesting beyond texture and flower shape, I’ve selected varieties in the pink, purple, blue, white and yellow families to create a unifying color palette that ties in shades from the front gardens as well as a bit of symbolism.

In addition to practical how-to instruction, one of the most interesting aspects of Herb Gardening in Five Seasons is that it is also peppered with stories about folklore and symbolism surrounding herbs throughout history. If you communicated in the language of flowers, it is entirely possible to grow a garden full of patience (chamomile), virtue (mint), everlasting love (baby’s breath), good wishes (basil), humility (bluebell), courage (edelweiss), and ambition (hollyhock). For a complete list of flower symbolism, visit here.

This year, I’m incorporating a specific symbol in the garden – several patches of perennial forget-me-nots for one special reason. They are the flowers that symbolize memories of enduring love, lasting love, tender love. They will be planted all around our pup, Indie, who was buried in one of the beds next to the greenhouse last September. Her unexpected death left a big hole in our lives and in our hearts for sure. I still find myself looking down one of the long paths towards the woods, thinking that she’ll come around the corner any minute like she did a thousand times before after a good chase with a squirrel or two. She was such a big presence here at 1750 House, especially in the yard, we wanted to make sure she was forever a part of the property’s history.

Covered in seed pods after a romp in the woods.

It’s so strange to think that exactly one year ago, on a warm spring evening, not unlike the ones we have been experiencing lately, long before we added the wooden fence around the greenhouse, we were experimenting with building a wattle fence. Indie kept us company all evening that night, watching over our endeavors, sitting pretty much in the same spot where she would come to be buried four months later. I like to think that she is still sitting there just like in the photo, watching over us and the greenhouse and the garden. If I learned anything about colonial gardening in America in the 17th and 18th centuries, it was that American garden design is rooted in nostalgia and a longing for what once was. Like Indie, the forget-me-nots will forever be woven into the fabric of the garden from here on out, self-seeding our little secret language of love and friendship year after year.

Step Five: Start Your Seeds

Thoughts from Adelma: The business of planting seeds should be a simple process, as natural as nature. (page 58)

Adelma recommends seed starting outdoors when the weather is appropriately suited, but she also understands the rush and excitement of trying to get a head start indoors or in a greenhouse. Either way, she’s a fan of keeping the germination stage on the slightly cooler side with nighttime temps between 50-60 degrees. She also recommends as much time outdoors in the fresh air as possible to encourage strong, healthy growth.

Since our experiments of trying to grow cool weather crops in an unheated greenhouse this past winter flopped, instead of pulling out the greenhouse’s winter coat of plastic and outfitting it with a heater rather late in the season, I opted to start everything indoors in a closet that has a lot of natural light and a fair amount of sun thanks to a big window in a small space. I kept the room temperature between 55-65 degrees during the whole germination process, and all the seeds sprouted like the magical little champions that they are. For the past month, almost daily (depending on the outdoor temperature), I transported all the seedlings out to the greenhouse where they could capture the light and a little extra balmy warmth generated by the sun before bringing them back in when the temp dropped below 55.

Calendula and feverfew seedlings

Now that our last frost date has just passed on Wednesday, most of these seedlings will be heading out to the garden within the next week or two. They are a bit smaller in size than if I had started them in the greenhouse over winter with the heater, but like Adelma suggested, this cooler germination method might make them a bit more resilient to fluctuating temperatures as the season gradually warms up and we round the corner into May.

Step Six: Prepare the Garden Beds

Thoughts from Adelma: Work up the soil to a depth of 12 inches using a rototiller or a spade. I recommend three rotillings or diggings: the first to remove the sticks and stones; the second to incorporate well-rotted compost or well-decayed cow manure in soil lacking humus; the third to mix in the garden lime spread on top until the ground is nearly white. (page 55-56)

Home soil acidity test using the baking soda/ vinegar method

It’s important to know the acidity level of the soil you are working with since that will determine if you are going to blend in any additives. Adelma recommends turning over the dirt no less than three times and removing all the sticks and rocks that might be present. If your garden beds need some amending, lime and compost are two great additives that will improve the growth of your herbs and strengthen the soil. Compost can be added anytime of year, but Adelma recommends adding lime in the fall otherwise, it could stunt the growth of the plants if added in spring.

Back in mid-March, I did a home soil acidity test recommended by The Spruce, utilizing the baking soda/vinegar method. I’m not sure how accurate this test is, but apparently, if you have acidic soil, the combination of baking soda, vinegar, distilled water, and dirt will cause the samples to really bubble up. Not much happened during my test…

From what I’ve gathered so far, our soil at 1750 House is fairly neutral and, if anything, leans toward a slight acidity, which most plants love. So I’m not adding lime this year. But we did order four yards of organic compost from a local nursery.

Each garden bed received four inches of fresh compost. I’m hoping that will be enough nutrients to start the seedlings off on a good footing. Later in the season, depending on how well everything grows up, I might also add in a seaweed fertilizer and some bone meal. But for now, we’ll see how everything grows in this next month or two before anything else is added.

Step Seven: Enlist Your Helpers

Thoughts from Adelma: “A pleasant summer sound is the hum of bees above a flowering bank of thyme. It is truly the bee’s plant…” (page 67)

Other than a few mentions here and there, Adelma doesn’t discuss the benefits of wildlife much in Herb Gardening in Five Seasons, but as I learned from reading all those gardening books over winter, pollinators depend on all sorts of herbs to help get them through their seasonal travels. Likewise, the herbs depend on them to grow and thrive.

The same goes for the birds. I read recently that the best pest control you can have for your garden is an ample assortment of wild birds. A pair of nesting sparrows alone can eat up to 30,000 insects a week. Just the kind of appetites you want to encourage to help eradicate an overabundance of aphids, scale, beetles, grubs, and a whole host of other winged things that would normally munch on your plants.

We’ve been feeding the birds ever since 2022 here at 1750 House, but last fall we added two new bird feeders and built three new nest boxes this spring to keep encouraging our wild flock. Within a week of putting the nest boxes up, all three houses were occupied by sparrows. It’s so fun to watch them claim their new homes and poke their heads out of the entry holes each morning.

Besides the sparrows, our yard has quite an active bunch of cardinals, mourning doves, chickadees, blue jays, woodpeckers, titmice, nuthatches, bluebirds, juncos, robins, hawks, crows, and occasionally a wild turkey or two. In a future post, later this summer I’ll introduce you to Red, our most sociable cardinal who waits every morning at the feeder for me along with Audi, the one-eared squirrel.

A new batch of hand-painted garden signs to welcome the 2025 season

As of today… the sweet peas are up, the nasturtiums have been transplanted, and the cilantro and echinecea seeds are just starting to sprout under their protective wire covers. My husband built an array of these wire covers in all different sizes and shapes to keep the birds and squirrels from eating the seeds that are directly sown. So far so good.

The preface of Herb Gardening in Five Seasons is titled Herbs are Forever – And For All. I love that turn of phrase. It is such a fitting way to describe the appeal, universality and allure of these tried and true garden reliables. No matter where you go in the world, you can find an herb garden and someone who tends it. Perhaps that is why they are such enduring components to the garden landscape. In the same way, Adelma’s mark on herb gardening has endured too. Long after her death, memories of the beautiful gardens she created at Caprilands still find a place in contemporary conversation. I hope our little herb garden at 1750 House has such a lasting effect. A 275-year-old house deserves the pretty partnership of a timeless garden to travel the years with.

Adelma Grenier Simmons in her later years, as happy as can be amongst her garden paradise.

“Fortunately, the study of herbs touches all aspects of our lives, at all ages, under all conditions. What was rigorous physical experience in youth and middle age may become an absorbing study for the armchair gardener, who halted in activities by age or physical handicap, can still enjoy a fascinating world of legend and history.” Adelma Grenier Simmons, 1964

In the next installment of the Greenhouse Diaries, we will make a spring recipe straight from Adelma’s own kitchen and check in on the seedlings to see how they are growing. In the meantime, cheers to Adelma, to her helpful guidance, and to the act and art of growing a garden.

The Greenhouse Diaries Entry #8: The End of the Beginning

The final selection of writing in Katharine Sergeant Angell White’s Onward and Upward In The Garden is dated March 28th, 1970. “By March,” she writes, “for those of us that live in the Northeast, the summer seed and plant orders are in. From Washington north to the Canadian border and east to Maine, the tender seedlings and plants raised in hotbeds, cold frames or greenhouses now must wait for their final snowstorm before being put into the ground. The gardener has finished his midwinter reading of Christmas gift books and laid his plans for new enterprises for the coming summer. It is time for him and for me to get out of our armchairs and take stock.”

Katharine Sergeant Angell White (1892-1977)

With our unusually cool spring and our last dip of mid-30-degree weather occurring just last week, Katharine’s 1970s Maine March was very much our 2023 Connecticut May. But as Katharine was eager to point out then, the time had finally come to spring forward into action. And now our time has finally come too. The job of filling the garden beds with our wintertime inspirations has arrived. Even though there are 53 years and two months between then and now, between Katharine’s Maine and my Connecticut, this is exactly the sentiment and excitement that propelled the gardens at 1750 House these past two weeks. The last of our seedlings (the basil and the okra) said goodbye to the protective shelter of the greenhouse and are now tucked in between clusters of 3-foot-tall brandywine tomatoes and fast-growing, shiny-skinned lemon jalapenos. For the first time in seven months, our growing station is empty. The 2022-2023 greenhouse diary entries are complete. Year one is officially in the ground.

We pretty much sailed through our first year of greenhouse gardening on the coattails of Mother Nature and a learn-as-you-go approach. In doing so, we found our way to specific techniques and procedures that helped us understand the greenhouse way of gardening over the course of our first New England winter. Much of the information we shared in previous posts is relevant specifically to our area, our climate, our specific type of greenhouse, but we also learned about a few universal tips and tools that would help any gardener no matter where you live or what you grow. In this post today, we are sharing information about six of those universal helpers. We couldn’t have gotten through two seasons without them, so if you are new to greenhouse gardening I hope they will help you too. Please note, none of these recommendations are sponsor supported. We have no connection to these companies and are not representing them for any financial incentive. We purchased all of these products at full retail price and wholeheartedly recommend them for the helpful time-tested benefit they provided.

Let’s look…

Moisture Meter

The number one cause of any failed garden generally tends to be overwatering. It can lead to pests, disease, root rot, slow growth, fungus, lethargy and soggy soil. I know for certain because I experienced much of this first-hand last year. After fifteen years of Southern gardening in a region where the ground usually remains hot and dry throughout much of the summer and almost daily watering is required, I was used to that rhythm of attention. When we moved north I completely underestimated the naturally moist conditions of New England soil. Although we did have a beautiful and vibrant garden in 2022, some areas lacked a lush, reassuring strength and a robust demeanor. I came to learn, that was in part due to bland soil and in part due to too much coddling. As it turned out, I overwatered by bucketfuls practically every day last summer.

A new form of education began with the moisture meter in the Fall in the greenhouse. It really helped teach me the true amount of water that each plant actually needed as opposed to visually guessing the amount I thought it needed. This inexpensive water wizard (about $8 on Amazon) is hands-down one of the most important garden tools you could have, right up there with a shovel and a rake. By simply inserting the copper stem into any garden pot, it instantly tells you how much moisture is in the soil.

This information is especially great when it comes to caring for a variety of plants that have a variety of different watering needs, like the kind we were raising in the greenhouse. For example, succulents like dry soil with occasional watering. Parsley on the other hand likes moist soil with regular watering and black-eyed susan vines never, ever want to be on the dry side of the moisture meter. If the meter flops all the way over to the right – overwatering is most likely an issue. So helpful! Every day, throughout the fall and winter, I inserted the moisture meter into each pot in the greenhouse to make sure everything stayed appropriately hydrated. Now that we are on our way to summer, the moisture meter can be used to test the garden bed soil as well as indoor houseplants, so there’ll be no overwatering this year. I’m officially trained.

Magnifying Eyeglasses

This recommendation may seem a little kooky, but if you want to keep pests away from your greenhouse over winter you have to get close to the plants and inspect them regularly to make sure they are not harboring minute critters. These magnifying glasses are actually made for watch repairers, but they are really great for garden work too. I’m legally blind in my left eye, so getting any help up close for my good eye is always appreciated and these glasses offer lots of opportunities to look at things from all directions. Both of the lenses move up and down and side to side independently, allowing you to get inside the middle of a plant where many pests tend to hide. Each lens has its own LED light that operates independently too so you can really see what you are looking at no matter the time of day or night. Different magnifying lenses with different strengths adjust the field of vision and are easily interchangeable.

As you may recall from previous posts, in the winter we had a pretty significant outbreak of spider mites and aphids in the greenhouse, both of which are difficult to see with the naked eye. I would never have never been aware of these critters before irreparable damage set in, without the assistance of the glasses. Despite their very technical appearance, there’s a magical upside to these guys too. When you put them on you become an explorer of a micro-universe. Plants look so cool up close. Bugs too for that matter.

Bon-Neem

In lieu of the spider mite and aphids outbreak, this Bon-Neem spray, although on the more expensive side ($17 a bottle) is effective in quickly broadcasting a lethal dose of all-natural organic neem oil. Since spider mites adore hot dry air, they breed like crazy. The adults won’t survive Neem spray but the eggs are unaffected by it so it took six applications (three bottles total) over the course of a month to make a significant dent in our mite and aphid population. It didn’t eradicate them completely – our next recommendation piggybacked on this spray to get the job done – but the oil acts like a protective coating against future pest invasions, so it’s definitely worth it.

Please note, if you decide to use this spray, it has a strong odor. I found it best to get all greenhouse tasks done for the day first before spraying it on the affected plants. Once everything was drenched, the greenhouse was closed up, and left, undisturbed, for 24 hours, so the Neem oil could do its work. After that amount of time, the odor dissipates completely and the greenhouse is on its way to becoming pest-free.

Isopropyl Rubbing Alcohol

Isopropyl alcohol is a much less expensive ($4.50 for 32oz) but yet very effective method when it comes to getting rid of spider mites and aphids. It’s more tedious than Neem spray since you have to wipe down the entire leaf of each plant (front and back) but it’s instantly effective and definitely worth the time if you want to make 100% sure that the treatment is reaching the problem areas. Like the Neem spray, this won’t kill spider mite eggs, so you need to reapply it again 3-4 days later, but that second dose is a good opportunity to investigate each plant to make sure the first application worked.

I found that a soaked cotton ball was ideal to use on the larger leafed plants like the peppers and basil, while cotton swabs, with the plastic connector (as opposed to the cardboard ones) were better for smaller more densely foliaged plants. The swabs easily bend in half and get around thick stems, delicate flower petals and hard-to-reach spots. Also, if you choose to go this route in your pest management plan, make sure you stick within the 70-90% percent isopropyl range. Anything above 90% will harm the plant.

Creamer

Although I have tried watering cans, hoses and sprayers of all shapes and sizes, nothing beats a creamer when it comes to working in small spaces with fragile seedlings. This vintage 1960s restaurant ware creamer had a cracked handle that had been carefully repaired at some point in its long life. Aesthetically, it might not be destined anymore for the coffee table but it is wonderfully useful in the greenhouse. Holding about a half cup of water, its narrow spout provides a perfectly slow, steady and gentle steam of water, ideal for fragile, newly emerged seedlings. You can drip-drop water on plantings or dump the whole container at once, but the beauty of using a creamer over a traditional garden hose or a bulkier watering can is the finite control you have over the amount of water you are pouring. Plus the slim size makes a handy temporary vase for bud clippings as you prune flowering plants.

Worm Bucket

At the beginning of autumn, I filled a 10-gallon steel bucket with a bag of organic potting soil and added a few worms from the garden. I wasn’t sure if this was a good idea or not for the worms, but I wanted to have extra garden soil on hand, for repotting and replenishing throughout the cold months, and I thought the worms might help in their ability to enrich the soil through their castings. As it turns out, warmed by the heater and given a weekly light watering, the worms settled into life in the bucket and made a happy home there. As I scooped trowelfuls worth of soil into potted plants periodically throughout the season, worm eggs wound up randomly and unknowingly in several pots and seed-starting trays. Come early spring, I spotted some baby worms wriggling around with the snapdragon and foxglove seedlings. Did the worms help fertilize the soil in a significant way? I’m not sure, but in the least, they probably helped aerate it. Now fully planted along the edge of the woods, the foxgloves are growing with unrestrained zeal these days. Perhaps the worms helped give them a nutritious head start.

Foxglove

Gardening can be a tricky balancing act between what mother nature offers and what you desire. In the greenhouse, you not only create a biodome of possibility but also a unique environment controlled by instinct, device and determination. These recommendations combined with our winterization wrap and our little workhorse of a heater were methods that worked well for us and in turn, I hope they work well for you too. They really jumpstarted our summer garden the moment the seasons changed this year. Three weeks into May, we already have flowers on our tomatoes, beans on our climbing great northerns, baby fruit on the cucamelons, and two handfuls of spicy and sweet peppers.

Brandywine Tomato
Great Northern Beans
Cucamelon
Orange Sun Sweet Pepper

The lettuces are now the size of full heads with tightly packed leaves and crisp texture. The herbs are flourishing. The collard greens are sporting leaves as big as turkey platters. Yesterday morning we harvested our first batch of rapini, just as the zucchini seeds poked their heads out of the ground. None of this spring vigor would have been possible without the help of the greenhouse and the joy all this seed-starting and plant-tending brought over the winter months. Thanks to the greenhouse I think we are well on our way to one delicious summer.

Collard Greens
Rapini

The only things that struggled in their transition between greenhouse and garden were three Mexican sunflower plants and one okra plant. They didn’t like that surprise dip into 30-degree temperatures. Interesting to note, those are both Southern heat-loving plants and perhaps the most vulnerable things we are growing in our cooler New England climate. As we learned in the history of American gardens post, nostalgia has played a big factor in how we have laid out our U.S. gardens and with what since the days of the pilgrims. Last year, I was excited to grow two of my most favorite Southern plants here in New England based solely on great memories, but maybe this area is not the most appropriate place for them. Next year I might grow them, only in the greenhouse, where they can be bathed in heat and light from seed to bloom. Little lessons and ideas sprout each day around here.

Once so full of plants, it was pretty odd to see the greenhouse return to its empty shell state. It’s been over nine months since it has been this devoid of greenery and although it still is just 4’x6′ in size, it now feels as big and as cavernous as a palace sans plants. To add a little cheer over the summer, I brought the succulents back to the shelves, and am considering adding some shade-loving plants that would enjoy the dappled light and summer leaf coverage overhead. Over the course of these warm months, while the greenhouse rests, we’ll give it a bath inside and out, build additional shelving to maximize space, and add a fresh layer of pea gravel to the floor so that it will be all ready to greet Autumn and a new set of gardening goals.

Katharine and E.B’s home in Brooklin, Maine

In November 1975 at their farmhouse in Maine, Katharine’s husband, E.B. White, gave her a small greenhouse and a potting shed to commemorate their 46th wedding anniversary. Knowing the magical distraction a greenhouse could offer his wife as she bravely battled ill health, he was certain it was the most pleasurable gift he could ever give her. A year and a half later, Katharine passed away at the age of 84. She didn’t get a chance to enjoy her greenhouse for very long, but a gardener’s joy comes daily, in the moment-to-moment observations of tiny details and subtle nuances. A lift of a leaf. A burst of bloom. The sight of sun as it shoots a seedling sky-high. Katharine’s greenhouse may have offered her just eighteen months of comfort, but oh what bliss those day-to-day noticings must have provided. Should we all be so lucky. To know nature so intimately that it becomes an offering, a salve, a focus. To know it as something so reliable it becomes a resting place, an arresting place, despite all of our earthly distresses.

Katharine & E.B. White. Photo courtesy of bangormetro.com

This series was so fun and the greenhouse so encouraging over the winter months that we have plans to add a second, larger, more permanent greenhouse to our landscape which hopefully will be completed by next winter. Until then, I hope all you gardeners stay with us all summer long as we cook up a bevy of vintage recipes, highlight forgotten kitchen stories from history, and share updates from the 1750 House renovation project. For all you collectors out there, if you haven’t already, sign up for our weekly newsletter to see what new old heirlooms make their way to the shop this summer. And finally, if you are new to the blog, the first entry in this Greenhouse Diaries series began in December 2022. Begin at the beginning with that first entry here.

Cheers to our fellow greenhouse comrades who shared stories with us along the way of this six-month journey… to Katharine Sergeant Angell White, who inspired this series in the first place… and to our little joy of a greenhouse. We can’t wait to watch all these plants grow up over the summer and to see what the greenhouse might inspire next.

Rapini florets

The Greenhouse Diaries Entry #6: How to Keep a Greenhouse Warm in Winter, Spring Seedlings and a Whole Lot of February

Wrap it up like a big present. In plastic. That’s how to keep a greenhouse warm in winter. Luckily, our greenhouse is small so this gift wrapping is not a giant undertaking. And it might not be the right solution for any big greenhouse owners, but for us, and our 4’x6′ growing station, this method of winterization has proved itself most competent. Like a champion, it weathered our second blast of single-digit-polar vortex temperatures in early February, it withstood wind gusts of 35 mph, and it embraced this week’s big snowstorm of 6.5″ inches all while maintaining an even 70-80 degree temperature range indoors. We can officially say, with confidence, that this is an ideal solution for any small greenhouse gardeners who live in a cold weather climate and struggle to keep plants warm throughout the winter.

We got a little behind in our greenhouse diaries updates, but by no means was February an uneventful month around here. As we all know, nature waits for no one. What was exciting twenty days ago in the greenhouse has now been replaced by exciting things happening at this very moment, so this post is a catch-up, a recap, and a new surprise all rolled into one in an effort not to make it a million miles long.

The front side of the greenhouse with a roll-up curtain panel to gain entry.

Here’s a brief recap on the winterization efforts. Essentially, in less than half a day, we built a wooden exoskeleton around the shoulder and roofline of the greenhouse and then wrapped the greenhouse in one giant piece of plastic. The plastic was stapled to the wooden skeleton which was screwed together but not screwed into the greenhouse. Instead, the wood frame rests on top of the greenhouse, secured by gravity from the wooden connection at the peak of the roof.

The backside of the greenhouse.

A 5′ foot wide roll-up curtain panel was made for the door using a curtain rod at the base and more plastic sheeting. Four bungee cords hold the plastic in place along each wall and two butterfly clamps hold the rolled-up panel in place when going in and out of the greenhouse. All it took material-wise was one roll of the plastic sheeting, six pieces of lumber, a curtain rod, a handful of screws, four bungee cords, and two butterfly clamps. If anyone would like a detailed drawing on how to replicate this plastic wrap for your own greenhouse, please send us a message or comment below and we’ll be happy to lay out the steps and materials.

Most days we leave the door panel rolled up to let a little outside air seep in through the draft in the doorframe. Just before dusk, it all gets buttoned back up again. Once winter is over, we will be able to easily remove, wrap up and save this plastic/wood frame system for the cold months later in the year. Using this type of winterization method and our one electric heater has kept the greenhouse a full 50-60 degrees warmer inside than the outside temperature. So on a 25-degree night, it will stay a consistent 75 degrees in the greenhouse. Some days, when the sun is out, the plastic keeps everything so warm we can turn the heater off completely. Both the established plants and the seedlings have really thrived in this much more consistent environment.

The Mexican sunflowers!

The only downside to this method of winterizing is that all the ventilation holes, the roof window, and each side wall from the pea gravel floor to the peaked roof get completely covered with plastic so there isn’t as much free air flow or circulation happening, and the view is reduced to a gauzy, opaque landscape once inside. The trapped heat is great for keeping everything inside warm but also invites pests to come and enjoy the tropical heat.

Over the course of February, we did see an outbreak of aphids, whiteflies, and spider mites, but a simple spray of homemade garlic water and store-bought organic neem oil did the trick to clear those up quickly.

Pureed garlic steeped in water for 24 hours before straining and applying.

One note on the Neem oil though – it does get rid of everything. We had some mushrooms that popped up in the pepper plants in January and also two resident spiders who were helping reduce the unwanted bug population, but unfortunately, mushroom nor spider survived the neem spray. So keep that in mind if you have some critters that you’d like to keep around.

Over the course of the month, we said goodbye and hello to a few plants. The broccoli, the pincushions, and our beautiful nasturtiums all completed their natural life cycle. As much as I hated to see these three go, at least they were moving on to the compost pile for nutrient recycling. Like our sourdough starter recipe published last week, all these first-year greenhouse plants have been the best springboards – the ones that taught us so much about how to begin in the first place. Before their final send-off, I picked the last of the nasturtiums for a bouquet. It was a big colorful cheers and thank you to my most loved flower this season…

The last of the nasturtium flowers in a bouquet of geraniums and parsley.

On the hello side, we said welcome to a bevy of new seedlings as they sprouted up this month. Snapdragons, foxglove, basil, black-eyed Susan vine, cucamelons, bell peppers, spicy peppers, cosmos, dill…

We harvested the orange bell pepper for a stuffed pepper recipe, the first round of collard greens for a sausage, potato, and collard hash, and the arugula for more salads than we can count. The chives, lavender, and tarragon all got haircuts and the Santaka grew five finger-long peppers.

Collard greens!

Santakla Peppers!

The geraniums are filling out so much they have completely taken over one corner of the greenhouse. Their resilience from frost recovery is pretty remarkable. I can see now why these plants have a shelf-life of 50 years if paid just a little bit of attention. With the colorful nasturtiums gone, they have been such a vibrant choice for the wintertime greenhouse.

After the bell pepper was harvested and after the spider mites came to visit, I did some trimming of the older pepper plant leaves, and pretty much overnight three jalapenos grew. Now each of the three pepper plants are blooming again, Maybe we’ll be lucky and get two summer cycles out of each plant.

Jalapenos!

This week, the most exuberant grower in the greenhouse has been the mint. At 12″ inches in height now, it’s been the epitome of spring-is-right-around-the-corner joy.

Nineteen days to go. That’s how close the first day of spring is. In anticipation, another round of seed starting begins this week. On the list for March starts are cucumbers, marigolds, squash, tomatoes, okra, collards, sunflowers, cauliflower, brussels sprouts, peas, broccoli, and zinnia. To keep things interesting, Mother Nature also might be sending two to four more inches of snow our way this weekend, just as the daffodils are popping up in the garden beds. Like I said up top, nature waits for no one. And so we carry on. Snow showers and spring flowers aside, this is the perfect time to get the summer garden started.

Cheers to almost-Spring and to figuring out the greenhouse winterization plan just as a new season approaches! Have you been starting your seeds too? If so, what are you growing this year?