Witch hazel illustration by Leonie Bell circa 1960s
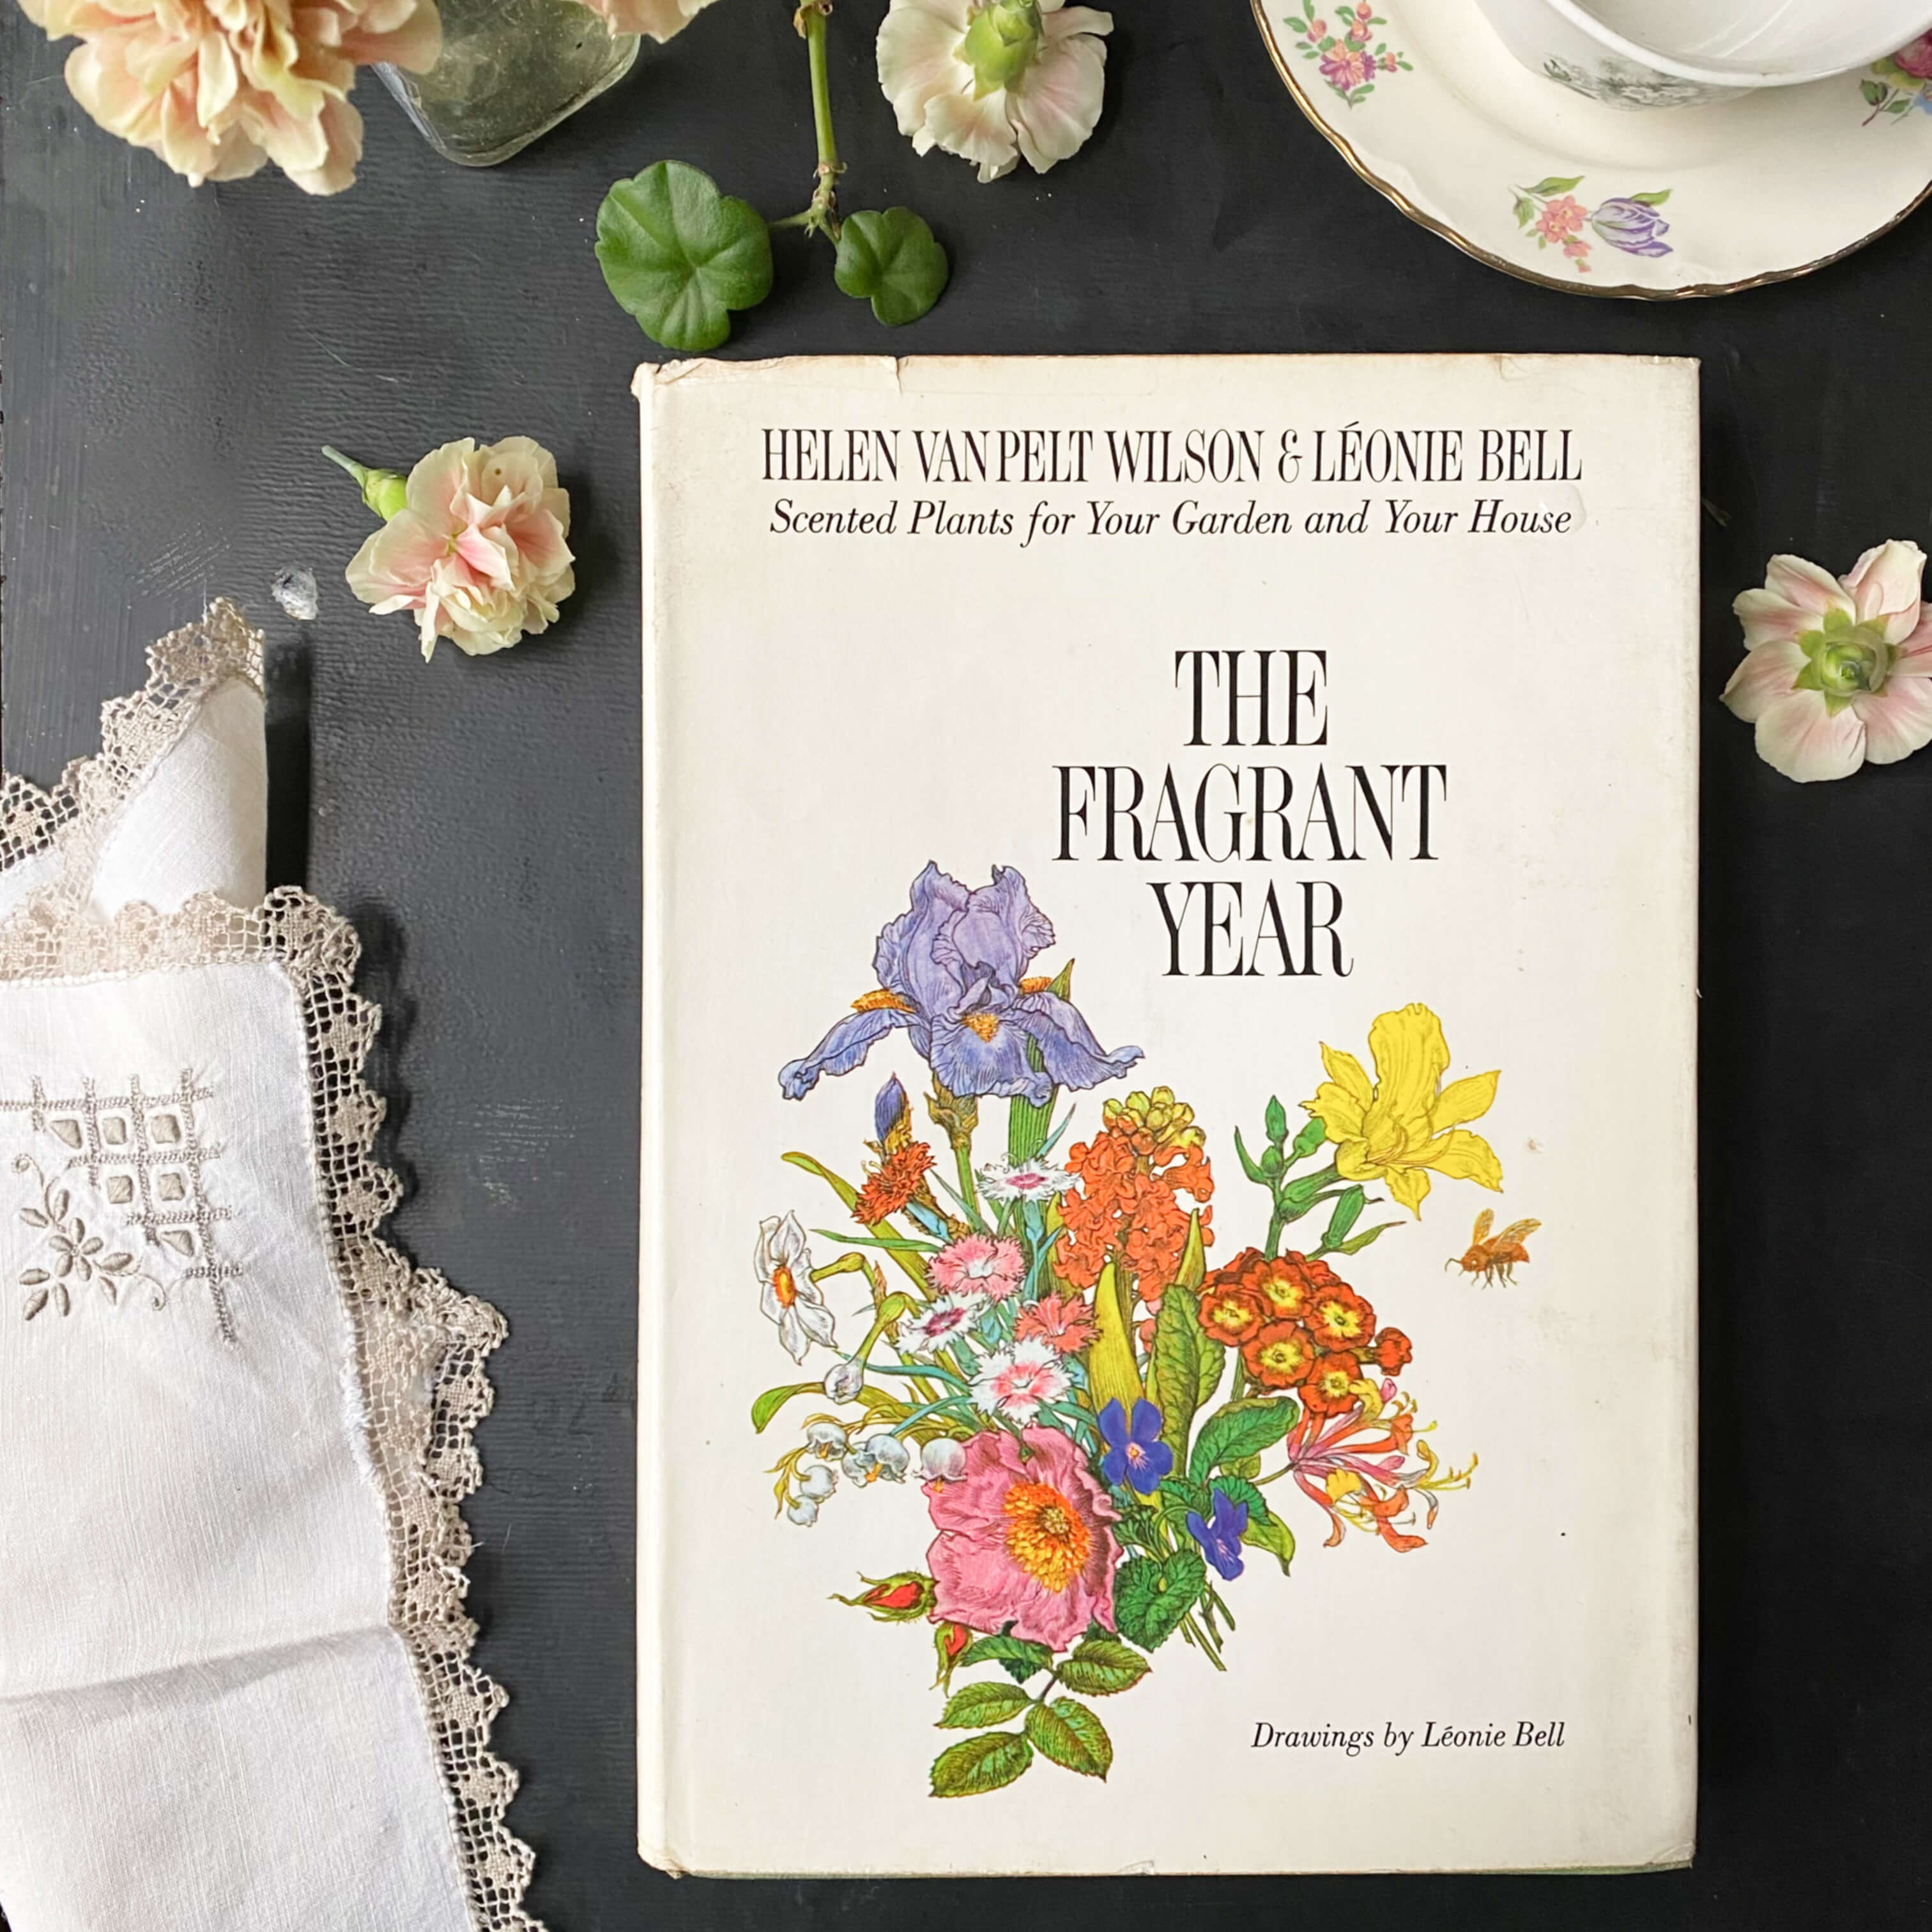
With a scent ranging from sweet yeasted bread to bubblegum, the centuries-old Hamamelis virginiana (aka the common witch hazel) kicks off Month #1 in this year’s Greenhouse Diaries series. In case you missed our introductory post last month, our theme for 2024 is a Fragrant Year, where we’ll be sharing twelve months of perfumed plants, flowers, and trees that have the power to add a calming, aromatic atmosphere to gardens big and small.
Inspired by the 1967 book, The Fragrant Year by Helen Van Pelt Wilson and Leonie Bell and their idea that planting a scented garden benefits not only one garden but many surrounding it, it’s an exciting project that I hope will bring some discussions and awareness about the power of plants and the perfume they provide.
Acting as guinea pigs and testing fields, the greenhouse and gardens of 1750 House are the experiment stations to see how Helen and Leonie’s suggestions work in our northern landscape. Although we are gardening in New England (Zone 6) and striving for a natural and historical outdoor environment appropriate to the history of the house, it’s my goal with this series to feature fragrant specimens that will grow in other parts of the country too, in case you are looking to augment your own green space with some pretty aromatics.
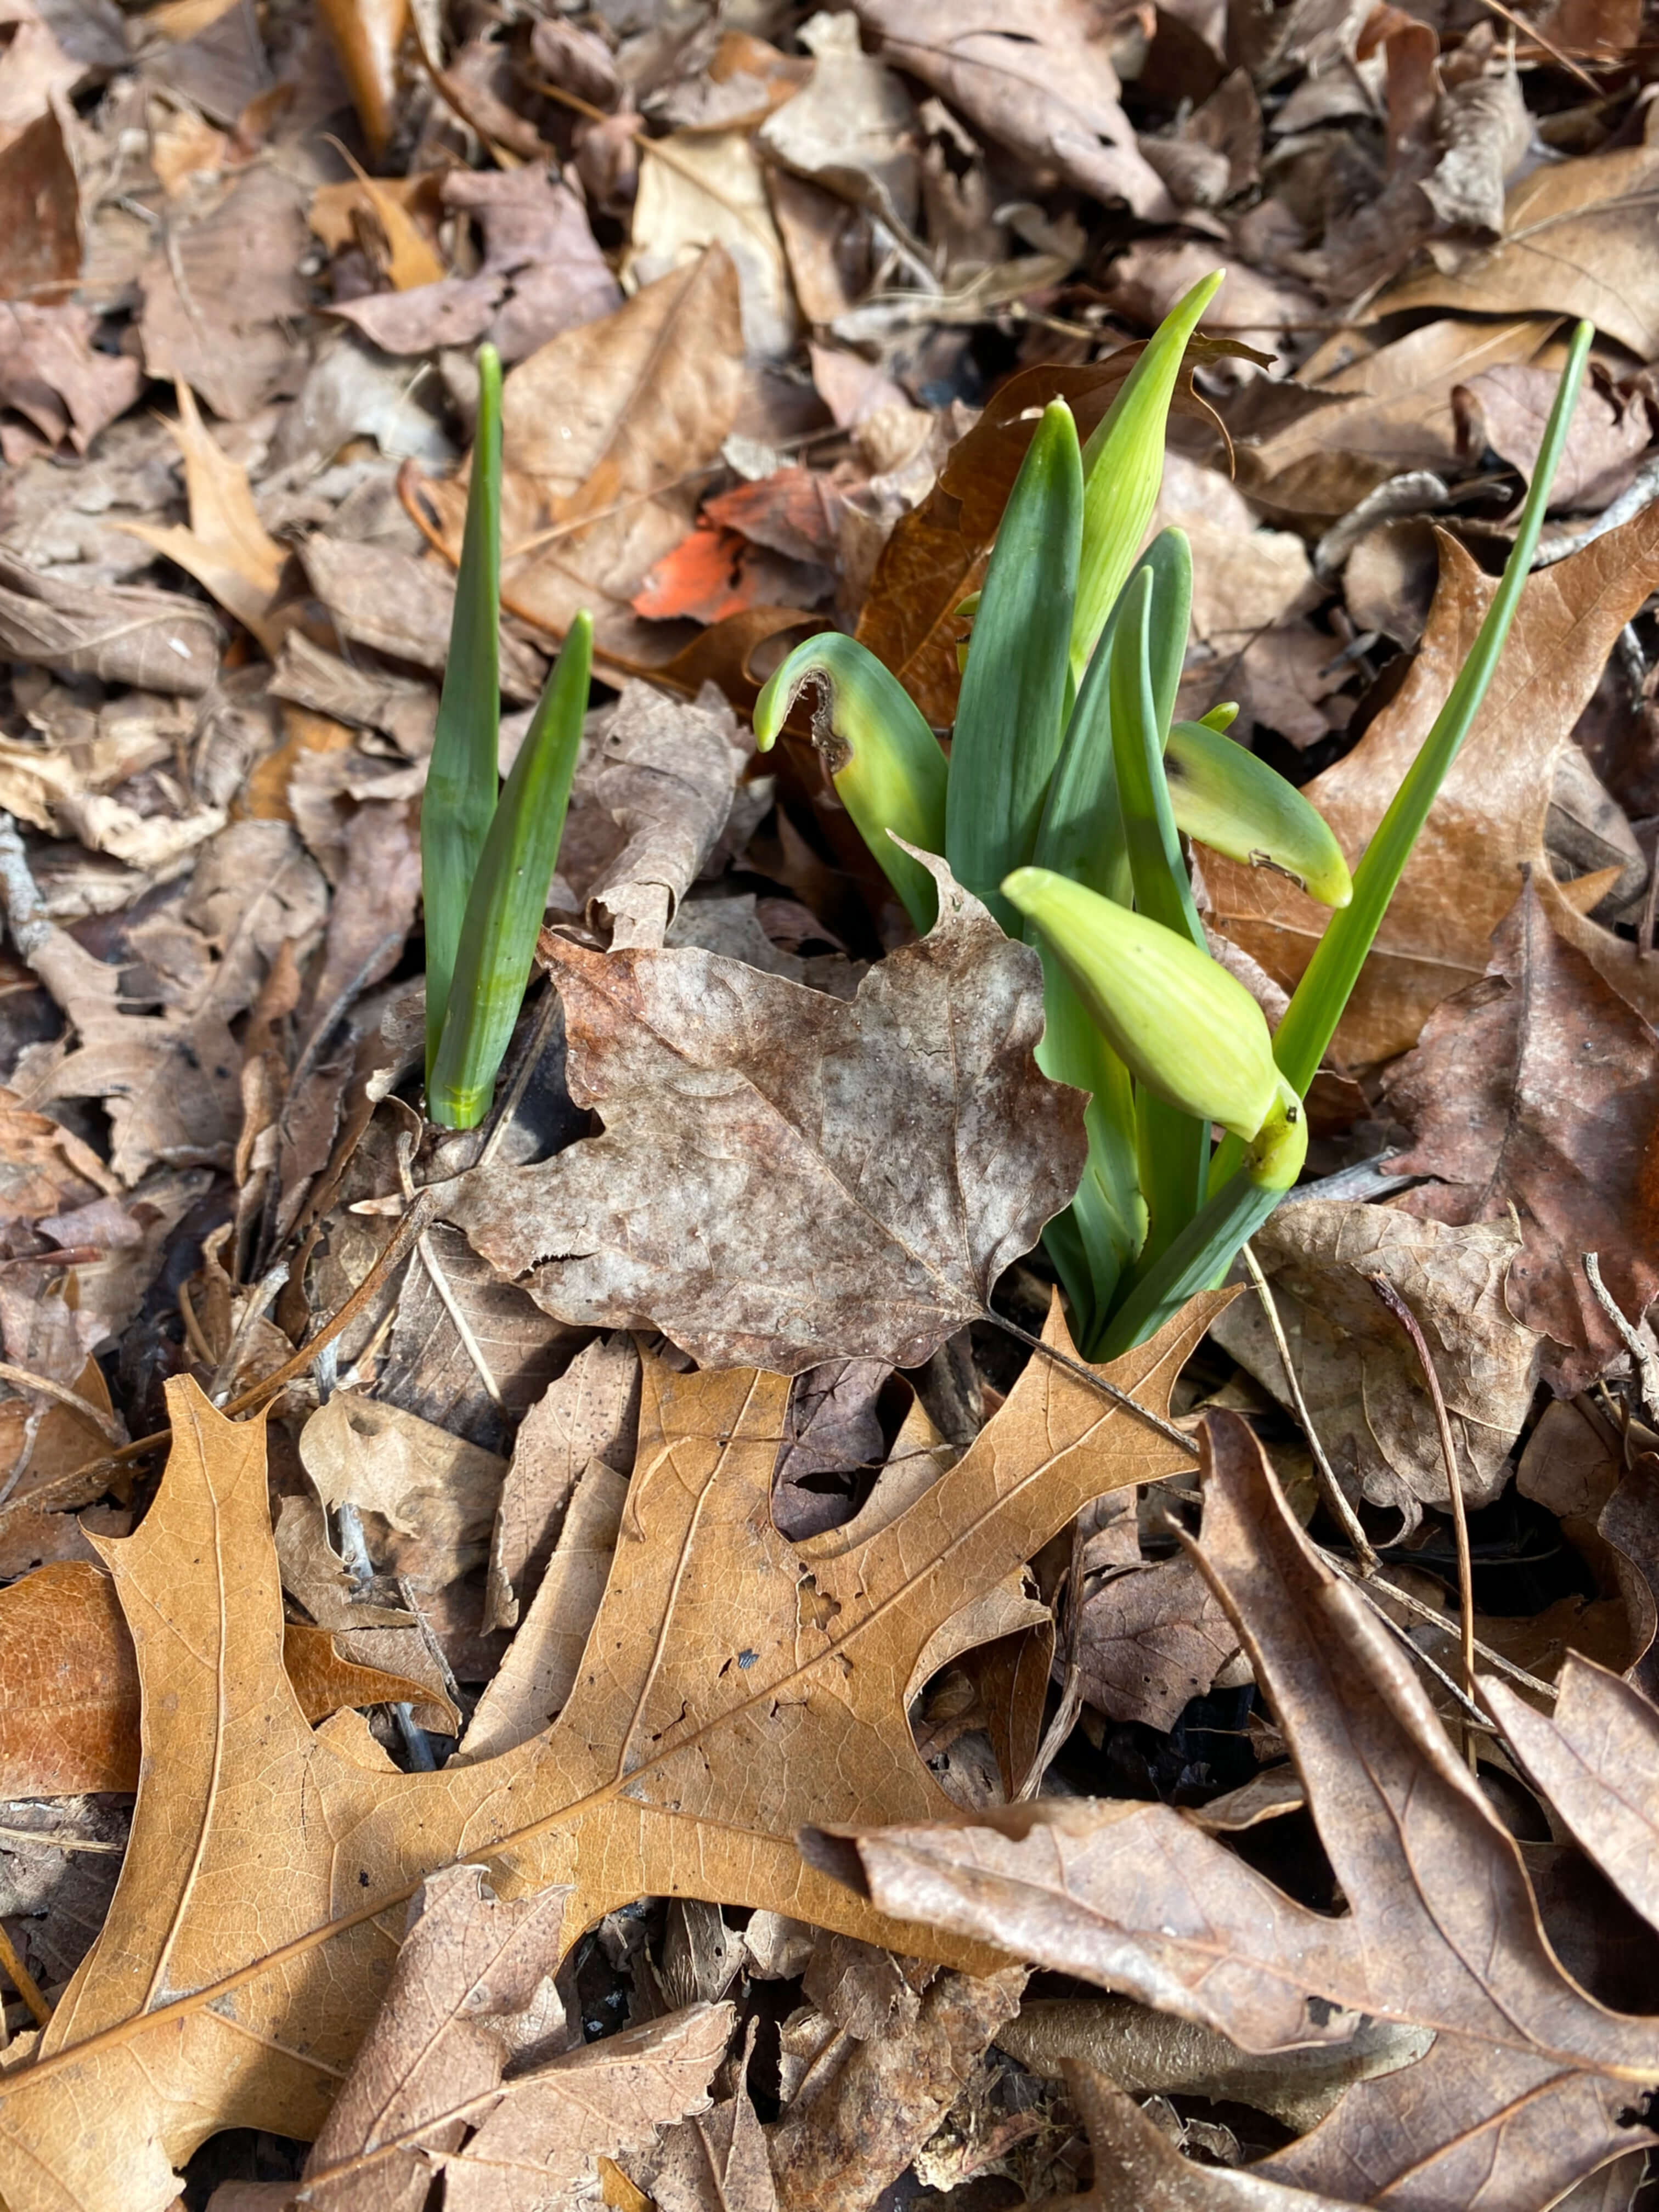
As I write this, the last of our 11″ inches of snow has just melted and signs of spring are stirring in the daffodils poking through in the front corner bed. Planted long before we ever moved in, I’ve come to rely on those flowers as little time clocks signaling that a new season is close at hand even though nighttime temps are still in the 20s and 30s. Spring, indeed, is happening. Soon.
In the beginning chapters of The Fragrant Year, Helen and Leonie write about the “optimistically planned” winter garden, which if done correctly should “offer us flowers with various shrubs to brighten the dull months.” One of their suggestions for wintertime color and scent is one of the oldest medicinal plants in the New World and a resident of the entire eastern half of the country from Canada to Florida.
Although technically considered a shrub or a small tree, when left to its own devices, common witch hazel can grow up to 30 feet tall, and is one of just a few plants that blooms in the dormant stages of winter. Brightening up the landscape with fringe-like ribbons of golden flowers, it adds bright color to the garden, shelter for birds, and a food source for winter pollinators like the dagger moth that shivers and shudders its way through the cold season.
The common witch hazel in winter. Photo courtesy of TN Nursery
Requiring moist soil, sun to partial shade, and an acidic to neutral PH level, witch hazel is an easy-going, practically carefree planting that grows one to two feet in height each year. Ideal for sunny spots, woodland edges or sloping hills where soil erosion is a concern, the helpful hazel compliments a variety of different landscapes in a variety of different states.
Last year, we had to make the tough decision to bring a tree service in to cut down two trees that were precariously leaning in the backyard. The salve for having to cut down two old trees was knowing that we would plant at least two new ones in their place.
February 2023 tree cutting
Surrounded by woodlands on two sides and facing a community garden in front, 1750 House is tucked in between acres of beautiful naturally-kept trees, including five elms and two cedars that are over 100 years old. While we have no shortage of very tall trees, we do have a bit of haphazard mid-range tree coverage that reflects over 270 years of garden endeavors executed by previous 1750 House residents. Privet, fruit trees, ornamental shrubs, wild natives, ornamental grasses and a few invasive species all compete for attention to the eye. We are on a mission to corral all these growers into a more cohesive vista so that they can work together to provide interesting layers at different heights to create a unique blend of shapes and colors throughout the year.
The appeal of planting a witch hazel shrub in the backyard is the pretty array of color it will add at eye level in the winter when most of the woodlands boast shades of grey, snowy whites, evergreen, berry reds and blacks. I also love the medicinal factor that witch hazel offers and the future opportunities it will bring later down the road to explore some homeopathic recipes.
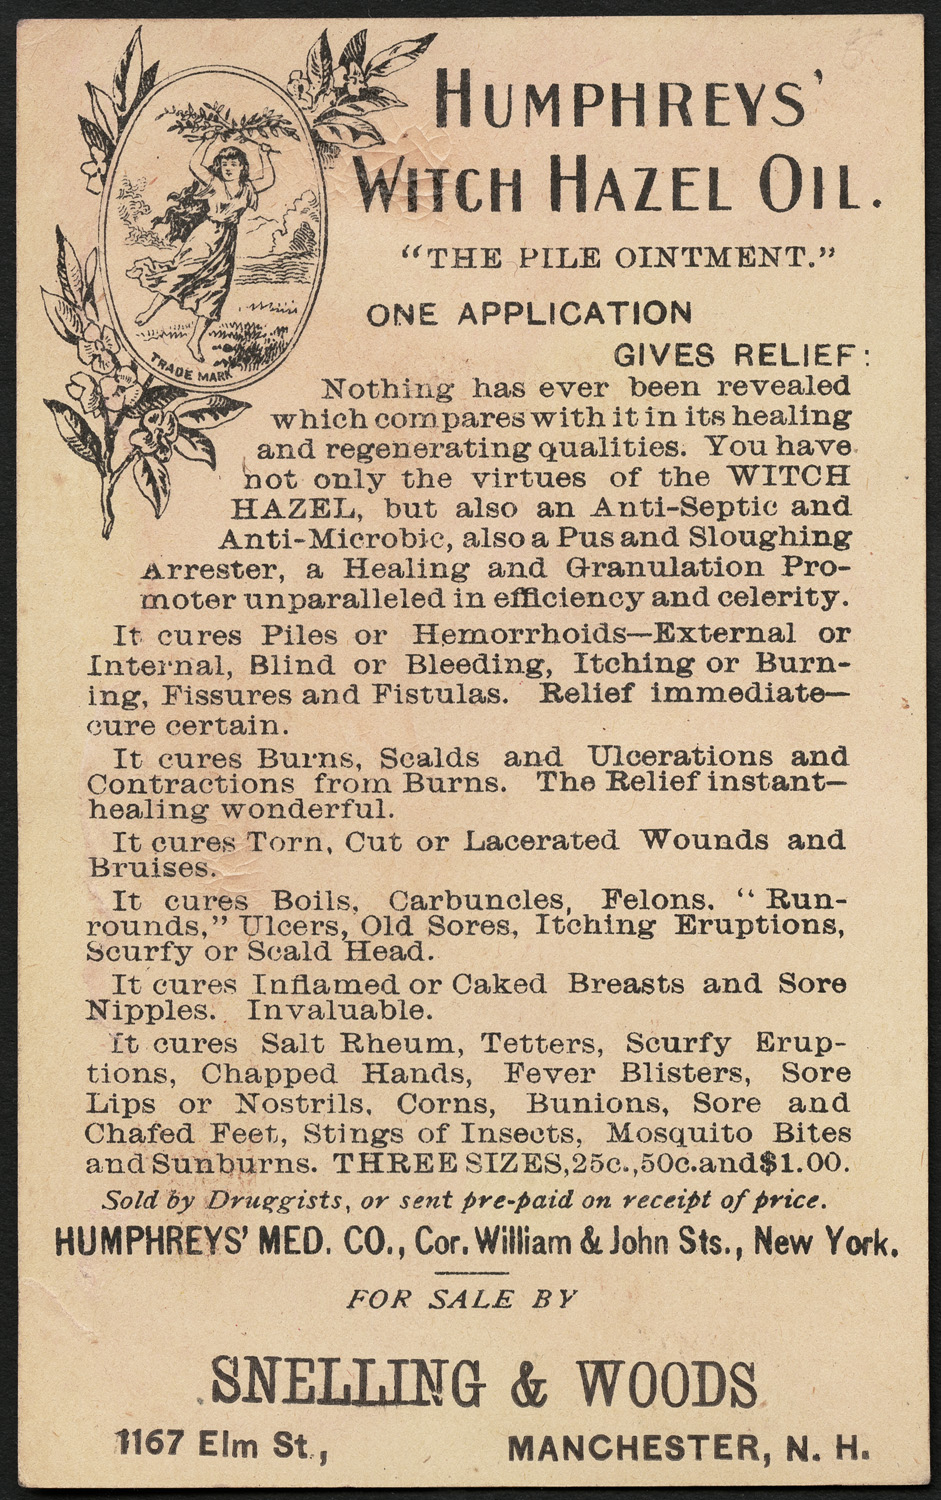
Humphrey’s Witch Hazel Oil was made in New Hampshire in the 1870s. Image courtesy of the Boston Public Library.
Befitting a proper and useful kitchen garden of a house built in the 18th century, witch hazel in all its forms, from leaf to stem to flower, has been cultivated for hundreds of years for use in poultices, anti-inflammatory salves, and skincare maintenance. In New England, we have the area’s indigenous tribes to thank for teaching early settlers how to boil the bark for medicinal tinctures to heal coughs, colds, and inflammatory ailments. The leaves were used in wound care. The wood for making bows for hunting. By the 19th century, witch hazel became a key ingredient in the first mass-marketed skincare product – Pond’s Cold Cream – which debuted in 1846 under the name Golden Treasure.
Helen and Leonie offered another use too… clipping a few branches of witch hazel in winter and adding them to a vase along with some balsam sprigs for some invigorating indoor aromatherapy. Even though it can take up to six years for the first blooms of witch hazel to appear, I can already imagine such a bouquet.
Young fruit of the witch hazel shrub. Photo: Katja Schulz
While I have ordered plenty of garden seeds online before, ordering a shrub off the internet was an entirely new experience. As I learned, live agricultural specimens like this one are shipped in timing with the appropriate planting season. So the witch-hazel shrub I selected from Tenesssee won’t arrive until spring even though it was ordered in late winter. That’s a handy system that sets you up for success from the beginning.
So the first month of our Fragrant Year series starts off with a to-be continued. We’ll check back in on our witch hazel planting adventures in spring when the shrubling arrives. In the meantime, if anyone else has any experience working with witch hazel, your thoughts are greatly appreciated. Please share them in the comments section.
Cheers to Helen and Leonie for their advice on adding winter color to the landscape and for the aromatic start to showcasing historic plants in the gardens at 1750 House. Until next month, happy gardening.
Other sights from the February greenhouse…
Not to be upstaged by the witch hazel, and just in time for our first Fragrant Year post, Liz Lemon is blooming and filling the greenhouse with her lovely citrus scents. New seedlings sprouted this month.
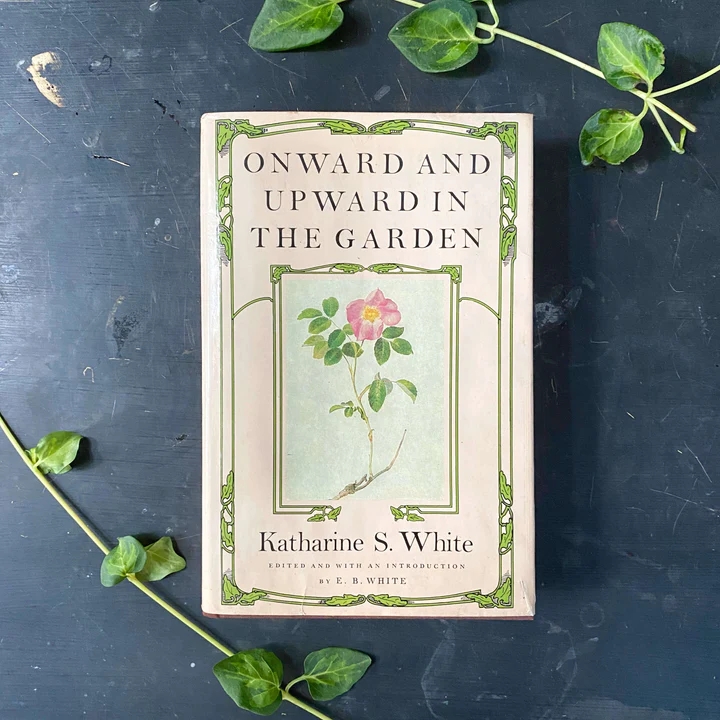
The final selection of writing in Katharine Sergeant Angell White’s Onward and Upward In The Garden is dated March 28th, 1970. “By March,” she writes, “for those of us that live in the Northeast, the summer seed and plant orders are in. From Washington north to the Canadian border and east to Maine, the tender seedlings and plants raised in hotbeds, cold frames or greenhouses now must wait for their final snowstorm before being put into the ground. The gardener has finished his midwinter reading of Christmas gift books and laid his plans for new enterprises for the coming summer. It is time for him and for me to get out of our armchairs and take stock.”
Katharine Sergeant Angell White (1892-1977)
With our unusually cool spring and our last dip of mid-30-degree weather occurring just last week, Katharine’s 1970s Maine March was very much our 2023 Connecticut May. But as Katharine was eager to point out then, the time had finally come to spring forward into action. And now our time has finally come too. The job of filling the garden beds with our wintertime inspirations has arrived. Even though there are 53 years and two months between then and now, between Katharine’s Maine and my Connecticut, this is exactly the sentiment and excitement that propelled the gardens at 1750 House these past two weeks. The last of our seedlings (the basil and the okra) said goodbye to the protective shelter of the greenhouse and are now tucked in between clusters of 3-foot-tall brandywine tomatoes and fast-growing, shiny-skinned lemon jalapenos. For the first time in seven months, our growing station is empty. The 2022-2023 greenhouse diary entries are complete. Year one is officially in the ground.
We pretty much sailed through our first year of greenhouse gardening on the coattails of Mother Nature and a learn-as-you-go approach. In doing so, we found our way to specific techniques and procedures that helped us understand the greenhouse way of gardening over the course of our first New England winter. Much of the information we shared in previous posts is relevant specifically to our area, our climate, our specific type of greenhouse, but we also learned about a few universal tips and tools that would help any gardener no matter where you live or what you grow. In this post today, we are sharing information about six of those universal helpers. We couldn’t have gotten through two seasons without them, so if you are new to greenhouse gardening I hope they will help you too. Please note, none of these recommendations are sponsor supported. We have no connection to these companies and are not representing them for any financial incentive. We purchased all of these products at full retail price and wholeheartedly recommend them for the helpful time-tested benefit they provided.
Let’s look…
Moisture Meter
The number one cause of any failed garden generally tends to be overwatering. It can lead to pests, disease, root rot, slow growth, fungus, lethargy and soggy soil. I know for certain because I experienced much of this first-hand last year. After fifteen years of Southern gardening in a region where the ground usually remains hot and dry throughout much of the summer and almost daily watering is required, I was used to that rhythm of attention. When we moved north I completely underestimated the naturally moist conditions of New England soil. Although we did have a beautiful and vibrant garden in 2022, some areas lacked a lush, reassuring strength and a robust demeanor. I came to learn, that was in part due to bland soil and in part due to too much coddling. As it turned out, I overwatered by bucketfuls practically every day last summer.
A new form of education began with the moisture meter in the Fall in the greenhouse. It really helped teach me the true amount of water that each plant actually needed as opposed to visually guessing the amount I thought it needed. This inexpensive water wizard (about $8 on Amazon) is hands-down one of the most important garden tools you could have, right up there with a shovel and a rake. By simply inserting the copper stem into any garden pot, it instantly tells you how much moisture is in the soil.
This information is especially great when it comes to caring for a variety of plants that have a variety of different watering needs, like the kind we were raising in the greenhouse. For example, succulents like dry soil with occasional watering. Parsley on the other hand likes moist soil with regular watering and black-eyed susan vines never, ever want to be on the dry side of the moisture meter. If the meter flops all the way over to the right – overwatering is most likely an issue. So helpful! Every day, throughout the fall and winter, I inserted the moisture meter into each pot in the greenhouse to make sure everything stayed appropriately hydrated. Now that we are on our way to summer, the moisture meter can be used to test the garden bed soil as well as indoor houseplants, so there’ll be no overwatering this year. I’m officially trained.
Magnifying Eyeglasses
This recommendation may seem a little kooky, but if you want to keep pests away from your greenhouse over winter you have to get close to the plants and inspect them regularly to make sure they are not harboring minute critters. These magnifying glasses are actually made for watch repairers, but they are really great for garden work too. I’m legally blind in my left eye, so getting any help up close for my good eye is always appreciated and these glasses offer lots of opportunities to look at things from all directions. Both of the lenses move up and down and side to side independently, allowing you to get inside the middle of a plant where many pests tend to hide. Each lens has its own LED light that operates independently too so you can really see what you are looking at no matter the time of day or night. Different magnifying lenses with different strengths adjust the field of vision and are easily interchangeable.
As you may recall from previous posts, in the winter we had a pretty significant outbreak of spider mites and aphids in the greenhouse, both of which are difficult to see with the naked eye. I would never have never been aware of these critters before irreparable damage set in, without the assistance of the glasses. Despite their very technical appearance, there’s a magical upside to these guys too. When you put them on you become an explorer of a micro-universe. Plants look so cool up close. Bugs too for that matter.
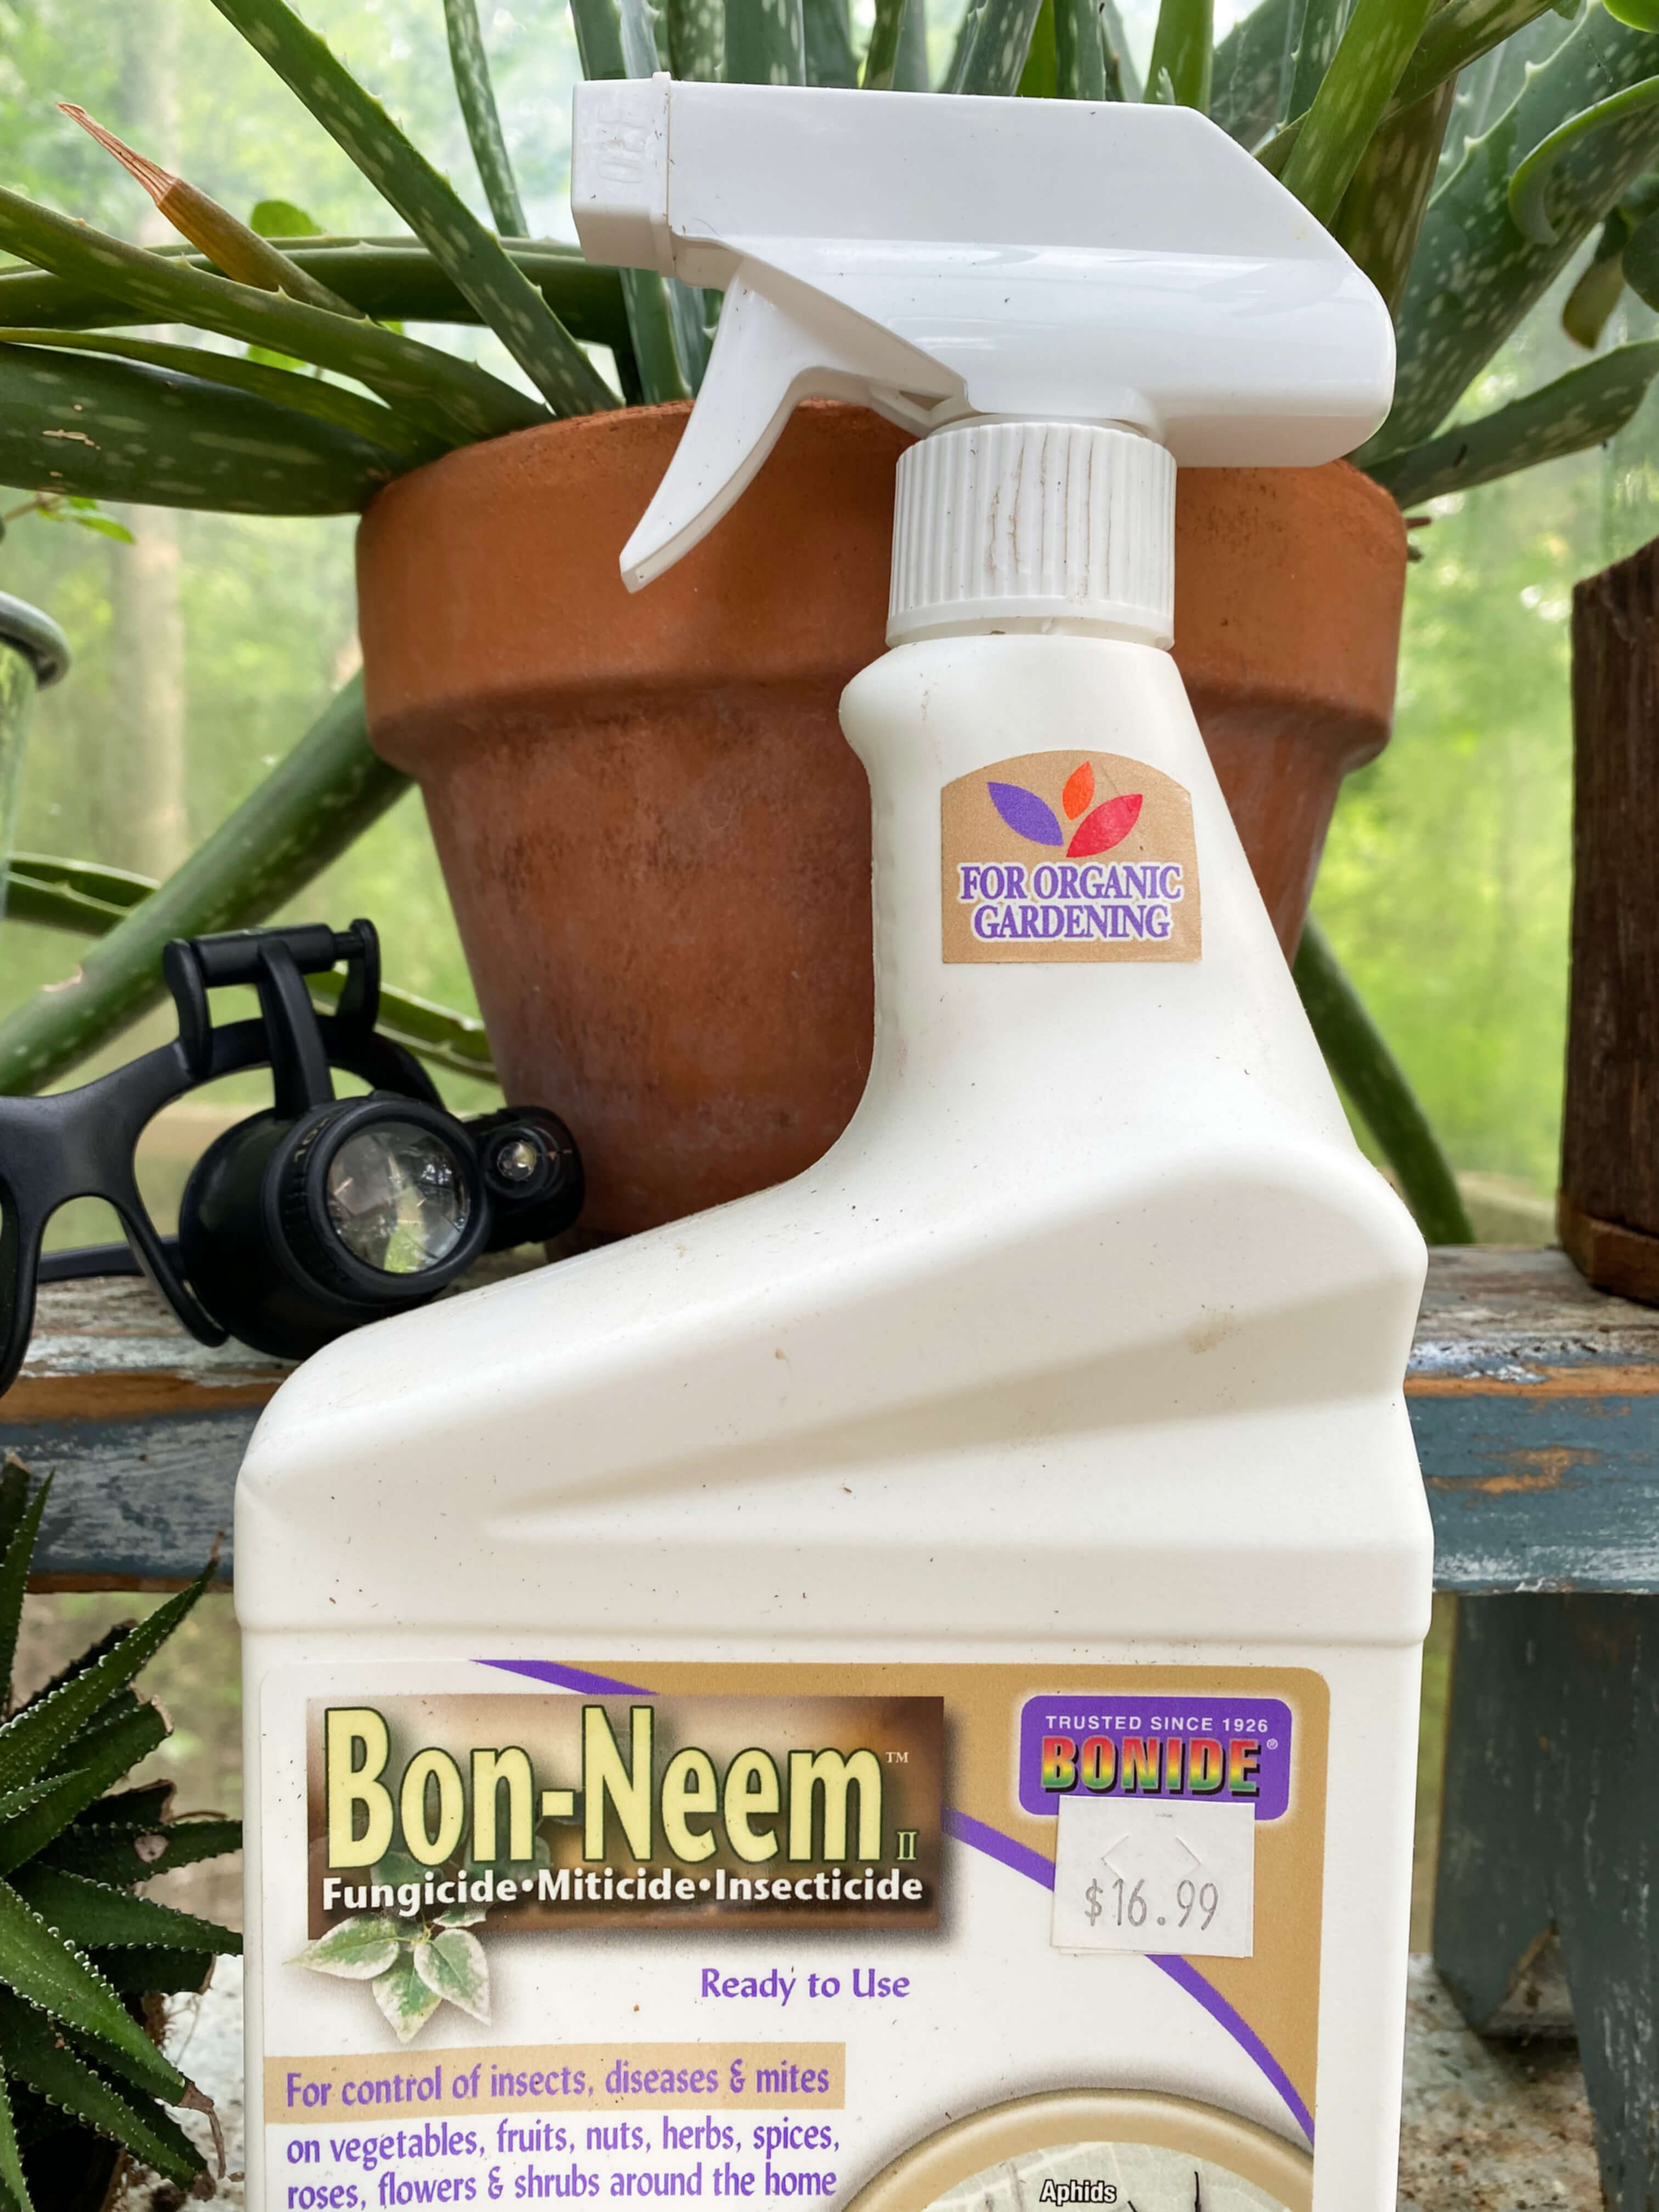
Bon-Neem
In lieu of the spider mite and aphids outbreak, this Bon-Neem spray, although on the more expensive side ($17 a bottle) is effective in quickly broadcasting a lethal dose of all-natural organic neem oil. Since spider mites adore hot dry air, they breed like crazy. The adults won’t survive Neem spray but the eggs are unaffected by it so it took six applications (three bottles total) over the course of a month to make a significant dent in our mite and aphid population. It didn’t eradicate them completely – our next recommendation piggybacked on this spray to get the job done – but the oil acts like a protective coating against future pest invasions, so it’s definitely worth it.
Please note, if you decide to use this spray, it has a strong odor. I found it best to get all greenhouse tasks done for the day first before spraying it on the affected plants. Once everything was drenched, the greenhouse was closed up, and left, undisturbed, for 24 hours, so the Neem oil could do its work. After that amount of time, the odor dissipates completely and the greenhouse is on its way to becoming pest-free.
Isopropyl Rubbing Alcohol
Isopropyl alcohol is a much less expensive ($4.50 for 32oz) but yet very effective method when it comes to getting rid of spider mites and aphids. It’s more tedious than Neem spray since you have to wipe down the entire leaf of each plant (front and back) but it’s instantly effective and definitely worth the time if you want to make 100% sure that the treatment is reaching the problem areas. Like the Neem spray, this won’t kill spider mite eggs, so you need to reapply it again 3-4 days later, but that second dose is a good opportunity to investigate each plant to make sure the first application worked.
I found that a soaked cotton ball was ideal to use on the larger leafed plants like the peppers and basil, while cotton swabs, with the plastic connector (as opposed to the cardboard ones) were better for smaller more densely foliaged plants. The swabs easily bend in half and get around thick stems, delicate flower petals and hard-to-reach spots. Also, if you choose to go this route in your pest management plan, make sure you stick within the 70-90% percent isopropyl range. Anything above 90% will harm the plant.
Creamer
Although I have tried watering cans, hoses and sprayers of all shapes and sizes, nothing beats a creamer when it comes to working in small spaces with fragile seedlings. This vintage 1960s restaurant ware creamer had a cracked handle that had been carefully repaired at some point in its long life. Aesthetically, it might not be destined anymore for the coffee table but it is wonderfully useful in the greenhouse. Holding about a half cup of water, its narrow spout provides a perfectly slow, steady and gentle steam of water, ideal for fragile, newly emerged seedlings. You can drip-drop water on plantings or dump the whole container at once, but the beauty of using a creamer over a traditional garden hose or a bulkier watering can is the finite control you have over the amount of water you are pouring. Plus the slim size makes a handy temporary vase for bud clippings as you prune flowering plants.
Worm Bucket
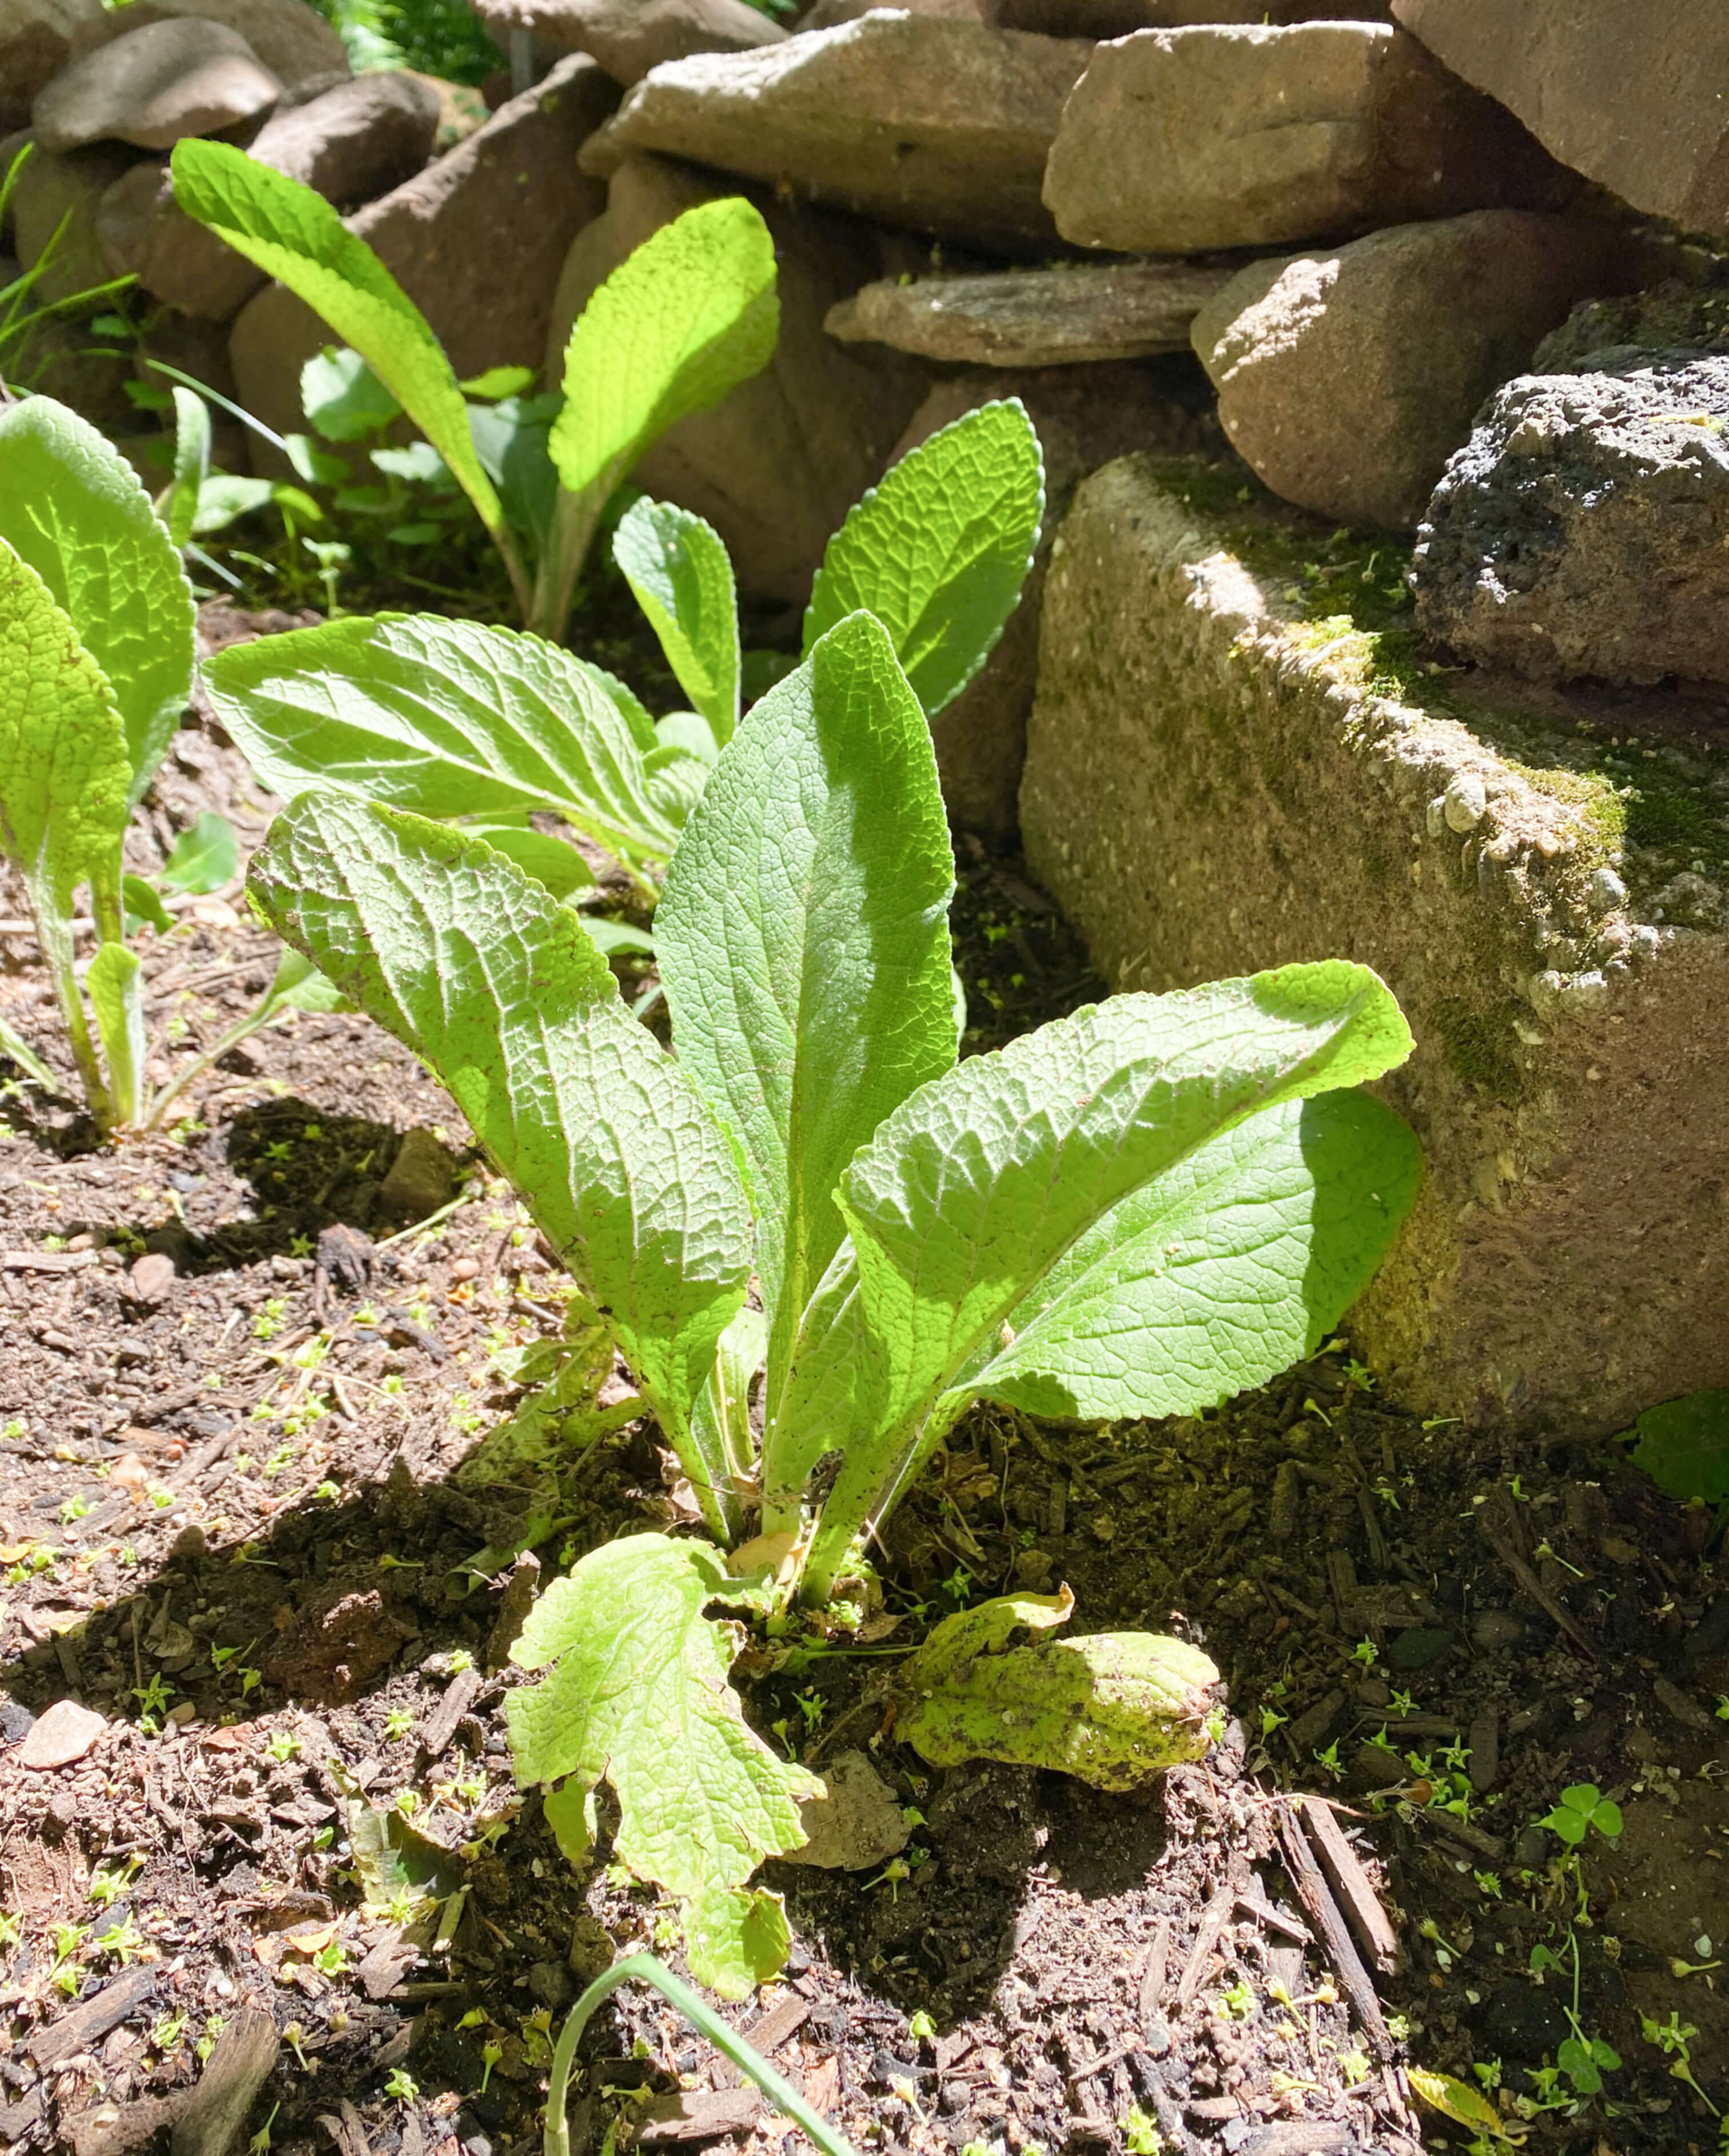
At the beginning of autumn, I filled a 10-gallon steel bucket with a bag of organic potting soil and added a few worms from the garden. I wasn’t sure if this was a good idea or not for the worms, but I wanted to have extra garden soil on hand, for repotting and replenishing throughout the cold months, and I thought the worms might help in their ability to enrich the soil through their castings. As it turns out, warmed by the heater and given a weekly light watering, the worms settled into life in the bucket and made a happy home there. As I scooped trowelfuls worth of soil into potted plants periodically throughout the season, worm eggs wound up randomly and unknowingly in several pots and seed-starting trays. Come early spring, I spotted some baby worms wriggling around with the snapdragon and foxglove seedlings. Did the worms help fertilize the soil in a significant way? I’m not sure, but in the least, they probably helped aerate it. Now fully planted along the edge of the woods, the foxgloves are growing with unrestrained zeal these days. Perhaps the worms helped give them a nutritious head start.
Foxglove
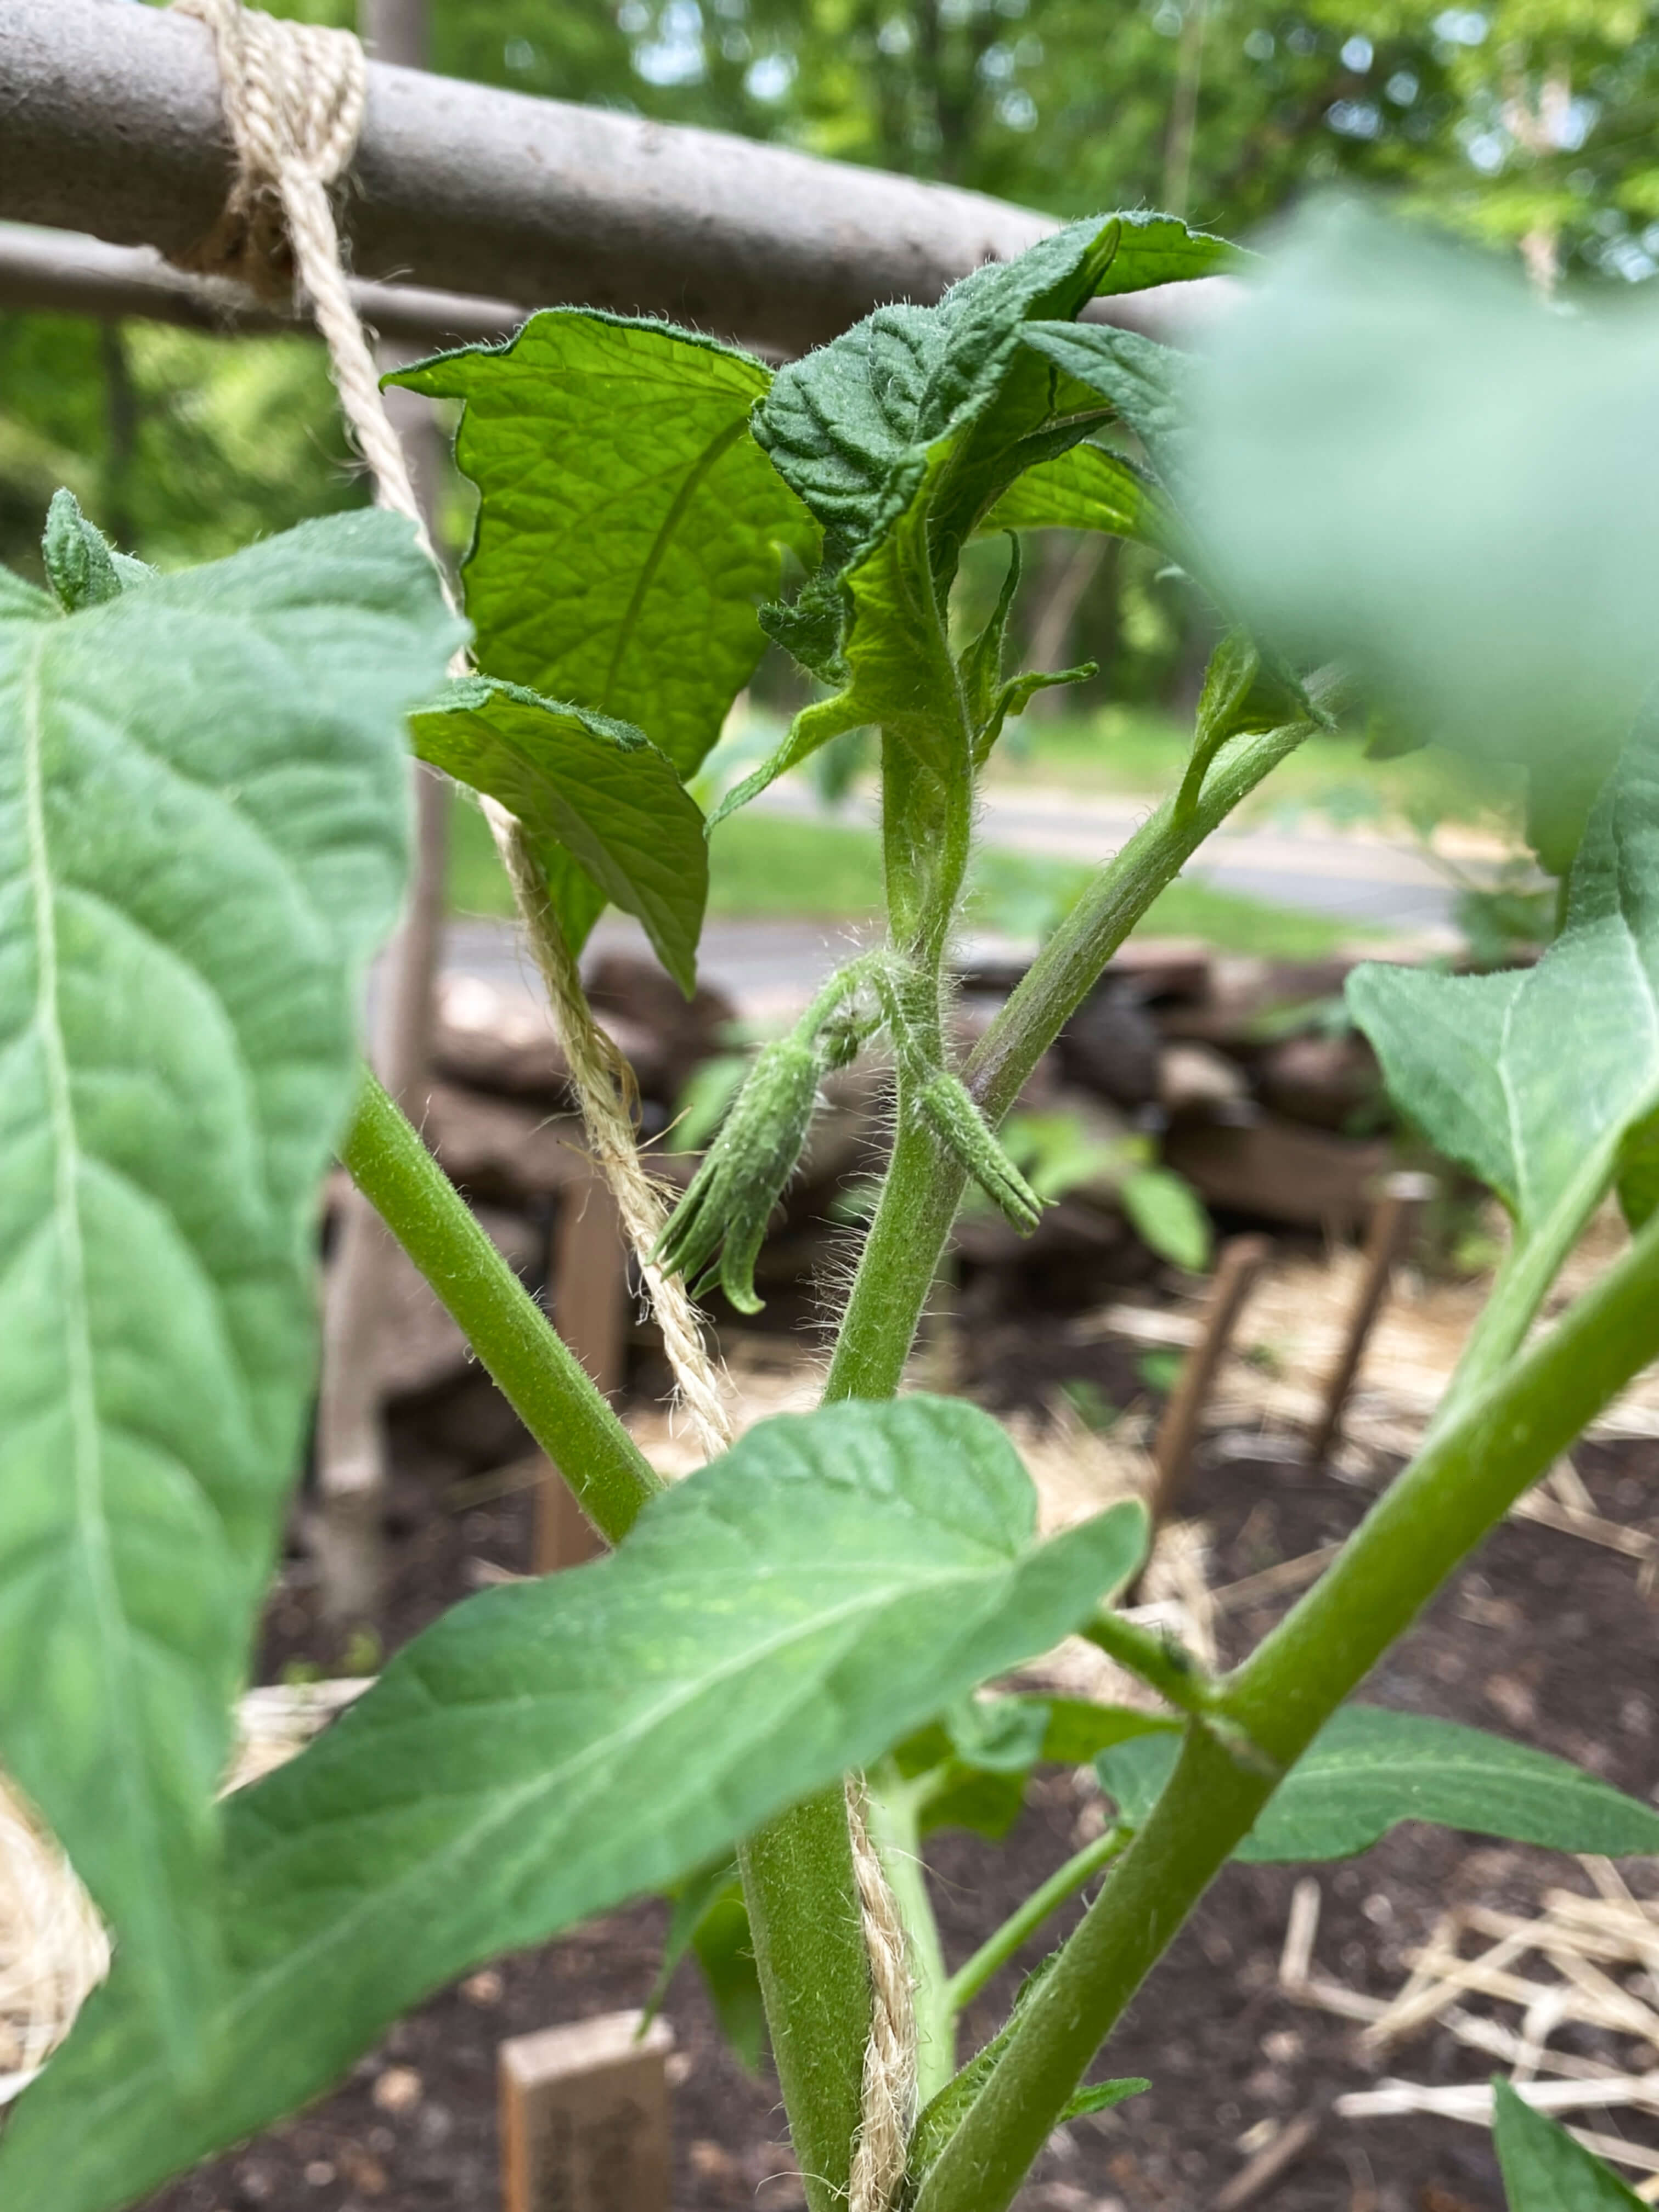
Gardening can be a tricky balancing act between what mother nature offers and what you desire. In the greenhouse, you not only create a biodome of possibility but also a unique environment controlled by instinct, device and determination. These recommendations combined with our winterization wrap and our little workhorse of a heater were methods that worked well for us and in turn, I hope they work well for you too. They really jumpstarted our summer garden the moment the seasons changed this year. Three weeks into May, we already have flowers on our tomatoes, beans on our climbing great northerns, baby fruit on the cucamelons, and two handfuls of spicy and sweet peppers.
Brandywine Tomato Great Northern BeansCucamelonOrange Sun Sweet Pepper
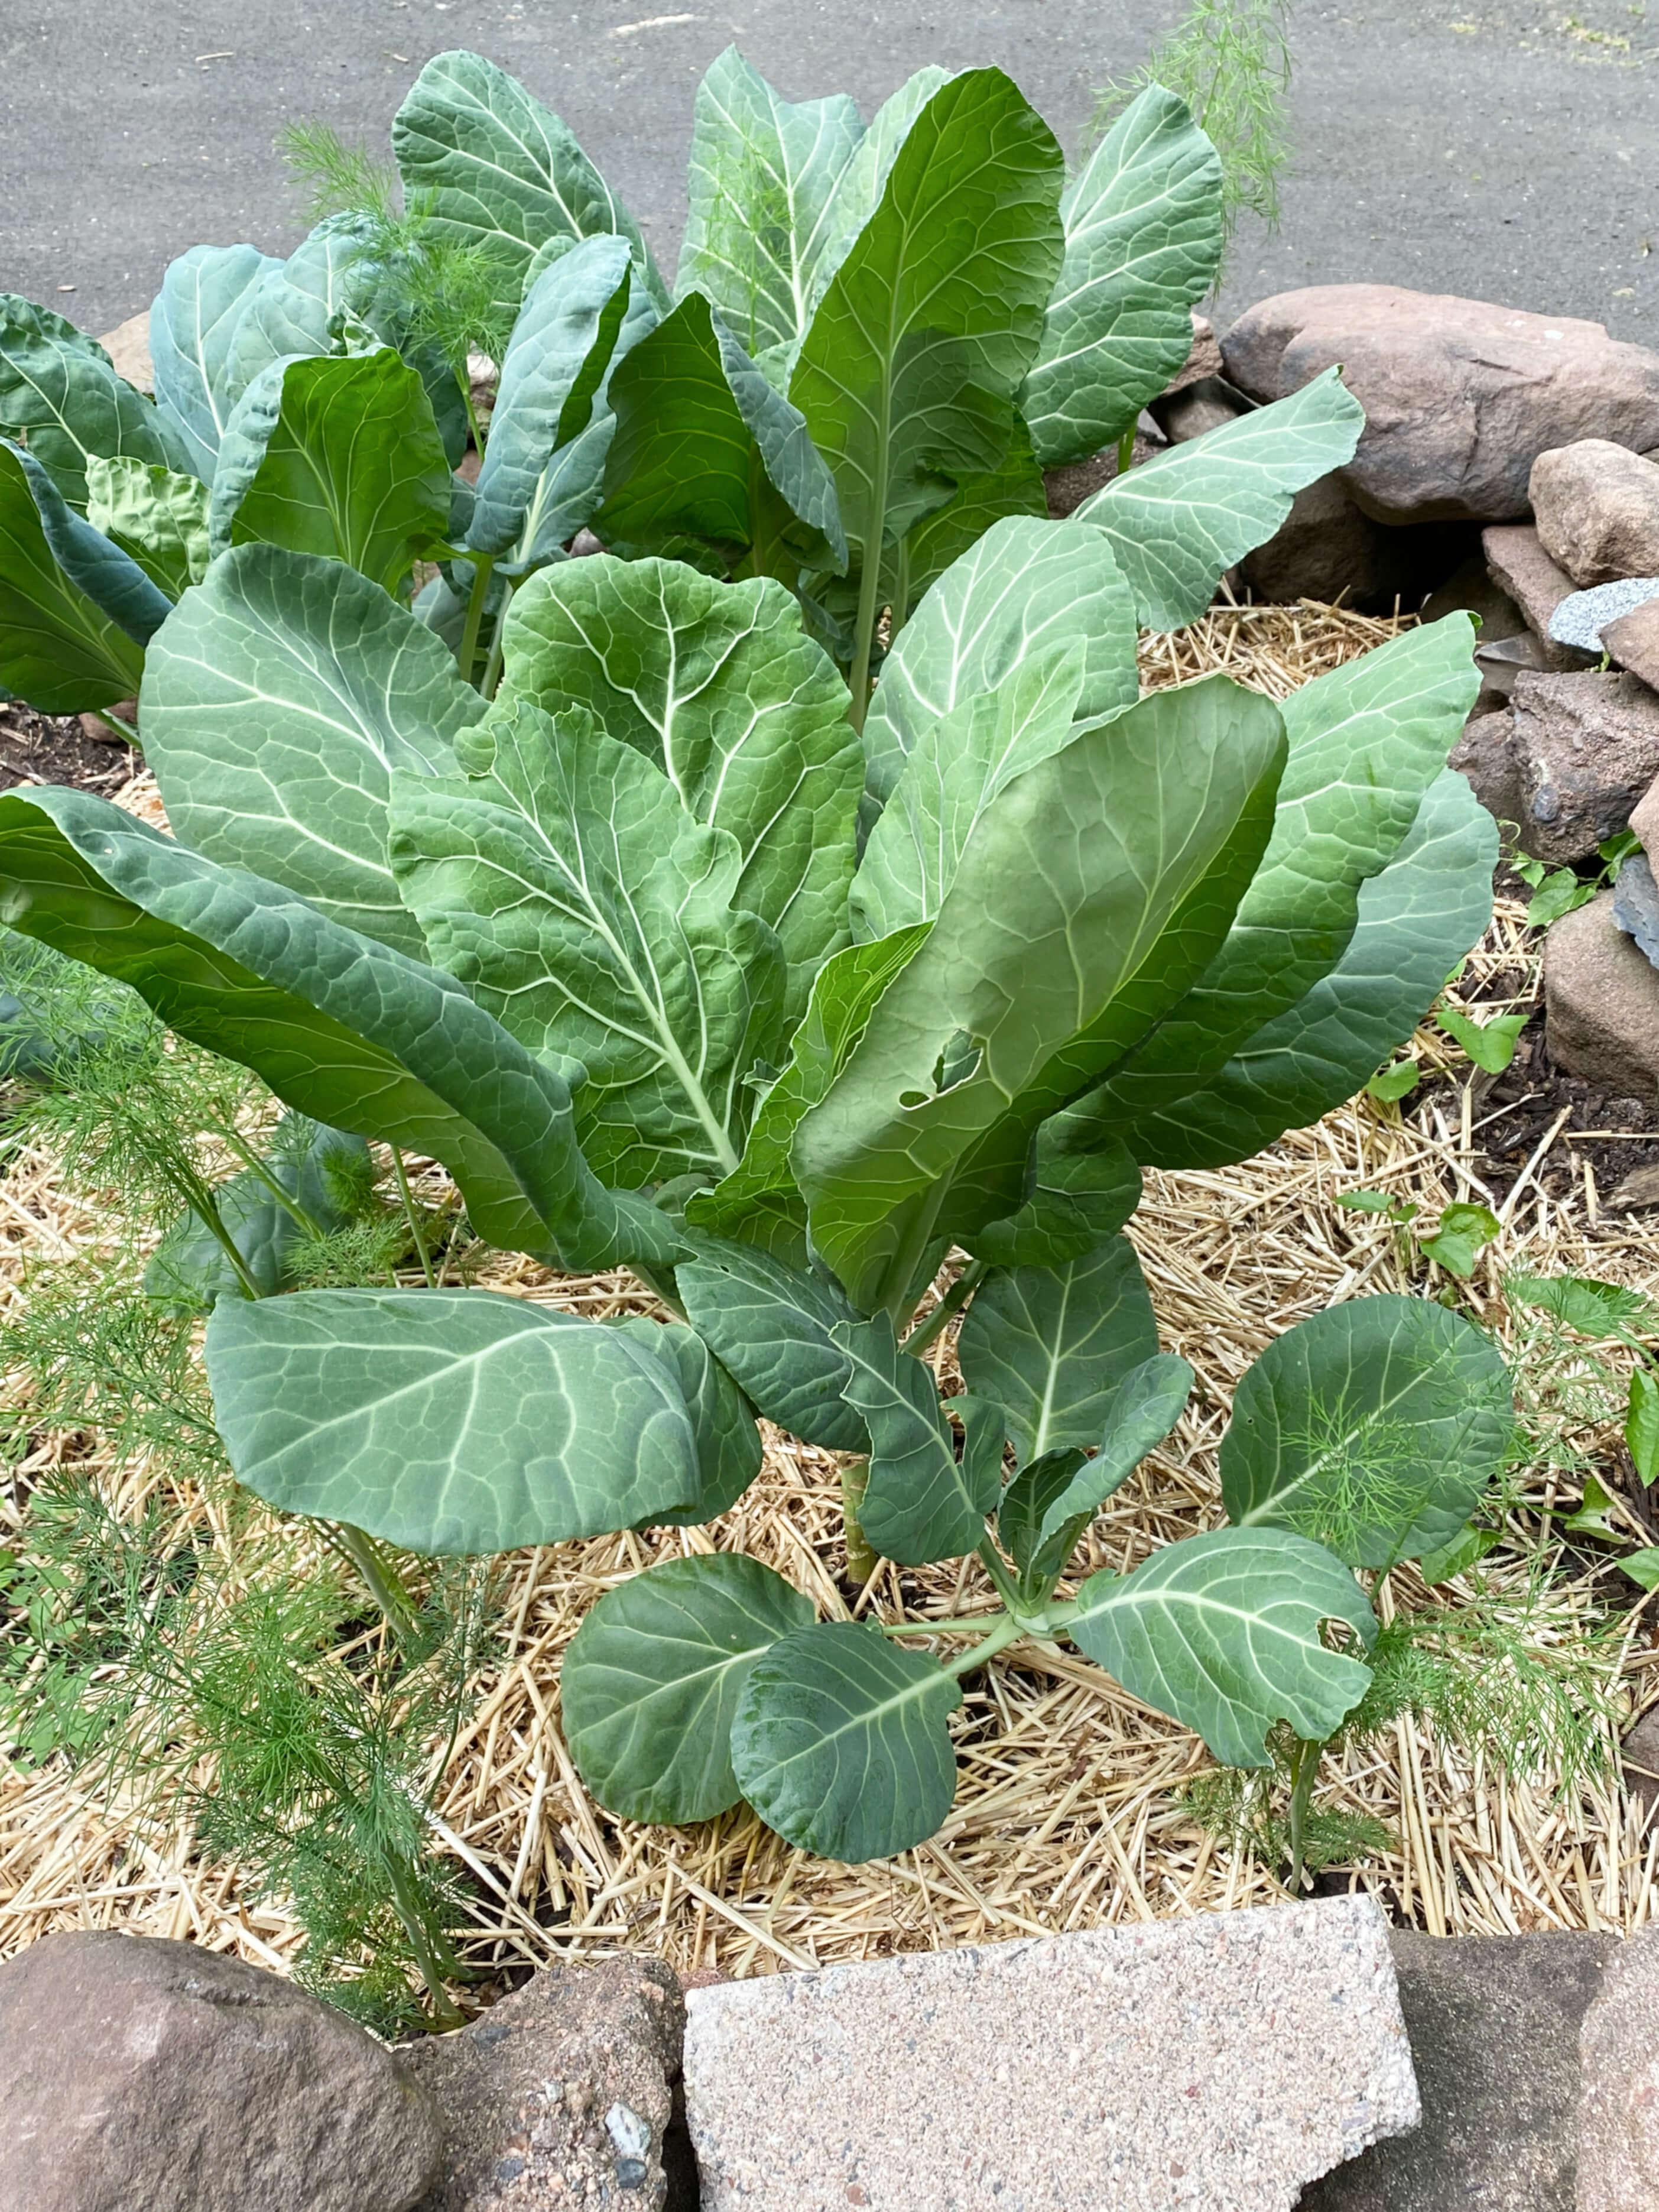
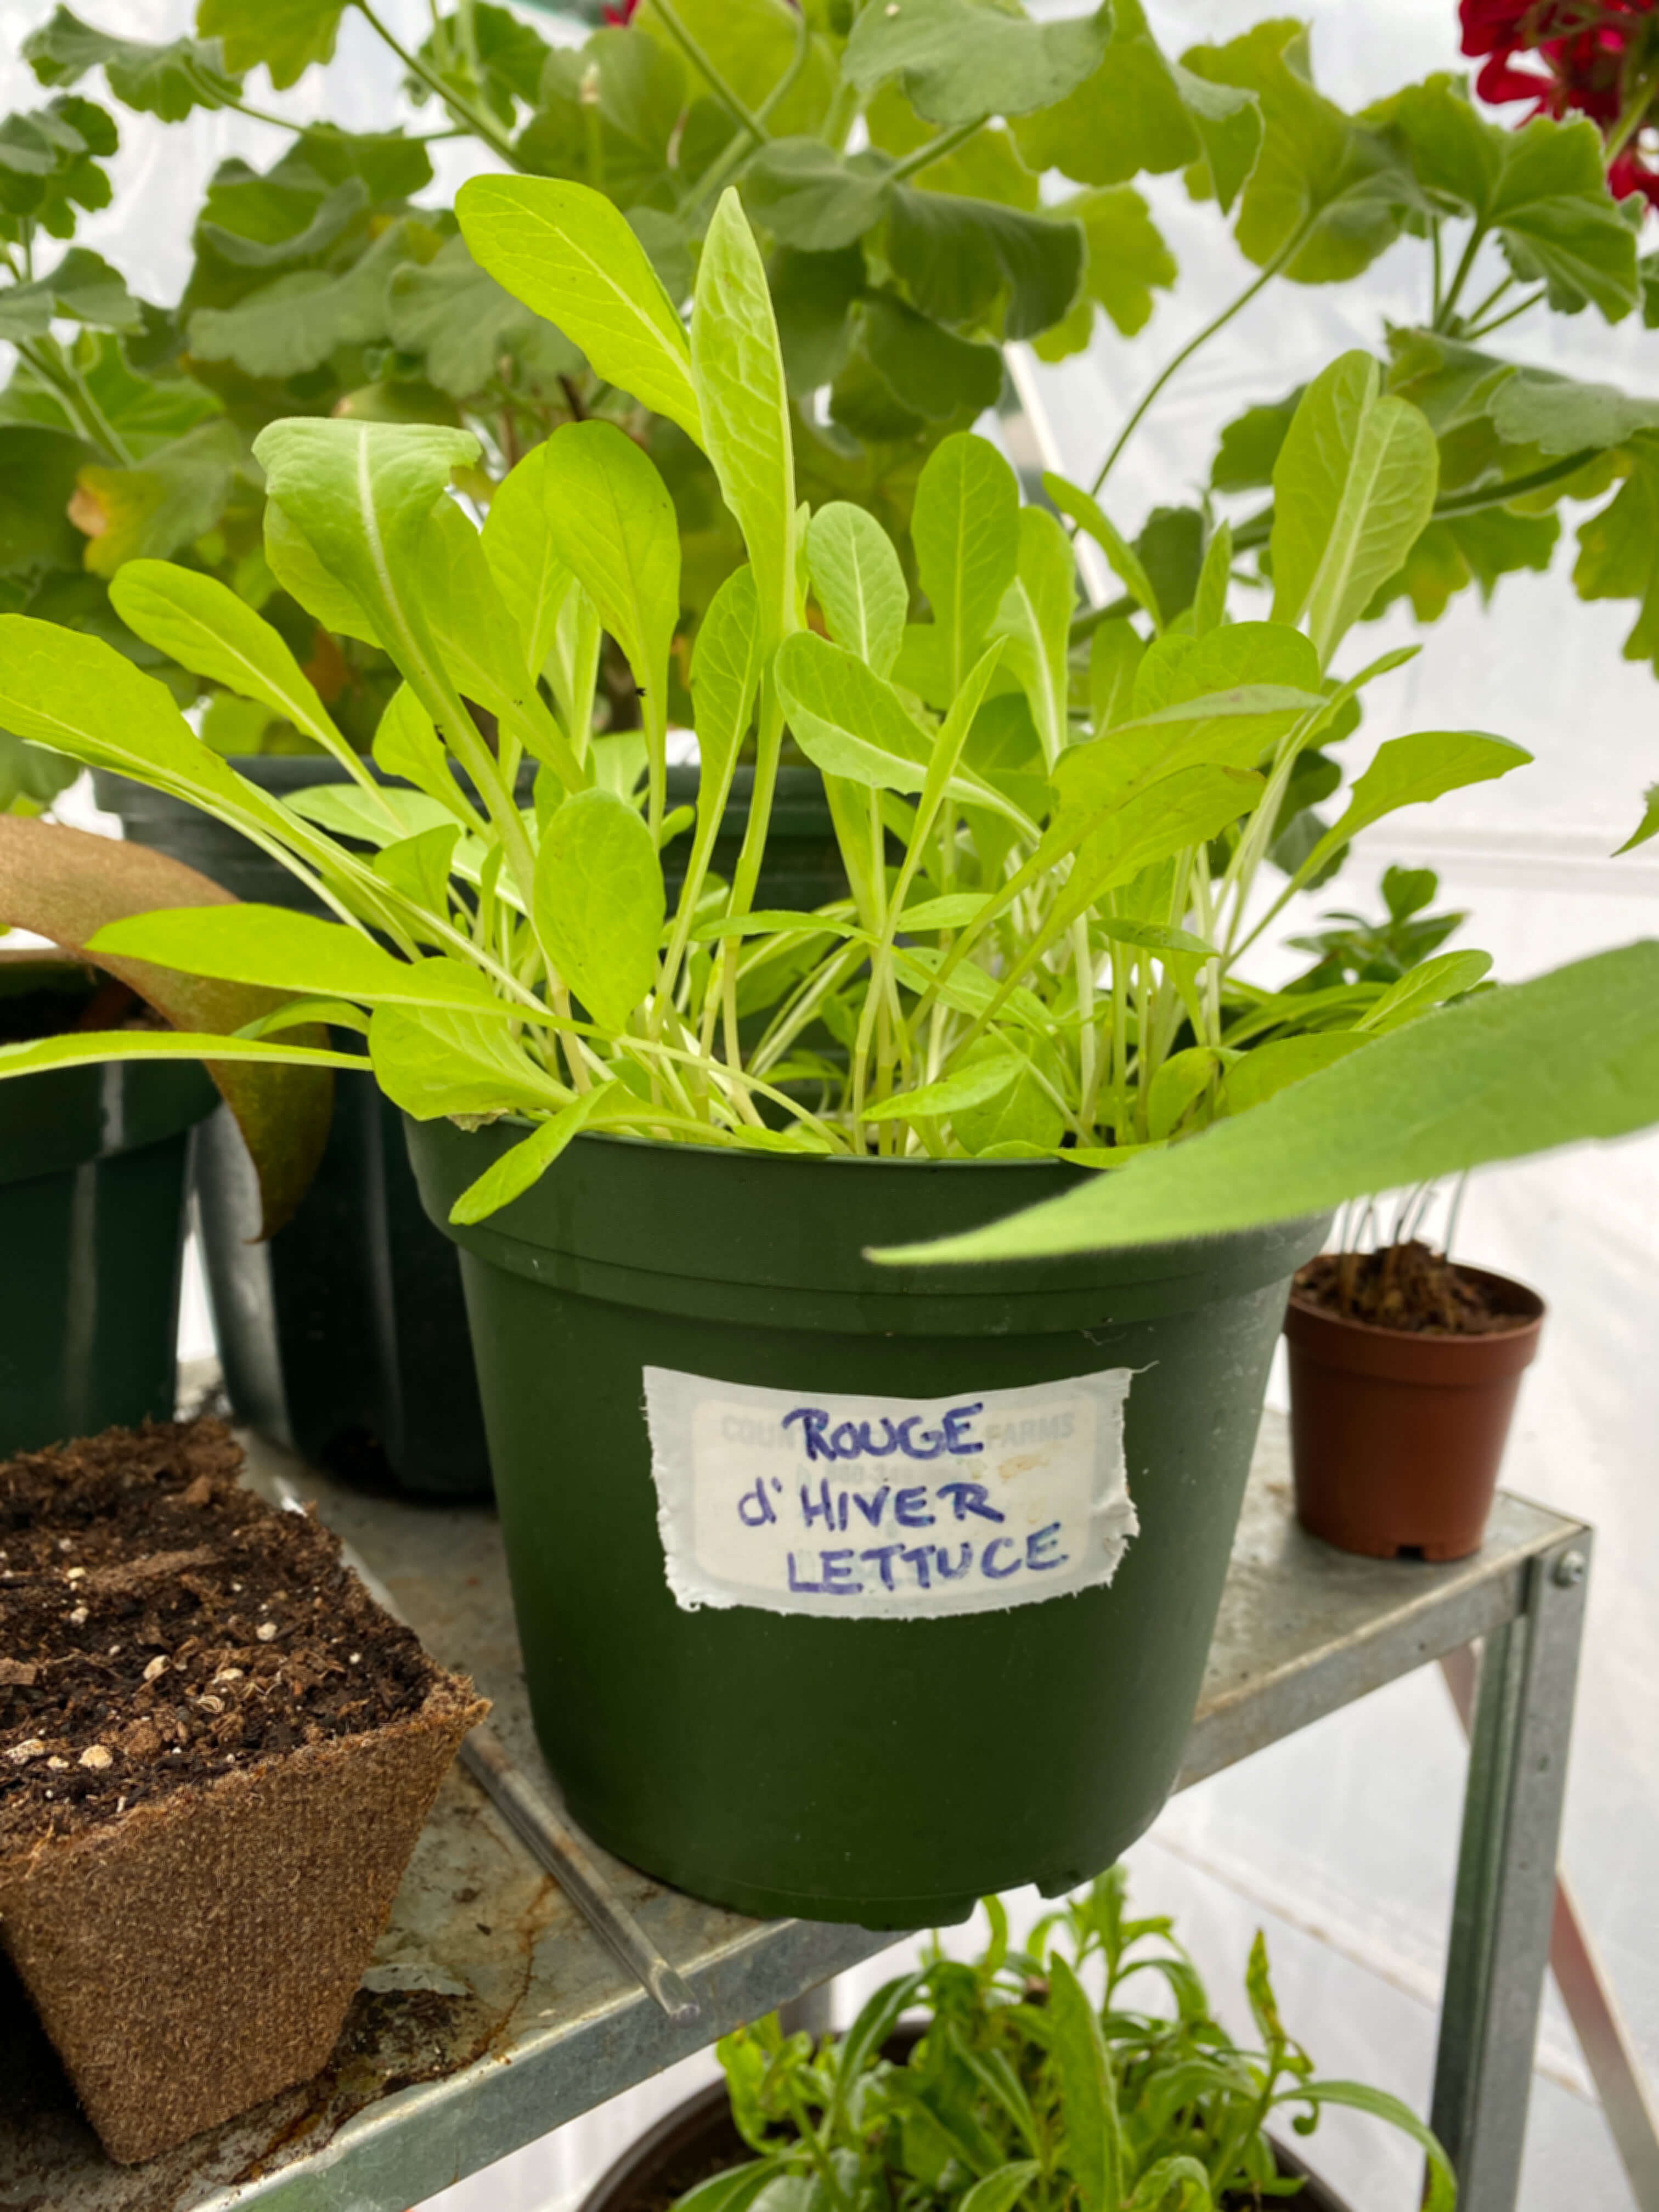
The lettuces are now the size of full heads with tightly packed leaves and crisp texture. The herbs are flourishing. The collard greens are sporting leaves as big as turkey platters. Yesterday morning we harvested our first batch of rapini, just as the zucchini seeds poked their heads out of the ground. None of this spring vigor would have been possible without the help of the greenhouse and the joy all this seed-starting and plant-tending brought over the winter months. Thanks to the greenhouse I think we are well on our way to one delicious summer.
Collard GreensRapini
The only things that struggled in their transition between greenhouse and garden were three Mexican sunflower plants and one okra plant. They didn’t like that surprise dip into 30-degree temperatures. Interesting to note, those are both Southern heat-loving plants and perhaps the most vulnerable things we are growing in our cooler New England climate. As we learned in the history of American gardens post, nostalgia has played a big factor in how we have laid out our U.S. gardens and with what since the days of the pilgrims. Last year, I was excited to grow two of my most favorite Southern plants here in New England based solely on great memories, but maybe this area is not the most appropriate place for them. Next year I might grow them, only in the greenhouse, where they can be bathed in heat and light from seed to bloom. Little lessons and ideas sprout each day around here.
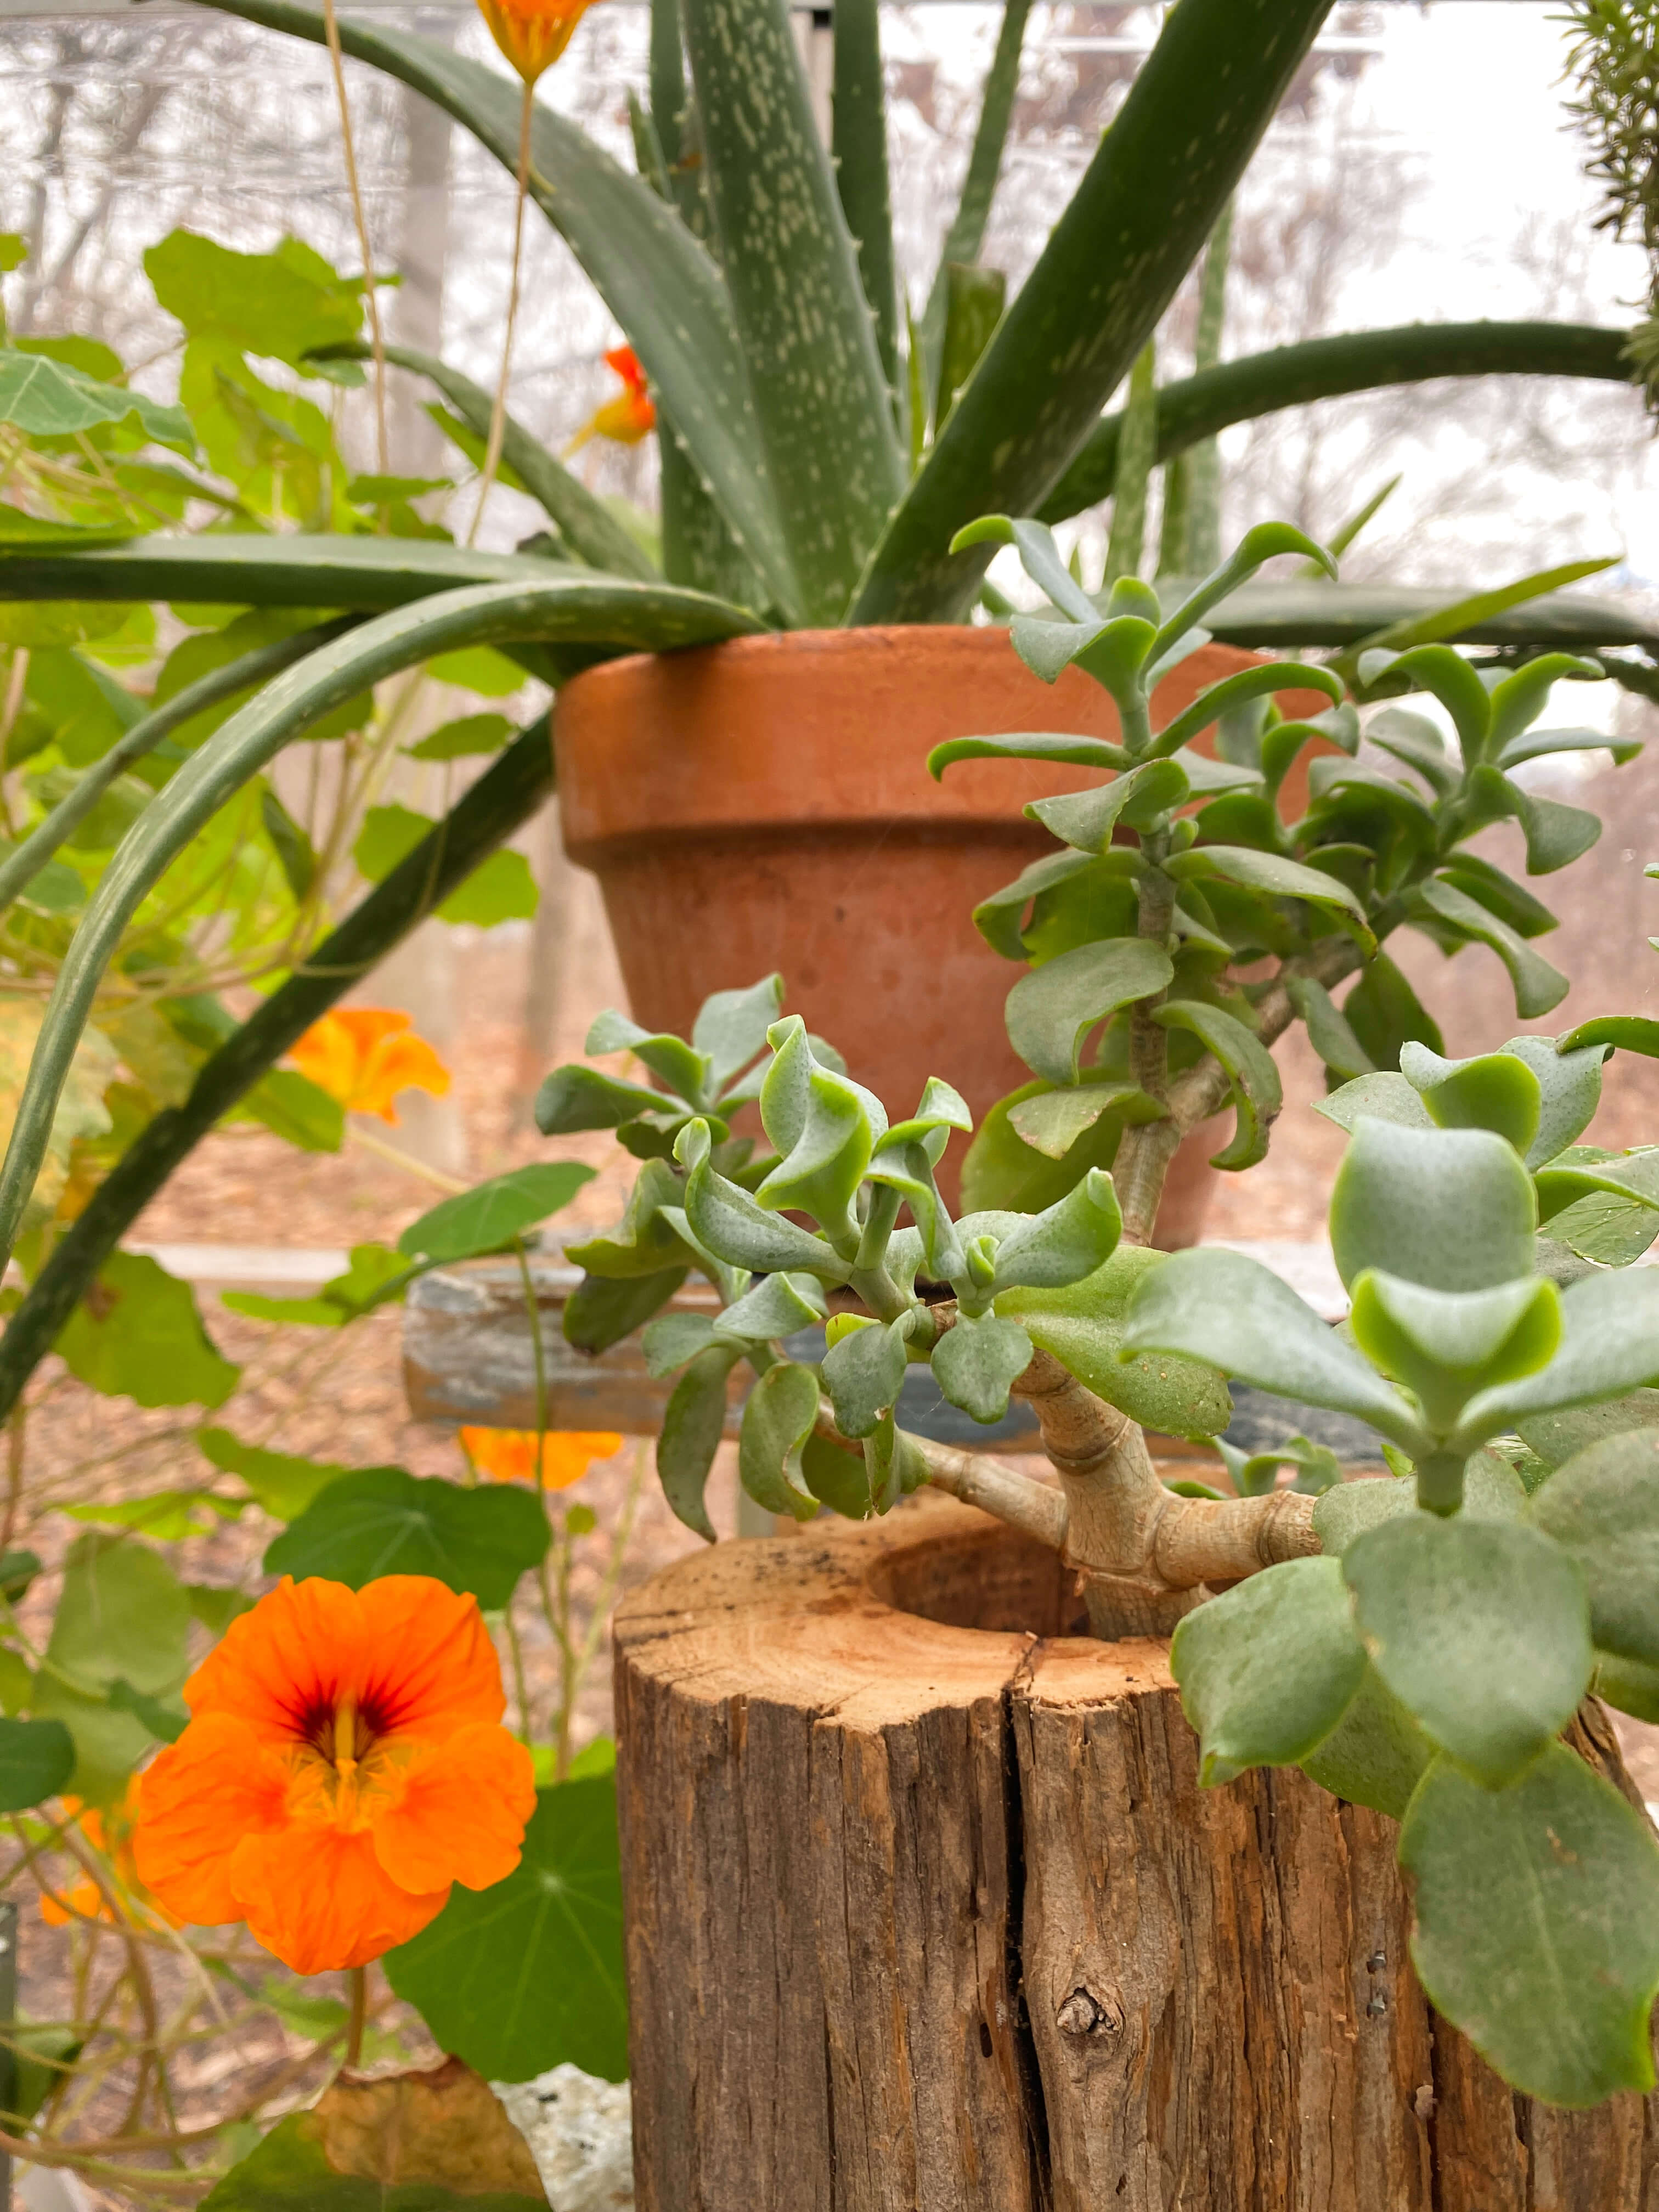
Once so full of plants, it was pretty odd to see the greenhouse return to its empty shell state. It’s been over nine months since it has been this devoid of greenery and although it still is just 4’x6′ in size, it now feels as big and as cavernous as a palace sans plants. To add a little cheer over the summer, I brought the succulents back to the shelves, and am considering adding some shade-loving plants that would enjoy the dappled light and summer leaf coverage overhead. Over the course of these warm months, while the greenhouse rests, we’ll give it a bath inside and out, build additional shelving to maximize space, and add a fresh layer of pea gravel to the floor so that it will be all ready to greet Autumn and a new set of gardening goals.
Katharine and E.B’s home in Brooklin, Maine
In November 1975 at their farmhouse in Maine, Katharine’s husband, E.B. White, gave her a small greenhouse and a potting shed to commemorate their 46th wedding anniversary. Knowing the magical distraction a greenhouse could offer his wife as she bravely battled ill health, he was certain it was the most pleasurable gift he could ever give her. A year and a half later, Katharine passed away at the age of 84. She didn’t get a chance to enjoy her greenhouse for very long, but a gardener’s joy comes daily, in the moment-to-moment observations of tiny details and subtle nuances. A lift of a leaf. A burst of bloom. The sight of sun as it shoots a seedling sky-high. Katharine’s greenhouse may have offered her just eighteen months of comfort, but oh what bliss those day-to-day noticings must have provided. Should we all be so lucky. To know nature so intimately that it becomes an offering, a salve, a focus. To know it as something so reliable it becomes a resting place, an arresting place, despite all of our earthly distresses.
Katharine & E.B. White. Photo courtesy of bangormetro.com
This series was so fun and the greenhouse so encouraging over the winter months that we have plans to add a second, larger, more permanent greenhouse to our landscape which hopefully will be completed by next winter. Until then, I hope all you gardeners stay with us all summer long as we cook up a bevy of vintage recipes, highlight forgotten kitchen stories from history, and share updates from the 1750 House renovation project. For all you collectors out there, if you haven’t already, sign up for our weekly newsletter to see what new old heirlooms make their way to the shop this summer. And finally, if you are new to the blog, the first entry in this Greenhouse Diaries series began in December 2022. Begin at the beginning with that first entry here.
Cheers to our fellow greenhouse comrades who shared stories with us along the way of this six-month journey… to Katharine Sergeant Angell White, who inspired this series in the first place… and to our little joy of a greenhouse. We can’t wait to watch all these plants grow up over the summer and to see what the greenhouse might inspire next.
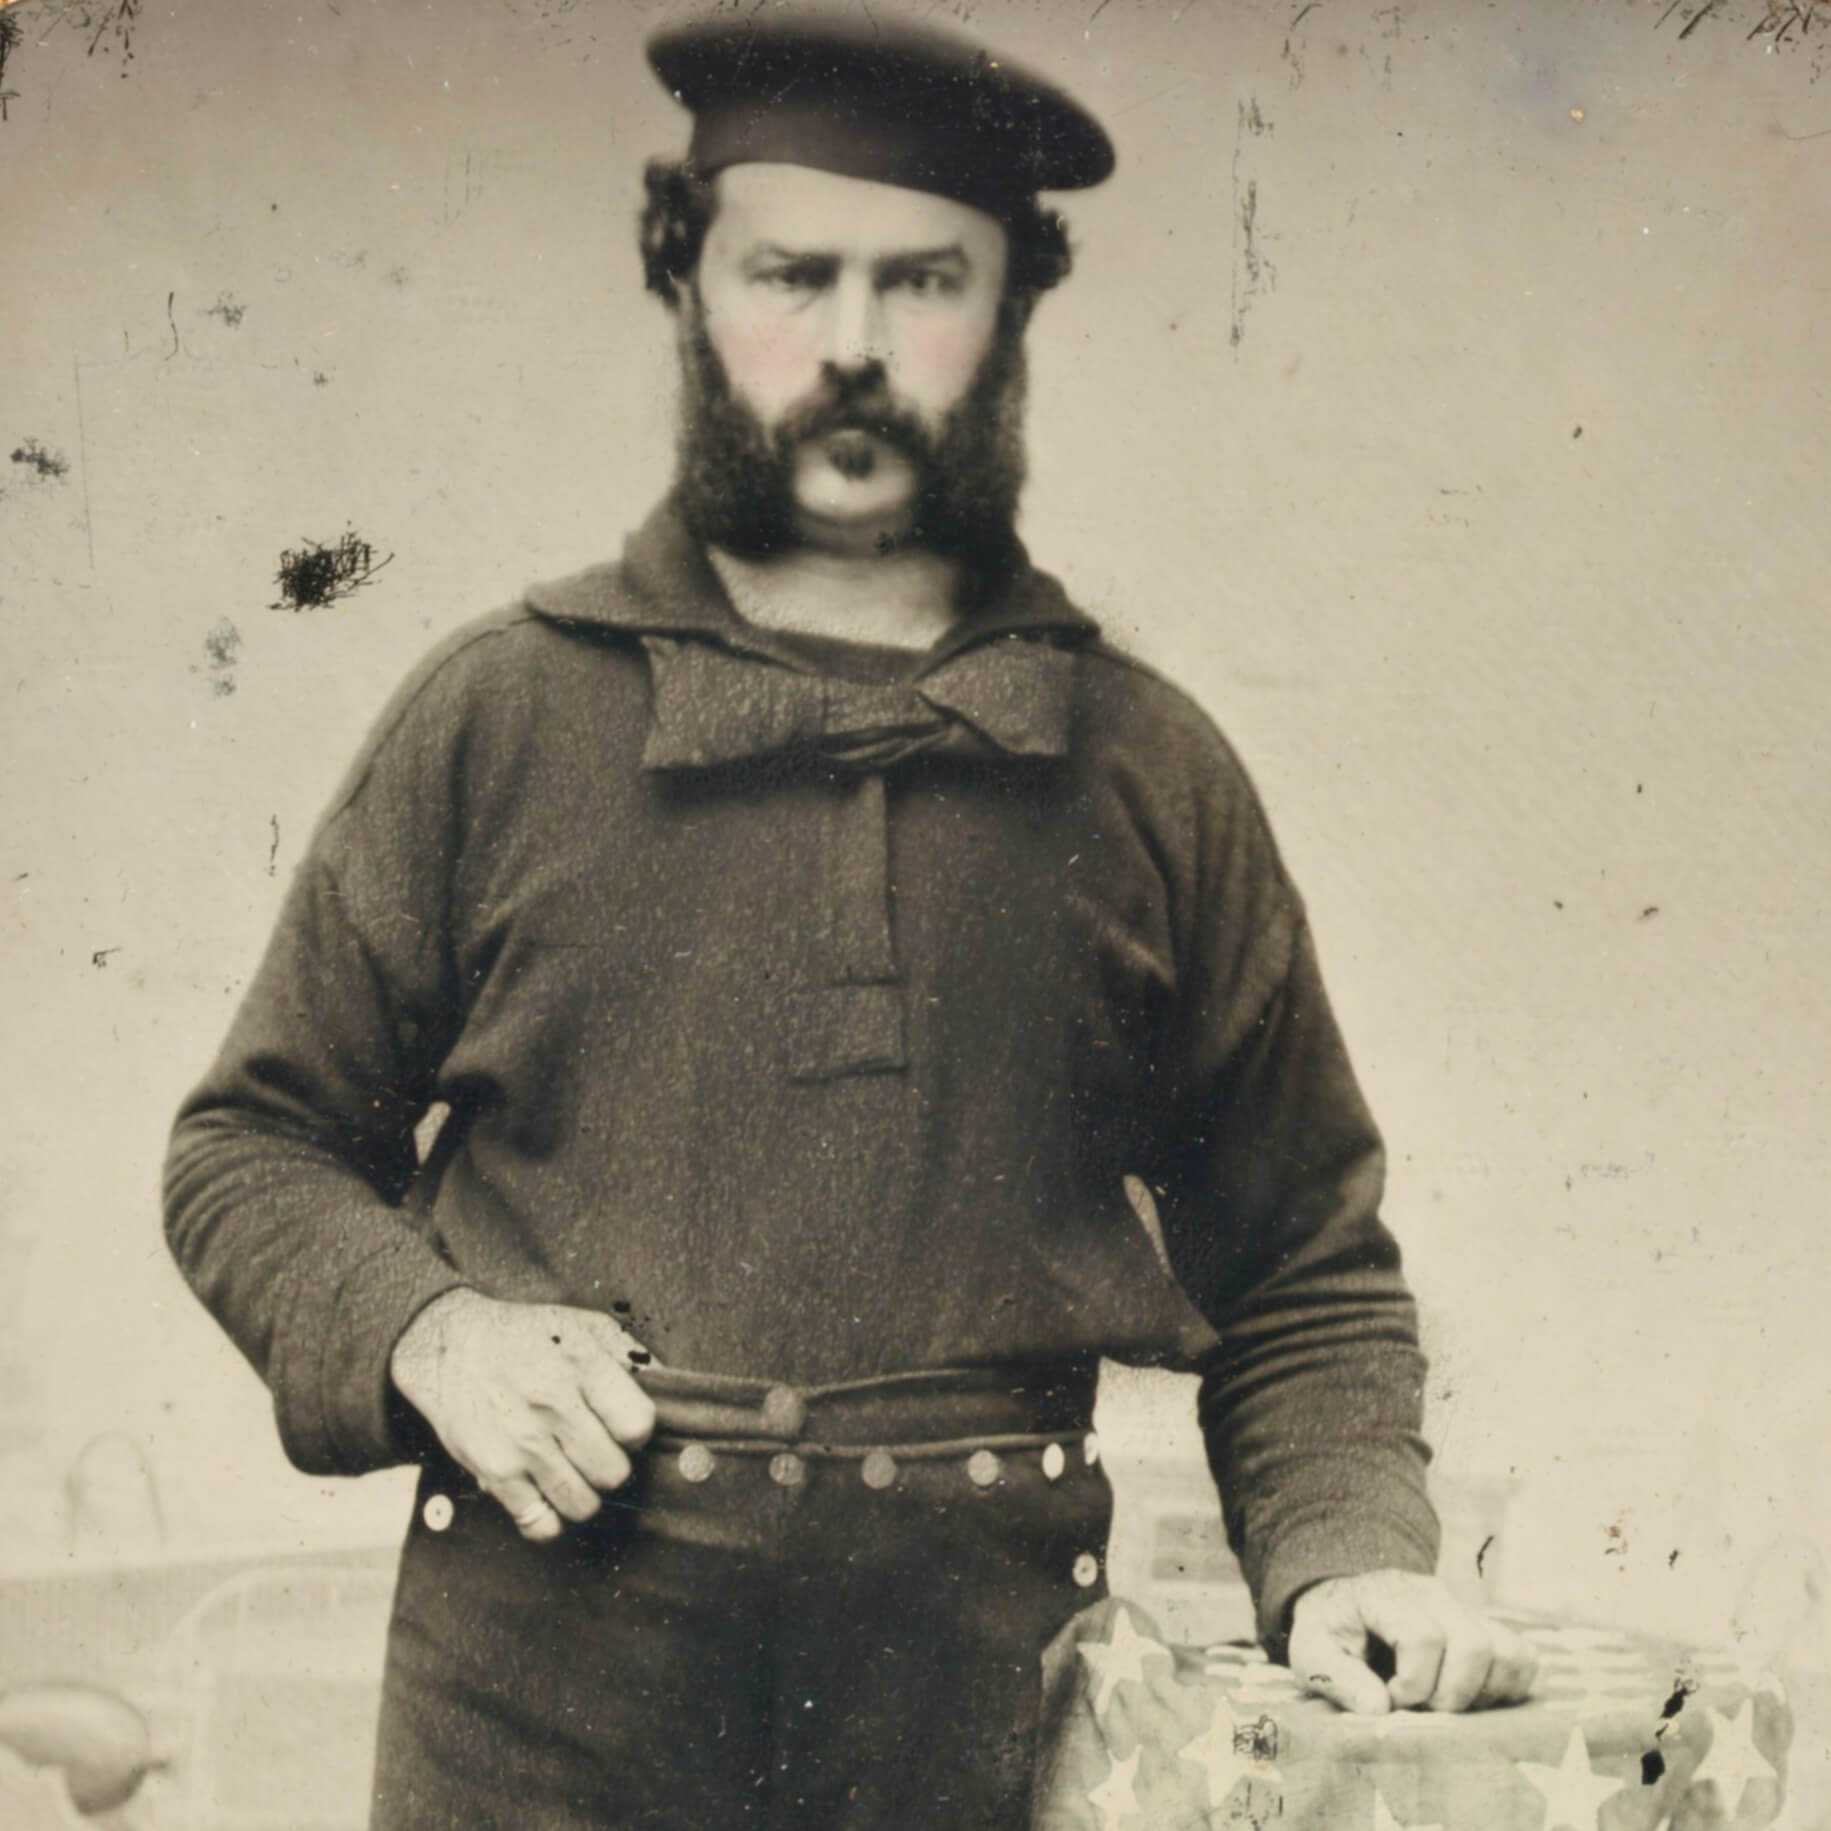
An unidentified sailor in Union Uniform circa 1861-1865. Photo: Library of Congress.
April 10th, 1861. On this day in history, if you were a sailor perusing the newspapers of Brooklyn, New York you’d find your next maritime adventure tucked in between advertisements for Shakespearean readings, housekeepers for hire, and rubber teeth dentistry services. There, in a want ad posted in the Brooklyn Evening Sun would be your future for the next several months or possibly years to come. The US Navy was looking for seamen. It would ensure a paycheck, food, medical attention, and a chance to see the world, or at least part of it, via ship. There would also be grog.
Brooklyn Evening Star – April 10th, 1861
Life aboard a 19th-century sailing vessel was not a gourmet affair. Unless you were the captain, sailors could expect to consume a diet heavy in hardtack (a tough, shelf-stable biscuit made of water, salt and flour) along with rations of salted meat, pork and fish, and possibly a vegetable or two like cabbage or turnips. Beverages available were typically three – water, beer and rum, consumed in that order as the length of time on the ship grew. Each stored in wooden barrels, water was a luxury that spoiled quickly and therefore was the first to go rancid due to inadequate refrigeration. Beer was next, oftentimes turning sludgy and sour, weeks into the journey. The only truly shelf-stable beverage was rum.
The USS Bienville, built in Brooklyn, NY served as a Union sail steamer from 1861-1867.
In today’s post, we are drinking like sailors and embracing a long-standing tradition that is still upheld by seamen around the world. The recipe is Hot Grog, a rum and water toddy of sorts that includes tea, fresh lemon juice and sugar. Back in the Navy during the 1800s, this drink in its simplest form of rum and water was commonplace – an expected part of everyday life aboard ship. Today it’s an ideal restorative for Spring. When temperatures can be cool at night and warm during the day it’s a comforting evening drink, a medicinal miracle worker for allergy season, and a celebratory cocktail served hot or cold depending on your weather and your whereabouts.
Rum and sailors have been companions for centuries. This recipe is definitely no new kid on the block. History states that the average sailor in the Navy during the 1700s -1800s consumed one-half to one pint of straight rum per day which could equal up to 27 gallons per year. A ration available to all men aboard, regardless of the type of sailing vessel, rum was both a highlight and a soothing salve for the spirit to get them through the hard work, the inclement weather, and the lonely atmosphere that surrounded life at sea. Food history also accounts for the fact that rancid water and spoiled beer left but one alternative for hydration. In that regard, rum was both a treat and a life-sustaining source of calories. But most importantly, it was a tradition.
Although there are a few different ways to make grog, today’s recipe featured here comes from The Mystic Seaport Cookbook. Published in 1970, this cookbook celebrates over 300 years of traditional New England fare offering a unique glimpse into maritime life. With a surprisingly extensive beverage section that includes several eggnog recipes, syllabubs, flavored brandy, punches and possets, Hot Grog is one the oldest of them all.
Portrait of Edward Vernon by Thomas Gainsborough
Dating to the 1730s, grog is attributed to British Navy Admiral, Edward Vernon (1684-1757). Nicknamed Old Grog, Edward celebrated a maritime victory over Spain with a round of rum for all the sailors on his ship. Although acknowledging that rum drinking was par for the course in the life of a sailor, Edward thought that more than two cups of rum a day was too much for any man, so he offered his seamen a drink of half water/half rum to toast their victory. This mixture became known as Grog, and as the decades and centuries progressed, the tradition of a daily drink of grog became a highlight of a sailor’s day aboard ship, marking an important place not only in maritime history but food history as well.
Our 1860s sailor up top at the beginning of the post, thumbing through the Brooklyn Evening Star, would have noted that the want ad included the mention of grog specifically. As that meant that this ship upheld tradition and would be more likely to follow through on its promises. In the 1700s and 1800s, many jobs for sailors aboard trading ships and cargo vessels were fraught with injustices that led to unfair working conditions. Partly because of unscrupulous captains, cramped quarters, disease, the danger of the work, and the uncertainty of long weeks or months spent out at sea, the life of a sailor was not an easy one. But certain dependable regularities could make the voyage more bearable – rum being one.
A delight in all ways that tea and rum can be on their own, this seafaring beverage is both visually enticing and physically appealing. Essentially like drinking a good, hot cup of tea, it’s a well-complemented combination of flavors, with no one ingredient overpowering the other. It’s preferable to select a strong type of black tea, but I suspect (although I haven’t tried it yet) that this drink might be equally interesting with an herbal tea like peppermint or ginger as well. I don’t think the sailors would mind if you experimented, just as long as you don’t forget the rum!
Hot Grog – Serves 6
3 large lemons
1/4 cup sugar
3/4 cup heavy rum
6 cups strong hot tea (lapsang souchong)
While water is boiling for tea, cut six long curls from the lemons using a vegetable peeler. Cut each lemon in half and juice them to make 1/2 cup.
Combine the sugar, lemon juice and rum in a mason jar or small bowl and stir. Divide the mixture among six warmed mugs. Prepare the tea and add it to each mug. Garnish each cup with a lemon rind swirl and serve immediately.
I’ve made this recipe a few times over the past couple of months. The first was at Christmastime when the polar vortex weather encouraged us to try all the ways to keep warm inside and out. I’ve also made it on a grey and rainy end-of-winter night when the air was so damp and heavy, it felt like Spring might never come. And then again just the other day, when the 60-degree day sun was setting and the temperatures started creeping back down into the low 50s. Each time, hot grog warmed the belly and refreshed the spirit.
A comfort in other ways too, grog made its way into sea shanty songs. Sung by sailors for hundreds of years, as they went about their life on the water, songs like Leave Her Johnny Leave Her , Drunken Sailor and the The Wellerman all touch on the challenges faced at sea and the important part that rum played. The Wellerman, in particular, features all three ingredients of hot grog – sugar and tea and rum. It was a popular song among the crews of New Zealand whaling boats in the early 1800s, and then again became a popular song on social media during the pandemic in 2020-2021. If you aren’t familiar with it, here’s the song in full… (with a little warning… it’s a bit of an earworm – you might be singing it for days!)…
It’s incredible to think what a far reach this magical combination of ingredients has had in the minds and hearts of sailors (and singers!) for centuries. From the New York waterfront all the way around the globe to the South Island of New Zealand and back again, for whatever occasion, at whatever temperature, and in whichever climate you chose to make a cup of grog, I hope you enjoy it just as much as we did here in the Vintage Kitchen.
Below are a few more want ads for sailors that add dimension and depth and color to this corner of nautical history. Cheers to all the sailors who’ve kept tradition alive via recipe and rum!
Wrap it up like a big present. In plastic. That’s how to keep a greenhouse warm in winter. Luckily, our greenhouse is small so this gift wrapping is not a giant undertaking. And it might not be the right solution for any big greenhouse owners, but for us, and our 4’x6′ growing station, this method of winterization has proved itself most competent. Like a champion, it weathered our second blast of single-digit-polar vortex temperatures in early February, it withstood wind gusts of 35 mph, and it embraced this week’s big snowstorm of 6.5″ inches all while maintaining an even 70-80 degree temperature range indoors. We can officially say, with confidence, that this is an ideal solution for any small greenhouse gardeners who live in a cold weather climate and struggle to keep plants warm throughout the winter.
We got a little behind in our greenhouse diaries updates, but by no means was February an uneventful month around here. As we all know, nature waits for no one. What was exciting twenty days ago in the greenhouse has now been replaced by exciting things happening at this very moment, so this post is a catch-up, a recap, and a new surprise all rolled into one in an effort not to make it a million miles long.
The front side of the greenhouse with a roll-up curtain panel to gain entry.
Here’s a brief recap on the winterization efforts. Essentially, in less than half a day, we built a wooden exoskeleton around the shoulder and roofline of the greenhouse and then wrapped the greenhouse in one giant piece of plastic. The plastic was stapled to the wooden skeleton which was screwed together but not screwed into the greenhouse. Instead, the wood frame rests on top of the greenhouse, secured by gravity from the wooden connection at the peak of the roof.
The backside of the greenhouse.
A 5′ foot wide roll-up curtain panel was made for the door using a curtain rod at the base and more plastic sheeting. Four bungee cords hold the plastic in place along each wall and two butterfly clamps hold the rolled-up panel in place when going in and out of the greenhouse. All it took material-wise was one roll of the plastic sheeting, six pieces of lumber, a curtain rod, a handful of screws, four bungee cords, and two butterfly clamps. If anyone would like a detailed drawing on how to replicate this plastic wrap for your own greenhouse, please send us a message or comment below and we’ll be happy to lay out the steps and materials.
Most days we leave the door panel rolled up to let a little outside air seep in through the draft in the doorframe. Just before dusk, it all gets buttoned back up again. Once winter is over, we will be able to easily remove, wrap up and save this plastic/wood frame system for the cold months later in the year. Using this type of winterization method and our one electric heater has kept the greenhouse a full 50-60 degrees warmer inside than the outside temperature. So on a 25-degree night, it will stay a consistent 75 degrees in the greenhouse. Some days, when the sun is out, the plastic keeps everything so warm we can turn the heater off completely. Both the established plants and the seedlings have really thrived in this much more consistent environment.
The Mexican sunflowers!
The only downside to this method of winterizing is that all the ventilation holes, the roof window, and each side wall from the pea gravel floor to the peaked roof get completely covered with plastic so there isn’t as much free air flow or circulation happening, and the view is reduced to a gauzy, opaque landscape once inside. The trapped heat is great for keeping everything inside warm but also invites pests to come and enjoy the tropical heat.
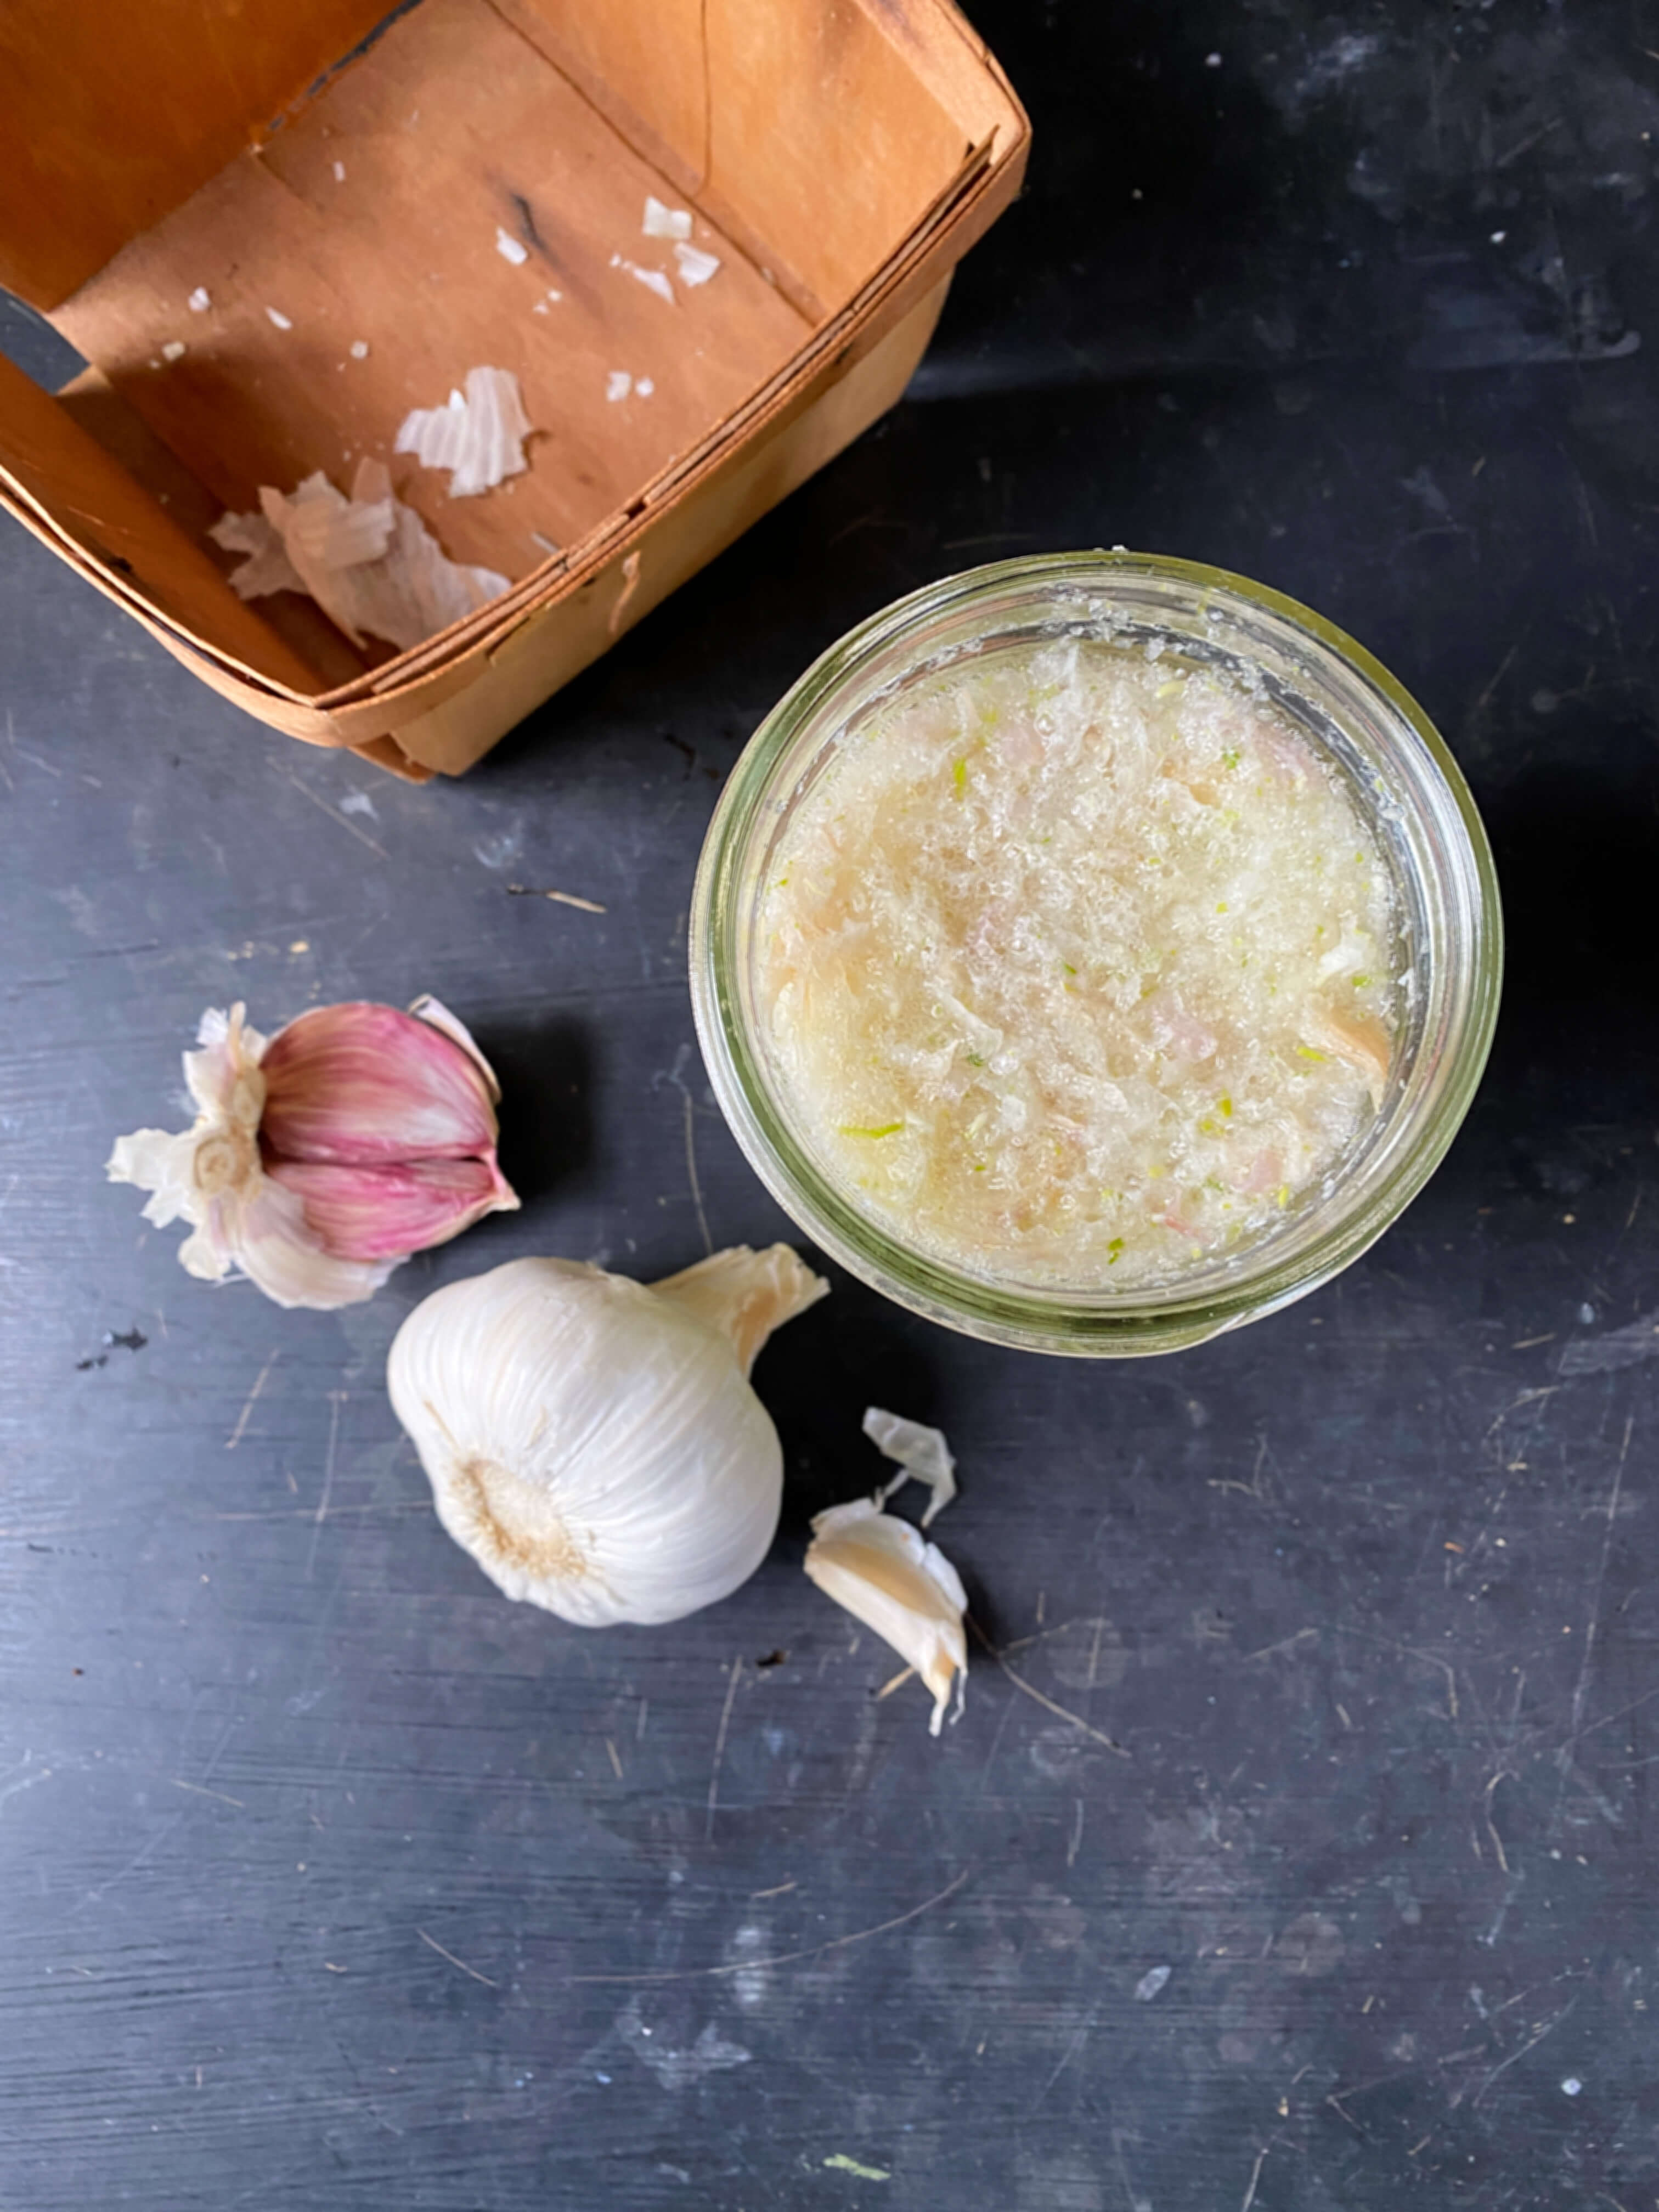
Over the course of February, we did see an outbreak of aphids, whiteflies, and spider mites, but a simple spray of homemade garlic water and store-bought organic neem oil did the trick to clear those up quickly.
Pureed garlic steeped in water for 24 hours before straining and applying.
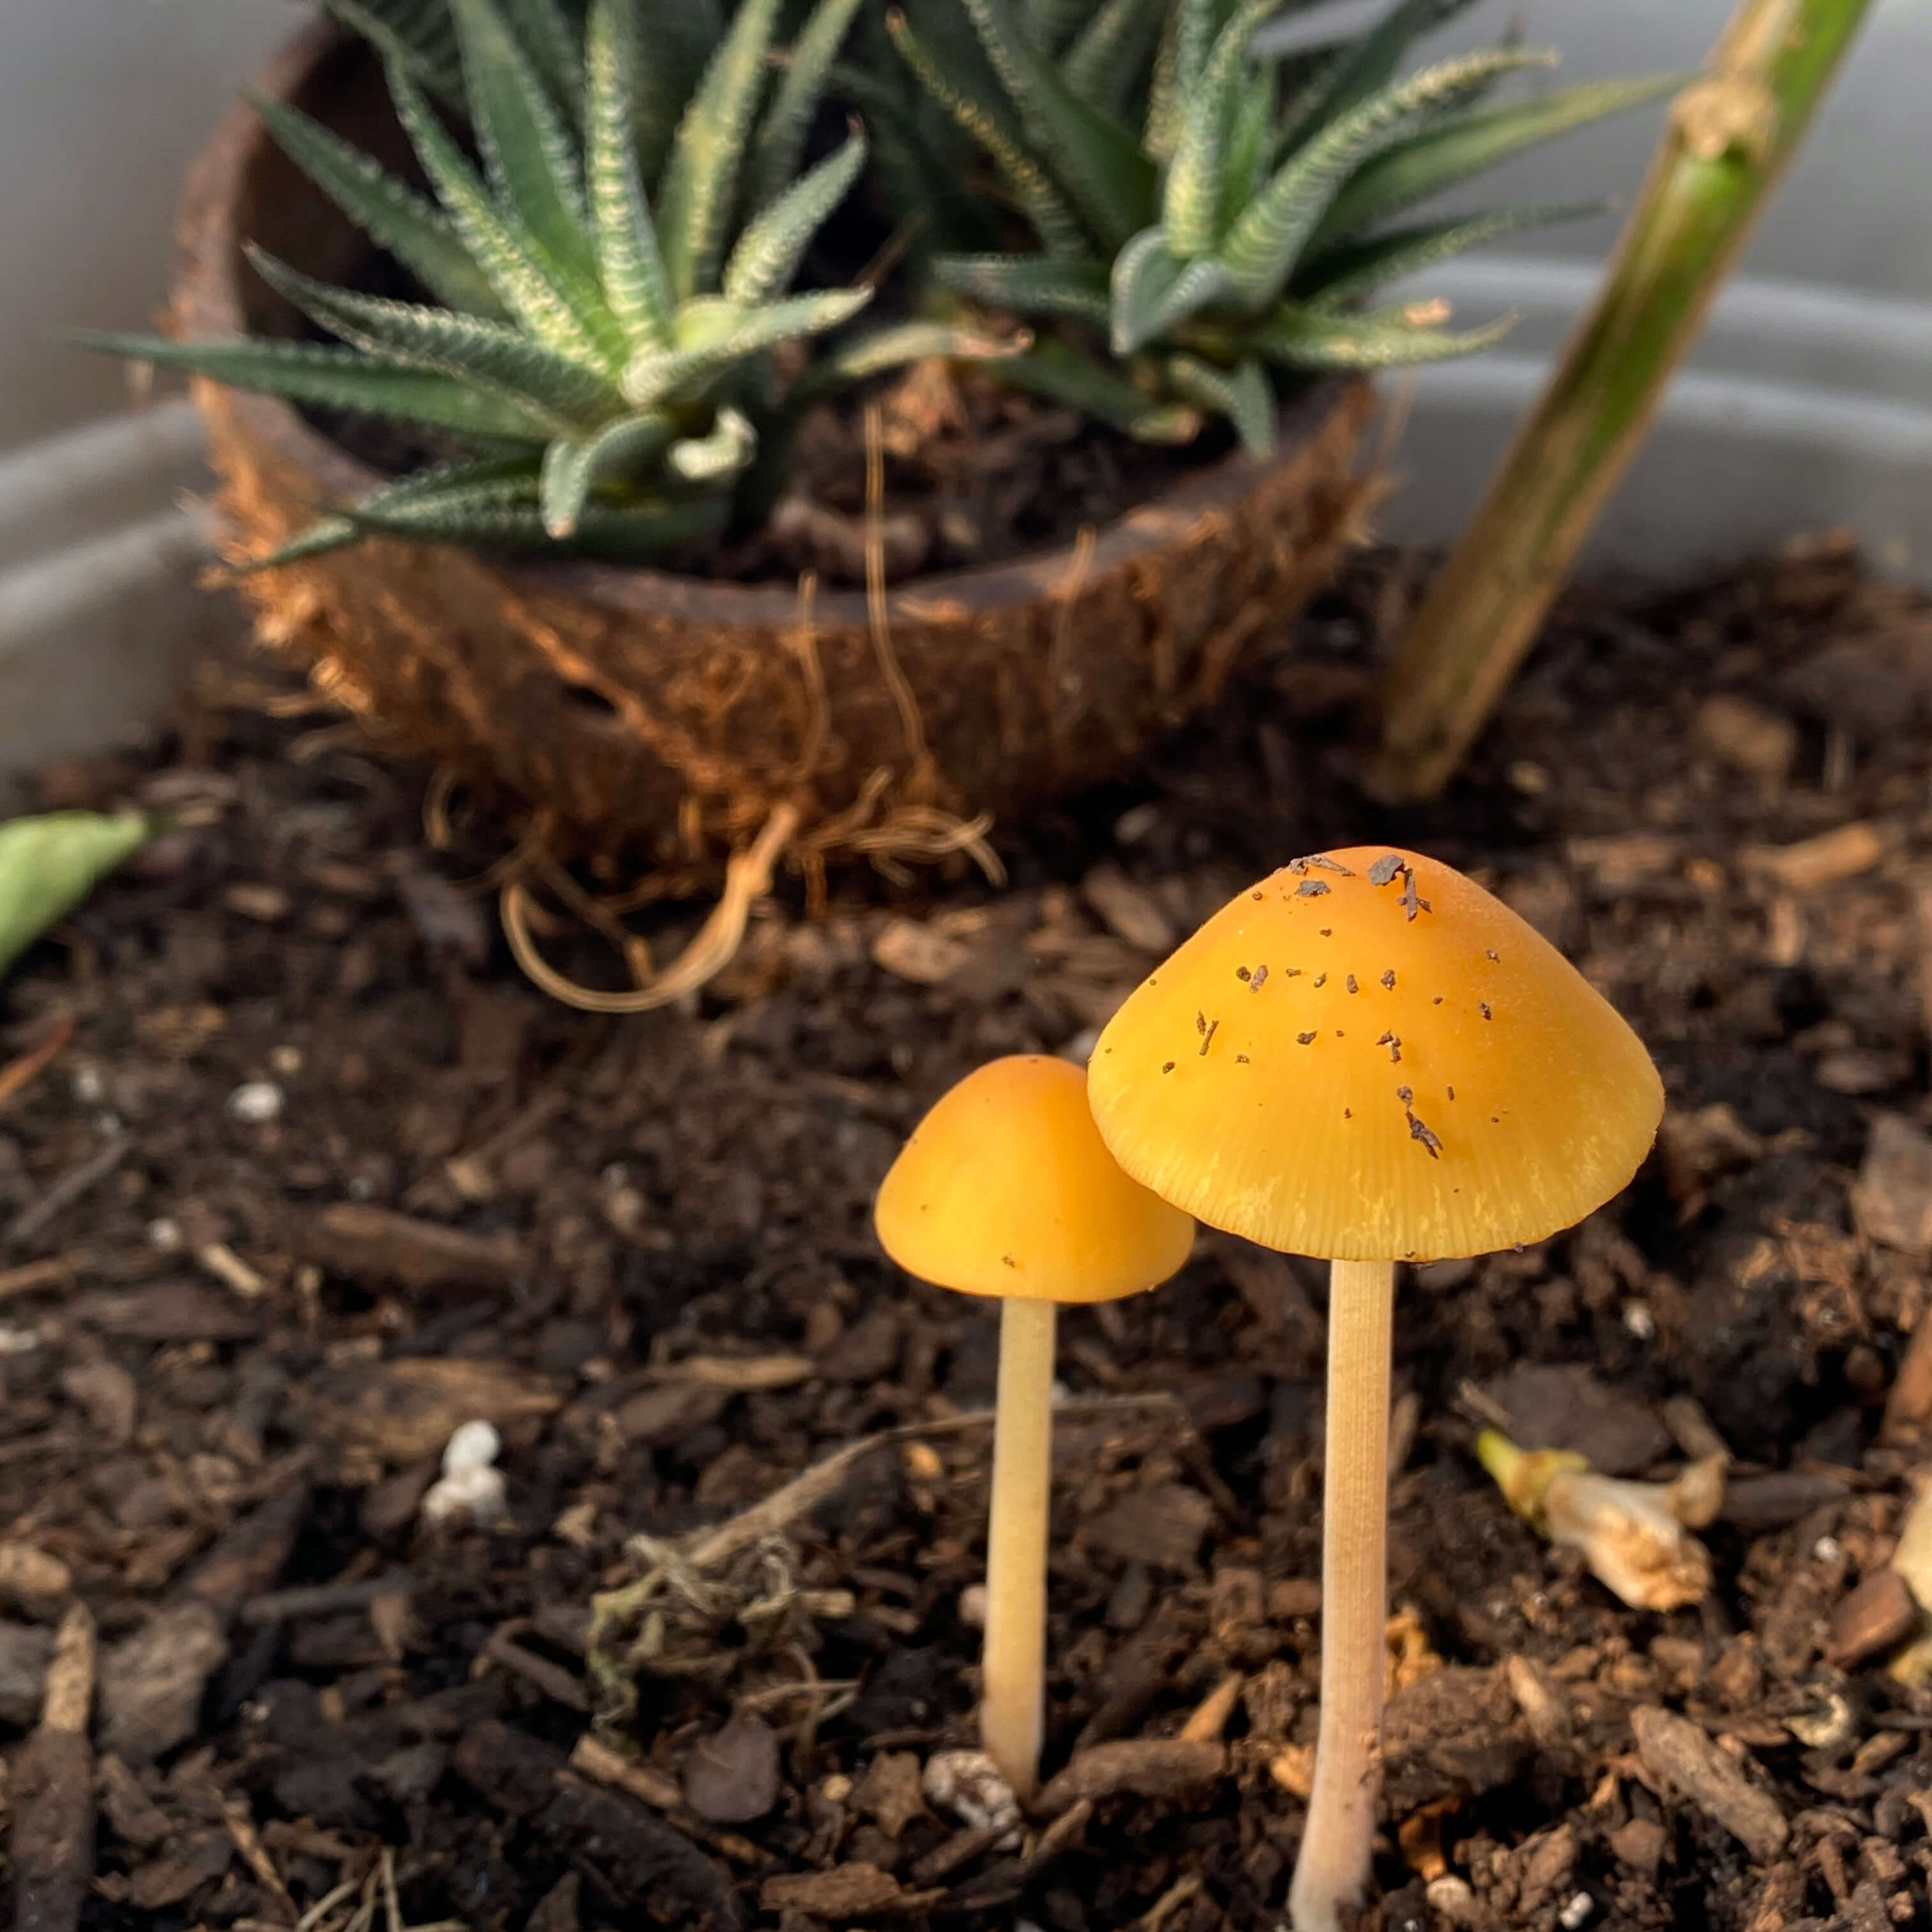
One note on the Neem oil though – it does get rid of everything. We had some mushrooms that popped up in the pepper plants in January and also two resident spiders who were helping reduce the unwanted bug population, but unfortunately, mushroom nor spider survived the neem spray. So keep that in mind if you have some critters that you’d like to keep around.
Over the course of the month, we said goodbye and hello to a few plants. The broccoli, the pincushions, and our beautiful nasturtiums all completed their natural life cycle. As much as I hated to see these three go, at least they were moving on to the compost pile for nutrient recycling. Like our sourdough starter recipe published last week, all these first-year greenhouse plants have been the best springboards – the ones that taught us so much about how to begin in the first place. Before their final send-off, I picked the last of the nasturtiums for a bouquet. It was a big colorful cheers and thank you to my most loved flower this season…
The last of the nasturtium flowers in a bouquet of geraniums and parsley.
On the hello side, we said welcome to a bevy of new seedlings as they sprouted up this month. Snapdragons, foxglove, basil, black-eyed Susan vine, cucamelons, bell peppers, spicy peppers, cosmos, dill…
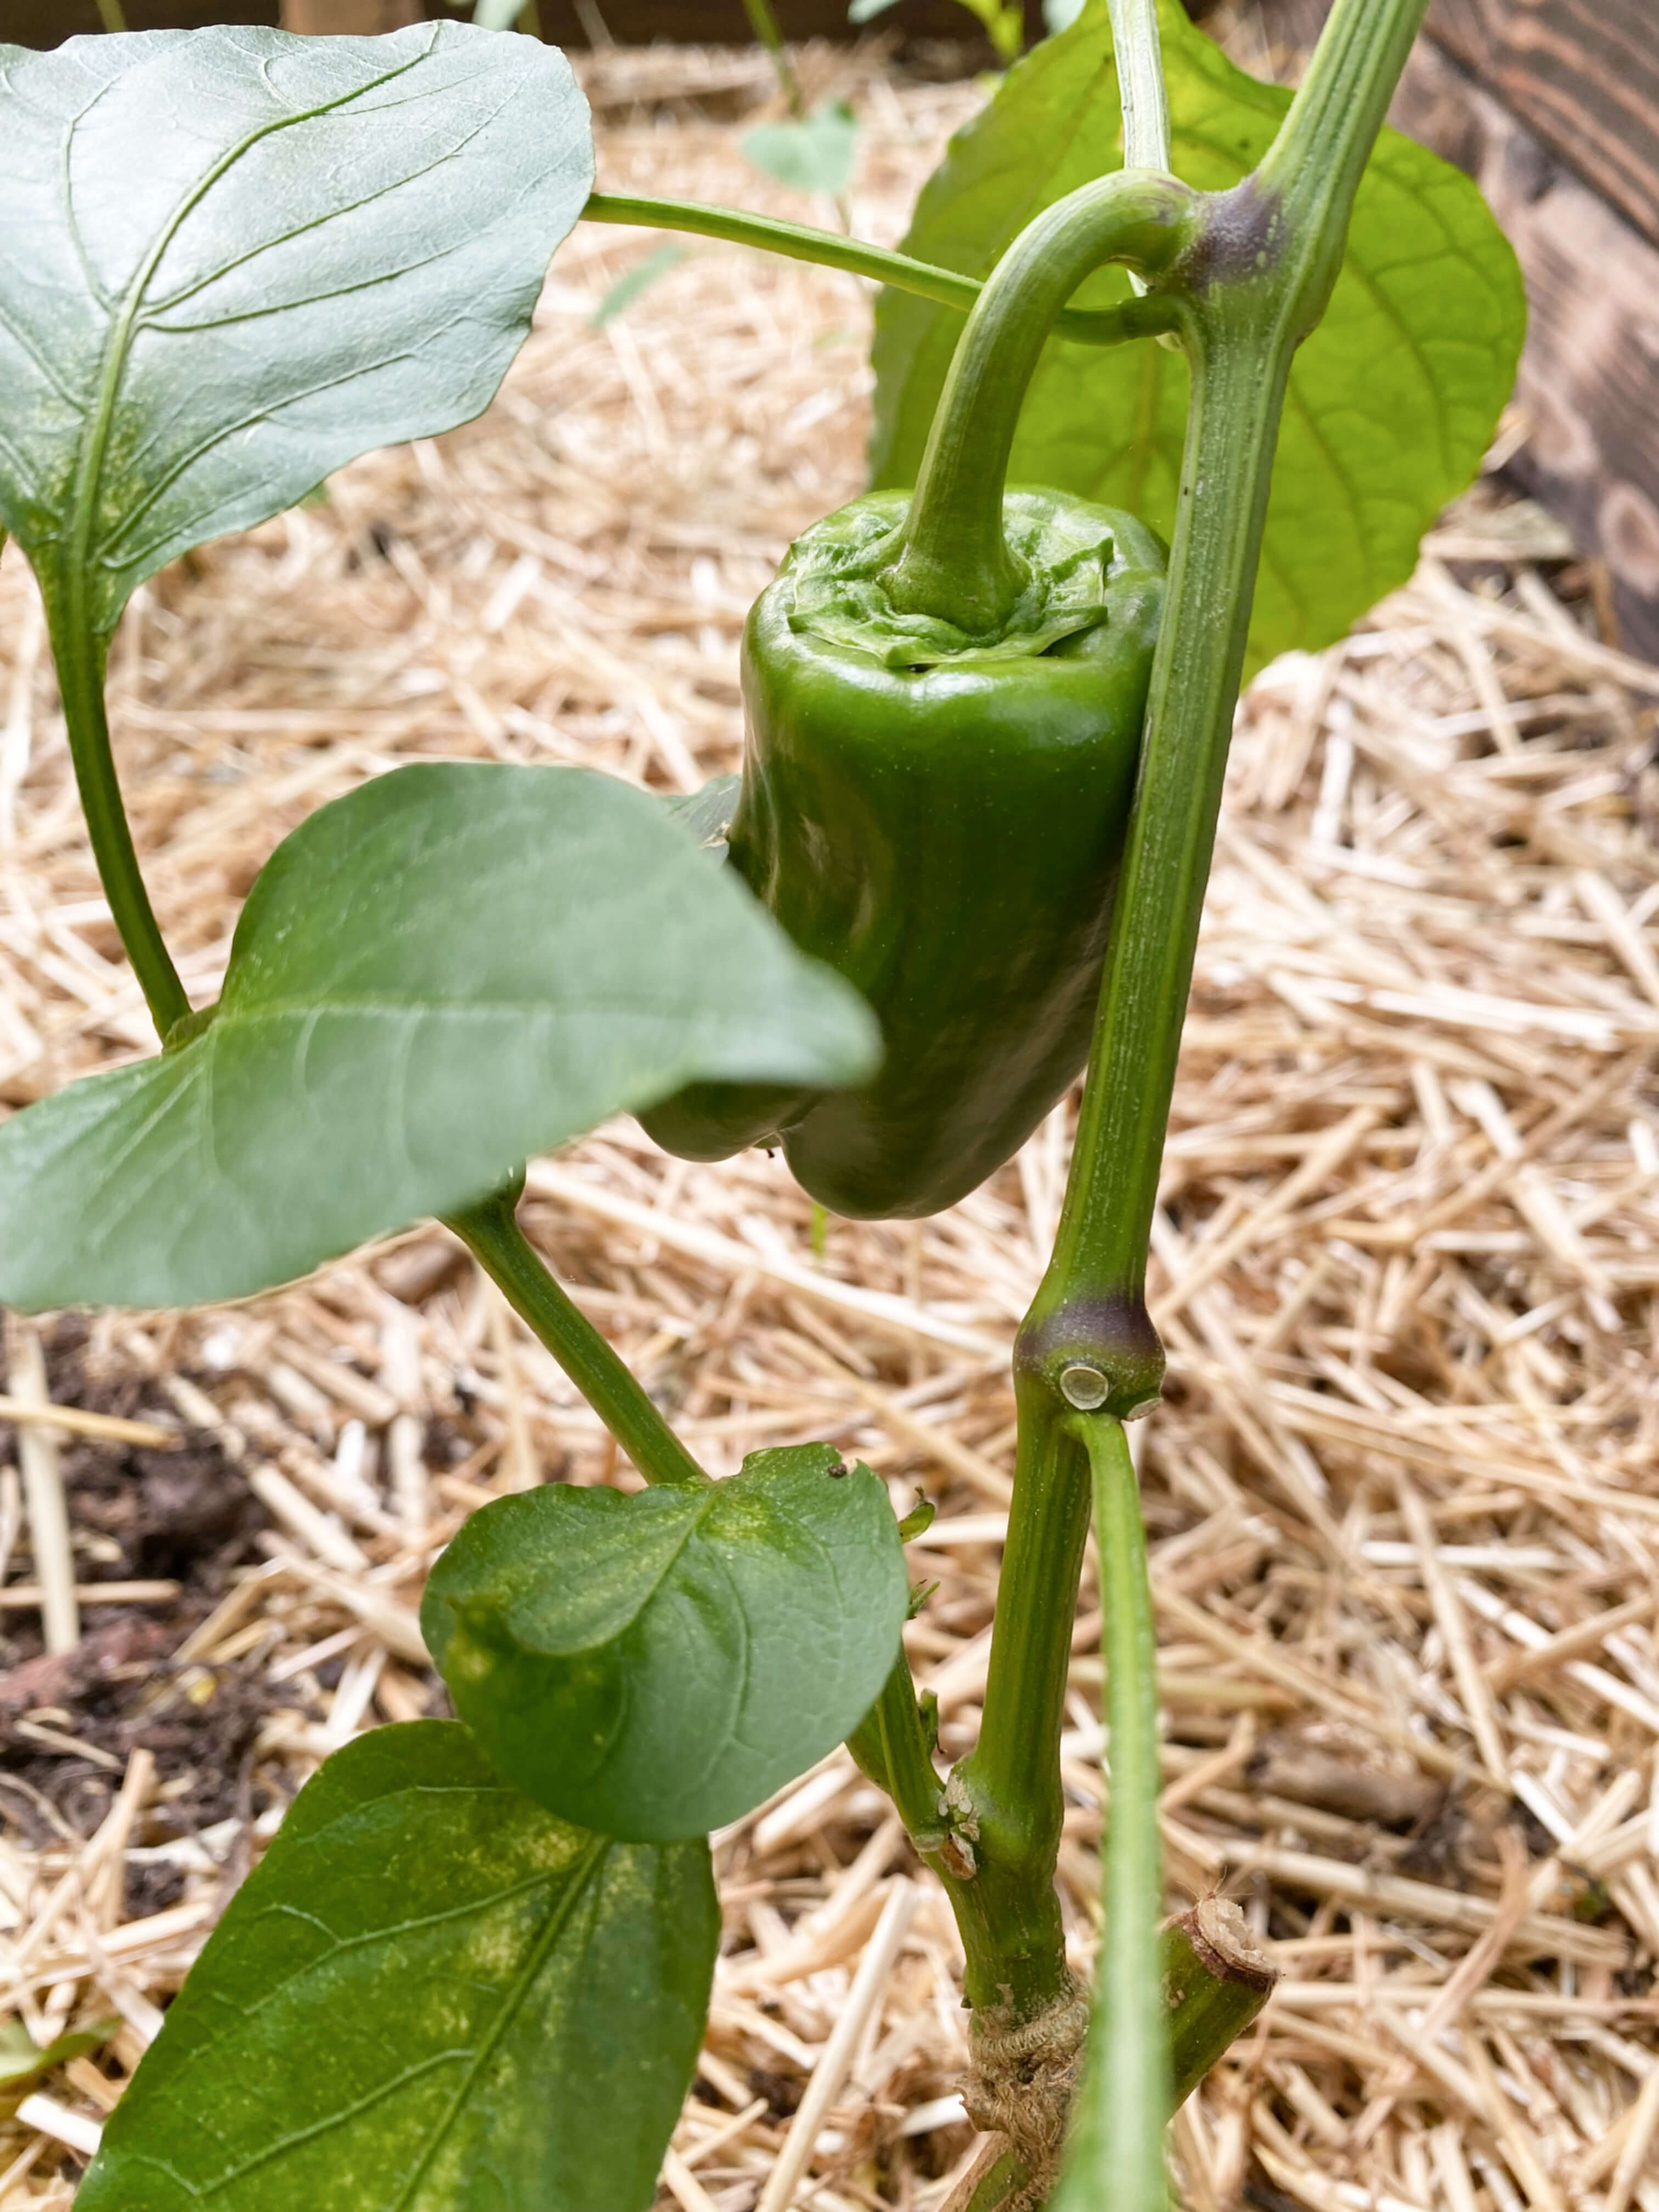
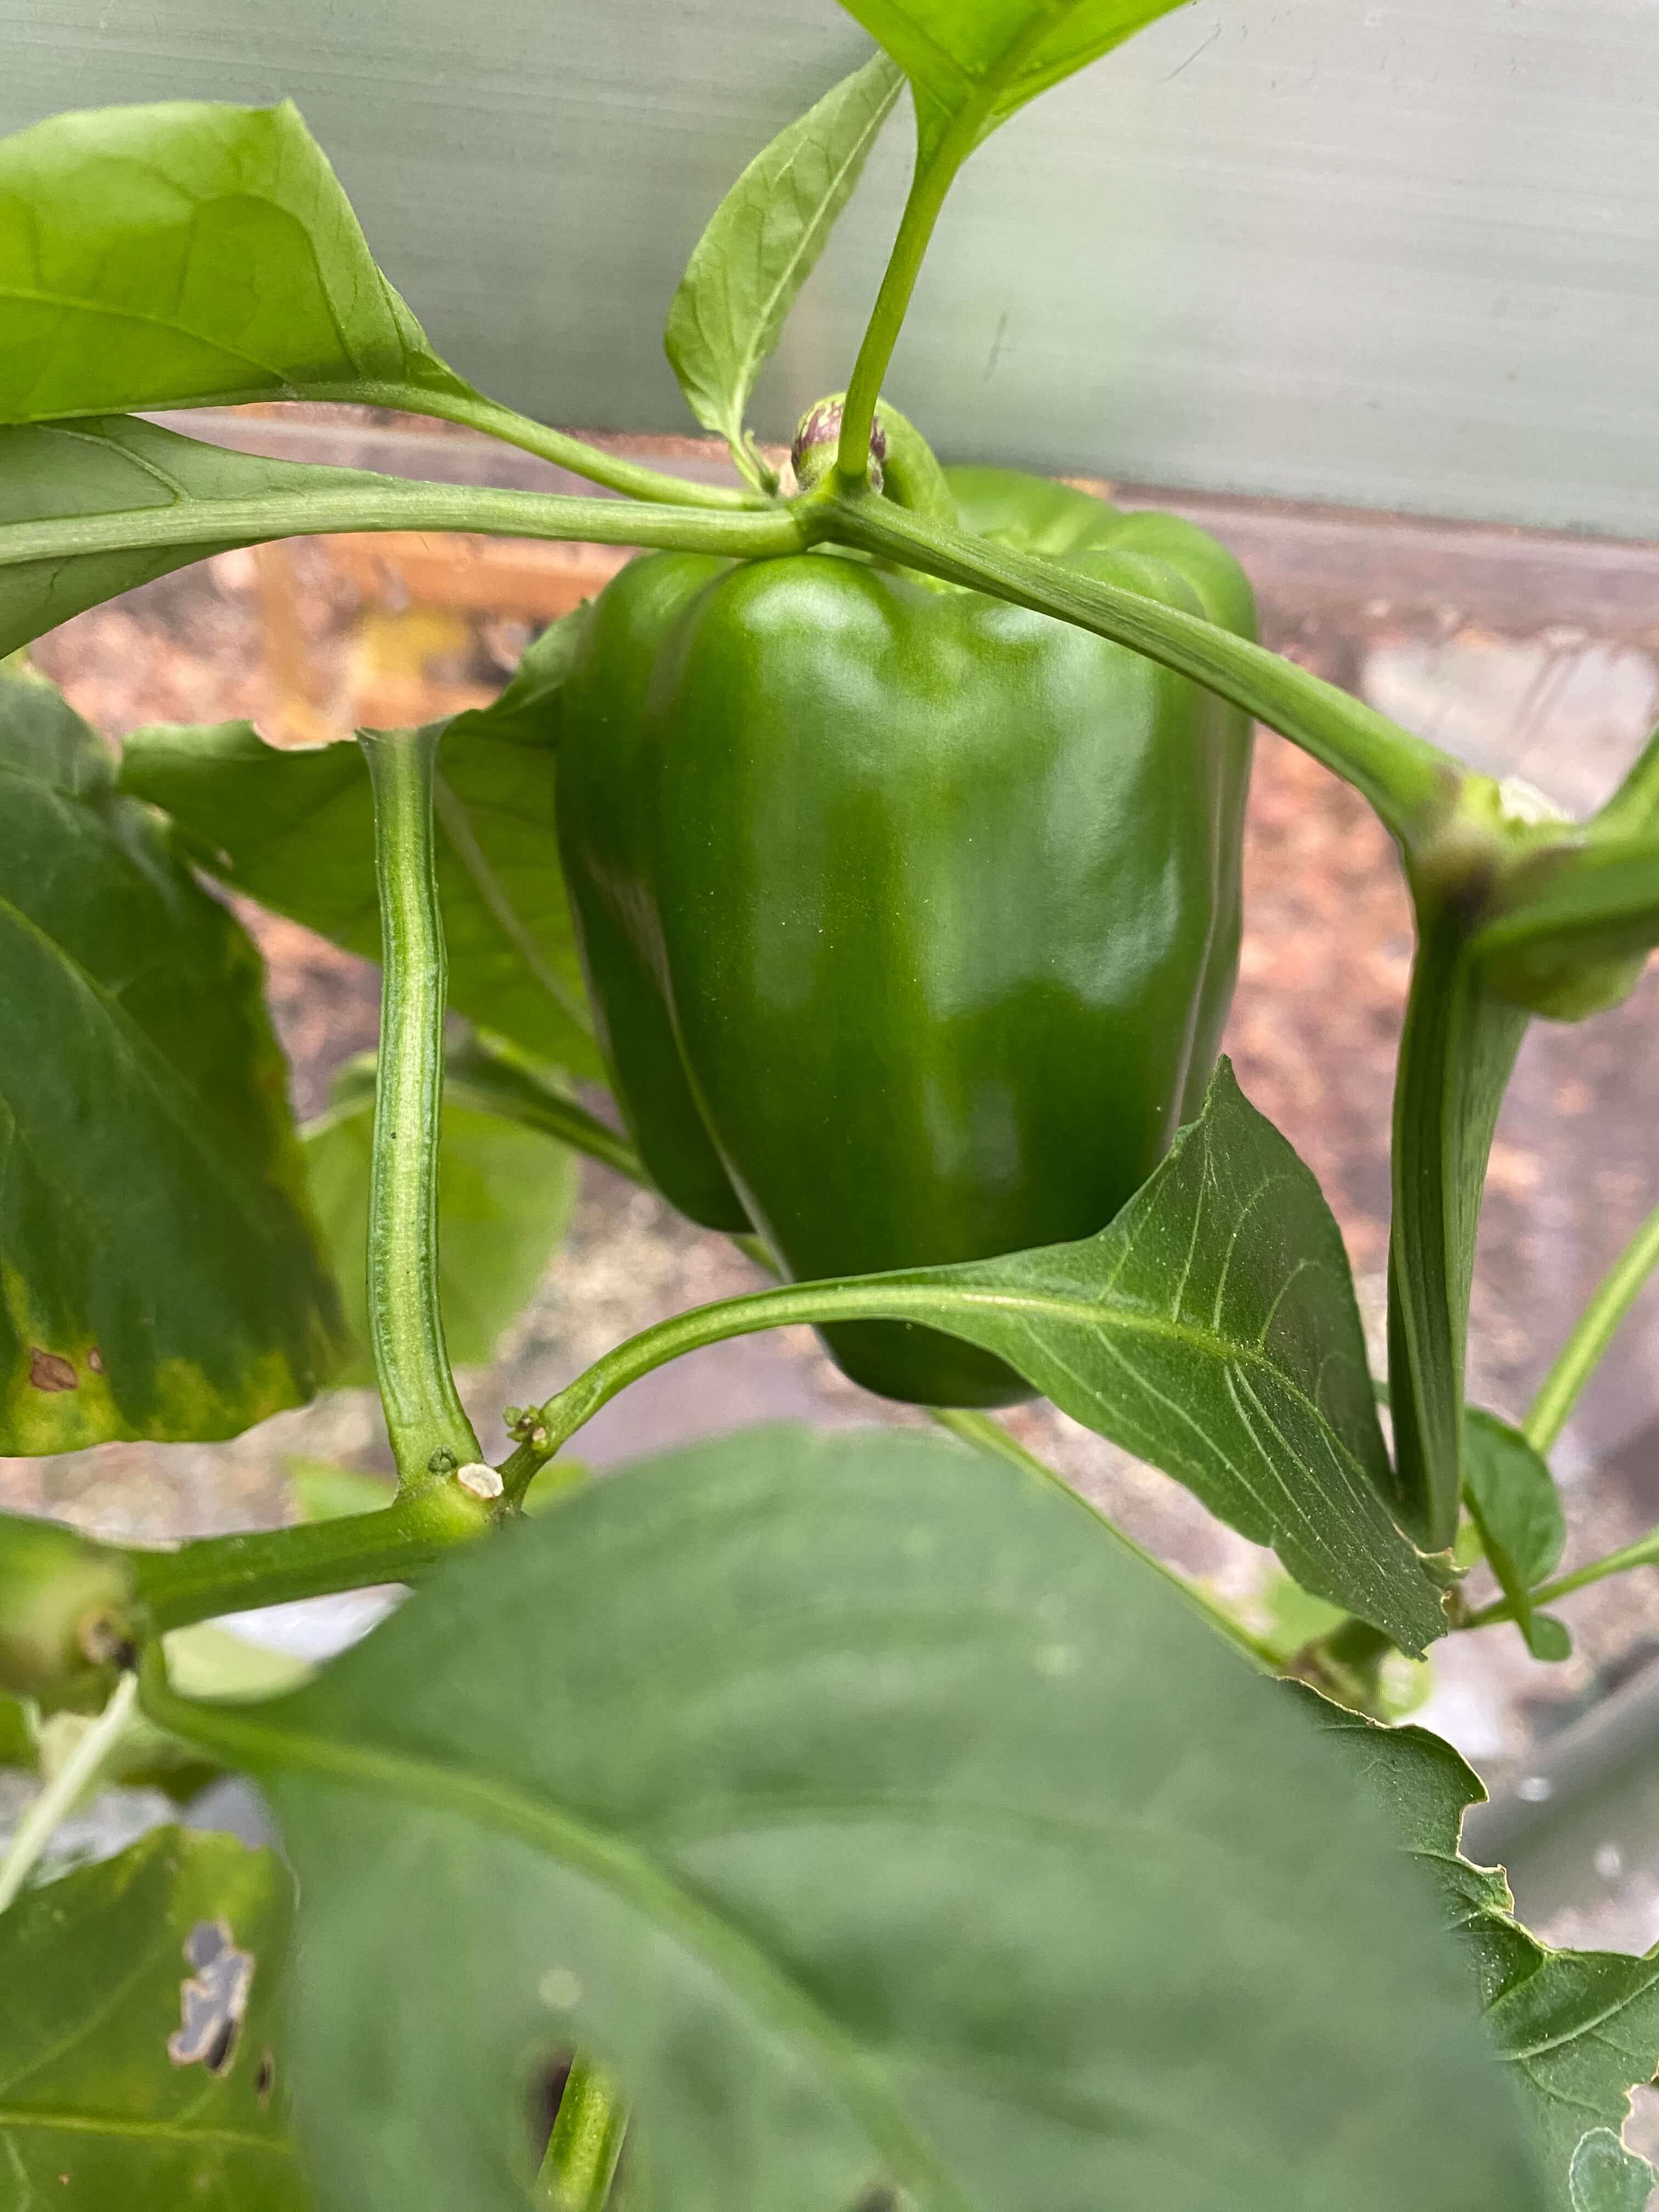
We harvested the orange bell pepper for a stuffed pepper recipe, the first round of collard greens for a sausage, potato, and collard hash, and the arugula for more salads than we can count. The chives, lavender, and tarragon all got haircuts and the Santaka grew five finger-long peppers.
Collard greens!Santakla Peppers!
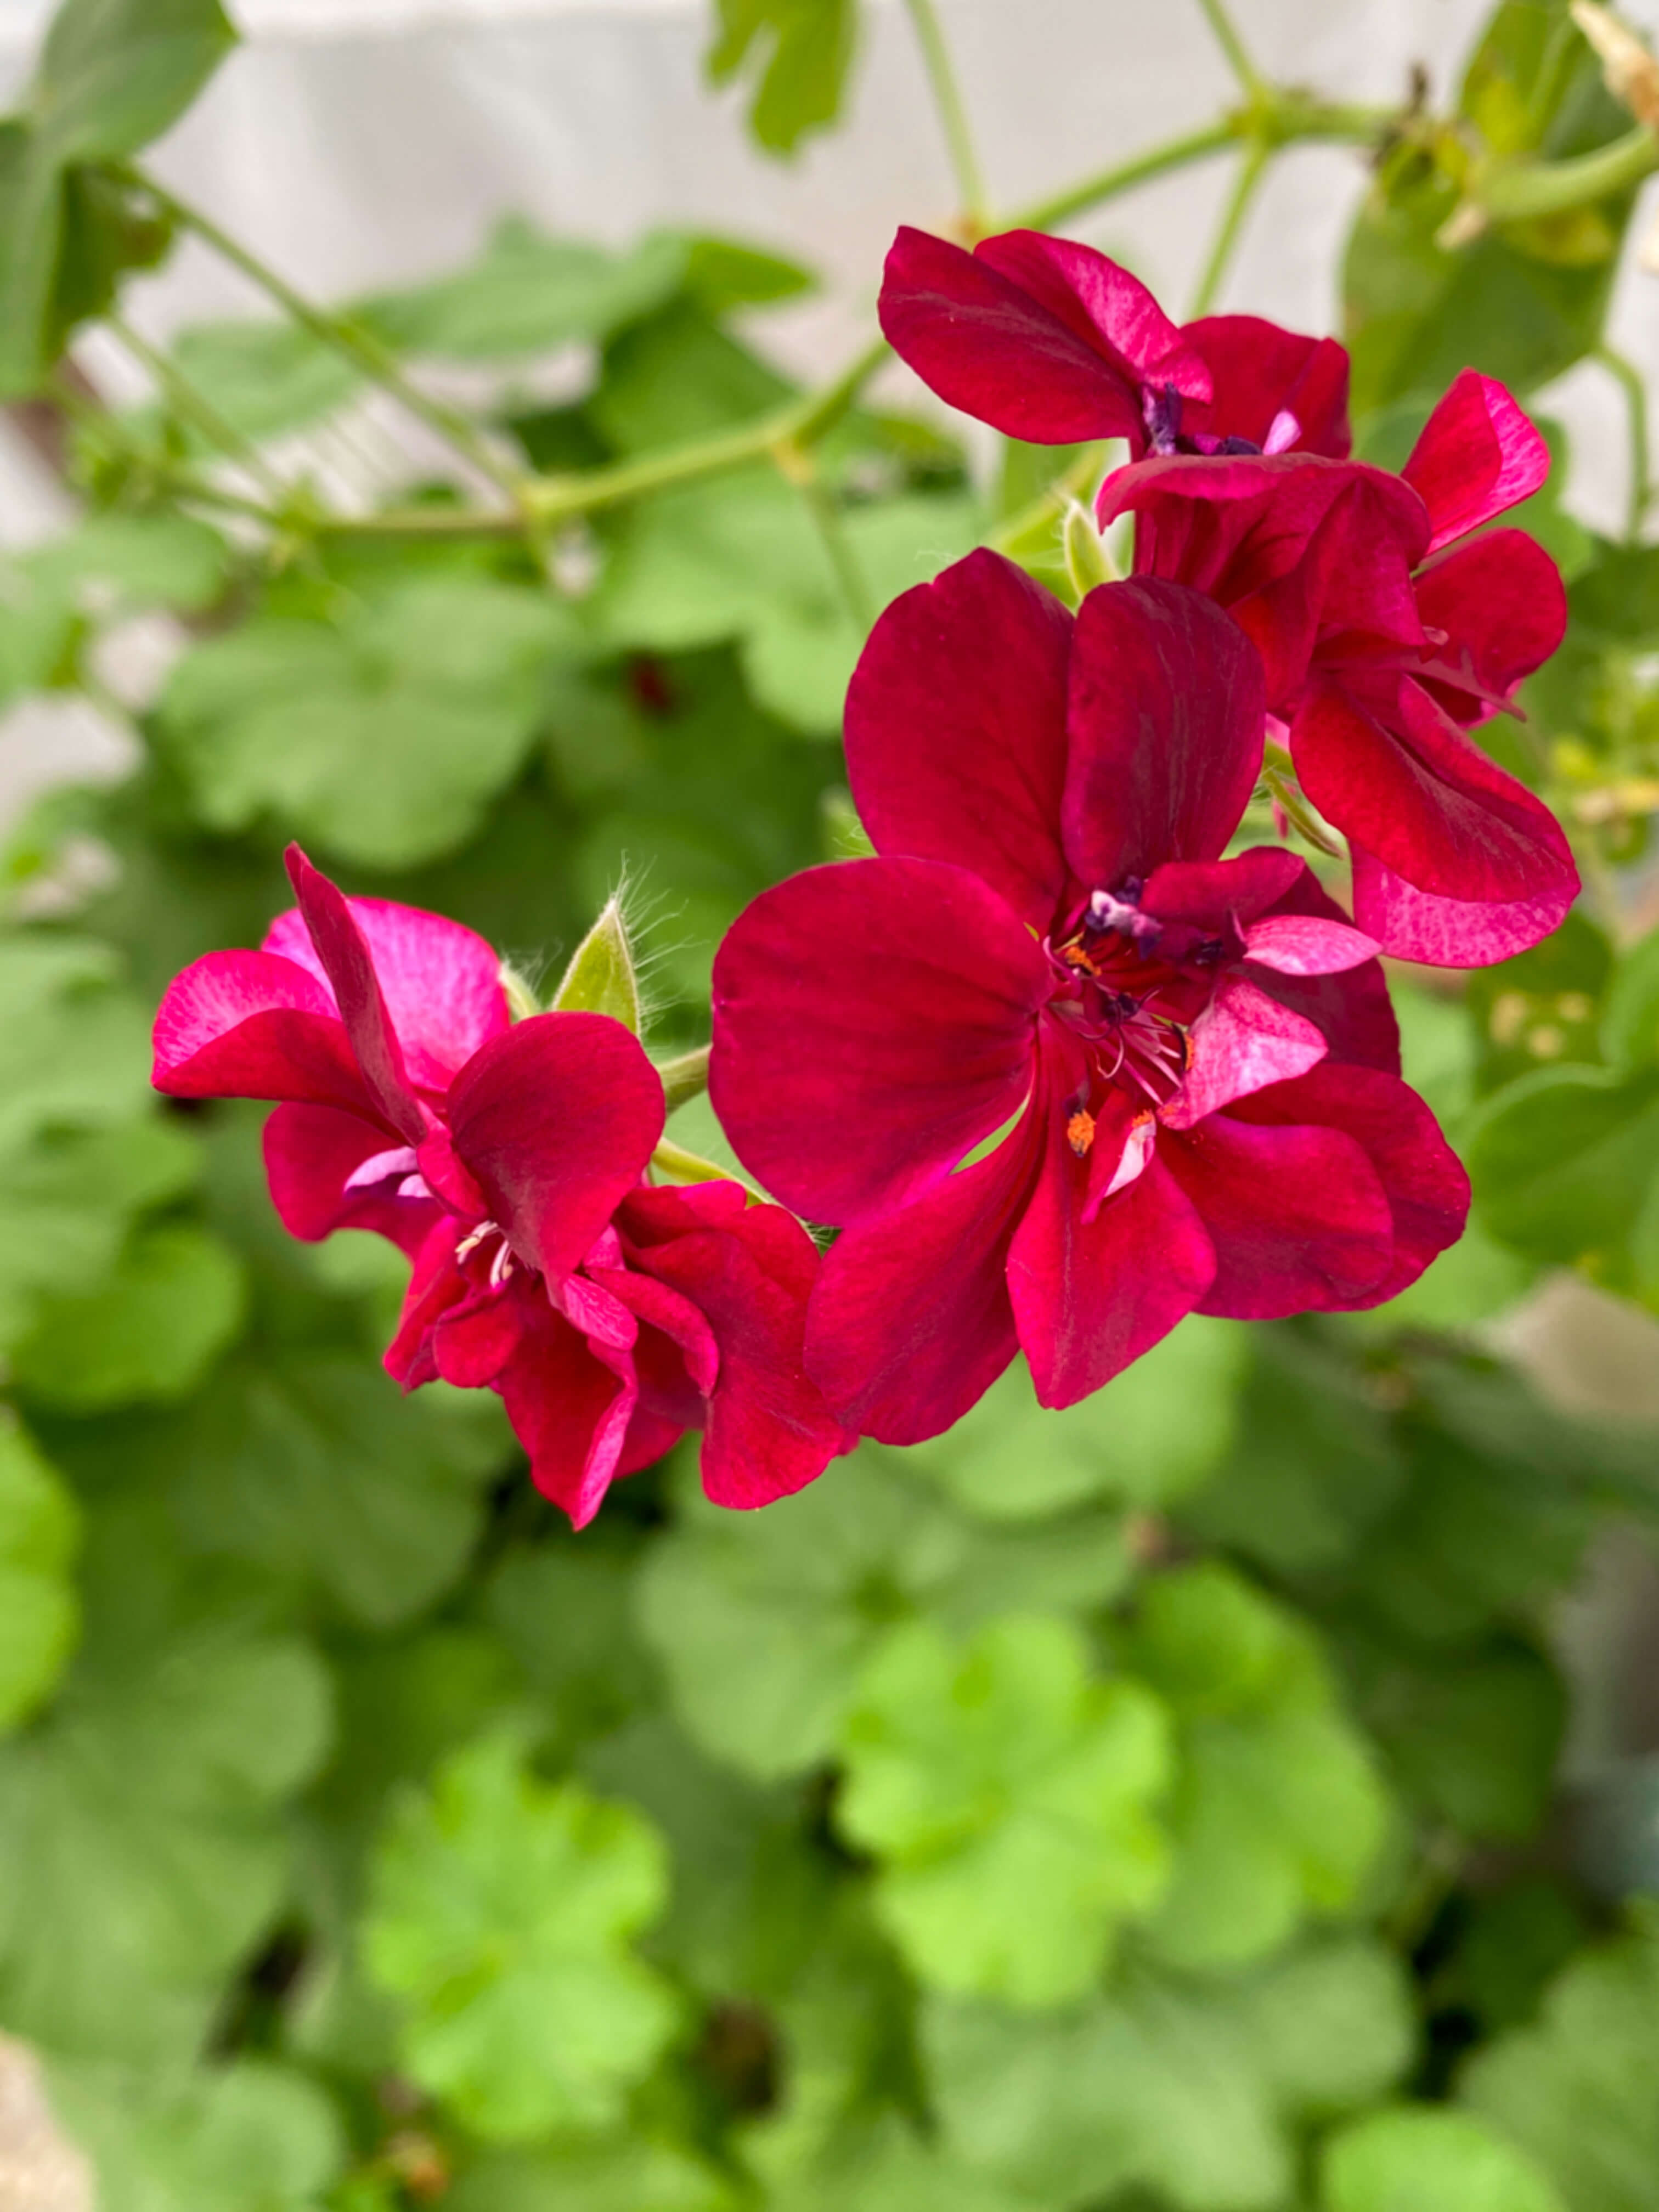
The geraniums are filling out so much they have completely taken over one corner of the greenhouse. Their resilience from frost recovery is pretty remarkable. I can see now why these plants have a shelf-life of 50 years if paid just a little bit of attention. With the colorful nasturtiums gone, they have been such a vibrant choice for the wintertime greenhouse.
After the bell pepper was harvested and after the spider mites came to visit, I did some trimming of the older pepper plant leaves, and pretty much overnight three jalapenos grew. Now each of the three pepper plants are blooming again, Maybe we’ll be lucky and get two summer cycles out of each plant.
Jalapenos!
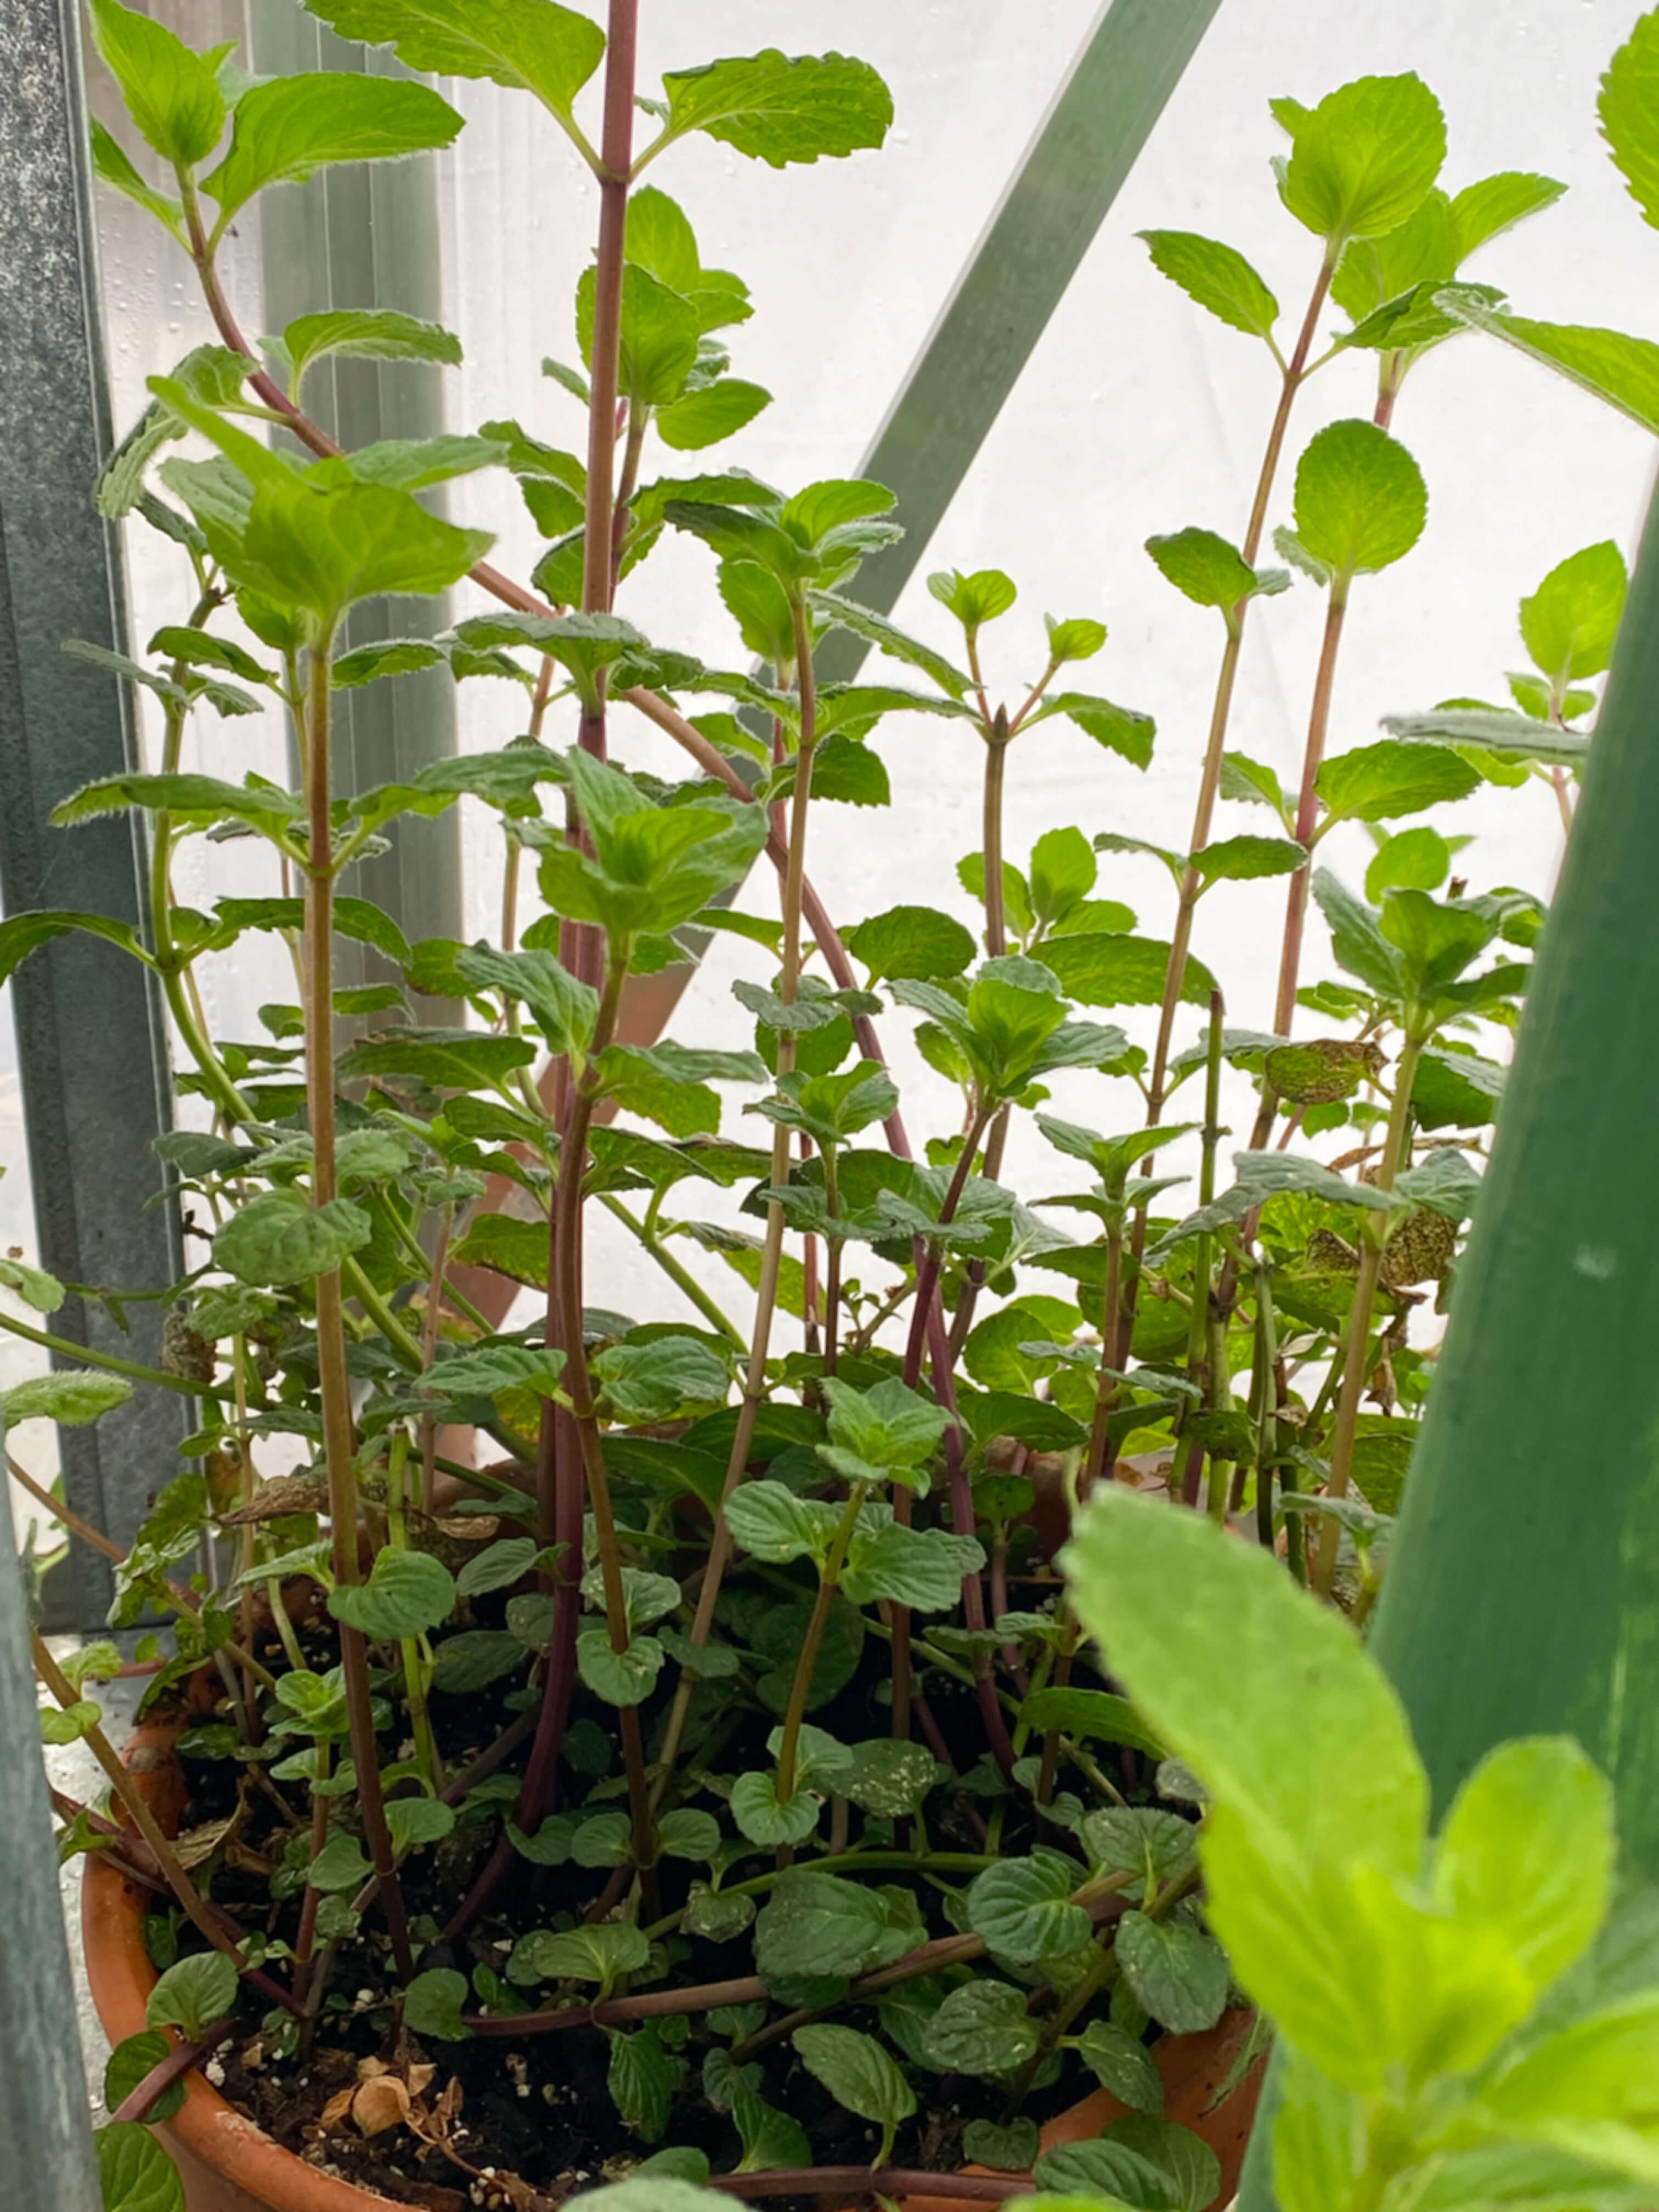
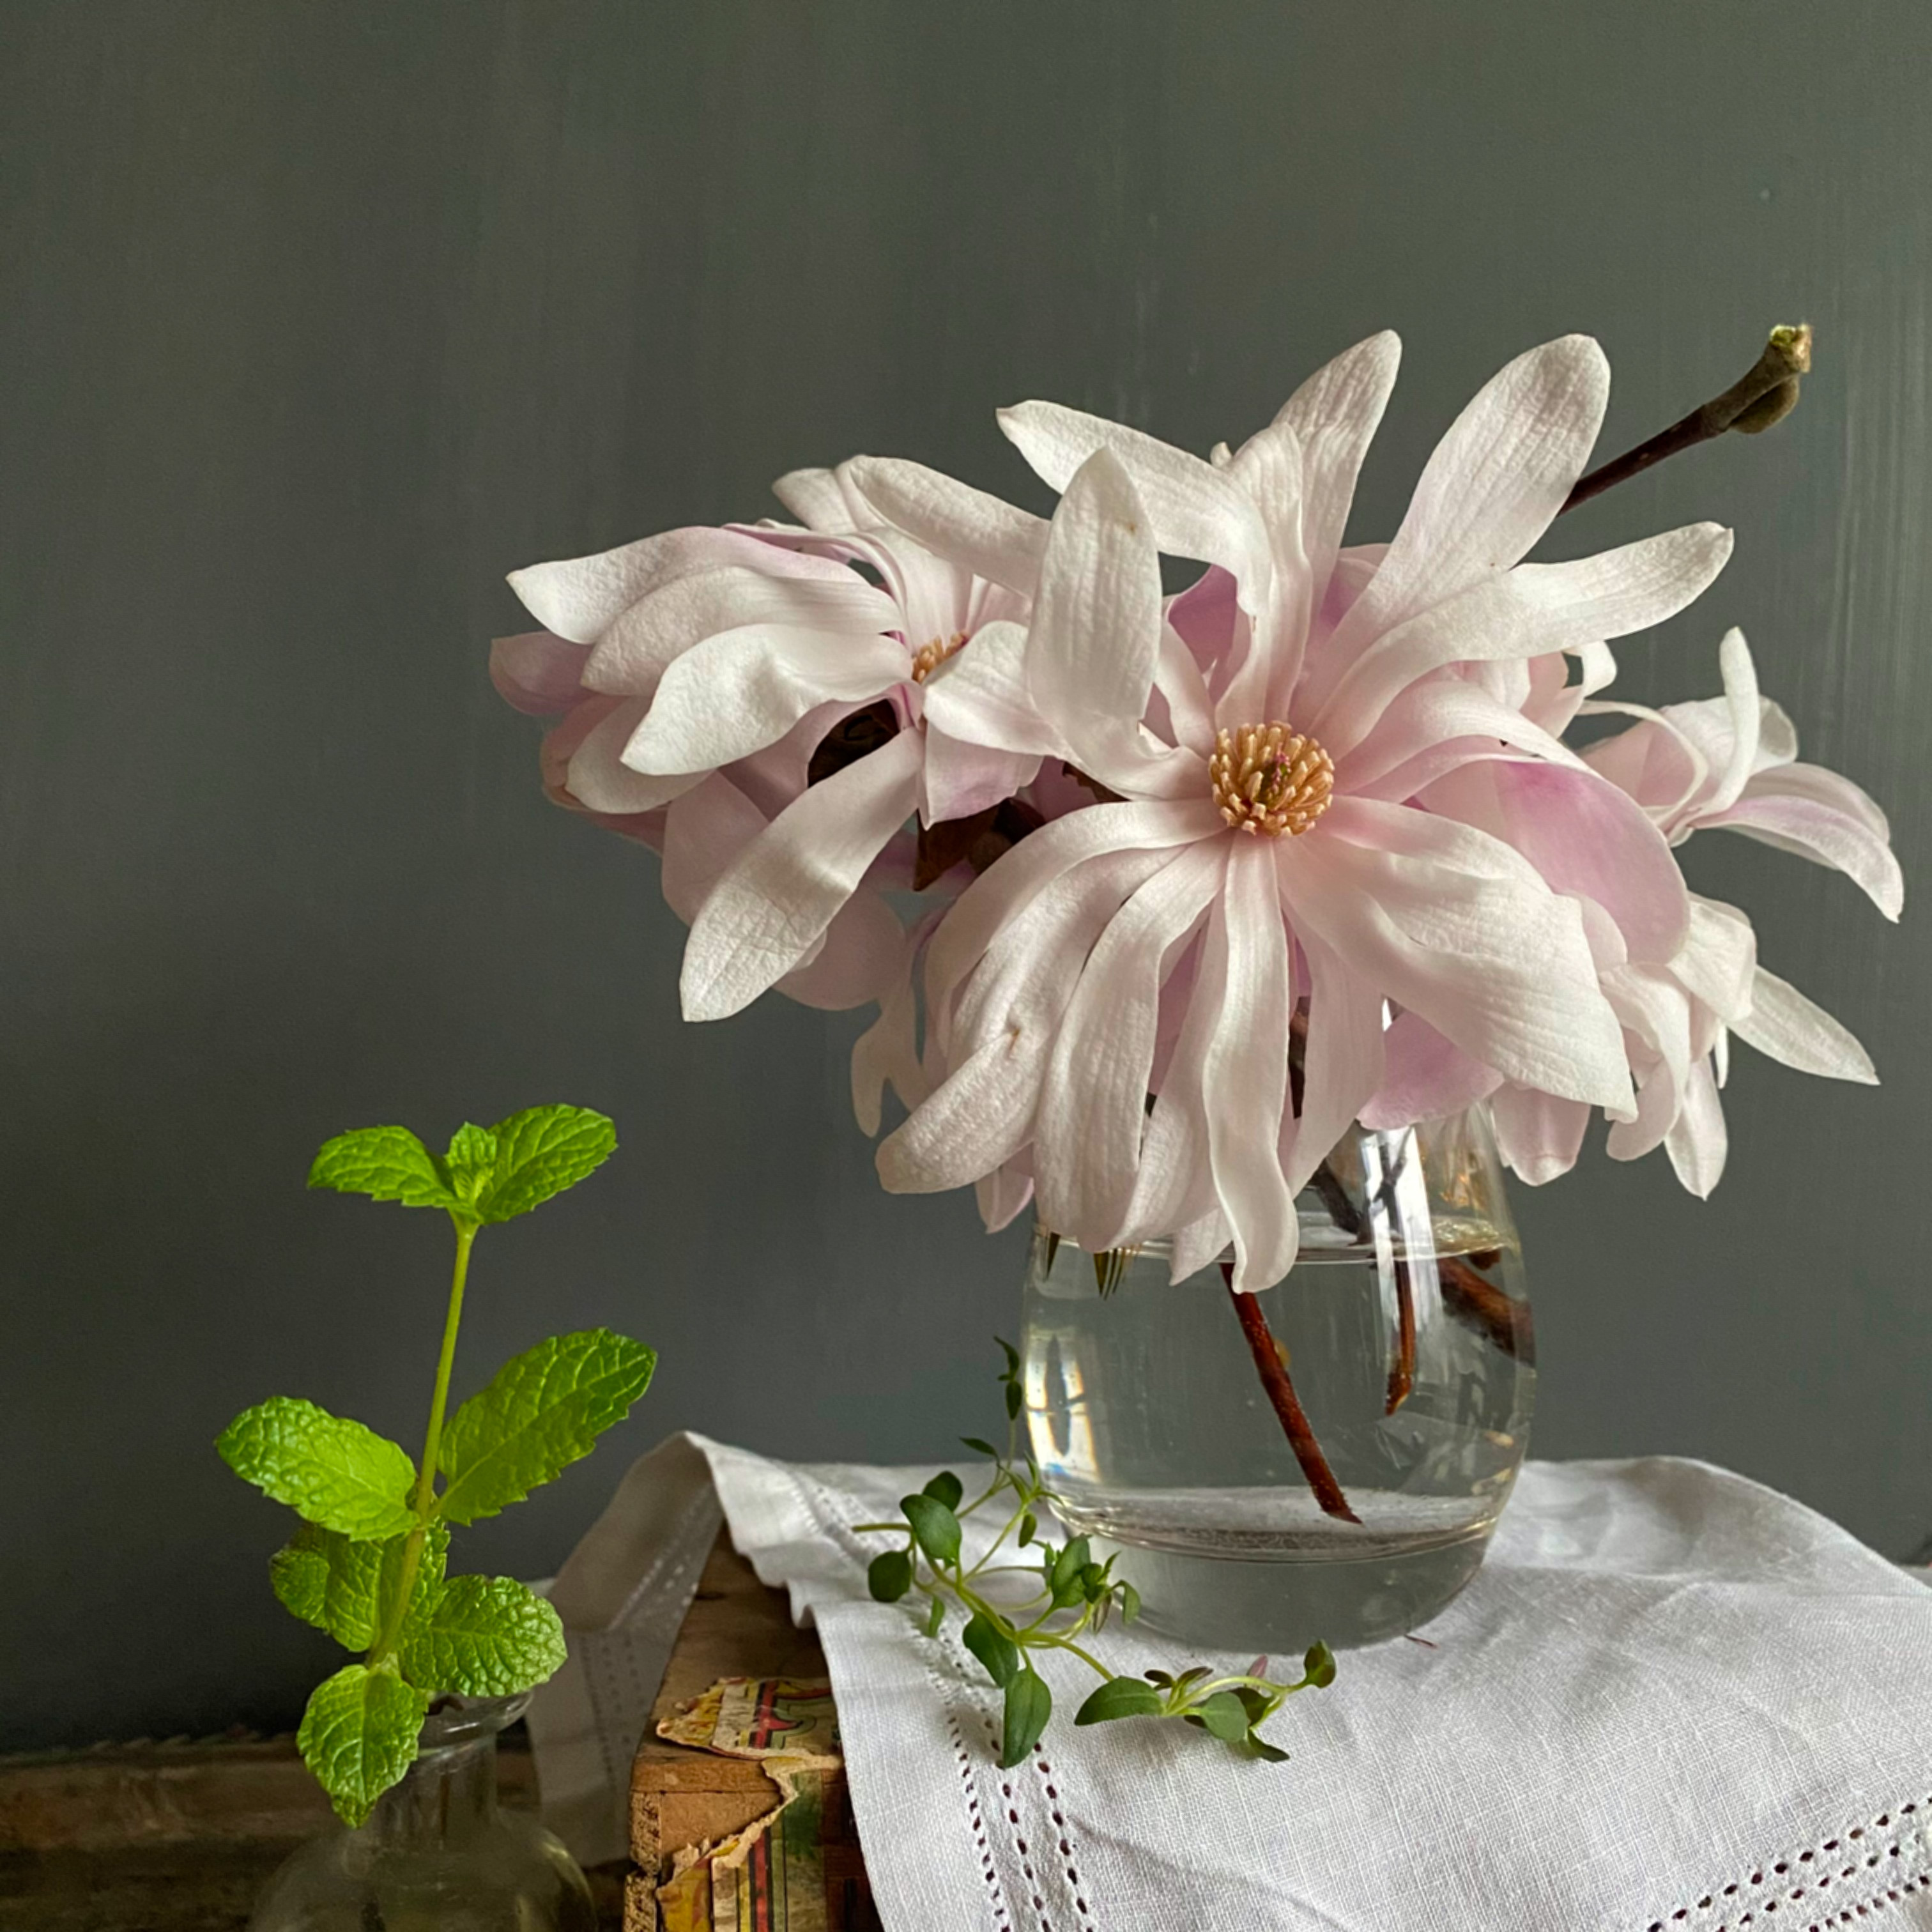
This week, the most exuberant grower in the greenhouse has been the mint. At 12″ inches in height now, it’s been the epitome of spring-is-right-around-the-corner joy.
Nineteen days to go. That’s how close the first day of spring is. In anticipation, another round of seed starting begins this week. On the list for March starts are cucumbers, marigolds, squash, tomatoes, okra, collards, sunflowers, cauliflower, brussels sprouts, peas, broccoli, and zinnia. To keep things interesting, Mother Nature also might be sending two to four more inches of snow our way this weekend, just as the daffodils are popping up in the garden beds. Like I said up top, nature waits for no one. And so we carry on. Snow showers and spring flowers aside, this is the perfect time to get the summer garden started.
Cheers to almost-Spring and to figuring out the greenhouse winterization plan just as a new season approaches! Have you been starting your seeds too? If so, what are you growing this year?
Valentine’s Day is still two weeks away, but in the greenhouse love and joy and lessons are in abundance these days. From the deep red petals of the geraniums to the blushing bell pepper to a big bowl of an aphrodisiac growing on the second-tier shelf, it seems like every plant is offering up a bit of romance and wisdom in one way or another. Is this what the winter harvest season looks like? Or does this mean spring might be coming early? I don’t know. Since it’s our first year, we can only take note and appreciate what’s happening right now in the greenhouse at this end-of-January date. Let’s look…
The sun gold cherry tomato branch produced another foursome…
The nasturtiums and geranium flowers are stretching their leaves and spreading so much cheer both in color and scent…
NasturtiumsGeraniums
Growing like gangbusters, the chives and the collard greens, are each overflowing from their containers…
The arugula and the parsley are keeping pace with our daily kitchen needs by enthusiastically providing continuous greens for every meal…
Greenhouse-grown arugula and parsley
One of our favorite recipes we tried this week was this new veggie burger from Jenny Rosenstrach’s cookbook The Weekday Vegetarians. We modified it a bit by adding a fried egg on top and stuffing the buns with our own greenhouse-grown arugula and parsley but otherwise followed the recipe exactly.
These burgers don’t require any baking in the oven – just stovetop cooking (or hot plate, in our case) in a cast-iron pan, so it’s an especially great recipe for under-construction cooking, small space meal-making, or college dorm food. Soft and light, as opposed to many veggie burger recipes that can sometimes tend to become dry and dense, Jenny’s recipe has the consistency of crab cakes and a delicate flavor combination of mushrooms, brown rice and pinto beans. Jenny suggested sliced avocado and a spicy mayo mixture for a topper, but because of our greenhouse abundance, we substituted those two with our own version of similar flavors and textures via the creamy egg and peppery parsley and arugula. It was delicious.
Nowadays, arugula is such a common salad staple that it’s easy to forget that it was once considered a gourmet green and talked about in haughty tones. Although British and Italian immigrants are credited with bringing it to America in the 19th century, it wasn’t really until the 1980s, that it started making a more regular appearance in American cookbooks.
Paula Peck was one of the very few who mentioned it in her 1960s-era book, The Art of Good Cooking, grouping it together with “very expensive” bibb lettuce and James Beard, our favorite gourmand, described it with a sense of reverent curiosity in his 1970s American Cookery book. But none of our favorite 20th-century chefs featured it as an ingredient to create a meal around until many decades later.
Not the case across the pond though. There was nothing new about it in England, Europe and the Mediterranean. There, arugula has been enjoyed for centuries. Legend states that in Roman times it was considered an aphrodisiac and was even banned from some gardens for its love potion properties. So if you wanted to make a romantic Valentine’s dinner for your sweetheart this year, consider a big bowl of arugula along with your shellfish.
Santaka pepper
Back to the spicy atmosphere in the greenhouse, the Santaka Pepper – although pretty small in stature at just 8 inches – is getting ready to flower (above) and Liz Lemon is growing a baby (below)…
Liz Lemon’s baby lemon!
The loveliest surprise of all this week though was the bell pepper. If you have been following along with previous entries from The Greenhouse Diaries, you’ll recall that this was a mystery bell pepper plant that was either a California Wonder, producing peppers that would ripen to a deep red color, or it was the Orange Sun variety, which would turn, as it names suggests, to a warm shade of orange once mature. For weeks, we’ve been waiting to see which color it would turn.
Finally, last Wednesday, the pepper started to change. With great excitement, I’m so pleased to share for certainty now, both the color and the type of plant we’ve been growing all these months here in the greenhouse. The first blush gave it all away…
Wednesday
Orange Sun! Each day it gets brighter and brighter…
ThursdayYesterday morning
If bell pepper had a theme song, it would be this one…
Through wind and rain, snow and sleet, sun and clouds, the greenhouse experienced all the different types of weather possible in these past 14 days. Outside it was a rollercoaster of highs and lows, but inside the temperature held steady between 70-80 degrees, the most even stretch of well-regulated temperature all winter so far. Thanks to our trusty heater, that cozy warmth is now making it possible to start our next endeavor…
Seed starting! After late sowing in the garden in 2022, this year the plan is to get a head start so that by the time the last frost date passes in our area (typically mid-to-late April), they’ll be a collection of hearty transplants ready to make their way out to the garden beds.
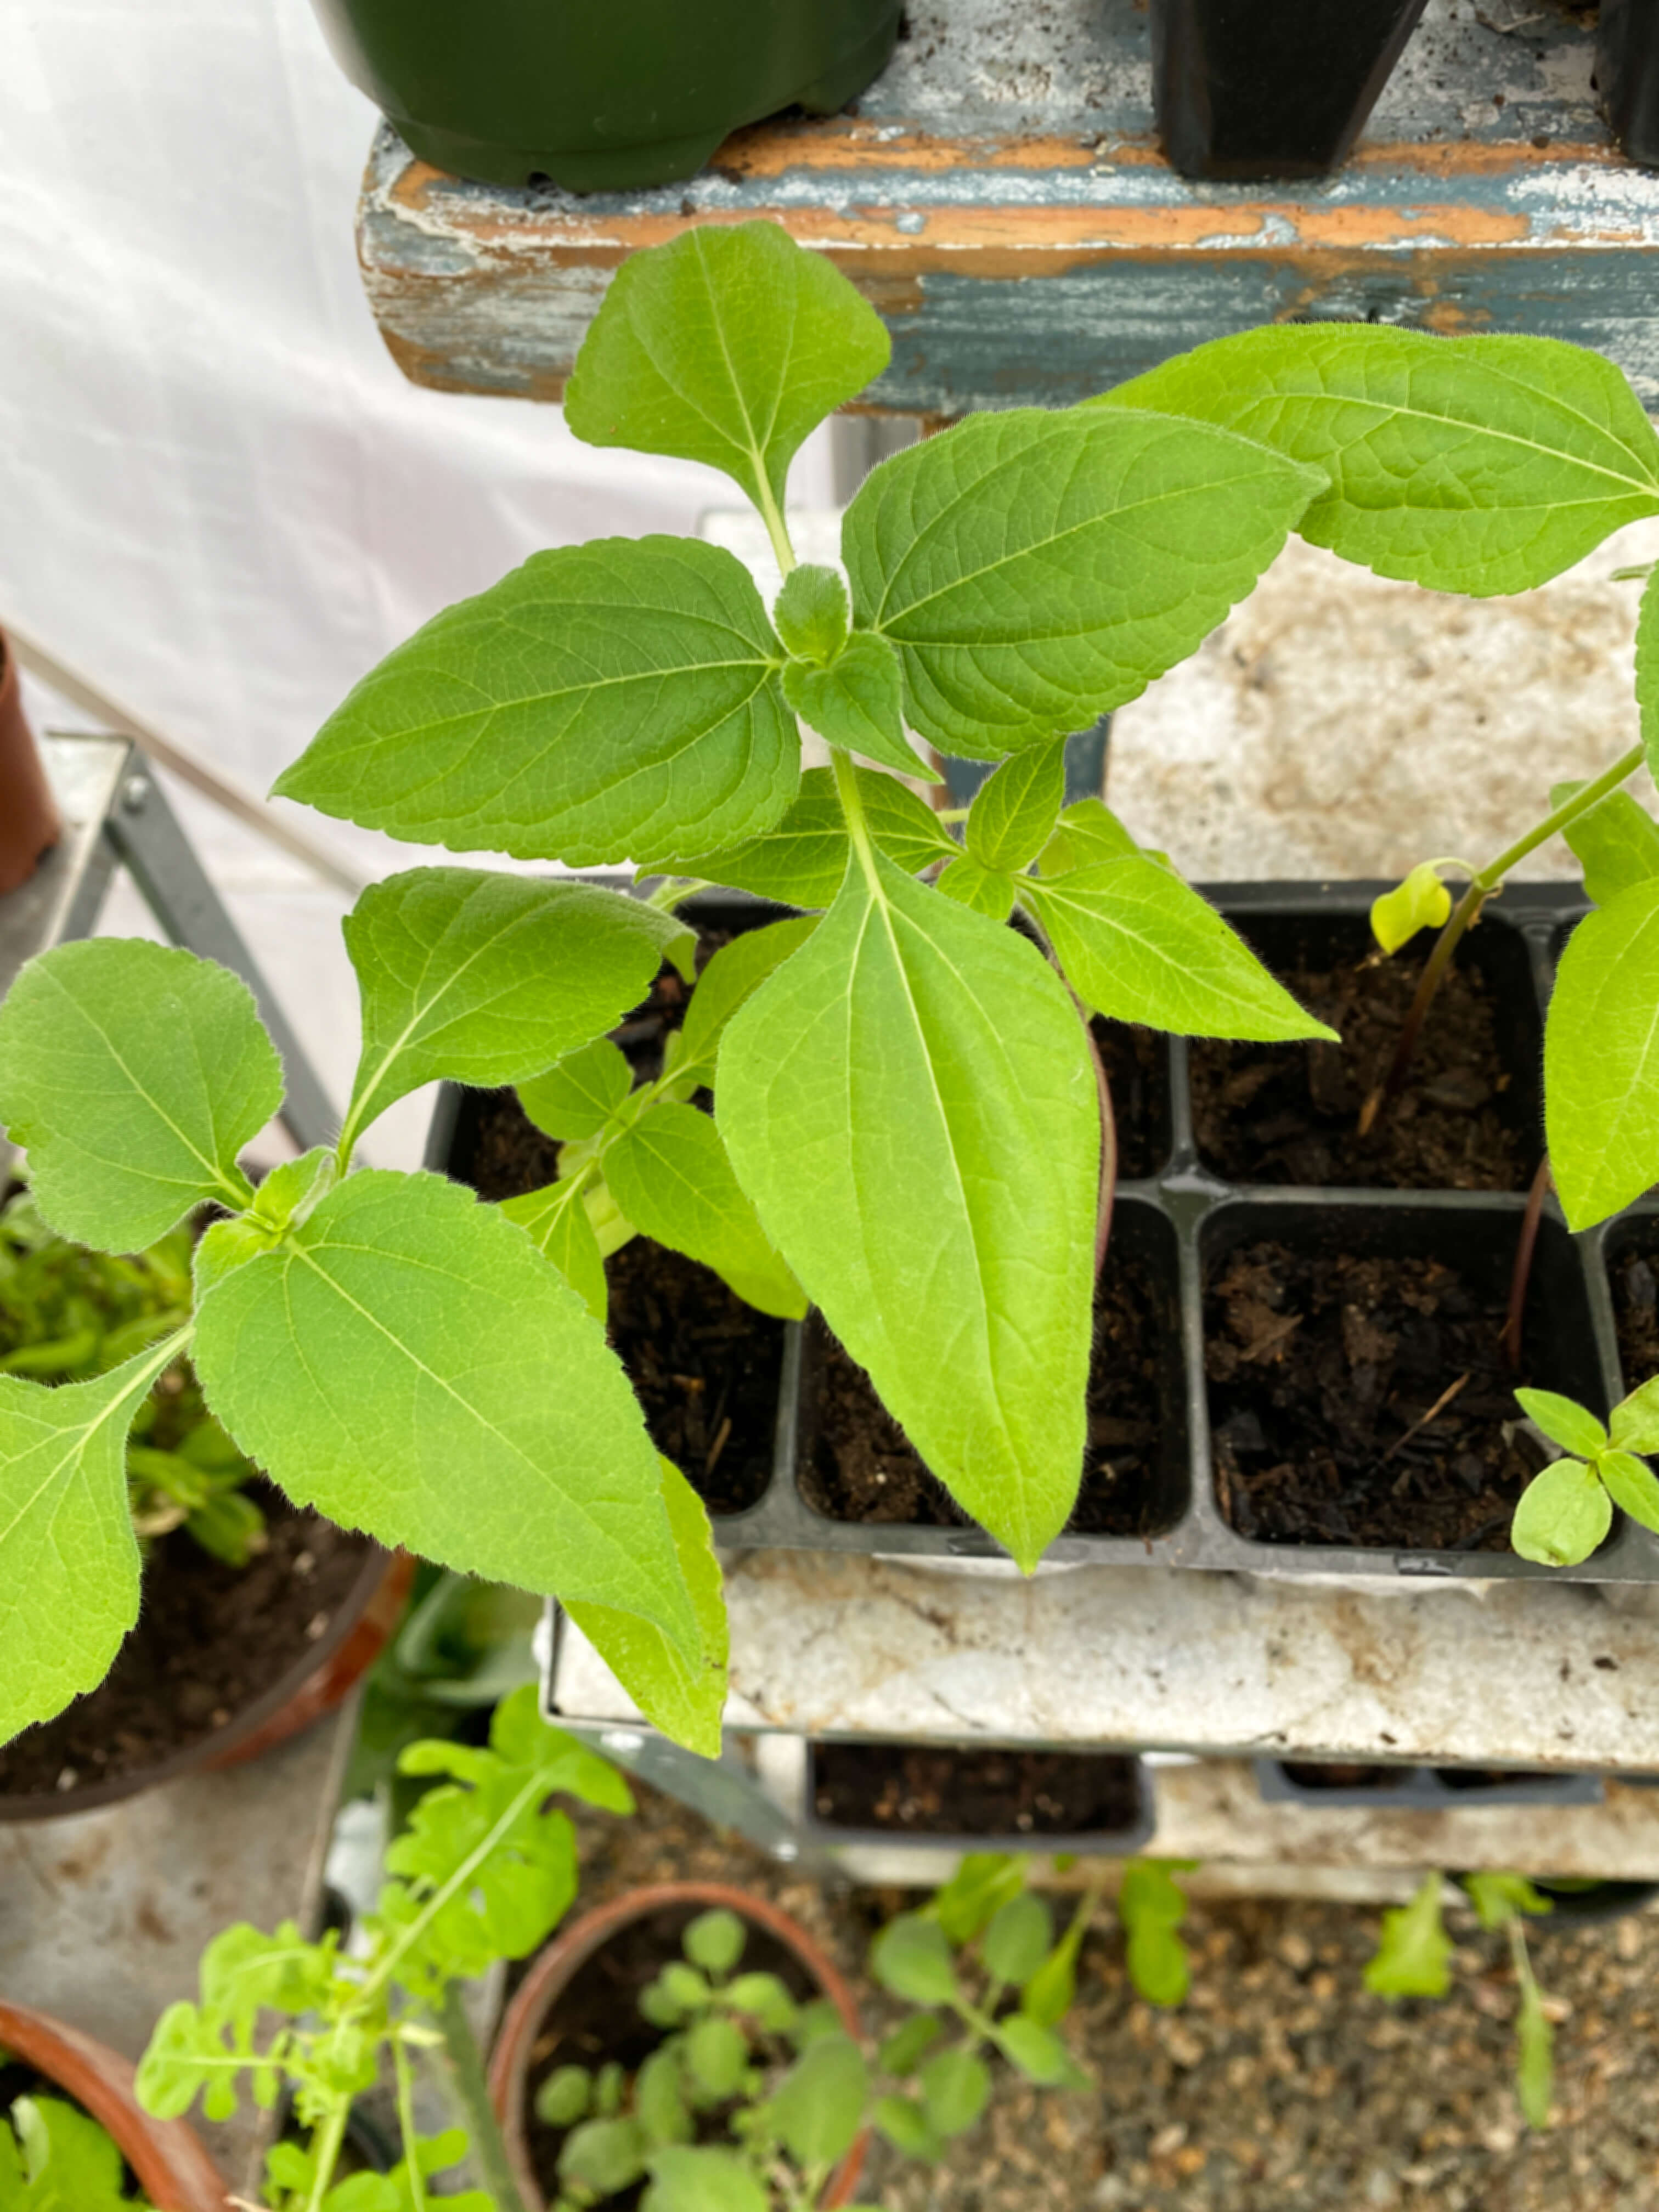
Excited to get to work on what is perhaps the most optimistic of gardening pursuits, the first set of seed trays were filled with flowers… snapdragons, Mexican sunflowers and foxglove. Four days in and the Mexican sunflowers have already started popping up. Another joy!
Mexican sunflower seedlings
The first time I ever grew Mexican sunflowers from seed was in 2012. I fell in love with their delicate, velvety soft stalks and their bright tangerine-colored petals. Blooming extensively throughout the season, they were a haven for bees and butterflies. That first year I was living in Georgia and they filled out into a 6′ foot by 5′ foot tall bush in a flash. That combination of heat, humidity, and full sun was a winning ticket. I haven’t had enough gardening space to try Mexican sunflowers again until this year, so I’m not sure if they will grow as large and as lush here in New England, but it will be an exciting experiment. This is how they turned out that first year (fingers crossed that we’ll get similar results and similar visitors)…
From the garden in 2012
Right on track, the snapdragons and the foxglove started sprouting yesterday. As biennials, we started some in the garden last year too, along with hollyhocks, but they didn’t grow very much. It’s my first attempt growing all three from seed, so we’ll see what happens this year. Between these greenhouse seedlings and those planted in the garden last year, we’ll have two sets hopefully coming up more productively this year.
Next up on the seed starting list for this coming week are a new batch of peppers and herbs, salad greens, hollyhocks, milkweed, and pincushion flowers, which will get us set up through the month of February before more seeds get started in March. By that stage, we’ll be rounding the corner towards Spring and our one-year anniversary at 1750 House. We aren’t as far along in our renovations as we thought we’d be, but I learned a valuable lesson this week from the veggie burgers.
At one point in Jenny’s instructions, when it comes to the step about forming the actual veggie burger patties, she writes “they will probably look mushy and unappetizing, but press on.” I love that she was so candid with this insight. And I love that she uses the encouraging words “press on.” As we continue to get to know the greenhouse, the 1750 House and the landscape in which they both lay, it is such a good reminder that all worthwhile endeavors require a healthy dose of blind faith and pressing on. Without that, we’d never make it to the flowering and flourishing days. I can’t wait to see what this spring holds in terms of a kitchen and a kitchen garden. We may be in the middle of the mushy parts now, but something deliciously wonderful awaits.
Cheers to love that sprouts, to the sun’s coming out party in the greenhouse, and to Jenny for sharing recipes and reminders.
Mexican sunflower seedling
{The Greenhouse Diaries is an ongoing series. if you are new to the blog, catch up here with Week #1, Week #2,Week #3 and Week #4 here}
A cramped pub. Green beer. A parade. A contest for the best-dressed leprechaun. A rousing time. A silly hat. A limerick, a shanty song, a poem about lads and lassies. A wistful ballad sung soft and sweet. In America, that’s a pretty traditional take on St. Patrick’s Day in pre-Covid years, back when camaraderie and celebration could and would run rampant.
This year there will be no raucous clinking of glasses with strangers, no sweaty rock bands stomping out the pace of their songs, or tables stuffed so close together that the entire room sways like one big sea of elbows and shoulders and breath and beer. But there’s more than one way to celebrate the holiday, pandemic or otherwise.
As the only cultural heritage day that has been universally acknowledged and accepted throughout the world, this love of Irish heritage celebrated every March 17th, has meant different things to different people in different parts of the globe throughout time.
In St Augustine, FL in the year 1600, St Patrick (then known to Spanish Floridians as St. Patricio) was celebrated with a gunpowder salute and a day of feasting to honor their belief that St. Patrick was protecting the city’s cornfields. In Boston in 1773, St Patrick’s Day meant a quiet dinner party among a few of the city’s prominent businessmen who celebrated not the love of a country but the love of British-born St. Patrick and his contributions to the Catholic faith in Ireland.
In Ireland at the start of the last century, the national holiday was a day meant for quiet reflection spent in church. For many local, national and international businesses throughout the 1900s and 2000s, the holiday meant and still means a massive marketing campaign that floods the retail world with all things green, lucky and legend-loving.
Here in the Vintage Kitchen, the holiday means the kick-off to springtime cooking. In our Southern neck of the woods, mid-March welcomes strawberry season, onion season, and early leafy green season. The first signs of flowers start dotting the landscape with dancing daffodils and jonquils. The color green in an array of tender shades burst out into the world – on tree tips, on blades of grass, in fresh produce newly arrived at the farmers market. This time of year is when our climate most resembles Ireland’s weather – cool, rainy, sometimes sunny, oftentimes cloudy. It’s the exact weather I remember from my first trip to Ireland many years ago. March marks the month I want to celebrate the country most.
In today’s holiday post, we are featuring five unique recipes from the Emerald Isle that herald the arrival of spring and that will keep you fed, Irish style, from morning til night. Included here are foods fresh from the fields, the streams, and the sea. They are untraditional takes on traditional food gathered from Ireland’s history that I hope will help will inspire your March menus like they always do mine. There’s a stovetop jam you can make in minutes, a soup that spotlights one of the oldest green vegetables in the world, and a seafood dinner that will have you rethinking your love of pork in exchange for this new fare. However you choose to celebrate the day – whether rowdy and pub bound, quiet and thoughtful or fully outfitted in space and spirit with decorations that delight, I hope these Irish themed foods will tempt you into creating some new traditions in your kitchen not just today but for the whole new Spring season ahead as well.
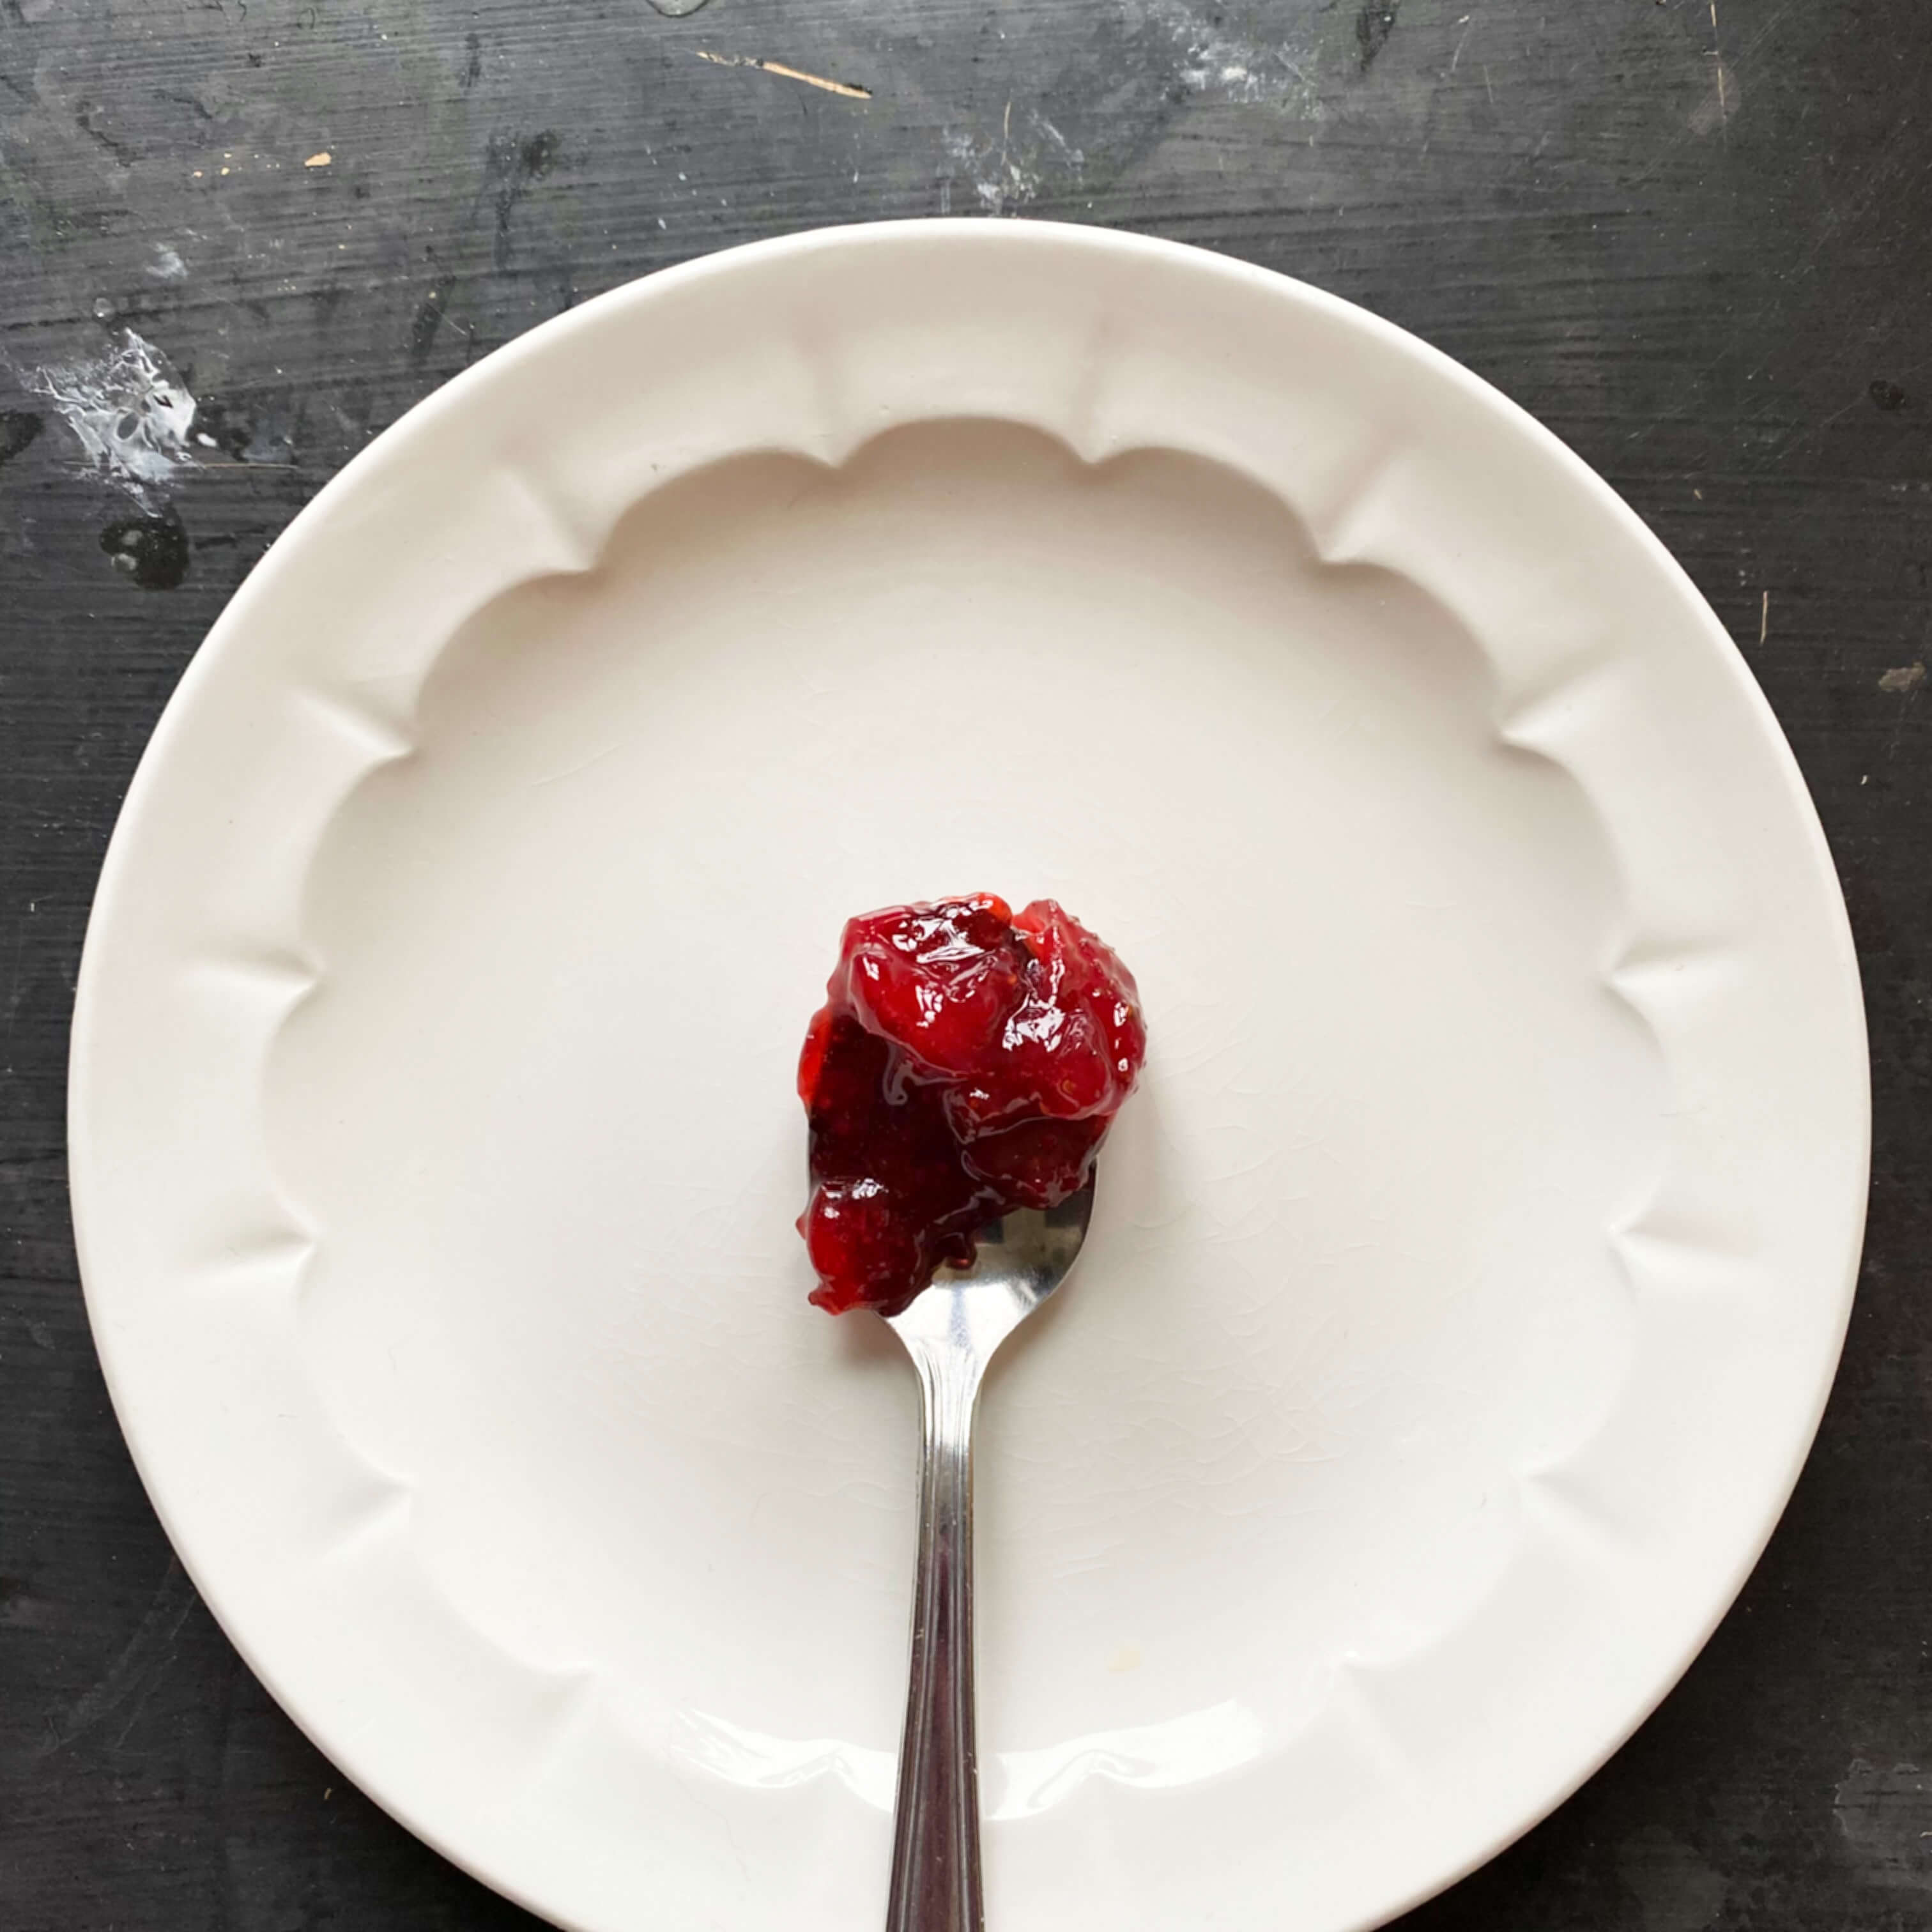
Currant Scones with Strawberry Preserves
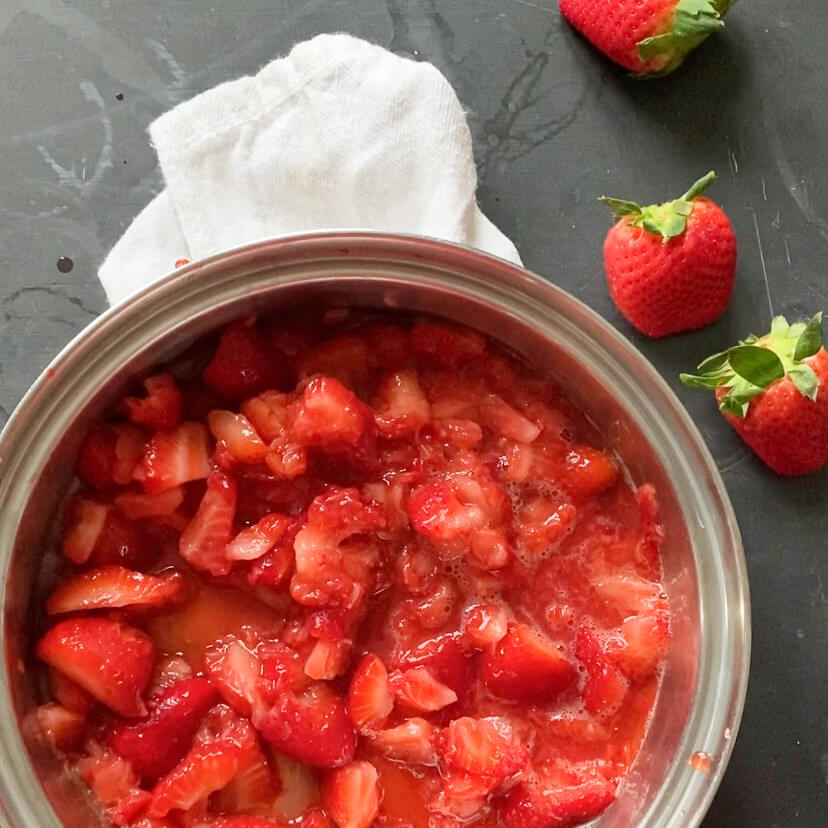
There is long-standing uncertainty in the baking world when it comes to England, Scotland, and Ireland. It seems no one can quite determine which country invented the scone first. Lucky for us, all three countries make wonderful versions. This recipe for currant scones is made even better with the inclusion of Irish butter and fresh strawberry preserves made on the stovetop from one carton of fresh berries. Since we are now entering strawberry season, this is the perfect time of year to make your own homemade jam with fruit at its most flavorful stage. If you are like me, and somewhat intimated by the home-canning process, and making your own jams and jellies seems daunting, this strawberry preserve recipe is the next best thing. Made in minutes from one carton of fresh berries and some added sugar, it is simple, quick to prepare, and gives any store-bought jam a serious run for its money. Not as shelf-stable as jarred jams and jellies, this version only lasts for about 7 days in the fridge but heaped on top of a warm scone it’s so good, you probably won’t even have it around that long. Pick the ripest, reddest, more fragrant strawberries you can find for this recipe and you can’t go wong.
Currant Scones with Strawberry Preserves
Makes 10-12 scones
1 cup wheat bran
2 cups unbleached bread flour
1 teaspoon baking soda
3 tablespoons sugar
1/2 teaspoon salt
1/3 cup cold Irish butter, cut ino pieces
1/3 cup dried currants
1 cup buttermilk
1 egg, beaten
Preheat the oven to 425 degrees. In a large bowl, stir the bran, flour baking soda, sugar, and salt until well blended. Using a fork mash up the butter in the flour mixture until the it resembles coarse crumbs. Mix in the currants, then quickly stir in the buttermilk and egg to form a soft dough.
Turn the dough out onto a lighlty floured work surface and pat it to 3/4 inch thickness. Use a glass or biscuit cutter that is 2″ inches in diameter, cut dough into rounds and place on a cookie sheet. Bake for 15 to 20 minutes or until golden brown.
Strawberry Preserves
Makes 1 1/2 cups
1 basket fresh strawberries
3/4 cup cane sugar
Rinse strawberries and remove green tops. Place berries in a medium saucepan and mash them coarsely (either using a potato masher or your hands). Cook the strawberries over medium heat, stirring frequently, until they begin to thicken (about 10 minutes).
Reduce the heat to low, add the suagr and stir until it dissolves. Increase heat to medium and boil, stirring frequently for 20 minutes or until the mixture thickens to thick jam-like consistency. Remove from heat and let cool. Store in an air-tight container in the fridge for up to one week.
Watercress and Lime Soup
Next up on the menu is Watercress and Lime Soup. Packed with nutrients, watercress is one of the oldest and healthiest leafy greens on earth dating all the way back to ancient times. Containing Calcium, Copper, Iron, Magnesium, Manganese, Niacin, Pantothenic Acid, Phosphorus, Potassium, Riboflavin, Selenium, Thiamin, Vitamin A, Vitamin B6, Vitamin C, Vitamin D, Vitamin E, Vitamin K and Zinc, it grows wild in clear, slow-moving streams all over Ireland.
Often used in Irish cooking like spinach, it appears in all sorts of hot and cold dishes as well as fresh salads, and on sandwiches. Watercress Soup is a traditional heritage food that usually involves potatoes, but this recipe, adapted from the kitchen of Adare Manor in County Limerick changes things up a bit by adding lime juice and removing the potatoes.
Adare Manor is a 13th century Tudor Revival-style castle that has a long and storied history of family ownership. Now it serves as a luxury hotel and golf resort.
The result is a creamy soup with a lot of depth, thanks to the peppery watercress and the tangy lime juice. Like the optimal seasonal timing of the strawberry preserves, this is a lovely springtime soup that blends flavorful watercress with cream and butter. Thin but nourishing, it is ideal fare for the rainy weather March and April often bring and shows off the bright bouquet of spring onion sets that are now coming into season.
Watercress & Lime Soup
Serves 6
2 tablespoons olive oil
1 onion, chopped
1 leek, white part only, chopped
3 celery stalks, chopped
1/2 cup diced celery root (if you can’t find celery root substitute 1 small white potato (peeled) and chopped and one extra stalk of celery, chopped)
6 cups vegetable broth
2 lbs. watercress
1 cup heavy whipping cream
Juice of 4 fresh limes
Salt & Pepper to taste
Freshly shaved parmesan cheese to taste
In a large soup pot over medium-low, heat the oil and saute the onion, leek, celery and celery root (or potato/celery stalk substitute) until tender but not browned, about 12 minutes. Stir in the vegetable broth and simmer for 30 minutes, stirring occasionally.
Add the watercress, raise the heat to high ad bring to a boil. Remove from heat and puree.
In a deep bowl, whip the cream until soft peak form. Add the lime juice to the soup puree and mix thoroughly. Then gently fold in the whipped cream until well blended. Season with salt and pepper. Serve in bowls with shaved parmesan cheese and a sprig of watercress for garnish.
This recipe, like most soups gets better the longer it sits. The lime retains its flavor and helps keep the color of the soup bright and green even after a few days in the fridge. For a heavier meal, a nice companion is a baked potato or a few slices of rustic country bread.
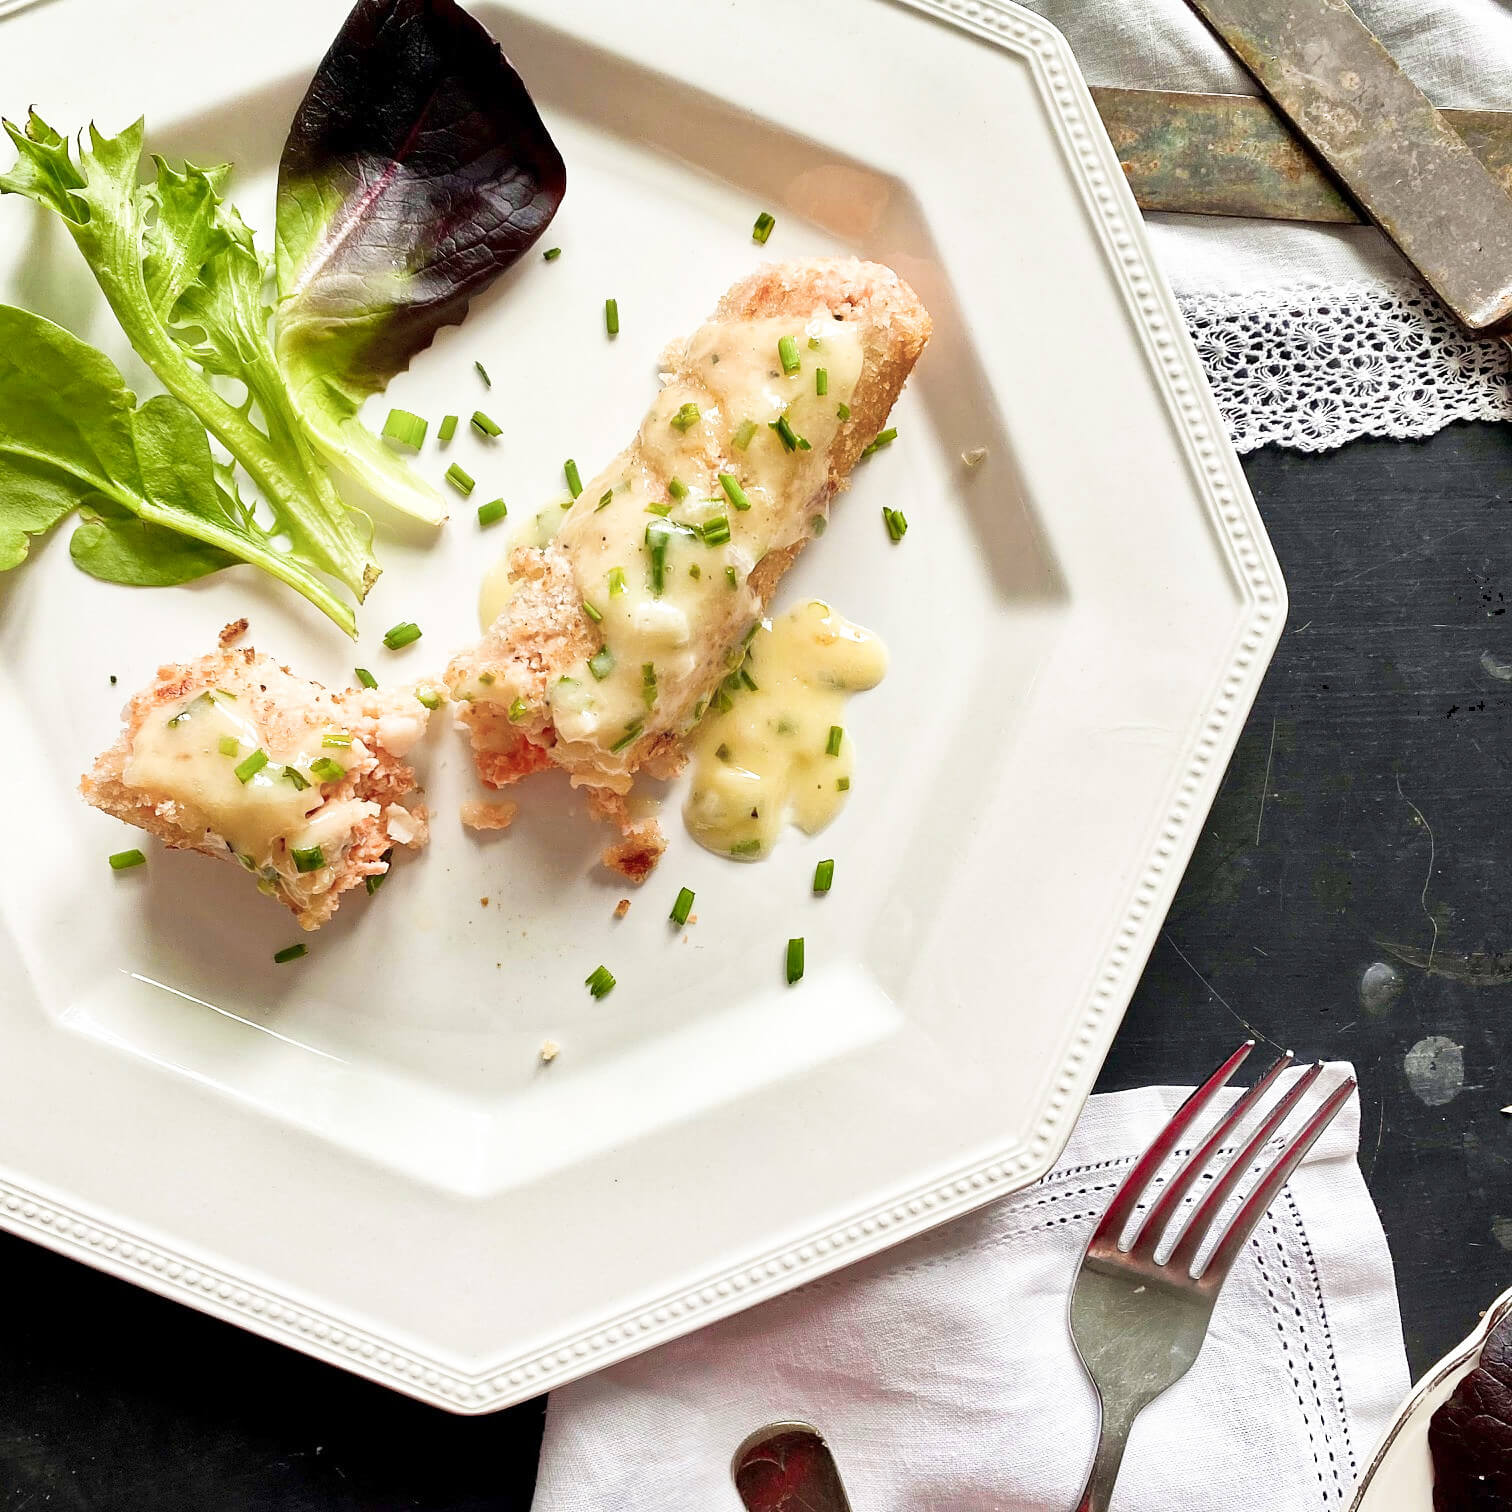
Seafood Sausages with Chive Sauce
The last two spotlights on Irish cooking for the springtime kitchen feature two recipes in one, although they can both operate independently as well. Fish based in one and sauce based in the other, both feature go-to ingrediants (seafood and chives) favored by Irish eaters all over the country. Salmon and cod are the two most commonly enjoyed fish in Ireland. This recipe contains both, along with the addition of scallops, turning it into a trifecta of seafood-loving delight.
Originating from the kitchen of Caragh Lodge, an ideal nature lover’s getaway that has sat on the shores of Caragh Lake in County Kerry since 1875, the former house now turned hotel has been associated with good fishing and good cooking for more than a century.
The recipe, Seafood Sausages with Chive Sauce is similar to crab cakes but in a sausage shape. Protein-laden, it is an extravagant dish that you might reserve for special occasions or jubilant merrymaking holidays like today when you want to surprise your dinner mates with something out of the ordinary. Rich, filling, and full of flavor, the sausages are fun to make, and they involve a unique technique. Like a fleet of canoes bobbing on the Irish Sea, the sausages are simmered in plastic wrap where they steam and plump their way into shape before being rolled in bread crumbs and sauteed in butter. Once plated, they are drizzled with more butter in the form of a silky chive sauce. The result is a totally decadent dining experience that sits on the same level of other indulgent foods like lobster with drawn butter, Eggs Benedict, and Beef Wellington. Colorful and unique, this is a recipe that offers much in the way of interest and would be lovely for other spring-time holidays like Mother’s Day or Easter in addition to St. Pat’s.
Seafood Sausages with Chive Sauce
Serves 4-6
12 oz salmon
1 tablespoon butter
4 oz. cod filet, finely diced
4 oz. scallops, finely diced
1/4 teaspoon salt
1/4 teaspoon pepper
2 teaspoons fresh chives, minced
2 egg whites
1/2 cup heavy whipping cream
1 cup fine fresh bread crumbs
2 tablespoons butter
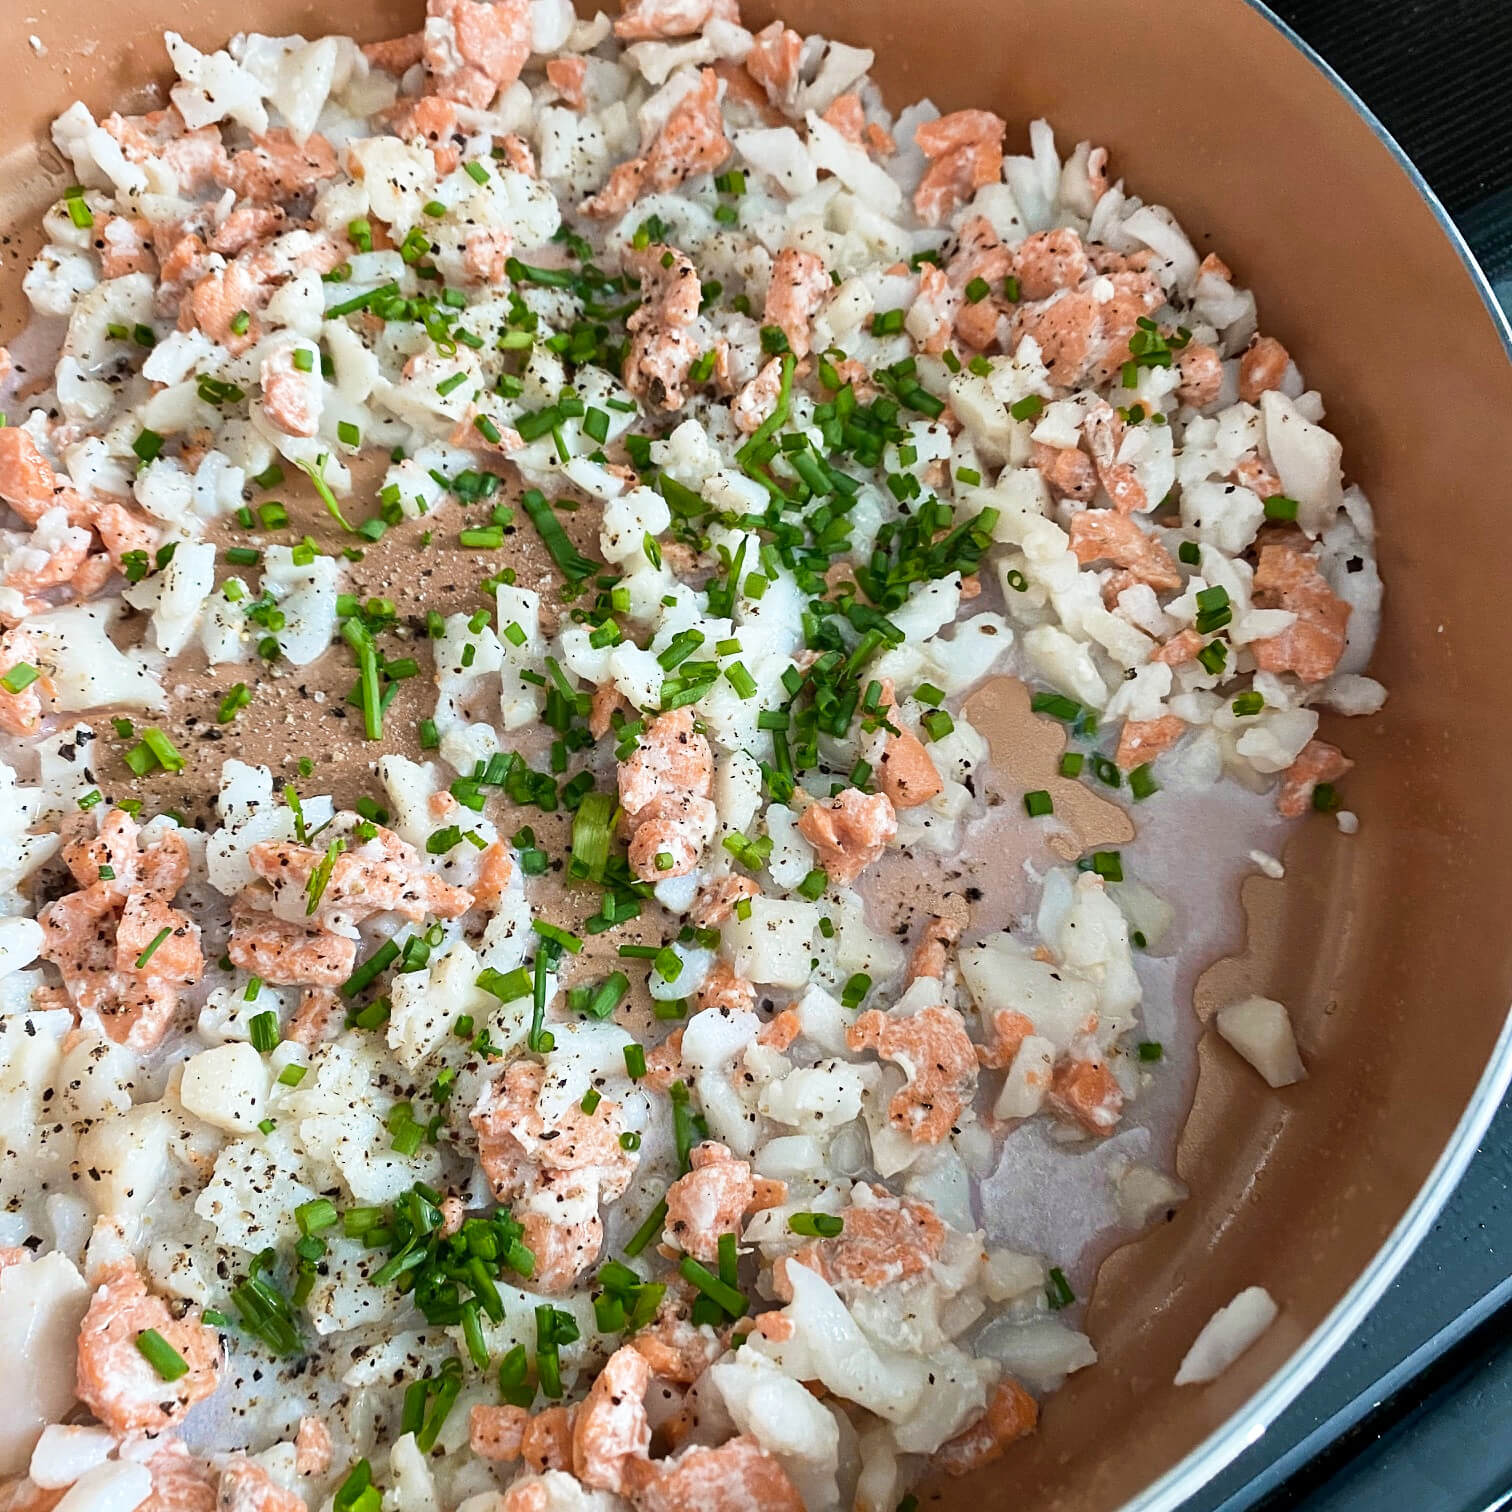
Finely dice 4 oz. of the salmon. In a large saute pan or skillet,melt the unsalted butter over medium heat and saute the cod, diced salmon, and scallops for 5 minutes or until opaque. Remove from heat and season with salt, pepper, and chives. Set aside.
In a blender or food processor, puree the remaining 8 oz of uncooked salmon. Add the egg whites, salt, and pepper and process until smooth. Place the pureed fish mixture in a bowl set inside a bowl of ice and slowly whisk in the cream.
Add the sauteed fish and mix to combine. Refrigerate mixture for one hour.
Remove fish mixture from fridge. Place one soup spoon size dollop of fish mixture onto a piece of plastic wrap and shape into a sausage.
Roll it up and tie a knot at each end with kitchen string. Repeat with the rest of the mixture.
Bring a large pot of water to a simmer and poach the sausages for 10-20 minutes depending on size and thickness.
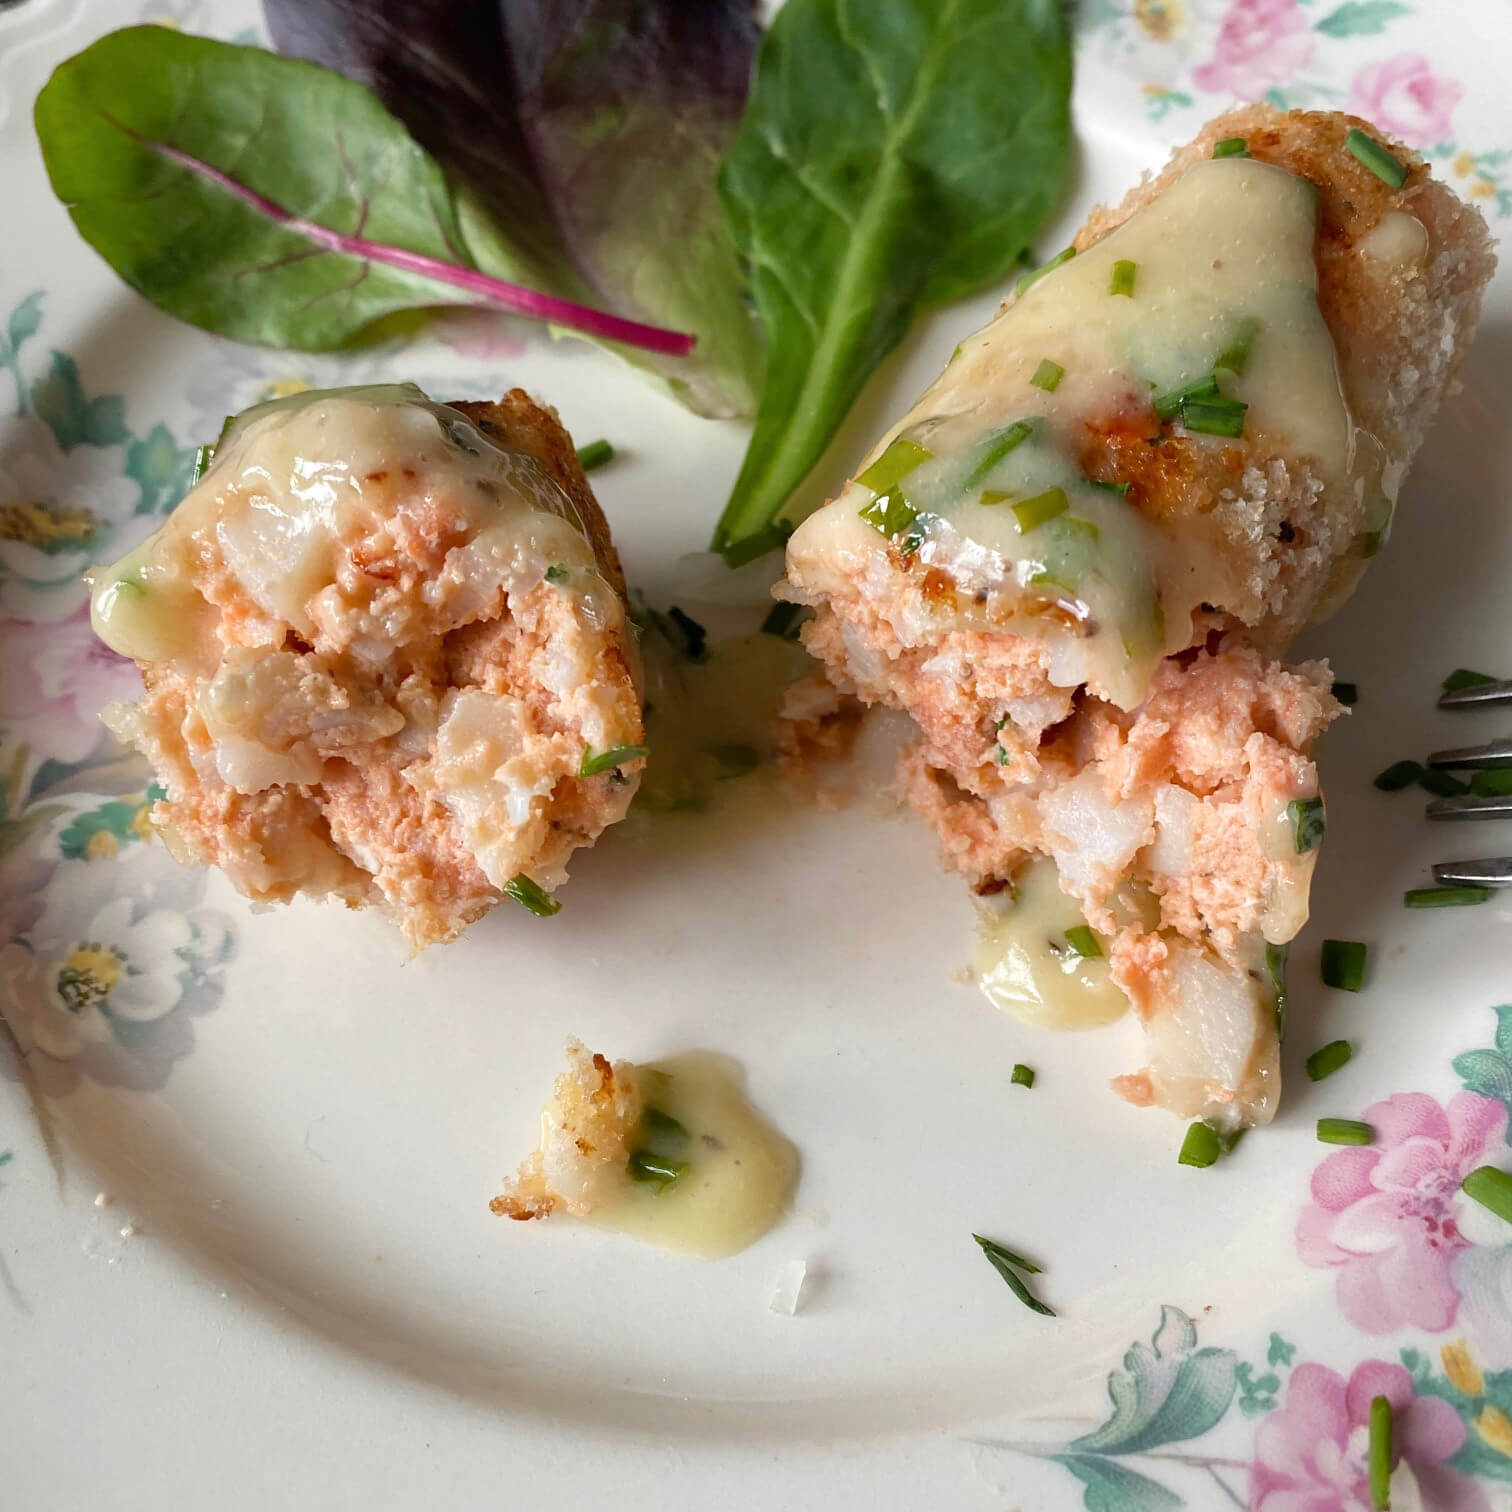
When the sausages are done look for the plastic wrap to take on an air bubble shape. The sausages should be plumped up like hotdogs get when boiled in water, and the sausages should be firm to the touch. (The firmer the sausages are the easier they will be to roll in the bread crumbs and saute in the pan without breaking apart). While the sausages are cooling make the Chive Sauce.
Once the sausages have fully cooked in the water remove them to a baking rack and let them cool completely (about 30 minutes).
Roll the sausages in bread crumbs. Melt the butter in a large saute pan over medium heat and fry them until golden brown on each side.
Chive Sauce
3 tablespoons dry white wine
3 tablespoons white wine vinegar
1 tablespoon minced shallots
One pinch of pepper
1 tablespoon heavy whipping cream
3/4 cup butter, cut into pieces
1 tablespoon fresh chives, minced
In a small saucepan combine the wine, vinegar, shallots, and pepper and bring to a boil over high heat. Boil until the liquid reduces to about 1/2 tablespoon. Add the cream and boil again until it begins to thicken. Whisk in the butter, a few pieces at a time keeping the sauce just warm enough to absorb the butter as you whisk. Add the chives. (If your sausages are not ready to serve at this point keep the sauce on low heat and stir occasionally until the sausages are cooked. Drizzle the sauce over the sausages and serve.
As mentioned earlier, both the sausages and the sauce are lovely together but also lend themselves to enjoyment with other foods. The chive sauce would be delicious drizzled over baked potatoes, eggs or tossed with pasta. The seafood sausages would be wonderful crumbled on top of a salad, stuffed inside a summer tomato or spread out on toast points. Kitchen creativity rules the day when it comes to these two recipes, including experimenting with different blends of fish for the sausage and different types of herbs for the sauce.
The thing I love about Irish cooking most, is the country’s ability to blend fresh ingredients with comfort foods. Cream and cheese and butter are rife in so many recipes but when balanced with fresh vegetables they don’t feel overwhelming in the gastronomy department. And I love how there’s a little bit of everything for everyone in Ireland – whether you prefer humble provincial food or fancy fare, there’s something to please every palate.
Cheers to Ireland and to Spring and to new foods and flavors on this happy St Patrick’s Day! Hope your day (and your season!) are the most delicious one yet!
Two days before Thanksgiving, not last year, but the year before, a sandwich was made and a seed was started. The sandwich was a smashed collaboration of avocado and sauteed kale, ricotta cheese and caramelized onions which turned out great and became a repeat recipe for awhile, but the real star of the show was the seed. On that day, November 22nd, 2016 a little life began.
Reminiscent of elementary school science classes, the avocado pit (actually called a berry) from the sandwich-making endeavor got cleaned up and pierced with toothpicks. Resting on the rim of a glass while partially submerged in water, it sat there half-hovering for days and then weeks and then months. Absolutely nothing happened. The holiday season came and went. We celebrated New Year’s and middle month birthdays and our first snow in the ending week of January. But in the land of the avocado, nothing was changing except regular refills of water in the glass. It was such uneventful gardening I didn’t even take photographs.
Heading into the first week of February (week 9), I thought perhaps my avocado seed was a dud and was ready to abandon the project altogether. But magically, almost as if the little seed had read my thoughts, a crack in the pit opened up one morning. Something was happening, at long last! Days later a tap root started reaching out like a diver heading towards the bottom of the sea. And then things really escalated. Every day, it grew longer and longer until little root tentacles started filling the bottom of the glass. Satisfied with itself, it turned its attention skyward and from the center of the pit, a long slender green shoot started reaching for the stars.
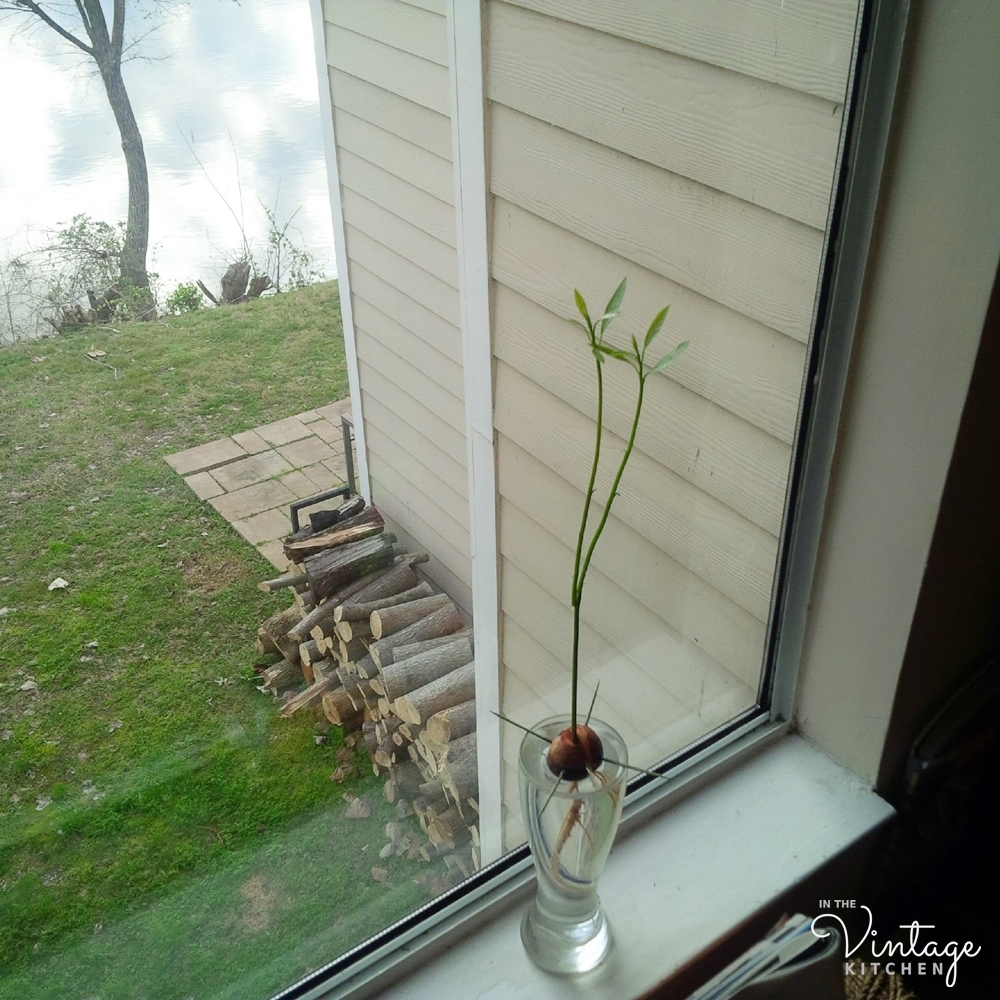
Drinking about a 1/4 cup of water a day, it grew almost a 1/2″ inch every morning. When it passed 12 inches” in height and grew its first set of leaves, I named this little guy growing with such gusto, Avi, and welcomed him into the family. For most of the Spring, Avi enjoyed his glass of water while taking in the river view from his perch in the window.
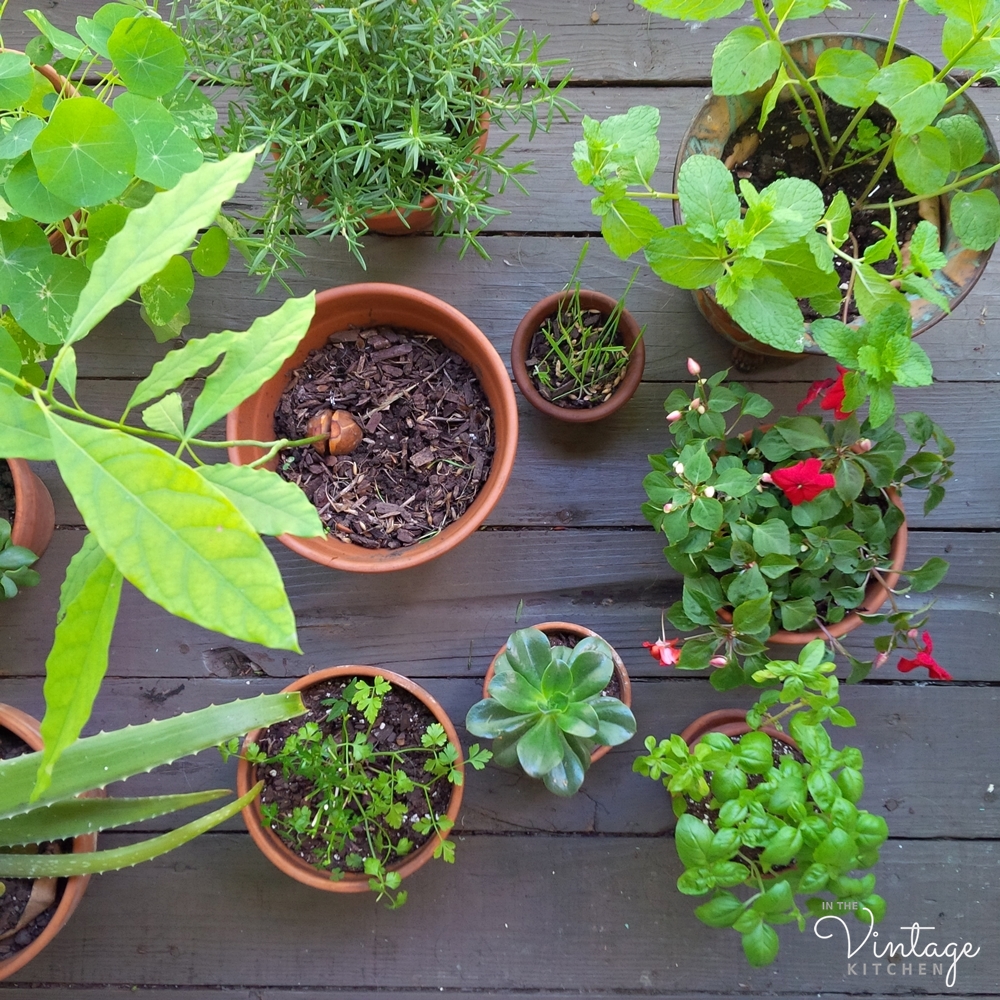
As the days grew longer and the temperatures warmed, I introduced to him to the outdoors for a little bit each day. When the hot, humid temperatures of summer in the South took over, he was transferred to a new garden pot filled with potting soil and joined the summer flowers on the balcony. You might remember seeing him from last summer’s post about how to make a mini-compost bin.
There’s Avi on the bottom right corner behind the nasturtiums!
In the lazy summer sun, Avi grew and grew and grew. Towering over the other plants, he looked like a king ruling over his court.
All summer he played a long-standing game with the nasturtiums to see who could climb the furthest.
Avi was the winner! When the seasons changed and the cool rains of Autumn scattered leaves on the balcony garden, Avi welcomed the wet weather.
But when we moved in mid-Fall trouble began. His first few nights went okay. He and Indie liked to watch the city lights come on from his new spot on the new balcony…
but during the day, when the sun was warm and bright, and the birds were floating overhead, Avi started doing peculiar things. Instead of carrying on with his growth spurt, he got limpy and lethargic. A week into his new surroundings, he developed brown spots and then white spots and then crinkly skin. Thinking he was not getting enough water, I doubled up. But soon after, he looked more like a loose umbrella than a young tree. His leaves turned from a colorful shade of lime to a dull blackish green. Tragedy was looming, we both knew it. A week before his first birthday I feared Avi might be on his last legs.
Signals from a troubling time of growing pains.
I brought him inside for a few days, consulted the internet and determined that he either had too much salt built up in his roots, ( a common side-effect of using regular tap water for daily watering) or he was getting too much sun on the new patio. I rinsed his roots in distilled water and gave him a new home in a bigger pot with fresh potting soil. Then he got a new vantage point – a sunny windowsill on top of a low bookshelf.
Avi’s second perch nestled in with pig and pineapple and Hedy Hatstand.
But for two weeks he still looked terrible. So he moved again, this time to a bright corner between two big windows – a spot that gets no direct sunlight but reflects light because of the white wall paint. It also happens to be right next to the kitchen, where I could keep a close eye on him. To my happiness, Avi flourished once again! Day by day, his leaves moved higher and higher until they went from vertical back to horizontal. And he started growing again.
Now he’s taller than dear Hudson and happy as a clam. As it turns out, all Avi ever wanted was to be close to the kitchen and out of the sun. Who can blame him?
Back to pretty green leaves and a happy disposition once again!
Today he measures 3′ feet 2″ inches tall and he’s just achieved his longest set of leaves at 12.5″ inches in length. Some gardening experts say that Avi will never produce avocados to eat, but that doesn’t matter, I like him just for the handsome plant that he is. And it’s fun to watch him grow. I hope to see him reach a height of 8-9 feet (maybe taller!), a little indoor arboretum in the making.
If you’d like to grow your own Avi, it’s really simple. Find step by step instructions here. You just need an extra dose of patience in the beginning until the berry cracks open and growing gets underway. Other than regular watering every couple days and eventual transplanting as it grows, avocado plants are easy to care for. Many garden sites say that avocados LOVE sun, but as we learned with Avi’s growing pains, too much sun is indeed, too much, so watch closely as your plant’s personality develops and see what he or she likes best.
On November 22nd, when Avi celebrates his second birthday, we’ll check back in to see how much he has grown in the nine months between now and then. Maybe he’ll be up to the ceiling!
In the meantime, cheers to Avi and his ability to weather the rigors of adolescence. And cheers to indoor gardening – an activity that’s in-season all year round!
The last time Ms. Jeannie posted on the blog it was snowing. And now it’s Spring!
Vintage Metal Marquee Sign – The Month of April
Goodness gracious where do the days go?! All throughout February and March Ms. Jeannie has been navigating the book club and her organizational systems for it.
80 February book club packages ready for the post office!
It has taken her away from blogging and all you lovely readers which she hates, but it has also introduced her to an assortment of wonderful authors and stories from new subscribers which she loves, so it’s been an exciting journey from concept to creation.
With a total of 88 subscribers as of this post, the book club is a constant bustle of activity. To date, which is now at the 7th month mark, Ms. Jeannie has wrapped 307 books, written 307 author’s bios and 307 book bios, been kicked out of the post office once (too many packages please come back tomorrow), gone through 15 packages of tape, finished 8 rolls of twine, folded 356 pieces of tissue paper, cut 560 lengths of ribbon and been reprimanded by the post master twice (only 10 packages at a time in line please!). Needless to say it’s been a spectacular adventure!
And while Ms. Jeannie’s days are now full of books, and research, and writing, and schedules , she managed to carve in a little gardening time over the weekend thanks to one of the most wonderful surprises ever…
A greenhouse on loan!
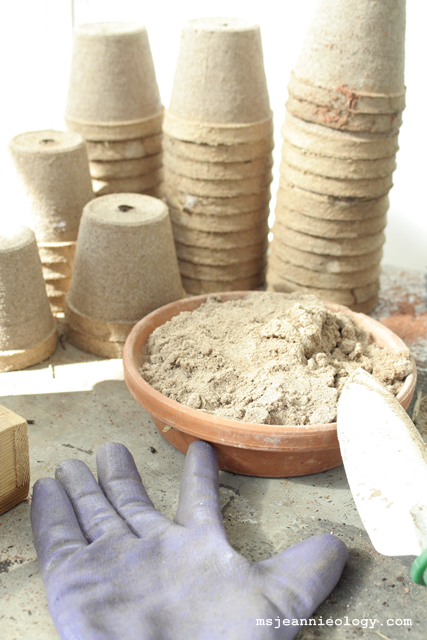
Ms. Jeannie’s neighbor has lent her the use of her greenhouse for the rest of the year! How exciting – a whole greenhouse all her own! It’s located just down at the end of the drive, so it’s a quick walk from the house, and ideally set with plenty of sun water spigots, and old rickety potting tables. After a quick yet thorough snake check by Mr. Jeannie (none thank goodness!) Ms. Jeannie got to work right away planting seeds…
The first seeds of the season!
So far, in just a day she managed to prepare and pot almost her entire vegetable garden…
Dill, cucumbers, spinach, hot peppers, and tomatoes.
It was the first sunny, dry and 70 degree weather in days and Ms. Jeannie was so glad to be enjoying it in her new horticulture house. She even collected sand from the creek bed for her spinach seedlings – these are going to be some pampered plants this year.
Creek sand!
Next week Ms. Jeannie will get to work on the flower seed aspect of the garden so stay tuned for some regular garden updates all season.
With each passing month, the book club gets better and better situated, so Ms. Jeannie looks forward to sharing a bevy of spring and summer blog posts.
Well, Ms. Jeannie has done it. She has finally planted all the garden seeds that she had ordered from Botanical Interests three weeks ago.
The just completed final garden patch.
She has been working on this goal bit by bit every few days, but Monday’s gorgeous weather really got her motivated to finish up.
At market last weekend, she bought some pre-started herbs for her garden (dill, rosemary, basil and mint) and wouldn’t you know, a few extra plantlings just happened to jump into her basket during that shopping trip too. So 4 jalapenos, 1 red bell pepper and two tomato plants round out the garden complete.
So in addition to her six containers full of sunflowers, a 4′ x 5′ sunflower patch and her newly finished 10″x 12″ vegetable, flowers and herb garden, Ms. Jeannie is well on her way to being a farmer!
In the 10′ x12′ patch, she mounded the herbs in the center of the patch to give the garden a little interest as everything starts growing out. She lined the base of the herb mound with rocks and lined her pathway in old bricks that she had lying about in the garage.
Mound of herbs!
Brick pathway
Until she gets a fence up she has blocked off the sections in her garden with fallen sticks from woods behind her house.
Garden sections. Jalapeno plants down front. Tomato plant in back.
Ms. Jeannie likes to halfhazardly organize her garden thoughts on paper before she plants, so she can keep her seed plans organized while she’s planting. On paper the garden plan looks like this:
Rough sketch of garden plan
As Ms. Jeannie was planting, she started thinking about the garden of her dreams and what all that would/could include. Years ago, she read a beautiful garden coffee table book called Venzano: A Scented Garden in Tuscany about a couple who bought a 12th century monastery in Italy and turned part of it into a nursery.
Venzano: A Scented Garden in Tuscany by Stephanie Donaldson
It is a gorgeous book and a gorgeous story.
View from Venzano
Courtyard at Venzano
Ms Jeannie is in love with the rustic pergola above. She has spent many a daydream trying to incorporate something similar into her own garden plan. At Venzano, it is used to shelter the herb garden.
Sadly, due to financial issues, the couple had to sell Venzano. It was bought by someone but the nursery is no longer in operation and the residence is private.
But thanks to the book, Ms. Jeannie can recreate the look of Venzano in her own garden. In addition to the splendid pergola above, Ms. Jeannie would also incorporate these dreamy elements that are available through Etsy.com…
Wrought Iron Garden Trellis from VanMadroneMetalworks
Pea Gravel from BluffCreekNaturals
Antique Iron Wire Garden Gate by beep3
100 Succulents from SanPedroCactus
Stepping Stone Paver Moulds from KapCreations
French Style Garden Bench from SusanVaillant
Wood Garden Markers from AndrewsReclaimed
Solar Powered Mason Jar Lights from BootsNGus
Antique Large Copper Wash Tub from RustedandWrought
White Cotton Ball String Lights by CottonLight
Garden Bench Made from Reclaimed Wood by SauteeWoodWorks
Birdhouse Gourds by MizzTizzysWeedSeeds
Ms. Jeannie is also in love with the twig style fences. In almost all the how-to guides on building a twig fence you can find the follwing verbage: challenging, impractical, un-sturdy, purely decorative, non-functional. Perfect! Ms. Jeannie’s on a mission to change all these negatives into positives and makes the world’s first easy, durable, functional twig fence!
She just loves the look of them, so maybe her passion alone will navigate her the tough parts. This is the kind of look she aspires to: