Embrace Your Inner Bula: You’re On Fiji Time This Week!

For all the travelers out there who are feeling a little bit housebound these days and are missing your exotic ports of call, this post is for you. For anyone who finds themselves in a food rut, tired and bored by all the usual dinnertime choices, this post is for you too. And for anyone feeling especially grumpy, frustrated or lackluster when it comes to navigating this strange roller coaster of a turbulent world, this post is also for you.

That may sound like a lot of importance to place upon on the shoulders of one food related blog post but the salve for all these wayward troubles can pretty much be soothed in one word thanks to our featured destination of the week.

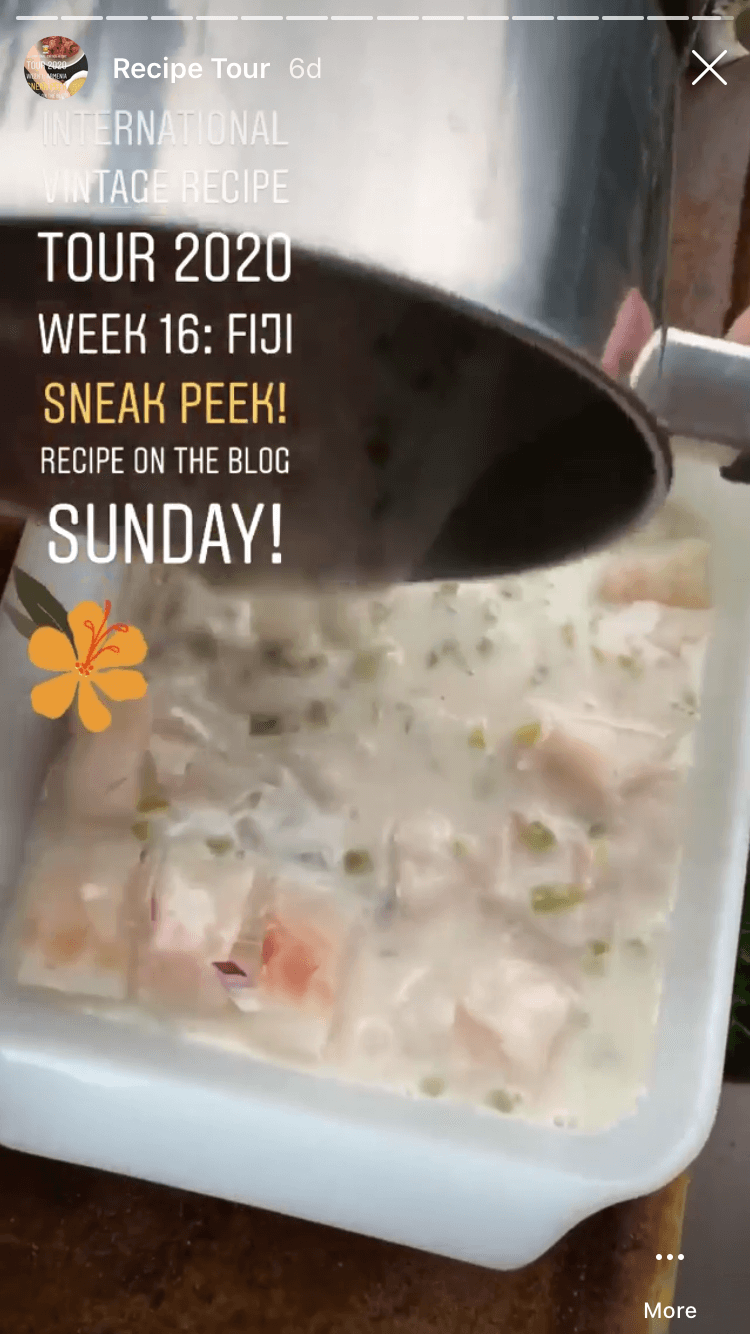
Tonight’s post takes us to the beautiful islands of Fiji, via the kitchen, to make a very quick, very easy  fish dish that tastes of coconuts and day dreams and relaxed coastal living. Welcome to Week 16 of the International Vintage Recipe Tour. Welcome to Fiji, dear kitcheners!

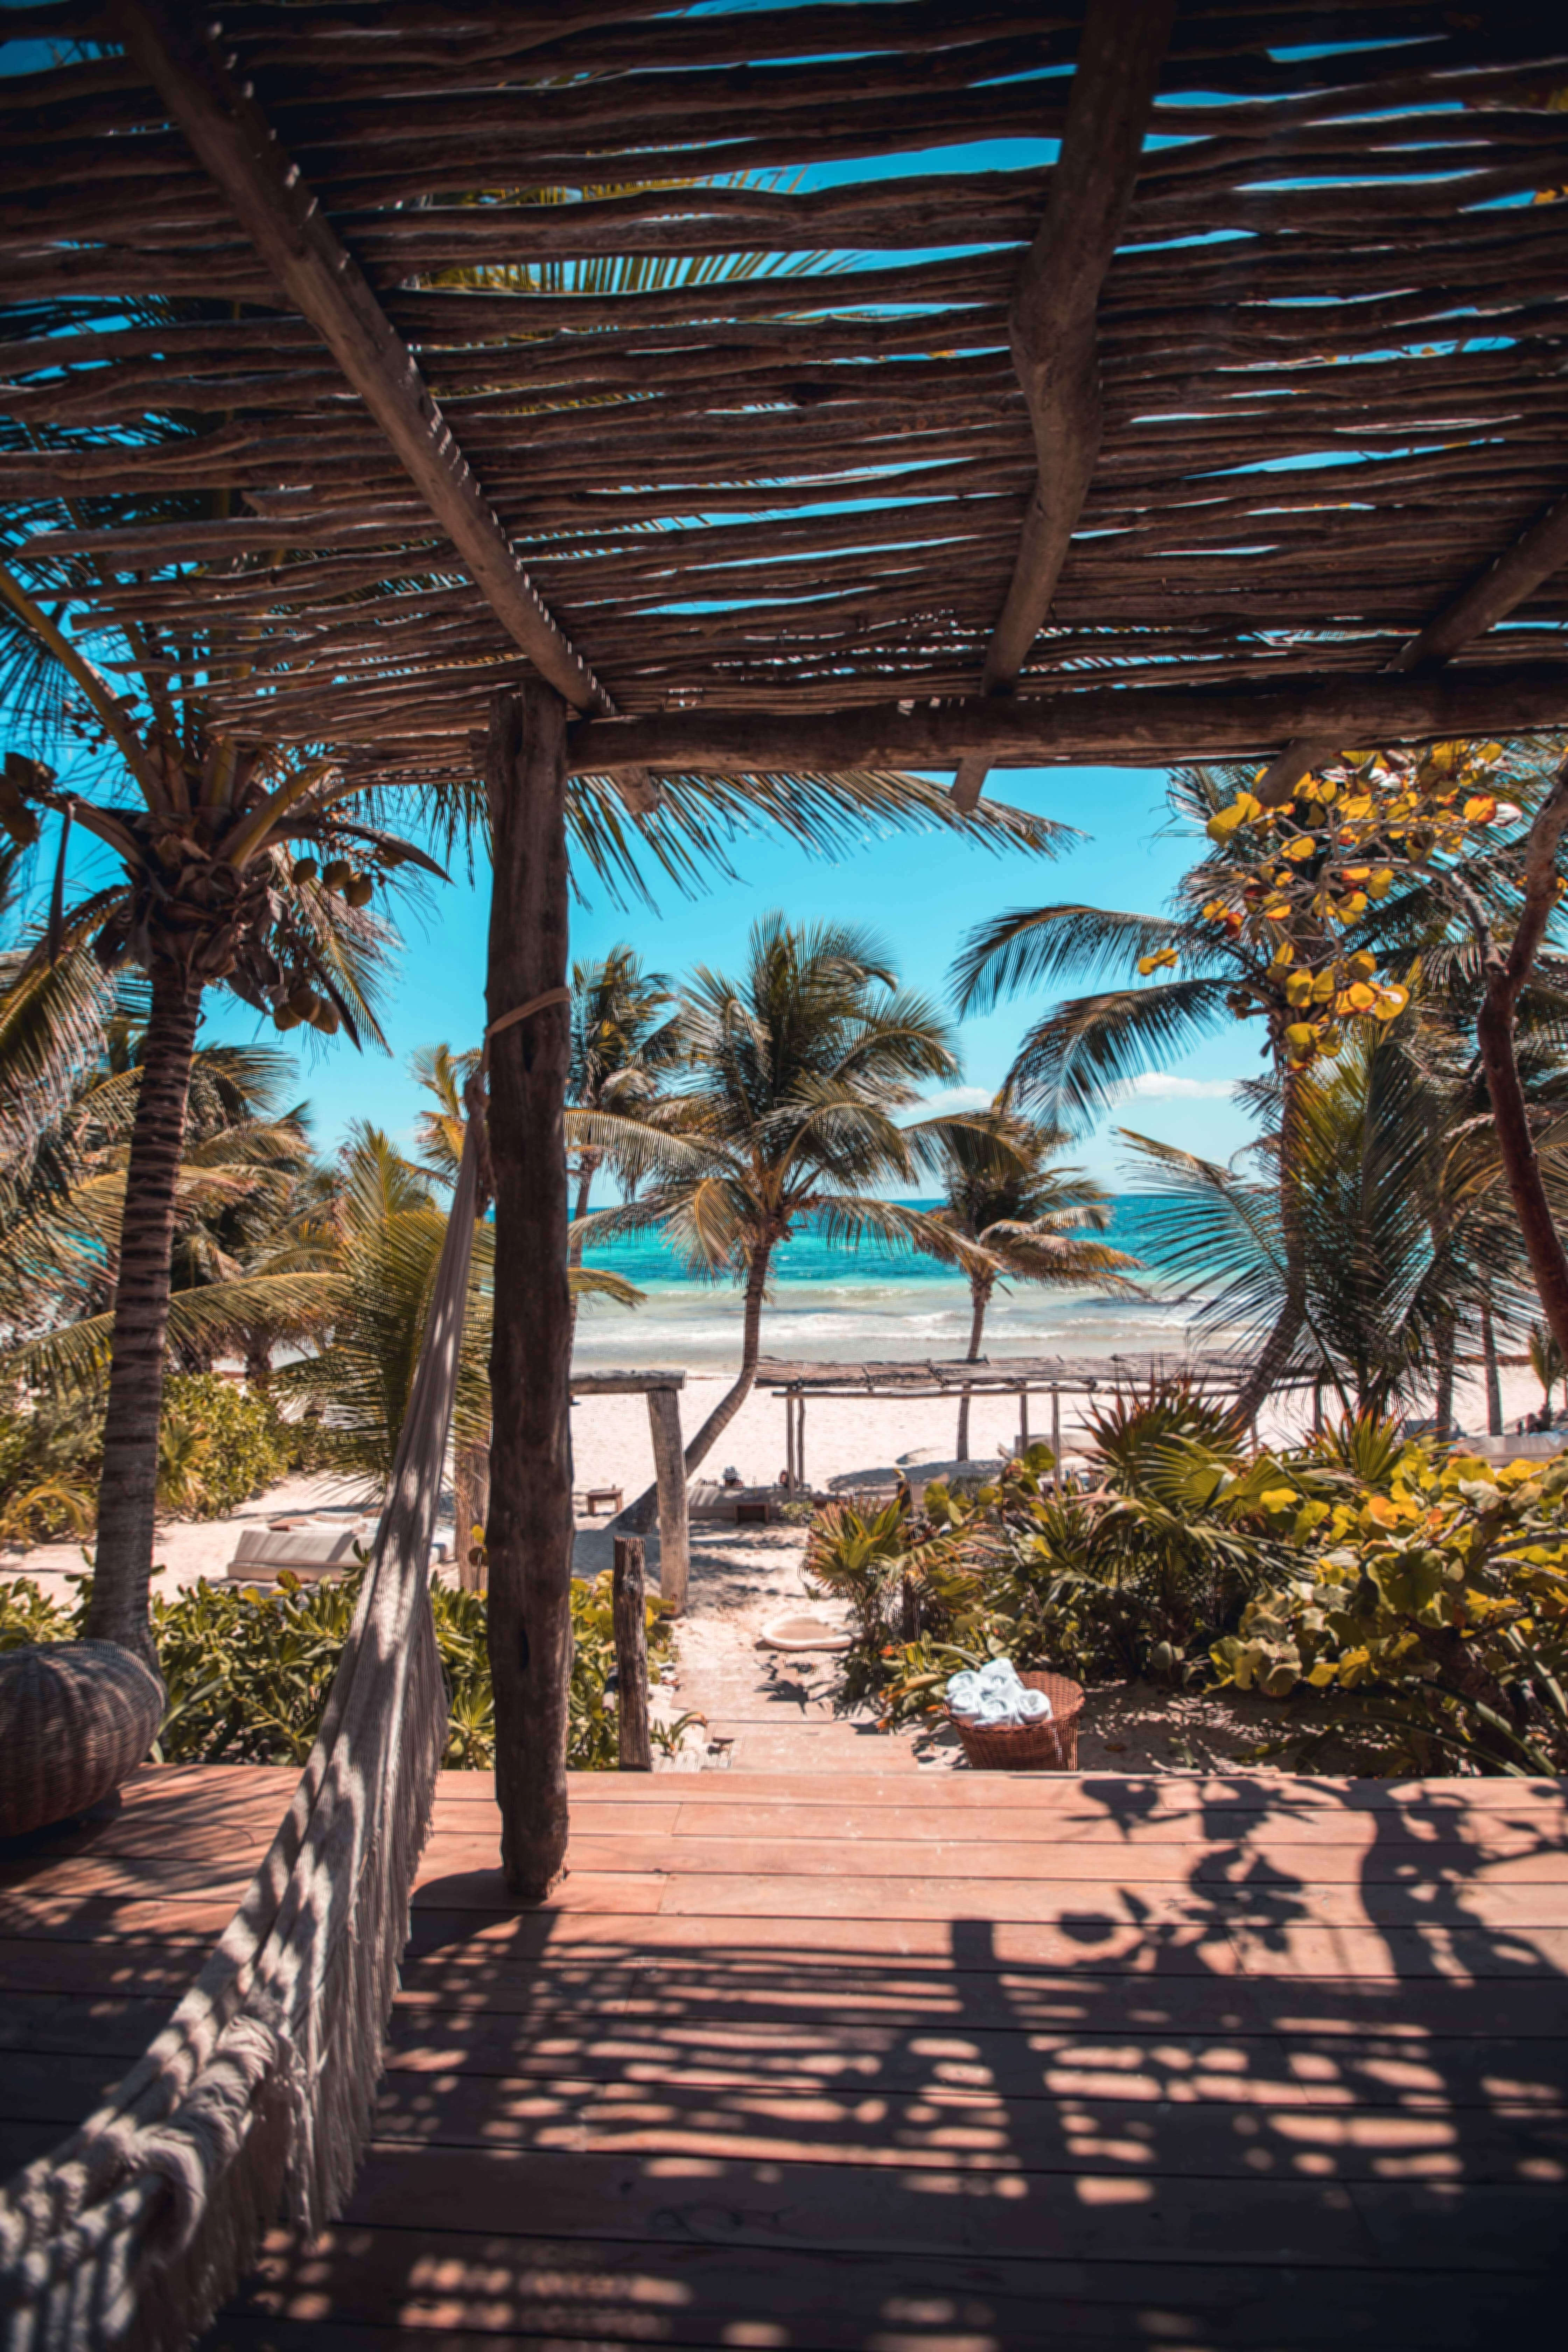
There is no doubt that Fiji is one of the most picturesque places in the world. But there is more to it than just sand and sun and beautiful beaches. Beyond all of the stunning panoromas, swaying palms and exotic flowers, there lives something even more beautiful. So beautiful in fact it can’t be translated via photograph.

It’s not a tangible item that you can hold in your hand or buy with your credit card or gift to a friend. It’s not a specific place you can visit, or a hotel you can check into, or a body of water you can bob around on. It’s not a rainbow, or a waterfall, or a sunset, or a mountaintop view or a brightly colored flower. It’s not a hike, nor a sunbathe, nor a visit to the spa.

Fiji’s exotic flowers.

It’s a feeling.

An inward attitude. A manifesto. An intrinsic, deeply rooted way of being. Something completely unique to the 22 islands that make up the country of Fiji.  It’s called bula.

Technically referred to as a greeting similar to saying hello, bula carries much more significance than a simple salutation. It resonates as a way of life for anyone lucky enough to visit or live on one of the islands. It also happens to be one of the most commonly talked about things that people miss most about Fiji once they leave the country.

First bula starts out as a pleasantry. A sincere wish for happiness, good health and a zesty energy for life. Then it subtly transforms from a word you are saying into a feeling you are emoting. It becomes an infectious enthusiasm of spirit. A radiation of joy. An exuberance of attitude. Regardless of current circumstances or situations, in spite of challenges and setbacks, embracing the bula spirit means expressing happiness, appreciation and friendliness. In other words… smiles and good nature for all. Whether they are strangers or loved ones, coworkers or customers, kids or adults, neighbors or newcomers, this extension of outward positivity has labeled Fijians the friendliest people in the world.

Practically a national language in and of itself, bula is a trademark of the island’s hospitality. It encourages warmth and welcome. Good cheer. Grateful attitudes. And a delight in the moment right in front of you. Besides their unique heritage and their idyllic landscape, it is the characteristic that Fijians are most proud of and what sets them apart as a community from everyone else in the world.

This type of jubilant reminder couldn’t have come at a better time. Especially for this week in regards to the Recipe Tour. As I’ve mentioned in a few posts over the last couple of months,  it’s been a bit of a challenge to keep the Tour on track since the tornado in March and then the pandemic right after. As you all know, it’s easy to get caught up in the global events unfolding each day and then to let that news cloud your mind, dampen your spirit, and affect your disposition. Sometimes writing about food while all this chaos is going on in the world seems trivial and I struggle with the desire and importance of wanting to share a good recipe while so much catastrophic stuff is going on.  But learning about Fiji’s bula spirit this week and then making one of their traditional island recipes really let in a breath of much-needed fresh air and perspective, both literally and figuratively.

If you saw the sneak peek video for this week’s recipe on Instagram, you may have noticed that it looked a little bit different than all the other videos from all the other weeks. That was due to a rainstorm that thundered its way through the preparation parts of this  week’s film shoot.

It was one of those storms that comes on quickly, toting dark grey clouds the size of whales and sucks up so much natural light, you have to turn on every single lamp in the room just so you can see what you are doing right in front of you. Rolling in just a few minutes into the cooking process, right as I began sauteing onions in a pan for the cream sauce, this storm turned the kitchen so dark and moody, the photo/video shoot had to immediately go on location (aka the balcony) so that I could grab as much natural light as possible. Otherwise the whole cooking process would have resulted in murky colors and grainy details. Fortunately for this purpose, there’s a small nook on the balcony between two potted herbs and some blooming flowers that is impervious to damp weather. It’s the one little dry spot that can accommodate an impromptu photoshoot without ruin to camera or food subjects.

In the video, you may have noticed what sounded like crashing waves roaring above the Fijian music playing in the background. That was actually the sound of the wind and the rain from the storm.   The heavy rain and the 60 mile an hour winds that eventually would come later that evening, kindly held off long enough so that the entire series of food photos were done from start to finish before I had to scurry around the balcony and bring everything inside.

It can be a little bit stressful cooking under the pressure of weather and good light, especially when preparing a dish that doesn’t offer any leeway for prolonged preparations. Generally, it takes anywhere from 3-6 hours to prep, photograph and video each week’s recipe for the Tour, depending on the level of difficulty and the cooking steps involved. Over the course of the last sixteen weeks, I’ve developed a nice little routine when it comes to making and photographing the recipes. But this week, the storm threw a wrench in the rhythm. This dish couldn’t sit around waiting on the weather to pass nor could it be made halfway and finished up the next day.

Instead of getting all flustered with the change in routine and getting caught up in some silly forced notion of perfectionism when it came to the photos, I thought about Fiji and how they might have handled this situation. I bet the first thing they would have done would be to smile and then say bula. Which is exactly what I did. Instead of fighting the weather, I appreciated the new way of thinking that the storm presented.  I didn’t fret over the lack of light and the frenzied pace of cooking. Even though there were mad dashes outside to photo and then mad dashes back inside to cook some more. I went with the flow  and managed a new rhythm. I poured sauce over fish while clouds poured rain over me. And I smiled about it. I embraced the bula spirit.

And you know what happened, dear kitcheners? Everything turned out just fine. Delicious in fact. Do you know what else happened? This was the first time in 16 weeks that a Tour recipe was prepped, prepared, photoed, cooked and on the table for presentation in under an hour. That’s a new first in the Kitchen! All because the rain storm scurried me along. Funny enough, this is the way of typical rain storms in Fiji as well – quick to arise, heavy in outpour, brief in stay. I love that Lady Nature decided to add her own little bit of Fijian authenticity to the cooking day.

Storm clouds over Pacific Harbour, Fiji

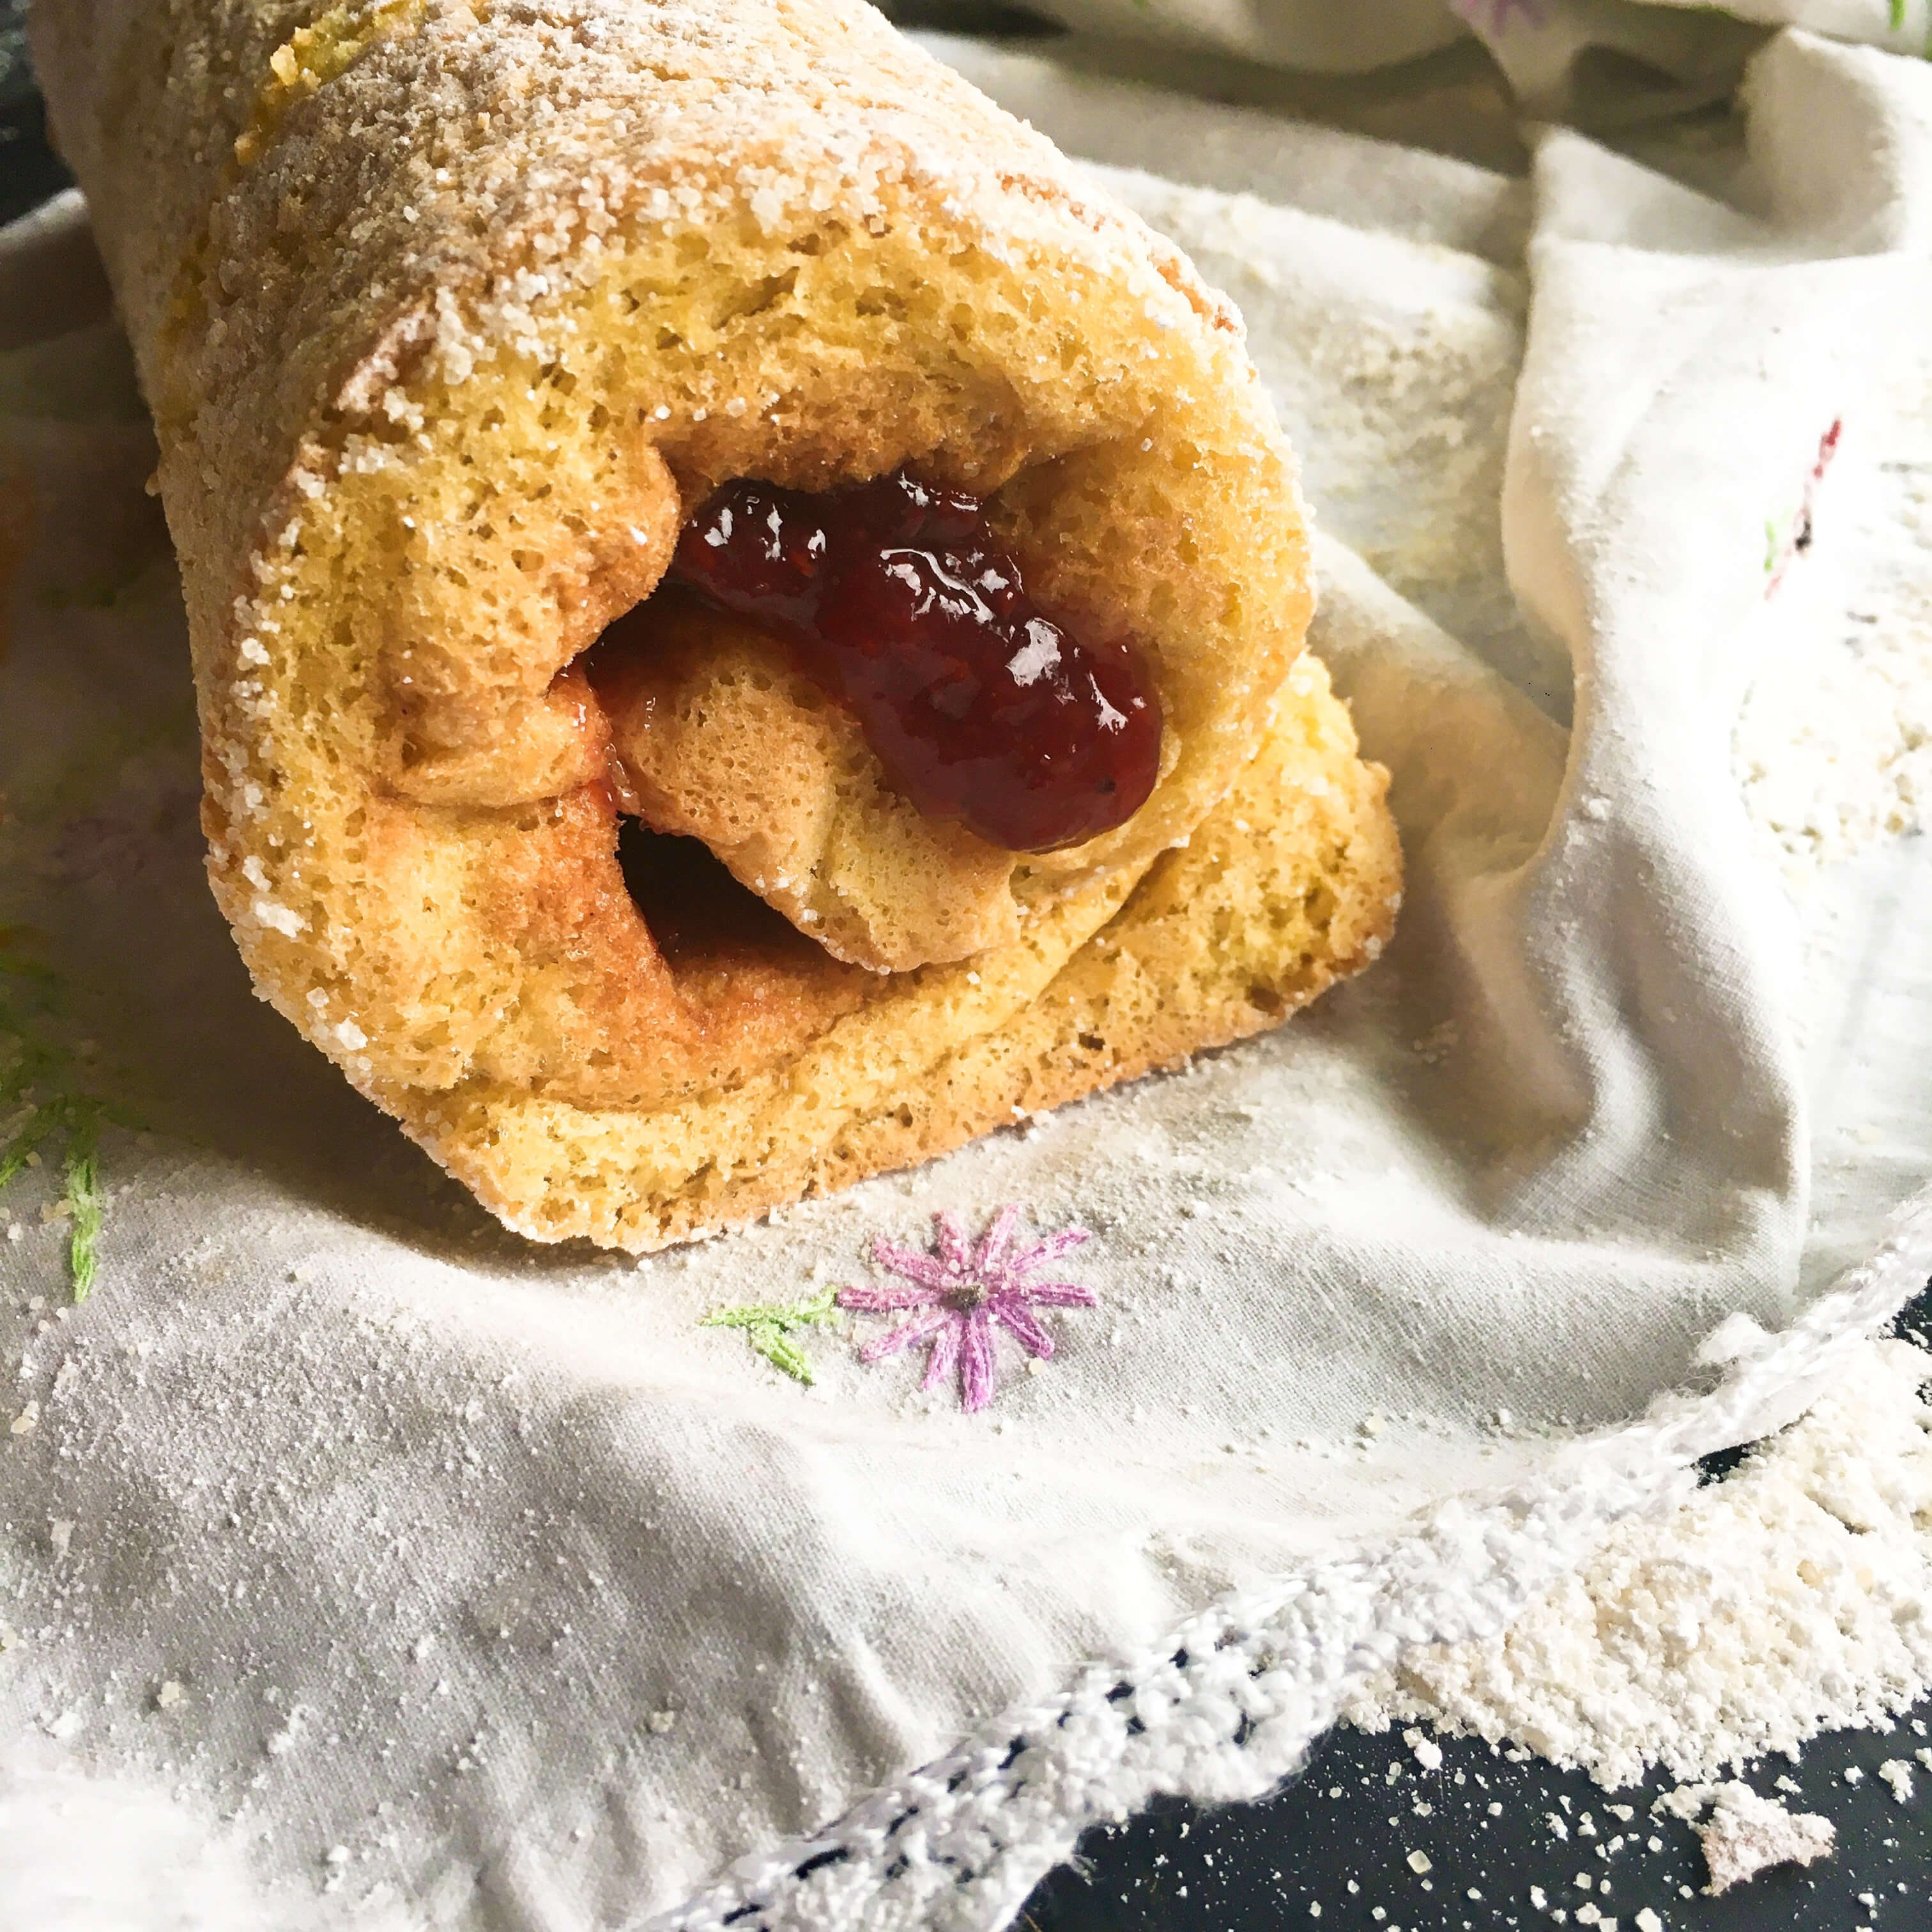
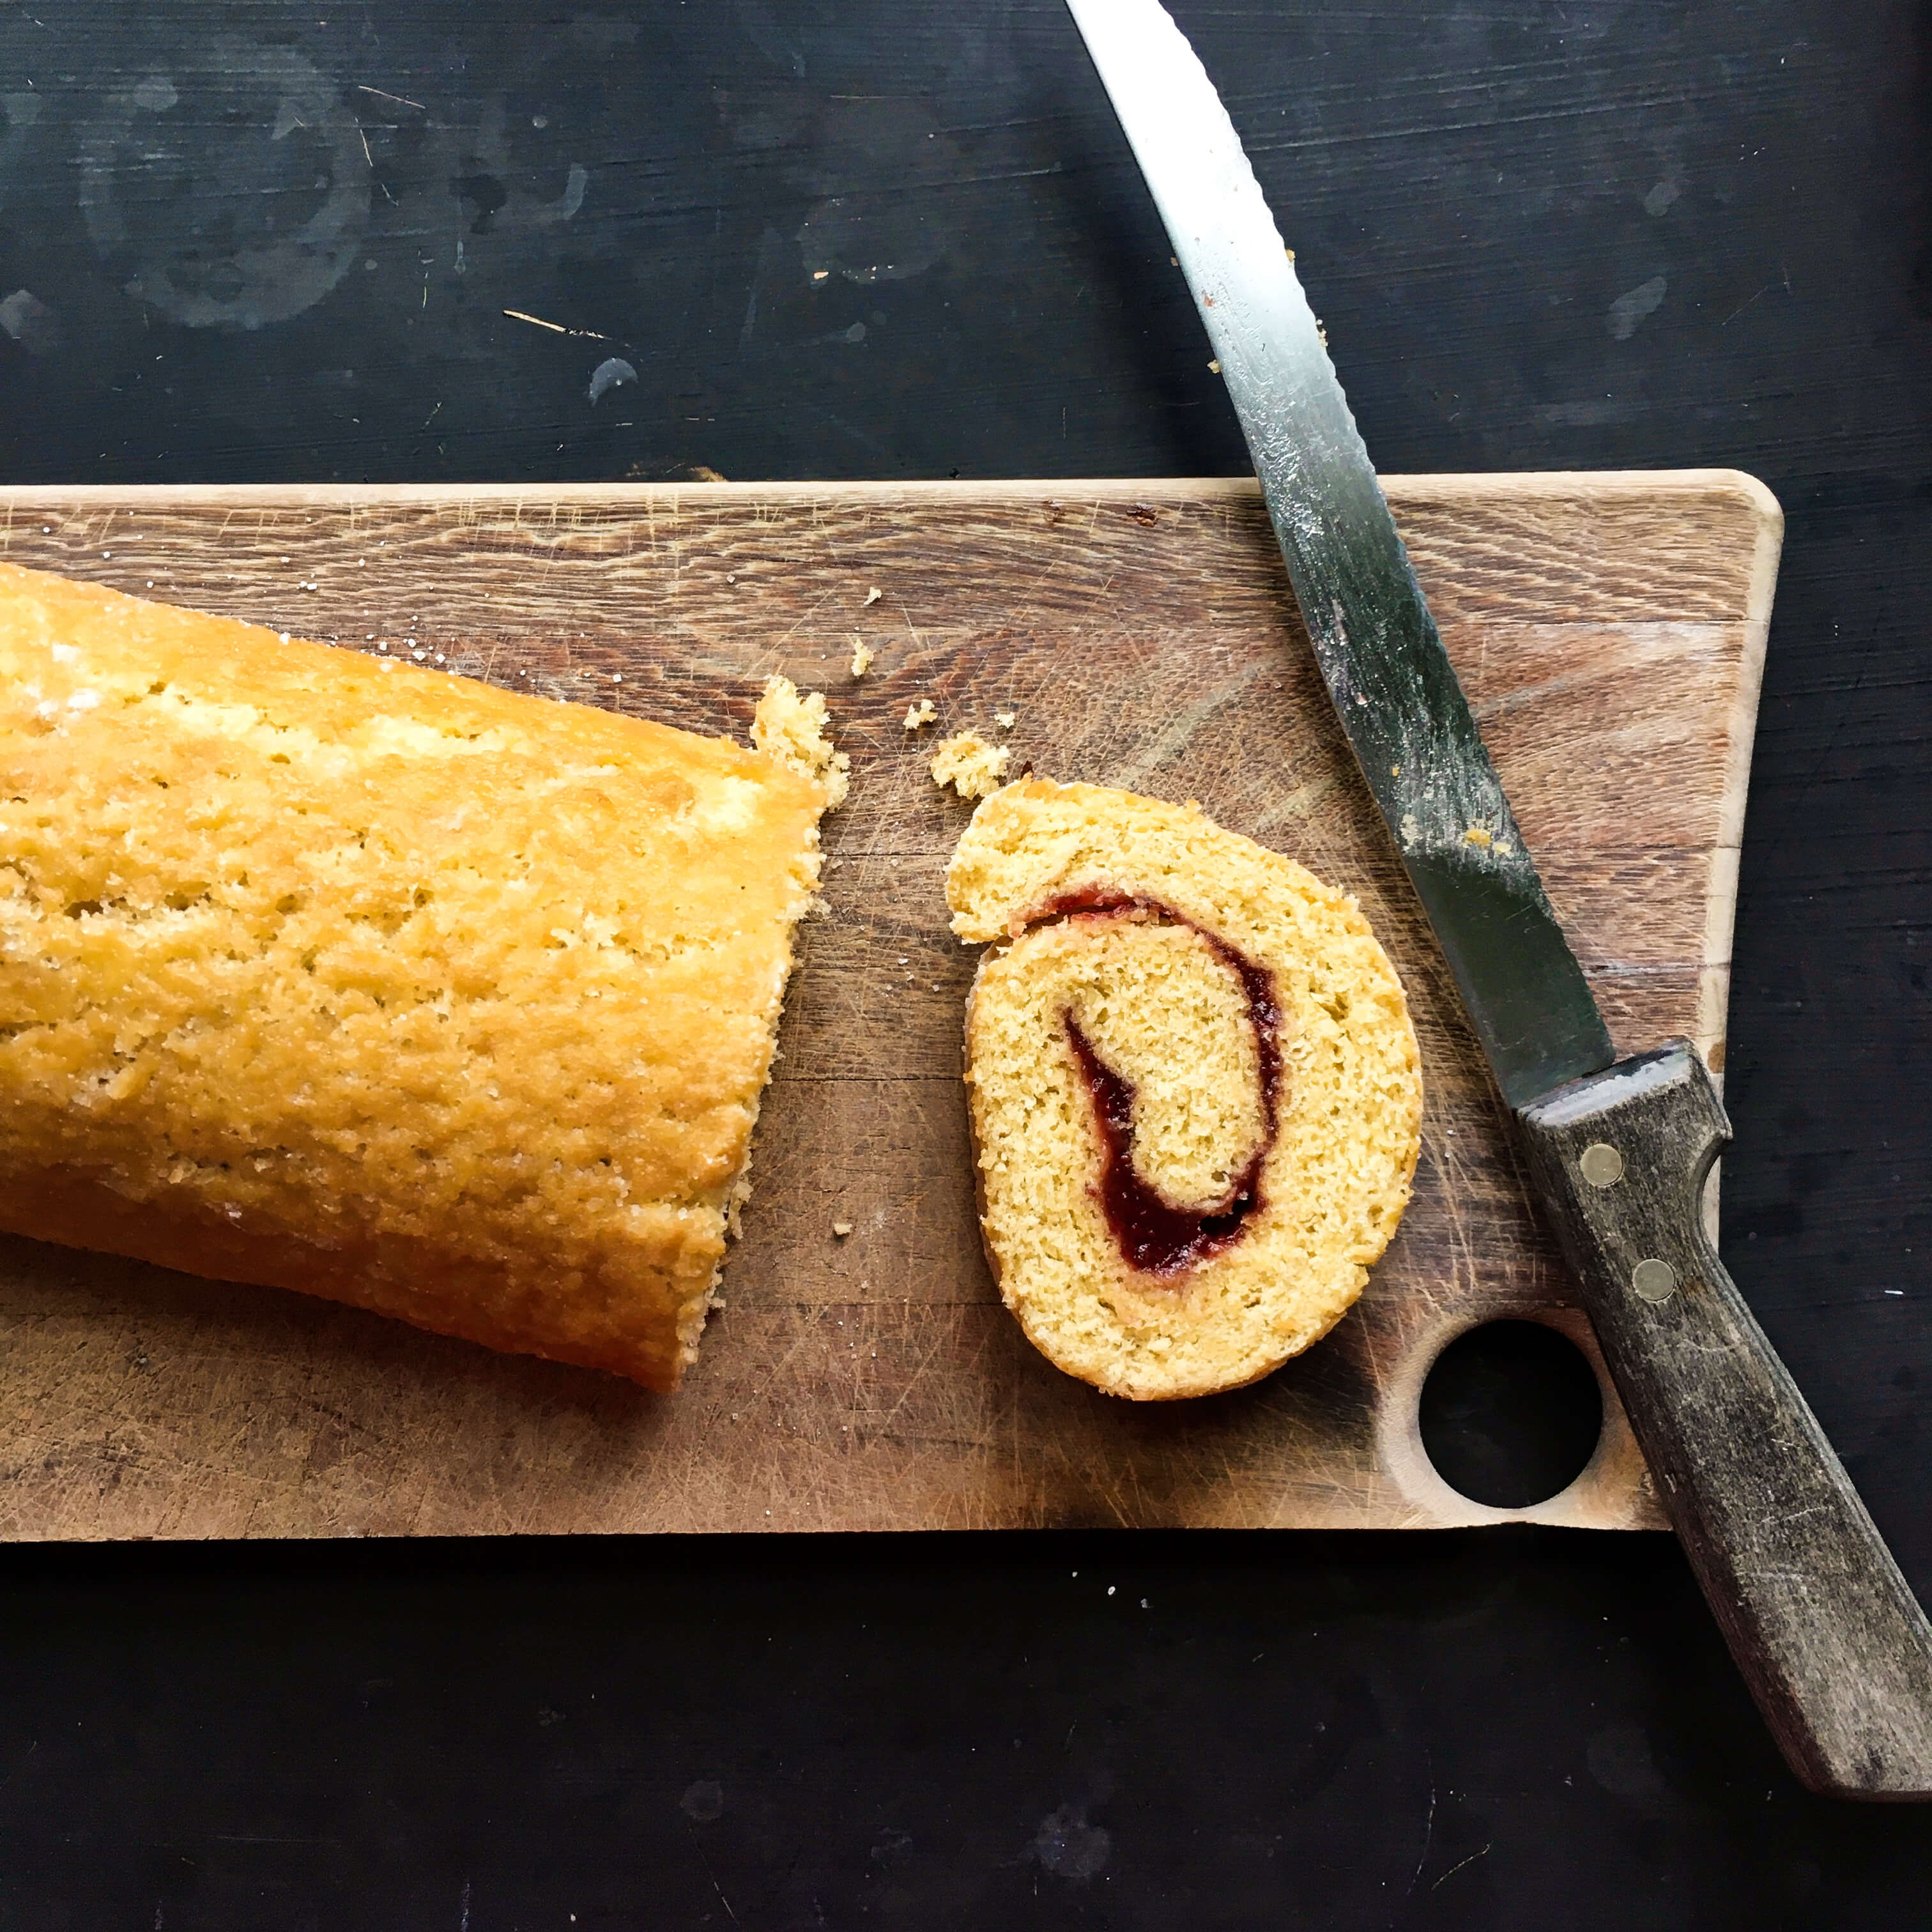
Like the islands themselves, this Baked Cod recipe is colorful, comforting and a breeze to make (rain or shine!). It’s really three recipes in one, each broken down into segments  – cream sauce, coconut milk, and cod, but since we’ve already made fresh coconut milk in Week 8’s trip to Ceylon, I substituted canned coconut milk for fresh, which shaves 45 minutes off the prep time. The cheddar cheese in the cream sauce can be yellow or white, depending on your own preference as it doesn’t affect the pearly color of the sauce either way. I also chopped up an extra  1/4 cup of the onions and green pepper for garnish at the end. That step added a nice fresh crunch to the finished dish. Had we not had the rain storm to contend with, this dish would have taken about 20 minutes to prepare. True to its island culture and the bula spirit,  it’s a joy to make.

We’ll start with the cream sauce, since you’ll want to make that first and just keep it warm on the stove while you assemble the cod in the baking dish. Again, please excuse the photos in this post, they don’t really capture beauty of the dish nor the process as I would have liked but you’ll get the idea. I loved this recipe so much I’ll happily make it again (on a sunny day!) so that I can take some new photos and enjoy a taste of the islands once again.

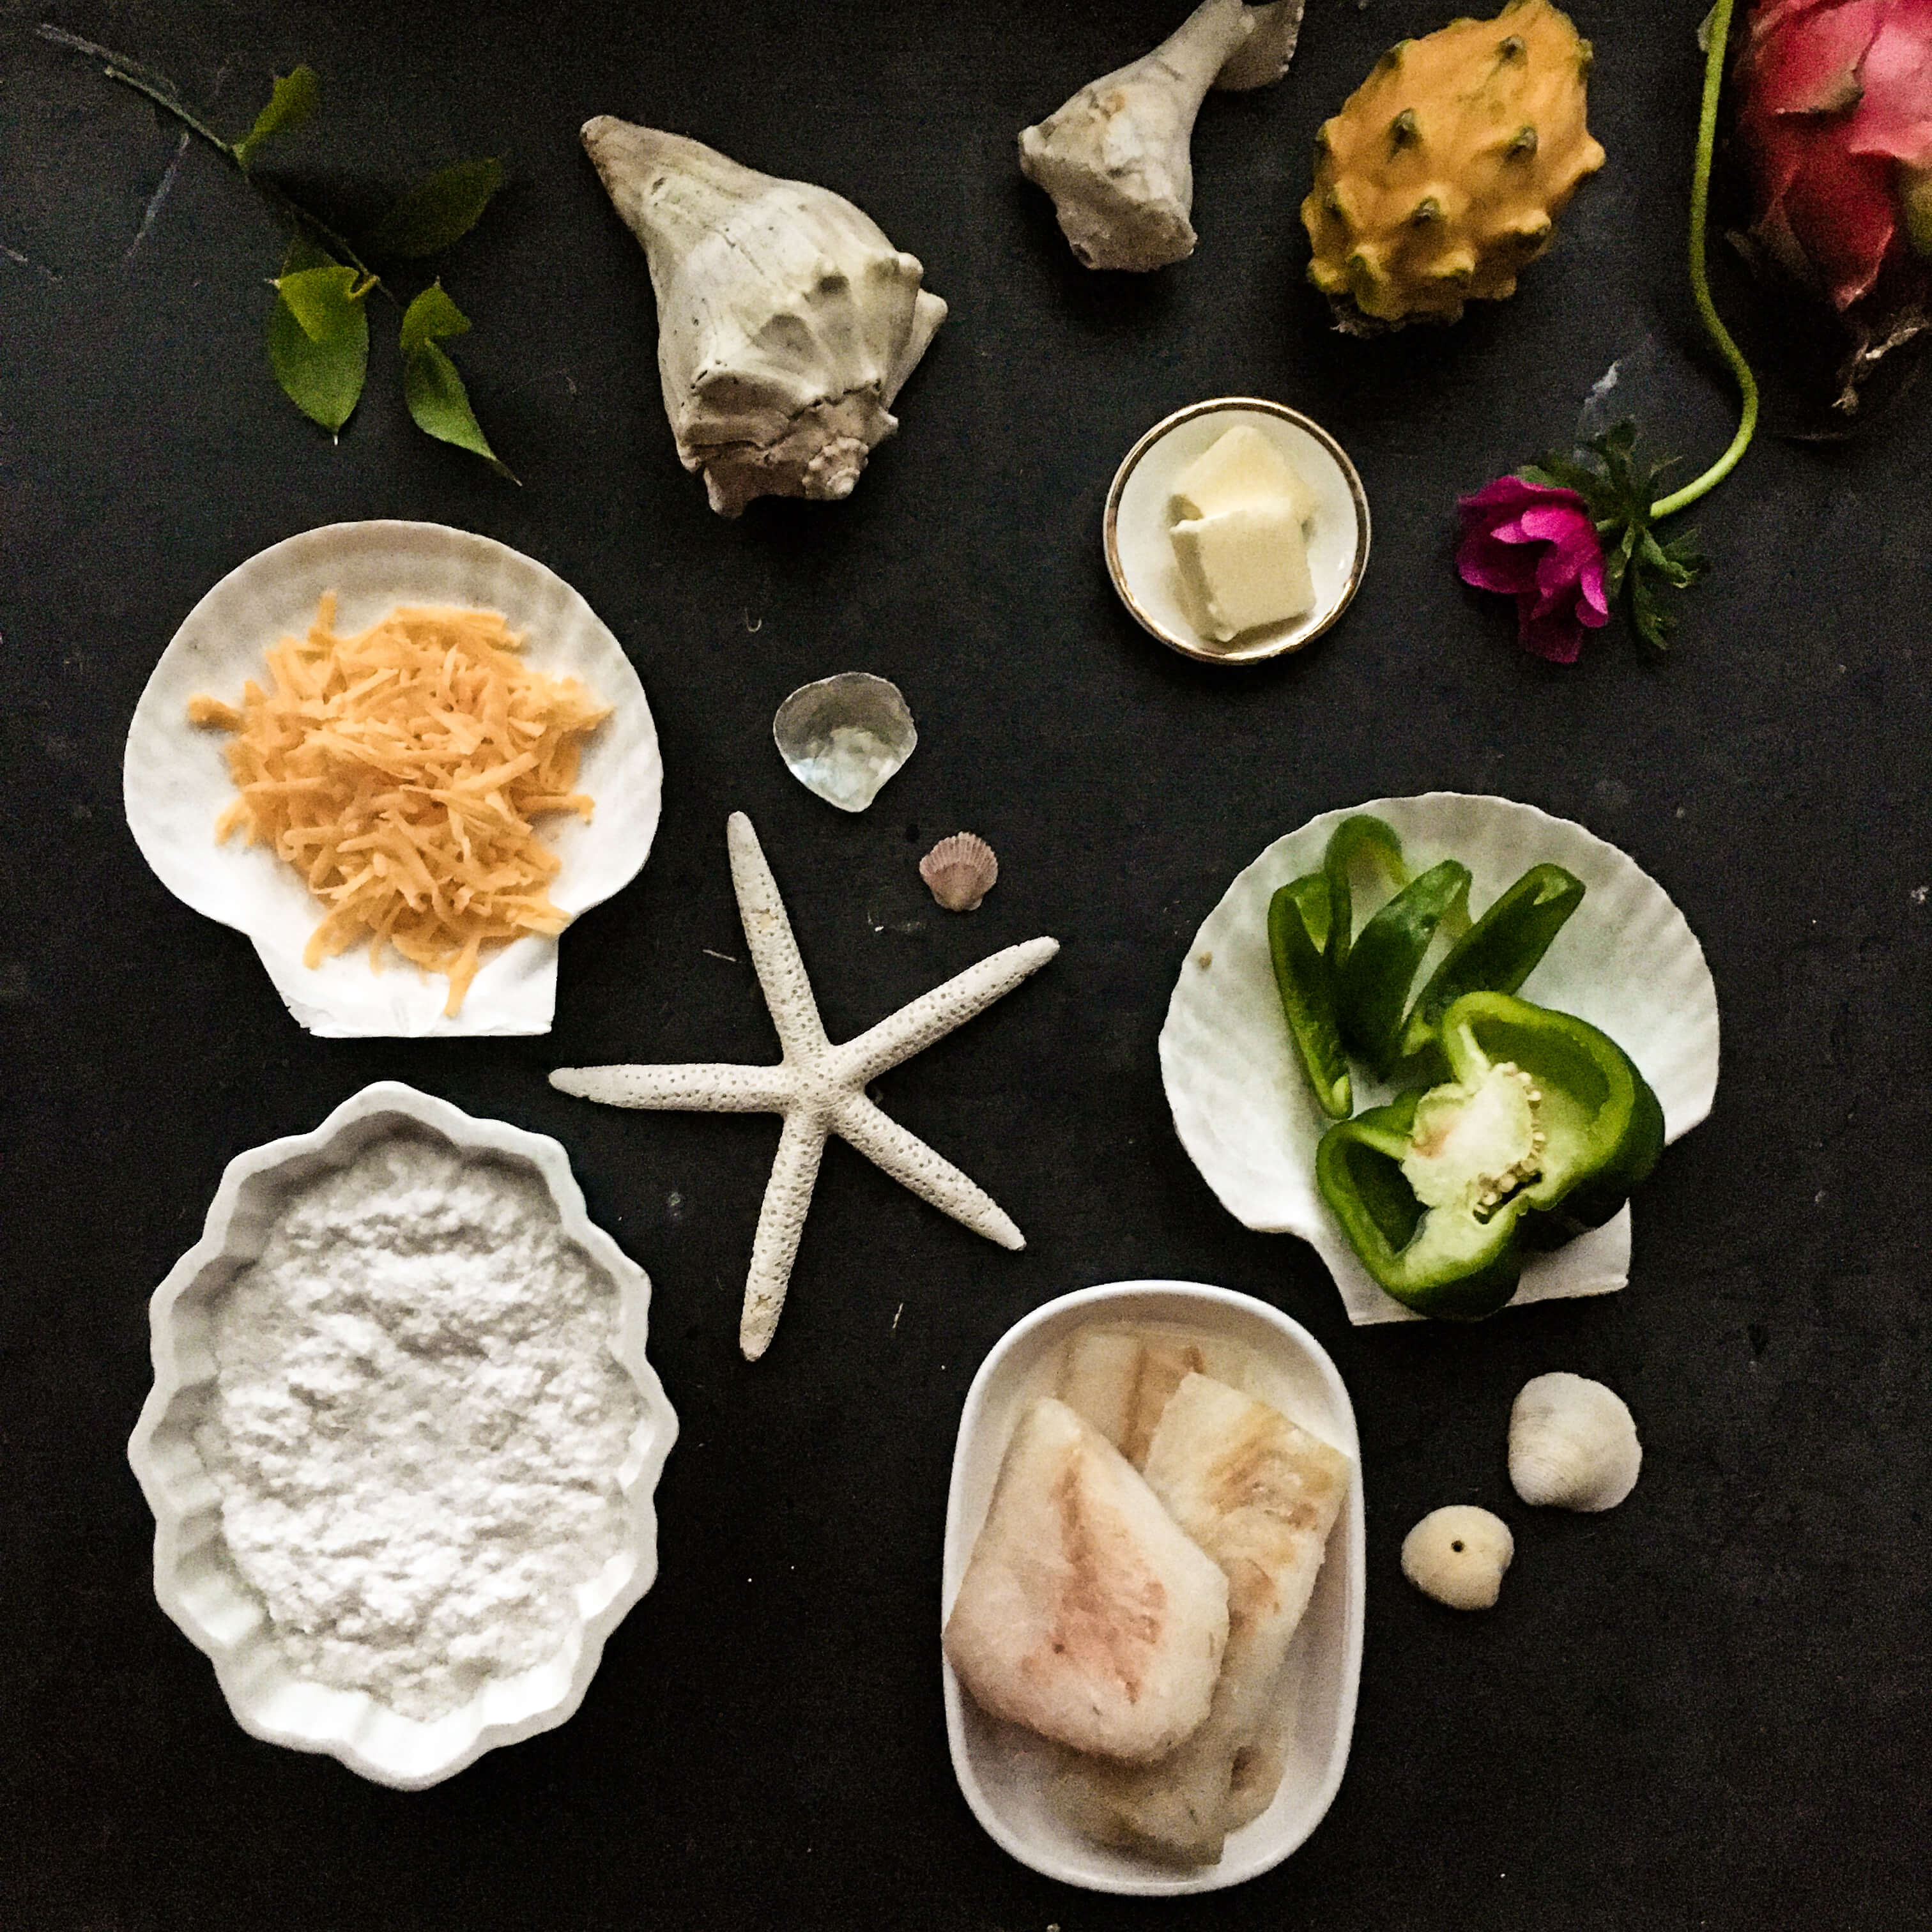
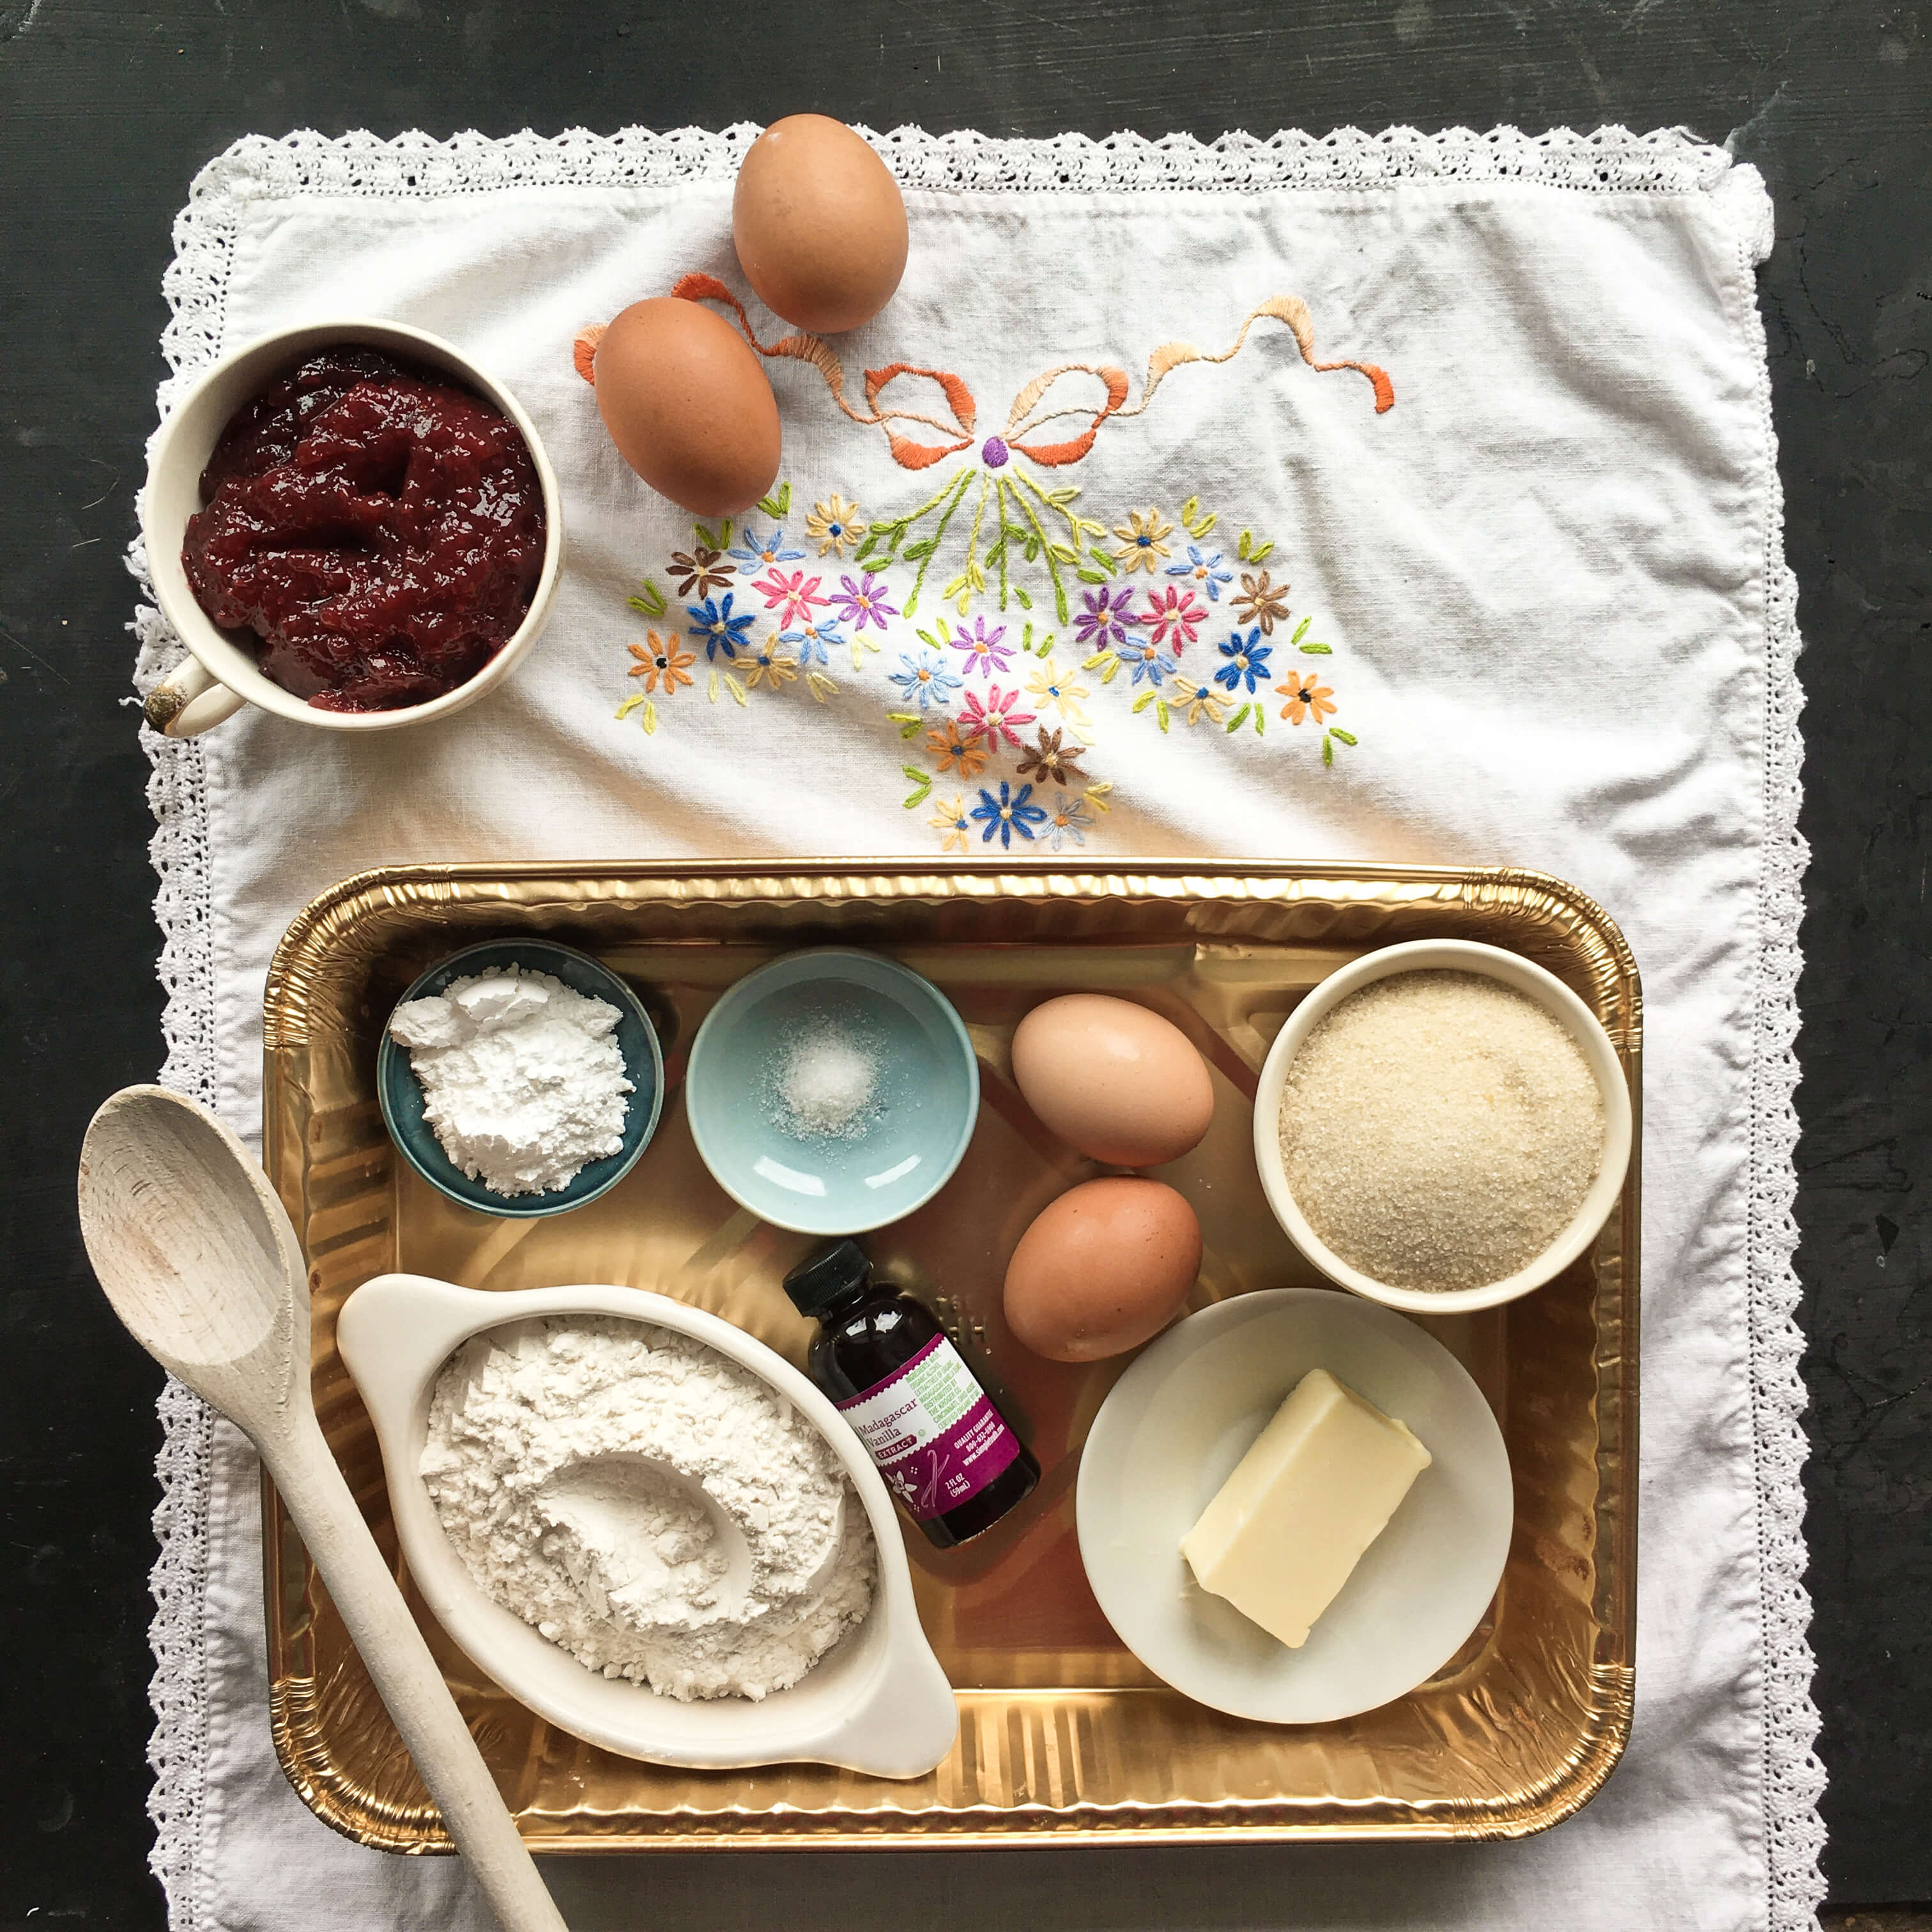
Fiji Cream Cream Sauce

1 tablespoon butter

3 tablespoons finely chopped red onion (plus 2 more tablespoons more for garnish)

3 tablespoons finely chopped green pepper (plus two more tablespoons for garnish)

1 1/2 cups coconut milk

salt to taste

1 1/2 tablespoons cornstarch

Preheat the oven to 350 degrees. Melt the butter in a saucepan. Cook the onion and green pepper, stirring, until the onion is wilted (about 4-5 minutes). Add 1 1/4 cups of the coconut milk and bring to a boil.

Blend the remaining 1/4 cup coconut milk with the cornstarch  and stir it into the simmering sauce . Simmer for three minutes, stirring constantly.

Baked Cod in Cream Sauce

Serves 4

2 cups boneless cod filet, cut into 1″ inch cubes

1 1/2 cups Fiji Cream Sauce

1/2 cup freshly grated cheddar cheese

Arrange the cod pieces in one layer in a baking dish and pour the sauce overall.

Sprinkle the cheddar cheese over the top…

and bake 30-40 minutes or until the cheese is melted and lightly browned. Once ready, remove from the oven and let sit for 5 minutes before serving.

Because of Fiji’s geographic location, its local cuisine has been influenced by India, the Polynesian Islands, Asia and most importantly by what grows naturally well on the islands. Coconut, sweet potatoes, root vegetables and seafood are common staples. Since there were no serving suggestions when it came to this recipe, I paired this creamy fish  with black rice for both its dynamic color and its fragrant, slightly nutty taste. This turned out to be an ideal companion as the flavors blended together really well and the rice soaked up some of the sauce. A little sprinkle of freshly chopped purple onion and green pepper on top of the fish added a splash of color for garnish.

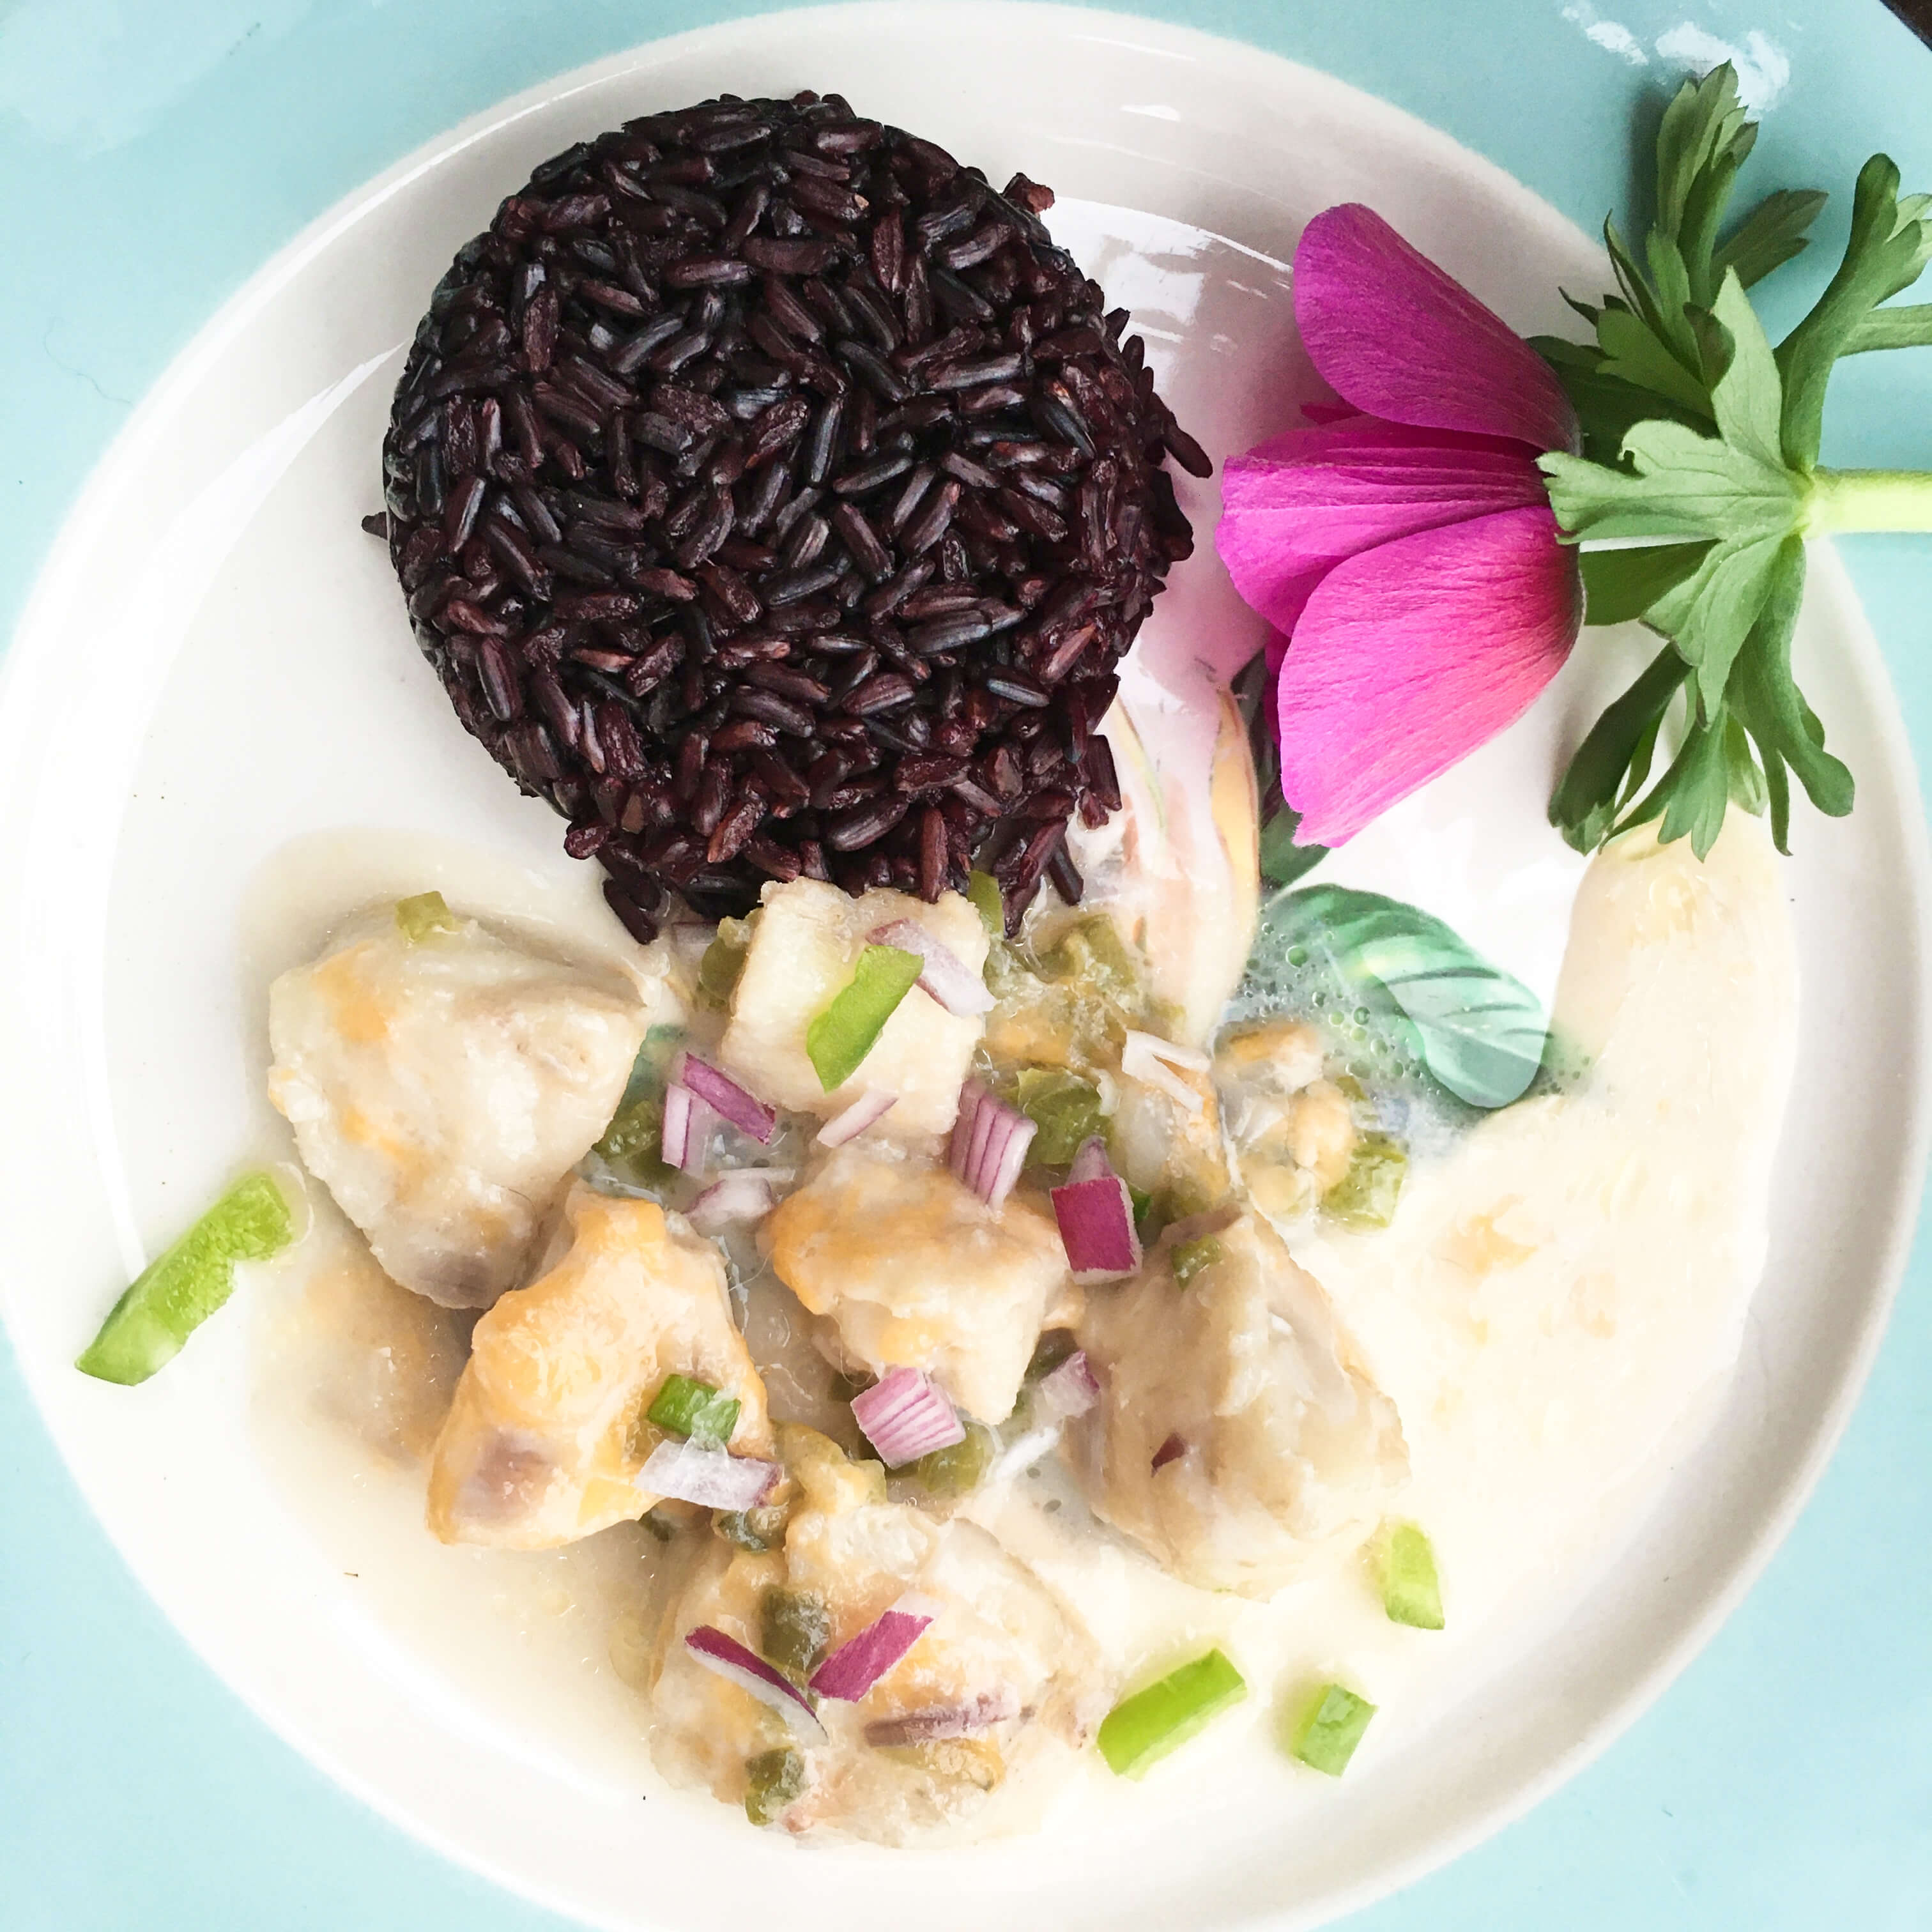
Even though the preparation for this dish was a little haphazard, by the time we were ready to try it, the bula spirit had fully presented itself.  Once the first bite was taken, it really did feel and taste like a rejuvenating dinner that had the power to soothe a number of situations. Placing a colorful flower on the plate lent an exotic island aesthetic, ideal for the wanderlust travelers feeling stuck at home. The creamy coconut milk, an alternative to a more common, basic white sauce or cheese sauce, added an out of the ordinary flavor component, offering fun inspiration for all the bored cooks out there.  And the green, purple and black hues of this dish added a delightful dose of color therapy (read more about the power of this in Week 10: Columbia) which couldn’t help but brighten up even the most lackluster soul. I found the comfort level of this meal to be a 10 (out of 10!) so for all you eaters feeling grumpy or out of sorts, this dish will hopefully raise your spirits in an equally comforting way as well. That’s the magic of food in Fiji for you! That’s the magic of the bula spirit inside you!

Cheers to Fiji for showing us how to embrace our inner bula by embracing and radiating warm affection and positivity, despite the challenges that face us. Next week, we’ll be heading off to the gourmand capital of the world, via the kitchen, as we celebrate Week 17 of the International Vintage Recipe Tour in France. See you soon!

Fiji Photo Credits: Timothy Ah Koy, Vijeshwar Datt, Ishan, Roberto Nickson, Prem Kurumpanai

A Very English Dessert: Trifally Speaking

Hello Hello! Happy Mother’s Day weekend to all the moms out there. Welcome to week 15 of the International Vintage Recipe Tour 2020. This week finds us in England via the kitchen, making a dessert that dates all the way back to the 1750’s.

It was a time when women dressed like this…

An embroidered muslin dress dating from 1730-1769 from the Victoria and Albert Museum collection

and men dressed like this…

Men’s fashionable suit made in England circa 1765. Courtesy of the Victoria & Albert museum collection.

and housing looked like this…

An engraving of Marble Hill, circa 1749 courtesy of english-heritage.org

and dessert looked like this…

In the kitchens of castles and cottages and country houses across the rolling hills and bucolic landscapes of England, big bowls filled with fruit and cream and custard and cake decorated tables and delighted diners.

The fun of this week’s vintage recipe starts with the adjectives that most often describe it… tipsy, whimsical, drunken, inconsequential, foolish, scrapy, flurried. It was first made in the 1500’s, but really became part of the popular dessert vernacular in the 1700’s, and was one of the few sweet treats of its day that appealed to practically every type of eater, from the thrifty homemaker to the flamboyant palace chef. Legend states that its origin may have originally sprouted in Spain or Italy, but once the British embraced it, it became a wholly English dessert. And it came complete with cute nicknames – The Tipsy Parson, The Tipsy Hedgehog, The Tipsy Squire. All an homage to the alcohol cleverly disguised inside the cake and custard that held the whole assemblage together.

Today in the Kitchen, I’m pleased to announce that we are making English Trifle, a piled up assortment of boozy cake, jam, fruit, custard and cream. Like any 500 year old recipe, lots of variations have emerged since it was first created, but the fundamental hallmarks of the recipe (cream, cake, alcohol, fruit, custard, jelly) haven’t changed in five centuries. That makes it one of the most authentic desserts in the history of baking.

The first cookbook to print a recipe for trifle with jelly was Hannah Glasse’s The Art of Cookery Made Plain and Easy, which was published in 1751.

Eight years ago, my friend Diana gave me a trifle dish. I loved it immediately for its big shape, but up until now never actually made the food that it’s named for. Instead, over the past almost-decade, I’ve used my trifle dish for all sorts of non-related kitchen jobs – a flower vase, a holder for various miscellanies (wine corks, napkins, kitchen tools, flatware), a container to corral foodstuffs (bread, cookies, nuts), a fruit bowl, an ice bucket, a table centerpiece for candles and crafts, an organizer for pantry odds and ends, and most recently a punch bowl. It’s overall handiness is ironic considering that this dish was made for one very specific type of dessert.

The trifle dish turned punch bowl was featured in Week 4 of the International Vintage Recipe Tour 2020 when we visited Barbados via the kitchen. Read more about that here.

Anyway, its exciting to think that this much loved glass container is not only making it’s trifle debut here on the Recipe Tour but also serving up the oldest historical food we have made on the blog yet. That means it is older than  Election Cake (1700’s) and older than Sally Lunn Cake (1600’s)

That’s Election Cake on the left and Sally Lunn Cake on the right!

The recipe we are following for this English Trifle is from the 1970’s New York Times International Cookbook, but it is pretty faithful to the 16th-18th century versions. The only adjustment I had to make with this specific recipe was exchanging the current jelly for raspberry preserves, since I couldn’t find current jelly at the grocery store.  Some vintage recipes for trifle feature other fruits like cherries, apricots, strawberries or peaches so really you could use any type of jam that you prefer best and still keep the historical integrity of true English Trifle completely intact.

A two part process, this was no quick whip up in the kitchen, but it’s not complicated to make.  Since it contains two recipes in one, I wound up breaking up the steps into two parts over two days – one day for the homemade sponge cake and the other day for the homemade custard and assembly. Over the years, especially in the mid-to late 20th century, many short-cut variations have been substituted for these two steps – including store bought pound cake, prepackaged ladyfingers, instant pudding mixes, prepackaged cake mixes and ready made whip cream. But I recommend making the whole dessert from scratch even though it takes a good chunk of time to prepare.

The process of making this over the course of two days worked well, because the longer the sponge cake rests in the fridge, the easier it is to slice for presentation in the trifle dish. It is also ideal to refrigerate the entire finished (and decorated) trifle overnight to allow the cake time to soak up the Madeira,  and to allow the rum to blend into the custard.

There’s a fun step in the sponge cake making process which involves a clean kitchen towel and the act of rolling the cake up inside it. If you are familiar with jelly roll cakes, this won’t be a new or unusual task for you, but if you’ve never rolled up a hot cake just out of the oven in a kitchen cloth before, it will feel a little strange and unnatural. Almost like something you’ve been trained not to do as a kid – like writing in a book or coloring on a wall. But persevere anyway. It all works out wonderfully in the end.

Sponge Jelly Roll

3 tablespoons butter, melted

4 eggs

1/4 teaspoon salt

3/4 cup plus 2 tablespoons granulated sugar

3/4 cup sifted all-purpose flour

1 teaspoon vanilla extract

2 tablespoons confectioner’s sugar

3/4 cup tart current jelly ( I used 50% less sugar organic raspberry preserves)

2 tablespoons Madeira

Preheat oven to 350 degrees.

Brush an 8×12 jelly roll pan (or a standard cake pan) with half the melted butter. Line the pan with a large sheet of parchment paper, letting a little of the paper hang over the sides. Then brush the parchment paper with the remaining butter.

Break the eggs into a medium size bowl. Add the salt and three quarters cup sugar.

Beat with an electric mixer until stiff or until the batter forms a thick ribbon and fall back onto itself when the beaters are lifted from the bowl. Carefully fold in the flour and vanilla. Pour this mixture into the prepared pan. Spread smooth with a ribber spatula. Bake in the oven for 15 minutes.

While the cake is baking, lay your clean kitchen towel flat on the counter. In a small bowl, sift together the remaining two tablespoons sugar with the confectioners’ sugar. Sprinkle the sugar mixture on the clean towel. Watch this step over on Instagram in the Week 15 video here.

After you pull the cake from the oven, grab all four corners of the parchment paper and immediately remove the cake from the pan. Carefully flip the cake onto the sugared towel and peel away the parchment paper.  Adjust the cake so that it lines up with the edge of the towel and then quickly roll it up. Watch a video of this step here.

Let the cake rest for 15 minutes wrapped in the towel. Then unroll the towel and spread the cake with a thin, even layer of jelly.

Then roll the cake up once more, except this time don’t roll it up into the cloth.

Transfer the roll carefully to a sheet of waxed paper or parchment paper,  and wrap it and place it in the fridge to chill. (Note: You can leave it in the fridge up to 24 hours. The longer it sits in the fridge the easier it will be to cut and arrange in the dish).

After the cake has chilled, remove it from the fridge and place it on a cutting board. Cut the entire jelly roll into 1/2″ inch thick slices.

Next line the bottom of the trifle dish with as many slices as will fit to cover the bottom and then line the sides of the dish. You should have a few slices left over after you’ve lined the dish. Set those remaining slices aside for use after the custard is ready.

Sprinkle the cake slices with the two tablespoons of Madeira and then cover and refrigerate the dish while you make Part Two of the recipe.

English Trifle

Serves 10-12

Sponge Jelly Roll slices

4 eggs, seperated

1/4 cup granulated sugar

1/2 tablespoon unflavored gelatin

1 1/4 cups light cream

2 cups heavy cream

2 tablespoons light rum

1 tablespoon confectioners’ sugar

1 teaspoon vanilla

Place the egg yolks in a medium bowl and add the sugar.

Beat thoroughly with an electric mixer and add the gelatin. Set aside.

Bring the light cream to a boil in a small saucepan, stirring constantly so that the cream does not scorch. Slowly add it to the egg mixture, stirring constantly with a whisk as you incorporate the milk.

Transfer the egg/milk mixture to a large saucepan. Cook and stir the mixture over low heat until it coats the back of a wooden spoon (about 10 minutes).

Immediately remove the saucepan from the heat and set the pan in a bowl filled with ice cubes to cool. Stir until cooled. {Note: I cooked my custard for about 15 minutes on the stove, which I think turned out to be about 5 minutes too long! Once the custard sits in the ice cubes it thickens even more, so ultimately when you remove the custard from the heat it should be about the consistency of somewhat runny cheese sauce and not quite as thick as loose pudding, which was more like my consistency.}

In a separate mixing bowl add the egg whites and beat until they form soft peaks.

Fold the whites into the cooled custard. {Note as you can see from the photo below my custard became pretty thick once it cooled. If this happens to you, don’t worry, once you fold in the egg whites and the cream you can use a rubber spatula to smooth the custard out. The rum also helps the custard break down a little bit.}

Beat half the heavy cream until stiff…

And then fold the heavy cream into the custard/egg white mixture…

Then fold in the rum…

Spoon all the custard into the trifle dish, covering the bottom slices and spreading the custard evenly with a spatula.

Cover the top of the custard with the reserved slices of jelly roll.

Beat the remaining cream and sweeten it with confectioners’ sugar and vanilla extract. Using a pastry tube or spoon, garnish the top of the trifle with cream. Now comes the fun part… decorating the top! The recipe’s directions stopped after the whipped cream, so we are now, at this stage,  left up to our own interpretations and creativity from this point forward. Some bakers like to decorate the tops of their trifles with crushed nuts, slivered almonds, shaved chocolate or fruit. I decided to top mine with strawberries, blackberries, raspberries and mint.

And because this recipe hails from England, the land of beautiful gardens, I put a few fresh flowers on top too.

We are enjoying strawberry season this month in the South, so the berries seemed like an ideal companion, and my sweet mint in the garden is growing by leaps and bounds, making me want to add mint to everything in order to keep it under control. But you might have your own fun spin on a trifle topper so I encourage you to get creative.

To serve the trifle, you just need to dive right into it with a big spoon and scoop out a slice of cake from the side and place it on a dessert plate. Then add an extra dollop of custard and whip cream from the interior and add some additional bits of topping for an extra bit of flair.

A truly delicious baking endeavor that tastes of summer and satisfaction, this whole dessert is substantial but not heavy. The custard is pillowy, the whip cream delicate, the berries tangy.  It is no wonder that this recipe has been floating around the dessert world for five hundred years. It’s a timeless classic for sure. No matter how we have evolved as humans from century to century, I don’t think we’ll ever tire of any combination involving fruit and cream, flour and custard, butter and jam. It’s in our history, after all.

P.S. The trifle will keep in the fridge for a few days but not the freezer, as this recipe is meant for sharing not storing. If you are still quarantining like we are in my neck of the woods, and your amount of eaters is small, don’t let the size and scale of this recipe sway you. Perhaps you could surprise your friends or neighbors with a little gift of British baking.

Cheers to England for propelling this dessert through centuries. And cheers to all the moms out there who have made this recipe in the past and will continue to make this recipe in the future!

Join us next week as we island hop over to Fiji for a tropical dinner and a special weather episode that adds audible ambiance to our cooking adventure. See you next time for Week 16 of the Recipe Tour!