The Historic Side of Haiti in Houses and Dessert


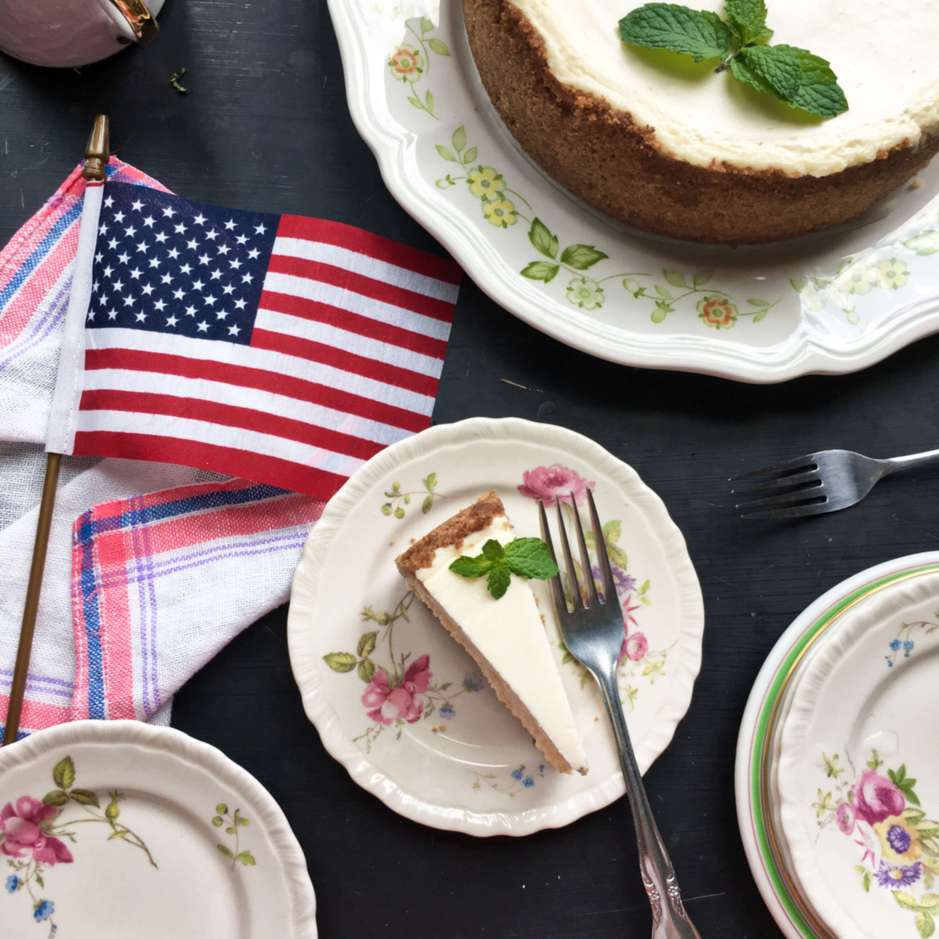
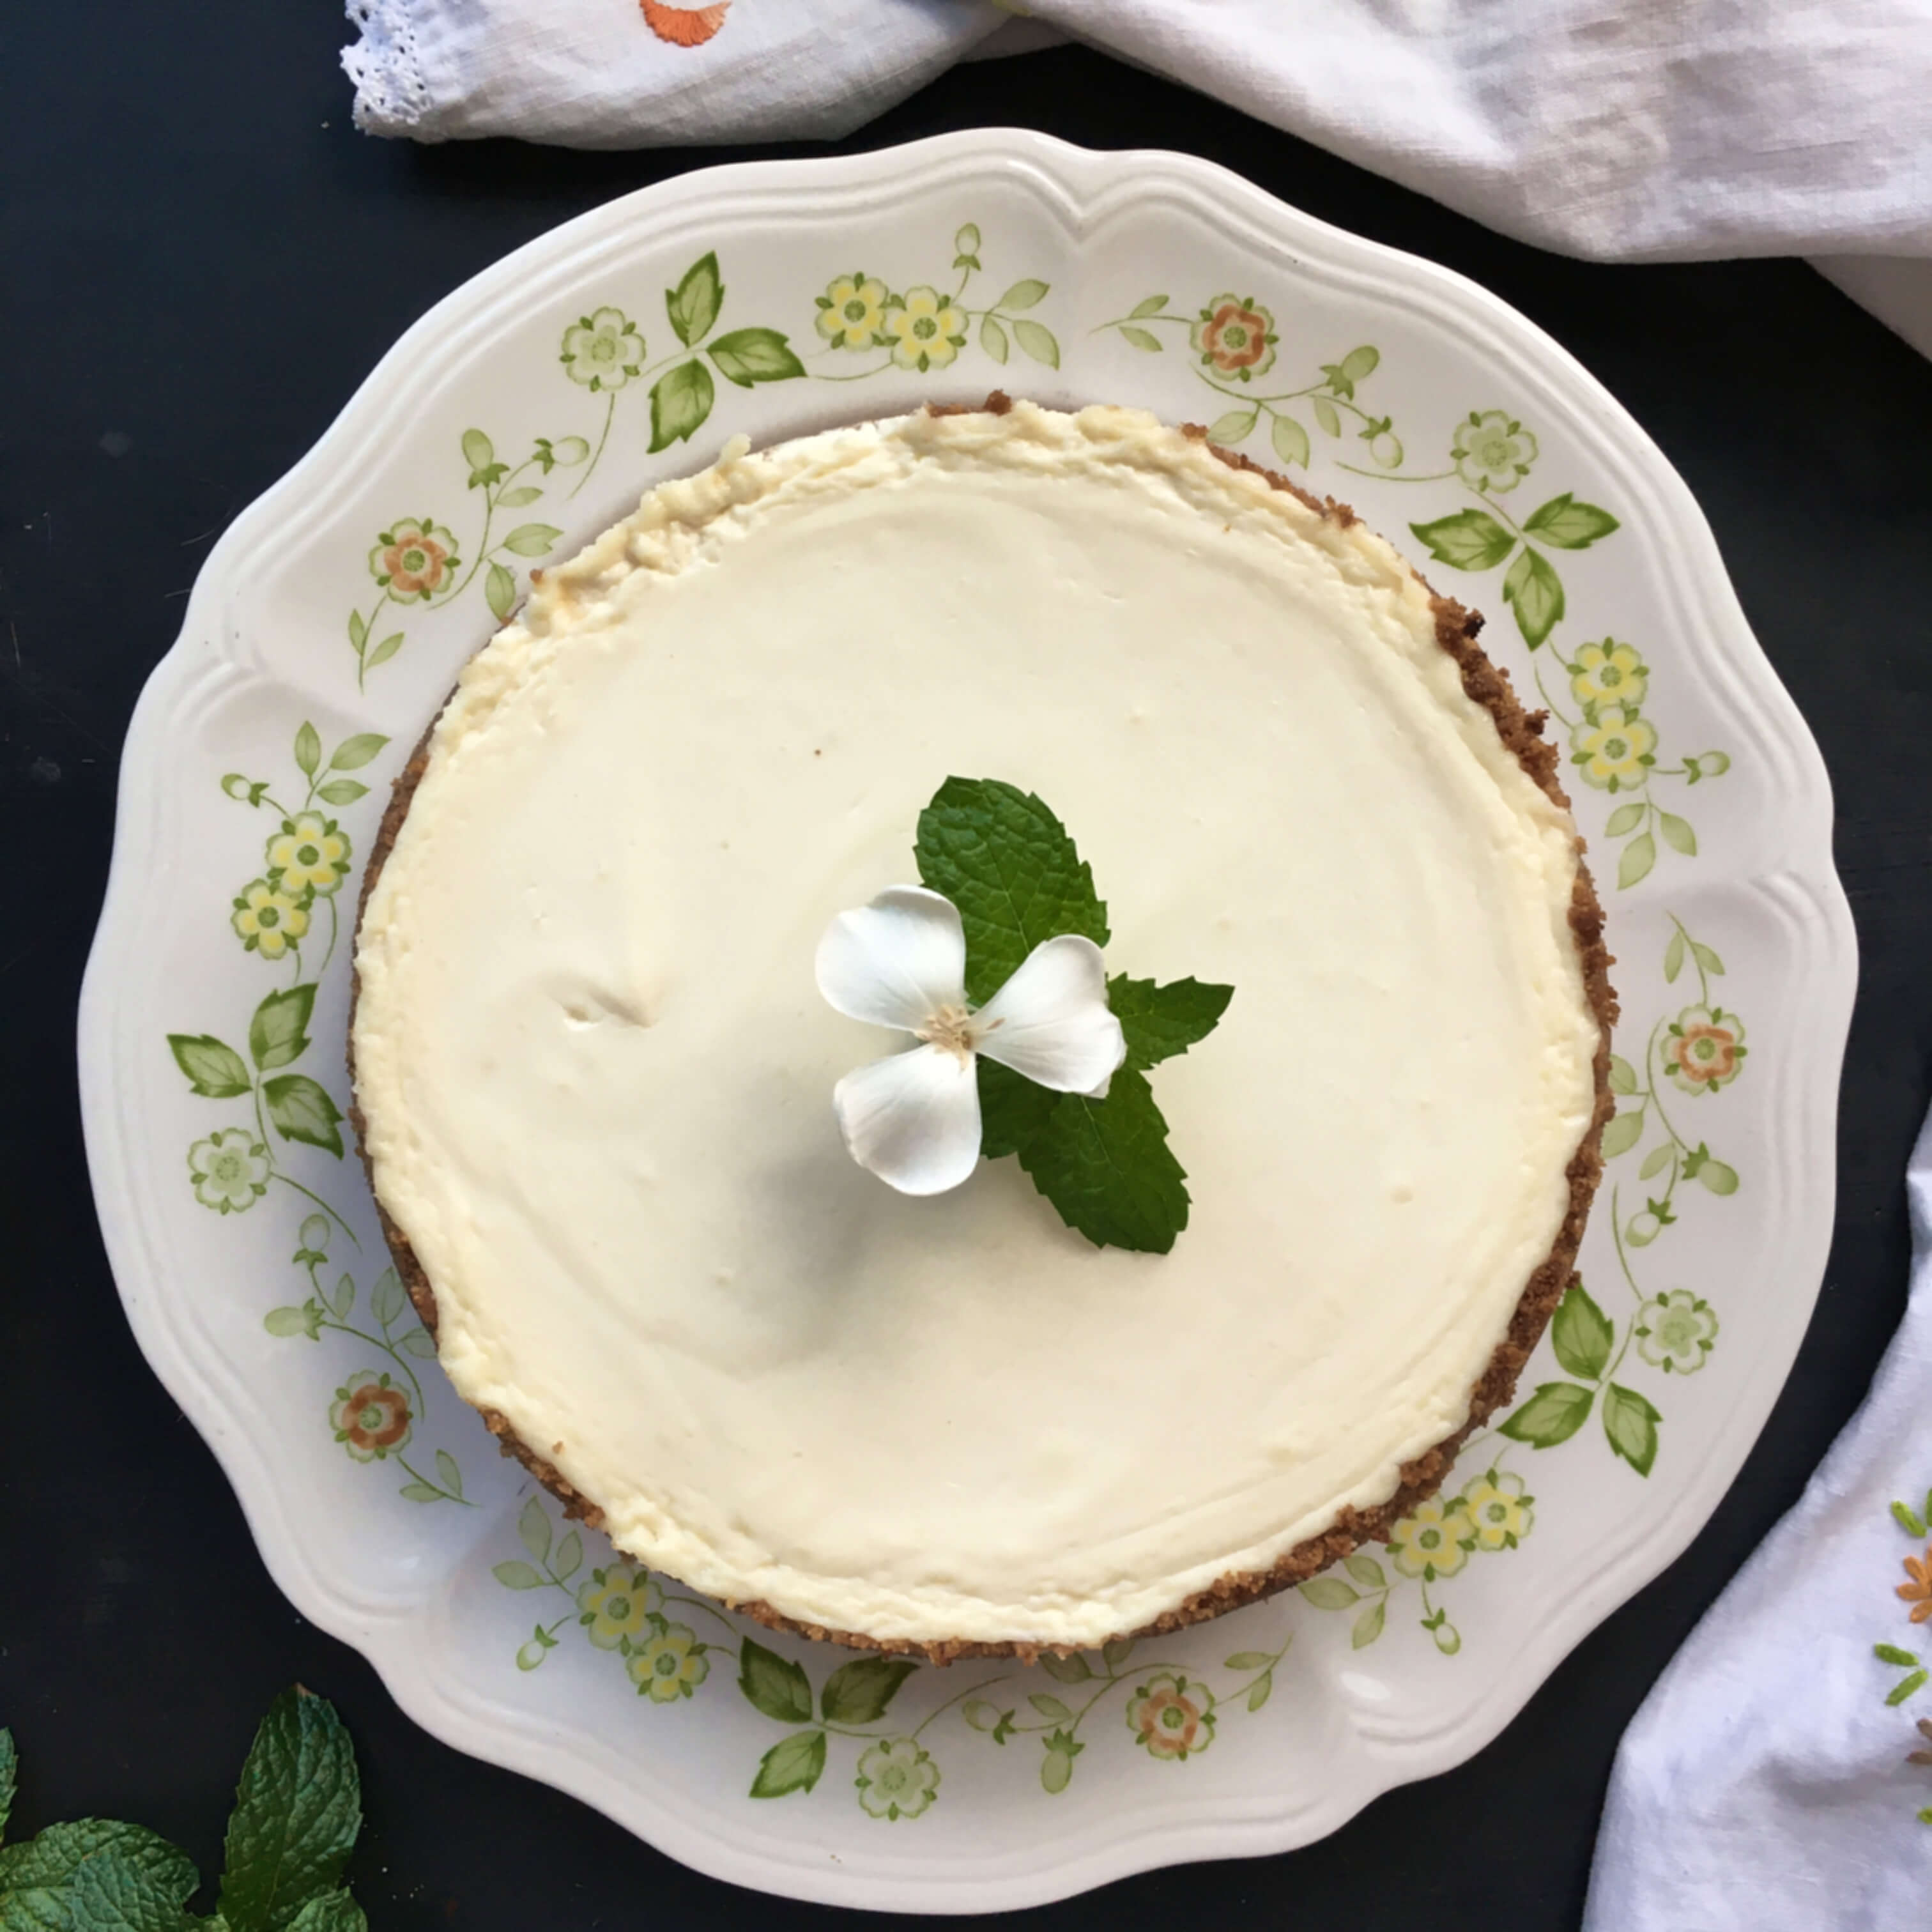
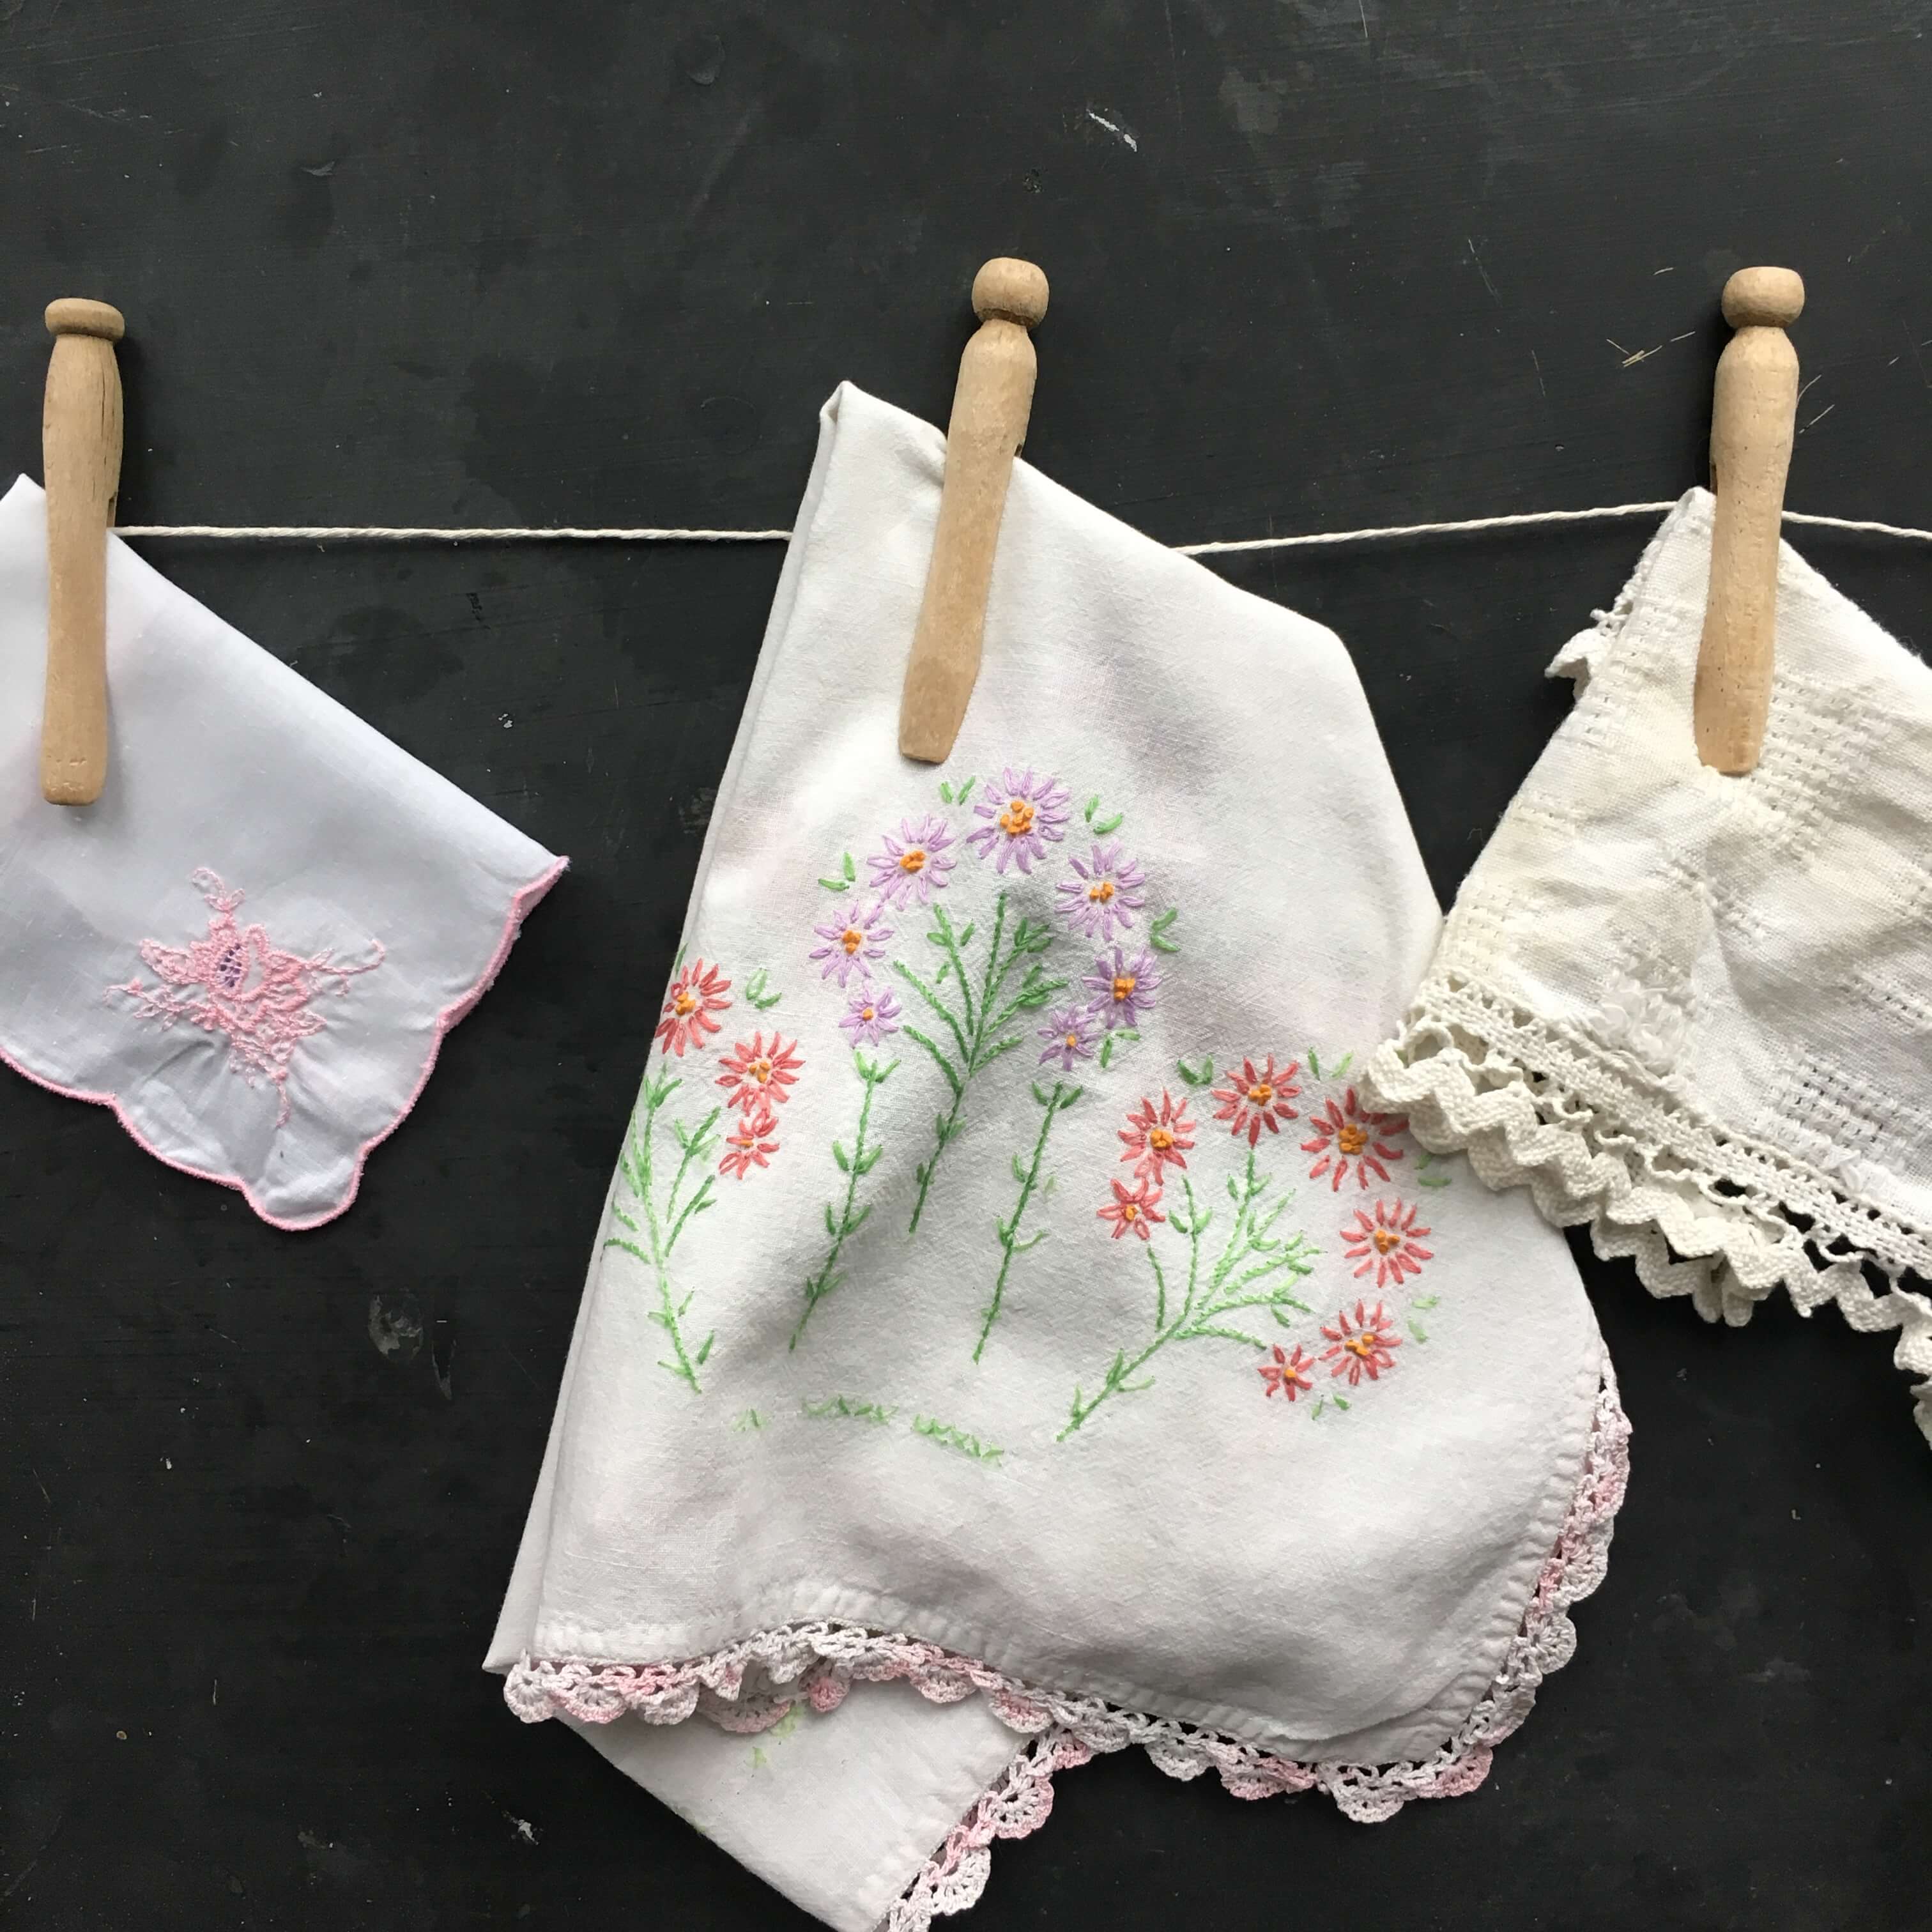
Warm and bloomy. That’s been the theme of our September days around here. The nighttimes though, they are a different story. Cool, breezy, decidedly leaning towards Fall, change is definitely amiss once the sun goes down and the stars come out. Literally caught between two seasons, where it is hot during the day but chilly at night, eating during this time of year, when the temperatures are flip-flopping back and forth can tend to be a bit tricky for everybody no matter what part of the country you live in.

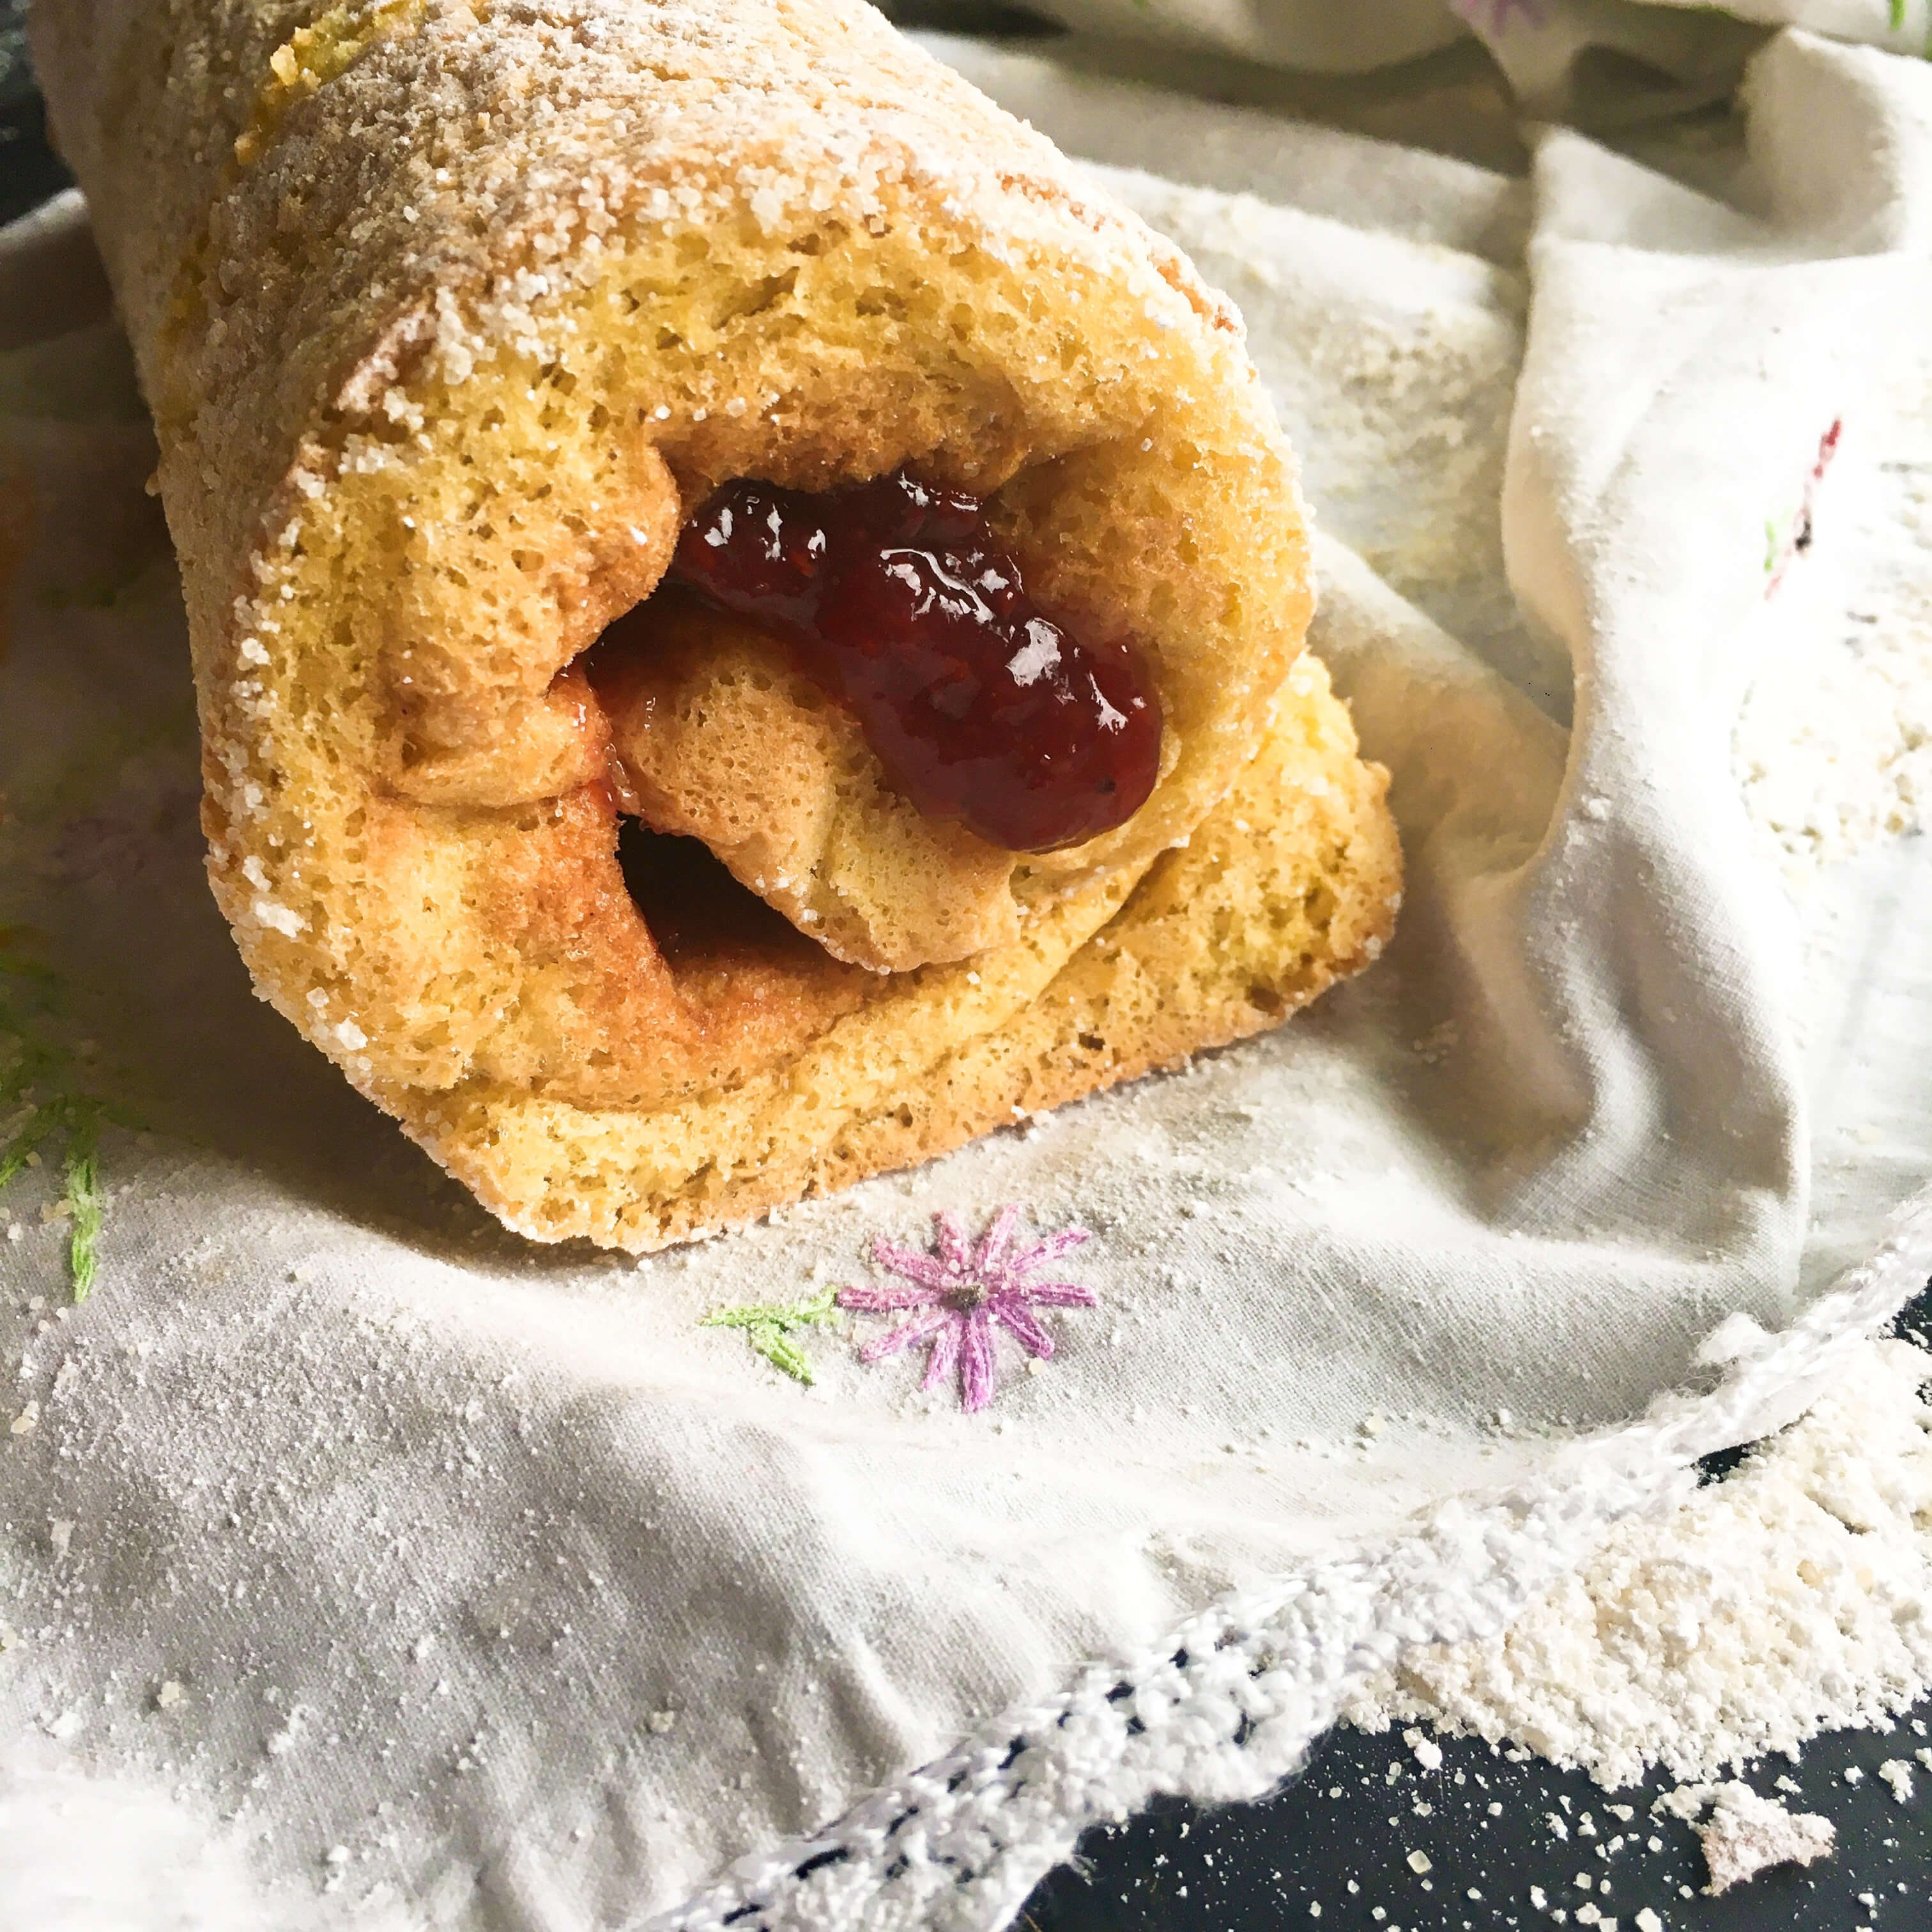
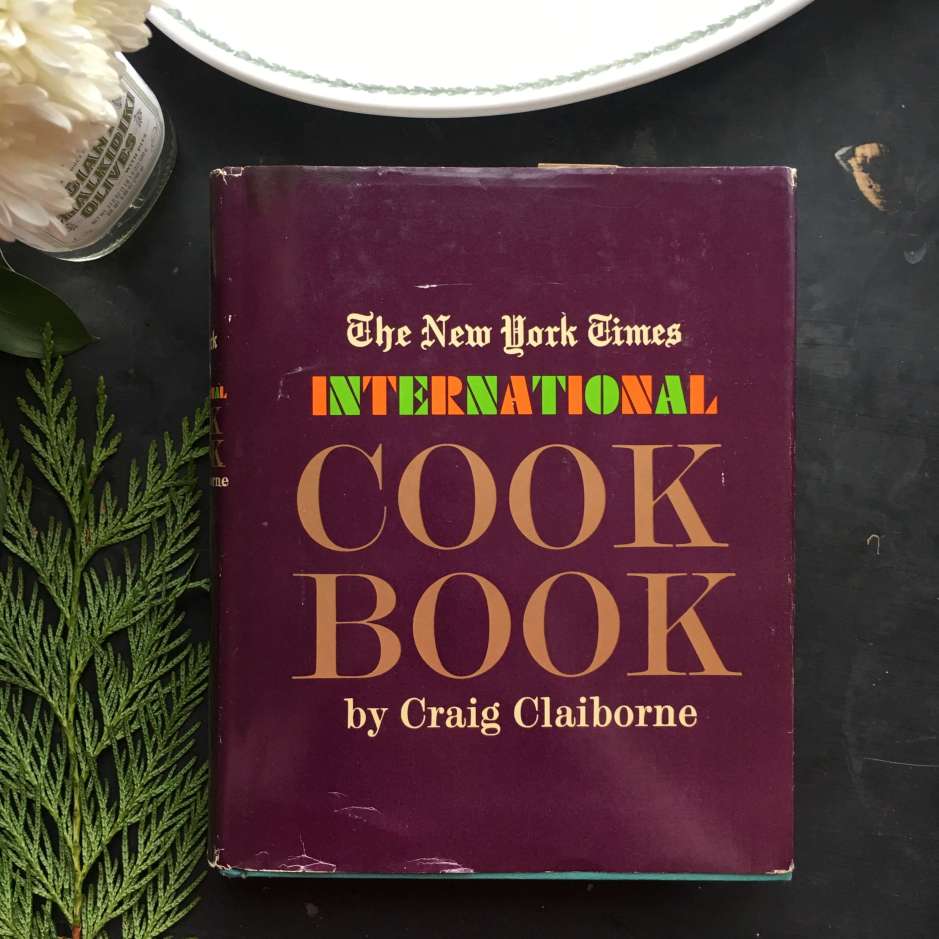
Since the start of this global culinary adventure back in January, not all of the foods on the Recipe Tour have matched up ideally with the time of year in which they were prepared. But I am excited to say that this stop in Haiti for Week 20 of the International Vintage Recipe Tour, has lined up perfectly with the current season. This week, we are making a dessert that is quick, and easy, and a bit out of the ordinary. It involves a handful of simple ingredients, the oven, some bravery and a taste for two seasons.  It has a lighter than air consistency like the best of summer eating yet also happens to be blanketed in layers of cozy Fall flavors.  And there is a special way to present it. That brings its own sense of magic too. In the form of a little flourish of fire at the end of the production, it both has the ability to dazzle your senses and delight your spirit. Like that familiar friend named nostalgia- just returned from last year, this sweet treat immediately welcomes the idea of logs and kindling and wood smoke and sweaters. It’s a dessert for the in-between times when your world isn’t quite what it used to be but also isn’t quite yet what it’s going to be. Yes indeed, this is the best time of year for this type of dessert.

On the menu today we are making Bananas Au Rhum, a Caribbean flambe that has influences in French, American and Haitian culture. But before we dive into the recipe and the making of it, I just wanted to acknowledge that this post has been on hold for most of the month due to the West Coast wildfires.  It didn’t seem like an appropriate time to feature a recipe that involved a voluntary fire in one kitchen while part of the country was battling involuntary fires in many numbers of neighborhoods. Having said that, for any readers who are sensitive to open flames at the moment, you may want to skip this post and join us again next week when we travel to a new (non-fire related) international destination that specializes in hearty foods for hungry appetites.

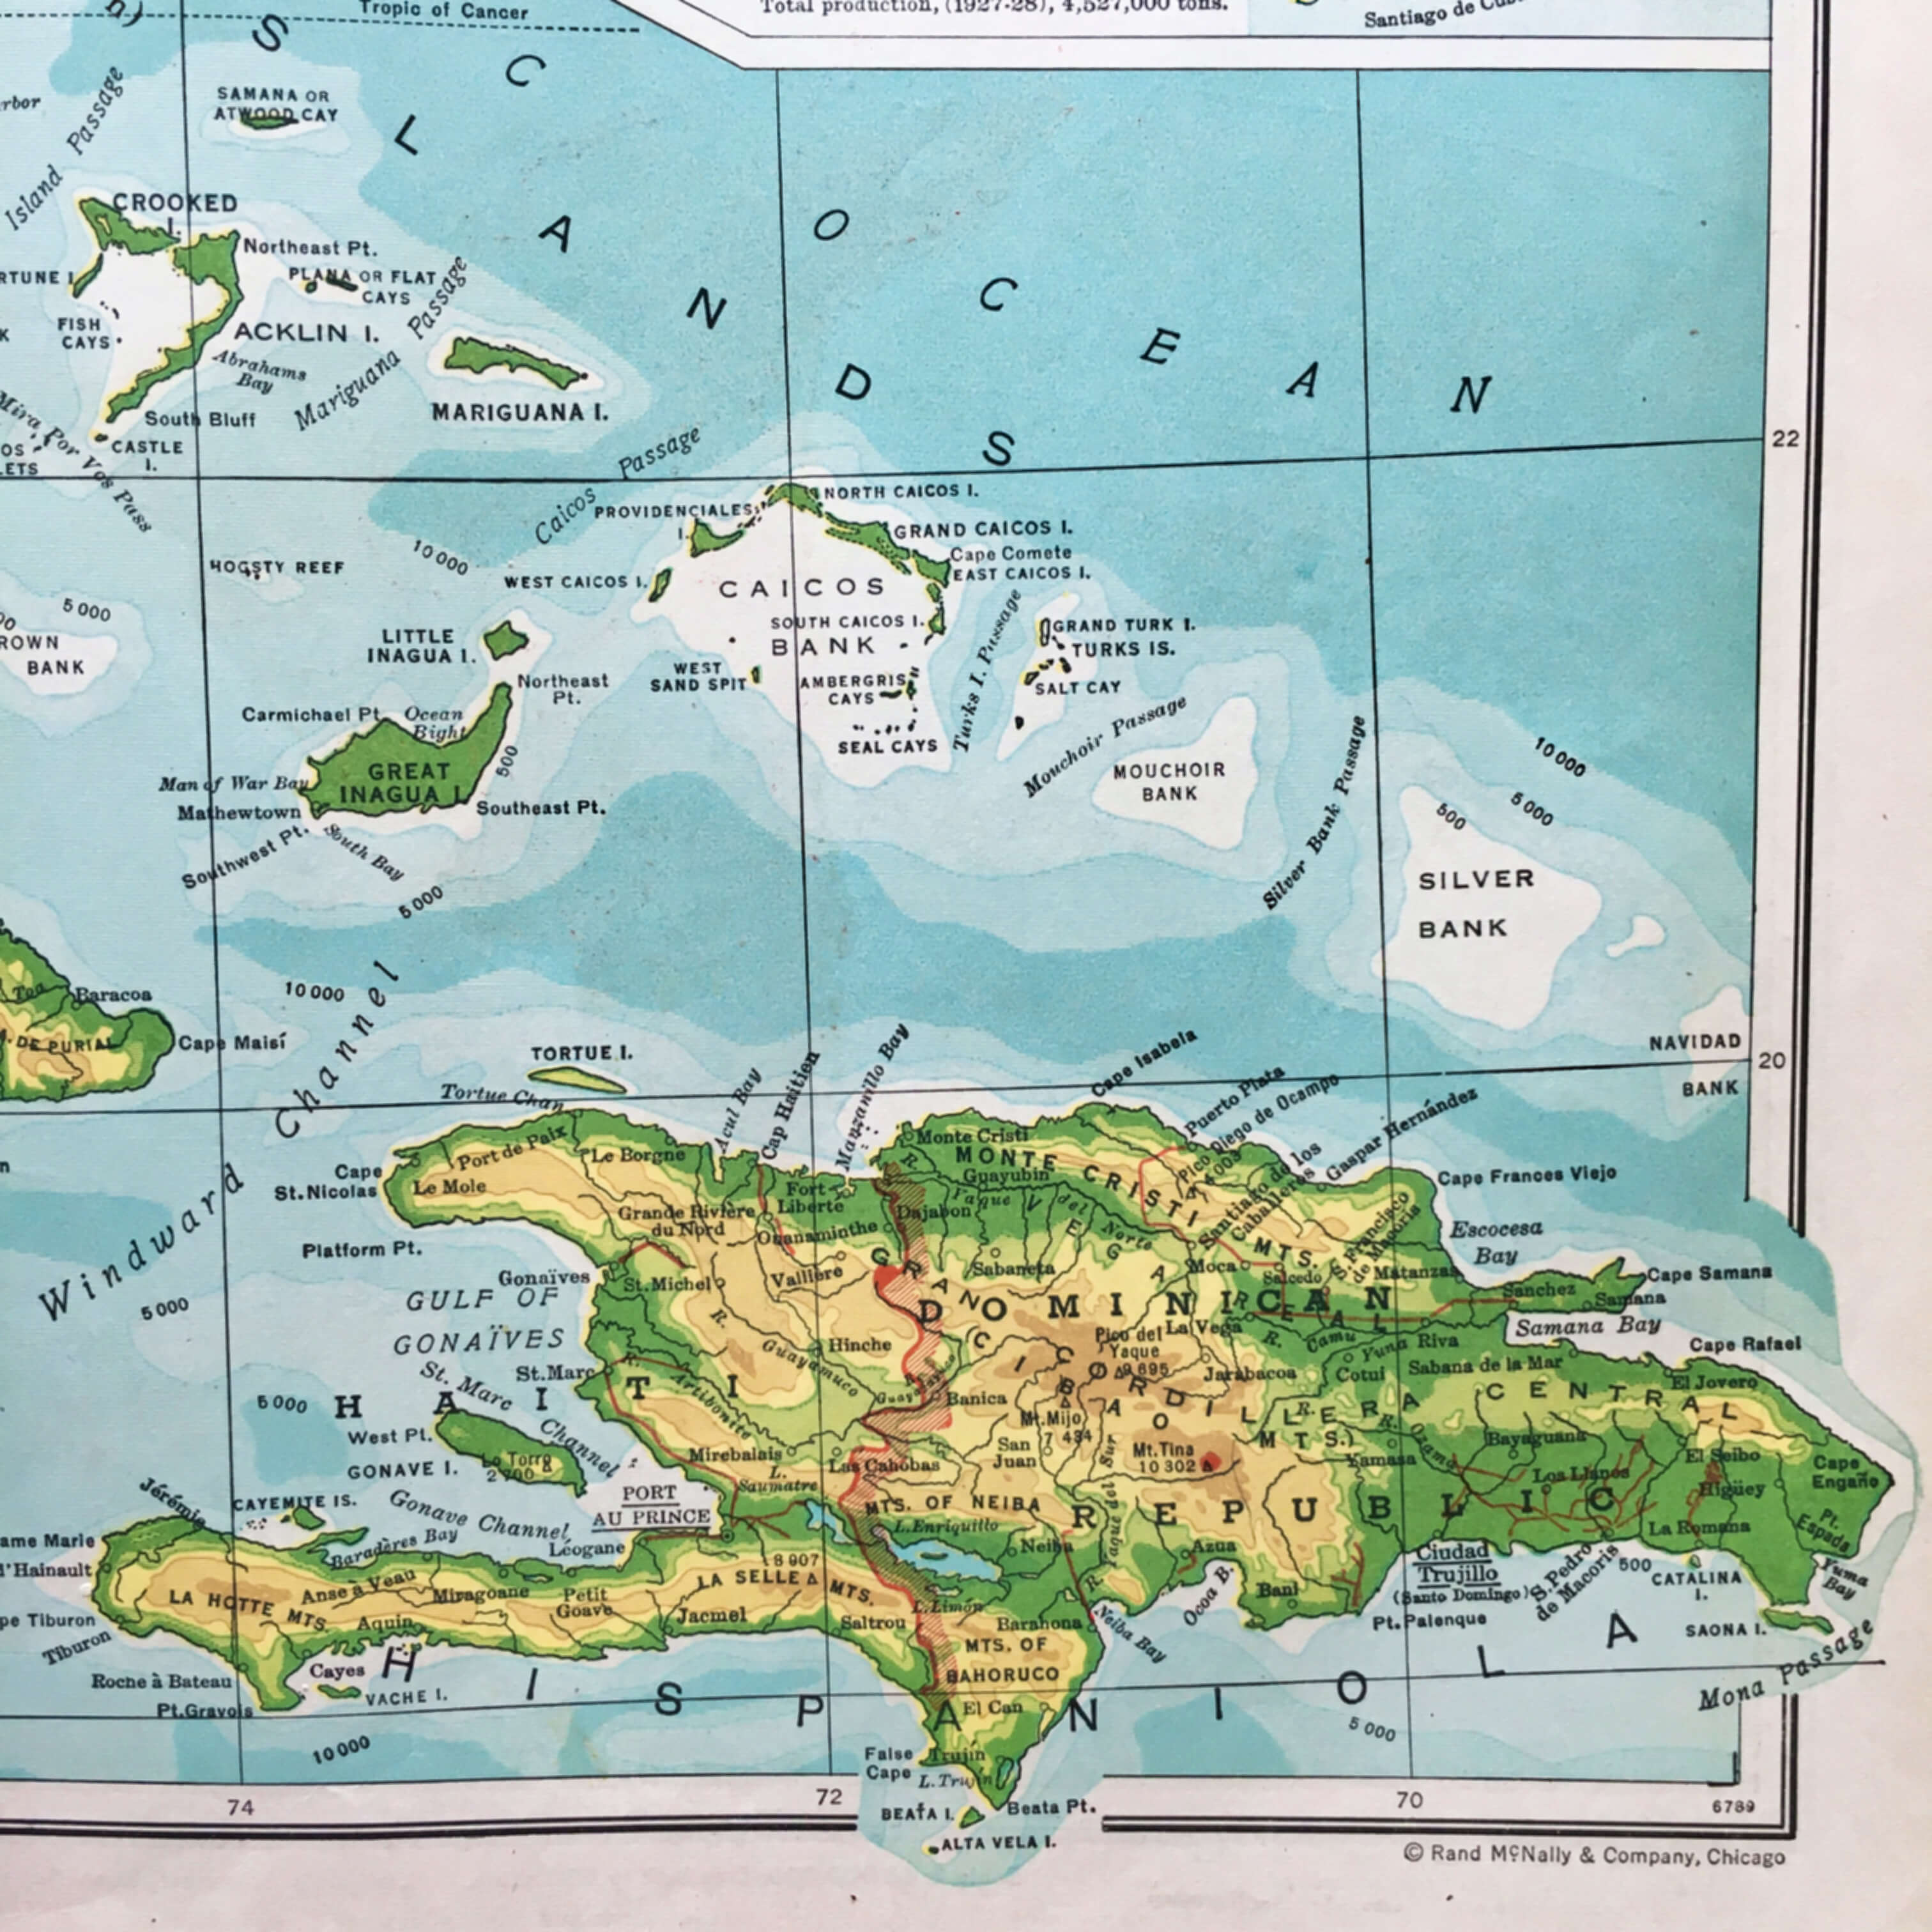
If you are sticking with us today, then hello, hello! Welcome to Haiti! Sharing the island of Hispaniola with its neighbor, the Dominican Republic, Haiti is a world all onto itself.

To learn about the history of this island nation means to learn about a country that has been battling ill-intentioned governments, poverty, corruption, slavery, and natural disasters pretty much since it was first discovered by Christopher Columbus in the 15th century.

As one of the poorest nations in the world, much of the news that gets relayed and recorded about this country, both in the past and the present, has mostly focused on Haiti’s challenges.  This, of course, is ideal when change needs to be made or special aid is required for situations like hurricane cleanup and economic assistance, but those types of immediate crises can tend to easily overshadow the elements that make Haiti unique, vibrant, and culturally important.  In today’s post, we are setting tragedies aside and drawing inspiration from the sweet side of Haiti’s history in the form of food, drink, architecture, and design aesthetics, all of which were shaped by French, Spanish, African, and indigenous influences. Like this vintage travel poster declares, there is plenty of joie de vivre to be found in Haiti. Today, we are here to highlight it!

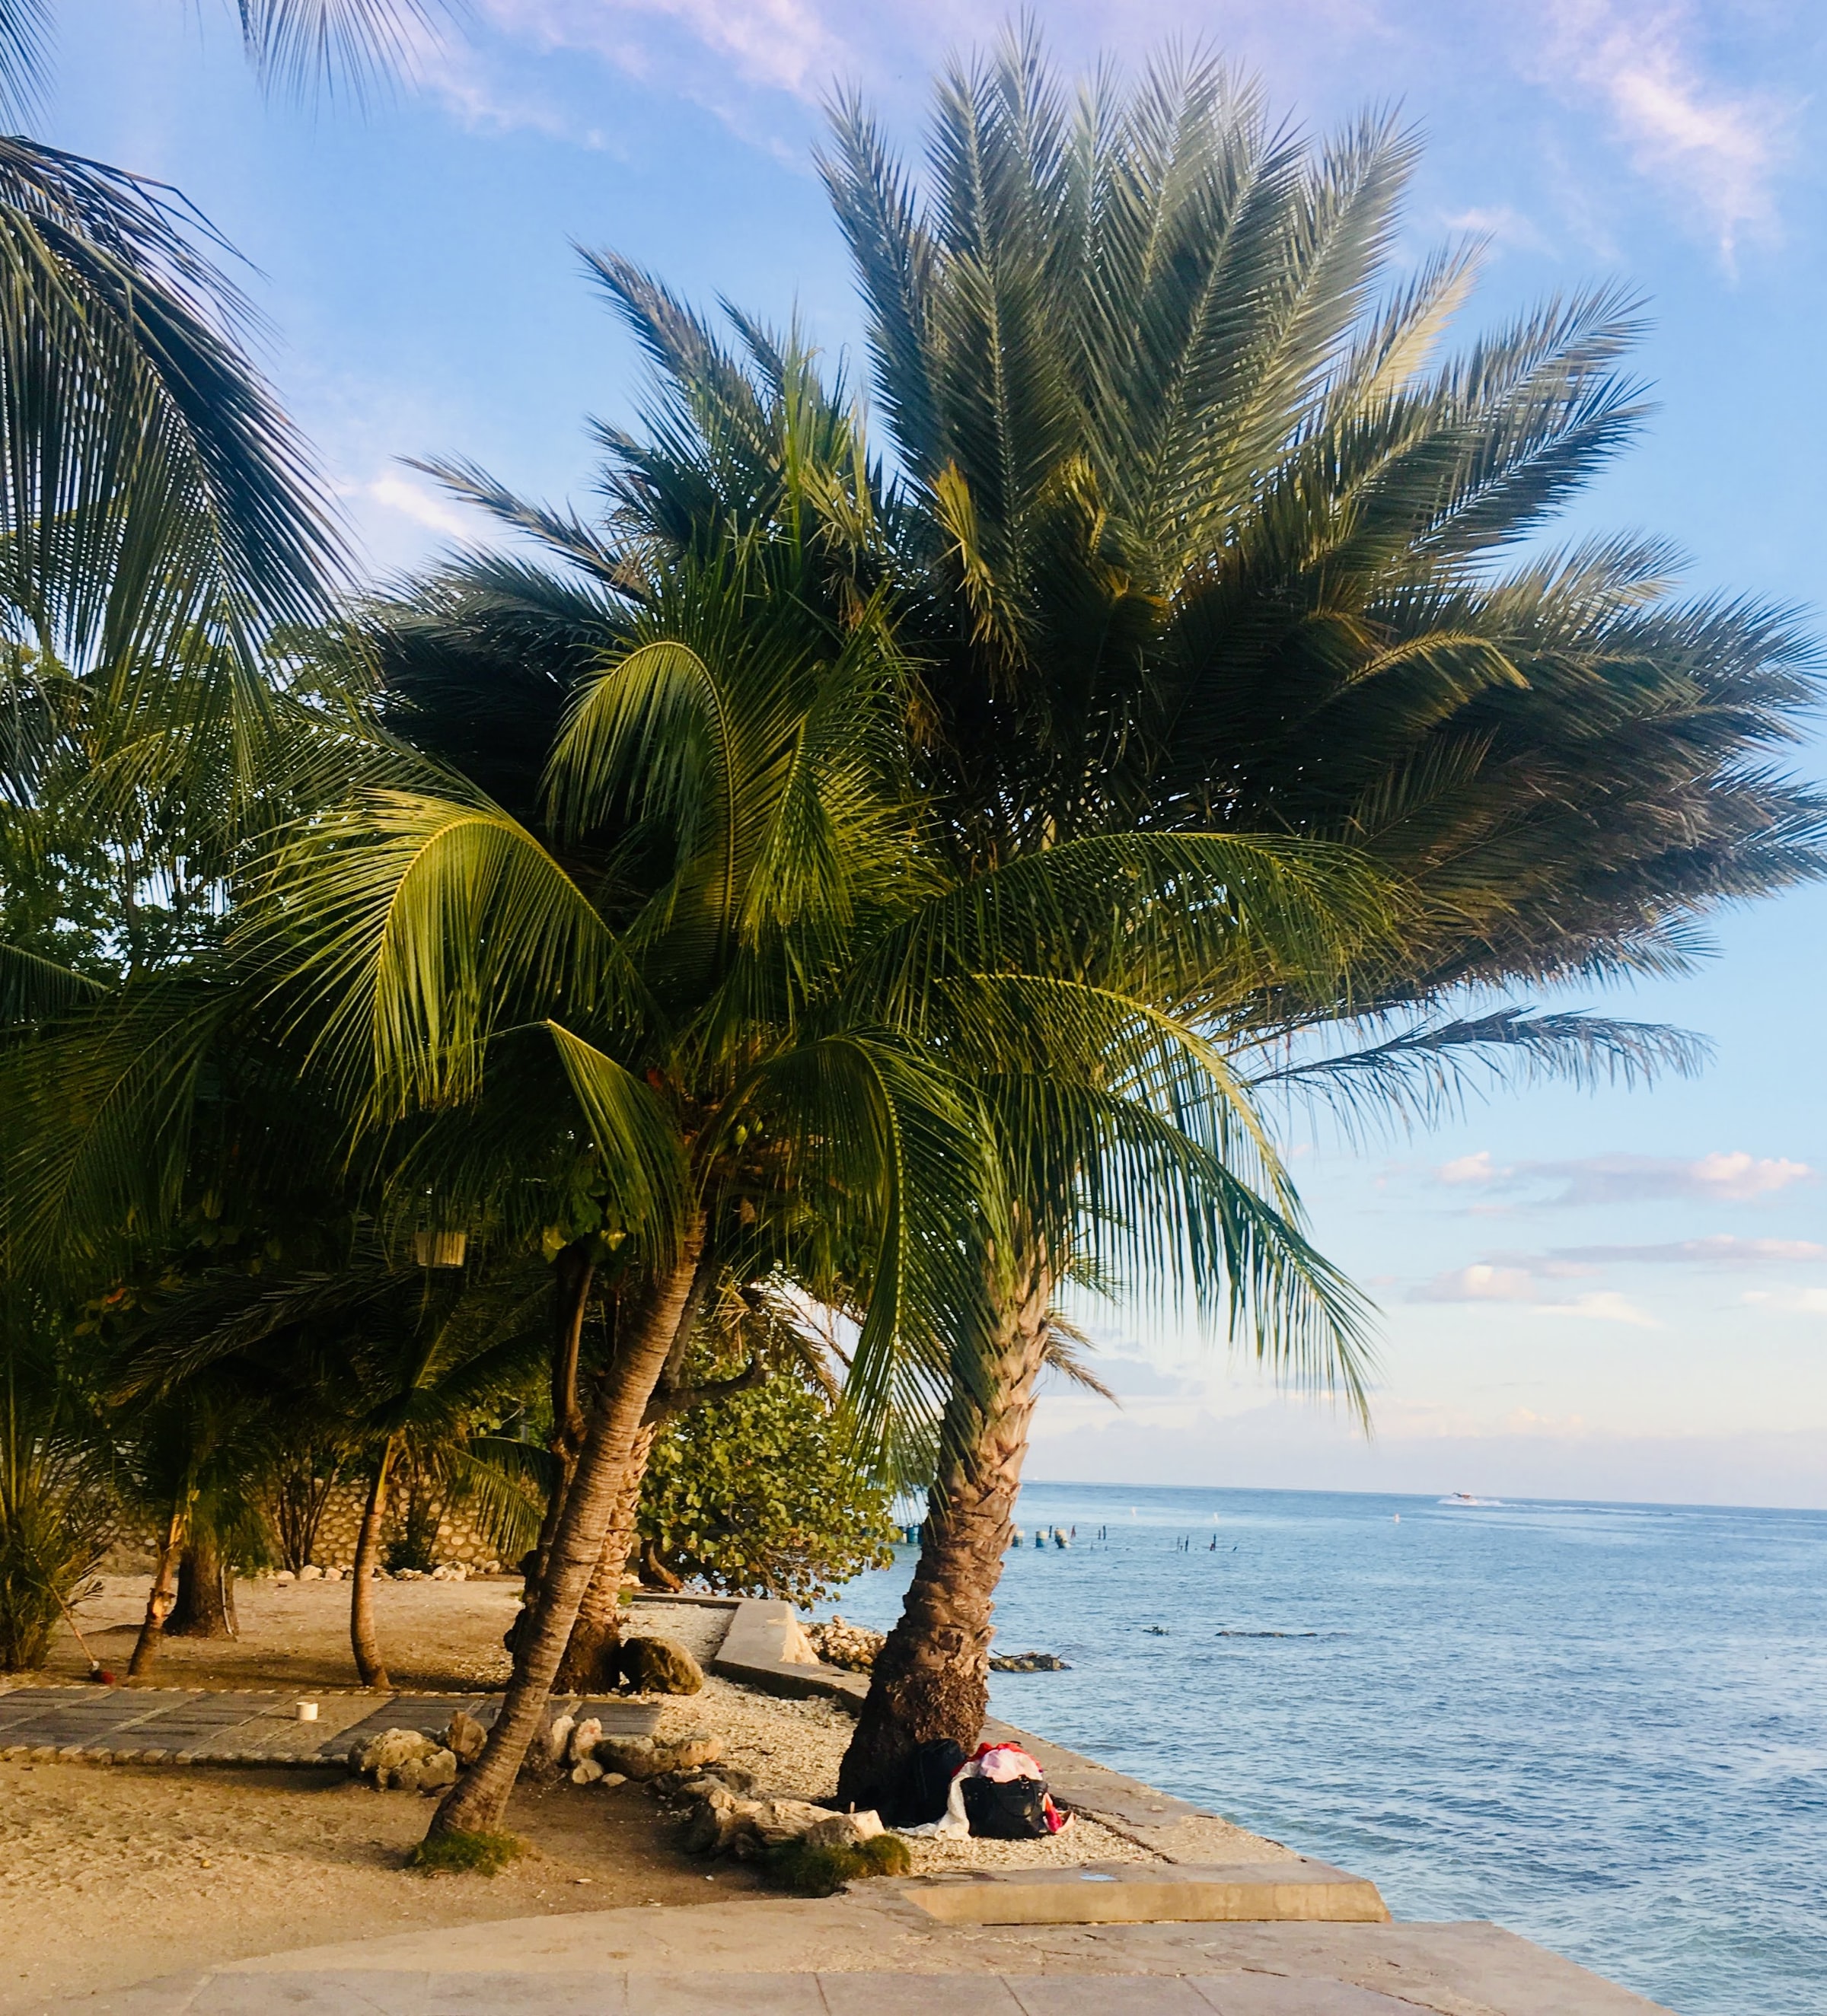
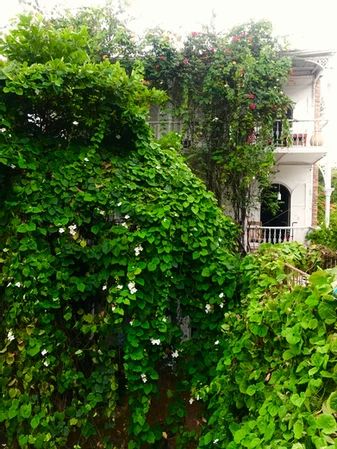
Nicknamed the Pearl of the Antilles, Haiti’s most celebrated attribute is its natural beauty. There the sea shines clear and turquoise, beaches are powdery white like sugar, and palm trees, tall and regal, ruffle out the landscape.

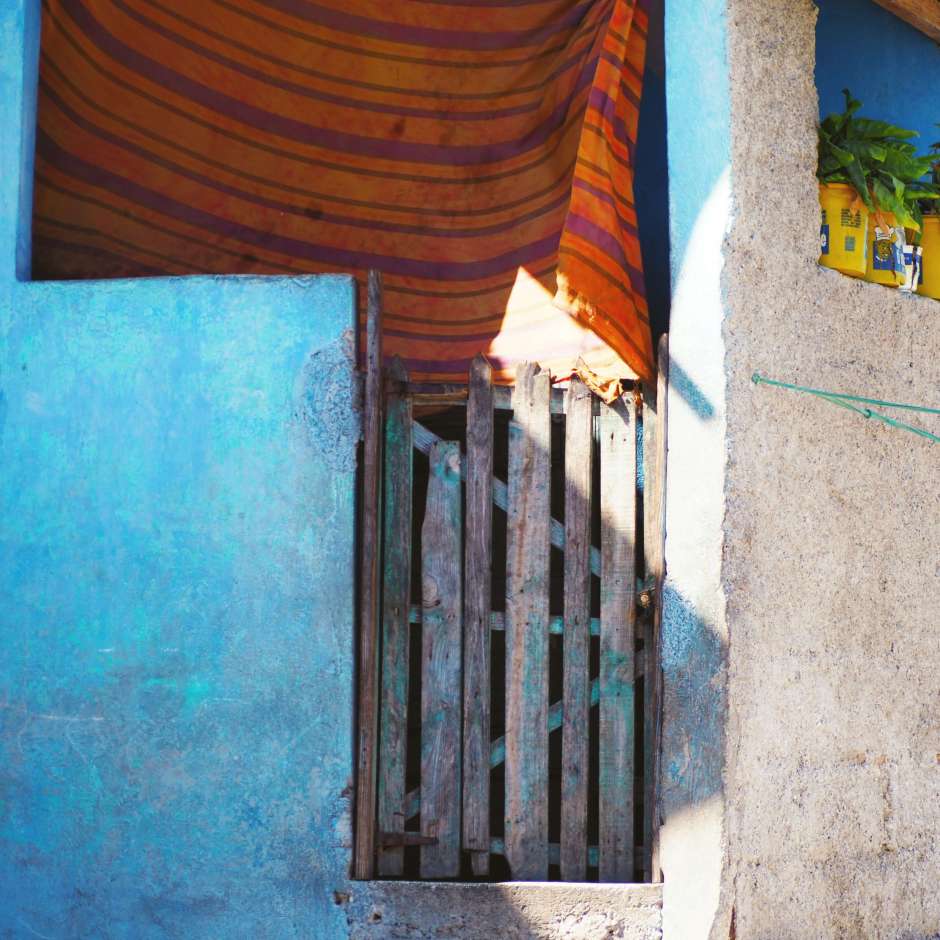
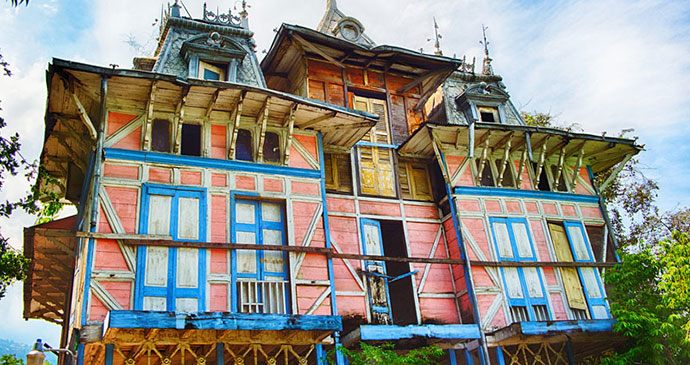
In the historic districts, Haiti is home to the Gingerbread house, a colorful style of architecture that has defined the island and defied almost every single weather event since inception. First introduced by three architects over a century ago, this specific style of colorful house with its exquisitely detailed trim work, tall windows, and airy interiors may look delicate among the more solid buildings of the Haitian landscape, but their strength and ability to withstand storm after storm has landed them on the preservation and conversation list of the World Monuments Fund where they are being renovated, rehabilitated, and appreciated for their craftsmanship and their historical significance.

Like the old cars and weathered residences of Havana, the gingerbread houses of Haiti create a cinematic aesthetic. With about 300,000 of them scattered throughout the island, they offer a peek inside the past to a time when Haiti’s wealthy built breezy beauties to defy island heat and humidity. Inspired by French architecture and New Orleans ornamentation, these houses were made primarily of wood, swathed in shutters, painted bright colors, and dotted with symbolism to reflect the mysteries and curiosities of a unique heritage not often discussed.

Outside, gingerbread houses feature gabled roofs, interesting angles, and strategically placed porches that offer picturesque views of the garden, the city or the sea. Inside, they are a menagerie of doorways and tile floors, louvres and alcoves,  with sky-high ceilings and arched doorframes all creatively arranged to encourage the heat to rise and the humidity to stay outside. Detailed interior trims and mouldings include ornamental designs of local patterns, emblems and shapes including voodoo symbols, all of which reflect the artistic creativity and spirituality of Haitian culture.

To capture this unique island aesthetic of the gingerbreads, which is at once, elegant, quirky, artistic and visually engaging, several unifying hallmarks help create a replicable effect…

  • Handmade Baskets: It is the ladies who do all do the selling at the market in Haiti. They tend to transport most of their offerings balanced on their head in large baskets, which have come to represent bounty and entrepreneurial spirit.
  • French Details: The French government ruled Haiti for 300 years, ending in 1803. Even though two hundred years have passed since then, French culture is still very much present around the country, particularly when it comes to design, language, food and antique style housewares.
  • Wood Shutters: A house in Haiti without air conditioning depends on wooden shutters to help cool interior spaces. Tall and elegant, these shutters take the place of drapes and bring a little bit of the outdoors in.
  • Folk Art: One of the most vibrant art forms on the island besides music, is folk art paintings which capture the passion, spirit and history of Haiti in vibrant colors. Some newly discovered favorite artists include Hector Hyppolite (1894-1948)  Andrew LaMar HopkinsJean Yvone Casenueve, and this one in the shop.
  • Unique Flooring: Many floors in the houses of Haiti’s historic districts are painted with patterns or contain geometric tiles that help keep the interior spaces cool and also looking beautiful.
  • Gingerbread Details: Gingerbread trim, victorian millwork and scroll saw designs are staples both indoors and out and can be seen all over Haiti, but most predominately in the historic districts. Unique architectural elements reflect the island vibe.
  • Tropical Plants: Haiti is home to over 25,00 different species of native flora and fauna. Nothing adds an instant dose of the exotic quite like growing a tropical plant indoors or out.
  • Voodoo Symbolism – With ties to the country’s African roots and the Roman Catholic religion, the practice of voodoo in Haiti offers a connection to the spirit world through many different manifestations including connections with patron saints and ancestral spirits . This symbol represents Papa Legba who acts as the mediator between the spirit world and the living world.
  • Vibrant Colors – The colors of the national flag of Haiti are blue, red and white but the country as a whole is awash in vibrant hues.  Inspiration can be found all over the country from the beautiful beaches to brightly painted buildings, textiles, handicrafts, art and even the famous tap tap buses. The gingerbread houses seem to reflect them all!
A gingerbread house in Port-au-Prince. Photo courtesy of Experience Haiti.

A few decades before the gingerbread bread houses started popping up around the island, a  man named Dupre came from France to Port-au-Prince in the 1860s. He started a rum distillery and gave it his family’s name – Barbancourt. One hundred and fifty years later, Barbancourt is recognized as one of the best rum brands in the world and is still operating as a family run business, now in its 5th generation.

The grounds of Barbencourt Distillery located in Port-Au Prince

By utilizing pure sugar cane juice instead of the more common molasses,  Barbancourt’s method of distilling rum has won awards around the world and is by far the best known and best-loved rum in Haiti. Ideally, we would have been using Barbancourt in our recipe today too, but after a lengthy discussion with a spirits expert at my local liquor store, it was decided that a 151 blend of rum would be the most appropriate in order to ensure that the bananas would catch fire and truly become a flambe. Several companies make a version of 151, which is essentially just rum with a really high alcohol content (75% by volume) but sadly, Barbancourt does not. Their highest alcohol content is 43%. So  I went with Goslings for this recipe. Goslings, like Barbancourt, has been around since the 1800s, and since it is made in Bermuda, it still lends an island vibe to this week’s cooking endeavor.

I should also note that the recipe never specified how high of an alcohol content was needed, but 151 is the standard go-to in the flambe world, so it’s a safe bet to rely upon, if this is your first time lighting foods on fire, like it was mine.

Grandpa Herbert’s 1960s Anchor Hocking casserole dish – protector of all fire-related cooking endeavors.

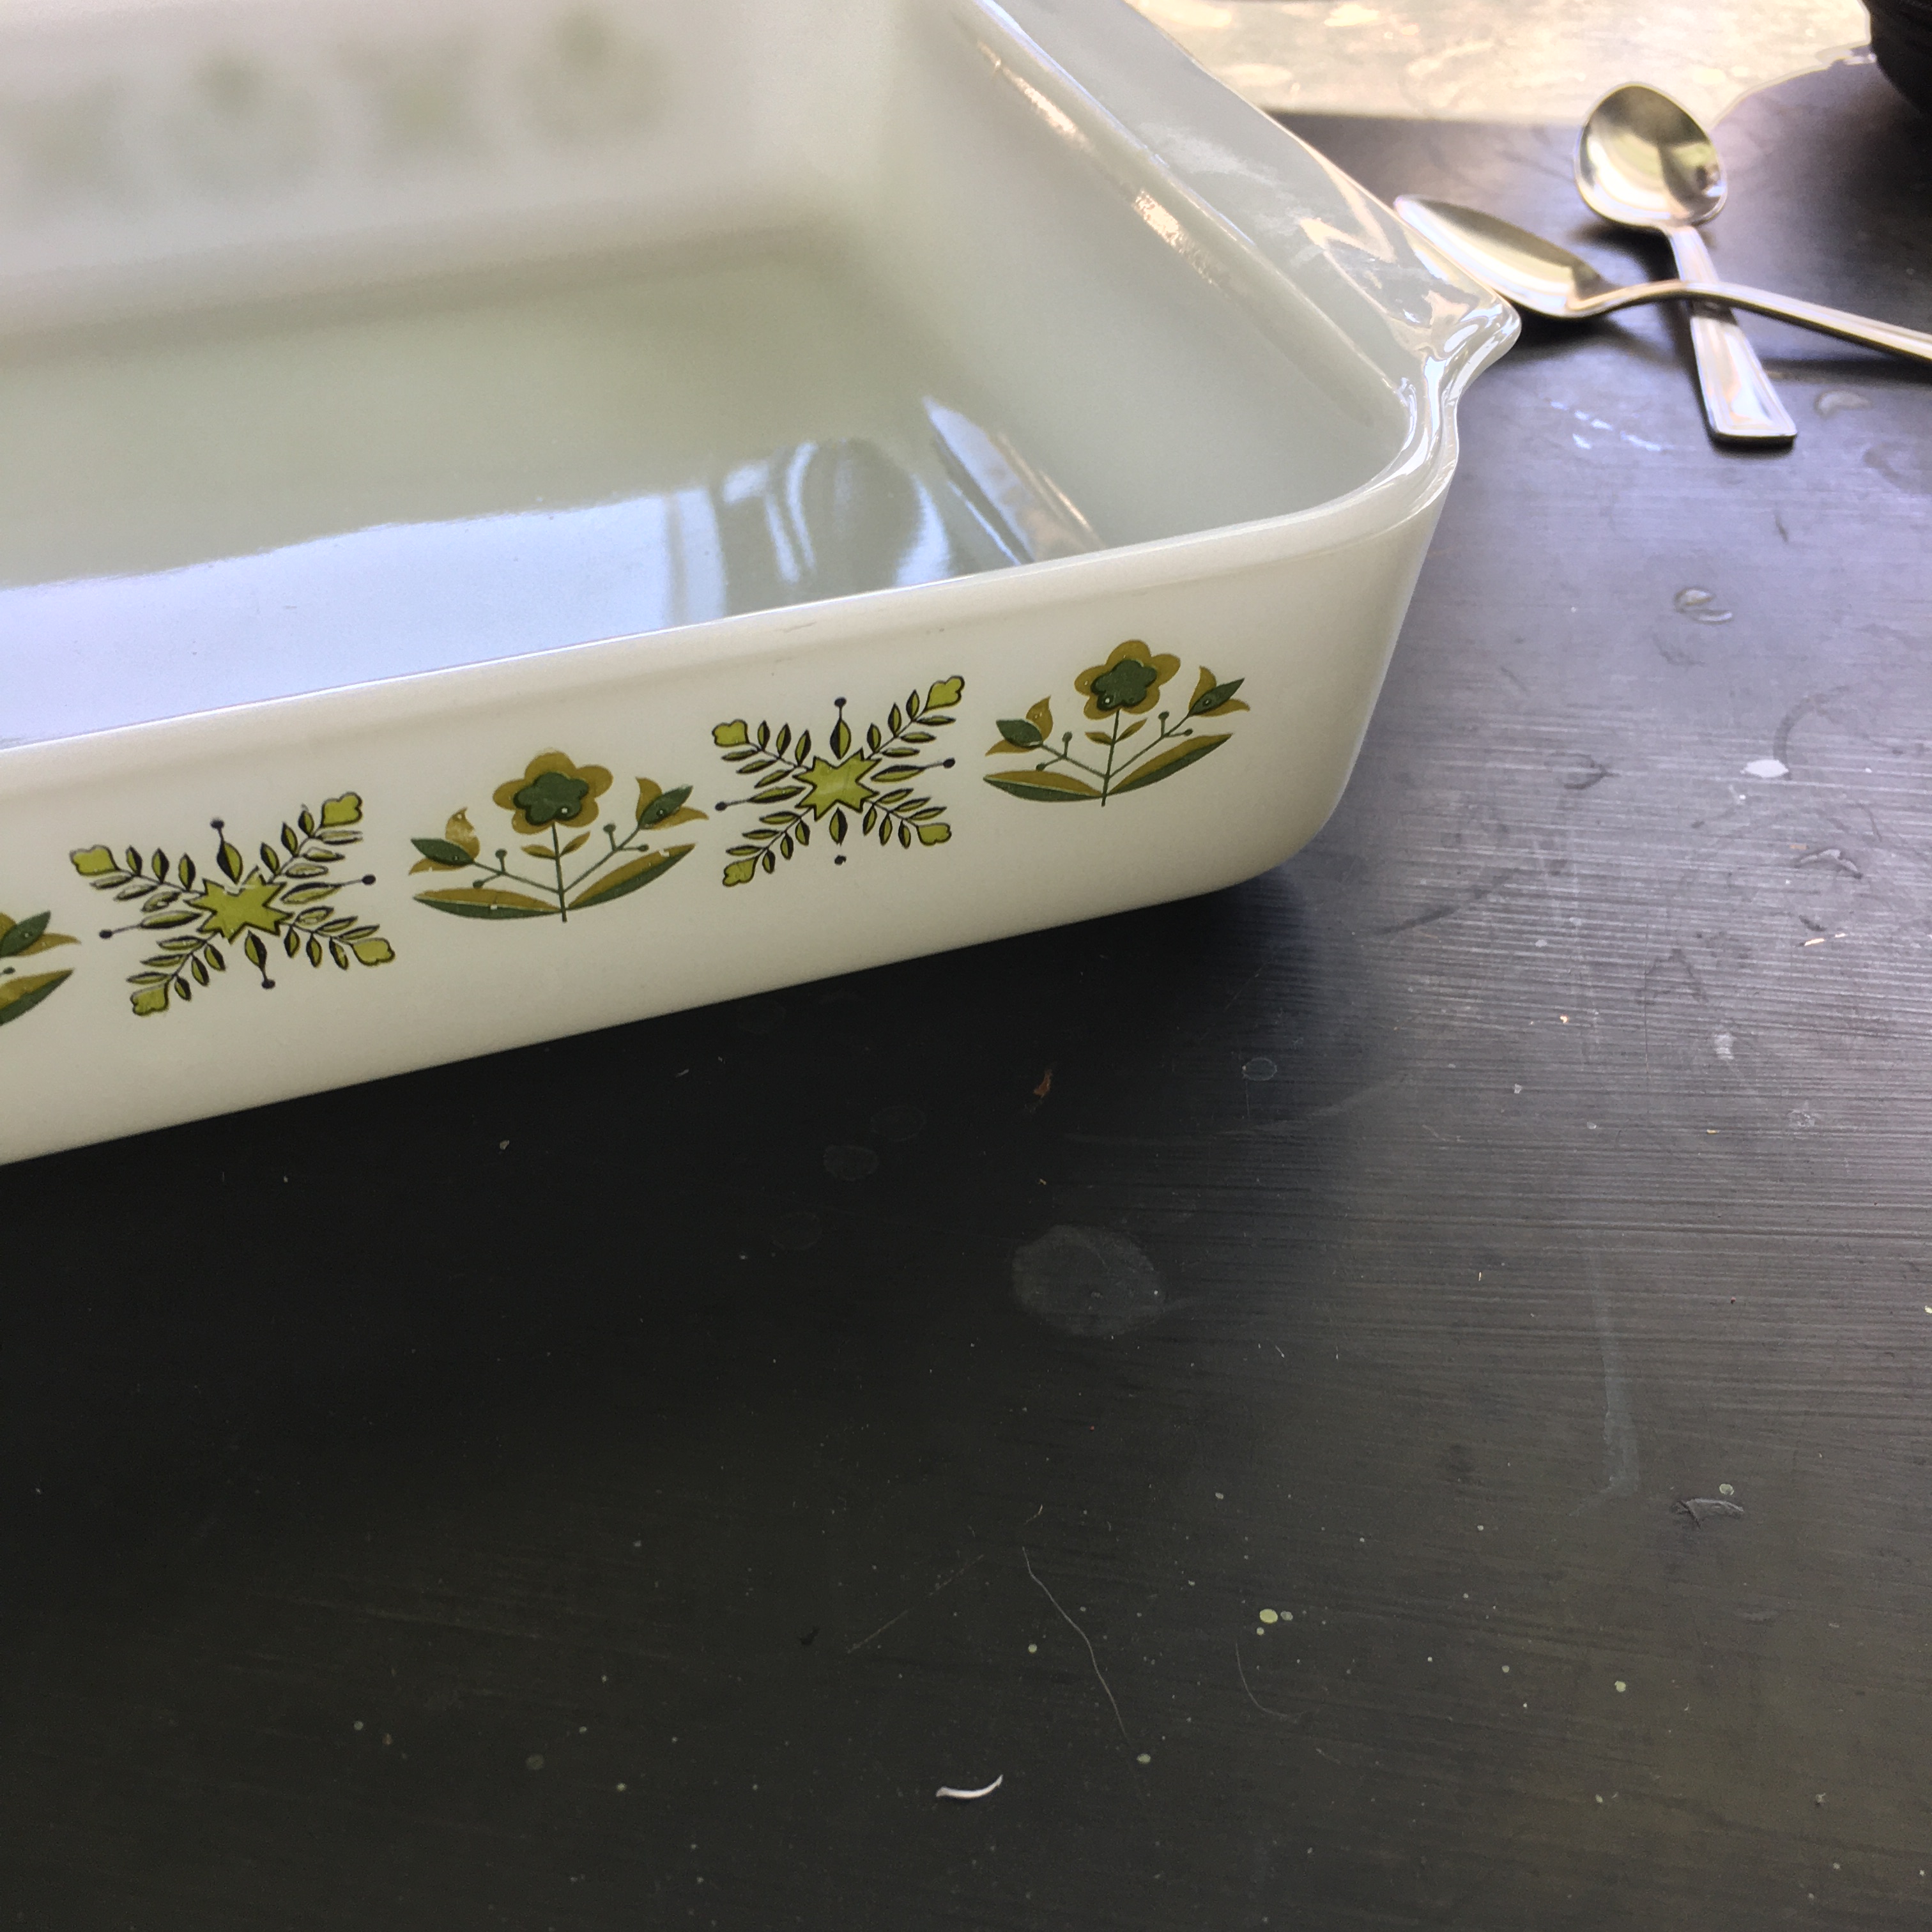
I’ll admit I was a little nervous about this step myself.  Before I bit the bullet and lit the match, I made sure to have our under-the-sink fire extinguisher out on the counter along with a dry towel for tamping, just in case the flames got a little too overzealous. I also used a special baking dish that has magical protective powers. My grandpa Herbert’s 1960s Anchor Hocking Fire King casserole dish. If you recall from previous posts, Herbert was a fireman in Chicago for forty years and I like to think that his baking dish holds special powers and would protect anyone who cooks with it from any unwanted fiery encounters.

Thanks to Grandpa, the dish, and the careful precautions, I’m happy to say that the kitchen is still intact, no one suffered singed eyebrows or burnt hair and the counter didn’t catch on fire. The flames, about 5 inches in height, lasted for about a minute before dying out. It was fun to watch them dance around the dish in that same mesmerizing way as lighting sparklers on the Fourth of July, or staring at a bonfire on the beach.  All in all, this was a recipe that was exciting to make and delicious to taste.

If you are new to the world of flambeed desserts, which have been around since the 1800s, than you are in for a treat. Lots of foods can be doused with alcohol and set aflame including crepes, oranges, pears, puddings, cakes, and cocktails but bananas are one of the most favorite.  In the oven, the bananas briefly swim in a sea of hot butter, sugar, and rum until the point where they all join together and start to turn brown and sticky. Once the caramelization begins to happen, then the dish gets doused in rum, the match gets lit and the rum catches fire creating a rich, warm flavor and an entertaining spectacle. Forget dinner and a show. With this recipe, we are going straight to dessert. And a show.
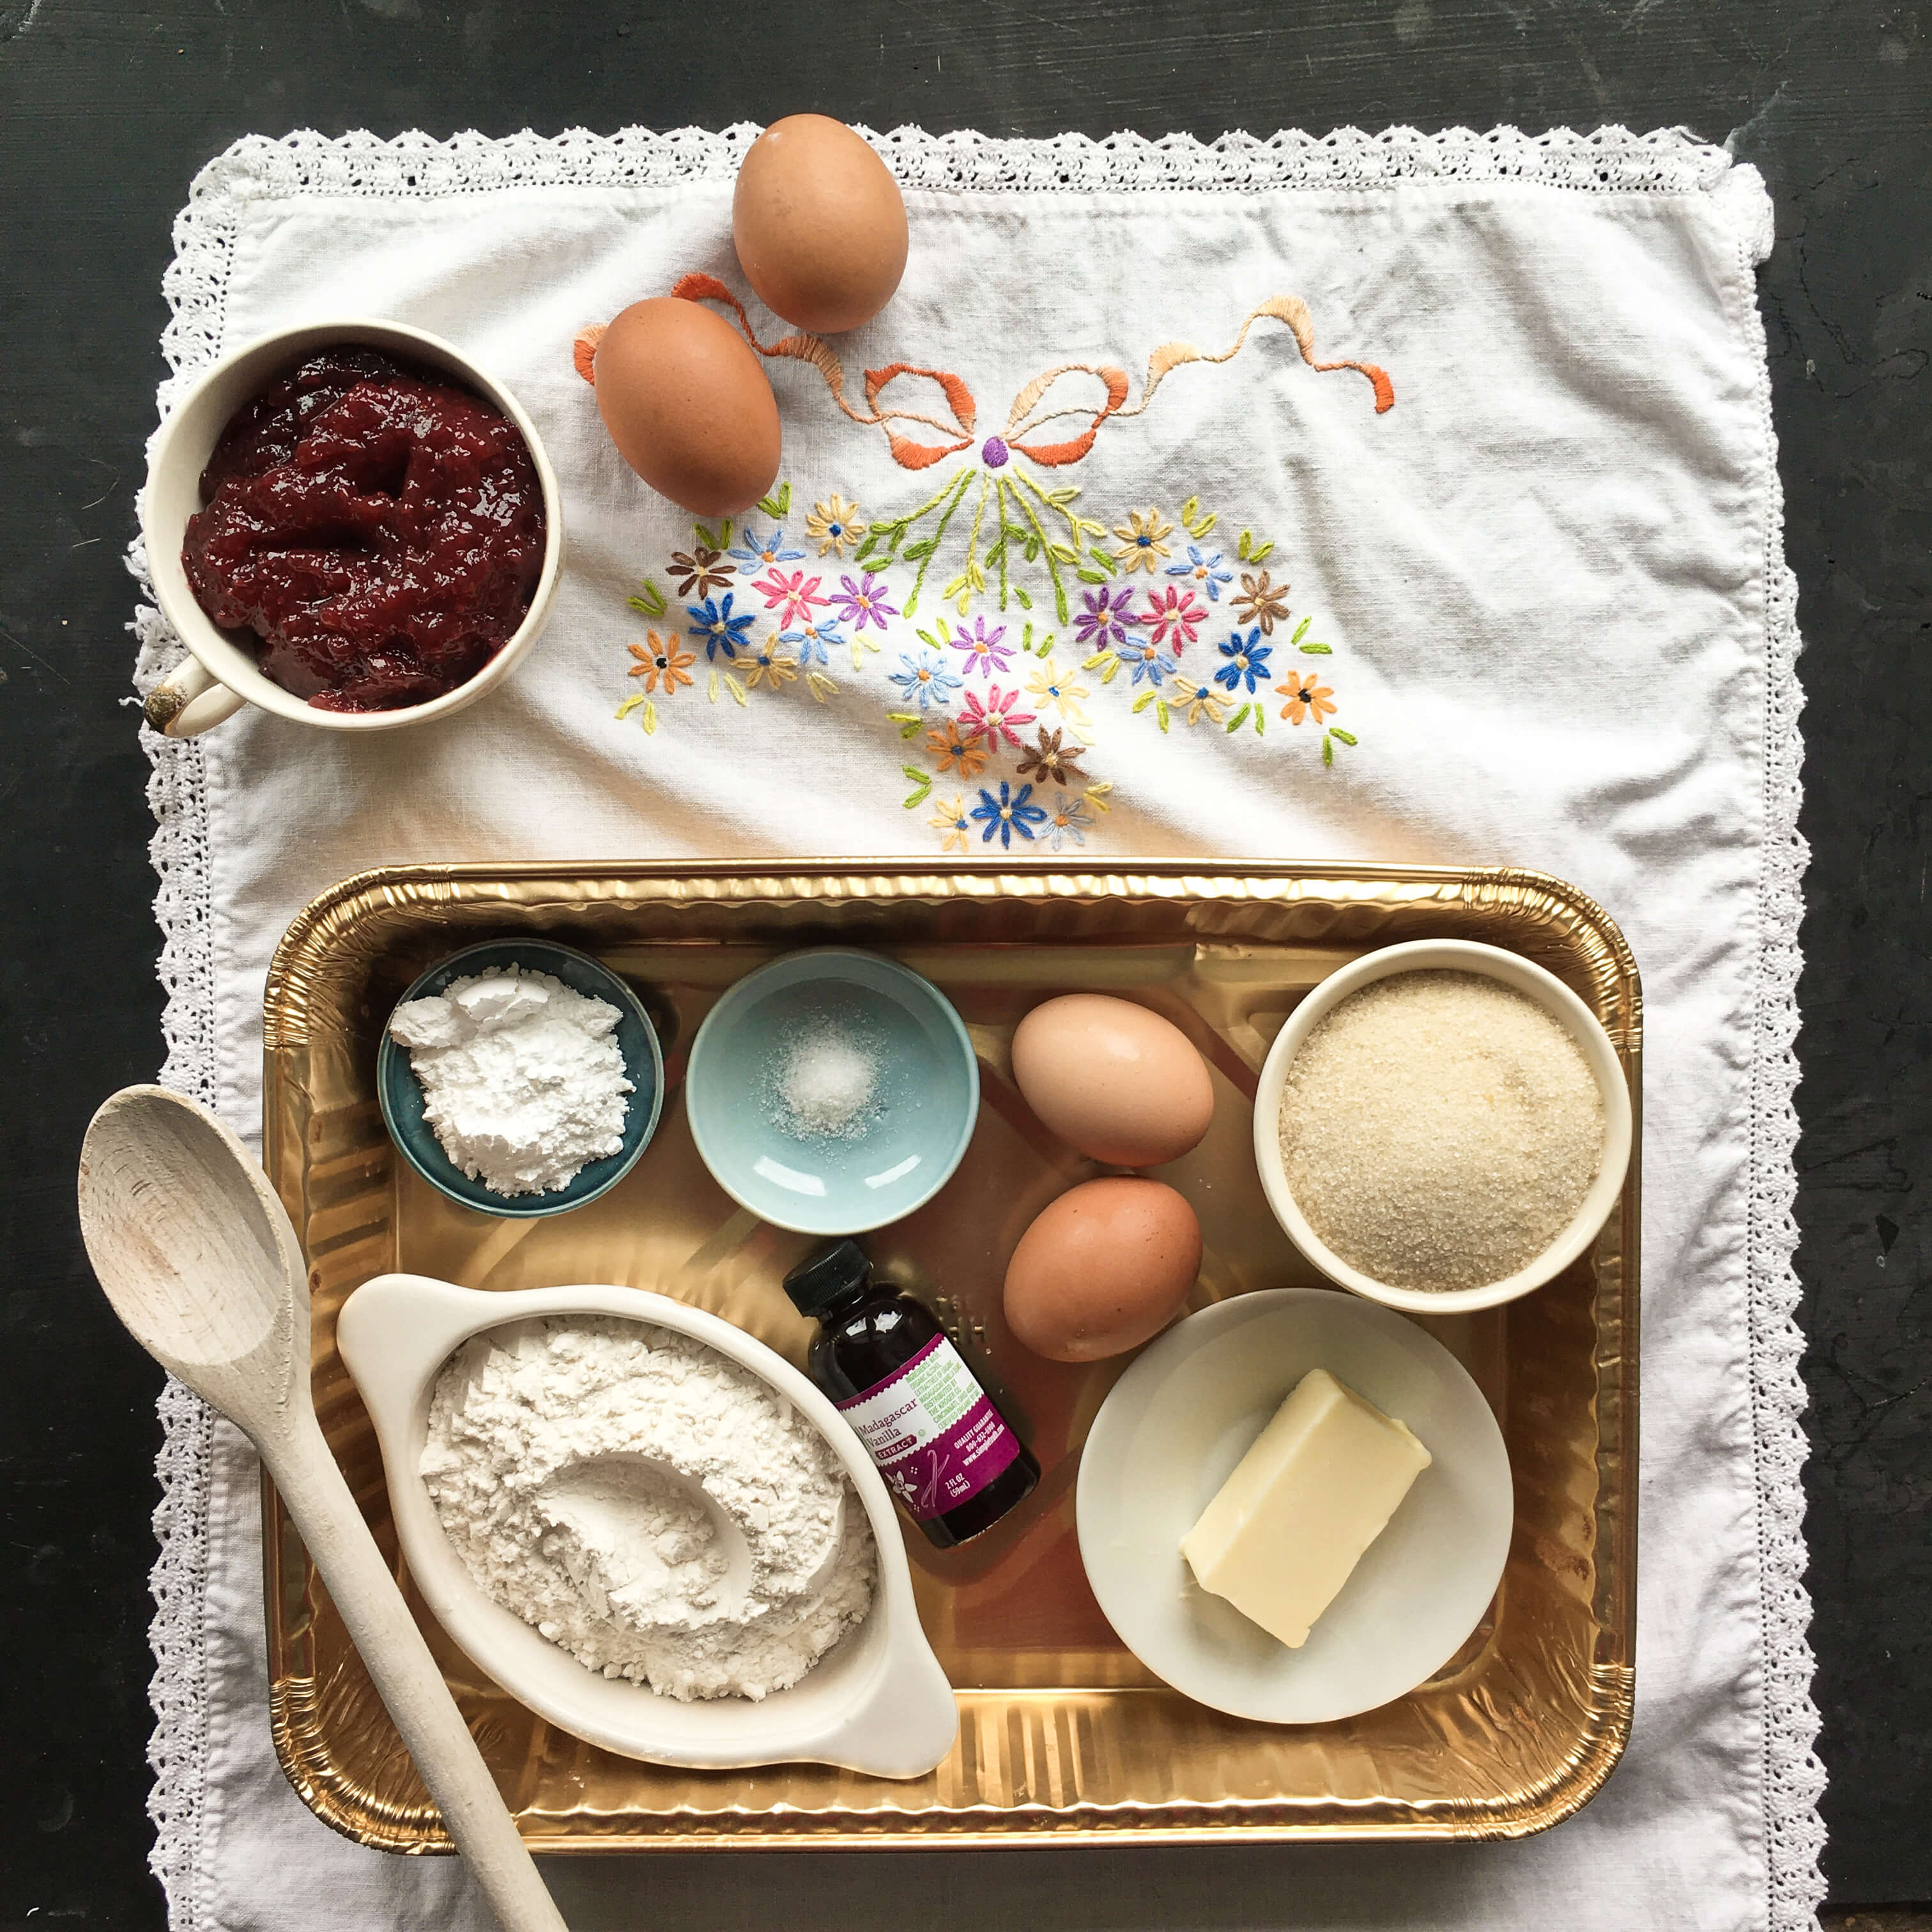
Bananas au Rhum

serves 4

4 firm ripe bananas

1/4 cup butter

1/4 cup brown sugar

lemon juice

1/2 cup rum

Preheat oven to 450 degrees. Peel the bananas and cut them in half lengthwise.

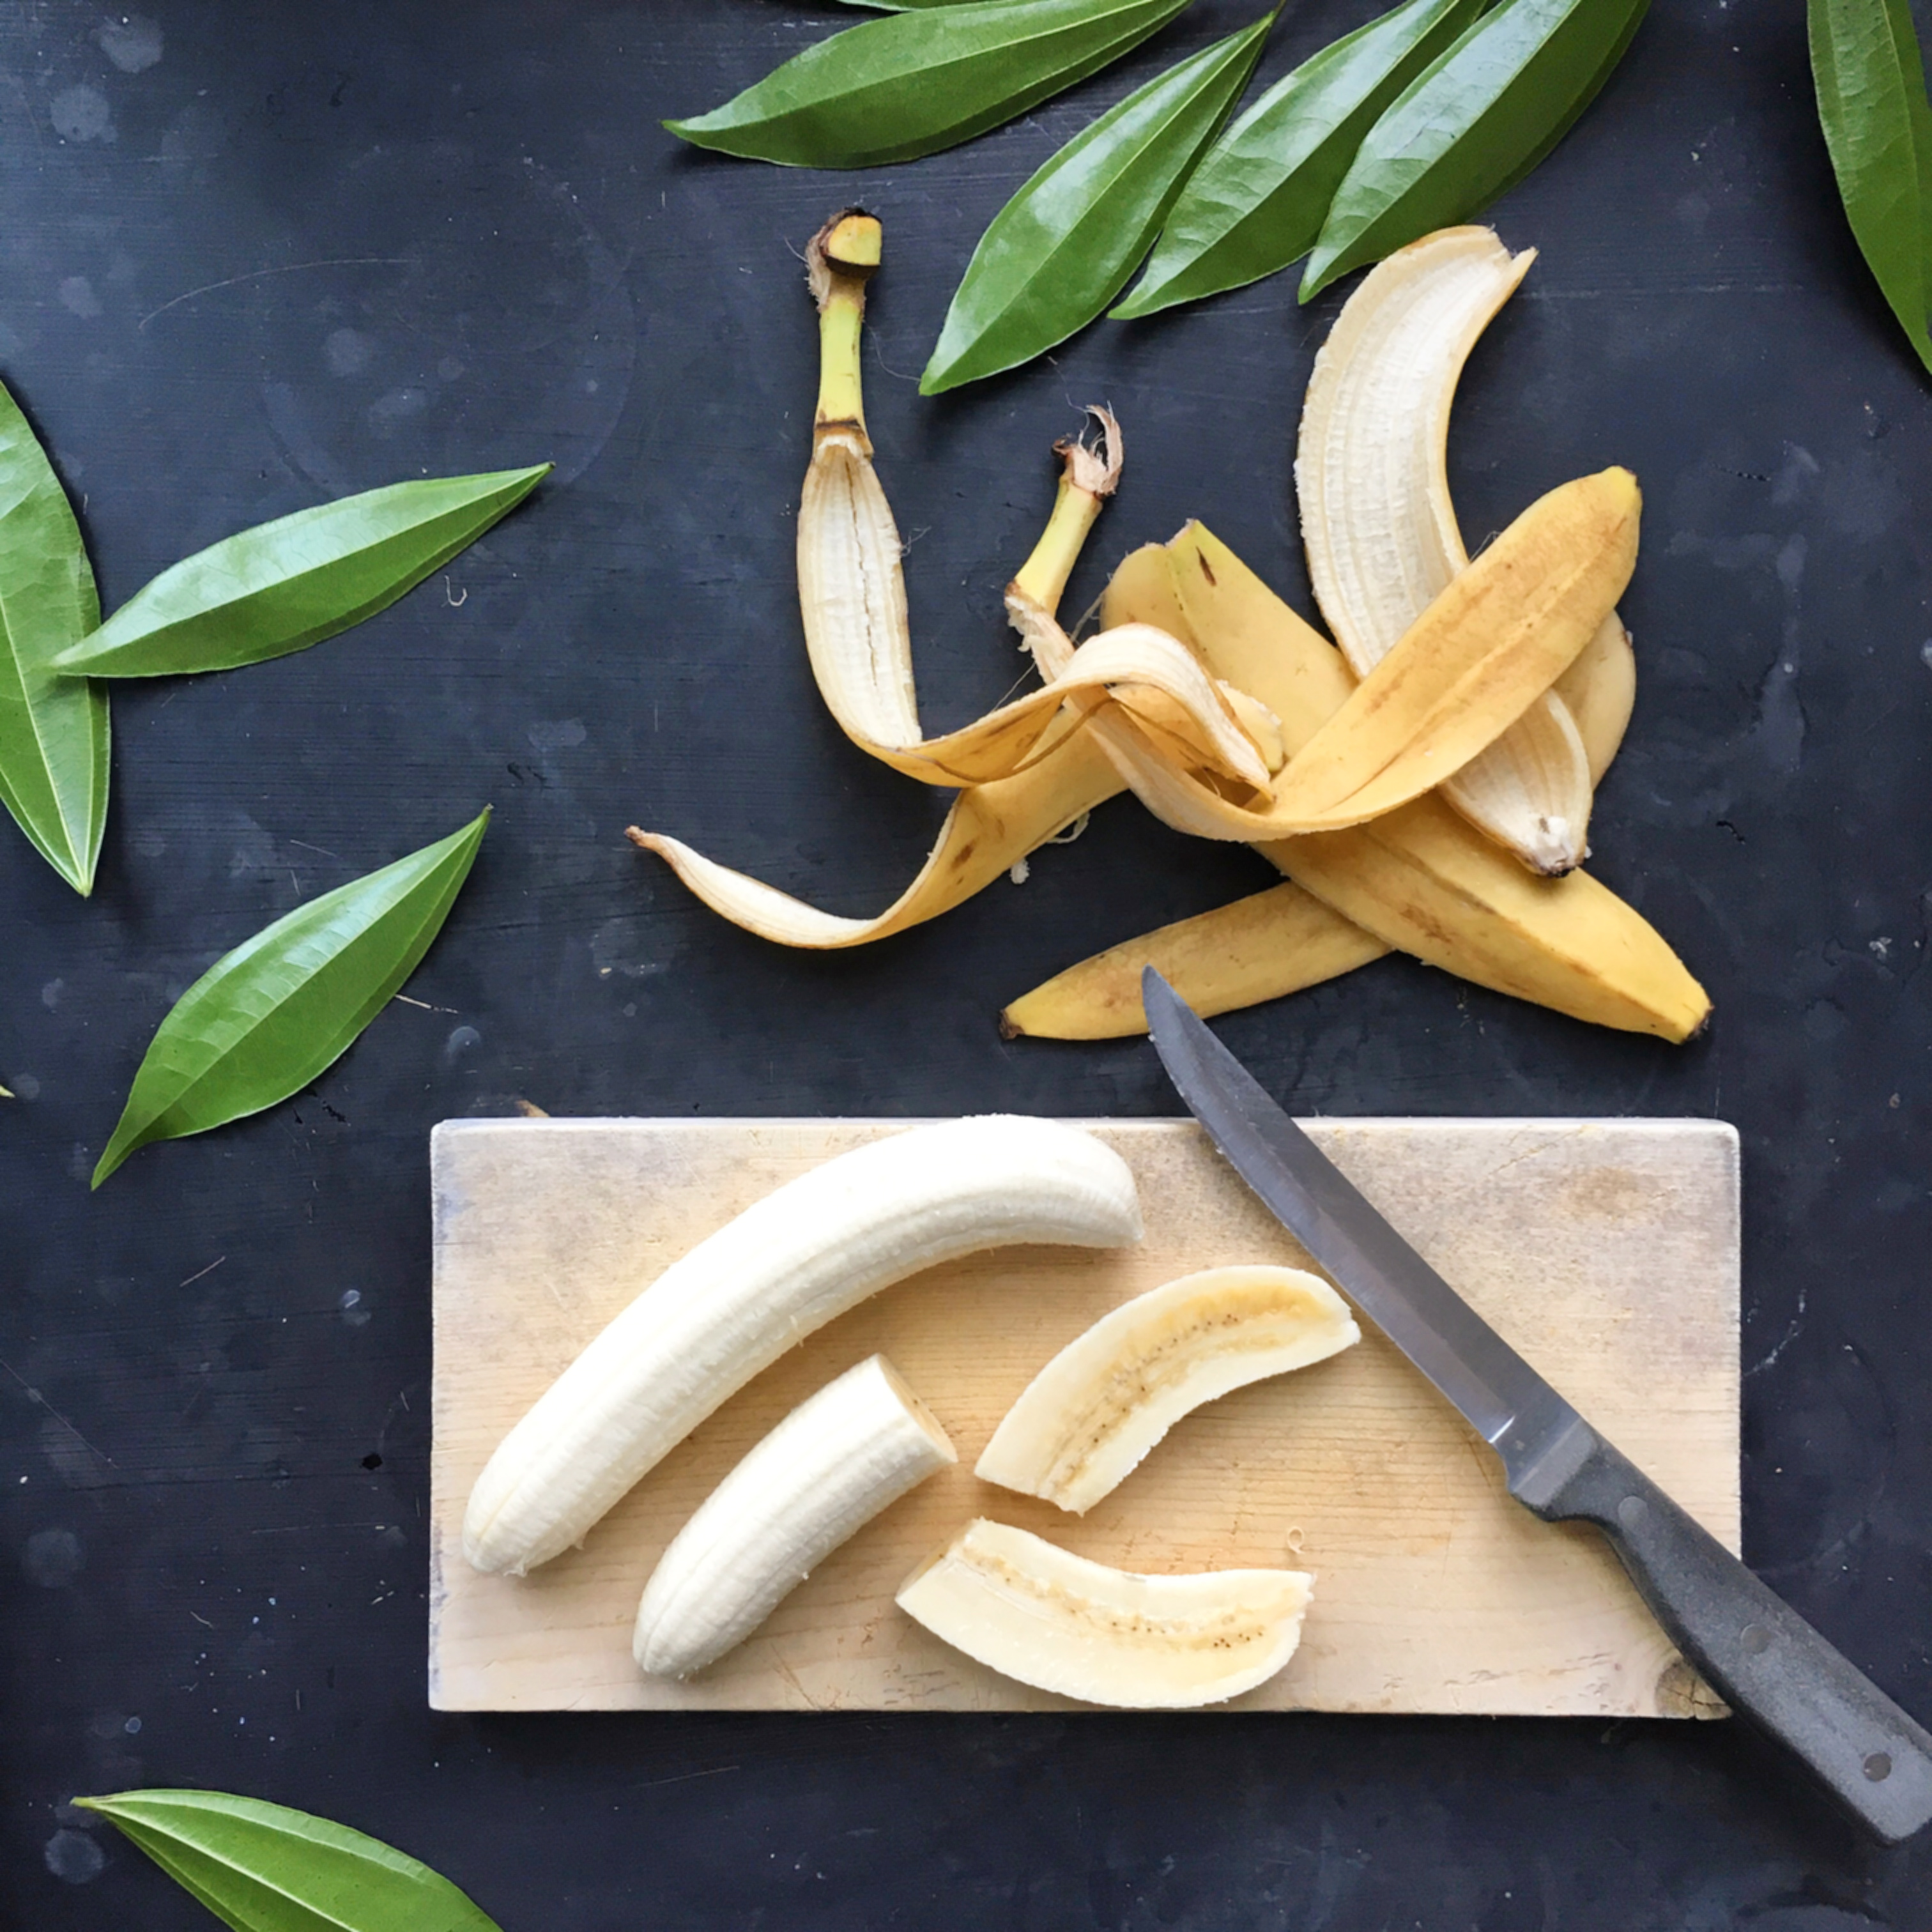
Melt the butter in an ovenproof baking dish and add the banana halves.

Sprinkle with sugar…

and bake for about 10 minutes or until the bananas are thoroughly hot and the sugar is melted. (Note: At this stage, they will look a little bit like half-cooked sausages.) Sprinkle with lemon juice and baste briefly. Return to the oven for two minutes.

Warm the rum ( I put mine in a cup in the microwave for 15 seconds) and pour it over the bananas. Ignite the rum…

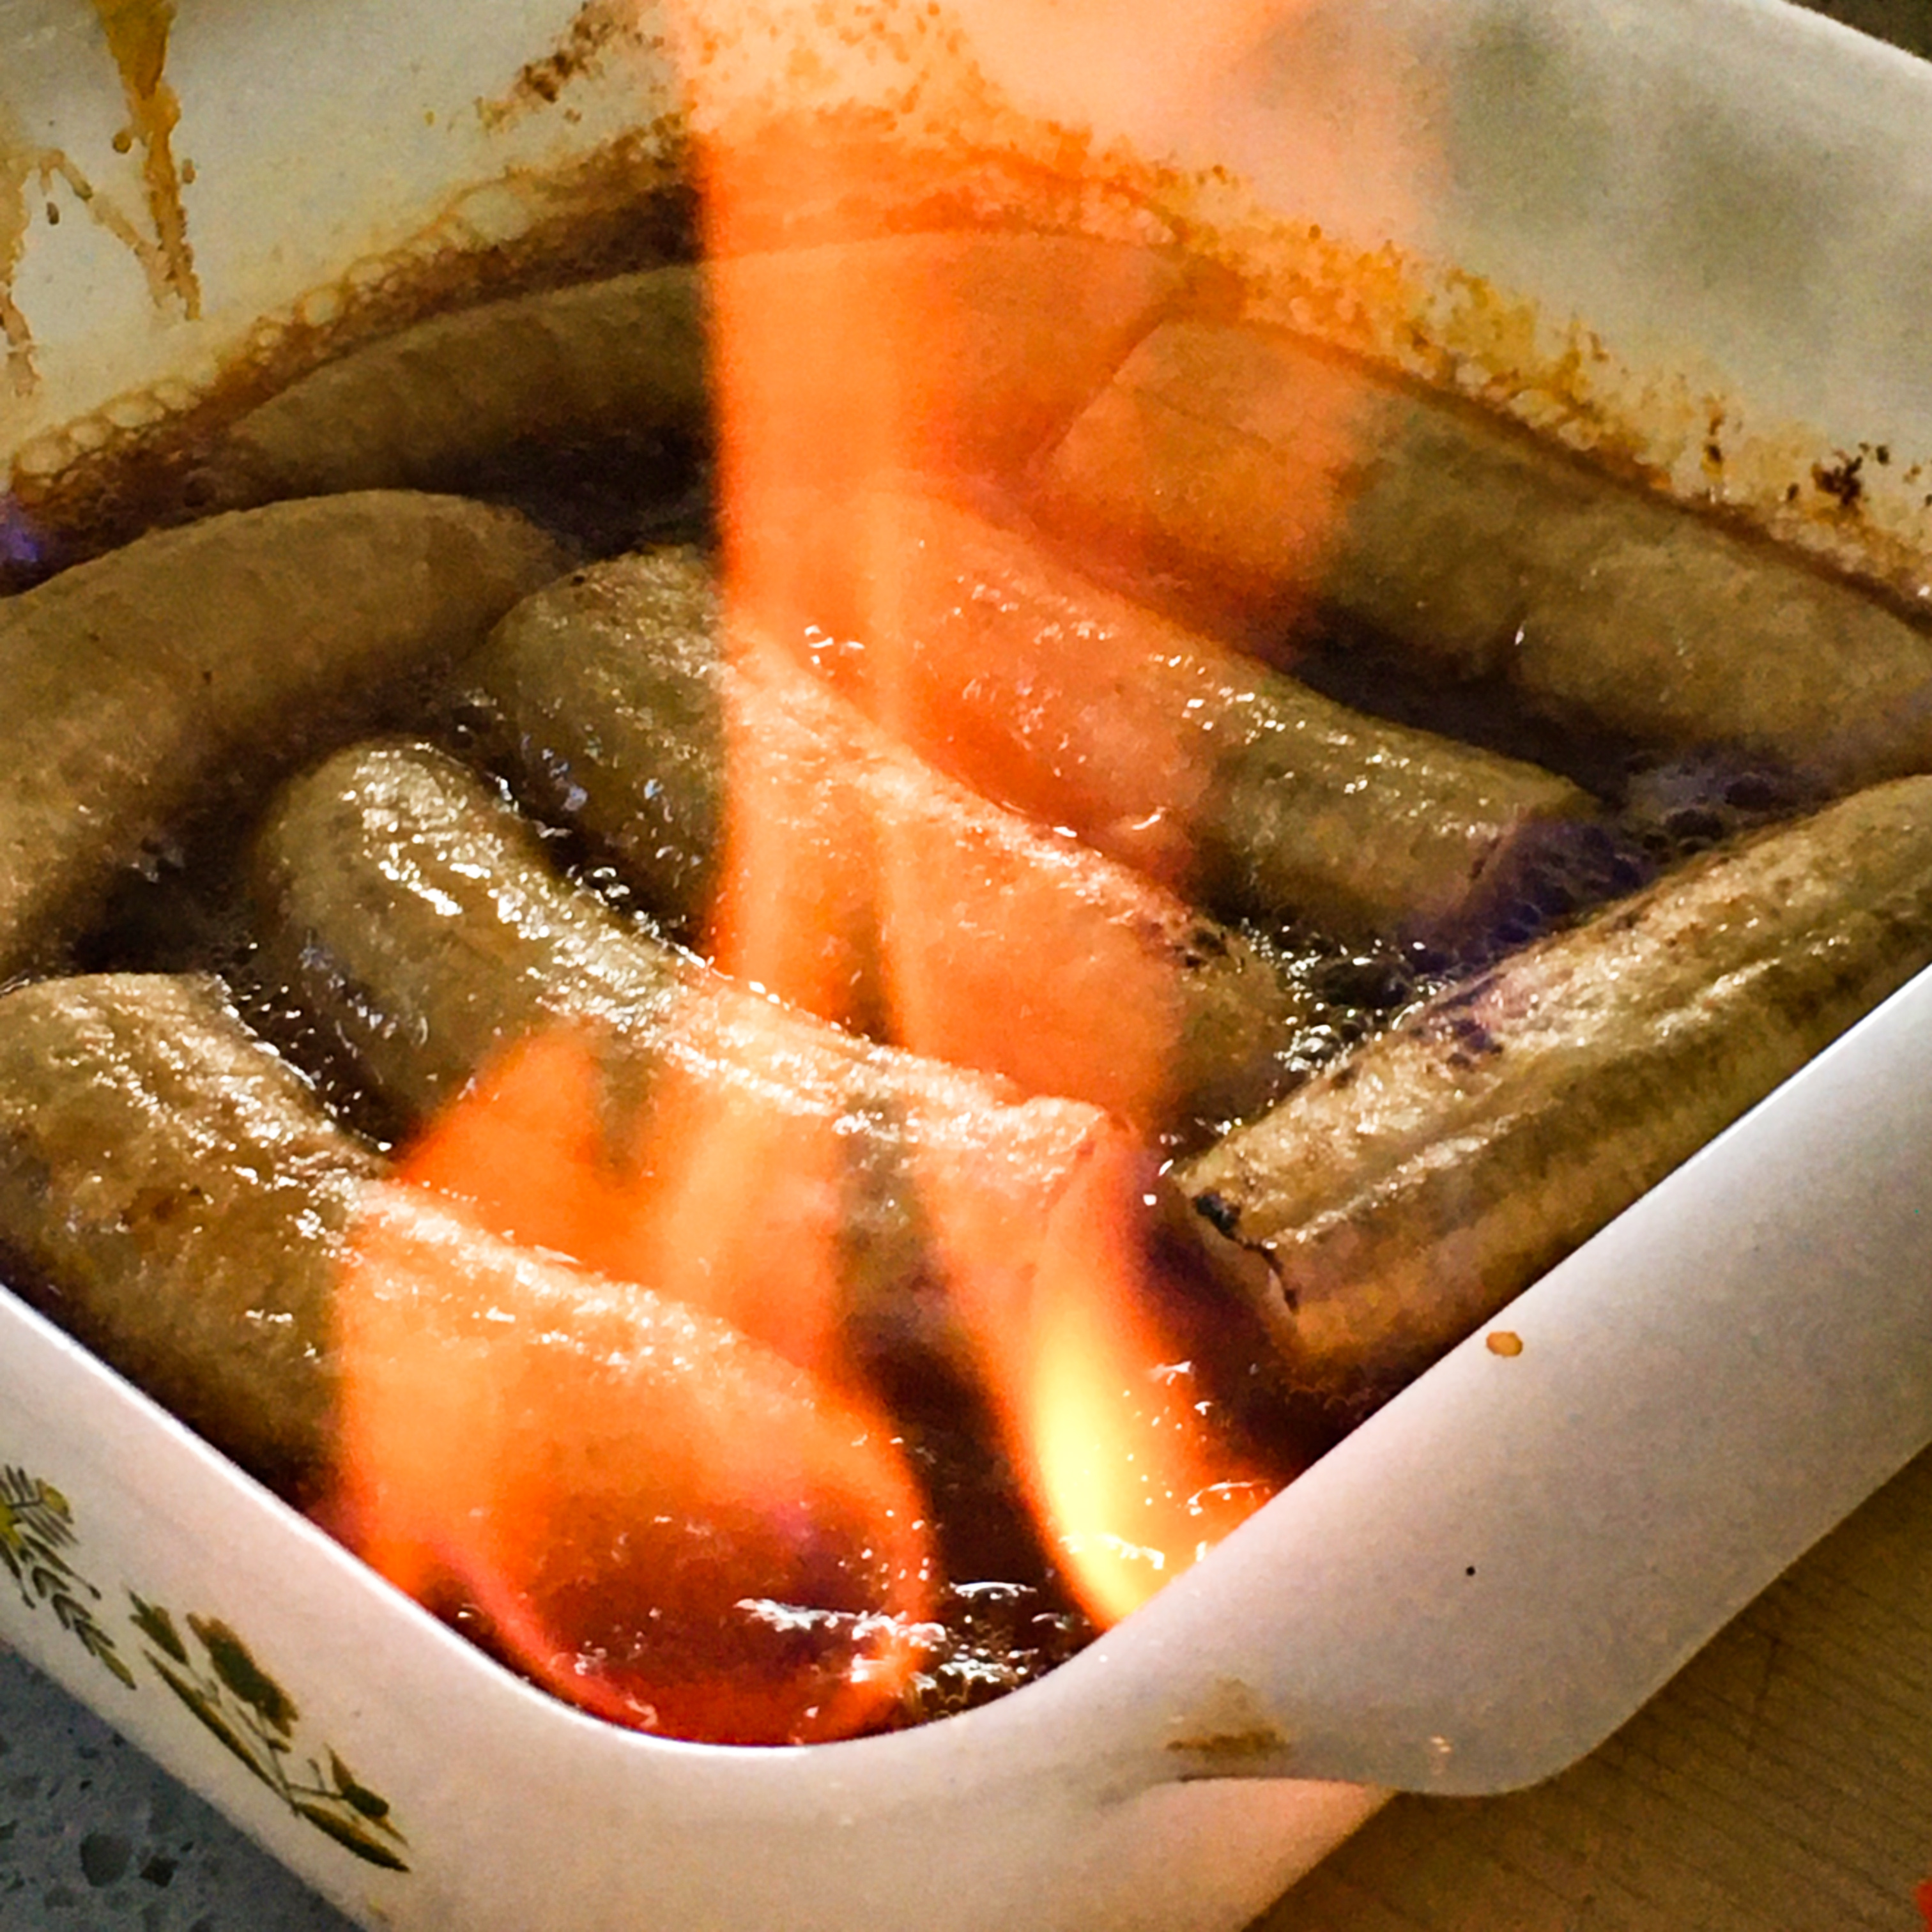
and when the flame dies, serve immediately.

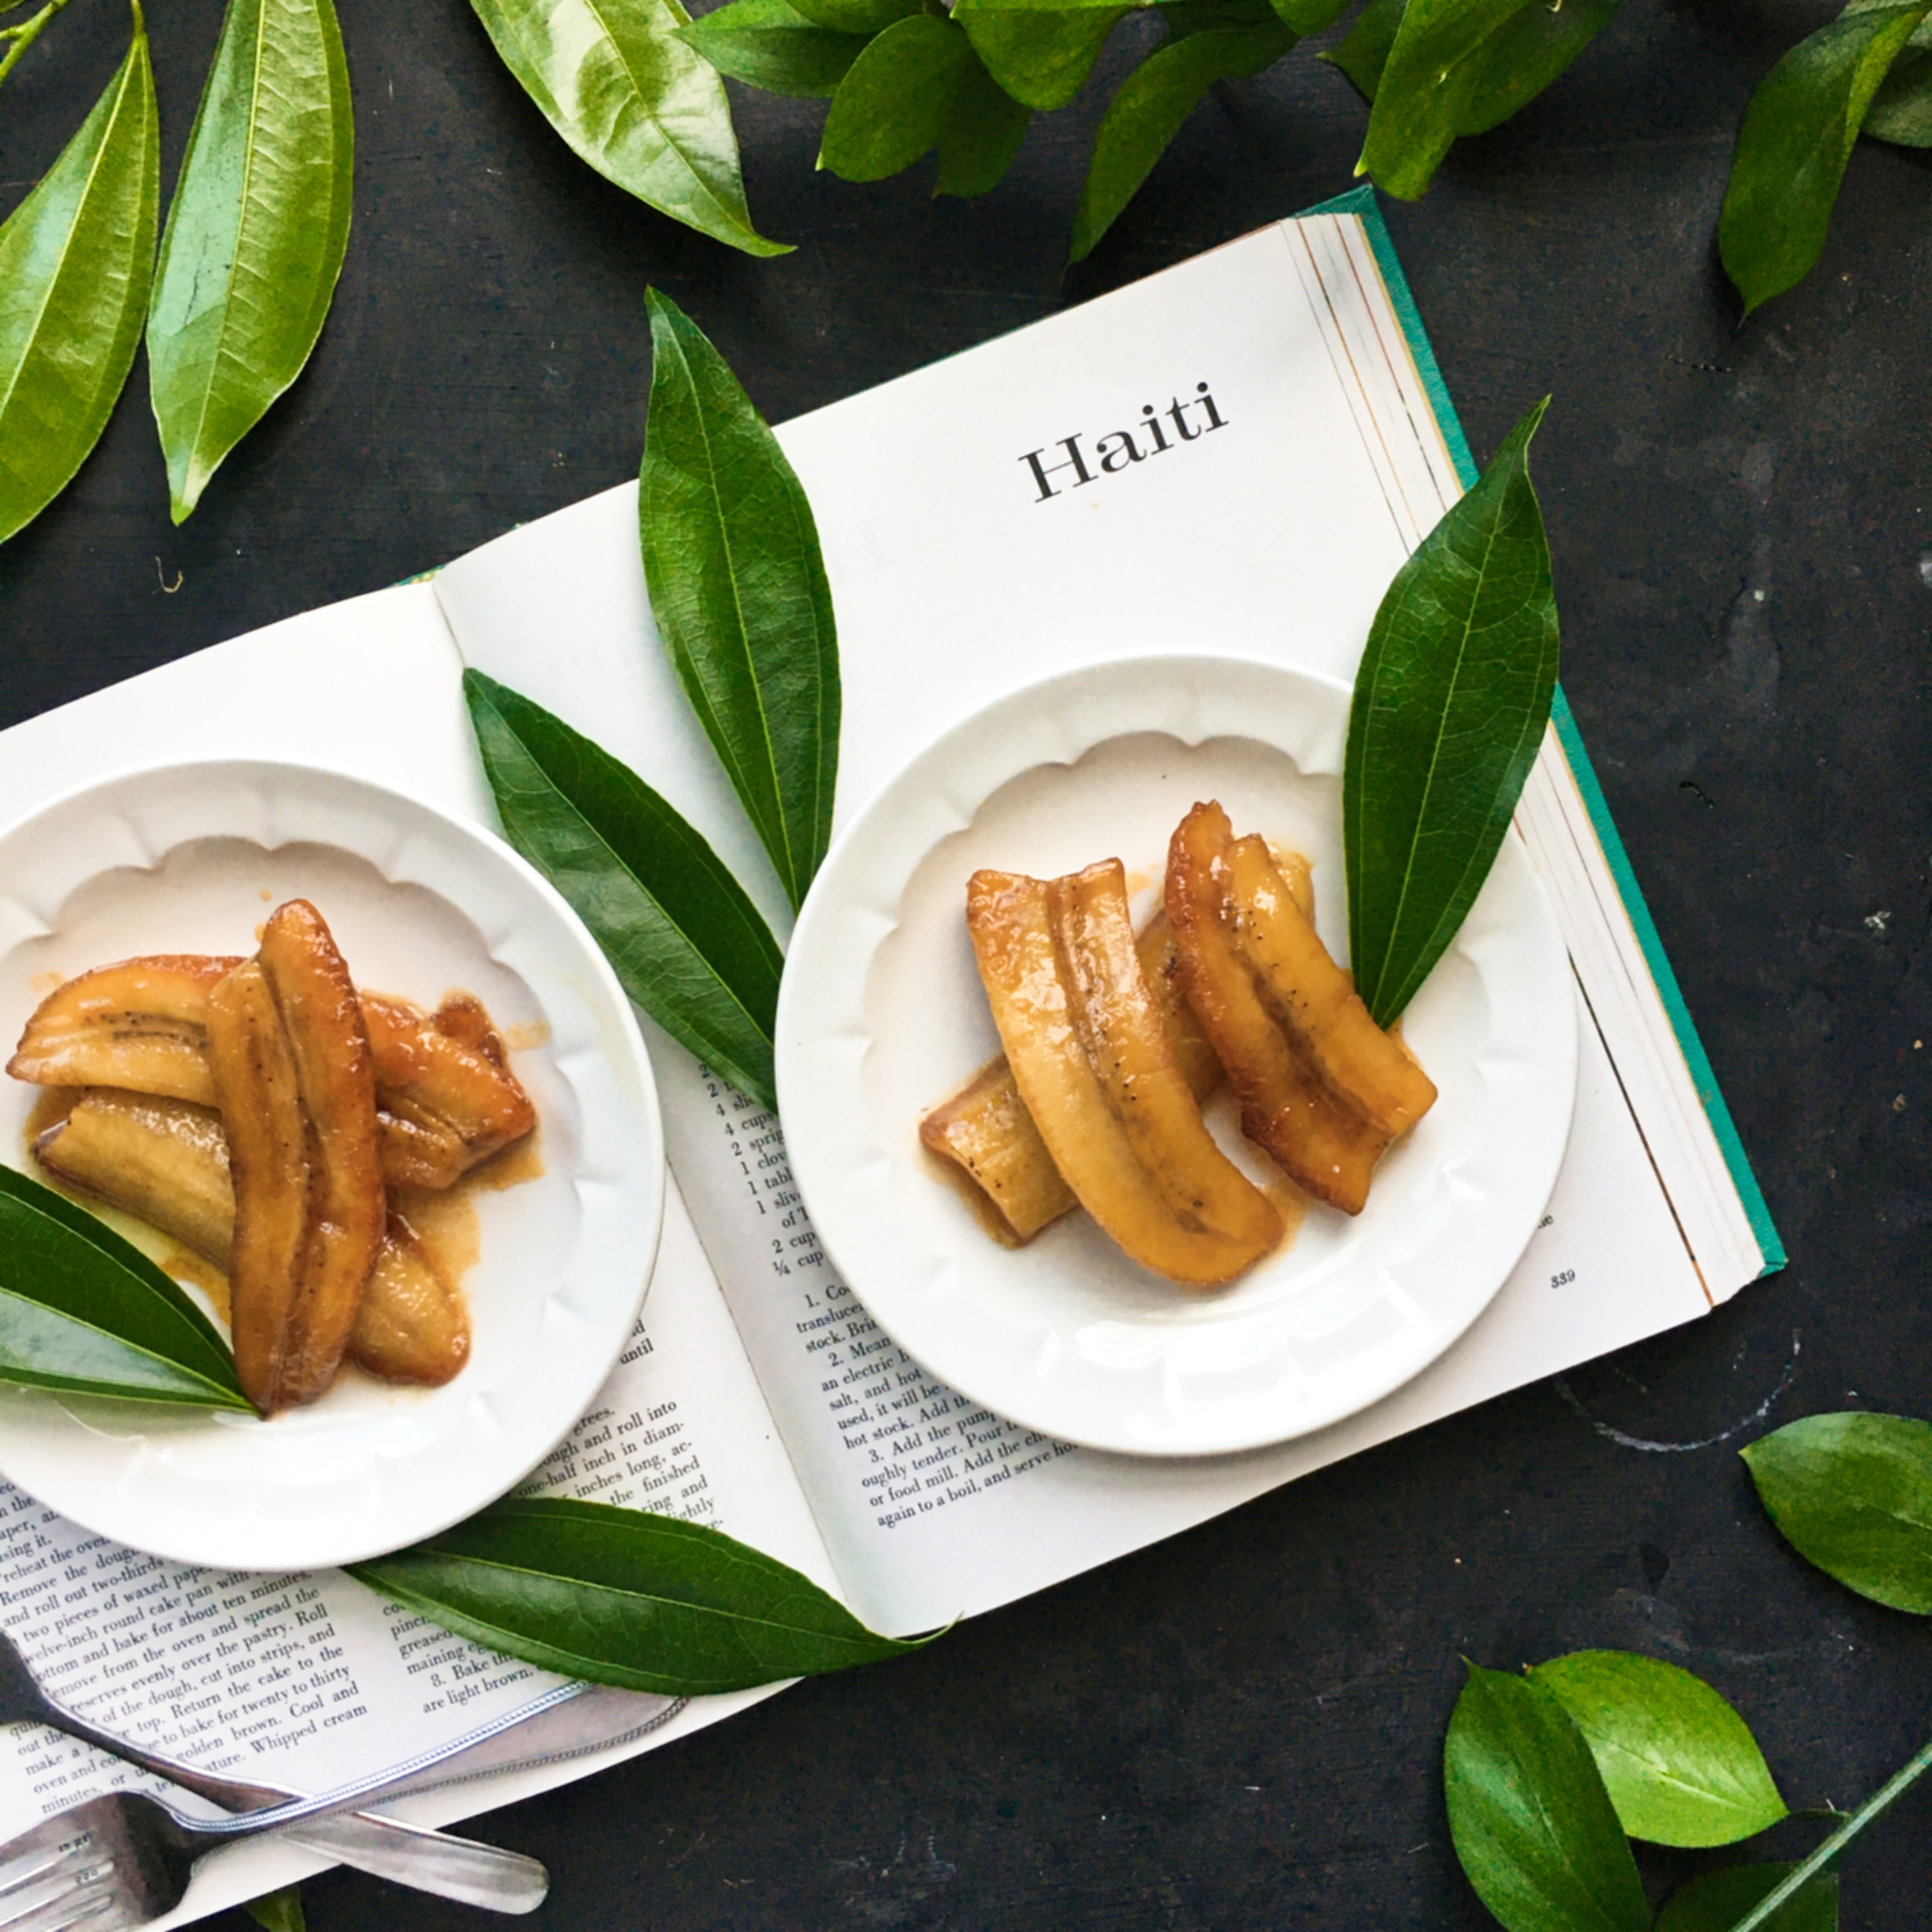
Besides the fire component, what makes this dessert especially interesting is that the bananas retain their shape. It sort of turns into a little game with your brain, because you’d think upon initial appearance – post oven – that the first bite would be relatively firm like a brownie or a soft-boiled egg but in actuality, the bananas have the consistency of something more like mousse or a marshmallow or even whipped cream. The first bite is an unexpected yet delightfully delicious surprise. In actuality, these cooked bananas are not unlike the gingerbread houses of Haiti – their looks are a little deceiving when it comes to the integrity of their composition.


Serve this dessert outdoors with a cup of coffee and you have the makings of a magical early Autumn night that is just right for this time of year. Since Bananas au Rhum is not one of those desserts that likes to hang around, go ahead and enjoy the whole dish right to the very last bite. You won’t regret it in the least!

Cheers to deliciously dramatic bananas, to the happy side of Haiti and their beautiful historic gingerbreads, and cheers to our brand new season. I hope you fall in love with each and all:)

Join us next time for Week 21 as we head to Hungary for colorful comfort food and officially mark the halfway point in the International Vintage Recipe Tour. Until then, happy cooking!

Advertisement

Fourth of July Baking: A German Dessert of American Symbolism and Celebrity

In 1986, there was a recipe. In 1956, there was a woman related to the recipe. In 1886, there was a statue related to the woman who was related to the recipe. In 1870, there was a model related to the statue who was related to the woman and the recipe. In 1865, there was a sculptor who was related to the model who was related to the statue who was related to the woman who was related to the recipe.  And so begins the story of Week 18 in the International Vintage Recipe Tour 2020.  Herzlich Willkommen! Welcome to Germany!

This week there is a little cooking surprise. In today’s post, we are diverting slightly from the original Tour plan and preparing a recipe, not from the New York Times International Cook Book, which we have been following since January, but from another vintage kitchen book altogether. This guest cookbook, Celebrity Desserts, was published in 1986 for a very particular reason and hails from the great state of New York just like our treasured International Tour cookbook. It also happens to fall right in line with this week’s featured destination of Germany and  the upcoming Fourth of July holiday.

All that being said we are off on quite a fun adventure today! It is a journey that involves not only German history but also French and American history too. It involves family cooking, patriotic holidays, and international icons of hope, opportunity, and hospitality -three things my family and I like to celebrate on the 4th of July. And then there’s the actual recipe itself. One that is luxurious without being fussy, a cool treat in hot weather, and so popular around the world that almost every country on the planet has their own particular version of it.

Initially, this trip to Germany via the kitchen was going to fill Week 18’s post with sights and stories of Sauerbraten,  an heirloom beef recipe that takes three days to prepare.  Excited to explore a very traditional method of making a famous German food, I hinted at things to come at the end of the Paris post. Unfortunately, I ran into some roadblocks.

In our unpredictable time of pandemic cooking, it seems that sourcing a grass-fed beef bottom roast that cost anything less than $50.00 and that was anything under 5lbs in size turned out to be a feat of great impossibilities.  Since the recipe only called for 3lbs of beef, both the size and the price suggested that maybe this lovely, long cooking project of authentic, homemade Sauerbraten might just be a bit too much to tackle at the moment. In an effort to remain flexible these days and simply go with the flow of what is available at the grocery and the market, the heirloom Sauerbraten will be rain checked for a later date. Hopefully, we can revisit this recipe again at some point further on in the year. By that time (fingers crossed) beef may be more plentiful and a bit more economical.

In the meantime, Celebrity Desserts called from the cookbook shelf.  Saving the day and the country fare by offering a wonderfully delicious creation of German heritage, the dessert we are making today, thanks to our guest cookbook, comes along with its own very unique history. One that embraces German, Italian, French, and American ancestry as well as celebrates a special lady we all know and love.  I’m so pleased to present our featured German dessert this week, Bavarian Cheesecake.

Cheesecake is a dessert uniquely prepared in a variety of ways depending on what part of the globe you call home. It is one of the few cakes that can be served baked or unbaked. It can be frozen, refrigerated, or served at room temperature. It can be made entirely of ricotta cheese or entirely of cream cheese. It can be slathered in sauce, dolloped with fruit, drizzled with chocolate, or dotted with nuts. It can be stuffed with spices, herbs, vegetables, or just about anything under the sun. And it runs the gamut as far as taste from sweet to savory to something in between. With such an opportunity for culinary creativity,  there’s no shortage of recipes when it comes to cheesecake. In just under .6 seconds Google will deliver over 215,000,000 cheesecake-related results. Narrow it down by specific ingredient and the field gets smaller but still contains hundreds of thousands of options. But the recipe we are making today stands out from all these others. This one has a very unique lineage that sets it apart from all the other cheesecakes and all the other variations.

As the cookbook title denotes, it involves a celebrity. But not one that you might suspect. This famous figure has never had her own cooking show, nor written a book, nor sang a song. She’s not the ruler of a country or a corporation (though her values would certainly be welcomed!). She didn’t invent a cure for a disease nor end world hunger nor paint a masterpiece. She wasn’t a dancer or a designer or a technology wizard. But she has been featured in her share of movies and she has been the subject of photographers for decades.  In order to get to the heart of this mystery woman’s famous roots, let’s begin at the ending, by tracing the recipe backwards.

It all starts with this face…

Do you recognize her? Most likely, probably not. She’s a pretty obscure reference in regards to her famous connection. But maybe the following info will help spark your curiosity or at least ignite the musings of your mind. Her name is Dorothy.  This photo of Dorothy was taken in the 1980s, part of a follow-up story from the 1950s when she had first become the topic of newspaper headlines. At the time this photo was taken, Dorothy lived in Boise, Idaho but the event that made her newsworthy in the 1950s revolved around something that happened in New York City. Any guesses as to who she might be? If not, here’s another clue…

This is Charlotte. She is related to Dorothy. Can you see any resemblance?  Charlotte was born in 1801 in the Alsace region of northern France. She married into a French family with the last name of Bartholdi. Charlotte had a son named Frederic who became an artist. This is Frederic…

Frederic dreamed of designing an enormous statue. He wanted to build it in France, but display it in America. The statue was going to require a lot of money to build, so he came to the United States in the 1860s ready to talk up his idea and gather some investors. As it turns out, Frederic’s concept sounded an awful lot like another American statue that was already in the works and slated for display in Plymouth, Massachusetts. That statue would eventually be called the National Monument to the Forefathers and looked like this…

Undeterred by this similarity, Frederic went back home to France and carried on with his own statue anyway. He raised money in his own country with the help of his mother and the generosity of local French citizens including school children. Eventually, Frederic’s dream was realized and his statue came to fruition. Off on a boat, it went to America. This is what he created…

Now back to Dorothy and Charlotte. Charlotte, Frederic’s mother, was the model for the face of the Statue of Liberty. Dorothy is Charlotte’s great-great-granddaughter.

When Dorothy was photographed in New York Harbor in the 1950s in front of the Statue of Liberty, everyone remarked on their striking similarities…

Dorothy Franks photographed in 1956 with the Statue. The inset photo was taken in 1984. Images courtesy of the Daily News.

Dorothy was related to Charlotte both via direct lineage and also by marriage, as she married her second cousin who was also related to Charlotte by blood. Today’s recipe for Bavarian Cheesecake comes from Dorothy’s kitchen.

The recipe was submitted for inclusion in the Celebrity Desserts Cookbook in 1986 by Dorothy’s granddaughter Linda, who lived in Washington state (oddly enough, in the same small town where my mom grew up). The cookbook was compiled by the Albany NY Council of the Telephone Pioneers of America, a social service organization founded in 1911 that was inspired by Alexander Graham Bell’s invention of the telephone. The Pioneers produced this cookbook as a fundraiser campaign to raise money for much-needed repairs to the Statue of Liberty. The Council collected favorite recipes from a variety of kitchens all across the country including famous ones (a former First Lady, well-known figures in the performing arts, iconic hospitality venues, etc) as well as regular home cooks, Pioneer members, and telephone industry employees who had culinary crowd-pleasers to share.  Undoubtedly Linda’s recipe and the provenance from which it came must have been the icing on the cake (no pun intended!) when it came to the whole cookbook. With just five degrees of separation from Linda’s kitchen in Bothell, WA to the Statue of Liberty in New York Harbor, this cheesecake recipe instantly added a whole new dynamic element to the American food scene and to celebratory Fourth of July fare.

The lineage of this recipe doesn’t stop with the ladies though, nor the French nationality. It’s called Bavarian Cheesecake because it hails from Bavaria, the state located inside Germany that is known for its fairy tale castles, picturesque scenery, and a handful of typically traditional German foods including beer and sausages.

Charlotte’s family were German protestants in Alsace and Dorothy’s grandfather was born in Italy. So the Bartholdis themselves were a multicultural bunch, just like the immigrants who would come to meet Lady Liberty in New York.  Eventually, Dorothy’s grandfather left Italy and immigrated to America in the late 1890s. When he floated in on the steel grey waves of water in New York Harbor, he passed under the coppery gaze of his grandmother Charlotte. What a surreal experience that must have been. In a Daily News interview published in the 1980s, Charlotte said the family was very proud of their connection to Lady Liberty and that her dad, when she was a little girl would tell stories about Charlotte and Frederic’s connection to the statue.

Dedication day !o The Statue of Liberty as photographed on October 28, 1886. Image courtesy of nps.org

Alongside Dorothy’s Italian grandfather, came boatloads of German immigrants. Of the 12 million people that came through Ellis Island from the 1890s – the 1950s, 1/12 of them were German. Because of that large influx from The Land of Poets and Thinkers (that is Germany’s nickname!), one in every four Americans today is connected via German ancestry.

I always think it is fascinating to learn about other people’s immigration stories. It’s so interesting to hear about the situations that brought them to America and to hear about what they encountered when they arrived, and where their dreams and aspirations took them. In Dorothy’s case, her Bartholdi ancestors immigrated to the U.S.  to work in the gold mines in Colorado and to set up shop as stone masons and funerary art designers. In a nutshell, that’s the story of how the Bartholdi family came to America. And how they made a new life for themselves, and made a family, and then made Dorothy and then Linda. And of course all that time they made the cheesecake.

If I could take poetic license with this recipe, I’d like to rename it  Bartholdi’s Bavarian Cheesecake, so that it never lost the lineage of the ladies and their connection to Liberty. Like the nervous anticipation of first-time immigrants to America, this was my first time ever making cheesecake. I must admit I was a little nervous. I had always thought that cheesecake was a very difficult thing to make  – something that took a long time and a lot of effort. Maybe some cheesecake versions are that way, but I’m happy to say that this recipe couldn’t have been easier. It did take a little bit of time – between the chilling of the crust and the two different oven bakes plus the cooling and the overnight rest in the fridge, but certainly, it wasn’t a three-day affair like the Sauerbraten would have been, and it wasn’t expensive to make.

Chalk it all up to the fact that it feeds a crowd, looks lovely on a plate, and lasts in the fridge for days and days and days, I think this Bavarian Cheesecake might just be the new favorite of the International Vintage Recipe Tour so far.  And that is really saying something. Australia’s Queen Mother’s Cake from Week 2 of the Tour is still receiving accolades by blog readers and eaters all these months later. So I’m especially excited to hear what you think of this latest addition to our culinary book of adventures. When we get to the end of the year and the end of the Tour, it will be fun to vote on the most favorite food made along the way. But for now, we have Bavaria and baking to get to…

Bartholdi’s Bavarian Cheesecake

Makes one 8″ inch cake or 12 Servings

For the crust:

2 cups finely crushed vanilla wafer crumbs

2 tablespoons sugar

1 tsp cinnamon

1 1/2 teaspoon nutmeg

1/3 cup butter

For the filling:

1 1/2 lbs cream cheese (or three 8oz. packages), softened

1 cup sugar

3 eggs

1 tablespoon lemon juice

1 teaspoon grated lemon rind

1/2 teaspoon vanilla

For the top layer:

2 cups sour cream

3 tablespoons sugar

1 teaspoon vanilla

For the crust: Combine first five ingredients (wafers, sugar, cinnamon, nutmeg, butter) in a bowl. With a pastry blender, cut butter until thoroughly blended until it resembles course crumbs.

Press mixture firmly and evenly against bottom and sides of a lightly greased 8-inch spring form pan. (Note: I used an 8 1/2 inch pan and that worked totally fine too.)

Refrigerate 30 minutes.

For the filling: Preheat the oven to 375 degrees. Cream cheese and sugar together in a large bowl until light and fluffy.

Add eggs one at a time, beating well after each addition.

Thoroughly blend in the lemon juice, lemon rind, and 1/2 teaspoon vanilla. Pour into chilled crumb crust.

Bake for 45 minutes. Remove from oven and let cool at room temperature for 30 minutes. (Note: The cake will brown a little on the edges, as seen in the photos below, and may even crack a little bit on top. All that is totally fine.)

For the top layer: Preheat the oven to 500 degrees. Blend together the sour cream, sugar and vanilla. Carefully spread sour cream mixture over cooled cheese filling.

Bake in oven for 10 minutes. Cool.

Then refrigerate overnight before serving.

Once you’ve refrigerated the cheesecake overnight, the top layer will become firm. This makes it a lovely platform for decorating in all sorts of ways. Since this is a patriotic dessert, you might consider adding blueberries, strawberries, or raspberries to the top. Or perhaps some lemon rind twists or fresh herbs. I decorated mine very simply with a sprig of mint and a flower (a petal each for Dorothy, for Charlotte and for Lady Liberty!).  I wanted to see how it tasted unadorned, without any other ingredients changing the flavor composition.

As it turns out, it tasted like a dream! I wasn’t sure if this was going to be a really dense cheesecake or if it was going to be more light and airy, but when I cut the first slice, the answer revealed itself…

The sour cream top layer had a taste and consistency exactly like the filling of cheese danish pastries. Sweet with a subtle creamy tang. The cream cheese layer had a consistency like very thick whip cream – pillowy but substantial without being hefty.

The crust held everything together so beautifully that each slice cut perfectly smooth and never fell apart when transferred to the individual serving plates.

What a joy this dessert turned out to be. Subtle and smooth, with hints of vanilla and lemon, it is a really lovely and really delicious dessert for summer. Especially if served cold straight from the fridge. An elegant alternative if you are tired of traditional Fourth of July flag cake, berry pies or fruit parfaits this dessert can be doled out in large slices or small and travels well. It also doesn’t mind hanging out in the fridge for hours while you party the day away.

Unlike a couple previous recipes from the Tour, there is absolutely nothing I would do to alter this recipe. I wouldn’t add anything, decorate it any differently or change the flavor components in any way. It is a true classic in all the best ways and absolutely perfect as is. Just like Lady Liberty herself:)

Cheers to Linda and Dorothy and Charlotte for providing a recipe with a really long family pedigree. And to Frederic for dreaming up a Statue that welcomed the world.

“Give me your tired, your poor, Your huddled masses yearning to breathe free, The wretched refuse of your teeming shore, Send these the homeless, tempest-tost to me. I lift my lamp beside the golden door.” – A portion of the poem, The New Colossus, by Emma Lazarus published in 1903 on a plaque at the base of the Statue of Liberty.

The lovely lady Liberty. Image credit: Juan Mayobre

The Statue of Liberty has been a sign of hope, potential and opportunity ever since her dedication on October 28, 1886. Except for the bald eagle, and the American flag she’s the most iconic symbol of our country that stands for everything we aspired to achieve as a nation. She’s artistic (thanks to Frederic), poetic (thanks to Emma Lazarus), strong (thanks to her copper cladding) and welcoming (thanks to Ellis Island). This has been one of the toughest years in American history to date, but I hope at the end of the day we can remember and focus on the qualities that Lady Liberty stands for. That we can shelter and accept and care for, with equal regard, all that come ashore.

Join me next time as our culinary adventures take us to Greece via the kitchen for Week 19 of the International Vintage Recipe Tour 2020!

UPDATE FROM OUR READERS!

If you find yourself without a springform pan for the cheesecake, rest assured, there are a couple of other pieces of dishware you can use as well, as noted by two of our readers…

Marianne in Seattle used a deep-dish pie pan, and served the cheesecake right from the pan. A beauty in all directions!

“It was really good. We all liked it!”  Marianne also substituted lemon wafer cookies from Trader Joe’s in place of the vanilla wafers. “The lemon cookies make a nice crust,” she said.

Marilyn in Arizona used a 9″ inch tart pan and it turned out beautifully. She shared the following… “Going to create a fun game (questions and answers) to play with the blog post. Better than sitting around discussing the virus… you saved the day Katherine!” How nice!

If you discover any helpful hints after making this recipe or would like to share a photo of your decorated dessert, please comment below. A big thank you to Marianne and Marilyn for their helpful tips!

A Very English Dessert: Trifally Speaking

Hello Hello! Happy Mother’s Day weekend to all the moms out there. Welcome to week 15 of the International Vintage Recipe Tour 2020. This week finds us in England via the kitchen, making a dessert that dates all the way back to the 1750’s.

It was a time when women dressed like this…

An embroidered muslin dress dating from 1730-1769 from the Victoria and Albert Museum collection

and men dressed like this…

Men’s fashionable suit made in England circa 1765. Courtesy of the Victoria & Albert museum collection.

and housing looked like this…

An engraving of Marble Hill, circa 1749 courtesy of english-heritage.org

and dessert looked like this…

In the kitchens of castles and cottages and country houses across the rolling hills and bucolic landscapes of England, big bowls filled with fruit and cream and custard and cake decorated tables and delighted diners.

The fun of this week’s vintage recipe starts with the adjectives that most often describe it… tipsy, whimsical, drunken, inconsequential, foolish, scrapy, flurried. It was first made in the 1500’s, but really became part of the popular dessert vernacular in the 1700’s, and was one of the few sweet treats of its day that appealed to practically every type of eater, from the thrifty homemaker to the flamboyant palace chef. Legend states that its origin may have originally sprouted in Spain or Italy, but once the British embraced it, it became a wholly English dessert. And it came complete with cute nicknames – The Tipsy Parson, The Tipsy Hedgehog, The Tipsy Squire. All an homage to the alcohol cleverly disguised inside the cake and custard that held the whole assemblage together.

Today in the Kitchen, I’m pleased to announce that we are making English Trifle, a piled up assortment of boozy cake, jam, fruit, custard and cream. Like any 500 year old recipe, lots of variations have emerged since it was first created, but the fundamental hallmarks of the recipe (cream, cake, alcohol, fruit, custard, jelly) haven’t changed in five centuries. That makes it one of the most authentic desserts in the history of baking.

The first cookbook to print a recipe for trifle with jelly was Hannah Glasse’s The Art of Cookery Made Plain and Easy, which was published in 1751.

Eight years ago, my friend Diana gave me a trifle dish. I loved it immediately for its big shape, but up until now never actually made the food that it’s named for. Instead, over the past almost-decade, I’ve used my trifle dish for all sorts of non-related kitchen jobs – a flower vase, a holder for various miscellanies (wine corks, napkins, kitchen tools, flatware), a container to corral foodstuffs (bread, cookies, nuts), a fruit bowl, an ice bucket, a table centerpiece for candles and crafts, an organizer for pantry odds and ends, and most recently a punch bowl. It’s overall handiness is ironic considering that this dish was made for one very specific type of dessert.

The trifle dish turned punch bowl was featured in Week 4 of the International Vintage Recipe Tour 2020 when we visited Barbados via the kitchen. Read more about that here.

Anyway, its exciting to think that this much loved glass container is not only making it’s trifle debut here on the Recipe Tour but also serving up the oldest historical food we have made on the blog yet. That means it is older than  Election Cake (1700’s) and older than Sally Lunn Cake (1600’s)

That’s Election Cake on the left and Sally Lunn Cake on the right!

The recipe we are following for this English Trifle is from the 1970’s New York Times International Cookbook, but it is pretty faithful to the 16th-18th century versions. The only adjustment I had to make with this specific recipe was exchanging the current jelly for raspberry preserves, since I couldn’t find current jelly at the grocery store.  Some vintage recipes for trifle feature other fruits like cherries, apricots, strawberries or peaches so really you could use any type of jam that you prefer best and still keep the historical integrity of true English Trifle completely intact.

A two part process, this was no quick whip up in the kitchen, but it’s not complicated to make.  Since it contains two recipes in one, I wound up breaking up the steps into two parts over two days – one day for the homemade sponge cake and the other day for the homemade custard and assembly. Over the years, especially in the mid-to late 20th century, many short-cut variations have been substituted for these two steps – including store bought pound cake, prepackaged ladyfingers, instant pudding mixes, prepackaged cake mixes and ready made whip cream. But I recommend making the whole dessert from scratch even though it takes a good chunk of time to prepare.

The process of making this over the course of two days worked well, because the longer the sponge cake rests in the fridge, the easier it is to slice for presentation in the trifle dish. It is also ideal to refrigerate the entire finished (and decorated) trifle overnight to allow the cake time to soak up the Madeira,  and to allow the rum to blend into the custard.

There’s a fun step in the sponge cake making process which involves a clean kitchen towel and the act of rolling the cake up inside it. If you are familiar with jelly roll cakes, this won’t be a new or unusual task for you, but if you’ve never rolled up a hot cake just out of the oven in a kitchen cloth before, it will feel a little strange and unnatural. Almost like something you’ve been trained not to do as a kid – like writing in a book or coloring on a wall. But persevere anyway. It all works out wonderfully in the end.

Sponge Jelly Roll

3 tablespoons butter, melted

4 eggs

1/4 teaspoon salt

3/4 cup plus 2 tablespoons granulated sugar

3/4 cup sifted all-purpose flour

1 teaspoon vanilla extract

2 tablespoons confectioner’s sugar

3/4 cup tart current jelly ( I used 50% less sugar organic raspberry preserves)

2 tablespoons Madeira

Preheat oven to 350 degrees.

Brush an 8×12 jelly roll pan (or a standard cake pan) with half the melted butter. Line the pan with a large sheet of parchment paper, letting a little of the paper hang over the sides. Then brush the parchment paper with the remaining butter.

Break the eggs into a medium size bowl. Add the salt and three quarters cup sugar.

Beat with an electric mixer until stiff or until the batter forms a thick ribbon and fall back onto itself when the beaters are lifted from the bowl. Carefully fold in the flour and vanilla. Pour this mixture into the prepared pan. Spread smooth with a ribber spatula. Bake in the oven for 15 minutes.

While the cake is baking, lay your clean kitchen towel flat on the counter. In a small bowl, sift together the remaining two tablespoons sugar with the confectioners’ sugar. Sprinkle the sugar mixture on the clean towel. Watch this step over on Instagram in the Week 15 video here.

After you pull the cake from the oven, grab all four corners of the parchment paper and immediately remove the cake from the pan. Carefully flip the cake onto the sugared towel and peel away the parchment paper.  Adjust the cake so that it lines up with the edge of the towel and then quickly roll it up. Watch a video of this step here.

Let the cake rest for 15 minutes wrapped in the towel. Then unroll the towel and spread the cake with a thin, even layer of jelly.

Then roll the cake up once more, except this time don’t roll it up into the cloth.

Transfer the roll carefully to a sheet of waxed paper or parchment paper,  and wrap it and place it in the fridge to chill. (Note: You can leave it in the fridge up to 24 hours. The longer it sits in the fridge the easier it will be to cut and arrange in the dish).

After the cake has chilled, remove it from the fridge and place it on a cutting board. Cut the entire jelly roll into 1/2″ inch thick slices.

Next line the bottom of the trifle dish with as many slices as will fit to cover the bottom and then line the sides of the dish. You should have a few slices left over after you’ve lined the dish. Set those remaining slices aside for use after the custard is ready.

Sprinkle the cake slices with the two tablespoons of Madeira and then cover and refrigerate the dish while you make Part Two of the recipe.

English Trifle

Serves 10-12

Sponge Jelly Roll slices

4 eggs, seperated

1/4 cup granulated sugar

1/2 tablespoon unflavored gelatin

1 1/4 cups light cream

2 cups heavy cream

2 tablespoons light rum

1 tablespoon confectioners’ sugar

1 teaspoon vanilla

Place the egg yolks in a medium bowl and add the sugar.

Beat thoroughly with an electric mixer and add the gelatin. Set aside.

Bring the light cream to a boil in a small saucepan, stirring constantly so that the cream does not scorch. Slowly add it to the egg mixture, stirring constantly with a whisk as you incorporate the milk.

Transfer the egg/milk mixture to a large saucepan. Cook and stir the mixture over low heat until it coats the back of a wooden spoon (about 10 minutes).

Immediately remove the saucepan from the heat and set the pan in a bowl filled with ice cubes to cool. Stir until cooled. {Note: I cooked my custard for about 15 minutes on the stove, which I think turned out to be about 5 minutes too long! Once the custard sits in the ice cubes it thickens even more, so ultimately when you remove the custard from the heat it should be about the consistency of somewhat runny cheese sauce and not quite as thick as loose pudding, which was more like my consistency.}

In a separate mixing bowl add the egg whites and beat until they form soft peaks.

Fold the whites into the cooled custard. {Note as you can see from the photo below my custard became pretty thick once it cooled. If this happens to you, don’t worry, once you fold in the egg whites and the cream you can use a rubber spatula to smooth the custard out. The rum also helps the custard break down a little bit.}

Beat half the heavy cream until stiff…

And then fold the heavy cream into the custard/egg white mixture…

Then fold in the rum…

Spoon all the custard into the trifle dish, covering the bottom slices and spreading the custard evenly with a spatula.

Cover the top of the custard with the reserved slices of jelly roll.

Beat the remaining cream and sweeten it with confectioners’ sugar and vanilla extract. Using a pastry tube or spoon, garnish the top of the trifle with cream. Now comes the fun part… decorating the top! The recipe’s directions stopped after the whipped cream, so we are now, at this stage,  left up to our own interpretations and creativity from this point forward. Some bakers like to decorate the tops of their trifles with crushed nuts, slivered almonds, shaved chocolate or fruit. I decided to top mine with strawberries, blackberries, raspberries and mint.

And because this recipe hails from England, the land of beautiful gardens, I put a few fresh flowers on top too.

We are enjoying strawberry season this month in the South, so the berries seemed like an ideal companion, and my sweet mint in the garden is growing by leaps and bounds, making me want to add mint to everything in order to keep it under control. But you might have your own fun spin on a trifle topper so I encourage you to get creative.

To serve the trifle, you just need to dive right into it with a big spoon and scoop out a slice of cake from the side and place it on a dessert plate. Then add an extra dollop of custard and whip cream from the interior and add some additional bits of topping for an extra bit of flair.

A truly delicious baking endeavor that tastes of summer and satisfaction, this whole dessert is substantial but not heavy. The custard is pillowy, the whip cream delicate, the berries tangy.  It is no wonder that this recipe has been floating around the dessert world for five hundred years. It’s a timeless classic for sure. No matter how we have evolved as humans from century to century, I don’t think we’ll ever tire of any combination involving fruit and cream, flour and custard, butter and jam. It’s in our history, after all.

P.S. The trifle will keep in the fridge for a few days but not the freezer, as this recipe is meant for sharing not storing. If you are still quarantining like we are in my neck of the woods, and your amount of eaters is small, don’t let the size and scale of this recipe sway you. Perhaps you could surprise your friends or neighbors with a little gift of British baking.

Cheers to England for propelling this dessert through centuries. And cheers to all the moms out there who have made this recipe in the past and will continue to make this recipe in the future!

Join us next week as we island hop over to Fiji for a tropical dinner and a special weather episode that adds audible ambiance to our cooking adventure. See you next time for Week 16 of the Recipe Tour!

Cabbage and Kraslice: Two Kitchen Comforts of Traditional Czechoslovakia

Happy April and happy Saturday dear kitcheners. Thank you for your patience this week while I took a couple of extra days to get this post together. As I mentioned on Instagram the other day, Friday has become the new Wednesday around here and then it became Saturday, at least when it came to this post:)

Adjusting to the new normal, this was the first full week that our farmers market has been officially closed, so sourcing two of the ingredients for this week’s recipe turned into a little more of a treasure hunt than anticipated. This was also the first week, we had to wait in line at the grocery. Have you guys experienced this yet? It wasn’t too bad – just about a 20 minute wait each time, but it did feel strange. While I waited I thought about all the people who waited in soup lines during the Great Depression and the bread lines in Russia just two decades ago.

Last year at this time, I was buying homemade bread, local strawberries and spring lettuce at the farmers market.

Since the farmers market is within walking distance and open seven days a week, I hadn’t realized how spoiled I’d become when it came to shopping every few days for food for the Vintage Kitchen posts or for household staples. But now that it is recommended that we all shop a week or two in advance, it has taken a little bit (actually a lot!) of extra organization on my part. So thank you for bearing with me.

Today’s post takes us to Czechoslovakia, a country that as of 1993,  is no longer called that. Two decades ago, the country split into two parts, forming two separate nations and came to be known as the Czech Republic and Slovakia. I can imagine that on the official day a country declares a name change there is lots of celebrating going on and a renewed sense of optimism as to better opportunities ahead. In keeping with that notion, this week we are celebrating too. Today is Week 12 of the International Vintage Recipe Tour 2020, which means we hit the three month mark and are officially 1/4 of the way through our year-long global culinary adventure. How exciting!

Clockwise from top left: Armenian Stuffed Meatballs; Picadinho a Brasileira; Fried Fish Wrapped in Paper; Colombian Beef and Vegetable Stew; Rum Punch; Maple Walnut Tart

So far we’ve made meatballs in Armenia, talked about hometown pride with Viktoria in Austria, and danced with Harry Belafonte in Barbados. We have also cooked our way through the wildfires in Australia, the tornado in Nashville and the outbreak of the coronavirus in China.

Clockwise from top left: Santiago Pork Roast; Fondue Bruxelloise;Sauerkraut Soup; Queen Mother’s Cake; Ceylon Curry; Viennese Chicken

There have been movie and book recommendations, a vintage playlist to set the cooking mood and a craft project designed to spark good memories. Together we have celebrated lunch time, cocktail time, dinner time and dessert time.

Clockwise from top left: We toured Austria with Viktoria; read The Hundred Year Walk in Armenia; discussed the history of Fondue in Belgium; discovered new old art in Brazil; danced to Calypso music in Barbados and met the Queen who inspired a cake in Australia

We’ve made food for cold weather, for hot weather, for mountaintop vistas and seaside beaches. We’ve fried and flipped, boiled and baked. It’s been action packed these past three months for sure.  The world is definietly not the same place that it was in Week 1, but I hope the Recipe Tour has been as fun and delicious for you as it has been for me.

Clockwise from top left: We saw the Comfort Tree in Canada; watched Liz Taylor light up the big screen in Ceylon, made floating paper lanterns in China, decorated Easter eggs in Czechoslovakia, discovered the effects of color therapy in Colombia; and learned all about tropical fruit from a Cuban farmer.

This week we’ll be exploring another beef based recipe, Czechoslovakian Sauerkraut Soup, a healthy comfort food that is not only great for balancing your digestive system but also adds a healthy dose of color and Springtime flavor to your table.

Czechoslovakian-style Sauerkraut Soup

On the cultural side, we are back in the craft studio, this time decorating Easter eggs in age-old Czechoslovakian fashion. Like the Chinese floating paper lantern project, this heritage craft is also laden with symbolism and positivity to help keep our spirits and our spaces filled with hope.

This time, we’ll start with the soup first, since it is a slow cooker of a recipe.  Requiring about 3 hours of cooking time and 20 minutes of vegetable prep, this so far was the easiest of the dishes to make in the Tour. Basically hands off (with the exception of the initial vegetable prep), the oven and the soup pot do all of the work here, leaving you free to do something fun (like Easter egg decorating!) while it cooks.

Featuring the humble, hearty cabbage (a fridge staple that stores easily for two weeks or longer) and quick roasted beef bones (a freezer staple that stores for months), this recipe is quarantine friendly, feeds a crowd and freezes beautifully. A better, more flavorful version of vegetable soup, thanks to the tangy addition of sauerkraut and earthy bone both, it is both a comfort food and a healthy powerhouse loaded with immune boosting vitamins and minerals.

Czechoslovakian cuisine, like Armenian food, was highly influenced and inspired by its nearby neighbors Germany, Poland, Austria and France, all of whom lent their culinary flair to Czech kitchens throughout history.  Predominately fans of an animal-based diet, the traditional Czechoslovakian home cook strived to master a dynamic range of rich flavors by combining starchy foods with a variety of vegetables and meat. Their cooler climate called for more durable produce and cold weather crops like winter greens, cabbages, carrots, onions, squash and potatoes.  The kinds of food that keep you feeling warm and fed on a cold winter day.

One of the challenges I encountered this week in the ingredient sourcing, was the beef bones and the short-ribs. Normally, I prefer to cook with grass-fed beef, which I usually purchase at the farmers market. Since the market is closed for the time being due to the pandemic,  it turned into a little adventure around town to see which grocery store would offer an equivalent. The first grocery carried no grass-fed beef. The second only offered grass-fed ground beef. The third store, finally was the ticket. In case you are struggling with this same scenario in your town, I am happy to share that Whole Foods carries  a variety of fresh grass-fed beef cuts. There, I was able to find the short ribs and the beef bones all in one spot.

The  most interesting twist on this recipe was the inclusion of both pickled sauerkraut and fresh cabbage. Sauerkraut is a centuries old food, first appearing on menus in the 1600’s, but this recipe makes it taste fresh, vibrant and modern. Hearty without being heavy, this soup is a delicious choice for springtime weather that yields warmer days but cooler nights. Pair it with slices of whole grain bread and butter or toast points and you have simple fare made from fridge, freezer and pantry staples.

Sauerkraut Soup

(Serves 8-10)

2 lbs short ribs of beef

2 lbs. beef bones

1 cup chopped onion

3 carrots, coarsely chopped

2 cloves garlic, peeled

1 teaspoon dried thyme

1 bay leaf

2 quarts water

2 1/2 cups canned tomatoes (one 20 oz. can)

8 cups shredded cabbage

Salt 7 freshly ground pepper to taste

3 tablespoons lemon juice

3 tablespoons sugar

1 lb. sauerkraut, squeezed dry

Preheat oven to 450 degrees.

Place the short ribs, beef bones, onion, carrots, thyme, garlic and bay leaf in a roasting pan.

Bake for about 20 minutes until the meat is brown.

Transfer the mixture to a large soup pot. Add a little bit of water to the roasting pan to dissolve the caramelized pieces and then pour the pan juices and contents into the pot. Add the remaining water, tomatoes, cabbage, and salt and pepper to taste.

Bring the mixture to a boil. Skim the fat from the top. Simmer for one and one half hours. Add the lemon juice, sugar, sauerkraut, and more water if necessary. Cook for one hour longer. Serve with sour cream.

With Easter less than two weeks away, I thought it would be fun to pair this post with a craft that Czechoslovakians are famous for… decorative Easter eggs. Also known as symbols of rebirth and new life, eggs are a good way to add a comforting sign of hope to your home.

Whether you celebrate the holiday or not, this is a fun seasonal project that you can keep year-round if you blow the eggs out before decorating them. Heavy in symbolism, these delicate eggs contain all sorts of hidden meanings in their design and color arrangements.  According to Czech culture, green symbolizes nature and growth and is believed to offer protection from illness. So I chose that color scheme as a way to visually fight back against the coronavirus.

Traditionally, Czechoslovakian artisans used beeswax pens, etching needles or straw to make designs on their eggs before dipping them in naturally colored dyes. I used a pencil and markers to draw my designs since I didn’t have a beeswax pen.

I also reverse dyed my eggs (taking them from brown to white) using a 1 cup to 1 cup vinegar and boiling water solution. The eggs boils for 20 minutes in this vinegar bath and then, once rinsed under cold water they can be fully wiped clean of their brown color. Here’s what one egg looks like halfway through the 20 minute boil…

Traditionally in Czechoslovakia, red was the most popular color egg, because it was the easiest color dye to make (thanks to berries and beets!) and represented beauty, health love and vitality.

Over time and many experiments, a rainbow of colors added their own special sentiment. Yellow symbolized good fortune since it was the color of grain. Blue represented heaven, white equaled purity and black symbolized ceremony.

Regarded as a highly skilled art form known as Kraslice (meaning embellished egg), Czech-style egg design takes years of practice, patience  and a steady hand to master. Many are still hand-painted today but some are mass produced as well to meet demand in the global marketplace. Designs range from simple sprigs of flowers or branches to highly ornate patterns, detailed animals and interlocking shapes.

Examples of different designs and colors. Photo courtesy of the Association of Painters of the Czech Republic.

Most Czech egg designs feature balanced imagery that is has been laid out in grid fashion beginning with a horizontal line and a vertical line that intersects in the middle of each egg like a cross.

They look complicated but once you start sketching them out, they are actually fairly easy to replicate. Here are some templates designs to follow or to help inspire your creativity…

Last year I painted Easter eggs with gold metallic paint. This year, I am adding to that collection with the new Czechoslovakian designed eggs. It will be fun to see what next year’s designs will bring and to watch this collection grow year after year!

The gold and white eggs were last year’s Easter craft project. Now the Czechoslovakian style eggs will be added to the collection this year.

Cheers to Czechoslovakia for adding two new comforts to our kitchen in the form of soup and eggs! Hope this post keeps your belly full and your creativity fed this week:)

Join me next week for Week 13 of the International Vintage Recipe Tour, as we make our way 2,800 miles south from the Czech Republic to Dahomey, our third country in the Tour that has been renamed due to changing history. In the meantime, stay safe, stay healthy and eat your soup:)

March 2021 UPDATE!

So excited that our Czechoslovakian Easter eggs were featured on parade.com. Stop by for a peek at a gorgeous array of creative Easter egg designs. The Vintage Kitchen is #57!

To Be or Not to Be: It’s Fondue in Belgium

Oh for the love of cheese already! How many weeks does it take to get yourself all discombobulated in the kitchen? As it turns out that number is five. Welcome to Week Five of the International Vintage Recipe Tour 2020. Last week we were in Barbados dancing around the kitchen with rum punch in hand. Tonight we are headed 4300 miles north to beautiful Belgium – the country that gave us diamonds, Audrey Hepburn, fancy chocolates, waffles, Brussels sprouts, and pretty sites like these…

But the way I went about this week’s cooking task I might as well have taken us all to a foggy headed mountain in Switzerland.

The most important rule of cooking, the number one rule, the golden rule of all rules is to read your recipe first. All the way through. This way you have a good understanding of what’s involved ingredient-wise and what’s coming up at the start of each step. It’s a no-brainer activity. Something that just occurs so naturally you don’t even have to think about it. Of course you always read the recipe first, silly. Except that one time you actually didn’t.

I’ve been anticipating this week’s dish since the very beginning of the project because  1) it features a food I’ve never made before but have always wanted to try, 2) it is cozy sweater weather fare ideal for this time of year and 3) it offers a fun dinner idea for upcoming Valentine’s Day. On the menu this week we are making Fondue Bruxelloise, a dairy laden comfort food that conjures up images of shared dining, pots on pedestals, and unabashed consumption of all the bread and cheese you ever wished to eat. How fun and delicious!

The first order of business this week, the fun order of business, before market shopping even ensued, was to purchase a fondue pot. In this case, of course it would need to be vintage, so out I went all around town looking for such a find. Three days later, nothing. There was not a vintage fondue pot to be had anywhere in my fair city. In a frenzied, last-minute search online, I found one in a neighboring state that could be here in time for the cooking project deadline.

Tah-dah… a sleek 1970’s stainless steel set complete with floral design work on the legs, teak accents on the handle and on the lid, and a set of forks to match. Perfect! While that gadget was flying through the air, I was busy collecting vintage advertisements from the 1960’s and 1970’s – the two decades in culinary history when fondue parties were at the peak of popularity. The retro ads circulating around the magazine world at that time captured a real sense of colorful joy and excitement when it came to showcasing the novelty of a fondue party.

With an exciting feast on the horizon and a new (old) fondue pot now in possession, it was time to buckle down and get to cooking. Like all the other dishes we  have made in the International Vintage Recipe Tour so far, the ingredients for Fondue Bruxelloise are not complicated ones. Basically the recipe consists of four main components… butter, milk, eggs, and cheese.

The night before I was going to make it, my husband inquired. Is this the type of fondue where you dip vegetables or just bread? Confidently, I said just bread, but then immediately went back to the kitchen to check the recipe just to make sure. And that, my fellow kitcheners, is where Week Five officially went south.

The preparation of Fondue Bruxelloise involves six steps which include a glass dish, overnight refrigeration, a vat of frying oil and cheese cutouts. It does not, at any stage, involve a fondue pot, fondue forks, or a steaming pool of cheese. Oh dear. My stainless steel beauty.

Somehow, in all this excitement of knowing that we were going to be making fondue and searching for a retro pot in which to prepare it, I forgot to read the recipe first. As it turns out, fondue, in the traditional sense that I was thinking of, is actually Swiss not Belgian in origin. The word fondue comes from the French and simply means melted, so technically lots of dishes could be considered fondue and lots of countries can claim their own variations. That’s why there are chocolate fondues (American), saucey and brothy fondues (Asian), oil fondues (Italian) and cheese fondues (French, Swiss and American). But Switzerland’s version of melted cheese remains at the top of the most popular hot pot recipes and it’s the first image most people think of upon hearing the word fondue.

This is what I had in mind originally!

So where does this leave Belgium, you ask? The answer lies in an Italian American named Nika Standen Hazelton.

Nika Standen Hazelton (1908-1992)

Nika was a trusted authority of regional cooking from cuisines all around the world. She started her writing career as a reporter in the 1930’s, and never lost that level of curiosity or scrutiny for the topic at hand. She approached each cookbook and each country with an investigative eye and a thorough understanding of the food scene, the culture and the eating habits of the places she explored. She was also a tremendous home cook and hostess herself, managing to turn both her own passion for food making and her insatiable interest of other countries into a life-long career. By the time of her death in 1992, she had published 30 cookbooks in total, taking readers on tour with her around the globe highlighting all sorts of interesting food ways with a candor that made her writing legendary.

In the 1960’s, Nika got to work collecting recipes for her Belgian Cookbook.  Exploring the country quite intimately, she was determined with her latest project to create a book of traditional everyday Belgian foods as prepared by the home cook. She wasn’t interested in featuring fancy dishes that you’d find in Belgian restaurants, nor she was interested in featuring foods that were so traditional and so foreign sounding that they would dismay the American reader who was just trying to gain an introductory sense of food in Belgium.  “All one wants are some feasible and pleasant dishes…” she wrote in the introduction to The Belgium Cookbook, published in 1970.  It is from that cookbook that Craig Claiborne collected this recipe for Fondue Bruxelloise, which literally translates as Melted from Brussels, for his New York Times International Cookbook, which was the springboard for our year-long cooking project here.

Still regarded as one of the most tastiest Belgian recipes out there, Nika’s Fondue Bruxelloise is similar in preparation to a croquette, looks like a mozzarella stick and contains an inner filling that tastes a bit like a lemony Hollandaise sauce, even though there is no lemon in it.

Once I actually read the recipe the whole way through, I was slightly intimidated. I’ve never fried anything in a big pot of oil before, something almost unheard of since I’ve lived in the South for over a decade now. Needless to say, I had to do a little bit of extra research on how to go about that, since the recipe assumes you already know what type of oil to use and what temperature to heat the oil to and so on. I’ve included those notes along with the original recipe below in case you are a frying novice like me too. Overall though it’s not a difficult recipe to manage, but it is a bit unusual in its preparation. Refrigerating the cheese batter overnight yields a rectangular creation that has the consistency of somewhat rubbery, somewhat softened butter. The bread crumbs are made fresh, chopped up in a food processor from a day old loaf. And the cheese squares require frying in small batches giving this cooking project an awkward stop and start rhythm as you wait for things to come together, at first in the fridge, and then in the frying pot. This is what this year is all about though. Learning new techniques and new foods from old recipes. Intimidation aside, there’s nothing to do but jump right in. So here we go…

Fondue Bruxelloise

(Makes 8-12 servings which equates approximately to 18 pieces that are roughly 2 1/2″ inch x 2 1/2″ inch squares)

1/4 butter

All-purpose flour (I used about 2/3 cup)

2 cups milk

1/4 lb. Gruyere cheese, grated

1 cup Parmesan cheese, grated

1/8 teaspoon cayenne pepper

1/4 teaspoon nutmeg

5 egg yolks

Salt and freshly ground pepper to taste

3 eggs lightly beaten

2 teaspoons cold water

1 tablespoon peanut oil

3 cups fresh bread crumbs (I made these using a day old baguette)

Oil for deep frying ( I used 24 oz of peanut oil)

Parsley

Melt the butter in a large saucepan and stir in six tablespoons of flour, using a wire whisk. Add the milk, stirring rapidly until the mixture is thickened and smooth. Simmer 5 minutes.

Remove the sauce from the heat and add the cheeses, cayenne pepper, nutmeg, egg yolks, and salt and pepper to taste. (Note: I used about 1/2 teaspoon salt and a 1/4 teaspoon freshly ground pepper). Return the sauce to the heat and stir rapidly with the whisk. Cook, stirring until it thickens further, but do not allow it to boil. (Note: I cooked this until the mixture just started to form a couple of big bubbles).

Generously butter a 13×9 inch or a 9×9 inch square pan and pour the sauce into it. (Note: The longest dish I have is 8×11 so I used that. See more notes about this specific choice of dish further down).

Spread the mixture smooth with a rubber spatula. Cover with buttered waxed paper (parchment paper) and refrigerate overnight or longer. (Note: I kept mine in the fridge for 24 hours).

Now firm, cut the mixture into squares, rectangles, rounds or diamond shapes. (Note: I chose squares because they were most simple and because while the top side of this mixture was firm, the underside was slightly gooey, so any well defined shape, like a diamond would have gotten all gummed up).

The bottom consistency might not have been as solidified as the top because I was using a smaller dish than was recommended, adding a thicker dimension to the overall mixture. Surprisingly though, even with this consistency the squares were fairly easy to remove from the dish and retained their square shape for the most part.

Top side!
Underside!

Beat the eggs until frothy, then beat in the water, oil, and salt and pepper to taste. Coat the cutouts on all sides with flour, then dip them into the egg mixture.

Finally, coat them in the bread crumbs tapping lightly with the flat side of a knife so the crumbs will adhere.

Heat the oil in a deep fat fryer to 360 degrees and cook the cutouts until golden. Drain on paper towels. Serve hot garnished with parsley.

(Note: As I mentioned earlier, this step was a little vague, especially for first time fryers. If you are a new experimenter with home frying, there are a couple of things I wanted share about the process. I don’t have a deep fat fryer myself so I used a heavy stainless steel medium-sized saucepan which worked perfectly well. I set the pot of oil over medium heat and let it warm gradually. It takes about 20 minutes for the oil to heat to 350 degrees, but use a thermometer to test the temperature to make sure it is hot enough before you add the cheese squares. The trick to frying is to do it in small batches. I could only fit three squares in at a time based on the size of my pot. This number still allowed ample room for them to bob around in the oil. I cooked each batch for 3 minutes. Also, it is important to let the oil warm back up to 350 degrees between batches. That step generally takes about 5 minutes).

After the squares have drained on a paper towel for about a minute it is best to serve them right away or keep them hot in the oven while you finish frying all the rest. That way when you cut into them, the melted cheese will ooze out into a little pool on your plate.


The longer they sit at room temperature, the more solidified the cheese gets inside. In the photo below, you’ll see that the plate on the right has been resting at room temperature for about 15 minutes. The cheese is still soft on the inside but is more like the consistency of fresh mozzarella rather than a melting pool…

Delicious in a very rich and decadent way, these cheese squares are like a little mini meal. Nika recommended serving Fondue Bruxelloise with fried parsley, but because they are so creamy, I’d recommend forgoing the extra frying and replacing it with anything acidic to balance out the flavors. Fresh parsley adds a bit of bright tang, as does freshly squeezed lemon juice. Other possible companions include a dollop of mustard or hot sauce, a side salad tossed in a citrus vinaigrette, a few slices of home grown tomatoes or simply a cold glass of dry white wine.

The cafe crowd in Brussels…

In Belgium, especially in the 20th century, locals used to enjoy a habit of a small snack everyday at 4 pm. A little delight like Fondue Bruxelloise would be perfect for such a time of day. Because of their velvety richness, you’d only want to eat one or two per setting, based on the size suggested in the recipe. Crunchy on the outside and soft and billowy on the inside, this serving size is a petite portion that is filling and satisfying but won’t risk spoiling your appetite for dinner a few hours later. As a national favorite, several Belgian cookbooks include Fondue Bruxelloise in their appetizer or hors d’oeuvres sections with suggestions to serve them at parties large and small. I like the idea of the 4:00pm Belgium tradition though and would next serve this at that time of day along with a glass of wine or a Belgian beer as part of a special happy hour treat. After all, it is fondue. It only seems fitting to involve some friends.

While this recipe was certainly not what I had anticipated at the start of the week, it turned out to be a curious adventure in cooking techniques and frying lessons. I may have not have gotten to use my new fondue pot, but perhaps when we visit Switzerland on the Recipe Tour towards the end of the year, I’ll be able to test out its capabilities with a classic Swiss fondue.  Then we can circle back around to this recipe and compare the two. In the meantime, I encourage everyone to read your recipes first:)

Cheers to cheese for offering up a few surprises and to Nika for taking us on an unexpected cooking adventure.  Also, a big cheers this week goes to blog reader Angela, who baked our featured Australian recipe, Queen Mother’s Cake for her neighborhood and received rave reviews! If anyone else has their own stories to share please send a message or comment below, we’d all love to more about your cooking experiences too!

Next Wednesday, just in time for Valentine’s Day weekend, we are headed to the passionate country of Brazil, where romance and recipes bloom in the kitchen. Stay tuned!

Announcing the International Vintage Recipe Tour 2020!

Happy New Year! Hope your holidays were festive and that your new year is off to a great start. Here in the Vintage Kitchen, there are lots of fun things in the works for 2020 – ones that incorporate both cooking and collecting. After the emotional events of last year, I’m ready to pour a giant amount of joy into this new decade starting right now, with January, and the announcement of a big year-long project…

international-vintage-recipe-tour

Pack your market bags dear readers, we are going on an adventure. Welcome to the International Vintage Recipe Tour of 2020! Each week throughout the year, I’ll be cooking an authentic heritage recipe from a different country that was featured in the 1971 edition of the New York Times International Cook Book. Sharing both the experience (and the recipe!) here on the blog every Wednesday, I hope you’ll join me in exploring together the cuisine of 45 countries over the course of 12 months. It’s going to be an epic year of discovery, one in which I hope will shine a spotlight on some old, wonderful, possibly forgotten dishes that may have gotten covered up over time.

the-new-york-times-international-cook-book

Throughout this project, we’ll cover all the food groups and prepare unique dishes for all meals of the day including breakfast, lunch, dinner, cocktail hour and dessert. Organized alphabetically by country, we’ll circumnavigate the globe, exploring an eclectic range of landscapes and cuisines together. One week, we’ll be making island fare fit for a summer beach party and the next we’ll be deep in another hemisphere’s mountain range cooking up cuisine much more suited for skiing and snow. Some recipes will be quick to make like mixing up a tropical cocktail or making homemade mustard, while others will involve more time and detailed technique like making a layer cake or pickling vegetables. We’ll visit all the continents (except Antarctica) and we’ll touch upon interesting aspects of each country’s history through interviews, books, movies, music, art and artifacts.

james-spanfeller-illustration

A year-long cooking project is quite a commitment. It’s the biggest endeavor I’ve ever attempted here on the blog and I’m not quite sure how smoothly it’s all going to run.  But exploring foreign foods has been a favorite source of joy and curiosity for me since my college days, when my sister and I used to throw International Dinner Night parties in our Brooklyn apartment. By traveling around the globe via the kitchen this year, I hope this project will spark some unexpected fun in your cook space too.

Since I haven’t previously tested or tried any of these recipes listed in the cookbook before, there’s a good chance we’ll encounter some mishaps along the way and uncover some unusual cooking situations. There are foods from many countries included in this adventure that I have never even tried before, and there are some countries listed in the cookbook that don’t even exist anymore thanks to changes in world history. But through this project I hope to start some conversations with you about the validity of vintage recipes, the ways in which we prepare foreign food and the effect these recipes have upon our modern palettes.

There are lots of books that could have been referenced once this idea of a vintage recipe tour started swirling around, but The New York Times International Cook Book is an ideal fit for this type of world-wide exploration for two main reasons. First, Craig Claiborne…

The recipes in the International Cook Book were collected and tested by Craig Claiborne (1920-2000), a long-time editor at the New York Times and a treasured favorite cook here in the Vintage Kitchen. Throughout his career, Craig came in contact with all sorts of foodies from all sorts of places around the world – famous chefs, restaurateurs, caterers, food critics, industry professionals, home cooks and “those who wanted to communicate their culture via their kitchen.” He was also a talented wonder in the kitchen himself and the author of over twenty cookbooks. There is not a recipe that I’ve tried of his that I haven’t absolutely loved. Needless to say, he knew a good recipe when he saw one and he knew the good sources from which to get them. When he was preparing The New York Times International Cook Book he consulted hundreds of people and traveled thousands of miles to collect the most highly prized recipes he could find. Although he hasn’t been as widely recognized or remembered as some other famous culinary icons of the past, I’m excited to re-introduce him here on the blog. With his name attached to this cookbook, I have a feeling we are in good gourmand hands.

Ingredients for spaghetti and anchovy and clam sauce from the Italy chapter of the The New York Times International Cook Book

The second reason why the International Cook Book is an ideal vintage recipe springboard is because of the decade in which it was produced…the 1970’s. The first edition came out in 1971,  a decade of heightened curiosity and savvy in both the international travel department and the cooking department. While the 1960’s made air travel to foreign countries appear glamorous and exotic, by the beginning of the 1970’s international escapades were more widely accessible to Americans. This interest in other cultures reflected in the food scene of the 1970’s too – by exposing American palates to more diverse cuisine and broadening their culinary horizons.

1970’s travel poster for Qantas Airlines

The disco era ushered in a decade of cosmopolitan dining and entertaining that was backed by newly found confidence, curiosity and skill in the kitchen. Swiss fondue parties were all the rage, Spanish paella became a fashionable dinner food, and homemade Italian tomato sauce consisted of garden-raised ingredients instead of the 1960’s version that often combined conveniences like ketchup and canned tomato soup. Cooking in the 1970’s revolved around excitement, a desire for authenticity and an interest in cultural awareness that is similar to the way we approach food today. Over the course of the year, it will be interesting to see how these vintage recipes compare to our modern palates and standards of both cooking and eating. It is often said that history repeats itself, I’m curious to see if that cliche applies to food as well.

I hope you join me each week in this around the world journey and discover some new favorite recipes yourself. We kick off the big adventure next Wednesday, January 8th, with our first country…

What’s on the menu for Armenia? You’ll just have to wait and see:) Until next week… cheers to the new year!