Taco Tuesday: In the Vintage Kitchen

mex1

In 1963, a new edition of a popular 12 year old cookbook was published by Beverly Pepper.

glamour magazine's after five cookbook

The cookbook was Glamour Magazine’s New After Five Cookbook containing a year’s worth of dinner recipes designed for the young modern woman who didn’t have a lot of extra time to sit down and menu plan. With an audience comprised primarily of busy career girls, new mothers, college grads, young marrieds and the over extended singleton…

photo via pinterest
photo via pinterest

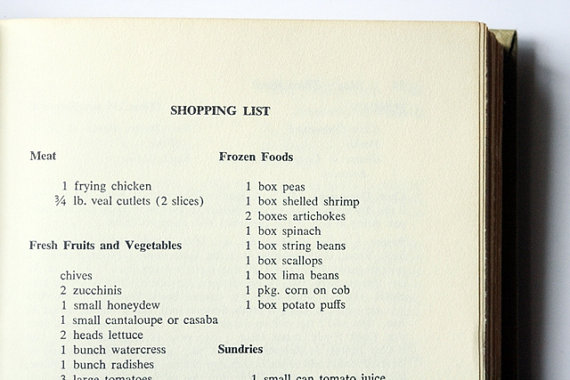
the After Five Cookbook was a dream come true. Broken down by month and then further by week, each section begins with a pantry staple list needed for the month followed by a weekly shopping list of all ingredients needed over the next six days..

recipe2

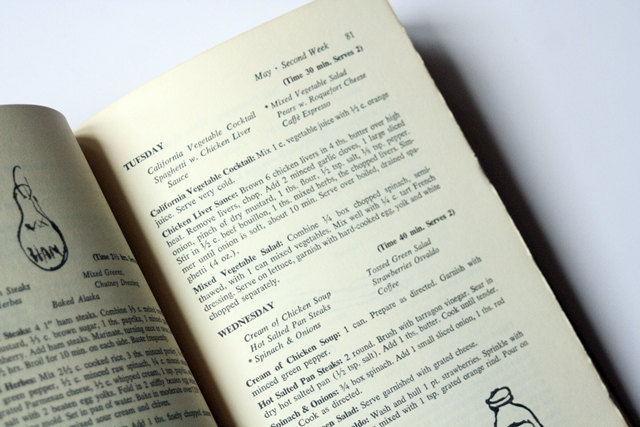
The recipes are laid out from from Sunday to Friday of each week with Saturday of course left out, assuming either a night off, a party engagement or better yet, a dinner date out.

recipe1

The last twenty pages contain special large-scale menus ideal for holidays or house parties when ladies were cooking for a crowd.

photo via pinterest
photo via pinterest

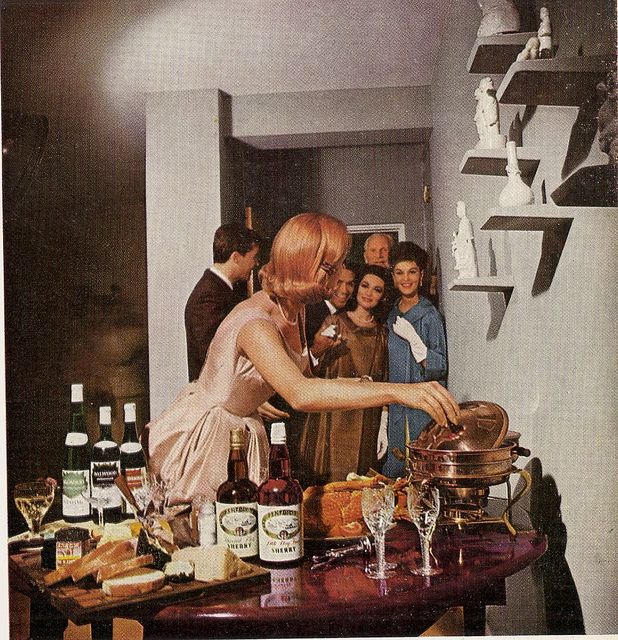
This is the section where Ms. Jeannie found the recipe for this blog post – a feast of flavor (or a gourmet gangfest as Beverley Pepper liked to call it) that serves eight but could easily be doubled or tripled to feed the proverbial army. Time is always short-handed in December so while this recipe does take two hours to prepare, it freezes wonderfully, sits well in a chafing dish, makes excellent leftovers and transports easily if you are tailgating or pot-lucking your way through the month.

Mexican Beef with Olives

Mexican Beef with Olives (serves 6-8)

3 lbs. cubed grass-fed stew beef

4 tablespoons olive oil

1/2 lb. ground grass-fed beef

2 minced garlic cloves

3 green peppers, cut in 1″inch strips
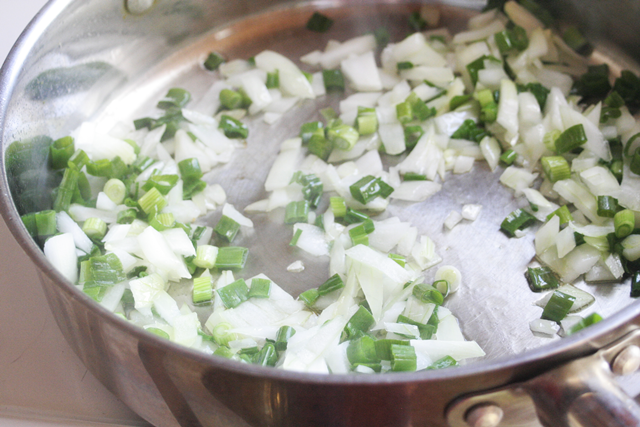
6 onions, chopped

2 tblsp. tomato paste

6 dashes Tabasco sauce (or equivalent hot sauce)

3 tblsp. chili powder

3 cups chicken broth

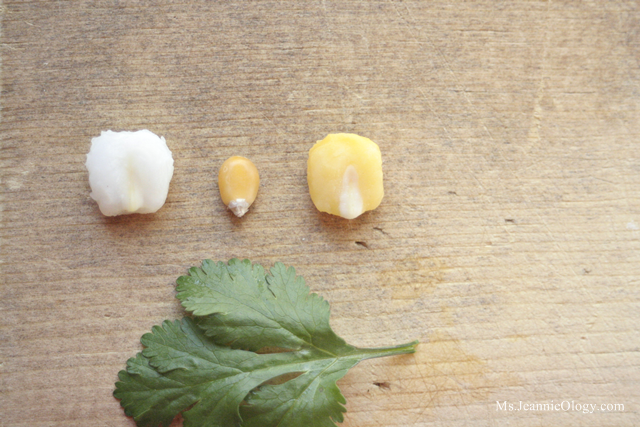
2 cans corn kernels, drained but reserve the liquid

1 cup spanish olives, sliced

salt and pepper (to taste)

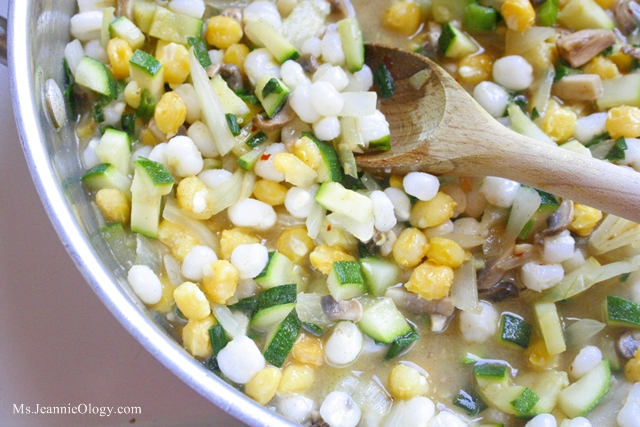
  1. In a large pan, brown the stew beef, ground beef, garlic, peppers and onions in the olive oil over medium high heat until the beef is browned and the onions begin to caramelize.
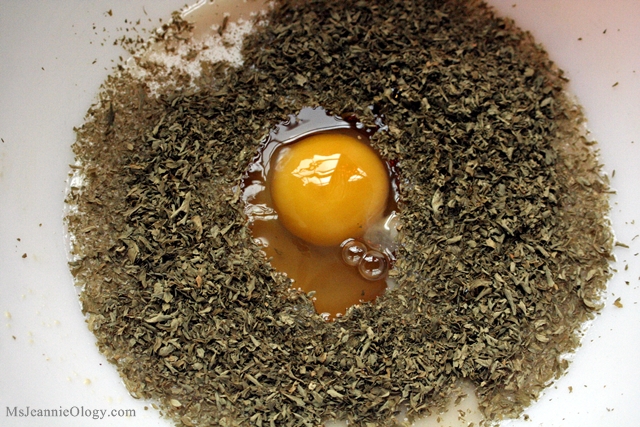
  2. Add the tomato paste, tabasco, chili powder, salt and pepper to the pan and mix well.
  3. Add the chicken broth, reduce heat to medium, cover and simmer for one hour.
  4. Add the corn kernals and simmer uncovered for an additional 30-45 minutes until most of the liquid is consumed.
  5. The mixture at this point should be thick and saucy, if it looks too liquidy or thin let it simmer longer, if it looks too dry add some of the reserved liquid from the drained corn kernels. Once the mixture reaches the desired consistency, add the olives and stir thoroughly over medium heat for 4 minutes.
  6. If you prepare this dish ahead of time add the olives just before reheating.
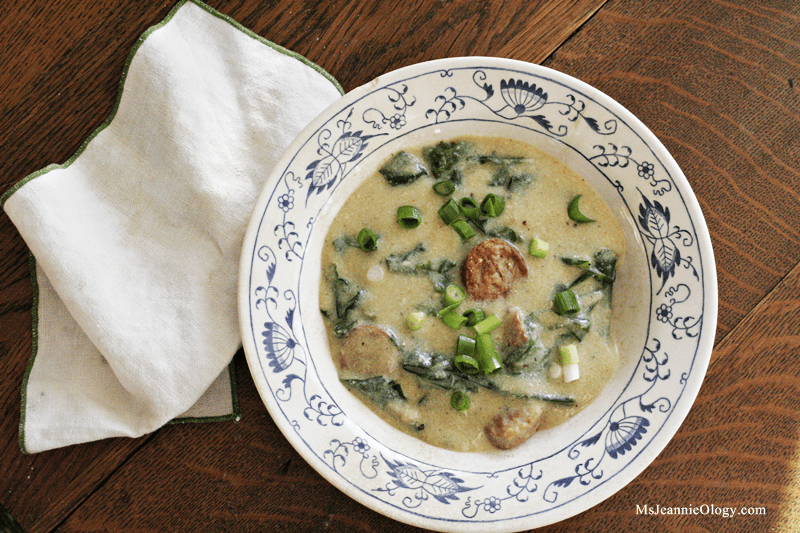
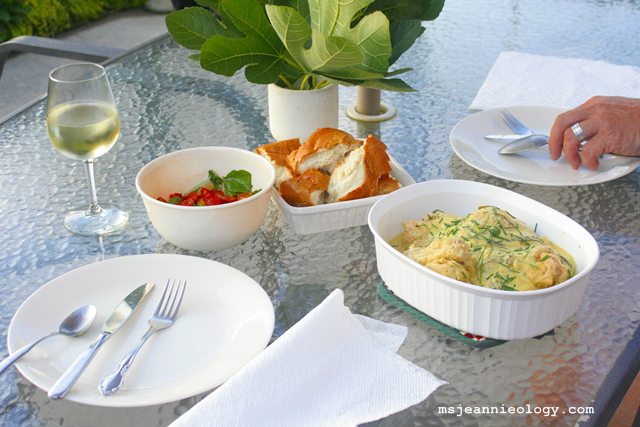
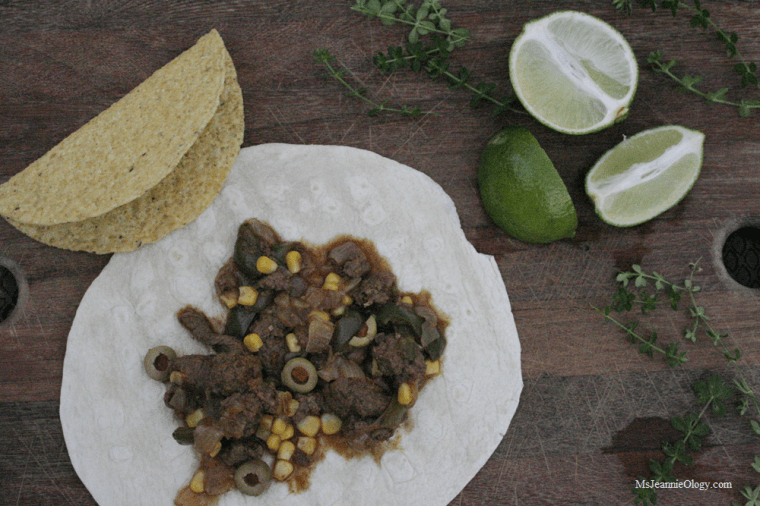
  7. Serve with rice, soft tortillas, hard tacos and lime wedges.

Mexican Beef with Olives

Ms. Jeannie served her tacos with white rice that was lightly tossed with freshly squeezed lime juice (half of a lime), a touch of salt and a few dashes of cumin.  Other serving options that would be equally delicious include: sour cream, cheddar cheese, cilantro, and/or sliced mango.

Fun for family and friends, this recipe only gets better as it sits in the fridge making leftovers and quick dinner reheats fast and easy throughout the week. A fun gift for food bloggers, kitchen experimenters and vintage cookbook lovers, the After Five Cookbook is available here.

Happy cooking dear readers!


Israel, India and the International Dinner Night – A Vintage Rosh Hashana Recipe

Authentic India-based Chicken Curry circa 1964

Happy New Year dear readers! This coming Sunday marks the two day festival of Rosh Hashana, which celebrates the creation of Adam and Eve and mankind’s role in the world.  Although Ms. Jeannie, herself is not Jewish, she thought it would be fun to mark the day with an international dinner night featuring a holiday approved (and kosher certified!) meal which brings together the unique and diverse flavors of the Holy Land.

Many cultural influences make up the demographic food map of Israel, including Indian, Greek, Arabic, Italian and French offering unexpected and interesting food combinations and flavor pairings. In this vintage Isreali cookbook, published in 1964…

The Israeli Cook Book by Molly Lyons Bar-David

author and culinary advisor to El-Al Airlines, Molly Lyons Bar-David compiled hundreds of authentic, local recipes from over 70 regions within the country. Many of the recipes had been passed down from generations bringing with them their own unique stories, folklore and legends which Molly also shares in the cookbook.

An alley in the Jewish Quarter in the old city of Jerusalem, Israel. Photo via pinterest.

Her intention for this culinary project was to serve true Israeli food on board mid-century El-Al airlines flights as a gateway experience for incoming passengers.

Vintage 1960s El-Al airlines travel poster. Via pinterest

But as Molly got deeper and deeper into the collection process, interviewing literally hundreds of locals, she learned that the diverse food scene was just as dynamic and layered as the centuries old history and faith long associated with Israel.

Cochin, India. Photo via pinterest

To honor the historical holiday, Ms. Jeannie chose an ancient chicken curry recipe that stems from the spice markets of Cochin, India as brought by the “Cochin Jews”  who were believed to have emigrated from Palestine after the second destruction of the Temple.

A Jewish family from Cochin , India circa 1880. Photo via pinterest.

Molly writes in her introduction to the recipe…

“Although their culture, (including a caste system) and even their skin coloring has become indistinguishable from that of their Hindu neighbors, they never forsook their Jewish heritage. Their food, chiefly rice and curries, is like that of the Indians, except that they strictly maintain the kosher laws.” 

Ms. Jeannie is a big fan of curry, and has made countless variations taken from recipe books, magazine articles, online sources and foodie recommendations, but this by far was the best (THE BEST!) curry recipe she has found to date. Full of flavor both subtle and bright, it makes a ton and keeps getting better day after day in the leftover department.

It is simple and easy to make and contains basic ingredients that are easy to gather. So if you are looking for a bit of the edible exotic to ring in the New Year or celebrate the history of a culture other than your own this is a fabulously delicious recipe! You can also omit the chicken and make it strictly a vegetable curry if you prefer. Ms. Jeannie served it on top of a bed of Jasmine rice with a side of warm Naan bread.

Cochin Curry
Cochin Curry

Chicken Curry (serves 4)

1 2lb chicken, cut in parts (do not de-bone)

5 tablespoons olive oil

3.5 cups water

5 large onions, chopped

2 cloves garlic, mashed

4 large tomatoes, chopped (or one large can of diced tomatoes)

1 cup celery, chopped

2 apples, peeled and cubed

2 tablespoons sugar

1 teaspoon ground ginger

1 tablespoon (or more!) curry powder (as a big fan, Ms. Jeannie used 2.5 tablespoons!)

1.5 tablespoons flour

3 cups coconut milk

2 tablespoons grated coconut (optional)

1.5 teaspoons salt

cayenne pepper (to taste)

c3

  1. Fry the chicken in 3 tablespoons of olive oil until lightly browned on all sides (about 10-12 minutes total or 5 minutes on each side). Remove from the pan and set aside.
  2. Add the water to a large stock pot and bring to a boil. Add the chicken and simmer uncovered for 30 minutes on medium low heat. c4
  3.  In a new large pan, heat the remaining 2 tablespoons olive oil and add all the chopped vegetables and spices (onions, garlic, tomatoes, celery, apples, sugar, ginger and curry powder). Mix to combine.  Sprinkle on the flour.  Mix well again and then add the coconut milk and seasonings, and simmer. Once the chicken is ready, transfer all pieces to the curried vegetables and cook 10-20 minutes more.
  4. Serve hot with rice and Naan bread if you like.* (Ms. Jeannie loves the Naan bread made by Stonefire Flatbreads which is available in most grocery stores in the fresh bakery section.)

Enjoy dear readers! If you’d like to learn about more authentic recipes from the Israeli Cook Book, the Jewish holidays they correspond with and the history behind them, please visit Ms. Jeannie’s shop here. And if you are celebrating the holiday this weekend, Happy Happy New Year:)

Authentic India-based Chicken Curry circa 1964
Authentic Indian Chicken Curry circa 1964 as prepared from The Israeli Cook Book by Molly Lyons Bar-David

Viva La Vintage: 1960s Dinner and a Movie {Italian Style}

Vintage Italian Travel Poster by Island Art Store via Etsy

Dear readers, in this week’s post we are all heading on a European adventure to the country best known for two things: food and romance.  On this trip you will be transported through food and film back to 1960’s Florence, Italy for an authentically magical night of escapism that will make you feel like the fanciest of weekend jet-setters! .

On the menu: Tuna Viareggio with Sauteed Wild Arugula Greens (from the vintage 1960’s cookbook The Art of Regional Italian Cooking by Maria Lo Pinto).

The Art of Italian Cooking by Maria Lo Pinto c. 1963 First Edition

In your glass: 1967 Grifone Tosacana wine (slightly chilled)

italy6

On the big screen: The 1962 romantic drama, The Light in the Piazza, starring Olivia de Havilland, Yvette Mimieux and George Hamilton which was shot entirely on location in Florence.

lightpiazza3

Ms. Jeannie fell in love with this movie not only for its gorgeous location and costumes but also for its unexpected story and wonderful acting. Olivia deHavilland (who most famously played Melanie in Gone With the Wind) plays Meg, a modern American mid-century mother in a coming of age story centered around her daughter Clara’s budding romance with handsome Italian Fabrizio (played by George Hamilton).

piazza

Its not your typical love story, Clara is not your typical young woman and Meg is not your typical mother. With a plot that takes all sorts of twists and turns in unexpected ways, each character reveals several layers of depth, facing situations that are complex and timeless.  It’s also very funny and Yvette as Meg’s daughter, Clara, does a delicate job of creating a woman who is both fresh and feisty. Ms. Jeannie will not say anything else so she doesn’t spoil the surprises in the movie but here is the original trailer so you can get a sense of the adventure…

Florence, located in central Italy is known for its gardens, beaches and simple delicate cuisine. So in keeping with the movie Ms. Jeannie chose a recipe from the vintage cookbook, The Art of Regional Italian Cooking by Maria Lo Pinto which organizes the foods of Italy by section within the country.

italy3

Combining the best of the beaches and the gardens – the dinner menu represented both attributes with wild fish and garden greens. Adding in a glass (or more!) of the Tuscan blend Grifone Toscana 1967-  a 2009 vintage made in the same central region as Florence and a rustic baguette on the side made this authentic Italian dinner complete.

italy5

Both dishes were fresh, fast and easy to prepare – perfect summer cooking! Ms. Jeannie purchased both her fish and the wine from Trader Joe’s.  Just a little preparation note – tuna cooks best when its is semi-frozen. So if you buy frozen filets like Ms. Jeannie did, you want to just thaw them in the refrigerator for about 30 minutes before slicing and cooking.

Tuna Viareggio Style (serves 4)

1.5lbs fresh tuna, sliced 1″ inch thick

1/2 cup flour

4 tablespoons olive oil

1 small onion, sliced

1 small clove garlic

1 tablespoon chopped fresh parsley

2 anchovy filets, chopped

1/2 cup dry white wine

3 tablespoons tomato paste

1 cup warm water

1 bay leaf

1/2 teaspoon basil, chopped

1/2 teaspoon oregano

salt to taste

Dust tuna slices with flour. Fry in skillet in two tablespoons of oil, over moderate flame, until lightly brown on both sides. Remove from pan and keep hot (on a plate covered with a lid works great!). In same pan saute onion, garlic and parsley in balance of oil. Remove garlic and add anchovies and wine: cook slowly until wine almost evaporates. Dilute tomato paste in warm water, and add with rest of ingredients. Cook covered over moderate flame for 15 minutes. Add fish carefully and cook 6-10 minutes longer. Serve immediately.

The Sauteed Arugula Greens were a modification from Maria Lo Pinto’s Sauteed Dandelion Greens recipe. Since Ms. Jeannie couldn’t find dandelion greens anywhere, the arugula was the next best substitute. You could also use spinach but cooking times will vary a little bit.

italy7

Sauteed Arugula Greens (serves 4)

2 lbs. fresh arugula

4 tablespoons olive oil

1 large garlic clove, cut in half

3 anchovy filets

Clean and wash greens. Roughly cut them in 2″ inch pieces. Heat oil in saucepan, add garlic and brown. Remove garlic and add greens, cover saucepan, and cook 5 minutes or until tender. Cut anchovies into small pieces and add. Mix well and cook 2 minutes longer. Serve immediately.

italy10

And there you have it dear readers! A mini-mental vacation to the land of good living! If you were feeling especially festive, you could also plan an outdoor movie night and set this one up under the stars. It would be very romantic. Or as they’d say in Italian… questo e molto romantico!

lightpiazza2

The Light in the Piazza is available for download or dvd purchase on Amazon here. The cookbook is available for purchase in Ms. Jeannie’s shop here. Catch up on past blog posts featuring other Italian recipes here. A special thanks to Mr. Jeannie Ology for the handsome hand modeling!

Between Seasons with Jacques: Hominy, Cilantro and Cumin Stew

Shhh… don’t tell Julia, we’ve got another favorite French chef!

Julia & Jacques
Julia & Jacques

Practically equivalent in the incredibly delicious food category, the culinary wonders of Jacques Pepin are a constant source of inspiration when it comes to time spent well in the kitchen. In a lot of ways he’s the opposite of Julia Child. She was an American who moved to France. He was a Frenchman who moved to America. Julia learned the classics of French cooking. Jacques created original recipes. She developed her interest in cooking later in life while Jacques grew up in his family’s restaurant in Lyon. But for all their opposites, they shared many things in common – their passion for food and fun being two.

Claudine & Jacques in 1994.

Like Julia, Jacques had his own cooking show on PBS which aired every Sunday afternoon in the late 1990s. Jacques was not only fabulous in the kitchen but he was funny too. The whole precipice of the show was him trying to teach his adult daughter, Claudine, how to cook. Claudine was an everyman (everywoman?!) in the kitchen, and although she was the daughter of an FFC (famous French chef) she didn’t know much about cooking.

For her, techniques were troublesome, flavor pairings were confusing and certain preparations were downright intimidating. But In Cooking with Claudine, Jacques was there to teach and Claudine was there to learn, sort of. They were cute together. She’d make her own shortcuts, he’d quibble with her about the proper way to cut an onion or smash some garlic. Often times she’d humor him and then do it her own way. They laughed with each other and in the end they both learned from each other. Dad and daughter cooking up some fun. This camaraderie turned into quite a few television appearances over the years. If you are lucky you can still catch dad and daughter whipping up something delightful at a food festival or a special event.

Here they are sharpening knives in Aspen in 2012…

Jacques may be French by birth but his heart and home are here with us in the States.  He has surrounded himself with American culture and cuisine since he first came to the U.S. in the 1950s. And guess where one of his first jobs was? Before earning his Master’s degree at Columbia University, Jacques helped develop menus for the restaurant of this famous mid-century travel icon…

Howard Johnson's
Howard Johnson’s Motor Lodge and Restaurant circa 1960’s!

Immersed in the everyday palate of the American culture, Jacques’ recipes pull from cultures around the world. They may have French foundations, but they are built with various cuisines which make for unique arrangements in the flavor department.

hominy1
Hominy, Cilantro and Cumin Stew

One recipe we tried recently featured an international concoction of ingredients. Pulling from Mexican, Mediterranean, and Middle-Eastern staples, this springtime stew is perfect for the hot/cold/hot/cold temperatures of March. When the weather is as indecisive as your appetite and you can’t choose between something warm, light, fresh, or hearty –  Jacques’ Hominy, Cilantro and Cumin stew is the way to go.

hominy1

It utilizes three springtime ingredients – onions and herbs – yet is packed with the warm, smoky flavor that suits a sweater and a scarf. It also involves this mysterious ingredient…

--

Before we made this recipe, we thought this was the same thing as polenta which is the same thing as grits – a Southern staple here in the South. But not so, dear readers. Hominy is actually a corn kernel plumped up to the size of a chickpea and sold in cans. So nothing at all like its flour sacked cousins.  A whole lesson was to be had at the grocery store. Polenta and grits are the same thing. Hominy is an entirely different matter altogether. Same family, different form.

Hominy comes in two varieties – white and yellow. And as you can see from this picture – when compared to a popcorn kernel it is quite plump. The recipe calls for both colors which gives it an attractive color palette.

hominy4

Because of its distinct flavor, there is not a lot of variety when it comes to cooking with hominy. We were surprised to find just a few different types of recipes online. Jacques loves to cook with these little corn puffs, and now thanks to his delicious recipe, we do too!

Hominy, Cilantro and Cumin Stew

(serves 6)

2 tablespoons canola oil (we used olive oil)

1 medium onion

6-8 scallions – washed, trimmed and chopped

2 small zucchini – washed, trimmed and diced

5-6 medium mushrooms – washed and chopped

5-6 cloves of garlic – peeled, crushed and finely chopped

1 1/2 teaspoons ground cumin

1/4 teaspoon crushed red pepper

1 can (15.5 oz) white hominy

1 can (15.5 oz) yellow hominy

1 medium tomato, peeled, seeded and chopped (because it is not tomato season here yet we used 7 oz. of canned diced tomatoes)

1 cup loosely packed fresh cilantro leaves, chopped

hominy5

Heat the oil in a large pan. When it is hot, saute the onions and scallions for one minute. Then add zucchini, mushrooms, garlic, cumin and pepper flakes: cook for 3-4 minutes.

hominy9

Add the hominy (with liquid from can) to the pan and bring mixture to a full boil. Reduce heat to low, cover and simmer for 10 minutes. Check the consistency after 10 – you don’t want it to be soupy, nor do you want it to be dry. If it is too liquidy – let it simmer until mixture is just moist. If it is too dry add a few tablespoons of water.

Stir in tomatoes and cilantro, and let the mixture come to a boil again. Let it cook for one more minute before ladling into serving bowls.

hominy2

Jacques makes this as a side dish but you could also have it on its own as a vegetarian lunch or dinner, which is what we did here. Serving it with a few tostadas gives it a nice bit of crunch but also it would be great with poached chicken or a simple white fish. You could even serve it as a chunky dip for your Cinco de Mayo party!

Happy hominy dear readers! If you have any great recipes featuring this flavorful fella please post it in the comments below.

PS. If you are loyal fan to Julia Child, find one of her vintage cookbooks for sale in her shop. Click the photo for more info!

julia_french

In the Kitchen with Indie: Organic Homemade Dog Treats!

indie1

In this week’s culinary adventure, Ms. Jeannie is focusing on something delicious for canine-minded readers of the blog: organic flaxseed dog treats! Or biscuits, if you’d like to correctly call them.

Around “officially” for over 150 years, specialty biscuits for dogs were created by this enterprising American electrician…

Photo courtesy of chestofbooks.com

James Spratt, who patented Spratt’s Meat Fribrine Dog Cakes, after he noticed a pack of dogs chewing on hardtack biscuits in the street. The city of London became his manufacturing mecca of choice in the 1870’s where his dog treats became quite a big British hit.

Spratts

Before long, exclusivity was compromised and the Bennett Brothers of New York City took note of the popular Spratt product and brought the concept home to America.

The Bennett Biscuit Company was established in the NYC’s Lower East Side in the early 1900’s, making Maltoid’s – milk, mineral and meat dog treats. Later Bennett’s biscuit company would be bought by National Biscuit Company (know known as Nabisco) and their production of Milk-Bone dog biscuits would become a household name by the 1940’s.

Maltoid_milk-bone

But because Indie has some food allergies and has to therefore exclude most grains from her diet (and unfortunately most over-the-counter dog treats like Milk-Bones), Ms. Jeannie is always on the lookout for a good recipe that won’t give Indie a rash.

Ms. Jeannie has found a favorite in this organic recipe and as you can see Indie is quite an enthusiastic kitchen helper when these are on the baking menu!

indie.9_2

Simple, easy to make and abundant in quantity you start out by combining yeast, warm water, chicken broth, maple syrup, dry parsley and an egg in a large mixing bowl…

indie2

Then you add ground flaxseed meal until it forms a stiff dough…

indie4

Next, roll the dough into a ball and knead for a few minutes…

indie5

Then you are ready to roll the dough out in a thin layer and cut out the shapes.  Ms. Jeannie lost her cookie cutters in the move somewhere so she improvised using the openings of two different sized glass jars…

indie6

Once you have all shapes cut out – place them on an un-greased cookie sheet and bake them in a 350 degree oven for 30 minutes. Turn them over and bake for an additional 15 minutes.  Once finished in the oven, let them cool on a rack for an hour.

indie10

Depending on the thickness of your dough – you can make chubby treats or paper thin treats. Ms. Jeannie likes to do a mixture of both. On the days when Indie does something really good or listens really well – she’ll get a chubby treat:)

By the time you get to this stage you’ll have several dozen homemade dog treats and one anxious sampler at your feet.

indie11

If you’d like to share your treats, it is fun to package them up and give them as little gifts to the extra-special creatures in your life. They make fun hostess gifts, thank you gifts and special holiday gifts.  Or if there is a secret canine valentine in your life…

indie1

… you’ll win their heart by giving them these:)

Here’s the complete recipe breakdown once more…

Organic Flaxseed Dog Treats

2 teaspoons dry yeast

1/2 cup lukewarm water

2 tablespoons dry parsley

1.5 cups chicken broth

3 tablespoons maple syrup (or honey)

1 egg

5 cups ground flaxseed meal

Preheat oven to 350.  Dissolve yeast in lukewarm water in a large mixing bowl. Add parsley, broth, syrup, and egg and stir to combine. Slowly mix in the flaxseed meal until it forms a stiff dough. Form dough into a ball and transfer it to a flat surface (you can sprinkle some additional flaxseed and parsley on the surface so that the dough will not stick) and knead for a few minutes.

Roll dough out into a thin layer (about 1/4″ inch for thin crispy treats or about 1/2″ inch for chubby chewy treats) and cut out shapes with cookie cutter. Place treats on an un-greased cookie sheet and bake for 30 minutes. then turn each treat over and bake for an additional 15 minutes. Place cooked treats on a cooling rake for 30 minutes.

Store all baked treats in an air-tight container.

Happy baking dear readers!


Monday in the Kitchen: It’s Sopa de Fuba Season!

Simple ingredients for a simple soup!

As the outside temperatures start leaning towards Autumn, Ms. Jeannie starts dreaming about soup in all its different variations. Undoubtedly one of her most favorite things to make in the cold months, she was practically giddy today in anticipation of inaugurating the season with one of her very favorites…Sopa de Fuba, a native recipe to this gorgeous place…

Can you guess where there is? Photo via pinterest.
Photo via pinterest.

Can you guess where in the world this picture was taken? If you guessed Brazil then you are right! To be more particular it is Minas Gerais – the fourth largest state in Brazil, known for it’s precious gem, diamond and gold mines, its historic colonial charm and a certain something special in the warm and hearty soup department.

Sopa de Fuba combines just a few simple ingredients in an unusual manner which makes it fun to cook and a bit out of the ordinary to serve.

It starts with the browning of cornmeal on the stove…

sdf2

And then the sauteing of sausage…

sdf3

You can use any variety of sausage from kielbasa to ground from pork to turkey depending on what you prefer. In this case Ms. Jeannie used organic hot Italian chicken sausage. Eventually you will wind up with slices or crumbles…

sdf4

The trickiest part of the whole production is when you incorporate one cup full of cornmeal broth to two lightly beaten eggs…

sdf5

The slower you whisk the hot broth into the cold eggs the better so as not to curddle the eggs. By drizzling instead of pouring and whisking quickly with a fork  its easier to incorporate the two and makes for a nice, thick, creamy looking mixture instead of thin and runny with floating flaky egg bits.

In the very end you wind up with this dreamy concotion that tastes like it has been cooking for days and feels like you have sweatered your insides in something soft and warm like cashmere.

sdf6

Taking about 90 minutes from prep to table, it is a robust rainy day recipe that makes you feel like you have spent some satisfying time in the kitchen yet doesn’t take all day nor the use of every dish. Pair it with  a nice glass of wine and some crusty bread or a warm dressing salad and you’ll be fortified for hours when it comes to the task of raking leaves, shoveling snow, or hiking mountains to find that one perfect Griswold worthy Christmas tree:) It also freezes well so make a big batch if you are so inclined and dinner will be taken care of down the winter road.

Here’s the recipe breakdown from start to finish. Ms. Jeannie adapted this just slightly from the original saveaur.com recipe. Her alterations are in italics.

Sopa de Fuba

SERVES 6

INGREDIENTS

½ cup yellow cornmeal
2 tbsp. canola oil (Ms. Jeannie uses olive oil) 
6 oz. kielbasa sausage, cut diagonally into ¼”-thick slices (you can use any kind of sausage here ina ny style from pork to turkey to chicken from italian sausage style to ground!)
7 cups chicken stock (you can also use beef broth, turkey stock or veal broth)
4 oz. collard greens, stemmed and thinly sliced crosswise
2 eggs, lightly beaten
Kosher salt and freshly ground black pepper, to taste
2 scallions, thinly sliced

INSTRUCTIONS

1. Heat cornmeal in a 10″ skillet over medium-high heat and cook, swirling pan constantly, until lightly toasted and fragrant, about 3–4 minutes. Transfer cornmeal to a bowl; set aside. Heat oil in skillet and add sausages; cook, turning occasionally, until browned and cooked through, about 10 minutes. Transfer to a plate and set aside.

2. Bring chicken stock to a boil in a 6-qt. pot over high heat. Whisk in reserved cornmeal, reduce heat to medium-low, and cook, whisking often, until cornmeal is tender, about 40 minutes. Stir in reserved sausages and collards and cook, stirring occasionally, until collards wilt, 15 minutes. Place eggs in a medium bowl and add 1 cup cornmeal mixture; whisk until smooth. Return mixture to pot and stir until incorporated; cook for 1 minute more and season with salt and pepper. Ladle soup into 6 serving bowls and garnish with scallions; serve hot.

sdf9

And that dear readers is Sopa de Fuba! Fun to say and delicious to eat;) If you feel the winter blues coming on – make a batch of this, picture yourself here and you’ll feel instantly restored. Like a mini vacation to an ancient city…

photo via pinterest
photo via pinterest
photo via pinterest
photo via pinterest
photo via pinterest
photo via pinterest
photo via pinterest
photo via pinterest

Happy Autumn eating all you hearty ones!


Saturday in the Kitchen: Chive Pesto


chive3

Ms. Jeannie’s chive plant reseeded itself from last year (good little plant!) and this summer has decided to go at growing with passion. When the stalks reached 2 feet, it was time for a hair cut.

chives7

Not wanting to waste any bit of these little delicates Ms. Jeannie searched high and low for a recipe that would incorporate cupfuls of chives instead of just bits of sprinkles here and there.  And surprisingly, it was harder to find than you might think – until she stumbled upon the Garden for A House blog and Kevin’s unique spin on classic pesto. Instead of traditional basil as the main green, he used chives! Perfect!

Ms. Jeannie got to work grinding nuts…

chive5

next came the garlic, olive oil, Parmesan cheese, and four big cups of freshly chopped chives…

chive6

She whirled all that together in her little food chopper until it formed a nice consistency – chunky but spreadable. And voila! Dinner was on its way to being done.  You could use this pesto lots of different ways – Kevin recommended fish, toasty baguette slices or pasta.

Ms. Jeannie went the pasta route…

chive4

and tossed it all together in the vintage bowl that she has for sale in her etsy shop. This bowl gets lots of attention but no one has claimed it for a treasure yet. Ms. Jeannie thought it might help if she incorporated some “action” shots and indeed those little yellow flowers do look pretty against all that bright green!

After tossing, she let the pasta/pesto mixture sit for about 20 minutes to cool down to room temperature and let the pasta soak up the sauce. Needless to say this was all in all an effortless dinner –  with just under 15 minutes from prep to finish.  And Ms. Jeannie accomplished two feats in one –  substantially cutting back the onion patch and making dinner. Oh the ease of the summer lifestyle.

Chive Pesto

(makes about 1.5 cups)

4 cups freshly chopped chives

2 oz. nuts (Ms. Jeannie used peanuts. Kevin used sliced almonds. But really you can use any kind you want)

1 cup Parmesan cheese, grated

1 garlic clove

1/4 cup olive oil

Chop your nuts first in a food processor or blender and then add the rest of the ingredients and mix until combined. You may need to add more olive oil for a looser pesto, depending on the type of consistency you like or how you plan to serve it. And you may want to add salt or pepper at the end – although Ms. Jeannie added neither – the cheese made it savory enough and the garlic added quite a  bit of spicy flavor.

chive1

A great BIG thank you to fellow blogger  Kevin for his ingenious recipe and for helping Ms. Jeannie not waste one little bit of her summer garden harvest. Stop by and read Kevin’s blog here.

And if that serving bowl caught your eye, you can find it here in Ms. Jeannie’s shop!

bowl

The next herb to tackle is the oregano. If anybody has any great recipes for oregano enmasse please comment below! In the meantime, happy garden cooking!


The Post-Derby Post: A Minty Affair

The mint julep is always the star of the show at the Kentucky Derby in the drinks department.  But when Ms. Jeannie’s own party plans got significantly waylaid this year, she decided instead of going all the traditional routes she was going to mix things up a bit. Instead of the mint julep, she created the Minty Donberry…

wine1

Which was a glass of chardonnay with a spring of mint and a slice of strawberry. Like a mini sangria, it was light and refreshing and looked pretty from the side…

wine2

Instead of traditional red roses, she went white and peach and purple in the flower department…

f1

with bouquets of lilacs, snowballs, flowering dogwood and clematis.

And instead of a formal sit-down dinner following the race she went with a smattering of appetizers for a more informal cocktail party-like atmosphere.  The favorite of the appetizers was a sausage and mint brown rice meatball accompanied by a cucumber mint raita sauce.  It was a nice match with the Minty Donberry, easy to prepare ahead of time and made a lot.  So even though there was no julep –  mint was still a main attraction!

Here’s the recipe…

dinner1


Sausage and Mint Brown Rice Meatballs with Minty Cucumber Raita Sauce…

For the Meatballs

1 lb. ground grass-fed organic sausage

1 cup cooked brown rice

1 cup fresh flat leaf parsley, chopped

1 egg, lightly beaten (preferably free range organic!)

2 cloves garlic, minced

1/2 cup milk

1 teaspoon salt

1/2 teaspoon pepper

1/4 teaspoon allspice

Prepare brown rice ahead of time and let cool. Add all ingredients together in a bowl and mix until well-combined. Cover bowl with plastic wrap and refrigerate for at least one hour (up to one day – if you want to prepare ahead). All ingredients should look evenly dispersed throughout the mixture, like this…

dinner2

Roll into 18 golf-ball sized meatballs or smaller if you want to make a miniature version. Bake at 425 for 15 minutes. Turn each meatball once and bake for another 10 to 15 minutes until the meatballs turn golden brown. This may require a little more or a little less cooking time depending on the size of your meatballs. Also, Ms. Jeannie broiled hers for the last couple of minutes to get a nice dark brown crust on each.


For the Minty Cucumber Raita…

1/2 large cucumber – peeled, seeds removed and then grated

1 cup sour cream

1/8 cup chopped fresh mint

1/2 teaspoon ground cumin

1/8 teaspoon cayenne

1 teaspoon honey mustard ( Ms. Jeannie used Inglehoffer’s which is a German mustard)

1 teaspoon apple cider vinegar

kosher salt and freshly ground pepper to taste

Place grated cucumbers in a paper towel and squeeze out all the extra liquid. Then combine all ingredients in a bowl until thoroughly mixed. Cover and refrigerate for at least one hour before serving.  Makes 2 cups of raita.

Arrange the meatballs on a platter alongside the raita. Ms. Jeannie served her sauce in her grandmother’s 1930’s teacup – which looked pretty! If you want to garnish the plate you can use (you guessed it) fresh mint or dill. But the meatballs don’t last long once out among the party crowd so you may not want to even bother!

dinner3

Ms. Jeannie was rooting for longshot Wildcat Red…

wildcat_red

and even though he didn’t win – it was still a great race! Now it is on to the Preakness to see if California Chrome will become a Triple Crown winner. Ms. Jeannie’s two best friends couldn’t make last night’s party so they’ve all decided to get together for round two on May 17th to watch the Preakness. It might just be a California themed event!


Bathe, Chop, Simmer: The Art of Italian Cooking, 1948

sauce1

All summer long, the garden tomatoes have ripened one or two a day – making an easy pluck, enough for a sandwich or a salad or an ingredient for dinner.  Now as the end of the season comes to a close, the bushes have reached their relaxed state of exhaustion. They are leggy, bald in some spots from clipping and pruning and dry in others  from months beneath the hot Georgia sun.

For all that they lack in fine appearance,  a curious event has been occurring over the past week or so. Suddenly,  it seems, the last little stragglers have joined together for one last hearty attempt to grow, ripen and red in abundance.

Over the weekend, Ms. Jeannie pulled 18 ripe tomatoes from her vines, with about 15 more “in the hopper” so to say that will be ready in the next couple of days.  My goodness! Their efforts seem valiant! Armed with her big basket full of beauties and under the spell of a cool rainy Saturday,  it seemed to Ms. Jeannie like the perfect time to make a new recipe from an old cookbook. The recipe is  Salsa Semplice Di Pomodoro #1, otherwise known as Plain Tomato Sauce #1 from the Art of Italian Cooking  by Maria Lo Pinto, circa 1948.

book1
The Art of Italian Cooking by Maria Lo Pinto, 1948

The cookbook is great. Hardcover, spotted, penciled, appreciated – every time she opens the cover, Ms. Jeannie feels like she is communicating with a dozen different women before her.  Their notes, their stains, maybe some sweat and tears all marked there on the pages. The author, Maria, bound all these recipes together because her friends kept asking how she did that, and this and that and this, again and again.  Just like the cookbook endeavor of the women of  St. Paul’s Greek Orthodox Church, the recipes contained in the Art of Italian Cooking have been passed down in Maria’s family for generations. Tried and true Italian, at it’s best!

sauce2

This is a really simple recipe with just 7 ingredients, which include basil, another overzealous  grower in Ms. Jeannie’s garden!  The recipe called for canned tomatoes, so Ms. Jeannie actually added a little bit of extra work to the whole affair by using fresh, but really that just meant a little bit of extra time preparing the tomatoes in a hot water bath.  So you could make this recipe either way depending on the amount of time you have.

sauce3

The hot water bath is easy – you just boil a big soup pot full of water  and once it starts bubbling drop your tomatoes in the water and let them bob about for 4-5 minutes. You’ll see the skins start to wrinkle and burst.  When that happens, they are ready to come out.

While the tomatoes are bobbing about you can chop the onions and garlic.  When the the wrinkles appear, lift each tomato from the bath (Ms. Jeannie likes to use a slotted spoon so that the excess water drains) you can put the tomatoes in a strainer to let them cool off a bit. Once cool enough to touch, you just peel the loose skin from the tomato, cut off any blemishes or spots and then set the tomatoes aside in a bowl.

Next,  warm the olive oil in a saute pan, add the onions and garlic, saute for 5 minutes and then add a sprig of basil and the tomatoes and sort of mash the tomatoes up with a wooden spoon in the pan.

sauce4

Simmer the whole pot on low for 45 minutes, stirring often. Next add the sugar and salt and pepper. Simmer for another 15 minutes and then it is ready!

sauce5

This batch makes about 3 cups of sauce (maybe a little more or a little less depending on the size of your tomatoes). According to the recipe it is enough for 1 lb. of pasta.  The consistency is thick with big chunks of tomato and onion, which works well with either a small pasta (shell, bow-tie, ziti) or the traditional spaghetti or fettuccine.

At the last minute, Ms. Jeannie decided to add two tablespoons of tomato paste and a cup of water, so that she would have enough sauce for an Eggplant Parmesan recipe she is going to try in October.  After simmering for another 15 minutes, those two additions increased the yield to 4 cups of sauce.

The great thing about this recipe is that you can tweak it however you like – add olives or mushrooms, oregano or a dash of red wine. In the introduction of the book, Maria encourages any and all experimenting – as she states – all these recipes are simple foundations of Italian cuisine – you can build up from them according to your palette.

Right now, it is still too warm for a heavy baked Italian dish, so Ms. Jeannie is freezing her batch. It is always seems fun to pull out little reminders of the summer garden when you are well into another season.

The next harvest challenge that needs to be tackled is the basil. Ms. Jeannie has plans to dry some and make a batch of pesto but there will still be lots to use before it starts going to seed, so if you have any suggestions please comment below!

In the meantime, here’s the tomato sauce recipe in full…

sauce7

Salsa Semplice Di Pomodoro #1 (Plain Tomato Sauce #1)

1 large canned tomatoes (or 15-20 small to medium garden tomatoes)

4 tbs. olive oil

2 sliced onions

1/2 tsp. sugar

1 clove garlic

1 sprig basil

Salt & Pepper to taste

Fry sliced onion and garlic about 5 minutes in oil. Add basil. Strain tomatoes through sieve; add and simmer 45 minutes or until tomatoes are cooked to a thick sauce. Stir frequently; add sugar, salt and pepper, stir thoroughly. Simmer 15 minutes.

This sauce may be used on any type of macaroni or boiled rice. Sufficient for 1 pound.  Also used with pizza recipe.

Mangia, dear readers! If you are unfamiliar with that expression, it means eat, in Italian!

Tuesday In the Kitchen – The Art of Greek Cookery

Opa! It's international dinner night!
Opa! It’s international dinner night!

Today, dear readers, we are going on a wonderful culinary adventure that is taking us from Greece to Long Island, New York  to Ms. Jeannie’s kitchen in Georgia.  The subject of our adventure is a recipe from this Greek cookbook…

The Art of Greek Cookery circa 1963

The recipes in The Art of Greek Cookery were compiled in 1958, by 16 first generation Greek women who lived in Hempstead, New York and were part of the congregation of St. Paul’s Greek Orthodox Church.

St. Paul's Greek Orthodox Church, Hempstead, NYPhoto courtesy of rohlfstudio.com
St. Paul’s Greek Orthodox Church, Hempstead, NYPhoto courtesy of rohlfstudio.com

The Church, which was formed in 1944, needed to expand as their congregation grew, so the ladies of the Church formed a recipe committee, which was a segment of the church’s social organization, the Mr. & Mrs. Club (so cute!). The intention of the recipe committee was to gather traditional recipes from their homeland into a book for American cooks and then to sell the books as a fundraiser for the new building construction. In true Julia Child spirit,  these ladies got to work gathering, testing and and adapting hundreds of recipes that were representatives of their Greek culture.  This is a picture of some of the original members of the recipe club…

Photo courtesy of stpaulhempstead.org

After two and half years of laboring,  they published a simple spiral bound cookbook entitled, The Grecian Gourmet, which turned out to be a runaway success. Both the The New York Times and the New York Tribune published articles about the women and their book project, which caught the attention of people all across the country and book orders poured in.

The recipe committee was humbled and amazed that their little cookbook had become such a sensation.

“It was a book that had immense appeal for all food conscious people. For gourmets and experimental cooks of all kinds; for tourists who upon returning from Greece, wished to duplicate  in their own kitchens some of the interesting and exciting dishes they had tasted in Greece on the Grecian islands. It was a work of love and a great pleasure for all of us.” – Theodora Lourekas, Chairmen of the Recipe Committee, 1963.

The cookbook also caught the attention of New York publishing giant Doubleday and Company, who wanted to republish it under their “Art of ” cookbook series. And so the Art of Greek Cookery was born in 1963.

greek9

Containing a wealth of recipes ranging from appetizers to desserts, the cookbook also contains information on Greek wines, traditional feast days, customs, traditions, suggested menus and a lovely forward by the then pastor, Father George Papadeas. To say that he was not only proud but impressed by the hard work and determination of these women was an understatement.  Just by reading the forward, preface and introduction of this cookbook you can tell that so much love and good cheer was behind this project.

100% of the proceeds from the book sales went into the church construction fund, which provided them with more than enough money to undertake the expansion.  Both the Church and the recipe club are still going strong today!

So in true spirit, Ms. Jeannie embarked on a new cooking challenge and made one of the recipes from the book. Ideally, she would have liked to have chosen a lamb recipe, since that is so traditional, but Ms. Jeannie feels bad for the little lambs and doesn’t know of a local, ethically sourced lamb company, so she chose a chicken dish instead. It had five ingredients and was ready within an hour. And it was DELICIOUS (with a big capital D!). Here’s the recipe…

All the ingredients you will need!
The ingredients!

Chicken with Scallions (also known as Kotopoulo me Kremidakia Freska)

3-4 lb. organic chicken, cut into 6 pieces

5 tablespoons butter

Salt & Pepper to taste

1 cup hot water

6 bunches organic scallions, rinsed and ends trimmed

3 organic eggs

1 lemon, juice of

Rinse chicken pieces and pat dry with paper towels. In a Dutch oven (or you can use a large soup pot) melt the butter, add the chicken pieces and brown until golden on all sides. Sprinkle with salt and pepper. *Add hot water and scallions. Cover and cook over low-heat for one hour.

In a medium bowl, beat eggs. Incorporate lemon juice slowly into egg mixture while constantly stirring to prevent curdling. Add some broth from the pan (about 1/2 cup), again constantly stirring to prevent curdling. Stir actively for about a minute.

Remove chicken from pan and place on a plate. Add the egg mixture to the pan broth and stir constantly for another minute to avoid curdling. Add the chicken back into the pot to soak up the sauce. The heat under the pan must be on low and the sauce must not be allowed to boil. Let the chicken rest in the sauce fora few minutes before removing from heat and serving.

* Special note – Ms. Jeannie doesn’t have a Dutch oven so she used a large soup pot. After she browned the chicken and before she added the water and scallions, she de-glazed the pan with 1/4 cup of white wine just because her pot tends to burn easily. If you are using a Dutch oven you might not need to add that step at all.

.. cook2

Once Ms. Jeannie placed the chicken and sauce in a serving dish she sprinkled it with some chives from her garden. This of course is optional. She served the chicken with a simple homegrown tomato basil salad which was marinated in olive oil and garlic for an hour, a crusty baguette and a glass of sauvignon blanc. Enjoying an authentic Greek dinner outside on the patio with Mr. Jeannie Ology made Ms. Jeannie feel like she was on a little vacation!

cook3

It is armchair traveling at its best and most delicious! Cheers or Opa (as they like to say in Greece)!