
It’s unusual for things to stick around New York City. In a place that’s constantly moving, constantly changing, constantly striving to be the best and the boldest, it is understandable that the pressure is great. The city, at most, is a complicated love affair offering you treasures in the form of new favorites…restaurants, boutiques, coffee houses, galleries, apartments, friends, jobs… you lose your heart, you fall in love, you grow to need them and then one day they are gone. It’s life lived bittersweet, but in an environment that constantly strives to out do itself, it’s to be expected. To Ms. Jeannie, that’s what makes the city wonderful. It’s addictive and adventurous and mysterious. It’s here one minute and gone the next. But every once in awhile you get lucky, the city gods smile upon you, and one of your favorites winds up sticking around for many, many years and many more beyond that.
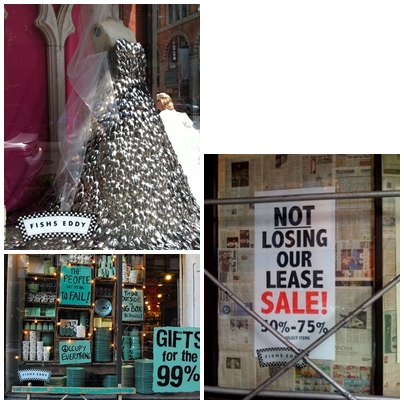
Such is the case with the whimsical vintage china and kitchen shop, Fishs Eddy, located at Broadway and 19th street. First opened in the mid-1980’s by Julie and her husband, Dave, Ms. Jeannie first discovered it thanks to her brother, who had purchased a vintage Howard Johnson’s creamer there, and then went about telling all of New York how wonderful of a place it was. Like her brother, Ms. Jeannie was smitten right away. Having just moved back to the city, from Seattle, it reminded her a bit of the market stalls in Pike Place, where everything was a feast for your eyes in that simple, unearthed presentation way that spoke a straightforward this-is-what-I-offer language. It also reminded her a bit of the one day sample sales, she had just started frequenting with her girlfriends. These were sort of “secret” sample sales where you had to be on “the list” and show up to a hush-hush location where designers opened trunks of clothes in near empty buildings and let you rummage through one of a kind fashions that were just retired from the runway or design studio. Of course these were deeply discounted clothes in waif sizes but you couldn’t help but feel like an adventurer among all those fabrics and that you being offered something rare and unusual.
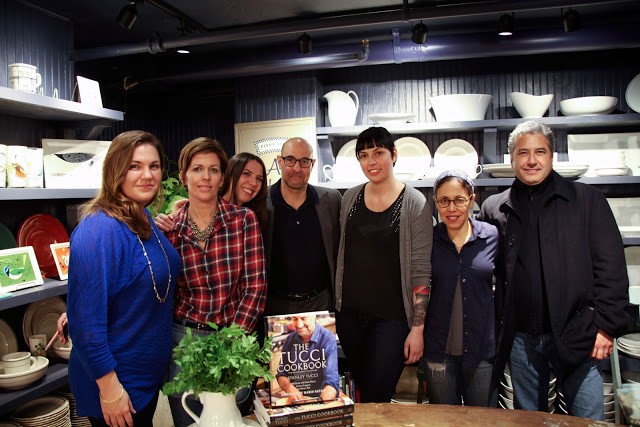
So how does one such store manage to make it in one of the toughest cities in the world for more than 25 years? Clearly it’s good business practices, but also there’s more to it then just operating the nuts and bolts of every day. Ms. Jeannie caught up with Julie to discuss all aspects of selling china in New York City. Here’s what she had to say…

Julie: After college I moved in on west 15th street. Dave was working at his cousin’s shop called the Wooden Indian. It was this quirky little store at the end of the block, they sold restaurant glassware and some dishes, along with a lot of peculiar stuff. It was a fixture in the West Village and a lot of cool artists and locals shopped there. Dave was working behind the counter, and well, the rest is history. I had graduated from Syracuse University and knew a little about Syracuse China-a major American manufacture of restaurant ware located near the campus. Dave knew a lot about restaurant dishes and glasses. He also knew how to run a shop. So he left his job and we opened our own store. The more we went out searching for dishes and glasses, the more we learned about these incredible factories and the manufacturing process and the wonderful people behind it.

MJ: How did the Fishs Eddy concept come about to begin with? If I understand correctly, Fishs Eddy started with your barn discovery of old restaurant ware back in the 1980’s. Did you know that you were specifically looking for dishes that day or did it just happen to work out that way? If you had stumbled upon a barn full of old lamps do you think you would have then been in the vintage lamp/lighting business?!

MJ: When you opened up shop in 1986, did you find that people got the mix and match concept right away or did you have to educate them about all the whimsical possibilities?


MJ: I was first introduced to Fishs Eddy through my brother who had bought a vintage Howard Johnson’s creamer from you guys. That was was 20 years ago and I still think about that creamer! Is there one item like that from the early days that brings back a sense of nostalgia for you?
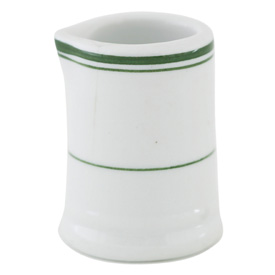
J: Hmmmm that’s a hard question because there are so many. The one pattern that I get very nostalgic for are these fantastic little cups made for the La Fonda Del Sol restaurant in the city. They were designed by Alexander Girard and had a fabulous design that was so 50’s and strikingly modern. The best part is that we’re working with the Girard family and bringing those dishes back! I still can’t get over that we’re producing a pattern that we found sitting in a basement 25 years ago, and who knows how long they were sitting there before we rescued them!

MJ: One of the most fun things about visiting Fishs Eddy is your store displays – with the old crates and big bins of bits and pieces, it makes everything feel like a constant discovery. Like we’ve unearthed a treasure that you might not even know you had. That’s great design! How do you come up with your display concepts?


J: I tell our visual people that if it looks as though they spent any time at all thinking and strategizing about how a display looks, then the display is going in the wrong direction. We aren’t decorative and we aren’t “fluffy.” Every fixture in the store has a purpose, opposed to other stores that put random and useless props out to set a mood. Our dishes and glasses are what sets the mood and I think that kind of straight forward merchandising gives customers a lot of credit. People are very creative if you give them a chance.
MJ: Design-wise, who or what inspires you?
J; Without a doubt, Todd Oldham! We approached Todd a few years ago thinking this guy is never going to call us back…but he did! Todd is truly a talented and brilliant designer, watching him in action is awe-inspiring. We’ll be talking about how to lay out a graphic or something like that, and Todd will just see something that is totally unexpected, but it’s always right!

But what inspires me even more is that Todd is most unpretentious, giving and wonderful person ever! His partner Tony is the same way. Todd overseas the Charley Harper estate and could have given that design to anyone for dishware. God knows a lot of people would have killed for it. But he trusted this small business to do the best quality. He doesn’t make decisions based on how much money he could make. I‘m inspired by Todd as a designer, and just as much for the person that he is. How many people can you say that about?

MJ: What is the most exciting item you ever discovered on your buying sprees and where was it from?
Side note: To see a fun quick little video of all the “hidden” doors, vaults and prohibition- era trickery inside the 21 Club click here.


MJ: After 25 years in the business, do you think you have seen it all when it comes to china patterns? Is there a holy grail of patterns that you are anticipating?
J: One of my favorite stories is when a customer took a photograph of the Fishs Eddy sign on the highway on route 17. They sent the photo to us and said “did you know they name a town after your store?” That town was founded about three hundred years before we were!


MJ: I absolutely love antique ironstone pottery and get so excited when I come across a piece. The older, more aged and imperfect looking the better – if it has a crack or a chip it is absolutely perfect! What sort of pieces or brands get you so excited like this?
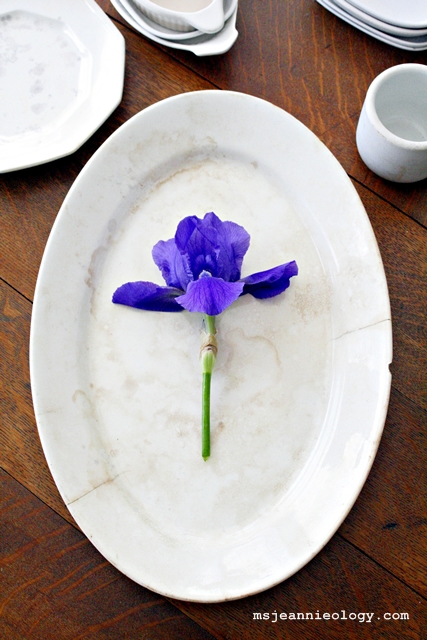
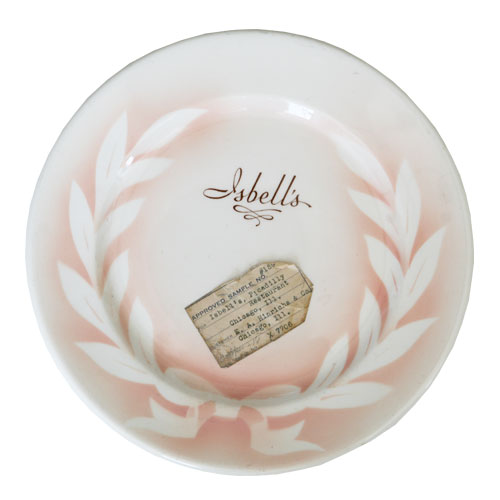
J: I love any dishes that have the original guideline markings under the glaze. There was this guy named Ray who worked forever at Shenango China factory and he signed off on all the sample plates. So we have lots of these plates with Ray’s signature. He even doodled on some of them!


MJ: What is your most favorite piece, or collection, in the shop right now?

MJ: Is it ever nerve-wracking to be around so many fragile things?
J: We’ve broken some pieces of our collection that, after the damage, I just have to go and hide under a rock for a few hours -but at the end of the day, they are dishes.


J: We do get a lot of celebrities. The one person I might have frozen in star “struckenness” is Bill Clinton, who came in a few months ago while I was out to lunch, of course.
MJ: If you could sit down to luncheon with anyone famous, alive or dead, who would you chose? And what would your place settings look like?
J: Gloria Steinem is one person. I sat a few rows behind her once when I went to Carnegie Hall with my father. I only watched her for the entire concert. Anyone who speaks up for gender equality is someone I want to have lunch with. And then there’s Hank Williams because I love county music. I know, I’m a big walking conflict of interest because it’s not like county music preaches gender equality.

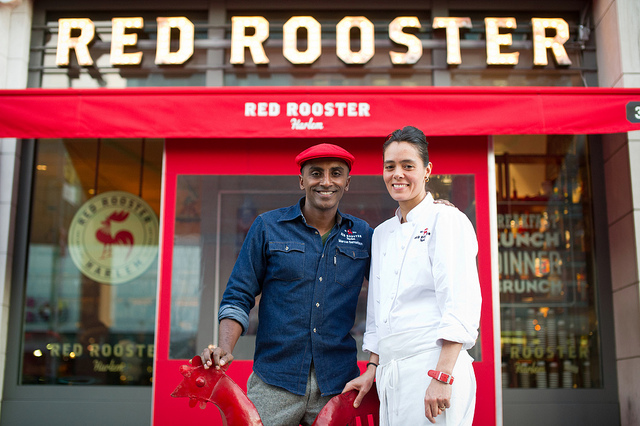
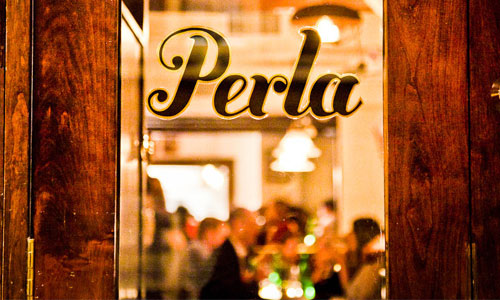
J: Marcus Samelsons Red Rooster, Joseph Leonard, Perla, Prune, Maialino, La Bernadine….too many to name!


MJ: If one of our readers was visiting NYC for the first time and you were their tour guide, what five places would you take them and why?

Share this:

Wineward Bound: Travel South to Chateau Elan Winery
Ms. Jeannie’s friend was visiting from the West Coast a few weeks ago, and over dinner one night he was remarking on a wonderful trip, he and his fiancee had taken to Napa Valley. Of course they stopped at a bevy of wineries to learn and sample and the whole experience really opened him up to the wide world of wine palates. So Ms. Jeannie thought it would be fun, now that he was a wine connoisseur of sorts, to take him on a little southern road trip to Braselton, Georgia, the location of the state’s most noteable vineyard, Chateau Elan.

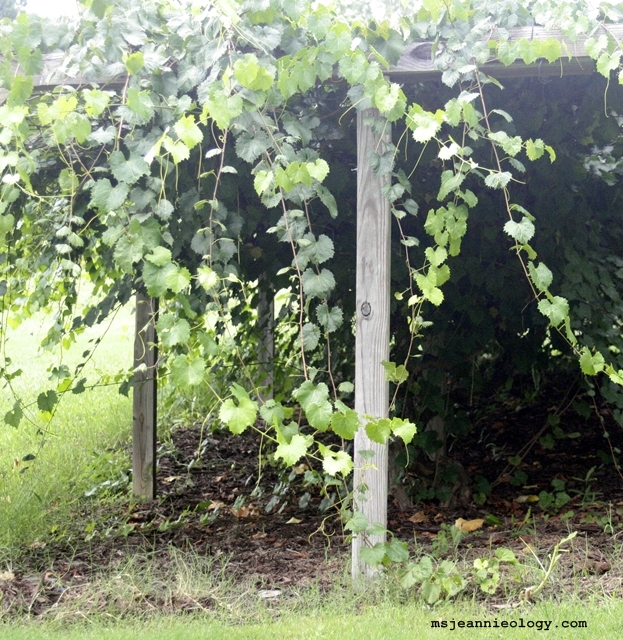
Wine in Georgia, you say? How could that be, Ms. Jeannie? Well, my dears, Georgia has actually been growing two unique types of grapes since the 1500’s – the scuppernong and the muscadine grape. It is not uncommon to see little vineyards of two or three rows in people’s yards all over the south. Ms. Jeannie, herself has two rows of 35 foot vines herself. Here’s some pictures…
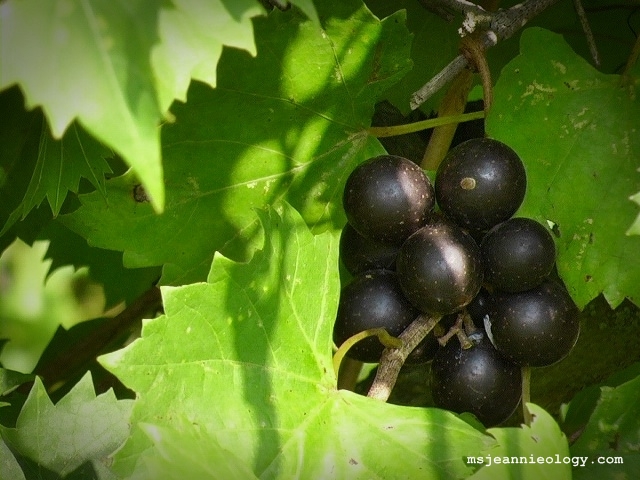

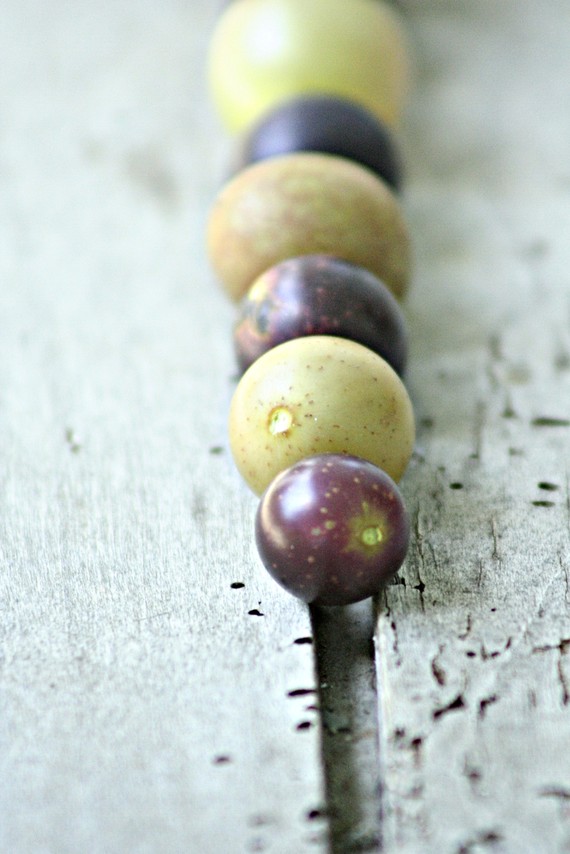
Larger then your traditional grape, muscadines (red) and scuppernongs (golden) are just slightly smaller then the size of a golf ball. You can see in this picture some some sizing perspective…
Both muscadines and scuppernongs have a thick, tart outer skin and a sweet, juicy center that is similar to a plum, yet with a touch more tang. Most people bite and then suck out the sweet interior pulp – but Ms. Jeannie likes to eat the whole thing or cut them up in little segments like a sweet tart.
First discovered growing wild in North Carolina by Italian explorer, Giovanni de Verranzano in 1524, these two varieties of grapes grow naturally only in the Southern United States where they thrive on a short cold season and lots of humidity.

When Giovanni discovered them growing in the Cape Fear River Valley, he wrote in his trip’s log book that the “grapes were of such greatness, yet wild, as France, Spain, nor Italy hath no greater.” At the time, Giovanni was on a coastal exploration trip on behalf of the French King, Francis I. Ms. Jeannie wonders what this french King must have thought of the their-bigger-than-yours statement when Giovanni went to report his trip findings!
On a side note, unfortunately, in the end things didn’t fair so well for Giovanni, who on his third trip to the coastal US, was killed (and some sources say eaten) by local natives in 1528. Goodness gracious – it is not a very sweet ending to the story of a man who discovered such a sweet fruit.
Anyway, back to the grapes…the wine produced from muscadine/scuppernong grapes is very, very sweet, (think sweeter then a riesling) and light in body, which makes it nice (in small doses!) on those hot summer evenings, when it seems too stifling to eat anything but air. Often times, as in the case of Chateau Elan’s varieties, these local grape wines are enhanced with other local fruits like peaches, strawberries or blueberries which give it a unique flavor. This enhancement also makes for interesting culinary delights like fruit syrups drizzled over ice cream, simple soaked white cakes or jams and jellies, so scuppernongs and muscadine, as you can see, s are quite versatile when it comes to cooking as well.
Chateau Elan offers four local varieties of muscadine/scuppernong wine as well as a variety of wines imported from their California vineyard, Diablo Grande in Patterson, CA.

Ms. Jeannie went on the wine tour and tasting at Chateau Elan so that she could try both the sister wines from California as well as the local Georgia wines.
The vineyard at Chateau Elan was established in 1981 and sits on 3,500 acres. It’s about a 45 minute drive east from Atlanta in the tiny, rural town of Braselton, GA. Braselton has a little Hollywood color to it. The actress Kim Basinger, bought the entire town for $20 million in the late 1980’s with the idea of turning it into a Hollywood film set/production studio. Unfortunately, that idea never materialized. Kim ran out of money and wound up selling Braselton to a developer in the mid-1990’s. Now it is mostly known for it’s antique shopping, area golf courses and of course, the Chateau Elan Resort which in addition to a winery includes a small luxury hotel, several golf courses and a spa.
Before we look at the wines, Ms. Jeannie wanted to point out a few pretty things she noticed about the Chateau itself…

Since it was early Spring when Ms. Jeannie visited – the gardens and vineyards were just waking up – but to add a bit of color to the landscape, the flower beds surrounding the Chateau all contained a bright yellow/blue combination of pansies and guess what… flowering broccoli! Very pretty and quite an unexpected pairing! Ms. Jeannie will have to remember this for her early season gardening.

At the entrance of the Chateau is this wonderful bronze statue of a woman stomping the grapes set inside a large fountain. It’s a really pretty figure!

When Ms. Jeannie was taking pictures, crows were hanging out on the roof-line – maybe they were getting together for cocktail hour themselves!

The winery tour starts inside the Chateau in the large gift shop area. On the tour, Ms. Jeannie learned about the production side of wine-making which included, of course, how it was stored, and bottled. It was a pretty industrial process and a long way away from stomping of the grapes that the statue represented – but it was interesting none the less.
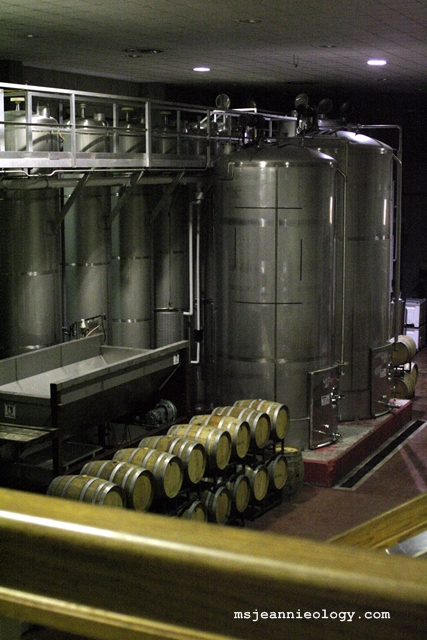
The barrels were beautiful all lined up in rows. The wine is aged in both French and American barrels…


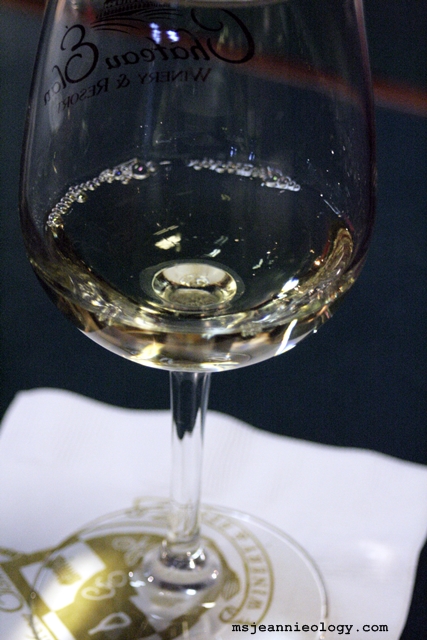
Once the tour was over it was on to the wine tasting. During the tasting, Ms. Jeannie sampled five wines, three from the California property and two from Georgia.


The first wine Ms. Jeannie tasted was the Chardonnay Reserve 2010, which she liked very much. In addition to the actual tasting part, she also learned how to sniff, swirl and suck in her breath to really appreciate the advanced flavors of the wine. This does make a big difference – to taste your wine this way. It’s nice to take some time to appreciate what you are drinking and to identify the subtle mix of flavors and aromas.
Next was the Pinot Noir. This one was lighter in color than Ms. Jeannie expected!

The next was Ms. Jeannie’s favorite of all the samples, the Scarlett 211. It was full-bodied and smelled a bit like incense. The Scarlett is a blend of Syrah and Sangiovese grapes which gives it a darker, richer color than the Pinot Noir.

The last two Ms. Jeannie tasted were the Georgia wines. The first was Summer Wine which was muscadine infused with peaches…

The second was Spring Blossom which was muscadine infused with raspberry…

Both were very sweet with residual sugar levels of 6%, ( to give you some perspective, the California wines had sugar levels of .5%). Ms. Jeannie, herself doesn’t care for such sweet wine, so she preferred the California varieties better – but she could see how these two could definitely be incorporated into a flavorful dessert.
In addition to wine, scuppernongs and muscadines also make fantastic jams. Ms. Jeannie wants to send a giant box to her sister this summer so she can experiment with some special jam recipes! She’ll keep you posted on how it all turns out.
After the wine tasting, Ms. Jeannie and her friend headed to Paddy’s Ale House, just one of the 9 dining experiences on the Chateau property.
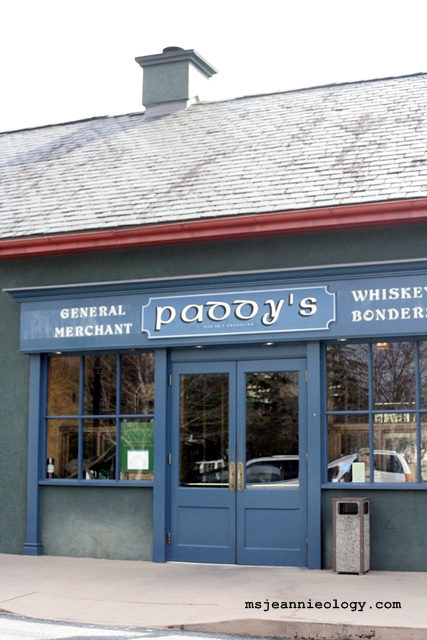
The pub was built in Ireland, then deconstructed, brought to Georgia and reassembled. It has wonderful character and has retained a true Irish spirit. So if you are not exactly a wine lover – but a beer lover instead – than this is a grand spot to while away the afternoon. They serve all the traditions – warm Guinness, Irish whiskies and their own take on traditional fare like Fish & Chips, Shepard’s Pie and Boxty. Ms. Jeannie had the Shepard’s Pie which was comprised of braised spare ribs, mixed with vegetables and baked under a layer of mashed potatoes. Delicious!
If you have visited the Chateau, Ms. Jeannie would love to hear about your experience so please comment below. If not, are there any local wineries in your neck of the woods that you enjoy? If so, please share them with us!
Share this:

Thursday in the Kitchen: Creamy Potato Soup – A Recipe from Ireland
Spring is waking up slowly here in the South. The nights are still cold but the afternoons reach into the early ’60’s on most days now. This afternoon warming makes for delicious stolen moments around the 4:00pm hour when Ms. Jeannie likes to take a cup of coffee outside with her and dream about all the potential and possibility for her garden plan this coming season.
In anticipation of all this gardening, Ms. Jeannie has been going through some of her favorite recipes so that she can figure out what she needs to grow so that she’ll have the freshest ingredients possible. One of her most favorite things to make is soup, so you’ll be sure there will be a variety of vegetables popping up!
In anticipation of such gardening delights and in anticipation of the upcoming Irish holiday, Ms. Jeannie cooked up one of her most favorite soups…potato!

This recipe came from her Irish Isles cookbook, which was a birthday gift this past summer from her dad.
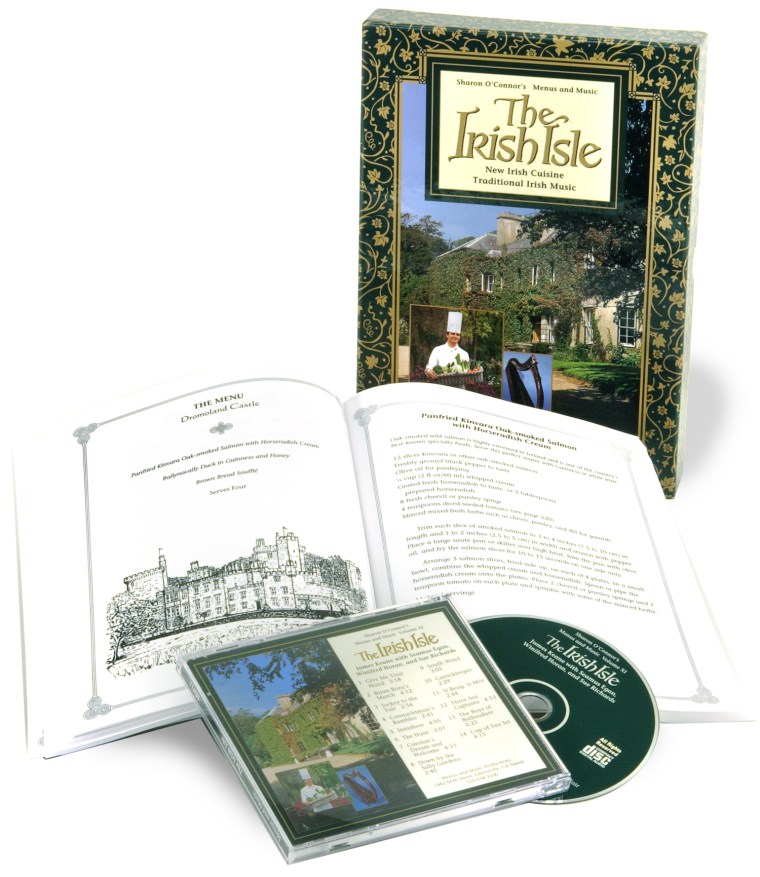
Not only was it a gift of recipes – but it also came with a cd of classical Irish music, which made for a well-rounded cooking experience!
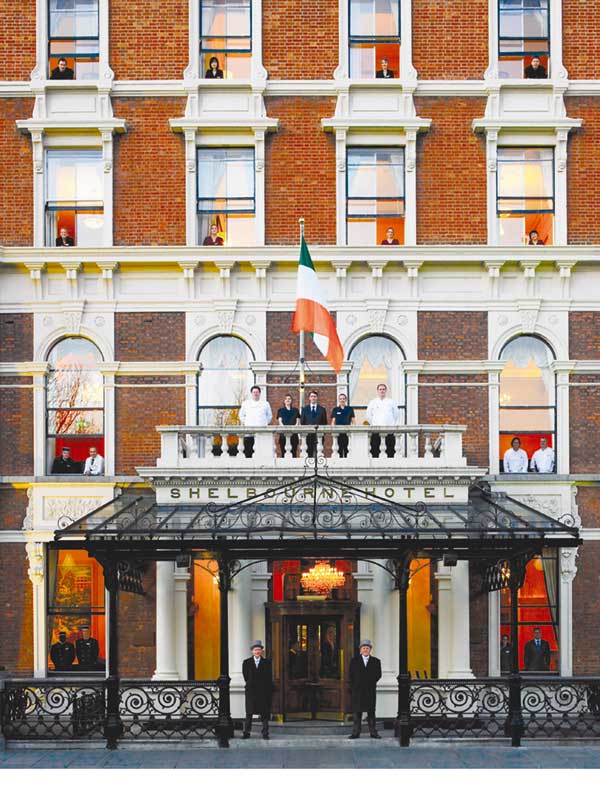
This was a very sentimental gift for Ms. Jeannie. Many years ago, she took a father daughter trip to Ireland and together, they explored the Southern countryside for 10 days. They stayed at 3 different hotels and visited about half a dozen cities and towns. There were sheep (so many!), crazy drivers, the perilous N7 , endless Frank Sinatra on the radio, fabulous museums, trips to the lace-makers, dinners in castles, driving tours of coastal fishing villages, a wet and wild tour of the Cliffs of Moher, lunches in pubs and a million miles of laughter in-between. It was a fantastic trip – one of Ms. Jeannie’s most favorite of all her travel adventures.
This cookbook is a compilation of recipes from the country hotels and manor houses all over Ireland. There are even some recipes from the places where Ms. Jeannie and her dad stayed!
The Leek and Potato Soup Recipe that Ms. Jeannie just made comes from Newport House in County Mayo.
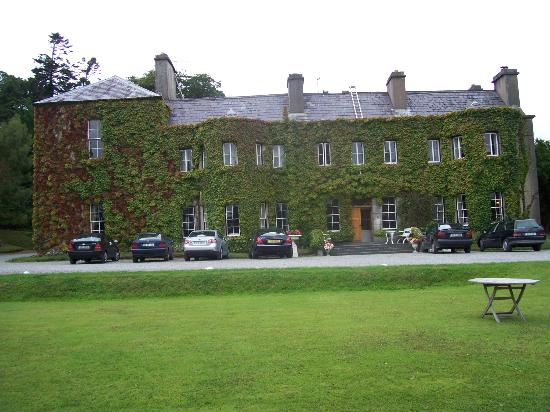
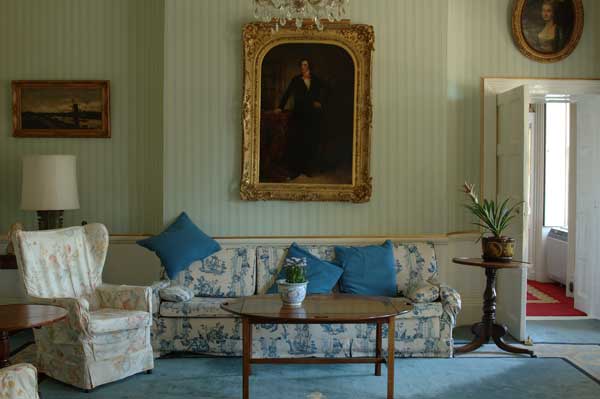
Built in the 1700’s, the country estate is now part of the Relais & Chateaux distinguished hotel group. It is a small, luxury country inn known most for its location overlooking the Newport River and its salmon and sea trout fishing, both in the river and in nearby waterways. The current owners, who were originally guests at the hotel, so fell in love with their accommodations they bought the hotel in the mid-1980’s to ensure that they would always have a fishing retreat to “come home to.” Imagine that! Going on vacation and purchasing your vacation destination because you loved it that much! Ms. Jeannie can totally understand – Ireland is magical like that:)
Here are some interior photos. The owners have decorated the hotel in a variety of antiques including Regency style mirrors. It looks like it has a lot of character!


It’s no wonder that soup is on the menu at Newport House. After a cool day of fishing on the water, Ms. Jeannie bets that a cup of hot potato soup is just what you’d want to have! She was delighted to see that it is still on the menu in the hotel’s dining room!

Ms. Jeannie modified the recipe just a tad to incorporate items she already had on hand, which included a few bunches of fresh spinach tossed in at the very end.
Here’s the recipe, with Ms. Jeannie’s substitutions in parentheses…
Leek and Potato Soup – Serves 4
4 tablespoons butter (Ms. Jeannie used 2 tablespoons olive oil and 2 tablespoons butter)
1 1/4 lbs. leeks, cleaned and sliced
1 cup onion, chopped
3/4 cup celery, chopped
4 cups homemade chicken broth
8 to 10 oz. potatoes, peeled and chopped (Ms. Jeannie used 2 large russet baking potatoes)
1 spring fresh thyme, leaves pulled
1 fresh sage leaf, whole
Salt & pepper to taste
1/2 cup heavy whipping cream (Ms. Jeannie used 1/2 cup of 2% milk)
2 large handful bunches of fresh spinach
1. In a large saucepan melt butter (and oil, if using Ms. Jeannie’s version) over medium low heat. Add leeks, onion and celery and saute until onions are translucent but not browned (about 5-7 minutes).
2. Add the chicken broth, potatoes, thyme and sage. Simmer for 20 minutes until potatoes are tender.
3. Transfer to a blender and puree. Return soup to original cooking pot, add cream (or milk) and salt and pepper. Fold in spinach and cook over low heat for 5 more minutes before serving.
Ms. Jeannie served her soup with a multi-grain baguette which was good for dipping! And, despite having only a 1/2 cup of cream (or milk in Ms. Jeannie’s case) this is an incredibly creamy soup once it is pureed. And it is quick to make with few ingredients! Thank you Ireland for making dinner simple and delicious!!!
Over the next couple of weeks, leading up to St. Patrick’s Day (Mr. Jeannie Ology’s heritage day!), Ms. Jeannie will be trying the recipes in the cookbook from the hotels and country houses she and her dad stayed in on their vacation. These are sneak peeks of three of them…


Until next time…Slainte, dear readers! Which means cheers in Irish:)
Share this:

Figs For All! How to Grow A Fig Tree In Your Garden

In preparation for some spring gardening projects, our dear blog reader, Amy, sent in a gardening question about fig trees and whether or not she would be able to grow them from cuttings in her neighborhood, which happens to be arid Arizona.
Instantly, Ms. Jeannie thought sure, why not grow them in Arizona since figs first originated thousands of years ago in Arabia. But she wasn’t sure about the cutting department, so she did a little investigation on Amy’s behalf.
Lucky for us, Ms. Jeannie learned that since they are one of the oldest fruit trees in the world, they have now been adapted and modified to grow in just about any climate. Which is good news for all fig lovers! So first order of business is to determine which type of fig tree that will grow best in your neck of the woods…please consult this list.
Next, once you’ve found the right variety, you can visit your local nursery or garden store and either buy a small fig tree that has already been started or you can order a cutting online and start your own. Ms. Jeannie found this great video on youtube from the NewEnglandGardener which takes you step by step through the cutting process…
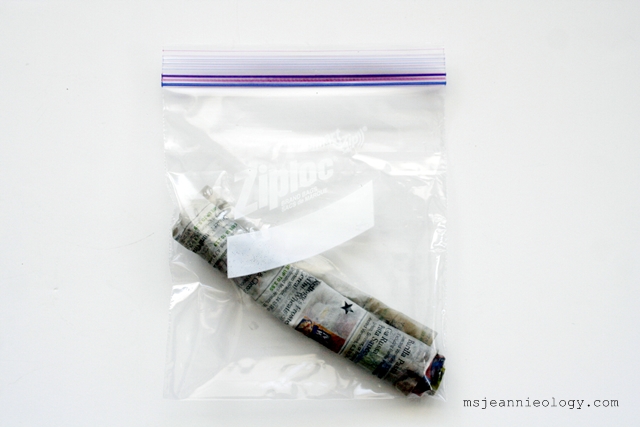
Ms. Jeannie was so inspired by the video – she decided to try her own clipping project, following the NewEnglandGardeners helpful guide. Here is what Ms. Jeannie used…

She clipped a section that had a green sprout already (in hopes that it will encourage more!)

Here’s the finished product. Now we wait for a few weeks and see what happens. Ms. Jeannie is going to keep the bag in her kitchen stairwell, which seems to collect all the heat in the house.
Please keep in mind, as noted in the video – growing trees does not happen over night. It will take a few years to get your cutting tree well established. However – they are fairly fast growers, so you’ll see changes over the course of months instead of years, like some other trees.
This is what the fig trees in Ms. Jeannie’s yard look like now, in the middle of winter (aka the dormant season, as the NewEnglandGardener refers to in the video)
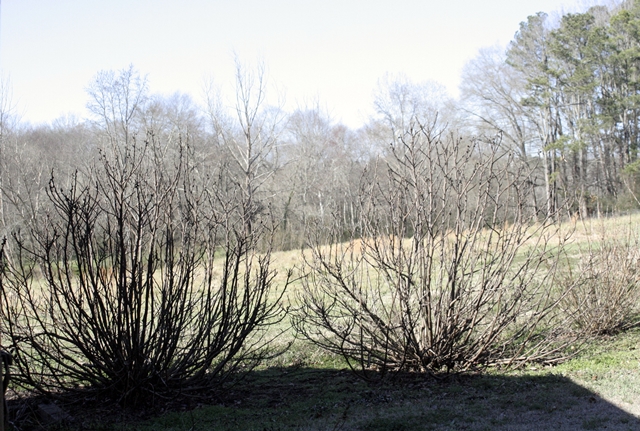
If you look closely, you can see they already have buds emerging even though it is only January. This is a perfect stage now, to take a clipping.

Isn’t it amazing that this little sprout will grow from a tiny little wonder into this, in only about 3 short months…
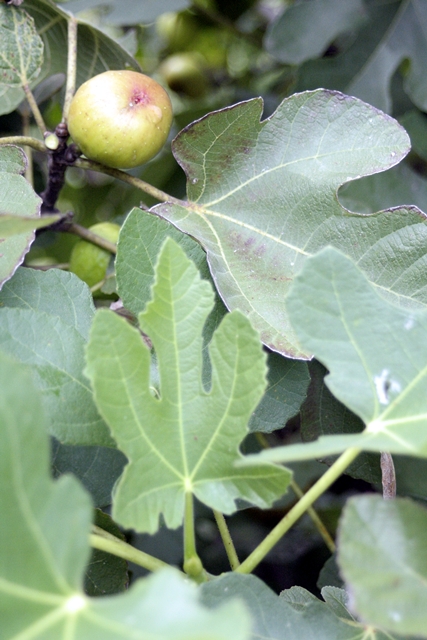
The fig trees in Ms. Jeannie’s yard are over 12 years old and reach about 10′ feet high x 8′ feet wide. They’ve been pruned every once in awhile but otherwise, are incredibly low-maintenance. You may recall, last summer, the two fig bushes in Ms. Jeannie’s yard had a banner production season. There must have been hundreds of figs that plumped up from July thru September.
Mostly she passed buckets along to her friends, ate a few cups each day and froze gallon bagfuls for a jam lesson that never quite came into fruition. No problem though, as of late, Ms. Jeannie has been enjoying the frozen figs in her morning yogurt shake. Why add ice cubes when you can add some frozen figs instead?!
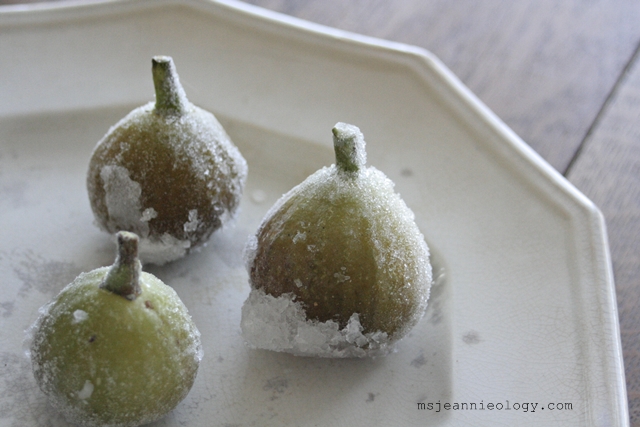
Ms. Jeannie tosses these little frozen delights right into the blender, straight out of the freezer in this state. They make the shake cold and add extra vitamins to the start of her day. Figs are high in vitamin K (good for blood clotting), vitamin E (protection from cell damage) and vitamin B6 (good for the nervous system, the breaking down of glucose and for cell energy).
They also contain the minerals manganese (good for your bones) and potassium (good for your blood pressure) and are also really high in dietary fiber. A delicious superfood! This is Ms. Jeannie’s recipe for her morning shake, if you are so inclined to try it…
Yogurt Fruit Shake
Makes two 8oz. glasses
1/2 cup organic 2% milk
6 whole frozen figs
1 banana (broken into 4 sections)
1 cup fat free vanilla yogurt
1 quarter fresh cantaloupe (rind removed and roughly chopped)
Add all ingredients in the blender and pulse on low until all the figs break down into pieces (about 30 seconds). Then put the blender on crush and let it mix for about a minute, which blends all the fruit and incorporates air to make it light and fluffy. If the shakes seems too thick, you can add more milk. Otherwise pour and enjoy! You can also add different types of fruit if you like. This is a really basic recipe and can be modified eighty million different ways!
Ms. Jeannie hopes this mini fig lesson will blossom into something wonderful for Amy and anyone one else with figgy aspirations. If you decide to start a fig tree from a clipping, keep us posted on how your progress goes. Ms. Jeannie in turn, will keep you updated on hers as well. Happy growing!!!
Share this:

From Our Readers: Scones, Wedding China and Homemade Jam
The other day when Ms. Jeannie went over the year in review, she mentioned making a batch of cinnamon-nutmeg scones. If you don’t recall, here is what they looked like:

Blog reader, Amy, wrote in to request the recipe agreeing that such a simple treat would be the perfect partner to mull over one’s thoughts with. This recipe is an easy one and made even better by adding home made jam on top.

Ms. Jeannie’s sister, Marianne, makes AMAZING jams and jellies. Those pictured above are the latest batch she just sent. It is a happy day whenever a box of goodies arrives from her. Mr. Jeannie Ology can hardly contain himself while the box gets unwrapped. This gift box included: Blackberry, Raspberry, Orange Cranberry and Italian Plum jams (Italian plum not pictured – because it’s already been devoured!).
Each jar holds a magnificent concoction of flavors – this one is cranberry orange.

Marianne picks all the fruit herself, in the Seattle summer months (aka the non-rainy season!), and then gets to work canning away. She also makes her own labels – so cute! She was a true Martha Stewart way before anybody knew about the actual Martha.

She’s actually really crafty in all the creative areas. When Ms. Jeannie’s other sister, Christine, got married in 2010, Ms. Jeannie and Marianne put together all the floral arrangements and wedding bouquets.

Their work space for the bouquet assembly was the hotel room floor the morning of the wedding. It was festive and fun to see a floor full of flowers. The arrangements came together with ribbon and laughter. It was frantic but in a good way and left such an edible memory – one of her favorites of the entire wedding weekend.

So, as you can see Marianne’s creativity knows no limits. From jam to floral arrangements – she’s a one woman wonder.
Back to those scones… Ms. Jeannie recommends, that once you remove them from the oven, you should add a healthy dose of butter and jam on top of each scone while they are still warm. Hopefully you are lucky, like Ms. Jeannie and have an excellent jam source too.
Nutmeg-Scented Scones
Makes eight triangle shaped scones.
- 2 cups all purpose flour
- 1/3 cup golden brown sugar
- 2 teaspoons baking powder
- 1 1/4 teaspoons freshly grated whole nutmeg or ground nutmeg
- 3/4 teaspoons cinnamon
- 1/2 teaspoon baking soda
- 1/2 teaspoon salt
- 6 tablespoons (3/4 stick) chilled unsalted butter, cut into 1/2-inch cubes
- 1 cup sour cream
- 1 egg white, beaten to blend with 2 teaspoons water (for glaze)
- 2 teaspoons sugar
Preheat oven to 425°F. Combine flour, brown sugar, baking powder, 1 teaspoon nutmeg, baking soda, cinnamon and salt in processor; blend 10 seconds. Using on/off turns, cut in butter until mixture resembles coarse meal. Add sour cream. Using on/off turns, blend until moist clumps form. Turn dough out onto floured work surface. Knead 4 turns to form ball. Flatten dough to about 3/4 inch thick circle. Cut into 8 wedges. Brush with egg-white glaze; sprinkle with 2 teaspoons sugar and 1/4 teaspoon nutmeg. Transfer to baking sheet, spacing 2 inches apart.
Bake scones until tops are golden brown and tester inserted into center comes out clean, about 20 minutes. Transfer scones to rack and cool slightly.
Recently, RoseMary from Shasta Lake Shop on Etsy, also wrote in about the Royal Jackson china (pictured with the scone). This is what she had to say:
“FYI The Autumn pattern was discontinued in the early 1950s. I was married in 1952 and chose it as my fine china pattern. I was devastated when in about 1953 I received a call that the pattern was being discontinued. I had just a few pieces, probably a service for 6. Replacement services were unknown at that time. It wasn’t until 50 years later that I found someone on ebay who had many of the pieces. I bought everything he had. Now I can set a table for 20+ people with all the extra serving pieces. Homer Laughlin also made a matching pattern in semi-vitreous china. Don’t know what its called or much about it but bought a set to help fill out my pattern for a while.” – RoseMary, The Shasta Lake Shop
Ms. Jeannie loves hearing stories like these! She tried to do a quick search for the Homer Laughlin pattern that RoseMary mentioned but she couldn’t come up with anything yet. If you know what the pattern name is, please write in! This china is so pretty – Ms. Jeannie couldn’t imagine having an entire set. RoseMary is one lucky lady!

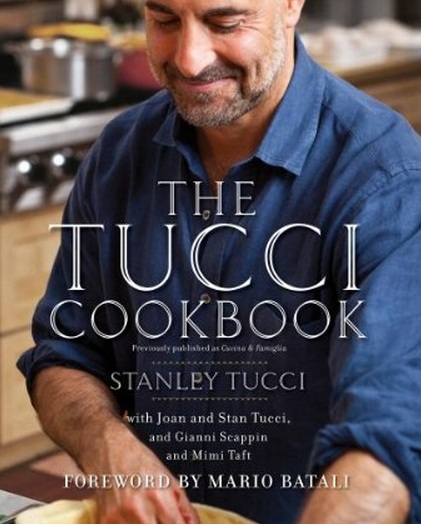
When Ms. Jeannie got married she didn’t register for one specific china pattern. Instead she registered at Fishs Eddy, which is a vintage/contemporary china store in New York City.

They sell a mix-match of vintage and antique dishes mostly from old hotels and restaurants, and then they offer some unique new patterns from designers like Cynthia Rowley too. Basically every time you visit – it’s a new experience.
So Ms. Jeannie registered for a color scheme (blue and white at the time!), which meant any piece of china that fell under those two colors was a gift in the making. Some people thought Ms. Jeannie was brave for being so whimsical in giving guests the “pick whatever you like” experience – but Ms. Jeannie thought of it as an adventure. Besides – there was nothing at Fishs Eddy that she didn’t like – so how could anyone go wrong? As long as it was blue and white – it was perfect!
And as it turned out, each piece that someone chose as a wedding gift, carried with it a little bit of personality from the gift giver. So it became a great memory stacked on top of another great memory. This is the kind of stuff Ms. Jeannie loves most about china. It’s not only the beauty of the actual piece – it’s the beauty of the memory that it represents too.
A big thank you for sharing your thoughts, dear readers! Ms. Jeannie looks forward to more conversations. Until then, happy reading (and writing!).
Share this:

What Ms. Jeannie Did on Her Christmas Vacation
Remember when you were in grade school and you had to write a paper or a theme, as it as called in catholic school, about what did over your holiday break? Well for some reason, this sort of reminiscence has always stuck with Ms. Jeannie, and she finds herself mentally recapping after every holiday and every vacation. So to continue the tradition…
What did Ms. Jeannie do during her Christmas vacation?
She learned how to sew!

Thanks to her wonderful friend, Wendy, Ms. Jeannie got a crash course on Christmas Day that included all the sewing basics, while Mr. Jeannie Ology and Mr. Wendy cooked a magnificent turkey dinner. Yes, dear readers, the ladies sewed and the men cooked and then they all came together to feast! It was a splendid holiday, indeed.
Wendy taught Ms. Jeannie a pattern that she picked up in a British sewing book. With a few slight modifications, Wendy taught Ms. Jeannie all the sewing basics at once.
They started with converting centimeters to inches and then cutting the cloth with those fun little triangle edged scissors. Next it was off to the sewing machine to learn how to thread the sewer and work the pedal. Boy those first stitches were thrilling! The tricky part was trying to keep the fabric straight.

As you know from previous posts, Ms. Jeannie comes from a long line of sewers, and she thinks inherently, that she will one day make a great one herself. Two hours in, she was already starting to feel like a pro! When she attached the pockets she felt like she had built the Taj Mahal of aprons…

And then something scary happened. Wendy left the room. But wait, there was still more to do. The pockets had to be re-enforced and the apron ties had to be made, both of which Wendy had described in detail how to do but we had yet to practice.
“It’s sink or swim time,” she said as she left.
With nervous notions, Ms. Jeannie tried to remember all that she had learned. Keep it straight, keep it steady, don’t bunch and go slow. She tapped the pedal, she fed the fabric, and wouldn’t you know that sewer did exactly what ms. Jeannie intended. Her first triangle stitch was created in an instant!

Ms. Jeannie just about cried with joy. A feeling of pure excitement and accomplishment on just about the same level as when she first learned how to write her name, read a book, ride a bicycle and drive a car. A little wobbly to start, but Ms. Jeannie felt like she just opened the door to a whole new world of possibilities.
The ties came next – a piece of cake!

And there you have it! A five hour craft project involving fabric and thread, a machine and an iron, all to yield a useful household item. Ms. Jeannie is in love with her new found skills!
So much so that she is noticing and admiring all sorts of sewing handiwork about the house now… the duvet cover, the the lines of her new dress, the pleats in the couch pillows. Endlessly fascinating, they all are.
And of course Ms. Jeannie is eyeing all sorts of apron styles – now that she’s got this one under her belt, or tie, if you prefer. Here are some of her favorites on Etsy… (click on each photo for more information)


And with Mr. Jeannie Ology in mind…


Yes indeed – this is a whole new world and Ms. Jeannie has big plans! Summer skirts, throws, pillows, bed blankets, dresses and definitely more aprons!
On a side note:
January marks the one year anniversary of Ms. Jeannie’s Etsy shop and in celebration she is having a 24% off sale! Why 24%, you ask? Well it all started back on January 24th, 2012. Clearly that 24 is a good number! Use coupon code HAPPY2013 to receive your discount upon checkout.
As we get closer to the big day, Ms. Jeannie will be doing a little past year re-cap so stay tuned. In the meantime, stop by and have a peak at some of her new listings…

Share this:

Carrots at Christmas? It’s Wednesday in the Kitchen: Parmesan Carrot Risotto
If you have been a part of Ms. Jeannie’s blog since the summer, you’ll know that Ms. Jeannie enjoys the fun of gardening (minus April’s poison ivy outbreak, of course!). Her small summer crops were full of crunchy cherry tomatoes, crispy green peppers, snappy garden peas, buckets of sunflowers and more jalapenos then Mr. Jeannie Ology knew what to do with!
After she had harvested all her plantings and tilled her garden back down to the soil again, Ms. Jeannie half-heartedly decided to plant a fall garden in a neighboring patch that was overwhelmed with weeds. She says half-heartedly, because after the zealousness with which she approached her summer garden, (designing her own patch, layout and fencing) Ms. Jeannie felt sort of confined working in the perimeters of this already established bed. It was a funny shape too. Sort of like a squashed trapezoid or a flattened kidney bean, and was flanked on both ends by azalea bushes. But it did back up to garden fencing (ideal for fall peas!) and had a pretty brick border, so…
She carried on anyway and planted two rows of peas, several rows of alternating onions and carrots and a border of zinnias. She was using old seeds, some over five years old as an experiment of sorts to see if they would actually still grow.
The weeds returned almost instantly. Some of the seedlings started to sprout. Fire ants began to picket. Apparently, being fond of the neighborhood, they were not keen on Ms. Jeannie’s idea to relocate their home. And then there were the mosquitoes – so big and so bold, Ms. Jeannie began to think she, herself, was their only source of sustenance.
For weeks Ms. Jeannie battled nature. But, as it turns out 5 year old seeds in combination with weeds, fire ants and mosquitoes does not make for a garden great. The peas bloomed then promptly withered, the onion shoots sent up green antennas from the ground, surveyed the location and then disappeared – never to be seen again. And the zinnias nevr even showed up at all. Ms. Jeannie was depressed. Halfhearted gardening was no fun. No fun at all.
But there was one bright spot among all this sad state of affairs. The carrots! Dear readers, the carrots…the carrots gave it their all! They sprouted, they grew long lacy foliage, they hummed happily. All autumn. Growing, growing, growing in the ground undisturbed. Like a bad mother, Ms. Jeannie paid them absolutely no attention. She didn’t water them, she didn’t weed around them or cover them on frosty nights, she didn’t even visit them on a weekly basis. Frankly, my dears, she just sort of forgot about them.
Until yesterday. When a faint memory tickled her mind. A long lost thought…plantings in the fall…carrots for Thanksgiving dinner (Ms. Jeannie’s original idea for the garden in the first place)… vegetables throughout the winter. Dreamy eyed, Ms. Jeannie wondered what might have become of those carrot seeds from so long ago…
So with shovel in hand, she headed out to the garden to investigate. Expectations were low – incredibly low. After all they’d been in the ground for 5 months. There had been many, many handfuls of cold 30 degree weather. There had been times of drought and times of flooding. And there had been that issue of lackluster attention.
But alas! The carrots didn’t care! No worries, they shouted. The green lacy sprouts greeted her like a long lost friend. They practically sang to her as she pulled them, one by one out the ground. Here’s a picture of the chorus…
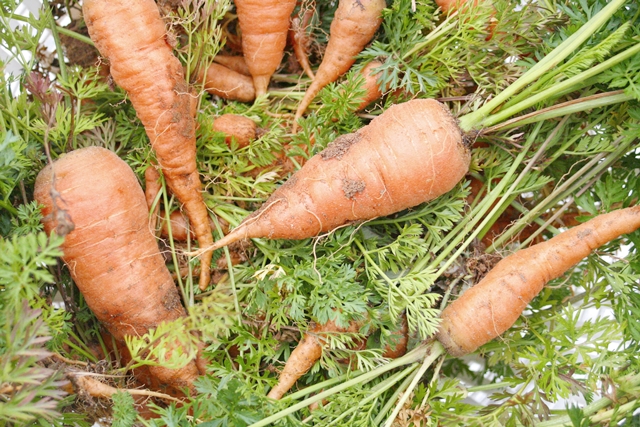
Full fledged carrots! Maybe a bit on the small side, some, but with such low expectations, Ms. Jeannie was practically overjoyed with the perfection of them all:) Such beauties they seemed!
Who would have thought you could enjoy such pretty vegetables in December? And with absolutely zero effort. Carrots may just very well be Ms. Jeannie’s new favorite vegetable.

This event called for celebration, so Ms. Jeannie found herself in the kitchen last night making a parmesan and carrot risotto. It was a chilly night – in the mid 30’s – and this was a warm, filling dinner full of autumn sunshine (thank you carrots!).
A lot of people shy away from making risotto because they think it is tedious or complicated, but really it couldn’t be a more simple recipe. The often thought tedious part just means you have to stay by the stove for about 20 minutes and stir frequently so the rice doesn’t stick. If you haven’t ever tried risotto, it is an Italian style rice based dish, that is filling like pasta and can be cooked a million different ways but always includes 3 ingredients: parmesean cheese, white wine and chicken broth.
Ms. Jeannie always likes to use homemade chicken broth but you could used canned or carton broth as a substitute too.
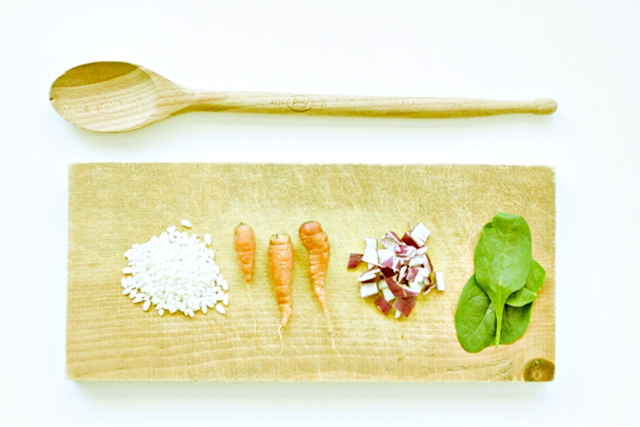
Here’s the recipe, which was adapted from a Martha Stewart recipe that had called for long grain rice in place of risotto. This is a picture of Ms. Jeannie’s finished product with a serving suggestion (see bottom of recipe for details).
Parmesan Carrot Risotto (serves 4)
Ingredients
- 3 1/2 cups homemade chicken broth
- 2 tablespoons butter
- 1 medium red onion, finely chopped
- 6 medium carrots, grated
- Coarse salt and ground pepper
- 1 1/4 cups arborrio rice
- 1/2 cup dry white wine
- 1/4 cup grated Parmesan
Directions
- In a saucepan, bring broth and 2 cups water to a bare simmer over medium.
- In a large saucepan, melt 1 tablespoon butter over medium. Add onion and carrots; season with salt and pepper. Cook, stirring occasionally, until softened, 5 to 7 minutes. Stir in rice. Add wine; cook, stirring, until absorbed, 1 to 2 minutes.
- Add 2 cups hot broth; simmer over medium-low, stirring frequently, until mostly absorbed, 10 to 12 minutes. Continue to add broth, 1 cup at a time, stirring occasionally, until absorbed before adding more. Cook until rice is creamy and just tender, about 20 minutes (you may not need all the broth).
- Remove risotto from heat. Stir in Parmesan and 1 tablespoon butter, and season with salt and pepper.
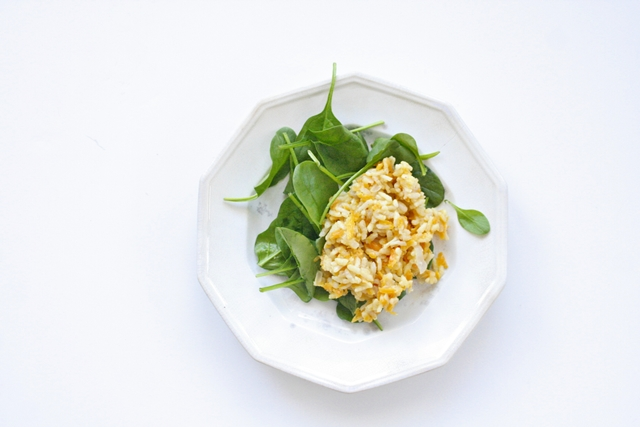
Ms. Jeannie served her risotto on top of a bed of raw baby spinach. She just grabbed a handful of spinach for each plate. The heat of the rice wilts the spinach a touch and adds a bit of bright color to the plate. Ms. Jeannie paired her dinner with Smoking Loon Sauvingnon Blanc, which complimented the sweetness of the carrots. She could have also served this with a crusty baguette too – had she not forgotten to get one at the store!
Here’s a close-up so you can see the texture…

Thank you sweet carrots for growing so great over all these months!!! See you again this spring for sure!
Share this:

Saturday in the Kitchen: Cheshire Cheese

It’s a cool, cloudy, over-cast day in Ms. Jeannie’s world today – the perfect atmosphere to accompany her new blog post all about Cheshire cheese from England.
It was experimentation lunch on Saturday in the Ology household! Always up for a game of “see-what-you-think-about-this-cheese,” Mr. Jeannie Ology, brought home a package of newly discovered Cheshire cheese from the market. Paired with a few local apples, a baguette and a new bottle of Italian il Carnevale di Venezia Pinot Grigio – it was a feast in the making!

Well, sort of.
Oh dear readers, have you ever tried Cheshire cheese? If so, please comment.
Ms. Jeannie was surprised to find that it was a very dry, dense cheese and very very crumbly. Similar in texture to feta but not as salty and not as moist, it reminded Ms. Jeannie a lot of curds in cottage cheese minus the creaminess. Mr. Jeannie Ology was not really a fan at all – preferring more the strong pungent textures and consistency of blue cheeses, aged cheddars and smoked goudas.

Ms. Jeannie had to agree. This cheese was incredibly mellow, so mellow, in fact she believes it might have actually gotten lost somewhere on its transatlantic journey to America. Perhaps though, she was at fault. Did she pair it with all the wrong flavors?
The pinot grigio also turned out to be very light in taste – although not bad – it would have made a far better picnic wine on a hot summer day. What was really needed now, wine-wise, to go with the cheshire was something that was complex and full-bodied, something overflowing with flavor that might have helped develop the subtly of the cheese. Sorry light Italian wine.
The apples were even a poor match, with their crunchy crispiness. Because the Cheshire was so dry, something more along the lines of an apple chutney would have been lovely. It could have surrounded the cheese like a nice hug. Or a fruit, drippy with it’s own juices like a mango, or an over-ripe plum or a mixture of crushed berries – that would have been equally delicious. But fruit companions pose their own set of problems – because we are no longer in summer fruit season.
So what to do with this non-chalant little wonder of a cheese? Ms. Jeannie took to the research department…
Hailing from Cheshire County in North West, England, as it turns out, Cheshire cheese is one of the oldest cheeses in Britain. It’s crumbly, dense, ultra-firm texture was created purposefully, so that the cheese would remain intact while being transported to market in wagons and carriages. Aha!
At the start it had many many friends, including the Royal Army who stocked only cheshire cheese on their ships. Throughout the 16th, 17th, 18th and 19th centuries, cheshire cheese reigned supreme. It wasn’t until the mid 1960’s that it began to see a decline in favoritism. Mostly this is accredited to the industrialization of the cheese making process, and now there are only a handful of farms making cheshire cheese the traditional way – which apparently – is the flavorful way.


Cheshire cheese comes in three colors: red, white and blue (very patriotic!). The white variation (what Ms. Jeannie sampled above) is the youngest of the three. The red, which is actually a pumpkin color is tinted with annato (a pulpy American tree seed used for dying fabrics and food) and the blue, which is aged with mold, resembles more of a veiny blue cheese. Perhaps Mr. Jeannie Ology would have liked that one better!
As far as recipes, Ms. Jeannie headed to epicurious.com to see how they suggested cooking with this now famous cheese. Surprisingly, there were only two recipes listed! How could this be, with a cheese that has existed since the 1600’s?!

One recipe was for Scottish farmhouse eggs, which is essentially scrambled eggs with cheese and onions; and the other, a crabmeat crostini with chives and creme fraiche. Both, Ms. Jeannie noted, enhanced the cheese with a bit of cream (is this a hint?!)
The latter recipe also recommended a pinot grigio as a wine pairing, which would be lovely considering in addition to crabmeat and cheese, the recipe included tangy lemon and lime juices along with a peppery hot sauce. Sounds delicious!
Further research turned up the British Cheese Board website, which turned out be the equivelant of winning the cheese recipe lottery! There was a bevy of cheshire cheese recipes (organized by season, no less), along with other recipes for wonderfully obscure cheeses like Caerphilly, Cornish Yarg and Wensleydale. Such delightful names – thank you England! Wensleydale, in particular sounds like a new day of the week — as in — “Oh darling, let’s not go Monday or Tuesday – let’s go Wensleydale!” So now we know – if need a new cheese recipe – stop by and visit the BCB.
Ms. Jeannie will keep you posted on how some of these new recipes turn out, but in the meantime, if you have any suggestions as to how you like your Cheshire – please let us know!
Share this:

Wednesday in the Kitchen – Simple Tomato Basil Tart
Ms. Jeannie is thoroughly lucky to have come from a family of cooking adventurers. Her parents, her sisters, her husband all love to cook and enjoy experimenting with new flavors and diverse ingredients.
When she was small, Ms. Jeannie’s mother taught her the “old-fashioned” way of baking, with recipes handed down from generation to generation. Which meant everything, always, was made by scratch. Cookies, cakes, pies, puddings, chocolate sauce, whipped cream, every decadent delight was made by our hands with real, whole ingredients.

As Ms. Jeannie grew and started her own experimenting, this love of building creations from the mixing bowl up stemmed out into other aspects of the palatte: homemade tomato sauce, chicken broth, pasta, salad dressings, soups, breads…it was thrilling to know that she could indeed make anything she wanted.
One of her most favorite things to make is pie crust. There is something about lumping a few, simple ingredients together in a bowl, mixing it about and then rolling it out into a delightful sheet of smooth paper-like dough.
There are challenges still though – even after all these years… like that wonderful flip of the thumb that makes a beautiful scalloped edge around the rim of the pie crust.Ms. Jeannie cannot seem to master this for the life of her. Instead she opts for the more rustic, “provincial” style of folding over the extra dough, which creates a very humble look.

Ms. Jeannie was consistently taught by her mother that using good ingredients was just as important as using good equipment. Which meant having a good set of mixing bowls, rolling pins , flour sifters and a pastry cloth. Necessities. Each and every one of them.

When Ms. Jeannie was off to college and on her own, she tried to cut a few corners in the equipment department. Using an empty wine bottle as a rolling pin, the wooden cutting board as a pastry cloth and a fork in place of a dough cutter, Ms. Jeannie was off and baking to somewhat satisfactory results. Sometimes the dough would be tough and difficult to work, flour would get all over everything (almost always on the floor!) and the dough never rolled out perfectly on the square cutting board – usually lopping off one side, making it thicker in that section then all the others.
For years she baked like this – improvising and substituting, working with what she had at hand instead of getting the proper tools. A pastry cloth – that is really what Ms. Jeannie desperately needed. But she always seemed to overlook this one neccessity when she was out shopping.
Until…two months ago! When she FINALLY she purchased a pastry cloth at the kitchen supply store. It cost $5.00. What are on earth was she waiting for all this time? It was indeed a jubilant and monumental day:)

Now, whatever Ms. Jeannie rolls out onto this magic carpet comes out lighter, flakier and more evenly consistent. It is completely marvelous! As it turns out – pastry cloths have been in use for over a century. Because they are made usually from unbleached cotton and/or oilcloth they provide a wonderful non-stick work environment. Seasoned with a little flour and carefully stored, pastry cloths can last for years. Marvelous, says Ms. Jeannie, since it took her years to acquire!
Here is Ms. Jeannie’s latest creation using her lovely kitchen helper… (note the rustic crust!)

Simple Tomato Basil Tart – Serves 4
1 cup flour
1/4 tsp. salt
6 tablespoons of vegetable shortening
1/4 cup ice cold water
1/2 lb. Farmer’s cheese
4 large handfuls of fresh basil, washed and torn in pieces
2 lbs. organic home-grown cherry tomatoes, washed and cut in half
3 tablespoons olive oil
Salt & Pepper to taste
1. Preheat the oven to 350 degrees. Place the halved tomatoes in a medium size bowl and toss in 3/4 of the fresh basil. Add the olive oil, salt and pepper and mix to combine. Set bowl aside and let tomatoes marinate while you make the dough.
2. Now onto the dough. In a large mixing bowl, combine the flour, salt and shortening. Using a dough cutter (or a fork – in Ms. Jeannie’s case) mash the shortening into the flour until it forms small crumb-like bits. Add the cold water and combine until dough forms. Knead it lightly into a ball with your hands. Just until it is no longer sticky. Be careful not to overwork the dough – then it will become tough.
3. Sprinkle a small handful of flour on your work surface (aka the pastry cloth!) and roll the dough out as thinly as possible. Place crust in a round cake pan and bake in oven just until the crust is firm but not brown. About 20-25 minutes.
4. Remove crust from oven, add the tomato/basil mixture. Take the farmers cheese and slice in thin chunks on top of the tomato mixture. Carefully mix cheese and tomatoes together with a spoon, making sure not to scrap a hole in the bottom crust. Top with the remaining 1/4 basil.
5. Return the tart to the oven and bake for 20 minutes. Broil for an additional 5-6 minutes until the cheese starts bubbling and turns golden brown.
6. Let rest for 10 minutes before serving.
Serve this with a simple side salad and a glass of white wine (Ms. Jeannie chose a Pinot Grigio) and you have a lovely, light, late-summer dinner!
Share this:

Wednesday Night in the Kitchen: Wonderful Whoopie Pies
Last night Ms. Jeannie had a craving for a little dessert. So she pulled out her recipe books and flipped through the pages to see what jumped out at her. As luck would have it, she discovered she had all the ingredients on hand to make Whoopie Pies, one of Mr. Jeannie Ology’s favorites.
If you’ve never had a Whoopie Pie, it is kind of like a cross between a homemade oreo cookie, an ice cream sandwich and cake. Here’s a picture of one from Ms. Jeannie’s batch…

It is essentially a whipped peanut butter cream filling sandwiched between two chocolate cake mounds. You can use all sorts of different types of filling (sweet cream, mint, maple cream, etc) but Mr. Jeannie Ology is such a nut for peanut butter, she decided to surprise him with a little sweet treat.
Originally made famous by the Pennsylvania Dutch, Ms. Jeannie first learned of whoopie pies when she visited Amish Country in Lancaster County, Pennsylvania years ago.
While flipping through Martha Stewart Living magazine some years later, Ms. Jeannie came across the recipe. So that’s the one she uses. You’ll find that version of the recipe listed at the bottom of this blog post.

Sources trace the first whoopie pie back to the early 1920’s. Named from the sheer delight of discovering such a treat, eaters of the delicious dessert often said “whoopie” when they were offered one to enjoy.
Both Maine and Pennsylvania are the state leaders when it comes to the commercial production of the whoopie pie. Maine loves them so much they are considered the official state treat.
Labadie’s Bakery in Maine has been making whoopie pies in the same location since 1925!

And every September in Pennsylvania, in the heart of Amish Country, occurs the Whoopie Pie Festival, where people participate in all sorts of challenging feats like the whoopie pie treasure hunt, the whoopie long shot, whoopie checkers, whoopie yell off, whoopie pie eating contest and more!

It’s an easy dessert to make and a fun project for little ones., since they can help spread the filling and make the “sandwiches”. Etsy has all the equipment you need to make your own batch of wonderfully delicious whoopie pies. All you need are the following…
Two mixing bowls:

One hand held mixer or stand alone electric mixer (this one comes with both!)

One wire whisk:

One large baking tray:

One wire cooling rack:

One spatula:

Or for those that aren’t the baking sort, you can buy them already made in a variety of flavors!
From original…

to red velvet…

to vegan pumpkin cinnamon…

to lemon buttercream…

to tropical…

Either way, whether you decide to make them yourself or by them already prepared you are in for a sweet treat!
Here’s the recipe that Ms. Jeannie used. Many thanks to Martha Stewart for incorporating the peanut butter:)
Peanut Butter Whoopie Pies –
Makes 18 Cookie Sandwiches
Ingredients
- 1 3/4 cups all-purpose flour
- 3/4 cup unsweetened cocoa powder (not Dutch process)
- 1 1/2 teaspoons baking soda
- 1/2 teaspoon fine salt
- 4 tablespoons unsalted butter, softened
- 1/4 cup vegetable shortening
- 1/2 cup granulated sugar
- 1/2 cup packed dark-brown sugar
- 1 large egg
- 1 cup whole milk
- 1 teaspoon pure vanilla extract
- Peanut Butter Buttercream
- 2 ounces bittersweet chocolate, finely chopped
Directions
- Preheat oven to 375 degrees. Line two large baking sheets with parchment paper; set aside. Sift together flour, cocoa, baking soda, and salt into a small bowl; set aside.
- Add butter, shortening, and sugars to the bowl of an electric mixer fitted with the paddle attachment; cream on high speed until smooth, about 3 minutes. Add egg; beat until pale and fluffy, about 2 minutes. Add half the flour mixture, then the milk and vanilla; beat until combined. Add the remaining flour mixture. Beat together, scraping down sides of bowl with a rubber spatula as needed.
- Drop 12 slightly rounded tablespoons of batter 2 inches apart on each baking sheet. Bake the cookies in the upper and lower thirds of oven, 10 minutes; switch the positions of the baking sheets, and rotate each one. Continue baking until the cookies spring back to the touch, 2 to 4 minutes more.
- Remove from oven; let cookies cool on baking sheets, 10 minutes.Transfer with a metal spatula to a wire rack; let cool completely. Meanwhile, line a cooled baking sheet with a new piece of parchment; repeat process with remaining batter.
- Spread 1 scant tablespoon buttercream on flat sides of half the cookies.Top each with one of the remaining cookies, flat side down, and gently press together. Transfer pies to a tray.
- Melt half the chocolate in a saucepan over low heat, stirring until smooth. Remove from heat; add remaining chocolate, and stir until melted and smooth. Transfer to a pastry bag fitted with a plain round tip (Ateco #2 or #3) or a small parchment cone. Pipe chocolate in a spiral pattern on top of each pie. Let chocolate set before serving, about 1 hour.
BLOG UPDATE! A lovely reader wrote in to say that Maine has its own Whoopie Festival too! This year, the Maine Whoopie Pie Festival is held on June 23rd from 10:00am – 4:00pm in Dover-Foxcroft, Maine.
Like the Pennsylvania Whoopie Pie Festival, there is a bevy of themed activities, but one of the most creative is the Whoopie Pie Trail which takes you on a tour of several bakeries in the Dover-Foxcroft area. This sounds like one delicious way to spend an afternoon!

