The Kindest Bread Recipe: A Homemade Yeasted Sandwich Bread from the Tassajara Bread Book circa 1970

When it comes to describing great bread recipes, they tend to take on a variety of accolades based on specific attributes. Best flavor. Best texture. Best no-knead. Best whole wheat. Best no wheat. Best gluten-free. Easiest to make. Fastest to bake. Biggest loaf. Smallest effort. Best. Fastest. Easiest. Again and again, over and around, brilliant bakers everywhere boast.

No one that I’ve encountered yet, though, has ever described their favorite bread recipe as the kindest. There’s no Google search for the best kindest bread. Kind isn’t really the type of word that generally pairs well with food descriptions and a you-have-to-make-it recipe. Baking or otherwise. But the recipe I’m sharing here in this post today can really only be, first and foremost, described that way. It is, of course, delicious and healthy and not complicated to make and contains simple ingredients, but above all, the best part of this recipe is its core, standout attribute… its kindness.

Without fully embracing that trait, you won’t be able to make this recipe as intended. And in not being able to make this recipe as intended, you’ll miss out on a truly delightful experience. One that is calming, relaxing, and joyful. You don’t need to be an expert baker or a seasoned bread maker to enjoy the fruits of this labor. You don’t even need to be a well-versed cook. In order to achieve the desired outcome of this recipe, you just need to be kind to it. To treat the ingredients and the process gently from start to finish.

Yeast is a living, breathing, growing life. Therefore, in order to make a marvelous loaf of bread, you need to treat the yeast gently and handle the dough tenderly, in the same way you would handle a newborn baby. This recipe is not about rushing or shortcuts or pre-made, pre-packaged substitutes. You don’t want to begin this culinary adventure with a scattered mind, an irritable mood, or perfection-induced pressure and motivation. This recipe is about showing kindness to yourself, the baker. It’s about showing respect for the ingredients involved, and about showing genuine care and consideration for the process of turning piles of fine and powdery specks into two golden loaves of substantial, nourishing bread.

Simply called Yeasted Bread, the recipe comes from The Tassajara Bread Book, first published in 1970 by Edward Espe Brown. At the time of publication, Edward was in his mid-20s, newly married and running the kitchen at Tassajara, a Zen spiritual center located in the remote Ventana Valley in Central California.

Edward Espe Brown

Opened in the 1960s, Tassajara was the first Zen spiritual center in the United States, and also the only Zen monastery outside of Asia. There in the Los Padres National Forest, students and guests from all over the world came to practice Zen philosophies and Buddhist principles in order to gain a more gentle approach to life. One that focused heavily on kindness, compassion, and thoughtfulness.

Los Padres National Forest. Photo credit: National Fish & Wildlife Foundation.

Due to its remote location, food for the guests, students, and staff was grown on-site at Green Gulch Farm, part of the Zen Mountain Center campus. Edward saw firsthand the time and care it took to grow the vegetables and fruits that eventually wound up in Tassajara’s kitchen for him and his helpers to prepare. With every chop and slice, simmer and slow roast, he continued that same level of care and attention in his cooking. He looked at every single ingredient as if it were a gift that he in turn would make into another gift of a satisfying meal for his friends, family, and guests at Tassajara to enjoy.

The kitchen at Tassajara. Photo credit: Bradley Allen.

“When I cook, I feel nurtured, sustained, like there’s energizing going on. It makes me feel the preciousness of life,” Edward shared in a 1985 Peninsula Times Tribune interview.

It’s that level of care and appreciation for the act of cooking and baking that established Edward’s reputation as a helpful coach in The Tassajara Bread Book. In this cookbook, as well as the other Tassajara books that followed, Edward wasn’t interested in telling home cooks how to make perfect food. He knew the act of cooking itself was too frenetic and ever-changing to prescribe a set of strict rules and guidelines that would be automatically applicable each and every time you came to the kitchen. Instead, he was interested in offering an understanding on how to approach cooking. He was interested in placing focus on intention and gratitude. Appreciating the life of the vegetable, the sharpness of the knife. Appreciating the aromatic steam from a bubbling broth, the flavors created when one ingredient combined with another, and the presence of the people sitting around the table. Good food would follow via the care put into its preparation.

Apart from being the first kind bread recipe that I’ve ever encountered, Edward’s bread book was also the first cookbook I’d ever run across that opens with a two-page poem of sorts that he wrote himself about working in the kitchen. It reads more like a spoken word piece than a traditional poem, but it has lovely sentiment and turns of phrase and sets the whole tone for the Tassajara cooking and breadmaking experience. Here’s an excerpt about mid-way through…

The place where everything connects. That’s how Tassajara’s Yeasted Bread can best be described. A combination of person, plant, preparation, and product. Rest assured, you are following a recipe with step-by-step instructions and a definitive end result, but you are also following your heart, your intuition, and your awareness of the process in equal measure.

Breadmaking can be tricky. There are a lot of factors that can intervene and mess with the process – humidity, air conditioning, hard water, soft water, oven temperatures, inactive ingredients, bacteria, a hot atmosphere, a cool environment. All components that may or may not be within your control. I found it to be very calming to read about a breadmaking process that begins by telling you, first and foremost, to relax.

An excerpt from The Tassajara Bread Book.

This was the first sandwich bread recipe I have tried to make since moving to New England. I didn’t know how my oven was going to act, or if our coastal air would make a difference, or if the summer heatwave temperatures on the day I first made it would help or hinder the process. Was it luck that made the bread turn out so well on the first try? Or was it the recipe and Edward’s call to action to treat every step along the way with care and kindness?

Edward called this recipe the basis from which all other bread recipes in the book are created. A springboard for later adding in additional flavorings or flours, as well as a solid resource for further experimentation and exploration of your own making. I’m not an expert breadmaker in any sense of the word and have had many failed experiments using other recipes from other places over many years, but none of those recipes ever mentioned baking with kindness and appreciation, nor stated anything close to Edward’s it-is-what-it-is philosophies. That might just be the winning equation to a good loaf of bread.

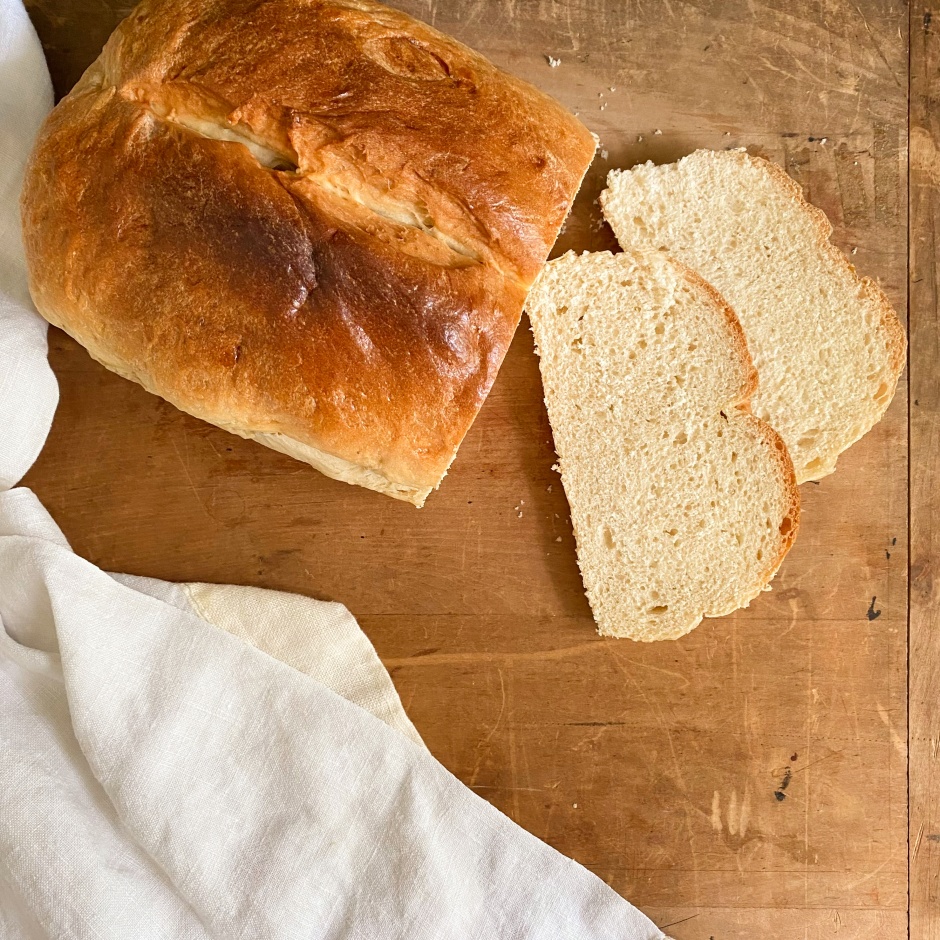
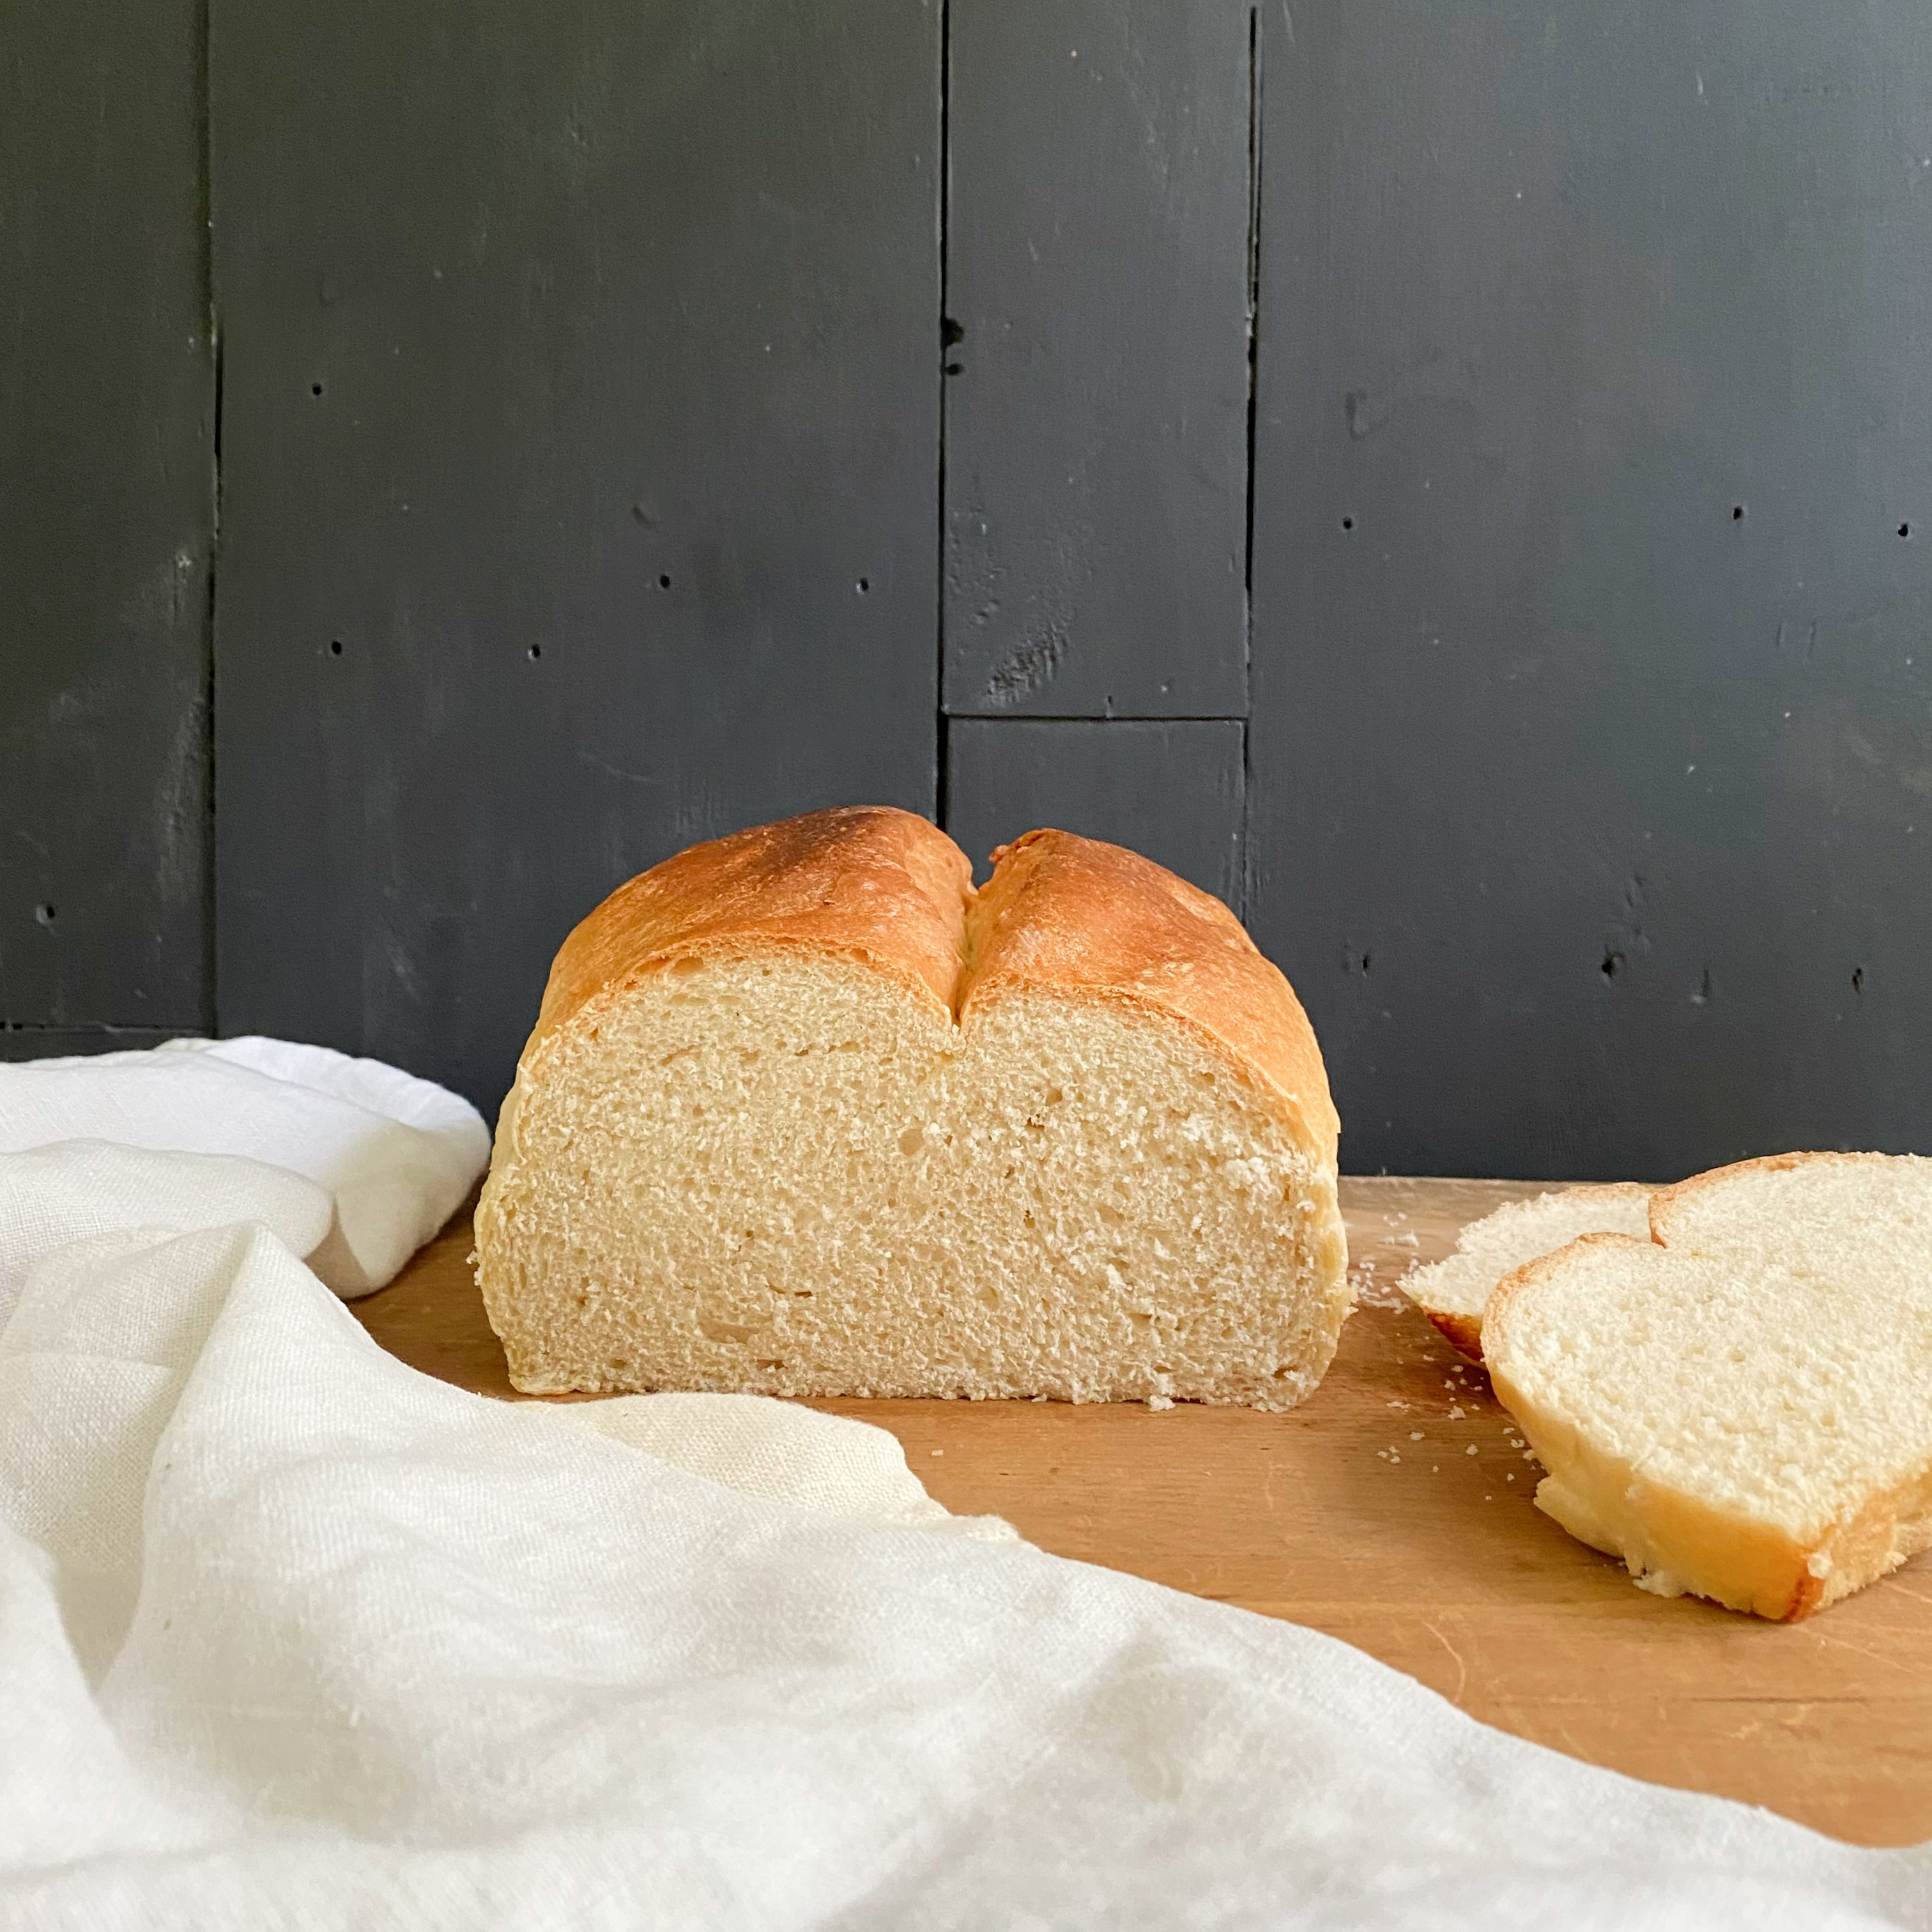
In case you have ever struggled, like me, with making homemade bread that winds up turning out flat, flavorless, or weighing twenty pounds, then this recipe will show you how to avoid all three. There’s a small amount of brown sugar that adds a hint of sweetness to the dough and also helps feed the yeast, but other than salt and butter, there are no other flavor enhancers. It produces two simple loaves that are ideal for sandwiches or toast with butter and jam. And it makes the type of bread meant to work in collaboration with other toppings, not compete with them. The loaves are of medium density with a light but substantial weight that makes you feel like you’ve eaten something nutritious, packed with good-for-you carbs and protein on a level that will sustain you for hours instead of just a few minutes. It’s not light and fluffy like a croissant nor is it hard and heavy like a peasant loaf. It’s somewhere in between. Spongey but firm with a texture that holds it shape and won’t fall apart when you cut it. I found it to be such a great, delicious, simple all-around bread. A best bread. Baked with kindness.

By 1973, three years after The Tassajara Bread Book was published, Edward had gained quite a following. The book at that point had sold over 150,000 copies, and racked up accolades from food critics, professional chefs and home cooks around the country. Edward went on to write Tassajara Cooking and then The Complete Tassajara Cooking, each featuring vegetarian recipes along with favorites from the bread book. In 1995, The Tassajara Bread Book celebrated its 25th anniversary with a reprinting and emphatic praise from the Washington Post, deeming it “the bible of breadmaking.” As it turns out, there is something about baking with kindness and gratitude, after all. Edward was right. The good food follows.

I can see why breadmaking is such a fulfilling form of baking. It’s a calming act. An encouraging endeavor. A delicious result. In our busy modern-day world that is grappling with so much unrest, noise, and difficult situations, it’s the serenity of this baking endeavor that I found to be most appealing. Baking in this Tassajara way is an act of love on all accounts…. thoughtfulness, acknowledgment, gratefulness, gratitude, and not just for the food but for yourself in the present moment too.

Tassajara Yeasted Bread

(makes 2 loaves)

3 cups lukewarm water (Note: lukewarm registers between 85 degrees F – 105 degrees F and does not feel warm or cold when splashed on the inside of your wrist).

1 1/2 tablespoons dry yeast (2 packets)

1/4 cup sweetening (honey, molasses or brown sugar) (I used brown sugar, loosely packed.)

1 cup dry milk (optional) ( I did not use it)

4 cups whole wheat flour or substitute unbleached white flour

4 teaspoons salt

1/3 cup oil or butter

3 cups additional whole wheat flour or unbleached white flour

1 cup additional flour for the kneading process

Dissolve the yeast in the water. Stir in sweetening and dry milk, if using. Stir in four cups of flour, one cup at a time, stirring briskly after each addition to form a thick batter. Scrape down the sides of the bowl occasionally as you mix. After the fourth cup of flour is incorporated, mix well with a wooden spoon for 100 strokes until the batter is very smooth.

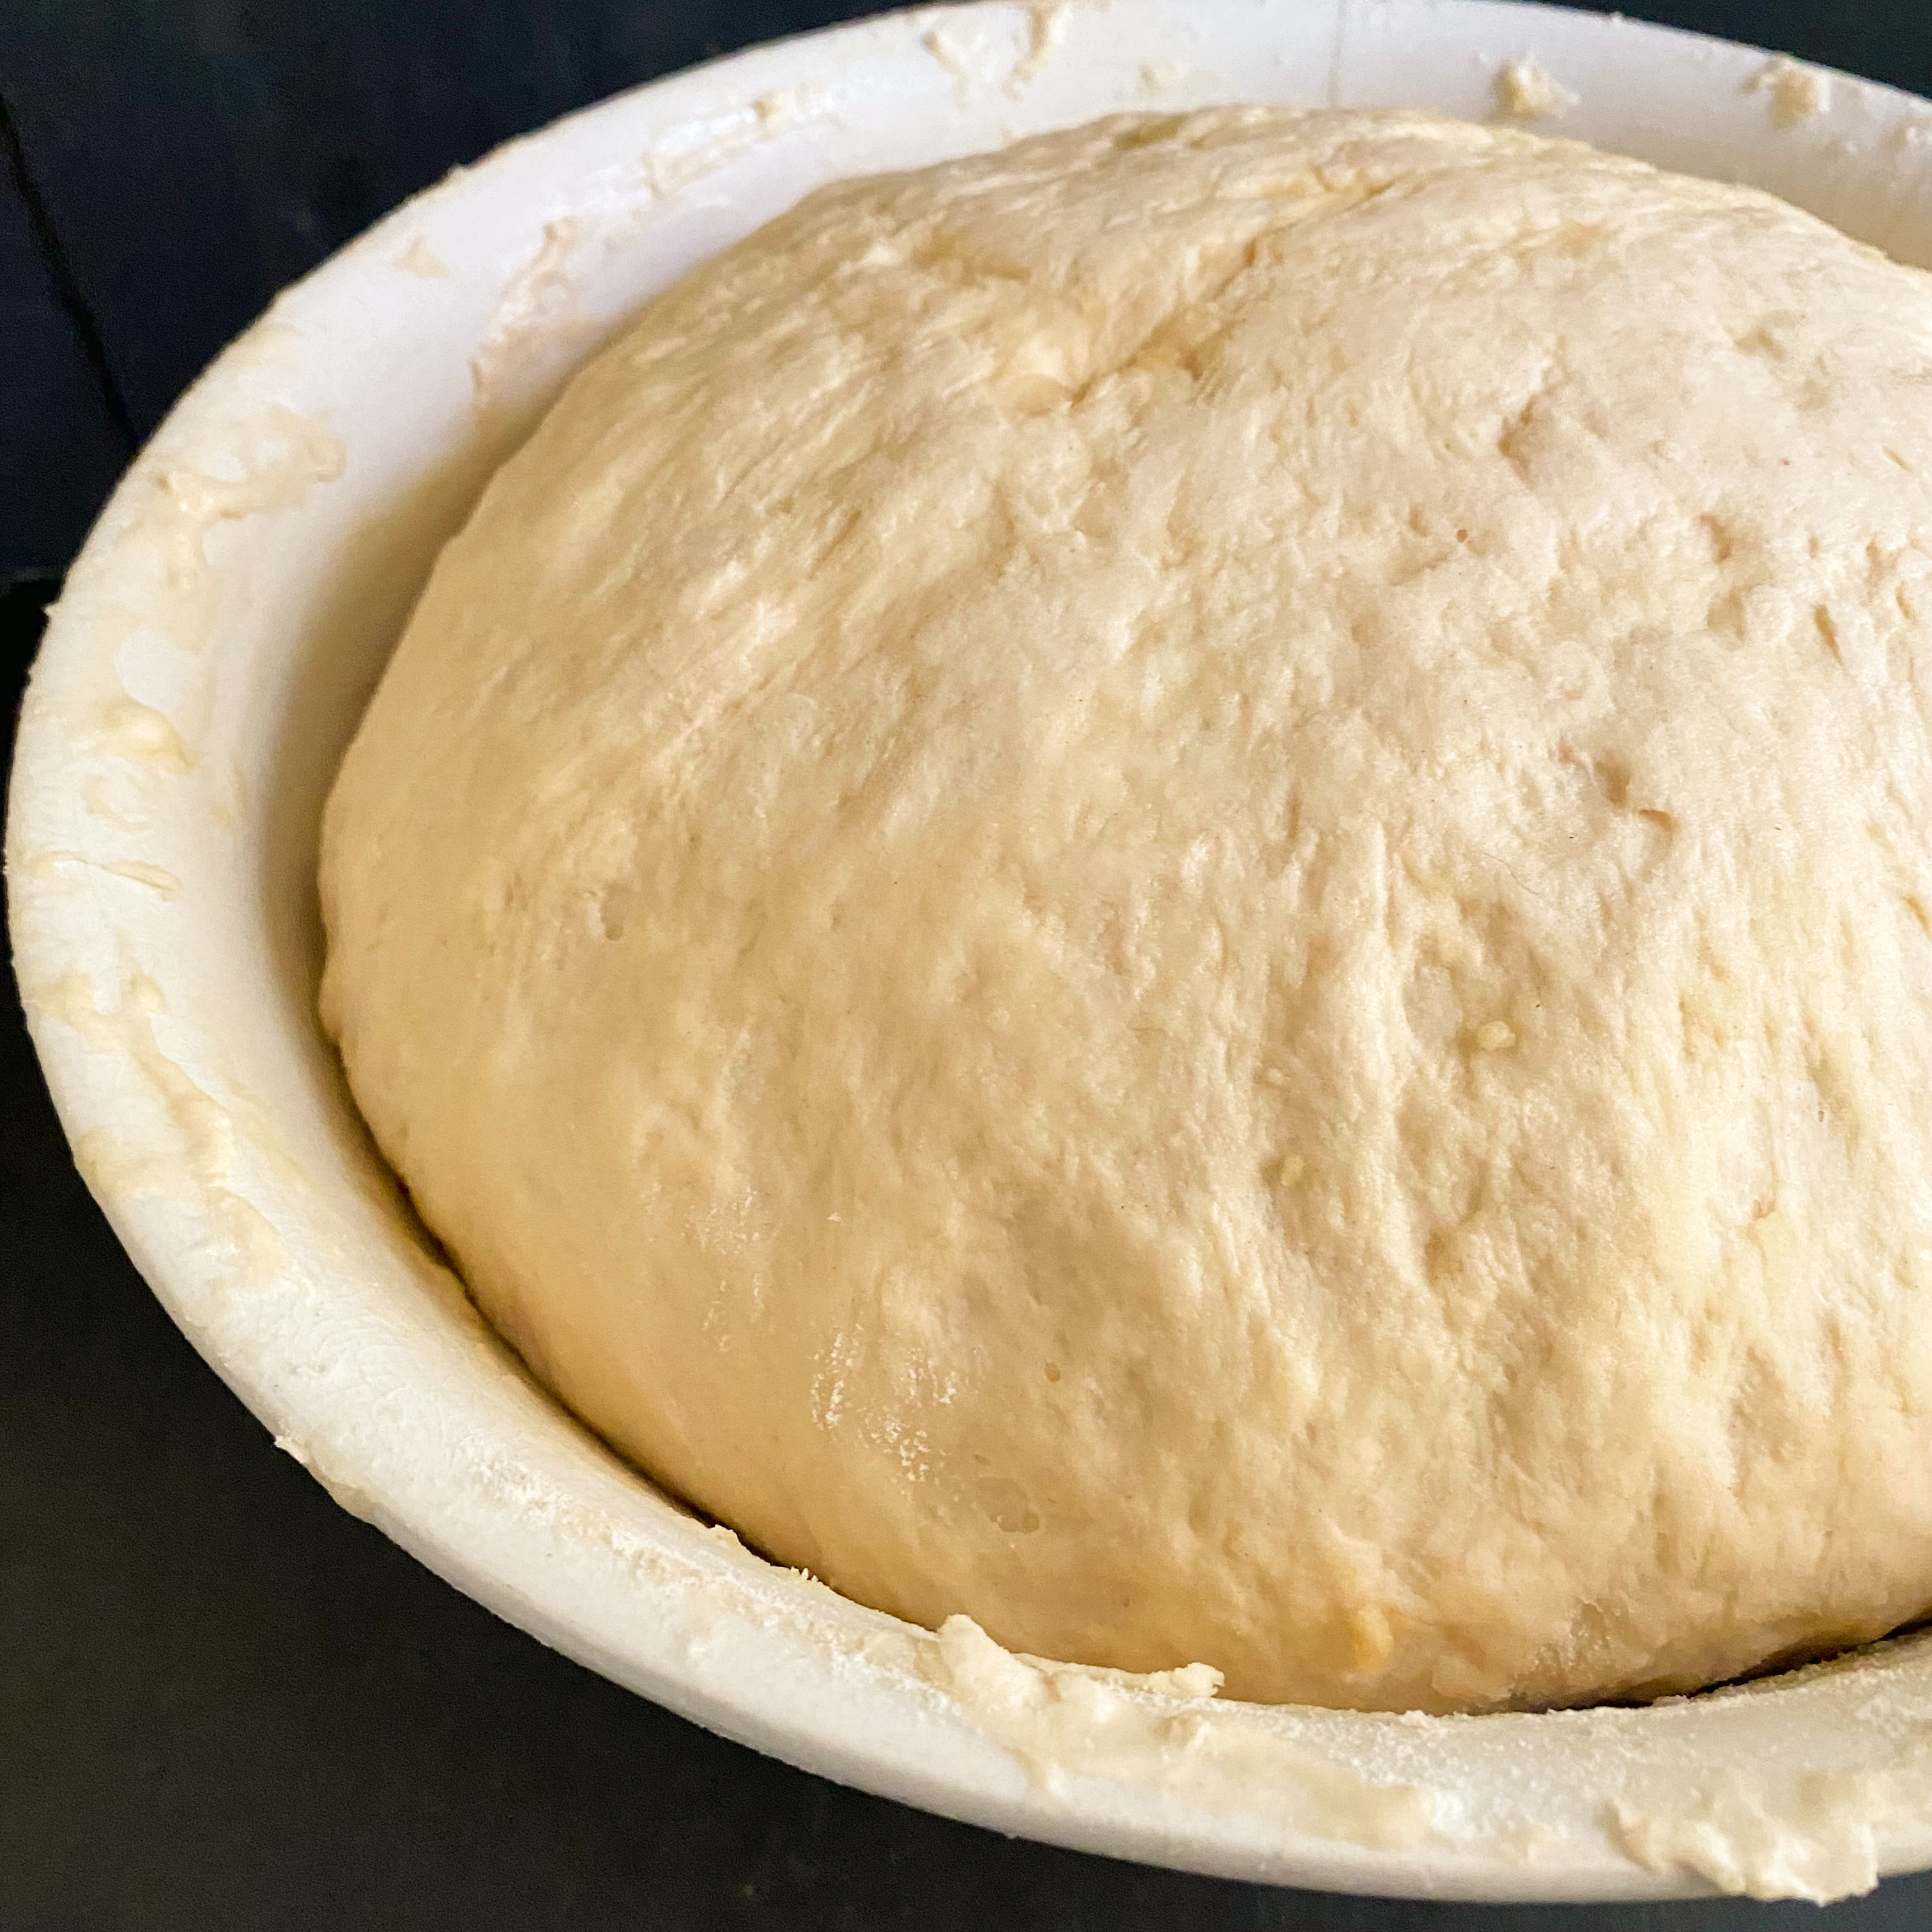
Cover bowl with a damp cloth and let rise for 45 minutes in a spot that is between 85-100 degrees in temperature. If the spot is cooler than this temperature the dough will take longer to rise.

After 45 minutes, fold in the salt and oil or butter. Fold in the additional three cups of flour, mixing until the dough comes away from the sides of the bowl.

Using the final fourth cup of flour spread out on a board, knead the dough for about 10 minutes or until it no longer sticks to the board. Knead the dough by flattening it with your hands and then folding it in half by pulling the top half down to meet the bottom. Use the heels of your hands to push the dough down and forward, rocking your whole body forward with each push, not just your hands and arms. Rotate the dough a quarter of the way around and repeat each previous motion, flattening, folding down, and pushing the dough forward. Keep rotating and repeating these steps for the entire 10 minutes until the dough is smooth.

Put the dough back in the bowl, cover it with a damp cloth, and let it rise 50-60 minutes until doubled in size.

Punch down the dough by placing your fist into the center of the dough and then all over it about 15-20 times.

Let it rise in the same bowl for 40-50 minutes again until doubled in size.

Preheat the oven to 350 degrees. If using an electric oven, preheat it to 325 degrees.

Shape the dough into a round ball and cut into two equal pieces. Shape each piece into a ball and let them rest for 5 minutes.

Knead each ball in your hand five or six times. Shape the dough into logs. Oil two bread pans and then place a dough log in each pan.

Let the dough rise 20-25 minutes in the pans.

Cut the top of each loaf with a 1/2″ inch slit to allow steam to escape. For a golden brown, shiny top, brush the surface of each loaf with an egg wash made of 1 egg beaten with 2 tablespoons water or milk. (I used milk.)

Bake for 50-60 minutes or until golden brown.

Remove from the pans and let the loaves cool on a rack.

Although it took about 6 hours to make from start to finish, the time passed quickly and was peppered with little moments of surprise and delight as the dough bubbled and popped, rose to magical heights, and filled the house with the warm, inviting scent of a bakery. It’s pretty lofty to say that a slice of homemade bread can cure the world of all its harms, but cooking with kindness, appreciation, and an open heart is a good start.

Delicious enjoyed still warm from the oven, at room temperature the next day, or toasted slice by slice, I didn’t encounter any situation in which this bread did not taste wonderful. The only thing I haven’t tried yet is freezing it. As fast as I can make the loaves, they seem to disappear pretty quickly. I’m making a new batch this weekend though, so I’ll freeze a loaf and update the post with details on how that turned out.

In the meantime, if you find yourself stressed out or overloaded this summer, take a break, bake this bread and think about all the wonderful things there are to be greatful for in this world starting with your own two hands, the mixing bowl you’ll use, and the yeast and the sugar that will you get you started. By activity’s end, you’ll feel like you have embarked on a mini-vacation.

Cheers to Edward for helping us focus our intentions on kindness and gratitude in our cooking, instead of fast-made food and pressure-filled perfection. Cheers to the yeast, flour, butter, sugar, water, and salt. To the antique bread board, the 1930s mixing bowl, and the modern-day oven that made this post possible. And cheers to the beautiful, delicious loaves they produced. I hope you love this best kindest bread recipe just as much.

Learn more about Tassajara here.

Find vintage Tassajara cookbooks in the shop here.

A 1960s Starter Recipe: The Baking Life of Ada Lou Roberts of Rose Lane Farm and Her Alaskan Sourdough Pancakes

{Warning: This post contains disturbing information related to a real-life event. If you are sensitive to stories about true crime, you may not want to read beyond the recipe sections.}

It could be said that Ada Lou Roberts’ arthritis launched her into the culinary zeitgeist, but that would only be a portion of the story. Also attributing was that one 1950s luncheon where forty-five attendees requested the recipe for her homemade buckwheat tea buns. And then there was her family of course who played a big part too. Her beloved mother and grandmother in particular, whispering all their kitchen secrets into her middle-aged ears, reminding Ada Lou of what she learned decades earlier as a small girl mastering the stove in her childhood home.

Ada Lou Roberts may not be a household name today, but back in the 1960s and 1970s, she was a go-to resource for bread baking. The author of three cookbooks and one novel, like many women born in the early 20th century (1907 in Ada Lou’s case) she learned how to cook from her mother and grandmother on their family farm in rural Montgomery County, Iowa. Her mother cooked every day for a large family that included seven brothers and sisters, extended family and the workers who helped out on the farm. Ada Lou’s grandmother helped out with the baking.

Many of her grandmother’s recipes were in the traditional Pennsylvania Dutch style, incorporating yeast and other natural leavenings, whole grains, seeds, and herbs, all of which they grew themselves on the farm. Ada Lou grew up braiding bread, feeding her family, learning about health, about harvest, and about happiness through time spent in the kitchen among dough balls and mixing bowls, flour sacks and family.

After Ada Lou got married, her and her husband Marcus, moved to their own farm in Kansas, known as Rose Lane. There Ada Lou continued the family baking, this time in her own busy kitchen as she raised her two boys. A diagnosis of early on-set arthritis in her hands led her to appreciate the tactile nature of kneading dough and the physical therapy it continuously provided to keep her hands active and nimble.

In 1960, she published her first cookbook, Favorite Breads From Rose Lane Farm. She was 53 years old at the time it debuted. By that point, she had been tinkering around with her family’s recipes for more than four decades, adjusting them here and there, modernizing them as American kitchens became more modern themselves. The buckwheat tea bun recipe featured prominently in the cookbook. Ada Lou said it was easier to publish one cookbook than handwrite forty five copies of the same recipe. The luncheon ladies were delighted.

Upon debut, reviewers referred to Favorite Breads as a sweet little baking book, but by 1963, it had become a highly recommended recipe collection stuffed full of valuable information. Championed by food columnists across the country, every time someone wrote to the newspaper for help, Ada Lou’s book became the answer for their bread-making woes.

In 1967, her second book Breads and Coffee Cakes with Homemade Starters from Rose Lane Farm was published. Again inspired by requests, this cookbook was born from letters written by fans of Ada Lou’s first cookbook. This time they asked for more recipes on homemade starters. Ada Lou filled an entire cookbook with them.

By definition, a homemade starter refers to a fermented dough that requires a lengthier amount of time to develop prior to baking. One common starter example is sourdough bread. The most famous sourdough bread comes from San Francisco, where the air is credited as a key ingredient alongside flour and water in creating that signature San Francisco sourdough flavor. Bakers from all over the world have tried to recreate that same sourdough taste but to no avail. It’s the air that sets it apart. Making starter recipes is a universal baking act known the world over, but it’s also highly individualistic depending on your location and your cooking environment.

In today’s post, we are featuring a starter recipe of Ada Lou’s, from her second book, Breads and Coffee Cakes with Homemade Starters. Today’s post features not bread or coffee cake but instead sourdough pancakes. It’s a weekend meal fit for kings and queens of the kitchen and anyone who likes to slow down on a Saturday and watch the overnight batter bubble and pop.

The recipe we are making today is really two recipes in one, Alaskan Sourdough Starter and Alaskan Sourdough Pancakes. There’s no note from A.L. as to the Alaskan connection for this particular set of recipes, but sourdough and the Last Frontier have had an ongoing love affair since the Gold Rush days. In the 1850s, miners from other states scampered up to Alaska with sourdough batches in hand as sustenance to carry them through all their mining adventures. Quickly, it became part of the food fabric of the state. So much so that even newcomers to Alaska today are still referred to as “sourdoughs.”

Somewhere in this early 1900s street scene in Nome, Alaska are jars of sourdough starter waiting to be consumed!

Men weren’t the only ones who had gold rush fever. Single women headed up to Alaska to mine gold and fill job demands brought about by the influx of speculators.

In my family, we once had a starter recipe that was traded back and forth between my aunt in California and my grandfather in Arizona for close to twenty years. It came to become an honored guest at parties and even went on family vacations with us. There are opposing memories between all the cousins now as to whether this family starter was for pancakes or for bread. One remembers sourdough bread, the other buckwheat pancakes, while another remembers sourdough pancakes and another recalls buckwheat bread. Confusion aside, we all remember it being delicious. Both my aunt and my grandfather passed away in the 1990s, so we don’t have them to set the record straight, but I think they were both pretty intrepid for tackling starter recipes to begin with and then keeping one going year after year for decades even though they lived 700 miles apart. Starter recipes are fun that way. They can be individualistic, inclusive, creative, and captivating all at once.

Ada Lou’s pancake recipe is delicious and bears that same sort of tangy, otherworldly flavor that sourdough bread evokes. Made up of simple pantry ingredients, the beauty of a good starter is in the verb itself. You just start. And then carry on. In give-and-take fashion, a portion of your very first batch gets saved out and then added to a future starter, where again a little bit of that future starter then gets reserved for the next starter after that and then so on and so on. Little portions of one combine into another. Recipe after recipe, week after week, year after year until you become like my Aunt Patti and Grandpa Phil still incorporating a portion of that same original starter into pancakes (or bread!) twenty years later. The longer your starter lives, the more incredible the flavor. Some starters have lived for more than 150 years and are still going strong.

For anyone new to the starter concept, it’s easier to explain while highlighting the steps in the recipes, so I’ll get right to the making of it. Pancake eaters await!

Alaskan Sourdough Starter

1 package of commercial dry yeast

1 cup warm water

2 teaspoons salt

4 tablespoons sugar

1 1/2 cups white flour

Prepare this one the day before you wish to use it. In a large mixing bowl, combine the yeast and warm water. Then add the salt, sugar, and flour and beat well. The batter should be thick but still pourable at this stage. Cover the bowl tightly with plastic wrap and put it in a warm place until it doubles in bulk. (Note: I put my bowl in the greenhouse where it rested at 82 degrees for 14 hours. Other ideal places are the top of the fridge, the back of the stove, on top of a heat register or near a radiator or fireplace. Ideally, you need a draft-free spot that will surround the bowl with an equal amount of warmth on all sides).

By the next day, your starter should have doubled in bulk. It will be dotted all over with air bubbles like this…

Before you move on to the next step of making the actual pancakes, remove one cup of this starter from the bowl and store it in a covered glass jar in the refrigerator…

Once you have completed that step, you have officially begun. Congratulations! Your starter is born. The next time you make pancakes (not for this recipe below but in the future), you’ll start all over again and make a new batch of Alaskan Sourdough Starter, but instead of adding yeast next time as the recipe calls for, you’ll substitute to it with the one cup of fridge starter instead. And then following the same process as above, once that batch has risen overnight, you will again remove one cup of the starter before you make that next batch of pancakes. You’ll store it in the fridge just like you did this time, and then that starter will be ready and waiting for the third time you make these recipes later on down the road. So that each time, you’ll always be adding to and then taking away one cup of starter to be reserved for a future date.

Now on to the pancakes…

Alaskan Sourdough Pancakes

(makes 12 4″ inch pancakes)

2 tablespoons butter

1 egg, well beaten

1/2 teaspoon baking soda dissolved in 1 tablespoon water

Alaskan Sourdough Starter (the full recipe you just made minus that 1 cup that you just reserved in the fridge)

To the starter batter add the butter, egg, baking soda and water. Mix thoroughly. Heat your griddle or pan. Add butter or cooking oil to the pan if necessary and then cook your pancakes. Once they have browned on each side they are ready to serve.

I served these pancakes with fresh blueberries, sprigs of mint, a dollop of butter and our favorite local Connecticut maple syrup harvested from Swamp Maple Farm, just a few miles down the road from 1750 House.

After getting a complete tutorial from the owner of Swamp Maple this past November, we now have all the info we need to start tapping our own sugar maples next fall. We are already looking forward to mountains of pancakes and 1750 House syrup!

Delicate and tender like crepes with slightly salty, slightly tangy notes, these pancakes were so well-rounded in flavor that the only way I can think of describing them is as a perfect vehicle. Not too sweet, they work in harmony with the syrup, the butter, the blueberries, the mint, in such a way that no one ingredient overpowers the other. Instead, it’s just a perfect meeting of all the taste sensations. Spongy in texture, the yeast gives this stack a bit more sustenance, so that you feel energized after eating it – not like you want to go take a nap.

As with all beginning starter recipes, the sourdough taste will become more present, more fragrant, more tangy as future batches are made incorporating the reserved starter from the fridge each time. Ada Lou advises using this method below next time you want to make up another batch of pancakes using the reserved starter that’s now sitting in the fridge…

While I was making these pancakes I couldn’t help but imagine Ada Lou in her idyllic-sounding Rose Lane Farm kitchen whipping up big batches of pancakes for her hungry boys. I couldn’t wait to find a photo of her or her Kansas farmhouse to share with you so that we could all see where this gorgeous set of recipes stemmed from. Nothing surfaced though. I even went back so far in time as to try to find a photo of her childhood home in Iowa where she learned how to cook with her mother and grandmother. I didn’t find that either. I did however find something else. Something terrible.

In 1912, when Ada Lou was five years old, two of her older sisters, Ina (aged 8) and Lena (aged 12) were killed by an axe murderer while spending the night at their friend’s house. It was a horrific crime that took not only the lives of Lena and Ina but also the entire family that they were staying the night with – two parents and their four children. This all occurred in the small, quaint, good-to-know-you hometown of Villisca, Iowa where Ada Lou grew up. It was a shock to the entire community as both families were very respectable and very well-liked. The murder made national headlines. Seven thousand people attended the funeral to lay Ina and Lena to rest. Referred to as the Villisca Axe Murders, for years throughout the 1910s and 1920s, Ada Lou’s parents and investigators tried to find the murderer and the motive, but the crime is still unsolved today.

I hesitated about including this information in this post. On one hand, it didn’t seem to have a lot to do with a pancake recipe. But on the other hand, it had a lot to do with Ada Lou. Her whole baking career was based on her family and the memories, the skills, and the recipes she learned from them. First in the childhood kitchen of her Iowa farmhouse and then in her adult kitchen at Rose Lane Farm in Kansas. In those early years of her life, while Ada Lou was learning to bake at home from her mother and her grandmother, her family was grieving and trying to process the horrific tragedy that senselessly wiped away her sisters’ lives in a blink.

I wonder if all that looking back in her mid-life years, before Ada Lou published her first cookbook, was some sort of salve for her and her family’s broken heart. I wonder if baking provided some sort of comfort to Ada Lou in those childhood days. A task that busied her hands, that focused her attention, that turned her gaze towards creating something wonderful, something lovely, something good for her family that had been so devastated by such a terrible act. Ada Lou was only five when her sisters were killed, and possibly too young to fully grasp at the time what specifically happened to them. But she grew up and came of age in the anxiety-leaden aftermath of their deaths. Living day to day with the desperation of her parents’ continual questioning, continual searching for answers, for understanding.

People come to baking for all different reasons… health, creativity, entertainment, curiosity, and comfort. I wonder if baking became Ada Lou’s salvation and then ultimately her success at carrying on with life post-tragedy. I wonder if she thought of it as a way to start putting her family back together one nourishing slice of bread or pancake at a time.

Ada Lou passed away in 1983, and to my knowledge, there is no record that I have found at least, where she ever publicly spoke about what happened to her sisters or how it affected her family or affected her own life. There isn’t even any article or news story that connects Ada Lou the baker with Ada Lou the sister of two murdered girls. Maybe this is why I couldn’t find any photos of Ada Lou or her Kansas farm, even at the height of her popularity in the 1960s and 70s, when everyone was clamoring for her recipes. Maybe Ada Lou wanted to set her personal life aside. Maybe it was just too painful to talk about. Maybe the act of baking and talking about baking and writing about baking was the only way forward. The only way for Ada Lou and her family to start again.

There’s something hopeful and optimistic and anticipatory about starting a starter recipe. That’s why I decided to include the whole story of Ada Lou’s life alongside her recipes. I think her story despite its tragic start, is one of hope, bravery, and admiration. It gives context to her baking and shows her strength of character and commitment to keeping her family’s culinary talents alive. Despite the bad, she extolled the good. Memory by memory. Bread by bread, cake by cake, recipe by recipe.

I hope these starter recipes start something wonderful in your kitchen. If we’re lucky, we might all just see our 2023 starters still working their magic in 2043 and 2053, and 2063 and maybe even beyond. Keep us posted if you decide to join us in this sourdough arena – we’d love to hear how things are going in your kitchen.

Cheers to Ada Lou for showing us all about the importance of new beginnings.

New England Style: Three Vintage Bread Recipes You’ll FALL in Love With

bread2

Now that Autumn is here and the temperatures are cooling and the holidays are coming in close, there is nothing that trumpets the start of the cozy Fall season more than baking homemade bread. This week in the Vintage Kitchen we are exploring three different types of bread – one quick bread, one muffin recipe and one sandwich bread, all tackled the old-fashioned way. Meaning without a bread machine or any fancy paddling mixers.

Inspiration begins back in the late 1960s when food writer and cookbook author, June Platt was living here…

littlecompton-ri

in the picturesque seaside town of Little Compton, Rhode Island. Tasked with writing a regional cookbook made up wholly of New England fare, June compiled a list of over 250 recipes that represented the belly and bounty of diverse Northern appetites.

Her recipes were published in 1971 under the title June Platt’s New England Cook Book…

June Platt's New England Cook Book

and contained recipes both historic and modern for all meals of the day including cocktail hour, appetizers, party fare, preserves, homemade wine and the infamous bread featured here in this post. Let’s look at what’s in the oven…

BREAD No. 1

If you are anything like us, you’ll find sandwich breadmaking a bit of a challenge. Usually when I attempt such creations my bread comes out weighing 18 pounds and has both the texture and composition of packed clay. Right when the oven door opens and the weighty wonder gets hoisted onto the cooling rack, I know instantly that she’ll need not a bread knife but a handsaw to cut into such a terrible beauty of an endeavor.

Thankfully though, things have changed dear readers. We can no longer say that baking is precariously difficult and that light, fluffy sandwich bread eludes us. Thanks to June Platt the perfect sandwich bread has been found. Easy to make, simple to bake.  Success at last!

Although it is yeast bread, and therefore, takes some hours to fully prepare from start to slice, it is WELL worth it and very simple. You’ll never want to eat any other bread again.

Brown Bread

Like New Englanders themselves, this bread is humble, hardy and versatile. According to June Platt, legend has it that this recipe stemmed from a farmer who was so fed up with his wife’s terrible cooking that he took to the kitchen himself, keen on preparing something (anything!) edible. As  fellow New Englander, Louisa May Alcott once said, necessity is the mother of all invention, and so Farmer made his bread and named it after his wife Ana and her (damnable) cooking talents…

Anadama Bread

(makes 2 loaves)

1/2 cup white stone ground cornmeal

2 cups boiling water

3 tablespoons butter

1/2 cup dark molasses

1 rounded teaspoon salt

1 yeast cake dissolved in 1/2 cup warm water

4 cups flour* (see note)

  1. Stir cornmeal very slowly into boiling water, using a wooden spoon.
  2. When thoroughly mixed add the butter, molasses and salt. Try to work out any lumps by flattening them out with the back of the wooden spoon against the side of the bowl or pan.
  3. Cool to lukewarm.
  4. Add the yeast dissolved in the warm water.
  5. Add the flour, one cup at a time, stirring with the wooden spoon, to make smooth dough.
  6. Place on a lightly floured board or canvas and knead well.
  7. Place dough in a well-buttered bowl and cover with a cloth wrung out in hot water.
  8. Allow to rise in a warm place, free from drafts, until more than double its original bulk (or for about 2.5 hours).
  9. Preheat oven to 400 degrees , and butter two 9″inch bread pans.
  10. Turn the dough out onto a lightly floured board again, knead lightly and shape into two loaves.
  11. Place dough in the buttered pans , cover with a towel wrung out in hot water , and allow to rise again until doubled in bulk (about one hour).
  12. Place the loaves in the pre-heated oven and bake until they are a deep golden brown (about 45-50 minutes).
  13. Place on a wire rake to cool before removing loaves from pans.

This a fun recipe to work on while you have a whole home day planned. Because it does take some time you may want to double up on the recipe and make four loaves of bread so you can stick some in the freezer for later use.

*We followed this recipe and the steps exactly with the exception of the flour. We subsitituted two cups all purpose flour and two cups of cake flour which is little bit lighter in texture.  This combo may have aided in a slightly fluffier loaf.

Moist, flavorful, easily sliced (no handsaw required!) this sandwich bread is perfect for everyday use in the versatile sandwich department. Hopefully it will become a household staple in your kitchen too.

*** Update 10/26/2016***

Another batch of bread was made this time using all-purpose flour (in place of cake flour) and olive oil (in place of butter) and it came out equally as wonderful and delicious. The all-purpose flour makes it the tiniest bit more dense but other than that there are no noticeable differences in either taste or texture, which leads us to believe that this just might be the most versatile and easily experimental bread recipe ever. Next time, we’ll try it with a sprinkling of nuts, seeds and/or whole grains to see what happens.

BREAD No. 2

Fruit and nut breads are always an instant favorite and an easy go-to for busy morning breakfasts. Around the the Vintage Kitchen, we never pass on homemade banana or berry breads. And the field of play that awaits when it comes to adding your own bits and bits of flair when it comes to enhancing quick breads is a great source of creativity when it comes to cooking. Since we are in the middle of nut season, June Platt’s vintage recipe for Cranberry-Orange-Walnut Bread sounded wonderfully delicious and in-season. Only there was one slight problem. Cranberries.

For some reason, this year,  even though we scoured high and low, store to market to store again – there were no cranberries to be found anywhere in our fair city – fresh, frozen or otherwise. A bit too early for Thanksgiving relish season, perhaps, New Englanders must have made this bread in the colder mornings of November instead of October.  Out of season, but not out of spirit we substituted. And then substituted again. Dried sour cherries replaced fresh cranberries and almonds replaced walnuts.

Cherries seemed fitting on the historic side – George Washington was a fan after all. On the flavor side, they are sweet yet tart like a cranberry and the dried version seemed like the next best thing. Just be sure when preparing this recipe you look for pitted sour cherries. We found our cherries at the international market inside our local farmers market and they were not pitted. De-pitting added an extra sticky 30 minutes to this project when it came to the prep department.

cherry1

Sour Cherry – Orange – Almond Bread

(makes 1 loaf)

2 cups sifted flour

1 1/2 teaspoons baking powder

1 teaspoon salt

1/2 teaspoon baking soda

1 egg ( well beaten)

Juice of 1 orange (about 1/3 cup)

Freshly grated rind of 1 orange (about 1 heaping teaspoon)

1/4 cup cold water

1 cup granulated cane sugar

1/4 cup melted butter

1 cup dried sour cherries, roughly chopped

1/2 cup whole almonds,  roughly chopped

  1. Preheat the oven to 350 degrees. Butter a 9″ inch bread pan.
  2. Combine the flour, baking powder, salt and baking soda.
  3. In a separate bowl, combine the beaten egg, orange juice, grated rind, water and sugar.
  4. Add the sifted ingredients and stir just long enough to mix. Stir in the melted butter. Fold in the sour cherries and almonds.
  5. Spoon mixture into the loaf pan and bake for 1 hour (or until inserted toothpick comes out clean). Oven temperatures really vary the timing on this one so keep your eye on it.
  6. Let cool on wire rack.

Because the almonds add a little hearty protein and the cherries mingle tartly with the sweet orange and cane sugars, this bread is almost like a soft protein bar. Two slices are very satisfying especially when served warm with a little butter. A lovely alternative to oatmeal on those frosty winter mornings, and a great bread for holiday house guests with its fast, festive and easy to freeze attitude, this bread will make holiday entertaining a breeze in the brunch/breakfast department.

Cherry orange almond bread

Bread No. 3

Our final bread comes to us by way of Vermont. June Platt had a special soft spot for the state and especially loved the maple syrup that sweetened all matter of meals in fall and winter. Her recipe for Vermont Johnnycake Muffins is ideally suited as a companion for a warm bowl of chili with its dense composition and hint of maple sweetness. Essentially, it is a cornbread muffin with a cute name.

Living in the South, there are two VERY different camps on the subject of cornbread. Northerners like their cornbread sweet, Southerners like their cornbread sour (or non-sweetened if you will). Here in the Vintage Kitchen, we prefer ours a little on the sweet side, but not so sugary that it tastes like cake. This Johnnycake is a hospitable meet-you-in-the-middle between North and South. A cornbread for everyone.

muffins1

Vermont Johnnycake Muffins

(makes 8 muffins)

1 cup sifted all-purpose flour

2 1/4 teaspoons baking powder

1/4 teaspoon salt

1/2 cup cornmeal

2 eggs, well beaten

1/3 cup milk

1/4 cup maple syrup

6 tablespoons melted butter

  1. Preheat oven to 400 degrees.
  2. Sift the flour, baking powder and salt together , add the cornmeal and sift again.
  3. Combine the remaining ingredients and add to the dry ingredients, stirring only enough to dampen all the flour.
  4. Pour into well-buttered muffin tins and bake in a hot oven for about 30 minutes or until golden brown.

June suggests serving these handsome guys with maple cream or maple butter. We suggest a little bit of jalapeno jelly, a dollop of goat cheese and a drizzle of honey.  Like the other breads above, these muffins freeze well and can fill up a hearty appetite in a half second. It’s just the kind of fortitude you need when shoveling snow or battling that freezing wind rolling in off the coast.

Vermont Johnnycake Muffins

Released to great critical acclaim, all the recipes in this cook book re-introduced regional delights that were overlooked and underrated in mid-20th century America.  June helped bring them out of hiding 45 years ago and in turn four decades later, the Vintage Kitchen is shining a spotlight on them again today. So whether you are looking for something new to bake-up this season or you are like us and just trying to bolster up your bread baking abilities, look no further than New England, dear readers!

To explore more vintage recipes from June Platt’s New England cookbook, including the wonderfully named Beach-Plum Jelly, Rinktum Ditty, Cranberry Troll Cream, Red Flannel Hash and the classics –  Lobster Rolls, New England Clam Chowder, Boston Baked Beans, etc etc etc… visit this link here.

Cheers and happy baking from June an the Vintage Kitchen and all of New England!

From Our Readers: Scones, Wedding China and Homemade Jam

The other day when Ms. Jeannie went over the year in review, she mentioned making a batch of cinnamon-nutmeg scones. If you don’t recall, here is what they looked like:

Scones, antique ironstone and vintage Royal Jackson china.

Blog reader, Amy, wrote in to request the recipe agreeing that such a simple treat would be the perfect partner to mull over one’s thoughts with. This recipe is an easy one  and made even better by adding home made jam on top.

Ms. Jeannie’s sister, Marianne, makes AMAZING jams and jellies. Those pictured above are the latest batch she just sent. It is a happy day whenever a box of goodies arrives from her. Mr. Jeannie Ology can hardly contain himself while the box gets unwrapped. This gift box included: Blackberry, Raspberry, Orange Cranberry and Italian Plum jams (Italian plum not pictured – because it’s already been devoured!).

Each jar holds a magnificent concoction of flavors – this one is cranberry orange.

The perfect amount of jam vs. chunky fruit.

Marianne picks all the fruit herself, in the Seattle summer months (aka the non-rainy season!), and then gets to work canning away. She also makes her own labels – so cute! She was a true Martha Stewart way before anybody knew about the actual Martha.

Gorgeous jam in a gorgeous package!

She’s actually really crafty in all the creative areas. When Ms. Jeannie’s other sister, Christine, got married in 2010, Ms. Jeannie and Marianne put together all the floral arrangements and wedding bouquets.

Wedding flowers in route to the wedding!

Their work space for the bouquet assembly was the hotel room floor the morning of the wedding.  It was festive and fun to see a floor full of flowers.  The arrangements came together with ribbon and laughter. It was frantic but in a good way and left such an edible memory – one of her favorites of the entire wedding weekend.

wed

So, as you can see Marianne’s creativity knows no limits. From jam to floral arrangements – she’s a one woman wonder.

Back to those scones…  Ms. Jeannie recommends, that once you remove them from the oven, you should add a healthy dose of butter and jam on top of each scone while they are still warm. Hopefully you are lucky, like Ms. Jeannie and have an excellent jam source too.

Nutmeg-Scented Scones

Makes eight triangle shaped scones.

  • 2 cups all purpose flour
  • 1/3 cup golden brown sugar
  • 2 teaspoons baking powder
  • 1 1/4 teaspoons freshly grated whole nutmeg or ground nutmeg
  • 3/4 teaspoons cinnamon
  • 1/2 teaspoon baking soda
  • 1/2 teaspoon salt
  • 6 tablespoons (3/4 stick) chilled unsalted butter, cut into 1/2-inch cubes
  • 1 cup sour cream
  • 1 egg white, beaten to blend with 2 teaspoons water (for glaze)
  • 2 teaspoons sugar

Preheat oven to 425°F. Combine flour, brown sugar, baking powder, 1 teaspoon nutmeg, baking soda, cinnamon and salt in processor; blend 10 seconds. Using on/off turns, cut in butter until mixture resembles coarse meal. Add sour cream. Using on/off turns, blend until moist clumps form. Turn dough out onto floured work surface. Knead 4 turns to form ball. Flatten dough to about 3/4 inch thick circle. Cut into 8 wedges. Brush with egg-white glaze; sprinkle with 2 teaspoons sugar and 1/4 teaspoon nutmeg. Transfer to baking sheet, spacing 2 inches apart.

Bake scones until tops are golden brown and tester inserted into center comes out clean, about 20 minutes. Transfer scones to rack and cool slightly.

Recently, RoseMary from Shasta Lake Shop on Etsy, also wrote in about the Royal Jackson china (pictured with the scone). This is what she had to say:

“FYI The Autumn pattern was discontinued in the early 1950s. I was married in 1952 and chose it as my fine china pattern. I was devastated when in about 1953 I received a call that the pattern was being discontinued. I had just a few pieces, probably a service for 6. Replacement services were unknown at that time. It wasn’t until 50 years later that I found someone on ebay who had many of the pieces. I bought everything he had. Now I can set a table for 20+ people with all the extra serving pieces. Homer Laughlin also made a matching pattern in semi-vitreous china. Don’t know what its called or much about it but bought a set to help fill out my pattern for a while.” – RoseMary, The Shasta Lake Shop

Ms. Jeannie loves hearing stories like these! She tried to do a quick search for the Homer Laughlin pattern that RoseMary mentioned but she couldn’t come up with anything yet. If you know what the pattern name is, please write in!  This china is so pretty – Ms. Jeannie couldn’t imagine having an entire set. RoseMary is one lucky lady!

Set of 6 Royal Jackson teacups - available in Ms. Jeannie's shop.
Set of 6 Royal Jackson teacups – available in Ms. Jeannie’s shop.

When Ms. Jeannie got married she didn’t register for one specific china pattern. Instead she registered at Fishs Eddy, which is a vintage/contemporary china store in New York City.

The magical Fishs Eddy store on Broadway and 19th Street in NYC. Photo credit: David Mills.

They sell a mix-match of vintage and antique dishes mostly from old hotels and restaurants, and then they offer some unique new patterns from designers like Cynthia Rowley too. Basically every time you visit – it’s a new experience.

So Ms. Jeannie registered for a color scheme (blue and white at the time!), which meant any piece of china that fell under those two colors was a gift in the making. Some people thought Ms. Jeannie was brave for being so whimsical in giving guests the “pick whatever you like” experience – but Ms. Jeannie thought of it as an adventure. Besides – there was nothing at Fishs Eddy that she didn’t like – so how could anyone go wrong? As long as it was blue and white – it was perfect!

And as it turned out, each piece that someone chose as a wedding gift, carried with it a little bit of personality from the gift giver. So it became a great memory stacked on top of another great memory. This is the kind of stuff Ms. Jeannie loves most about china. It’s not only the beauty of the actual piece – it’s the beauty of the memory that it represents too.

A big thank you for sharing your thoughts, dear readers! Ms. Jeannie looks forward to more conversations. Until then, happy reading (and writing!).

Wednesday Night in the Kitchen: Wonderful Whoopie Pies

Last night  Ms. Jeannie had a craving for a little dessert. So she pulled out her recipe books and flipped through the pages to see what jumped out at her. As luck would have it, she discovered she had all the ingredients on hand to make Whoopie Pies, one of Mr. Jeannie Ology’s favorites.

If you’ve never had a Whoopie Pie, it is kind of like a cross between a homemade oreo cookie, an ice cream sandwich and cake. Here’s a picture of one from Ms. Jeannie’s batch…

Ms. Jeannie’s Homemade Whoopie Pies

It is essentially a whipped peanut butter cream filling sandwiched between two chocolate cake mounds.  You can use all sorts of different types of filling (sweet cream, mint, maple cream, etc) but Mr. Jeannie Ology is such a nut for peanut butter, she decided to surprise him with a little sweet treat.

Originally made famous by the Pennsylvania Dutch, Ms. Jeannie first learned of whoopie pies when she visited Amish Country in Lancaster County, Pennsylvania years ago.

While flipping through Martha Stewart Living magazine some years later, Ms. Jeannie came across the recipe. So that’s the one she uses. You’ll find that version of the recipe listed at the bottom of this blog post.

Ms. Jeannie’s platter of whoopie pies. There were a few more in the batch that got eaten before the photoshoot:) That Mr. Jeannie Ology – he just loves them!

Sources trace the first whoopie pie back to the early 1920’s.  Named from the sheer delight of discovering such a treat, eaters of the delicious dessert often said “whoopie” when they were offered one to enjoy.

Both Maine and Pennsylvania are the state leaders when it comes to the commercial production of the whoopie pie. Maine loves them so much they are considered the official state treat.

Labadie’s Bakery in Maine has been making whoopie pies in the same location since 1925!

Labadie’s Bakery – Lewiston, Maine

And every September in Pennsylvania, in the heart of Amish Country, occurs the Whoopie Pie Festival, where people participate in all sorts of challenging feats like the whoopie pie treasure hunt, the whoopie long shot, whoopie checkers, whoopie yell off, whoopie pie eating contest and more!

The Annual Whoopie Pie Festival in Strasburg, PA. This year scheduled for September 15th, 2012.

It’s an easy dessert to make and a fun project for little ones., since they can help spread the filling and make the “sandwiches”. Etsy has all the equipment you need to make your own batch of wonderfully delicious whoopie pies. All you need are the following…

Two mixing bowls:

Two Milk Glass Mixing Bowls from mothrasue

One hand held mixer or stand alone electric mixer (this one comes with both!)

Vintage Hamilton Beach Mixer from AttysVintage

One wire whisk:

Vintage Copper Wire Whisk from thebluebirdstudio

One large baking tray:

Vintage Bakery Tray from cheryl12108

One wire cooling rack:

Vintage French Wire Cooling Rack from stilllifestyle

One spatula:

Green Bakelite Vintage Spatula from efinegifts

Or for those that aren’t the baking sort, you can buy them already made in a variety of flavors!

From original…

3 Month Supply of Whoopie Pies from BundlesBakeShop

to red velvet…

Gourmet Red Velvet Whoopie Pies from CandyCakeTruffles

to vegan pumpkin cinnamon…

Vegan Pumpkin Cinnamon Whoopie Pies from LoveThyBaker

to lemon buttercream…

Lemon Whoopie Pies by radicalculinary

to tropical…

Tropical Whoopie Pies with Pineapple and Macadamia by VeganVille

Either way, whether you decide to make them yourself or by them already prepared you are in for a sweet treat!

Here’s the recipe that Ms. Jeannie used. Many thanks to Martha Stewart for incorporating the peanut butter:)

Peanut Butter Whoopie Pies –

Makes 18 Cookie Sandwiches

Ingredients

  • 1 3/4 cups all-purpose flour
  • 3/4 cup unsweetened cocoa powder (not Dutch process)
  • 1 1/2 teaspoons baking soda
  • 1/2 teaspoon fine salt
  • 4 tablespoons unsalted butter, softened
  • 1/4 cup vegetable shortening
  • 1/2 cup granulated sugar
  • 1/2 cup packed dark-brown sugar
  • 1 large egg
  • 1 cup whole milk
  • 1 teaspoon pure vanilla extract
  • Peanut Butter Buttercream
  • 2 ounces bittersweet chocolate, finely chopped

Directions

  1. Preheat oven to 375 degrees. Line two large baking sheets with parchment paper; set aside. Sift together flour, cocoa, baking soda, and salt into a small bowl; set aside.
  2. Add butter, shortening, and sugars to the bowl of an electric mixer fitted with the paddle attachment; cream on high speed until smooth, about 3 minutes. Add egg; beat until pale and fluffy, about 2 minutes. Add half the flour mixture, then the milk and vanilla; beat until combined. Add the remaining flour mixture. Beat together, scraping down sides of bowl with a rubber spatula as needed.
  3. Drop 12 slightly rounded tablespoons of batter 2 inches apart on each baking sheet. Bake the cookies in the upper and lower thirds of oven, 10 minutes; switch the positions of the baking sheets, and rotate each one. Continue baking until the cookies spring back to the touch, 2 to 4 minutes more.
  4. Remove from oven; let cookies cool on baking sheets, 10 minutes.Transfer with a metal spatula to a wire rack; let cool completely. Meanwhile, line a cooled baking sheet with a new piece of parchment; repeat process with remaining batter.
  5. Spread 1 scant tablespoon buttercream on flat sides of half the cookies.Top each with one of the remaining cookies, flat side down, and gently press together. Transfer pies to a tray.
  6. Melt half the chocolate in a saucepan over low heat, stirring until smooth. Remove from heat; add remaining chocolate, and stir until melted and smooth. Transfer to a pastry bag fitted with a plain round tip (Ateco #2 or #3) or a small parchment cone. Pipe chocolate in a spiral pattern on top of each pie. Let chocolate set before serving, about 1 hour.

BLOG UPDATE! A lovely reader wrote in to say that Maine has its own Whoopie Festival too! This year, the  Maine Whoopie Pie Festival is held on June 23rd from 10:00am – 4:00pm in Dover-Foxcroft, Maine.

Like the Pennsylvania Whoopie Pie Festival, there is a bevy of themed activities, but one of the most creative is the Whoopie Pie Trail which takes you on a tour of several bakeries in the Dover-Foxcroft area. This sounds like one delicious way to spend an afternoon!