Sugar Spun Success: It’s the 1920’s, It’s Wilton and It’s the Winter Snowflake Cake!

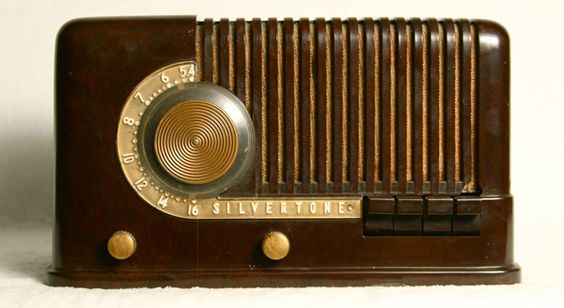
Although it was invented technically in 1927, television didn’t make a widespread appearance in homes until the 1950’s. And cooking shows didn’t reach their heyday until the 1990’s. That means there was no Food Channel, no Great British Baking Show, no Martha Stewart. If you wanted expert instruction in the 1920’s on how to bake a festive looking cake for the holidays you basically had four options as far as guidance… your mom, your grandmother, your favorite cookbook or your favorite radio show…

Agnes White Tizard, the voice of Betty Crocker on Betty Crocker’s Cooking School of the Air taught listeners how to cook for 20 years. Read more about her here.

Very reliable sources for sure, those options would have definitely produced a delicious, time-tested cake that everyone enjoyed, and had been enjoying for years and years. But none of those options would have been able to show you how to make something new and innovative. For that you would have had to go to Chicago – to the Wilton School of Cake Decorating, where you’d get expert hands-on-training on how to make the most pretty and modern cake of the holiday season.

Dewey McKinley Wilton

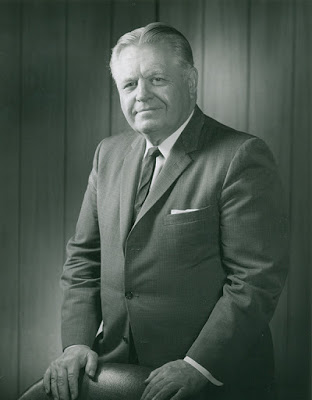
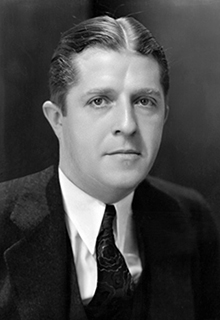
Started in 1929 by confectionery artist Dewey McKinley Wilton,  the Wilton School first taught classes to area pastry chefs in the hotel industry. Dewey had a special relationship with these guys in particular. As a traveling pulled sugar expert, Dewey would show up in hotel kitchens around the Midwest when the pastry chefs needed an extra bit of magnificence to wow their hotel guests.

An example of pulled sugar ribbons atop a modern day cake. This is the type of work Dewey did for area hotels in the 1920’s. Photo via pinterest.

Most of these pastry chefs were wonders themselves in the cake baking department, having been trained in Europe, and were very proficient with a frosting knife and lofty buttery layers. But they weren’t quite as familiar with Dewey’s flair for pulling sugar into hardened shapes and intricate designs.

A 1920’s pastry chef with confectionery creation. Photo courtesy of snackncake.com

Quite curious, they wanted to know about techniques, about processes, about possibilities. And most importantly, all these pastry chefs wanted to know how exactly a pot of boiling melted sugar could eventually turn into a big, brilliant ribbon or a bird or a crunchy piece of abstract art. Dewey was more than happy to share what he knew, but after so many pastry chefs in so many hotels kept asking so many of the same questions over and over again, his entrepreneurial spirit kicked in.

Instead of telling each chef, one by one, how pulled sugar was done, he realized he needed to be teaching one class geared towards many minds.  So that’s what he did. He started the Wilton School of Cake Decorating in the dining room of his house in 1929 and charged $25 a class for an expert lesson on how to pull sugar and make hard candies. The class filled up in a jiffy. Nothing excites a pastry chef more than a newfangled way to decorate a sweet treat, and in all that sugary merry making of the new School there was plenty of learning going on.  While Dewey was teaching his students, he was also learning about their classical European ways to bake, frost and assemble cakes in eye-catching ways.

An image from the early years of the Wilton School of Cake Decorating.

Soon word spread beyond the pastry chef community. The school was fun and informative and produced the most spectacular and delicious cakes the Midwest had ever experienced. People started arriving for instruction from other towns beyond Chicago, and then other states beyond Illinois. Home cooks, caterers, food economists and restaurant owners were clamoring to learn Dewey’s special way with cakes – a method he wound up calling the Wilton Way – which combined the best parts of European baking with simple easy-to-replicate American designs.

Now getting ready to celebrate its 100th birthday in a few short years, The Wilton School of Cake Decorating and Confectionery Art still remains a bustling educational center for all baking aficionados.  Determined to create interesting and engaging art through butter and suagr, Dewey and his following generations grew the business into not only a school, but also a food product and accessories line that can be found in most grocery stores around the country today as well as on their website. They even offer online classes for those who can’t make the trip to Illinois to join the fun in person.

That’s a pretty remarkable career for any business, let alone one in the baking industry where it can be difficult to remain innovative and approachable at the same time. Thanks to Dewey’s Wilton Way  and his easily accessible method, he helped dispel the myth that cake decorating was an intimidating, complicated art meant for only a certain type of person.  Thousands of accomplished students have graduated from the Wilton program since its inception, many continuing on with successful careers in the baking industry.

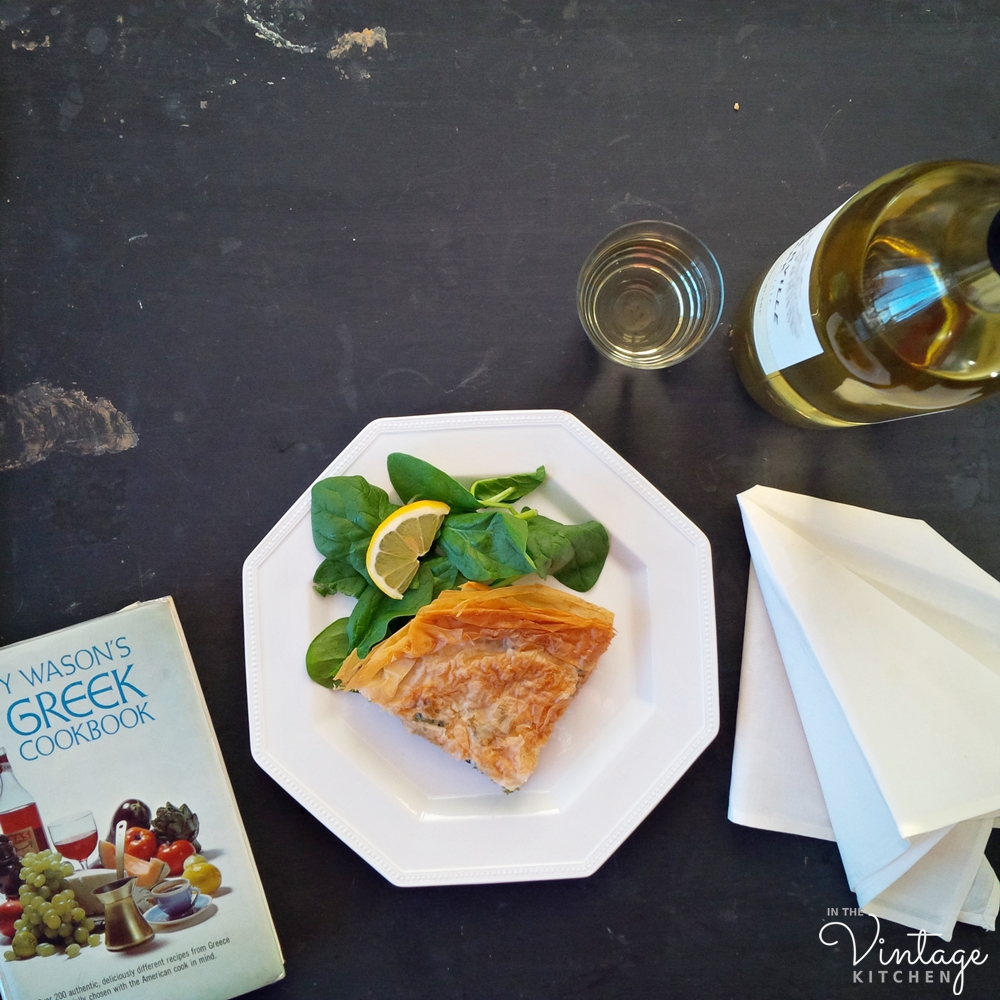
Here in the Vintage Kitchen, I was introduced to the Wilton Way through this book…

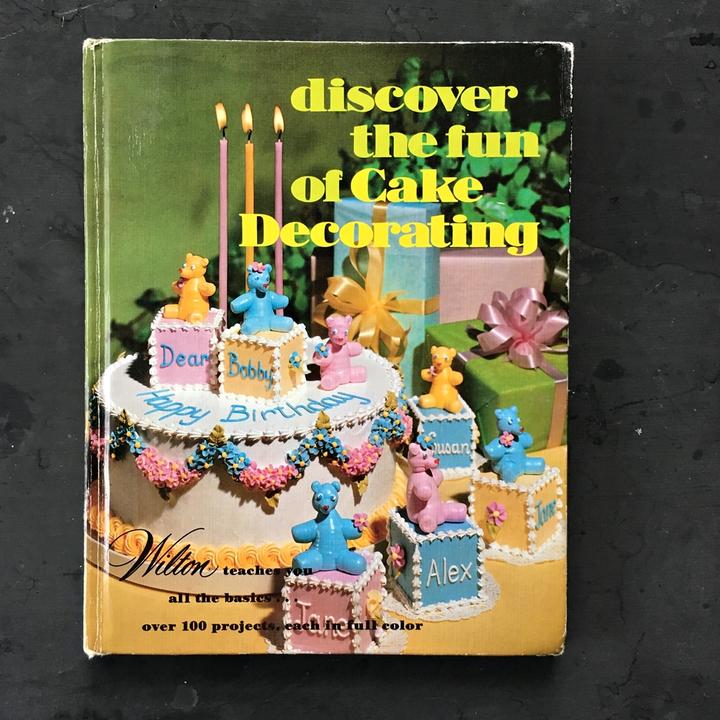
a 1991 reprint of their 1979 cake decorating book. It is full of attractive cakes, some vibrant with retro charm, others timeless and elegant…

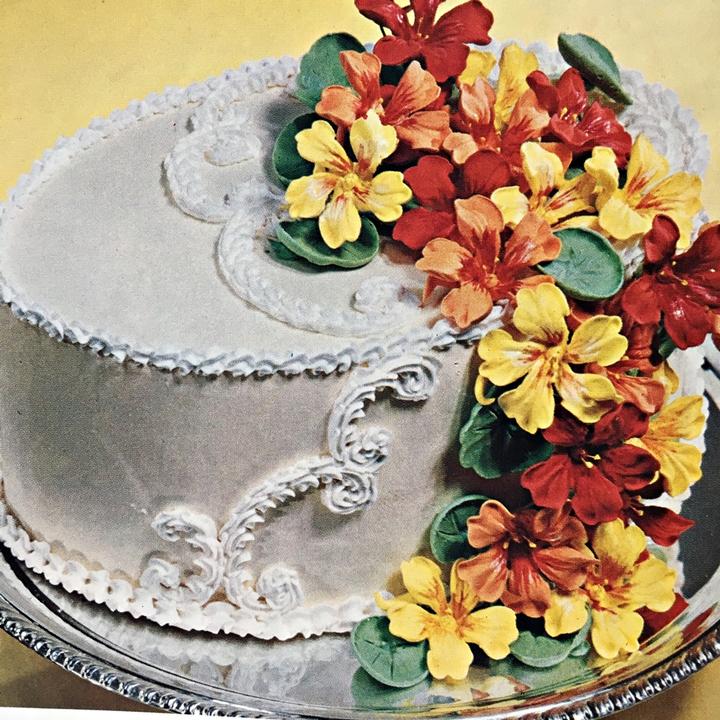
Laid out like coursework, it teaches readers progressively in master class style. Meaning that if you start at the very beginning, and work your way through each chapter, by the end of the book you’ll have amassed so much skill you’ll be able to confidently tackle the baking and decorating of a multi-tiered wedding cake festooned with  a bevy of frothy details.

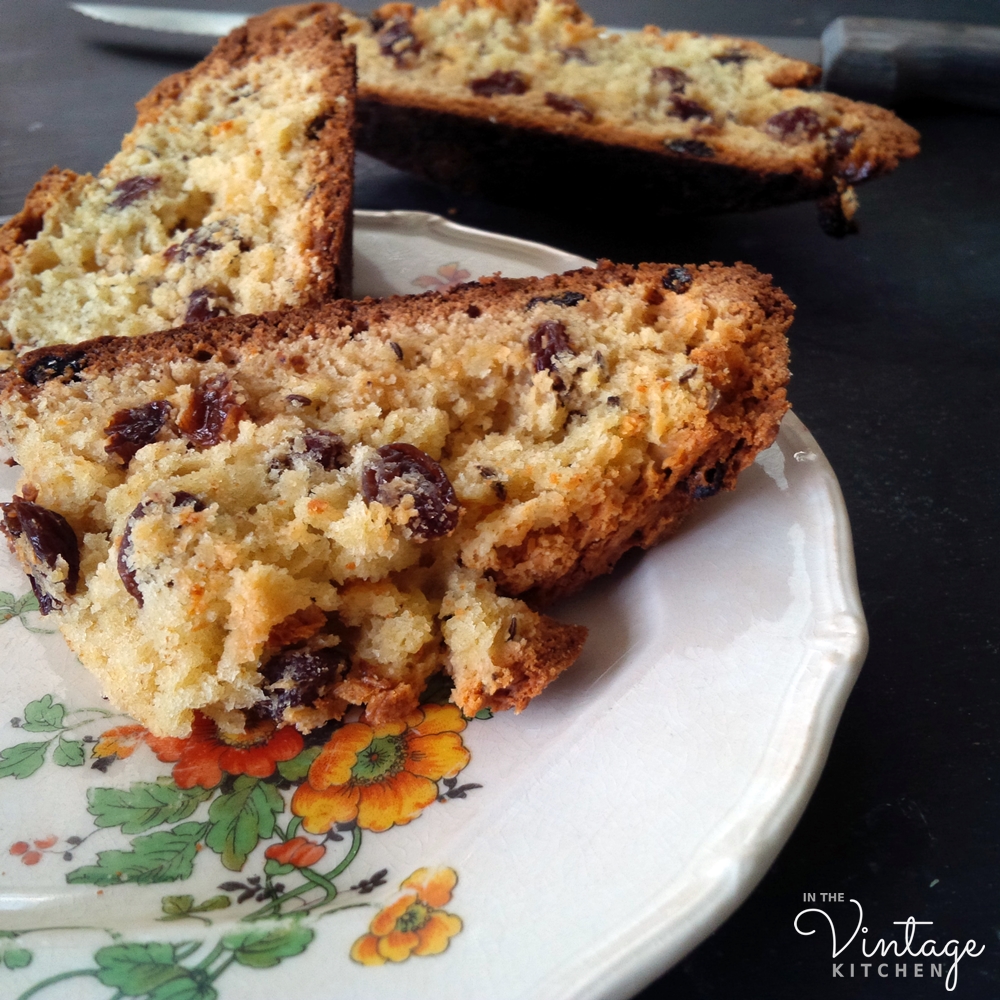
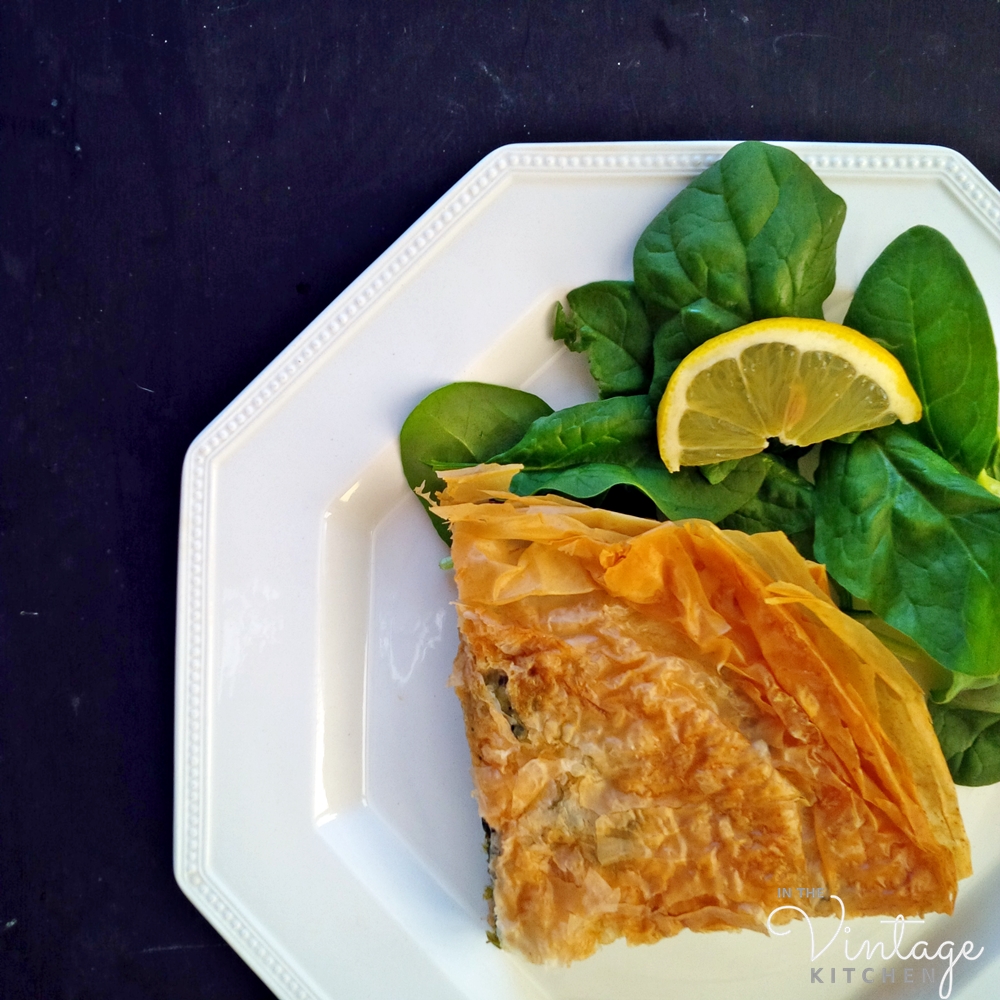
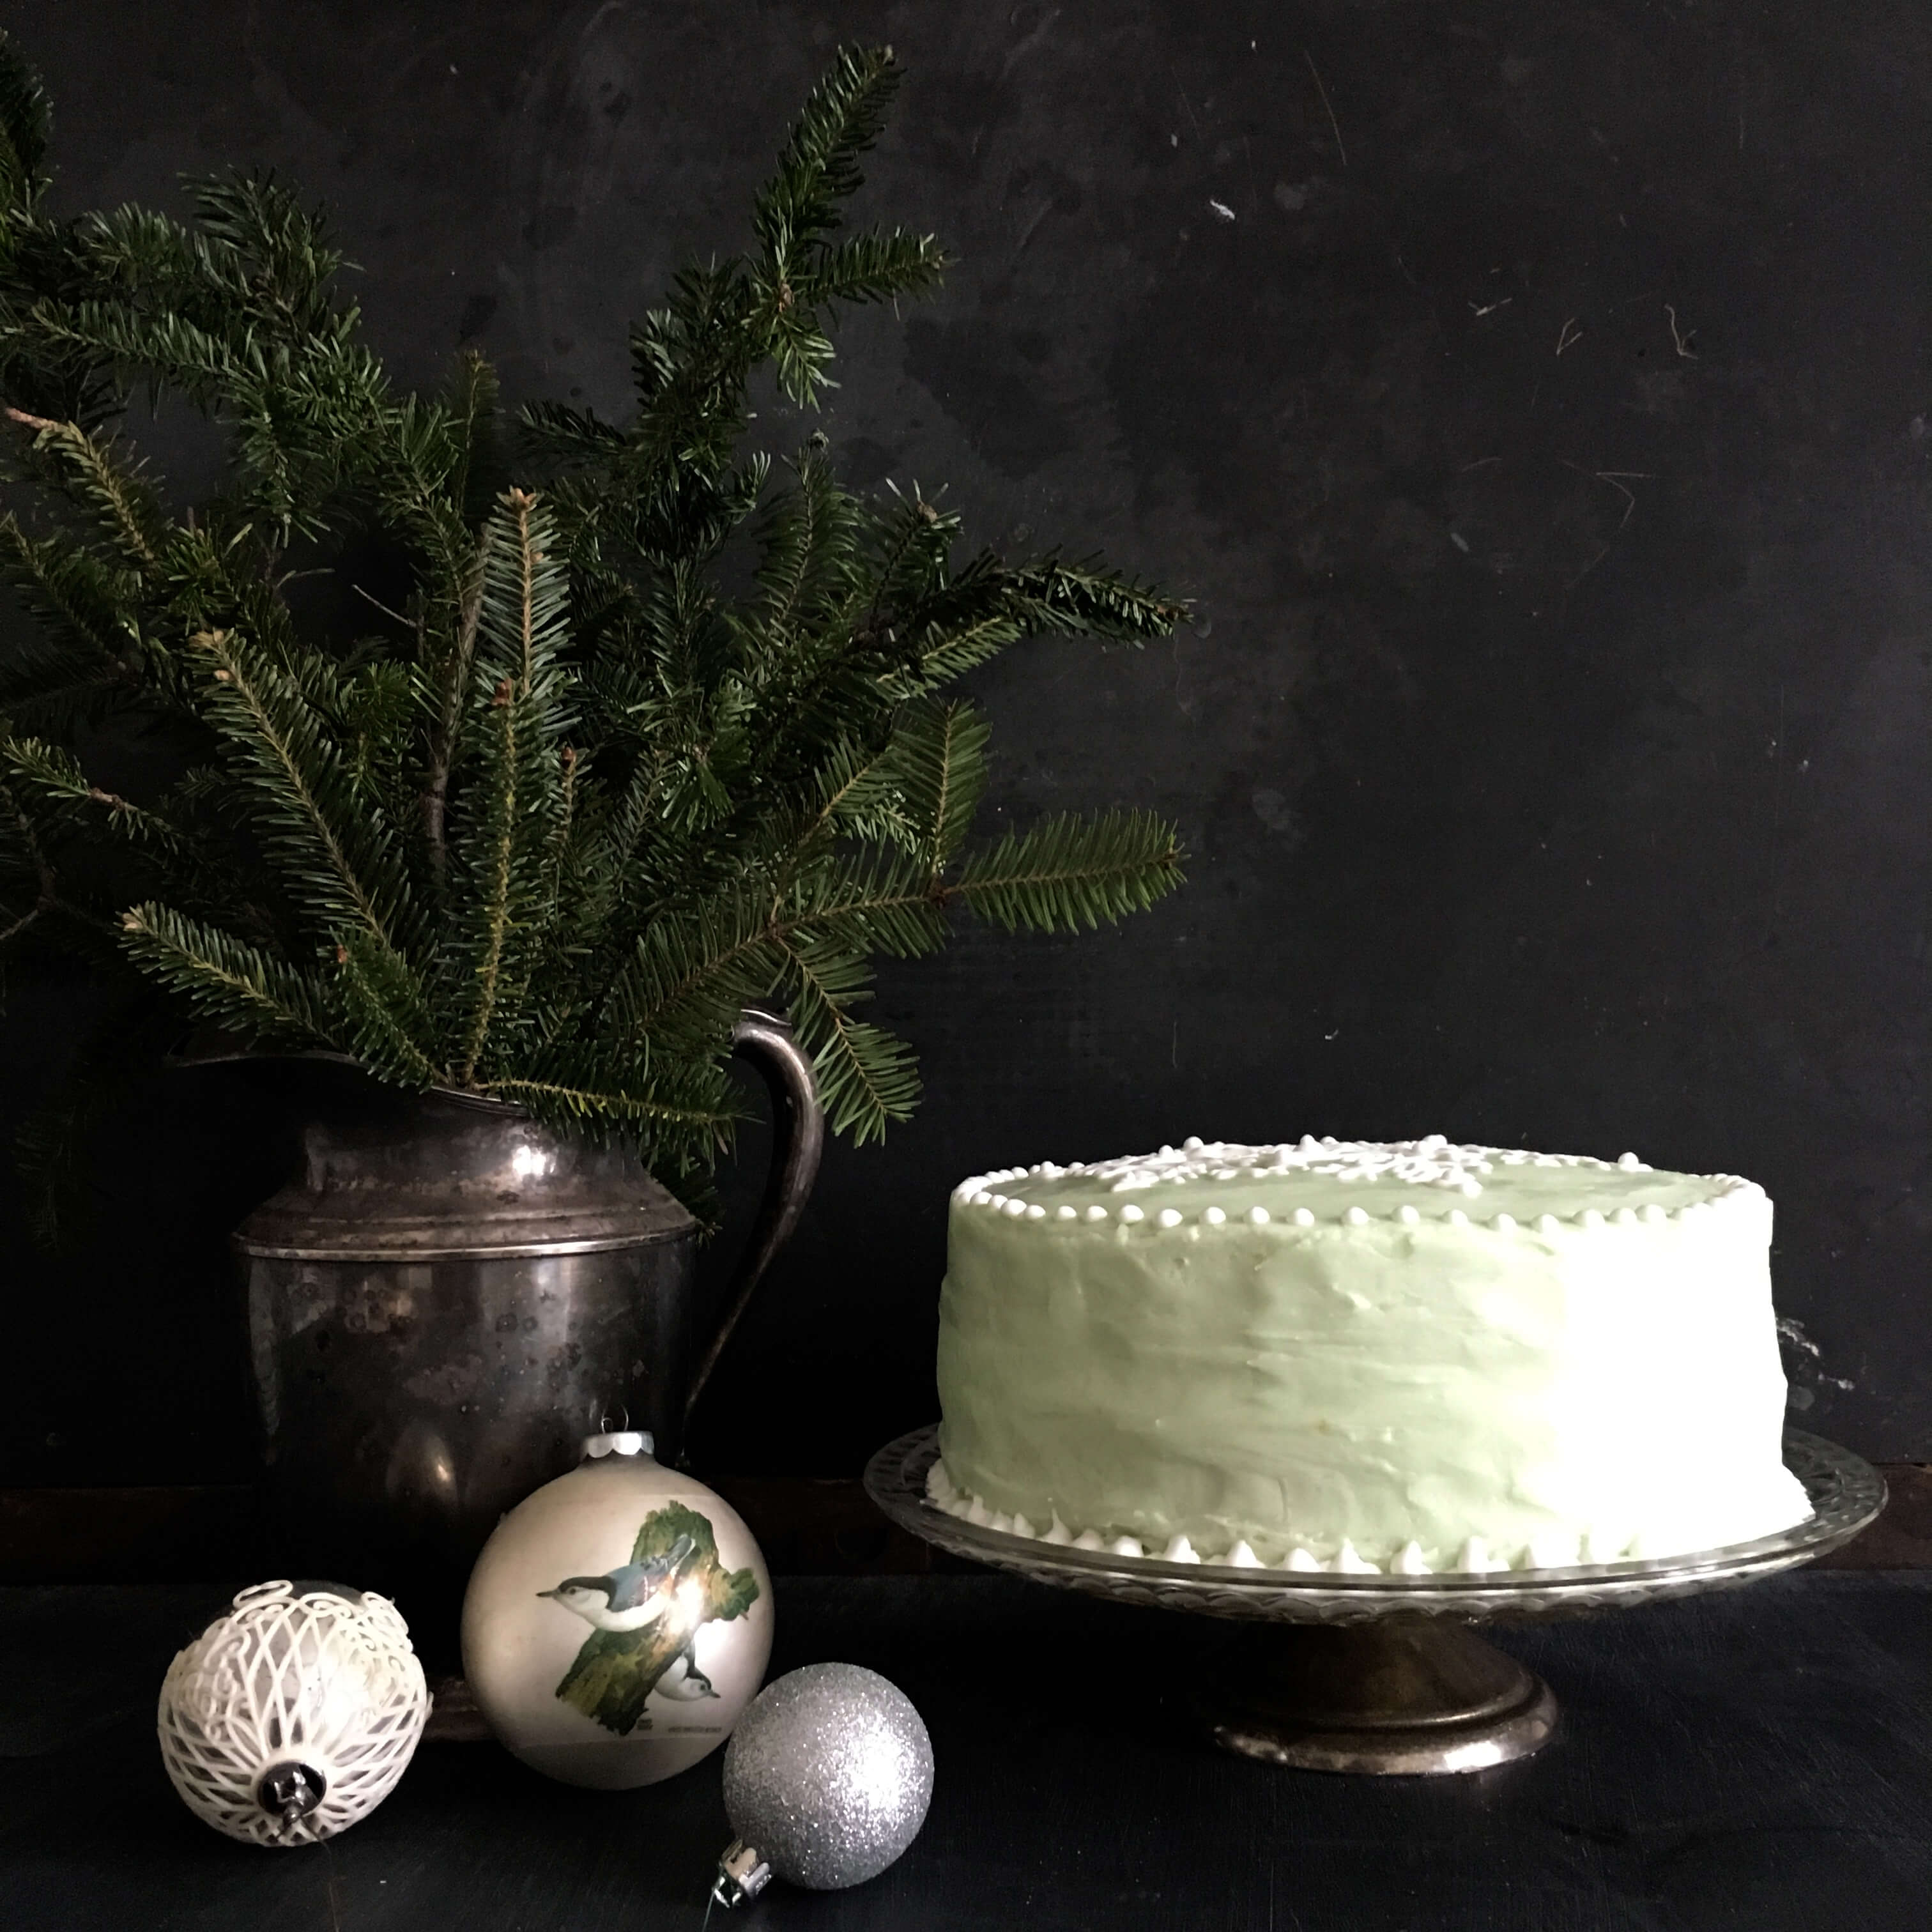
This past week, I endeavored to make their Winter Snowflake Cake – a pale green pastel beauty that consisted of two layers and frosted snowflakes…

This was my first foray into cake decorating with an intentional design, multiple frostings and more than one piping project, so it was a fun adventure, but it definitely didn’t go quite as planned. The Wilton’s are fast to reassure in their book, saying that the best way to make a perfect cake is to practice, practice, practice. I fast forwarded through the beginning chapters and went straight to this cake. That being said, here’s my finished version…

You’ll notice it is missing some elements from the original cake – most noticeably the side snowflakes. I’ll explain how they went awry further down in the post. I’m also sharing the recipes, as I go along too, in case you want to take yourself to school and experiment with making your own vintage snowflake cake this winter as well.

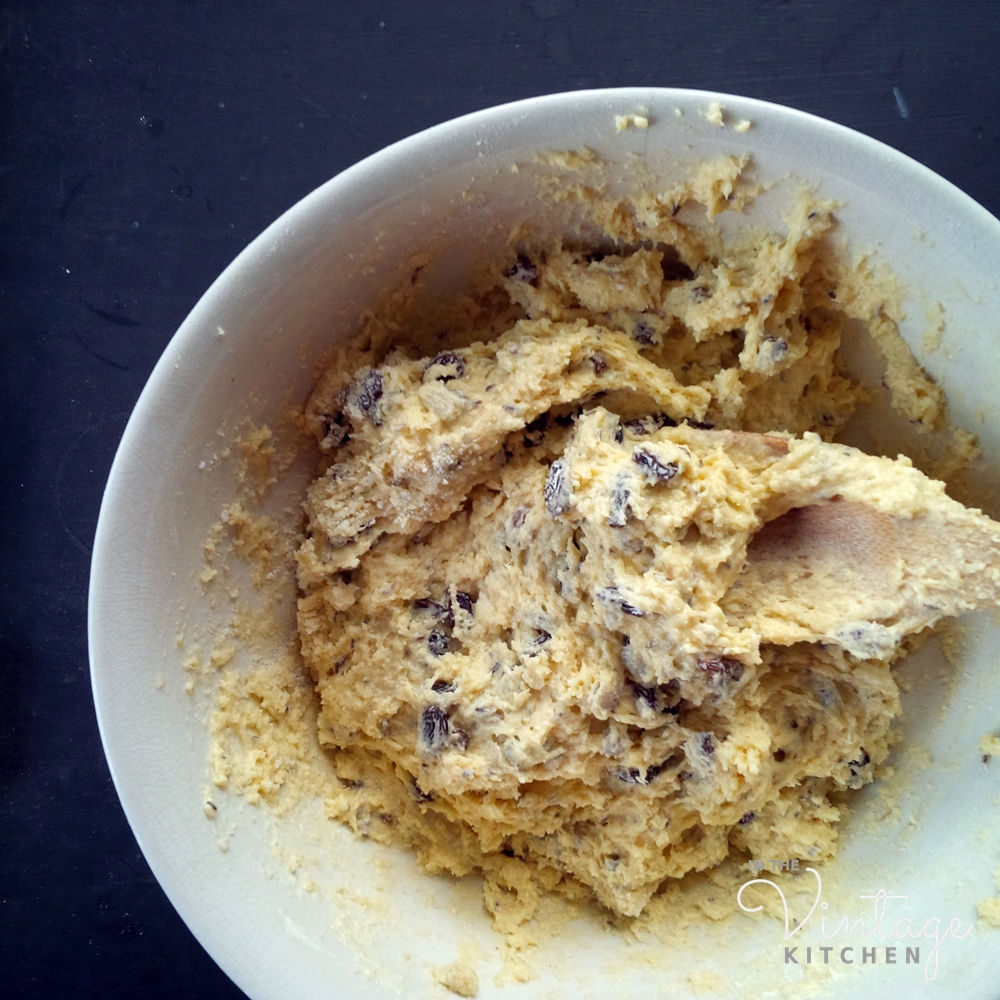
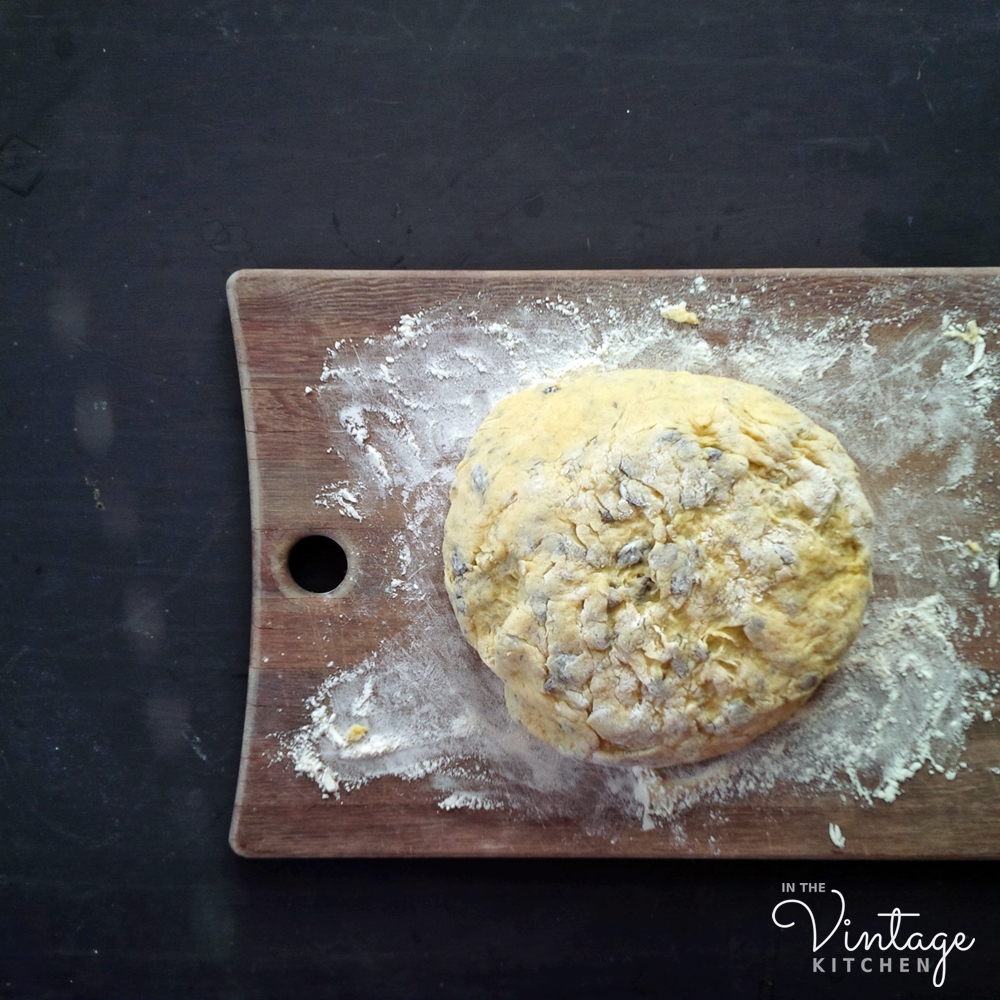
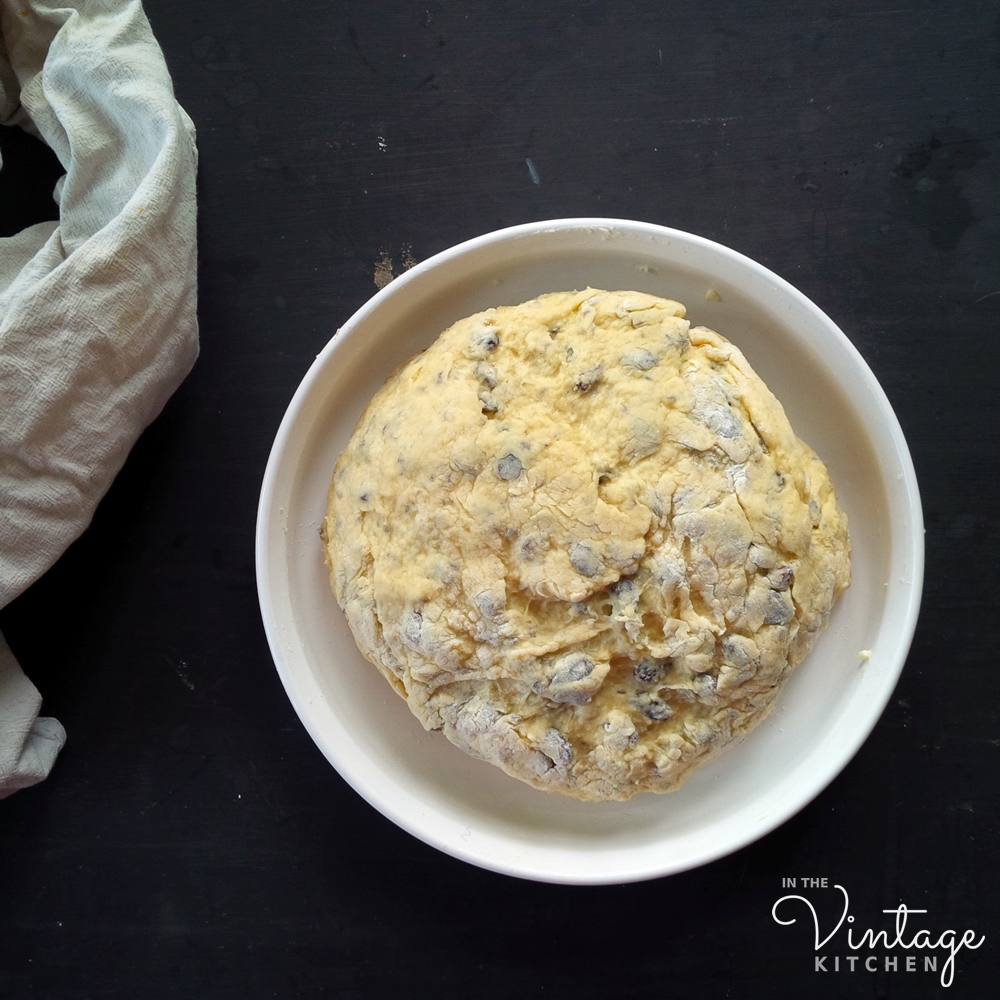
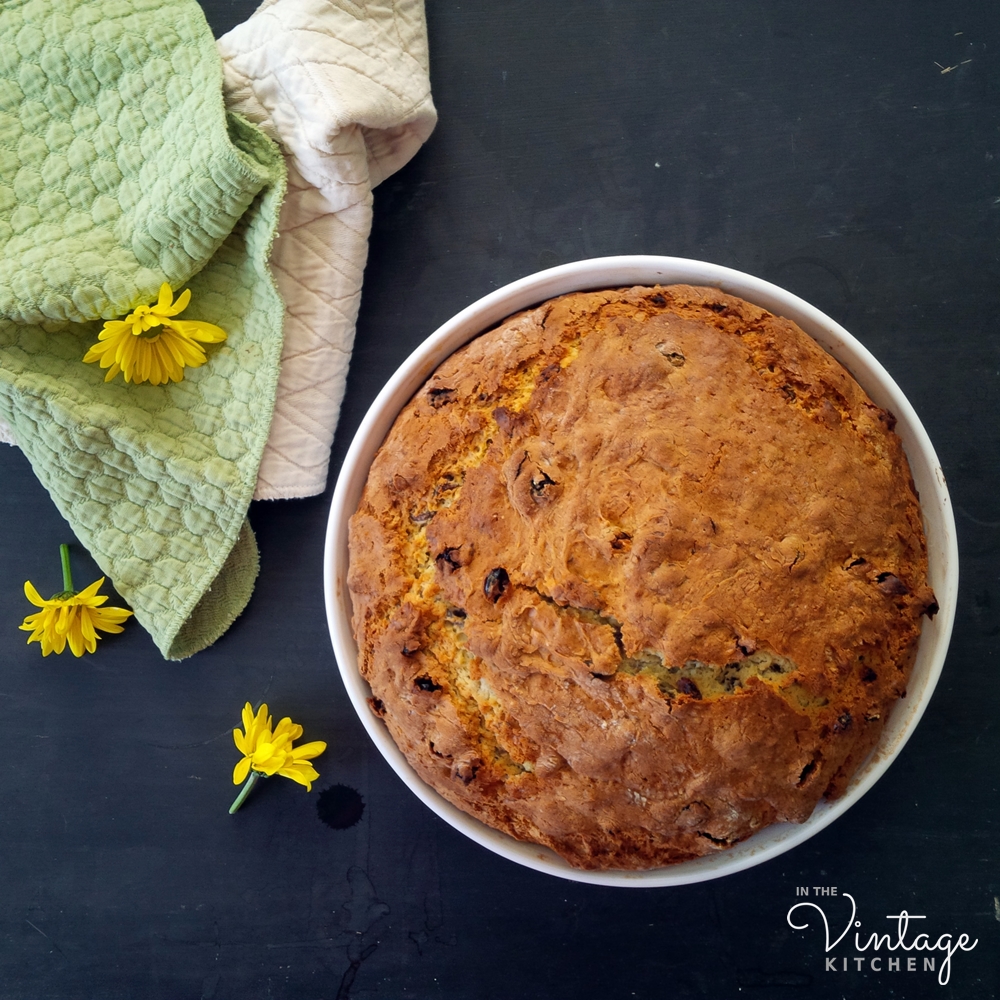
One funny thing about this cake decorating book in particular is that it’s all about cake decorating and only cake decorating, which means that you have to gather a recipe in order to bake the actual layer cake part from another source. I used Martha Stewart’s Butter Cake recipe which turned out great because it baked flat and even on all sides – characteristics you definitely want when making a multiple layer cake.

Martha Stewart’s Butter Cake 1 

(makes two 9.5″ inch round cakes)

8 ounces unsalted butter

3 cups cake flour, plus more for dusting

1 tablespoon baking powder

1/2 teaspoon salt

2 cups sugar

4 large eggs

1 teaspoon pure vanilla extract

1 cup whole milk

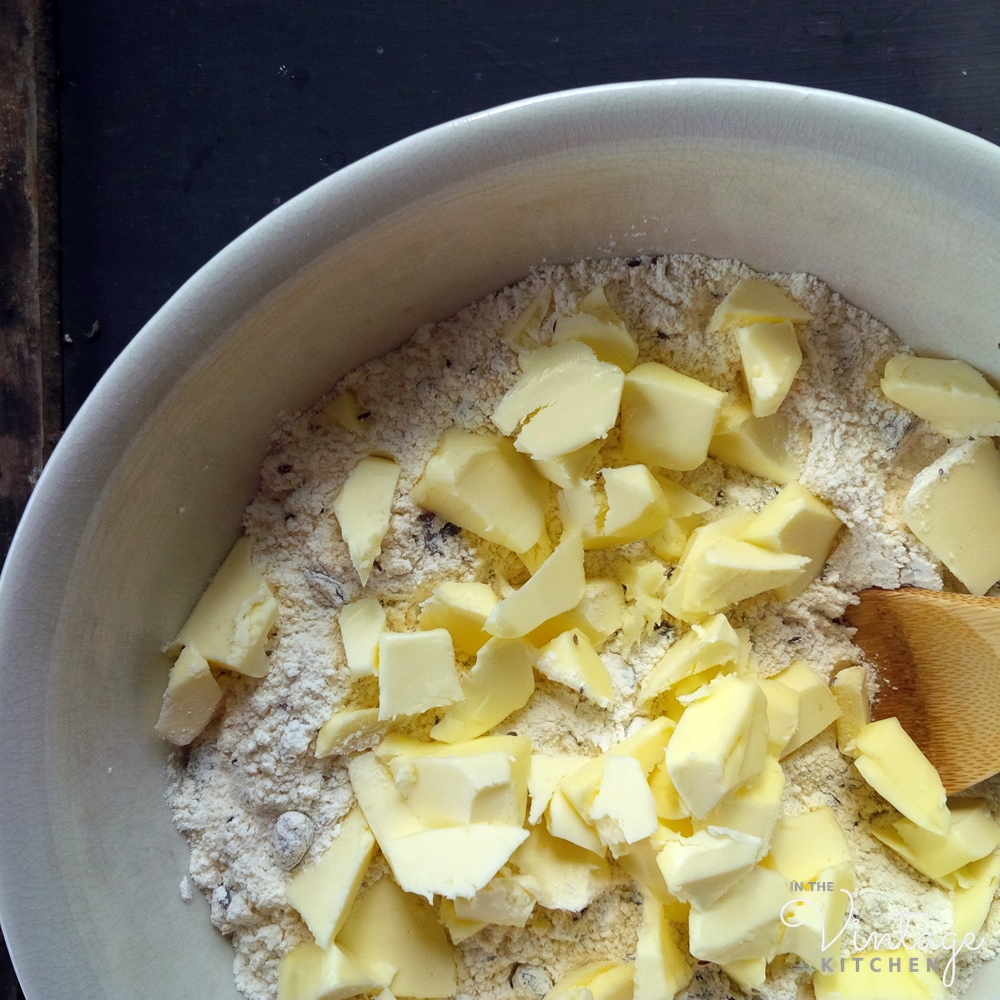
Preheat oven to 350. Butter cake pans and dust with flour, tapping out excess flour.

Whisk together flour, baking powder and salt in a medium bowl. Set aside.

In a large bowl, using an electric mixer, mix butter and sugar until pale (about 2-3 minutes). Add eggs, one at a time, mixing well after each addition. Add vanilla and mix again.  Add flour mixture in three batches alternating between each batch with two batches of milk. Stir until evenly combined.

Distribute batter evenly between cake pans (this is about 3 1/4 cups of batter per pan).

Bake for 20-25 minutes or until cake tester inserted in center comes out clean.

Let cakes cool in pan on wire rack for 20 minutes. Invert cake layers and remove cake from pan. Let cool on wire rack completely then wrap each cake in wax paper and then plastic wrap and store in the fridge until you are ready to frost.

There are two types of frosting used for this cake. A pale green buttercream and a bright white royal icing. Both icing recipes are from the Wilton School and are easy to use. They both include a curious ingredient called meringue powder (made by Wilton!) which can be found in the baking section of your grocery or online.

I didn’t even know there was such a thing as meringue powder before this project,  but basically it is an egg-white substitute used in place of whipping up fresh eggs. Normally, I’m not a fan of substitute convenience products but since this was the first time I was making this cake I wanted to use the products they recommended. Next time, I’ll try to make my own meringue using fresh eggs. Now it’s onto the frosting…

Snow-white Buttercream

(makes 8 cups)

2/3 cup water

4 tablespoons meringue powder

11 1/2 cups sifted confectioner’s sugar

1 1/4 cups butter

3/4 teaspoon salt

1/2 teaspoon vanilla

2-3 drops green food coloring

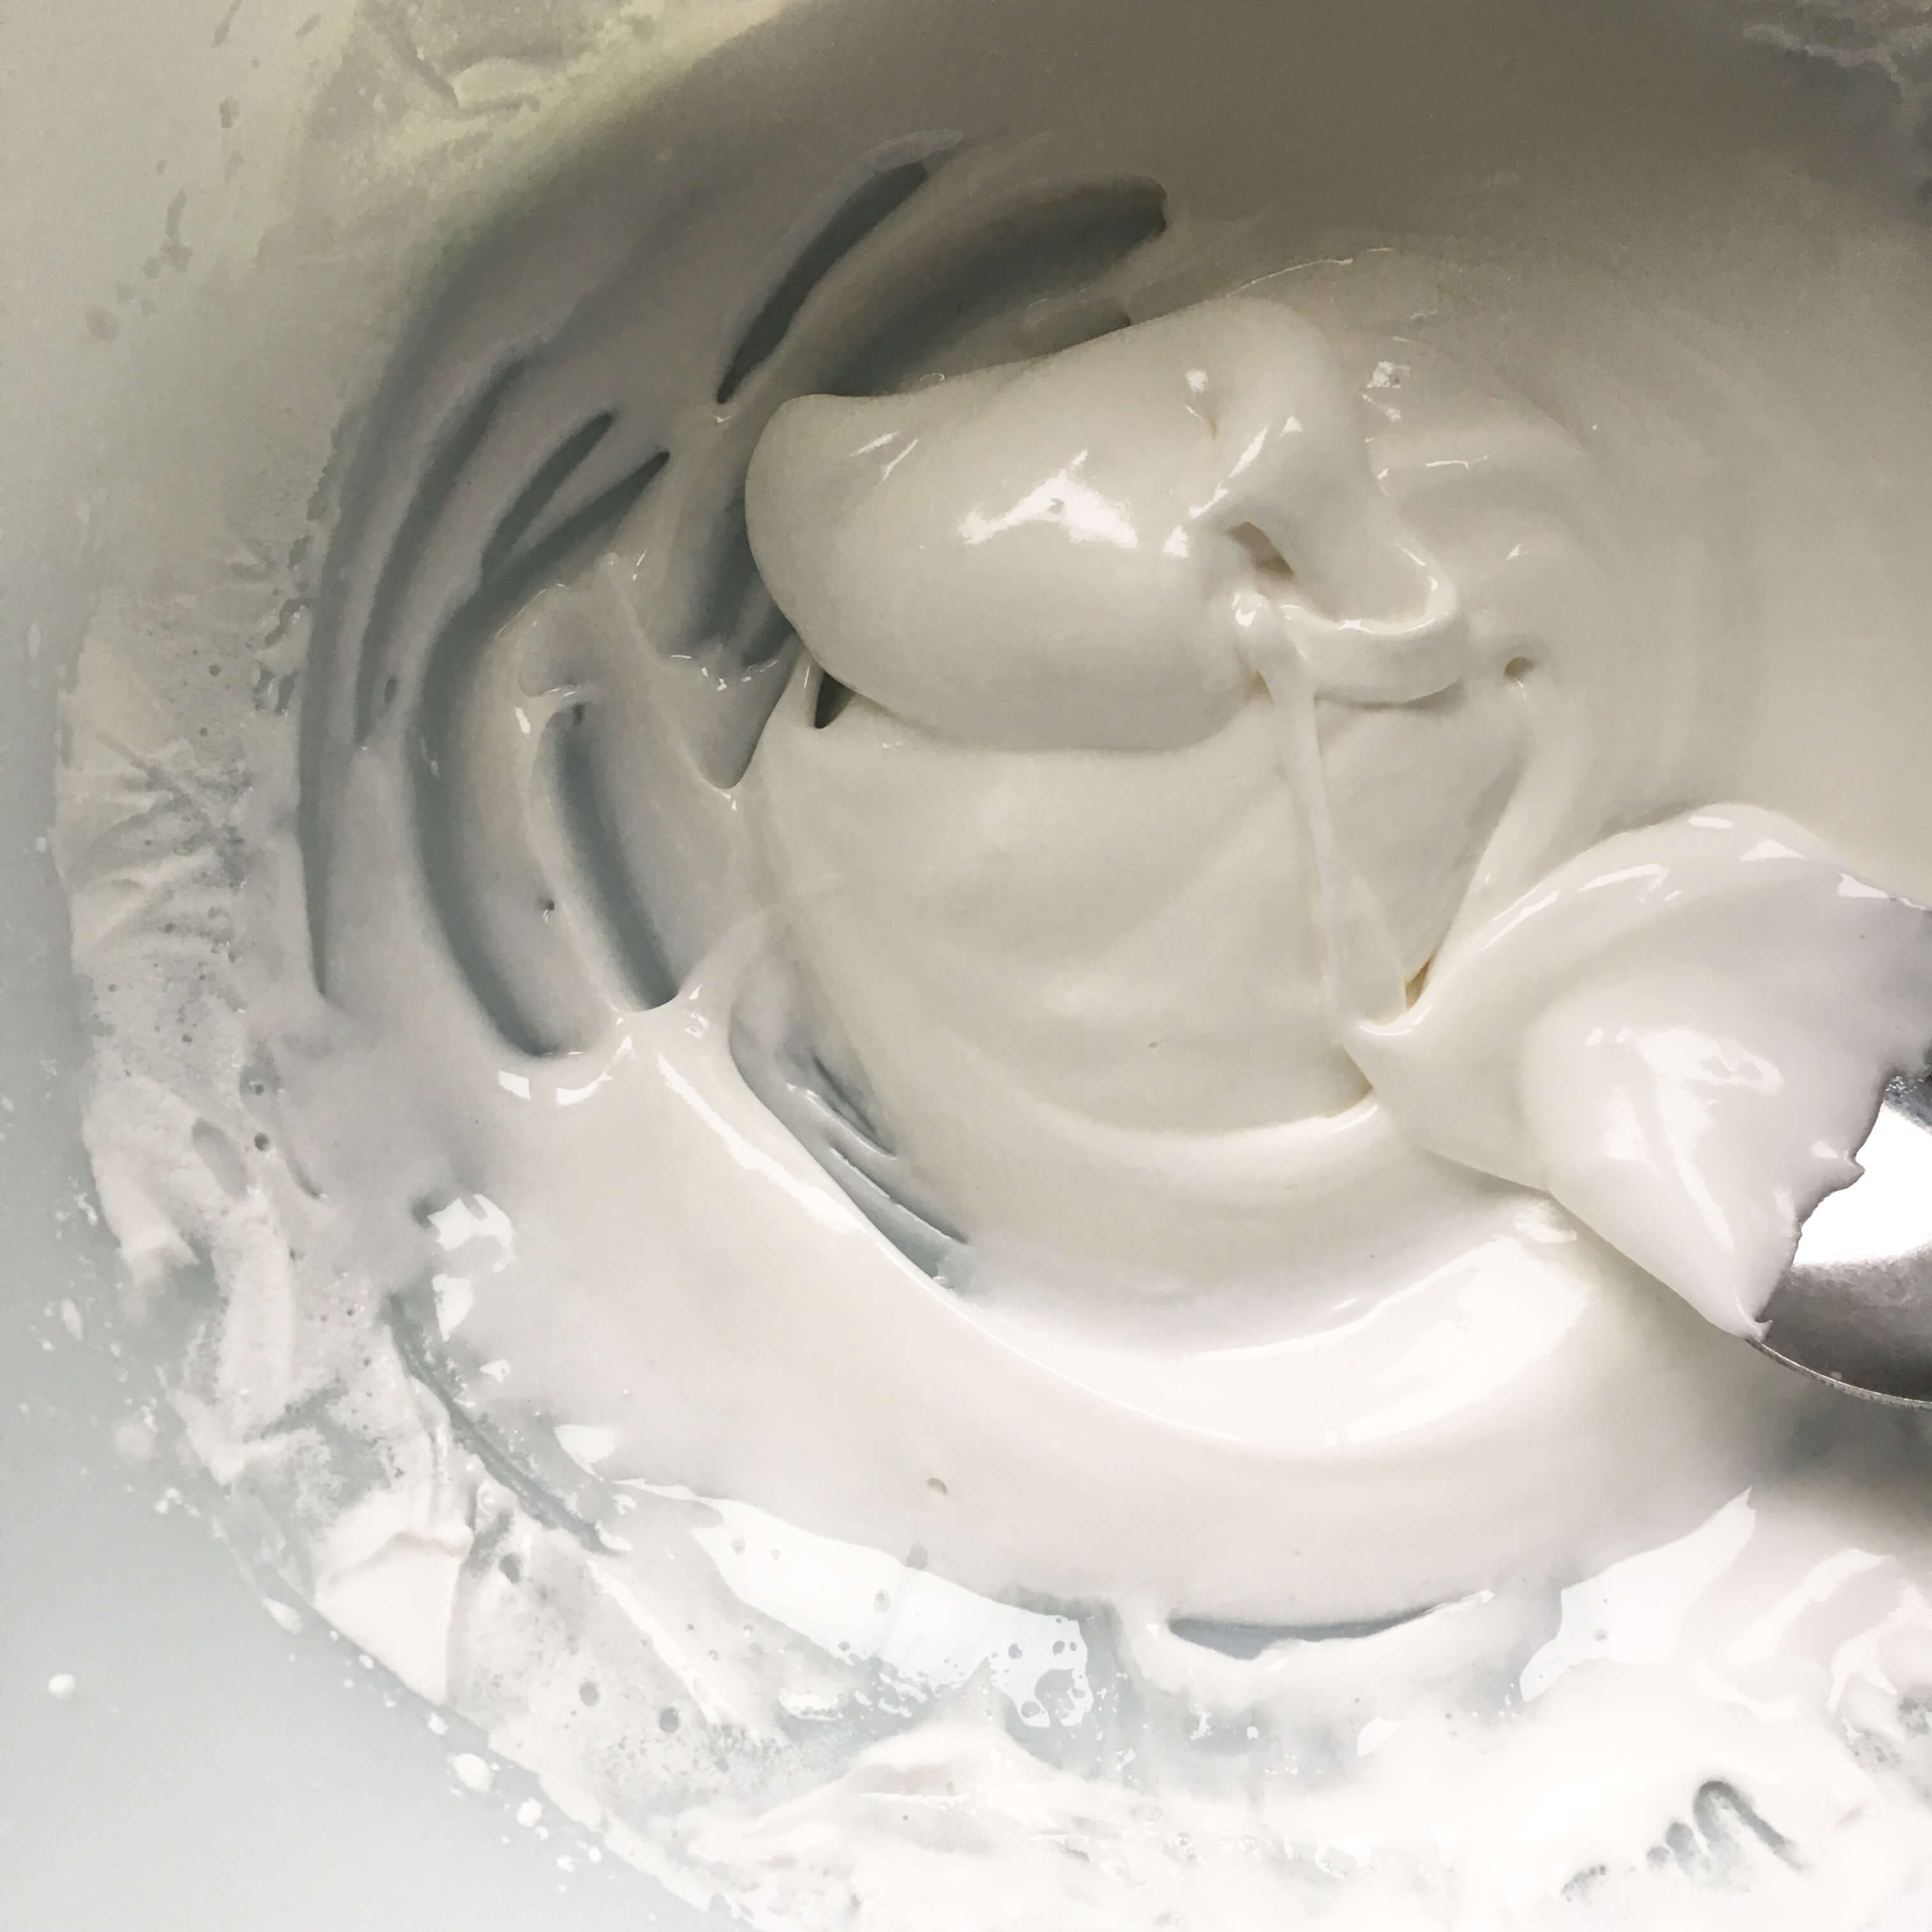
In a large mixing bowl, combine water and meringue powder and whip at high speed until peaks form. Add 4 cups sugar, one cup at a time, beating at low speed after each addition. Alternately, add butter and remainder of sugar. Add salt and vanilla and beat at low speed until smooth. Add food coloring one drop at a time, (a little goes a long way!) mixing thoroughly between drops until a desired shade is achieved. The color will deepen as the icing ages, so keep that in mind when adding drops.

Special note: This  recipe makes enough frosting for one two layer cake  including top, sides and  filling between layers, plus a little extra. Leftover frosting can be stored in an air-tight container in the fridge for several weeks.

Next, I set to work frosting the top of the first layer and then the top and sides of the next layer…

When it was all sufficiently frosted, I cleaned the frosting knife and then gently scraped it as evenly as possibly around the sides of the cake to create a smooth texture.That same treatment was repeated on top of the cake too so that it maintained a flat and level surface. At this stage, I learned a fun little trick. A little drop of water helps to smooth icing out – so round I went once more on the sides with a wet frosting knife. Then the cake was set aside so that the icing could harden (or “crust” as Wilton described it). Next on the schedule was making the icing for the snowflakes…

Meringue Royal Icing

(makes 3 1/2 cups)

3 level tablespoons meringue powder

1 lb. confectioner’s sugar

3 1/2 oz. warm water

1/2 teaspoon cream of tartar

Combine all ingredients in a medium sized mixing bowl. At first, mix slowly with an electric mixer then increase the speed to medium and mix for 7-10 minutes.

Things is where things got a little bit tricky. While the snowflake icing is super easy to make,  the method used to make the snowflakes is really difficult. It involved piping icing onto wax paper…

letting each snowflake dry for an hour…

re-piping each one again (aka over-piping), letting it dry for another hour…

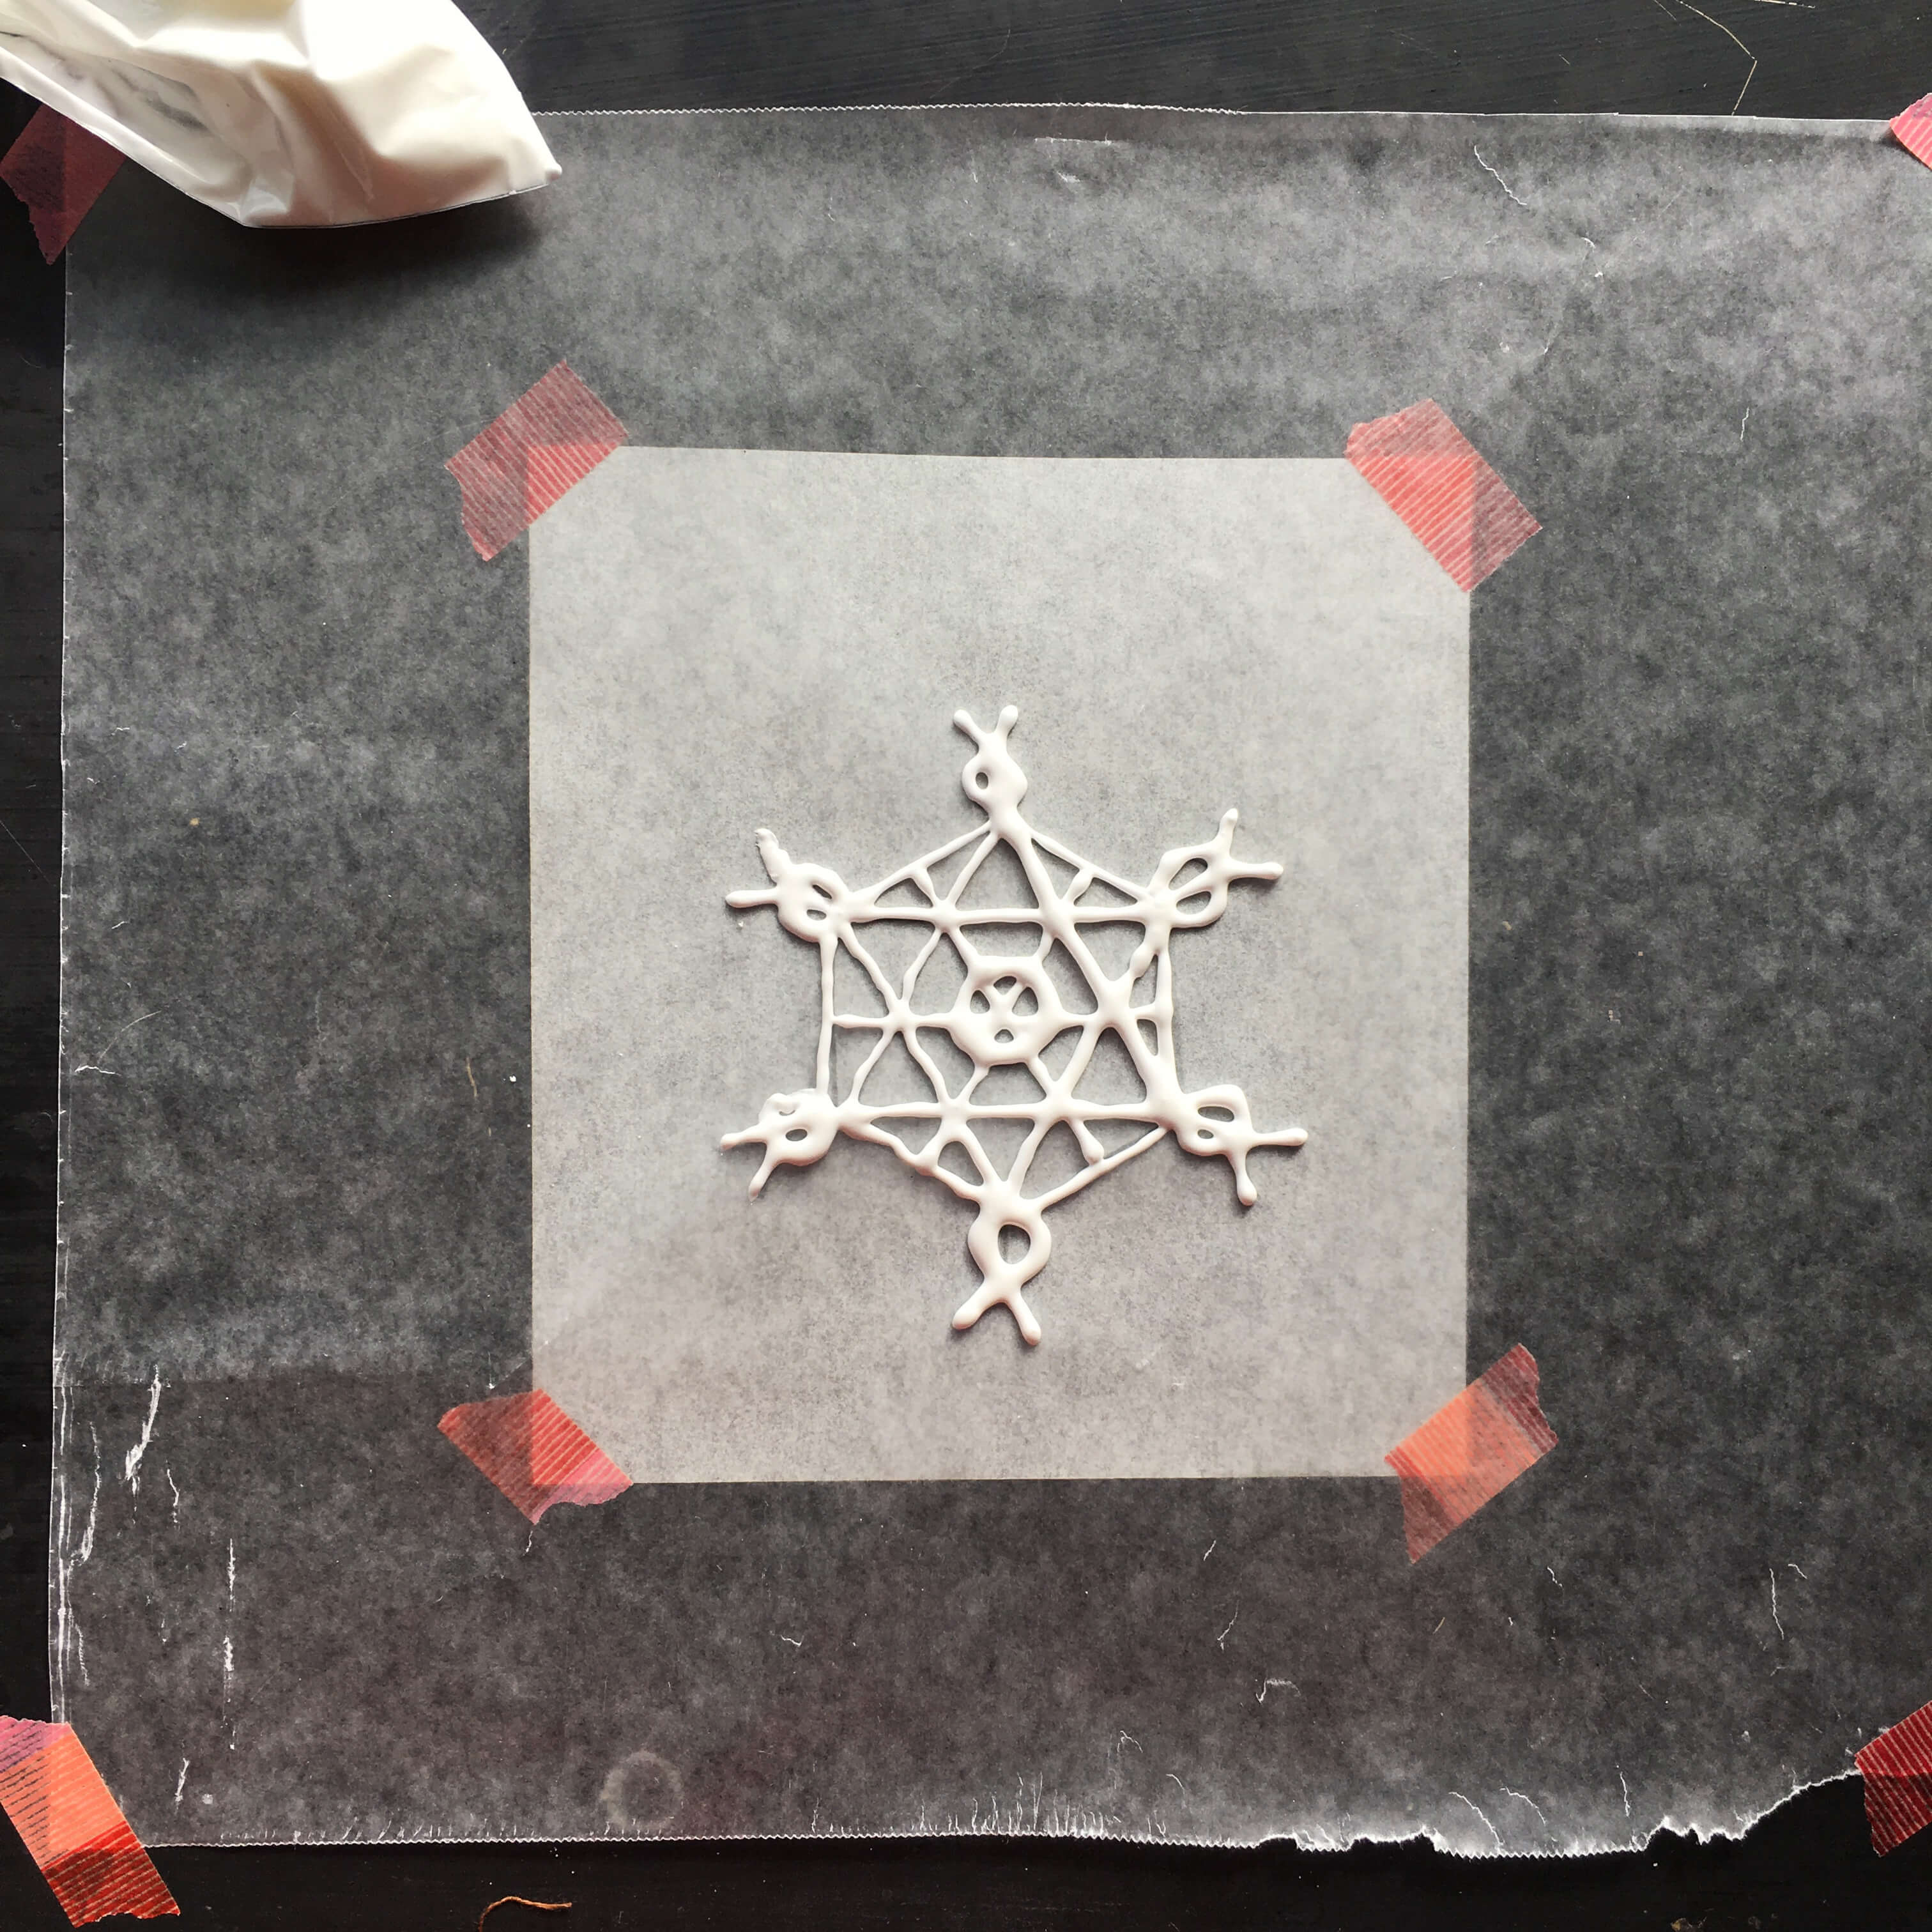
and then carefully removing each snowflake from the wax paper and adhering them to the cake one by one. In theory, this sounds simple enough, but each snowflake was very tricky to remove without them doing this…

After many attempts and many hours, I abandoned this method of snowflake making altogether. Evidently I need more practice in this department! Instead, I just carried on and piped the large snowflake directly on top of the cake, freehand style, and left the sides bare.

Finally, this winter snowflake cake was trimmed on top and bottom with little snowballs. Wilton recommended using two-different sized pastry tubes #3 and #6 for this task, but I just used just one ziploc bag and it worked great.

And that was how this vintage snowflake cake came to be. It definitely isn’t a perfect cake compared to Wilton standards, but it was a whole lot of fun to make and has me thinking about future designs once I practice, practice, practice as Wilton often recommends.

Have you guys ever decorated cakes like this before? If you have any tips or techniques or adventure stories of your own confectionery creations, please share them in the comments section below. It will be fun to help propel the educational portion of this post, so that we can all learn together. And most definitely, if you embark on this winter snowflake baking project, please let us know how it all tuned out in your kitchen.

In the meantime, learn more about the wonderful world of Wilton and their inspiring vintage cake decorating book  here.  Several other shop items also made an appearance in this post’s photos as well… find the 1960’s era glass cake stand here, the 1920’s silver plate water pitcher here, and the vintage embroidered tea towel here.

Hope your weekend is as sweet as buttercream and as lofty as a layer cake! Cheers!


The Cake That Fed An Entire Town: {Part Two} On Election Day in 1700’s America

Ladies and gentlemen, the results are in!  Eighteen ingredients, nine hours, three loaf pans and one historic recipe later  – we have a winner – in Election Cake. Yesterday, when I wrote about the history of this patriotic confection, there was uncertainty and speculation about what exactly it was (cake or bread?) and if it was going to be a palatable sweet treat that transitioned well across three centuries. Today, we discovered what this celebratory concoction was all about. Let’s look…

The recipe began yesterday, simple enough, with yeast and water and flour, and a dash of sugar and oil…

It was left to rise six hours on its own, which it did, like a good little cake…

Next, went in a handful of ingredients…

After they were all mixed together, the batter was ready to be parceled out into three loaf pans…

and were left to rise again, for another hour, which they really didn’t do at all. It would be generous to say that after the hour was up, each loaf was half an inch taller, but that would be an exaggeration. Maybe, indeed the batter did rise a little, but if so it was barely noticeable. I hesitated here at this stage, thinking maybe I should let them sit longer so that each loaf could get bigger. But then I remembered that the author of this recipe, Fannie Farmer, was a stickler for precision and instruction, so into the oven the three loaves went, without any extra rise time. Just follow the recipe. That’s what Fannie would have said.

Exactly at the one-hour mark, no less and no more,  the loaves came out sky-high and golden brown…

Fannie didn’t fail us after all! The tops even cracked open themselves and looked like little lips about to say yum. A good sign of things to come.  After a short cooling-off period, the loaves were ready to cut and serve and taste…

And that is when I discovered that this very old Election Cake is in fact, very delicious. I understand how people could get confused about whether to call it a cake or a bread because really it is similar to both.  It has a texture and consistency like banana bread or zucchini bread but also it has a light and fluffy body like cake. The combination of the whiskey, yeast, and nutmeg gives it a subtle hint of almost root beer-like tang that is lovely and warm. Although it already has a cup of butter in it, this little darling of a delectable is calling out to be sliced and toasted with an extra slather of butter.

While no one ingredient is powerfully overwhelming, all of them work well together to create a balanced flavor that hints at citrus and at spice, which leads me to understand how so many varieties of Election Cake came about between the 1700’s and now. It’s wonderful just as it is, but it’s also one of those recipes that might spark your creativity. After you have made it once or twice, it will make you feel brave – enough to confidently add your own little twist. Not an improvement, just a twist.  Maybe you’ll want to add some nuts or orange peel or cinnamon or cranberries. Or maybe you’ll get creative on the serving side and want to pair it along with thinly sliced pieces of ham or brie or cream cheese for a savory little snack. I love recipes like this – ones that feed your brain as well as your belly.

Either way, you decide to approach this recipe,  you’ll be most successful with it if you use good quality ingredients like local eggs, fresh nutmeg, European butter, etc. They might be a little more expensive to buy, but the more fresh and natural your ingredients, the more flavorful this cake, in particular, will be. And because it makes three loaves at once, you can freeze two for later, preferably when it’s cold and snowy, as this would be especially nice for winter breakfast alongside a cup of coffee, for lunch or tea-time, or even afternoon hors d’oeuvres. Sweet in a satisfying, robust way (not in an empty calorie way), it will give you renewed energy to carry on with your day, which was exactly the original intention way back on voting days in the 1700s.

Fannie Farmer’s Election Cake

(Makes 3 loaves. Recipe written exactly as it appeared in the 1965 edition of the Fannie Farmer Cookbook)

Put in a bowl… 1 cup warm water (not hot)

Sprinkle over it… 1 package yeast

Add… 1 tablespoon sugar, 1 tablespoon salad oil (I used olive oil), 2 1/2 cups flour

Beat thoroughly, cover, and let rise overnight or at least 6 hours.

Butter three loaf tins. Cream 1 cup butter. Cream in 2 cups dark brown sugar.

Add 4 eggs, well beaten.

Stir in 1 tablespoon grated lemon rind and 1 tablespoon lemon juice.

Sift together 1 1/2 cups flour, 1 1/2 teaspoons baking soda, 1/2 teaspoon powdered cloves, 1/2 teaspoon nutmeg, 1/2 teaspoon mace (if you can’t find this spice, substitute it for an additional 1/2 teaspoon nutmeg), 1/2 teaspoon salt.

Add to the butter mixture. Add 2 cups seeded raisins, 1 cup whiskey.

Stir into the yeast batter and beat to blend well. Divide the dough into the tins. cover and let rise for 1 hour. Bake about 1 hour at 350 degrees.

Interested in learning more about Fannie Farmer and her historic recipes? Find the 1965 edition of her original 1898 cookbook in the shop here.

And just a little reminder… there are just two days left to save 20% off all vintage and antique platters in the shop! Find your favorite here. 

The Cake That Fed An Entire Town: {Part One} On Election Day in 1700’s America

Once upon a time in history long, long ago there was a cake that fed the whole entire town on Election Day. Called simply, Election Cake, it was an active participant in the voting scene of early America. But while the recipe’s origins are as old as the United States itself, the exact history is a little bit varied depending on which source in which state is telling the tale.

The first American cookbook was written by Amelia Simmons and published in 1796. Her second edition of this cookbook, published two years later in 1798, features the first published recipe for Election Cake.

Essentially though, everyone pretty much agrees that it boils down to the early days of New England (some say Connecticut, some say Massachusetts) when Election Day was celebrated in the Spring and considered one of the biggest party days of the year. Enjoyed with the same amount of zeal as our modern St. Patrick’s Day festivities, Election Day in 1700s America was a boozy holiday full of ale and camaraderie, and community support. Only people weren’t celebrating one particular heritage like we do the Irish on St. Patrick’s Day. They were celebrating everyone’s heritage, as Americans, on Election Day. The fervor was for freedom. And the cake was needed to sop up everyone’s spirits (the ale especially).  It also provided a little motivation to actively vote for the political candidates of the day, because even in 1700s America, people (and politicians!) were aware of the powerfully compelling nature of cake and its ability to attract favor.

Being such a big festivity in the lives of Colonial America, with people traveling from miles around to attend special gatherings,  it made sense to local residents, at the time, to bake one enormous cake to serve all who showed up. So out of thirty quarts of flour and fourteen pounds of sugar and ten pounds of butter, Election Cake was born from the loving hands and hearts of local women who couldn’t vote themselves but could at the very least feed the men who were voting for them. Some historians say that this proves that women were important members of the political spectrum even back then when they had no vocal authority.  I don’t know about that, they may have just looked at the voting day in a practical feed-the-masses way,  but it is fun to think that while they were baking, they were also discussing political topics among themselves. Even if they were just hushed whispers while they were mixing batter and melting butter, I like to think they were formulating their own ideas about what should and could happen in the future shaping of America.

An election cake recipe from 1889 by Ellen Wadsworth Johnson. Photo courtesy of connecticuthistory.org

The interesting thing about Election Cake though is that it is not really cake. Since its inception, it has really been more of a fruit and spice-studded bread than a traditional cake. And in true American spirit, it has been revised and enhanced and reworked over the centuries into numerous different versions like breakfast buns, frosted bundt cakes, and drunken fruit cakes. The core of the recipe remains the same though – flour, butter, and sugar – but over the years different variations have been included and excluded that involve milk, eggs, raisins, currents, citrus fruits, whiskey, rum, brandy, wine, confectioner’s sugar, etc. Baking equipment differs too. Originally, back in the day when one giant cake was made, it was too big to fit into any bakeware so it just baked free-form on the oven floor. Next came bread loaf pans, a smart decision that produced numerous easy-to-handle loaves that could be made by numerous hands. Then there was the bundt cake method, the cast iron skillet method, the baking dish method, etc.

The 1965 edition of the Fannie Farmer Cookbook originally published in 1898.

For this post, I’m making the Fannie Farmer version from her 1965 Fannie Farmer Cookbook, which was first published in 1898. True to form, this recipe has changed a bit over the Fannie Farmer years too. The 1960s version involves raisins, whiskey, and loaf pans. Her original recipe from 1898 called for figs, sour milk, and bread dough starter.

The bulk of this project lies in waiting for the dough to rise (six hours!).

A nine hour baking project from start to finish, this is a kitchen adventure that will unfold over two days and two blog posts. Tonight, we discussed the history behind the recipe, and tomorrow we’ll discuss the actual recipe and how it all turned out. Will it indeed be more like a raisin bread rather than a fruit cake, as it is listed in Fannie’s cookbook? Will our modern palettes fall in love with this old-fashioned recipe enough to resurrect it and recommend it in the Vintage Kitchen?  Will it become a repeat labor of love on future days of election or will it be a one-hit-not-so-wonderful? Only time will tell in this case. Tune in tomorrow for the 2018 Election Day results, vintage kitchen style… {read part two here}.

Plum Perfect for Fall: A Joy-Filled Dessert Recipe from 1964

Over on Instagram the other day, I posted this photo above of the first Fall-themed dessert to come out of the Vintage Kitchen oven. It’s called Plum Cake Cockaigne and is from the 1964 edition of one of the most popular cookbooks in American history – Joy of Cooking by Irma Rombauer.

Also over on Instagram, I learned something new recently about cooking blogs and recipe finders. It seems not everyone wants to scroll through a whole entire story in order to get a recipe, so I’m trying something new with this post – recipe at the top,  story at the bottom. You guys let me know how you prefer this new layout.  Time always seems to be so short during these last few months of the year, so if this makes your life (and your cooking experience!) easier please let me know by comment or message and I’ll adjust as you prefer.

Plum Cake Cockaigne

1 cup all-purpose flour

1 teaspoon double-acting baking powder

1/4 teaspoon salt

2 tablespoons sugar (I used brown sugar)

1 1/2 to 3 tablespoons butter (I used 3)

1 egg

1/2 teaspoon vanilla

Milk

3-4 cups thinly sliced plums, skin-on (about 5 plums)

1 cup sugar (I used brown sugar)

2 teaspoons cinnamon

3 tablespoons melted butter

Preheat the oven to 425 degrees.

In a large mixing bowl, sift the flour. Add the baking powder, salt, and sugar to the flour and re-sift.

Add the butter (Note: The juicer your plums, the less butter you need to add. My plums weren’t excessively juicy so I used the full 3 tablespoons of butter), mashing it up in the flour mixture with a fork, until the entire mixture looks crumb-like.

In a measuring cup, add the egg, vanilla, and enough milk to equal a 1/2 cup of liquid (this was about 1/4 cup milk in my case). Whisk together until these three ingredients are combined.

Add the egg mixture to the flour mixture and stir until a stiff dough forms. Spread the dough mixture evenly on the bottom of your pan or baking dish and then set aside. (Note: Irma recommended a 9×9 x 2 1/2 inch pan but I used a round 10″ inch x 2″ inch baking dish and that worked great as well).

Next, thinly slice your plums so that you will have enough to overlap each one in your pan – tart style and then arrange them on top of the dough. This is the fun, creative part! You can make many different types of designs with your plums if you like.

In a small bowl, combine the sugar, cinnamon and melted butter and then sprinkle the mixture on top of the plums.

Bake in the oven for about 25 minutes until the top is bubbly and brown.

Our plum cake was so bubbly I couldn’t help but take a little video of it as it was coming out of the oven!

I recommend letting the whole thing cool before slicing and serving it if you prefer to plate it in wedge-shaped slices.  Since the top layer carmelizes it is easier to slice when it is in a  cooler, more solidified state.  If you’d rather eat it warm, right out of the oven,  simply scoop it into a bowl and enjoy. Serve it on its own, with a dollop of whip cream or a bit of vanilla ice cream and taste the season unfold in all its cinnamon sugar splendor.

What is really fun about this dessert is that it is like two sweet treats combined into one – half tart and half cake. Because there is only one cup of flour and one egg, the cake part is very thin and the fruit arrangement on top is very much like a tart, so this turns out to be a light and less filling alternative to two traditional desserts yet retains all the lovely flavor of both. Plums don’t get as much attention in the Fall as apples and pumpkins in the baking department, but they are still in season until the end of October, so they make a lovely unexpected seasonal dessert.

That’s Irma on the left and her daughter, Marion on the right. 

Plum Cake Cockaigne (pronounced caw-cane) was a favorite recipe in the Rombauer household. The word cockaigne was a term of endearment in the cookbook and was tacked onto various recipes throughout the Joy of Cooking as a way to signify the absolute personal favorite recipes of the Rombauer clan. Derived from old French, cockaigne literally refers to a mythical land of plentiful luxury, comfort, and peace. Such a dreamy notion of an ideal paradise was so charming to the Rombauers it was also the name they chose for their country estate.  How fun!

The 1964 edition of the Joy of Cooking came out two years after Irma died, the first edition to be edited, revised and enhanced by Irma’s daughter, Marion and Marion’s husband, John. Not without its own dramas, this edition needed all the cockaigne it could get. The first printing of the 1964 edition was published without Marion’s final approval, which meant that various inconsistencies and typos were present. This drove Marion crazy, as she wanted to really honor her mother’s work and keep up with the trusted reputation that the Joy brand had accumulated over 30 years since its debut in 1931. So the 1964 edition went through several reprints in order to right all the wrongs that Marion doggedly corrected herself. You get a sense of the enormous responsibility and weight of the legacy that Marion felt surrounding the whole Joy endeavor from her dedication at the beginning of the book…

The edition that is available in the shop is the 1967 printing of the 1964 edition, the one that Marion was finally satisfied with. All of this devising and revising is a real testament to the dedication of the Rombauer family. One that started with Irma way back in the 1930’s and still continues through present family generations today.

Irma’s launch into cooking stardom is a fabulous story, one that we’ll discuss later on in the month as we celebrate her birthday on October 30th. For a woman who wasn’t known for cooking skills when she first started writing a cookbook, she certainly has proven her abilities time and again over the past 80 years. Stay tuned on that front.

In the meantime, there are a couple of weeks left to enjoy plum season. Hope you “fall” in love with this recipe as much we did!

Find the cookbook in the shop here and a link to our Instagram account here if you’d like to keep up with daily doses from the Vintage Kitchen.

Cheers and happy baking!

Luther Burbank, The Reliable Russet and Everyone’s Favorite Way to Eat A French Fry {1970’s Style}

They come with names that sound like 1970s rock bands… Bodega Red, Arran Victory, British Queen, Golden Wonder, Bellarosa.  Or like types of prize-winning chickens… German Butterball, Champion, Adirondack Red, Tyson.  Some even sound like certain breeds of dairy cows… Shetland Black, Royal Jersey, Blue Bell, Annabelle, Cream of the Crop.

But today we are not talking about chickens or cows or headliner music. Instead,  today we are talking about potatoes. All those names previously discussed are specific types of one of the most consumed foods on the planet- the noble and nourishing potato.  With more than 5,000 varieties in the world, you might think that it would be hard for one lone potato type to stand out in his vast tuber family of brown, round, knobby-eyed dirt dwellers.  But there is actually one big-time celebrity in the batch – a spotlight stealer known around the world –  a superstar of the food and restaurant scene that represents the most frequently consumed potato on the planet.

It is my pleasure to present the story of the wondrously addictive potato variety known as the Burbank Russet. Haven’t heard of it, you say? Ah, but just you wait…you’ll know it. Maybe not by backstory but definitely by bite.

On Friday, it was National French Fry Day and we celebrated with a homemade batch of Russet potato french fries in honor of the guy who created them. Meet Luther Burbank, 19th-century American botanist extraordinaire…

Luther grew up in Massachusetts in the 1850s playing with seed balls in his mother’s garden instead of playing with sports balls in his farm neighborhood. His interest in botany from the time he was a youngster fueled his curiosity for plant cultivation, a field of study that would eventually turn into a lifelong career. Throughout his childhood and into early adulthood, Luther tinkered around with seed starting and plant breeding.  Although it was a laboriously slow process, most often times ending up in disappointment, Luther came by this area of study naturally. His mother also shared his interest in gardening and the two of them would happily spend hours working in the garden, talking about the life stages of various plants.

The plant world was a playground to Luther, something that represented creativity and freedom from set rules and rigid disciplines. He had aspirations to one day have his own farm in California where he would grow vegetables and flowers for the retail market and try his hand at growing new breeds of plant life. In his early 20’s, he started experimenting with potatoes.  But developing a new variety wasn’t as easy as you might think.  Potatoes are peculiar things. They can be regenerated in two ways – through seeds or eyes. Either method produces similar results or slightly different results in the form of mutations or spores each time offspring are generated.  It is difficult to determine at the onslaught of a growing project how the potatoes will turn out at the end of the project. More often than not the experimentation stage for Luther in trying to cultivate a new variety was long and finicky.

If you have never seen how a potato grows, this is a good illustration. Plant above the ground and lots of potatoes nestled together below ground. Image from the 1893 L.L.May & Company Seed Catalog featuring Northern Potatoes.

But in 1873 gratification came, finally, to Luther’s ruddy, soil-covered hands. One day in his 24th year, Luther went out into the field to dig his latest sample crop, half expecting to uncover the same old story of growing the exact same plant he started out trying not to grow. But this time, something was different.  Instead of digging up an ordinary round potato, Luther pulled a tuber out of the ground that was twice as big and twice as long. It was reddish-brown in color and hefty in weight. A totally different specimen than the parent potatoes he had started this most recent batch with.  Success at last! His first genuinely original new potato had emerged.

He christened this new masterpiece the Burbank Russet and immediately sold it for $125. Was that enough money for Luther to retire early to his California dream farmhouse and garden? Not quite yet, but that’s not important to this story.  Money never mattered to Luther, only the science that stood behind it. He had made a new potato and that was pretty motivating stuff to keep his heart in the game and his hands in the soil.

Luther’s Burbank Russet was an exciting and innovative new addition to the agricultural market for its time because of its size. Almost twice as large as typical potatoes of that era, it also boasted an adaptable consistency (good for baking, mashing and frying) and it was more disease resistant to common blights that affected many potato crops around the world. But after it was introduced in the late 1800s, it took some time for the Burbank Russet to catch on. The US government initially started farming it in Oregon and from there it slowly spread to neighboring states and then the region and then the rest of the country. Eventually, it became the best-loved potato cultivator in the United States.

Russet potato farmers in 1940’s Idaho.

Farmers loved it because it was easy to grow and held up well in both shipping and storage. Once it became a successful and abundant crop, the food industry got on board. Its size, consistency and cooking adaptability made it an ideal food product for both general household consumers as well as commercial food companies and restaurants.

Although the actual cooking process of making French fries – cutting strips of potatoes and frying them in fat – had been around in France and Belgium since the 1700s, it wasn’t until a valuable American discovery was made in the 1930s that fries started to take hold as an American food staple. This important discovery was that french fries froze well and could be reheated easily while still maintaining the same shape, taste and texture.  In the early days of refrigeration, this was exciting!  This mere fact opened up opportunities for the retail, transportation and restaurant industries as french fries could now be shipped around the country in both frozen and fresh forms.

A midcentury newspaper ad for McDonald’s french fries.

By the time hamburger stands started popping up in the 1950s and 1960s, french fries became a main attraction at the drive-in burger stand as well as the family dinner table.

A vintage frozen french fry ad from the 1960s. Photo courtesy of itsjustoldpaper on Etsy.

The novelty of enjoying french fries both at home and at restaurants offered plenty of potential in the form of culinary creativity.  In mid-century America, the common condiments for them were simple… ketchup (or catsup, however you prefer!) and salt.

A 1955 advertisement for French Fries featuring Hunt’s catsup.

But by the 1970s, these little potato favorites were garnering more international gourmet attention. Common toppings and condiment companions of the disco era included the following…

…paprika, cracked black pepper, parmesan cheese, malt vinegar, crushed herbs, ketchup, mayonnaise, mustard,  salt, and a special mayonnaise/mustard mixed combo variation. In addition to frying, it also became much more commonplace, especially in the latter decades of the 20th century, to oven-bake freshly cut fries. This method of cooking was believed to be a “healthier” version since it involved less oil and a tamer cooking experience (no vats of hot fat to contend with!) as opposed to traditional deep-fry methods.

Because a lot of people tend to think it is easier to go to a fast food restaurant and buy a serving or two of fries or grab a box of frozen ones from the grocery store, we made the oven-baked variation for this post to prove how simple, quick and easy it is to take a fresh potato and turn it into a delicious hot french fry in less than 30 minutes. This recipe comes from the vintage cookbook Joy of Cooking (1975 edition)  and was a breeze to make. Literally, it took 5 minutes to prepare and 20 minutes to bake,  which makes it a fast side dish for your summer burgers.

Oven “French-Fried” Potatoes (serves 1-2)

1 large russet potato (scrubbed)

1/8 cup olive oil

A generous sprinkling of sea salt

Preheat oven to 450 degrees. Slice potatoes lengthwise into long  1/4″ sticks (you can do this by hand or by using the julienne setting on your vegetable slicer. Either way try to keep each stick as uniform as possible to ensure even baking. Lay the freshly cut sticks between a couple layers of paper towels and pat dry to remove extra moisture, then spread sticks out on an ungreased baking sheet and drizzle with olive oil.

Using your hands, toss the potatoes and oil together so that all sticks are coated and spread them back out in the pan as flat as possible.

Bake in the oven for 10 minutes. Then remove from the oven and flip the fries over and  return back to the oven for an additional 8-10 minutes.  They should look something like this when they are ready…

Remove fries from the baking pan onto a paper towel-lined plate. Sprinkle with salt and pepper (or any of your favorite spices) and serve immediately.

Inspired by the 1970s list of approved condiments, I kept thinking while writing this post how fun it would be to have a french fry bar party where guests could pick and choose their own toppings from a wide assortment. So many flavors pair well with potatoes, so the possibilities would be endless as far as dips and dredges, sprinkles and submersibles. The one element of homemade french fries that should always remain constant though is the potato – always use russet potatoes. They are the variety of choice in almost every fast food french fry you’ll ever eat – including McDonald’s whose fries are legendary. And besides, you’ll make Luther happy using his version over any other!

Luther never lived to see the ultimate french fry-loving success of his humble potato breed, although he did live a fulfilling gardening life up until the time of his death in the mid-1920s. And he did acquire that dream farm in California that he always wanted…

Luther Burbank’s house as it looked in the 1920s
Now in 2018, his house is a city park and garden that is open to the public.
Luther Burbank House and Garden, 200 Santa Rosa Ave., Santa Rosa, CA

And he built a garden where he invented new varieties of fruits and flowers and vegetables. We have Luther to thank for cultivating these beauties…

Clockwise from top left: The Plumcot – a mix between plums and apricots, the Fire Poppy, the July Elberta Peach, the Spineless Cactus and the Shasta Daisy

So while he never did see his potatoes bubbling up in oil at the Golden Arches, he did see his lifelong passion laid out in the garden as the golden hour light passed from day into night. Satisfaction was never going to be found in fame or fortune when it came to Luther Burbank. He didn’t care about either of those two things. His happiness lived deep within the dirt – a vast canvas of potential –  fueled by a creativity and curiosity that never ceased to inspire him.

Cheers to Luther for inventing one of the most delicious potatoes in the world. And cheers to all the farmers who keep growing the russets. May they continue to add a bit of indulgence to our diets and serve as a basis for inspiration in our culinary endeavors.

Find out more about Luther and his Santa Rosa, CA garden park here.  Find the vintage Joy of Cooking cookbook in the shop here. 

If you guys have any favorite toppings or condiments that you prefer on your french fries please post them in the comments section below. We’d love to hear from you!

A Mare-gerita Affair: Happy Derby de Mayo Day!

It’s twice the fun… Happy Cinco de Mayo and Happy Kentucky Derby Day! Our busy week of posts winds up today with the table decorations for our Derby De Mayo party. On Tuesday,  we got out our vintage cookbook and planned our menu…

On Wednesday, we pulled out our dishes and planned our table settings…

On Thursday, we posted the story of Adelaida Cuellar, the inspiration (and the vintage recipe supplier!) behind this year’s party…

On Friday, we posted fun facts for this year’s Derby, picked our winners….

and made a second batch of Carne Mexicano and Ranchero Sauce for today’s party…

And for the final bit of merry-making, this morning we made our table decorations for our burrito stations and cocktail bar…


Our signature cocktail of the day is a traditional margarita with a touch of mint and a new name… the Mare-gerita complete with our sombrero-ed host…

Our final activity was making papel picado banners (traditional Mexican paper bunting) to adorn our make-your-own burrito station…

Mexican paper banner bunting, also known as Papel Picado

Needless to say it was a very fun and busy week. And now its time to celebrate. Thanks for following along all week. We hope your Derby parties and/or Cinco de Mayo celebrations are the best ones yet!

Cheers to a safe race and festive celebrations!

Adelaida from Mexico & Her Lasting Impact on America {Plus Two of Her Recipes!}

Adelaida Cuellar photographed in 1901 with three of her children. photo courtesy of D Magazine.

In 1892, two young lovers crossed the border from Mexico into the United States and got married in Texas. They spoke no English but were very fluent in the language of love. They were dreamers yearning for better opportunities then their home country could provide, and they were determined to work hard to create a beautiful life that would bring them all  they desired.

The newlywed years of Macurio and Adelaida Cuellar led them through a myriad of jobs on ranches around the Texas countryside. For five years they moved about before they settled down in Kaufman, Texas, a suburb of Dallas, where Macurio started sharecropping and Adelaida started a family. As the seasons passed, their family grew, eventually producing twelve babies.

This is an unidentified farm photo from the Cuellar collection. It may have been the farm where Adelaida and Macurio raised their family. If not, it gives an interesting perspective on what farm life looks like in Texas during the time Adelaida and Macurio lived and worked there.  Image courtesy of the University of North Texas Digital library.

Ranch and farm work weren’t the most profitable of jobs, so Adelaida took a stall at the Kaufman County Fairgrounds in 1926 selling two things…  chili and tamales. It was her hope that her homemade recipes, so loved by her family, would bring in a little extra income to help support her children.  To her surprise, the food stand was an instant success.  The profits she made from her entrepreneurial endeavor were much larger than farm or ranch work earnings, so Adelaida kept at it, turning her stall into a tidy little family business.  Some of her children helped her cook while others formed a family band playing Mexican music to entertain the eaters.

During the 1920’s, Tex-Mex cuisine was a new style of cooking that combined traditional recipes from Mexico and Spain but with toned down spice factors which were more appealing to American palates. Adelaida’s chili and tamales debuted at just the right time – exotic enough for adventurous eaters and flavorful enough without being too spicy to dissuade repeat business. With every taste of tamale and every cup of chili, Adelaida’s reputation for preparing delicious Mexican food began growing.

Adelaida’s Cafe – simply called Cuellar Cafe – opened in  1928.  Image courtesy of the University of North Texas Digital library.

In her mid-fifties, Adelaida opened her own restaurant which did well until the Great Depression hit and she was forced to close due to the terrible economy.  Each of her grown boys inspired by their mother’s own entrepreneurial spirit opened their own independent Mexican restaurants in different cities throughout Texas, Oklahoma and Louisiana using the recipes that Adelaida made for them growing up.

Each of the sons, enamored with cooking just like their mom, quickly realized there was something missing from their independent ventures… family love and support. From the beginning, in the county fairground days, the Cuellar family was successful at the tamale and chili stand because they all worked together towards one common goal. But now the family was spread over many cities, and their restaurants couldn’t be as successful because they all weren’t working together.

This is one of the original porcelain neon signs from the first El Chico restaurant in Dallas. It’s now for sale on ebay here.

So in 1940, five of the brothers banded together to form one restaurant in Dallas, which they named El Chico. The entire family and extended family worked there together, each bringing their own unique talents.

Opening night of El Chico featured a Mariachi band to entertain the crowd. Image courtesy of the University of North Texas Digital library.

Everyone who worked at the restaurant was fluent in Adelaida’s style of perfection when it came to selecting quality ingredients and blending the spice mixtures in the correct way, so the food was authentic and consistent, which kept customers coming back. And the Cuellar family was proud of what they were accomplishing.  At the heart of their restaurant lay the heart of Adelaida and all that she stood for.  Her children wanted to extend that same level of love and devotion with all who dined at El Chico.

A popular dining place indeed! This photo was taken in 1945. Image courtesy of the University of North Texas Digital library.

Just like Adelaida’s chili and tamale stand, El Chico became phenomenally successful, making the Cuellar family and the El Chico brand one of the greatest American success stories. They went on to open more than 40 restaurants throughout the country, built a successful packaged food division for the retail market, and offered franchise opportunities for budding entrepreneurs. By the 1970s, they were the largest full-service Mexican food company in the world. They cooked for United States presidents at the White House, for princess Grace Kelly at her palace in Monaco and entertained movie stars like John Wayne in Dallas. The family stayed together through all these years and all this growth, never veering from what they knew – good food taught to them by Adelaida.

A Cuellar family portrait with Adelaida and Macurio in the front row center. Image courtesy of the University of North Texas Digital library.

Adelaida passed away in 1969 at the age of 97, not before experiencing the overwhelming success of her family and seeing how her humble tamale and chili stand at the Kaufman County fairgrounds grew into a multi-million dollar corporation over the course of forty years. The Cuellar children credit both their mom and their dad with teaching them about the value of working hard (and quickly) toward their goals and the importance of taking chances.

In 1970, El Chico published a small, spiral bound cookbook of some of the family recipes that they used in the restaurant, along with some others collected from their travels. Hailed as one of the most authentic Tex-Mex cookbooks ever published, it’s now a hard-to-find treasure.  It is in fact, so special and represents such an importantand  integral part of the ethnic American food landscape, that it’s held in special collection at the Smithsonian’s National Museum of American History. We are also very pleased to offer a copy in the kitchen shop. 

Since Cinco de Mayo is coming up this Saturday, on the same day as the Kentucky Derby, we thought it would fun to highlight two vintage recipes from the El Chico cookbook to ring in the festivities. A general crowdpleaser with a ton of creative toppings, these recipes are fun party foods so whether you are celebrating Mexico or Kentucky, or both this weekend, there will be something edible for everyone.

On the menu it’s El Chico’s Homemade Beef Burritos & Ranchera Sauce. Both are really easy to make. You’ll have the whole thing whipped up in under 30 minutes. Each recipe features fresh ingredients with generous amounts of spices, so you can skip buying the taco seasoning packages and the taco sauce at the grocery store. There’s plenty of flavor between the two recipes.  In addition to ground beef, you could also incorporate ground pork, turkey or chicken if you wanted to offer multiple variations.

What’s especially great about the Carne Mexicano recipe is that it includes vinegar which gives it a little bit of tang and de-greases the pan all at once so you don’t need a thickening agent like cornstarch or flour which is included in most commercial taco seasoning packets. As with many vintage recipes, we cut down the salt by 2/3rds, so we recommend starting with our measurement first and adding more to taste if you feel it needs it.

Carne Mexicano for Burritos

2 lbs. ground beef (we used grass-fed beef)

2 tablespoons chili powder

2 tablespoons paprika

2 tablespoons salt (we used only 2 teaspoons)

1 teaspoon garlic powder

1 teaspoon ground cumin

1/2 cup vinegar

1/4 cup chopped onion

In a cast-iron pan over medium-high heat brown the beef and onions until cooked through. Add the spices and cook for 1-2 more minutes. Add the vinegar, scraping the bottom of the pan to deglaze it. Remove from heat and serve immediately or store mixture in a covered dish and keep warm until ready to serve.

El Chico’s Ranchero Sauce (A La Caballero)

2 cups fresh chopped tomatoes

1/4 cup chopped onions

1/4 cup chopped hot green peppers (we used serrano peppers)

2 tablespoons shortening (we used olive oil)

Salt and Pepper to taste

Saute the onions and peppers in shortening (or olive oil). When the onions are translucent add the tomatoes and simmer over a low fire for five minutes.  Serve it immediately or at room temperature.

Obviously, the hotter your peppers, the spicer your sauce is going to be. This recipe makes about 1/2 cup of sauce so if you are cooking for a crowd you might want to double or triple the recipe. We used serrano peppers which were quite hot so a little bit spooned on top of your Carne Mexicano goes a long way!

There are so many topping options when it comes to burritos, so your creativity can really shine here based on your preferences.  El Chico suggested that their burritos include only cheese, refried beans, Carne Mexicana and the Ranchero Sauce. But we added a bunch of our favorite toppings too which included sour cream, spring lettuce, red onion, mango, tomato, cilantro, avocado and lime juice.  Other possibilities re guacamole, green olives, rice, etc etc. The sky is the limit. Can your burrito ever really have too much stuff?

Coming up tomorrow on the blog, we’ll be sharing our picks for the Kentucky Derby winner, as well as our table decorations for the Derby Party, which tie together both the Mexican theme and the horse theme. If you are planning a party for either event, we’d love to hear how you are celebrating.

In the meantime, cheers to Adelaida and the Cuellar family for sharing their long-time favorite family recipes with all of us. We will definitely be sending a toast their way on Saturday!

Explore more information about the El Chico cookbook here. And learn more about the restaurant chain, still in operation, here. 

Breakfast with Bette Davis and the Famous Three Minute Egg

You could assume a lot of things about Bette Davis. Perhaps you’ve watched her movies (all 100+ of them) and you know her characters… smart, complicated, dramatic… and you think, personally, she must have been like that too. Or maybe you’ve read her books and know that her life hasn’t always been charming or easy, and you might think she bravely dealt with a lot of disappointment. Or perhaps you’ve seen her past interviews on television or youtube and witnessed how funny and polished and magnetic she was even in the off hours of her professional life.

All those instances might lead you to assume things about Bette, making you define her as one thing more than another – brassy, smart, privileged, funny, vulnerable, demanding, narcissistic, intense, wise, melodramatic, sincere, even terrifying.  Thanks to Kathryn Sermak’s new book, Miss D & Me, we can put our assumptions aside and know first-hand that Bette was a little bit of all those things. And so much more.

It is always fascinating to me to read about the behind-the-scenes lives of people in the public eye. Especially those stories shared by people who worked closely with a celebrity on a daily, detailed basis. Mostly because it breaks down the perception barrier of thinking that famous lives are so much more different than our own. That somehow fame and notoriety have morphed them into other-worldly figures washed clean from weakness and frailties. We generally only get to see one side of a famous person’s life depending on which part the media chooses to focus on, but with behind-the-scenes stories, you are offered a glimpse into a much more diverse landscape than any two-minute news clip or ten-minute interview could provide.

Ordinary people that work alongside extraordinary people are witness to the three-dimensional side of stardom  – all the good and all the bad wrapped up in one experience.  Like the relationship between Katharine Hepburn and her cook Norah, or Frank Sinatra and his valet George Jacobs or Madonna and her brother Christopher we are offered the chance to understand that the lives of these seemingly mythical creatures are really just fellow human beings, both flawed and fabulous.

When Kathryn Sermak first came to work as Bette’s assistant in 1979, Kathryn was a young, carefree Californian who spelled her name the classic way – Catherine – and had just newly spelled out a dream of one day living in France. Bette was in her 70’s, still working and very much set in her ways. Kathryn thought she was taking a simple summer job that would enable her to fund her way to France – not even really aware of who Bette Davis actually was. In turn, Bette thought she was getting a competent, sophisticated assistant in Kathryn whom would be both professional and perfunctory. Both were in for a very big surprise.

In the early, uncertain days, Kathryn didn’t expect to eventually count Bette as one of her best friends and Bette absolutely never entertained the idea that Kathryn would become like a daughter to her. At first, everything was wrong for both women. On Bette’s side, Kathryn was not enough – she wasn’t cultured, she wasn’t able to anticipate needs, she wasn’t sophisticated, nor groomed for the level of lifestyle that Bette had grown into. On Kathryn’s side Bette was too much… too demanding, too overbearing and too controlling. Both thought they would never last the first week together.

The turn in their relationship from bad to better came down to one simple little thing – an egg. Bette’s breakfast most always consisted of a three-minute egg. The proper cooking of it was her litmus test as to the value of any good assistant’s worth. There’s not much to cooking a three-minute egg. It involves a pan of boiling water, an egg still in its shell and three minutes of simmering.   But Bette added a twist to this simple test. How do you cook a three-minute egg in a hotel room with no stove, no pots and pans and no kitchen? Perplexed, Kathryn had no idea until Bette motioned to the in-room coffee pot. Then hot water was brewed. The egg was placed in the glass coffee carafe and the time was monitored on a wristwatch for 3 minutes exactly. In this small test of skill, it wasn’t that Kathryn failed to quickly and cleverly assess the options of impromptu cooking in a kitchenless room, but instead, it was the trainability of her actions that caught Bette’s attention.

That was the beauty of their relationship and the bud that ultimately bonded them together. The fact that Kathryn was young, fresh and naive while Bette was experienced, opinionated and worldly proved a combination of character traits that formed a tight friendship that lasted the rest of Bette’s life. It wasn’t always easy for these two women learning about life and each other day by day, but by the end the experience was invaluable.

There were outlandish moments, like when Bette insisted Kathryn change the spelling of her name from Catherine to Kathryn so that she would be more memorable (which she did!). There were all the lessons Kathryn had to endure… etiquette, elocution, table manners,  how to walk properly, how to dress effectively, how to eat with decorum and how to hold court at a table full of strangers.

There were awkward moments, when Bette’s insistence on how to appropriately handle certain social situations was so outdated, that Kathryn would bear the brunt of the embarrassment.   This was especially apparent when Bette insisted on dressing Kathryn for a formal dance in Washington DC complete with fur coat, gloves, a designer dress, expensive jewelry and dance lessons only for Kathryn to encounter a room full of denim-clad twenty-somethings casually hanging out in a dance hall.

There were the vulnerable moments when Bette crumpled up in the face of public humiliation as her daughter wrote an unflattering tell-all book, or when Bette threw off her wig in the car one day and embarked on a temper tantrum that was heartbreakingly child-like.  There was oodles of advice about men and relationships and sticking up for oneself in the face of adversity. And there were the laughs and the conversations and the sweet letters that Bette would write to Kathryn expressing all the appreciation she felt for her darling assistant and her close friend. There were silent treatments and long work days, elegant cocktail hours and thoughtful gifts, tears and tenacity, laughter and luxury. There was life, with all its good and all its bad.

And there were eggs – lots of eggs. Bette and Kathryn traveled the world together and ate at many fine restaurants, but the food Bette would choose to make for herself or her family on days off was simple fare that harkened back to her New England roots. Homemade burgers, cucumber salad, cornish game hen, wine spritzers, clam bakes, fresh berries with cold cream… those are the foods that she liked to make. For this post, our breakfast menu inspired by Bette Davis includes the following:

A Bette Davis inspired breakfast!

It’s a simple menu symbolizing all that was Bette Davis – sweet, salty, fresh, traditional, colorful, warm, cool and classic. It takes just a few minutes to make and is so easy it doesn’t even require detailed instruction. Simply boil an egg for 3 minutes.  Slice some homemade bread and slather it with jam.  Bake a potato in the oven for an hour and then finely chop it up with some scallions and salt and pepper and add the mix to a pan with some olive oil and let it cook until it turns brown and crusty. Adorn the plate with fresh fruit. Tah-dah! Breakfast, Bette Davis style, is ready!

Kathryn would be the first person to tell you that life with Bette was extraordinary for her last ten years. That the talented movie star was never far from the actual woman. That there was a glamorous side to her, a practical side, a petulant side and a vulnerable side that made her interesting and unique and ultimately endearing. That she was far from perfect but perfectly real.

“That’s me: an old kazoo with some sparklers, ” Bette once said.

The many faces of Bette Davis throughout her 55-year career.

Cheers to Bette for tackling life head-on,  with grace and style and fortitude and being 100% unique about the whole affair until the very end. Cheers to Kathryn to giving us a very real look into the life of real woman and cheers to three-minute eggs – a new breakfast favorite here in the Vintage Kitchen!

This post is part of a blogathon hosted by In the Good Old Days of Classic Hollywood featuring the life and film Career of Bette Davis. Read more about this incredible woman and her work in a variety of posts contributed by a dozen different film bloggers here. 

Find the vintage cookbooks that contributed recipes to this post in the shop here.

Find the recipe for homemade brown bread from a previous post here.

Find out more about Kathryn Sermak and her book, Miss D & Me here.

Katharine’s Norah’s Cousin’s Irish Soda Bread: From the Kitchen of the Hepburn Household

If you’ve been a long-time reader of the blog, you’ll know what big fans we are of Katharine Hepburn.  Last Fall, we made her famous Lace Cookies. The ones that were in constant request at both her city house and her country house, so much so that extra batches were kept on hand, either freshly baked or on standby in the freezer. Was Katharine always the one baking away? Sometimes. But mostly it was Norah, Katharine’s longtime personal cook, domestic helper and treasured friend.

Norah Considine. Photo from the book At Home With Kate.

Norah Considine worked for Kate for 30 years, day in and day out, making the kind of food that Katharine loved best – simple, hearty, and well-balanced. Sometimes, though, Norah would sneak in her own recipes, a combination of food from her Irish heritage and dishes that she made up on the fly to feed her five kids. With guests continuously coming and going from the Turtle Bay city townhouse and from Fenwick, the Hepburn family compound in Connecticut, mealtimes were always eventful, and Norah was always up to the task to make them as delicious as possible. Cooking for everyone with equal aplomb, making meals that were thoughtfully prepared and proven to please, Norah was accustomed to feeding an ever-evolving crowd that ranged from household staff to famous celebrities. In turn, she became a little bit famous herself, with returning guests regularly requesting her rum cake, or her beef stew, or her creamed chipped beef on toast.

Katharine Hepburn’s townhouse in the Turtle Bay neighborhood of NYC

Even though Kate liked to run a tight ship, she was generous with her friends and her staff. Every year on St. Patrick’s Day, Kate would leave New York City and head to Fenwick so that Norah could have the townhouse to herself to entertain her friends and family for St. Patrick’s Day. This party was no small gathering, sometimes counting over 100 people or more.  But no matter what the attendance numbers were, large or small,  Kate always wanted Norah to be the star of the show for her special event, so she’d graciously leave in order to give Norah the run of the place.

For a change, Norah would cook for herself and her friends, and she would relax into the traditional celebrations of her heritage day.  At these parties, you didn’t always know who was going to be attending – friends and family flew in, drove in and walked over from all corners of the city, the country, and the world. There were homemade costumes and contests, musicians and dancers and tables full of traditional food and drinks. One of the edibles Norah always made for these parties was her cousin’s Irish Soda Bread, a recipe that traveled all the way from Ireland.

This was the soda bread recipe that was legendary in Norah’s family and in Katharine’s house. It has fed hundreds of people throughout hundreds of parties, and like Kate’s Lace Cookies, it represents wonderful memories and extraordinary experiences.  Not bad for a humble bread born out of lean economic times.  With a consistency somewhere between a fluffy cake and a crumbly cornbread, Norah’s cousin’s Irish Soda Bread is a decadent little treat, both sweet and hearty in a satisfyingly nourishing way. One slice makes you understand how it fortified a country for two and a half centuries.

Although technically, not really Irish in origin (the Native Americans were the first to come up with the general idea), Ireland has been proclaiming soda bread a national staple since the 1830s. Because it contains no yeast, an expensive ingredient in times past, soda bread gets its bulk from baking soda, which chemically raises the dough when combined with flour and any acidic property like sour milk, buttermilk, or, in Norah’s case, sour cream.  Some people even add a touch of orange juice or lemon rind to their soda bread for an extra dose of certainty that the chemical reaction will yield a tall and fluffy loaf.

There are lots of variations on the traditional soda bread recipe, but Norah’s is interesting because it includes caraway seeds, sour cream, and just a little bit more butter. Super fast and easy to put together, this recipe only takes about 15 minutes to prepare and bakes to a crunchy, golden brown within an hour. Norah recommended enjoying it warm, just minutes out of the oven, or if you want to wait a bit,  let it cool to room temperature and toast it with a little butter right before you are ready to serve it. The one drawback of Irish soda bread is that it dries out quickly – so if you are not going to serve it the day you make it, then it is best to freeze it and reheat it when the occasion arises.

Not as hard as biscotti and not as dense as cornbread, Irish soda bread lands somewhere in the middle as far as form. It pairs beautifully with any salty meat like ham, sausage or brisket for a savory-sweet combo, and would be marvelous with a soft creamy-textured cheese like Brie or goat cheese.  In an adventurous mood, we might even top a toasted slice with cream cheese and bacon and kale for an interesting brunch option or serve it alongside baked apples or a chopped salad of pear and fig.  In the next couple of months, we’ll be experimenting with Norah’s soda bread recipe, trying out some different food pairings. Once we’ve determined our favorites, we’ll post them here on the blog.

In the meantime, we encourage you to try this delicious holiday bread and look forward to hearing your thoughts on it.

Norah’s Cousin’s Irish Soda Bread

4 cups unbleached flour* plus more for dusting (*Norah liked King Arthur flour best

4 teaspoons baking powder

1 cup granulated sugar

2 cups raisins

4 teaspoons caraway seeds

4 eggs

1 pint sour cream (2 cups)

1 teaspoon baking soda

1 1/2 sticks, salted butter, plus more for pan

Preheat the oven to 375 degrees. In a large mixing bowl, combine the flour, baking powder, sugar, raisins, and caraway seeds.

Roughly chop the butter into the flour mixture and combine to the point that the mixture looks like coarse meal. You can do this with the tines of a fork, a wooden spoon, or your own two hands. Set aside.

In a small bowl combine the sour cream, eggs, and baking soda.

Mix well and then slowly add the liquid mixture to the dry ingredients…

Mix until combined and until the bread is no longer sticky. You might need to add as much as 1/4 cup extra flour to this process, but be careful not to overmix the dough.

Ideally, you want the dough to be just smooth enough so that you can pick it up in your fingers and transfer it to a lightly floured cutting board without it sticking to your hands.

On the board, shape the dough and then transfer it to a greased 2-quart baking pan. Keep in mind, the dough expands to fit its baking container and then rises – so if you are using something other than a 2-quart dish, just be aware that it will grow in size.

Bake for 1 hour. Cool on a wire rack for a few minutes before removing from the pan and slicing.

However you choose to spend St. Patrick’s Day, whether it be at a big house party like Norah’s, or at a simple celebratory supper for a few (much more Kate Hepburn style), we hope you have a wonderful holiday full of good food, good friends, and good spirits!

Cheers to Kate and to Norah and to Norah’s cousin, whose family recipe has traveled across countries, continents, kitchens, and time. Happy St. Patrick’s Day with much love from In The Vintage Kitchen.

That’s Norah (wearing the polka dot blouse) in the midst of her St. Patrick’s Day merrymaking.

Gender Discrimination in the 1940s: Why a Correspondent Turned From War to Cookbooks

Betty Wason (1912-2001)

In Sweden, in 1939, as Nazi troops began their invasion of Norway, a young American journalist staying in Stockholm began delivering eyewitness accounts of the historic event.  She was 28 years old and the only correspondent in that section of the world broadcasting live stories for CBS Radio. Her name was Betty Wason and her vantage point was intimate. Her reports were well-written, authentic, and timely in the transmission of details. She was brave, dedicated, and determined, eventually getting close to Nazi troops in Norway in order to tell the stories of wounded British soldiers and all that they had seen.  She was a woman alone in a war zone, a thoughtful writer in a chaotic environment, and a new traveler out discovering foreign lands. But for all the things Betty was, there was one thing she wasn’t. She was not a man.

And that affected everything.

Gender discrimination runs rampant in every field throughout history, except maybe one…. radio news broadcasting in the 1930s and the 1940s. Mainly because there wasn’t any argument against the discrimination. Things were simply done and not done and there were rules to abide by.  One of those rules concerned women. Women  simply did not, were not, allowed to read the news over the air.  It was firmly believed that the feminine register could not convey the seriousness and importance of hard-hitting news stories. Instead, women’s voices were relegated only to entertainment-type shows… cooking lessons, homemaking stories, commercial ads and literature readings. Anything more serious or historically significant was left up to men to communicate on-air.  This proved a problem, for our gal Betty.

Growing up in Indiana in the 1920s, Betty was a creative spirit from the start with interests in music, art and fashion design. After graduating from Perdue University with a degree in home economics in the early 1930s, Betty bounced around a few jobs in her home state before realizing she wanted a more exotic life than Indiana could provide.  As a young woman full of vivaciousness and adventure and a desire to see the world, Betty went to New York and settled into a two-year job working at McCall’s magazine. But even in the exciting city of New York, her wanderlust could not be quelled. Europe was calling and Betty wanted to travel.

Vintage 1930’s travel posters to Czechoslovakia show the beauty and attraction of foreign travel. This was one of the countries Betty would visit and report from.

Not having the financial means to live abroad without working, Betty contacted TransRadio Press who was willing to pay young journalists overseas for eyewitness stories concerning World War II. A brief stint in Europe trying to make a go of it as a correspondent didn’t yield enough money for Betty to live on,  so she came back to New York only to try again less than a year later. On her second go-around though, she worked with CBS who was desperate to get any and all international news they could get their hands on in regards to the war. That’s when Betty headed to Sweden, just before Hitler arrived in Norway.

Betty’s contact at  CBS was Paul White who was in charge of news broadcasting.

There were many male war correspondents living and working overseas at this time, but they were mainly focused on print pieces suitable for newspapers and magazine readers. Radio was becoming more and more popular in terms of delivering news, but the seasoned overseas reporters, so focused on their writing, were out of the loop on the fact that radio news was rising in popularity. There was a niche market blooming in quick, short news briefs for ears instead of eyes and Betty saw an opportunity to be a part of it.

A 1940’s radio

Since Betty was the only correspondent in the Scandinavian region, she was recording and filing her own reports for CBS and being paid on a weekly basis.  But quickly, CBS determined that Betty’s voice was a problem (too light, too feminine, too high in pitch).  It was believed, even in times of war, especially in times of war, that radio listeners didn’t want to hear a delicate voice reporting on death and destruction. Her reporting content was strong though, so CBS said that she had to find a male counterpart to step in as the voice in front of her work.

Betty was upset that she couldn’t speak the words that she was writing, but she wanted to keep her job, so she trained Winston Burdett, an American newly arrived in Stockholm, in the art of journalism for a radio audience, and he read her reports for her. Incidentally, she trained Burdett so well that she wound up working herself right out of Sweden. Burdett was after all a man and now (thanks to Betty) a good broadcaster.

Winston went on to have a lengthy career as a broadcast journalist at CBS. In 1955, he admitted to being a communist spy during the 1930s and 1940s when Betty worked with him.

Trying to find another unique vantage point like she had in Stockholm, Betty went to the Balkan Islands, and to Turkey before settling in Greece where she again sent reports home to CBS. Again, CBS said she needed a male counterpart to vocally relay her stories. And again Betty complied, this time working with a male Embassy secretary, who, at least, introduced himself on-air as “Phil Brown speaking for Betty Wason.”

Betty Wason in Greece. She made her own uniform to appear more professional since there was no dress code for correspondents. Photo courtesy of Hard News: Women in Broadcast Journalism.

As the Nazis occupied Greece, Betty’s bravery was called upon again as she reported eyewitness occurrences on a regular basis through her Embassy mouthpiece. While there, she endured house arrest under Nazi supervision for two months before the regime flew her and several other journalists to Europe for questioning. Concerned that Betty might be a spy, the Nazis detained her for an additional week by herself before eventually allowing her to fly back home to the US, where she was greeted with fanfare for having endured captivity and detainment.

Invigorated by the attention she received upon returning home and by the contributions she had made to broadcast journalism overseas, Betty naturally went to the CBS offices in New York to inquire after more work or a new assignment. Shockingly, executives at CBS refused to acknowledge that she played any significant part in the broadcasting realm overseas and denounced her requests for more story assignments. In an instant, Betty was dismissed like she had never been a part of the reporting team in the first place. Immediately, her work was marginalized even though CBS had been using her content repeatedly throughout the war, finding it valuable enough at the time to pay her for it. But upon Betty’s return, none of that seemed to matter. Had Betty been a man she would have been offered a position like Winston Burdett or handed a new assignment and sent to another corner of the globe. She would have been encouraged and supported by her colleagues and eventually been able to dispel the ridiculous notion that women couldn’t vocally report the news. But that didn’t happen.

After being turned away by CBS, Betty left New York and went on to Washinton DC, where she joined forces with other women in broadcasting, collaborating on various news shows and continuing on with her writing.  Those few years of dangerous foreign reporting and her budding career of broadcast journalism didn’t turn out the way Betty expected, but ultimately, good things came out of this redirection in her life.  Her ability to believe in her own talents and to creatively work around roadblocks with persistence and perseverance led her to a fulfilling career as a writer, on her own terms.

A sampling of Betty’s cookbooks published from the 1950s-1980s

Inspired by her travels and her curiosity to learn more about local cultures and customs, Betty was devoted to exploring the history and the food scene in all the countries she visited, each eventually yielding their own distinct cookbook. Through her explorations in The Art of Spanish Cooking, The Art of German Cookingof Vegetable Cooking… of Mediterranean Cooking…  Betty wanted readers to experience the sights, sounds, smells, and tastes of her favorite places.  That genuine, awestruck wonder led to over 20 beautifully written books that pull readers (and home cooks!) in from page one…

How I wish I were about to fly to Greece again, to relive once more that special thrill of seeing from the sky the ragged ochre shoreline with its-jewel-like border of turqouise merging into the royal blue of the Aegean…(from the introduction of her Greek cookbook)

Betty pictured here with her daughter Ellen, in 1963, aboard a TWA flight bound for Spain to research recipes for The Art of Spanish Cooking.

In the Vintage Kitchen, we were introduced to Betty through her Greek cookbook simply titled Betty Wason’s Greek Cookbook, a stained and splattered edition worthy of its adventurous war correspondent author.

If a cookbook could ever be a travel guide, it would be Betty’s style of approaching food. Not only does she include authentic recipes, but she writes about them with the eye of a curious tourist learning a country in detail.  In her Greek Cookbook, published in 1969, in addition to 200 recipes, she also included a state-by-state reference guide on where to buy authentic Greek ingredients in the US, a glossary of Greek terms, and special tips and tricks to make sure that the cooking experience remained as easily replicated as possible.

Yesterday, it was Betty’s birthday and today it is International Women’s Day. We couldn’t think of a better post to publish than this one on the forgotten lady of broadcast journalism and now the remembered author of important vintage cookbooks.  In celebration, we made her recipe for Spanakopeta from her Greek cookbook. With spinach now coming into season,  it is an ideal dish for Spring and a guaranteed crowd-pleaser for upcoming holidays like Easter and Mother’s Day. If you have never had Spanakopeta before, it is similar to quiche…. a mixture of cheese and spinach and herbs stuffed between two layers of phyllo dough.

Betty Wason’s recipe for Spanakopeta, A Greek version of Spinach Pie

It’s light in texture and constitution so it can be enjoyed as a side dish or a small dinner or a brunch accompaniment. Betty suggested that it could be served hot or at room temperature, which makes picnic basketing an option too.  It reheats well and can sit in the fridge for a few days without getting soggy so if you are a make-ahead meal planner this recipe will be effortlessly easy and valuable.

Betty Wason’s SPANAKOPETA

Serves 6

12 phyllo pastry sheets

2 pounds fresh or frozen spinach (we used fresh)

1 teaspoon fresh dill, minced and chopped

2 tablespoons fresh parsley, minced

Salt to taste (optional)

2 eggs

1/2 lb. Gruyere-type cheese, feta cheese or dry pot cheese (* see notes)

1/2 cup melted butter or olive oil (we combined 1/4 cup of each)

Preheat the oven to 350 degrees.

If frozen spinach is used, cook as directed on package and drain well. If fresh spinach is used, wash and clean the leaves to remove any traces of dirt and pat dry. Heat a large saucepan over medium-high heat. Do not add any butter, oil or water to the pan. Working in batches, add as many large handfuls of spinach as will fit reasonably in the pan and toss with a wooden spoon until all spinach is wilted (about 2-3 minutes per batch). You may have to do this step in several batches depending on the size of your pan. Spread each cooked batch of spinach out on a cookie sheet to cool.

Once all the spinach is cooked, it will look like this…

At this point, you’ll need to wring as much water out of the spinach as possible. The easiest way to do this is to grab clumps in your hand and wring them out forming tightly packed meatball-like shapes. The drier the spinach the better so wring as much water out as you can.

Next, on a cutting board roughly chop each of the spinach balls. Mix in the dill, parsley, and salt to taste and toss until combined. I found there to be enough natural salt in the spinach and the cheese, so we didn’t add any extra salt to this dish at all, but season it to your preference.

Add one egg to the spinach and herbs and toss to combine. Grate the cheese. We can only find Gruyere at our grocery store occasionally, so I used Danish Fontina which is similar. Other options are Jarlsberg, Swiss or Feta.

Add the second egg to the grated cheese and mix to combine.

Butter a square 9×9 baking dish and place 6 sheets of phyllo pastry in the bottom. Brush each sheet with the olive oil and/or butter. Then add the spinach, and top with the cheese.

Cover with six more sheets of phyllo, each brushed in butter/olive oil. Don’t forget to brush the top layer.

Ready for the oven!

Bake in a 350-degree oven for 35 to 40 minutes until pastry is golden. Remove from the oven, let cool until the dish can be handled,

then turn out upside down on a baking sheet and return it to the oven so that the undercrust can become crisp and golden (about 15-20 minutes).

Back into the oven!

Remove from the oven, flip back over and cut into squares. Serve while hot or wait for it to cool to room temperature. We served our spanakopeta with a glass of sauvignon blanc and a simple side salad tossed in olive oil and lemon juice. Other additional sides that would be lovely with this include hard-boiled eggs, olives, mixed nuts,  prosciutto, or roasted sweet potatoes.

Light, airy, and full of subtle flavors that are a little bit nutty (the cheese), a little bit zesty (the herbs) and a little bit earthy (the spinach), Betty’s spanakopeta is packed full of good, healthy nutrients, providing a simple introduction to the lovely world of Greek food.

It’s a good-for-your-spirit food mirroring Betty’s healthy outlook on life. She cast aside all the bitterness and resentment that could have filled her up in the post-CBS days and instead stuffed her life full of light, bright joy that enriched her spirit and fed her soul. Cheers and happy birthday to Betty for continuing to inspire women around the world with your writing.

Interested in learning more about Betty and her Greek recipes? Find her cookbook in the Vintage Kitchen shop here.