
Every year in the shop, while researching vintage and antique cookbooks, I discover an array of fascinating stories about 19th and 20th-century women who made an impact on the global culinary landscape. Sometimes these cookbooks are fueled by immigration stories. Women relocating to a new land only to realize a visceral homesickness for foods left behind in their old country. Other times they are written from travel adventures. Escapades to far-flung places that inspire a life-long interest in an exotic culture and a cuisine. And sometimes they are the scholarly pursuits of teachers, scientists, or home economists educated in food and nutrition intent on improving the overall health of men, women and children.
Today is International Women’s Day. To celebrate, I thought it would be fun to share a glimpse into the personal lives of some of the international cookbooks and their authors discovered within the past year that highlight a unique perspective on global food history and culture.

Some of these women are famous, long-lauded for their culinary achievements throughout the 20th century. But others in this list have almost all but been forgotten despite the impact they once made on the international food landscape. In an effort to collect unique food stories from around the globe and a cookbook from every country, it’s always inspiring to learn how the love of cooking experienced by one person can unite cultures, cross borders, and bring together many people all in the pursuit of a good meal.
Each year on International Women’s Day over on Instagram, I compile the list of the international vintage cookbook authors that were newly discovered in the previous year via books curated for the shop. It’s one of my most favorite posts of the year since it highlights not only heritage recipes but also draws attention to the achievements of women that may have slipped from the spotlight.
For whatever reason, I’ve never thought about incorporating the International Women’s Day Instagram post into a blog post too, but this year, I’m starting a new tradition and celebrating the ladies here as well. These ten women represent a range of life stories that extend beyond recipes, beyond food. They come from India, Ireland, and the Ukraine. They write of France, the US, and the UK. They tell stories of entrepreneurship, of immigration, of cultural preservation, of censorship. They are not only writers and cooks but social activists, suffragists, school teachers, and television personalities. But most importantly, they are reporters and recorders of life lived via the kitchen. Let’s look…
1. Maura Laverty – Feasting Galore (1961)

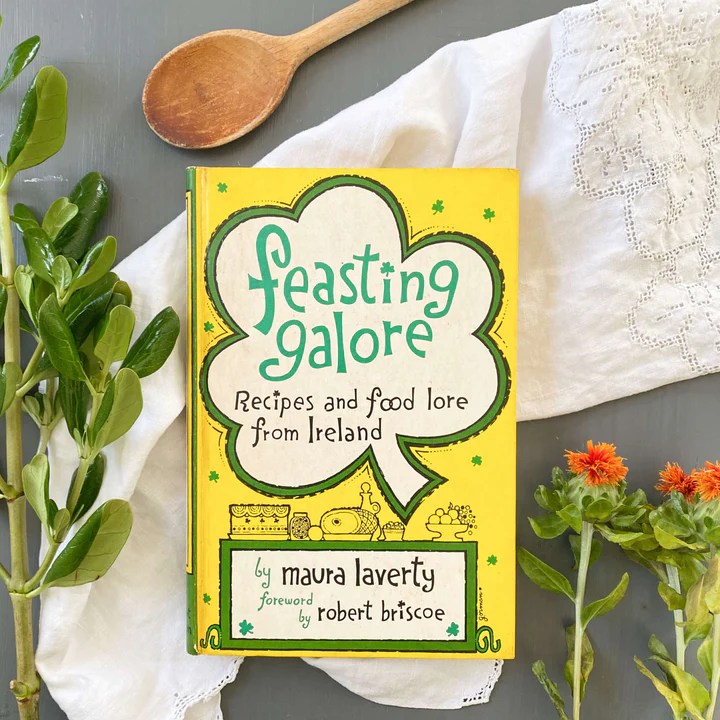
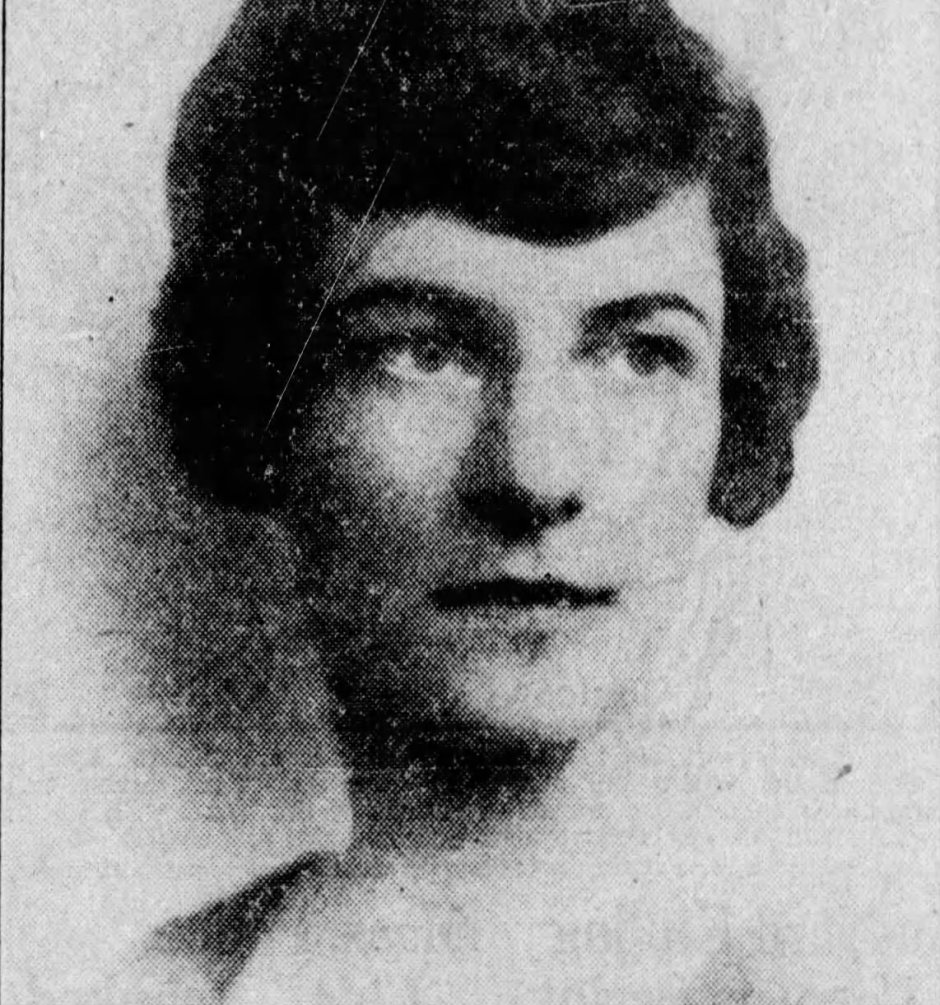
The first American edition of Feasting Galore: Recipes and Food Lore from Ireland was published in 1961. It was written by celebrated Irish novelist, playwright, journalist, and cooking authority, Maura Laverty (1907-1966) and debuted at a time in American culture when travel to Ireland and interest in Irish culture was newly on the rise.
Packed full of recipes, anecdotes, and folklore from the Emerald Isle, Maura’s cookbook featured 200 recipes interspersed between colorful stories about Irish culture and food. With an enchanting way of weaving storytelling into recipes that then transitioned back into stories again, Maura’s cookbook was unique in that it read like both a recipe book and a storybook all in one.
Growing up in County Kildare, Maura’s love of cooking began in childhood and was both encouraged and influenced by her maternal grandmother with whom she spent a lot of time. That relationship eventually formed the plot of a fiction book titled Never No More, published in 1942, which became a bestseller in Ireland and put Maura on the path to becoming a popular Irish writer. Despite the fact that her next three novels were banned by Ireland’s Censorship of Publication Board for obscenity (a stigma that has since been lifted) Maura pressed on writing plays, television shows, books on cooking, and children’s stories.
In and out of marriage to a fellow journalist, Maura supported herself and her children via her writing throughout her life. Known for her humor, captivating storytelling, and tenacity to continue working at her craft, despite falling victim to Ireland’s repressive book-banning policies, Maura’s perseverance, talent, and cooking expertise deemed her a national treasure. Introduced to America via several short stories she wrote for Women’s Day magazine in the 1950s, when Feasting Galore was published in New York by Holt, Rhinehart & Winston in 1961, it was to the delight of American book critics. “Looking into Maura Laverty’s book is like opening an old brown box and finding a real emerald,” noted food columnist Sylia Windle Humphrey of the Lexington Harold in 1961.
Interesting recipes from Feasting Galore include Fairy Rings, Potato Scones, Carrot Marmalade, Boxty on the Griddle, Elderflower Lemonade, Puddeny-Pie, Emerald Sauce, Baked Limerick Ham, Wexford Sole in Cider Sauce, Bread and Cheese Panada, Dunmurray Rice, Crab Apple and Bramble Jelly, Pickled Gooseberries, Friday Manglam, Golden Vale Pudding, Nested Eggs, Whiskey Pie, Oat Cakes and Columcille Cookies.
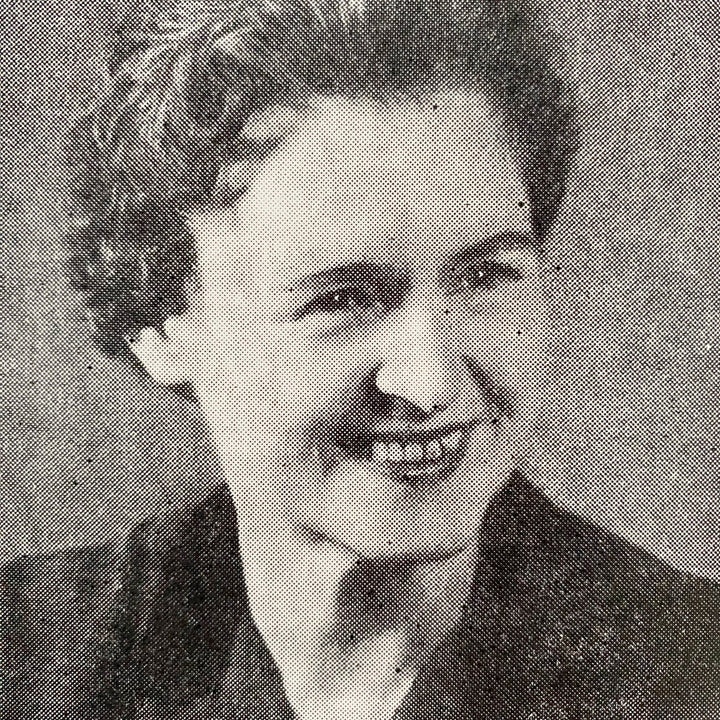
Photo of Maura Laverty courtesy of The Evening Star, March 16, 1947
2. Savella Stechishin – Traditional Ukrainian Cookery (1957)

When Ukrainian-Canadian home economist Savella Stechishin (1903-2002) first published her book, Traditional Ukrainian Cookery in 1957, there were about 450,000 Ukrainian immigrants living in Canada. That was a large increase from the 10,000 that initially immigrated to the Great White North in the early 1900s. Savella’s mission was to keep Ukrainian heritage alive by celebrating the traditional foods of her homeland and by teaching second and third-generation Ukrainian-Canadians the unique customs and culture of their Eastern European heritage.

An educational force, Savella’s pride in her heritage fueled her entire life in Canada. After immigrating from West Ukraine with her family as a young girl, Savella received a teaching degree in home economics from the University of Saskatchewan in the 1930s, went on to help establish the Ukrainian Women’s Association of Canada, taught cultural classes to students at the St. Petro Mohyla Institute, wrote a cultural column for the Ukrainian Voice for over two decades and was involved in work for the Ukrainian Museum of Canada. Perhaps most notable were her contributions on the culinary front with the publication of her cookbook in 1957.
Published when Savella was 55 years old, it took her half a dozen years to complete the cookbook, which highlighted over 650 traditional recipes mostly gathered from pre-WWII Ukrainian recipe books. The challenge was not in finding wonderful Ukrainian recipes but in adapting them to modern-midcentury Canadian kitchens with proper measurements and ingredients equal in taste and flavor to that found naturally in the Ukraine. As Savella learned, foreign recipes don’t always translate easily in foreign lands and much testing had to be done. Luckily, chapters of the Ukrainian Women’s Association across Canada helped test and retest all the recipes to ensure they were true representatives of traditional Ukrainian cuisine.

Upon debut, Traditional Ukrainian Cookery became the first Ukrainian cookbook ever published and was an instant bestseller. In addition to recipes, it featured notes on Ukrainian history, culture, holiday customs, and food presentation. In print through the 1990s, Savella’s cookbook sold over 80,000 copies worldwide making it not only a classic, go-to resource in both Canadian and Ukrainian kitchens but around the globe as well.
Interesting recipes include Stuffed Pork Tenderloin, Savory Roast Beef, Smetana Sauce with Green Onions, Lokshyna, Linyvi Holubtsi, Stuffed Onions, Potato and Cheese Casserole, Puffy Pampushky, Layered Sweet Nalysnyky, Sour Rye Bread, Babka with Pumpkin, Economical Perekladanets, Pyrih with Cabbage Filling, Uncooked Cheese Paska, Horikhivnyk, Caraway Krendi Pretzels, Crunchy Nut Rurky, Crackling Korzhyky Biscuits, Apple Pastila, and Dried fruit Candy plus so many more!
A hard-to-find cookbook these days, the sixth edition published in 1973 is available in the shop here.
3. Anne Wilan – La Varenne’s Paris Kitchen (1981)

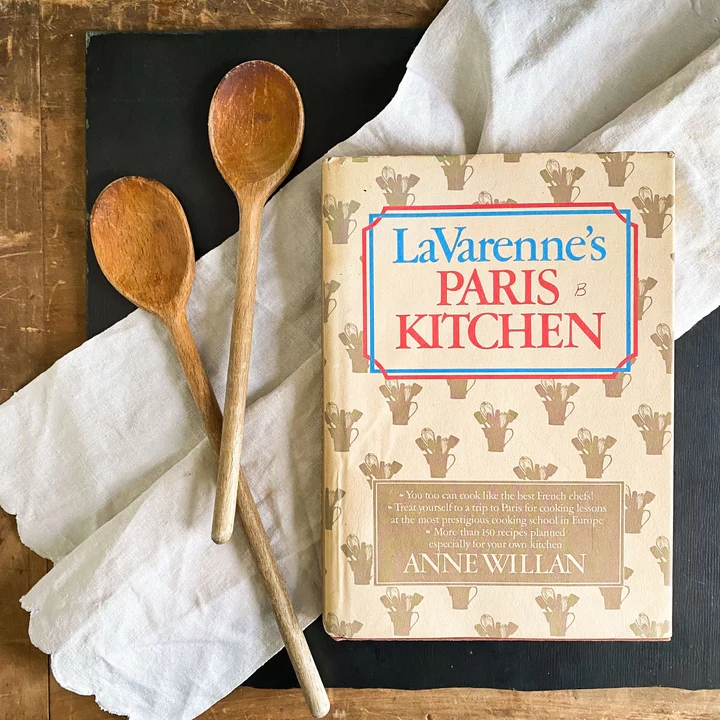
Founded by Anne Wilan in 1975 in an old Parisian building that once housed a neighborhood cafe, L’Ecole de Cuisine La Varenne quickly became a preeminent culinary school for anyone wanting to learn traditional French cooking. For the next 15 years, culinary students from around the world would flock to this Paris school to learn all the foundational techniques that made French cooking so esteemed. With instruction in both English and French, students graduated with professional culinary degrees, and many went on to pursue careers in the food industry in all its facets from catering to restaurant ownership, line cooks to food writers and everything in between.
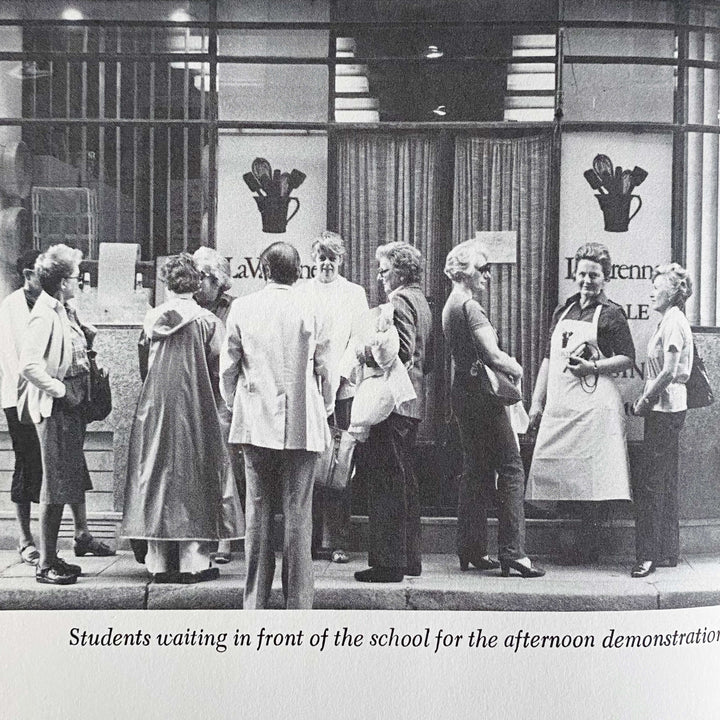
The popularity of the school saw branch programs open in rural France; Venice, Italy; Santa Monica, California; and at the Greenbrier Hotel in White Sulpher Springs, West Virginia. Due to high food costs, the Paris location closed in 1990 and the last of the satellite programs closed in 2017 in California.
The experience of running such an acclaimed enterprise led Anne, a decorated and beloved cook herself, to publish several books about her La Varenne experiences that not only shared details about the operation of the school but also included recipes too.
Published in 1981, La Varenne’s Paris Kitchen offered a course of study for home cooks in America who didn’t have the opportunity to attend class in France. Laid out in syllabus fashion, each of the seven instructors at the school, including Anne, provided sample menus and recipes of varying difficulty which home cooks could tackle chapter by chapter. By the end of the book, the goal was to be skilled in the foundational principles of French cooking.
Interesting recipes from La Varenne’s Paris Kitchen include Asparagus in Puff Pastry, Bearnaise Sauce, Chicken Breasts with Port, Tangerine Tart, Volcano Salad, Coffee Bavarian Cream, Veal Paupiettes with Lemon Stuffing, Light Apple Tart, Orange Chanteclaire, Stuffed Tomatoes and Eggs Maintenon.
Find a 1981 First Edition Copy of this book in the shop here.
4. Fu Pei-Mei – Pei Mei’s Chinese Cook Book (1969)
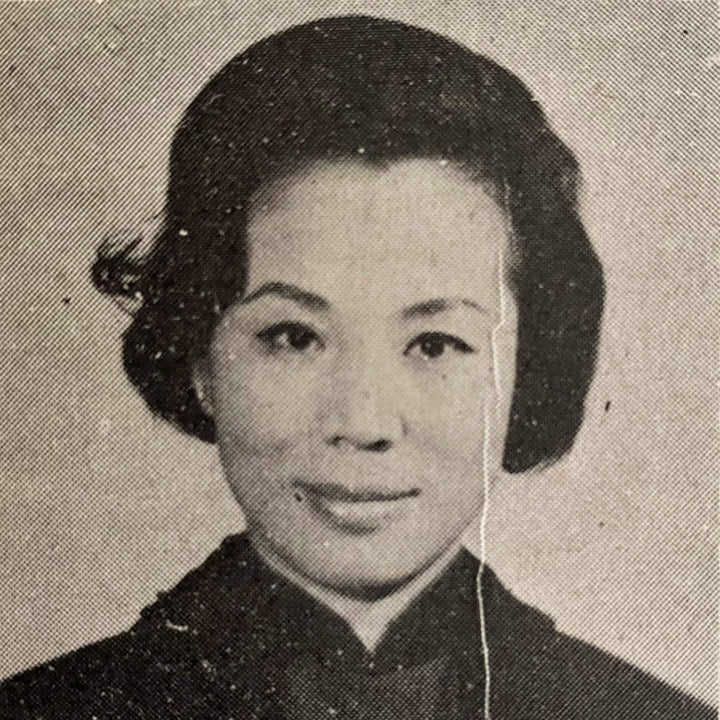

Fu Pei-Mei (1931-2004), undoubtedly the most beloved and famous Chinese/Taiwanese cook of the 20th century, came to her culinary pursuits like many women of the 1950s. As a young wife who wanted to impress her husband with her cooking prowess and tempting dishes, Fu began married life in Taiwan with her heart set on being a wonderful cook for her family and friends. But desire alone doesn’t make an excellent chef and Fu struggled in that newlywed period through the preparation of each and every dish that she set on the table for her discerning husband.
Frustrated with her own lack of ability, Fu paid local professional chefs to teach her the skills of good Chinese cooking. Over a two-year period, she mastered all the classics of her Chinese homeland and its distinct regions. She dazzled her husband and children with delicious food, becoming so confident in her abilities that she started teaching Chinese cooking lessons to women living in Taiwan. Those lessons led to cooking classes offered to US military personnel stationed in Taiwan along with their spouses. From there, her teaching courses climbed from in-person to on-camera as she hosted her own cooking show for Taiwan television. The cooking show would become a staple program and continue for forty years turning Fu Pei-Mei into a household name and a trusted authority on Chinese and Tawainese cooking well beyond her Taipai community.

The trajectory of Fu Pei-Mei’s career is often compared to that of Julia Child’s in that she came to cooking following marriage, lived in a country different than her homeland where she learned from experts how to cook, and then became an expert herself. Just like Julia, Fu had a charming personality that won the hearts of women who found her accessible and relatable – an un-intimidating and encouraging presence in the kitchen.
In 1969, Fu published her first cookbook, Pei Mei’s Chinese Cook Book, a 265-page collection of traditional recipes written in both Chinese and English. Two other volumes would follow along with numerous reprintings. Eventually, Fu would publish over 30 cookbooks throughout her career.
To say that her influence on Chinese cooking was immense is an understatement. In Chinese culture, her recipes are iconic and her cookbooks are proudly passed down between generations. Still to this day, she remains the most trusted authority on Chinese cooking and her books are considered classics in the kitchen.
Interesting recipes from Pei-Mei’s Chinese Cook Book include Dry Cooked String Beans, Chicken and Cucumber Salad, Shark’s Fin in Brown Sauce, Mongolian B-B-Q, Meat Balls with Sour Sauce, Flowered Chicken Soup, Sweet and Sour Cabbage, Ma-Po’s Bean Curd, Camphor and Tea Smoked Duck, Egg Fu Yung, Sweet and Sour Pork, Steamed Chicken with Green Onion, Shrimp with Cashew Nuts, and Stewed Chicken with Pineapple Sauce.
Find a rare 1969 bi-lingual edition of her cookbook in the shop here.
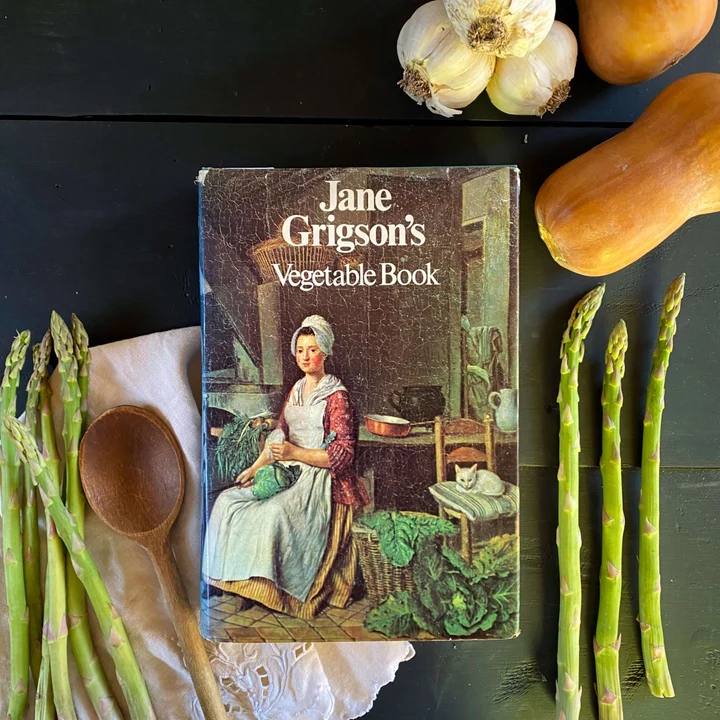
5. Jane Grigson – Jane Grigson’s Vegetable Book (1978)
Just like all the famous greats in the kitchen… Julia Child, Elizabeth David, Madhur Jaffrey, Claudia Rodin… British cookbook author and food writer Jane Grigson (1928-1990) holds high court in the kitchens of the 20th and 21st centuries.
An epicurean powerhouse who first found her way to cooking from art gallery and editorial translation work, when it came to writing about and preparing food Jane’s influence on the culinary landscape rounded the globe in her efforts to bring forth interesting recipes and interesting stories. Combining world history, farming practices, cultural identity, gardening, home cooking, and travel stories, Jane’s food writing has the ability to sweep you up on a culinary adventure and push you into the kitchen for an engaging, colorful, and delicious experience.
The author of ten much-lauded cookbooks throughout her career, Jane published Jane Grigson’s Vegetable Book in England in 1978. Covering 75 vegetables in alphabetical order across 600+ pages, Jane gathered recipes from history, from kitchens around the world, from other cooks and their books, and from her own kitchen to create this large-scale compendium chockful of veggies of all varieties.
When Jane Grigson’s Vegetable Book debuted, it won several awards including the Glenfiddich Food and Drink Writer of the Year and the Andre Simon Memorial Book Fund Award. It still remains one of the most favorite of all Jane’s cookbooks, inspiring professional chefs and home cooks of all ages and skill levels.
Interesting recipes from Jane Grigson’s Vegetable Book include Gratin Savoyard, Chicken Gumbo, Palestine Soup, Pancakes with Carrot Filling, Sauerkraut Salad, Aubergine Slippers, Baked Avocado with Crab, Asparagus Fricassee, Letil and Pork Stew, and Sicilian Stuffed Peppers.
Find a 1979 First American edition in the shop here.
Photo of Jane Grigson courtesy of Tarrytown Daily News, Nov. 28 1992
6. Sarah Field Splint – The Art of Cooking & Serving (1926)

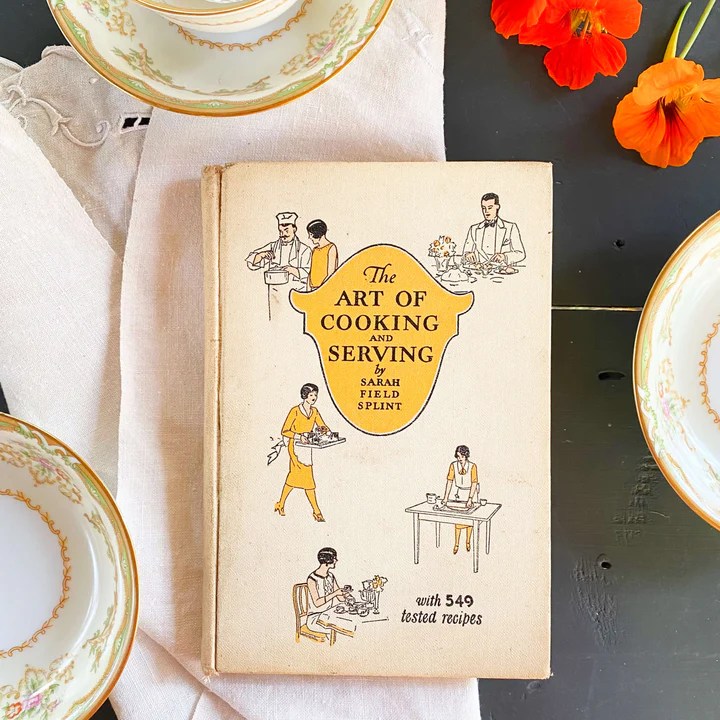
First published in 1926, The Art of Cooking and Serving was a modern take on meal planning, nutrition, and cooking techniques for the modern 1920s woman who didn’t want to spend the entire day cooking in the kitchen.
Containing just under 200 recipes, it was written by American Sarah Field Splint (1883-1959), a popular women’s magazine editor, suffragette, and domestic science expert, and produced in partnership with Crisco – a vegetable shortening product that Sarah endorsed as an alternative to butter.
First introduced in 1911, most home cooks relied on Crisco for cooking and frying but by the 1920s, it started to be marketed for baking as well. Sarah’s cookbook helped highlight the wide variety of recipes that could be achieved using Crisco. Everything from cakes to muffins, breads to breakfast foods, sauces to souffles could all be perfected with the help of this reliable vegetable shortening. By the time the 1931 edition of The Art of Cooking and Serving was published, over 540 recipes were included, which suggests not only the popularity of the book but the enthusiasm for Crisco as well.
Crisco aside, what’s especially interesting about this Depression-era cookbook, is the focus on getting the most value both physically and emotionally from each meal as possible. Highlighting nourishing foods, the reuse of frying oil, and the repurposing of leftovers for additional meals signaled the sign of trying economic times. A chapter on servantless households details the changing roles of women when it came to food preparation. And emphasis was placed on good taste, both in food and presentation, with the mission to make both as hospitable and alluring as possible. As Sarah advised… a pretty china pattern added just as much fortitude for the spirit as did a steak dinner for the body.
Interesting recipes include Orange Biscuits, Wedding Cake, Molasses Mint Taffy, Mexican Kisses, Hot Chocolate Sauce, Steamed Chocolate Pudding, Deep Dish Huckleberry Pie, Danish Pastry, Butterscotch Tarts, Ginger Cake, Mother’s Tea Cakes, Cheese Straws, Coffee Cake, Whole Wheat Griddle Cakes, Gree Corn Fritters, Potato Souffle, Sausage Turnovers, Jelly Omelet, Baked Spaghetti, Fried Hominey, Sweet Potato Croquettes, French Crullers, Raised Doughnuts, and Saratoga Chips
7. The Women of St. Paul’s Church – The Art of Greek Cookery (1963)

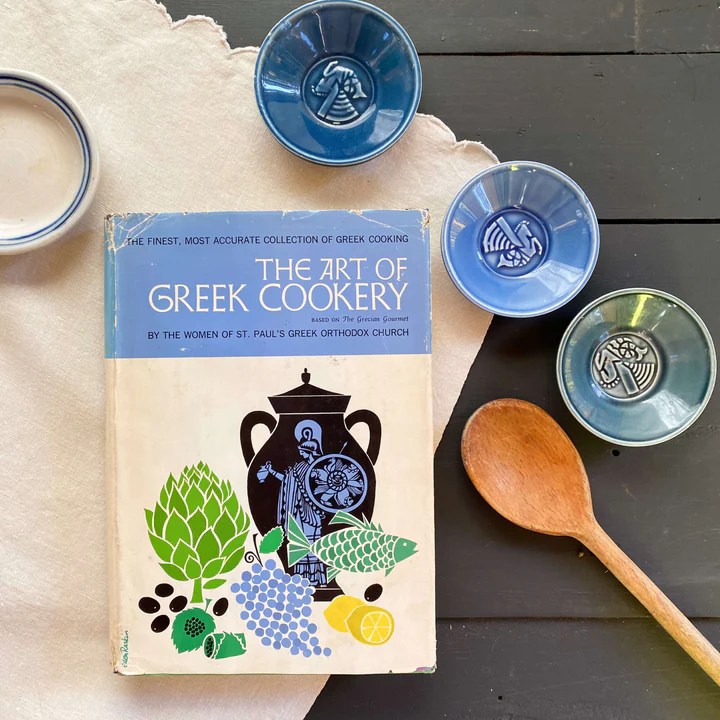
The recipes in The Art of Greek Cookery were compiled in 1958, by 16 first-generation Greek women who were part of the congregation of St. Paul’s Greek Orthodox Church in Hempstead, New York.
First formed in 1944, St Paul’s Church by the late 1950s was thriving. Needing to expand as its membership grew, the ladies of the congregation started a recipe committee as part of the Church’s social organization known as the Mr. & Mrs. Club. The goal of the committee was to gather traditional Greek heritage recipes and compile them into a book for American cooks as a fundraiser to help pay for construction on a new building. With true grit and determination, these ladies got to work gathering, testing and adapting hundreds of recipes representative of their Greek culture.
After two and half years of laboring, they published a simple spiral-bound cookbook entitled, The Grecian Gourmet. Both The New York Times and the New York Tribune published articles about the women and their book project, which caught the attention of home cooks all across the country. Book orders poured in. The recipe committee was humbled and amazed that their little cookbook had become such a sensation.
The cookbook also caught the attention of New York publishing giant Doubleday and Company, who wanted to republish it under their “Art of ” cookbook series. And so The Art of Greek Cookery was born in 1963.
Containing a wealth of recipes ranging from appetizers to desserts, this cookbook also contained information on Greek wines, traditional feast days, customs, suggested menus, and a lovely forward by the then pastor, Father George Papadeas. To say that he was not only proud but impressed by the hard work and determination of these women was an understatement. Just by reading the forward, the preface, and the introduction of this cookbook, you can tell that so much love and good cheer was behind this project. 100% of the proceeds from the book sales went into the church construction fund, which provided the congregation with more than enough money to undertake the expansion project. Both the Church and the recipe club are still going strong today.
Interesting recipes include Stuffed Grapevine Leaves, Cocktail Meatballs, Yogurt Dip, Stuffed Mussels, Buttermilk Soup, Chicken with Dill Sauce, Codfish Stew, Chicken Stefado, Roast Lamb with Artichokes, Fresh Ham Macaronada, Moussaka ( 3 versions!), Pastichio (also 3 versions!), Stuffed Cabbage Leaves, Zucchini Souffle, Squash Fritters, Rum Cake a la Grecque, Ravani, Butter Cookies, Halvah, Caramel Custard, Eggplant Preserves and Quince Puree.
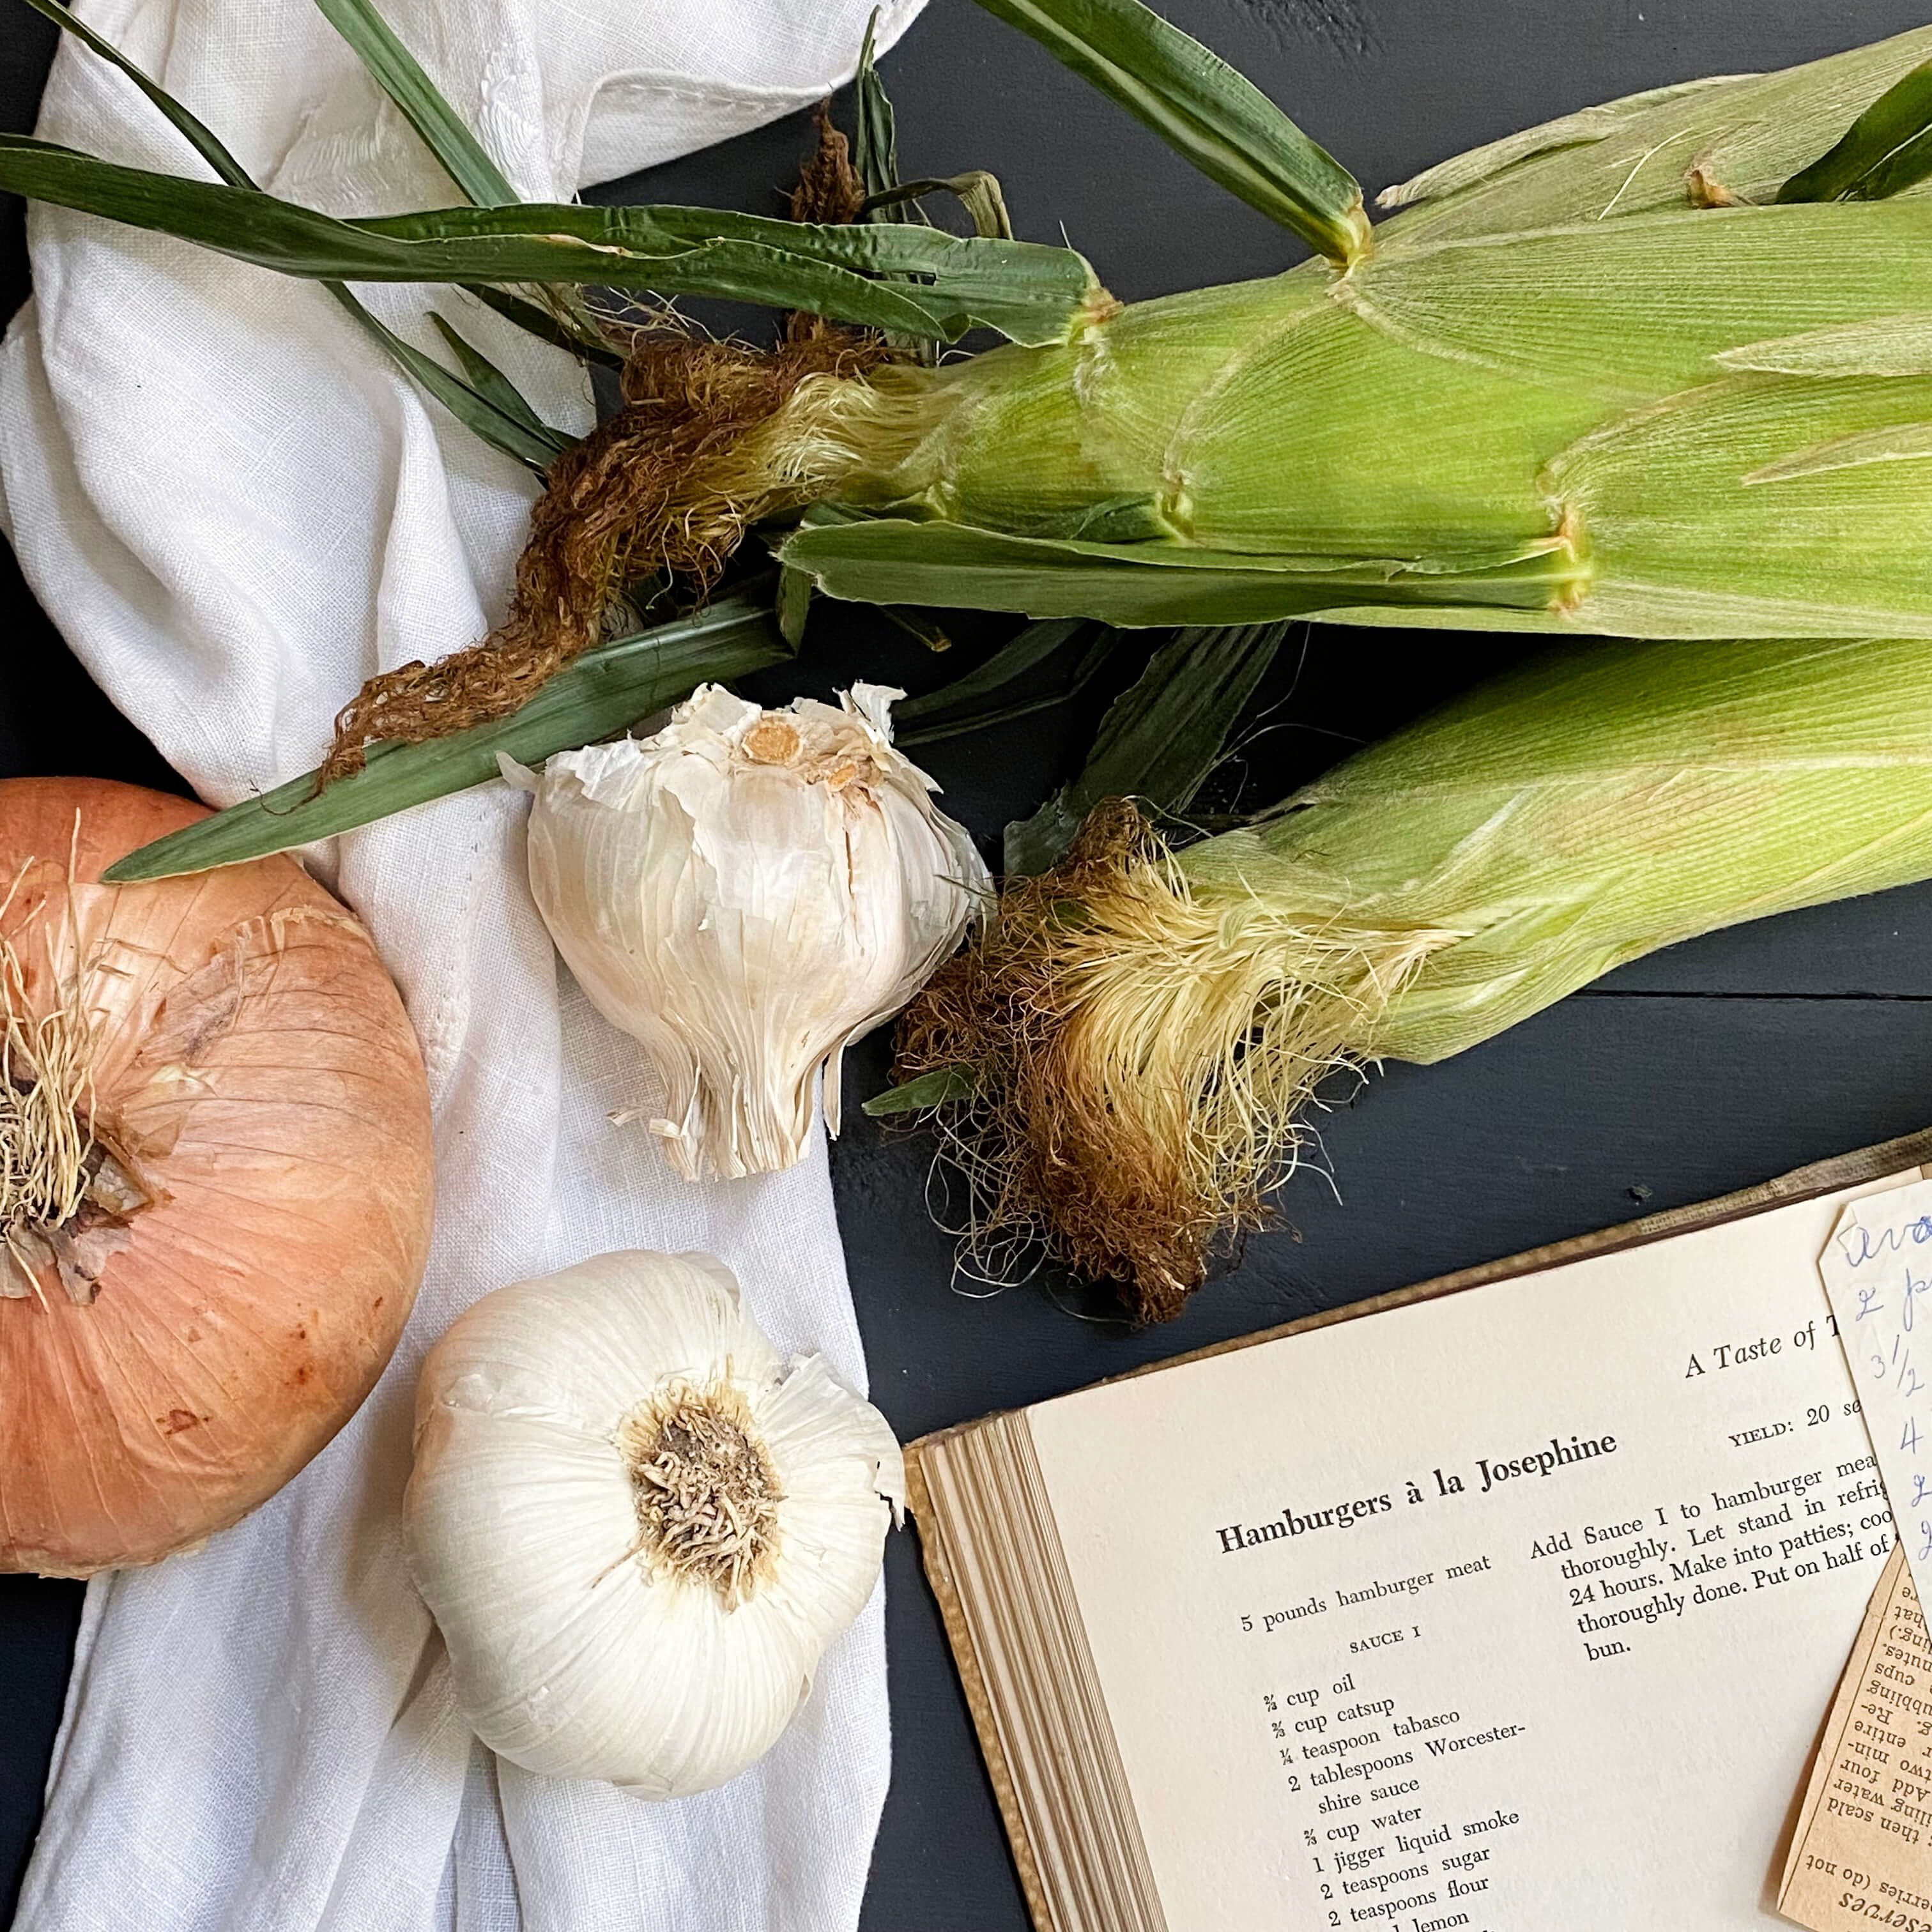
8. Madhur Jaffrey – A Taste of India (1986)


Long before Madhur Jaffrey (b. 1933) became a culinary icon, she was a wife, and a mom, and an actress living in New York City. A strong sense of nostalgia and a desire to share some of her heritage foods with her American friends led Madhur to communicate with her mother via letters about the recipes she missed most from her homeland of India. For 15 years, the two women corresponded back and forth. That communication via mail led to Madhur’s first cookbook, An Invitation to Indian Cooking published in 1973.
Next, Madhur was off on a seven-year East Asian culinary adventure visiting Japan. Thailand, Indonesia, the Philippines, Korea, and her own homeland of India to collect and record authentic vegetarian recipes from those cultures. The result of all that travel was a second cookbook published in 1981, Madhur Jaffrey’s World of the East Vegetarian Cooking.
By the time A Taste of India, her fifth cookbook was published in 1986, Madhur’s culinary reputation for outstanding authentic Indian cuisine was firmly established. Exploring India’s diverse food customs and heritage, complete with a plethora of travel photographs, A Taste of India reads as much like a visitor’s guide as it does a recipe book, giving home cooks the chance to fully immerse themselves in the history and culture of fourteen distinct regions throughout India.
Madhur was not a new face to the shop this year but A Taste Of India was, and it was so insightful regarding both the visual and practical art of food in India, that it’s included this year as a true heritage companion to Indian cooking.

Interwoven with family stories, atmospheric memories from Madhur’s childhood and historical context surrounding each recipe, this cookbook was packed with fascinating information about what, how and why Indians eat the way they do and how home cooks could capture the essence of authentic Indian cuisine in their own American kitchens.
Exploring a vast array of different culinary foods, each prepared according to the customs and traditions found in a myriad of diverse topographical locations around the country from mountains to deserts to tropical lowlands and coastal areas, A Taste of India highlighted recipes from Delhi, Punjab, Haryana, Uttar Pradesh, Rajasthan, Madhya Pradesh, Gujarat, Maharashtra, Kashmir, Bengal, Hyderabad, Tamil, Nadu, Karnataka and Kerala.
Interesting recipes included Potatoes Cooked with Ginger, Chickpea Flour Stew with Dumplings, Steamed Savoury Cakes, Walnut Chutney, Kashmiri Spinach, Chicken with Fresh Green Coriander, Fish in Bengali Sauce, Shrimp Cooked with Coconut Milk, Vegetables Cooked with Split Peas, Eggplants with Apple, Rice with Tomatoes and Spinach, Punjabi Black-Eyed Peas and Rice Cooked in Aromatic Broth.
9. Elizabeth Kander – The Settlement Cook Book (1901)


First published in 1901, The Settlement Cook Book was created by Mrs. Simon Kander, aka Elizabeth Black Kander (1858-1940) to help give immigrant families, mostly of Jewish descent, a proper start in America as they relocated from Eastern Europe to Wisconsin. Lizzie, a college graduate and lifelong community activist taught cooking classes at a social service agency called The Settlement. Helping Milwaukee’s economically challenged immigrant communities, gain valuable skills in the kitchen, The Settlement helped acclimate its new residents to a more modern American way of life.
Containing traditional foods from their homeland (included for comfort) as well as foods popular in America during the turn of the 20th century (included for practicality and social acceptance), Lizzie’s desire was to give all families a successful start in America from the inside out via good food, nutrition, information and sanitary kitchen care.
Part of Wisconsin’s assimilation movement in the early 1900s, Lizzie first published The Settlement Cook Book in 1901, prompted by a fund-raising effort for the Settlement House. A runaway success, it was in continuous print for the next 90 years and became one of the few cookbook brands that accurately tells the story of Jewish American food evolution, eating habits, and appetite preferences over the course of the entire 20th century. Even after Lizzie passed away in 1940, this cookbook continued to make a valuable mark on the culinary landscape.
Interesting recipes from The Settlement Cookbook include Sour Cream Kolatchen, Almond Pretzels, Iced Coffolate, Homemade Vinegar, Matzos Charlotte with Apples, Red Cabbage with Wine, Koenigsberger Klops, White Wine Soup, Eggs a la Tarcat, Apricot Nut Bread, Matzos Sponge Roll, Banana Cake, Potato Chocolate Torte, Cardamon Cookies and a host of fun cocktails.
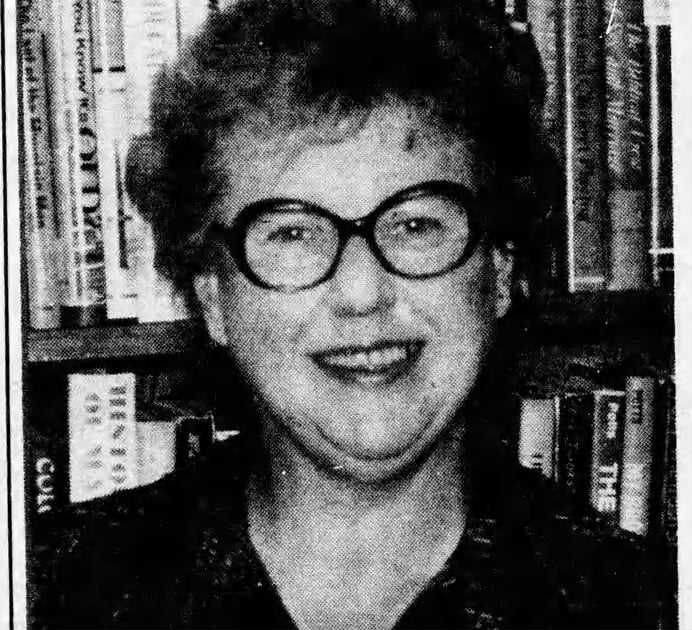
10. Ann Seranne – The Complete Book of Home Preserving (1955)
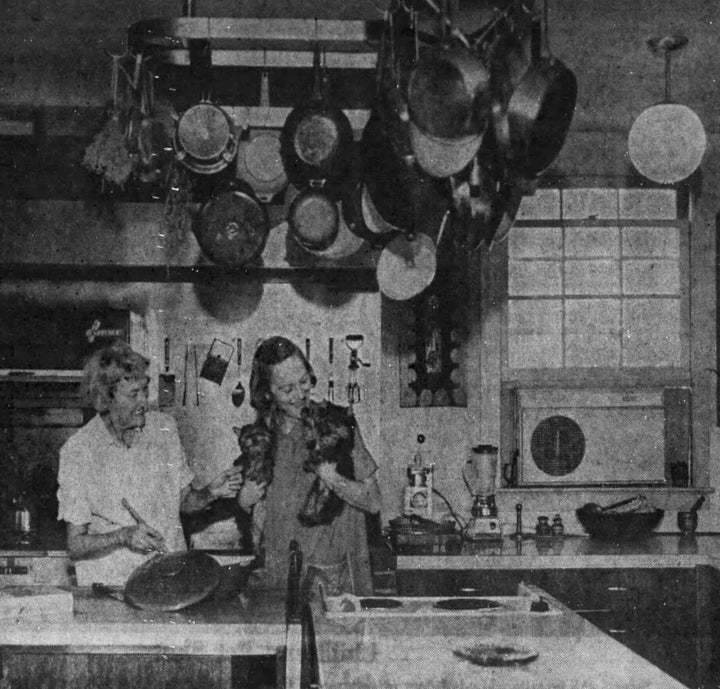

A former food editor at Gourmet magazine, a food columnist at the New York Post, and a prolific author, Ann Seranne was the pen name of American cook and writer Margaret Ruth Smith (1913-1988).
On an educational trajectory to become a medical doctor, Margaret instead turned to food science after she was expelled for setting lab cats free during her college years. Writing about food was more in line with her beliefs than animal testing, so when she started developing a keen interest in kitchen science and food chemistry in the 1930s, she adopted the name Ann Seranne as her nom de plume. Twenty-five books later, Ann was a leading expert and trusted resource in the culinary industry.
In 1955, she published The Complete Book of Home Preserving. Leaving no food preservation method untouched, from canning fruits and vegetables to freezing meat to drying herbs and smoking fish, this cookbook was a treasure trove of history, food prep, and recipes ideal for kitchen gardeners, off-grid lifestylers or anyone interested in a self-sustainable food system.
Incredibly thorough as far as information, with recipes included to guide home cooks along the way, Ann offered all sorts of helpful assistance when it came to preparing food now to eat later. From equipment to dos and don’ts to selecting the right packaging and the right containers, no stone was left unturned. Techniques for drying herbs, preserving fish (ie rackling – an ancient Nordic style of fish preservation) and smoking meats included tried and true methods that were utilized in other countries too.
Lauded by food critics, home cooks, and columnists alike, many cookbooks throughout the 20th century focused lightly on canning but Ann’s book became a kitchen bible for self-sustainability.
Interesting recipes from The Complete Book of Home Preserving include Green Tomato Pickles, Cherry Marmalade, Strawberry Rhubarb Jelly, Watermelon Plum Conserve, Carrot Butter, Cantaloupe Orange Jam, Preserved Coconut, French Brandied Fruits, Ginger Root Preserve, White Grapes in Cognac, Canned Baked Beans, Pate, Meat0Vegetable Stew, Crab Soup and Gumbo,. Canned Spiced Salmon, Artichoke Relish, Hot Dog Relish, Apple Chutney, Pickled Blueberries, Apple Ketchup, Smoked Country Sausage, Corned Beef, Dried Apples, and Velva Fruit.
Photo of Ann Seranne (left) in her kitchen courtesy of The Hamilton Spectator Dec. 11, 1968
I hope you found this list of cooks and their books just as interesting as I did. And that it not only piques your interest in learning more about the women included here but also inspires your own cooking journey and all the possibilities that await. You never know where a good recipe might lead.
Cheers to Maura, Savella, Fu, Jane, Elizabeth, Sarah, the ladies of St. Paul’s Church, Madhur, Anne, and Ann for sharing their kitchen journeys via books and recipes. Our modern-day meals would not be as delicious without your contributions. And cheers to all the millions of women around the globe who continue to cook, feed, create, dream, innovate, and inspire the culinary landscape of history, day in and day out, year after year. Because of your too often under-appreciated and overlooked cooking endeavors, we thrive.