The Magical Second Life of Samuel Gottscho and a Locally Inspired Recipe to Match

When Samuel Gottscho began his professional photography career at the age of 50, it was a leap of faith and a vast change from the garment industry salesman job he had known all his adult life. By this point, as he entered into his fifth decade, he was a husband and a father with a young daughter to raise and a long-time reputation in the industry that provided a steady paycheck and reliable consistency. But after twenty-five years of a job that both he and his father did before him, Samuel’s heart was no longer wrapped up in the lace and the fabric and the embroidery that he peddled around the city. Instead, it was his camera – his weekend hobby since the age of 20, his faithful muse, his constant companion – that began nudging him to move in another direction away from the professional life he had always known.

The Rochester Optical Camera with Tripod – Samuel’s first camera circa 1900. Photo courtesy of the Missouri History Museum.

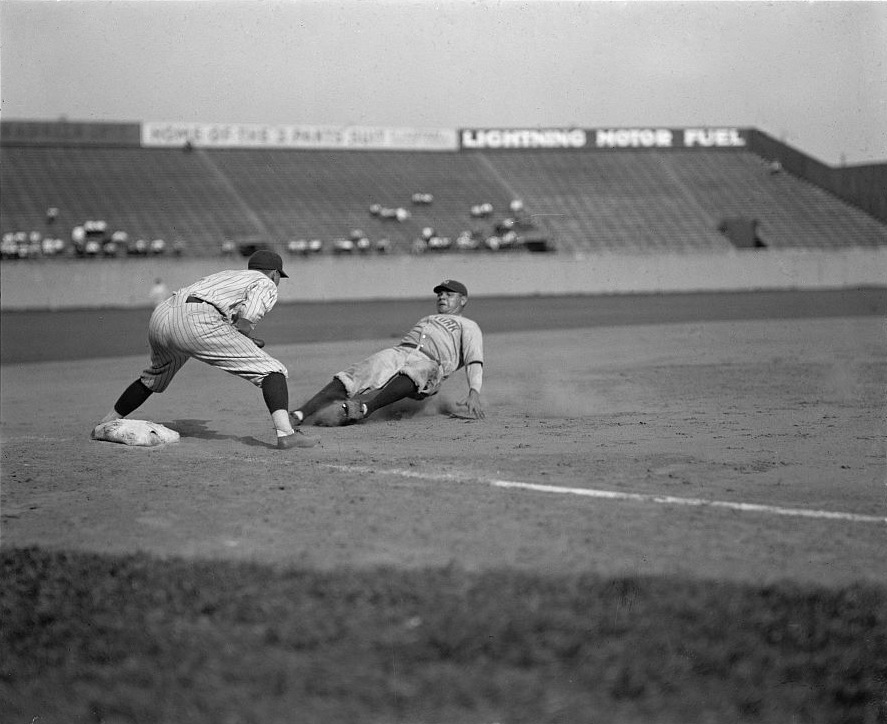
The year Samuel turned 50, it was 1925. New York was thriving. Museums were opening. New buildings and storefronts were being constructed. Model T’s were zipping around the city just like Babe Ruth was zipping around the bases.

Babe Ruth safe at third base in a game against the Senators on June 23, 1925.

In the 1920s. the average life expectancy for American men hovered between 53-60 years old. Realizing Samuel was just a few years away from possibly the end of his life, he questioned how he wanted to finish things up… by lugging around a fabric sample case or by adventuring out in the world with his camera? There was a lot to weigh between practicality and passion. Between case and camera. Between settling and jumping.

Ultimately, Samuel had the support of his encouraging wife, Rosalind, and an optimistic attitude. That, as it turns out, was all he needed.

Samuel Gottscho. The Financial District in the 1930s.

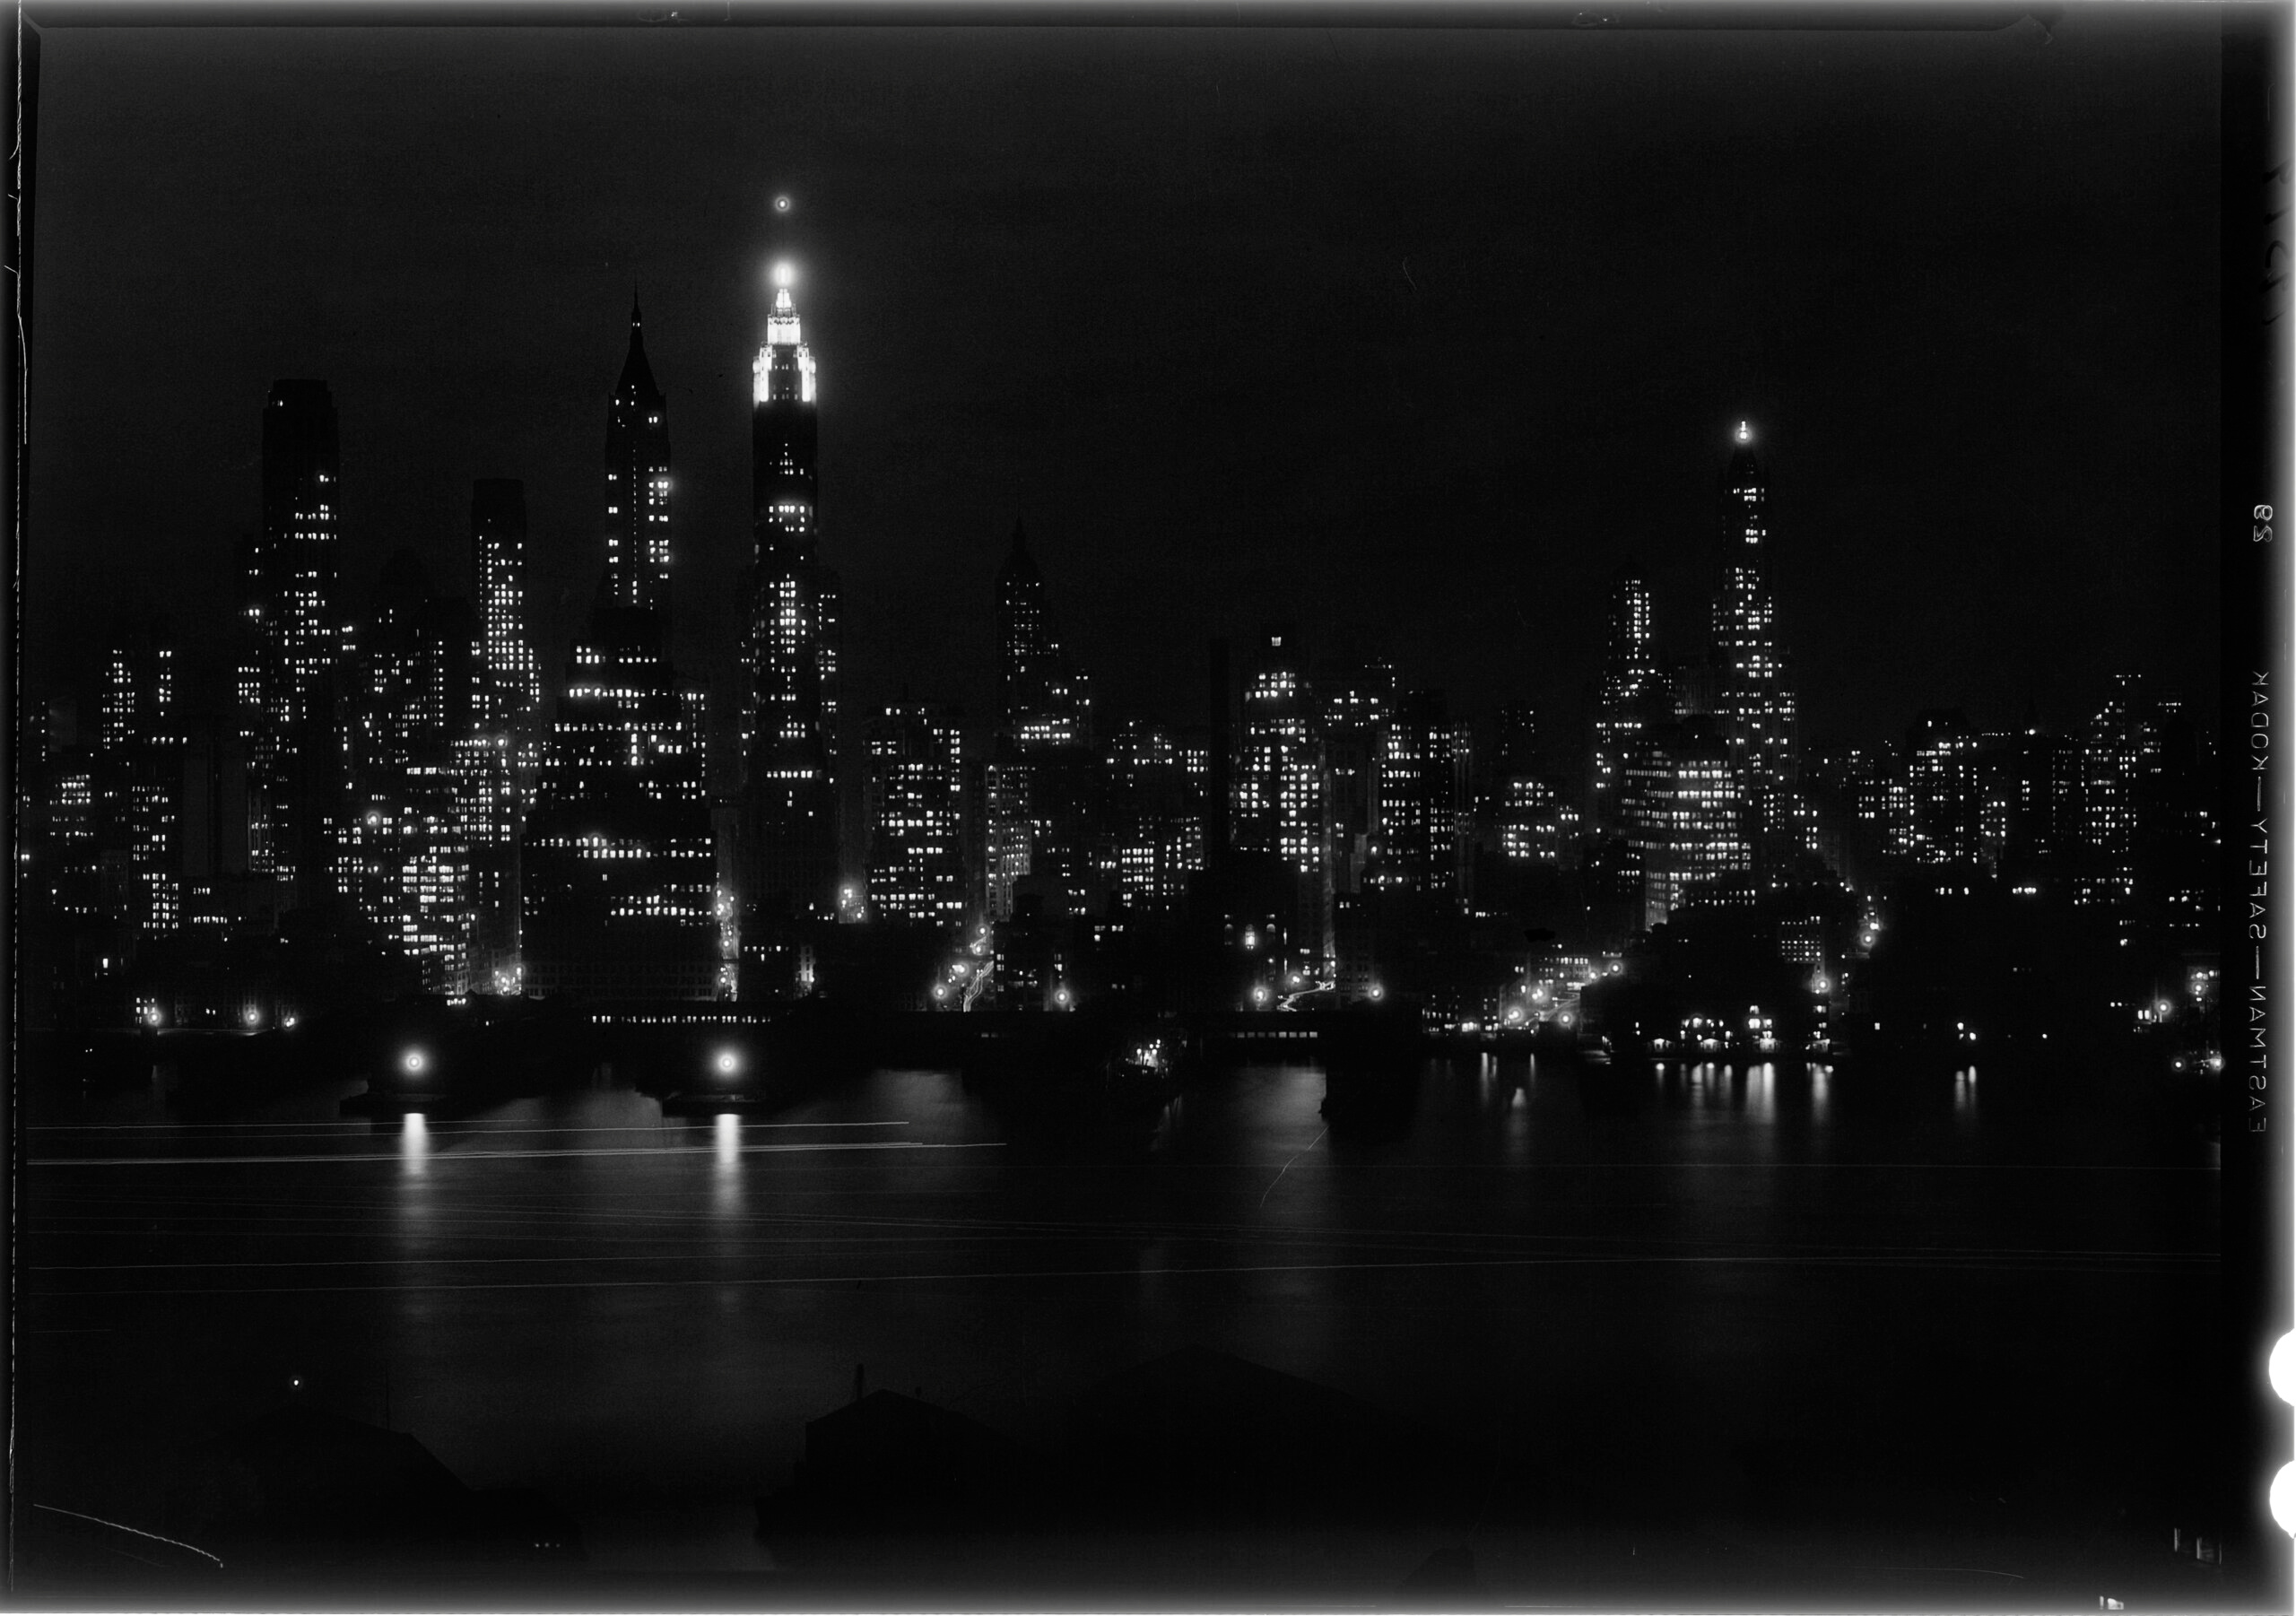
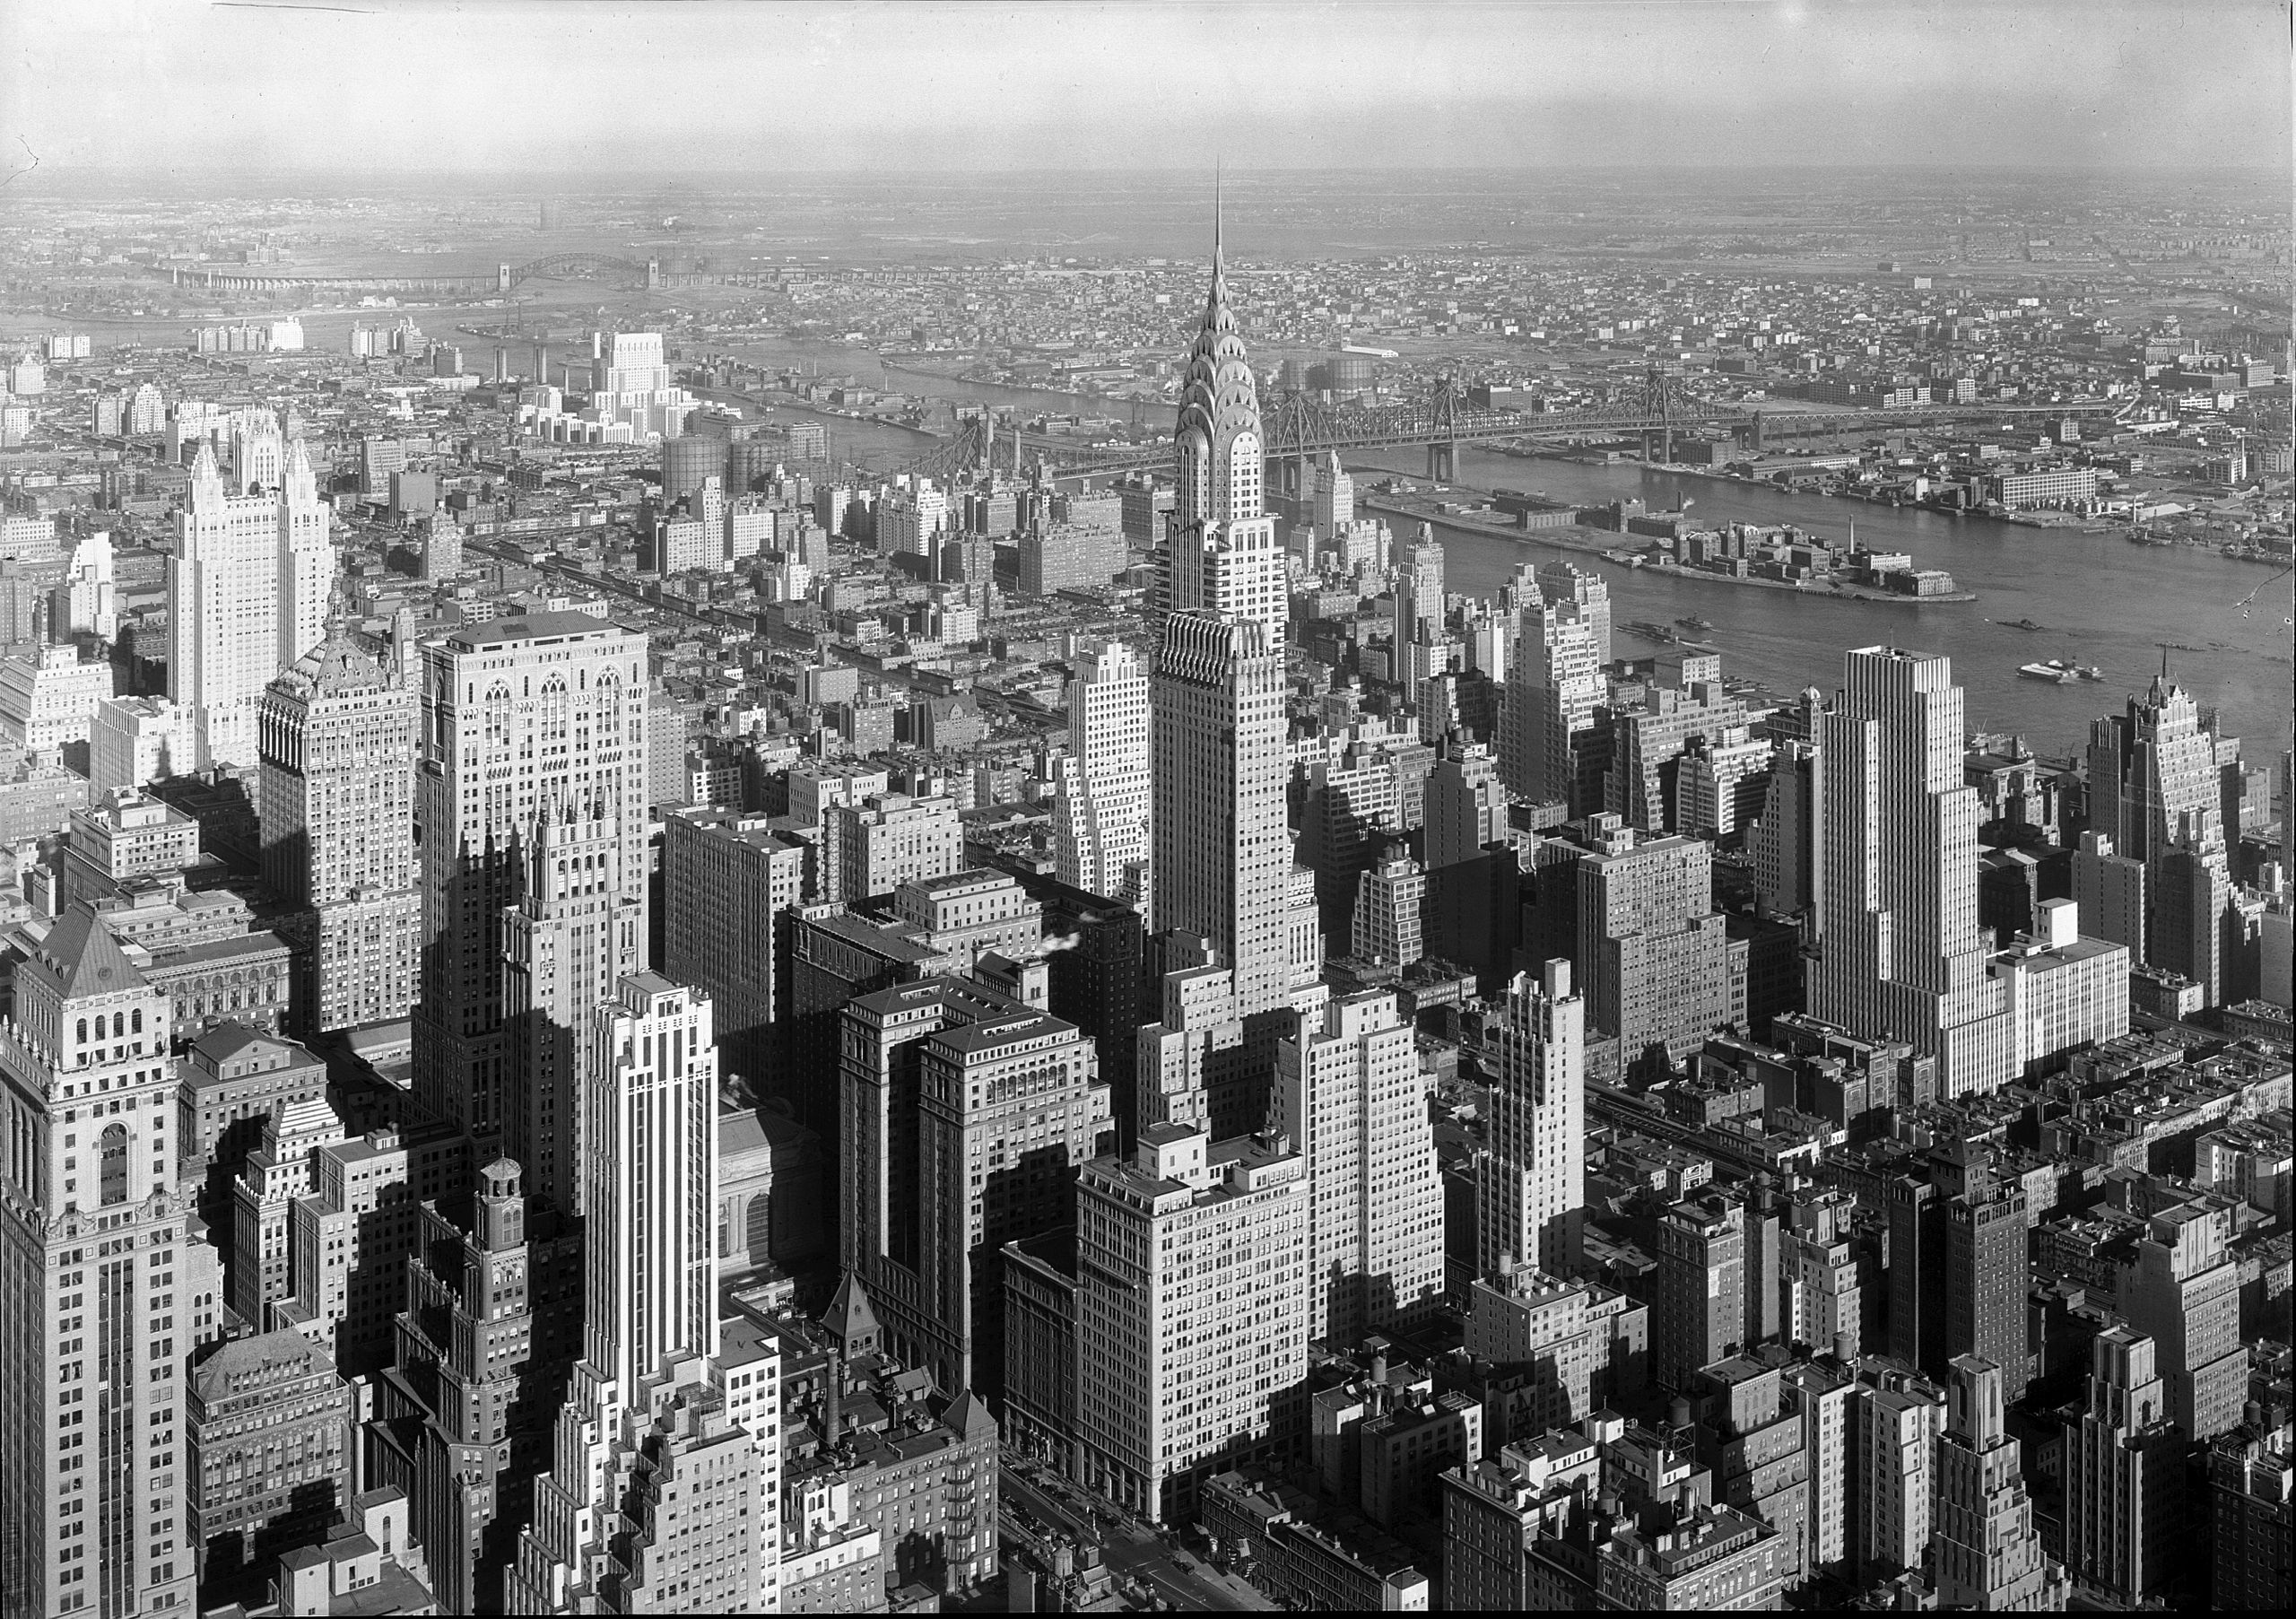
Starting in New York City among the skyscrapers and the night lights, it didn’t take long for people to notice that Samuel had talent. His photographs captured the epitome of 1930s architectural elegance and that beguiling sense of power and opportunity that New York City stood for. Every day a story unfolded in the dramas of the big city skyline. Samuel captured them one by one in the morning mist rolling in off the East River and in the twinkling lights that turned the city into a glowing lacework of lanterns…

Samuel Gottscho. New York City Views from the St. George Hotel. 1933.

Samuel Gottscho. 52nd Street & the East River, New York City. 1931

Samuel Gottscho. New York City. 1933

Samuel Gottscho. Rockefeller Center. December 1933. Library of Congress.

Samuel Gottscho. Chrysler Building and Midtown Manhattan, 1932.

Exterior photoshoots commissioned by local architects led to interior photoshoots commissioned by designers, builders, and business owners…

Samuel Gottscho. Roxy Theater at 49th Street circa 1932. Photo courtesy of the Library of Congress.

Samuel Gottscho. 33 Beekman Place, New York City. 1928.

Samuel Gottscho. Huntington, Long Island, NY. 1933

Those led to house and garden portraits for landscape designers and homeowners…

Samuel Gottscho. Ashland Farm. Warrenton Virginia. 1930

Samuel Gottscho. Wilmington, Delaware. 1932

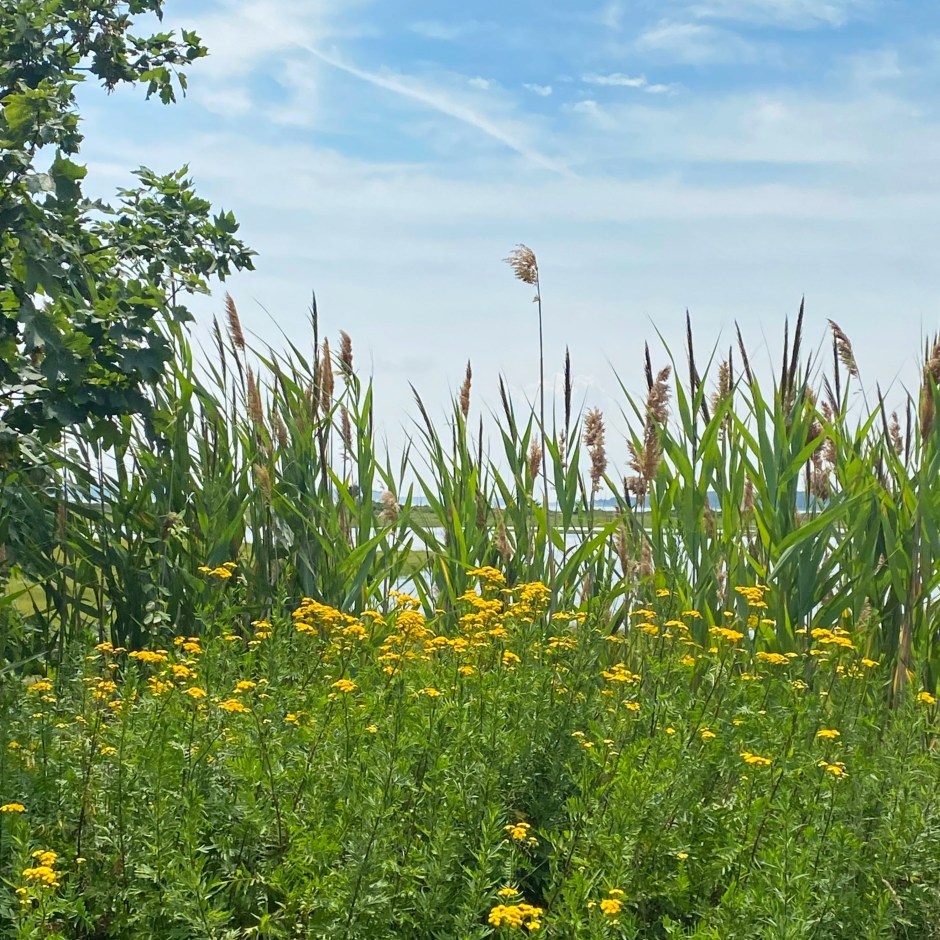
and then to wildflower portraits pursued at first for his own interests…

Samuel Gottscho. Common Evening Primrose from The Pocket Guide to the Wildflowers. 1951

but then later for clients, book publishers, and magazine editors.

Samuel Gottscho. The Pocket Guide To The Wildflowers. 1951.

At first, Samuel’s introduction to the wildflowers were daily hikes around the upstate New York hotel where he and his wife and daughter summered every year in the Adirondacks. When the gas rations were in effect in the 1940s, it wasn’t feasible to explore the countryside with the car and driver Samuel previously employed in the city. Foot travel replaced the car, his young daughter, Doris replaced the driver and the two would tottle off together to explore the woods any chance they got.

Samuel’s daughter, Doris. Photo courtesy of the Library of Congress via Familysearch.org

Noting the curious array of flowers that dotted the roadsides and the woodlands and how they all fit together into the broader landscape made Samuel appreciate the composition of each and every flower in a new, more visual, more vital way. As he learned, Queen Anne’s Lace or feathery petaled Bergamot or the large craggy, canopied trees found in these upstate New York hideaways were just as stately, just as visually spectacular, just as unique, as the Chrysler Building towering above Manhattan.

Enchanted with the light, the subject matter, the shape and the composition of the flower fields, Samuel found them to be little cities in their own way. Tall, short, fluffy, sparse. Each one added pops of color, variety, and form to the overall canvas that was the natural wilderness. Eventually, Samuel’s Adirondack wildflower summers were replaced with Sound-side summers spent on Long Island, New York’s North Fork.

The North Flork is located at the far right of the island in the green section. The Hamptons lies in the bottom right corner in the blue section. Queens and New York City are at the far left of the map.

Known as its own agricultural wonderland bordered on one side by the Long Island Sound and the other side by the Atlantic Ocean, this island surrounded by lighthouses and studded with sailboats was first inhabited by the Corchaug, Algonquin and Montauk tribes. Boasting its own never-ending supply of native wildflowers, it delighted the eye with all sorts of natural splendors highlighted by backdrops of the water, beaches, pine groves, pasturelands and marshes. Samuel photographed every bit of it.

Photo of Samuel Gottscho by Edward Dart courtesy of Newsday. April 1970

No stranger to wild things and naturally picturesque vistas, the North Fork was home to New York State’s first farms and first English and European families. Dating all the way back to the 17th century, Southold, the town where Samuel spent his Sound-side summers was settled in 1640 by farmers, tradespeople and clergymen from England and Europe by way of Connecticut.

Barnabus was a baker and the town overseer of Southold. Photo courtesy of the Art & Architecture Quarterly

A fishing and farming community long before the Island ever became a residential extension of New York City, this stretch of Long Island from the tip of Orient Point to the mid-section of the island never lost its agricultural roots. Full of sprawling vineyards, seaside homes, stretches of pebble-studded beaches, open meadows and working farms that produce every sort of market delight you could ever want, it’s a food lover’s paradise from flowers to honey to wine to grass-fed beef.

Croteaux Vineyards is the only winery in the US to focus solely on making rose wine.

Fresh farm stands are everywhere around the North Fork.

Open pasture lands with views of the Sound.

Wildflower settings just like this inspired Samuel throughout the 20th century.

Celebrating this area’s centuries-old agricultural history, in today’s post, we are featuring a recipe made using grass-fed beef from cows raised and pastured on Long Island’s Acabonac Farms. Just a short drive down the coast from where Samuel summered in Southold, Acabonac Farms works in tandem with the natural landscape just like Long Island’s first settlers did back in the 1600s.

See how Acabonac Farms’ watercolor illustration was made here.

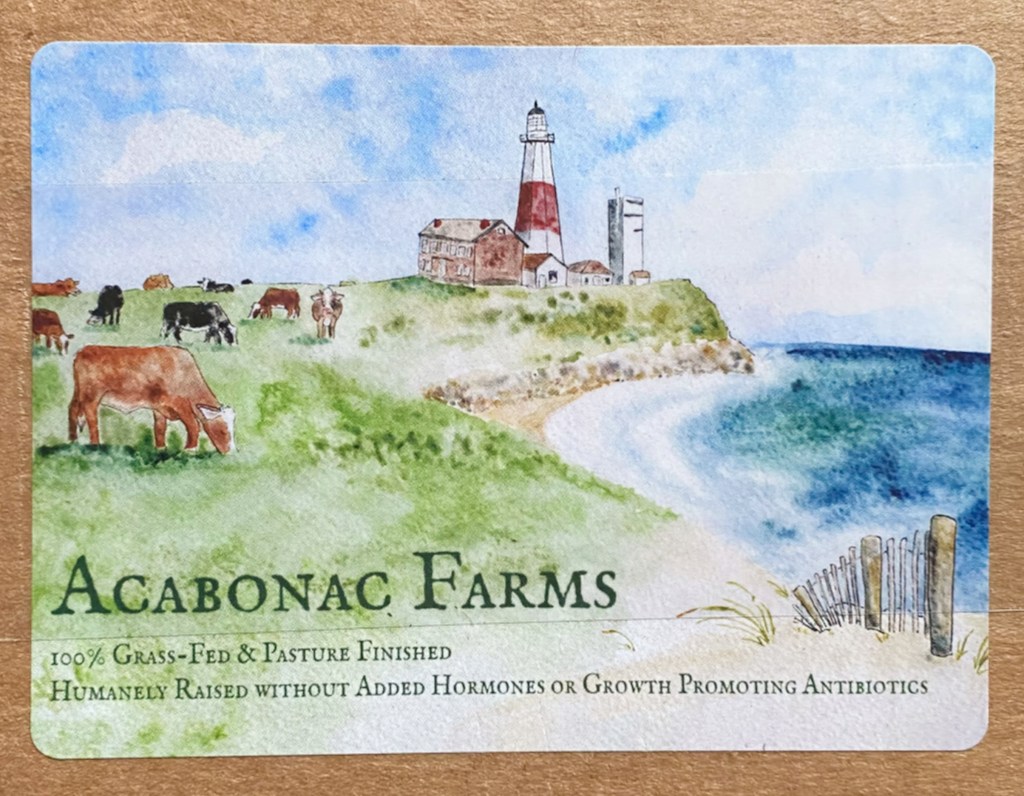
By embracing the unique nutrient-dense soil that makes it one of the best terrains in the state, combined with the salty sea air, the continuously circulating breezes blowing in off the water, and the well-draining composition of the soil, it’s a trifecta of a location historically known for growing good grass which in turn grows good grass-fed cows.

Throughout his second career, Samuel’s photographs appeared in publications all over the country, but none may have been more proud of Samuel’s work than his hometown newspaper, The New York Times, where he was regularly featured. In keeping that joyful relationship intact, our featured recipe for this post comes from the 1961 New York Times Cookbook and combines Acabonac Farms grass-fed sirloin steak with an unusual 24-hour marinade to create picnic-toting steak sandwiches fit to fuel any wildflower photographer’s wanderings.

Named after the patron saint of hunting, this recipe called Steak St. Hubert, can be made with venison or beef using round or sirloin cuts depending on your preference. Originally, it was meant to be enjoyed as a single cut of meat – a steak dinner complete with a red current jelly reduction sauce – but I decided to turn the steak into sandwiches so we could pack it along with potato salad and refrigerator pickles for a summer picnic getaway to see the land that so inspired Samuel.

Consisting of a unique menagerie of ingredients, this marinade contains no cane sugar and no salt but does include carrots, wine, and apple cider vinegar, which I found to be a pretty intriguing mix. A bit like Annie’s Wine Baked Brisket and Santiago Pork Roast, this is a two-day, three-part recipe to prepare but well worth the time.

Although this is a local post featuring Long Island, Acabonac Farms beef is available to any home cook no matter where you live. If you haven’t had the experience of ordering meat via mail before, the process couldn’t be easier. You simply place your order online and it shows up at your door two days later in a box packed with dry ice and the individually frozen, vacuum-packed cuts you requested.

From the farm in Long Island to the front door of 1750 House.

Beef that arrives by mail can be thawed in the fridge overnight (in its original packaging) or stored in the freezer for use at a later date. For this recipe, the three packages of steaks we ordered went into the fridge for 12 hours before they were added (completely thawed) to the marinade and then returned to the fridge for another 24 hours.

The marinade is easy to put together. The original 1961 recipe called for a big bowl as the marinade vessel but I found that a two-gallon Ziploc bag worked just as great and made it easier to store in the fridge. Other than that note, the marinade recipe comes together just like this…

Steak St. Hubert Sandwiches (serves 10-12)

For the marinade:

3 16 oz .sirloin steaks cut 1/2-3/4″ inch thick

2 shallots, chopped

2 carrots, sliced

2 onions, sliced

1 clove garlic, chopped

2 sprigs of fresh thyme

2 bay leaves

1/3 teaspoon freshly ground black pepper

1 small pinch of ground cloves

2 cups dry white wine

3/4 cup apple cider vinegar + 1/4 cup water, mixed together

1/2 cup olive oil

For the pan:

Salt

Pepper

6 tablespoons butter

For the sandwiches:

Portuguese rolls (or any soft and pillowy sandwich roll that has a crusty exterior and an airy interior)

lettuce

red onion, sliced in thin rings

Condiments (cherry jam, horseradish, mayonnaise, dijon mustard or any others you might prefer)

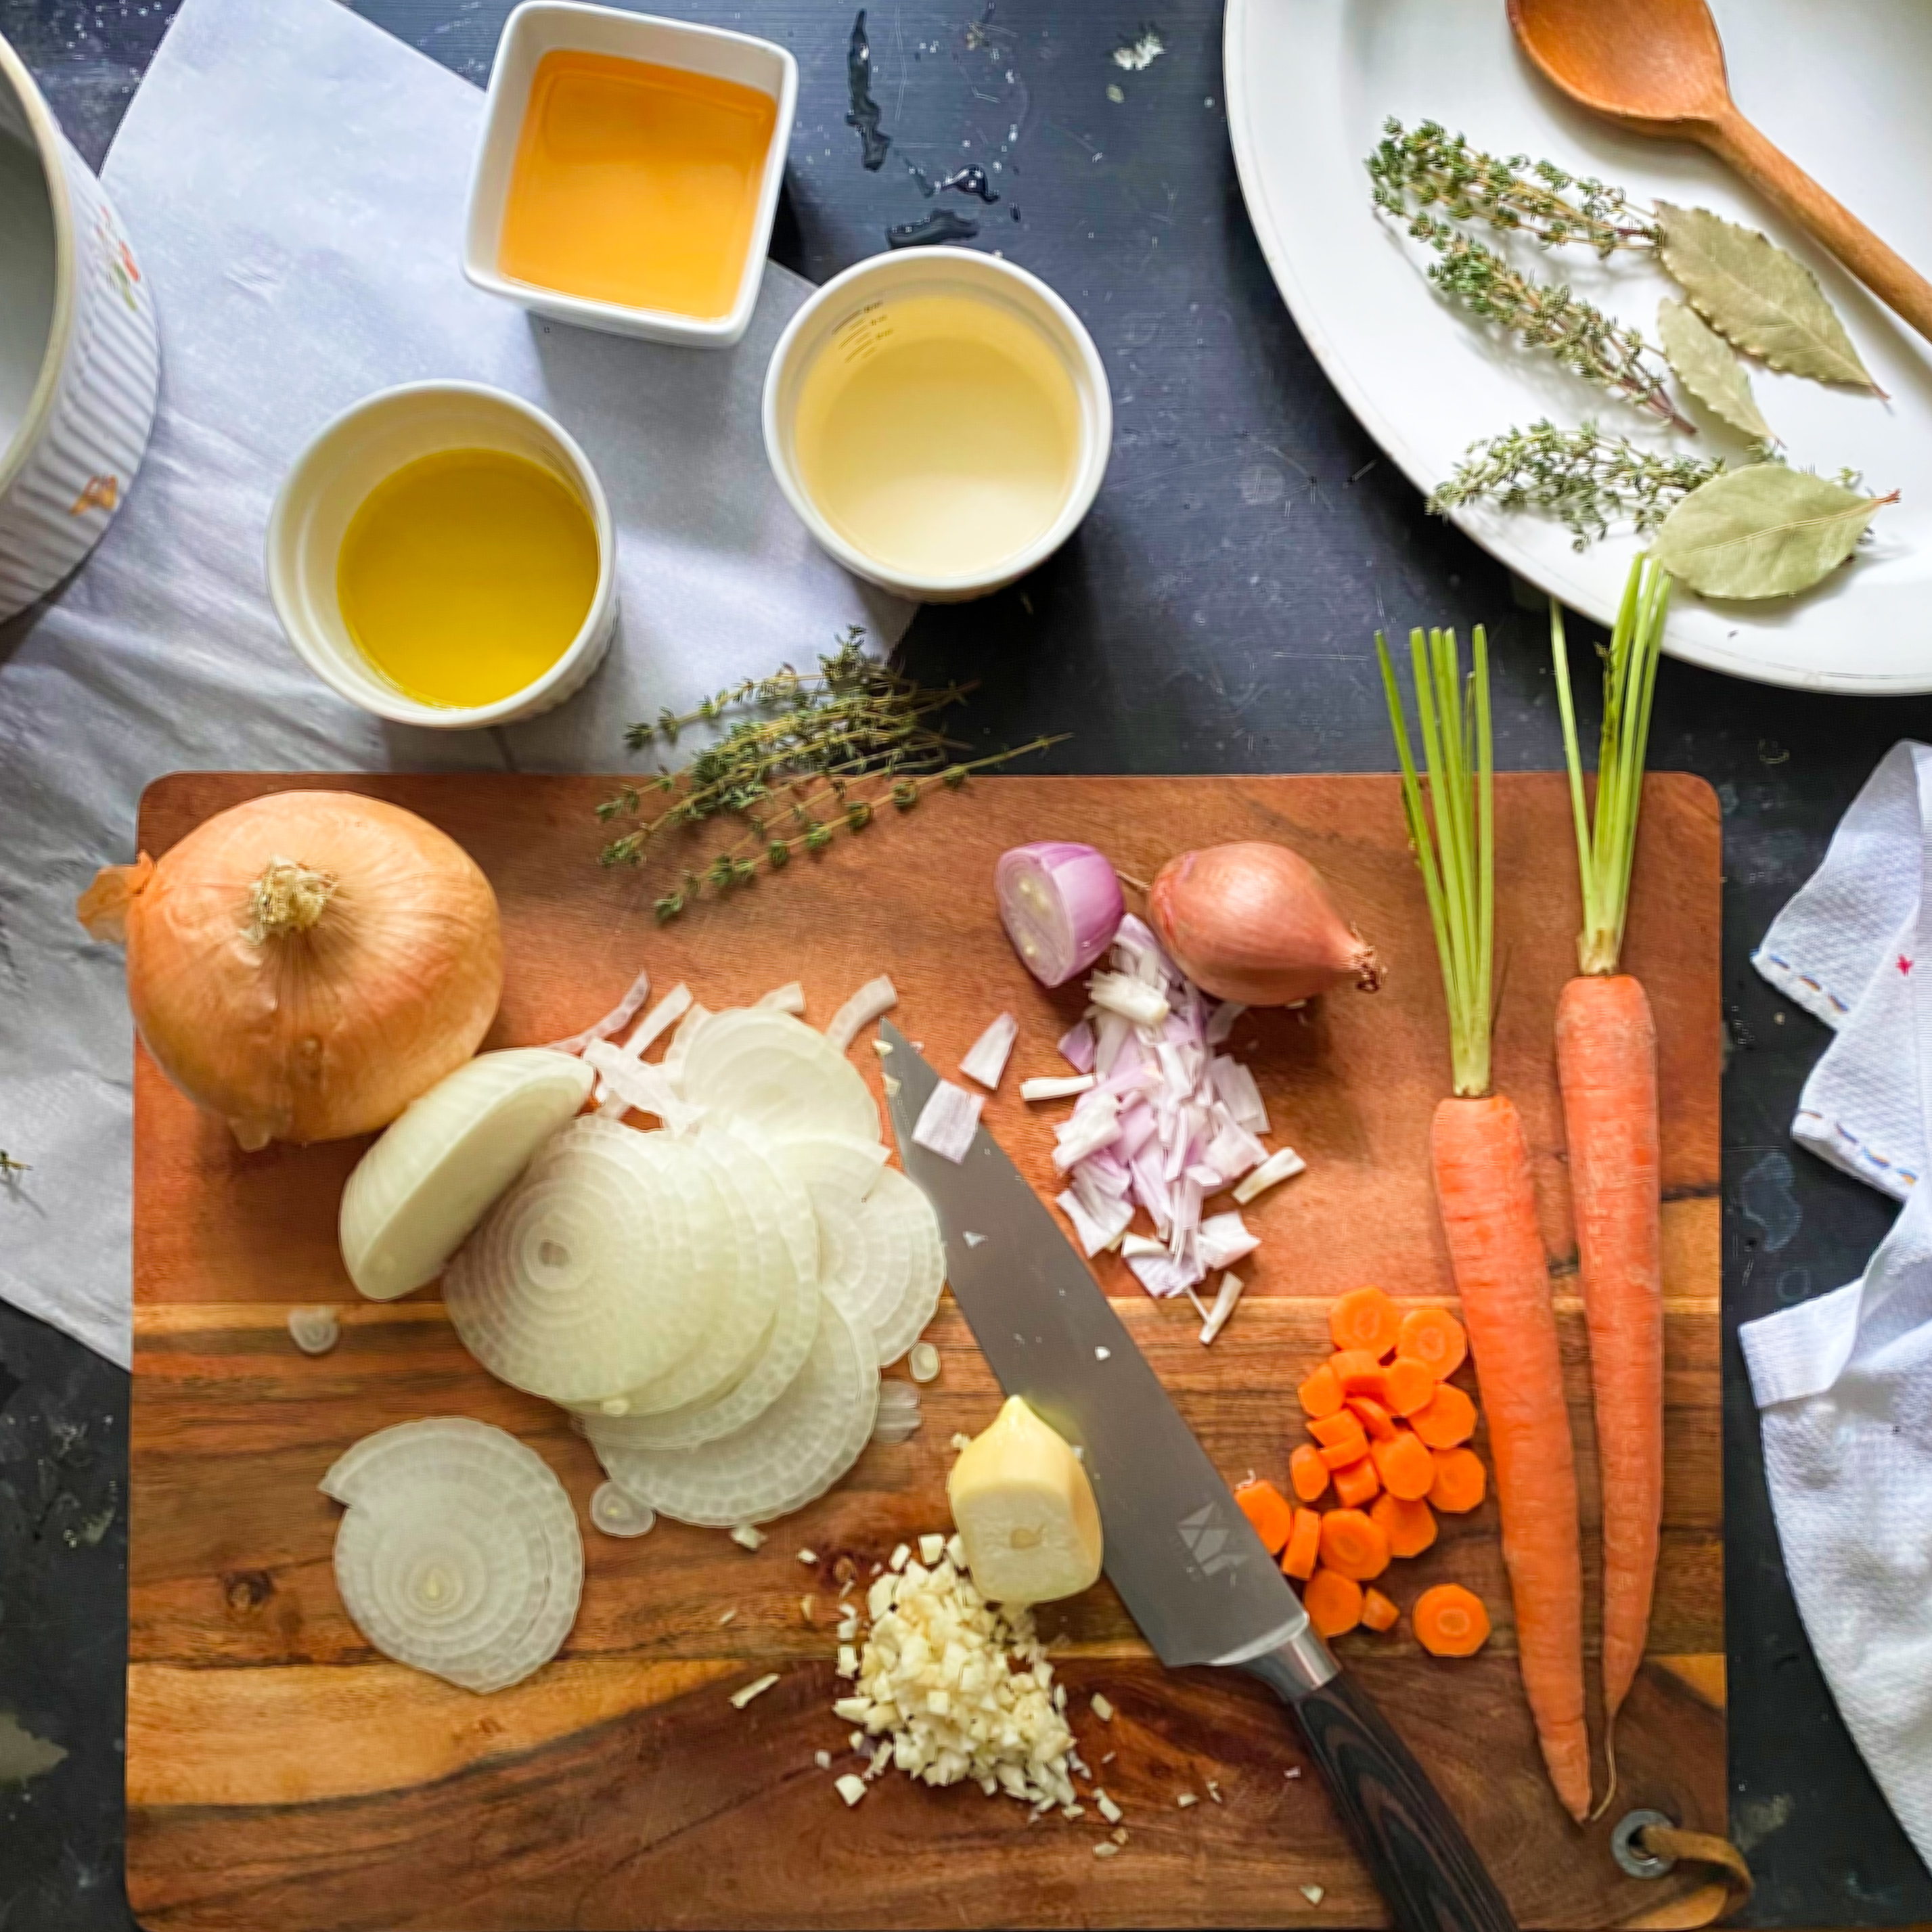
In a large bowl, mix all the ingredients together minus the steaks. Add the steaks and toss the mixture again.

Remove the steaks to a large (2-gallon size) Ziploc bag. Pour the marinade mixture from the bowl into the bag, covering the steaks completely. Seal the bag and store it in the fridge for 24 hours.

After 24 hours have passed, remove the steaks from the marinade bag to a large plate or casserole dish and let them warm up to room temperature while you prepare your cooking pan (about 15-20 minutes.

Salt and pepper both sides of each steak. In a large cast iron or heavy-bottomed pan, working individually, melt two tablespoons of butter over medium-high heat, cooking each steak one at a time for 7-10 minutes per side to achieve a medium rare center. Repeat with the following two steaks.

Transfer each steak as it comes off the heat to a parchment-lined piece of foil. Wrap each steak in the foil and let them rest until completely cool (about 30-45 minutes).

If you are planning to take these sandwiches on the road, the whole steaks can be refrigerated before slicing for up to 12 hours once cooled. When you are ready to prepare your sandwiches, slice each steak into thin ribbons.

Tuck the thin slices of beef between two slices of bread and call it divine or you could adventure even further and stretch your palate to include a train of condiment flavor pairings. Mustard, horseradish, mayonnaise. Maple syrup, cherry jam or hot sauce. Top the beef with a layer of blue cheese or fresh pineapple or a ring of red onions and you have a custom sandwich built just for you. Originally, the recipe called for a red current reduction sauce (an element that might not travel well), so I toted along a jar of French cherry jam in addition to the other above-mentioned condiments. A dollop of jam on top of the steak and between the layers of onion and lettuce was a magical combination of the sweet, savory kind that I would highly recommend.

A complete delight of a recipe from start to finish, the sirloin was full of flavor but not in a way that you could easily detect by the marinade ingredients alone. Most steak marinades I’ve ever tried in the past make the meat taste like the ingredients it was marinated in. Teriyaki steak for example tastes like soy sauce. A honey mustard marinade makes everything taste like honey and mustard. But this marinade was different. There was not one ingredient that overpowered the other. Instead, it combined a symphony of subtleties that left room to taste the flavor of the grass-fed beef. It made such a tender, succulent sandwich, it can best be described as pure, at every step, and every bite. Perhaps that is the magic of the salt, sea and sun of Acabonac Farms’ location. A delicious alternative to burgers and a great travel food for tailgate parties, fall leaf-peeping adventures and family football games, St Hubert steak sandwiches offer the best of New York’s local food that also happens to be accessible to everyone around the country no matter where you live.

Samuel Gottscho in 1956. Photo courtesy of the Museum of the City of New York.

As for Samuel and his Long Island escapades among the wildflowers, he had no worry about that average life expectancy marker in the 1920s. Samuel may have been fifty years old when he left his salesman job and professionally embarked on his new career, but it kept him engaged and enthralled for the next forty-five years of his life. When Samuel passed away in January 1971, he was 95 years old. Up until a week before his death, he was out in the field capturing the wild winter landscape, fulfilling client commissions, and working on his own personal archive that exceeded 40,000 images. What was Samuel’s secret to such a fulfilling life?

“It’s never losing the inquiring and enthusiastic spirit of the amateur,” he once told a reporter.

By the time, Samuel passed away, he was the recipient of numerous distinguished awards and accolades in the fields of architecture, horticulture, and landscape design. He was published in architectural digests, home design magazines, photography manuals, and newspapers around the country. Occasionally he would give a lecture or a presentation to a garden club or a photography circle. He was an expert for sure but he never had the bravado of one. Those accomplishments were nice, but that’s not what drove Samuel. His heart fired up at the sight of light, of composition, of shape. His heart fired up at photography and anything leading to it.

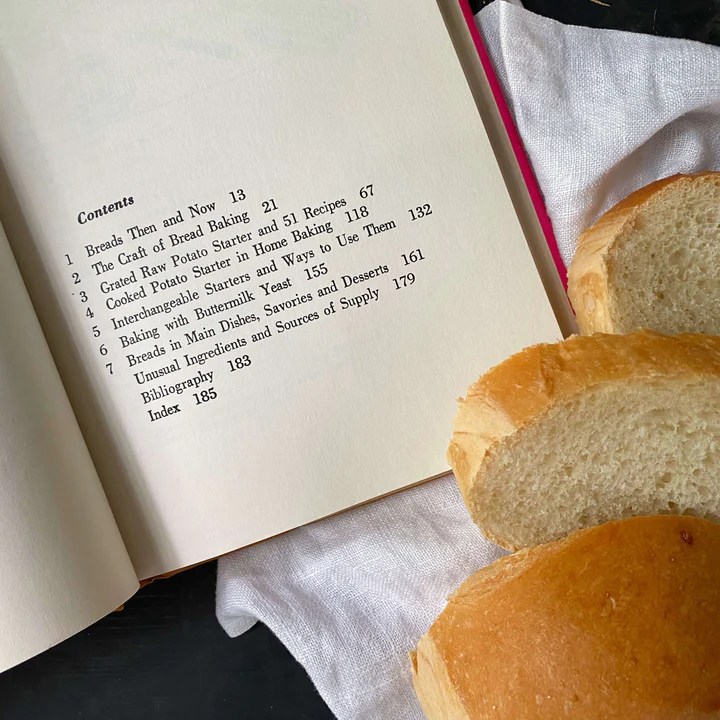
Just like the accessibility to Acabonac Farm’s grass-fed beef, you don’t have to live in the vicinity of New York City or Long Island to view more of Samuel’s work. Upon his death, he donated his entire photographic collection to the Museum of the City of New York and the Avery Architectural and Fine Arts Library at Columbia University. Over 2/3rds of his collection has also been digitally archived at the Library of Congress. More of Samuel’s work has been published in a gorgeous 2005 coffee-table book, The Mythic City, focusing on his New York architecture portraits spanning the 1920s-1940s. And last but not least, there are his wildflower photos published in the petite 1951 Pocket Guide to the Wildflowers, which is how I came to be introduced to Samuel’s life and work.

See more examples of Samuel’s wildflower work from this book in the shop here.

Just like the camera was Samuel’s gateway to an entirely new life, Samuel’s life became my gateway to an entirely new area of the world and an entirely new vintage recipe. I’m so happy to share his story with you here on the blog in hopes that it inspires something new in you too.

View from the Cross Sound Ferry at Orient Point, NY

Cheers to Samuel for not letting age be a factor in following his passion and for the incredible volume of work that he left for everyone to enjoy. Cheers to Acabonac Farms for sponsoring this post and for contributing the delicious grass-fed beef for this recipe. And finally cheers to the farmers of Long Island who work day in and day out to keep the agricultural history of the region alive and thriving.

A One-Pot Recipe for Your Pup: Homemade Dog Food Back by Reader Request

To view the full 30-Days graphic that includes all 30 bowls, click here.

This past January, we shared a post highlighting thirty days of homemade dog food that we made for our pup, Indie, during the month of December 2022.

As much a photo collage as a visual guide on the types of food that Indie has been eating throughout her life here with us, I wanted to dispel the myth that cooking for your pup is difficult, time-consuming and complicated. It was a piece that worked in tandem with a 2018 post about the history of dog food where we also introduced how to make your own balanced meals for your dog regardless of size, age or breed.

The history of dog food and how to make your own.

Both posts shared details about a large majority of the types of food Indie (and all dogs) can eat but neither contained a specific recipe. So in today’s post, as requested recently by our canine-loving readers, I’m sharing one of Indie’s most favorite meals complete with an ingredient list, step-by-step instructions and notes on scaling proportions depending on the size of your dog.

On the menu today it’s Steamed Chicken, Carrots & Sweet Potatoes – a one-pot stovetop meal that takes five minutes to prepare and one hour to cook. You can amend the recipe to make a large batch that will make up to eight meals or you can make a small batch that will provide a fresh homecooked meal for one to two days worth of dinners and breakfasts. Fridge-friendly, freezer-friendly and on-the-go-approved, if packed in an air-tight container and kept cold, this recipe can tag along on your all summer outings including picnicking, hiking, and overnight vacations. It can be reheated in the microwave or the oven if your dog likes warm food, or it can be enjoyed cold right from the fridge. You can toss in additional grains or vegetables if your pal has a big appetite, or serve it as is – a simple meat and two.

This is also a good starter recipe if you are new to the world of making homemade dog food or are introducing your pup to this new way of eating. It’s simple to make, requires just a handful of ingredients, and is easily digestible for all dogs. And just like all of Indie’s other meals, it’s 100% human friendly too. That’s the key to homemade dog food. There is not one ingredient in this recipe that you wouldn’t want to eat yourself. Let’s look…

Steamed Chicken with Carrots & Sweet Potatoes served here over a bed of green lentils.

Homemade Dog Food: Steamed Chicken with Carrots & Sweet Potatoes

This recipe makes 4-5 servings for a medium-sized dog weighing 45-50 lbs. Please see note regarding portion sizes following the recipe.

One 2-3lb package of chicken thighs, containing 4-6 thighs (Bone-in and skin-on preferred, but you can also use skinless/boneless thighs, chicken breasts or chicken tenders. We do not recommend bone-in-chicken breasts or wings though as these contain too many small bones. Please see note below.)

3 tablespoons olive oil

1 lb baby carrots

3 large sweet potatoes, skin-on and roughly chopped into large 3″ inch cubes

1 healthy pinch of sea salt

Optional: a handful of roughly chopped fresh parsley

Rinse chicken and pat dry with paper towels. Set aside. In a large stock pot, over medium-high heat, add the olive oil, making sure it coats the entire bottom of the pot. Let the oil warm up for about one minute. Add the carrots in a flat layer.

Next, add the chicken (skin side down if using bone-in thighs) …

Sprinkle the chicken with a generous pinch of sea salt. Then add the chopped sweet potatoes on top of the chicken and the fresh parsley on top of the potatoes.

Turn the heat down to medium. Cover the pot and cook for 60 minutes. Remove the pot from the heat and let it rest for 15 minutes on a cooling rack. Dinner is done!

With stew-like consistency, this dog-friendly recipe is full of comfort food flavors all bathed in a natural broth that forms when the water in the carrots and sweet potatoes mixes with the olive oil and the chicken fat. The hour-long steam makes the chicken fall off the bone and makes the vegetables so tender you can slice them with a butter knife.

If you use skin-on chicken thighs with bones you’ll get a richer-looking broth.

After the chicken has rested, remove one thigh, one cup of sweet potatoes, 1/2 cup of carrots, and 1/3 cup of broth to your dog’s bowl. Pull the chicken from the bone with a fork and then discard the bone. Because they splinter easily and can cause internal damage to organs, you never want to feed your pup any chicken bones. This is why we don’t recommend using bone-in chicken breasts which usually come with the ribs attached. The same goes for chicken wings which are made up of many small bones that can be easily missed when cutting the chicken up after it cooks.

Once you have transferred the chicken and vegetables to your pup’s bowl, slice everything into bite-sized pieces, mix it all together and let it cool to room temperature before serving.

Hands down one of Indie’s most favorite meals, Steamed Chicken with Carrots & Sweet Potatoes is a year-round pup-pleaser of a recipe and contains all sorts of nutritious vitamins and minerals. Collagen (chicken skin), beta-carotene (sweet potatoes, carrots), magnesium (sea salt), healthy fat and vitamins E & K (olive oil), and lean protein (chicken) are just a few of the beneficial vitamins and minerals wrapped up in this recipe that will help keep your dog happy and healthy.

Over the 4th of July weekend, Indie celebrated her 10th birthday. Of course, we surprised her with her favorite chicken dinner. This time, in addition to the sweet potatoes and carrots we added in some chopped-up cucumbers, another summer love of hers.

For the love of homemade food and cucumbers.

That is just a little example of how carefree this chicken recipe can be. The carrots, olive oil, and the chicken itself are mainstays, but the sweet potatoes can be swapped out for butternut squash, red potatoes, broccoli, cauliflower, cabbage, pumpkin, celery, beets. Just avoid adding any onions, garlic, or citrus fruits – three types of food that also seem like they might be natural companions to this meal, but are actually toxic to dogs. If you are interested in more possibilities to add in or swap out be sure to check the lists of other approved dog-friendly foods in the previous two posts here and here.

Leftovers can be stored in an air-tight container in the fridge for up to four days. When the broth cools it transforms into a jelly-like consistency similar to aspic. Don’t be put off by its wiggly jiggly nature. It’s just the coagulation of the olive oil, broth, vegetable juices and chicken fat. Your dog will love it, so be sure to include a little bit of it with each additional serving. If you decide to make some rice or lentils to augment the chicken and vegetables that jelly will add extra flavor to the new additions.

Day Two – the wiggly jigglys!

And two final notes on year-round enjoyment of this recipe and portion sizes …

In the summer, Indie tends to eat a little less food if it’s particularly hot, so when it comes to this recipe, she’s happy most of the warm-weather months with just the chicken, sweet potato and carrot combo. But in fall, winter and spring when she is at her most active, we usually add in a few other foods too for both variety and an extra dose of go-power. Other accompaniments you might like to include are the following…

  • 3/4 cup of cooked rice, 1/2 cup of cooked lentils or 1/4 cup oatmeal
  • 1 cup of additional cooked and chopped green vegetables (broccoli, collard greens, kale, spinach, zucchini, celery, green beans or peas)

All the proportions discussed so far are based on Indie’s medium 55lb. frame. If you are making this recipe for a small breed dog like a chihuahua or a bichon, you can certainly swap out the thighs for smaller cuts like chicken tenders or thin-cut chicken breasts. If you decide to use either of those, simply adjust the cooking process by starting with the layer of carrots first after you add the olive oil, then add the chicken, salt and sweet potato layers. That way the chicken won’t get stuck to the bottom of the pot.

And on the opposite spectrum, if you have a large breed dog over 60 lbs. I’d recommend doubling the portion size of the recipe above. The nice thing about using a big stock pot is that you can fit quite a bit of food in it. I’ve made this recipe using all types of chicken cuts, and all types of quantities from 4 to 8 thighs with 2lbs of carrots and six sweet potatoes, and it still comes out great every time.

Recently I discovered the 1910 story of Bum, a stray dog in St. Joseph, Missouri who frequented the back door of several restaurants in town each day. He was such a polite and enthusiastic eater, the kitchen cooks and wait staff couldn’t help but spoil him with the finest menu selections of the day. After Bum enjoyed a delicious meal at his favorite luncheonettes, he’d trot down the street and wait patiently for his next favorite set of restaurants to open up for dinner service. Bum so charmed all the restaurant workers that he became the most beloved (and well-fed) fixture in the neighborhood.

This story reminds of Indie, who was also a stray who trotted into our backyard during our Fourth of July barbecue in 2014. Once she had her first bite of grilled chicken, she never left. And so began a now nine-year adventure of cooking for Indie, our most enthusiastic taste-tester here in the Vintage Kitchen. Julia Child was famous for saying ” People who love to eat are always the best people.” Around here, we could say the same about dogs too.

Bum in 1910. Indie in 2023. Photo of Bum courtesy of the St. Joseph News-Press (Dec. 16, 1910).

I hope this post is helpful to the readers who requested it. We are always here to answer any questions you might have so feel free to ask away should you run into any troubles. In the meantime, happy eating to your pups. I hope they love this recipe as much as Indie does!

Cheers to all the dogs out there who inspire a wealth of joy and creativity in the kitchen. And to Indie, our delight of a dinner eater from day one.

On This Day in 1861: Brooklyn Want Ads, Hot Grog and A Sailor’s Time-Honored Tradition

An unidentified sailor in Union Uniform circa 1861-1865. Photo: Library of Congress.

April 10th, 1861. On this day in history, if you were a sailor perusing the newspapers of Brooklyn, New York you’d find your next maritime adventure tucked in between advertisements for Shakespearean readings, housekeepers for hire, and rubber teeth dentistry services. There, in a want ad posted in the Brooklyn Evening Sun would be your future for the next several months or possibly years to come. The US Navy was looking for seamen. It would ensure a paycheck, food, medical attention, and a chance to see the world, or at least part of it, via ship. There would also be grog.

Brooklyn Evening Star – April 10th, 1861

Life aboard a 19th-century sailing vessel was not a gourmet affair. Unless you were the captain, sailors could expect to consume a diet heavy in hardtack (a tough, shelf-stable biscuit made of water, salt and flour) along with rations of salted meat, pork and fish, and possibly a vegetable or two like cabbage or turnips. Beverages available were typically three – water, beer and rum, consumed in that order as the length of time on the ship grew. Each stored in wooden barrels, water was a luxury that spoiled quickly and therefore was the first to go rancid due to inadequate refrigeration. Beer was next, oftentimes turning sludgy and sour, weeks into the journey. The only truly shelf-stable beverage was rum.

The USS Bienville, built in Brooklyn, NY served as a Union sail steamer from 1861-1867.

In today’s post, we are drinking like sailors and embracing a long-standing tradition that is still upheld by seamen around the world. The recipe is Hot Grog, a rum and water toddy of sorts that includes tea, fresh lemon juice and sugar. Back in the Navy during the 1800s, this drink in its simplest form of rum and water was commonplace – an expected part of everyday life aboard ship. Today it’s an ideal restorative for Spring. When temperatures can be cool at night and warm during the day it’s a comforting evening drink, a medicinal miracle worker for allergy season, and a celebratory cocktail served hot or cold depending on your weather and your whereabouts.

Rum and sailors have been companions for centuries. This recipe is definitely no new kid on the block. History states that the average sailor in the Navy during the 1700s -1800s consumed one-half to one pint of straight rum per day which could equal up to 27 gallons per year. A ration available to all men aboard, regardless of the type of sailing vessel, rum was both a highlight and a soothing salve for the spirit to get them through the hard work, the inclement weather, and the lonely atmosphere that surrounded life at sea. Food history also accounts for the fact that rancid water and spoiled beer left but one alternative for hydration. In that regard, rum was both a treat and a life-sustaining source of calories. But most importantly, it was a tradition.

Read more about this cookbook in the shop here.

Although there are a few different ways to make grog, today’s recipe featured here comes from The Mystic Seaport Cookbook. Published in 1970, this cookbook celebrates over 300 years of traditional New England fare offering a unique glimpse into maritime life. With a surprisingly extensive beverage section that includes several eggnog recipes, syllabubs, flavored brandy, punches and possets, Hot Grog is one the oldest of them all.

Portrait of Edward Vernon by Thomas Gainsborough

Dating to the 1730s, grog is attributed to British Navy Admiral, Edward Vernon (1684-1757). Nicknamed Old Grog, Edward celebrated a maritime victory over Spain with a round of rum for all the sailors on his ship. Although acknowledging that rum drinking was par for the course in the life of a sailor, Edward thought that more than two cups of rum a day was too much for any man, so he offered his seamen a drink of half water/half rum to toast their victory. This mixture became known as Grog, and as the decades and centuries progressed, the tradition of a daily drink of grog became a highlight of a sailor’s day aboard ship, marking an important place not only in maritime history but food history as well.

Our 1860s sailor up top at the beginning of the post, thumbing through the Brooklyn Evening Star, would have noted that the want ad included the mention of grog specifically. As that meant that this ship upheld tradition and would be more likely to follow through on its promises. In the 1700s and 1800s, many jobs for sailors aboard trading ships and cargo vessels were fraught with injustices that led to unfair working conditions. Partly because of unscrupulous captains, cramped quarters, disease, the danger of the work, and the uncertainty of long weeks or months spent out at sea, the life of a sailor was not an easy one. But certain dependable regularities could make the voyage more bearable – rum being one.

A delight in all ways that tea and rum can be on their own, this seafaring beverage is both visually enticing and physically appealing. Essentially like drinking a good, hot cup of tea, it’s a well-complemented combination of flavors, with no one ingredient overpowering the other. It’s preferable to select a strong type of black tea, but I suspect (although I haven’t tried it yet) that this drink might be equally interesting with an herbal tea like peppermint or ginger as well. I don’t think the sailors would mind if you experimented, just as long as you don’t forget the rum!

Hot Grog – Serves 6

3 large lemons

1/4 cup sugar

3/4 cup heavy rum

6 cups strong hot tea (lapsang souchong)

While water is boiling for tea, cut six long curls from the lemons using a vegetable peeler. Cut each lemon in half and juice them to make 1/2 cup.

Combine the sugar, lemon juice and rum in a mason jar or small bowl and stir. Divide the mixture among six warmed mugs. Prepare the tea and add it to each mug. Garnish each cup with a lemon rind swirl and serve immediately.

I’ve made this recipe a few times over the past couple of months. The first was at Christmastime when the polar vortex weather encouraged us to try all the ways to keep warm inside and out. I’ve also made it on a grey and rainy end-of-winter night when the air was so damp and heavy, it felt like Spring might never come. And then again just the other day, when the 60-degree day sun was setting and the temperatures started creeping back down into the low 50s. Each time, hot grog warmed the belly and refreshed the spirit.

A comfort in other ways too, grog made its way into sea shanty songs. Sung by sailors for hundreds of years, as they went about their life on the water, songs like Leave Her Johnny Leave Her , Drunken Sailor and the The Wellerman all touch on the challenges faced at sea and the important part that rum played. The Wellerman, in particular, features all three ingredients of hot grog – sugar and tea and rum. It was a popular song among the crews of New Zealand whaling boats in the early 1800s, and then again became a popular song on social media during the pandemic in 2020-2021. If you aren’t familiar with it, here’s the song in full… (with a little warning… it’s a bit of an earworm – you might be singing it for days!)…

It’s incredible to think what a far reach this magical combination of ingredients has had in the minds and hearts of sailors (and singers!) for centuries. From the New York waterfront all the way around the globe to the South Island of New Zealand and back again, for whatever occasion, at whatever temperature, and in whichever climate you chose to make a cup of grog, I hope you enjoy it just as much as we did here in the Vintage Kitchen.

Below are a few more want ads for sailors that add dimension and depth and color to this corner of nautical history. Cheers to all the sailors who’ve kept tradition alive via recipe and rum!

Bangor Daily Whig & Courier – November 5th, 1863

Bangor Daily Whig & Courier – November 11th, 1856

Bangor Daily Whig & Courier- Set. 8, 1864

A 1960s Starter Recipe: The Baking Life of Ada Lou Roberts of Rose Lane Farm and Her Alaskan Sourdough Pancakes

{Warning: This post contains disturbing information related to a real-life event. If you are sensitive to stories about true crime, you may not want to read beyond the recipe sections.}

It could be said that Ada Lou Roberts’ arthritis launched her into the culinary zeitgeist, but that would only be a portion of the story. Also attributing was that one 1950s luncheon where forty-five attendees requested the recipe for her homemade buckwheat tea buns. And then there was her family of course who played a big part too. Her beloved mother and grandmother in particular, whispering all their kitchen secrets into her middle-aged ears, reminding Ada Lou of what she learned decades earlier as a small girl mastering the stove in her childhood home.

Ada Lou Roberts may not be a household name today, but back in the 1960s and 1970s, she was a go-to resource for bread baking. The author of three cookbooks and one novel, like many women born in the early 20th century (1907 in Ada Lou’s case) she learned how to cook from her mother and grandmother on their family farm in rural Montgomery County, Iowa. Her mother cooked every day for a large family that included seven brothers and sisters, extended family and the workers who helped out on the farm. Ada Lou’s grandmother helped out with the baking.

Many of her grandmother’s recipes were in the traditional Pennsylvania Dutch style, incorporating yeast and other natural leavenings, whole grains, seeds, and herbs, all of which they grew themselves on the farm. Ada Lou grew up braiding bread, feeding her family, learning about health, about harvest, and about happiness through time spent in the kitchen among dough balls and mixing bowls, flour sacks and family.

After Ada Lou got married, her and her husband Marcus, moved to their own farm in Kansas, known as Rose Lane. There Ada Lou continued the family baking, this time in her own busy kitchen as she raised her two boys. A diagnosis of early on-set arthritis in her hands led her to appreciate the tactile nature of kneading dough and the physical therapy it continuously provided to keep her hands active and nimble.

In 1960, she published her first cookbook, Favorite Breads From Rose Lane Farm. She was 53 years old at the time it debuted. By that point, she had been tinkering around with her family’s recipes for more than four decades, adjusting them here and there, modernizing them as American kitchens became more modern themselves. The buckwheat tea bun recipe featured prominently in the cookbook. Ada Lou said it was easier to publish one cookbook than handwrite forty five copies of the same recipe. The luncheon ladies were delighted.

Upon debut, reviewers referred to Favorite Breads as a sweet little baking book, but by 1963, it had become a highly recommended recipe collection stuffed full of valuable information. Championed by food columnists across the country, every time someone wrote to the newspaper for help, Ada Lou’s book became the answer for their bread-making woes.

In 1967, her second book Breads and Coffee Cakes with Homemade Starters from Rose Lane Farm was published. Again inspired by requests, this cookbook was born from letters written by fans of Ada Lou’s first cookbook. This time they asked for more recipes on homemade starters. Ada Lou filled an entire cookbook with them.

By definition, a homemade starter refers to a fermented dough that requires a lengthier amount of time to develop prior to baking. One common starter example is sourdough bread. The most famous sourdough bread comes from San Francisco, where the air is credited as a key ingredient alongside flour and water in creating that signature San Francisco sourdough flavor. Bakers from all over the world have tried to recreate that same sourdough taste but to no avail. It’s the air that sets it apart. Making starter recipes is a universal baking act known the world over, but it’s also highly individualistic depending on your location and your cooking environment.

In today’s post, we are featuring a starter recipe of Ada Lou’s, from her second book, Breads and Coffee Cakes with Homemade Starters. Today’s post features not bread or coffee cake but instead sourdough pancakes. It’s a weekend meal fit for kings and queens of the kitchen and anyone who likes to slow down on a Saturday and watch the overnight batter bubble and pop.

The recipe we are making today is really two recipes in one, Alaskan Sourdough Starter and Alaskan Sourdough Pancakes. There’s no note from A.L. as to the Alaskan connection for this particular set of recipes, but sourdough and the Last Frontier have had an ongoing love affair since the Gold Rush days. In the 1850s, miners from other states scampered up to Alaska with sourdough batches in hand as sustenance to carry them through all their mining adventures. Quickly, it became part of the food fabric of the state. So much so that even newcomers to Alaska today are still referred to as “sourdoughs.”

Somewhere in this early 1900s street scene in Nome, Alaska are jars of sourdough starter waiting to be consumed!

Men weren’t the only ones who had gold rush fever. Single women headed up to Alaska to mine gold and fill job demands brought about by the influx of speculators.

In my family, we once had a starter recipe that was traded back and forth between my aunt in California and my grandfather in Arizona for close to twenty years. It came to become an honored guest at parties and even went on family vacations with us. There are opposing memories between all the cousins now as to whether this family starter was for pancakes or for bread. One remembers sourdough bread, the other buckwheat pancakes, while another remembers sourdough pancakes and another recalls buckwheat bread. Confusion aside, we all remember it being delicious. Both my aunt and my grandfather passed away in the 1990s, so we don’t have them to set the record straight, but I think they were both pretty intrepid for tackling starter recipes to begin with and then keeping one going year after year for decades even though they lived 700 miles apart. Starter recipes are fun that way. They can be individualistic, inclusive, creative, and captivating all at once.

Ada Lou’s pancake recipe is delicious and bears that same sort of tangy, otherworldly flavor that sourdough bread evokes. Made up of simple pantry ingredients, the beauty of a good starter is in the verb itself. You just start. And then carry on. In give-and-take fashion, a portion of your very first batch gets saved out and then added to a future starter, where again a little bit of that future starter then gets reserved for the next starter after that and then so on and so on. Little portions of one combine into another. Recipe after recipe, week after week, year after year until you become like my Aunt Patti and Grandpa Phil still incorporating a portion of that same original starter into pancakes (or bread!) twenty years later. The longer your starter lives, the more incredible the flavor. Some starters have lived for more than 150 years and are still going strong.

For anyone new to the starter concept, it’s easier to explain while highlighting the steps in the recipes, so I’ll get right to the making of it. Pancake eaters await!

Alaskan Sourdough Starter

1 package of commercial dry yeast

1 cup warm water

2 teaspoons salt

4 tablespoons sugar

1 1/2 cups white flour

Prepare this one the day before you wish to use it. In a large mixing bowl, combine the yeast and warm water. Then add the salt, sugar, and flour and beat well. The batter should be thick but still pourable at this stage. Cover the bowl tightly with plastic wrap and put it in a warm place until it doubles in bulk. (Note: I put my bowl in the greenhouse where it rested at 82 degrees for 14 hours. Other ideal places are the top of the fridge, the back of the stove, on top of a heat register or near a radiator or fireplace. Ideally, you need a draft-free spot that will surround the bowl with an equal amount of warmth on all sides).

By the next day, your starter should have doubled in bulk. It will be dotted all over with air bubbles like this…

Before you move on to the next step of making the actual pancakes, remove one cup of this starter from the bowl and store it in a covered glass jar in the refrigerator…

Once you have completed that step, you have officially begun. Congratulations! Your starter is born. The next time you make pancakes (not for this recipe below but in the future), you’ll start all over again and make a new batch of Alaskan Sourdough Starter, but instead of adding yeast next time as the recipe calls for, you’ll substitute to it with the one cup of fridge starter instead. And then following the same process as above, once that batch has risen overnight, you will again remove one cup of the starter before you make that next batch of pancakes. You’ll store it in the fridge just like you did this time, and then that starter will be ready and waiting for the third time you make these recipes later on down the road. So that each time, you’ll always be adding to and then taking away one cup of starter to be reserved for a future date.

Now on to the pancakes…

Alaskan Sourdough Pancakes

(makes 12 4″ inch pancakes)

2 tablespoons butter

1 egg, well beaten

1/2 teaspoon baking soda dissolved in 1 tablespoon water

Alaskan Sourdough Starter (the full recipe you just made minus that 1 cup that you just reserved in the fridge)

To the starter batter add the butter, egg, baking soda and water. Mix thoroughly. Heat your griddle or pan. Add butter or cooking oil to the pan if necessary and then cook your pancakes. Once they have browned on each side they are ready to serve.

I served these pancakes with fresh blueberries, sprigs of mint, a dollop of butter and our favorite local Connecticut maple syrup harvested from Swamp Maple Farm, just a few miles down the road from 1750 House.

After getting a complete tutorial from the owner of Swamp Maple this past November, we now have all the info we need to start tapping our own sugar maples next fall. We are already looking forward to mountains of pancakes and 1750 House syrup!

Delicate and tender like crepes with slightly salty, slightly tangy notes, these pancakes were so well-rounded in flavor that the only way I can think of describing them is as a perfect vehicle. Not too sweet, they work in harmony with the syrup, the butter, the blueberries, the mint, in such a way that no one ingredient overpowers the other. Instead, it’s just a perfect meeting of all the taste sensations. Spongy in texture, the yeast gives this stack a bit more sustenance, so that you feel energized after eating it – not like you want to go take a nap.

As with all beginning starter recipes, the sourdough taste will become more present, more fragrant, more tangy as future batches are made incorporating the reserved starter from the fridge each time. Ada Lou advises using this method below next time you want to make up another batch of pancakes using the reserved starter that’s now sitting in the fridge…

While I was making these pancakes I couldn’t help but imagine Ada Lou in her idyllic-sounding Rose Lane Farm kitchen whipping up big batches of pancakes for her hungry boys. I couldn’t wait to find a photo of her or her Kansas farmhouse to share with you so that we could all see where this gorgeous set of recipes stemmed from. Nothing surfaced though. I even went back so far in time as to try to find a photo of her childhood home in Iowa where she learned how to cook with her mother and grandmother. I didn’t find that either. I did however find something else. Something terrible.

In 1912, when Ada Lou was five years old, two of her older sisters, Ina (aged 8) and Lena (aged 12) were killed by an axe murderer while spending the night at their friend’s house. It was a horrific crime that took not only the lives of Lena and Ina but also the entire family that they were staying the night with – two parents and their four children. This all occurred in the small, quaint, good-to-know-you hometown of Villisca, Iowa where Ada Lou grew up. It was a shock to the entire community as both families were very respectable and very well-liked. The murder made national headlines. Seven thousand people attended the funeral to lay Ina and Lena to rest. Referred to as the Villisca Axe Murders, for years throughout the 1910s and 1920s, Ada Lou’s parents and investigators tried to find the murderer and the motive, but the crime is still unsolved today.

I hesitated about including this information in this post. On one hand, it didn’t seem to have a lot to do with a pancake recipe. But on the other hand, it had a lot to do with Ada Lou. Her whole baking career was based on her family and the memories, the skills, and the recipes she learned from them. First in the childhood kitchen of her Iowa farmhouse and then in her adult kitchen at Rose Lane Farm in Kansas. In those early years of her life, while Ada Lou was learning to bake at home from her mother and her grandmother, her family was grieving and trying to process the horrific tragedy that senselessly wiped away her sisters’ lives in a blink.

I wonder if all that looking back in her mid-life years, before Ada Lou published her first cookbook, was some sort of salve for her and her family’s broken heart. I wonder if baking provided some sort of comfort to Ada Lou in those childhood days. A task that busied her hands, that focused her attention, that turned her gaze towards creating something wonderful, something lovely, something good for her family that had been so devastated by such a terrible act. Ada Lou was only five when her sisters were killed, and possibly too young to fully grasp at the time what specifically happened to them. But she grew up and came of age in the anxiety-leaden aftermath of their deaths. Living day to day with the desperation of her parents’ continual questioning, continual searching for answers, for understanding.

People come to baking for all different reasons… health, creativity, entertainment, curiosity, and comfort. I wonder if baking became Ada Lou’s salvation and then ultimately her success at carrying on with life post-tragedy. I wonder if she thought of it as a way to start putting her family back together one nourishing slice of bread or pancake at a time.

Ada Lou passed away in 1983, and to my knowledge, there is no record that I have found at least, where she ever publicly spoke about what happened to her sisters or how it affected her family or affected her own life. There isn’t even any article or news story that connects Ada Lou the baker with Ada Lou the sister of two murdered girls. Maybe this is why I couldn’t find any photos of Ada Lou or her Kansas farm, even at the height of her popularity in the 1960s and 70s, when everyone was clamoring for her recipes. Maybe Ada Lou wanted to set her personal life aside. Maybe it was just too painful to talk about. Maybe the act of baking and talking about baking and writing about baking was the only way forward. The only way for Ada Lou and her family to start again.

There’s something hopeful and optimistic and anticipatory about starting a starter recipe. That’s why I decided to include the whole story of Ada Lou’s life alongside her recipes. I think her story despite its tragic start, is one of hope, bravery, and admiration. It gives context to her baking and shows her strength of character and commitment to keeping her family’s culinary talents alive. Despite the bad, she extolled the good. Memory by memory. Bread by bread, cake by cake, recipe by recipe.

I hope these starter recipes start something wonderful in your kitchen. If we’re lucky, we might all just see our 2023 starters still working their magic in 2043 and 2053, and 2063 and maybe even beyond. Keep us posted if you decide to join us in this sourdough arena – we’d love to hear how things are going in your kitchen.

Cheers to Ada Lou for showing us all about the importance of new beginnings.

The Greenhouse Diaries Entry #5: Seed Starting, The Blushing Bell Pepper and What We Learned from a Veggie Burger

Valentine’s Day is still two weeks away, but in the greenhouse love and joy and lessons are in abundance these days. From the deep red petals of the geraniums to the blushing bell pepper to a big bowl of an aphrodisiac growing on the second-tier shelf, it seems like every plant is offering up a bit of romance and wisdom in one way or another. Is this what the winter harvest season looks like? Or does this mean spring might be coming early? I don’t know. Since it’s our first year, we can only take note and appreciate what’s happening right now in the greenhouse at this end-of-January date. Let’s look…

The sun gold cherry tomato branch produced another foursome…

The nasturtiums and geranium flowers are stretching their leaves and spreading so much cheer both in color and scent…

Nasturtiums
Geraniums

Growing like gangbusters, the chives and the collard greens, are each overflowing from their containers…

The arugula and the parsley are keeping pace with our daily kitchen needs by enthusiastically providing continuous greens for every meal…

Greenhouse-grown arugula and parsley

One of our favorite recipes we tried this week was this new veggie burger from Jenny Rosenstrach’s cookbook The Weekday Vegetarians. We modified it a bit by adding a fried egg on top and stuffing the buns with our own greenhouse-grown arugula and parsley but otherwise followed the recipe exactly.

These burgers don’t require any baking in the oven – just stovetop cooking (or hot plate, in our case) in a cast-iron pan, so it’s an especially great recipe for under-construction cooking, small space meal-making, or college dorm food. Soft and light, as opposed to many veggie burger recipes that can sometimes tend to become dry and dense, Jenny’s recipe has the consistency of crab cakes and a delicate flavor combination of mushrooms, brown rice and pinto beans. Jenny suggested sliced avocado and a spicy mayo mixture for a topper, but because of our greenhouse abundance, we substituted those two with our own version of similar flavors and textures via the creamy egg and peppery parsley and arugula. It was delicious.

Nowadays, arugula is such a common salad staple that it’s easy to forget that it was once considered a gourmet green and talked about in haughty tones. Although British and Italian immigrants are credited with bringing it to America in the 19th century, it wasn’t really until the 1980s, that it started making a more regular appearance in American cookbooks.

Paula Peck was one of the very few who mentioned it in her 1960s-era book, The Art of Good Cooking, grouping it together with “very expensive” bibb lettuce and James Beard, our favorite gourmand, described it with a sense of reverent curiosity in his 1970s American Cookery book. But none of our favorite 20th-century chefs featured it as an ingredient to create a meal around until many decades later.

Not the case across the pond though. There was nothing new about it in England, Europe and the Mediterranean. There, arugula has been enjoyed for centuries. Legend states that in Roman times it was considered an aphrodisiac and was even banned from some gardens for its love potion properties. So if you wanted to make a romantic Valentine’s dinner for your sweetheart this year, consider a big bowl of arugula along with your shellfish.

Santaka pepper

Back to the spicy atmosphere in the greenhouse, the Santaka Pepper – although pretty small in stature at just 8 inches – is getting ready to flower (above) and Liz Lemon is growing a baby (below)…

Liz Lemon’s baby lemon!

The loveliest surprise of all this week though was the bell pepper. If you have been following along with previous entries from The Greenhouse Diaries, you’ll recall that this was a mystery bell pepper plant that was either a California Wonder, producing peppers that would ripen to a deep red color, or it was the Orange Sun variety, which would turn, as it names suggests, to a warm shade of orange once mature. For weeks, we’ve been waiting to see which color it would turn.

Finally, last Wednesday, the pepper started to change. With great excitement, I’m so pleased to share for certainty now, both the color and the type of plant we’ve been growing all these months here in the greenhouse. The first blush gave it all away…

Wednesday

Orange Sun! Each day it gets brighter and brighter…

Thursday

Yesterday morning

If bell pepper had a theme song, it would be this one…

Through wind and rain, snow and sleet, sun and clouds, the greenhouse experienced all the different types of weather possible in these past 14 days. Outside it was a rollercoaster of highs and lows, but inside the temperature held steady between 70-80 degrees, the most even stretch of well-regulated temperature all winter so far. Thanks to our trusty heater, that cozy warmth is now making it possible to start our next endeavor…

Seed starting! After late sowing in the garden in 2022, this year the plan is to get a head start so that by the time the last frost date passes in our area (typically mid-to-late April), they’ll be a collection of hearty transplants ready to make their way out to the garden beds.

Excited to get to work on what is perhaps the most optimistic of gardening pursuits, the first set of seed trays were filled with flowers… snapdragons, Mexican sunflowers and foxglove. Four days in and the Mexican sunflowers have already started popping up. Another joy!

Mexican sunflower seedlings

The first time I ever grew Mexican sunflowers from seed was in 2012. I fell in love with their delicate, velvety soft stalks and their bright tangerine-colored petals. Blooming extensively throughout the season, they were a haven for bees and butterflies. That first year I was living in Georgia and they filled out into a 6′ foot by 5′ foot tall bush in a flash. That combination of heat, humidity, and full sun was a winning ticket. I haven’t had enough gardening space to try Mexican sunflowers again until this year, so I’m not sure if they will grow as large and as lush here in New England, but it will be an exciting experiment. This is how they turned out that first year (fingers crossed that we’ll get similar results and similar visitors)…

From the garden in 2012

Right on track, the snapdragons and the foxglove started sprouting yesterday. As biennials, we started some in the garden last year too, along with hollyhocks, but they didn’t grow very much. It’s my first attempt growing all three from seed, so we’ll see what happens this year. Between these greenhouse seedlings and those planted in the garden last year, we’ll have two sets hopefully coming up more productively this year.

Next up on the seed starting list for this coming week are a new batch of peppers and herbs, salad greens, hollyhocks, milkweed, and pincushion flowers, which will get us set up through the month of February before more seeds get started in March. By that stage, we’ll be rounding the corner towards Spring and our one-year anniversary at 1750 House. We aren’t as far along in our renovations as we thought we’d be, but I learned a valuable lesson this week from the veggie burgers.

At one point in Jenny’s instructions, when it comes to the step about forming the actual veggie burger patties, she writes “they will probably look mushy and unappetizing, but press on.” I love that she was so candid with this insight. And I love that she uses the encouraging words “press on.” As we continue to get to know the greenhouse, the 1750 House and the landscape in which they both lay, it is such a good reminder that all worthwhile endeavors require a healthy dose of blind faith and pressing on. Without that, we’d never make it to the flowering and flourishing days. I can’t wait to see what this spring holds in terms of a kitchen and a kitchen garden. We may be in the middle of the mushy parts now, but something deliciously wonderful awaits.

Cheers to love that sprouts, to the sun’s coming out party in the greenhouse, and to Jenny for sharing recipes and reminders.

Mexican sunflower seedling

{The Greenhouse Diaries is an ongoing series. if you are new to the blog, catch up here with Week #1Week #2, Week #3 and Week #4 here}

The Greenhouse Diaries Entry #3: Snow and Bell Peppers

current outside temperature: 33 degrees, greenhouse temp: 61.2 degrees

Last week, we left off with two cliffhangers… an impending snowstorm and an outbreak of powdery mildew. Did the greenhouse stay warm during our first storm? Have the sage and the tarragon recovered? Let’s see…

The total accumulation last Sunday night was 2.5″ inches. The greenhouse didn’t blow away or collapse (a victory!) and nothing was frost covered inside. We didn’t get the haybales purchased and placed before the storm for two reasons… 1) we wanted to see how the greenhouse would do on its own and 2) perhaps there might be a better alternative.

In theory, haybales placed around the outside base of the greenhouse act as insulation. They cover any vulnerable seams or crevices from drafts as well as act like a barrier against cold winter winds. Our greenhouse was never meant to be air-tight in its design. There are tiny exposed airways around some connector pieces and screws, which is good for ventilation. I hesitated about the bale method of winterization because there are about a dozen plants in our greenhouse that draw light from the bottom sidewalls and the hay bales once placed around the base would block their access to light from that direction. Of course, that would probably only encourage the plants to grow taller, to reach for the light above the bales and towards the roof but the idea of covering up this beautifully airy space with something heavy and dense didn’t seem quite right. In honor of light, we chose to wait and see.

So the snow came and the greenhouse experienced it sans haybales and everything was fine, except for the temperature. The coldest the greenhouse has ever been, even with the heater going at level 3 (the maximum setting) was that night. 43 degrees. Not cold enough for frost to appear but more than twenty degrees away from ideal interior temperatures. This first snowfall was such a good test. We definitely needed to protect it more.

My husband came up with the great idea of a plastic sheet covering the door frame from the peak all the way down to the base. The plastic at the roof was held down with two leftover 2 x 6 pieces of lumber, one on each side of the peak with the board ends resting in the gutters to help hold it all in place. Three treated 4x4s weighted down the plastic at the base. Essentially, he made a makeshift curtain panel for the front door that looked like this…

By covering the greenhouse in this way, it eliminated the draft that comes in around the door while still allowing lots of light to come through. Once this new plastic panel was added, the interior temp went right back up to 65 degrees within an hour. Success!

Until the next night.

Wind got a hold of the plastic and carried the curtain across the yard at some point in the middle of the night. The internal greenhouse temp plummeted straight back down to the low 40s.

Not entirely deterred, my husband set out for a second attempt. This time he stapled the plastic to the treated wood at the base, nailed two shorter boards together to form a wooden peak for the top that mimicked the pitch of the roofline, and then stapled the top end of the plastic to the wooden frame…

And that turned out to make all the difference. For the rest of the week, the plastic has stayed in place and the greenhouse is warm and draft free. To gain entry, we just take the wooden peak down and set the treated wood off to the side and then put it all back in place once we’re done inside. So simple.

Temperatures fluctuations and winter weather aside, luckily the greenhouse plants didn’t seem to be affected by all these up-and-down changes. The sage and tarragon were still flocked with powdery mildew so they got a second spray of the organic fungicide. The tarragon responded to this extra care and attention by slowly unraveling its first flower…

The marigolds have been thinning themselves out one by one since they arrived in the greenhouse, so they got repotted to a smaller container. If I had to peg any of the summer flowers that I thought would do best in the greenhouse it was the marigolds. They were such hardy growers in the garden from spring to fall, so I was surprised to see them losing leaves, drying out and getting long and leggy in the greenhouse. Hopefully, this new home will encourage them to fill out more around the middle.

On the growth spurt front, the geranium leaves tripled in size…

the broccoli grew by another inch…

the spicy Santaka pepper seedlings put out a whole new layer of leaves…

and our lone bell pepper seems to grow bigger by the minute…

Between seeing the greenhouse outlined in snow early in the week and then hearing the tinkling of raindrops on the roof at the end of the week, I can understand now why Philip Johnson built and loved his Glass House so much.

The Glass House in New Canaan, CT designed by Philip Johnson in 1945 and built in 1949.

While working on that and the neighboring Brick House, Philip mentioned being overtaken by waves of emotion for certain details during the design process. He was talking about archways and vantage points and shapes that felt like hugs, but I loved that he used the word overtaken to describe his attraction to the space and his ideas in it. That’s exactly what it feels like to stand in the greenhouse. To be overtaken by nature, by light, by warmth, by possibility, by protection. It’s no wonder plants thrive in such an environment.

Ivy-Leaf Geranium

As we work through renovations on the 1750 House during these fall and winter months, oftentimes the greenhouse is the warmest, quietest, calmest place to be. The polycarbonate walls muffle man-made sounds from the environment but oddly amplify the sounds of surrounding nature like birds singing in the trees or leaves whirling around on the ground. The bright light, even when the sky is cloudy and threatening with rain or snow, illuminates all the details on every leaf, on every petal. Possessed of an ever-evolving scent similar to warm tea the whole space changes aromatically day by day depending on what’s in bloom. And the heater – that warm little hug of a heater wraps everything up like a cozy sweater on the coldest of days. I used to think The Glass House was such a vulnerable piece of art, exposed, and unsettling in its lack of privacy. But now I see that what Philip created there was a love letter to the senses. This greenhouse is much the same. Plastic curtain panels and all.

A Rare Look at a Halloween Sweet Treat from the 1960s

Happy Halloween! In today’s post, we are starting off your holiday with a rare treat – a little something sweet from the files of food history.

In 1960, a bit of marketing magic happened to a specific sector of the food industry that no one ever saw coming. It didn’t burst onto the scene with immediate stardom but it was fresh and fun and set the stage for something much bigger down the road. This initial marketing campaign didn’t debut at Halloween, but it did get caught up in the fervor of the holiday and all the potential that trick or treating offered.

In celebration of this sweet treat day, in today’s post, I thought it would be fun to feature a vintage advertising campaign that centers around a very rare piece of Halloween ephemera that was almost lost to history. This one piece of found paper tells the story of a food, an industry, a holiday, and one group of clever individuals who had an unfailing love for one very specific product.

It all starts with the advertising campaign that began rolling out in 1960. This was a campaign that was not promoting a food or a recipe or a meal that was rare or coveted or exotic. It was actually the opposite. It was spotlighting a food that was quite humble and ordinary and pretty unremarkable in the appearance department. It was one of those foods that lies under the radar. Helpful, necessary, enjoyable, but not exactly glamorous, it wasn’t until a certain advisory board formed that this food’s reputation got a total makeover in the likeability department. Through clever ads, product placement, and innovative promotions, this group grabbed attention and shook things up. Eventually, two decades later the food they promoted would become a pop culture icon known by millions of people around the world. By then, it would be forever linked with a catchy theme song and a field of merchandise that stretched way beyond anything to do with kitchens and cooking. The Smithsonian Museum even took note and acquired it for their collection.

So what is it you ask? What is this magical food that went from simple to superstar over the latter half of the 20th century? Here’s a clue… it’s brown and wrinkly. It comes in petite boxes and big canisters. It’s used in baking and cooking. It’s sweet and small, mini and meaty. Can you guess what it might be?

It’s a raisin.

The group of individuals responsible for bringing the raisin into the limelight was the California Raisin Advisory Board, based in Fresno. Founded in the 1950s, the Board was crazy for raisins and wanted to share their joy of this dehydrated fruit with eaters everywhere. Their enthusiasm was backed by noble intent too. They wanted to help draw attention to the local raisin growers who were struggling to make a profit in mid-20th century California.

Typically, when you hear the words “advisory board” you don’t automatically think of whimsy and fun but the California Raisin Advisory Board (also ironically known as C.R.A.B.) proposed a marketing campaign that was full of joy from beginning to end. Their mission was to produce effective advertisements that targeted the heart of the home – the kitchen – and all the ways in which raisins could become a household favorite and a sustainable staple, cherished enough to support the industry that grew them.

This is still life painted by Clara Peeters in 1615 featuring a bowl of raisins and almonds.

Raisins of course had been an ingredient in cooking and baking since the 1600s, so in the 1960s they were not a new food, but the industry was struggling and the Advisory Board wanted to step in to help. They wanted to take the raisin out of the cabinet of yesteryear, dust off its stodgy patina, and give it some zing. With centuries worth of material to work with there was no shortage of ideas when it came to inspiration, but the Advisory Board wanted to focus on a fresh approach and universal appeal. So where did they start?

With bread. As in raisin bread. A sweet, studded cinnamon-laced loaf often enjoyed at breakfast, this baker’s delight was centuries old too, just like the fruit it featured. But in the 1920s, raisin bread received some new interest when it was deemed a “health food” by dieticians and nutritionists. Sugar aside, raisins hold a lot of vitamins and minerals in their puckered little shape including magnesium, potassium, and fiber. Added to the protein found in bread, the combination formed a magical collaboration of a seemingly decadent eating experience paired with a hearty dose of healthy goodness. That gave the Advisory Board a lot of angles to play with when it came to promotion. Raisin bread was nutritious. It was affordable. It could be store-bought or home-baked. It smelled like heaven when toasted. And it appealed to both kids and adults. Paired with some clever writing and marketing during National Raisin Bread Month (November), the Advisory Board launched a raisin campaign full of plucky personality…

A cookie campaign followed suit…

The Advisory Board was off and running. Throughout the 1960s, the Advisory Board launched a flurry of seasonal promotions that included National Raisin Week in April, summer picnic season in July, back-to-school snack packs in September, and the Raisins for Happy Holidays campaign in December. In-store grocery taste tests, advertisements, sweepstakes and giveaways encouraged repeat buyers and kept the noble raisin front of mind.

The California Raisin Advisory Board also churned out raisin recipes year-round for newspaper columns from their test kitchen. Photo courtesy of the Sacramento Bee, 1970.

When Halloween time rolled around each year, the holiday provided an additional opportunity to remind parents and kids how sweet a treat, a raisin was. Just like traditional Halloween candy, albeit healthier, during the month of October, the Advisory Board promoted the fact that raisins came in small boxes – a handy size for trick-or-treaters. Posters made for grocery stores and food shops hinted at Halloween excitement. This is an example of a very rare original grocery store poster featuring the California Raisins Advisory Board…

Measuring 25″ inches x 14.25″ inches it is a true survivor of history and a real-life example of the Advisory Board’s cute and colorful messaging. Most food store advertising was discarded in the trash promptly after a promotion ended to make way for new advertising in its place. Printed on thin, inexpensive paper these eye-catching advertisements were not made to last more than 60 days let alone six decades. Oftentimes, they were hung in store windows exposed to heat, sun,, humidity, and temperature changes which would cause them to crinkle and fade over time. When I found this one, it was in fragile and brittle shape and was held together only by hope and a dehydrated rubber band. Ripped and torn in so many places it was impossible to unravel it without it completely breaking apart. A quick peek down the interior of its rolled-up shape, yielded the image of a pumpkin face smiling back. How fun! Home to the Kitchen it came for further investigation and repair.

Carefully rolling out the paper, rehydrating it with a warm, ever-so-moist-paper towel, and then gluing it to acid-free archival poster board took a couple days of attention. Each time a ripped section was flattened out and smoothed over it was a small victory in revealing the bigger picture. Little by little, inch by inch, the poster’s overall image went from bits and pieces to one whole poster.

Finally put back together, for a year, the poster sat just like that – attached to the thick archival poster board with a big wide border surrounding it. Waiting to see if it would stay secured, retain its bright colors and not disintegrate, it was wonderful to see that 360 days later the poster looked exactly the same. Removing the excess matting by cutting it down to its original size, a wood frame was built for it using antique wood remnants from the 1750 House. Floating the poster inside the wood frame allows for all the imperfections along the top nad bottom edge of the poster to show – a visual record of its fragile history. The poster, although greatly improved from its original found state, still bears its wounds in Frankensteinish patchwork.

But what I love most about this poster now, is how despite all its rough and tumble elements, it still manages to radiate joy and a sense of enthusiasm. That was the power of the Advisory Board’s campaign. Raisins are fun.

Raisin drying racks. Fresno, CA. 1901. Image courtesy of the Library of Congress

The first raisin farms in Fresno were started by a group of female schoolteachers in 1876. They decided to set aside four acres out of one hundred acres that they purchased so that they could grow grapes for a raisin harvest. Two years later, the first batch (30 boxes) was ready for market and a West Coast industry began.

In the early 1900s, Raisin growers in Fresno would make anywhere from $50-$125.00 per harvested acre.

By the 1960s, the US produced 250,000 tons a year, mostly from farms in the Fresno area. Foreign competition was tough though and the raisin growers were struggling to keep afloat. That’s when the Advisory Board stepped in with their breads and their cookies and their sweet, colorful, clever campaigns declaring raisins raisins raisins a wonderful thing.

As cute as the pumpkin goblin face was on the poster, it was not the imagery that launched the raisins to worldwide fame. That would happen in the mid-1980s when the Advisory Board approved an idea from a Foote, Cone, and Belding advertising executive who pitched an idea about raisins and a band and a signature song.

The California Raisins, singing Marvin Gaye’s 1968 Motown hit, Heard It Through The Grapevine was born. Indicative of the Advisory Board’s continuous efforts to pitch their product in clever ways, the California Raisins soaked into the fabric of mainstream society like no other fruit campaign had done before. This is the first commercial that started the success…

Making up a whole world of claymation figures and storytelling, the California Raisin band was an immediate hit and could be seen everywhere – on tv, in print ads, and on cross-promotional advertising products across grocery store shelves. This was the kind of big-splash notoriety that the Advisory Board was after in the 1960s. With more and more customers buying raisins in the 1980s and 1990s, thanks to the singing sensations, the Advisory Board was fulfilling its mission.

Photo courtesy of Crazy for Costumes.

In 1986, the California Raisin became the most popular Halloween costume of the year. The Raisin band members were reproduced in figurine form and Heard it Through the Grapevine reached the top 100 song charts. When the Smithsonian acquired the original California raisin claymation figures in 1991, it firmly sealed the success of the Raisin Advisory Board. Their singularly beloved product was now beloved by all.

Unfortunately, the sweet taste of success didn’t yield the type of monetary compensation that was hoped for when it came to the raisin growers. The Advisory Board disbanded in 1994 after struggling to balance the costs between promoting the raisins and keeping the growers profitable. Creativity can be harsh that way. Sometimes clever doesn’t equal capitalism. But in this case, it sure did produce some fun art and a new way to look at the world, even if it was discovered decades later than intended.

Cheers to joyful advertising, loving what you love completely, and to our little rescued poster whose celebrating its 60th Halloween this year! Hope it added a little something sweet to your holiday. Happy Halloween!

Back to School: 31 Photographs of 20th Century Cooking Classes

Photo courtesy of the Boston Globe – April 1st, 1894

The first cooking school in America opened its doors to students in 1879. That was the Boston Cooking School, founded by the Women’s Education Association. The school’s chairman was Sarah E. Hooper, who after traveling abroad during the 1850s, was so impressed with the vocational training provided at industrial schools for domestic workers in England and Scotland, that she opened her own school in Australia where she was living at the time. There, a much-needed type of education, Sarah’s school became a big success giving her the confidence and expertise to try such an endeavor when she moved back to America. Since then, cooking and education have gone hand in hand. In today’s post, you’ll find 26 vintage photographs that highlight the relationship between food and teaching as seen in classrooms around the globe. It’s a fun look at history via the kitchen lens. Each of these photos tells its own unique story, from the equipment used to the clothing worn to the expressions on the faces of the teachers and students themselves. Let’s take a look…

The Naval Cooking School, New York City circa 1915-1920
Cake Making at the Boston Cooking School, Boston, MA, 1908
Cooking class at Stanthorpe State School, Australia, 1933
The Edison Cooking School, Seattle, 1955
Students preparing lunch at the Boston Cooking School, Boston, MA, 1908
Cooking Students at the Montgomery Industrial School for Girls, Montgomery, Alabama, 1910
Welfare Hall cooking class, Boston, MA, 1905
Cooking School for Working Mothers, Berlin, Germany, 1913
Sherman Indian High School Cooking Class, Riverside, California, 1910
Teachers and Students at The Hotel and Culinary School of Finland, Helsinki, 1956
High school cooking class, Washington DC, 1899
Cooking class at Grafton Public School, Australia, 1926
Cooking Class for Boys, Norway, 1963
Cooking class at the Carlisle Indian School, Carlisle, Pennsylvania, 1901
Elementary school cooking laboratory, New York circa 1908-1915
Chevy Chase High School cooking class, Bethesda, Maryland, 1935
The Frigidaire Cooking School, Clarkesville, Georgia, 1950
High school cooking class, Watertown, New York, 1909
Montgomery Blair High School cooking class, Silver Spring Maryland, 1935
Cooking class at a school for girls, Jerusalem 1936
Cooking class at Banneker Junior High School, Washington DC 1942
Forst Street Public School cookery class, New South Wales, 1910
Home Economics class, Ontario, Canada, 1959
The Star Bulletin Cooking School, Honolulu, Hawaii, 1934
Y.W.C.A. Cooking class, Canada 1939
Salem Boys Club cooking class Salem, Oregon, 1976. Photo courtesy of the Statesman Journal

African American Cooking Class circa 1910-1940
Teacher’s College Domestic Science Class & Cooking Laboratory, Oxford Ohio, 1915
Housekeeping and cooking students, Germany, 1905
Ohio State Normal College Cooking Laboratory, 1910
Wood Stove Cooking Class circa 1899

As we welcome this studious month of September, we wanted to say a special cheers to all the teachers out there who have kept our minds fed and our bellies full throughout history. Hope you have enjoyed this unique glimpse into the past. Happy Labor Day!

Grilling with Friends: A 1955 Recipe for Savoy Potatoes

I wish there was a way to tally friendship in the kitchen. How many recipes were inspired throughout history by friends or for friends? How many meals were shared in convivial collaboration between one cook and another? How many dishes were dissected? Techniques taught? Secrets traded? How many hours were spent by friends, with friends, for friends tasting, touching, and talking about food?

I bet the number is in the billions. A billion hours. A billion recipes. A billion friends. I bet it is a safe assumption to say that friendship in the kitchen has been a major influence on the culinary world since the caveman days when everybody cooked, and then subsequently ate, together, around an open fire. Aside from health, friendship must surely be the foundation of food. The building block of life.

This weekend we are featuring a recipe that is friend friendly. It was created by two best pals – James Beard and Helen Evans Brown in 1955 and highlights the diverse possibilities of the outdoor grill. On the menu today, it’s Savoy Potatoes, a tipple topple stack of thinly sliced potatoes tucked between layers of cheese and dotted with herbs and butter. The recipe was part of the Frills for the Grill chapter from Helen and James’ Complete Book of Outdoor Cookery.

Frills for the grill indeed. The fun of this recipe, aside from its delectable composition and fancy presentation, is that it can be made entirely out of doors from start to finish. All you need is a prep table, a cutting board, a cast iron pan, a cheese grater, a bowl and a sharp knife. Grab a friend or two to help prepare everything, and the joy begins.

Of all the vegetables to be cooked on the grill, the noble potato oftentimes gets left behind. Understandably so. They are dense and big and take a long time to cook if left whole. If they do make it to the wire racks, most recipes are not that imaginative. There’s the baked potato wrapped in tin foil, the quartered potato steamed in paper, and the mini oval-shaped potatoes par-boiled and skewered for kebabs. But this recipe presents a whole new way to look at serving potatoes hot off the grill with an elegant twist.

Presentation-wise Savoy Potatoes is lovely, with thin layers of stacked slices browned by butter and melted cheese. Caramelization leaves the potatoes on the bottom layer crispy and golden while the top layer is tender like a casserole. Most similar to Scalloped Potatoes (a.k.a. Potatoes Gratin) minus the cream, it has a hearty consistency and flavorful yet subtle depth thanks to the two cheeses and the herbs. This recipe can be made in one large round cast iron pan or many mini cast irons, depending on your preference and your available pan options. Either way, it will be delicious.

When James and Helen finally got together to create a cookbook, it was a long-time dream come true. Both were busy, well-respected cooks and authors in their own right. Helen on the West Coast, and James on the East Coast.

A sampling of Helen’s cookbooks published between the 1950s and 1960s.

Supportive and encouraging of each other’s work, they each had their own unique way with food and writing, which meant there was no room for competition between them, just a sense of mutual respect, camaraderie and curiosity regarding the culinary industry they both loved.

A sampling of James Beard’s cookbooks

Enamored with each other as most best friends are, their relationship was strictly platonic (Helen was married and James was gay) but they showered each other with affection and attention every chance they got. For years, they maintained an epistolary relationship where letters flew between coasts at a rapid-fire pace. In these letters, Helen and James exchanged recipes, cooking questions, industry gossip, travel adventures, menus, food samples, diets, and stories surrounding what they ate and with whom. A consistent topic of the letters were ideas bounced around about projects they could collaborate on together… a restaurant in the Hamptons, a snack shop in New York City, a kitchen store filled with books and antiques, a magazine for gourmands, a cooking school, a newspaper column. Time, distance, and scheduling made many of these ideas difficult to undertake when it came to reality, but of all the possibilities they dreamed up, a cookbook turned out to be the one idea that took shape. To their mutual excitement, in May of 1955, The Complete Book of Outdoor Cookery was published by Doubleday & Company.

Helen and James’ mission for the book was to cover recipes that included all methods of outdoor cooking equipment in one place. Grills, campfires, hibachis, spit-roasts, cooking on a boat, cooking from a trailer, cooking at the beach, along with defined roles for men and women in the art of creating a jovial outdoor dining experience. Helen and James suggested that women be in charge of menu planning, market shopping, and presentation, while the guys were in charge of the actual cooking. Helen called it a night off for the ladies (grab a cocktail and a lounge chair, she suggested) while James referred to the actual task of grilling as a man’s sport and the ultimate culinary proving ground. Both viewpoints may seem a bit boxed in today, but in the 1950s when almost every homecooked family meal in households across the country was made indoors by women, this idea of getting guys involved in the meal-making process was both novel and exciting. Cookbooks began springing up on shelves across the country about this adventurous way to prepare a meal.

1950s Barbeque books like this one – Better Homes and Gardens Barbeque Book – illustrated the sheer joy of outdoor cooking especially when it came to domestic family life.

Gender roles aside, Savoy Potatoes is best prepared by two people, if not more. There are herbs to gather from the garden, potatoes to chop, cheese to grate, and the grill to tend to, so multiple hands are encouraged not only for practicality but for fun too.

Note: We used a charcoal grill for this recipe. Cooking times and temps may vary if you are using a gas grill.

Savoy Potatoes

Serves 8

1/4 cup butter

6 medium potatoes

1 1/2 cups grated Gruyere cheese

1/2 cup grated Parmesan cheese

Salt & Pepper to taste

1 handful of fresh thyme, chopped (optional)

Butter cast iron skillet(s) generously to prevent the potatoes from sticking during the cooking process. Combine the two cheeses together into a medium-sized bowl. Leaving the skins on, thinly slice the potatoes into rounds. Arrange a layer of potatoes inside the bottom of the buttered pan, then add a layer of cheese. Season with salt and pepper and a dab of butter. Repeat the layers of potatoes, cheese, butter, and salt and pepper again. Top with a sprinkle of fresh thyme.

Cover skillet with foil and cook on the grill over medium heat (between 280-300 degrees) until the potatoes are tender when pierced with a fork and the cheese is thoroughly melted (about 25-30 minutes).

Remove from the grill, let cool for a few minutes and then flip the potatoes over onto a plate and serve.

At this point, the potatoes should come out of the pan in one solid piece. You don’t have to flip the potatoes over before serving them. They look appetizing on both ends, but the bottom has such a nice golden brown color and a crispy texture, it makes for a delicious first-bite introduction to this vintage recipe. The slightly smoky flavor from the grill mingles with the nuttiness of the cheese and the soft potatoes in the most tasty and aromatic of ways.

Helen and James recommended that Savoy Potatoes be served with roast beef, grilled fish, or poultry. During the hot days of summer, we liked it best as a vegetarian dinner served alongside a simple garden salad and a glass of chilled sauvignon blanc. In the cooler months when you crave something heartier, in addition to James and Helen’s suggestions we would recommend adding a fried egg on top and a sprinkle of chopped bacon, ham, or pancetta. A drizzle of maple syrup would add another level of interesting flavor.

Like good friends, this is a relaxed recipe. Not hard to make, it’s very accommodating when it comes to your own cooking creativity. Play around with different cheeses, and different toppings, or make it the foundation of a build-your-own-food bar and invite your friends to add their own custom toppings. Sour cream, chives, dill, smoked salmon, a variety of spices, sauteed spinach and onions, diced peppers and tomatoes, hot sauce… there are so many options that would pair equally as well with this dish.

When I asked my sister, who is one of James Beard’s biggest fans and one of my favorite people to exchange recipes with, what she liked most about his style of cooking, she shared that it was all about his universal love of food and friendship. “He felt that people could be unified through the experience of a meal no matter their country or culture.” In other words, he recognized food as the foundation of friendship. Cheers to that! Hope this recipe instigates an impromptu dinner party with your friends and family and that you love the whole experience of making it just as much as we did.

Cheers to James and Helen for this gorgeous recipe and the friendship that made it. I hope it inspires many more. If you’d like to learn more about these two culinary icons and their impact on American cooking, stop by the shop and peruse the cookbook shelf.

The Lost Art of Paula Peck: Egg & Mashed Potato Pizza circa 1966

In 1966, these words described her cooking… creative, imaginative, inventive, eclectic, beautifully presented, and internationally inspired. Craig Claiborne, the New York Times food editor and a beloved favorite here in the Vintage Kitchen, said “anyone who truly cares about cooking is fortunate indeed that such a talent as hers can be shared on the printed page.” James Beard called her “the finest cook I know.” Newspaper columnist Elizabeth de Sylva deemed her the “free spirit of cooking,” and food writer Gaynor Maddox labeled her “one of the most exciting, competent, and delightful guides to better dining.”

Today, here in the Vintage Kitchen, we are featuring a thoroughly modern-minded yet vintage recipe from the culinary repertoire of Paula Peck (1927-1972), who was a phenomenal but now forgotten cook popular during the mid-20th century. I use the word forgotten carefully. Since professional chefs today consider her cookbooks classics and since she still has a quiet army of devoted fans, she’s not lost to a select group, but Paula is definitely, surprisingly not part of mainstream cooking conversations like other famous names that traveled in her circle. Why is that? Was she overshadowed by bigger personalities like Julia Child or James Beard? Did her culinary prowess get dismissed over time? Her recipes simply forgotten?

In order to try to figure out why Paula Peck is not a household name today, we need to start at the beginning and explore the details of how she came to be the topic of conversation in mid-20th century kitchens.

It all started with her spouse.

Among the many causes he supported, James Peck participated in the Freedom Rides in 1961, which protested the segregation of African Americans on public transportation. He was attacked and badly beaten for his involvement, but continued to defend the civil rights of African Americans. He is pictured here, fourth from left. Learn more about this experience in a 1979 interview here.

Paula’s husband, James Peck, known as Jim, was a newsworthy civil rights activist who worked his entire life trying to bring people together for noble and decent causes. Involved with the War Resistance League, the American Civil Liberties Union, and the Congress of Racial Equality among others, it was Jim who first inspired Paula to dive into the world of cooking after they were married in 1950. Up until that point, Paula knew little about how to create a meal. This was a bit of a tricky situation since she married a foodie. Unless she wanted to lose her husband to the local eateries of New York City night after night, she knew she was going to need to learn to cook. So as a young bride of 23, she set out on a mission to tempt her husband and his adventurous gourmet palate away from the restaurant scene, which he adored, and into the kitchen of his own home.

Paula Peck in her kitchen in December 1966. Photo: Newsday

As Paula started experimenting with food, she fell more and more and more in love with cooking. In trying to appeal to her husband’s enjoyment of international cuisine, in particular, she studied foods from all around the globe. She began collecting cookbooks, keeping track of recipes in a file box and gathering ideas about food preparation with friends. With every passing bite, Jim encouraged her explorations. Eventually, she gathered enough courage to take a cooking class with one of the country’s most celebrated gourmands, James Beard. From there, her culinary star rose bright and shiny, as the two struck up a friendship. One opportunity led to another. Paula became James’ apprentice and then his teaching partner. And then she went on to teach her own cooking classes.

Eleven years into her culinary journey, she published her first cookbook The Art of Fine Baking in 1961. After that, she was hired to work on the baking portion of the mega Time-Life Foods of the World cookbook series along with a host of respected chefs, food writers, and culinary experts. In 1966, she published a second cookbook, The Art of Good Cooking, in which she espoused the physical beauty of the kitchen, of quality ingredients, of simple equipment, of the breath-of-fresh-air joy that became her signature cooking style.

Her recipes began to appear with frequency in newspaper columns nationwide. She did live in-person cooking demonstrations for various events. She conducted interviews. The industry was achatter with news about Paula, about her recipes, about her unique approach to food. By 1970, Paula, the twenty-something girl who was not so skilled in cooking two decades earlier, arrived in the form of an accomplished, confident culinary teacher. Swathed in accolades, with nothing but a field of potential and possibility in front of her, surrounded by skilled peers and influential connections, Paula’s trajectory was on course for iconic status. And then something terrible happened. Paula died. Sadly, she was just 45.

In the 1960s, Paula circulated in the culinary world a bit differently than her comrades. Unlike most well-known cooks of her day, she wasn’t necessarily focused on age-old techniques. She questioned things. She wondered about established facts of cooking, curious if there were other ways or reasons to approach techniques beyond the traditional. She wasn’t concerned as much with how things were done, had been done, or should be done. Instead, she gave herself, and then her students, permission to experiment with food intuitively and to play around with taste, texture, and time.

Taking little bits and pieces from other cuisines, from other places and adapting them in ways that were unique and interesting, Paula worked with food from the foundation up, building a recipe like an artist builds up a scene in a painting. Taking into account, color, subject matter, texture, time, origin, flavor, and the relationship between one ingredient to another, her food was dotted with elements of surprise and flourish. It was those bits of unexpected detail that wound up setting her apart from all the gastronomes of her day. And I think it was those bits of detail that make her food still very relevant today.

Take pizza for example. Everybody knows the age-old basic pie with its flour crust, tomato sauce, a sprinkling of cheese, and perhaps a topping or two. But in Paula’s midcentury mind, the word pizza could mean something else entirely too. It could look something like this…

Paula Peck’s Egg & Potato Pizza

As a prime example of Paula’s creativity in the kitchen, it is her recipe for Egg & Potato Pizza from her 1966 book, The Art of Good Cooking, that is being featured here today. Using mashed potatoes as a base, sauteed onions, peppers, garlic, and mushrooms in place of a tomato sauce, and sausage and two kinds of cheese as toppers, this entire dish is polka-dotted with raw eggs and then popped into the oven for a brief bake. Surprise, whimsy, and a delicious combination of flavors are the result.

In a decade when casseroles were king of the dining table, the presentation alone of this recipe most definitely must have felt like a delightful break from the ordinary in 1960s America. More like a popular modern-day sheet pan meal than a traditional pizza, this fun-to-make any-time-of-day appropriate dish has contemporary comfort food written all over it. Made with simple ingredients and easily prepared, it feeds six people, is satisfyingly filling, and is fun to present table-side. In other words, it contains all the hallmarks of a perfect Paula dining experience.

I made this recipe as-is except I substituted chicken sausage for Italian sausage. And one thing to note before you begin… this recipe is best served immediately when it comes out of the oven. If you leave it to sit for a minute or two the eggs will continue to cook to a hard-boiled consistency and will eventually turn rubbery, if you wait to serve it much longer after that. If you like your eggs runny, cook the potatoes and toppings minus the eggs just until the cheese begins to melt (about 17 minutes) and then crack your eggs in their allotted divots and stick the whole tray back in the oven for about 3 minutes.

Paula Peck’s Egg & Potato Pizza

Serves 6

1/2 cup olive oil

3 cups well seasoned mashed potatoes

1 large onion, peeled and sliced

2 cloves garlic, minced

2 cups mushrooms

1 green pepper, seeded and sliced

4 cooked sweet or hot Italian sausages (I used maple-glazed chicken sausage)

6 eggs

1/4 cup grated Parmesan cheese

2/3 cup diced mozzarella cheese

Freshly chopped spinach for garnish (optional)

Preheat the oven to 400 degrees. Grease a large flat baking tray generously with olive oil. Spread the mashed potatoes evenly covering the entire pan. With the back of a spoon, make six indentions in the potatoes for the eggs which will be added later.

Bake the potato-lined pan in an oven for 30-40 minutes or until the potatoes seem slightly crisp on the bottom. Remove from oven.

While the potatoes are baking, slice sausages 1/4 inch thick and brown them in a pan on the stovetop. Set aside. Next, saute onion, garlic, mushrooms, and green pepper in remaining olive oil until soft.

After the potatoes have been removed from the oven, spread top of it with the sauteed mixture and sliced sausage, leaving indentations clear.

Break eggs into each of the indentations. Sprinkle with Parmesan cheese and dot with pieces of mozzarella cheese.

Return to oven. Bake for 20 minutes or until eggs are set and the cheese is bubbly.

Cut the pizza up into squares or wedges and serve immediately. Paula recommended a green salad as a side dish which is a great choice if you are making this for brunch or dinner especially.

Ideal for upcoming spring holiday breakfasts like St. Patrick’s Day, Easter or Mother’s Day, when onions and spinach are in season, this egg and potato pizza is a blank slate for your creative interpretations too. Add purple onions in place of yellow onions for additional color. Garnish with fresh herbs or scallions on top in place of spinach. Replace Italian sausage with prosciutto or smoked salmon. Serve it for breakfast, for brunch, for lunch, for dinner. Call it a pizza or a sheet pan meal or a one-dish wonder. Paula would be the first one to tell you to take this recipe and run with it till your heart is content. Interpret it as you like. That’s what cooking was all about in the Peck family kitchen.

“My belief is that tradition should not hamper us if we find a better way of doing things,” Paula wrote in 1966. Perhaps that very attitude is what has kept Paula’s recipes out of the widely circulated limelight of modern-day kitchen conversations. Instead of being stubborn, restrictive, and definitive about only one be-all-end-all way to approach food preparation, Paula encouraged exploration. She encouraged hands-on learning. And she encouraged continual education.

That type of exploration and freedom tends to breed a sense of confidence that builds over time through experience. A new cook might start out making one of Paula’s recipes exactly as she described, but then over time, feeling secure at the eventual mastery would adopt Paula’s methods of questioning and discovering. The recipe would get tweaked, augmented, adapted, enhanced. As it evolved, it would take on new forms, new ingredients, new flavors, a new identity. Attribution back to its original source, over time, would get muddied, fuzzy, forgotten, and then lost to history completely. I think that’s what happened to Paula and her creative approach.

In modern-day multi-cultural fusion cooking, in outside-of-the-box presentation, and in the pairing of unusual yet complementary flavors, I think today signs of Paula’s style of cooking are all over our culinary landscape. We just don’t realize that she was the source from which it all began. Paula Peck by name might not be on the tip of everyone’s tongue these days, but her inspiring style of cooking still is.

I hope you enjoy this recipe as much as we did. If you decide to add your own flourish to this dish please send us a message or a photo of your finished affair. We’d love to learn how Paula inspired you!

Cheers to creativity in the kitchen! And to Paula for showing us what fun cooking can be when you add a little splash of imagination.