Gender Discrimination in the 1940s: Why a Correspondent Turned From War to Cookbooks

Betty Wason (1912-2001)

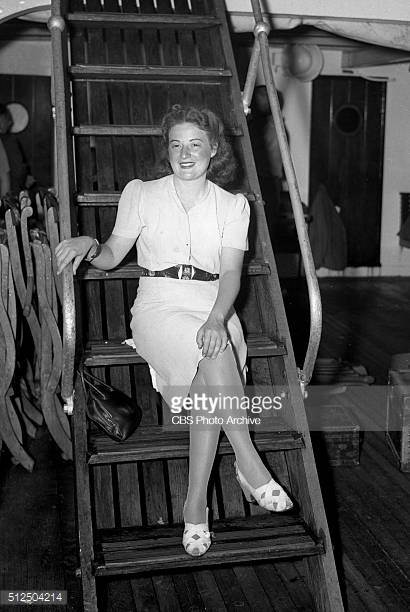
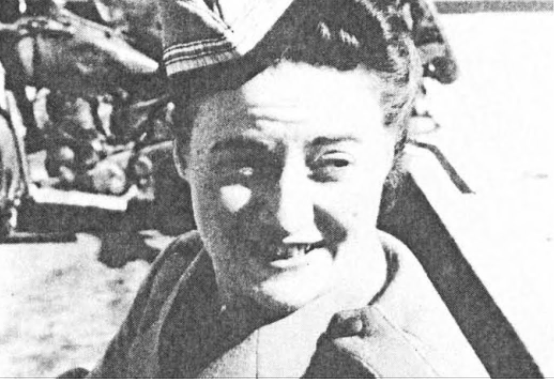
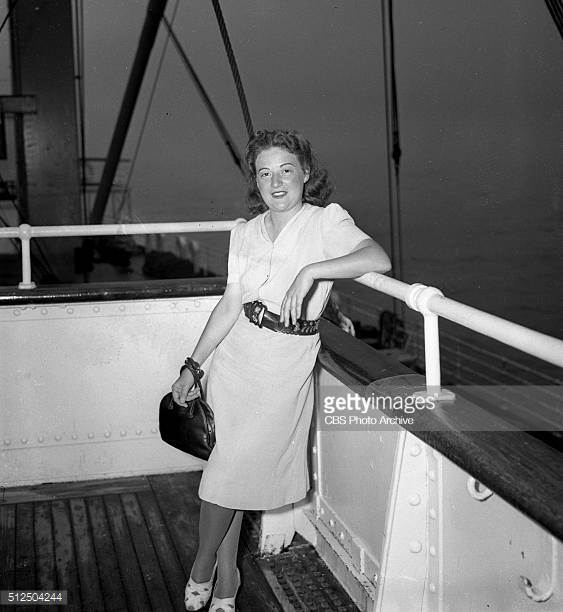
In Sweden, in 1939, as Nazi troops began their invasion of Norway, a young American journalist staying in Stockholm began delivering eyewitness accounts of the historic event.  She was 28 years old and the only correspondent in that section of the world broadcasting live stories for CBS Radio. Her name was Betty Wason and her vantage point was intimate. Her reports were well-written, authentic, and timely in the transmission of details. She was brave, dedicated, and determined, eventually getting close to Nazi troops in Norway in order to tell the stories of wounded British soldiers and all that they had seen.  She was a woman alone in a war zone, a thoughtful writer in a chaotic environment, and a new traveler out discovering foreign lands. But for all the things Betty was, there was one thing she wasn’t. She was not a man.

And that affected everything.

Gender discrimination runs rampant in every field throughout history, except maybe one…. radio news broadcasting in the 1930s and the 1940s. Mainly because there wasn’t any argument against the discrimination. Things were simply done and not done and there were rules to abide by.  One of those rules concerned women. Women  simply did not, were not, allowed to read the news over the air.  It was firmly believed that the feminine register could not convey the seriousness and importance of hard-hitting news stories. Instead, women’s voices were relegated only to entertainment-type shows… cooking lessons, homemaking stories, commercial ads and literature readings. Anything more serious or historically significant was left up to men to communicate on-air.  This proved a problem, for our gal Betty.

Growing up in Indiana in the 1920s, Betty was a creative spirit from the start with interests in music, art and fashion design. After graduating from Perdue University with a degree in home economics in the early 1930s, Betty bounced around a few jobs in her home state before realizing she wanted a more exotic life than Indiana could provide.  As a young woman full of vivaciousness and adventure and a desire to see the world, Betty went to New York and settled into a two-year job working at McCall’s magazine. But even in the exciting city of New York, her wanderlust could not be quelled. Europe was calling and Betty wanted to travel.

Vintage 1930’s travel posters to Czechoslovakia show the beauty and attraction of foreign travel. This was one of the countries Betty would visit and report from.

Not having the financial means to live abroad without working, Betty contacted TransRadio Press who was willing to pay young journalists overseas for eyewitness stories concerning World War II. A brief stint in Europe trying to make a go of it as a correspondent didn’t yield enough money for Betty to live on,  so she came back to New York only to try again less than a year later. On her second go-around though, she worked with CBS who was desperate to get any and all international news they could get their hands on in regards to the war. That’s when Betty headed to Sweden, just before Hitler arrived in Norway.

Betty’s contact at  CBS was Paul White who was in charge of news broadcasting.

There were many male war correspondents living and working overseas at this time, but they were mainly focused on print pieces suitable for newspapers and magazine readers. Radio was becoming more and more popular in terms of delivering news, but the seasoned overseas reporters, so focused on their writing, were out of the loop on the fact that radio news was rising in popularity. There was a niche market blooming in quick, short news briefs for ears instead of eyes and Betty saw an opportunity to be a part of it.

A 1940’s radio

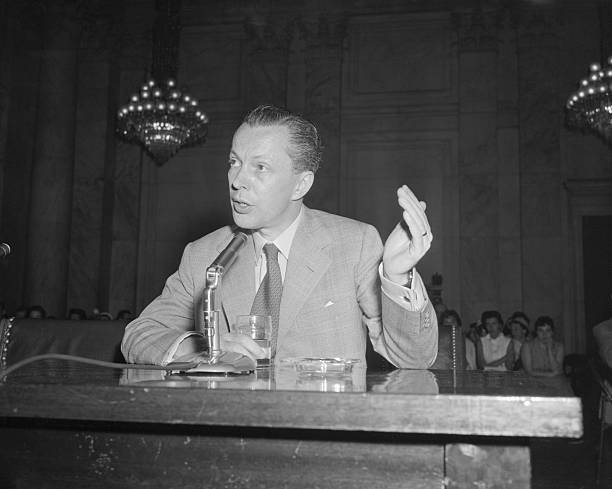
Since Betty was the only correspondent in the Scandinavian region, she was recording and filing her own reports for CBS and being paid on a weekly basis.  But quickly, CBS determined that Betty’s voice was a problem (too light, too feminine, too high in pitch).  It was believed, even in times of war, especially in times of war, that radio listeners didn’t want to hear a delicate voice reporting on death and destruction. Her reporting content was strong though, so CBS said that she had to find a male counterpart to step in as the voice in front of her work.

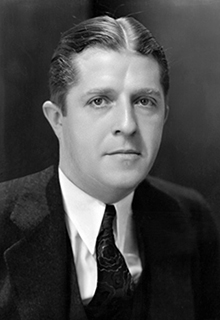
Betty was upset that she couldn’t speak the words that she was writing, but she wanted to keep her job, so she trained Winston Burdett, an American newly arrived in Stockholm, in the art of journalism for a radio audience, and he read her reports for her. Incidentally, she trained Burdett so well that she wound up working herself right out of Sweden. Burdett was after all a man and now (thanks to Betty) a good broadcaster.

Winston went on to have a lengthy career as a broadcast journalist at CBS. In 1955, he admitted to being a communist spy during the 1930s and 1940s when Betty worked with him.

Trying to find another unique vantage point like she had in Stockholm, Betty went to the Balkan Islands, and to Turkey before settling in Greece where she again sent reports home to CBS. Again, CBS said she needed a male counterpart to vocally relay her stories. And again Betty complied, this time working with a male Embassy secretary, who, at least, introduced himself on-air as “Phil Brown speaking for Betty Wason.”

Betty Wason in Greece. She made her own uniform to appear more professional since there was no dress code for correspondents. Photo courtesy of Hard News: Women in Broadcast Journalism.

As the Nazis occupied Greece, Betty’s bravery was called upon again as she reported eyewitness occurrences on a regular basis through her Embassy mouthpiece. While there, she endured house arrest under Nazi supervision for two months before the regime flew her and several other journalists to Europe for questioning. Concerned that Betty might be a spy, the Nazis detained her for an additional week by herself before eventually allowing her to fly back home to the US, where she was greeted with fanfare for having endured captivity and detainment.

Invigorated by the attention she received upon returning home and by the contributions she had made to broadcast journalism overseas, Betty naturally went to the CBS offices in New York to inquire after more work or a new assignment. Shockingly, executives at CBS refused to acknowledge that she played any significant part in the broadcasting realm overseas and denounced her requests for more story assignments. In an instant, Betty was dismissed like she had never been a part of the reporting team in the first place. Immediately, her work was marginalized even though CBS had been using her content repeatedly throughout the war, finding it valuable enough at the time to pay her for it. But upon Betty’s return, none of that seemed to matter. Had Betty been a man she would have been offered a position like Winston Burdett or handed a new assignment and sent to another corner of the globe. She would have been encouraged and supported by her colleagues and eventually been able to dispel the ridiculous notion that women couldn’t vocally report the news. But that didn’t happen.

After being turned away by CBS, Betty left New York and went on to Washinton DC, where she joined forces with other women in broadcasting, collaborating on various news shows and continuing on with her writing.  Those few years of dangerous foreign reporting and her budding career of broadcast journalism didn’t turn out the way Betty expected, but ultimately, good things came out of this redirection in her life.  Her ability to believe in her own talents and to creatively work around roadblocks with persistence and perseverance led her to a fulfilling career as a writer, on her own terms.

A sampling of Betty’s cookbooks published from the 1950s-1980s

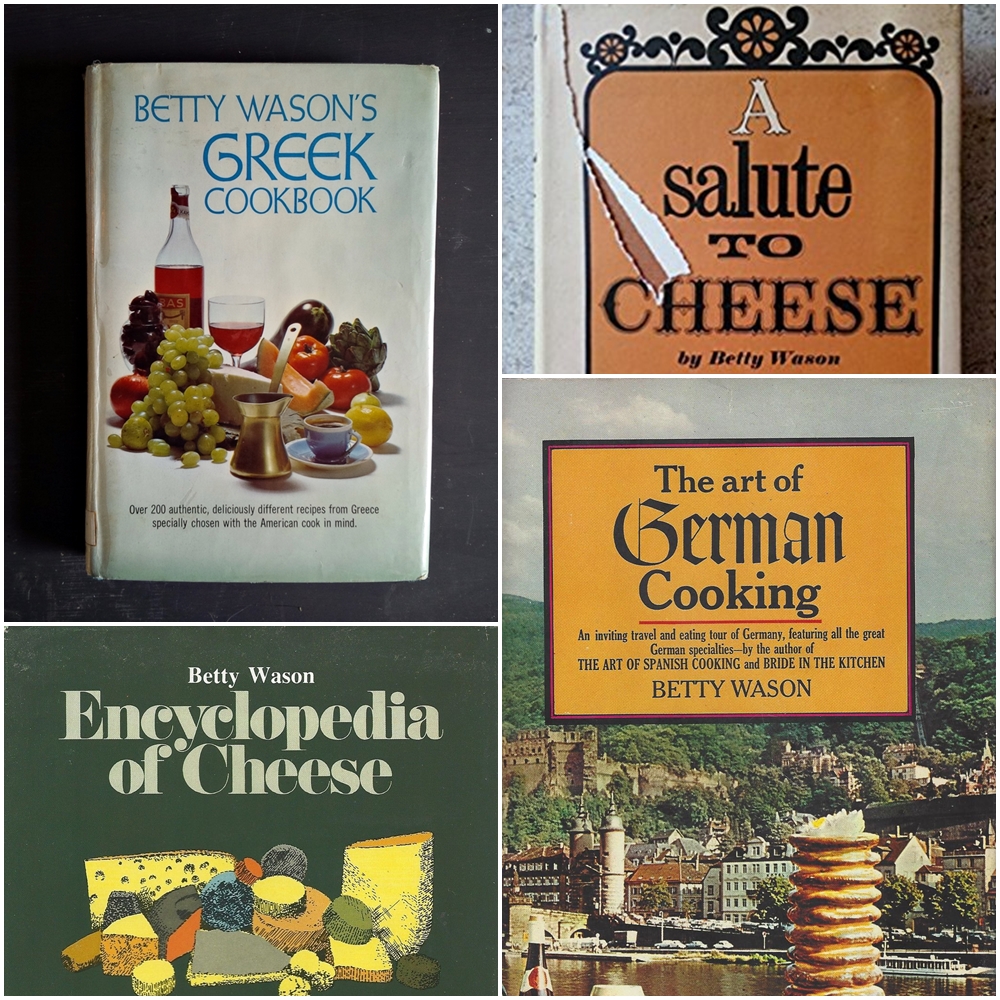
Inspired by her travels and her curiosity to learn more about local cultures and customs, Betty was devoted to exploring the history and the food scene in all the countries she visited, each eventually yielding their own distinct cookbook. Through her explorations in The Art of Spanish Cooking, The Art of German Cookingof Vegetable Cooking… of Mediterranean Cooking…  Betty wanted readers to experience the sights, sounds, smells, and tastes of her favorite places.  That genuine, awestruck wonder led to over 20 beautifully written books that pull readers (and home cooks!) in from page one…

How I wish I were about to fly to Greece again, to relive once more that special thrill of seeing from the sky the ragged ochre shoreline with its-jewel-like border of turqouise merging into the royal blue of the Aegean…(from the introduction of her Greek cookbook)

Betty pictured here with her daughter Ellen, in 1963, aboard a TWA flight bound for Spain to research recipes for The Art of Spanish Cooking.

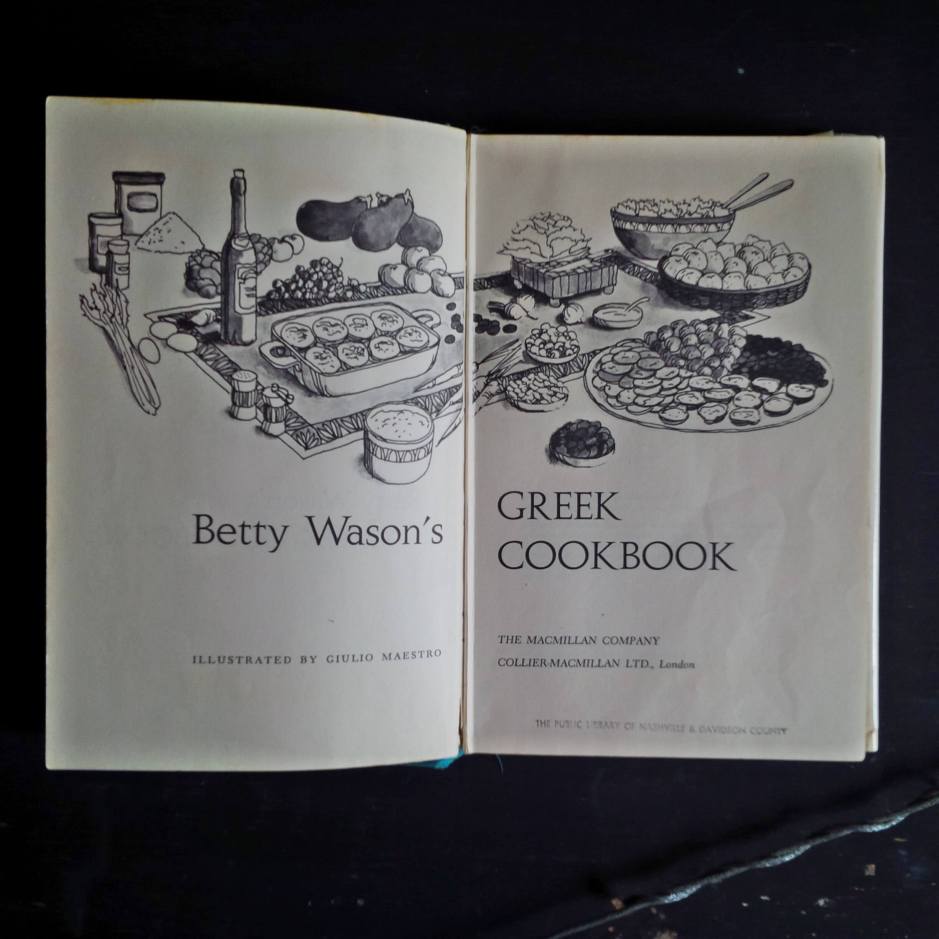
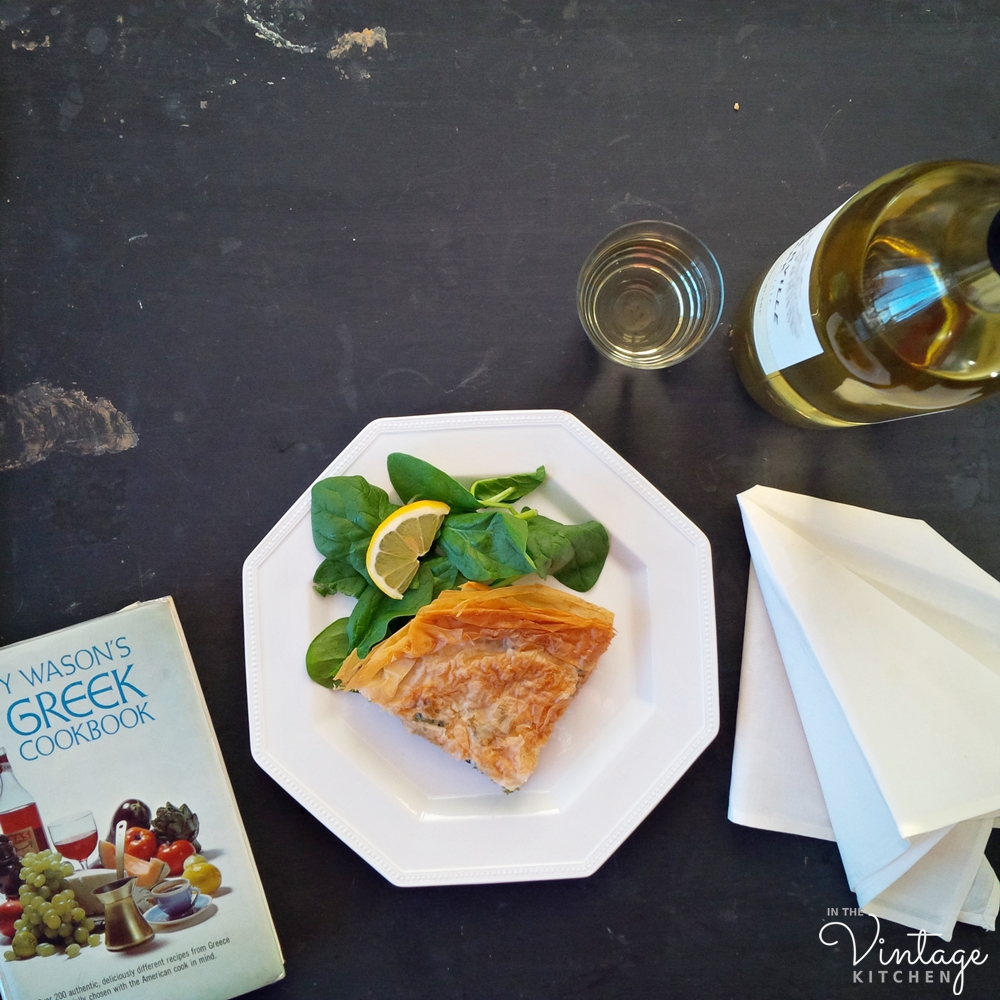
In the Vintage Kitchen, we were introduced to Betty through her Greek cookbook simply titled Betty Wason’s Greek Cookbook, a stained and splattered edition worthy of its adventurous war correspondent author.

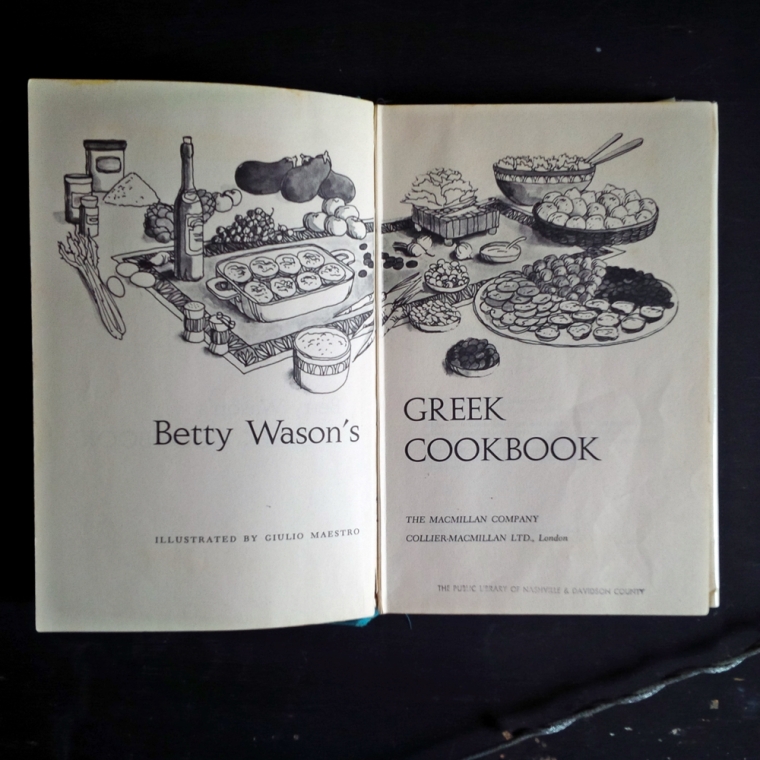
If a cookbook could ever be a travel guide, it would be Betty’s style of approaching food. Not only does she include authentic recipes, but she writes about them with the eye of a curious tourist learning a country in detail.  In her Greek Cookbook, published in 1969, in addition to 200 recipes, she also included a state-by-state reference guide on where to buy authentic Greek ingredients in the US, a glossary of Greek terms, and special tips and tricks to make sure that the cooking experience remained as easily replicated as possible.

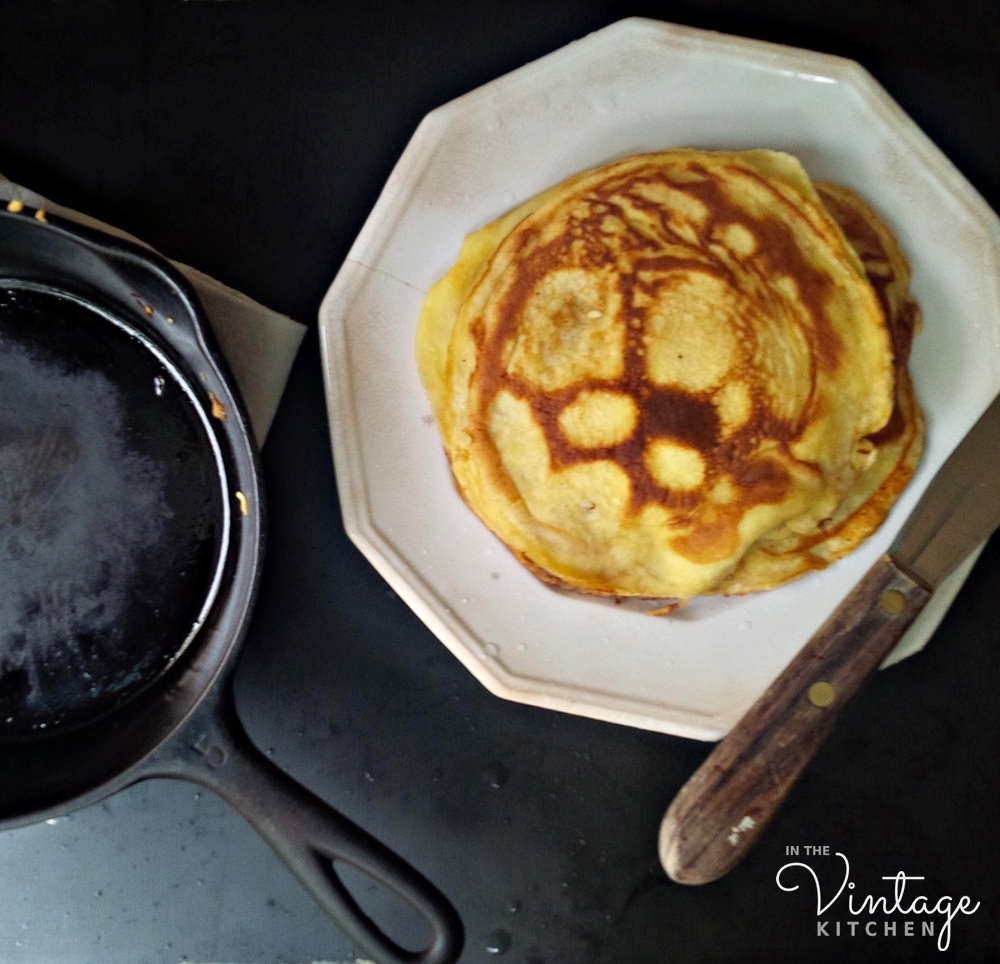
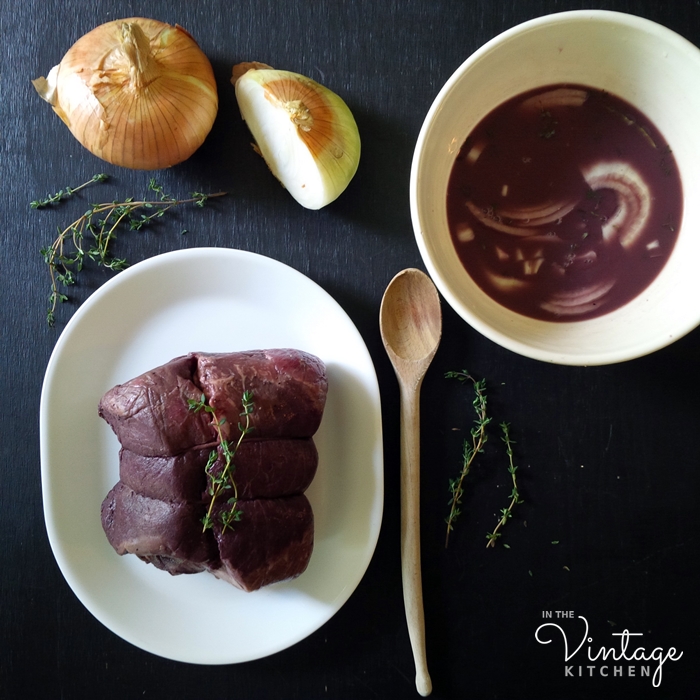
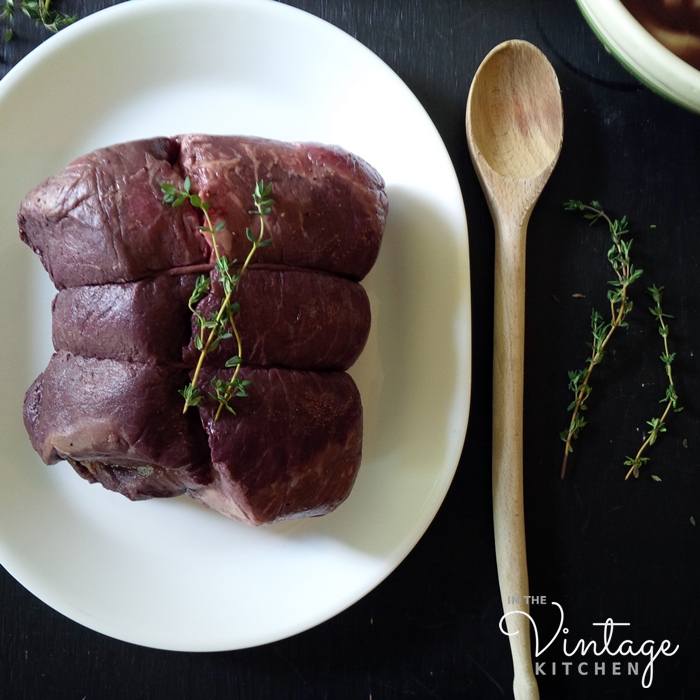
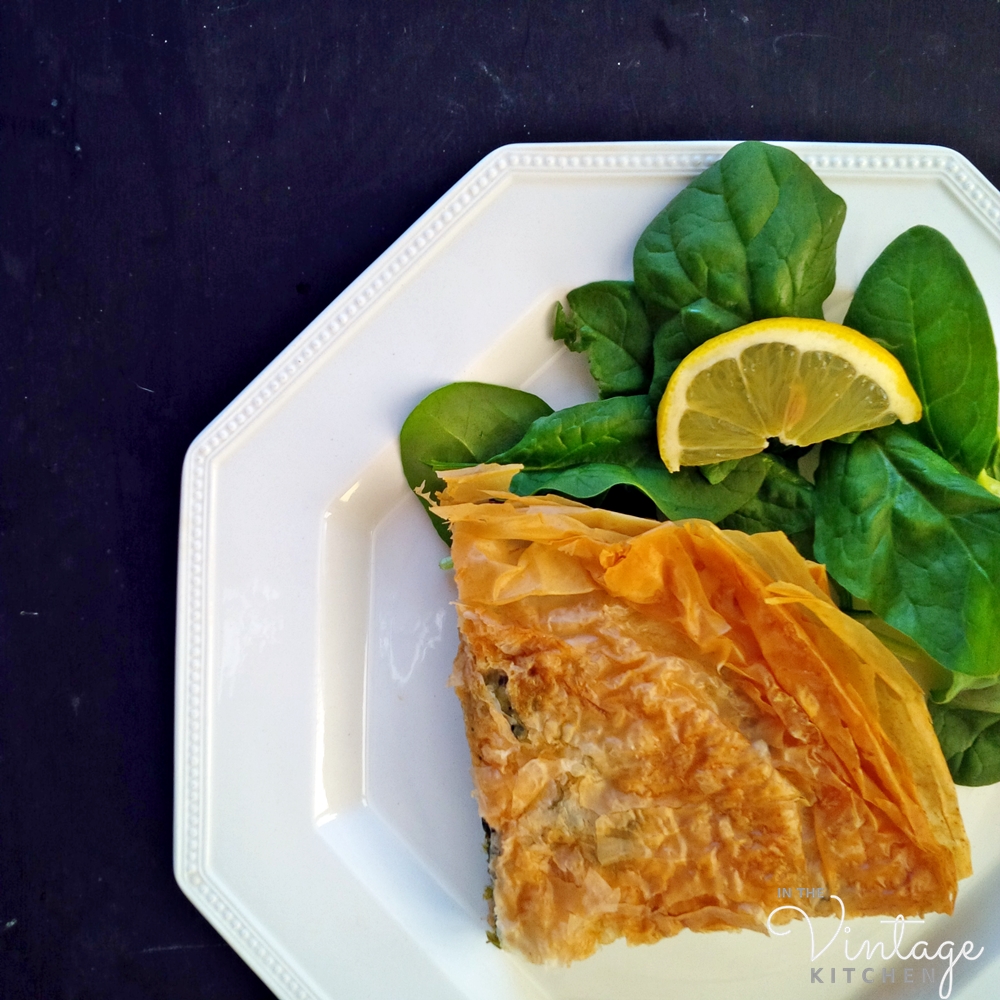
Yesterday, it was Betty’s birthday and today it is International Women’s Day. We couldn’t think of a better post to publish than this one on the forgotten lady of broadcast journalism and now the remembered author of important vintage cookbooks.  In celebration, we made her recipe for Spanakopeta from her Greek cookbook. With spinach now coming into season,  it is an ideal dish for Spring and a guaranteed crowd-pleaser for upcoming holidays like Easter and Mother’s Day. If you have never had Spanakopeta before, it is similar to quiche…. a mixture of cheese and spinach and herbs stuffed between two layers of phyllo dough.

Betty Wason’s recipe for Spanakopeta, A Greek version of Spinach Pie

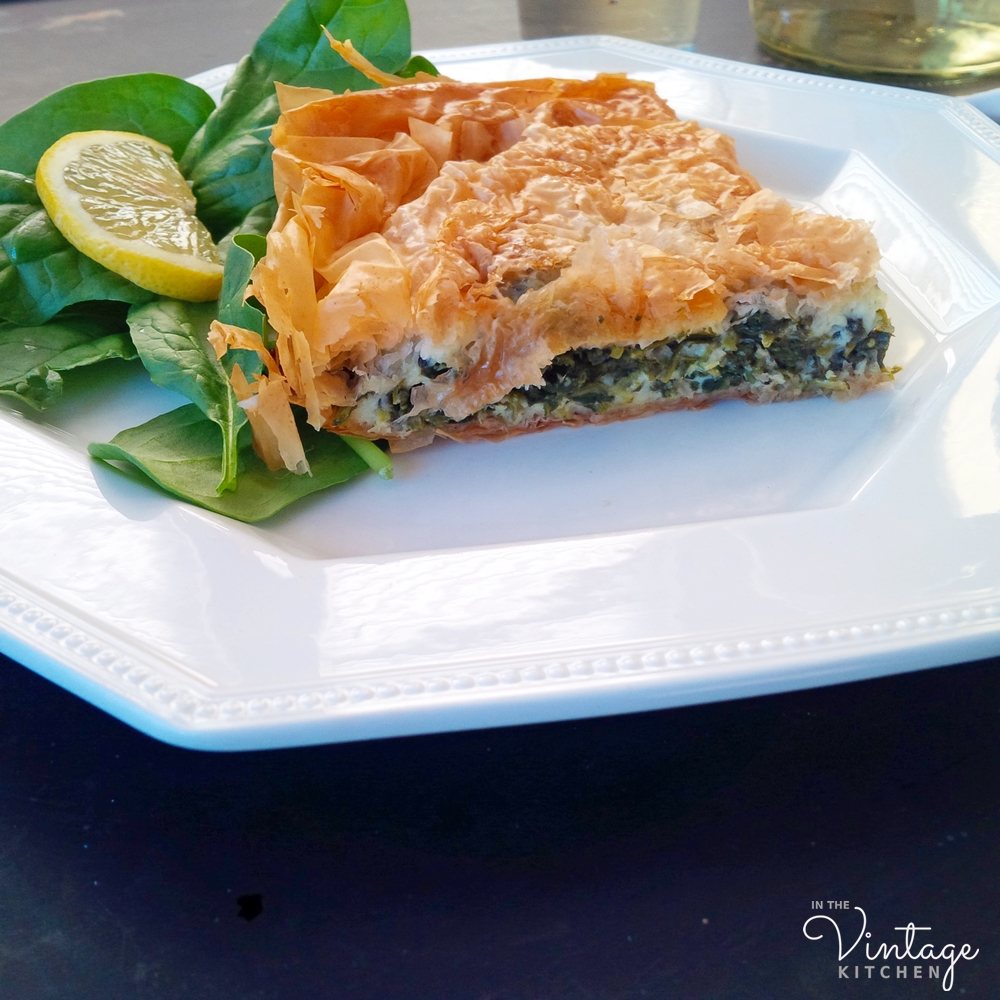
It’s light in texture and constitution so it can be enjoyed as a side dish or a small dinner or a brunch accompaniment. Betty suggested that it could be served hot or at room temperature, which makes picnic basketing an option too.  It reheats well and can sit in the fridge for a few days without getting soggy so if you are a make-ahead meal planner this recipe will be effortlessly easy and valuable.

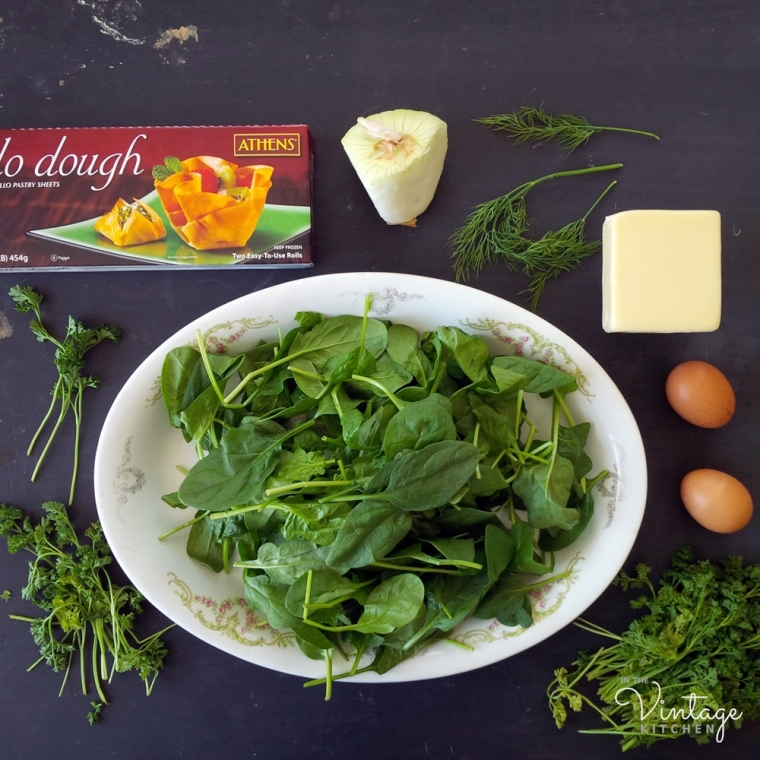
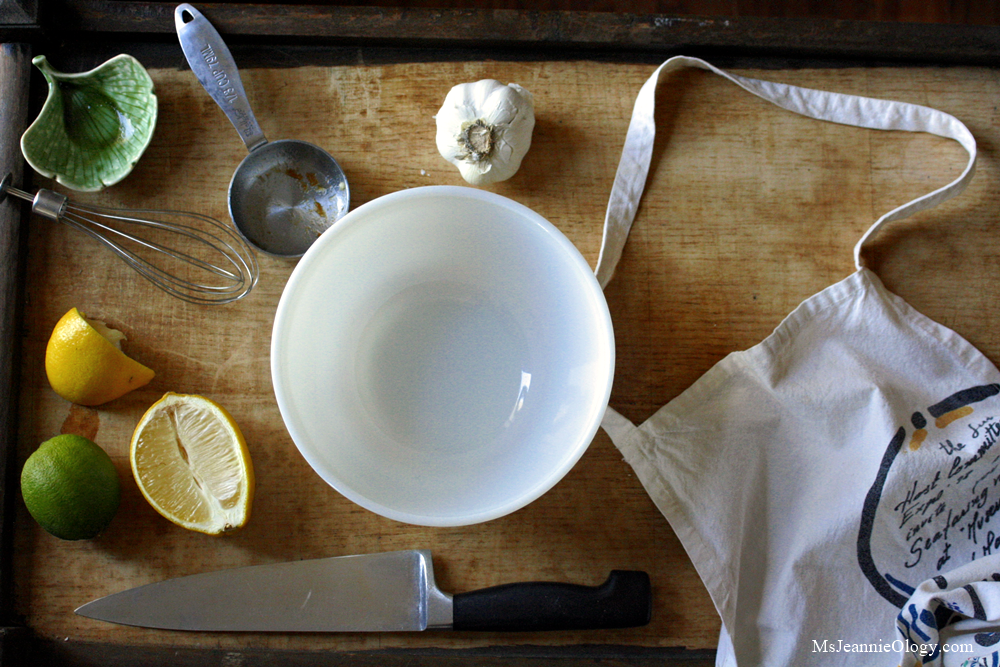
Betty Wason’s SPANAKOPETA

Serves 6

12 phyllo pastry sheets

2 pounds fresh or frozen spinach (we used fresh)

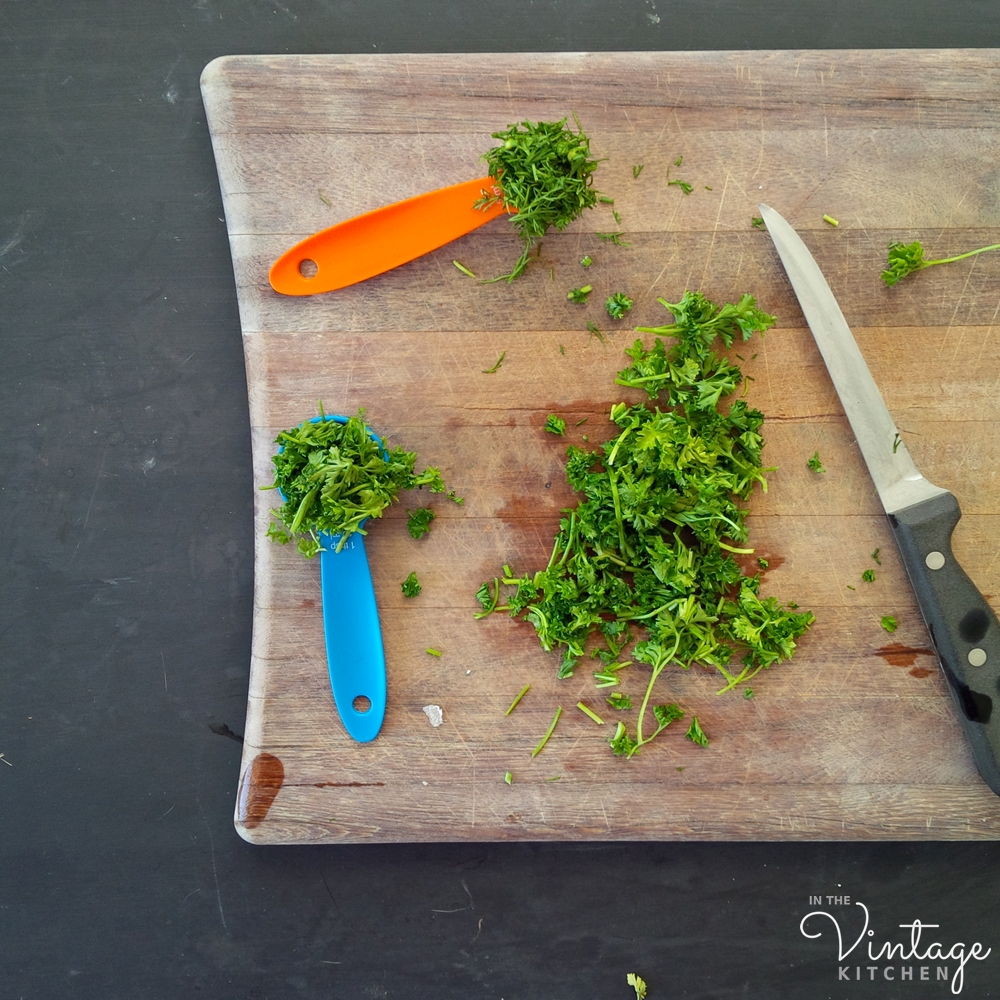
1 teaspoon fresh dill, minced and chopped

2 tablespoons fresh parsley, minced

Salt to taste (optional)

2 eggs

1/2 lb. Gruyere-type cheese, feta cheese or dry pot cheese (* see notes)

1/2 cup melted butter or olive oil (we combined 1/4 cup of each)

Preheat the oven to 350 degrees.

If frozen spinach is used, cook as directed on package and drain well. If fresh spinach is used, wash and clean the leaves to remove any traces of dirt and pat dry. Heat a large saucepan over medium-high heat. Do not add any butter, oil or water to the pan. Working in batches, add as many large handfuls of spinach as will fit reasonably in the pan and toss with a wooden spoon until all spinach is wilted (about 2-3 minutes per batch). You may have to do this step in several batches depending on the size of your pan. Spread each cooked batch of spinach out on a cookie sheet to cool.

Once all the spinach is cooked, it will look like this…

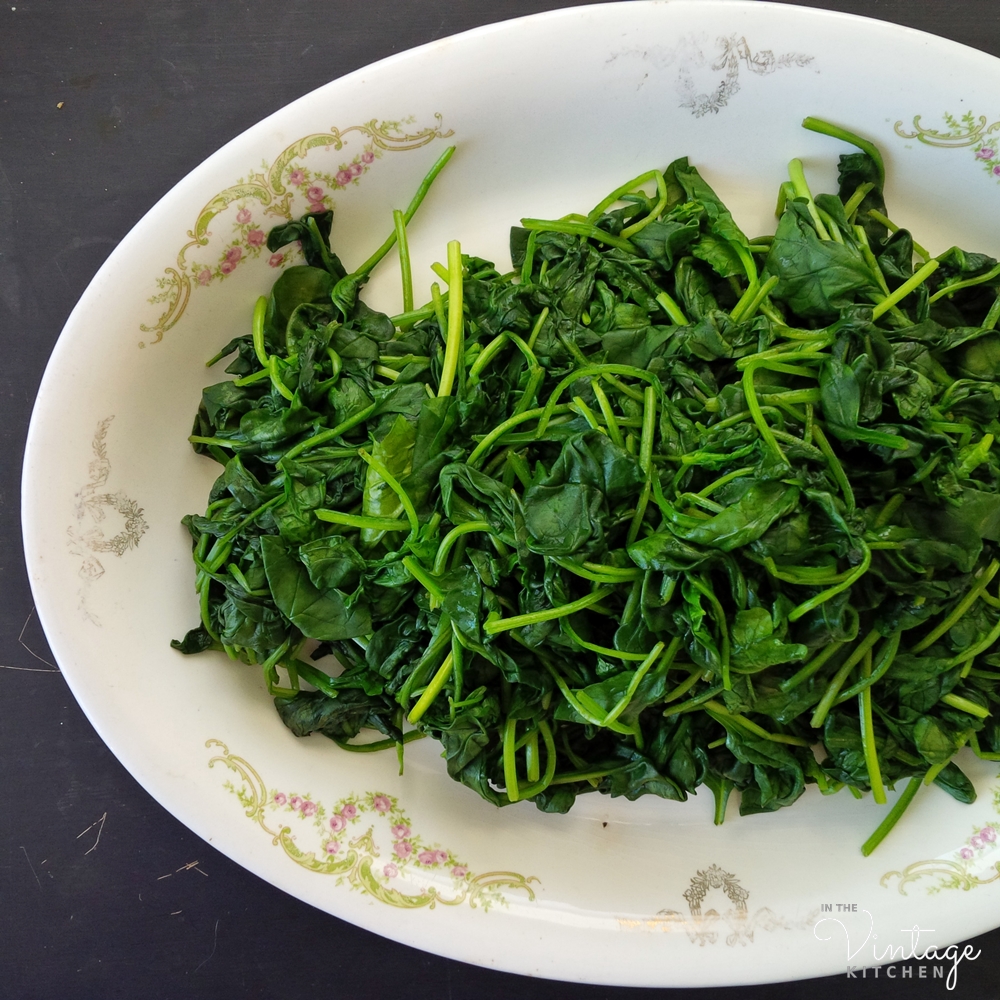
At this point, you’ll need to wring as much water out of the spinach as possible. The easiest way to do this is to grab clumps in your hand and wring them out forming tightly packed meatball-like shapes. The drier the spinach the better so wring as much water out as you can.

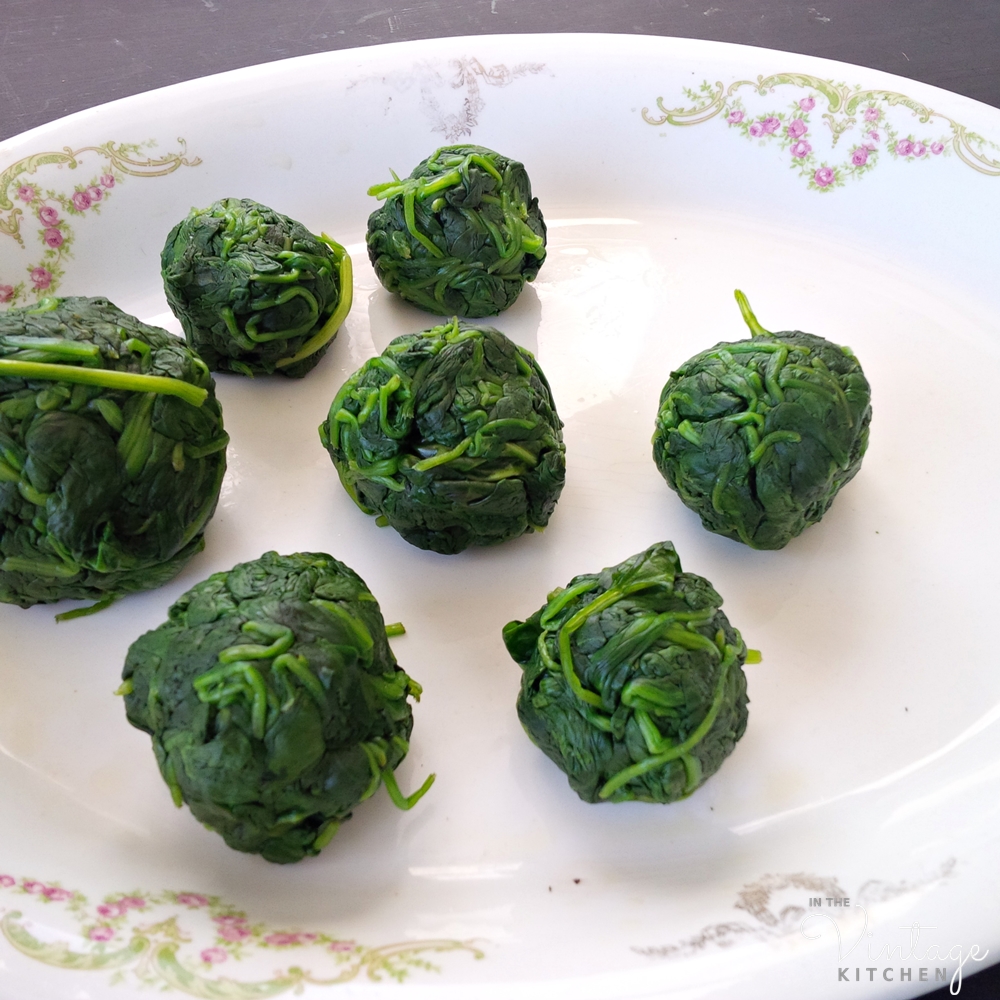
Next, on a cutting board roughly chop each of the spinach balls. Mix in the dill, parsley, and salt to taste and toss until combined. I found there to be enough natural salt in the spinach and the cheese, so we didn’t add any extra salt to this dish at all, but season it to your preference.

Add one egg to the spinach and herbs and toss to combine. Grate the cheese. We can only find Gruyere at our grocery store occasionally, so I used Danish Fontina which is similar. Other options are Jarlsberg, Swiss or Feta.

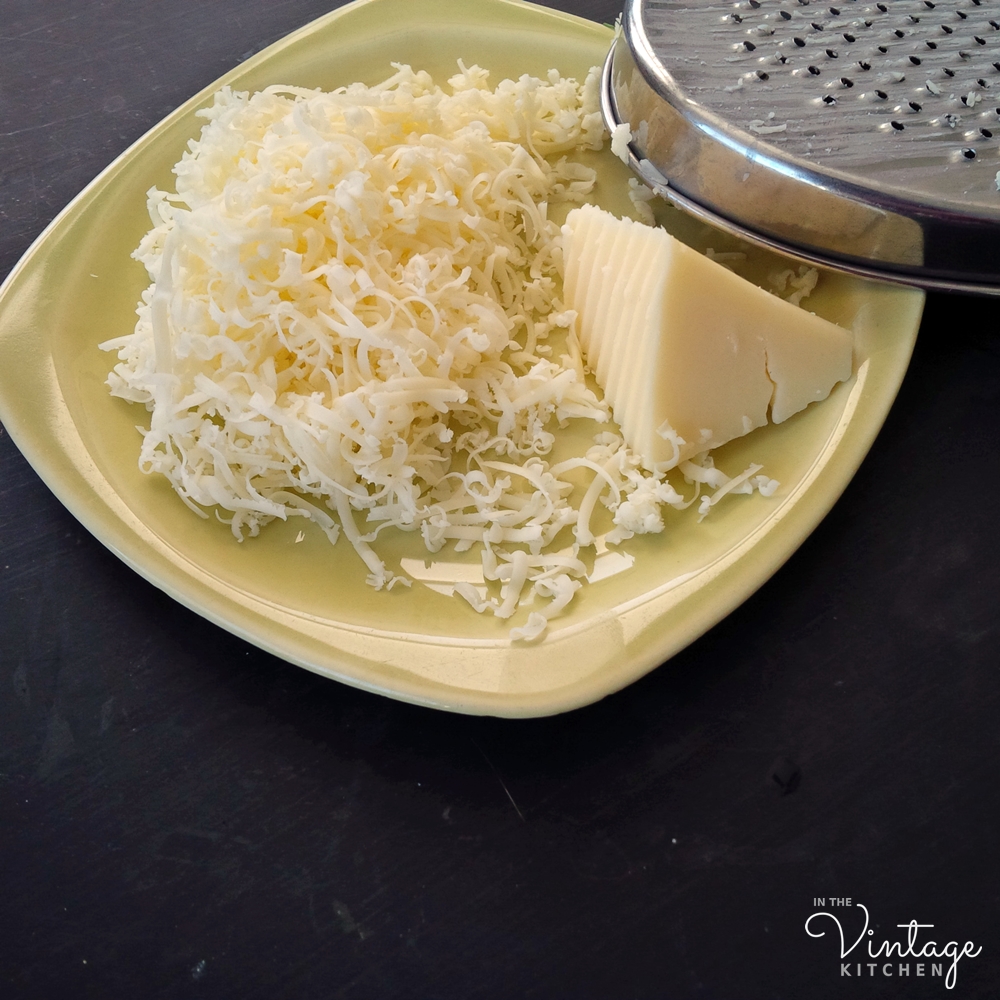
Add the second egg to the grated cheese and mix to combine.

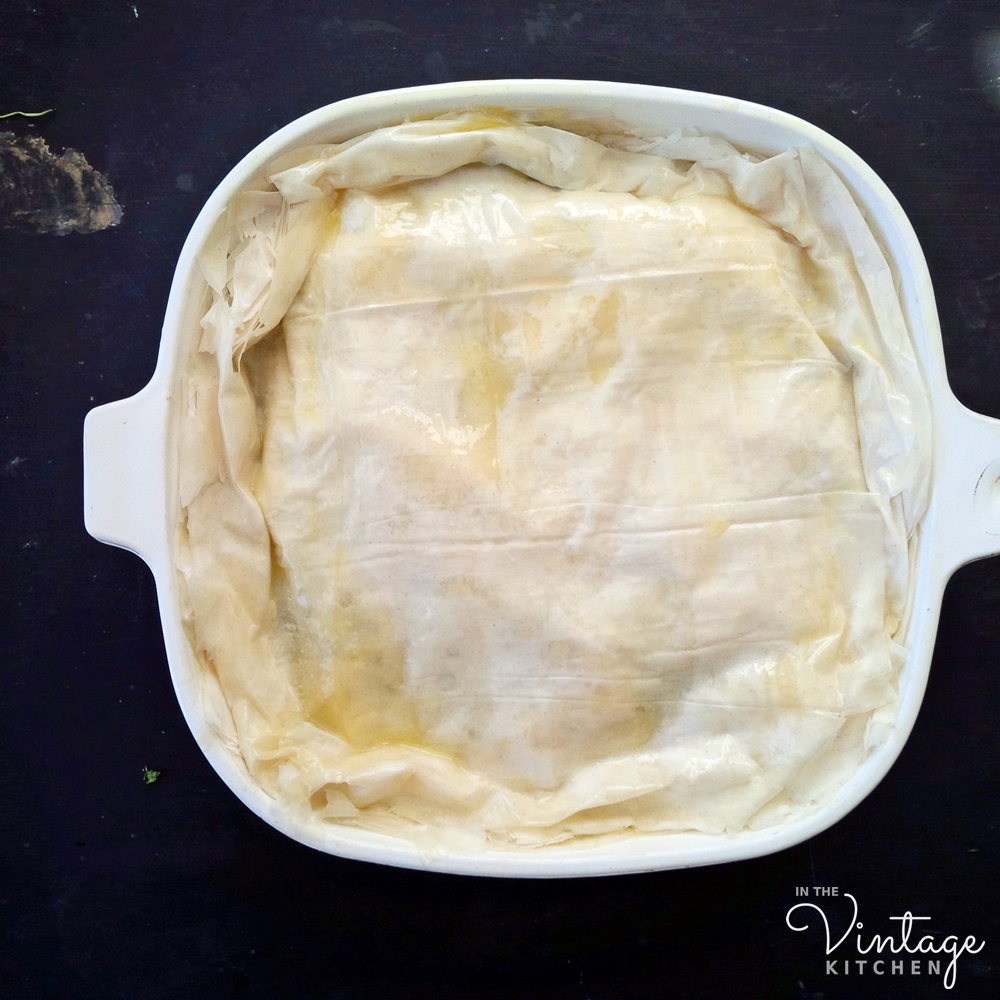
Butter a square 9×9 baking dish and place 6 sheets of phyllo pastry in the bottom. Brush each sheet with the olive oil and/or butter. Then add the spinach, and top with the cheese.

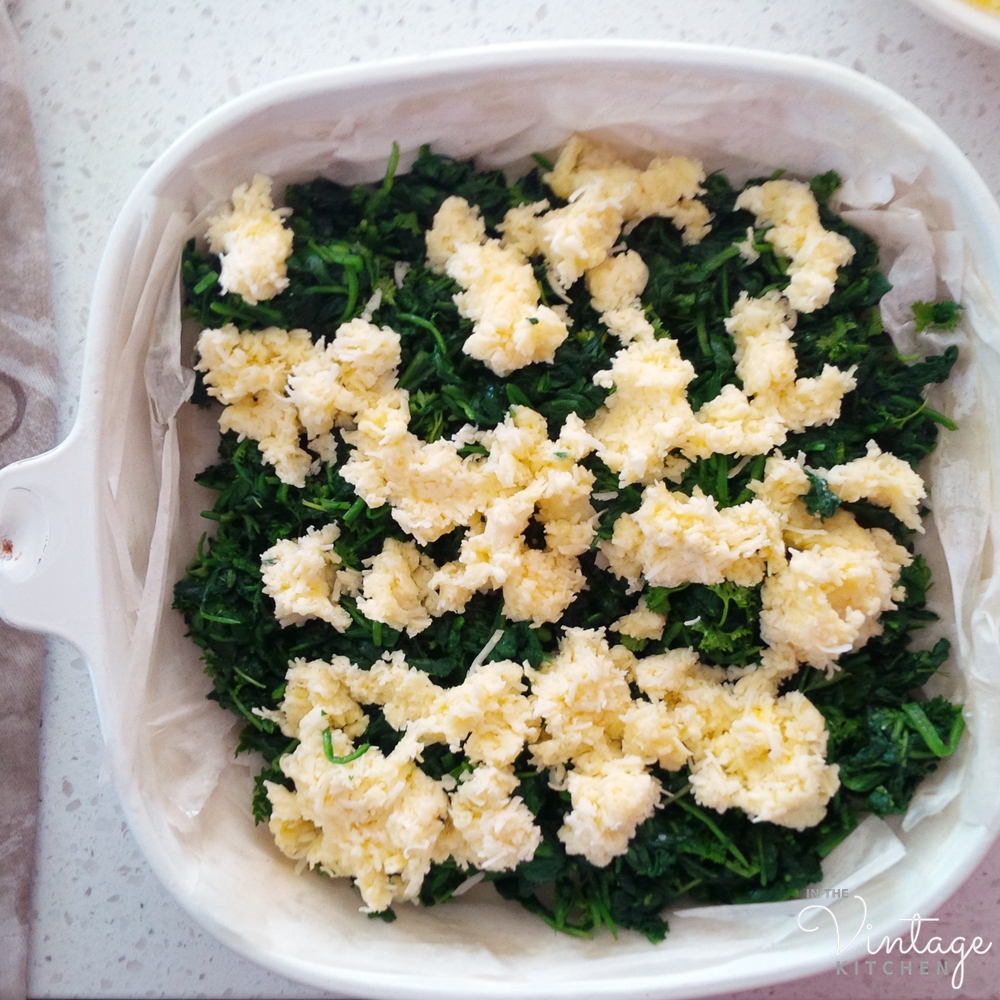
Cover with six more sheets of phyllo, each brushed in butter/olive oil. Don’t forget to brush the top layer.

Ready for the oven!

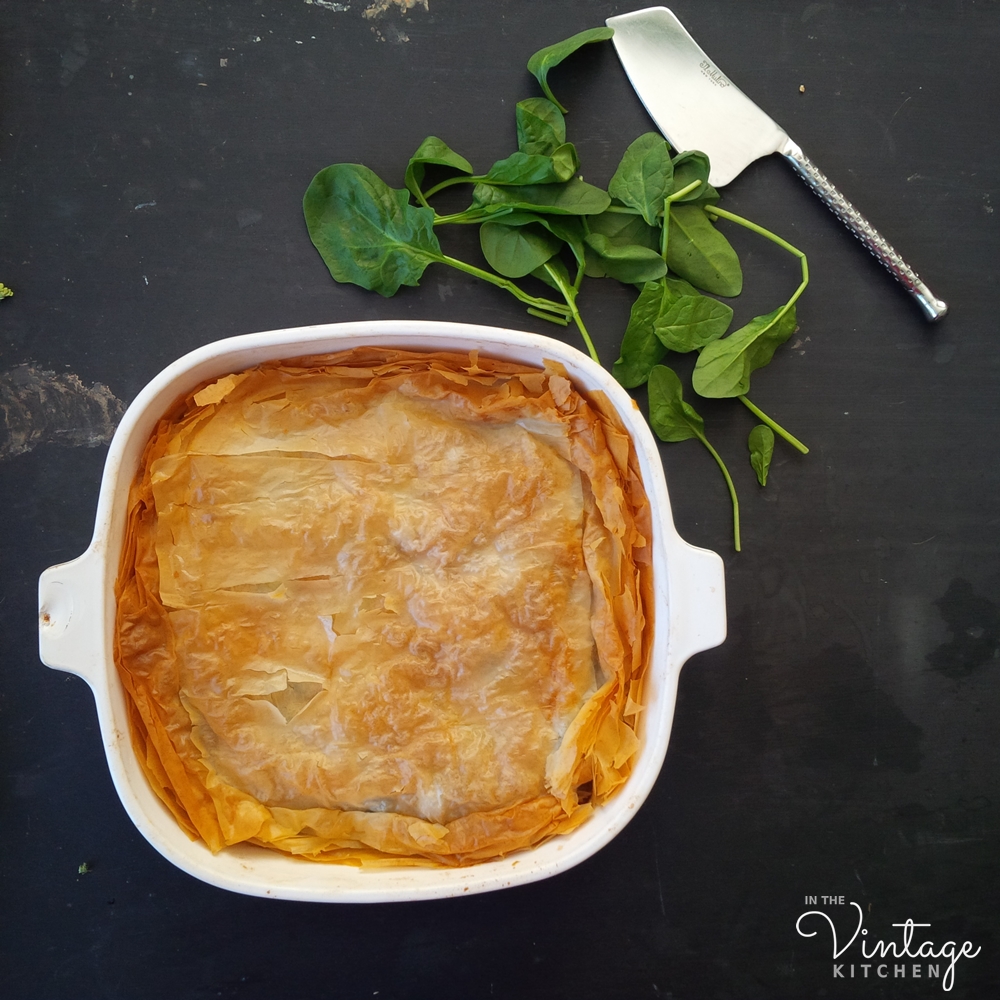
Bake in a 350-degree oven for 35 to 40 minutes until pastry is golden. Remove from the oven, let cool until the dish can be handled,

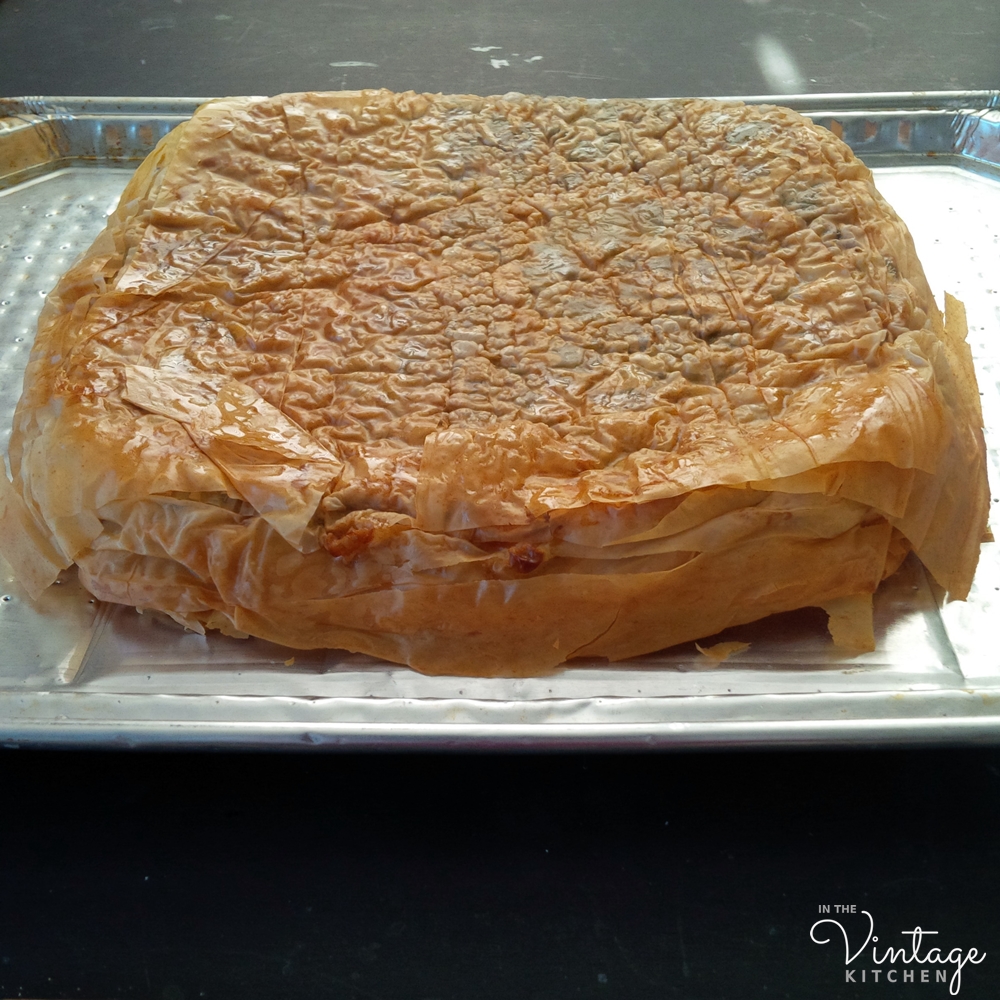
then turn out upside down on a baking sheet and return it to the oven so that the undercrust can become crisp and golden (about 15-20 minutes).

Back into the oven!

Remove from the oven, flip back over and cut into squares. Serve while hot or wait for it to cool to room temperature. We served our spanakopeta with a glass of sauvignon blanc and a simple side salad tossed in olive oil and lemon juice. Other additional sides that would be lovely with this include hard-boiled eggs, olives, mixed nuts,  prosciutto, or roasted sweet potatoes.

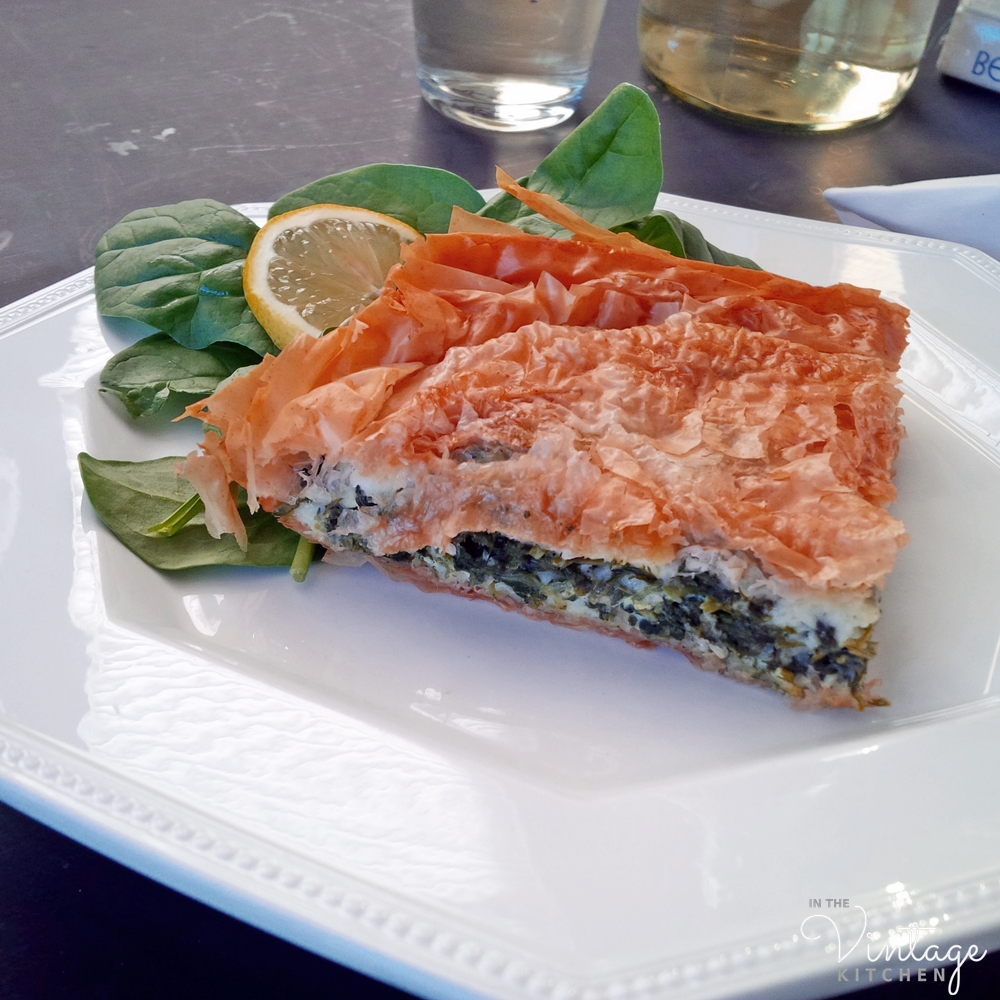
Light, airy, and full of subtle flavors that are a little bit nutty (the cheese), a little bit zesty (the herbs) and a little bit earthy (the spinach), Betty’s spanakopeta is packed full of good, healthy nutrients, providing a simple introduction to the lovely world of Greek food.

It’s a good-for-your-spirit food mirroring Betty’s healthy outlook on life. She cast aside all the bitterness and resentment that could have filled her up in the post-CBS days and instead stuffed her life full of light, bright joy that enriched her spirit and fed her soul. Cheers and happy birthday to Betty for continuing to inspire women around the world with your writing.

Interested in learning more about Betty and her Greek recipes? Find her cookbook in the Vintage Kitchen shop here.

Our Favorites: Five Wonderfully Whimsical Things about Julia Child (And A Recipe!)

Her old cookbooks teach us new tricks. Her methodical approach to food never fails us. Her infectious joie de vivre still inspires us. She may have passed away 13 years ago but the spirit of Julia Child is still very much alive and well here in the Vintage Kitchen.  Yesterday marked Julia Child’s 105th birthday.  In celebration, we’ve compiled a list of five whimsical things that we absolutely adore about this great lady.

1. The Photograph – December 1968, France

This is my most favorite picture of Julia Child. It was taken in December 1968 while she was staying at her summer house, La Pitchoune, in Plascassier, France. I love that she is laughing so hard she’s practically tumbling off the counter. I wonder what the situation was at the moment this image was captured. Was her husband, Paul, standing just out of frame telling a joke? Or maybe one of those crab claws just reached up and started playing tug-of-war with her fork. Or maybe it was Julia herself just hamming it up for the camera. Spontineanity ran wild in Julia’s kitchen and I have feeling there were many days in many kitchens around the world that witnessed a moment like this with the engaging lady laugher.

2. The TV Appearance – David Letterman

On December 22, 1986 Julia Child was scheduled to demonstrate how to cook with a blowtorch on the Late Night with David Letterman show. The segment starts out as planned but quickly goes awry and both Julia and David wring all the humor they can out of this unexpected situation. It’s a fly-by-the-seat-of-your-pants funny piece – both of them cleverly improvising with the comedy at hand.  Julia is famous for saying “No matter what happens in the kitchen, – never apologize.” You can see her sticking to that advice with aplomb here.

3. The Decorating Choice – La Oubliette

In Julia Child’s memoir, My Life in France, she describes moving into a French apartment that was already furnished.  It was full of old antiques that were musty, broken down and too small for her tall stature.  The shabby scene depressed her so much that she rounded up everything that she disliked in the apartment,  put them into a closet, and shut the door tight, never to encounter that stuff again. She named that closet La Oubliette or the Forgettery. Anything that displeased her from that point forward for the duration of the time that she and Paul lived there went into that closet.  Out of sight, out of mind.

After reading that passage years ago and falling in love with that idea, I established my own Forgettery in whatever place we’ve lived in. Not all of our spaces have had the luxury of spare closets, but a cupboard or a drawer or a hidden shelf works just fine too.  Sometimes we use it not only for physical objects but also for words. There is something very gratifying about walking into your own Oubliette, saying out loud whatever injustice happened to you that day, and then walking out, shutting the door and leaving all that negativity and all those bad vibes closed in there instead of in you. Julia. She was a cook and a therapist all in one!

4. The Random Cambridge, MA Kitchen Comforts

This past May, we had the exciting experience of visiting Julia Child’s kitchen at the Museum of American History. I had seen pictures of it online before so I knew that I’d see the yellow tablecloth and her big restaurant stove and the pots and pans hanging from the pegboard, but what I didn’t realize I’d see was a host of everyday items that had nothing to do with the kitchen.

You know, those other errant household objects of daily life that just seem to migrate their way into the kitchen but have nothing to do with food or cooking? Things like keys, wallets, shoes, books, tape, paint cans, bags, notebooks, etc.? Julia’s kitchen was full of that sort of stuff too. A Rubix cube, a pile of papers, jars of pens and pencils, a calculator, some sort of glowing orb-like light, bird identification books, a signal mirror from World War II.   Julia was all about keeping things close by that she loved. She even had a junk drawer packed full of odds and ends. And a slew of giant, oversized cooking tool props that appeared in funny stories on her cooking show.  She wasn’t into staged or professionally decorated or aesthetically styled perfection. She was into comfort and function and fun entertaining in a casual environment. Even though Julia and Paul hired architect Robert Woods Kennedy to redesign the kitchen after they purchased the house,  all the decorating of their most favorite room was left up to them.  And it shows in the eclectic menagerie of items they collected and colors they loved.

5. The Book – Jessie Hartland

I recently discovered this fantastic children’s book Bon Appetit! The Delicious Life of Julia Child, at a local book sale. Written and illustrated by Jessie Hartland and published in 2012 it is technically considered a children’s book but really anyone of any age could easily appreciate and enjoy it. Jessie tells Julia’s life story in a vivacious arrangement of words and pictures that is so enchanting you’ll want to read it out-loud while imitating Julia’s voice.  It is such a sweet, good-natured and fun-loving approach to the life of this extraordinary culinary icon, you’ll feel like you’ve met Julia Child herself by the end of it.

On the last page of the book, Jessie shares her own adaptation of French crepes inspired by Julia’s recipe. Since it is Julia’s birthday week, and she shouldn’t be cooking for her own celebrations, we made Jessie’s version instead which turned out to be delicious. Julia would definitely approve.

The only ingredient differences in Jessie’s vs. Julia’s recipe is salt and water. Julia’s has a little of both and Jessie’s has none. And to be totally honest we like Jessie’s version better.

One of the things that Julia Child liked most about French cooking was that it was “careful cooking” meaning that you had to spend time with it and keep a thoughtful eye on the procedure of it. She treated all her recipes at first like mountains that needed to be climbed and then, once conquered, like friends that needed to be nurtured and shared and appreciated.  If you have never made crepes before, it may sound a little scary when it comes to flipping these thin style pancakes, but once you’ve conquered it, you’ve mastered this multi-functional breakfast/lunch/ dinner and dessert appropriate food like a champion.

The ingredients are very simple and straight forward. I used free range organic farm eggs, organic whole milk and organic butter in this recipe. Like Julia Child always says – the better quality your ingredients, the better your food will taste.  And if you store your eggs in the refrigerator let them warm up to room temperature before you use them.

Jessie’s Crepes

(makes 5-6 crepes, each about 6.5″ inches in diameter)

3 eggs

1 cup milk

3/4 cup flour

butter (about 1/8th cup)

In a medium sized bowl, beat the eggs with a whisk. Add the milk and whisk again. Add the flour and whisk one more time. Next Jessie recommends pouring the batter through a fine strainer into a glass measuring cup. I don’t have a strainer so I poured the mixture through cheese cloth wrapped around the fine side of a cheese grater. That worked just fine.

This step removes any large flour lumps and makes the batter silky smooth.  If you don’t have a glass measuring cup you can just strain the batter into a mixing bowl and scoop it with a soup ladle.

Melt 1 teaspoon of butter in a frying pan until it is hot (medium high temp) but not smoking. Whisk the batter one more time and then pour about 1/4 cup into the frying pan. Holding the handle twist and rotate the pan to make sure the batter evenly coats the entire bottom of the pan. Wait about 30 seconds (there should be no more loose or runny batter on the top of the crepe – if there still is cook it a little longer) and then, if you are feeling brave flip the crepe in the pan to cook the other side for about 15 seconds.

There are a couple of other options regarding flipping if you don’t want to toss your crepe up in the air.

Option #1: Carefully slide a spatula underneath the crepe and flip it to the other side.

Option #2:  My personal favorite –  use a cake frosting knife, and slide it under the pancake and quickly flip it.  The goal of all this cooking and flipping is two fold… don’t wait too long to flip it so that the bottom burns and don’t tear the crepe in the process of flipping. The first one might not make the table – and that’s okay – if it burns, or tears or winds up on the floor just start again with more butter and a new scoop of batter. Practice makes perfect. And one general rule of thumb – more butter is better than less butter when it comes to making sure the crepes don’t stick, so when in doubt add more not less. This is what your crepes should look like once they are ready…

Repeat this step until you have made all your crepes. You can keep them warm by placing each one on top of the other, stack-stile, on a plate covered with aluminum foil as each one comes out of the pan. Or covered in a dish in the oven on the lowest temperature setting.

Crepes are a foundation piece that can be served in a number of different ways for breakfast, lunch, dinner or dessert. When we make ours for breakfast, we sprinkle powdered sugar on a warm crepe, roll it up and then top it with a mixture of seasonal fruit in the summer or a warm fruit compote in the fall and winter. But you can just about add anything you like to a crepe and it will be delicious.

One thing to keep in mind when serving crepes is that they contain no sugar so if you like them sweet don’t forget to add sugar or honey, maple syrup, chocolate sauce, whip cream or your own fruit medley.

French Crepes ala Jessie via Julia!

And of course, the very best companion for this festive French dish is a good book like Bon Appetit, which you can find here.

If you are a big fan of Julia, like us, please share your favorite things about her in the comment section below. We’d love to learn more about how she inspires you!

In the meantime cheers to the lady who keeps inspiring us to find the fun in the food! Happy Birthday Julia!

Summer Dinner with Sunset: Cold Roast Beef with Whipped Horseradish circa 1962

In 2018, a sunset celebrates its 120th birthday. No, it’s not the anniversary of the blushing pastel sky that shadows overhead just before night (that’s as old as time).  And it is not the commemoration of Billy Wilder’s movie Sunset Blvd (that was 1950) nor the anniversary of the actual naming of the boulevard known as Sunset (that was the early 1900’s).  Instead, we are talking about the kind of sunset that stacks up on your coffee table – Sunset Magazine – one of the oldest, longest running magazines in American publishing history.

For over a century, this West Coast-centric lifestyle publication has been entertaining readers with outdoor recreation, travel, home design, gardening and food-focused articles steeped in the natural beauty of the United States’ Pacific side. Originally produced in 1898 to dispel myths about wild, wooly California, Sunset magazine was created as a marketing and promotional piece for Southern Pacific Railways. Its goal was to encourage tourists to buy land in California so the railway could profit in transportation, tourism, and land ownership sales.  By highlighting the natural beauty of the scenic coastline, the agreeable climate and the sophisticated resort towns of Southern California, in particular, early readers were introduced to the artistic side of the state through nature photography, regional literature, and poetic musings.

Sunset Magazine then, in 1898 (first issue!) and now (the current issue July, 2017)

The up and down decades of the 20th century brought many changes to the magazine’s content, format, and layout but throughout its long life,  Sunset has always inspired readers to get outside and enjoy the natural landscape. The recipe we are featuring today involves just that – a nod towards a relaxed dinner geared for outdoor ease and feast enough for a dozen family members and friends.   It is a perfect packer for the picnic basket or a set-it-and-leave-it sort of arrangement that yields plenty of time for firefly watching or sprinkler swimming or whatever your favorite summer pastimes include.  It is a cold roast beef, cooked early in the amiable hours of the day,  and then put away to chill in the fridge until hungry appetites demand to be fed.

The recipe comes from the 1962 Dinner Party Cook Book compiled by the editorial staff of Sunset Magazine. This very cool collection features a wide assortment of party menu recipes that coincide with big and small occasions throughout the year. Birthday parties, graduations, theme night dinners, and holidays are all tackled with a wealth of ingenuity and imagination in the menu planning department. Our cold roast beef fell under the theme of an Easy Summer Dinner, combining a selection of dishes that were cool to the palate and required little heating (other than baking the roast).

Temperatures have been heat-wavish here in the South reaching 100 degrees for the past week with even higher heat index numbers.  This Easy Summer Dinner was just what we needed. The ease comes in a 24-hour red wine, onion and herb marinade and then a quick pop into the oven for 2-3 hours of cooking. Once it comes out of the oven it cools on the counter before heading to the fridge where it chills until dinner time.  The benefits of this dish are many because the roast is large – big enough to feed up to 18 people – which means you could have a lot of leftovers depending on your party size. Here in the Vintage Kitchen, that meant practically a week of additional dinners plus extra for the freezer. From just one roast we made fajitas, beef pot pie, steak salad, stuffed peppers plus two extra nights of the actual recipe. Easy summer dinner indeed!

The recipe calls for a 5-6 lb rump roast which we substituted for a 4 lb. grass-fed beef rump roast.  We like grass-fed beef the best because it’s healthier for humans and because it is a better lifestyle for the cows who forage on open pastures eating only natural grasses instead of being lumped together on feedlots eating only grain. If you try this recipe and incorporate grass-fed beef too, there are a couple of factors that need to be altered. Grass-fed beef cooks faster since it is much leaner than grain-fed beef so it’s important to pay attention to the roasting time.  Instructions for both types of beef are included with the recipe here, depending on your own preferences. Other than that, this very easy dinner is as promised – very easy.  And the whipped horseradish is the perfect accompaniment so definitely don’t forget it.

Sunset’s Beef A La Mode

(serves 12-18)

5 – 6 lb. rump roast (or 5-6 lb. grass-fed beef rump roast)

2 cups dry red table wine

1 onion, sliced

1/2 teaspoon fresh thyme

1/4 teaspoon crushed whole black pepper

1 bay leaf

Flour seasoned with salt and pepper

1/4 cup beef fat, shortening or oil

1 cup tomato puree

1/2 cup sour cream

1/2 cup mayonnaise

1/4 cup grated horseradish

Place the roast in a large bowl and cover with the wine, onion, thyme, black pepper and bay leaf. Marinate for 24 hours in the fridge,  turning a few times throughout the marinade process.

After 24 hours, remove the meat from the marinade, setting the marinade aside for future use.  Let the beef warm up to room temperature before patting it dry and dusting it all over with the flour/salt/pepper mixture.

In a Dutch Oven brown meat on all sides in the beef fat, shortening or oil. If you are using grass-fed beef do this step in a hot skillet with 3 tablespoons of olive oil. Sear meat about a minute per side on all sides.

Seared on all sides and ready for the oven.

Pour the marinade and the tomato puree in the Dutch oven, cover and bake at 350 degrees for 3-4 hours or until fork-tender. If you are using grass-fed beef, after searing, place in Dutch oven or a large casserole dish, add the marinade and tomato puree and top the roast with three pats of butter. Cover and bake at 425 for 20 minutes then turn the oven off and keep the roast in there for two hours, being careful to not open the oven door for the entire time.

You want the internal temperature of your roast to be about 135 degrees when finished. Once your roast is done, remove it from the oven and let it rest at room temperature until it is cool. Refrigerate until ready to serve.

While your roast is cooling, in a small bowl, whip together the sour cream, mayonnaise, and horseradish in a bowl. Refrigerate until ready to serve.

Once dinner time arrives, thinly slice the roast beef, arrange on plates and drizzle with the horseradish mixture.

The original 1962 recipe included side dishes of hominy, watercress salad and sesame seed crusted toast points. While those sound lovely we skipped those dishes and served our grass fed roast beef with a simple side salad of mixed greens tossed in a homemade lime vinaigrette. It was simple and complimentary and easy. The words of the day!

If you time your dinner and your day right, you’ll be able to experience two sunsets at once. One a feast for your eyes, the other a feast for your belly. Hope you find this vintage recipe as effortless as we did.

Explore 61 other 1960’s themed menus in The Dinner Party Cook Book available in the Vintage Kitchen Shop here.

New to grass-fed beef cooking? Visit the website of our favorite grass-fed beef vendor at the Nashville Farmers Market and learn more.

Cheers to easy summer nights and to the good friends that fill them.

Culinary Creativity: Recipes From Our Prize Winner!

By day they are executives in New York City but by night (and most weekends too) they are culinary wizards adventuring their way around the inventive kitchen. Meet blog reader Michael, one of the winners in last month’s Spartan Souvenir giveaway and his lovely wife Renee.

reneemichael

As soon as their prize of Greek olive oil and wild mountain oregano hit their mailbox they started daydreaming about what they could make. Possibilities abounded of course, but it didn’t take very long before they settled on two Mediterranean-style dishes that highlighted their new winnings and captured the simple fresh flavors of their farmer’s market palates.  In a lovely spirit of community, these two home chefs not only sent back a follow-up note on their gift receipt but also included recipes and photos of everything they made with their Sparta samplings. Fantastic! Here is what they made…

greekdishes2
“The olive oil has such a nice fruitiness and the oregano is slightly floral and delicate,” shared Renee. “We love it!”

Long-time connoisseurs of make-it-yourself pizza they first prepared a Mediterranean style Greek pizza with homemade dough and an inventive brussels sprout topping. Next, (just in time for Fish Friday) they made a simple Greek-style baked cod using local fish and an array of herbs.

Michael and Renee’s recipes couldn’t have come at a better time in our calendar year. If you are still entertaining holiday house guests the Greek Pizza makes for a fun party pleaser and can be doubled or tripled in size to fit all appetites.  Or if you find yourself ready to put the heavy plates of the holiday season behind you then the Greek Baked Cod would be just the ticket for a light and refreshing meal. Both recipes highlight the unique flavor of the olive oil and oregano from Sparta, Greece which you can find at thespartantable.com All other ingredients can be locally sourced from your grocery or market.

pizza3

Greek Pizza

Note: Michael and Renee followed Jim Lahey’s lead on the pizza dough preparation. You can find a step-by-step guide here which includes a casual video on the making of it all. If you have never made homemade pizza dough before don’t feel intimidated, it’s very easy and this is a no-knead recipe which makes it even easier. If you can’t sacrifice the time for the dough, start out simple with a pre-raised dough ball from Trader Joe’s or the fresh bakery department at most supermarkets.

(for the dough)

3.5 cups all-purpose flour ( M&R veered slightly from the dough recipe and incorporated some whole wheat flour as well. This recipe reflects their version.)

1/2 cup whole wheat flour

1/4 teaspoon active dry yeast

2 teaspoons fine sea salt

1 1/2 cups water

(for the topping)

1/2 red onion, thinly sliced and placed in a bowl, covered with water for at least 30 minutes, then drained and dried

1 Serrano chili pepper, thinly sliced (remove the seeds and veins if you are averse to heat or if your chili is super strong)

8-10 raw brussels sprouts, shaved

1/4- 1/3 cup (plus more for topping) Parmesan cheese, freshly grated

1/2 teaspoon Spartan Table wild mountain Greek Oregano

5 ounces Spartan Table Extra Virgin Greek olive oil

Salt and Pepper to taste

Prepare dough as directed. Preheat oven to 475 degrees. Add pizza stone about one hour prior to baking. Mold the dough into a circle on a pizza peel lined with semolina flour to prevent sticking and for easy sliding.

Place all topping ingredients together in a bowl and mix in olive oil and salt and pepper to coat.

pizza2

Scatter your toppings evenly on top of the dough. Bake until bubbly and slightly browned about 10-12 minutes. Depending on your oven, this could take more or less time. Finish with olive oil,  sea salt, and extra Parmesan cheese.

pizza1

In The Vintage Kitchen UPDATE! August 2021 – The sky is the limit when it comes to experimenting with this homemade pizza recipe.  Greek olive oil and wild mountain oregano pair beautifully with an array of toppings… 

including mushroom meatballs, fresh basil, cherry tomatoes and this heirloom Italian sauce recipe.  Featured here are (clockwise from top) Greek Pizza; Italian Cherry Tomato; and Meatless Mushroom Meatball.

Greek Baked Cod (serves 2)

Fresh, local cod  (enough for two portions)

1/2 teaspoon Spartan Table Greek oregano

5 ounces Spartan Table Greek olive oil for drizzling and finishing

1  quarter of a large organic lemon, thinly sliced

1 half of a medium shallot, thinly sliced

1/4 quarter cup of thinly sliced fresh fennel (from the bulb)
 
Salt and pepper to taste
 
1/2 tablespoon fresh parsley, finely minced, for finishing

Preheat oven to 425 degrees.

Add cod to two pieces of foil paper (doubled so that it doesn’t leak) placed on a baking sheet. Drizzle fish with the olive oil, oregano, and salt and pepper. Arrange the shallot slices on the bottom of the foil, place the cod filet on top with the fennel and lemon slices.

fish1
 
Close the foil (like a packet) and bake for about 20-25 minutes, depending on your oven and size of the cod. Ours took about 20 minutes to cook. Finish with an extra drizzle of the oil, sea salt and parsley.
 
fish3
 

In the land of the Vintage Kitchen, it is very exciting to have such an enthusiastic (and delicious!) response to a blog post. Hopefully, Michael and Renee’s recipes will help pave the way for more culinary adventures discovered by our readers. Having come full circle with an interview that originated months ago in the faraway, mystical olive groves of Greece and ended up finally on the kitchen table of two New York foodies, this post feels a bit like magic. Even though a zillion miles separates us from Sparta and  Nashville and New York we now share a commonality in the history of a food. And our cross-culture community feels a bit more close-knit.  As Homer said, “the journey is the thing.”

Again, a big thank you to Jehny and George for carrying on the family tradition of olive-growing in Greece and to Michael and Renee in New York for inspiring us with two new recipes fit for a feast.

 
If you missed the interview with Jehny and George from The Spartan Table find it here.  If you have any questions regarding Michael and Renee’s recipes post them in the comment box and we’ll get them answered ASAP.
 

Cheers or opa, as they say in Greece, to the final days of 2016. May they be both merry and bright.


kitchen prep

Travel South to Juliette, Georgia: Film Location of Fried Green Tomatoes

Ms. Jeannie embarked on a road trip recently to the Southern town of Juliette, Georgia where they filmed the movie Fried Green Tomatoes.

Movie Poster – Fried Green Tomatoes

If you aren’t familiar with the storyline it is about a middle aged woman, Eveyln Couch, (Kathy Bates) who is stuck in a rut and on the verge of a mid-life crisis.  She befriends a senior citizen, Mrs. Threadgoode ( Jessica Tandy) who shares stories from her past which eventually provide all the life lessons, hope and inspiration that Evelyn needs to get out of her rut.  This movie was based on the bestselling book Fried Green Tomatoes at the Whistle Stop Cafe, by Fannie Flag.

The story switches between present day and 1920’s Alabama, but as you can see below Juliette, Georgia worked just fine in capturing the era. The historical aspect of the story centers around Whistle Stop, the train depot cafe and two women who run it; Idgy & Ruth.

Sets were built in Juliette for the movie and never taken down. Now they are used in the city’s tourism promotion. Ms. Jeannie was thrilled to see that the Whistle Stop Cafe in real life looks exactly like it did in the movie (minus the contemporary cars of course!):

The Whistle Stop Cafe as seen in the movie

The Whistle Stop Cafe as it looks today

Ms. Jeannie had lunch at the cafe. Of course,  she ordered fried green tomatoes!

Fried Green Tomatoes at the Whistle Stop Cafe!

Close-up view! A meal in itself!

If you’ve never eaten this before – you are in for a treat. Like most famous recipes, everyone has their own techniques but this recipe posted by busterbucks on hub pages is great because it explains the process step-by step and has lots of pictures.

A friend of Ms. Jeannie’s prepares a lot of Southern recipes using this cookbook from 1939. You might be able to find a fried green tomato recipe (or two!) in there!

Fine Old Dixie Cookbook from LittleBeachDesigns

After lunch Ms. Jeannie walked around town. Juliette is tiny and is just comprised really of  one main street and a few side streets:

There are little nods to the movie all around town.

Juliette is able to sustain itself just from tourism related to the movie. That is marvelous for a small town like this, which would have become a ghost town had Hollywood not come callin’. It was bustling the day Ms. Jeannie visited. There was even an hour and a half wait for lunch at the cafe. Ms. Jeannie took the time to poke around town.

This is the famous barbeque in back of the cafe:

This is the barbeque scene from the movie.

This is Smokey Lonesome’s house which is the little shack you can see pictured above – just beyond the barbeque pit.

These are the falls Ruth (Mary Louise Parker) walks across at the beginning of the movie.

This is the scene from the movie.

After first seeing Fried Green Tomatoes, Ms. Jeannie became interested in beekeeping. She has yet to own any bees of her own but she has quite a growing list of beekeeping related items in her Etsy favorites folder…

Straw Beekeeping Hat from honeybeefarmer

Antique Beekeeper’s Hand Bellow from DailyMemorandom

Beekeeping Bee Hive from toughtimbers

Ms. Jeannie could definietly use a few lessons from pros like these:

Online Urban Beekeeping 101 from brooklynhoney

Until she gets her beekeeping operation up and running, she will shop locally for organic honey…

Did you know that people derive the most health benefits from honey that was produced within a 15 mile radius of their home? Support your local farmers and your local bees at localharvest.org