Happy New Year! Hope your holidays were festive and that your new year is off to a great start. Here in the Vintage Kitchen, there are lots of fun things in the works for 2020 – ones that incorporate both cooking and collecting. After the emotional events of last year, I’m ready to pour a giant amount of joy into this new decade starting right now, with January, and the announcement of a big year-long project…
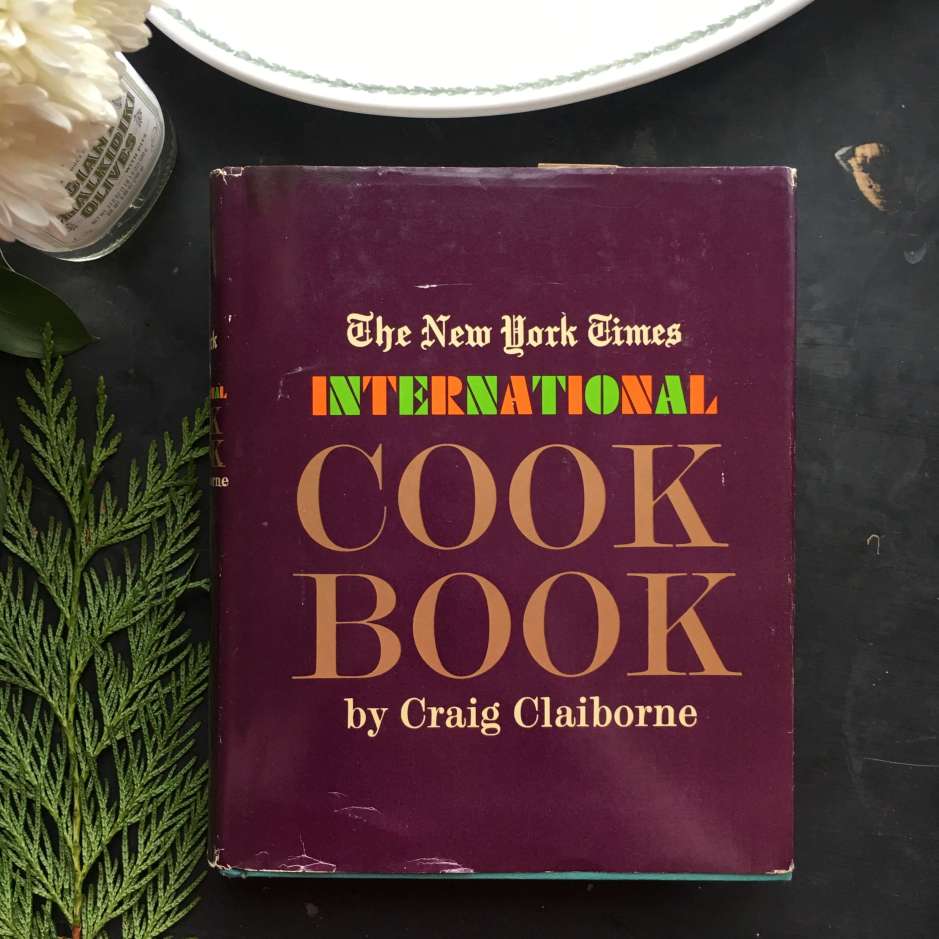
Pack your market bags dear readers, we are going on an adventure. Welcome to the International Vintage Recipe Tour of 2020. Each week throughout the year, I’ll be cooking an authentic heritage recipe from a different country that was featured in the 1971 edition of the New York Times International Cook Book. Sharing both the experience (and the recipe) here on the blog every Wednesday, I hope you’ll join me in exploring together the cuisine of 45 countries over the course of 12 months. It’s going to be an epic year of discovery, one in which I hope will shine a spotlight on some old, wonderful, possibly forgotten dishes that may have gotten covered up over time.
Throughout this project, we’ll cover all the food groups and prepare unique dishes for all meals of the day including breakfast, lunch, dinner, cocktail hour and dessert. Organized alphabetically by country, we’ll circumnavigate the globe, exploring an eclectic range of landscapes and cuisines together. One week, we’ll be making island fare fit for a summer beach party and the next we’ll be deep in another hemisphere’s mountain range cooking up cuisine much more suited for skiing and snow. Some recipes will be quick to make like mixing up a tropical cocktail or making homemade mustard, while others will involve more time and detailed technique like making a layer cake or pickling vegetables. We’ll visit all the continents (except Antarctica) and we’ll touch upon interesting aspects of each country’s history through interviews, books, movies, music, art and artifacts.
A year-long cooking project is quite a commitment. It’s the biggest endeavor I’ve ever attempted here on the blog and I’m not quite sure how smoothly it’s all going to run. But exploring foreign foods has been a favorite source of joy and curiosity for me since my college days, when my sister and I used to throw International Dinner Night parties in our Brooklyn apartment. By traveling around the globe via the kitchen this year, I hope this project will spark some unexpected fun in your cook space too.
Since I haven’t previously tested or tried any of these recipes listed in the cookbook before, there’s a good chance we’ll encounter some mishaps along the way and uncover some unusual cooking situations. There are foods from many countries included in this adventure that I have never even tried before, and there are some countries listed in the cookbook that don’t even exist anymore thanks to changes in world history. But through this project I hope to start some conversations with you about the validity of vintage recipes, the ways in which we prepare foreign food and the effect these recipes have upon our modern palettes.
There are lots of books that could have been referenced once this idea of a vintage recipe tour started swirling around, but The New York Times International Cook Book is an ideal fit for this type of world-wide exploration for two main reasons. First, Craig Claiborne…
The recipes in the International Cook Book were collected and tested by Craig Claiborne (1920-2000), a long-time editor at the New York Times and a treasured favorite cook here in the Vintage Kitchen. Throughout his career, Craig came in contact with all sorts of foodies from all sorts of places around the world – famous chefs, restaurateurs, caterers, food critics, industry professionals, home cooks and “those who wanted to communicate their culture via their kitchen.” He was also a talented wonder in the kitchen himself and the author of over twenty cookbooks. There is not a recipe that I’ve tried of his that I haven’t absolutely loved. Needless to say, he knew a good recipe when he saw one and he knew the good sources from which to get them. When he was preparing The New York Times International Cook Book he consulted hundreds of people and traveled thousands of miles to collect the most highly prized recipes he could find. Although he hasn’t been as widely recognized or remembered as some other famous culinary icons of the past, I’m excited to re-introduce him here on the blog. With his name attached to this cookbook, I have a feeling we are in good gourmand hands.
Ingredients for spaghetti and anchovy and clam sauce from the Italy chapter of the The New York Times International Cook Book
The second reason why the International Cook Book is an ideal vintage recipe springboard is because of the decade in which it was produced…the 1970’s. The first edition came out in 1971, a decade of heightened curiosity and savvy in both the international travel department and the cooking department. While the 1960’s made air travel to foreign countries appear glamorous and exotic, by the beginning of the 1970’s international escapades were more widely accessible to Americans. This interest in other cultures reflected in the food scene of the 1970’s too – by exposing American palates to more diverse cuisine and broadening their culinary horizons.
1970’s travel poster for Qantas Airlines
The disco era ushered in a decade of cosmopolitan dining and entertaining that was backed by newly found confidence, curiosity and skill in the kitchen. Swiss fondue parties were all the rage, Spanish paella became a fashionable dinner food, and homemade Italian tomato sauce consisted of garden-raised ingredients instead of the 1960’s version that often combined conveniences like ketchup and canned tomato soup. Cooking in the 1970’s revolved around excitement, a desire for authenticity and an interest in cultural awareness that is similar to the way we approach food today. Over the course of the year, it will be interesting to see how these vintage recipes compare to our modern palates and standards of both cooking and eating. It is often said that history repeats itself, I’m curious to see if that cliche applies to food as well.
I hope you join me each week in this around the world journey and discover some new favorite recipes yourself. We kick off the big adventure next Wednesday, January 8th, with our first country…
What’s on the menu for Armenia? You’ll just have to wait and see:) Until next week… cheers to the new year!
In the historic baking world, there’s a legend that springs from a yeast bread. Depending on the sources and the provenance of specific recipes, facts about this legend vary widely and wildly. In some tales, she’s a 17th-century girl, in others an 18th-century woman. She was French. She was English. She was colonial American. She was an ordinary teenager, she was a famous baker, she was a lowly domestic servant. She had a name that was either Sally or Solange or Madame or Marie. She was a real human being but she then again she was a fake and then yet again someone else’s flight of fancy. For three centuries, this baking icon has tumbled through time on the flimsiest of resumes. This is the story of Sally Lunn and a cake (or it might have been a bread) that made her famous.
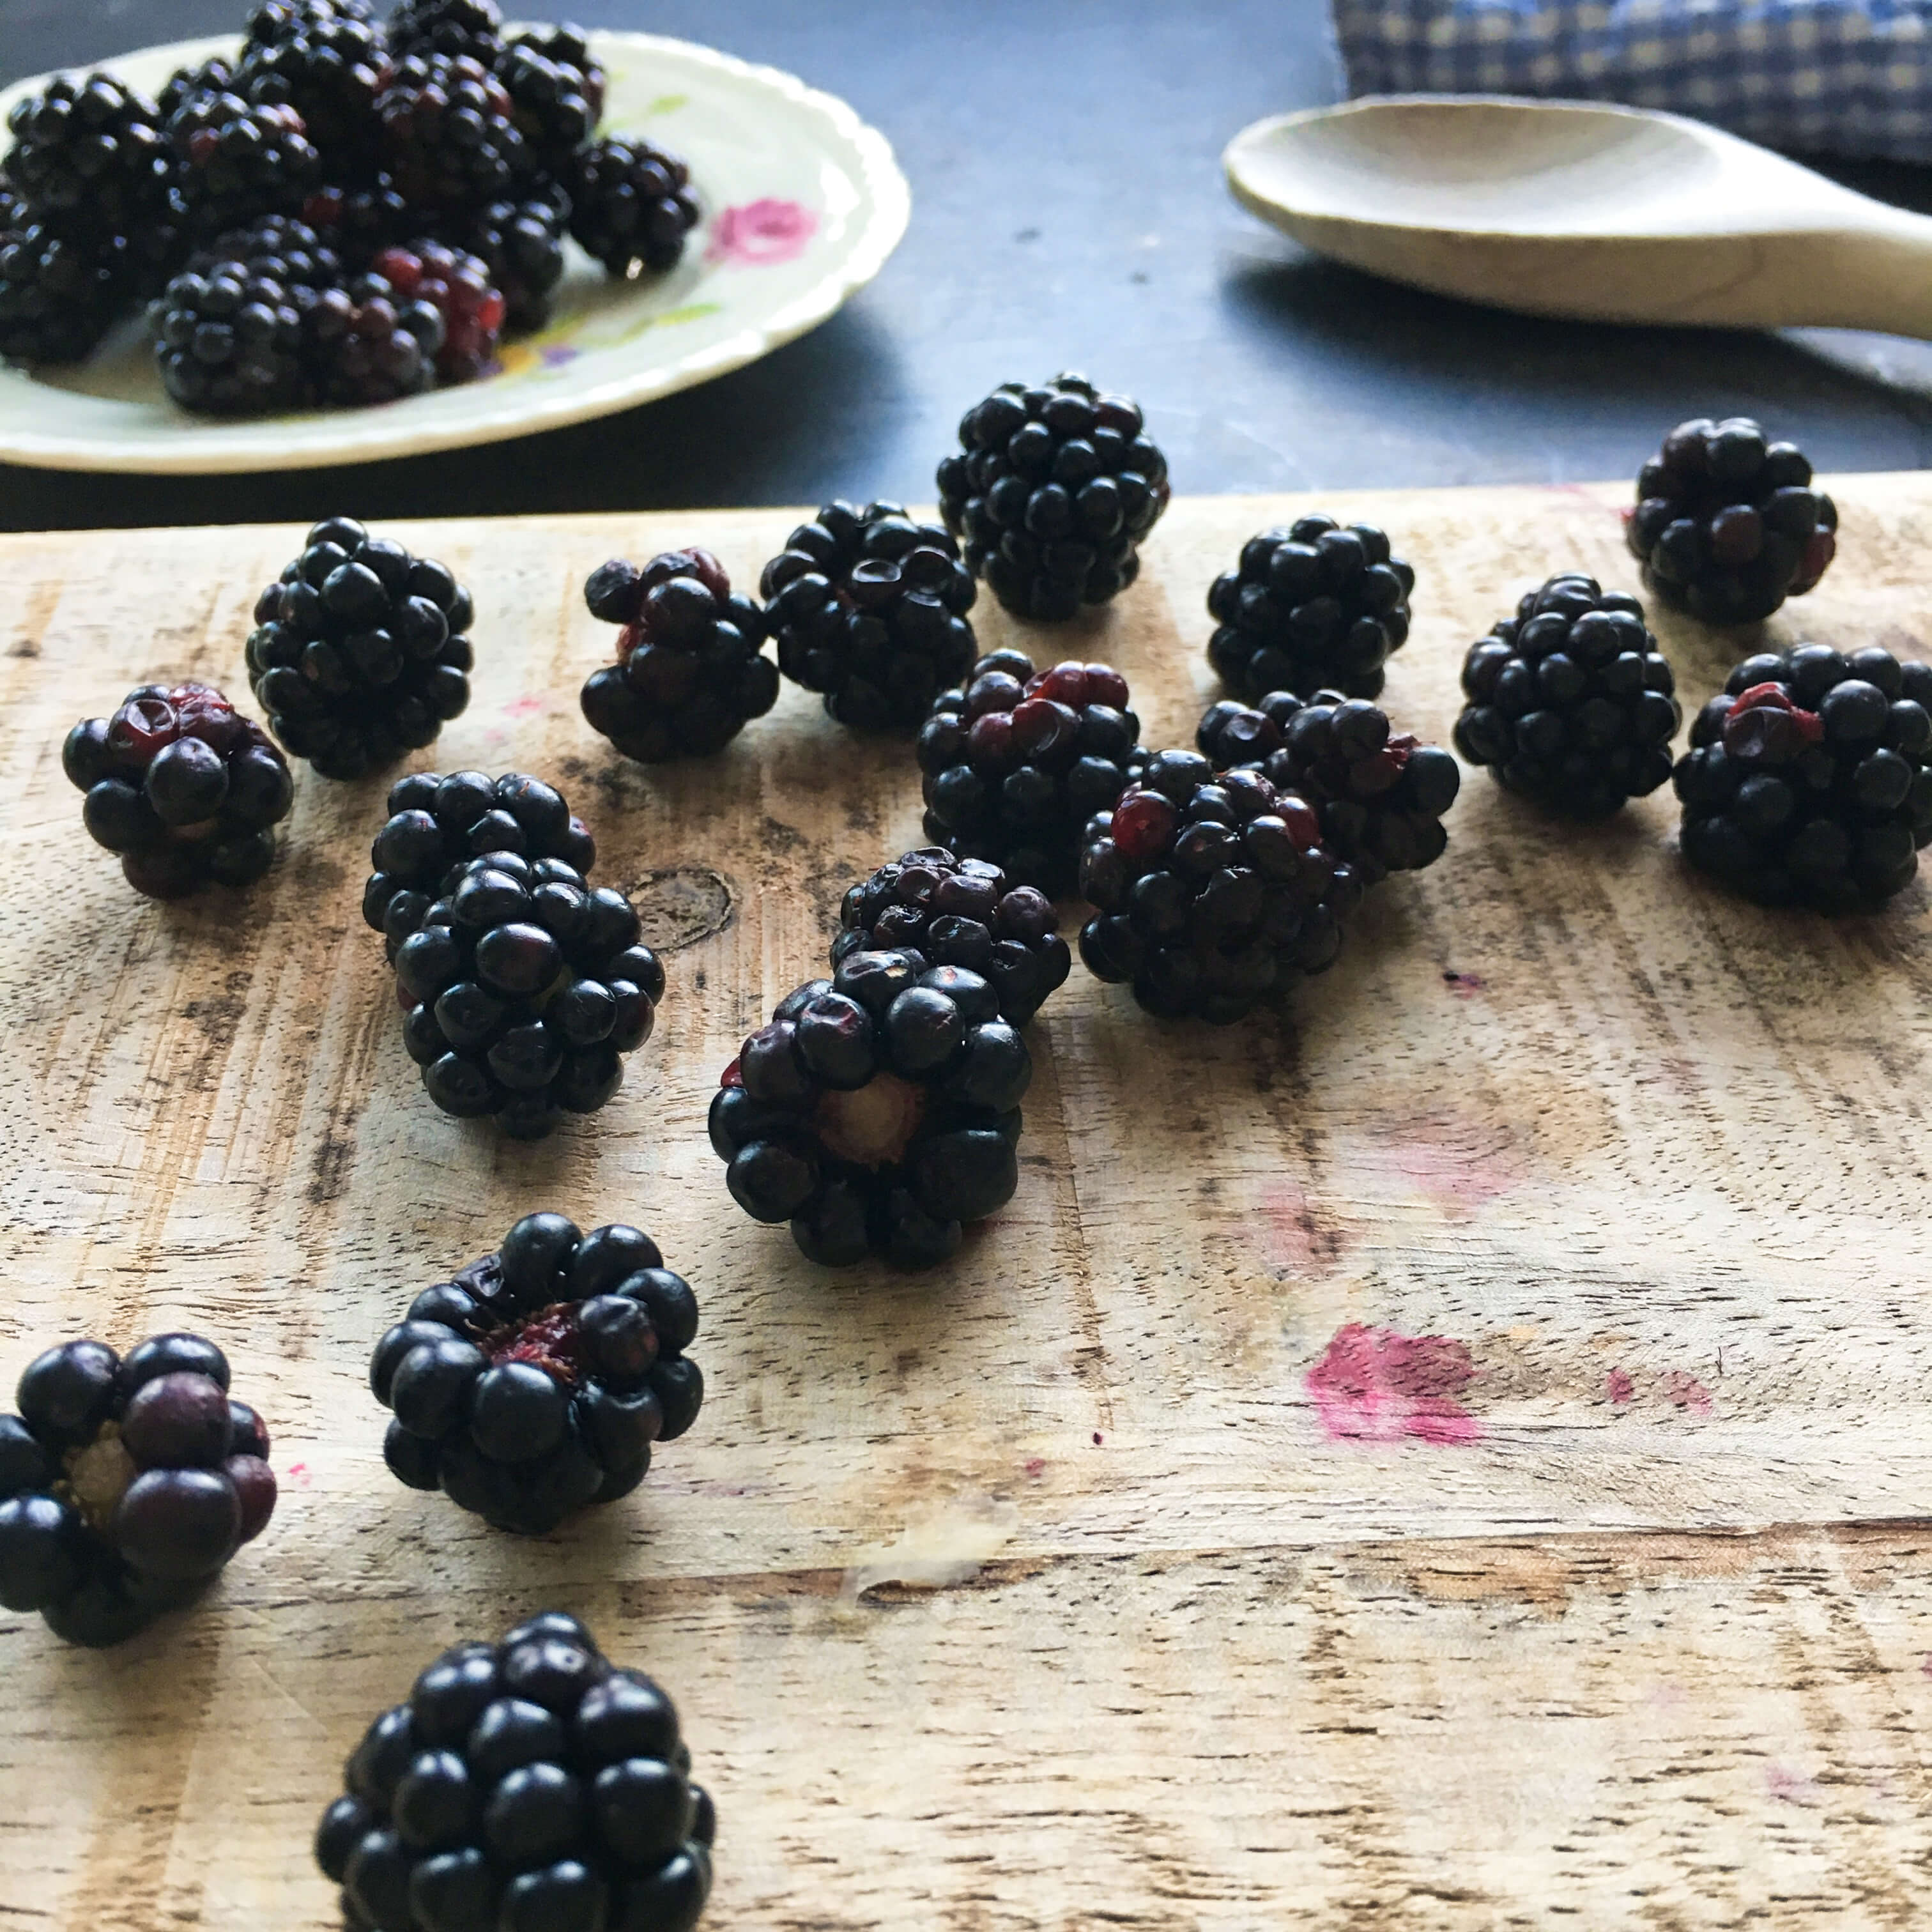
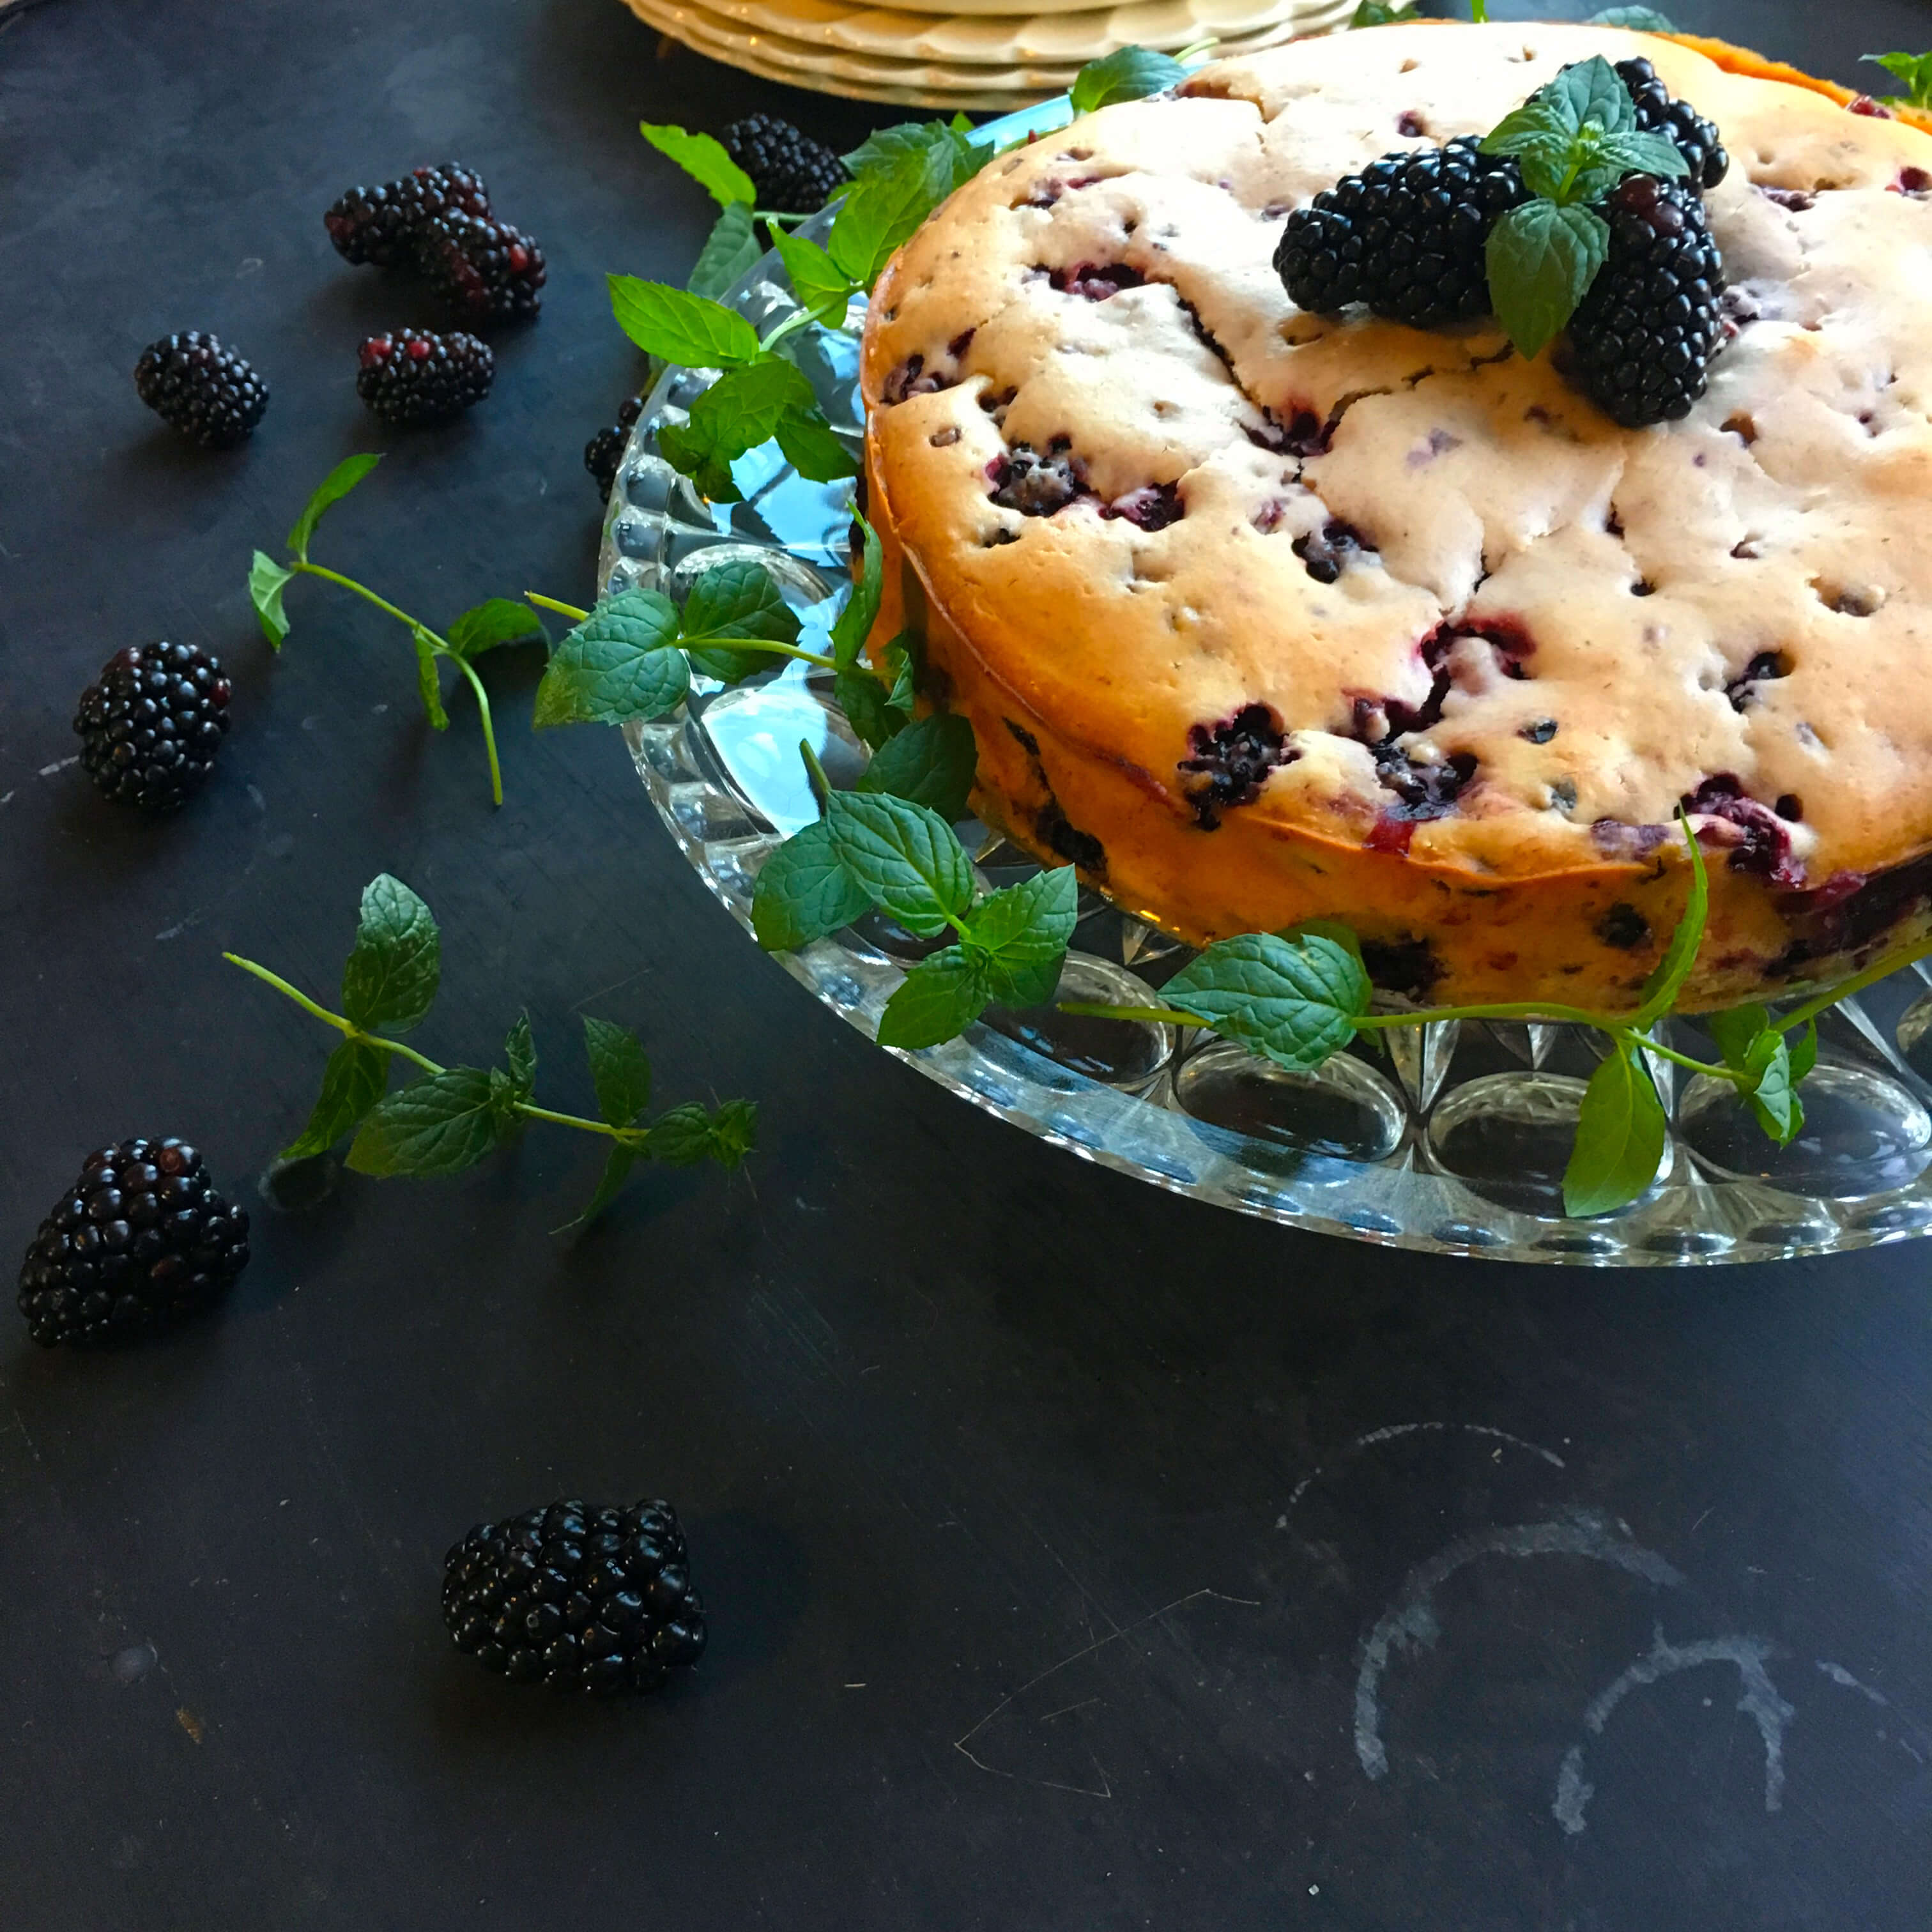
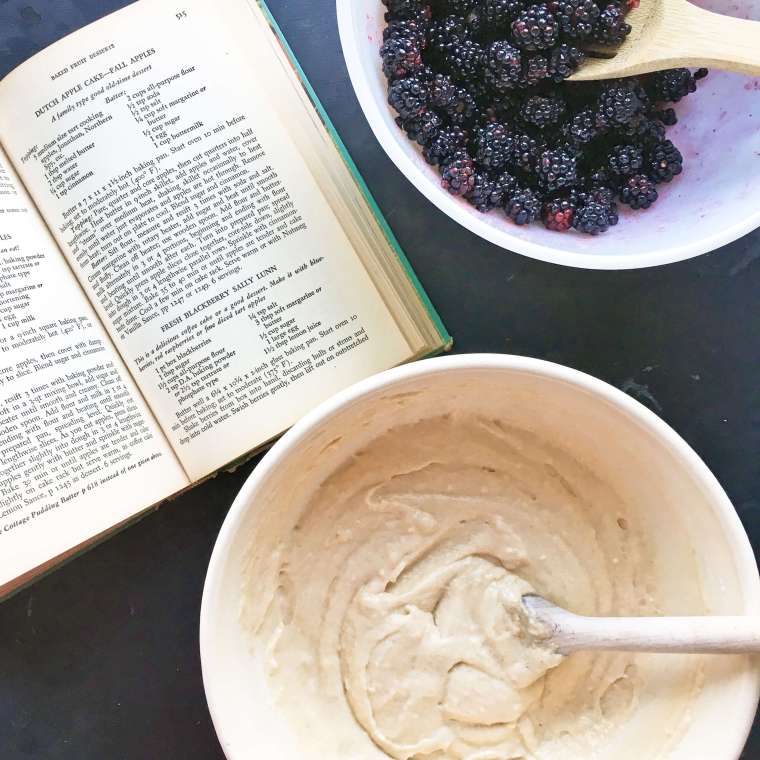
This weekend, after coming home from the market with a batch of blackberries that were so deliciously ripe they smelled like wine, I discovered a vintage recipe that is as difficult to describe as the lady it was named after. Called Fresh Blackberry Sally Lunn, it came from Meta Given’s 1957 Encyclopedia of Modern Cooking. Surprisingly, out of a stack of forty different vintage cookbooks spanning the early 1900s to the early 1980s, Meta’s book was one of just a few that contained any recipes for fresh blackberries at all. Homemade jam and blackberry pie unified the books that did include the fruit, but Meta’s was the only cookbook that combined blackberries with a cake in the name of Sally Lunn. I love any recipe that is unique and stands out. The name Sally Lunn sounded curious and since I’d never heard of her before I had a feeling this might be fun to share with you too.
Like the age-old conundrum of who came first – the chicken or the egg – there are two different variations of a baked good that purportedly made Sally Lunn famous. One was a yeasted savory bread that looks like a cross between a bundt cake and a hamburger bun…
The yeasted bread version from the Williamsburg Cookbook, 1981 editionAnother version – not quite as bun-like on the bottom. Photo also from the Williamsburg Cookbook, 1981 edition.
and the other is a sweetened tea cake that looks like something between a blueberry pancake and a cobbler…
You wouldn’t be wrong to call either variation a Sally Lunn, even though they are two completely different types of food. Because of that, her name has popped up in recipe titles in a myriad of ways. There’s the Sally Lunn Bun, Virginia Sally Lunn, Sally Lunn Bread, Sally Lunn Cake, Sweet Sally Lunn, and just plain old Sally Lunn among others. Likewise, in indexes, you’ll find her popping up under L for Lunn, S for Sally, or more specifically under category sections that include Cakes, Breads, Desserts, Baked Goods, Tea Cakes, Yeast Breads, Coffee Cakes, Coffee Breads, etc. So how could one possibly mythical person be identified with two types of very different yet specific baked goods over the course of hundreds of years?
As it turns out no one knows. And thus far it has been impossible to authentically identify any true source that leads to Sally and the bread and cake that share her name. Lots of ideas about her float around. She was a teenage maidservant named Sally Lunn who delivered a newly invented bread to her master of the house, who in turn delightfully named it for her. She was a talented French baker named Solange, who escaped to a bakery in England where she began to make a popular brioche-style confection that looked like the rising of the sun. She was a working-class woman in 18th century England crying out her name in the streets as a sales tool for the bread that became her trademark. There’s even a historic eating house in England that speculates they might have been the site of Sally’s original bakery in the late 1600s.
Sally Lunn’s Historic Eating House in Bath, England
I like to believe the theory that Sally Lunn was an actual baker living in 1700s England. The story details how she invented a sweet yeast bread that became very popular at first locally, then regionally, then across the sea. With this theory, it makes sense then that references to Sally Lunn would have shown up in early American cookbooks, a favored recipe brought over by the English as they colonized America. Possibly, at some point in history, when yeast either became too expensive, or there was a shortage, a non-yeast cake version was invented by some other creative and clever baker in the 1800s who used all the same ingredients of Sally Lunn bread minus the yeast. Thereby keeping the name Sally Lunn in the recipe title. By the time, the 1950s rolled around perhaps Meta made her own creative choice by marrying blackberries into the non-yeast version of Sally Lunn cake. Whether this is an accurate assumption or not, no one will ever know for certain unless some of Sally’s baking notes happen to show up. But with all this mysteriousness that surrounds Sally and her two contributions to the baking industry, I think she’d be happy knowing that at least her name stayed attached even though the origin story didn’t. It is, after all, the ultimate branding success story, 1700’s style!
Meta Given’s two-volume Modern Encyclopedia of Cooking from the 1950s
Meta Given was a legend in the culinary world in her own right. A nutritionist at heart, she set out to write some of the most comprehensive cookbooks of the 1950s that included recipes for people across the entire economic spectrum. Her books featured everything from thrifty staples like squirrel stew to elegant French dishes with layered sauces and nuanced flavors. Her mission was to make cooking fun, enjoyable, and accessible for everyone while also making it nutritious and creative. I’m so pleased to present her lovely sweet treat of a dessert that highlights the juicy, sun-ripened flavors of blackberries nearing summer’s end. What I love about this cake in particular is that it is pretty healthy – using small amounts of sugar, butter, and flour. The blackberries really keep the cake moist and add a familiar sweet-tart flavor similar to cobbler but with a velvety more dense consistency like a blueberry pancake. If you wanted to add an extra dash of sweetness you could drizzle the whole cake with honey or follow Meta’s suggestion of adding a lemon sugar glaze once the cake is out of the oven, but I loved it just as it was… simple and summery.
Meta Given’s Fresh Blackberry Sally Lunn Cake
1-pint box of freshly picked blackberries (enough for 2 1/2 cups)
1 tablespoon sugar
1 1/2 cups all-purpose flour
2 teaspoons baking powder
1/4 teaspoon salt
3 tablespoons salted butter, softened
2/3rd cup sugar ( I used raw cane sugar)
1 large egg
1 1/2 tablespoons lemon juice
1/2 cup sour cream*
1/2 cup whole milk*
(*Note – The milk measurement was left out of the original recipe, but was included in a revised edition in 1959. I used the sour cream/milk combination but you can also substitute those two ingredients for 1 cup of buttermilk).
Preheat oven to 375 degrees. Butter well an 8 1/2″ inch springform cake pan.
Drop berries into a bowl of cold water to rinse and remove any stems or leaf debris. Swish berries gently and then by hand remove them to a colander to drain. Once the berries have drained in the colander transfer them to a medium size bowl and gently toss them with 1 tablespoon of sugar. Set aside.
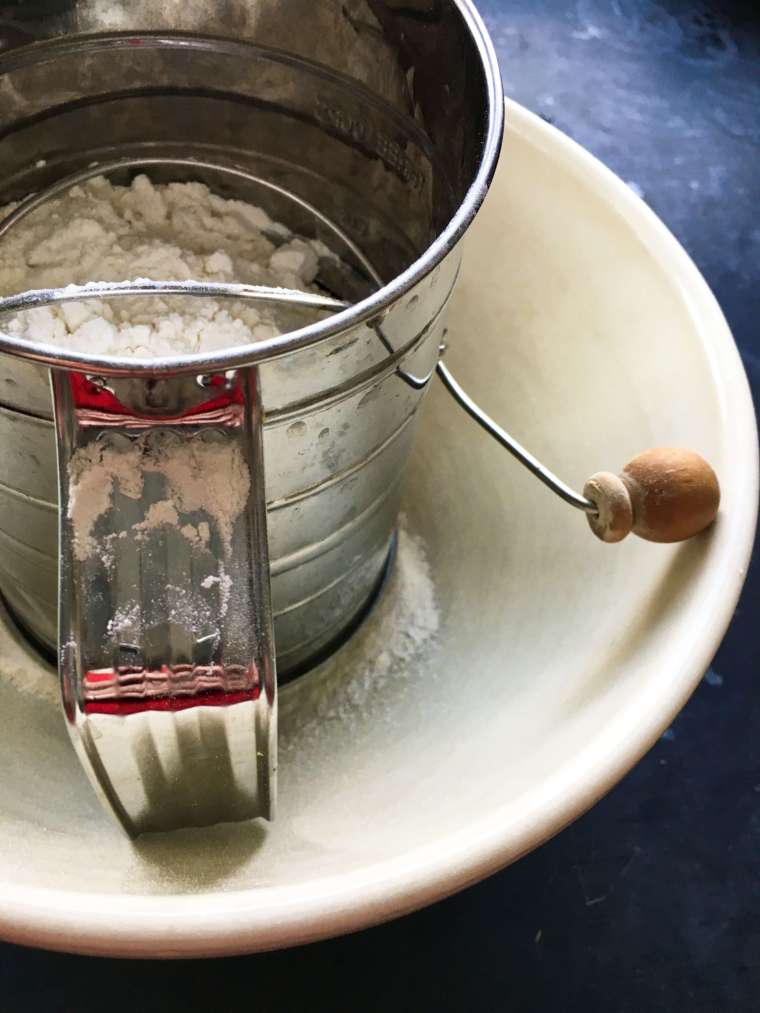
In a separate bowl, sift the flour, baking soda, and salt together. Set aside.
In another bowl, whip the butter, sugar, and egg together until creamy. Stir in lemon juice using a wooden spoon and then add the flour, sour cream, and milk, blending until smooth.
Gently fold in the blackberries until just well distributed. Turn batter into prepared pan.
Bake until golden brown (about 40-55 minutes) or until a toothpick inserted in the center comes out clean. Once ready to remove from oven, let cake cool slightly in pan on a cooling rack before serving either lukewarm or at room temperature.
In addition to enjoying the end-of-season fruit harvest this month, Fresh Blackberry Sally Lunn cake also freezes well. So if you choose that storage method you’ll still be able to taste the warm days of summer even on the coldest winter nights. And because it does have a pancake-esque quality to it, it wouldn’t be terrible to serve it for breakfast or even alongside a summer salad for brunch or lunch. This Fall, I’ll share the other version of Sally Lunn as we dive into bread-baking season to see how these two, and if these two compare in any way other than by name.
In the meantime, cheers to Sally and to Meta for baking delicious food that withstands not only multiple decades but multiple centuries too! If you are interested in learning more about Meta and her cookbooks, find a few in the shop here. The Williamsburg Cookbook will also be heading to the shop shortly as well, in case you want to catch up on your colonial fare before heading into the holiday season. Find that one coming to the cookbook section shortly. And finally, this cake was styled using the lovely vintage 1960s Italian cut glass cake stand which you can find in the shop here.
Happy August! As promised in the last post, here is the article written for Artisans List that highlights the beauty and joy of a vintage style picnic. We’ve got just six weeks left before Autumn officially starts, but rest assured that doesn’t mean that picnic season, as we most traditionally know it, is over. There are plenty of Fall foliage opportunities for all you Northerners intent on a day trip and a dine out in nature. If you happen to live in the Southern half of the hemisphere than lucky you – everyday is a good day for a picnic no matter what time of year. When we settle into the cooler months, I’ll also be featuring two outside of the box picnic ideas – the carpet picnic and the car picnic – both which promise to hold as much fun as their summertime counterpart. So stayed tuned on that front. In the meantime, six full weeks of summer still await. From somewhere I can hear a basket calling your name…
Twentieth century foodie, gourmand and all around good cook, James Beard declared that “picnicking is one of the supreme pleasures of outdoor life.” Indeed. No other dining experience seems quite so decadent. The fresh air, the natural setting, the creative food choices, the deliciously idle intentions. Picnics have a wonderful way of engaging all of our senses in such a fantastic way. It’s almost overwhelming.
Those first few moments at picnic’s start – when you are dizzy with the view and the weather and the notion of doing nothing but relaxing and reveling in food and friends – is satisfaction enough. But then a truckload of simple delights follow one right after another. There is that liberating sensation of kicking off shoes and wiggling bare toes in soft grass. The crisp, snapping action of the picnic blanket as it unfurls from containment, joyfully sailing on the breeze before floating to the ground. There is the laying out of the carefully wrapped food parcels and the first sip of a celebratory toast. The giddy laughter, the bird songs, the sound of leafy trees dancing on the breeze… suddenly you are aware of the musical vitality of nature and yourself in it.
On a picnic, the world shines newly bright with details mostly overlooked in the hustle bustle routine of everyday life. It is an activity that encourages you to stop and to breathe and to melt – into your surroundings, into your friends, into the food that makes up your lunch or your dinner or your breakfast time snack. Yes, picnics are a triumphant and pleasurable experience. And there’s no better season for them then right now. In today’s post, we will be discussing the art of of the vintage picnic – how it came to be, how it shaped us, and why we still need to celebrate it now. Highlighting a handful of old, but still very relevant recipes, this post also offers suggestions on how to build your own vintage picnic experience so that you too can succumb to the relaxing style of outdoor eating that our ancestors favored so long ago. It’s history in a most delicious form, unveiled, just as we are about to round the corner towards the 4th of July, the most popular picnic holiday of the year.
This idea of eating outdoors from a basket on a blanket is no trend. It has been around for centuries and has taken eaters on a plethora of picturesque adventures. But it wasn’t always a simple act. At first, outdoor dining began in grand style. Lavish entertaining in lavish settings. In the 1700’s, there were the hunting after-parties which made glorious outdoor feasts of animals bagged from the day’s sport. Garden gatherings in the 1800’s involved fine china, silverware and fancy dress. Plein air luncheons in the early 1900’s focused on seasonal foods, artistic creativity and exquisite manners. Today, picnics involve technology fueled cooling mechanisms, compartmentalized backpacks and fitted amenities made for details and devices. Needless to say, the desire to picnic has never been lost, but the way we eat outdoors has evolved quite a bit over time.
Nowadays, anything goes when it comes to picnic style and presentation. An impromptu paper bag lunch for two in a city park can be just as engaging as a thoughtfully prepared country basket for six. But just like any activity worth doing, there is a certain art form to a well produced picnic that makes for a more pleasurable experience. The vintage-style picnic favors china plates and real glassware, classic cocktails and linen napkins, and most importantly, homemade food. It is the sort of affair that wraps you up in a long, restful lazy day adventure fueled with time-honored tradition and attention to detail. It discourages anything fast or obtuse- like technology and frenzied time schedules and plastic utensils. It champions a slower, simpler and more relaxing rhythm. The type of experience that not only feeds your appetite but also your senses, your spirit and your sanity. Basically, a vintage-style picnic is a big, long break in your day meant for resting, relaxing and restoring through small details… the time-worn touch of an old plate, the taste of an heirloom recipe, the time-out of technology, and the tune in to your natural surroundings.
Legend loosely states that the word picnic stemmed from the French pique-nique which derives from the action of picking and selecting small spots or things. Originally, pique-niques were more like potlucks, in that all invited guests were asked to contribute a little food or drink for the group to share together. But it was England, in the 19th century, not France who created the picnic in the modern sense that we know it as today. Both a mealtime and a leisure activity, the English made picnicking a deliciously long-term and lengthy event that could last all day and well into the night if done right. They played games, read books, plucked instruments, talked, sang, painted, swam, flew kites, played sports and generally just all around enjoyed themselves while snacking on small plates of assorted foods from wicker hampers and baskets.
Monet’s painting, Le Dejeuner Sur L’Herbe (Dinner on the Grass) was painted between 1865 and 1866.
In America, prior to the Civil War, there were no lackadaisical, carefree picnic outings. If any outdoor eating occurred before that time period, it was eating en masse – generally a large sociable event where whole communities of people turned out to enjoy a barbecue or a church social or a political rally. The Victorians ushered in more intimate, family-style picnic parties, rambling in close proximity to home, as their appreciation of nature and outdoor enthusiasm bloomed in the late 1800’s. But the rise of the automobile, the building of the U.S. highway system, and the introduction of drive-up motor lodges and nationals parks all encouraged a whole new independence when it came to on-the-go eating as the 20th century began. Suddenly, the English style picnic took hold as Americans began exploring their more easy-to-navigate country. Economical, spontaneous and available to everyone, picnics naturally turned destinations into dining opportunities. All you needed was a basket, a blanket, a small collection of foodstuffs and an adventurous spirit. Outdoor eating euphoria had arrived!
A group of picnickers photographed in 1914 by Albert M. Price. Photo credit: Library of Congress
Back in earlier centuries, outdoor eating meant bountiful quantities and dramatic fare. Whole animals roasted over fire pits, multiple courses served by domestic staff, exotic ingredients, rich foods, elaborate presentation. But as outdoor dining began to evolve over time into smaller parties and simpler affairs, the food that accompanied it changed also. As serving staffs diminished and people became more independent, picnics and the baskets they represented, became simpler – filled with foods that could be easily made, easily transported and easily unpacked. By the time the mid-20th century rolled around, there was a definite type of picnic fare anticipated and defined by the activity. Fried chicken, salads and deviled eggs topped the favorites list, along with hot dogs, sandwiches, pies, cakes, bread and fruit.
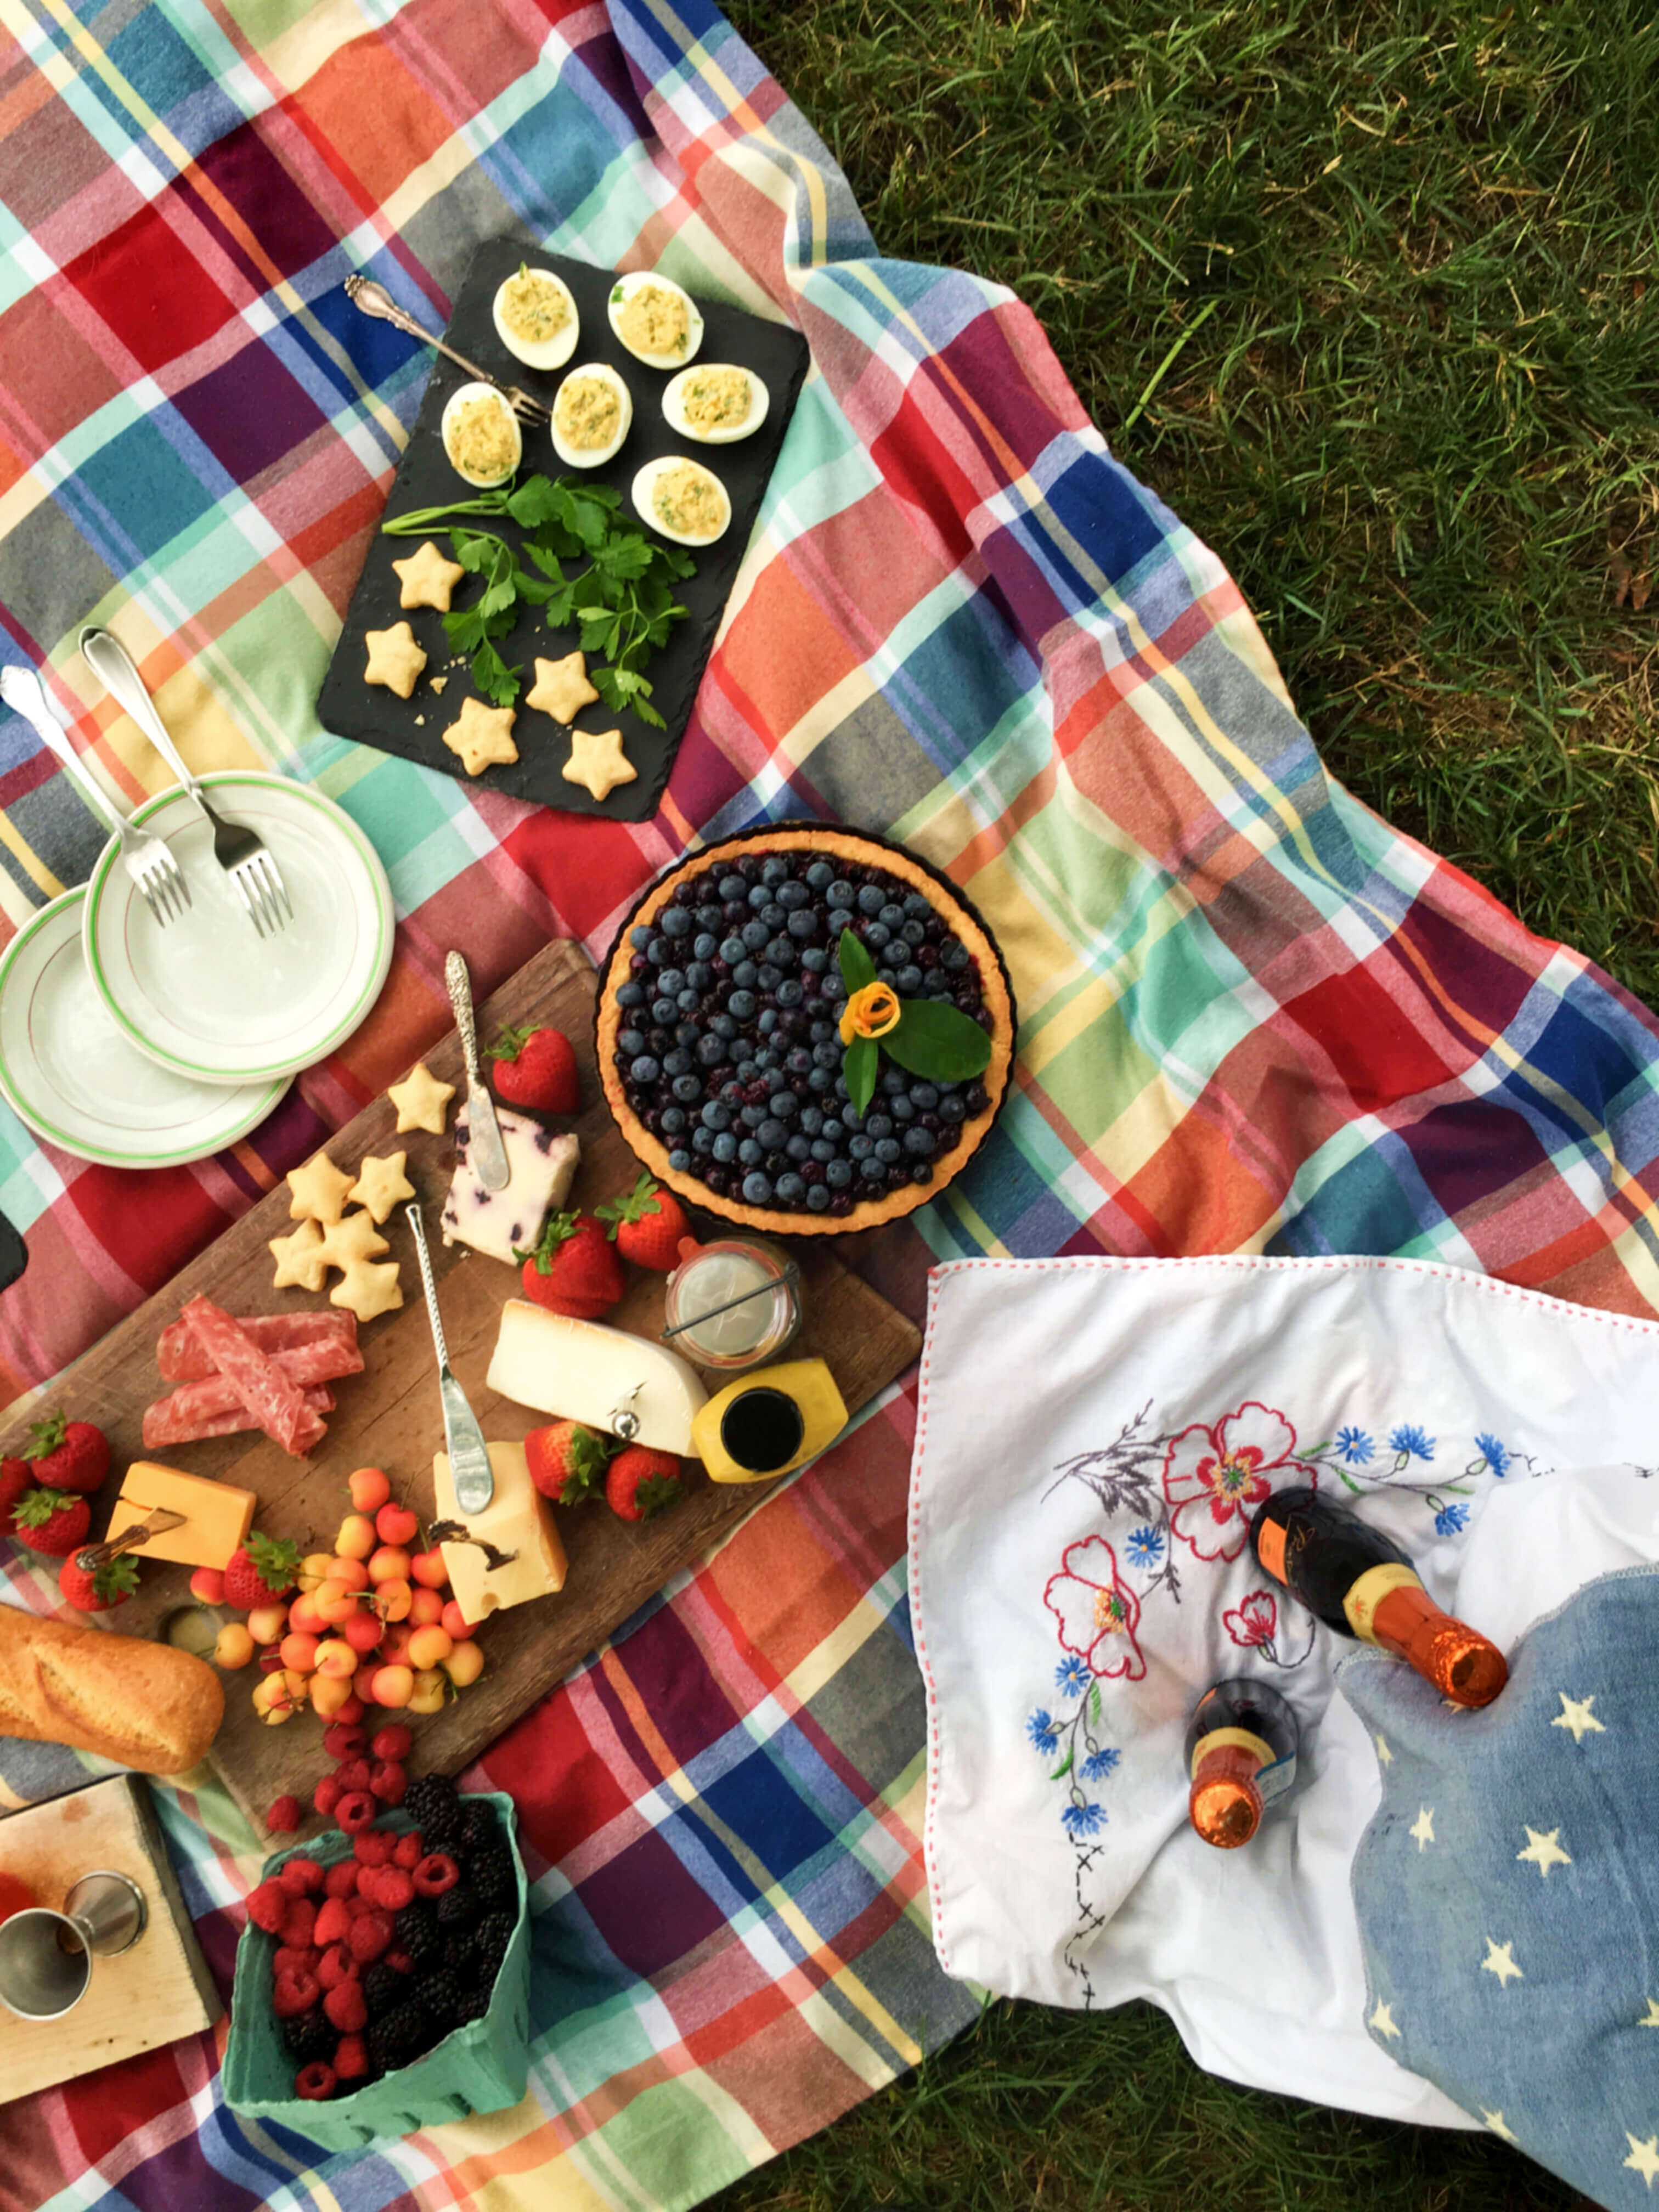
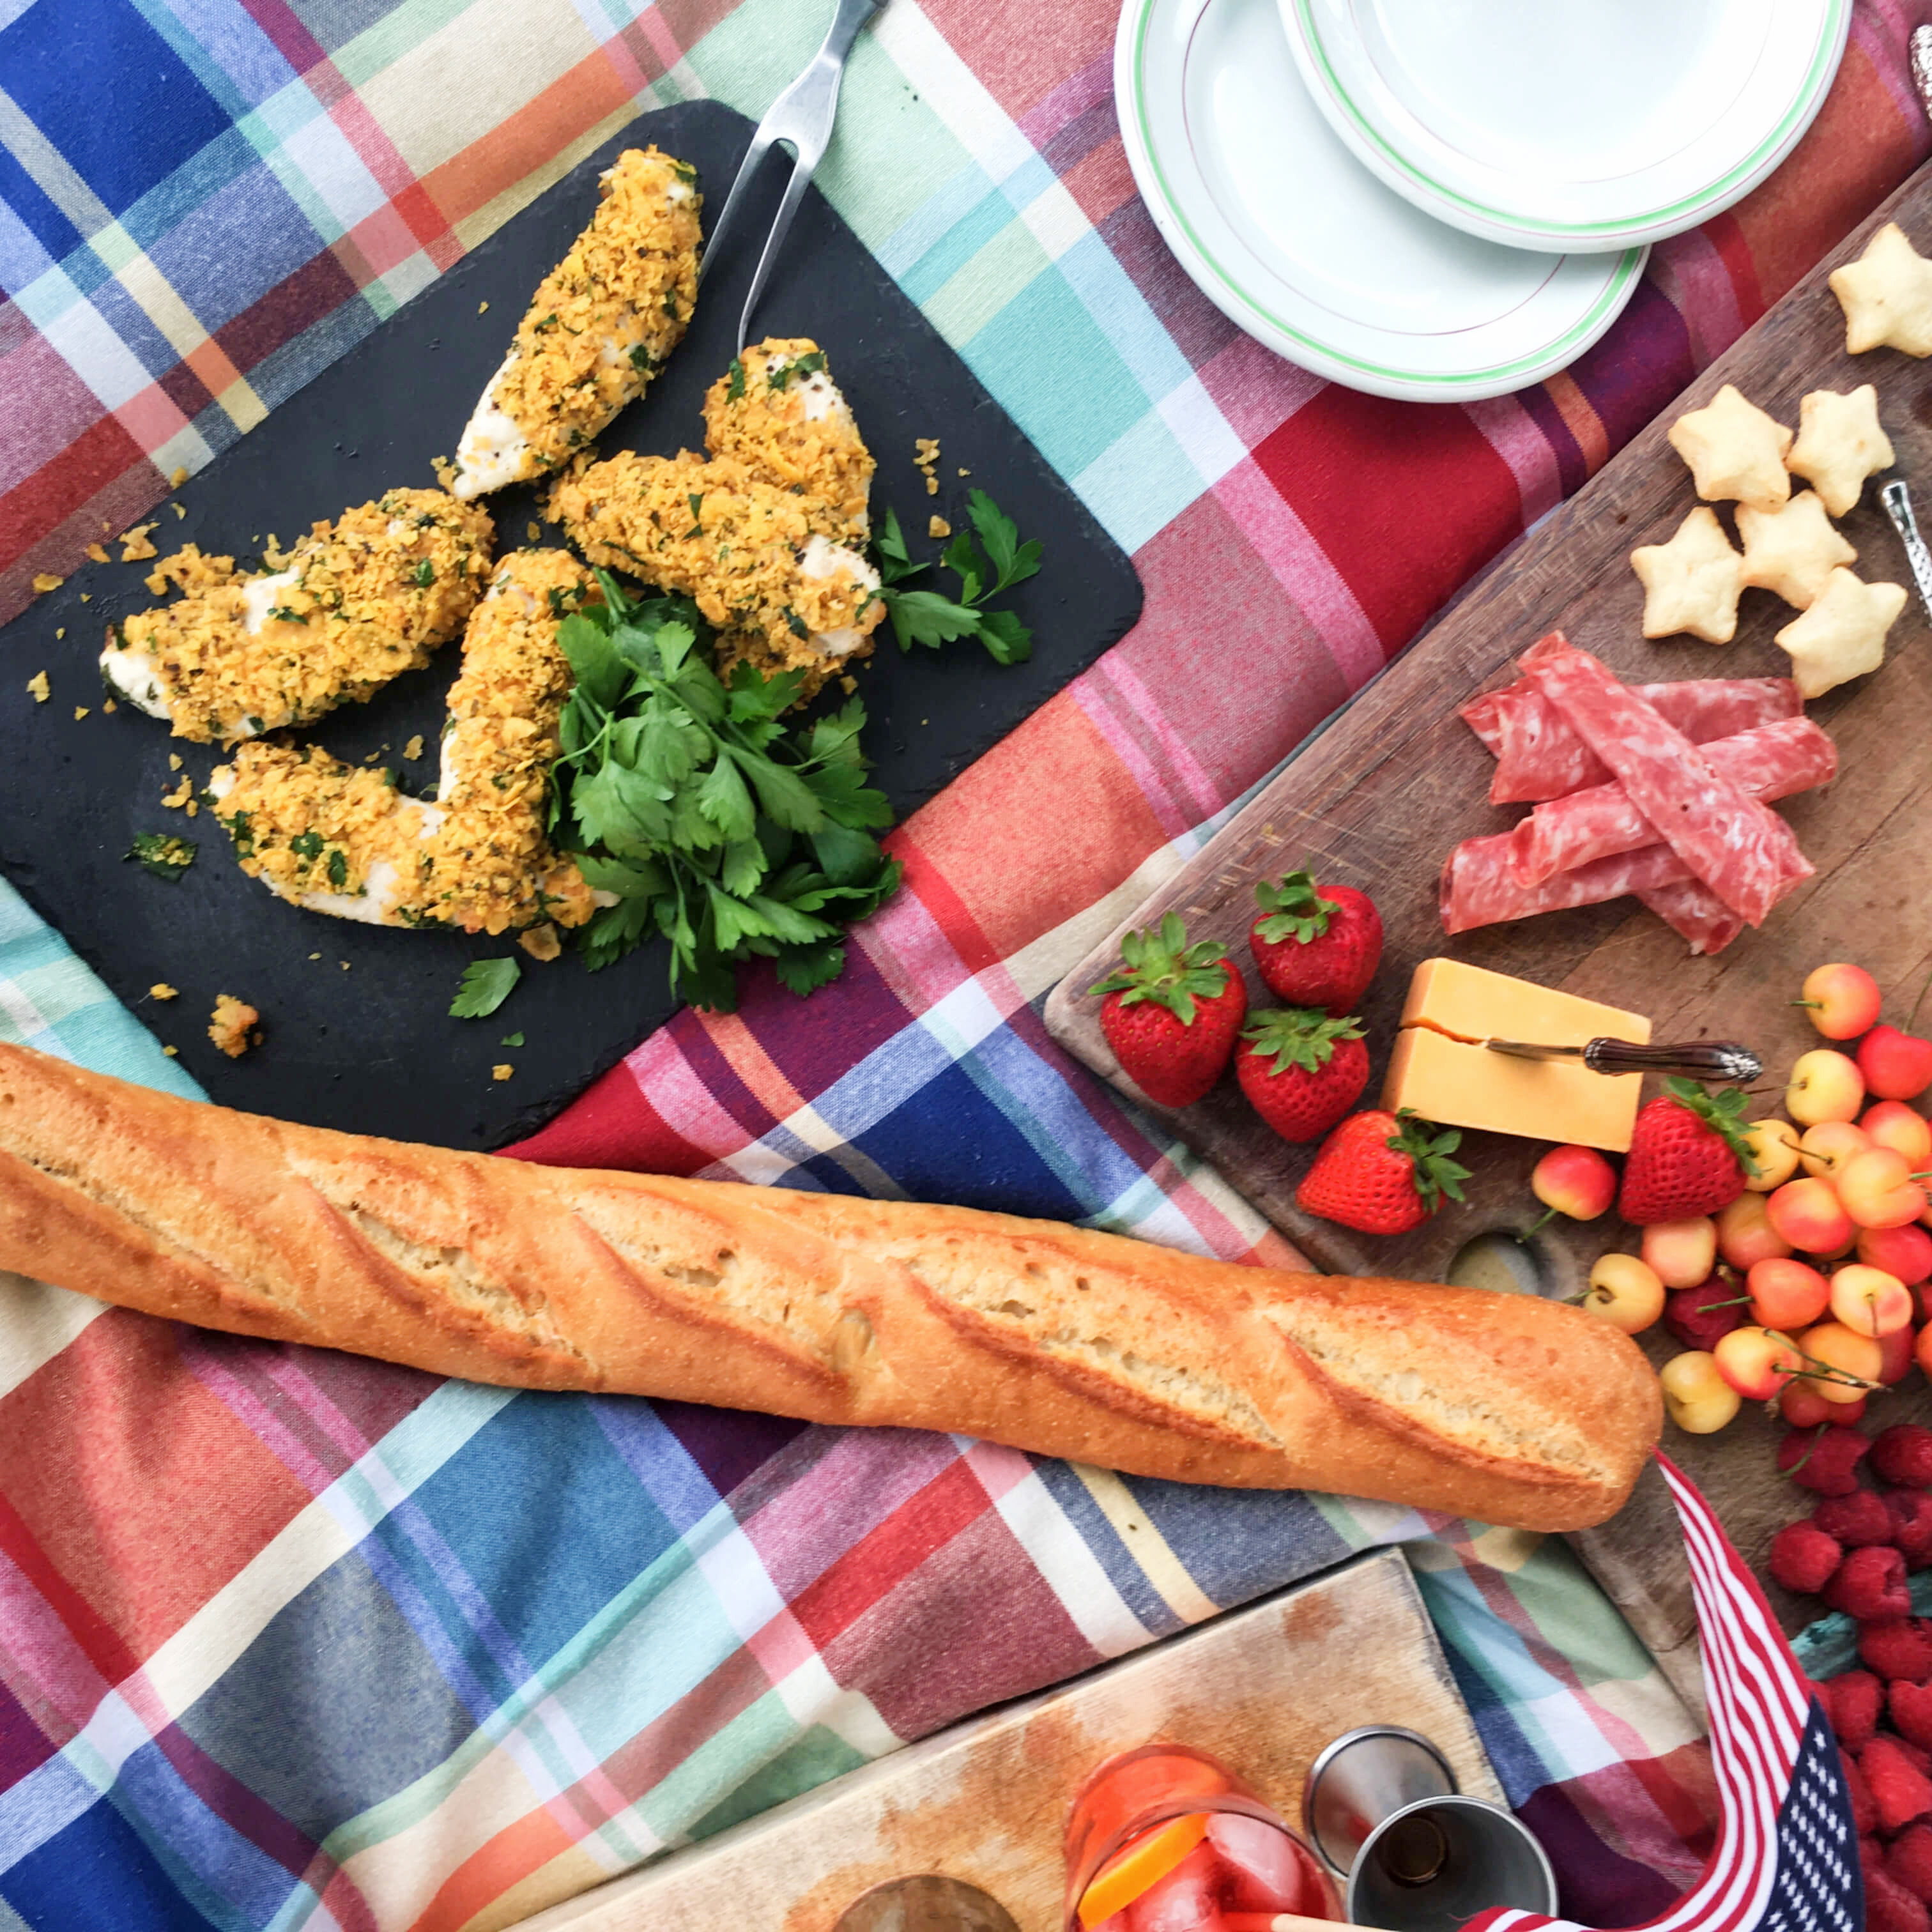
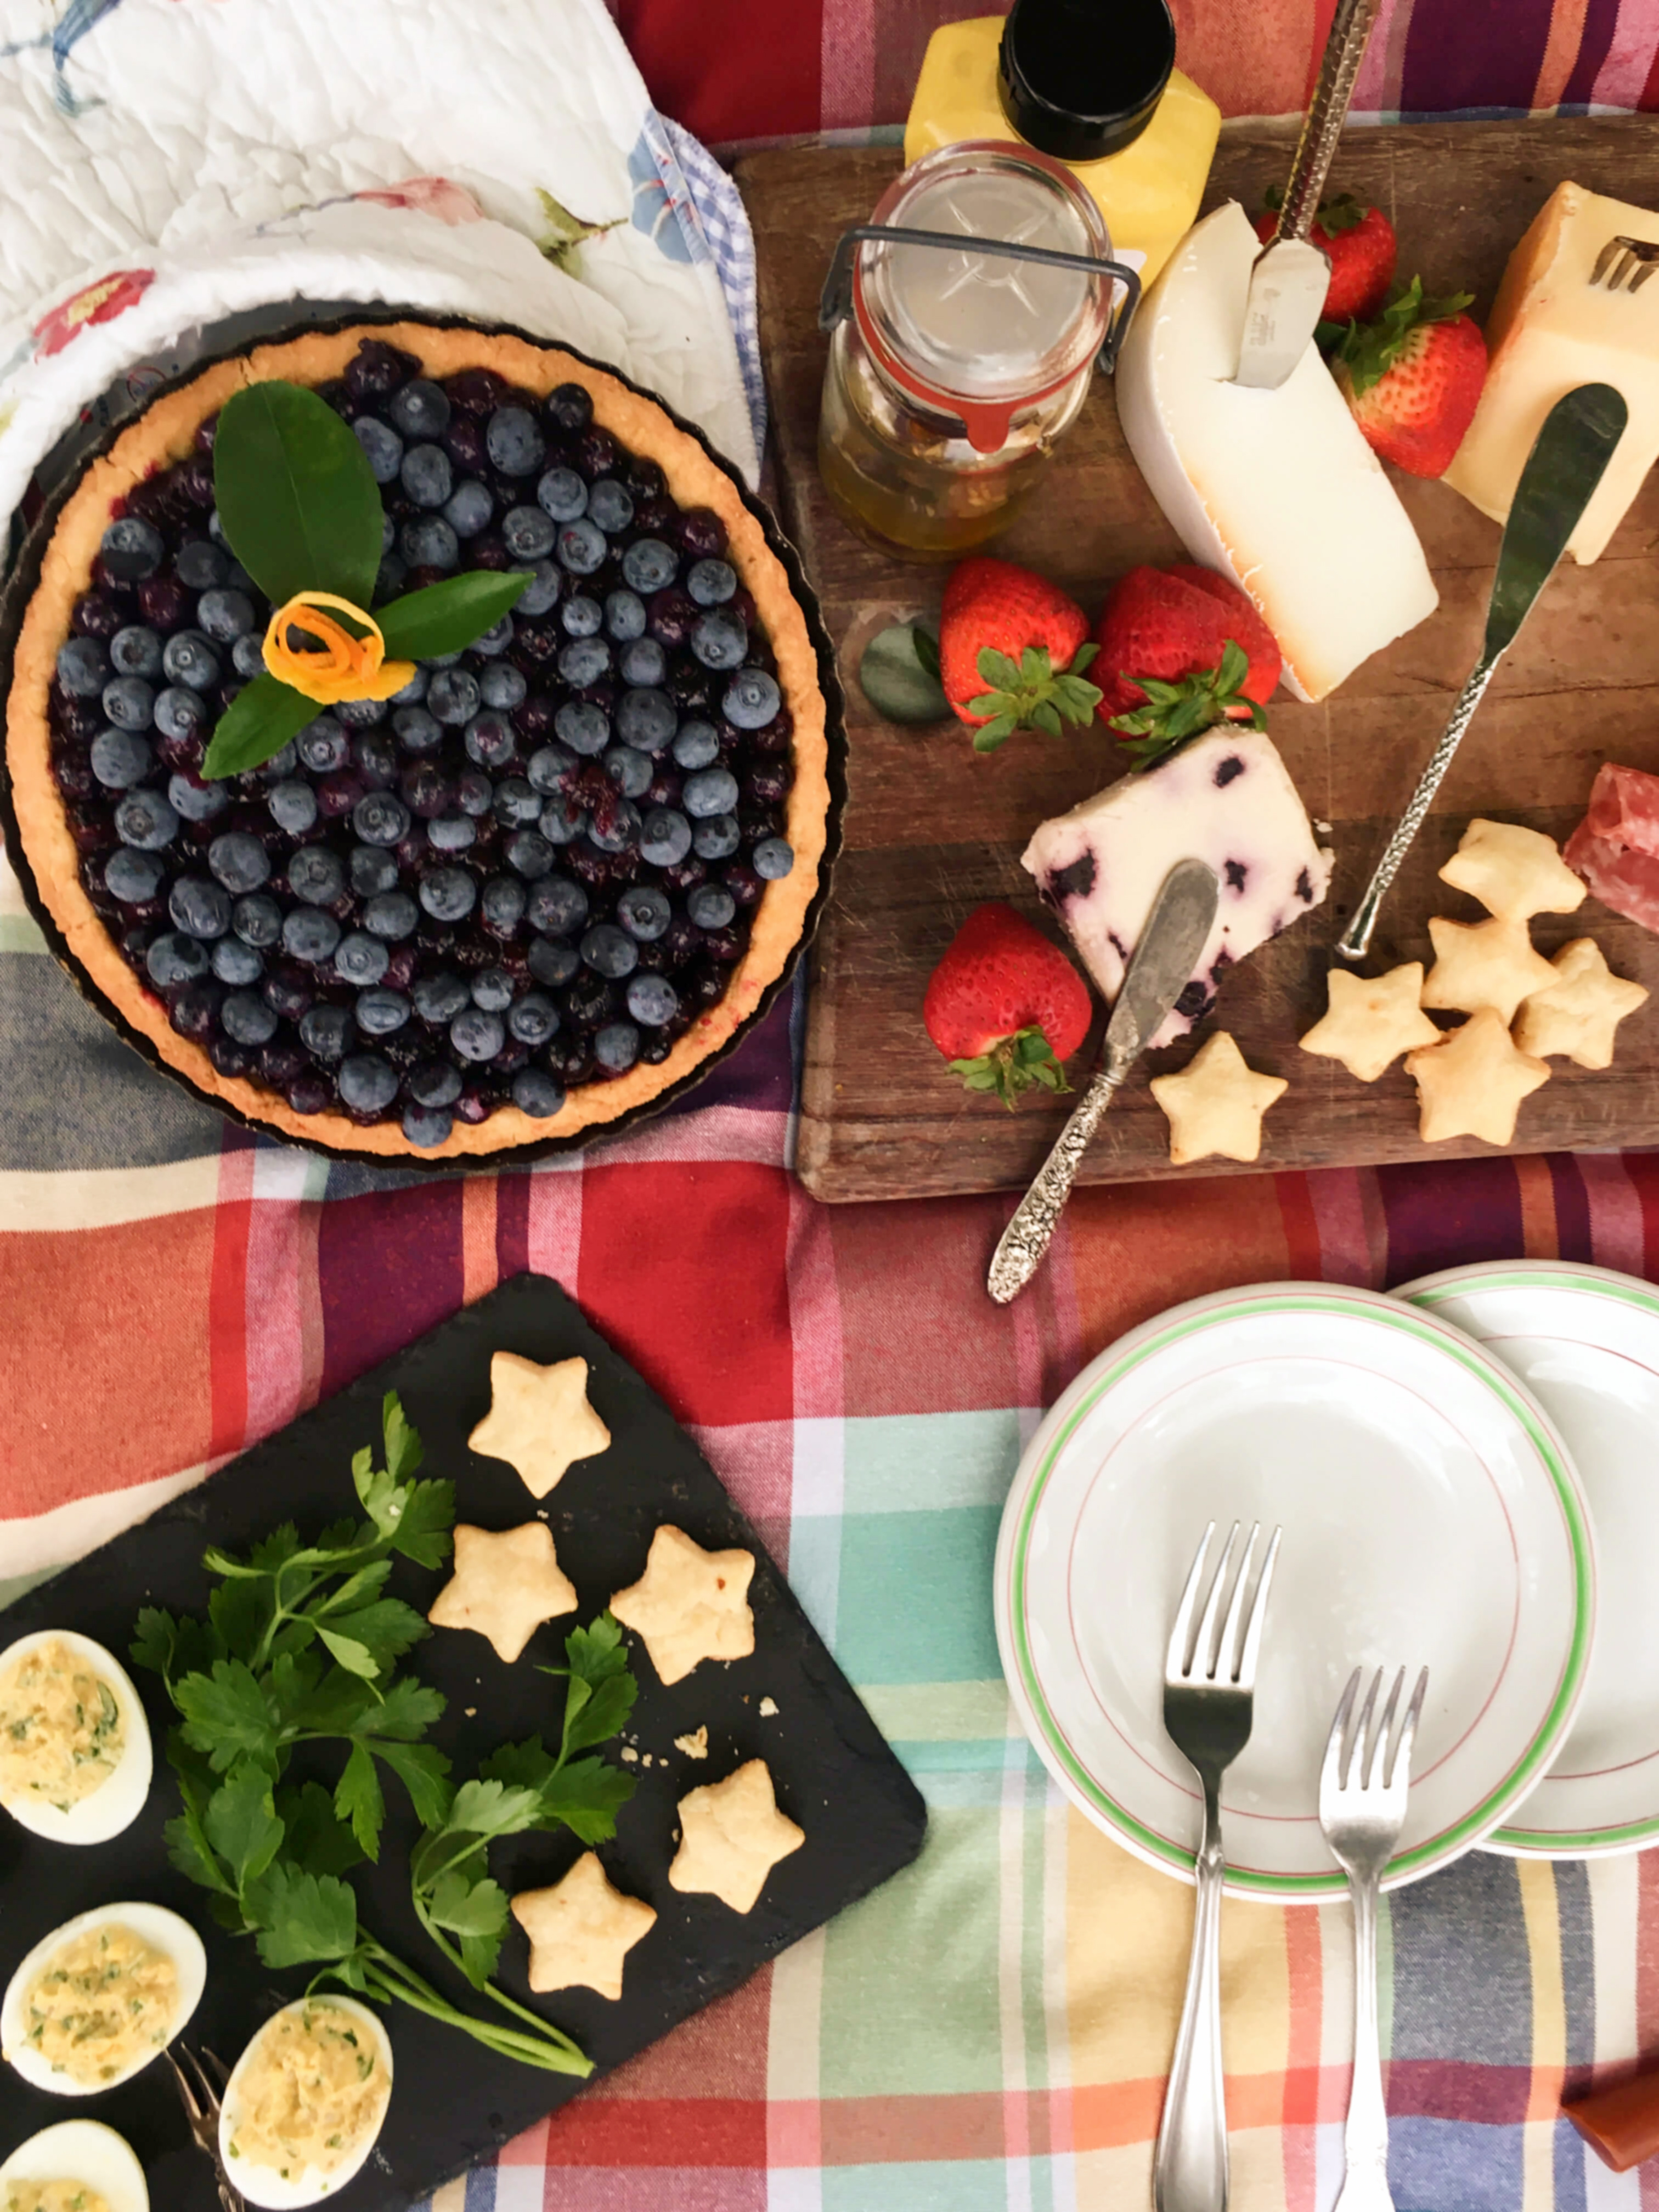
The picnic basket spread out before you in this post highlights vintage recipes that capture that same essence of familiarity and practicality, while also providing a well-rounded balance of flavors and tastes. Vintage recipes include Sicilian-Style Marinated Olives, Oven-Fried Chicken, Deviled Eggs, Cheese Straws and Blueberry Tart. Americanos join the party as a refreshing aperitif to toast the season and the stars.
Ranging from the 1960’s to the 1980’s, these recipes came from a handful of treasured vintage cookbooks. They pair gourmet creations from famous chefs like James Beard with regional favorites from lesser-known sources, like the ladies of the Junior League of Huntsville, Alabama. Covering all matters of taste from sweet to salty, savory to sour, they are considered traditional picnic foods, but each contains an unusual twist in the form of a cooking method or an ingredient pairing that makes them both interesting and innovative. Whether you make all of these recipes at once for your next outing or just focus on a dish or two to sample and try, you’ll discover that all of these options listed here are steeped in simplicity. Almost all of them can be made a day or two ahead of time, so that your restful day of picnicking doesn’t include you running around the kitchen like a crazed cook.
And, just one more note before we get to the recipes. While food is obviously the main attraction in a picnic, the vintage-style picnic places just as much importance on the accessories that go along with it as well – a.k.a. the servingware. While it is true that we may no longer entertain as formally as we did in centuries past, there is something lovely about incorporating some little niceties into your basket in the form of linen napkins, china plates and glass drinkware. These details add an elevated aesthetic to your picnic that reflects the elegant English versions of yesteryear, and really just makes for a nicer overall dining experience. A cocktail enjoyed from a plastic cup or a homemade dessert pierced with a plastic fork is never quite the same experience as using real glass and real flatware. Even James Beard agreed about that point. “Skimp on all the other dishware if you have too – but never on the glassware for your cocktail,” he advised.
A few vintage items featured in this post are a handwoven picnic basket from the 1930’s, a matching set of W.H. Grindley hotelware salad plates made in England (also in the 1930’s) and a handful of embroidered vintage linens in various shapes and sizes. Vintage restaurantware dishes in general are a great choice for picnics because they are heavy duty and aren’t quite as fragile as delicate ceramic or porcelain dishes. Salad plates or bread and butter plates are also the perfect size for your small snack needs and aren’t as bulky to pack as dinner sized equivalents. Likewise, vintage tablecloths make ideal picnic blankets thanks to their soft fabrics (decades of washing and drying!), variety of sizes and nostalgic designs. As you build your vintage accessories collection, you’ll also notice that these elements have a fun way of engaging people in conversation too. Each item in your basket expresses its own unique story. When packing all these elements up I like to designate the sturdy picnic basket for fragile foods, a separate tote bag for the servingware and linens and an additional tote for drinks and ice. That way everything remains intact from the moment you leave your kitchen to the moment you arrive at your destination.
Americano (serves 1)
1 1/2 oz. Campari
1 1/2 oz. Sweet Vermouth
3 oz. Club Soda
Ice Cubes
Twist or Slice of lemon or orange for garnish
Add the Campari and vermouth to an old-fashioned glass. Add ice cubes and club soda. Stir to combine. Garnish with a slice or twist of lemon or orange.
Marinated Olives, Sicilian Style (from the Silver Palate Good Times Cookbook, 1985)
1 pound Ligurian, Nicoise or Greek Olives or a combination, drained
8 cloves garlic, cut lengthwise in half
Zest of 1/2 orange
Zest of 1/2 lemon
2 tablespoons fennel seeds
1 tablespoon chopped fresh rosemary
1/2 cup fresh lemon juice (about 2 lemons)
3 tablespoons olive oil
Combine olives, garlic, citrus, fennel and rosemary in a large bowl. Drizzle with lemon juice and oil. Marinate, stirring occasionally at room temperature at least 24 hours.
Cut the hard-boiled eggs in half and remove the yolks to a small bowl. Mash yolks with sardines, onion and parsley. Blend with mayonnaise until you reach ideal consistency then fill each egg half. Chill in fridge until ready to pack into your picnic basket. These can be made up to 24 hours in advance. * If you don’t have a portable egg carrier, disposable muffin tins make a great alternative.
1/3 cup butter, melted but cooled to room temperature
6 cups corn flakes, crushed
Preheat oven to 375 degrees. Combine the garlic, salt, pepper, herbs, parsley and melted butter in a shallow dish and mix thoroughly. In a separate shallow dish add the crushed cornflakes. Dredge each piece of chicken on both sides in the butter mixture and then coat them on each side in the cornflakes. Place the prepared chicken on a lightly greased cookie sheet and bake for 20 minutes or until chicken is golden brown and crispy. *Note: This chicken recipe will loose its crunch factor the longer it sits. So if you are picnicking, this should be the last dish you make before packing the picnic basket and heading out the door. That being said, it’s still wonderful hours later or even the next day, but the corn flake coating will have a more breaded consistency rather than a crispy crunch.
1 lb. New York State sharp cheese (or any sharp cheddar), grated
3/4 cup butter
2 cups flour
1 teaspoon salt
1/2 teaspoon red pepper
smoked paprika for garnish
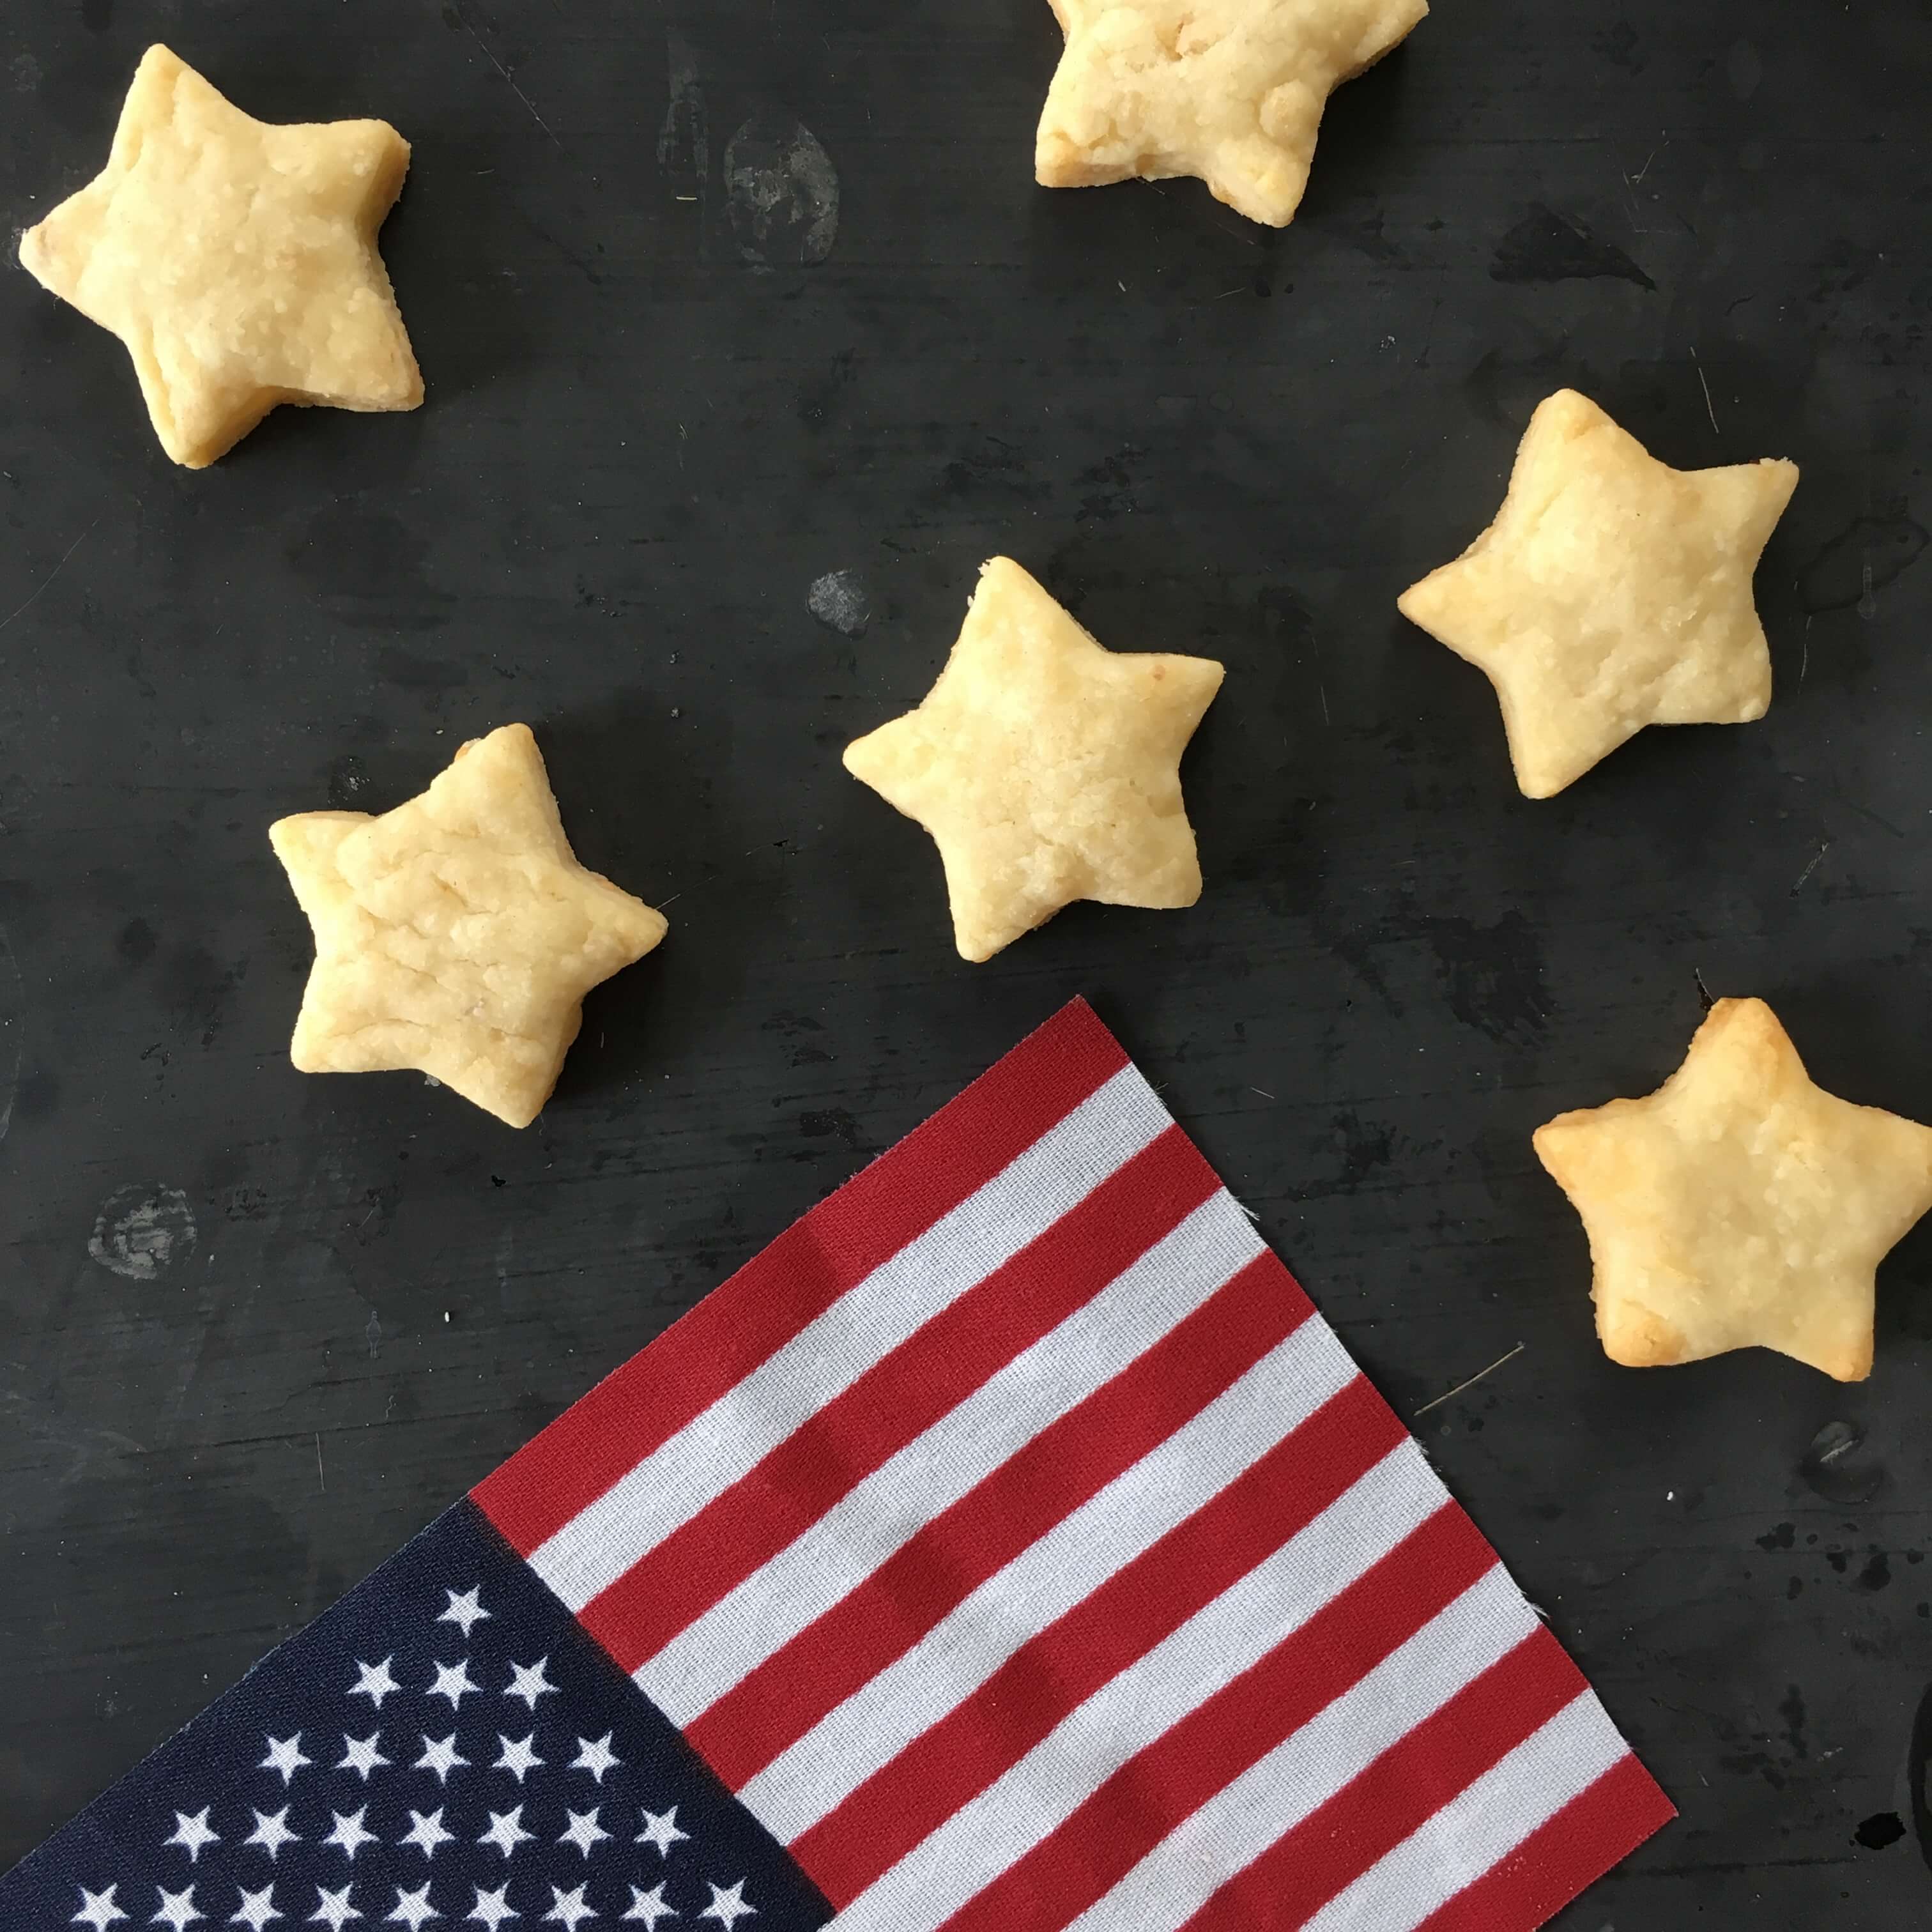
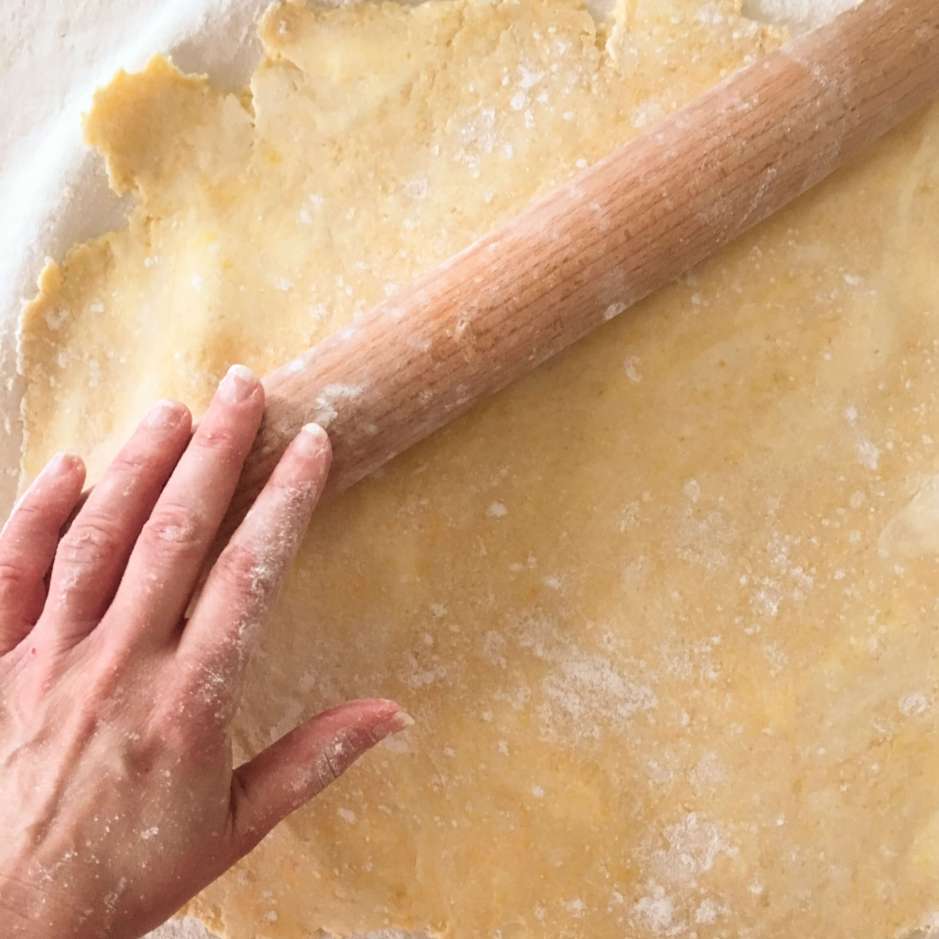
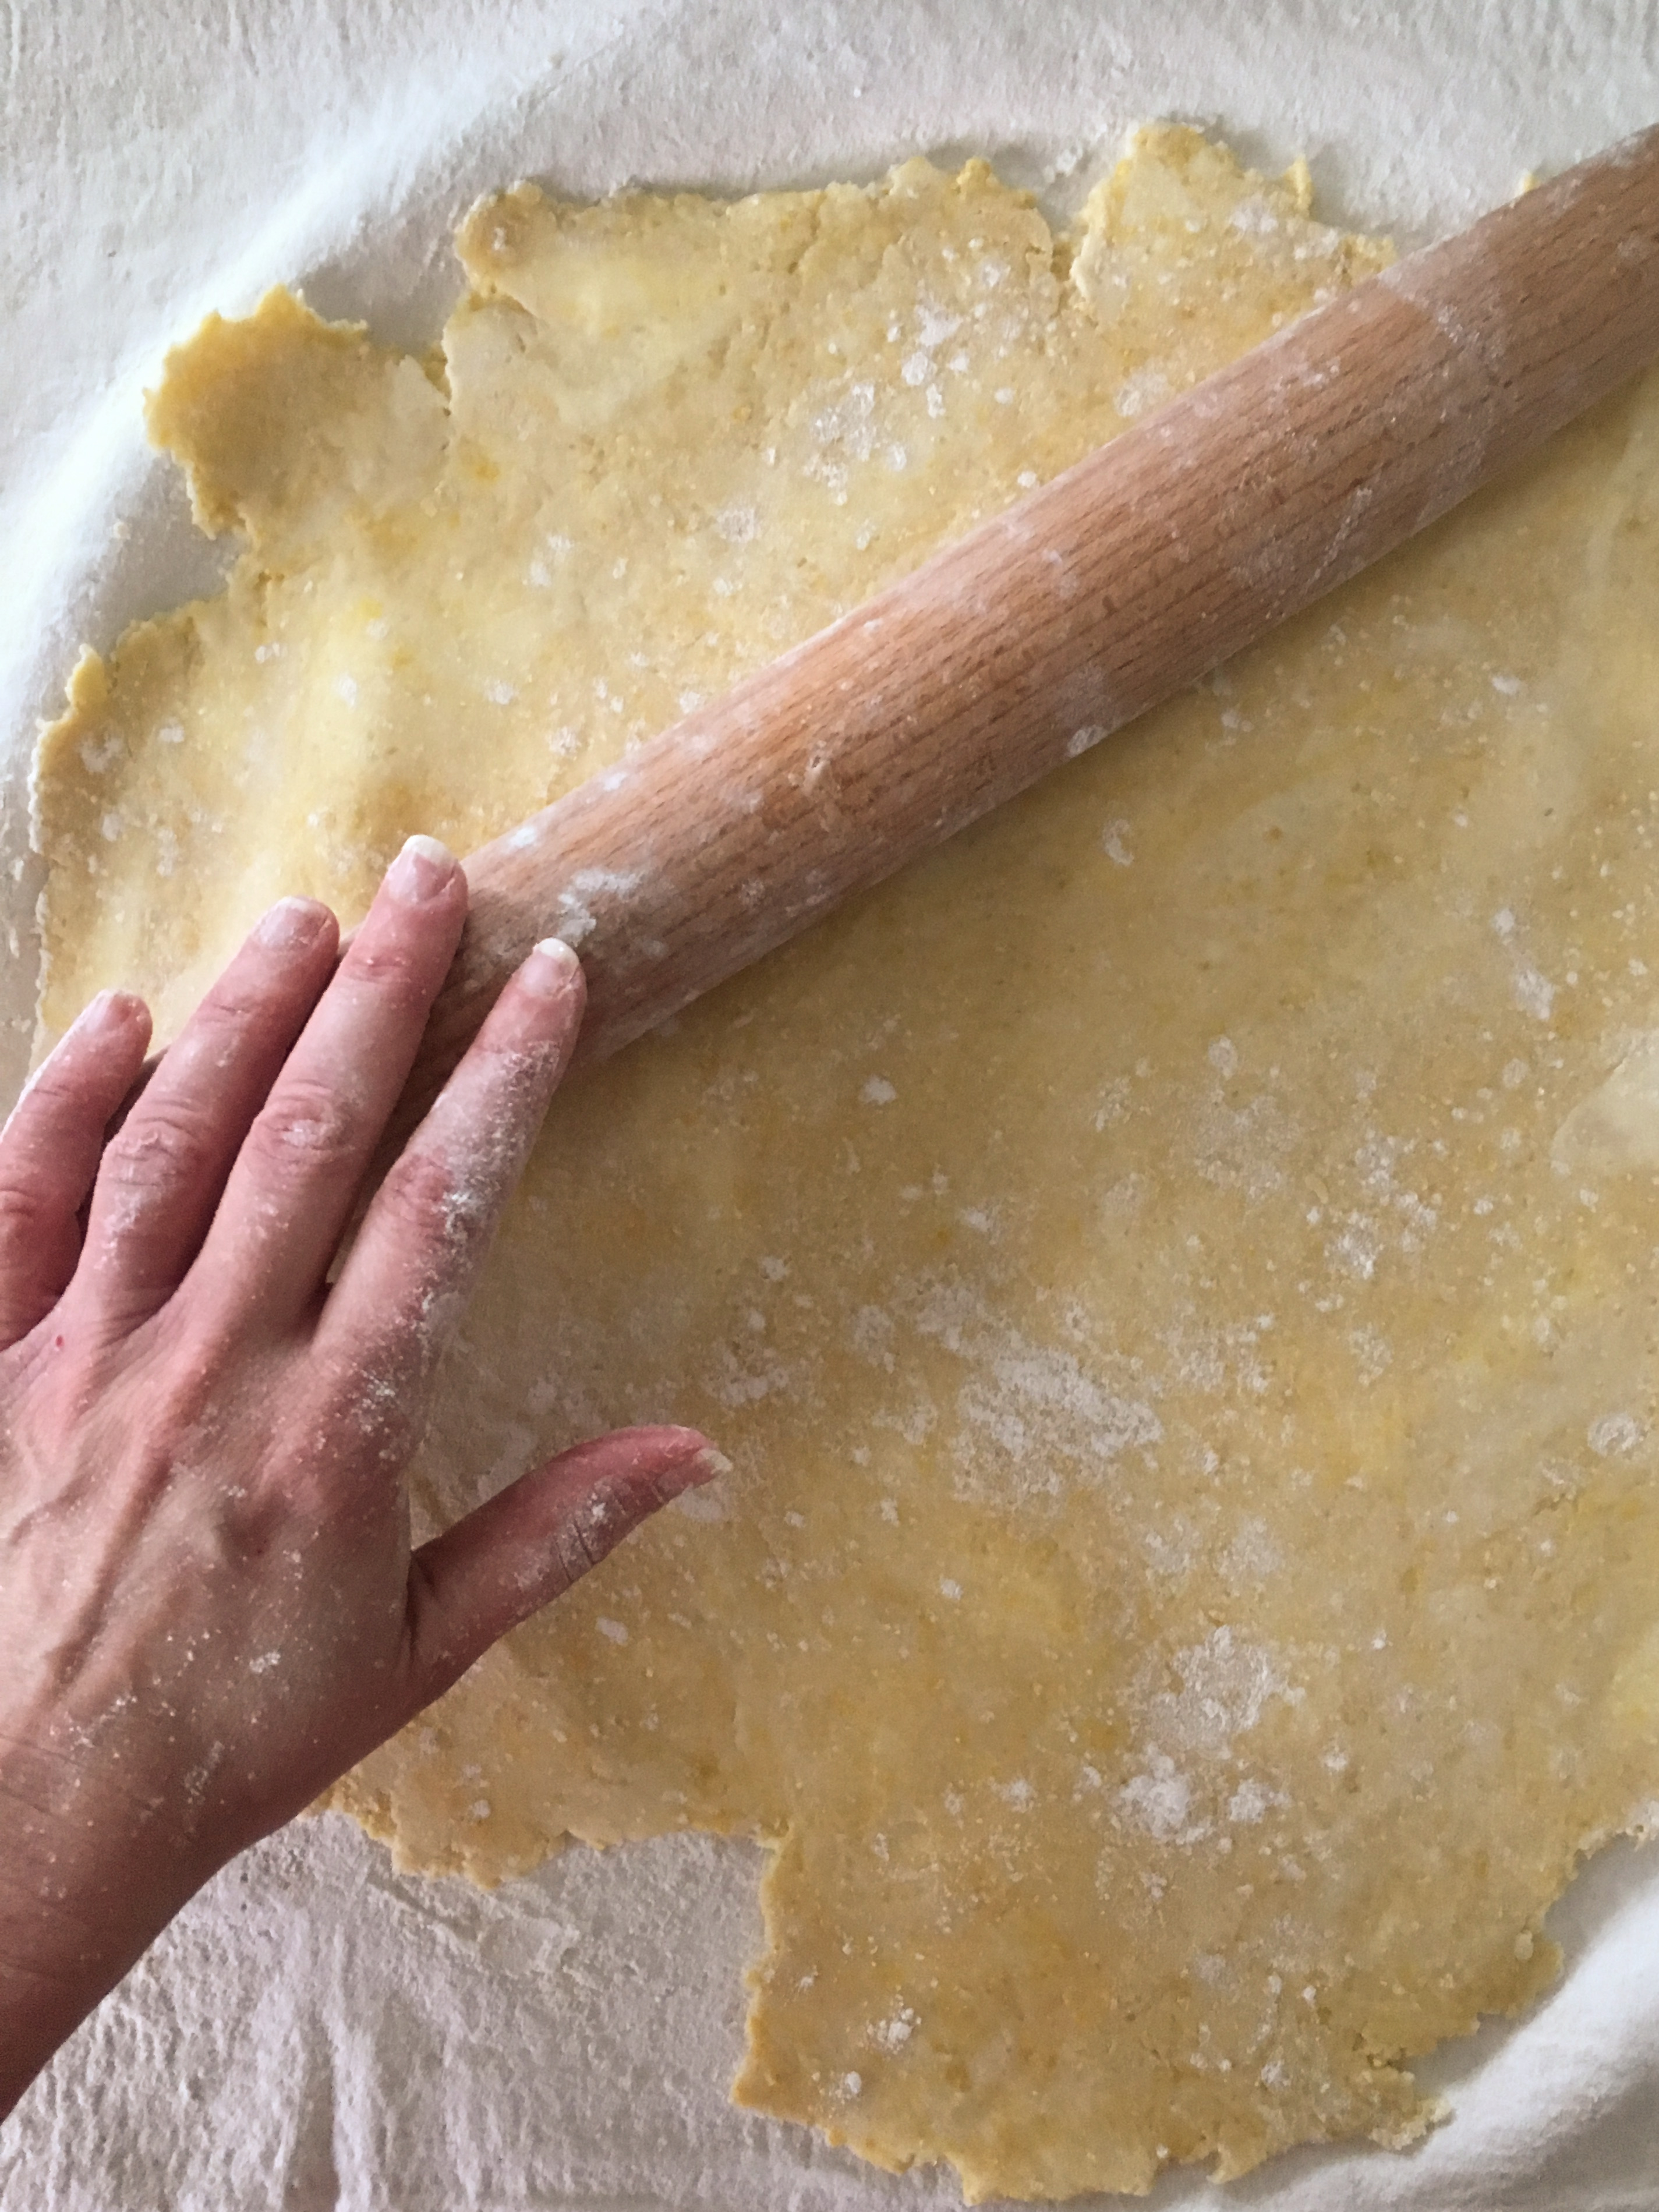
Leave both the cheese and the butter out overnight on the counter to soften. The next morning, preheat the oven to 350 degrees. Mix all the ingredients together (except the smoked paprika) in a medium bowl by hand. Knead the dough until it turns into a consistency like play-doh. Form into a ball shape. On a lightly floured pastry cloth, roll the dough out firmly to 1/4 inch thickness with a wooden rolling pin. By pressing it into the cloth with the rolling pin, you’ll be able to smooth out any crumbly or wrinkly areas as you work. Using a small star shaped cookie cutter, cut out the stars and place them on an ungreased cookie sheet. Bake for 12-14 minutes or until lightly golden in color. Let stars cool on a rack and dust with smoked paprika just before serving.
Homemade Blueberry Tart (recipes adapted from the Smitten Kitchen and Martha Stewart)
For the tart shell:
1 1/2 cups all-purpose flour
1/2 cup confectioner’s sugar
1/4 teaspoon salt
1/2 teaspoon cinnamon
9 tablespoons very cold (or frozen) butter, cut into small pieces
1 large egg
In a large bowl, mix the flour, sugar, salt and cinnamon together. Add the chopped butter pieces and blend with with a fork until the mixture resembles small bread crumbs in various sizes. Add the egg and mix until combined. Form the dough into a ball, wrap in plastic wrap and chill in the fridge for at least 2 hours.
Butter a 9-inch tart pan (the kind with a removable bottom). Place the chilled dough on a lightly floured pastry cloth and roll out to a size big enough to accommodate an extra 1/2 inch of dough in diameter when placed in the tart pan. Add dough to pan, trim any excess dough beyond the extra 1/2″inch that hangs over the sides. Fold the remaining 1/2″ inch of dough back into the tart pan, so that you are re-enforcing the side walls with an extra layer of dough. Pierce crust all over (bottom and sides) with a fork. Place tart pan in freezer for at least 45 minutes.
Preheat oven to 375 degrees. Remove tart pan from freezer and place directly in oven for 20-25 minutes or until the tart shell turns a soft golden brown. Remove from oven and let cool on a rack.
For the blueberry filling:
6 cups fresh blueberries
2/3 cup cane sugar
1/2 teaspoon cinnamon
1/2 teaspoon nutmeg
4 tablespoons all-purpose flour
3 tablespoons fresh lemon juice
pinch of salt
In a medium saucepan, bring 1/4 cup water and 1 1/2 cups blueberries to a boil over high heat. Reduce heat and let berries simmer, stirring occasionally for about 4 minutes.
In a small bowl mix the flour with 4 tablespoons of water until smooth and then add to the blueberries in the pan. Next, add the lemon juice, sugar, salt, cinnamon and nutmeg. Bring to a boil and then reduce heat. Let the mixture thicken for about 1 minute. Remove from heat and stir in 3 1/2 cups of blueberries. Immediately, add this hot blueberry mixture to the tart shell.
Sprinkle the remaining cup of fresh blueberries across the top of the hot mixture, gently pressing the berries down so that they stick into the hot mixture enough to bind them together. Place the tart in the fridge for at least 30 minutes or at most overnight.
Additional Picnic Companions
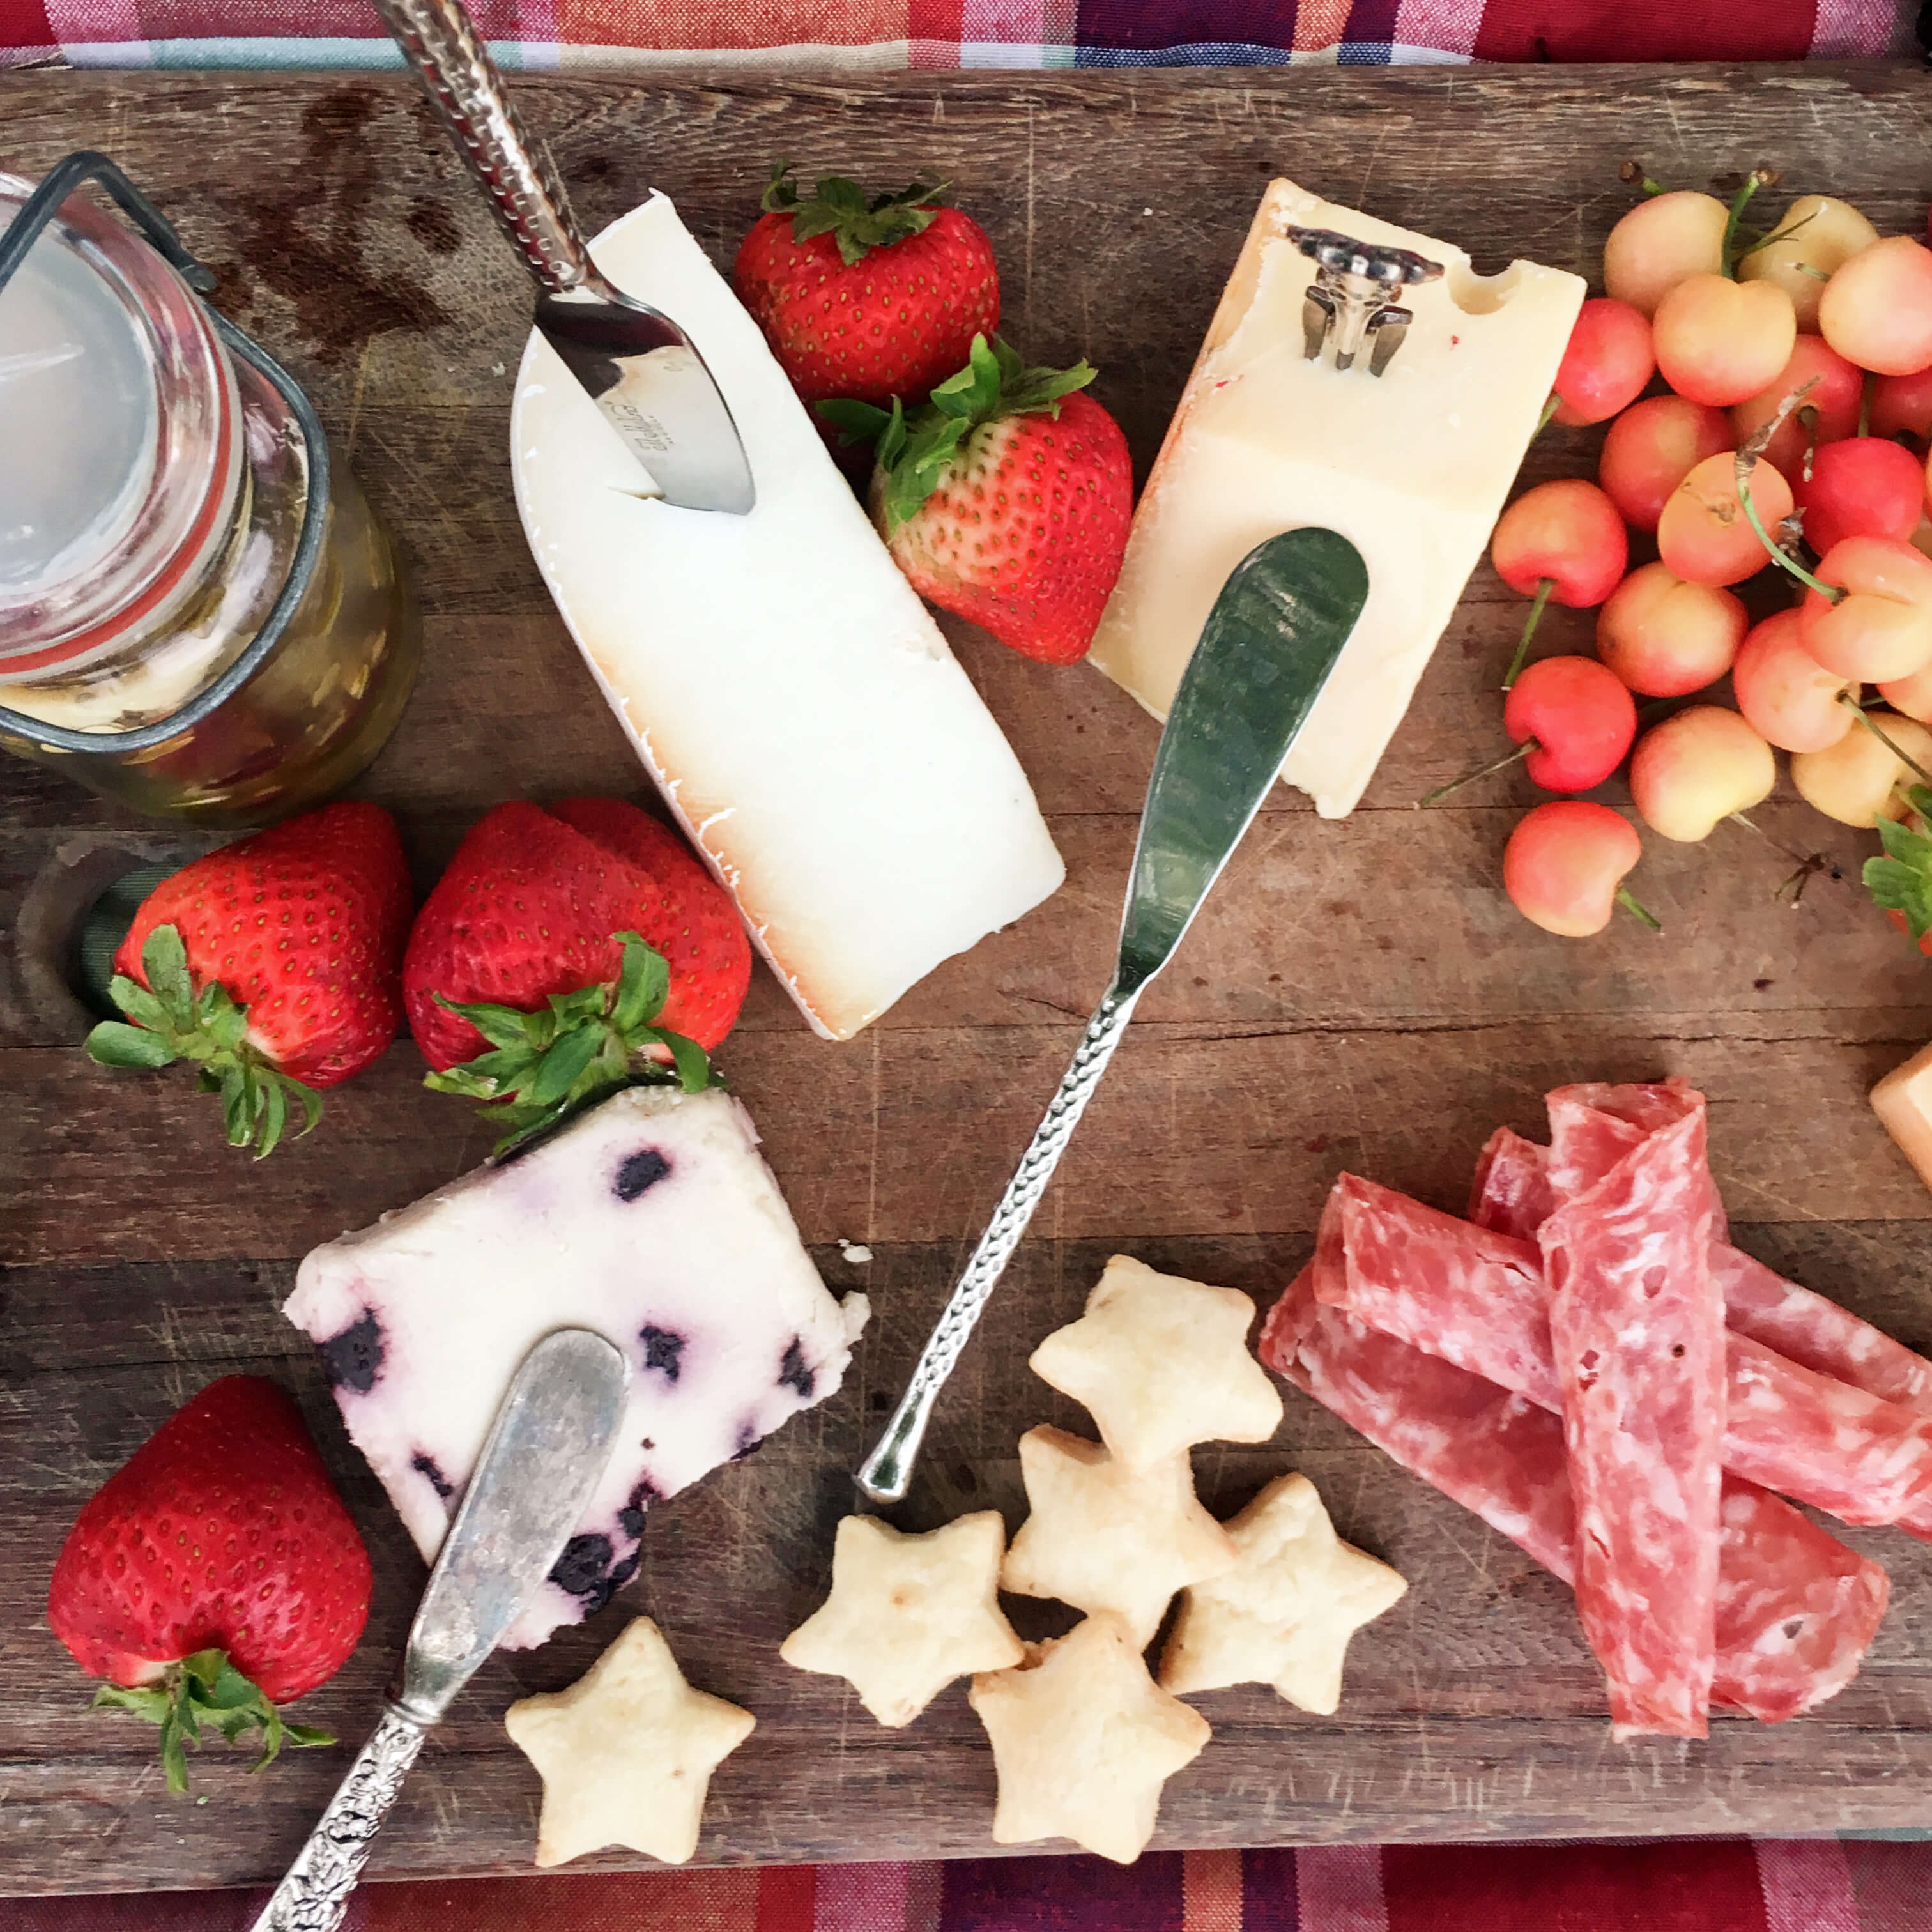
One of the joys of picnic fare is the ability to snack and nibble on little bits of food at whim throughout the day. Since the original pique-nique days, small has been the favored size and serving proportion. For that purpose, a wooden cutting board filled with fresh fruit, a sampling of cheeses, cured meats, fresh herbs and bread offer an infinite number of little edibles that can be combined in interesting ways with the food options listed above. From chicken baguette sandwiches to cheese and crackers to deviled egg wrapped prosciutto, variety runs the gamut. The picnic board here included rainier cherries, strawberries, blackberries, raspberries, goat’s milk Gouda, cave-aged cheddar, blueberry Stilton, herb stuffed salami, thinly sliced prosciutto, Genoa salami, a bouquet of fresh herbs and a French baguette.
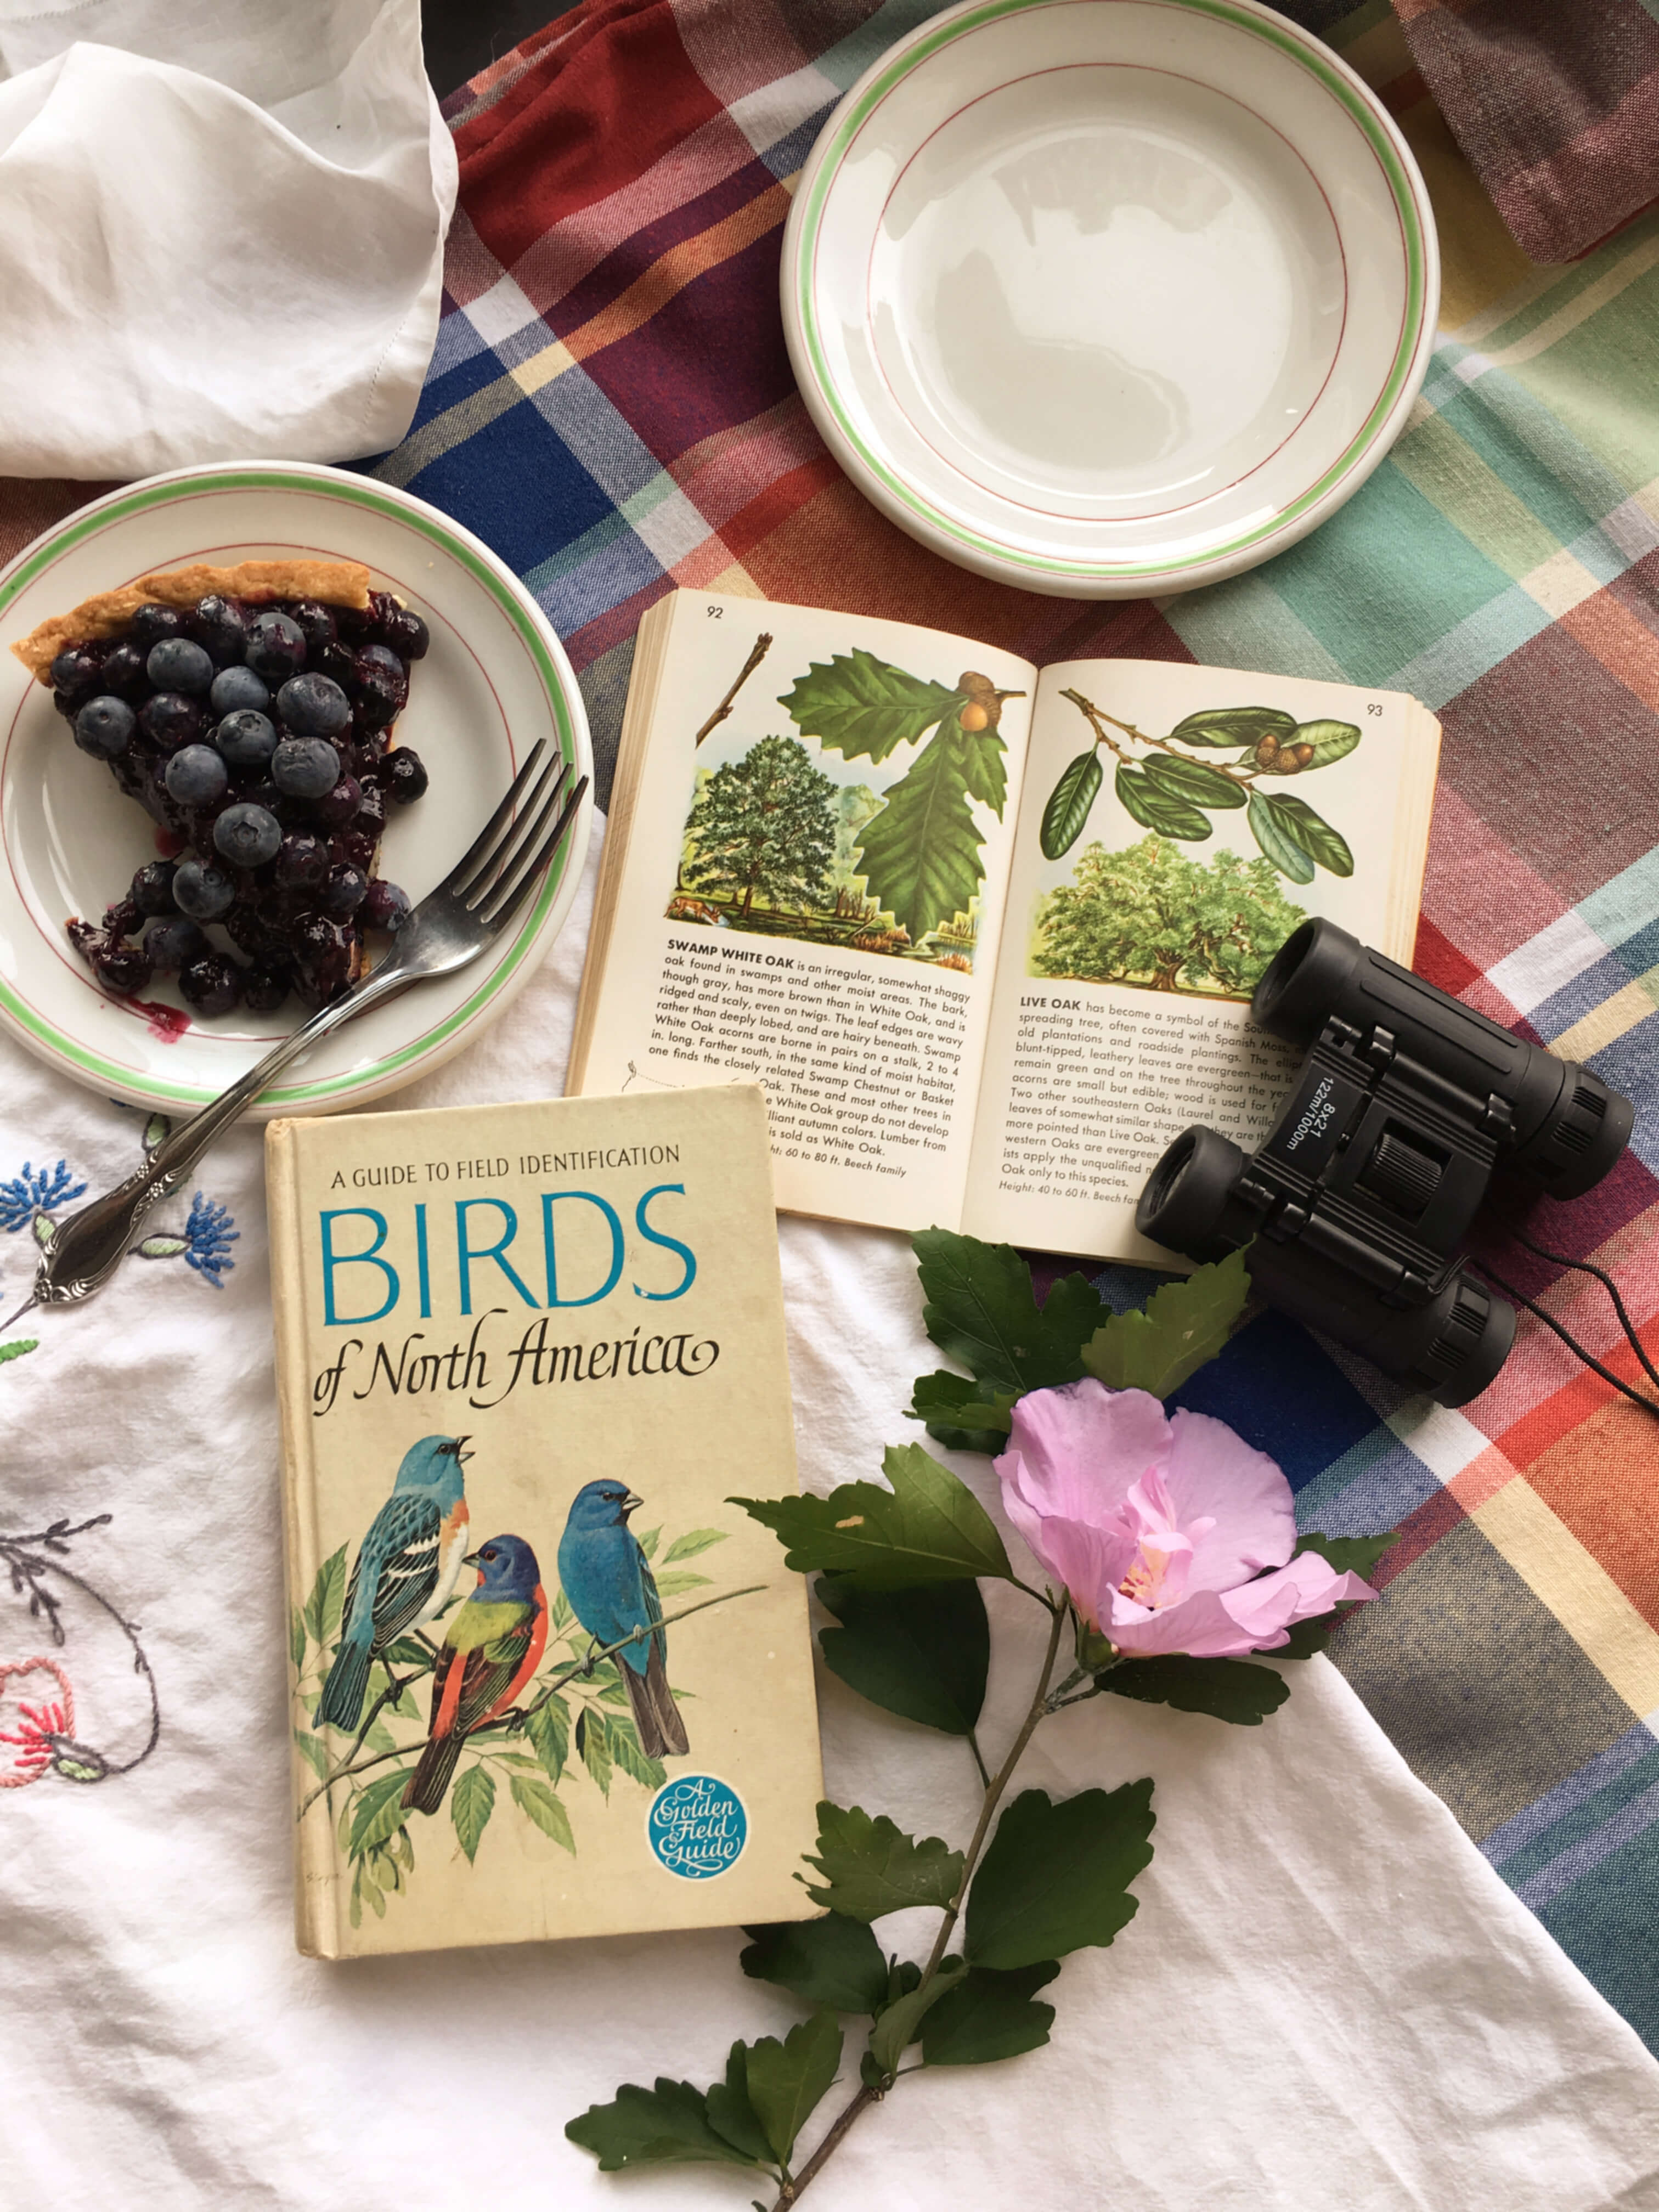
Finally, when bellies are full and appetites satisfied, the vintage-style picnic experience celebrates and salutes the pursuit of leisurely activities. There’s no rushing to clean up or clear out once you finish eating. The whole, blissful idea behind a vintage-style picnic is to stay awhile and relax into yourself and your surroundings. One of my most favorite picnic activities is bird watching and tree scouting. I usually tote along a couple of species guides and a pair of binoculars, so that I can identify what’s flying over and growing up around me. Other fun activity suggestions (depending on your setting) include painting, sketching, walking, kite flying, playing cards, reading, talking, napping, swimming, collecting and just appreciating the people and places that share your afternoon.
The world is a beautiful place. Time is a priceless gift. Eating is a ceremonial act. The art of the vintage picnic reminds us of that. Just as it has in the past and will continue to do so in the future. Wherever your picnic adventures take you this summer, I hope they are magical and delicious. Cheers to dining out in nature. Hope it is your best meal yet!
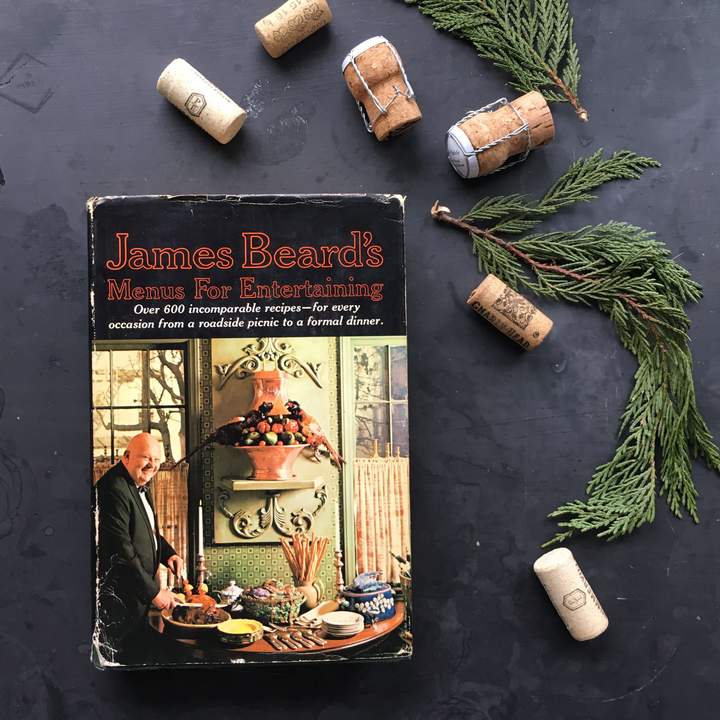
In 1965, when James Beard published his new cookbook, Menus for Entertaining, he had one thing in mind… generosity. Unlike his 14 cookbooks published previously, all of which taught readers how to prepare good food, this one focused on the largehearted act of cooking for other people.
A subtle change from his more tutorial-style instruction favored in earlier cookbooks, this one captured an idealized, ethereal expression of how to combine the art of being a good cook with the art of being a thoughtful host. Two concepts that, surprisingly, don’t always meet up in the race to put a good meal on the table.
There are lots of elements that can inspire one to cook. Maybe it’s a particular ingredient or a time constraint, a season or a health reason, the weather or a garden, a particular holiday or a memory, a special piece of cooking equipment or a celebratory event. And there are lots of fundamental reasons to prepare a meal: to satiate, to learn, to nourish, to educate, to create, to boast. In James’ case, in this cookbook, his inspiration was people and his reason was gratitude.
“There is no greater reward than pleasing your audience,” James shares in the introduction. His cookbook was not only about preparing something delicious, it was also about spoiling his guests, about indulging the valuable time spent together, and about presenting a thoughtful, custom dining experience. Like a play or a live performance, this type of entertaining is a nuanced event. Something wrapped around food and friendship equally. To James it meant paying as much attention to what you were serving as to whom you were serving and why.
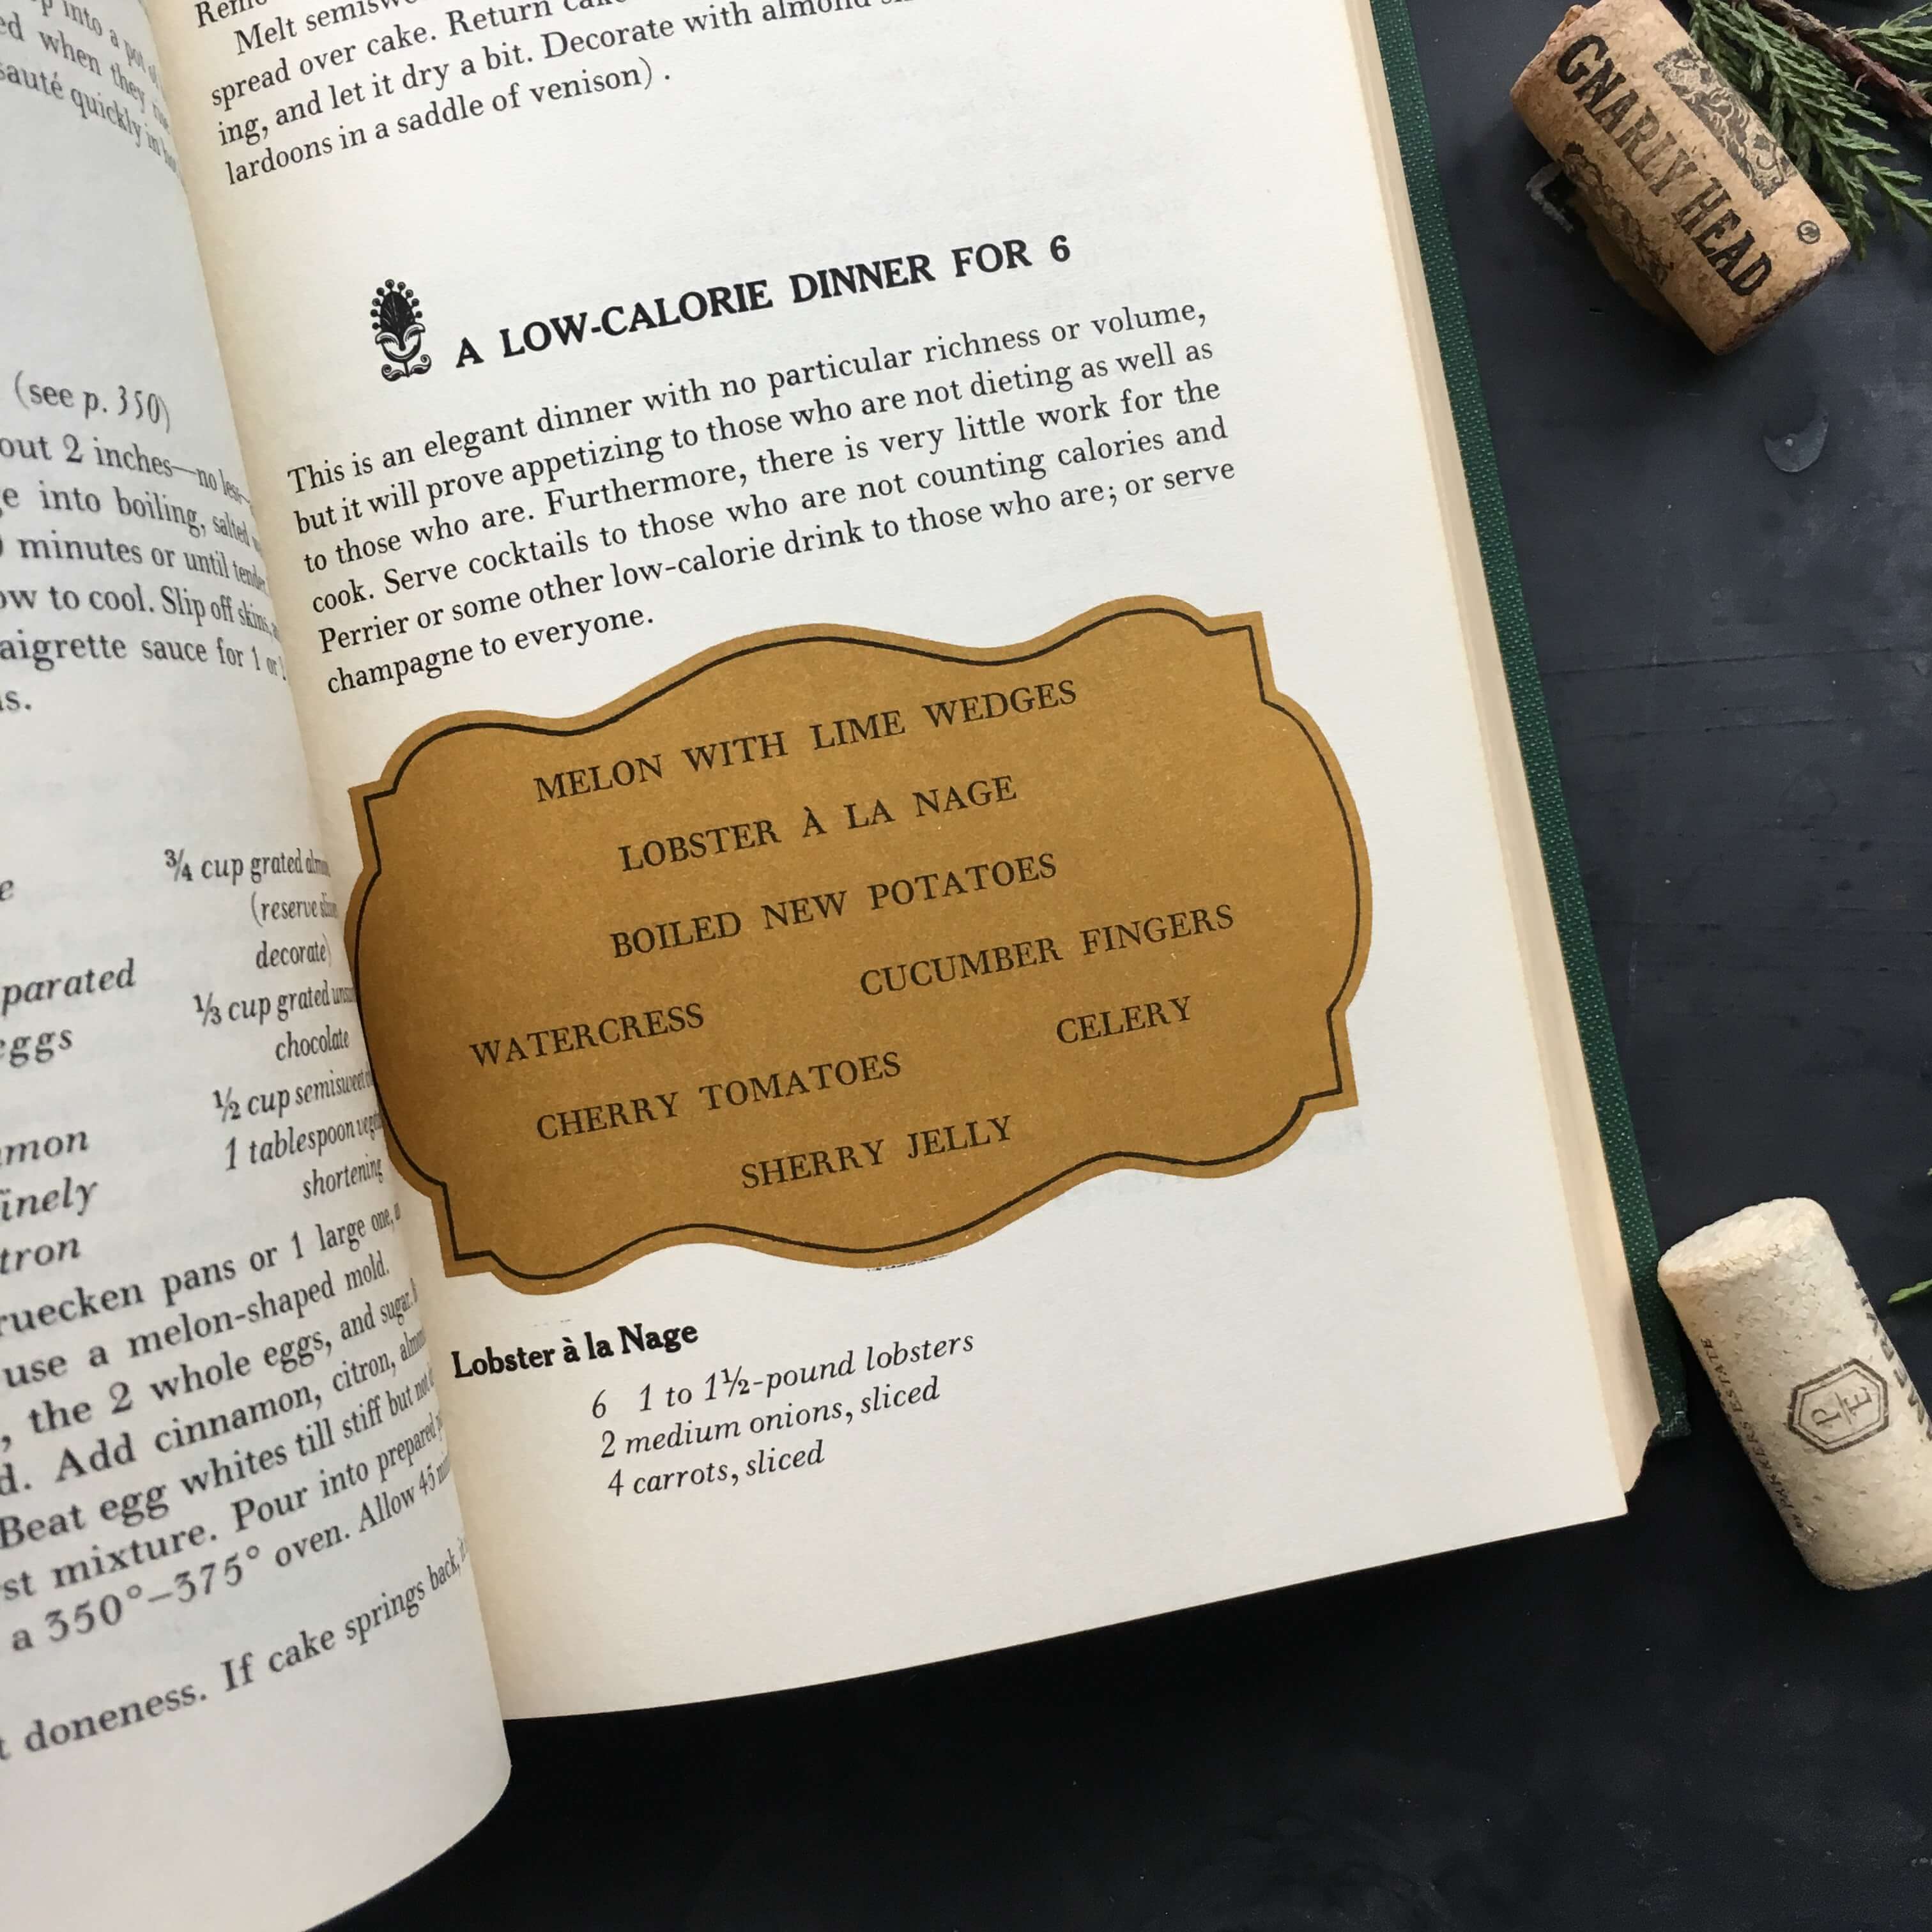
For example, if James wanted to throw a dinner party and wanted to include a certain guest whom he knew was on a diet, he would plan a light and low calorie menu for the night, making sure that it didn’t skimp on flavor but was fully satisfying for everyone, dieters or not, without being calorie heavy.
Or if he had a friend who longed to travel to Germany but couldn’t afford the plane ticket, James would plan a whole dinner party around German foods from start to finish complete with music and wine and Bavarian-style decorations. By putting focus on this German lover’s interests, it was his thoughtful way of acknowledging, satiating and celebrating his friend’s wanderlust.
This idea of unselfishly cooking for other people in an effort to please them and care for them is a notion that really hit home these past dozen weeks while I’ve been away from the blog. I spent the time in Florida, in and and out of the hospital with my sick dad as he fought hard through infections and medical procedures, rehab and rest. While I was there, I was overwhelmed by the love and support that people showed my family through gifts of food. From the vendor at the farmers market who tucked extra pastries into our packages, to neighbors who stocked the fridge with homemade meals, to family friends who stopped by with treats in their hands and empathy in their hearts, it was these thoughtful gestures of kindness that helped sustain and support our spirits during a daunting time. Like James suggests in his book, cooking is one of the kindest, most fundamental things that you can do for another person, so you might as well throw your heart into it and fill the effort with joy and passion.
On Friday over on Instagram, I posted a picture of this homemade pear tart which was made with the Rich Pastry Dough recipe from James’ 1965 cookbook.
This was a thank you food parcel too. A gift for my friend, Diane, who shared her vintage cookbook collection with me while she was packing up to move. Like James in 1965, and the wonderful people in Florida in 2019, I wanted to thank her for her kindness with a homemade dessert. One that could be easily kept and consumed over the weekend while she moved from one house to another. I wanted to make something for her that could be eaten on the run for breakfast or enjoyed by slice or sliver late in the afternoon when the moving boxes might seem endless and energy levels might be in need of a boost. Either way, tarts are very accommodating in that department. They travel well in the car, can sit on the counter all day, and can be eaten, provincial style without any need for plates and forks.
This pear tart in particular, is also a good transition dessert between Winter and Spring, and the wonky weather that always seems to be sorting itself out in March as the temps fluctuate between hot and cold. Comforting cinnamon and in-season pears are nods toward Winter, while the thin buttery crust with flecks of lemon rind adds a light, fresh note for Springtime. Diane’s husband is also a collector of vintage French cookbooks, so it seemed fitting to make a classically French dessert, but with a slight James Beard twist for them. This crust includes egg yolks, lemon rind and lots of butter and the filling is a combination of Julia Child’s pear tart, James Beard’s apple tart and my sister’s homemade apricot jam. (Note: If you don’t have a jam-maker in your family, don’t worry. Any good-quality, corn syrup-free store bought jam will work too.)
Whether you make this for yourself or as a gift for someone else in your life, I hope you enjoy every part of the process of making it and presenting it. That’s what James would have wanted and what he hoped for when creating his cookbook so many decades ago.
James Beard’s Rich Pastry Dough circa 1965
Makes 1 2 crust pie or 2 shells
2 cups unsifted flour
3 tablespoons sugar
1/2 cup butter
1/4 cup vegetable shortening ( I used butter)
1 1/2 teaspoons grated lemon rind
2 raw egg yolks
1/2 teaspoon sea salt
Make a well in the center of the flour. Add sugar; butter, not too hard, not too soft, cut in small pieces; vegetable shortening cut in small pieces; lemon rind; eggs and salt. Work quickly with finger tips to make a smooth, firm pastry. Dough should form a ball and leave tabletop or bowl fairly clean. Chill dough ball in the fridge for at least 30 minutes before rolling.
Remove dough ball from fridge. Cut in half. Roll out one half of the dough on a floured work surface. Transfer rolled dough to tart tin and remove excess dough from the sides. Using a fork prick the dough all over the bottom and sides. Chill unbaked tart shell in pan in the freezer for 2 hours.
After two hours, remove tart pan from freezer and place immediately in a hot 450 degree oven for 10 minutes to pre-bake. Remove from oven and let cool in pan on a wire rack while you assemble the filling.
Pear Tart Filling
4 ripe pears
1/4 lb butter
1 teaspoon vanilla
1/2-1 teaspoon cinnamon (depending on taste preference)
1 splash of white wine
2 tablespoons cane sugar + 2 more tablespoons for sprinkling
1/8 teaspoon salt
A dash of nutmeg
Juice of half a lemon
Apricot Jam
Leaving the skins on, dice two of the pears into quarter inch pieces. Add them to a small saucepan along with the butter, vanilla, cinnamon, white wine, salt, 2 tablespoons sugar and nutmeg and bring to a boil. Reduce heat and let simmer until most of the liquid is evaporated (forming a consistency close to thick and chunky applesauce). Remove from heat. Let cool.
While filling is cooling cut the remaining two pears in half. Then lay them cut side down on a cutting board and carefully slice them vertically into paper-thin slices.
Spread the filling evenly into the pre-baked tart dough. Arrange the pear slices in a circular fashion on top of the filling. Squeeze lemon juice over the pear slices and sprinkle with 2 tablespoons cane sugar. Bake in a 350 degree oven for 30 minutes or until pears and crust are lightly brown on top.
Remove from oven. Spread a thin layer of apricot jam over the entire tart and let cool to room temperature.
Last November, my husband and I traveled through Gearhart, OR where James Beard grew up, spent childhood summers and eventually after a long and hardy life, became the final resting place for his ashes. We were hoping to see a glimpse of his life in town. Perhaps a restaurant named after him or his childhood house now a monument to visit. But there were no obvious signs. There was just a big stretch of beautiful ocean and the sound of the sea. Maybe that summed up his impact on the 20th century food scene best… a massive presence that still ripples through our modern days making us feel inspired, and impressed, soothed and comforted.
The beach between Astoria and Gearhart, OR
Cheers to James Beard, to good friends and to thoughtful food! Interested in learning more about James Beard? Discover a few of his cookbooks, including Menus for Entertaining, in the shop here,here and here.
Irma with her children circa 1914. Photo courtesy of Stand Facing the Stove by Anne Mendelson.
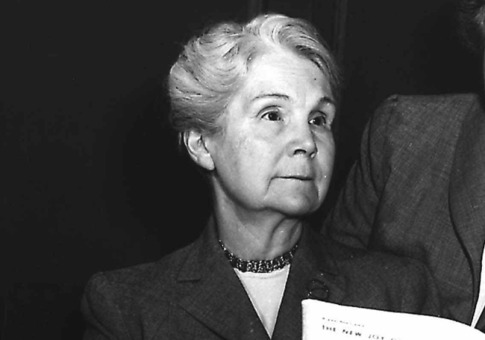
Long before Irma Rombauer became a household name, she was an everywoman of the early 1900’s living in St. Louis, Missouri with her husband and two children. As the wife of an attorney who had political aspirations, Irma was actively involved in the social scene of St. Louis, a well-connected member of various clubs and organizations and a fun hostess of house parties and local events.
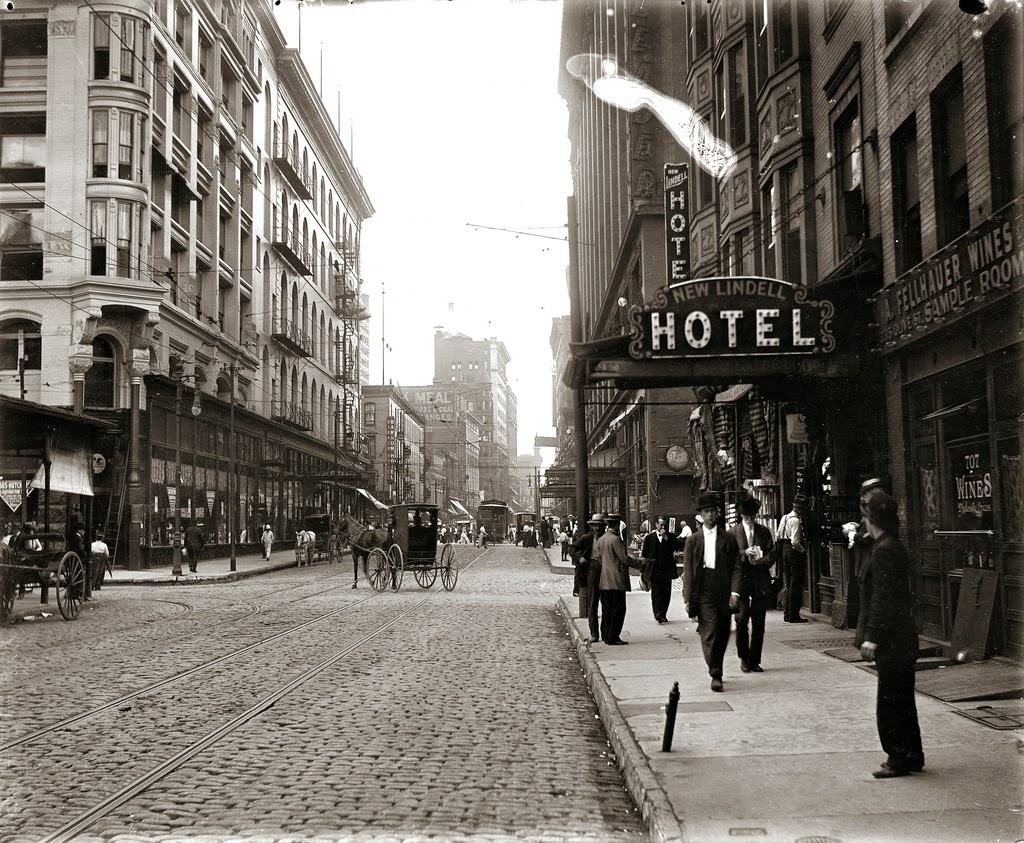
St Louis in 1906, seven years after Irma married. Photo courtesy of Vintage Everyday
When the stock market crashed and her husband tragically committed suicide as a result, the rosy colors of Irma’s St. Louis lifestyle suddenly took on a whole new shade. Without much money in savings, Irma, now in her early 50’s, had to quickly figure out what to do. Most importantly, she had to figure out how to survive on her own and care for her family, as a single woman, after thirty years of marriage.
While the Great Depression was a very hard time financially for families around the country, it was also a very creative period in home cooking. As everyone struggled to survive and to feed their families, barriers started breaking down as far as people’s pre-conceived notions of kitchen work and culinary skills. The wealthy could no longer afford kitchen staff and therefore had to start cooking for themselves. The middle class no longer had the same budget for groceries and had to learn how to cook more frugally. And the lower class had to stretch their meager food supplies even further. That meant a whole wave of new cooks were beginning to emerge. Cooks who needed answers on how to do new things whether it was learning basic skills, innovative recipes or new techniques.
Irma saw an opportunity here in this great depression of both her own and the country’s. Americans needed a practical, instructive cookbook that offered good nutritional food for all budgets and all skill levels. Assume nothing, teach everything and most importantly find the joy, those were the thoughts ruminating in Irma’s mind. This cookbook idea seemed especially relevant after a fellow St Louisan published a cookbook in 1929 featuring all sorts of expensive ingredients and decadent dishes – a notion that seemed totally inappropriate to Irma for both the time and the town.
The funny thing about Irma though at this point in her life, was that she wasn’t exactly known for her cooking. Her parties with her husband in the past had been memorable – not for the food but for the atmosphere. While Irma herself was a dynamic hostess and an interesting, intelligent conversationalist, what she served was overshadowed by her charming personality. People didn’t come away from Irma’s kitchen raving about her food but instead raving about Irma. So the very idea that Irma would embark, could embark, on writing a cookbook, as just a sort-of-okay meal maker, was a great surprise to everyone who knew her. But none of that mattered. Irma had a plan in mind that was going to turn her kitchen from dull to delicious.
One of the groups Irma belonged to was The Wednesday Club where women gathered to discuss intellectually stimulating topics. Photo courtesy of wednesdayclubstlouis.org
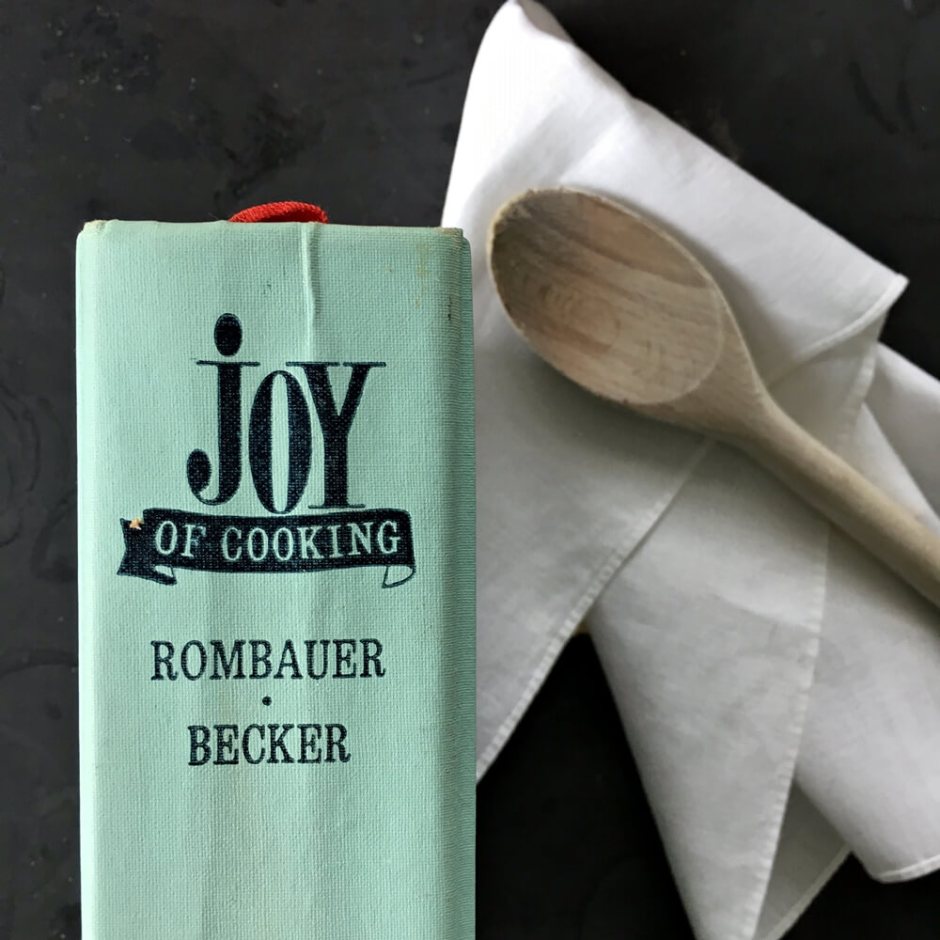
Because she was so well connected and knew a lot of people in her community, Irma started collecting recipes from her friends and their families. Recipes that were proven hand-me-downs, time-honored and beloved. Once gathered, she went home and tested each recipe herself… adapting, tweaking, altering and omitting along the way if needed. When a satisfactory bundle of approved recipes emerged that suited her taste, she organized them into book form, named it The Joy of Cooking: A Compilation of Reliable Recipes with a Casual Culinary Chat and had 3,000 copies printed up by a local print shop. Tah-dah, the Joy of Cooking was born.
Irma mailed out copies of the cookbook from home and handled publicity and sales campaigns herself, enthusiastically spreading the joy of Joy. The rest is cooking history. Bobbs-Merrill picked up professional publishing of the book in 1936 with the debut of the second edition. Irma became a trusted authority known for her reliable recipes and engaging writing style. And the book went on to sell 18 million copies across eight updated editions. Covering everything from how to skin a squirrel to how to make a souffle, Joy of Cooking raised a nation of home cooks (18 million of them!) by assuming nothing, teaching everything and finding the joy.
All the editions of Joy of Cooking through the years and a photo of Irma and her daughter Marion, who worked on many of the cookbooks.
That is a wonderful contribution to the American food scene. At a time when women could have felt marginalized by their roles as domestic cooks, Irma made cooking exciting and delicious and easily attainable. Her cookbooks turned into confidence and that confidence radiated into all other aspects of life. Rumor has it that a new addition is scheduled for publication in 2019, edited and updated by the Rombauer family, who have faithfully handled the cookbook and its revisions since Irma’s death in 1962. Thanks to Irma’s children and her grandchildren, they have made the Joy of Cooking a record holder as the oldest cookbook in history that is still maintained by one family. A legacy that hopefully will keep Irma in our kitchens for another 80 years.
Cheers to the Rombauer family and to Irma, in particular, who would have celebrated her 141st birthday today, and cheers to always finding the joy in both good times and bad.
Looking for your own vintage edition of Joy Of Cooking? Find two ediions currently available in the shop – one from 1967 here and one from 1975 here. And if you missed the previous blog post, catch up with a recipe for Irma’s Plum Cake Cockaigne here.
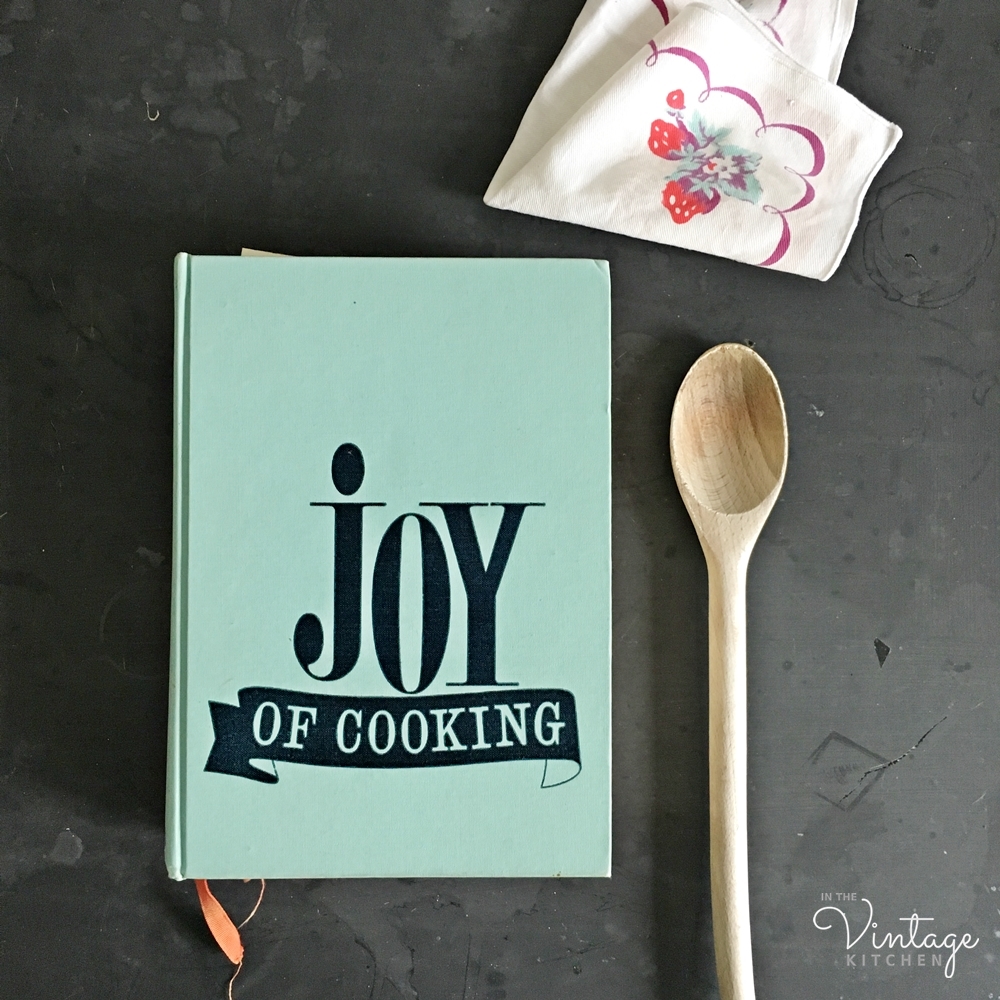
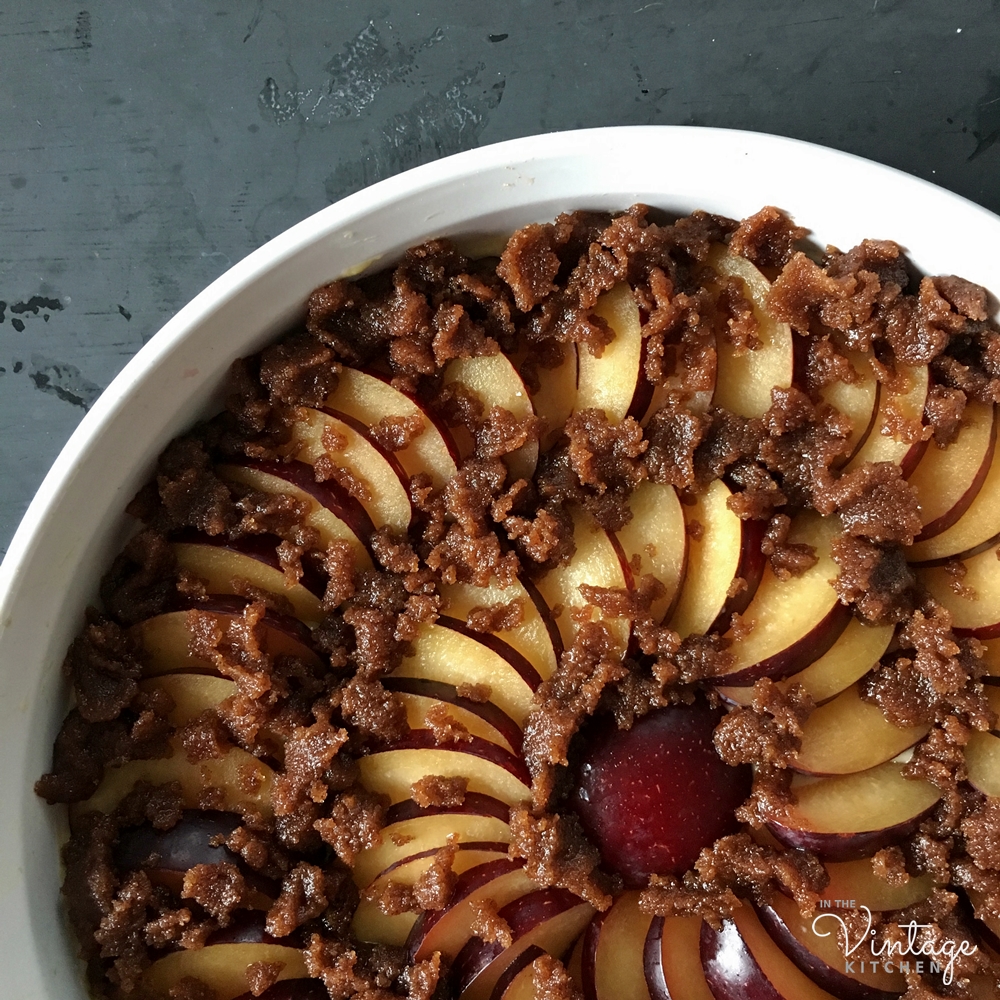
Over on Instagram the other day, I posted this photo above of the first Fall-themed dessert to come out of the Vintage Kitchen oven. It’s called Plum Cake Cockaigne and is from the 1964 edition of one of the most popular cookbooks in American history – Joy of Cooking by Irma Rombauer.
Also over on Instagram, I learned something new recently about cooking blogs and recipe finders. It seems not everyone wants to scroll through a whole entire story in order to get a recipe, so I’m trying something new with this post – recipe at the top, story at the bottom. You guys let me know how you prefer this new layout. Time always seems to be so short during these last few months of the year, so if this makes your life (and your cooking experience!) easier please let me know by comment or message and I’ll adjust as you prefer.
In a large mixing bowl, sift the flour. Add the baking powder, salt, and sugar to the flour and re-sift.
Add the butter (Note: The juicer your plums, the less butter you need to add. My plums weren’t excessively juicy so I used the full 3 tablespoons of butter), mashing it up in the flour mixture with a fork, until the entire mixture looks crumb-like.
In a measuring cup, add the egg, vanilla, and enough milk to equal a 1/2 cup of liquid (this was about 1/4 cup milk in my case). Whisk together until these three ingredients are combined.
Add the egg mixture to the flour mixture and stir until a stiff dough forms. Spread the dough mixture evenly on the bottom of your pan or baking dish and then set aside. (Note: Irma recommended a 9×9 x 2 1/2 inch pan but I used a round 10″ inch x 2″ inch baking dish and that worked great as well).
Next, thinly slice your plums so that you will have enough to overlap each one in your pan – tart style and then arrange them on top of the dough. This is the fun, creative part! You can make many different types of designs with your plums if you like.
In a small bowl, combine the sugar, cinnamon and melted butter and then sprinkle the mixture on top of the plums.
Bake in the oven for about 25 minutes until the top is bubbly and brown.
Our plum cake was so bubbly I couldn’t help but take a little video of it as it was coming out of the oven!
I recommend letting the whole thing cool before slicing and serving it if you prefer to plate it in wedge-shaped slices. Since the top layer carmelizes it is easier to slice when it is in a cooler, more solidified state. If you’d rather eat it warm, right out of the oven, simply scoop it into a bowl and enjoy. Serve it on its own, with a dollop of whip cream or a bit of vanilla ice cream and taste the season unfold in all its cinnamon sugar splendor.
What is really fun about this dessert is that it is like two sweet treats combined into one – half tart and half cake. Because there is only one cup of flour and one egg, the cake part is very thin and the fruit arrangement on top is very much like a tart, so this turns out to be a light and less filling alternative to two traditional desserts yet retains all the lovely flavor of both. Plums don’t get as much attention in the Fall as apples and pumpkins in the baking department, but they are still in season until the end of October, so they make a lovely unexpected seasonal dessert.
That’s Irma on the left and her daughter, Marion on the right.
Plum Cake Cockaigne (pronounced caw-cane) was a favorite recipe in the Rombauer household. The word cockaigne was a term of endearment in the cookbook and was tacked onto various recipes throughout the Joy of Cooking as a way to signify the absolute personal favorite recipes of the Rombauer clan. Derived from old French, cockaigne literally refers to a mythical land of plentiful luxury, comfort, and peace. Such a dreamy notion of an ideal paradise was so charming to the Rombauers it was also the name they chose for their country estate. How fun!
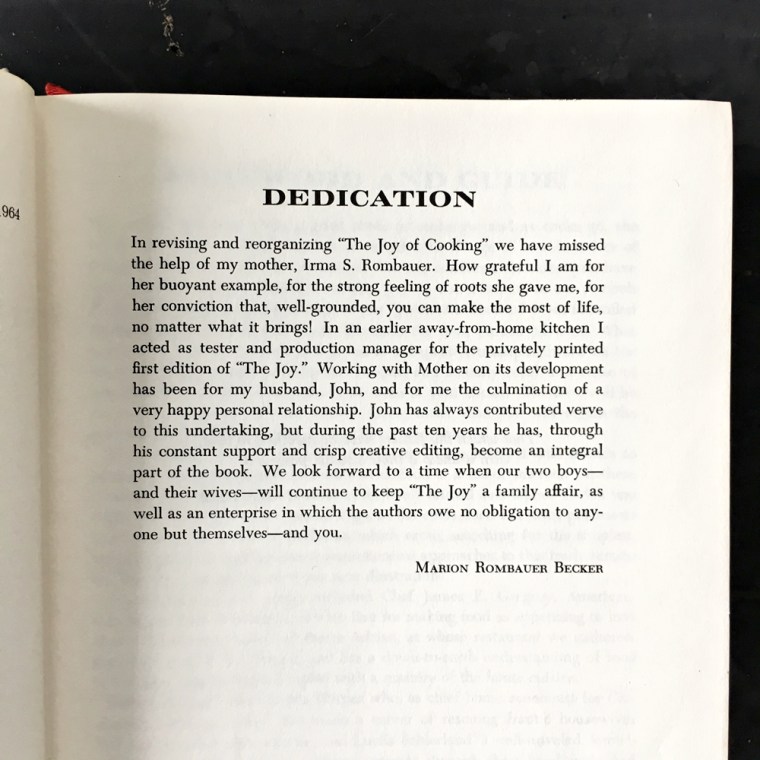
The 1964 edition of the Joy of Cooking came out two years after Irma died, the first edition to be edited, revised and enhanced by Irma’s daughter, Marion and Marion’s husband, John. Not without its own dramas, this edition needed all the cockaigne it could get. The first printing of the 1964 edition was published without Marion’s final approval, which meant that various inconsistencies and typos were present. This drove Marion crazy, as she wanted to really honor her mother’s work and keep up with the trusted reputation that the Joy brand had accumulated over 30 years since its debut in 1931. So the 1964 edition went through several reprints in order to right all the wrongs that Marion doggedly corrected herself. You get a sense of the enormous responsibility and weight of the legacy that Marion felt surrounding the whole Joy endeavor from her dedication at the beginning of the book…
The edition that is available in the shop is the 1967 printing of the 1964 edition, the one that Marion was finally satisfied with. All of this devising and revising is a real testament to the dedication of the Rombauer family. One that started with Irma way back in the 1930’s and still continues through present family generations today.
Irma’s launch into cooking stardom is a fabulous story, one that we’ll discuss later on in the month as we celebrate her birthday on October 30th. For a woman who wasn’t known for cooking skills when she first started writing a cookbook, she certainly has proven her abilities time and again over the past 80 years. Stay tuned on that front.
In the meantime, there are a couple of weeks left to enjoy plum season. Hope you “fall” in love with this recipe as much we did!
Find the cookbook in the shop here and a link to our Instagram account here if you’d like to keep up with daily doses from the Vintage Kitchen.
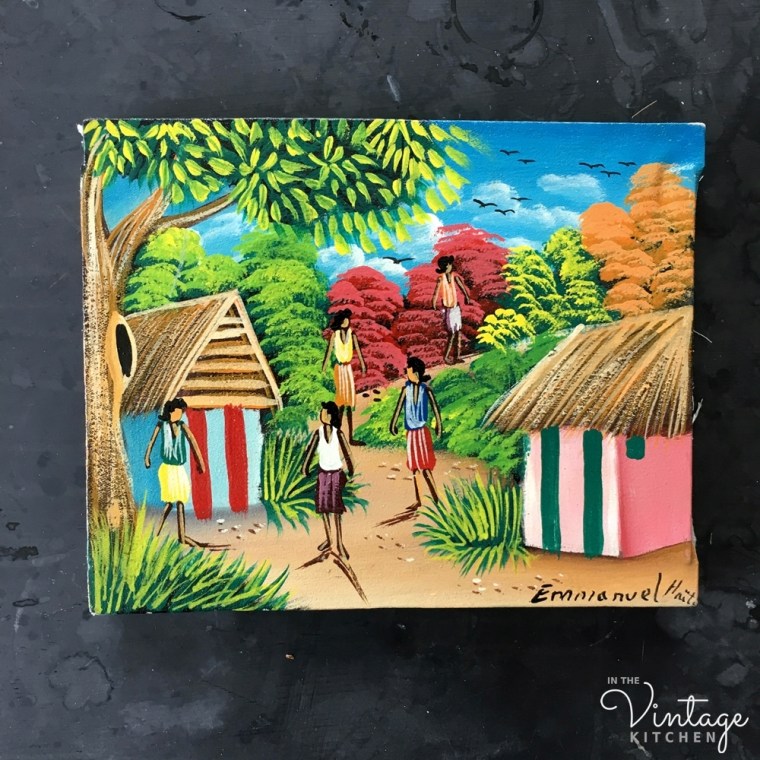
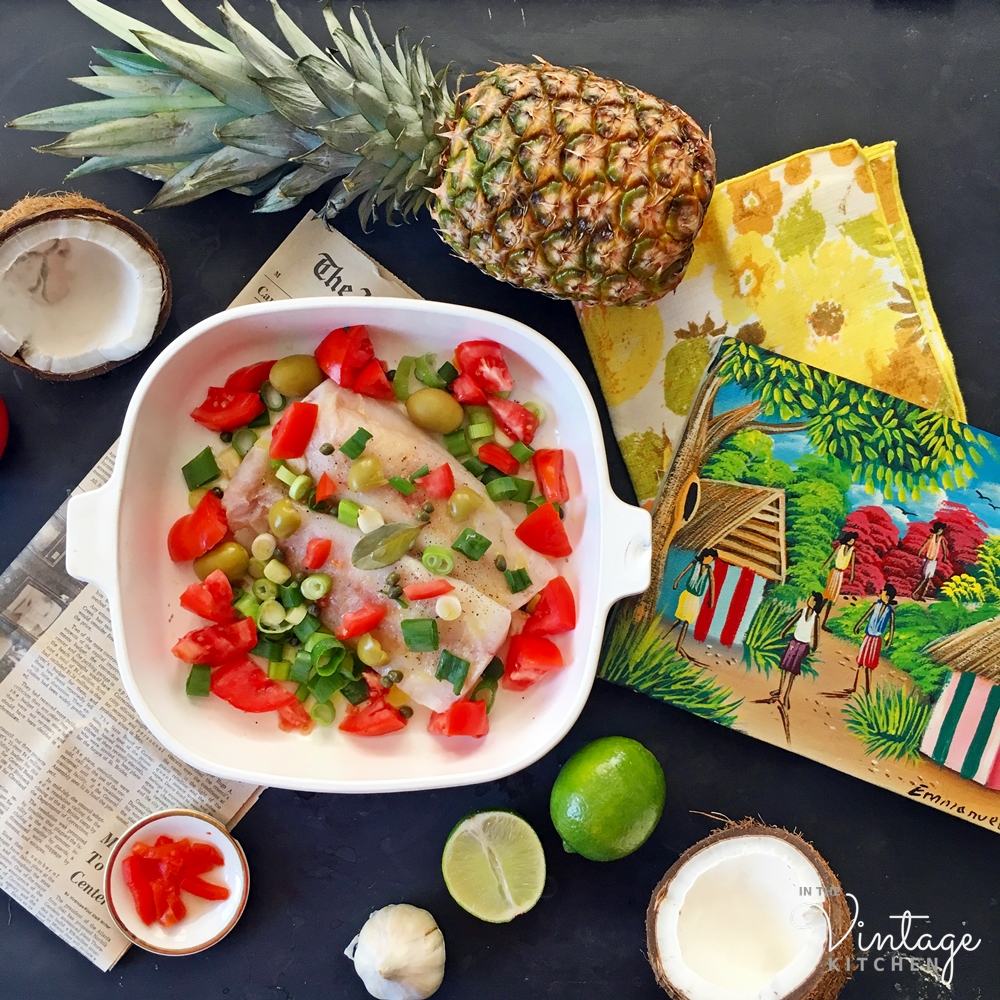
Can a painting inspire dinner? Absolutely! That’s exactly what happened when I found this tropical painting while out curating items for the shop. It’s a petite folk art landscape scene from Haiti with a handmade wooden frame and stretched cotton cloth instead of canvas. The colors are so vibrant…
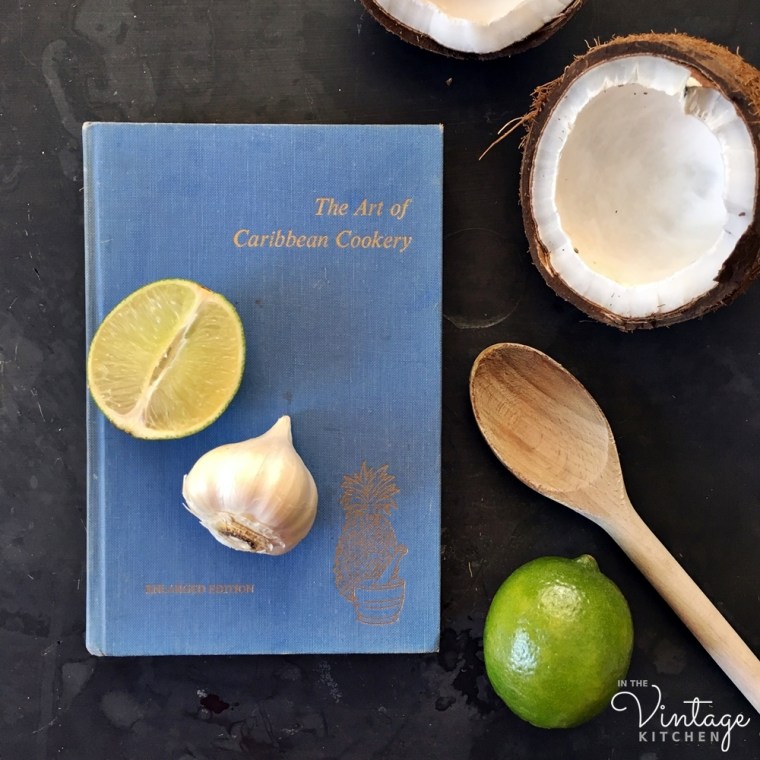
and the brush strokes so full of energy. The whole scene sings with the colorful island vibes that the Caribbean is known for. Immediately it made me think of the 1960’s cookbook in the shop – The Art of Caribbean Cookery – another midcentury treasure that also sings songs of colorful island life.
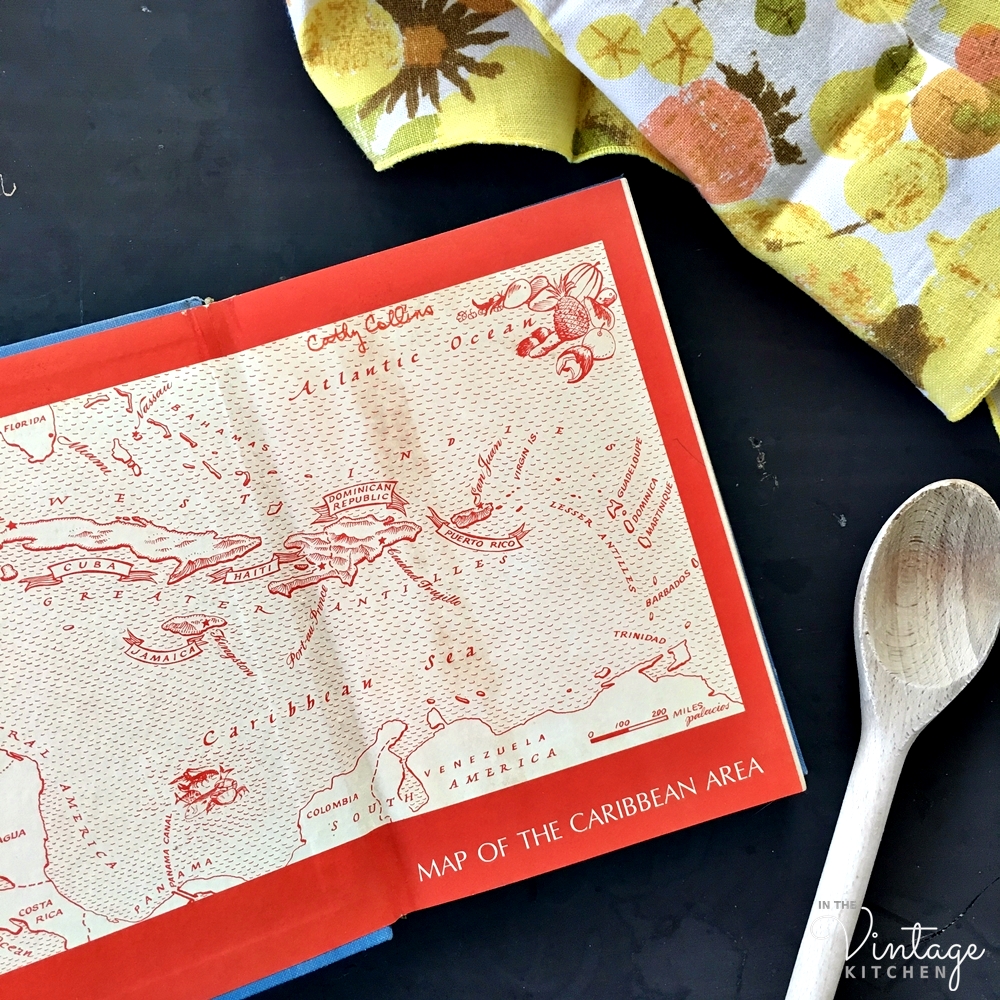
The painting hails from Haiti, just one of the 28 islands that make up the Caribbean, but the cookbook, written by Carmen Aboy Valldejuli, includes all the cultural influences of all the islands… Puerto Rico, Cuba, the Dominican Republic, Haiti, Jamaica, etc. Carmen is Puerto Rican herself and grew up in a traditional island household of the 1920’s, a world where servants cooked and children were not encouraged to help.
Old San Juan, Puerto Rico in the 1920s. Photography by Charles Martin courtesy of National Geographic
As Carmen explains in the introduction of her cookbook, it was deemed improper for well-brought-up young ladies to perform menial household chores, cooking included. “Only occasionally was I ever allowed to enter the vast room where food was actually prepared, and how I regretted that.”
Carmen and her family’s house, Casa Aboy, in Puerto Rico, including a photo of the dining room. These images were taken in the 1980’s by Felix Julian DelcampoThis is the house as it appears today, bright and pretty. Photo via pinterest.
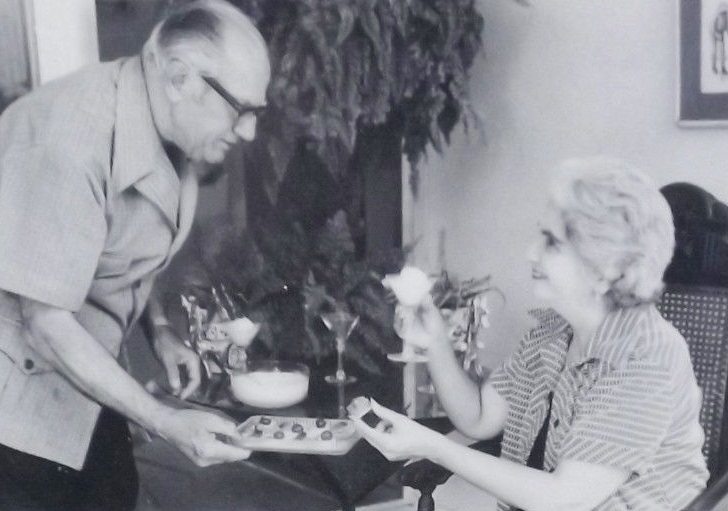
But things changed once she met her husband, Luis, in the late 1930’s. Luis was an unashamed food zealot – an eater, a cooker, and a recipe collector. He had a day job in engineering but on nights and weekends, he and Carmen crafted their time together around the glorious subject of food. Bolstered by one another’s support and enthusiasm, the two indulged their culinary interests in a fun and curious way, which turned out to be the only encouragement Carmen needed to realize her life-long passion for cooking. What used to be forbidden was now a freedom.
Carmen and Luis – the Carribean’s cooking dynamite team. Luis was always in charge of the cocktails.
Carmen took on this new interest with gusto. She and Luis dined their way through the islands, exploring offerings at family tables, fancy restaurants and everything in between. They traipsed around sugar plantations and farms and fruit groves. They listened and questioned and learned from everyone they encountered about cooking methods and techniques, about family stories and recipes passed down through generations. After each escapade, they’d return home to their own kitchen in Puerto Rico ready to dissect what they had discovered. As Carmen learned first hand, cooking in the Caribbean was a vast wonderland of food, flavor, and influence from other countries far from the tropics.
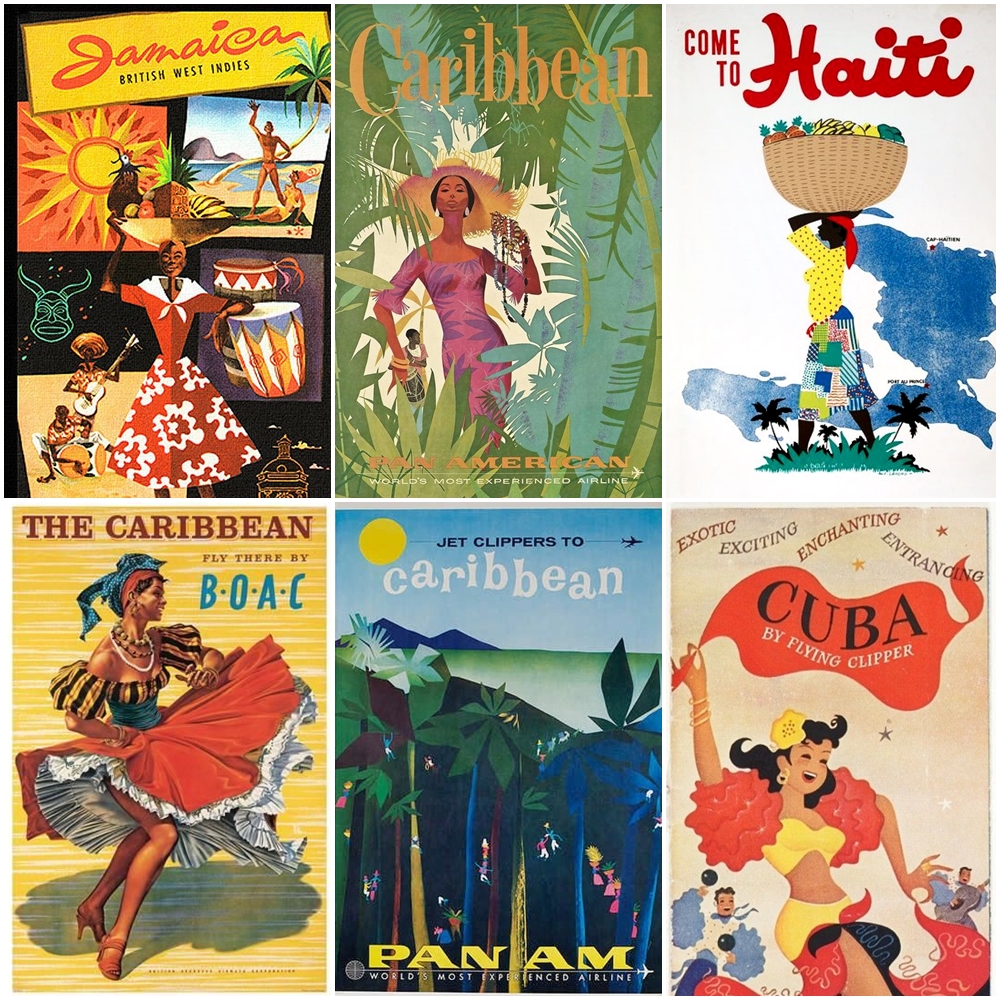
Vintage Caribbean travel posters from the 1950s and 1960s.
Floating between the Gulf Of Mexico and the Atlantic Ocean, with the United States, Mexico and South America acting as surrounding neighbors, the Caribbean is made up of an incredibly diverse population – an exotic tribe of people from Europe, Africa, Mexico, the Mediterranean coast, the United States and the U.K.
Vintage 1960s travel poster designed by Paul Loweree
Originally there were the first inhabitants, the Arawak Indians, but then came the British, French, Dutch, Danish, and Spanish settlers along with slaves from Africa who worked the sugar plantations and ex-pats from America looking for escapism. All these cultural influences grew diversity on the islands and greatly layered the cuisine of the Caribbean, making it not just one type of food, but a blend of many nationalities.
In the painting, there is no sign of food, but its very essence pulls your imagination towards sandy beaches, tropical drinks, coconuts, rum, pineapple, papayas. Carmen is quick to explain that cooking in the Caribbean is not all “roast pig and ritual,” that food varies from island to island, built upon six centuries of history and the cohabitation of many cultures. It was with that in mind that I chose, a recipe from Carmen’s cookbook that is an authentic Carribean dish marinated in generations of foreign influence. For today’s post, we are making a recipe that combines elements of Spain with two Caribbean staples – olives and capers. The dish is called Pescado Dorado or Golden Fish and it is a lovely meal to wrap up the end of summer with since it shines best with garden tomatoes fresh off the vine.
Carmen’s recipe recommended using a whole fish but I used cod filets instead since I couldn’t find a whole tropical-looking fish at our neighborhood market. The recipe serves 8 but if you don’t want to make a big dinner out of it, simply cut all the ingredient measurements in half and you’ll wind up with a smaller serving for four.
PESCADO DORADO – GOLDEN FISH
(serves 8)
1 fish weighing 4 lbs, cleaned (or 4lbs of fish filets – I used cod)
2 large limes
2 tablespoons salt
1/2 teaspoon pepper
2 medium onions, peeled and sliced
2 bay leaves
12 green olives
1 tablespoon capers
1 tablespoon liquid from jar of capers
1/2 cup water
1/2 cup olive oil
2 cloves garlic, peeled and mashed
1 1/4 pounds tomatoes
2 canned pimientos
If using a whole fish, wash it inside and out. Ignore this step if using fish filets. Cut 2 slight gashes on both sides of the fish or filets. Place the fish in a baking dish. Squeeze the juice of the limes over the fish and sprinkle with salt and pepper.
Arrange the rest of the ingredients from the onions to the tomatoes on top and around the sides of the fish.
Preheat oven temperature to 550 degrees.* Bake fish for 15 minutes. Lower temperature to 425 degrees and bake for 25 minutes longer, basting fish occasionally.
Heat pimientos and serve as a garnish on top of fish.
*A note on cooking time and temp – In 1963, Carmen’s oven reached 550 degrees. In 2018, the hottest my oven gets is 525 degrees. I cooked the fish at 525 degrees for the first 15 minutes and then reduced it to 425 degrees and cooked it for the remaining time with no problems.
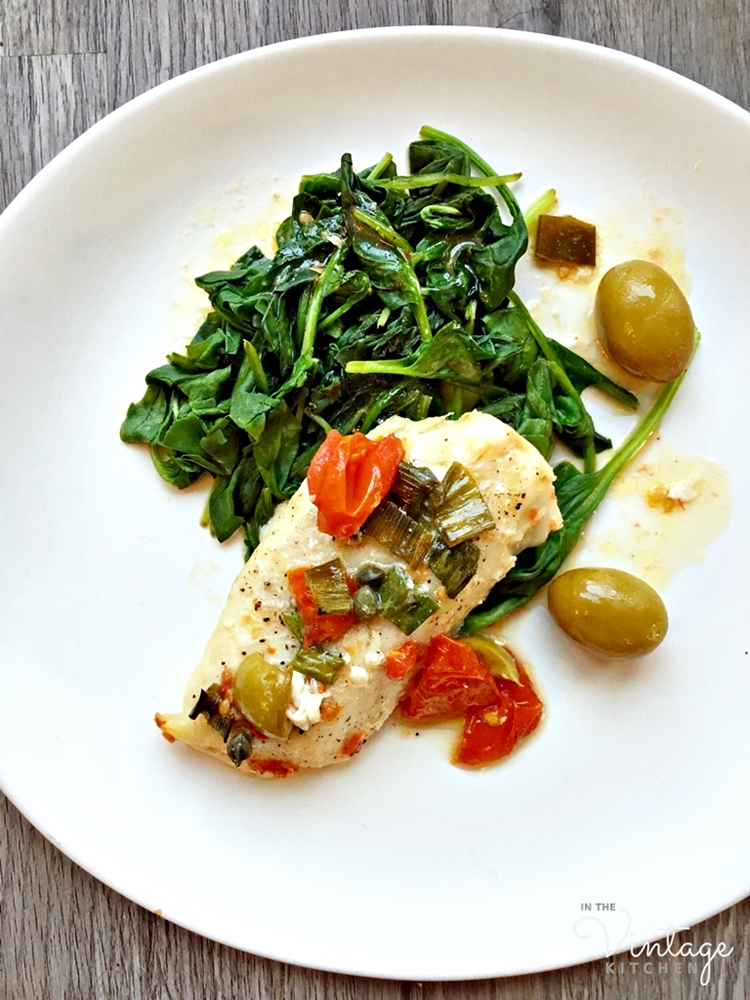
Carmen Aboy Valldejuli’s Pescado Dorado
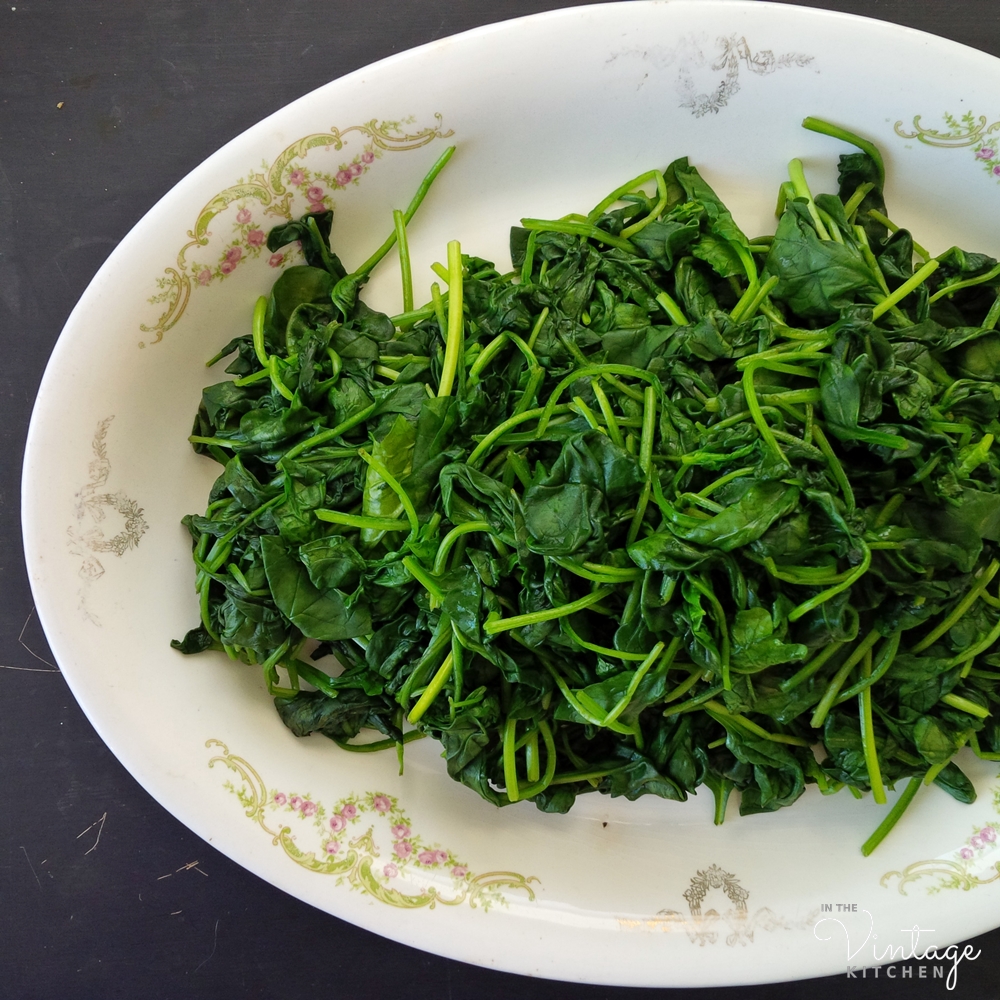
What emerged from the oven, after it was done baking, was a flaky cloud of codfish that was swimming in a salty citrus sea. To say that this dish was anything but delicious would be an understatement. Sometimes fish dishes are very light and leave you still feeling hungry, but this one is robust in flavor and is filling enough on its own. I paired this fish dish with a handful of sauteed spinach and garlic but rice would also work or a side salad. Dessert was kept equally simple with a fresh fruit board that included pineapple, mango, papaya and fresh coconut.
We also had a little musical accompaniment during dinner from Harry Belafonte, one of the most iconic singers of Caribbean folk songs in the world. About a month ago, I heard the song Cocoanut Woman for the first time…
and instantly loved it. Further discovery led to his Calypso album, a bestseller full of Caribbean folk songs that was released in 1956. In its first year, this album sold a million copies landing Harry on top music charts and making him an international superstar. If you are unfamiliar with his work, you’ll find a big collection of his songs on here including the Jamician folk song Day-O about dock workers loading banana boats and the island love song, Jamaica Farewell.
Between the three – painting, music, and food – this dinner felt like a mini island vacation all in itself. If you find that your summer has come and gone and left you without the chance to relax as much as you wished, try spending the evening with Carmen and Harry and Emmanuel (the painter) and see if your spirit can’t be soothed by a little slice of creative paradise. A glass of rum helps spread the cheer too.
Incidentally, I tried to find out more about my muse for this post, the artist named Emmanuel who painted the Haitian landscape that started all this to begin with. But he was elusive. As it turns out, there are LOTS of painters named Emmanuel in the Caribbean. That’s okay, though, it doesn’t matter that he can’t be tracked down further. Muses aren’t exactly known for their easy accessibility. Bob Dylan believed that the highest purpose of art was to inspire. In that case, Emmanuel certainly fulfilled his role, at least during dinner time in the Vintage Kitchen. As for Carmen, she went on to become an expert, the expert, of Caribbean cuisine, publishing several cookbooks throughout her life. Even though she died in 2005, she is still regarded as the classic authority on Caribbean island cuisine.
So as you can see, a painting can indeed inspire dinner and also a little more. Hope this post inspires you just as much. Cheers to soaking up the essence of the islands without ever leaving home.
—
Find the cookbook and the painting in the shop here and here. Find Harry Belafonte’s music on our Vintage Caribbean Vibes Spotify playlist here.
There once was a border collie from the Scottish Highlands who ate nothing but turnip greens and lived to be over 20 years old. Dogs in the 14th century ate bones and bread, goat milk and bean broth, meat, and eggs. In the latter half of the 19th century, dogs ate wheat meal, beetroot, and beef blood. In the early 20th century, they ate horsemeat. Today, dogs eat a variety of assorted things ranging from buffalo to chicken, brown rice to broccoli, fruit to fish oil.
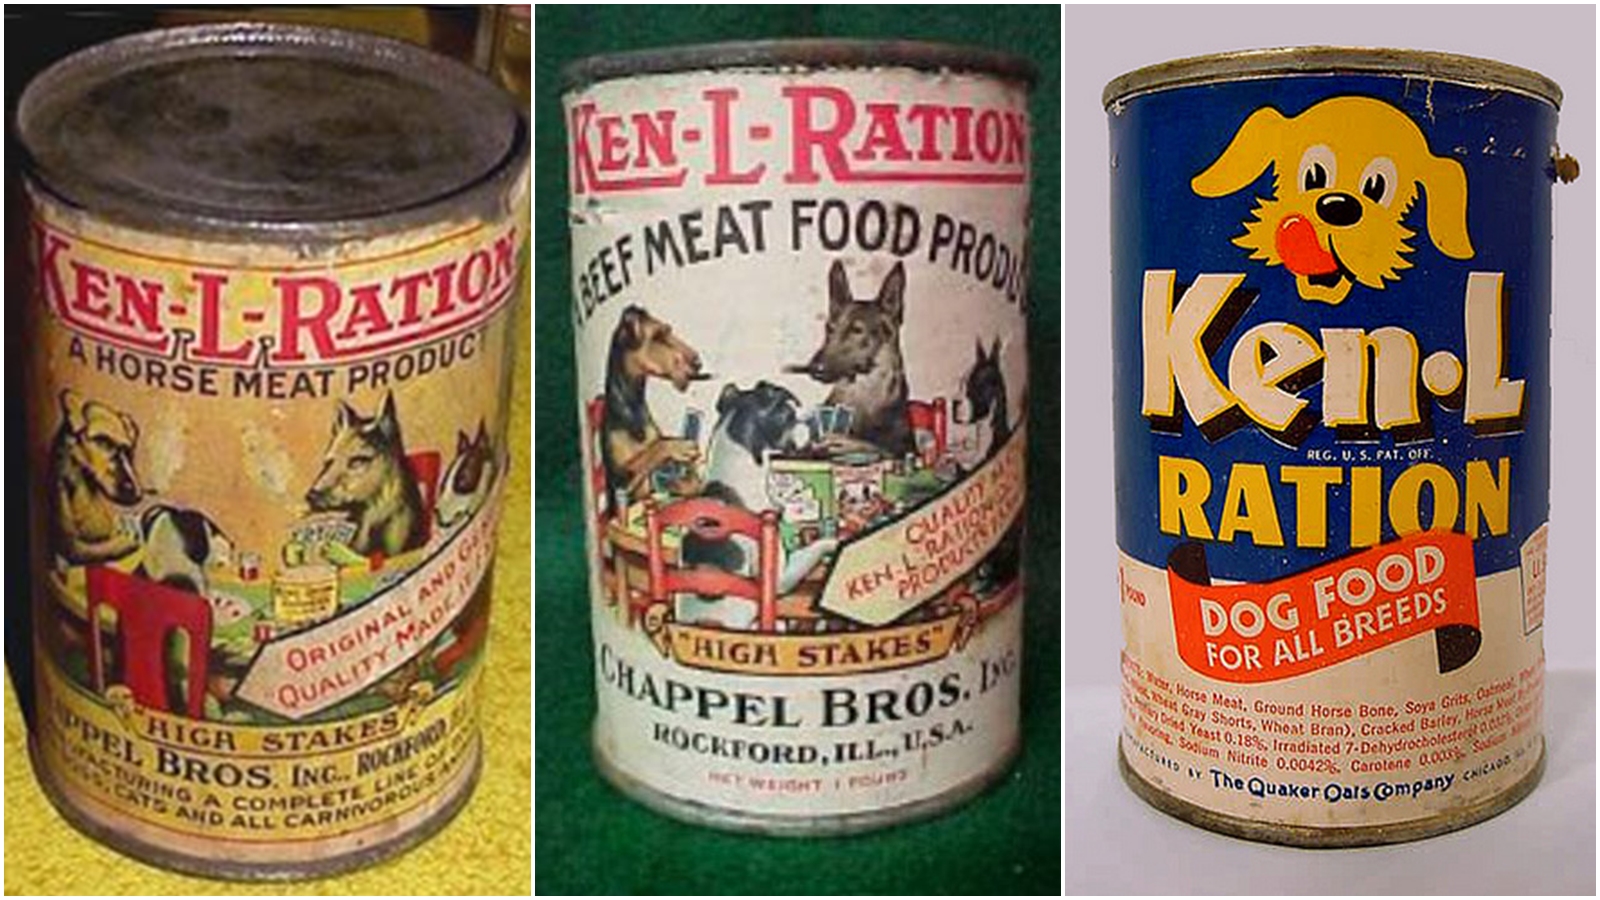
Ken-L was the first canned dog food debuting in 1920 and featured horse meat. They added beef in 1921. Still, a popular ingredient through the 1960s, both horse meat and ground horse bone can be seen in the ingredient list on the mid-century can at right.
Since dogs were first domesticated over 12,000 years ago their diets have varied depending on geographic location, activity, and ownership. As descendants of wolves who eat mostly birds, fish, deer, rabbits, and other hoofed animals, dogs’ appetites have evolved to include vegetables, herbs, protein, and grains making food options more than abundant and diverse today.
There has never before been a time in history when there has been so much choice available in the dog food industry. From traditional shelf-stable canned and dried foods to fresh meat patties, freeze-dried jerky, frozen bones and a bouquet of vitamin supplements, feeding your dog today involves nothing more than practical understanding and common sense.
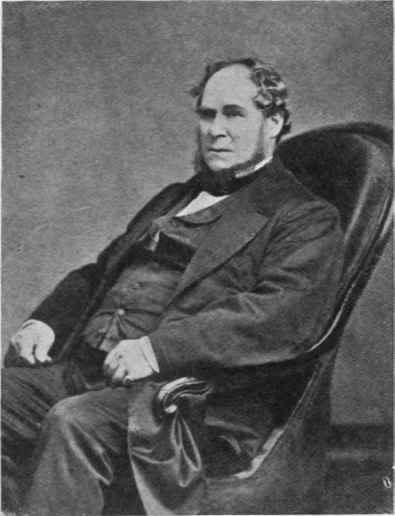
James Spratt, the father of food for dogs, commercially speaking. Photo courtesy of chestofbooks.com
We have this guy, James Spratt to thank for first coming up with the idea to commercialize dog food in the 1860s. He invented the world’s first dog biscuit after he observed England’s seaside dogs fighting over hardtack biscuits that were cast aside by sailors down at the docks. This ignited James’ interest in the idea of creating a whole canine meal that came in a compact shape, just like a biscuit – something that was easy to carry, easy to dispense, and easy to store. Spratt’s Meat Fiberine Dog Cakes were born shortly after.
An 1876 ad for Spratt’s Meat Fribrine Dog Cakes.
The cakes became so popular many companies started making their own versions, thus creating competition and a burgeoning marketplace. Now, pet food is a $31 billion a year industry just in the U.S. alone, and feeding your dog has gone from Spratt’s biscuits in the 19th century to basic canned meats in the 20th century to gourmet ready-to-eat dinners in the 21st century. That’s quite an evolution in less than 200 years.
With all this choice, it can be tricky to navigate all the options of what to feed your dog- especially if you walk down the pet food aisle at your local grocery store and see a bamboozlement of advertising with each brand declaring their food the best, the most nutritious, the most natural or organic or beneficial. You can feed your dog like a wild wolf or a pampered princess or a farm animal. You can spend $5.00 on a giant economy bag of dry dog food or $20.00 on a petite gourmet bag of artisan-crafted pellets. There’s canned food that comes in a solid lump with ingredients that you can’t pronounce and there are ready-to-eat meals in plastic tubs that resemble the beef stew you are making for your own dinner.
So which food does Indie, the enthusiastic taste-tester of the Vintage Kitchen eat? None of the above.
Instead, every day she gets a combination of fresh foods consisting of easy-to-gather ingredients that are readily available. Indie is a sociable pup and meets a lot of people in her city travels on a day-to-day basis. If there is one comment that she receives most often it is how soft and shiny her coat feels. It’s been described as everything from a plush blanket to a mink coat to a thick carpet. People think that she is completely pampered with lots of regular trips to the groomer but Indie is a tom-boy at heart and could care less about her pretty fur. She’s never been to the groomer, and she’s only had three baths ever, (each of which she totally hated). We attribute her great state – her glossy coat, her bright eyes, her abundant energy level and her eager appetite all to the good food she eats.
By making her own dog food, we have the opportunity to eliminate preservatives, fillers, by-products and known skin-allergy-causing ingredients like corn, wheat, and soy from her diet. We have better control over her overall health and can feed her the nutrition she needs based on weekly changes in her activity and lifestyle levels. That means on days she is more active, she gets more protein and more carbs to fuel all her running and jumping. On days she’s less active she gets more vegetables and less carbs so that she doesn’t put on sedentary weight and get lethargic. We have been feeding Indie this way for over five years now. Needless to say, she’s been an enthusiastic eater from her first bowl forward!
You might think that making your own dog food is labor-intensive, time-consuming, and expensive, but it is actually the complete opposite. As we learned above from dogs throughout history, their diet is pretty diverse just like ours. All her dog food ingredients come from the same place where we shop for our food – the farmers market, the grocery store, etc.. It takes about one hour to prepare a week’s worth of food (up to 14 meals) or 15 minutes a day if we decide to cook for her each night. Cost-wise on average, we spend about $10-$12 a week on the ingredients that make up her meals.
There are three main components to a healthy dog diet – protein, vegetables, and grains. Amounts of each vary depending on your dog’s size and activity level (for example, the more active your pup is, the more protein they should eat), but every day, in every bowl Indie’s meal consists of at least one element from each of these three categories for balanced nutrition.
PROTEIN
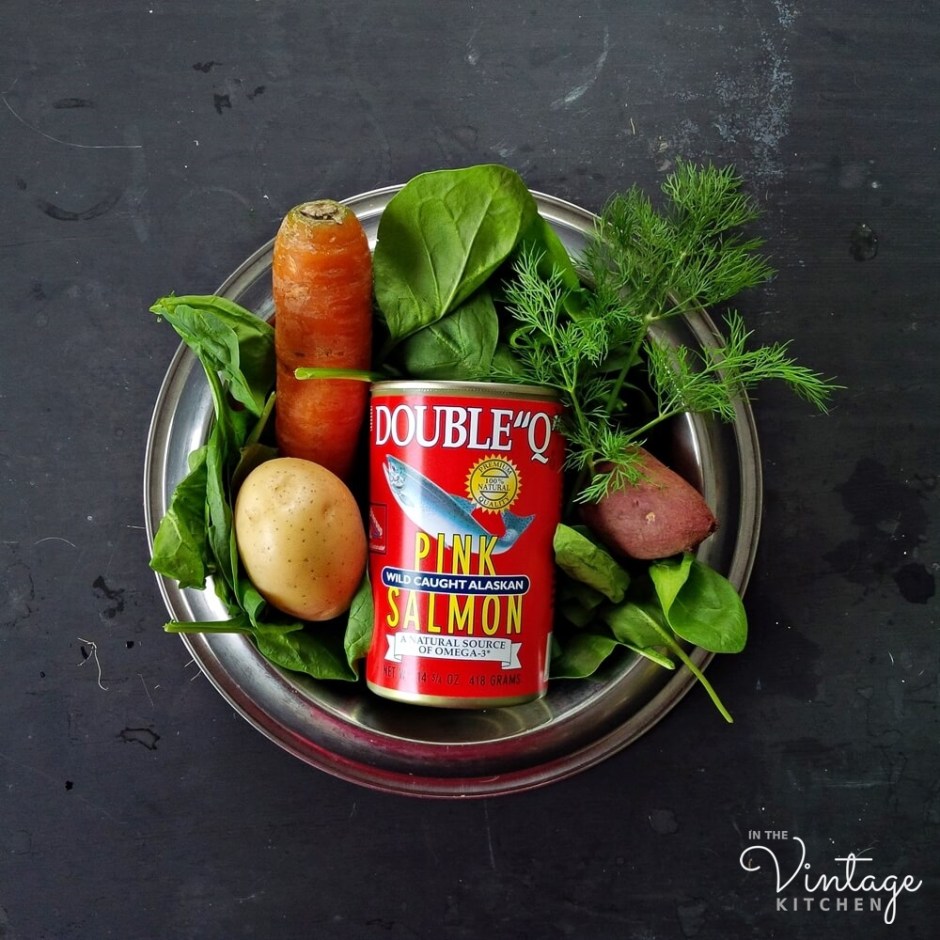
Indie’s main source of protein is primarily salmon. Usually, it’s canned salmon that includes the skin and bones. Sometimes she eats fresh salmon or frozen as long as it’s wild-caught. Occasional additions of chicken, eggs, beans and homemade broth also round out her main protein sources. Once every few months she’ll have a little bit of beef, pork, or lamb for variety. There is a theory about serving your dog raw proteins but we always cook Indie’s (with the exception of the canned salmon) just to be on the safe side as far as bacteria. We cook her protein in one of three ways – sauteed in olive oil on the stove, poached in broth or baked in the oven. Eggs are usually scrambled or hard-boiled. And beans are canned.
VEGETABLES
As a true gourmand, Indie loves most vegetables. Her regular rotation includes sweet potatoes, spinach, kale, apples, potatoes, carrots, peas, cucumbers, tomatoes, parsley, pineapple, beets, celery, pumpkin, zucchini, butternut squash, acorn squash, bell peppers, broccoli, cauliflower, strawberries, avocado, pears, collard greens, cabbage and okra. Her vegetables either come from the farmer’s market or the grocery store. She mostly eats what’s in season, except for sweet potatoes and apples which she eats pretty much year-round. And while she eats all of these vegetables mentioned above, she doesn’t eat this whole list all at once. Generally, she eats 2-3 different types of vegetables in one meal.
GRAINS
Primarily her main grain is white rice but sometimes we’ll add in cooked oatmeal, barley, wild rice or quinoa for variety. White rice is better than brown rice because dogs have short digestive tracts (unlike people who have long digestive tracts) so rice passes through their system quite quickly. The main benefit of brown rice is that it acts like a scrub brush for the digestive system making it great for people but not necessary in dogs since it passes through too fast to benefit.
The part that takes the longest when in it comes to making homemade dog food is baking the potatoes (one hour in a 425-degree oven) and cooking the rice (15 minutes). While the potatoes are baking and the rice is cooking, we prepare the vegetables by chopping them into bite-sized pieces, and either sauteeing, boiling, or roasting them. We also use this time to boil the eggs, open the beans and/or cook the proteins as well.
By the time the potatoes are done – all the other dog food components are ready too. We let everything cool down to room temperature before adding all the ingredients together in one large mixing bowl and tossing it all to combine. When we make a big bach like this for the week, we divvy up the mixture into smaller, daily dose-sized containers and store them in the fridge.
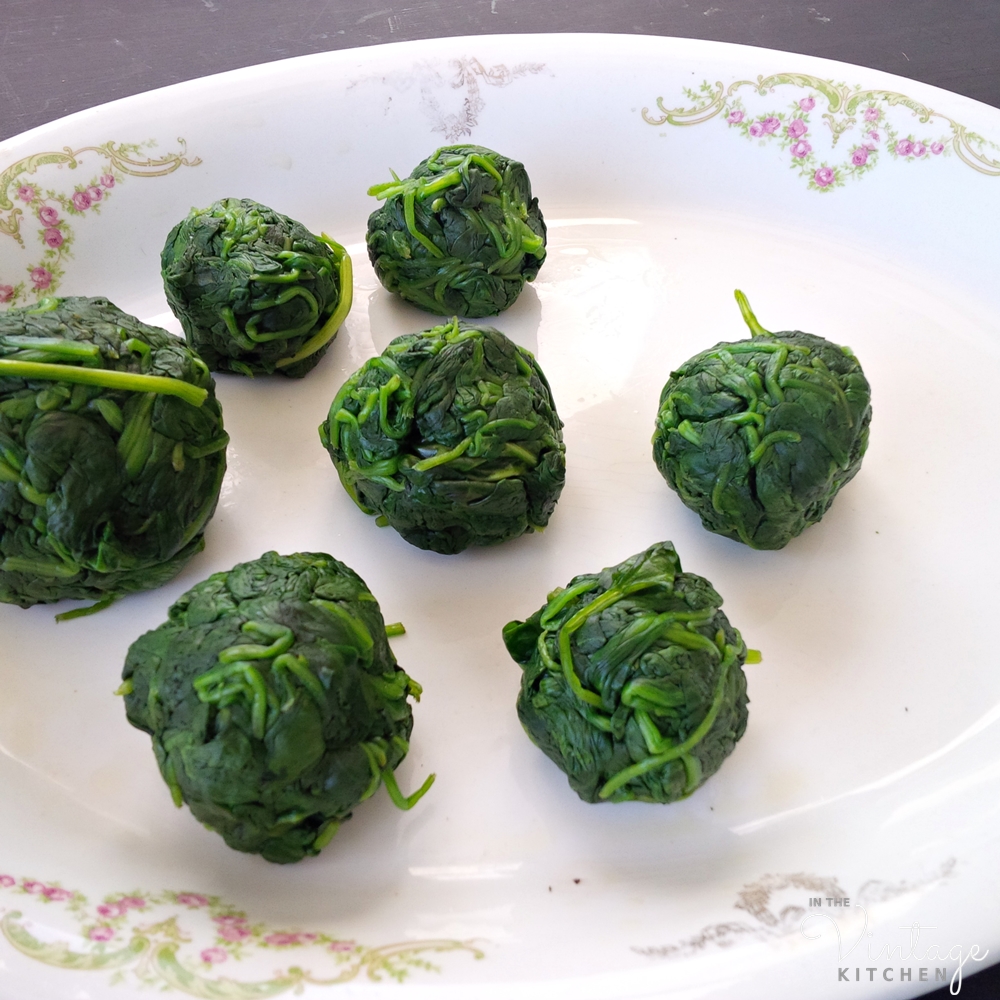
Indie’s dinnertime bowl consisting of 1/3 cup canned salmon, 3/4 cup cooked white rice, one sauteed carrot, one half of a hard-boiled egg, two finger-sized sweet potatoes (with skin), a handful of sauteed spinach and one small new potato (with skin).
MEASUREMENTS
Indie eats usually 1 1/2 cups of cooked rice, 2/3 cup of protein and 2-3 cups of vegetables per day. She eats twice a day – breakfast and dinner. She weighs 55 lbs and is moderately active as far as exercise. What we feed her reflects her lifestyle and activity level so if you want to start making your own homemade dog food too, use it as a guide only and not specific measurements. Adjustments and modifications will need to be made for your own dog’s size and energy level as well as how often you feed your dog per day and their own individual appetite preferences. Large dogs obviously need more food, small dogs less.
When we were visiting our friend’s house for the weekend, Indie let everyone know her true thoughts on the raw kale we newly introduced to her diet. No thank you!
PERSONALITY QUIRKS
One of the things that will become immediately apparent when you start making your own dog food is how quirky your buddy can be. For instance, Indie will only eat her kale if it is sauteed in a little bit of olive oil. If it’s included in her bowl raw, she’ll pick out all the pieces and lay them next to her bowl. Her not-so-subtle hint that kale is only great when it’s cooked! She also usually likes most of her vegetables cooked unless they are finely grated like we sometimes do with raw carrots, celery, zucchini or broccoli. Usually, we just chop and boil, sautee, or oven-roast all of her vegetables until soft, but not mushy.
If you start making your own pup’s food, there are a few simple things to keep in mind when determining what’s good and bad for canine consumption…
A FEW FOODS NOT TO ADD
Never add salt or pepper to your pup’s protein while cooking. (If you are using boneless, skinless chicken breasts or fresh fish cook them in olive oil instead of butter.)
Onions
Chocolate
Rhubarb
Spices
Apple seeds and cores
Raisins, grapes or plums
Lemons or Limes
Bones of any kind (except the ones in canned salmon are fine)
ADDITIONAL FUN THINGS TO ADD ON OCCASION IN MODERATION
Greek Yogurt
Peanut Butter
Olive Oil
Cheese
Applesauce
Bread
Nuts (finely chopped)
Basically, when it comes to cooking for your dog think of it like cooking for yourself. If you are making scrambled eggs for yourself for breakfast, portion some out for your pet too. If you are making steamed broccoli for your dinner, steam some extra for your pup. Or if you are making a traditional spinach salad for your lunch, chop up some extra spinach, bacon and egg for the dog bowl. You’ll discover how fun and creative cooking can be for both you and your pal.
If you are uncertain whether or not you want to switch your dog’s diet to a 100% homemade one – start small with baby steps and throw in a cooked egg or a few slices of apple with their food and see how they like it and then expand little by little.
The nice thing about feeding your pup the food you make is that you can see results or benefits within a few days. Depending on how much fresh food you introduce, their coats will be shinier, their energy levels more balanced and their attention more focused (especially at mealtime!). You will also be able to monitor their health by what’s going in and what’s coming out. We have to pick up after Indie, since we live in the city so it’s a good opportunity to tell if everything is in balance and processing well. If her waste is runny or mucousy-looking rather then firm and solid then we know an ingredient is upsetting her stomach lining and we can quickly recall and identify which ingredients we’ve recently fed her and can adjust her fresh foods from there.
All in all, we hope that making your own dog food will be fun and enjoyable for both you and your pup. If you already make your own homemade dog food, please share your story in the comments section below so that we can continue to learn together and create delicious meals for our wonderful companions. Indie is ALWAYS ready to test out a new recipe!
Cheers to our canine pals and to all the fresh dinners they inspire. Happy cooking!
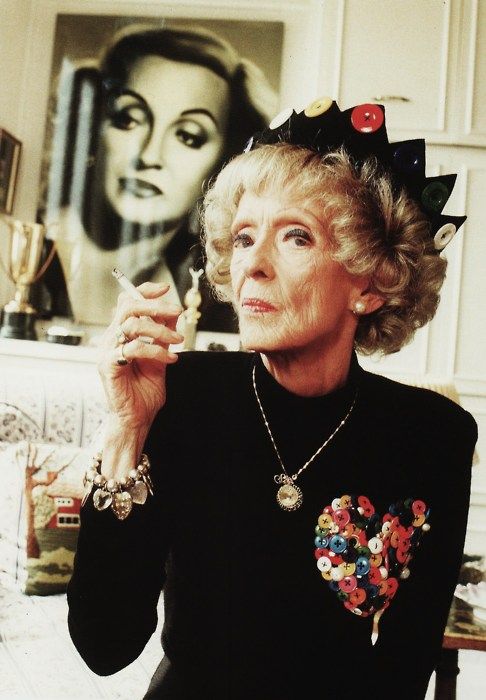
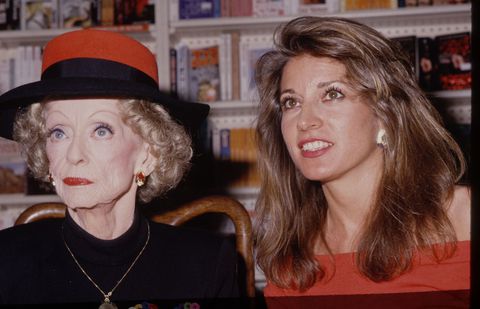
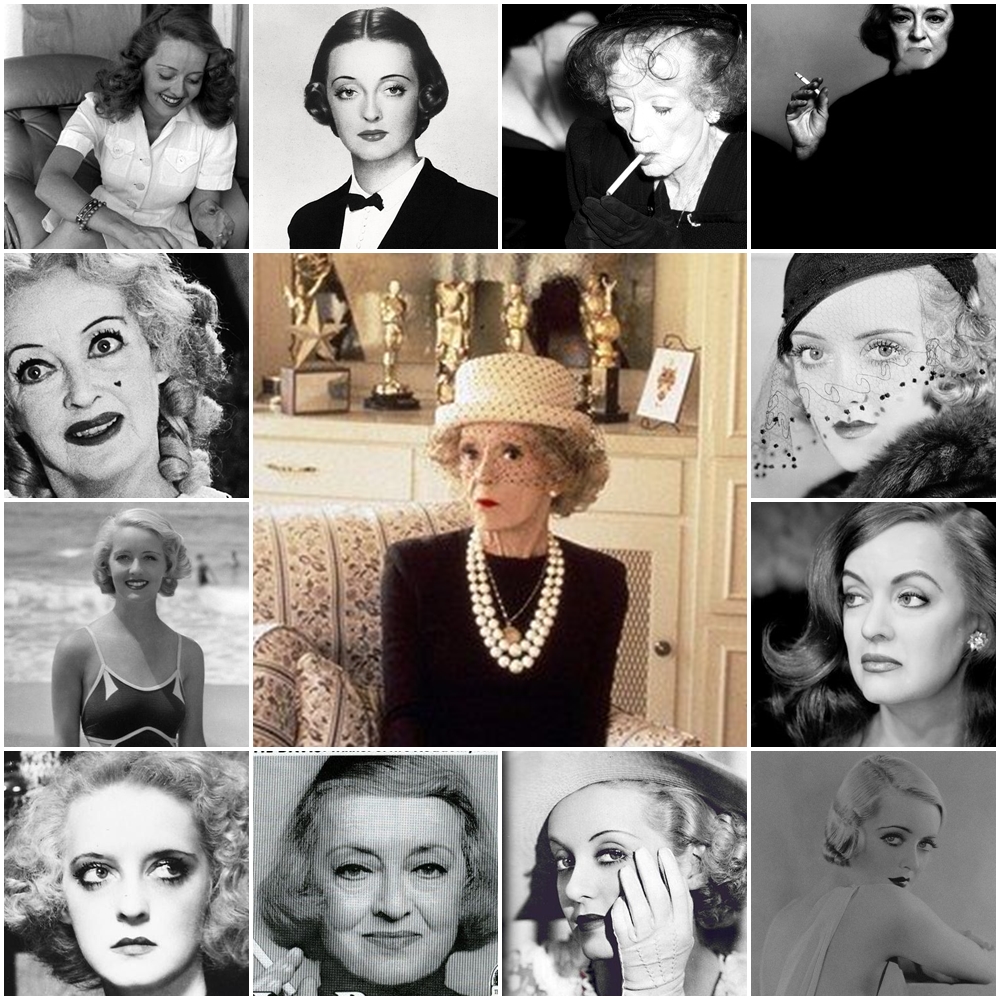
You could assume a lot of things about Bette Davis. Perhaps you’ve watched her movies (all 100+ of them) and you know her characters… smart, complicated, dramatic… and you think, personally, she must have been like that too. Or maybe you’ve read her books and know that her life hasn’t always been charming or easy, and you might think she bravely dealt with a lot of disappointment. Or perhaps you’ve seen her past interviews on television or youtube and witnessed how funny and polished and magnetic she was even in the off hours of her professional life.
All those instances might lead you to assume things about Bette, making you define her as one thing more than another – brassy, smart, privileged, funny, vulnerable, demanding, narcissistic, intense, wise, melodramatic, sincere, even terrifying. Thanks to Kathryn Sermak’s new book, Miss D & Me, we can put our assumptions aside and know first-hand that Bette was a little bit of all those things. And so much more.
It is always fascinating to me to read about the behind-the-scenes lives of people in the public eye. Especially those stories shared by people who worked closely with a celebrity on a daily, detailed basis. Mostly because it breaks down the perception barrier of thinking that famous lives are so much more different than our own. That somehow fame and notoriety have morphed them into other-worldly figures washed clean from weakness and frailties. We generally only get to see one side of a famous person’s life depending on which part the media chooses to focus on, but with behind-the-scenes stories, you are offered a glimpse into a much more diverse landscape than any two-minute news clip or ten-minute interview could provide.
Ordinary people that work alongside extraordinary people are witness to the three-dimensional side of stardom – all the good and all the bad wrapped up in one experience. Like the relationship between Katharine Hepburn and her cook Norah, or Frank Sinatra and his valet George Jacobs or Madonna and her brother Christopher we are offered the chance to understand that the lives of these seemingly mythical creatures are really just fellow human beings, both flawed and fabulous.
When Kathryn Sermak first came to work as Bette’s assistant in 1979, Kathryn was a young, carefree Californian who spelled her name the classic way – Catherine – and had just newly spelled out a dream of one day living in France. Bette was in her 70’s, still working and very much set in her ways. Kathryn thought she was taking a simple summer job that would enable her to fund her way to France – not even really aware of who Bette Davis actually was. In turn, Bette thought she was getting a competent, sophisticated assistant in Kathryn whom would be both professional and perfunctory. Both were in for a very big surprise.
In the early, uncertain days, Kathryn didn’t expect to eventually count Bette as one of her best friends and Bette absolutely never entertained the idea that Kathryn would become like a daughter to her. At first, everything was wrong for both women. On Bette’s side, Kathryn was not enough – she wasn’t cultured, she wasn’t able to anticipate needs, she wasn’t sophisticated, nor groomed for the level of lifestyle that Bette had grown into. On Kathryn’s side Bette was too much… too demanding, too overbearing and too controlling. Both thought they would never last the first week together.
The turn in their relationship from bad to better came down to one simple little thing – an egg. Bette’s breakfast most always consisted of a three-minute egg. The proper cooking of it was her litmus test as to the value of any good assistant’s worth. There’s not much to cooking a three-minute egg. It involves a pan of boiling water, an egg still in its shell and three minutes of simmering. But Bette added a twist to this simple test. How do you cook a three-minute egg in a hotel room with no stove, no pots and pans and no kitchen? Perplexed, Kathryn had no idea until Bette motioned to the in-room coffee pot. Then hot water was brewed. The egg was placed in the glass coffee carafe and the time was monitored on a wristwatch for 3 minutes exactly. In this small test of skill, it wasn’t that Kathryn failed to quickly and cleverly assess the options of impromptu cooking in a kitchenless room, but instead, it was the trainability of her actions that caught Bette’s attention.
That was the beauty of their relationship and the bud that ultimately bonded them together. The fact that Kathryn was young, fresh and naive while Bette was experienced, opinionated and worldly proved a combination of character traits that formed a tight friendship that lasted the rest of Bette’s life. It wasn’t always easy for these two women learning about life and each other day by day, but by the end the experience was invaluable.
There were outlandish moments, like when Bette insisted Kathryn change the spelling of her name from Catherine to Kathryn so that she would be more memorable (which she did!). There were all the lessons Kathryn had to endure… etiquette, elocution, table manners, how to walk properly, how to dress effectively, how to eat with decorum and how to hold court at a table full of strangers.
There were awkward moments, when Bette’s insistence on how to appropriately handle certain social situations was so outdated, that Kathryn would bear the brunt of the embarrassment. This was especially apparent when Bette insisted on dressing Kathryn for a formal dance in Washington DC complete with fur coat, gloves, a designer dress, expensive jewelry and dance lessons only for Kathryn to encounter a room full of denim-clad twenty-somethings casually hanging out in a dance hall.
There were the vulnerable moments when Bette crumpled up in the face of public humiliation as her daughter wrote an unflattering tell-all book, or when Bette threw off her wig in the car one day and embarked on a temper tantrum that was heartbreakingly child-like. There was oodles of advice about men and relationships and sticking up for oneself in the face of adversity. And there were the laughs and the conversations and the sweet letters that Bette would write to Kathryn expressing all the appreciation she felt for her darling assistant and her close friend. There were silent treatments and long work days, elegant cocktail hours and thoughtful gifts, tears and tenacity, laughter and luxury. There was life, with all its good and all its bad.
And there were eggs – lots of eggs. Bette and Kathryn traveled the world together and ate at many fine restaurants, but the food Bette would choose to make for herself or her family on days off was simple fare that harkened back to her New England roots. Homemade burgers, cucumber salad, cornish game hen, wine spritzers, clam bakes, fresh berries with cold cream… those are the foods that she liked to make. For this post, our breakfast menu inspired by Bette Davis includes the following:
It’s a simple menu symbolizing all that was Bette Davis – sweet, salty, fresh, traditional, colorful, warm, cool and classic. It takes just a few minutes to make and is so easy it doesn’t even require detailed instruction. Simply boil an egg for 3 minutes. Slice some homemade bread and slather it with jam. Bake a potato in the oven for an hour and then finely chop it up with some scallions and salt and pepper and add the mix to a pan with some olive oil and let it cook until it turns brown and crusty. Adorn the plate with fresh fruit. Tah-dah! Breakfast, Bette Davis style, is ready!
Kathryn would be the first person to tell you that life with Bette was extraordinary for her last ten years. That the talented movie star was never far from the actual woman. That there was a glamorous side to her, a practical side, a petulant side and a vulnerable side that made her interesting and unique and ultimately endearing. That she was far from perfect but perfectly real.
“That’s me: an old kazoo with some sparklers, ” Bette once said.
The many faces of Bette Davis throughout her 55-year career.
Cheers to Bette for tackling life head-on, with grace and style and fortitude and being 100% unique about the whole affair until the very end. Cheers to Kathryn to giving us a very real look into the life of real woman and cheers to three-minute eggs – a new breakfast favorite here in the Vintage Kitchen!
This post is part of a blogathon hosted by In the Good Old Days of Classic Hollywood featuring the life and film Career of Bette Davis. Read more about this incredible woman and her work in a variety of posts contributed by a dozen different film bloggers here.
Find the vintage cookbooks that contributed recipes to this post in the shop here.
Find the recipe for homemade brown bread from a previous post here.
Find out more about Kathryn Sermak and her book, Miss D & Me here.
In Sweden, in 1939, as Nazi troops began their invasion of Norway, a young American journalist staying in Stockholm began delivering eyewitness accounts of the historic event. She was 28 years old and the only correspondent in that section of the world broadcasting live stories for CBS Radio. Her name was Betty Wason and her vantage point was intimate. Her reports were well-written, authentic, and timely in the transmission of details. She was brave, dedicated, and determined, eventually getting close to Nazi troops in Norway in order to tell the stories of wounded British soldiers and all that they had seen. She was a woman alone in a war zone, a thoughtful writer in a chaotic environment, and a new traveler out discovering foreign lands. But for all the things Betty was, there was one thing she wasn’t. She was not a man.
And that affected everything.
Gender discrimination runs rampant in every field throughout history, except maybe one…. radio news broadcasting in the 1930s and the 1940s. Mainly because there wasn’t any argument against the discrimination. Things were simply done and not done and there were rules to abide by. One of those rules concerned women. Women simply did not, were not, allowed to read the news over the air. It was firmly believed that the feminine register could not convey the seriousness and importance of hard-hitting news stories. Instead, women’s voices were relegated only to entertainment-type shows… cooking lessons, homemaking stories, commercial ads and literature readings. Anything more serious or historically significant was left up to men to communicate on-air. This proved a problem, for our gal Betty.
Growing up in Indiana in the 1920s, Betty was a creative spirit from the start with interests in music, art and fashion design. After graduating from Perdue University with a degree in home economics in the early 1930s, Betty bounced around a few jobs in her home state before realizing she wanted a more exotic life than Indiana could provide. As a young woman full of vivaciousness and adventure and a desire to see the world, Betty went to New York and settled into a two-year job working at McCall’s magazine. But even in the exciting city of New York, her wanderlust could not be quelled. Europe was calling and Betty wanted to travel.
Vintage 1930’s travel posters to Czechoslovakia show the beauty and attraction of foreign travel. This was one of the countries Betty would visit and report from.
Not having the financial means to live abroad without working, Betty contacted TransRadio Press who was willing to pay young journalists overseas for eyewitness stories concerning World War II. A brief stint in Europe trying to make a go of it as a correspondent didn’t yield enough money for Betty to live on, so she came back to New York only to try again less than a year later. On her second go-around though, she worked with CBS who was desperate to get any and all international news they could get their hands on in regards to the war. That’s when Betty headed to Sweden, just before Hitler arrived in Norway.
Betty’s contact at CBS was Paul White who was in charge of news broadcasting.
There were many male war correspondents living and working overseas at this time, but they were mainly focused on print pieces suitable for newspapers and magazine readers. Radio was becoming more and more popular in terms of delivering news, but the seasoned overseas reporters, so focused on their writing, were out of the loop on the fact that radio news was rising in popularity. There was a niche market blooming in quick, short news briefs for ears instead of eyes and Betty saw an opportunity to be a part of it.
A 1940’s radio
Since Betty was the only correspondent in the Scandinavian region, she was recording and filing her own reports for CBS and being paid on a weekly basis. But quickly, CBS determined that Betty’s voice was a problem (too light, too feminine, too high in pitch). It was believed, even in times of war, especially in times of war, that radio listeners didn’t want to hear a delicate voice reporting on death and destruction. Her reporting content was strong though, so CBS said that she had to find a male counterpart to step in as the voice in front of her work.
Betty was upset that she couldn’t speak the words that she was writing, but she wanted to keep her job, so she trained Winston Burdett, an American newly arrived in Stockholm, in the art of journalism for a radio audience, and he read her reports for her. Incidentally, she trained Burdett so well that she wound up working herself right out of Sweden. Burdett was after all a man and now (thanks to Betty) a good broadcaster.
Winston went on to have a lengthy career as a broadcast journalist at CBS. In 1955, he admitted to being a communist spy during the 1930s and 1940s when Betty worked with him.
Trying to find another unique vantage point like she had in Stockholm, Betty went to the Balkan Islands, and to Turkey before settling in Greece where she again sent reports home to CBS. Again, CBS said she needed a male counterpart to vocally relay her stories. And again Betty complied, this time working with a male Embassy secretary, who, at least, introduced himself on-air as “Phil Brown speaking for Betty Wason.”
Betty Wason in Greece. She made her own uniform to appear more professional since there was no dress code for correspondents. Photo courtesy of Hard News: Women in Broadcast Journalism.
As the Nazis occupied Greece, Betty’s bravery was called upon again as she reported eyewitness occurrences on a regular basis through her Embassy mouthpiece. While there, she endured house arrest under Nazi supervision for two months before the regime flew her and several other journalists to Europe for questioning. Concerned that Betty might be a spy, the Nazis detained her for an additional week by herself before eventually allowing her to fly back home to the US, where she was greeted with fanfare for having endured captivity and detainment.
Invigorated by the attention she received upon returning home and by the contributions she had made to broadcast journalism overseas, Betty naturally went to the CBS offices in New York to inquire after more work or a new assignment. Shockingly, executives at CBS refused to acknowledge that she played any significant part in the broadcasting realm overseas and denounced her requests for more story assignments. In an instant, Betty was dismissed like she had never been a part of the reporting team in the first place. Immediately, her work was marginalized even though CBS had been using her content repeatedly throughout the war, finding it valuable enough at the time to pay her for it. But upon Betty’s return, none of that seemed to matter. Had Betty been a man she would have been offered a position like Winston Burdett or handed a new assignment and sent to another corner of the globe. She would have been encouraged and supported by her colleagues and eventually been able to dispel the ridiculous notion that women couldn’t vocally report the news. But that didn’t happen.
After being turned away by CBS, Betty left New York and went on to Washinton DC, where she joined forces with other women in broadcasting, collaborating on various news shows and continuing on with her writing. Those few years of dangerous foreign reporting and her budding career of broadcast journalism didn’t turn out the way Betty expected, but ultimately, good things came out of this redirection in her life. Her ability to believe in her own talents and to creatively work around roadblocks with persistence and perseverance led her to a fulfilling career as a writer, on her own terms.
A sampling of Betty’s cookbooks published from the 1950s-1980s
Inspired by her travels and her curiosity to learn more about local cultures and customs, Betty was devoted to exploring the history and the food scene in all the countries she visited, each eventually yielding their own distinct cookbook. Through her explorations in The Art of Spanish Cooking,The Art of German Cooking… of Vegetable Cooking… of Mediterranean Cooking… Betty wanted readers to experience the sights, sounds, smells, and tastes of her favorite places. That genuine, awestruck wonder led to over 20 beautifully written books that pull readers (and home cooks!) in from page one…
How I wish I were about to fly to Greece again, to relive once more that special thrill of seeing from the sky the ragged ochre shoreline with its-jewel-like border of turqouise merging into the royal blue of the Aegean…(from the introduction of her Greek cookbook)
Betty pictured here with her daughter Ellen, in 1963, aboard a TWA flight bound for Spain to research recipes for The Art of Spanish Cooking.
In the Vintage Kitchen, we were introduced to Betty through her Greek cookbook simply titled Betty Wason’s Greek Cookbook, a stained and splattered edition worthy of its adventurous war correspondent author.
If a cookbook could ever be a travel guide, it would be Betty’s style of approaching food. Not only does she include authentic recipes, but she writes about them with the eye of a curious tourist learning a country in detail. In her Greek Cookbook, published in 1969, in addition to 200 recipes, she also included a state-by-state reference guide on where to buy authentic Greek ingredients in the US, a glossary of Greek terms, and special tips and tricks to make sure that the cooking experience remained as easily replicated as possible.
Yesterday, it was Betty’s birthday and today it is International Women’s Day. We couldn’t think of a better post to publish than this one on the forgotten lady of broadcast journalism and now the remembered author of important vintage cookbooks. In celebration, we made her recipe for Spanakopeta from her Greek cookbook. With spinach now coming into season, it is an ideal dish for Spring and a guaranteed crowd-pleaser for upcoming holidays like Easter and Mother’s Day. If you have never had Spanakopeta before, it is similar to quiche…. a mixture of cheese and spinach and herbs stuffed between two layers of phyllo dough.
Betty Wason’s recipe for Spanakopeta, A Greek version of Spinach Pie
It’s light in texture and constitution so it can be enjoyed as a side dish or a small dinner or a brunch accompaniment. Betty suggested that it could be served hot or at room temperature, which makes picnic basketing an option too. It reheats well and can sit in the fridge for a few days without getting soggy so if you are a make-ahead meal planner this recipe will be effortlessly easy and valuable.
Betty Wason’s SPANAKOPETA
Serves 6
12 phyllo pastry sheets
2 pounds fresh or frozen spinach (we used fresh)
1 teaspoon fresh dill, minced and chopped
2 tablespoons fresh parsley, minced
Salt to taste (optional)
2 eggs
1/2 lb. Gruyere-type cheese, feta cheese or dry pot cheese (* see notes)
1/2 cup melted butter or olive oil (we combined 1/4 cup of each)
Preheat the oven to 350 degrees.
If frozen spinach is used, cook as directed on package and drain well. If fresh spinach is used, wash and clean the leaves to remove any traces of dirt and pat dry. Heat a large saucepan over medium-high heat. Do not add any butter, oil or water to the pan. Working in batches, add as many large handfuls of spinach as will fit reasonably in the pan and toss with a wooden spoon until all spinach is wilted (about 2-3 minutes per batch). You may have to do this step in several batches depending on the size of your pan. Spread each cooked batch of spinach out on a cookie sheet to cool.
Once all the spinach is cooked, it will look like this…
At this point, you’ll need to wring as much water out of the spinach as possible. The easiest way to do this is to grab clumps in your hand and wring them out forming tightly packed meatball-like shapes. The drier the spinach the better so wring as much water out as you can.
Next, on a cutting board roughly chop each of the spinach balls. Mix in the dill, parsley, and salt to taste and toss until combined. I found there to be enough natural salt in the spinach and the cheese, so we didn’t add any extra salt to this dish at all, but season it to your preference.
Add one egg to the spinach and herbs and toss to combine. Grate the cheese. We can only find Gruyere at our grocery store occasionally, so I used Danish Fontina which is similar. Other options are Jarlsberg, Swiss or Feta.
Add the second egg to the grated cheese and mix to combine.
Butter a square 9×9 baking dish and place 6 sheets of phyllo pastry in the bottom. Brush each sheet with the olive oil and/or butter. Then add the spinach, and top with the cheese.
Cover with six more sheets of phyllo, each brushed in butter/olive oil. Don’t forget to brush the top layer.
Ready for the oven!
Bake in a 350-degree oven for 35 to 40 minutes until pastry is golden. Remove from the oven, let cool until the dish can be handled,
then turn out upside down on a baking sheet and return it to the oven so that the undercrust can become crisp and golden (about 15-20 minutes).
Back into the oven!
Remove from the oven, flip back over and cut into squares. Serve while hot or wait for it to cool to room temperature. We served our spanakopeta with a glass of sauvignon blanc and a simple side salad tossed in olive oil and lemon juice. Other additional sides that would be lovely with this include hard-boiled eggs, olives, mixed nuts, prosciutto, or roasted sweet potatoes.
Light, airy, and full of subtle flavors that are a little bit nutty (the cheese), a little bit zesty (the herbs) and a little bit earthy (the spinach), Betty’s spanakopeta is packed full of good, healthy nutrients, providing a simple introduction to the lovely world of Greek food.
It’s a good-for-your-spirit food mirroring Betty’s healthy outlook on life. She cast aside all the bitterness and resentment that could have filled her up in the post-CBS days and instead stuffed her life full of light, bright joy that enriched her spirit and fed her soul. Cheers and happy birthday to Betty for continuing to inspire women around the world with your writing.
Interested in learning more about Betty and her Greek recipes? Find her cookbook in the Vintage Kitchen shop here.