Color Therapy in Cooking and Colombia

The rainbow shades of Bogata, Colombia.

Crimson, ochre, emerald, fuschia, celadon, aubergine, tangerine – those are just a few of the everyday shades that radiate from the country most often recognized as hosting the happiest residents on Earth. Welcome to Week 10 of the International Vintage Recipe Tour 2020!

This week we are in Colombia via the kitchen to make a bountiful one pot comfort meal bursting with vibrant vegetables, spices and herbs.  We’ll also be discussing color therapy in relation to cooking and how it can instantly lift your spirit and help calm your anxiety. Two factors that seem especially important these days when it comes to navigating quarantine, the coronavirus and the current state of our world.

All of the images in this week’s post (except the recipe-related ones) were taken by photographers in Colombia, each capturing the jubilant atmosphere of a country caught up in color. Get ready to be dazzled dear kitcheners. Joyful images of bright beauty await. Welcome to life inside a rainbow. Welcome to Colombia…

The Colombian flag flying high in Bogata. Photograph by Flavia Carpia
Parrots of Colombia
Cartagena, Colombia
The verdant mountains of Salento, Colombia. Photograph by Christian Rodriguez
Shopping in Colombia captures all your attention. Photograph by Michael Baron

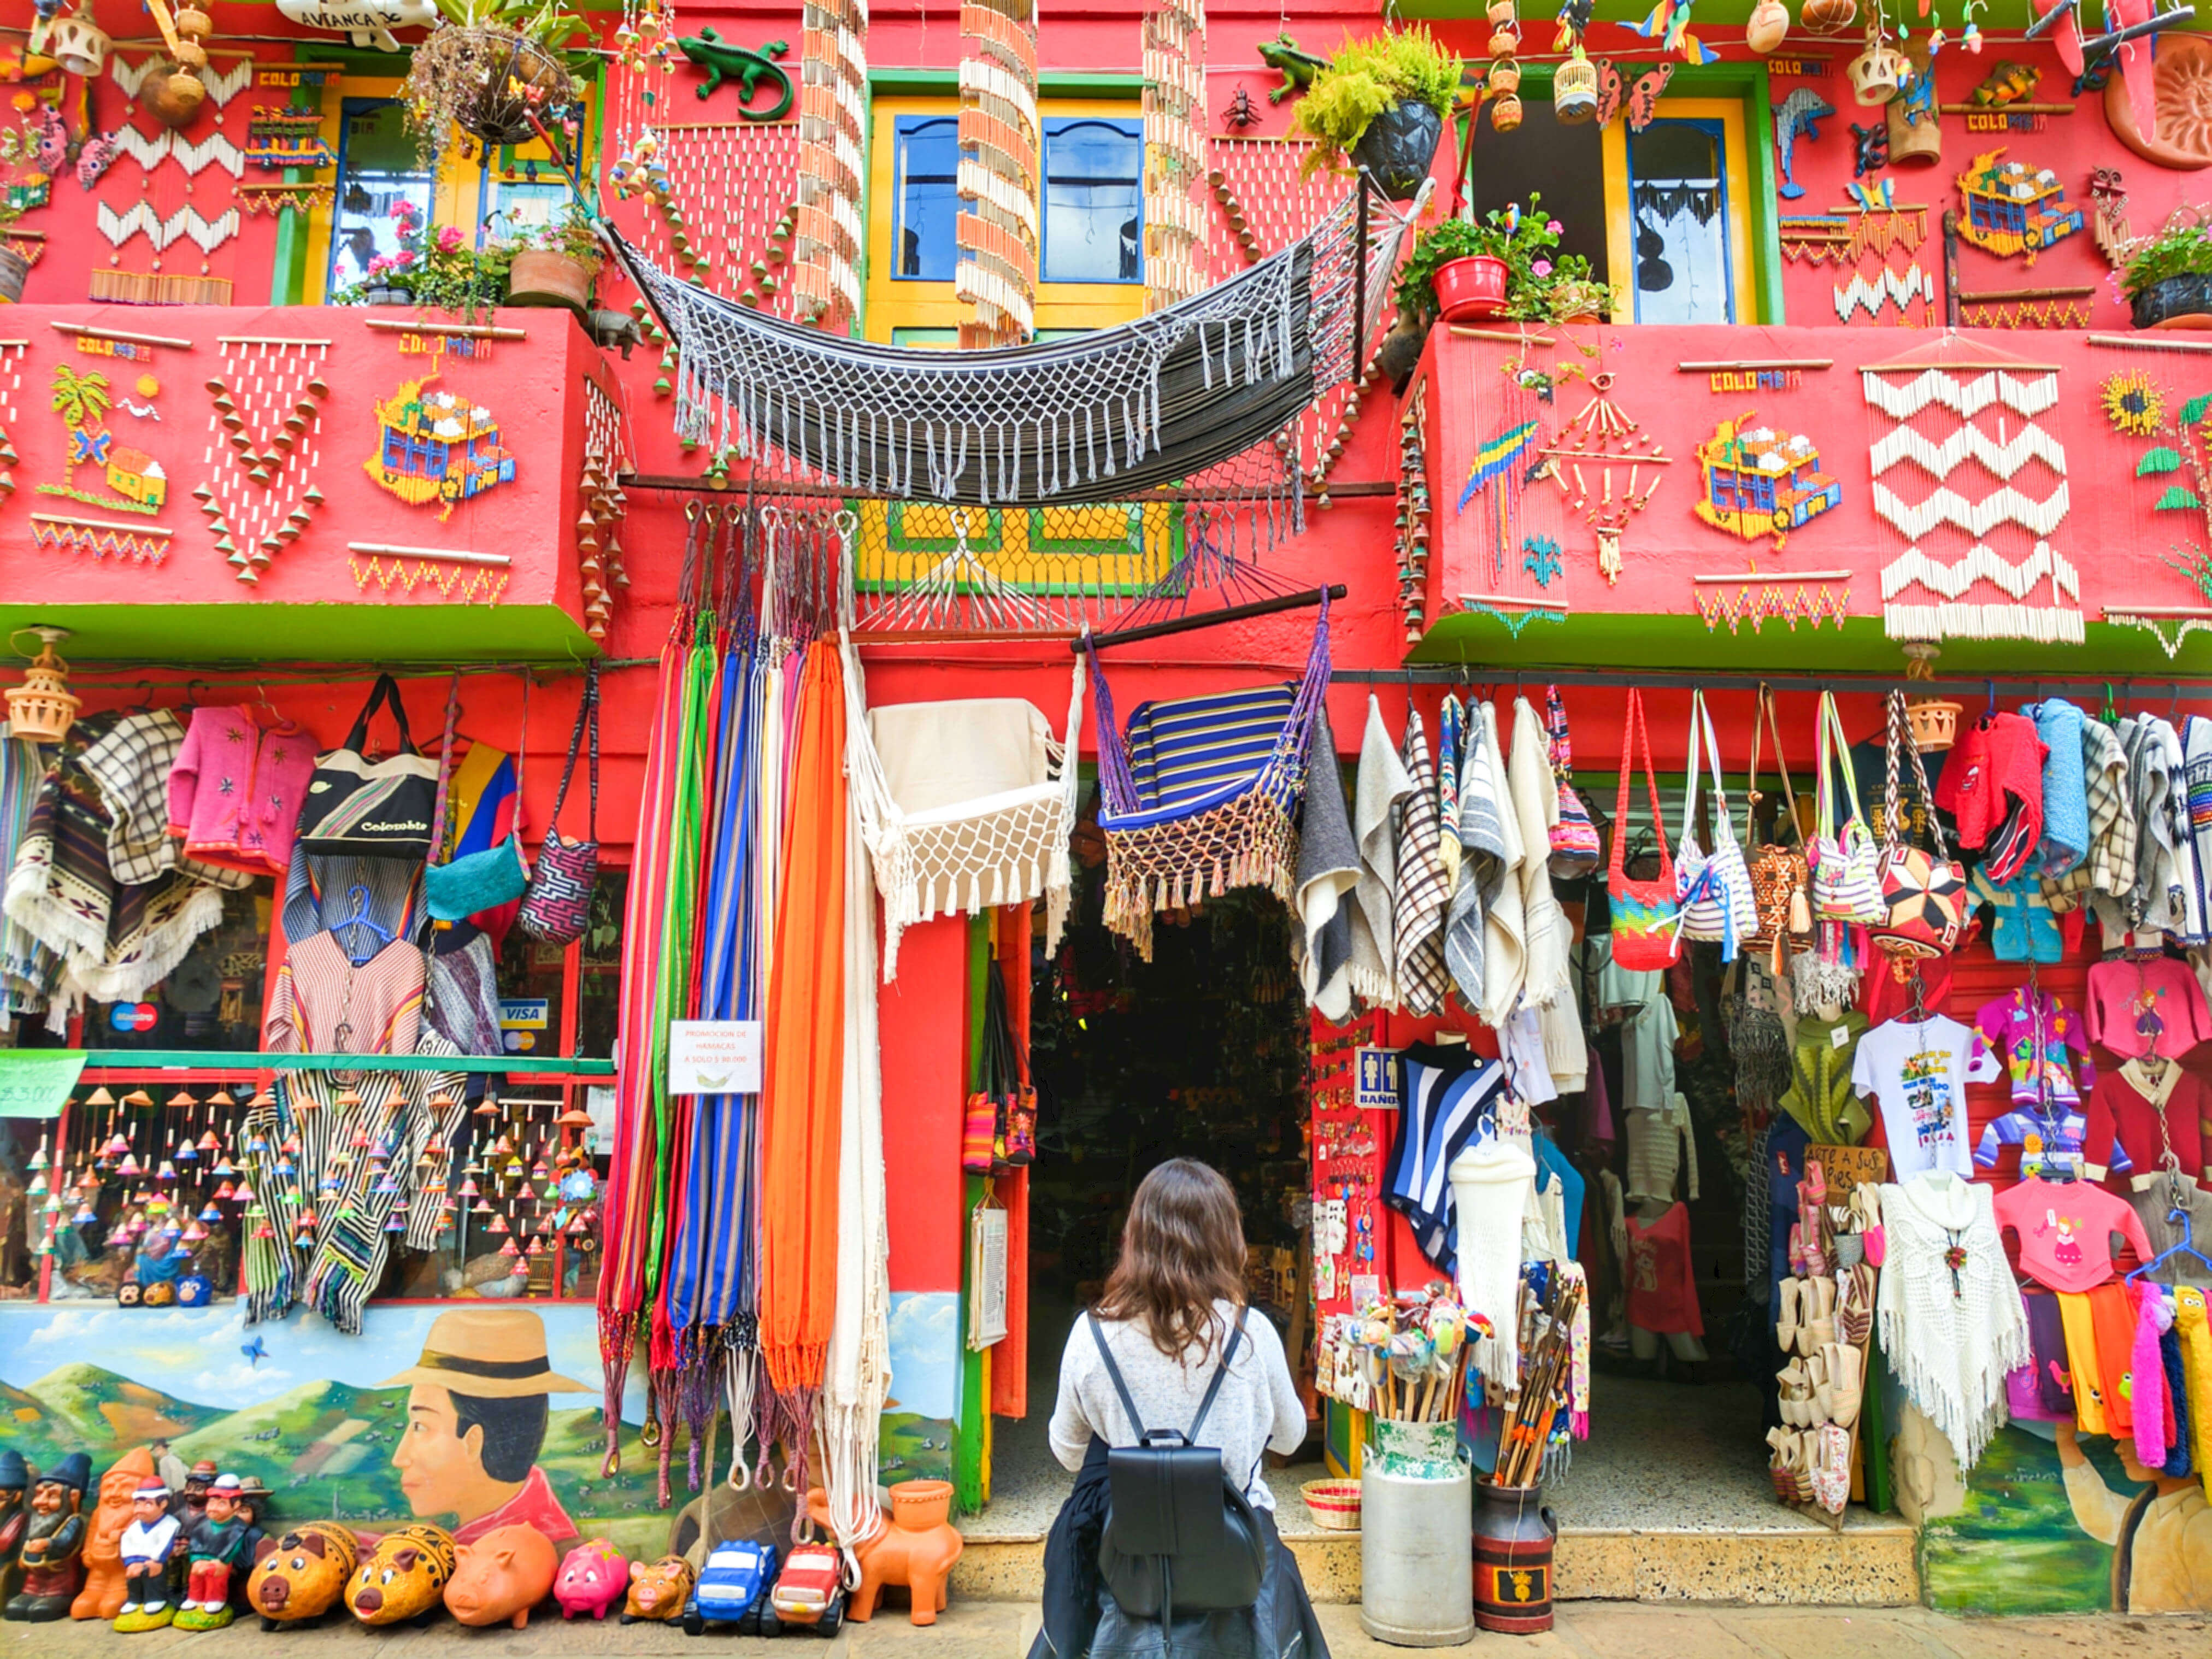
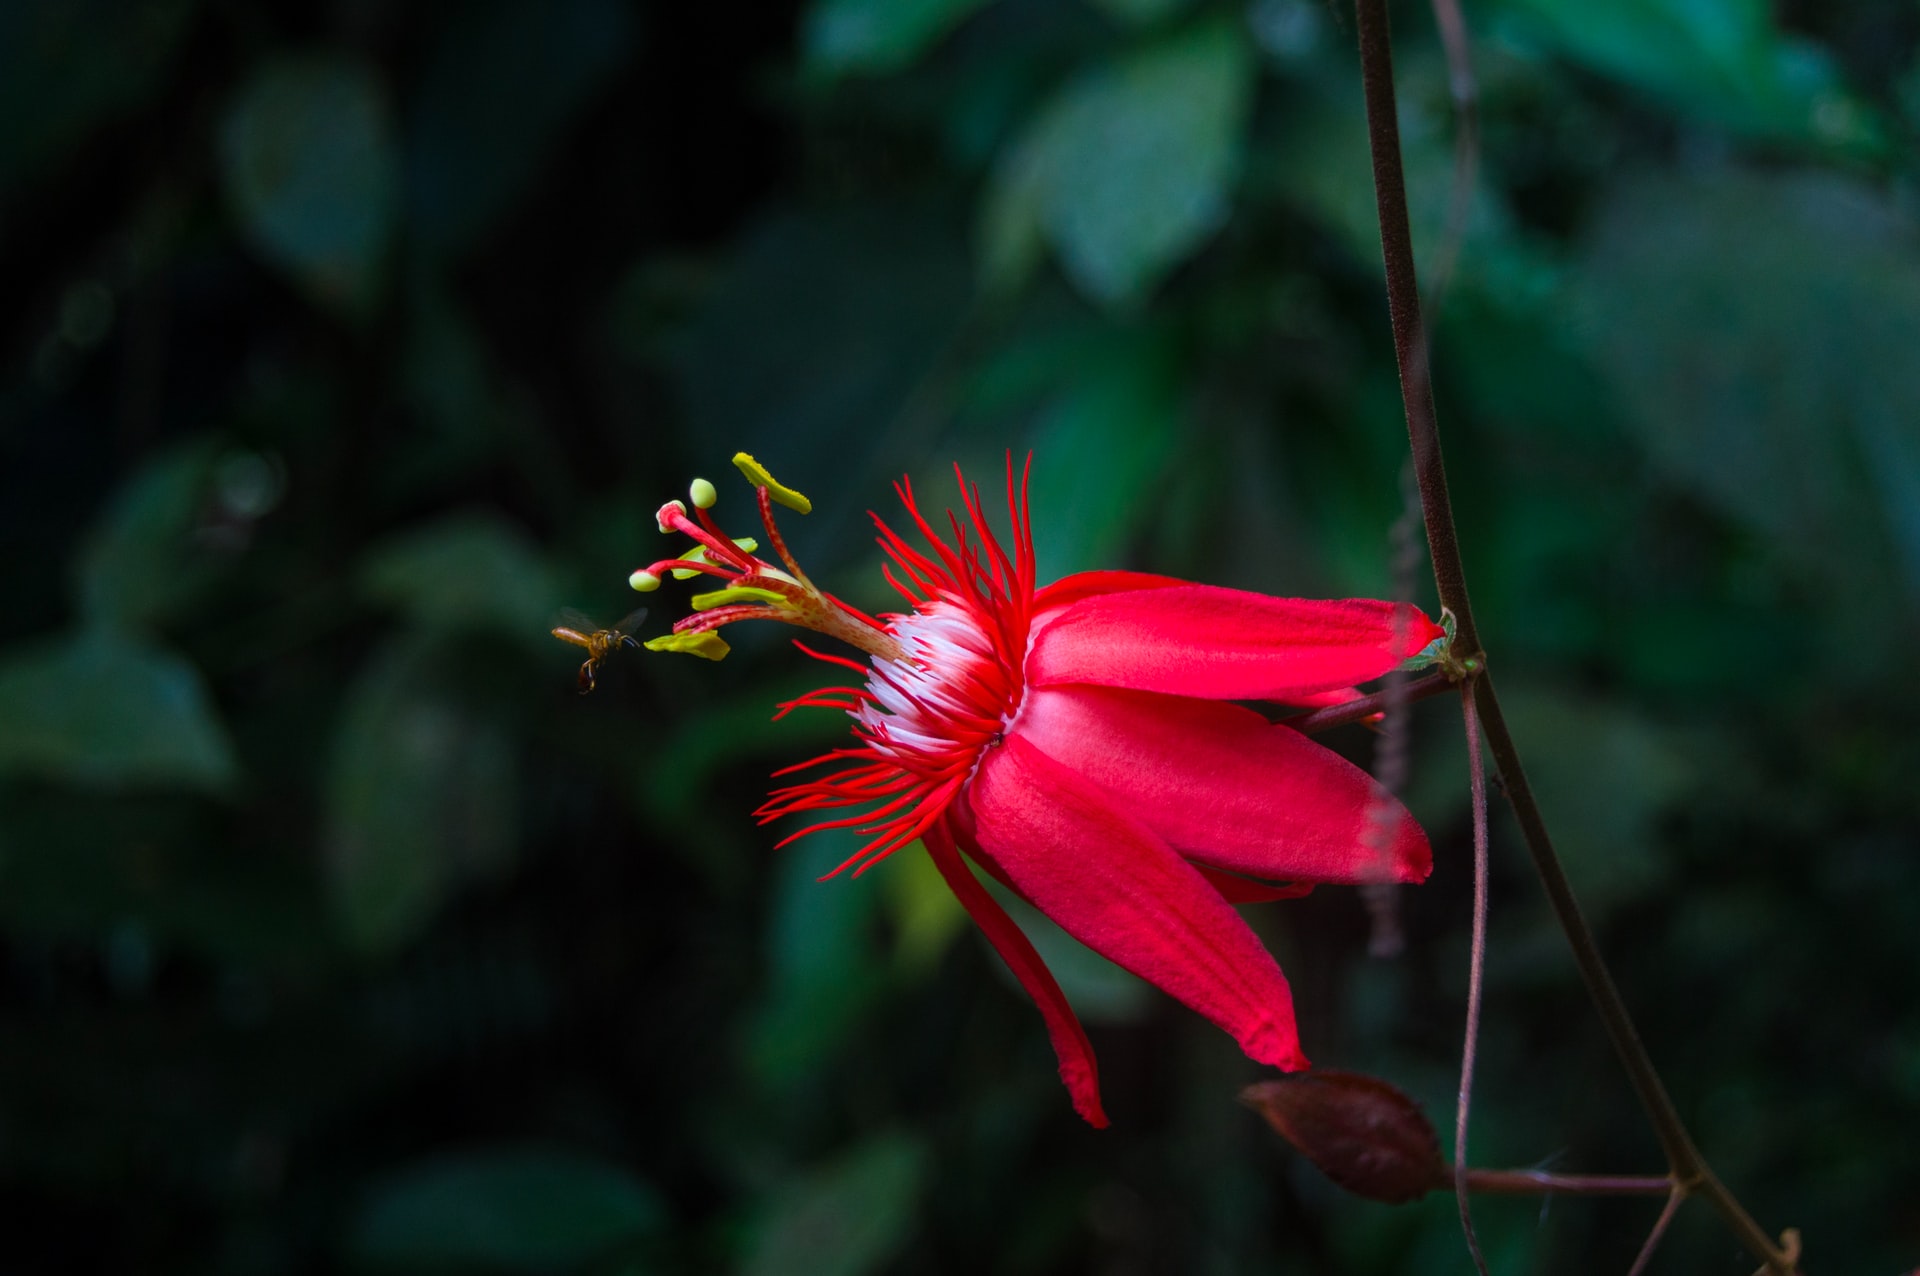
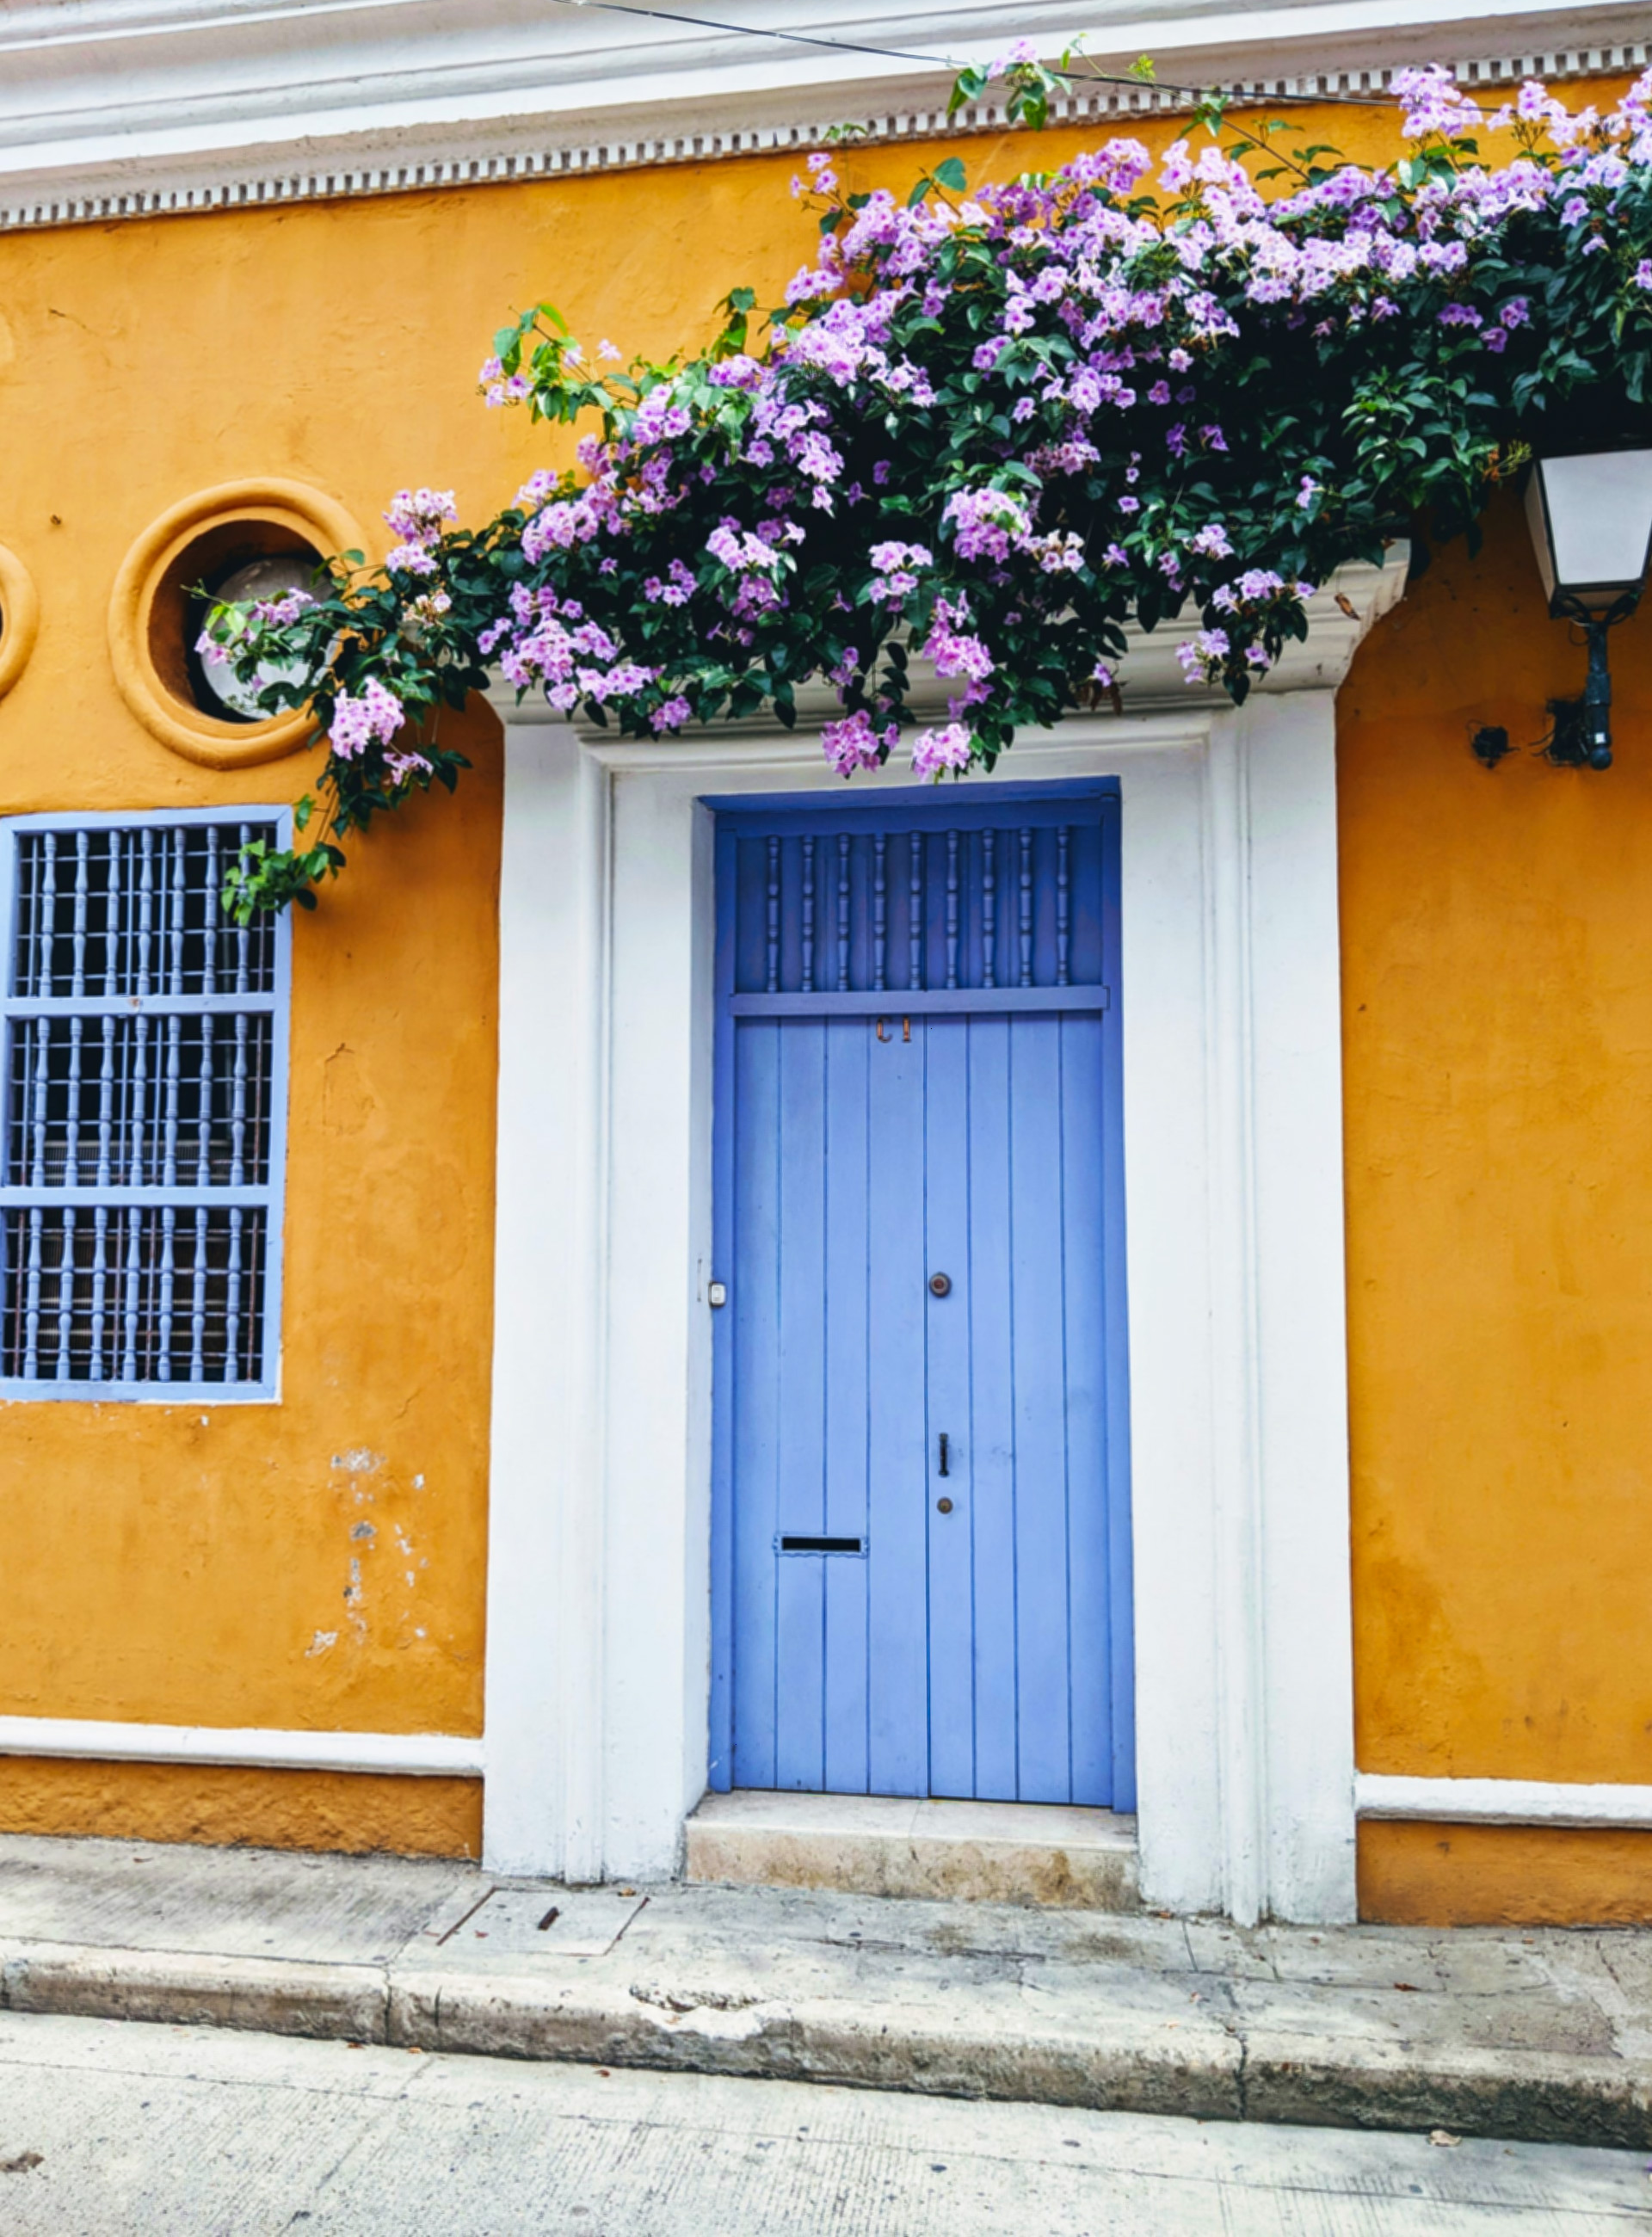
As you can see, it’s pretty difficult to talk about Colombia and not talk about hues bright and bold. Everything from their buildings to their birds to their landscapes to their food burst with  colors impossible to ignore.

Cartegena,Colombia. Photograph by Ricardo Gomez Angel.
Colombia is home to 4,000 thousand varieties of orchids. It is even their national flower. Photo by Steve Seck

There are lots of theories that float around about why Colombia in particular, a country that has known poverty, hardship, and crime for most of the past two centuries, continues to remain recognized for glee and good nature.

Flowers float and fall everywhere. This is someone’s front door in Bolivar, Colombia. Photograph by Regina Anaejionu


Colorful birds zip around the skies. Photograph by Andres Herrera.
Even a morning cup of coffee starts with a shade of sunshine. Photograph taken at a cafe in Bogata, Colombia by Dan Gold.
Cano Crisrales – known as the most colorful river in the world due to an array of multi-colored seasonal algae blossoms is located in the Macarena Mountain Range in Meta, Colombia

Some speculate that it’s because of its incredible biodiversity, or the fact that bicycling is the king of all roads and exercise, or that personal relationships are the most valued treasure. Others say that it is more psychological.

Where the flamingos meet. Parque Natural Los Flamenco in Camarones, Colombia.

In general, the simple joys of life in Colombia are revered – socializing, storytelling, dancing, laughing, cooking, eating, spending time together. In Colombia, senior citizens are considered the loudest voices, change is constant, attitudes are relaxed and expectations are low. All of these qualities yield more content behavior and a fuller appreciation of things that Colombians do have instead of things they don’t have. There is also carnival. Consistent year-round reminders to celebrate and extol their unique cultural heritage might just be one reason, the reason, why Colombians may be happier than most nationalities. Every month of the year in Colombia you can find at least a handful of festivals somewhere within the country each celebrating a wide variety of things – folklore, religion, history, etc. In total, Colombia hosts over 120 festivals a year, which basically boils down to a party every three days.

Every day is a good day to fly a pennant flag in Colombia! Photograph by Jorge Gardener

I like to think that it has something to do with Colombia’s food culture too. In addition, to happy spirits, Colombia is home to happy habitats for an immense range of plants and animals (close to 60,000 species). Being the second most biodiverse country in the world means having easy (or at least easier) access to a wide variety of naturally fresh fruits and vegetables in a variety of colors, shapes and consistencies.

Photo by Ricardo Gomez Angel

In Colombia you can find it all – forests, seasides, wetlands, mountains, flat lands, big cities, small towns, deserts, lakes, rivers, streams, remote outposts and everything in between. This is important for variety and interest when it comes to diet. Boredom is the number one killer of a good appetite, but when you are lucky enough to live in a place where such culinary abundance abounds, then naturally your day will be more enticing just based solely on the food you have available to feed your family, your friends and yourself.

Colombian corn. Photograph by Frank Merino.
Roadside cafe amidst color and character. Photograph by Frank Mercado.

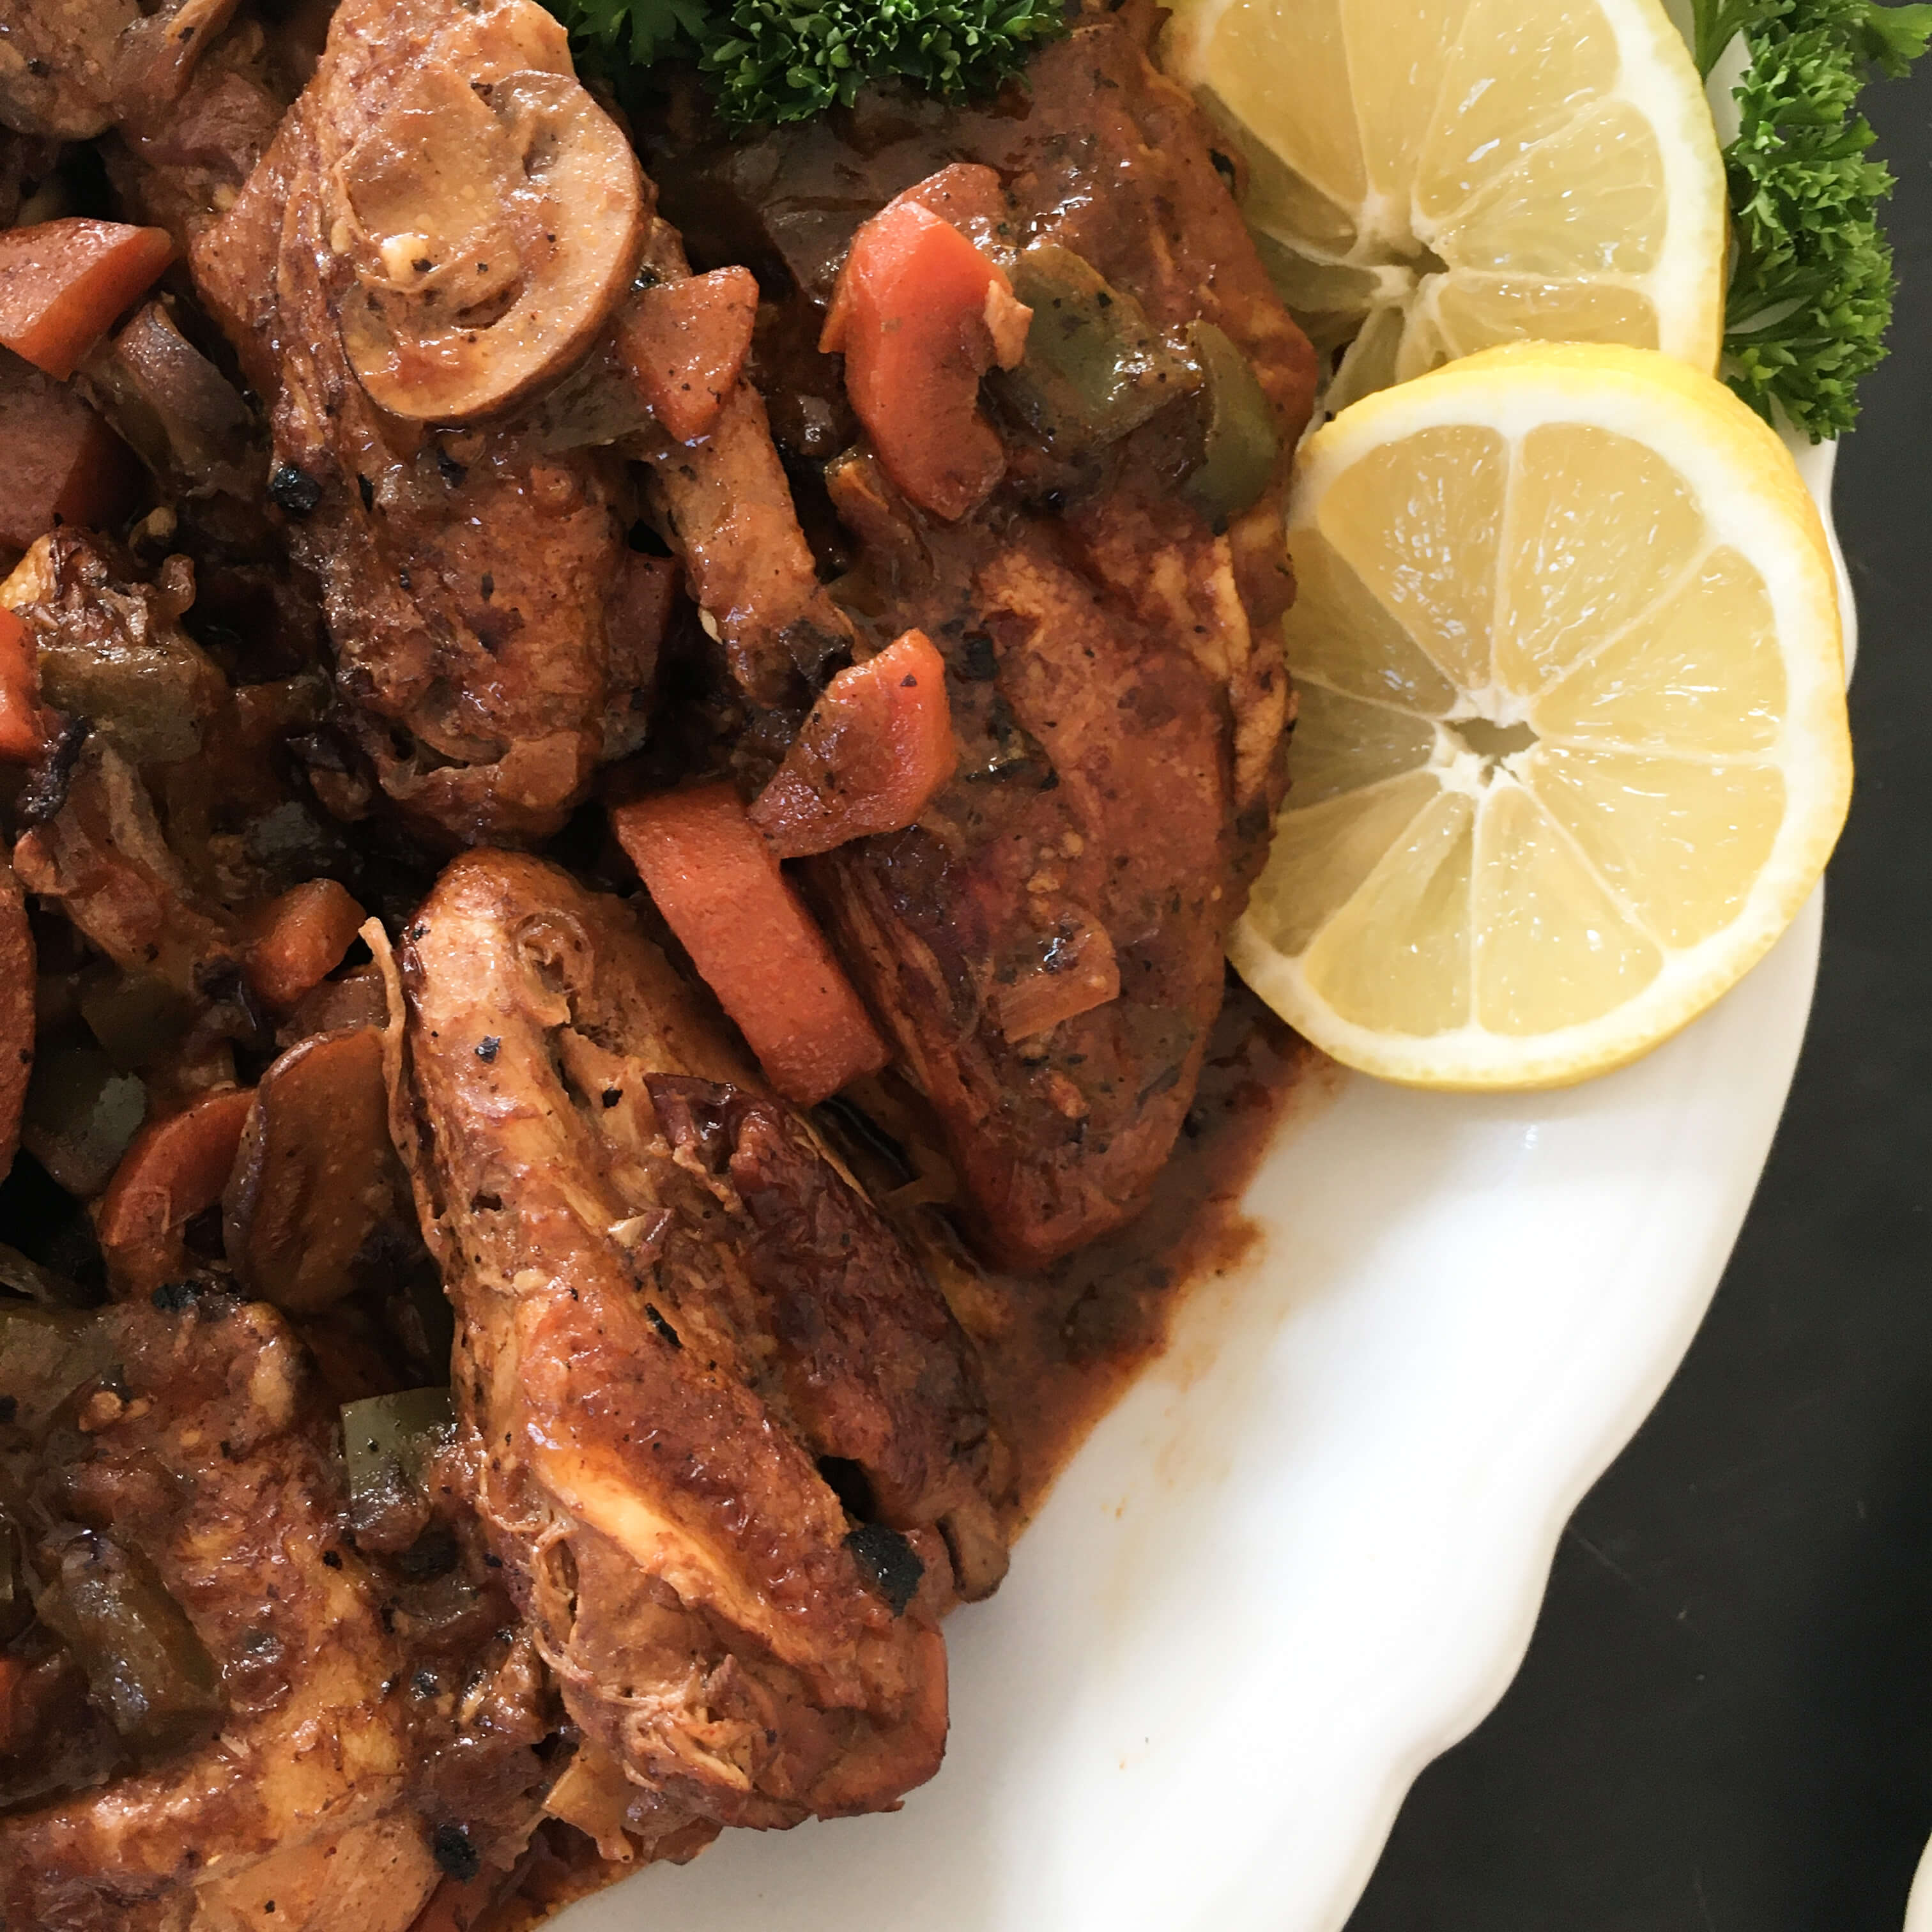
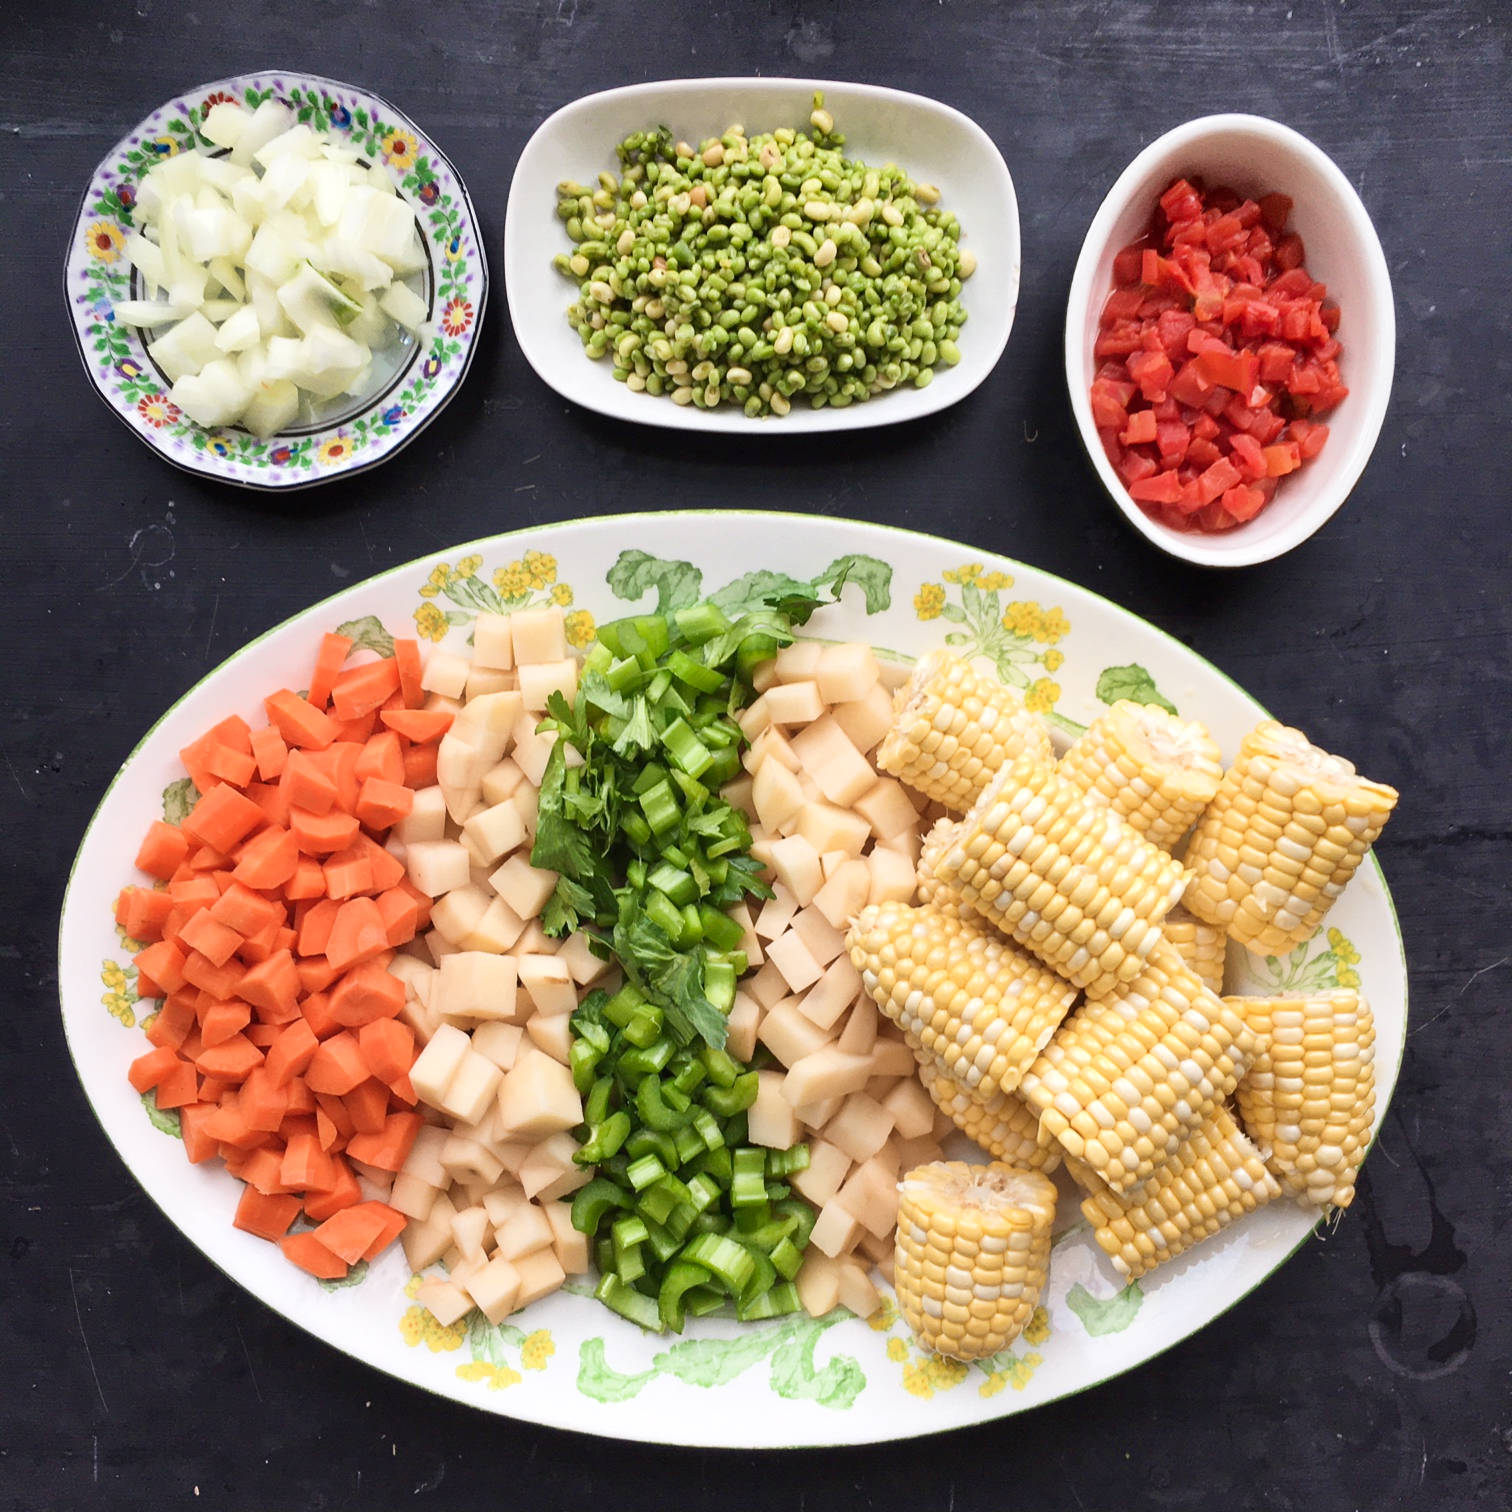
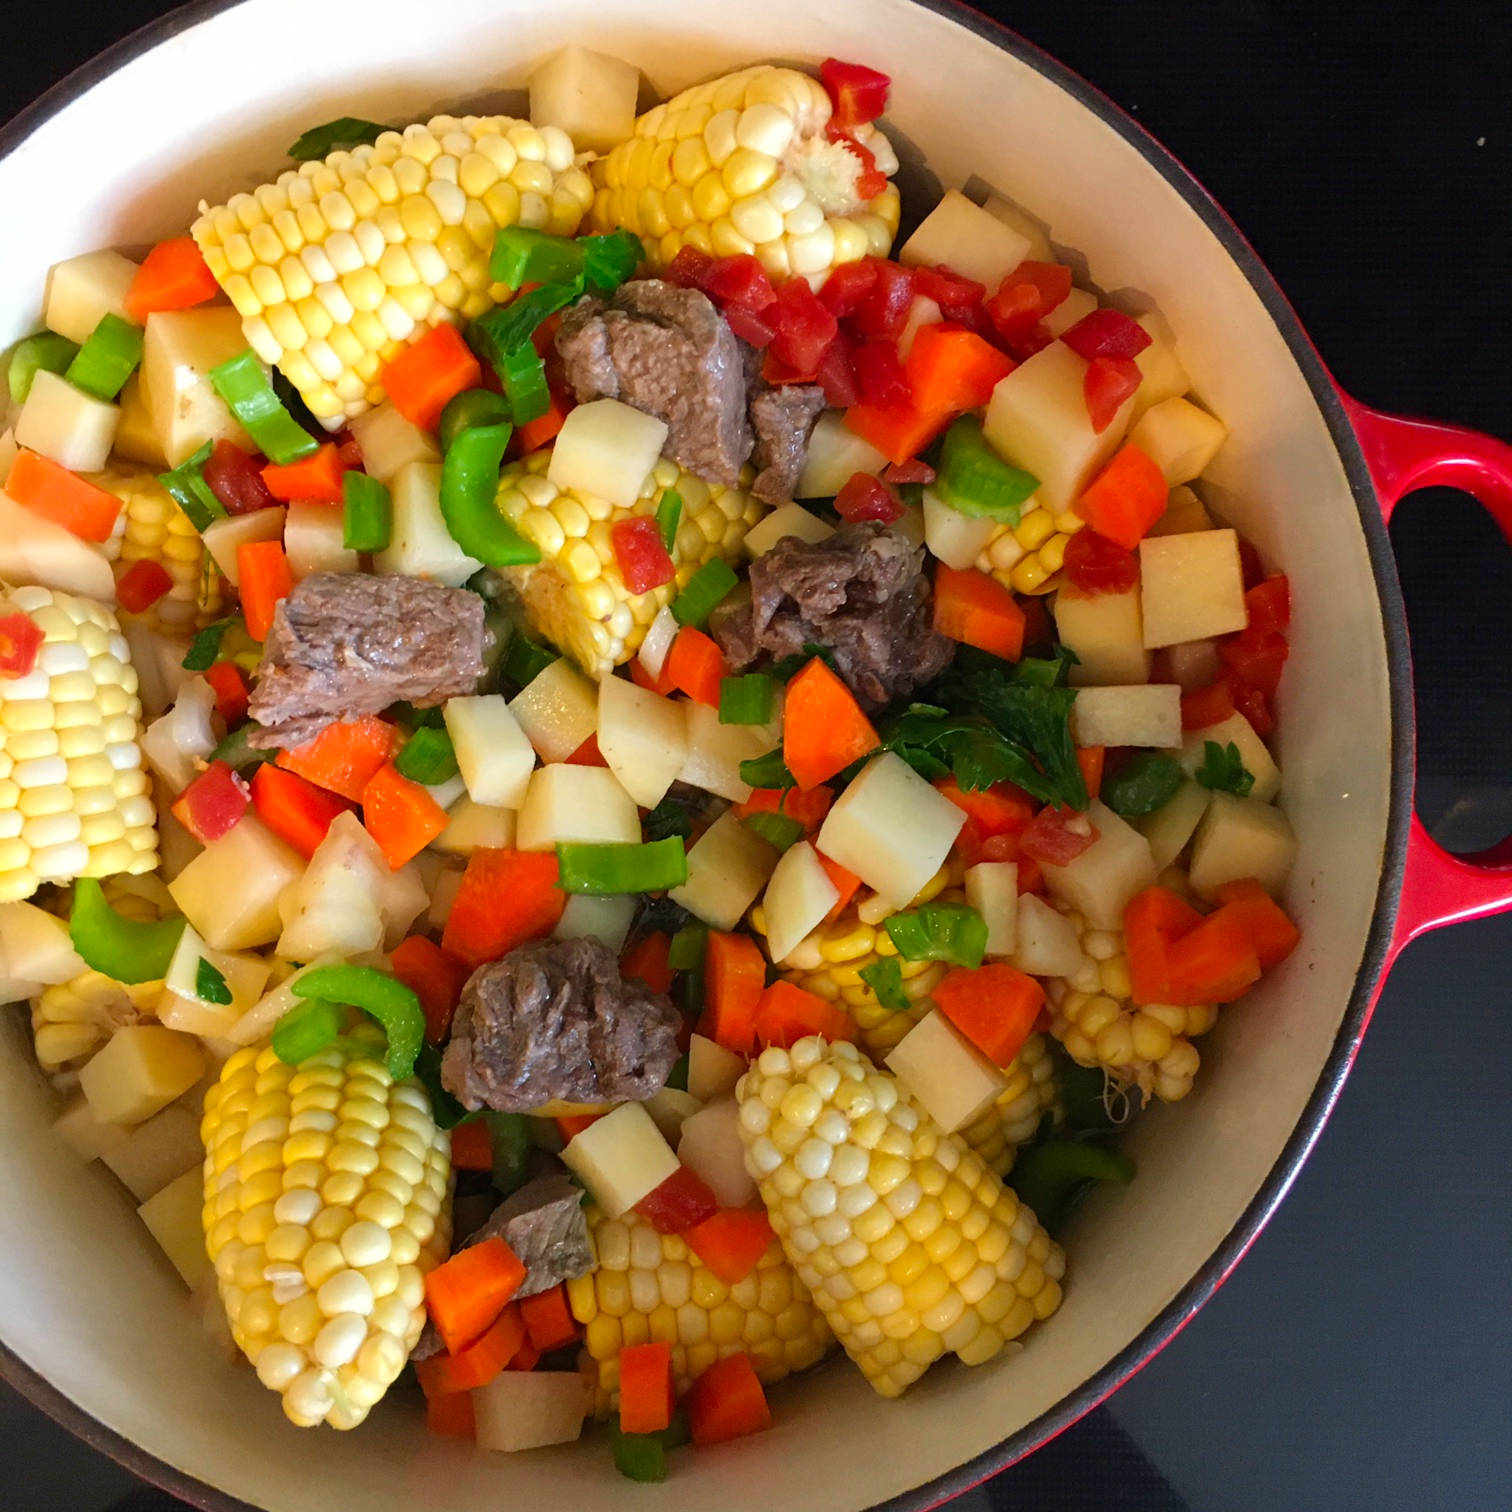
The Colombian diet varies between regions but most commonly consists of a medley of rice, corn, vegetables, meat, poultry, seafood, beans, grains, dairy, fruit, coffee and chocolate. This week we are making Colombian Beef Stew, the most colorful dish of the Recipe Tour so far.

Colombian Beef Stew circa 1971

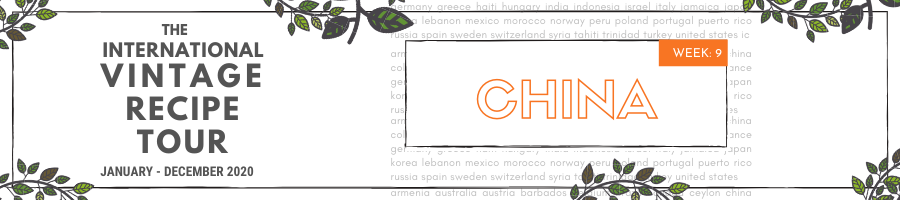
I’ve always thought of beef stew as a brown, lumpy semi-soup, a conglomeration that contains hours of cooked meat and soggy vegetables and bland, basic flavors. This is not the case of stew in Colombia. Based on the photos of the country peppered throughout this post should we be surprised that Colombian Beef Stew is a kaleidoscope of color too?

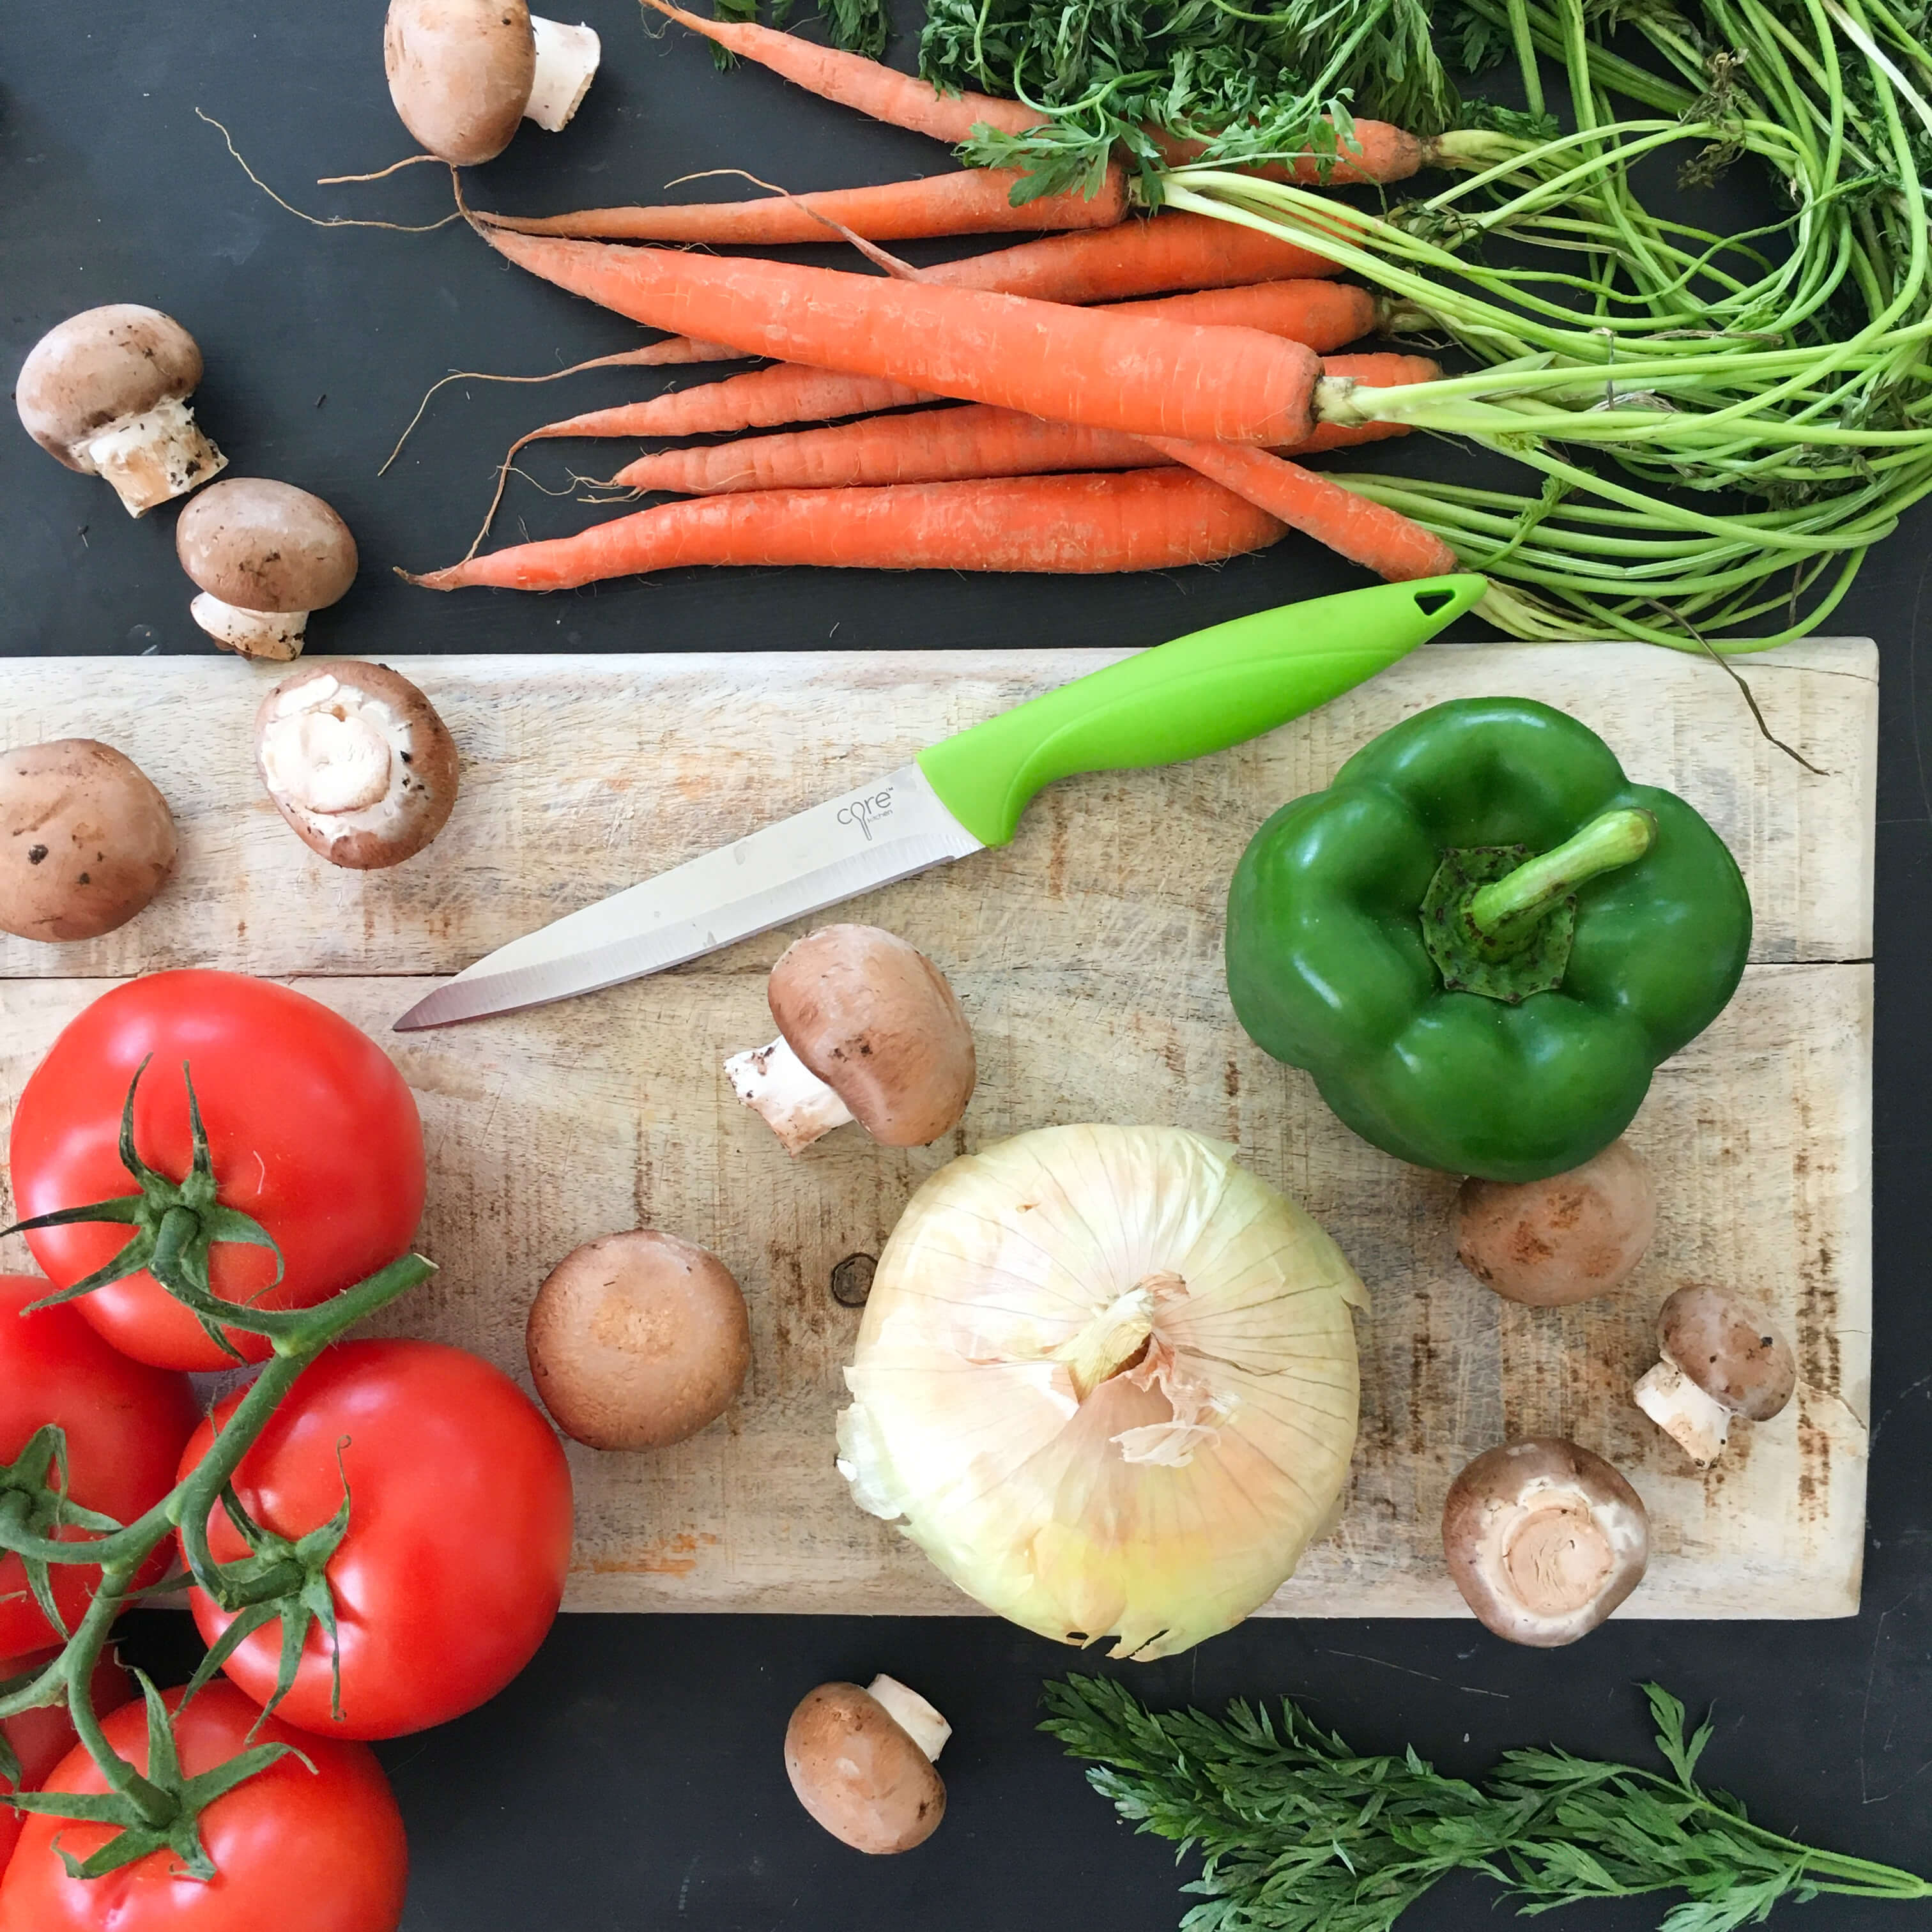
You’ll notice that this recipe includes traditional hallmarks of beef stew – meat, potatoes, carrots, celery, onions but it differs in the way it is cooked and offers some interesting ingredients that yield a wonderful array of complimentary flavors.  I loved it for its non-brown broth, dynamic appearance, and its inclusion of whole corn cobs. It also contains an interesting wheel of precise spice, which I found intriguing… 6 peppercorns (not 5, not 7!), one garlic clove halved (not minced nor crushed), dried oregano as opposed to fresh and cider vinegar (a third acid  – on top of tomatoes and onions).

Admittedly, it started out as one of those recipes I didn’t really have high hopes for based on my predilection for not really liking beef stew to begin with. Also, it called for whole ears of corn. Something I have never bought 1) in the grocery store or 2) in the middle of March. This recipe showed me what a corn evader I’ve been all these years. The farmers market in the middle of hot, humid, high summer is the only time I’ve ever purchased ears of corn, assuming that local, like tomatoes, would far surpass anything available from the trucked in variety at the grocery store.  This recipe made me reconsider all that. The corn was wonderful and just as comparable in taste as a mid-summer crop.

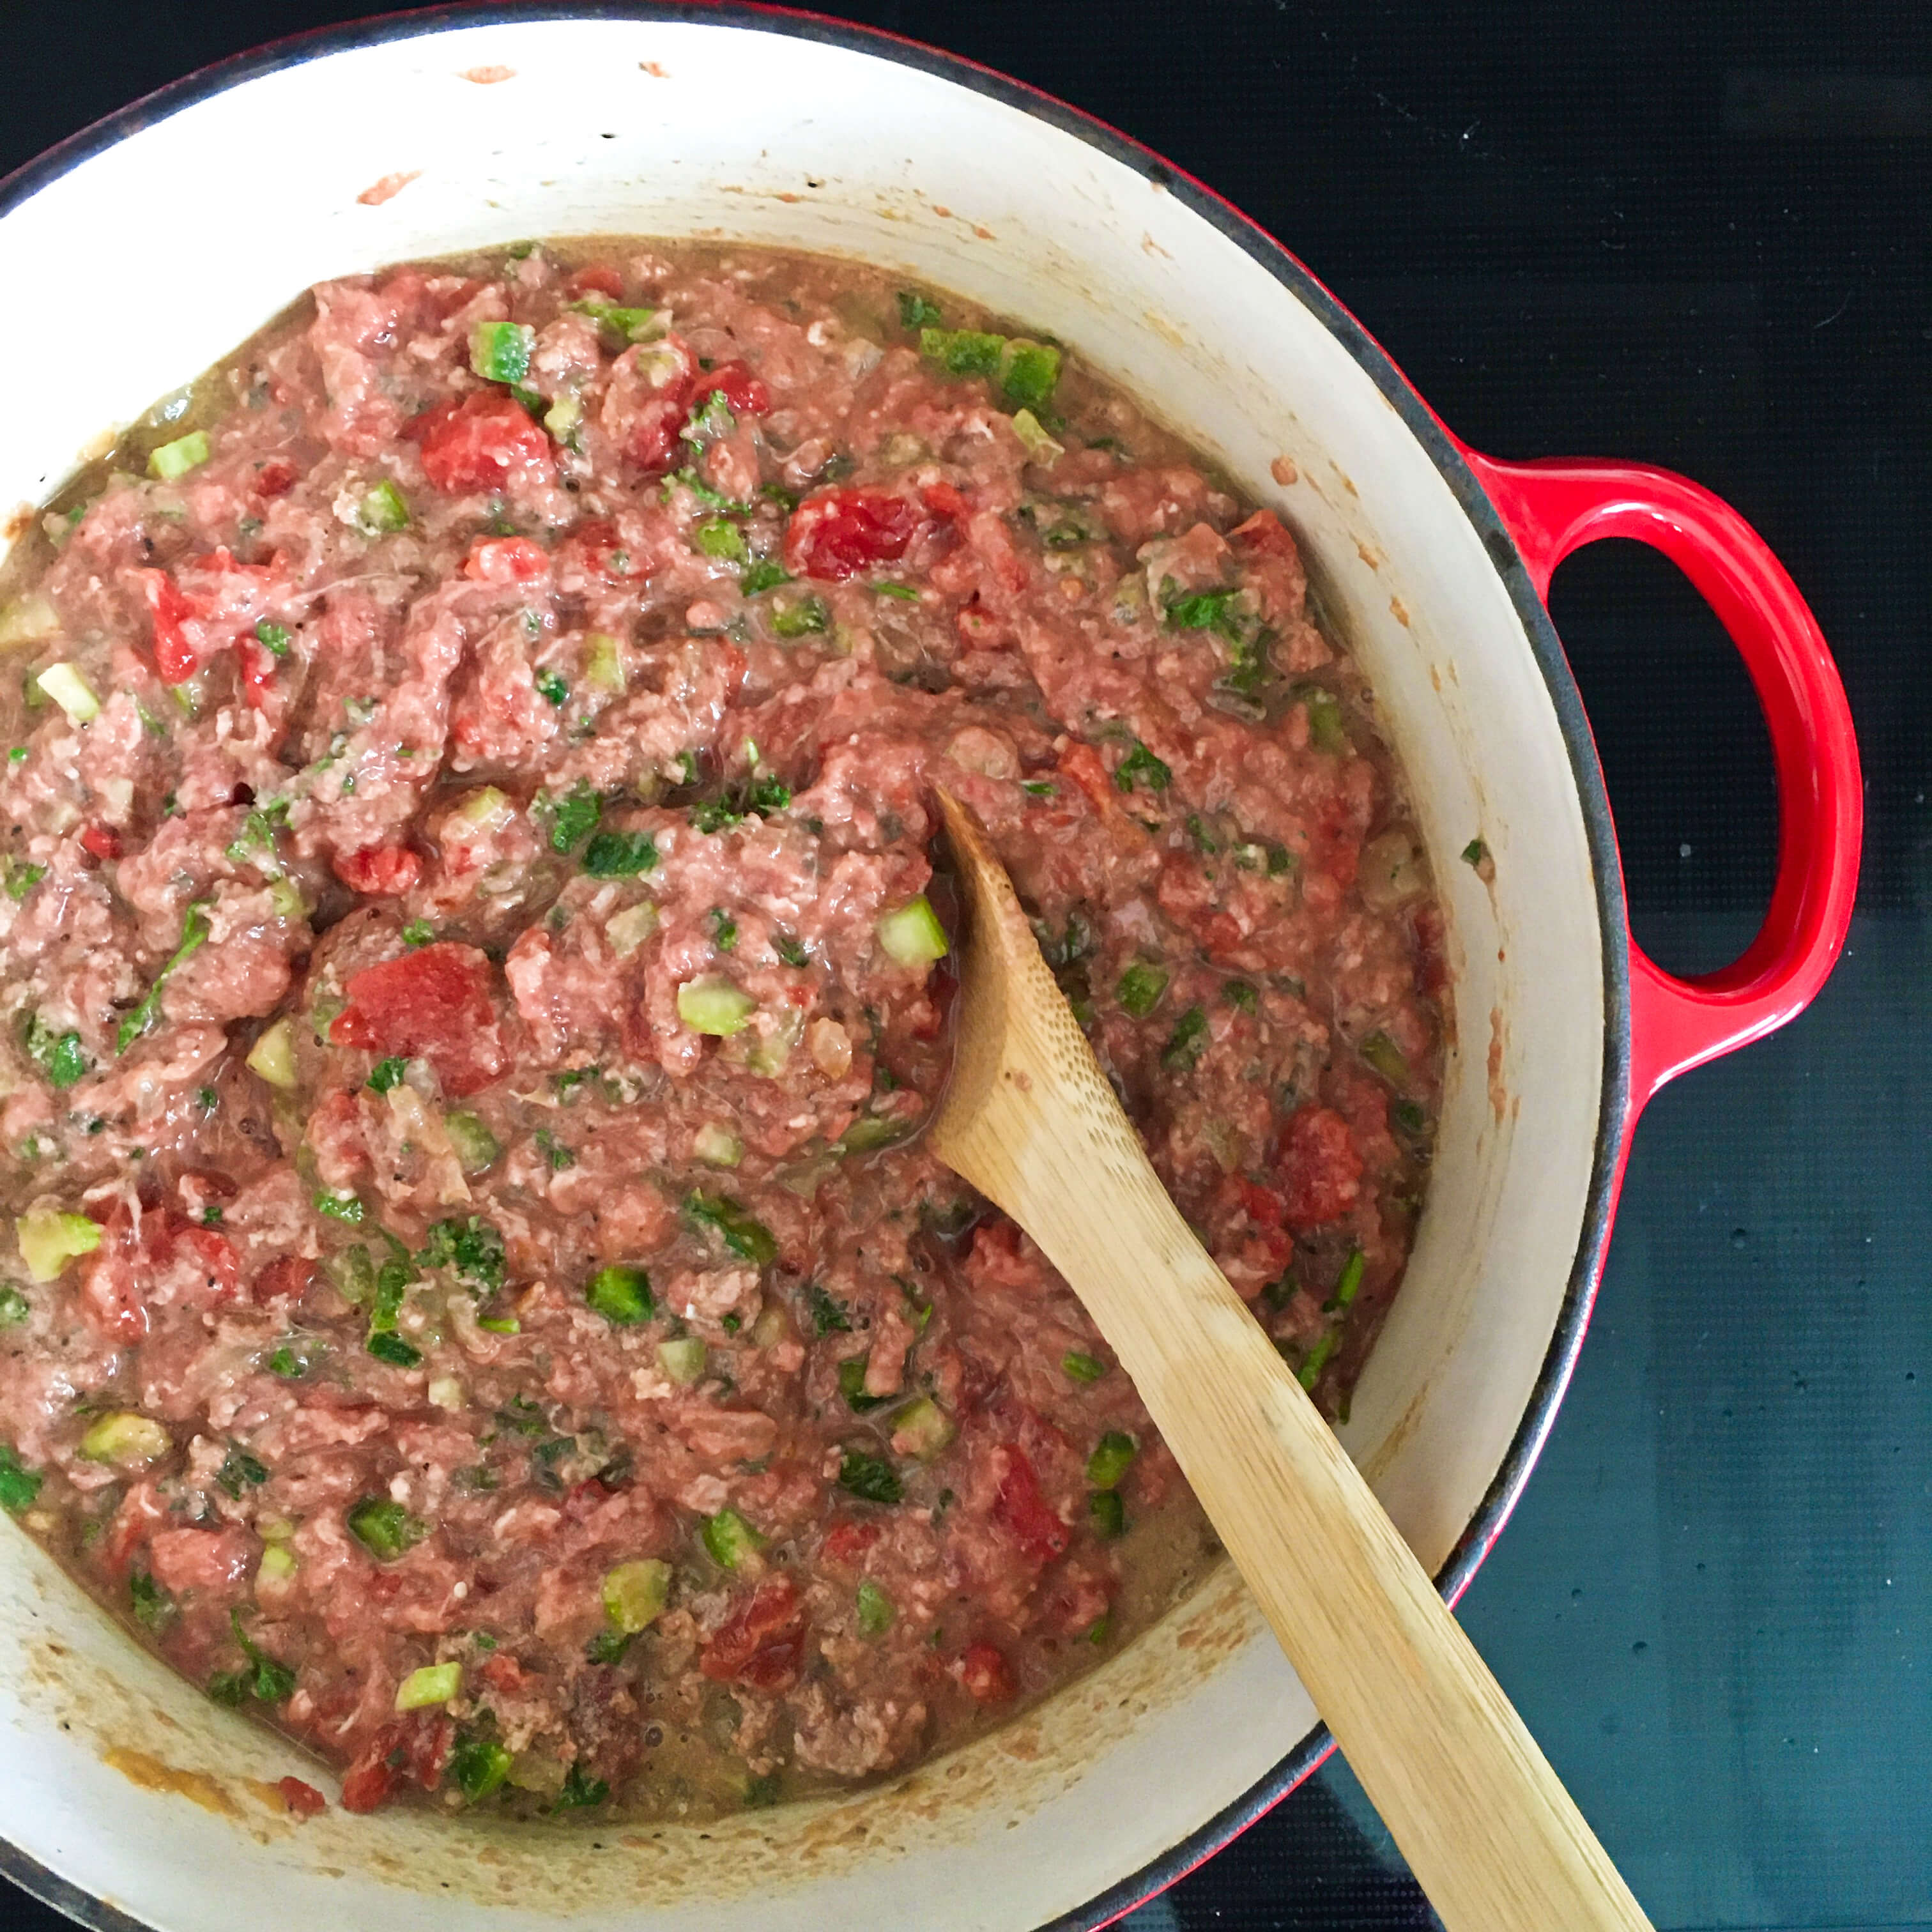
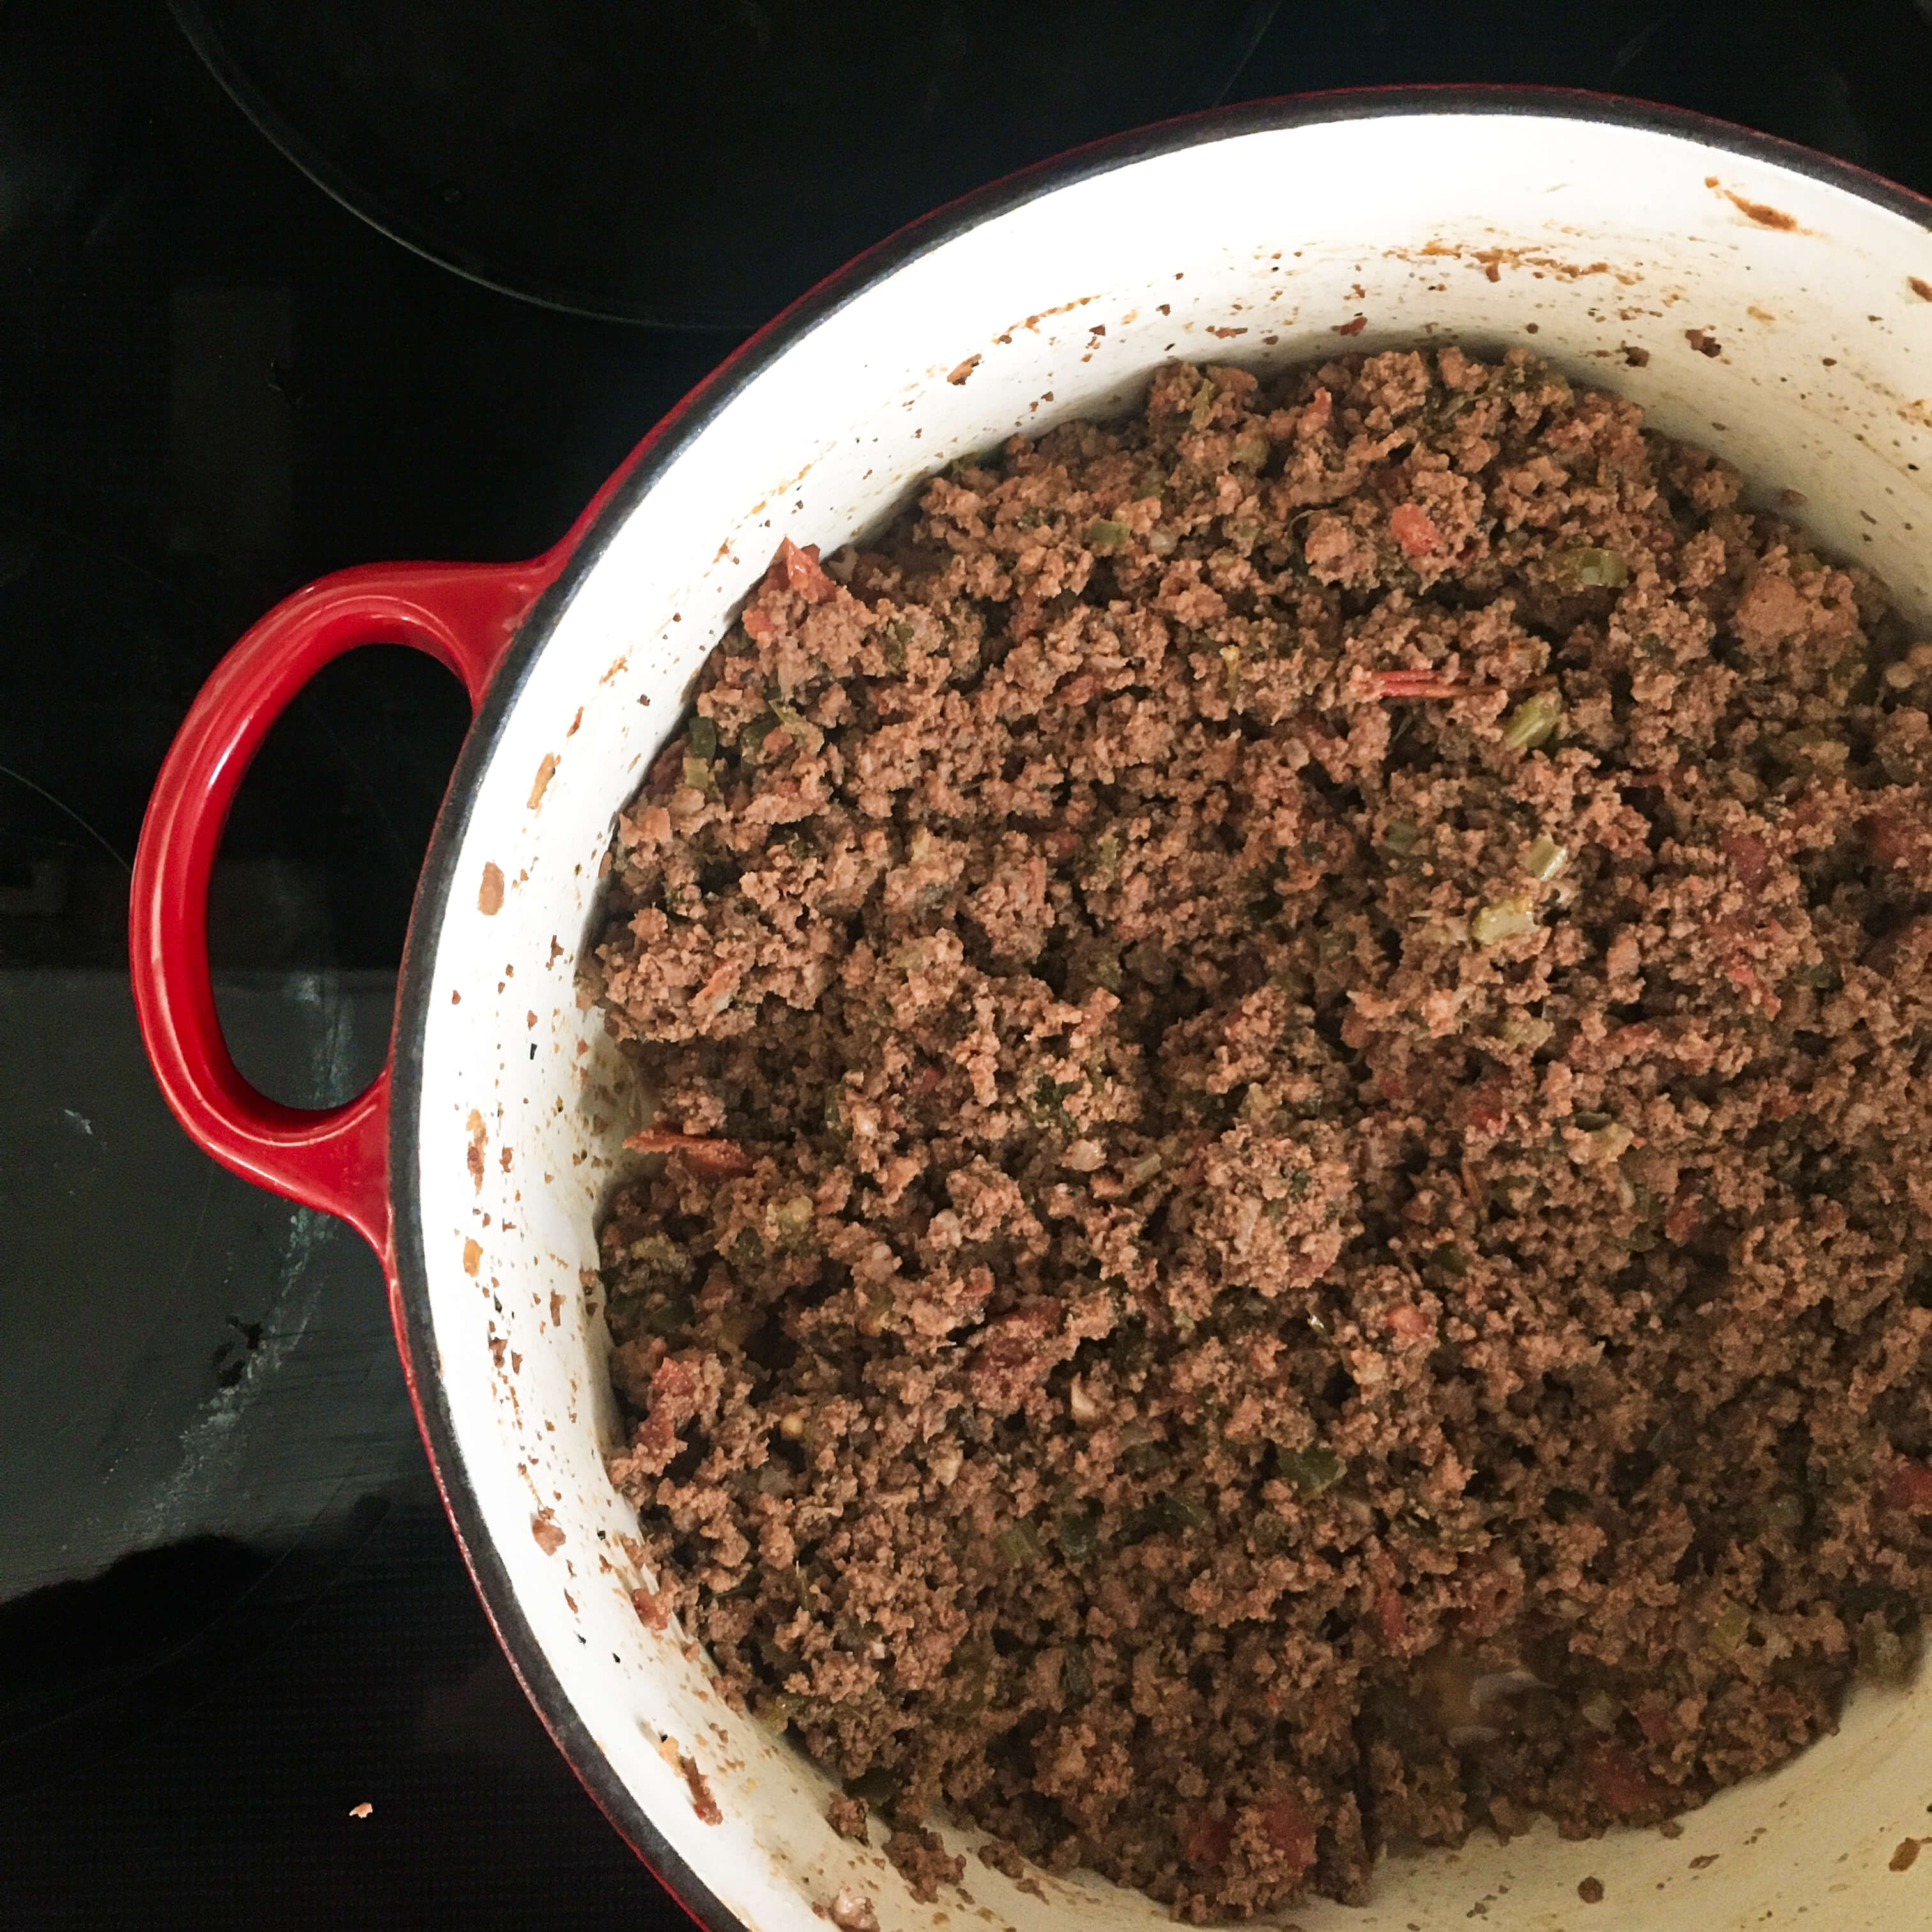
Most importantly though, I loved this recipe for its vivid arrangement. The days as of late have been grey and rainy around here, as if Lady Nature was just as forlorn about all the recent world events. But in the kitchen, in the stew pot, in this recipe, my senses delighted. There was the bright red of the grass-fed beef, the flamboyant orange of the carrots, the vivacity of the celery greens. The saffron bled a watery shade of marigold when mixed with water, the cumin smelled of wood smoke, and the sight of the tomato red cook pot itself  – an inheritance from my dear dad’s collection – brought instant joy. All of this is most revealing in a myriad of subtle ways.

Color works magic on our bodies whether we recognize it or not. Thanks to neurons, electromagnetic energy, pulsating frequencies, and the subconscious way in which we process information, our response to color when it comes to cooking and food is both revealing, comforting, therapeutic and ever changing.

It’s the reason why in times of stress or struggle we crave foods that are yellow, red or brown (think macaroni and cheese, red lentils, lasagna, beans or burgers). They are the comforting caretaker colors. Brown nurtures the spirit, red gives us energy and yellow offers optimism. All things your body inherently craves and needs in order to overcome sadness, depression, trauma or lack of control.  Blue foods are calming and signal self-care. Green foods signal health, vitality, and creativity while orange foods trigger happiness.

So while I was throwing carrots, celery, stew meat, cumin, saffron, corn and peas into a pot I was also adding comfort, energy, optimism, vitality and happiness to the mix. No wonder I loved this recipe so much! This sounds like a pretty good way to inherently fight back against the coronavirus, and the day to day uncertainty of navigating an international crisis while recovering from the effects of a tornado.

It also makes sense reagrding Colombia and why it radiates with joy. All their color balances all their emotions. Their bright and bold palettes soothe and comfort and excite and calm. Their colorful culture invokes passion and positivity.  It enchants and exhilarates. Happiness begets happiness. Color brings joy. Whether you are talking about a banana, a building, a bed of flowers or a beef stew:)

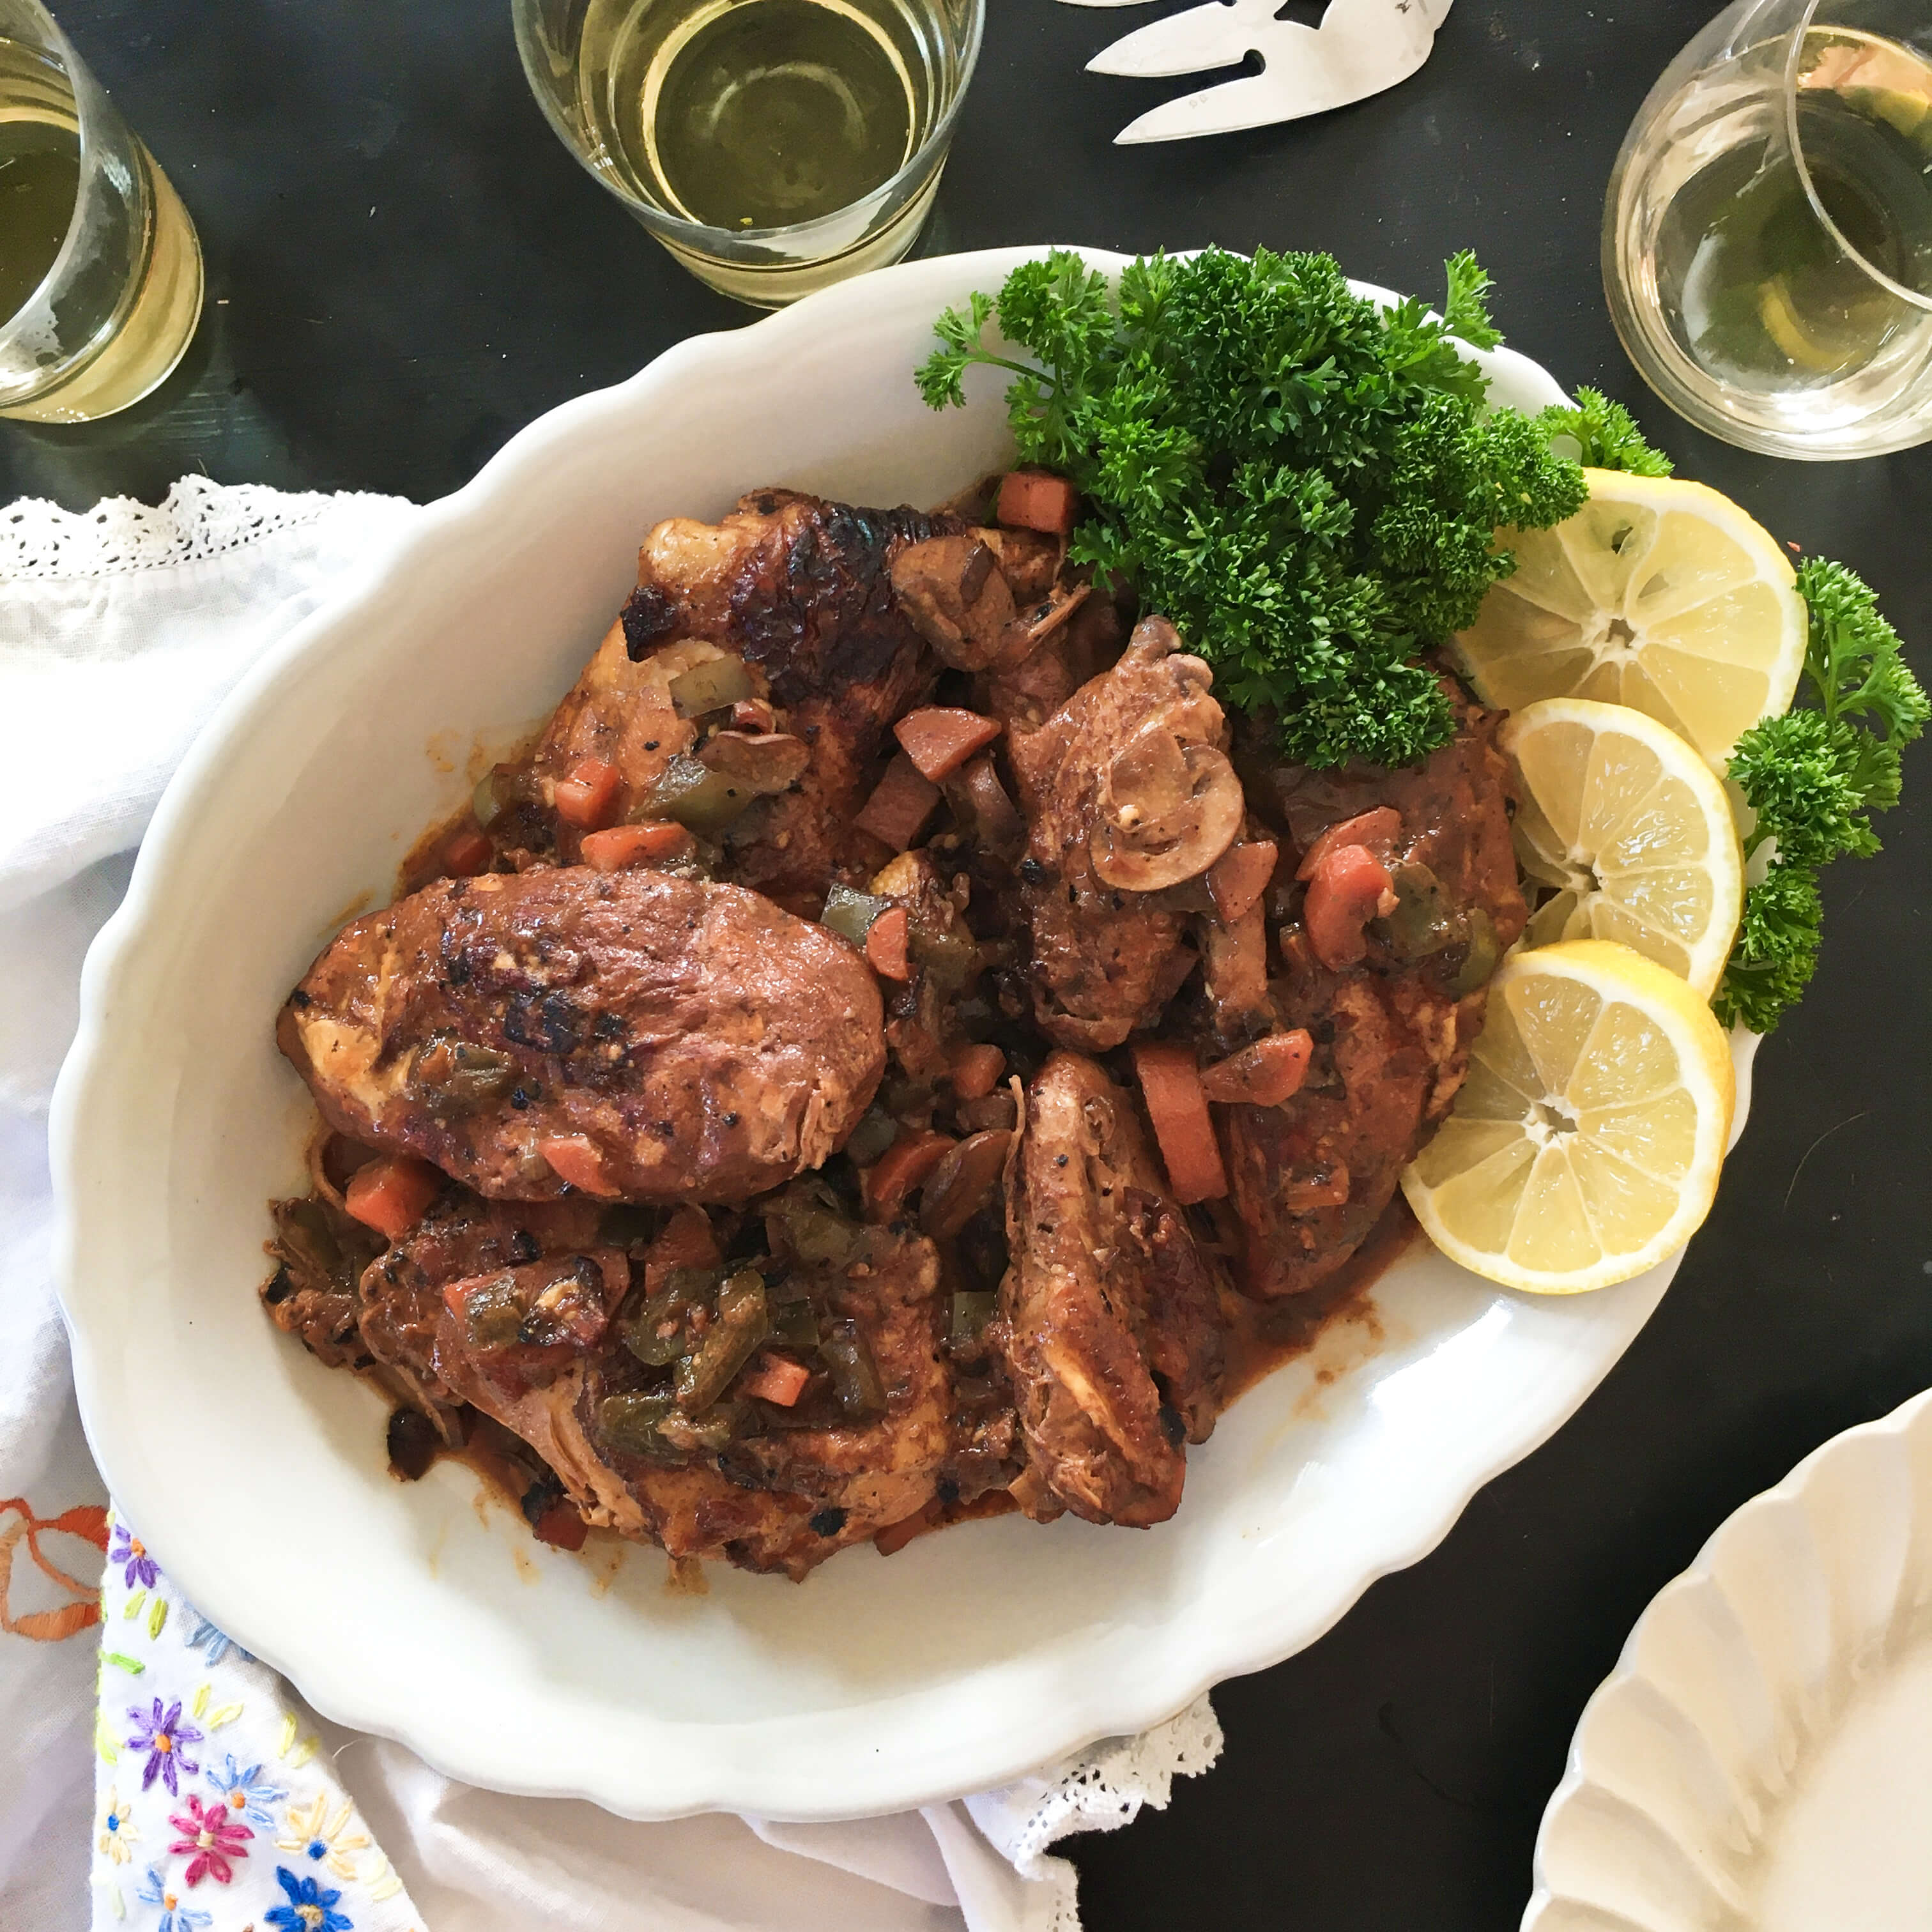
If things seem insurmountably bleak these days, I recommend pulling out the biggest cooking pot you have and filling it with some Colombian Beef Stew. It may not be the answer to everything, but it is a start to feeling better. Sometimes all we need to get us through is just a splash of color.

Colombian Beef and Vegetable Stew (Cocido Bogotano)

(Serves 6-8)

2 lbs boneless lean beef stew meat, cut into 1.5 inch cubes (I used grass-fed beef)

1 bay leaf

1/2 teaspoon ground cumin

6 peppercorns

1 clove garlic, halved

1 teaspoon cider vinegar

2 teaspoons salt

3 cups plus 1 teaspoon cold water

2 medium potatoes, peeled and cubed

2 large carrots, peeled and diced

4 ribs celery, sliced

4 ears of corn, shucked and cut into 2 inch lengths

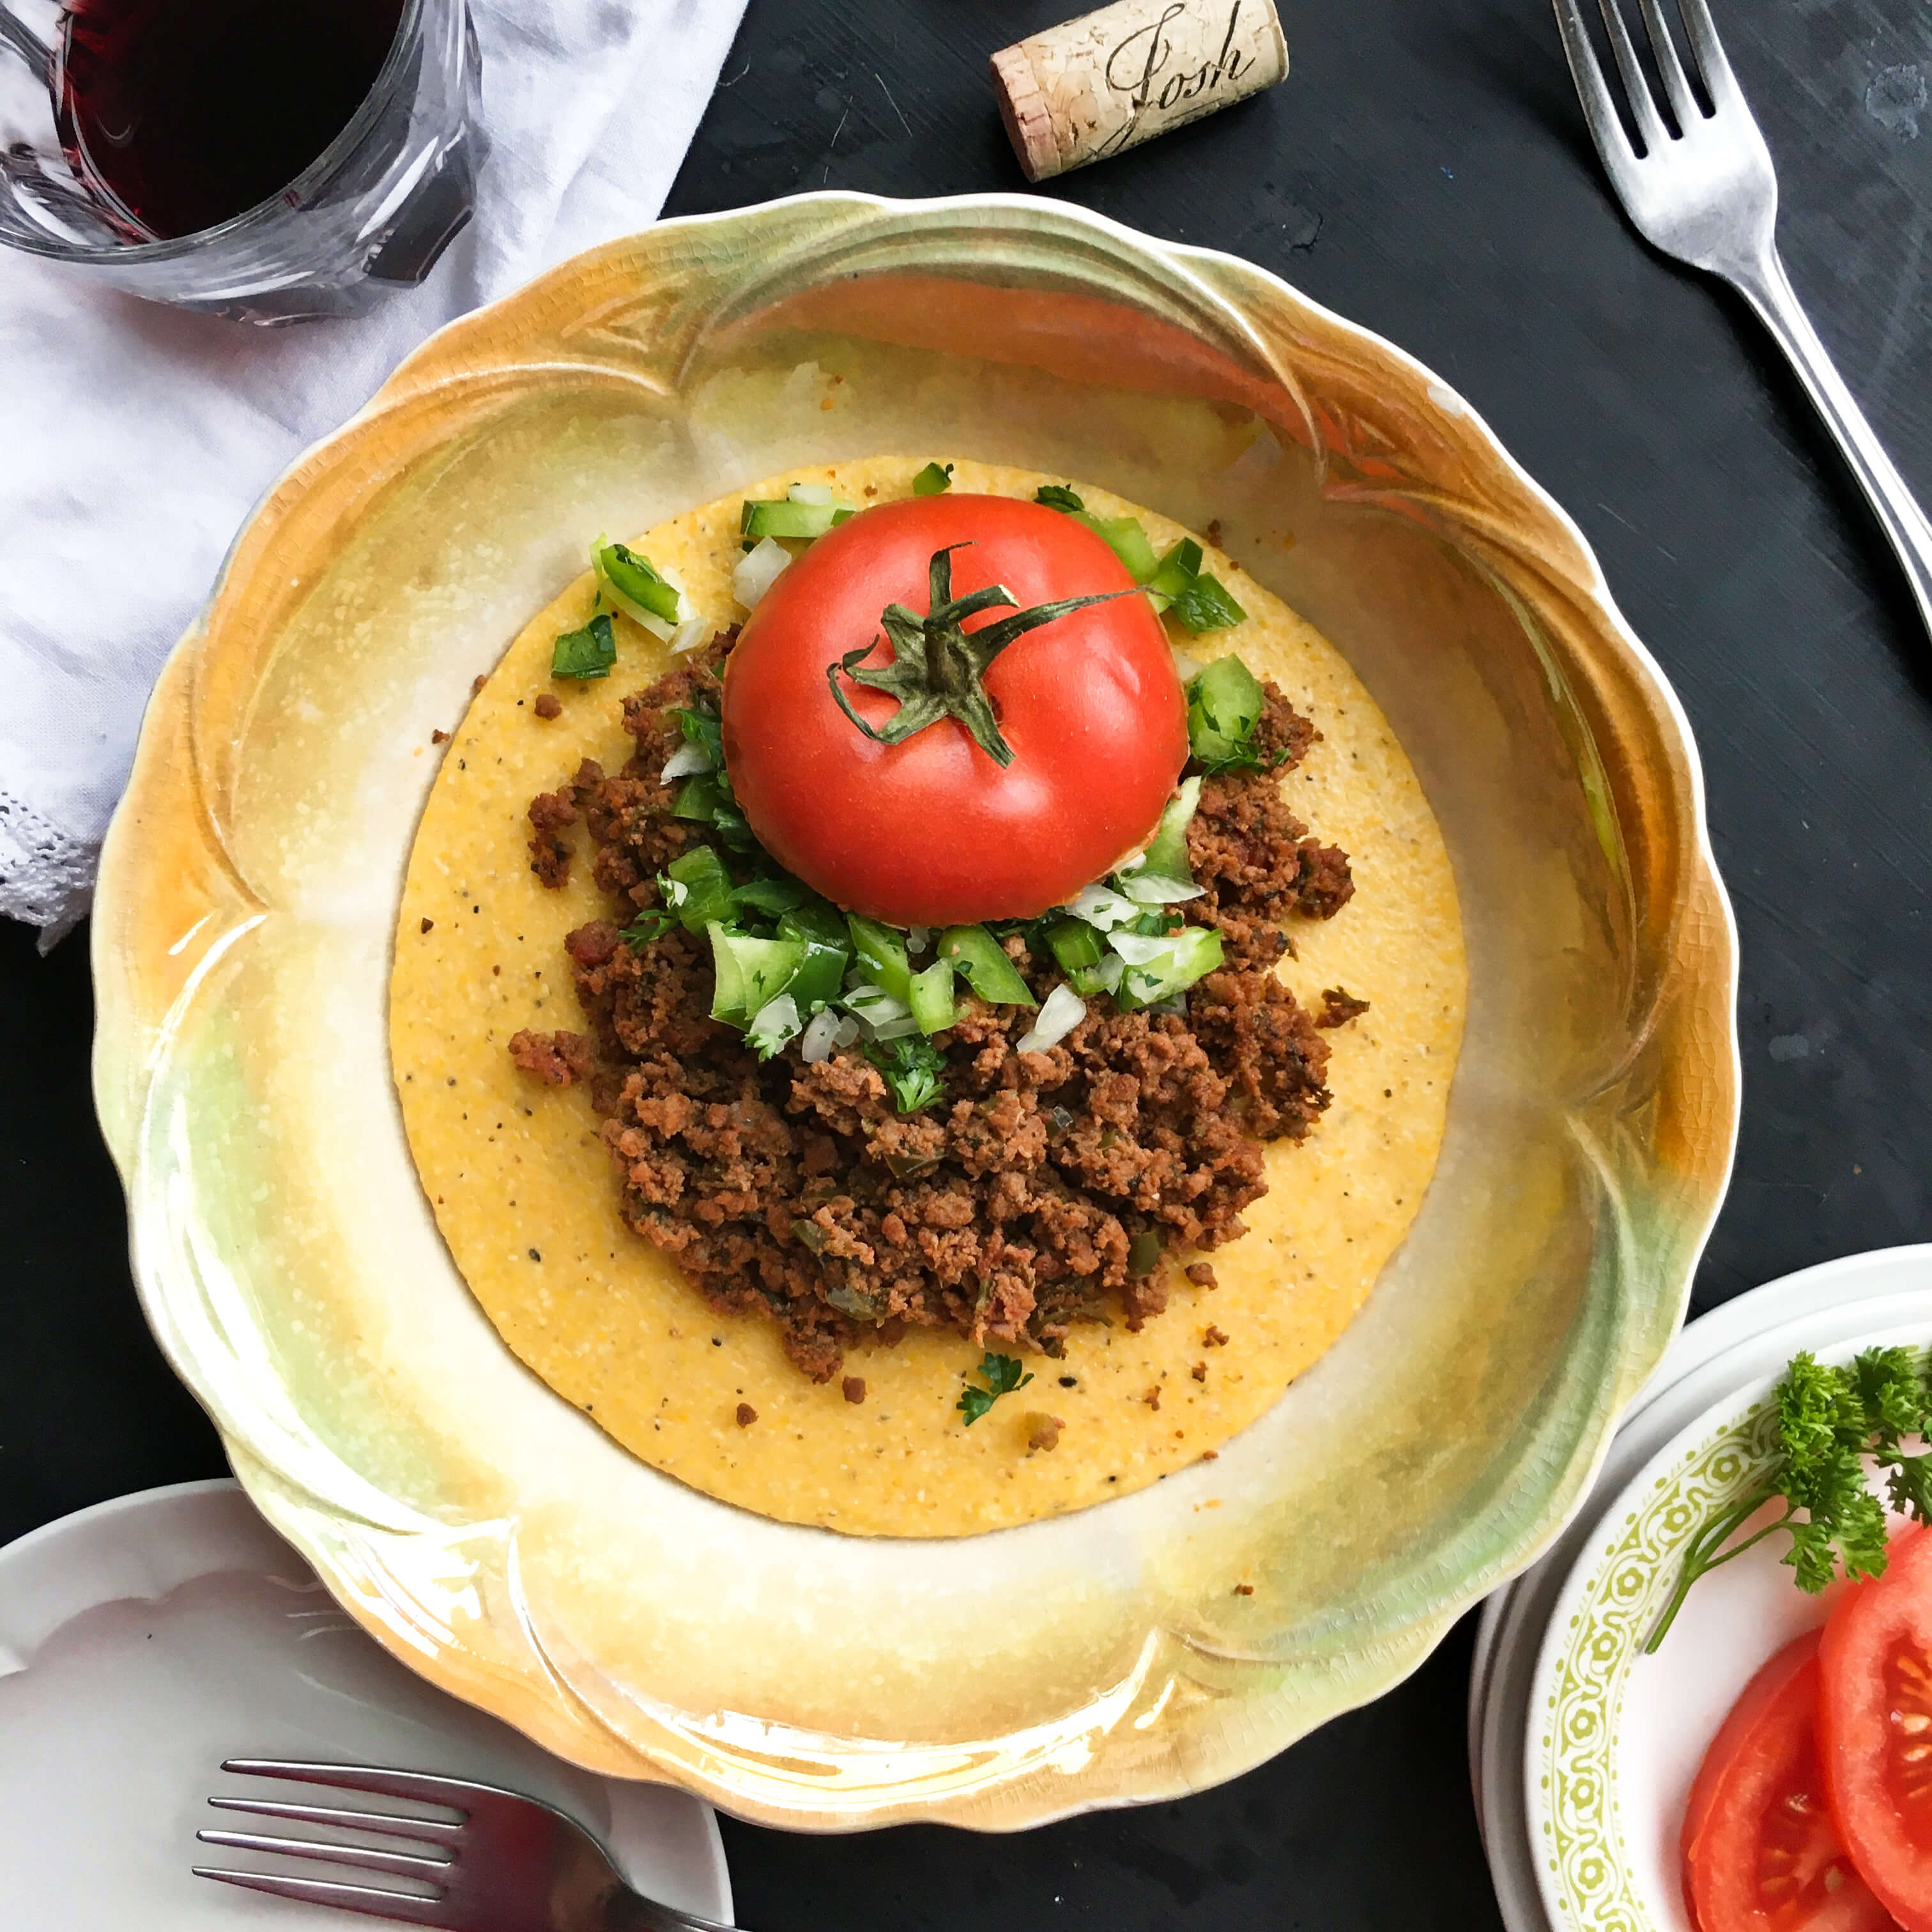
1/2 cup chopped onion

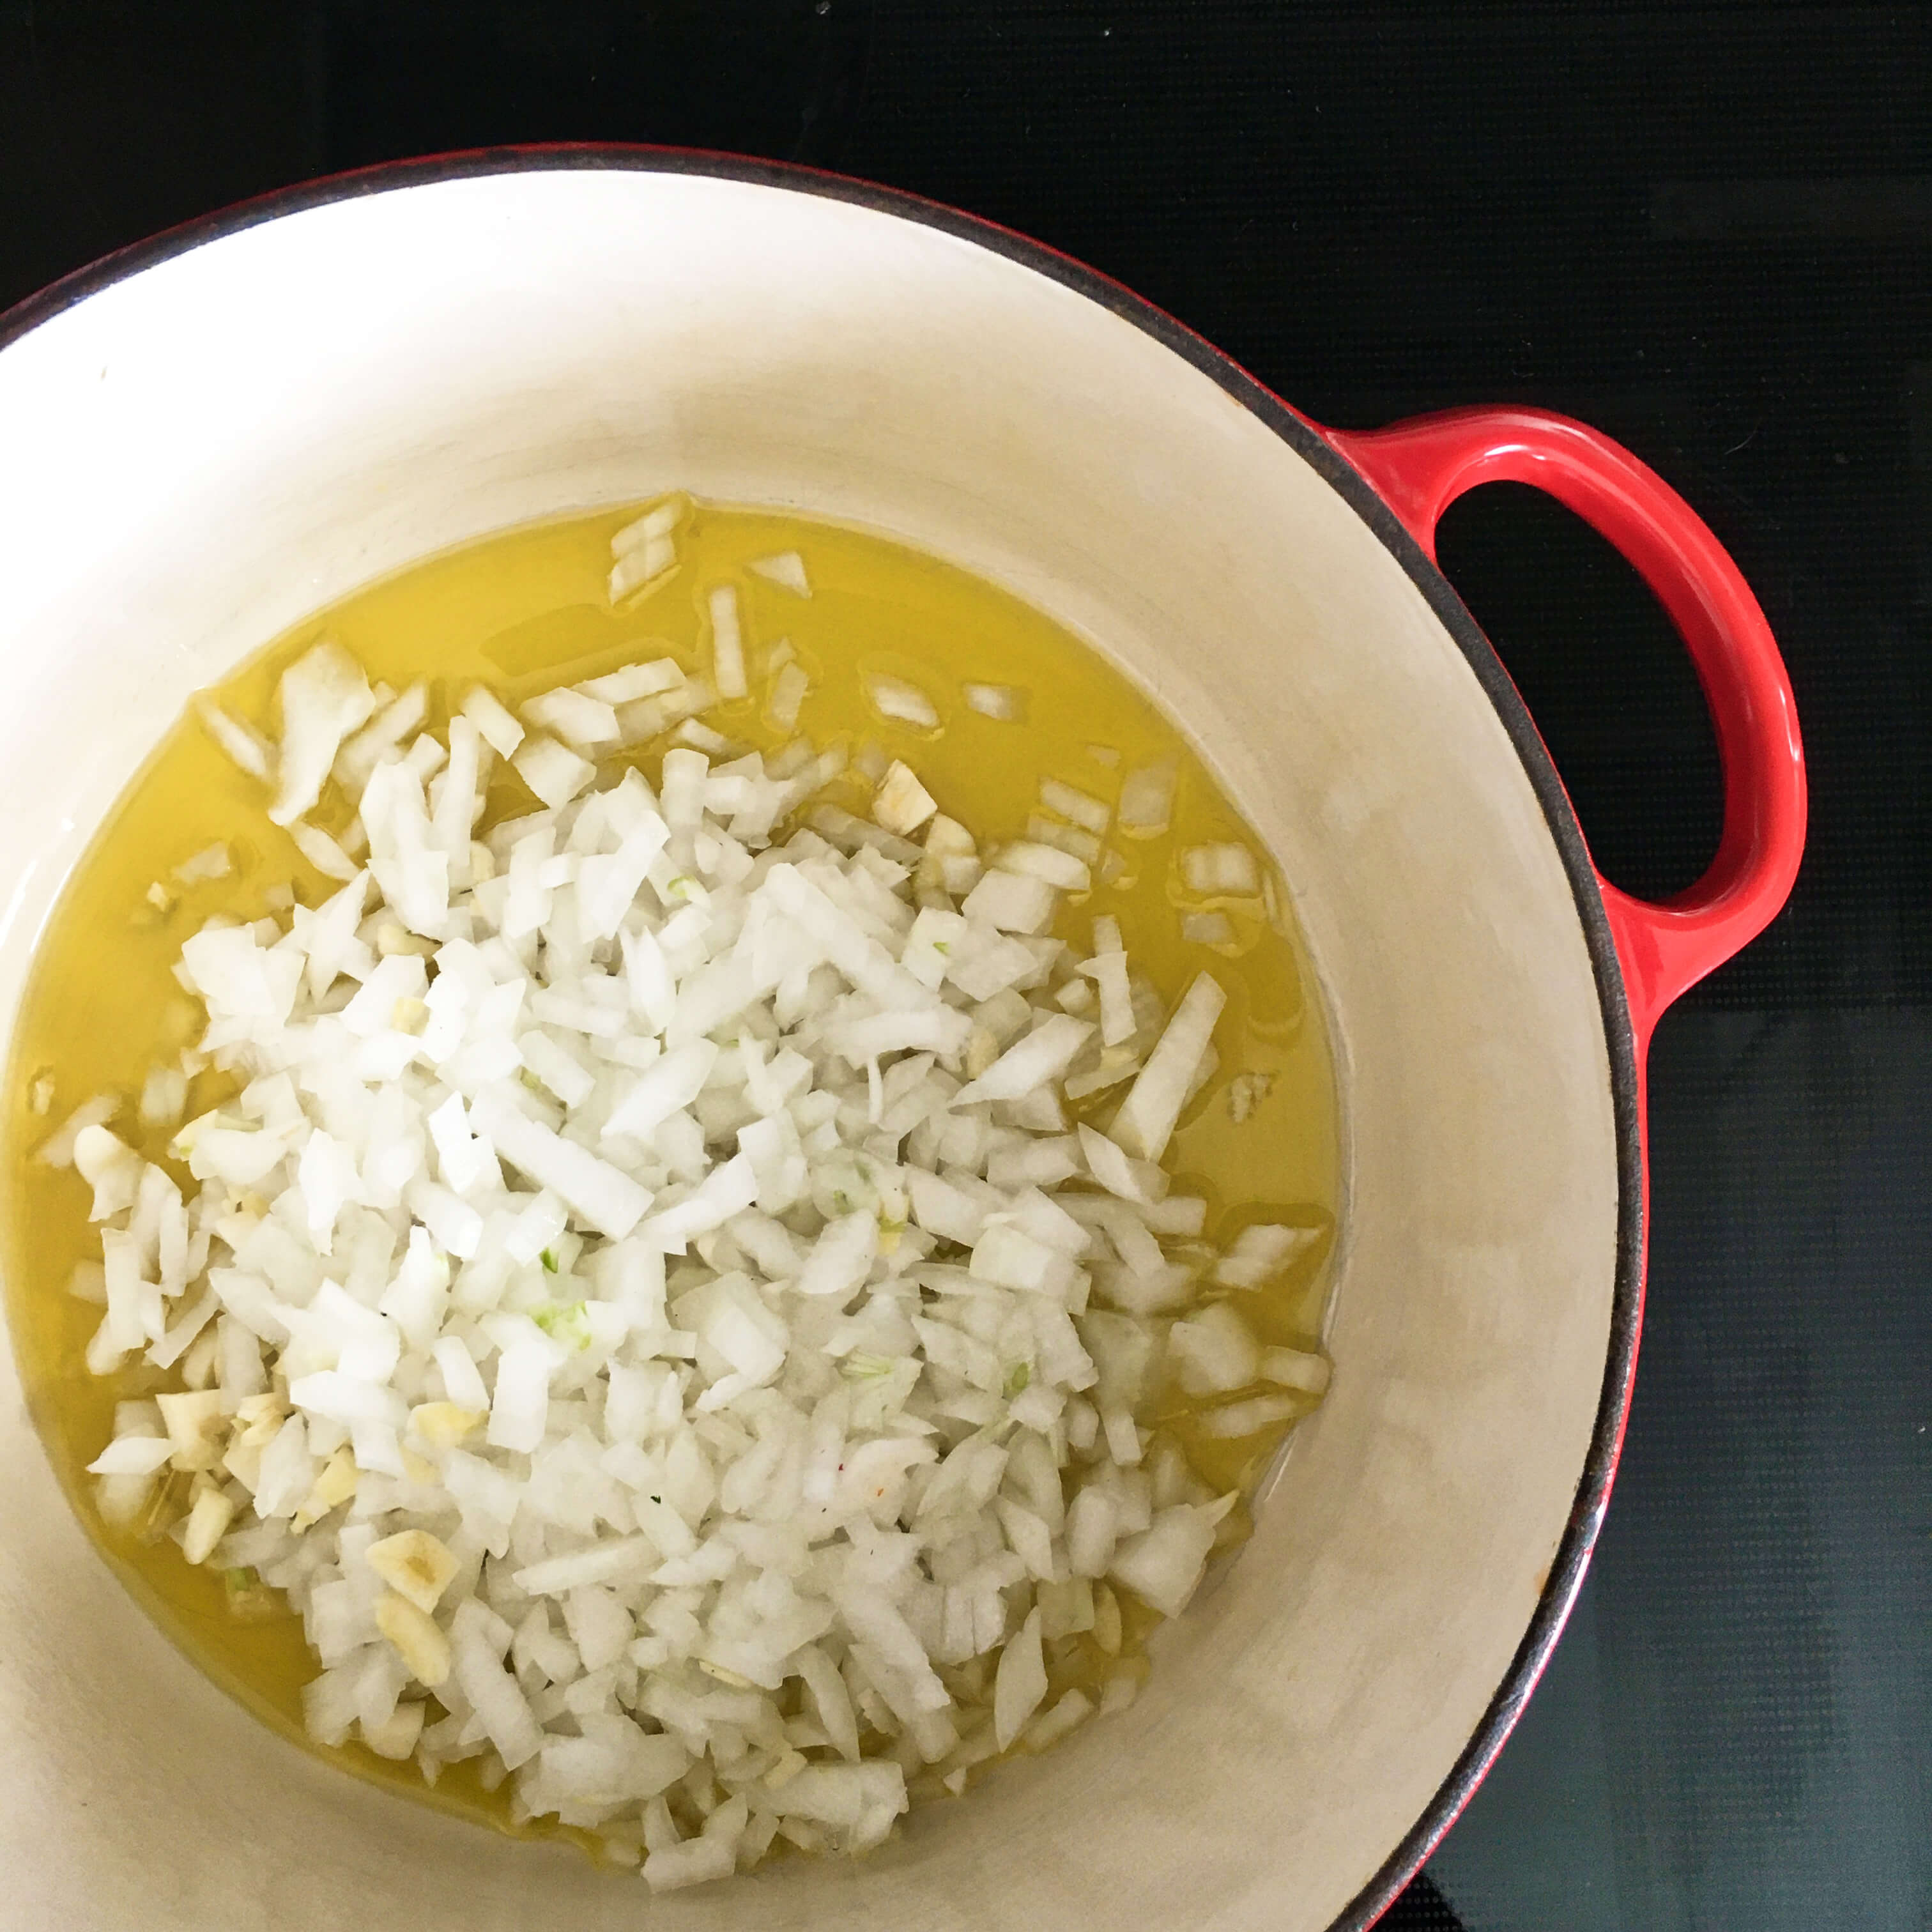
1/2 cup diced tomato ( I used canned since it’s not tomato season quite yet!)

1/4 teaspoon ground saffron (Special Note: So far, I’ve found that Trader Joe’s is the best place to find this at the most reasonable price)

1/2 teaspoon dried oregano

1 cup fresh or frozen peas

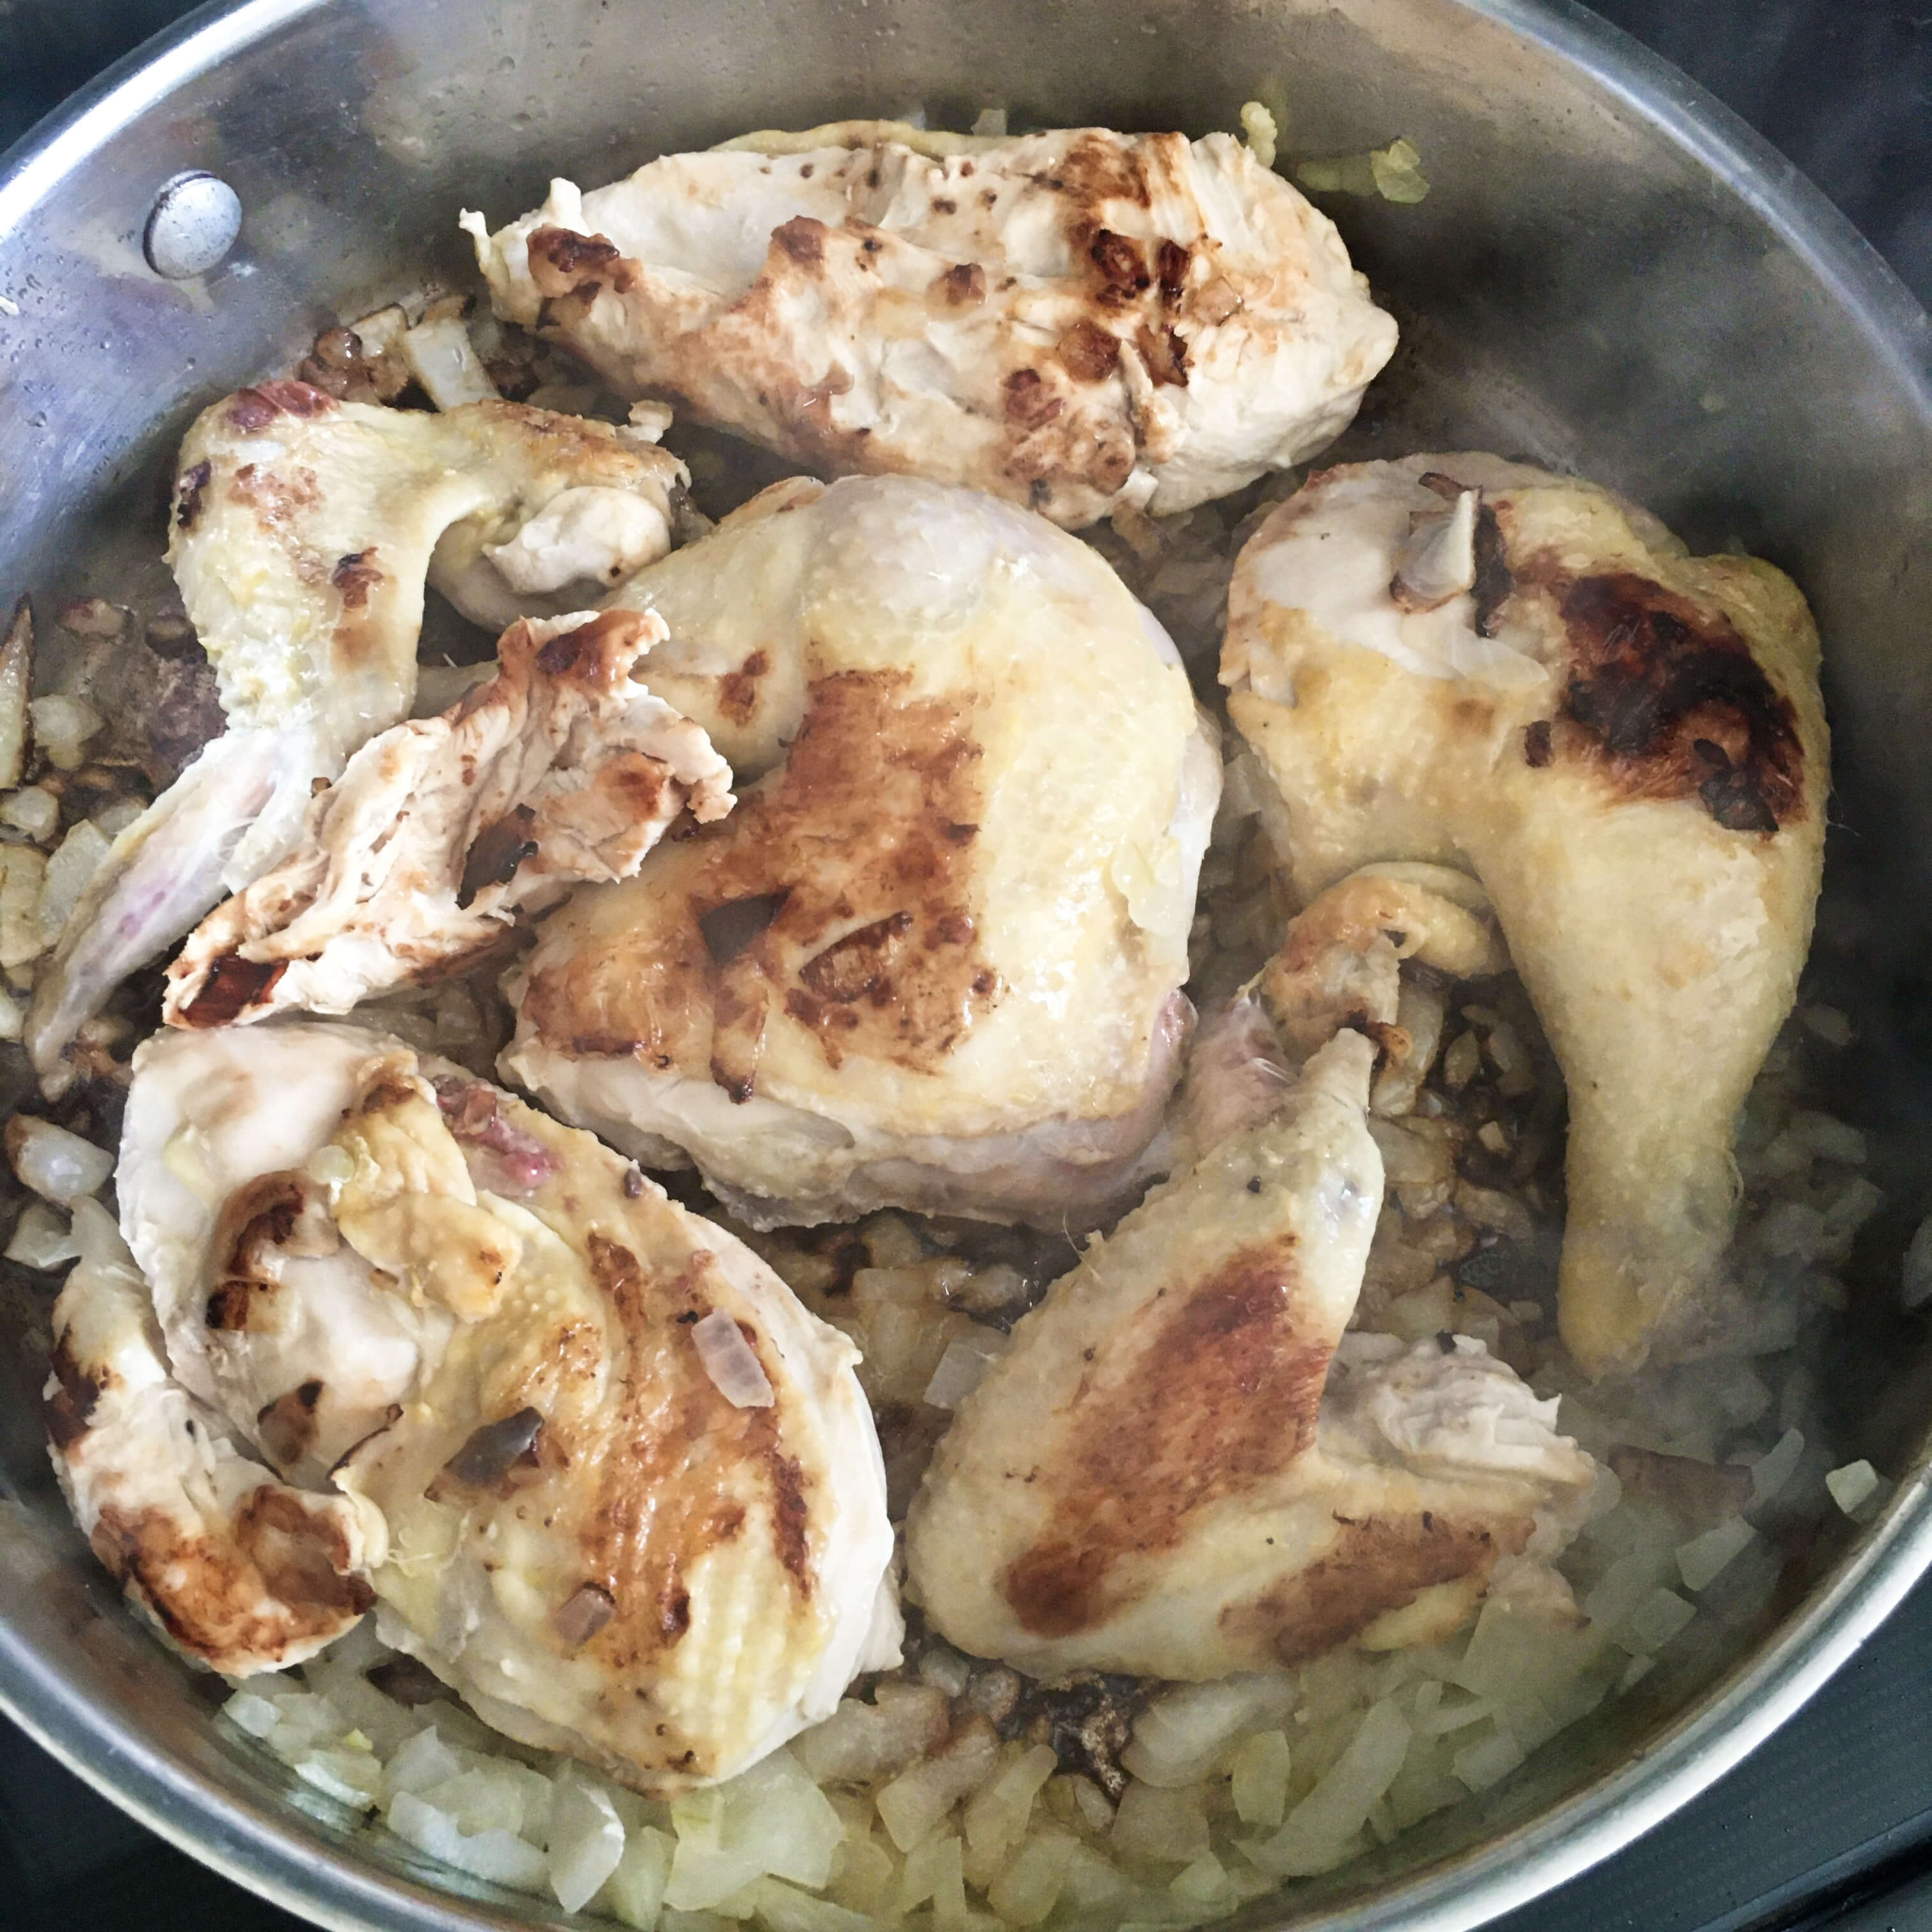
Place the meat in a saucepan with the bay leaf, cumin, peppercorns, garlic, vinegar, salt and three cups water.

Cover and cook slowly for one hour, until the meat is almost tender.

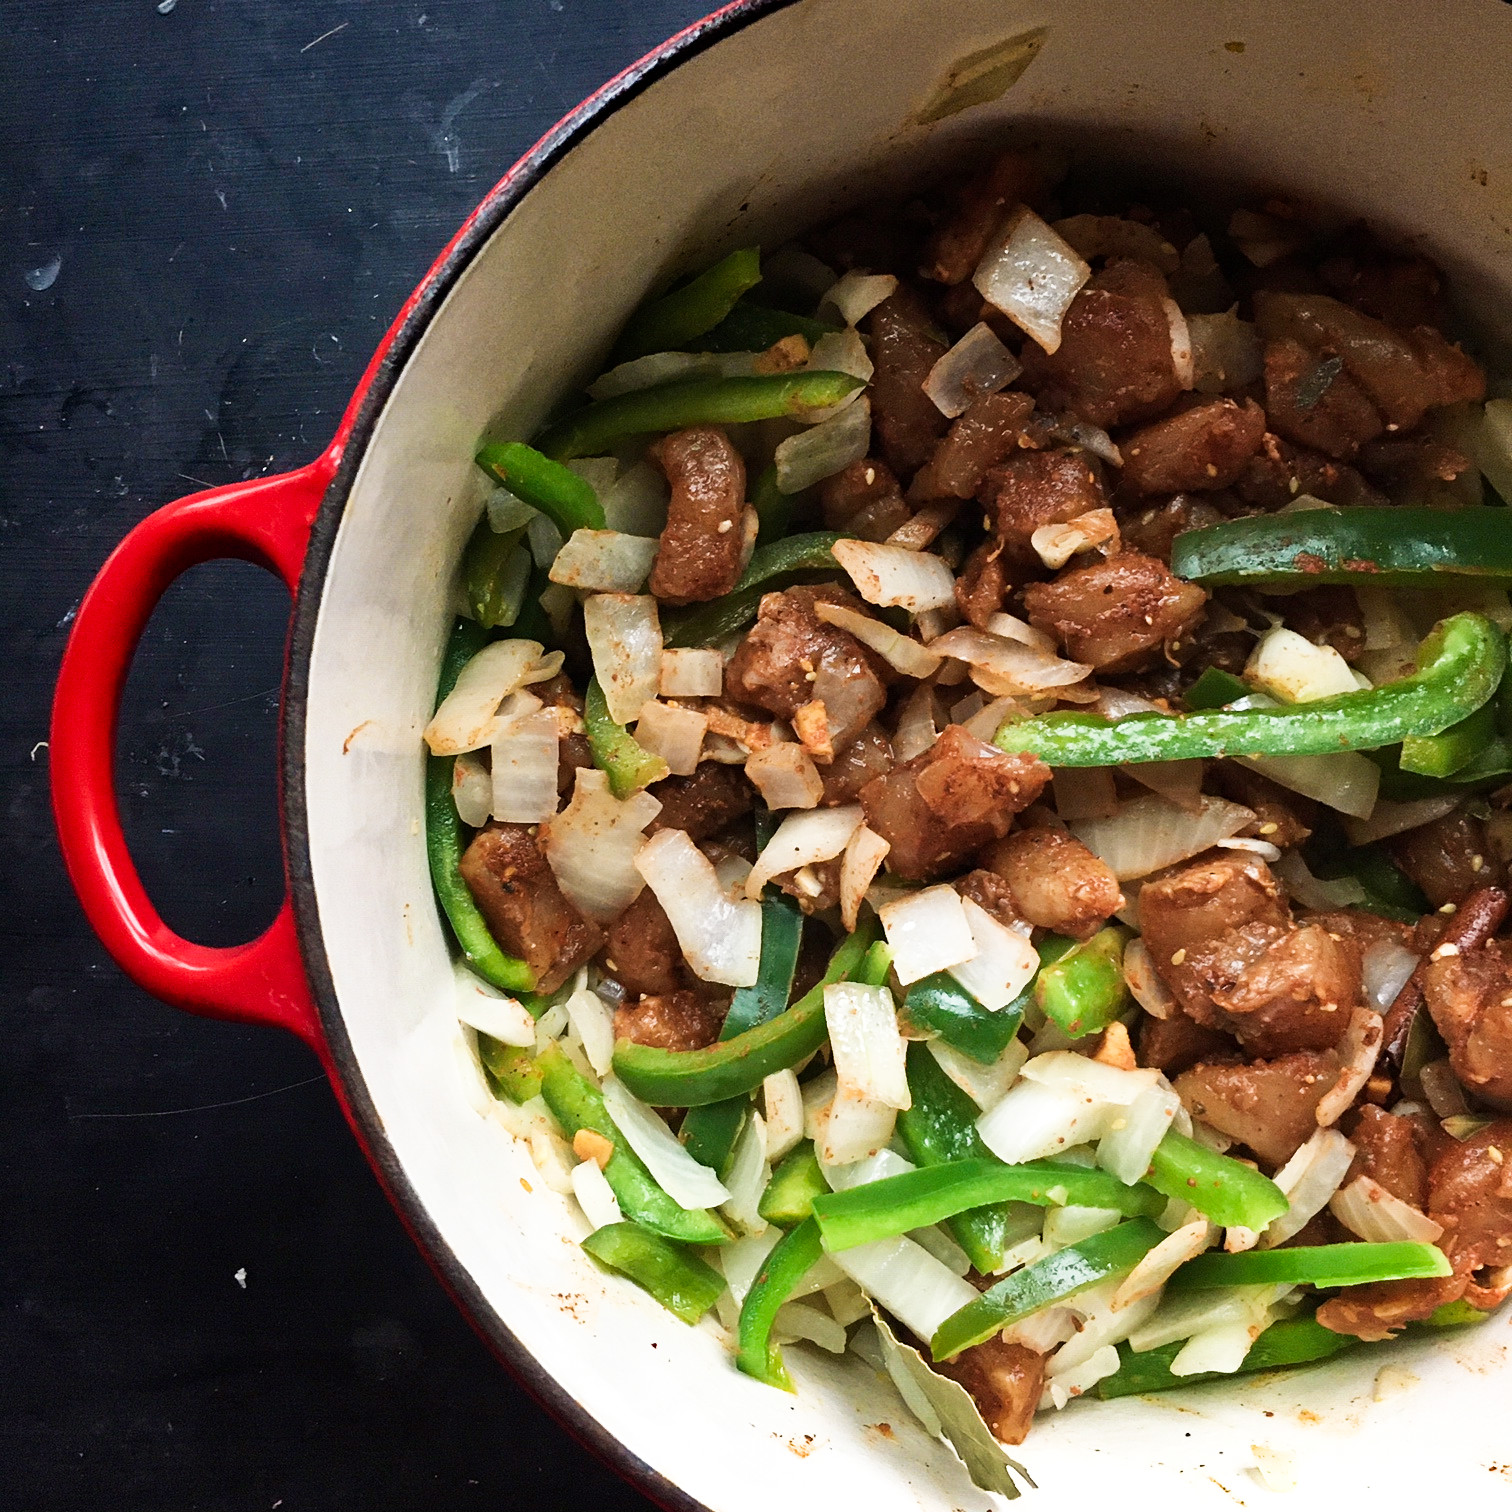
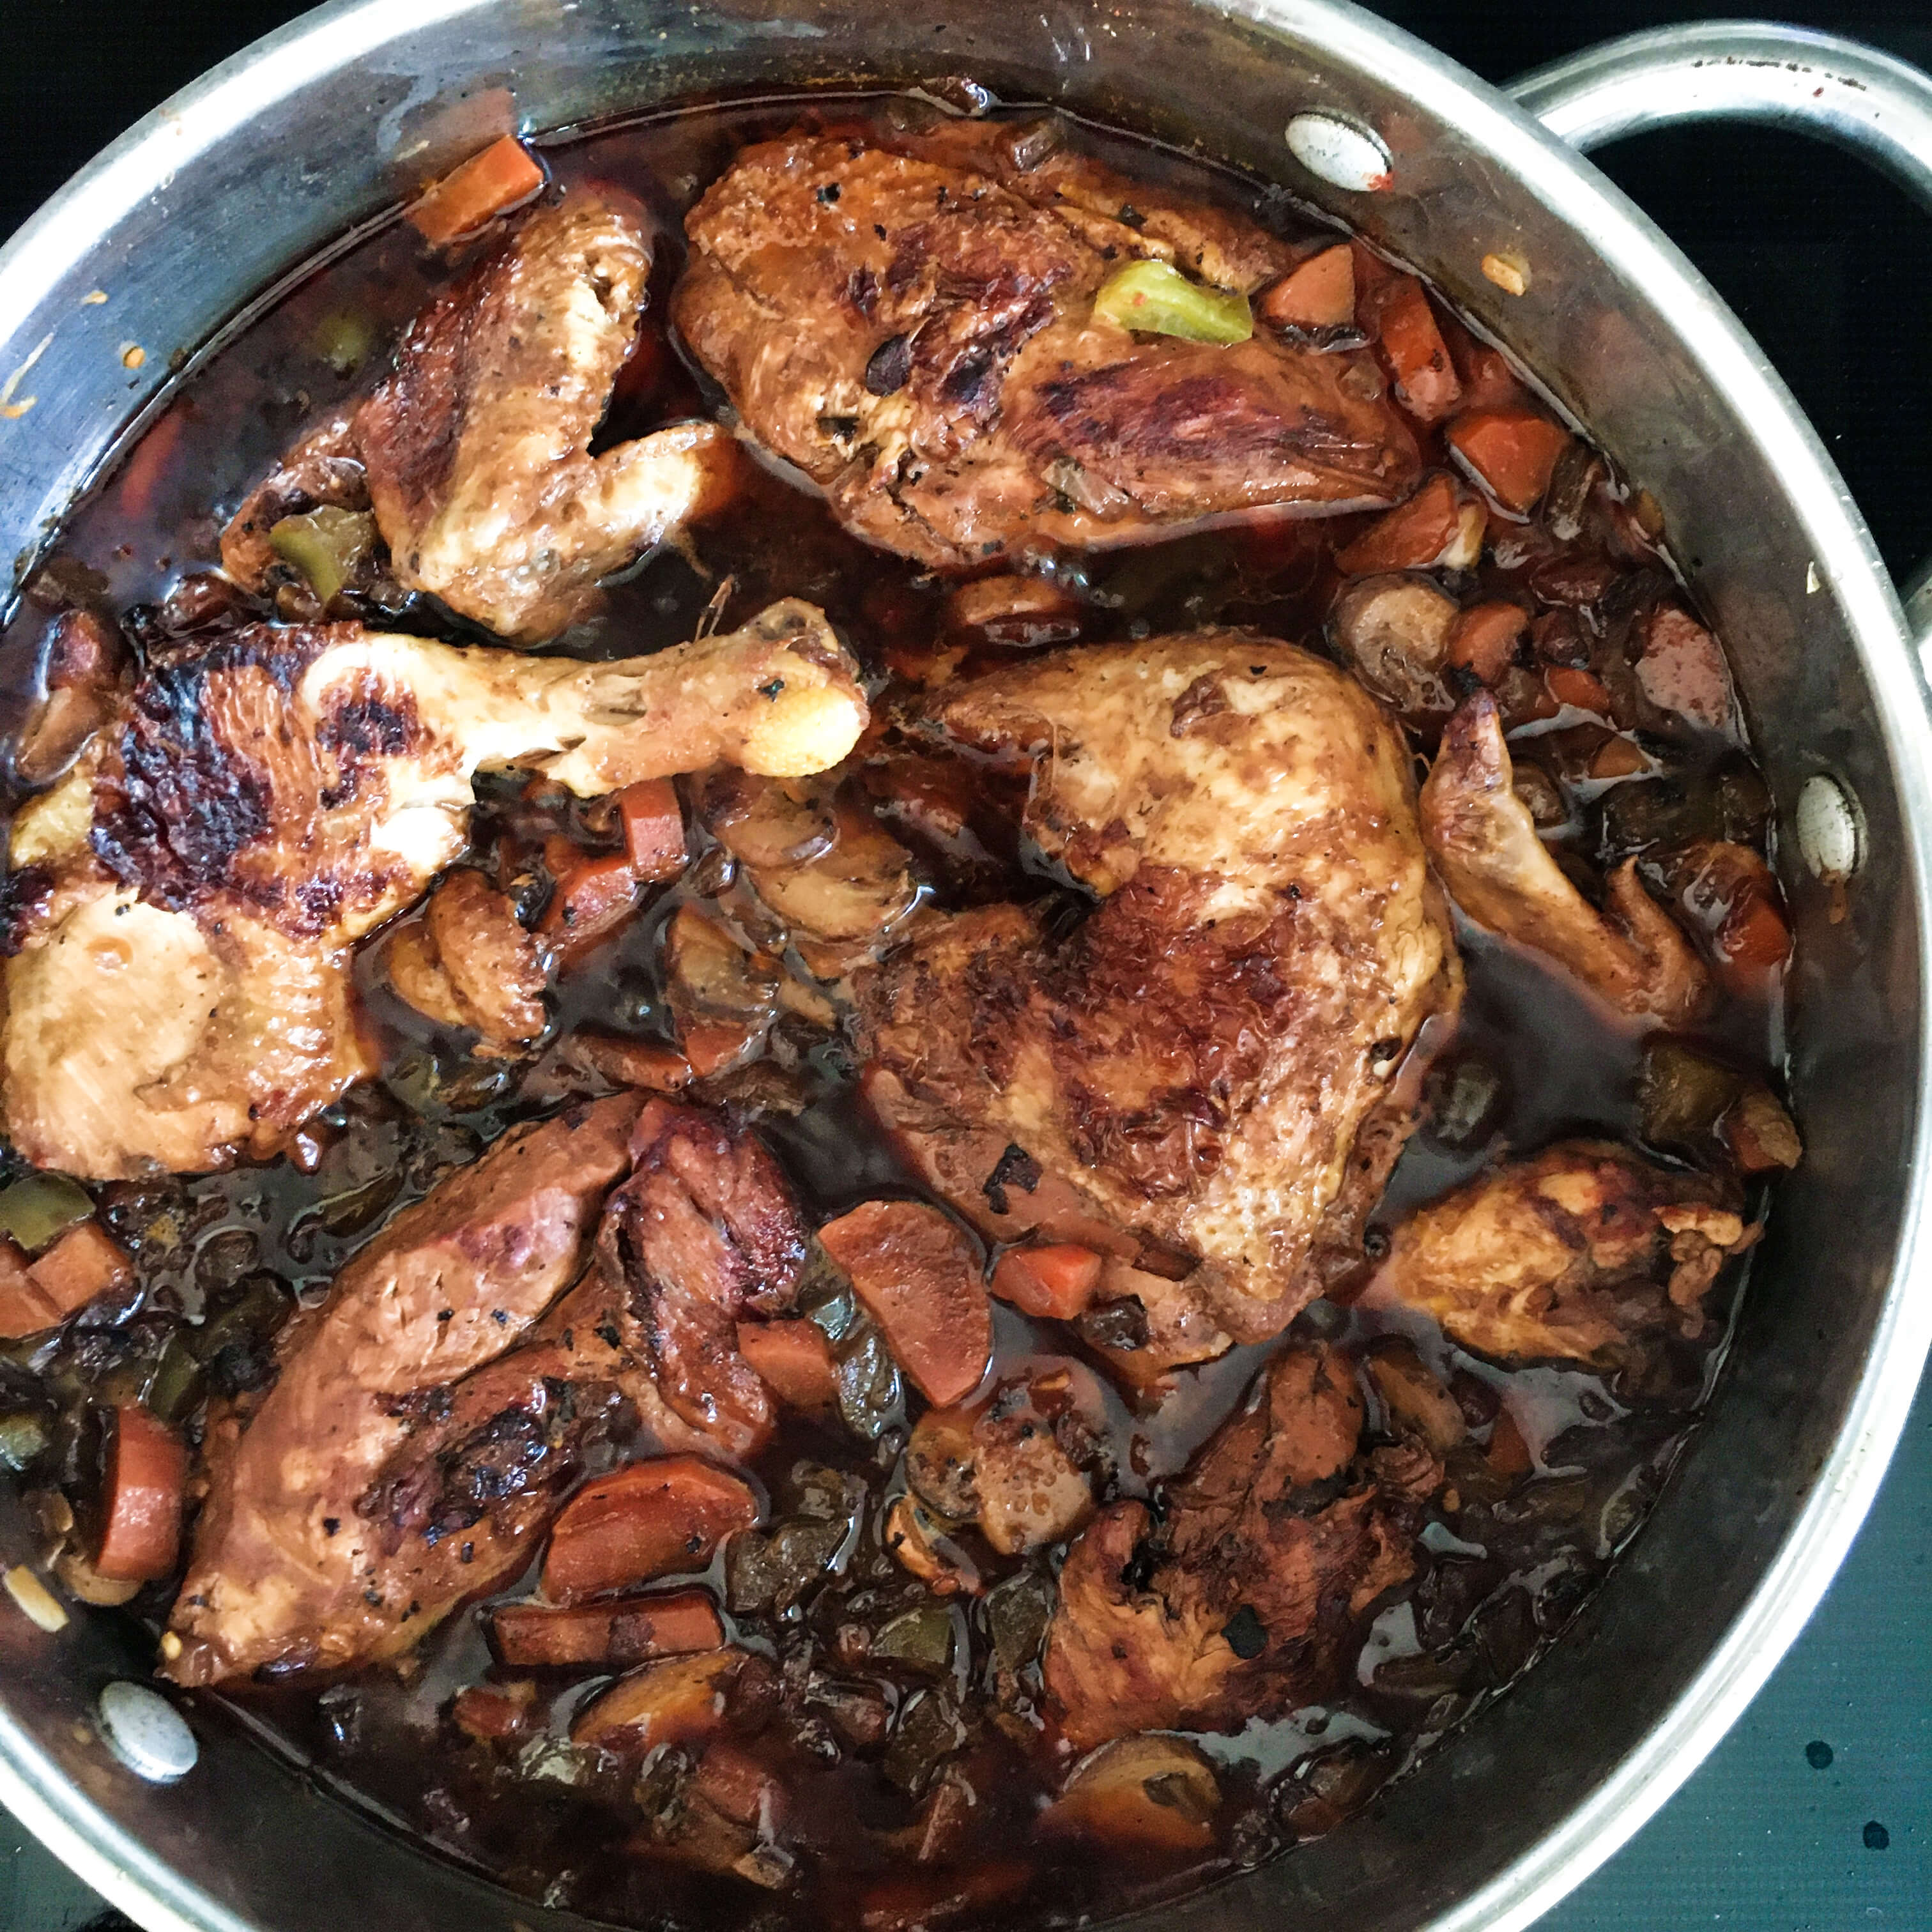
Add the potatoes, carrots, celery, corn, onion and tomato.

Cover and cook for 20 minutes, until the vegetables are tender.

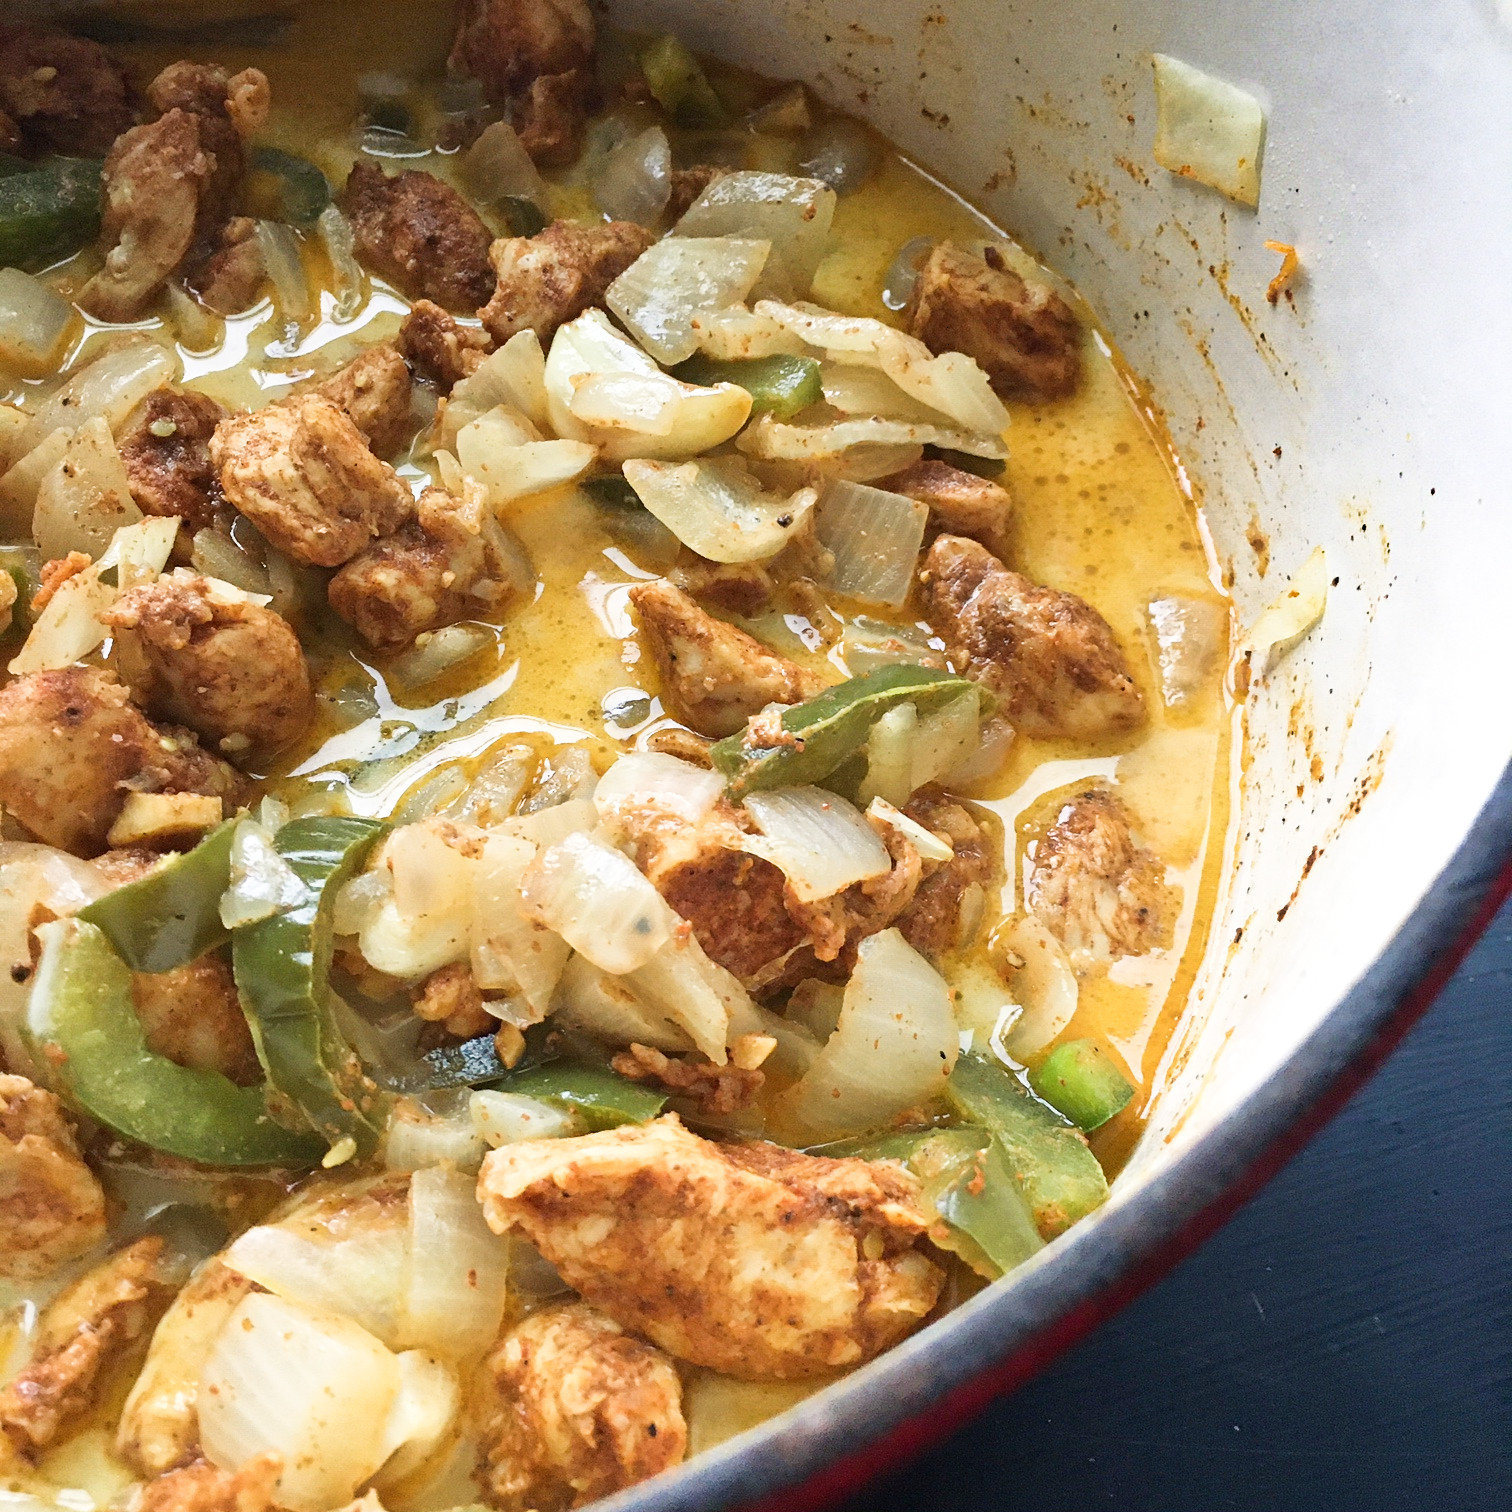
Dissolve the saffron in one teaspoon water and add to stew, along with the oregano and peas. Cover and cook for 10 minutes, until the vegetables are done. Serve in bowls accompanied with slices of rustic bread and garnished with celery leaves.

Cheers to Colombia for providing a much needed dose of color and joy to our lives this week and to the humble stew pot for managing to be both a homecooker and a therapist all in one!

Join us next Wednesday for Week 11 when we head to Cuba where we get wrapped up in the world of slow roasting and botanicals. In the meantime, take care of your yourself and your spirit.

The Natural Disaster and the Postponement

Hello there dear and treasured kitcheners. As you know, Wednesday nights are usually the time when you can catch up on the latest installment of the International Vintage Recipe Tour. I regret to inform you that this week the post is delayed until Friday, due to an ongoing power outage. My lovely and beautiful and cherished city neighborhood was one of the places that was most hard- hit by the tornado that blew through Nashville just after midnight on Tuesday morning. The photo accompanying this post is of one of my favorite restaurants just two blocks away. Sadly, this is by far not the worst site in the neighborhood. It’s been difficult and devastating these past few days,  but luckily the Vintage Kitchen, the Tour, and the spirit behind both, keep the joy and the passion ignited and moving towards sunnier days ahead.

This week our featured country is China, another area of the world dealing with a troubling crisis. Thankfully, our focus this week is anything but bleak. The recipe stemming from this colorful Asian country is delicious and features a unique cooking technique and stylized presentation. I can’t wait to discuss it all with you. Coming up in Friday’s post, there is also special focus placed on a Chinese cultural tradition that is soothing, inspiring and illuminating. I didn’t realize at the time I was pulling all the threads together for this week’s Recipe Tour that it would feature a symbolic lifeline in the Chinese community that would also become a lifeline for me too. But the world is wonderful that way – making us feel unique and universal all at once.  Please come back and visit again on Friday where good recipes await and joy prevails. See you soon.

Eating with Elephants & Elizabeth Taylor: It’s Dinner and a Movie Night, Ceylon Style!!

Hope you are hungry this week fellow kitcheners! Tonight’s post is all about a feast for the eyes, the imagination and the belly. Welcome to Week 8 of the International Vintage Recipe Tour 2020. Welcome to Ceylon…

Last week we were in Canada making a Walnut Tart and learning all about maple trees. This week we are traveling 8,400 miles east to the lost land of Ceylon, the first stop in our Recipe Tour that involves a country that no longer exists. Well, that’s not entirely accurate. The landscape itself still exists but the country has been renamed from Ceylon to Sri Lanka. This automatically adds a sentimental bit of nostalgia to our cooking endeavors this week. So what exactly led to such a big change in our world history?

An old trading map of Taprobane. Photo courtesy of lankapura.com

In a nutshell, this is what happened. Ceylon was a British ruled country beginning in 1815. Before that, the country was known by a variety of different names including Taprobane, Ceilao and my personal favorite, Serendip, which is where we get the word serendipity from.  In 1948, Ceylon established independence from Britain but it wasn’t until 1972 that they changed the name of their country to something that was more reflective of their unique heritage. They chose the name Sri Lanka which means Island of Resplendence, a positive, empowering moniker that let the world know they were ready to shine proudly, brilliantly, and independently all on their own accord. Tonight’s recipe dates to 1971, the year just before Ceylon changed names and took on a new identity.

Camellia sinensis – the base of all tea plants

Most tea drinkers today know about historic Ceylon because of the famous tea that came from there- a black variant steeped in antioxidants that boasts all sorts of health benefits. As a favorite known around the world, Sri Lanka’s current tea industry contributes over a billion dollars a year to their economy. Other local treasures hail from this island nation too. Important food exports include coconuts and spices. On the International Vintage Recipe Tour this week we are featuring all three of these noteworthy commodities – two in recipe version (coconuts and spices) and one in movie version (tea).

1930’s Map of Ceylon

On the menu this week we are making Ceylon Curry – a spice infused chicken recipe that involves a marinade, a slow simmer, and a freshly made batch of homemade coconut milk. For entertainment, tonight’s dinner is paired with a sweeping 1954 melodrama of a movie called Elephant Walk, which stars Elizabeth Taylor and takes place on a tea plantation in Ceylon.

Liz plays Ruth, an English bride who moves to Ceylon with her new husband. There he runs a tea-plantation first started by his father years ago, called Elephant Walk. Filled with excitement and anticipation at this exotic new life ahead, Ruth, upon arrival, quickly discovers a world very different than what she had anticipated, and a husband very much changed from his wooing days back in England.

Natural beauty and a luxurious environment make up her new home, but Ruth learns almost immediately it is not a peaceful paradise.  As it turns out the plantation was built, decades ago by her father-in-law, right in the middle of the migratory walking path to water made by the local elephants during drought season. This off-handed act of careless  disregard for the natural instincts of the elephants has created a hostile environment between man and animal, leaving everyone’s defenses constantly on guard.  To make matters more uneasy, Ruth’s husband (played by Peter Finch) is still controlled by his dead father’s arcane rules when it comes to running not only his business but also his personal life.

Busy with the management of the tea business by day and carousing with his friends at night, he has little empathy for Ruth, a stranger in a new land, and little desire to restructure his life in order to accommodate his new wife. Curious and questioning, Ruth is the only non-native woman on the plantation.  An intelligent, independent, feminine creature, she is set adrift among a sea of old-school men who possess a boy’s club- type mentality. Nothing seems to make sense to her once she arrives in her new home. She doesn’t have any direction, doesn’t understand her purpose and doesn’t understand her husband, yet she is determined to figure things out.  Trying to navigate this complex world leads to a growing kinship that develops with her husband’s business manager (played by Dana Andrews), who also happens to be the only person on the plantation that will talk to her about anything important, including the ostentatious ways of her father-in-law and the mysterious and powerful hold he still has on everyone at Elephant Walk.

While the plantation environment is glamorous and decadent, Ruth must continuously adjust her attitudes and behaviors in order to keep her marriage together. When she can’t stand the peculiarities of life in this strange world one more minute and decides to flee back to England, a cholera outbreak occurs keeping her quarantined within the boundaries of the plantation. I won’t tell anymore about the story so as not to spoil the ending but you’ll see from this trailer that lots of drama happens throughout the movie…

Filmed on location in Ceylon, it’s is a wonderful glimpse into the exotic culture and landscape of vintage Sri Lanka. Some of the scenes were filmed in and around an actual tea company, so we get to see a little bit about how tea is made (or used to be made anyway!)…

Tea leaf gatherers.
Tea equipment on the right, brooding husband on the left:)

and there are lots of scenes that feature the lush and verdant country landscape…

Vintage clothes lovers will appreciate beautiful Liz and her Parisian wardrobe…

Originally, Vivian Leigh was scheduled to play the lead role, but she suffered from a nervous breakdown at the start of filming. Elizabeth Taylor was called in to replace her.

as well as the safari clothes and tuxedos worn by the guys…

That’s Peter Finch on the left and in top right corner. Dana Andrews is in the bottom right.

There’s a party scene that involves traditional dances and a kitchen scene so immense in size and scope it would boggle the mind of any home cook.  There was even a dinner scene complete with curry and rice!

If you aren’t familiar, curry comes in lots of colors. In this scene in the movie it was green. In our recipe this week it is red. But also in my pantry, I have orange curry, yellow curry and brown curry. That’s because there is no such thing as a universal curry.  Curry is a conglomeration of different spices all blended together. There is curry on the sweet side, curry on the spicy side, curry that is mild, curry that is intense and curry that has been infused with different seeds and aromatics.  Each version is unique in taste and scent.

The curry I used for this recipe is a red Thai Curry that was made of finely ground paprika, lemongrass, salt, shallots, galangal, cumin, coriander, chiles, pepper, cilantro, garlic, lime leaves, basil and spearmint. But you can use any kind of curry powder you like for this dish.  If you have a spice shop in your neighborhood, I highly recommend getting your curry powder there since it will be most fresh and flavorful, yielding an optimal culinary experience.

While Elephant Walk immerses us visually in the sights of Ceylon, this week’s meal immerses us in the scents of Ceylon. Tonight’s dinner is two recipes in one. The first is for homemade coconut milk and the second is for chicken curry. Both are easy to make but the coconut milk is labor intensive. If you are short on time, just buy a can of coconut milk and add it to the curry.

I have never made, or even thought about making homemade coconut milk before, so I was excited to try it. Basically it involves cracking open two coconuts, scooping out the meat and then blending it with water in the blender. It sounds simple. It sounds easy. It sounds like a 10 minute project.  I warn  you now this step takes some time (about 45 minutes per coconut) and it takes a little bit of muscle to crack the coconuts open and to scoop out the flesh. It’s a messy endeavor even if you are a meticulously tidy cook and it involves tools.  You’ll need a hammer, a heavy chef’s knife or cleaver, a strong butter knife, a vegetable peeler, cheese cloth and a medium to large funnel.

I made everybody a bit nervous when I posted a sneak peek video on Instagram on Sunday about the tricky aspect of chopping open a coconut. (If you missed it, click here and scroll through the sneak peek videos until you get to week 8.) It took about a minute and a half to crack open each coconut.  I used the backside of the cleaver so there really was no threat that I would chop a finger or a hand off, but I’m truly grateful that everyone was so worried for my limbs!  I’m happy to say everything is still intact, fingers and hands, and I’m more knowledgeable for having experienced the procedure. The whole task just takes a little bit of bravery, some good firm wacks with the knife and a steady determination to see the project complete. Eventually victory comes.  I’m sure this is one of those skills that improves the more often you do it. Maybe by the year’s end, we will all be experts at cracking those coconuts.

In the meantime, I must say, cracking coconuts was a pretty fun experience all the way around. There was lots of laughing during this process, bits of coconut shell went flying all around the kitchen and there was even a little impromptu competition between my husband and I about who could crack a coconut faster. He won. By a significant amount of time. So I’d encourage you to make your own homemade coconut milk at least once, just for the experience of doing it. Even though it may sound daunting and isn’t 100% necessary to the total overall taste of the recipe (a canned version would suffice just the same) you might discover a new sense of joie de vivre and camaraderie in the kitchen.

Coconut Milk Made in a Blender

(Makes about 4 cups)

2 coconuts

4 cups hot water

Once the coconuts are cracked open. Discard the water inside. Get out your hammer. Turn each coconut half skin-side down on top of a few sheets of paper towels and bang away at it until the shell either 1) falls away from the coconut meat or two separates enough that you can slide your butter knife between the outside shell and pry the meat out. This is the messy part, as coconut chucks may go flying around around your kitchen from both the hammering and the prying.

Once you remove the hard shell there will be a softer brown shell attached to the meat which you’ll peel off with the vegetable peeler. The recipe calls for two coconuts, however, you don’t need that much milk for the recipe, so if you don’t 3 cups of leftover coconut milk hanging around in your fridge, then just use one coconut.

how-to-make-homemade-coconut-milk-in-a-blender

Once the coconut meat from one coconut is peeled, cut it into chunks, toss it in the blender and pour two cups of very hot water over the meat. Blend it on high for about 3-4 minutes until thoroughly blended.

Line a funnel with cheese cloth and set the funnel inside a large mason jar. Pour the mixture into the cheese cloth in batches. When it has finished dripping into the jar squeeze the remaining coconut pulp that hasn’t drained through the cheese cloth directly into the mason jar to extract as much liquid as possible. (Note: at this stage the leftover coconut pulp looks and feels a lot like flaked candle wax.) Then discard the pulp and repeat until you have emptied your blender and there is no more coconut meat to process. Two coconuts should yield about four cups of coconut milk. Refrigerate coconut milk until ready for use.

Ceylon Chicken Curry

(serves 6)

2 lbs. boneless skinless chicken cutlets

2 1/2 teaspoons salt

1/2 teaspoon freshly ground pepper

1 tablespoon vinegar

1 one inch cinnamon stick

3 tablespoons curry powder

2 cloves garlic, crushed

1 teaspoon chopped fresh ginger

3 bay leaves

2 cardamom seeds (or 2 pinches of ground cardamom)

Cayenne pepper to taste (this is optional – I didn’t use it since my curry powder already ha some spiciness to it)

3 tablespoons butter

2 onions, chopped

1 green pepper, seeded and sliced

1 cup coconut milk

1 tablespoon fresh lemon juice

Cut the chicken into small chunks and place in a bowl. Add the salt, pepper, vinegar, cinnamon, curry powder, garlic, ginger, two bay leaves (crushed), one cardamom seed or one pinch of dried cardamom, and cayenne (if using).  Mix well. Cover and refrigerate for at least two hours or up to 24 hours. (I marinated mine for about 12 hours).

Heat the butter in a dutch oven or a large saucepan and add the onion, the remaining bay leaf and cardamom seed (or pinch of ground cardamom) and the green pepper. Cook briefly (about 5 minutes) over medium heat, stirring occasionally.

Then add the seasoned chicken and cook stirring occasionally, until the liquid is partly absorbed (about 5 minutes).

Then cover and cook 45 minutes over low heat.

When the chicken is tender, add the coconut milk and simmer, covered for 10-15 minutes. Add the lemon juice just before taking the pan off the heat, but keep stirring until it has been incorporated. Then you are ready to serve it.

I suggest serving this curry over a bed of jasmine rice accompanied alongside a glass (or two!) of cold white wine – preferably a varietal that sits on the sweeter side.

As I’ve  mentioned occasionally on the blog before, I’ve been a big fan of curry for a long time and have tried handfuls of different recipes. This is by far, my most favorite to date.    The curry itself is so full of flavor, I can’t wait to try it with other types of curry powder to see how the tastes change. The coconut milk adds a brothy consistency that is lovely for sopping up with bread or extra rice and offers a creamy contrast between the spiciness of the curry.

Marinating the chicken ahead of time (a new concept for me!) makes each piece so tender. Just like a slow-cooked chili or stew recipe, it only tastes better the longer it sits in its juices. All in all, this was just a joy of a recipe. Even the tricky coconut chopping wound up adding a new theatrical element to the kitchen that was fun and unexpected.

While you are enjoying your dinner… the other thing I suggest is turning on the movie (you’ll find it on Amazon), and turning off your phone or any other ringing, blinging and beeping devices.  Just for the next two hours immerse yourself in all the sights, sounds and tastes of vintage Ceylon. By meal’s end, you’ll have experienced a brief encounter with a lost country through vibrant cinematic and culinary storytelling.

Cheers to vintage Ceylon and to magical movies and recipes that transport us! Join us next week as we head to China where we make an unusual dish that involves specialty papers and curious methods.

Thoughts on Love, Dinner and New Discoveries Courtesy of Brazil

Happy Valentine’s week fellow kitcheners! Since love and romance are dominating the spotlight right now, it’s wonderfully fortuitous that the featured destination on our International Vintage Recipe Tour this week wound up being Brazil. It’s not good to generalize people or countries, but Brazil is known to be a passionate place.

Beautiful Brazil!

Consistently included in top ten lists as one of the world’s most romantic nationalities, it’s safe to say that Brazil is in love with love. And we are not just talking romantic relationships here. Brazilians are known to be equally passionate about their hometown  soccer team, their spouse, their favorite carnival and their kitchen.  Ah serendipity! On this week of hearts and roses and pink colored everything, a romantic holiday dinner awaits us here in the Vintage Kitchen.

Or so I imagined!

I was hoping that our vintage recipe was going to highlight a dinner food that matched the passionate place from which it came.  Surprisingly  that wasn’t quite the case. On today’s menu we are making Picadinho a Brasileira, a recipe that roughly translates to “Minced to the Brazilian” in Portuguese. A popular heritage dish especially in Southeastern Brazil, there are two main versions of picadinho – one a hearty beef stew with whole vegetables and the other a slow simmered light and fluffy ground beef cooked with wine and vegetables.

Picadinho a Brasileira

Our recipe this week involves the latter.  Not exactly one of the glamour foods usually touted on Valentine’s Day menus (steak, lobster, oysters, anything drenched in champagne or chocolate) ground beef always tends to get relegated to more humble, homey everyday recipes like meatloaf, burgers, tacos and casseroles. It’s never a dish you see people eating in romantic movies. It’s never the culinary centerpiece tucked in between candlelight and flower bouquets. And it’s definitely not the most tantalizing type of meat to photograph.

I don’t know exactly what I expected of Brazilian food at the start of Week 6, but I think I was hoping for something a little more exotic in the food spectrum, something that matched the passion of the people. A recipe that involved colorful fruit perhaps or a sea swimmer from the waters of the Atlantic. Picadinho a Brasileira is neither of those two things. But after making this recipe and thinking about it for a bit, I came to realize that it is in actuality, an absolutely wonderful and appropriate dish to share with your sweetheart or your gaggle of loved ones on Valentine’s Day. More reasons on that shortly.

Tonight we’ll dive right into the recipe so that we can talk about the unique aspects and attributes of it after all the steps are laid out. A super easy recipe to make (a nice reprieve after the confusing fondue affair of last week!) Picadinho a Brasileira is a one pot dish that slow simmers on the stove for almost two hours.  It includes half a bottle of wine, a satisfying amount of vegetable chopping and six eggs (something that originally sounded a bit unusual). It’s also low-maintenance thanks to the slow cooking so it conveniently allows time for you to do other stuff while its simmering away. Maybe that’s where you can fit some extra time for romance:)

Picadinho a Brasileira

Serves 6-8

1/2 cup olive oil

1 large onion, finely chopped

4 cloves garlic, coursely chopped

2 lbs ground beef (I used grass-fed)

6 eggs

2 ribs celery, including leaves, finely chopped

1 green pepper, cored, seeded and finely chopped

1 cup finely chopped parsley

2 cans (17 oz. each) Italian style tomatoes

Salt and freshly ground pepper to taste

1 1/2 cups dry red wine (I used Storyteller Red Blend)

Hot red pepper flakes to taste

Heat the oil in a large, deep saucepan and add the onion and garlic. Cook until golden brown, stirring frequently.

While the onions are cooking, place the meat in a large bowl. Add the eggs, celery, green pepper, parsley and tomatoes.

Combine everything together with your hands until it is thoroughly mixed. (Note: This step is a little soupy and a little sludgy not to mention both visually and tactile-wise pretty unappealing, but don’t worry, it gets better soon.)

Add the mixture to the onions in the pan and cook stirring until well blended and the meat loses its red color. Cook the mixture 15 minutes and then add the salt (I used about  1 1/2 teaspoons), pepper (I used about 1/2 teaspoon) and one cup of wine. Cover and cook 15 minutes longer.  (Side Note:  If you are following the Recipe Tour over on Instagram too, you can see a  little video of this step in the Highlights section. Every Sunday, I post a sneak peek video of the recipe coming up, so if you are big into previews come visit the Vintage Kitchen Instagram page on Sundays!)

Now back to the recipe!

Add the remaining wine  and red pepper flakes (I used about two pinches), then partly cover and cook, stirring occasionally, one hour or longer. At the beginning of the one hour of cooking, the picadinho will be very liquidy, but as it cooks over the next 60 minutes, it will dry out and all of the moisture will evaporate. At that stage it will look like this…

…a  mixture that mirrors taco meat but is much lighter and fluffier. Once all the liquid has evaporated the dish is done and is ready for serving.

Traditionally, you’d accompany Picadinho  a Brasileira with white rice or farofa (which is a Brazilian form of farina – something similar to cream of wheat). However, I wasn’t that excited about either option when it came to pretty plating,  visual appeal and a Valentine vibe. As you can see the picadihno has lost most of its vegetable color and is pretty much in the end just one shade of brown. It is not the most visually striking dish that we have made so far, but what it lacks in appearance it more than makes up for in delicious flavor.

Between the fruity notes of the wine, the citrus notes of the tomatoes and the sweetness of the onions, combined with the fact that it looks a lot like taco meat, my first impression upon tasting it was to pair it with something in the corn family. Something like tortillas. Although this dish would be fantastic with such a companion, corn tortillas are not widely consumed in Brazil, so to stick a little closer to a more authentic meal, I chose corn grits since they are more similar to the consistency of farofa. Made with milk, Parmesan cheese and butter, the grits add color, a creamy texture and a complimentary corn flavor that blends all the ingredients in the picadinho together so well. I also added some freshly chopped onion, parsley and green pepper for a burst of fresh crunch and more color.

All sorts of other garnishes like sour cream, cheddar cheese, olives, avocado, cilantro, basil (basically anything you enjoy on a taco)  would also be delicious here, albeit not very Brazilian. But that, I discovered, was really the fun of this recipe. It is open to creativity, to interpretation, to personal touch. Which brings us back to why this recipe is actually a very good choice for Valentine’s Day. Let’s look…

  1. It has the ability to showcase your own creative flair and your personal passion for cooking. Wrap it up in pastry dough like empanadas, stuff it into pasta shells, serve it over potatoes or transform it into a patty melt. It’s yours to experiment with, to make, to mold, to accent and to call your own. It’s a love letter to your culinary ingenuity!
  2. For all the lovebirds that like to eat together, it’s a shareable meal.
  3. It’s family friendly, thanks to its basic ingredients, making it inclusive for all the ones you share your life with.
  4. It feeds a crowd, so if you wanted to throw a galentine party this Valentine’s Day it’s a delicious option for both entrees or hors d’oeuvres.
  5. It’s a food that stimulates the art of conversation and encourages new ideas, which means it’s pretty much guaranteed to keep the attention of fellow diners for at least a little while.

Picadinho a Brasileira may not be chocolate covered strawberries or lobster thermidor or a fancy special occasion food brought out once a year, but any Brazilian would tell you that love deserves to be extended, extolled and celebrated every moment, every day, not just on February 14th. Romance doesn’t have to be elaborate in order to be understood or received. A simple meal served to someone special is such a sincere act of love. The enjoyment that follows – tasting something new, talking about the experience and exploring some culinary curiosities leads to unexpected discoveries. This one dish opened up a whole conversation between myself and my valentine of a husband about spices that had us chatting and speculating the day away. Also, while researching this blog post,  I discovered some new favorites courtesy of Brazil…

Two new vintage books to read by Brazilian authors Paulo Coelho and Jorge Amado

and a new art book to explore…

And it also led to the discovery of two new artists. I love this 1920’s era portrait, untitled, but referred to as Woman with Lemons by Brazilian artist Tarsila do Amaral (1886-1973)…

and the colorful botanical collage paintings of Brazilian-born artist Beatriz Milhazes…

So you just never quite know where your dinner will wind up taking you!  At the start of this particular cooking adventure, I thought this post was going to be all about a traditional romantic Valentine’s Day worthy dinner. An idea I understand now sort of bordered on the cliche side of things. But in reality, this seemingly unromantic Brazilian ground beef recipe turned out to be quite a little passionate catalyst that produced new loves in art, literature and conversation. That’s pretty romantic after all!

I hope this Valentine’s Day your hearts and bellies are full to the brim with thoughts and  foods that you make you feel happy, loved and inspired. Cheers to the holiday and cheers to foods that surprise and satiate us not only physically but mentally and emotionally!

Next week finds us making a sweet treat that hails from the land that Meghan and Harry now call home…Canada! Until then, happy cooking!


To Be or Not to Be: It’s Fondue in Belgium

Oh for the love of cheese already! How many weeks does it take to get yourself all discombobulated in the kitchen? As it turns out that number is five. Welcome to Week Five of the International Vintage Recipe Tour 2020. Last week we were in Barbados dancing around the kitchen with rum punch in hand. Tonight we are headed 4300 miles north to beautiful Belgium – the country that gave us diamonds, Audrey Hepburn, fancy chocolates, waffles, Brussels sprouts, and pretty sites like these…

But the way I went about this week’s cooking task I might as well have taken us all to a foggy headed mountain in Switzerland.

The most important rule of cooking, the number one rule, the golden rule of all rules is to read your recipe first. All the way through. This way you have a good understanding of what’s involved ingredient-wise and what’s coming up at the start of each step. It’s a no-brainer activity. Something that just occurs so naturally you don’t even have to think about it. Of course you always read the recipe first, silly. Except that one time you actually didn’t.

I’ve been anticipating this week’s dish since the very beginning of the project because  1) it features a food I’ve never made before but have always wanted to try, 2) it is cozy sweater weather fare ideal for this time of year and 3) it offers a fun dinner idea for upcoming Valentine’s Day. On the menu this week we are making Fondue Bruxelloise, a dairy laden comfort food that conjures up images of shared dining, pots on pedestals, and unabashed consumption of all the bread and cheese you ever wished to eat. How fun and delicious!

The first order of business this week, the fun order of business, before market shopping even ensued, was to purchase a fondue pot. In this case, of course it would need to be vintage, so out I went all around town looking for such a find. Three days later, nothing. There was not a vintage fondue pot to be had anywhere in my fair city. In a frenzied, last-minute search online, I found one in a neighboring state that could be here in time for the cooking project deadline.

Tah-dah… a sleek 1970’s stainless steel set complete with floral design work on the legs, teak accents on the handle and on the lid, and a set of forks to match. Perfect! While that gadget was flying through the air, I was busy collecting vintage advertisements from the 1960’s and 1970’s – the two decades in culinary history when fondue parties were at the peak of popularity. The retro ads circulating around the magazine world at that time captured a real sense of colorful joy and excitement when it came to showcasing the novelty of a fondue party.

With an exciting feast on the horizon and a new (old) fondue pot now in possession, it was time to buckle down and get to cooking. Like all the other dishes we  have made in the International Vintage Recipe Tour so far, the ingredients for Fondue Bruxelloise are not complicated ones. Basically the recipe consists of four main components… butter, milk, eggs, and cheese.

The night before I was going to make it, my husband inquired. Is this the type of fondue where you dip vegetables or just bread? Confidently, I said just bread, but then immediately went back to the kitchen to check the recipe just to make sure. And that, my fellow kitcheners, is where Week Five officially went south.

The preparation of Fondue Bruxelloise involves six steps which include a glass dish, overnight refrigeration, a vat of frying oil and cheese cutouts. It does not, at any stage, involve a fondue pot, fondue forks, or a steaming pool of cheese. Oh dear. My stainless steel beauty.

Somehow, in all this excitement of knowing that we were going to be making fondue and searching for a retro pot in which to prepare it, I forgot to read the recipe first. As it turns out, fondue, in the traditional sense that I was thinking of, is actually Swiss not Belgian in origin. The word fondue comes from the French and simply means melted, so technically lots of dishes could be considered fondue and lots of countries can claim their own variations. That’s why there are chocolate fondues (American), saucey and brothy fondues (Asian), oil fondues (Italian) and cheese fondues (French, Swiss and American). But Switzerland’s version of melted cheese remains at the top of the most popular hot pot recipes and it’s the first image most people think of upon hearing the word fondue.

This is what I had in mind originally!

So where does this leave Belgium, you ask? The answer lies in an Italian American named Nika Standen Hazelton.

Nika Standen Hazelton (1908-1992)

Nika was a trusted authority of regional cooking from cuisines all around the world. She started her writing career as a reporter in the 1930’s, and never lost that level of curiosity or scrutiny for the topic at hand. She approached each cookbook and each country with an investigative eye and a thorough understanding of the food scene, the culture and the eating habits of the places she explored. She was also a tremendous home cook and hostess herself, managing to turn both her own passion for food making and her insatiable interest of other countries into a life-long career. By the time of her death in 1992, she had published 30 cookbooks in total, taking readers on tour with her around the globe highlighting all sorts of interesting food ways with a candor that made her writing legendary.

In the 1960’s, Nika got to work collecting recipes for her Belgian Cookbook.  Exploring the country quite intimately, she was determined with her latest project to create a book of traditional everyday Belgian foods as prepared by the home cook. She wasn’t interested in featuring fancy dishes that you’d find in Belgian restaurants, nor she was interested in featuring foods that were so traditional and so foreign sounding that they would dismay the American reader who was just trying to gain an introductory sense of food in Belgium.  “All one wants are some feasible and pleasant dishes…” she wrote in the introduction to The Belgium Cookbook, published in 1970.  It is from that cookbook that Craig Claiborne collected this recipe for Fondue Bruxelloise, which literally translates as Melted from Brussels, for his New York Times International Cookbook, which was the springboard for our year-long cooking project here.

Still regarded as one of the most tastiest Belgian recipes out there, Nika’s Fondue Bruxelloise is similar in preparation to a croquette, looks like a mozzarella stick and contains an inner filling that tastes a bit like a lemony Hollandaise sauce, even though there is no lemon in it.

Once I actually read the recipe the whole way through, I was slightly intimidated. I’ve never fried anything in a big pot of oil before, something almost unheard of since I’ve lived in the South for over a decade now. Needless to say, I had to do a little bit of extra research on how to go about that, since the recipe assumes you already know what type of oil to use and what temperature to heat the oil to and so on. I’ve included those notes along with the original recipe below in case you are a frying novice like me too. Overall though it’s not a difficult recipe to manage, but it is a bit unusual in its preparation. Refrigerating the cheese batter overnight yields a rectangular creation that has the consistency of somewhat rubbery, somewhat softened butter. The bread crumbs are made fresh, chopped up in a food processor from a day old loaf. And the cheese squares require frying in small batches giving this cooking project an awkward stop and start rhythm as you wait for things to come together, at first in the fridge, and then in the frying pot. This is what this year is all about though. Learning new techniques and new foods from old recipes. Intimidation aside, there’s nothing to do but jump right in. So here we go…

Fondue Bruxelloise

(Makes 8-12 servings which equates approximately to 18 pieces that are roughly 2 1/2″ inch x 2 1/2″ inch squares)

1/4 butter

All-purpose flour (I used about 2/3 cup)

2 cups milk

1/4 lb. Gruyere cheese, grated

1 cup Parmesan cheese, grated

1/8 teaspoon cayenne pepper

1/4 teaspoon nutmeg

5 egg yolks

Salt and freshly ground pepper to taste

3 eggs lightly beaten

2 teaspoons cold water

1 tablespoon peanut oil

3 cups fresh bread crumbs (I made these using a day old baguette)

Oil for deep frying ( I used 24 oz of peanut oil)

Parsley

Melt the butter in a large saucepan and stir in six tablespoons of flour, using a wire whisk. Add the milk, stirring rapidly until the mixture is thickened and smooth. Simmer 5 minutes.

Remove the sauce from the heat and add the cheeses, cayenne pepper, nutmeg, egg yolks, and salt and pepper to taste. (Note: I used about 1/2 teaspoon salt and a 1/4 teaspoon freshly ground pepper). Return the sauce to the heat and stir rapidly with the whisk. Cook, stirring until it thickens further, but do not allow it to boil. (Note: I cooked this until the mixture just started to form a couple of big bubbles).

Generously butter a 13×9 inch or a 9×9 inch square pan and pour the sauce into it. (Note: The longest dish I have is 8×11 so I used that. See more notes about this specific choice of dish further down).

Spread the mixture smooth with a rubber spatula. Cover with buttered waxed paper (parchment paper) and refrigerate overnight or longer. (Note: I kept mine in the fridge for 24 hours).

Now firm, cut the mixture into squares, rectangles, rounds or diamond shapes. (Note: I chose squares because they were most simple and because while the top side of this mixture was firm, the underside was slightly gooey, so any well defined shape, like a diamond would have gotten all gummed up).

The bottom consistency might not have been as solidified as the top because I was using a smaller dish than was recommended, adding a thicker dimension to the overall mixture. Surprisingly though, even with this consistency the squares were fairly easy to remove from the dish and retained their square shape for the most part.

Top side!
Underside!

Beat the eggs until frothy, then beat in the water, oil, and salt and pepper to taste. Coat the cutouts on all sides with flour, then dip them into the egg mixture.

Finally, coat them in the bread crumbs tapping lightly with the flat side of a knife so the crumbs will adhere.

Heat the oil in a deep fat fryer to 360 degrees and cook the cutouts until golden. Drain on paper towels. Serve hot garnished with parsley.

(Note: As I mentioned earlier, this step was a little vague, especially for first time fryers. If you are a new experimenter with home frying, there are a couple of things I wanted share about the process. I don’t have a deep fat fryer myself so I used a heavy stainless steel medium-sized saucepan which worked perfectly well. I set the pot of oil over medium heat and let it warm gradually. It takes about 20 minutes for the oil to heat to 350 degrees, but use a thermometer to test the temperature to make sure it is hot enough before you add the cheese squares. The trick to frying is to do it in small batches. I could only fit three squares in at a time based on the size of my pot. This number still allowed ample room for them to bob around in the oil. I cooked each batch for 3 minutes. Also, it is important to let the oil warm back up to 350 degrees between batches. That step generally takes about 5 minutes).

After the squares have drained on a paper towel for about a minute it is best to serve them right away or keep them hot in the oven while you finish frying all the rest. That way when you cut into them, the melted cheese will ooze out into a little pool on your plate.


The longer they sit at room temperature, the more solidified the cheese gets inside. In the photo below, you’ll see that the plate on the right has been resting at room temperature for about 15 minutes. The cheese is still soft on the inside but is more like the consistency of fresh mozzarella rather than a melting pool…

Delicious in a very rich and decadent way, these cheese squares are like a little mini meal. Nika recommended serving Fondue Bruxelloise with fried parsley, but because they are so creamy, I’d recommend forgoing the extra frying and replacing it with anything acidic to balance out the flavors. Fresh parsley adds a bit of bright tang, as does freshly squeezed lemon juice. Other possible companions include a dollop of mustard or hot sauce, a side salad tossed in a citrus vinaigrette, a few slices of home grown tomatoes or simply a cold glass of dry white wine.

The cafe crowd in Brussels…

In Belgium, especially in the 20th century, locals used to enjoy a habit of a small snack everyday at 4 pm. A little delight like Fondue Bruxelloise would be perfect for such a time of day. Because of their velvety richness, you’d only want to eat one or two per setting, based on the size suggested in the recipe. Crunchy on the outside and soft and billowy on the inside, this serving size is a petite portion that is filling and satisfying but won’t risk spoiling your appetite for dinner a few hours later. As a national favorite, several Belgian cookbooks include Fondue Bruxelloise in their appetizer or hors d’oeuvres sections with suggestions to serve them at parties large and small. I like the idea of the 4:00pm Belgium tradition though and would next serve this at that time of day along with a glass of wine or a Belgian beer as part of a special happy hour treat. After all, it is fondue. It only seems fitting to involve some friends.

While this recipe was certainly not what I had anticipated at the start of the week, it turned out to be a curious adventure in cooking techniques and frying lessons. I may have not have gotten to use my new fondue pot, but perhaps when we visit Switzerland on the Recipe Tour towards the end of the year, I’ll be able to test out its capabilities with a classic Swiss fondue.  Then we can circle back around to this recipe and compare the two. In the meantime, I encourage everyone to read your recipes first:)

Cheers to cheese for offering up a few surprises and to Nika for taking us on an unexpected cooking adventure.  Also, a big cheers this week goes to blog reader Angela, who baked our featured Australian recipe, Queen Mother’s Cake for her neighborhood and received rave reviews! If anyone else has their own stories to share please send a message or comment below, we’d all love to more about your cooking experiences too!

Next Wednesday, just in time for Valentine’s Day weekend, we are headed to the passionate country of Brazil, where romance and recipes bloom in the kitchen. Stay tuned!

All Around Austria via Food and Festivity: An Interview and a Recipe

From the land of Johann Strauss, Mozart, Gustav Klimt, and my lovely friend, Viktoria, comes the latest escapade in our around-the-world culinary adventure. Welcome to Week Three of the International Vintage Recipe Tour 2020!

Last week, we were in Australia dissecting the history of a favorite Aussie cake that turned out to be inspired by a famous woman from England. This week, we are heading here…

… to picturesque Austria… a country known for its gorgeous snow-capped mountains, stunning cityscapes and panoramic vistas. On the menu is Viennese Chicken – a saucy vegetable-laden vintage recipe that is perfect fare for cold winter weather.

Viennese Chicken

In this post, we will not only be cooking something warm and hearty, but we will also be getting to know the warm-spirited Viktoria, an Austrian native who has been living and working in the U.S. for the past year and a half. She’s about to head back home to Europe, but before she bids Nashville goodbye, I caught up with her to discuss the food culture in her native country, how it compares and contrasts with ours here in America, and to see what she knows about the mysterious Austrian recipe that’s the focus of our international menu this week. She also recommends a list of the most interesting things to see (and eat!) in Austria, reflects on which aspects of her U.S. adventure she will miss most and shares how one particular type of American restaurant stole her heart.

Photo courtesy of Drew Beamer.

Our recipe this week is an easy one to make, so before we get to cooking, grab a glass of Riesling or an Austrian beer and get to know a beautiful part of the globe through the eyes of a local. I’m so pleased to introduce to you to Viktoria, art director by day, intrepid explorer by night (and on the weekends!)…

In The Vintage Kitchen: Tell us a little about the city in Austria in which you are from…

Viktoria: Well, first and foremost I cannot call it a city ha – I grew up in a very small town, called Stans, with only around 2000 people. It’s one of those charming little places with one tiny grocery store, one butcher, one bakery, one bank and so on… but hey, that’s everything you basically need, right? 

Stans im Karwendel

Stans is a town within the state of the Tyrol – one of 9 states within Austria. It’s in the western part of Austria, surrounded by the Alps, yet only 1h away from the German border in the north and the Italian border in the south. (Yes, dimension in Europe are a little bit different.)

What are some things you missed most about Austria while living in the United States?

The 4 F’s: Family, Food, Fall Fest and Fasching!

1) Family: The thing I missed the most is definitely my family. Just to be clear, I was never homesick, from the second I stepped out of the airplane at BNA airport I immediately knew I found my second home away from home, but my family and I are very close so it was definitely a big change for me to not see or spend time with them every other day.

2) Food: I am not a picky person at all, I have no allergies or intolerances and I definitely have what Americans would call a “goat stomach.” Having said that, it is not hard for me to adjust to a country’s culinary culture. Besides that Austria and America have lots of similarities in food, so from the very beginning I was sure I would not starve overseas. Yet, nothing is as good as granny’s Schweinebraten or my sister’s chocolate mousse cake. People who know me, know that I am not a big fan of sweets, but man, let me tell you what, I just can’t resist it!

The fancy cows of Fall Fest!

3) Fall Fest: I’m sure people are familiar with the Octoberfest in Munich. Our fall fest is similar to that, beside the fact that we also have a cattle drive. Farmers drive their cows down from the mountain meadows into the valley where they spend the winter months. People from Italy, Germany and France come to see this spectacle, which happens every year during the last two weeks of September. The cows wear bells and flower arrangements; it’s almost like a fashion show for cows if you want to put it that way ha. There is a farmers market, souvenir booths, food courts, live music, and, most importantly, the men and women dress in snazzy Lederhosen and beautiful Dirndls.

The colorful and creative world known as Fasching. Photo courtesy of austria-forum.org

4) Fasching: It’s the Austrian word for carnival. Fasching season starts on the 6th of January and ends on the day of Ash Wednesday, which is February 26th this year. Within this period we have days like Fasching Tuesday or Silly Thursday. People dress up in conspicuous costumes and we have parades with floats and wild colorful parties. This time of the year even has its very own pastry, specifically dedicated to Fasching– The “Faschings-Krapfen”.

Faschings Krapfen! Photo via pinterest.

How is daily life different in the U.S. vs Austria?

There’s actually not a big difference. You go to work, run your errands, and meet up with friends – the basics. I think the biggest difference for me personally is that back in Austria I had to get up at 6AM at the latest to drive to the railway station, catch my train to Innsbruck (the capital and biggest city of the Tyrol) where I had to catch a bus in order to get to work.

The beautiful cityscape of Innsbruck, Austria

We Austrians love out public transportation system ha! Here in Nashville I only have to hop into my car and I’m at work 10 minutes later. So yes, I’m definitely super spoiled when it comes to sleeping late in the morning now! But besides that I think Americans and Austrians have a pretty similar everyday life.

Since 2018, Viktoria’s U.S. home base has been the city of Nashville. Photo courtesy of Tanner Boriack.

What are some things you’ll miss most about America once you return home?

Just circle back to question 3 and you will have your answer ha! No, to be serious, I had a great time here in the U.S.: I worked a job that I loved, I was part of a culture that I enjoyed inhaling and most importantly, I was surrounded by so many loving and caring people. It’s almost unbelievable what great personalities I met and the close friends I made on this journey.

Oh, and brisket! I love brisket; unfortunately that’s not a thing in Austria.

What is your most favorite Austrian food? And what is your most favorite American food?

I wish I could give you a definite answer for this questions but I cannot. And I love that fact! There is way too much good food out there and it would be a waste to focus myself on only one most favorite thing. That’s why I’ll give you my top 3:
Viktoria’s favorite Austrian foods -Clockwise from top: Kaiserschmarn, Schweinebraten and Cheese and Spinach Dumplings
For Austria it is definitely Schweinebraten. The one they have at the Bavarian Beerhouse here is not bad at all but in no way comparable to the Austrian original. Schweinebraten is followed by cheese and spinach dumplings. Unlike what Americans call dumplings, these are more like balls of batter that contains a lot of different ingredients and gets boiled and served with lots of melted butter. We even have a festival to celebrate our love for dumplings in the Tyrol. And last but not least the – the“Kaiserschmarn.” I looked up the translation and the dictionary suggested “sweet cut-up pancake with raisins.” We serve it with powdered sugar and apple mousse. It’s a main dish as well as a desert – a dish that deserves to be among my top 3.

When it comes to American cuisine it’s the brisket that would probably make it on the winner’s rostrum. I am a meat lover and since I didn’t know what brisket was before I moved to the States I immediately fell in love with this dark smoked delicacy. Another thing that I am hardly able to resist is a Nashville specialty: Hot Chicken! Wings, thighs, breasts, battered and fried or grilled – I don’t care, I love them all, as long as they come with a hot and spicy Buffalo sauce.

Are you familiar with Viennese Chicken? If so, do you have any stories that relate to it in some way? Maybe you’ve made a version yourself or this was something you mom made?

Unfortunately I’m not familiar with this specific recipe. It reminds me a little bit of “Jäger Schnitzel” (“hunters-schnitzel”). It’s either a pork or chicken schnitzel, served with spaetzle and creamy mushroom sauce.

Jager Schnitzel

Also, cheese speatzle is a very famous Austrian dish. Speatzle are little pasta dough twirlings, mixed with melted cheese, garnished with cheese and topped with fried onions, usually served in a traditional cast iron pan. Super filling but super yummy!

If someone was traveling to Austria for the first time, which top five places would you recommend they visit first?

First and foremost is definitely Vienna. Yes, there are thousands of tourists but there is a good reason for that. Vienna offers so many things to see and do: outstanding architecture, fascinating history, open minded and hospitable locals, a wide culinary palette, from traditional Austrian dishes to food inspired by different countries from all over the world, to the newest food trends; you will find it all in Vienna.

When you come to Austria you should also pay Carinthia, our most southern state, a visit. Carinthia’s biggest lake, the Worthersee lake is one of Austria’s most famous summer destinations. It appeals not only to those who want to canoe across the lake, but also spelunkers who will want to check out several caves, including Griffen Stalactite Cave, which is considered Austria’s most colorful cave. Those who are vintage car enthusiasts may enjoy a visit to Gmund, birthplace of the Porsche, or to the large Villach Automotive Museum with its collection of cars, motorcycles and more.

I studied and worked in Innsbruck for 4 years. It’s this great historical jewel surrounded by stunning scenery. Rumor has it that Innsbruck replaced Vienna as the most expensive city to live in. Innsbruck, with a name that translates as “bridge over the inn,” (Inn is the name of the river that runs through Innsbruck) is an all-season tourist destination.

It is internationally known for its winter sports, having hosted the Winter Olympics in 1964 and 1976. But this Tyrolean city offers more than just great skiing. It offers a good mix of cathedrals, such as Hofkirche, which houses the tomb of Emperor Maximilian I; the Schloss Ambras, which has a collection of paintings and armor; and the Bell Museum, a nod to 400 years of bell-making.

The gorgeous town of Halstatt

More beautiful scenery can be found in the Salzkammergut. It is a beautiful resort area that starts with Salzburg and heads east into a land of lakes. Sparkling clean lakes, green hills, wonderful mountains, romantic towns like St.Wolfgang and Hallstatt make up this region. Travelers who have seen the movie The Sound Of Music will know what this lake region looks like, because that movie was filmed in and around the city of Salzburg and the neighboring Salzkammergut region. For those who enjoy classical music, a visit of the city Salzburg, the home of the Mozartkugel and birth house of Mozart is worthwhile.

Mozart’s Birthplace in Salzburg, Austria

And last but not least St Anton am Arlberg. It is a must visit for all winter sport enthusiasts. This town is widely regarded as the leading ski resort destination in Austria. Located in the Tyrol, this village offers serious, legendary ski terrain that caters to a mixed level of abilities. Often attracting adventurous youths, St Anton is notorious for living up to the saying “work hard, play hard”. The vast landscape welcomes its loyal winter crowd, as well as its summer mountaineers, who come to trek the landscape each year.

Here’s a very accurate video about the best places in Austria that I can highly recommend watching. It even taught me things I didn’t know about:

Have you been to Vienna before? If so what is your impression of it?

Yes, in fact I studied and lived there for over a year when I was working for McCann Erickson. Vienna is the capital of Austria and such a multifaceted city. Vienna is not only famous for its architecture and history but also for its worldly and cosmopolitan vibe. I loved grabbing my laptop and just hanging out in one of many cozy coffee houses and watch people strolling by. Vienna is a very lively city and there is always something going on for everyone.

Every aspect of Vienna looks like a perfect picture postcard!

Also, since everything here is kind of food related, I want to use this opportunity to resolve one of the most misconstrued stories of the culinary world – the story of the croissant!
The earliest known occurrence of the croissant dates all the way back to 1683 Vienna, Austria. The legend takes place during the Ottoman Turk siege of the city; a baker apparently heard the Turks tunneling under the walls of the city as he lit his ovens to bake the morning bread. He quickly sounded an alarm, and the military collapsed the tunnel, saving the city. To celebrate, the baker baked a crescent-shaped bread, in the shape of the crescent moon of the Turkish flag.

And for whom this is not enough, the Vienna Kipferl pastry actually dates back to the 13th century. Ergo, Austria invented the ‘croissant’. It is a sore topic for this Austrian, so thanks for letting me vent publicly – ha!

Who taught you how to cook?

It was definitely my school education, maybe combined with me having always been a connoisseur of delicious food and being curious about new recipes. Many people don’t know that I went to Tourism College for 5 years between the age of 14 and 19. Besides majoring in tourism management and marketing I also had to complete a 4 year apprenticeship where I was thought how to cook as well as learn to fold at least 40 different shapes of napkins. But let’s be serious for a second – the Tirol is one of the top tourism regions in Austria and skilled professionals within this sector are highly in demand. My interest in tourism wasn’t the main reason why I went to Tourism College though – it was because of the language studies they offered. I studied German, English, Italian, French and Russian. Languages always fascinated me. Long story short, this is how I learned cooking. If you are trained on how to cook a 5-course meal for 10 people all by yourself, you can also cook a box of pasta just for you.

What are some of your favorite things to cook?

Speaking of pasta! I love love love pasta in all variations with all sauces possible. Pasta creations are my favorite! Pasta might sound boring to some people but you can create so many creative delicious variations with all kinds of ingredients. I am definitely always looking for new adventurous and interesting recipes out there; I like trying new things.

Viktoria with her mom, sister and niece

When it comes to traditional food though, I would never even try to compete with my sister. You would think making the perfect Schweinebraten takes decades of experience and at least 2 cut off fingers, but at the young age of only 32 she has already perfected the recipe for a sublime Schweinebraten with Sauerkraut, potatoes and breaded dumplings.

When you return home to Austria, what is the first thing you will eat?

I will most like have a Kaiser Roll with smoked bacon and a bottle of ice-cold Zipfer beer (it is a local beer and my most favorite).

You might want to ask why I am so sure about this. The answer is simply: because whenever I go back home my family picks me up from the airport and brings exactly these two things with them! What a lovely tradition it has become.

Do you have a favorite restaurant back in Austria? If so, what about it did you like? 

There definitely is. Let me mention one thing first: If you are looking for a place to eat in the Tirol region and you find places which names include “Gasthaus” or “Gasthof” you can’t go wrong. These are local restaurants with local food and local specialties.
And when it comes to Tyrolean delicious dishes I definitely have a favorite restaurant.

It is called “Gasthof Herrnhaus” (see “Gasthof, you can’t go wrong). I not only really like this place because I once did an internship in their kitchen but moreover because they serve great local food for a moderate price. Don’t get me wrong, I know that good food and especially good quality has its price but at Gasthof Herrnhaus you really get something for your money, and that is one thing that Tyrolean hospitality is about.

Interior of Gasthof Herrnhaus

How is food and/or the culture surrounding food different in the US than in Austria?

I have two approaches to this question.

One word: barfood.

Unlike America, in Austria we either have a bar where you can get something to drink, or a restaurant where you can get something to eat. If I think about trying to find a place in Austria where I can just hangout, watch my favorite sports team, eat my delicious chicken wings and drink a beer, I will probably not be able to come up with a single place. I am very simple as you can see ha.

Downton Nashville Bar Scene. Photo courtesy of Drew Hays

There are great restaurants in both, America and Austria, of course, but when it comes to the barfood culture as I call it, there is definitely a big difference and something I would love to have in Austria as well.

Before food is served on our plates it has to be bought. And I think this is a big difference between America and Austria. My first grocery-shopping-trip to Kroger took me a striking two hours! Can you believe this ha. By now I have become a total pro as to knowing in what aisle the items are that I need, but when I first moved here I was totally lost. The overwhelming amount of goods and different products completely over stimulated me. And please don’t get me started on my first experience with a self check-out counter ha.

One event that I consider myself lucky of having been able to be a part of is Thanksgiving. In Austria we have something that’s called “Ernte Dank” which means being thankful for this falls crops, but it is neither a very special nor a family get together kind of event. I was invited twice to my landlady’s nephew’s house for Thanksgiving and I always had a great time there. People getting together for good (and way too much) food, quality time, maybe some football and pumpkin shooting is a wonderful occasion. I am very happy and thankful for having been invited to this annually family event.

When you are not busy designing beautiful things for work, what do you like to do with your free time? Do you have any hobbies?

Funny enough, I would say my hobby is looking for new hobbies. I mean I like to work out, cook, paint, go for a walk, and be in nature but I always try to find new interesting activities. Recently I have been into axe throwing and it turns out I am actually quite good at it. It is a lot of fun and will definitely help you forget some of the everyday stress. When it comes to watching sports, I definitely count soccer and ice hockey to my most favorite kinds of sport. When I have to think about an activity that satisfies me the most though, I have to say it is definitely meeting up with friends, having a beer and simply spending a good time together with the people I love.


What are three places in Austria that most inspire you and why? 

1) Wolfsklamm Gorge, Tirol:

The Wolfsklamm Gorge impresses nature lovers with thundering waterfalls and emerald green pools. The location of this trail is very convenient for me because I can start the hike right from my doorstep. I used to go there a lot with my dad when I was a kid.

Walking through the Wolfsklamm Canyon in the Karwendel Alps, Stans in Tyrol, Alps, Tyrol, Austria, Europe

The beautiful waterfalls, timber bridges and the galleries carved into the rock have always fascinated me- it seems so magical. Its 354 steps, to be precise, that lead upwards to the pilgrimage monastery of St. Georgenberg, where we always used to rest and stop for a bite to eat because they have a great restaurant up there. It’s a picturesque and magical hike that makes you feel like you are in a different world.

Kloster St. Georgenberg in Tirol

2) Millstätter Lake, Carinthia:

My stepdad is from this region of Austria where my grandparents still run a farm up on a mountain. Whenever I go there to visit them I can’t get enough of the spectacular view on the lake…

especially on a summer day when the setting sun is reflecting in the waters surface and makes the entire like sparkle. It’s a beautiful place where the time seems to stop whenever you soak up this stunning view. I love to go there to recharge my batteries.

3) My grandma’s attic:

A place you will not find in a tourist guide – my grandma’s attic. My grandma is Italian (that might explain my love for Italian food) and she used to run a souvenir shop. After the shop closed she kept a lot of the stuff, my grandma likes keeping stuff in general, she wouldn’t even throw away an old and broken picture frame. I loved to play in my grandma’s attic when I was a kid because I always found new ancient items and made up stories for them. It’s for sure a so repository for inspiration!

Who or what inspires your cooking? 

I think I am a typical millennial when it comes to answering this question. Most of the time it simply happens that a recipe, of one of the social media food channels that I follow, pops up in my feed. I save it for later and whenever I feel like trying something new I recall it and it tells me what ingredients I need and how to cook it – super convenient.

One time it happened though, that I found an old cookbook that my grandma used to use. You know, one of those with a handwritten font and no photos ha. What an adventure it was to cook a recipe from this book, completely without any pictures to show how the outcome would look. Now that I remember how much fun this was, I think I should do it more often. Maybe not for family gatherings, at least not without doing a test run first. I love to cook for my family. The feedback has always been good so far, at least they keep asking me to cook for them ha.

If you could invite any five famous people (living or dead) to dinner who would you choose and why?  

That is a tough question but considering my current mood and time here are the 5 people I would invite right now and right away:

Four of five ideal guests at Viktoria’s dinner party. Clockwise from top left: Hermione Granger, Anthony Bourdain, Kurt Cobain, Nick Offerman

Hermione Granger: I hope movie characters count as well. I always wanted to meet her. Hermione was literally my role model when I was kid: she is brave, smart, modest and a very loyal friend. Maybe she would teach me a thing or two about magic. I love magic; I think everyone should have some magic in their lives. Wingardium Leviosa ha!

Kurt Cobain: I read his biography when I was 12 (yep, I was a weird kid) but there has always been something that fascinated me about this guy. He always conveyed the image of this very anguished and beyond his time creative person. I would have a lot of questions for that dude. Also, I am curious to see how he would act at a dinner party in 2020.

Nick Offerman: He is super interesting, entertaining and also kind of a genius. He definitely has an appreciation for some of the finer things in life and I think 5 minutes with him would leave an impression, so a dinner party can only be fantastic. Also he can probably treat a steak better than I, so he’s on grill duty.

My uncle Michael: He was my mom’s younger brother and my godfather. I was born in November 1993; he passed away from cancer shortly after my baptism in 94 at the age of 30. I never had the change to meet him. According to my mom I apparently inherited his assertiveness and my love for motorcycles. On his tombstone they engraved the swallow tattoo that he had. I got the same tattoo on my lower leg.

Anthony Bourdain: His love of great adventures, new friends, fine food and drink and the remarkable stories of the not only culinary world made him a unique storyteller that I would love to meet. Also, I need someone to watch the food and the kitchen while I hang and practice my magic tricks with Hermione. 😉

I think we would be a fun round: Good food, great music, fun entertainment, some magic and family, sounds like a good combination to me.

What is one goal that you hope to accomplish in 2020?

2020 is going to be a very interesting year for me I would say. There are lots of uncertainties. People who know me will tell you that I am a person who always has a plan A, B and at least C. My plan A for 2020 is to go back home to Austria, since my visa expires, and apply for a new one in March. I have made the decision for myself that I will not have a precise plan B or C this time. Simply because it will take me some time to process a possible failure of plan A. So even if I do not know what is going to happen, I am still very excited about seeing what this year has in store for me.

Karwendel wandern Stanser Joch

There is one very specific goal that I have for 2020 though: I want to scale the “Stanser Joch”. My dad keeps telling me: “You are not a genuine local (Stanser) if you haven’t been at the summit cross and written down your name in the book of Stanser Joch.” Sounds like ancient mythology, but it’s not, simply something my dad will keep rubbing under my nose until the end of days if I won’t eventually hike up there with him ha.

Do you think you’ll ever come back to live and work in the U.S. again? (Secretly, I hope so!) 

Thank you for saying that haha. I do hope so too. When I moved to the US in 2018, if you had told me where I would be today, I would not have believed it! I have enjoyed my time and have loved living in Nashville. I definitely widened my horizons, professionally as well as personally. Every place you go and every person you meet is a part of your storybook. My time here was one of the most enriching experiences of my -still very young I should say- life. So yes, I really hope there will be another U.S. chapter in my storybook. 🙂

Now that we are all experts on the festive foods and vibrant landscape of Austria, thanks to Viktoria, we can get to work on making Viennese Chicken. So far, the easiest recipe of the Tour to make, it is also the most obscure when it comes to its origin story. It even managed to stump our interviewee, who likened it to something along the lines of a somewhat more familiar Austrian favorite – schnitzel.

Viennese Chicken made from a 1971 recipe

Close but not exactly, the difference between Viennese Chicken and Vienna Schnitzel lies in bread crumbs. The latter has them, the former does not. Similar also to Italian and French recipes for Chicken Cacciatore or Hungarian Parikahendl, it seems that Viennese Chicken (at least in the way that we are making it here) has fallen into obscurity. Fantastic!

This is exactly the kind of recipe we were hoping to uncover this year during the Tour – something that is delicious but barely known about. At least when it comes to recipe searches online. The only recipe that I could find that was almost exact (but again not totally) was a reference to a Boston Cooking School recipe that was posted on a cooking website back in 1996. The Boston Cooking School operated from the 1870’s to the 1950’s, which means this recipe could have first emerged during that early time period, then resurfaced in the 1970’s (when this recipe was published) and then fell out of favor sometime after the 1990’s.

The only spices in Viennese Chicken are simple ones – paprika, salt and pepper

Whatever the case may be, I’m glad to be drawing attention to it again. A healthier alternative to pounded, pan fried and breaded schnitzel, Viennese Chicken is much more similar to a hearty beef pot roast or a winter stew. Ready in under an hour, including prep time and cooking, it requires only one big pan and one big spice – paprika. The chicken gently cooks in its own juices with the help of a homemade chicken stock and a few stew-happy vegetables, so it’s a breeze to make and only gets more flavorful the next day and the day after that.

I followed the recipe exactly, except that I wound up using smoked paprika (a personal preference) instead of regular paprika and I wound up adding another 1/2 teaspoon of salt and about 1 tablespoon of freshly squeezed lemon juice to the sauce at the very end. I’ll include those extras in the ingredient list as well, but before adding those two last minute additions though, you might want to test the sauce yourself to see what you think.

Also, making homemade chicken stock, as recommended in the recipe, is an easy and fulfilling task that really brings out a round bouquet of flavors in this dish. That recipe is included here too. The stock simmers on the stove for an hour and a half, but if you are running short on time, you could substitute pre-packaged stock from the grocery. {One side note: I like to use chicken legs in my stock recipe in place of wings and backbones. Once the chicken has thoroughly cooked in the broth I cut the meat from the bones for use in Indie’s dog food. It’s a time saver step for me but not a necessary one for you.}

Homemade Chicken Stock

(makes 1 3/4 quarts)

3 pounds chicken necks, wings, and backs (or legs!)

10 cups water

1 onion, peeled

2 ribs celery

2 sprigs parsley

salt to taste (I used about 1 teaspoon Kosher sea salt)

10 peppercorns

Place all the ingredients in a large kettle and bring to a boil. Simmer, uncovered, for an hour and a half, skimming the surface as necessary. Strain through cheesecloth and boil rapidly, uncovered to reduce the stock to about 7 cups. Skim off all the fat and chill.

Viennese Chicken

Serves 4

2 tablespoons butter

1 onion, finely chopped

1 chicken (2 to 3 pounds), cut into serving pieces

1 green pepper, chopped

2 carrots, chopped

6 mushrooms, sliced

1 tomato, skinned and diced

1 cup chicken stock

1 teaspoon paprika ( I used smoked paprika)

1/2 teaspoon salt

1/8 teaspoon freshly ground black pepper

1 tablespoon all-purpose flour

1/4 cup sour cream

Additional – 1/2 teaspoon salt

1 tablespoon freshly squeezed lemon juice

Melt the butter in a large heavy saucepan. Add the onion and saute until tender but not browned. Add the chicken pieces and brown on all sides.

Add the green pepper, carrots, mushrooms, tomato, stock, paprika, 1/2 teaspoon salt and pepper.

Bring to a boil. Cover and simmer twenty five to thirty five minutes, until the chicken is tender.

{A little tip:  My big heavy duty saucepan never came with a lid, so when a recipe calls for a cover I just use tin foil and seal it really tight around the edges. This works perfectly in place of a conventional lid, but this does remind me for this year-long cooking project, I should really invest in some new pots and pans!}

Remove the lid…

In a separate bowl, blend the sour cream and flour together and then stir it into the pan. {Note: It’s a little awkward to smoothly stir the sour cream mixture into the saucepan because of the chicken, so I suggest removing about a cup of liquid from the pan and stirring that into the sour cream bowl, blending it thoroughly, and then incorporate that mixture back into the pan.}

Toss everything to coat…

At this stage, taste the sauce and determine whether you want to add an additional 1/2 teaspoon salt and the lemon juice. Once seasoned to your preference, transfer the chicken to a warm platter, and spoon the sauce over the top. Garnish the dish with lemon slices and fresh parsley and serve.

Good companion foods with Viennese Chicken would be anything in the potato family (mashed, baked, boiled, sauteed), any kind of rustic bread or baguette, any vegetable that is bulky yet light like peas or cauliflower or just a simple dish of rice or pasta.

Originally, before I began actually cooking this recipe I thought it was going to be very light and creamy in color and texture. But as the onions caramelized while the chicken was browning on each side, they built a foundation of flavor that turned the broth a dark brown like the color of soy sauce. When the sour cream and flour were added at the end, it brightened the whole dish up a bit but left all that slow roasted, caramel-like flavor. If you aren’t a red meat eater, but long for hearty, comforting foods like pot roast or beef stew, especially on these cold winter days,  than this just might become your new favorite. I hope you guys love this recipe so much that you help it become a trend again. It is definitely worthy of  some new time in the spotlight!

Cheers to Viktoria for sharing her Austria with us, and cheers to new (old) recipes coming out of the dark recesses of history once again! If you try this recipe, please let us know your thoughts in the comments section below. If you ever get a chance to visit Austria – stop by Stans and say hi to Viktoria. She’ll be the one in the beautiful dirndl that’s ready to greet you in five languages.

Join us next Wednesday, Week Four of the International Vintage Recipe Tour 2020, as we island hop our way over to Barbados, where will be livening up the night with a little party atmosphere. Stay tuned!

The International Vintage Recipe Tour: {Week 1} Armenian Stuffed Meat Balls

Welcome to Week 1 of the International Vintage Recipe Tour 2020! If you missed the previous blog post a few days ago, this is week #1 of a year-long culinary adventure as we cook our way through 45 countries in 12 months, courtesy of recipes from the 1971 edition of The New York Times International Cook Book. If you are all caught up and ready to explore, then cheers to our travels. Let’s get started…

COUNTRY #1: Armenia

In today’s post, we are headed to Armenia via the kitchen, to prepare a traditional heritage food packed with protein and whole grains, and to learn more about this exotic country’s history thanks to the publication of a modern day memoir.

I must confess right off the bat, before I began this cooking project I knew absolutely nothing about Armenia, other than the fact that it is where the paternal side of the Kardashian clan hails from. Pronounced R-Me-Knee-A (not R-Min-E-A!), and  nestled between Turkey, Georgia and Iran, Armenia is a small country that could easily be missed, depending on the age of the map you are consulting…

Located in Western Asia, a section of the world which also includes Middle Eastern countries,  Armenians consider themselves neither Middle Eastern nor Asian but distinctly European. Armenia is the birthplace of the apricot and home to the oldest winery in the world (which dates back 6000 years). The capital city of Yerevan predates Rome, and is considered one of the oldest inhabited capital cities in the world. On the food front, their traditional cuisine has been influenced and enhanced by the closeness of their surrounding neighbors, giving Armenian dishes a unique blend of Russian, Turkish, Georgian and Mediterranean flavors.

This week in the kitchen, we are making a regional favorite, Armenian Stuffed Meat Balls. Essentially, this recipe is a meatball made with lamb, which is then stuffed inside another meatball, also made of lamb, and then cooked in beef broth. Each batch of meatballs is made with a different blend of ingredients – one vegetable laden, the other grain laden. Once tucked inside each other, they are quickly cooked in a boiling homemade broth and served immediately from the pot, plump and steamy.  Although stuffing meatballs sounds a little bit complicated, it’s actually a very easy and fun recipe to make.

Over the course of the last few decades I have made countless numbers of meatballs, but I never considered, before this recipe, that they could be 1) be stuffed or 2) be cooked in other ways besides pan frying or baking in the oven. Always a fan of innovative cooking methods and creative food compositions, I thought these stuffed and boiled meatballs would be a really interesting and exciting challenge. And boy was this the case!  A combination of  artistry, hand massage and play dough, these magical meatballs rolled their way into formation in the kitchen with nothing but joy and fun.

The only tricky situation I encountered with this recipe was sourcing bulgur, a cracked wheat that is a staple in the Armenian diet. Usually I can find this easily in the organic section of my local grocery store, but the day I went to shop for all the recipe ingredients, the store had sold out of what I needed. Two additional stops at other grocery stores also yielded an empty cart. Because the International Vintage Recipe Tour happens at a quick clip with shopping, cooking, photographing and writing all occurring within a week’s time frame, I had to come up with a substitution for this now elusive ingredient.  My first challenge of the project!

As it turns out, thanks to some quick research online, it was a simple remedy. Two similar alternatives for bulgur are couscous and quinoa, both standard finds in most grocery stores, both traditional heritage foods of Armenia and surrounding countries, and both substituted with the same 1-1 ratio. Perfect!

While the meatballs are easy to make, and they cook within ten minutes,  they do require about 6 hours of preparation time. Most of the time is eaten up by broth making (3 hours), chilling time in the fridge (2 hours), and hand kneading (20 minutes) but simultaneously, while each of these tasks are occurring, other components of the recipe can be readied, making it feel like the hours and the tasks just fly by. Both the interior meatball filling and the beef broth can be made a day or two ahead of time, but I recommend doing it all at once just for the sheer delight of completely immersing yourself in the making of this unique food.  The recipe itself feeds a crowd, making on average between 22-24 meatballs in total, so this would be a fun weekend cooking project when you don’t have the pressure of the busy work week to battle and you can relax with a glass of wine or an Armenian cognac as you cook the day away.

THE RECIPES: Homemade Beef Stock and Armenian Stuffed Meat Balls 

(Note: All  recipes prepared throughout the International Vintage Recipe Tour are executed exactly 100% as written in the New York Times International Cook Book, unless noted).

Homemade Beef Stock

4-5 lbs. beef short ribs or beef soup bones

2 leeks, trimmed split and washed well

2 carrots, trimmed and scraped

2 ribs celery, cut in half

1 onion stuck with two cloves

2 sprigs fresh thyme or 1/2 teaspoon dried thyme

Salt to taste

1 teaspoon peppercorns

Place the beef in a kettle and cover with cold water. Bring to a boil and blanch about 5 minutes, then drain and run under cold water. Return the bones to the kettle and add the remaining ingredients. Add more cold water to cover and simmer, uncovered, about three hours. Skim the surface as the stock cooks to remove fat and scum. Strain.

Armenian Stuffed Meat Balls

For the stuffing:

1 lb. lamb, ground

4 medium onions, sliced

1/4 cup finely chopped green pepper

2 tablespoons chopped parsley

1/4 teaspoon chopped mint

1 teaspoon salt

1 teaspoon freshly ground pepper

For the Meatballs:

1 lb. very lean ground lamb

1 cup very fine burghul (cracked wheat) or 1 cup quinoa or 1 cup couscous

Salt and freshly ground pepper to taste

1 small onion, finely chopped

1 tablespoon finely chopped parsley

water

4 cups boiling beef stock

To make the stuffing, saute the lamb over medium heat, stirring occasionally. Add the onions and cook over low heat  for thirty minutes, stirring occasionally. Add the green pepper, parsley and mint and cook 10 minutes. Add salt and pepper and simmer for five minutes.

When cool, chill stuffing for at least 2 hours. After it is filled shape into the size of marbles (about one teaspoonful for each)

To make the meat balls, combine the meat burghal, salt, pepper, onion and parsley and knead the mixture as you would dough , adding a few drops of water as you go along. Knead the mixture for twenty minutes until the mixture is like a medium soft dough.

Dip your hands in a bowl of cold water and make balls the size of walnuts. Make a dent in the middle of each ball with your thumb and press all around the inside wall to amke a round opening for the filling. The wall should be fairly thin. (Watch a video on how to do this on my Instastory here).

Place the marble-sized filling in each shell and bring the edges together to close. Smooth the surface with wet fingers  and flatten slightly by gently pressing between the palms.

Drop the meat balls into the boiling stock and cook for ten minutes  or until the meat balls come to the surface. Remove with a slotted spoon without puncturing. Serve immediately.

THE RESULT…

Delicious! Like a hearty little bundle of meatloaf, these meatballs contain all the components of a balanced dish with subtle, nuanced flavors. Filling, comforting and satisfying, the only thing I would have wished, was that they were a bit more aromatic in the spice department. They weren’t bland in the least, but I think I might have been spoiled years ago by my lovely Bulgarian friend’s specialty of Turkish meatballs, which are laden with cumin. That aside, these Armenian meat balls were delicious and delicate in their own unique way. I bet also, had I prepared this dish in the Springtime when the onions and the mint are at their peak of freshness, the sweetness of the mint and the tangy-ness of the onion would have been stronger, sharper and more distinct.

Next time, I’ll experiment with this recipe again in March or April, and add a triple dose of mint to the stuffing to see how that adds to the overall taste. If you try this recipe now, during the winter months, I would suggest serving them with a dollop of mint jelly or a spicy habanero jelly to add another dynamic layer of flavor. Traditionally, this food would be served alongside a heaping pile of rice pilaf or in a shallow basin of broth, like a soup, but because we are featuring just one recipe from each country on this Tour (although this week had two because of the broth) I served these meatballs with a simple side salad and some fresh grapes in lieu of the suggested Armenian Rice Pilaf recipe that followed in the cookbook.

HISTORICAL COMPANION: The Hundred Year Walk

Just like you would pair a fine wine with a fine meal to bring out the food’s flavor,  I thought it would be fun to connect each recipe we make with a unique cultural story from history to add interest to the dish and spark additional conversation. Throughout the tour, this historical nod will come in various forms – interviews, book recommendations, movie suggestions, music playlists, art discussions and artifact discoveries. This week’s cultural tie-in comes in the form of a book, The Hundred Year Walk, which details the history of Armenia and its people in a highly relatable way.

Written  by Dawn Anahid MacKeen, a thirty-something California native who is half American and half Armenian, The Hundred Year Walk,  published in 2016, tells the true story of her Armenian grandfather who survived Turkish military capture in the early part of the 20th century. It’s almost impossible to research anything about Armenia without reference to the tragic Armenian genocide of 1915 – an event that killed over 1 million people – about half of the country’s population. While this is a heavy topic for our recipe tour, this event is as important to the country’s history as their staple foods, and has come to define the Armenian culture throughout the past 100 years.

Dawn’s grandfather Stepan, a survivor of the Armenian genocide of 1915, recorded details of this life-altering experience and his escape to freedom in journals which he kept throughout his life.  Those journals were passed down to Dawn’s mother who tucked them away, out of sight for decades. But in the early 2000’s, on a trip home to California to visit her parents, Dawn finds the handwritten books and suddenly becomes consumed by stories surrounding her grandfather’s unusual and heroic escape.  Filled with a desire to understand her own family history and the struggles Stepan faced, Dawn begins piecing together  his cataclysmic journey as he walked through cities, over mountains and eventually across the desert in order to escape death. Retelling Stepan’s story as events unfolded in 1915, Dawn also parallels this ancient history with her own modern day journey of exploration in the early 2000’s, as she follows in his own footsteps retracing his route through modern day Turkey and Syria – a young woman traveling alone amid post 9/11 tension and unease.

What I loved most about Dawn’s book was her ability to paint a thoroughly engrossing portrait of the Armenian way of life known by her grandfather’s generation, and then balance that against her own unique perspective and experiences as a modern day American woman. Her book is a crash course in all things Armenia, while also offering a compassionate viewpoint of the effects of war and displacement upon multiple generations.

On a side note, one of the random things I learned in preparation for this post is that the library will buy books for you.  I wanted to read The Hundred Year Walk over the Christmas holiday but none of the books available online would be delivered in the timeframe that I needed, and my local bookstore didn’t carry this title. Dawn’s book was also not included in my local library system, which meant that they didn’t have any copies in any of their branches. On their website, I noticed a feature called “suggest a book ” where you can suggest a book for the library to buy which will then become part of  their permanent circulating collection. Not sure, how all this worked nor how quickly, I submitted a request for the library to purchase a copy of The Hundred Year Walk. The very next day I received an email that the book request had been approved, and that they were ordering several copies for several branches. Four days later, I received another email. The book was at the library ready for pickup. How marvelous! I’m not sure if all libraries offer this service, but it’s worth an inquiry if you find yourself in a particular predicament.

A 1940’s map of West Asia

History can feel very far removed and intimidating when you have no reference point or fundamental understanding of a country or a culture that is thousands of miles away and vastly different from your own.  But cooking this batch of Stuffed Meat Balls and reading The Hundred Year Walk was such a captivating experience.   Riveting from page one, I won’t spoil the book and its trajectory of events, only to say that it starts with a scene in the kitchen – a conversation between Dawn and her mother while they wash dishes. It’s a mundane task, so commonplace and ordinary, yet ultimately becomes life-changing for both women as there in the swirl of the dish water, Stepan’s story begins to form.

I hope Week One of the International Vintage Recipe Tour sets up in your kitchen in just the same way.  That conversations spark between between friends and family as meatballs get made and interest about Armenia grows.  I look forward to exploring and sharing more recipes from this fascinating country with you in future posts.  In the meantime, if you have any related food stories or experiences to share about Armenia or the Stuffed Meat Ball recipe,  please share them in the comments section below. I’d love to hear your thoughts.

To learn more about Dawn Anahid Mackeen , visit her website here.

Join us next week, as we embark on Week Two of our epicurean adventure… Australia, where we’ll feature a good news recipe for a country that needs all the good news it can get right now.

FEATURED!

This recipe was featured in The Armenian-Mirror Spectator on November 19th, 2020! Stop by to read about it here! 

Announcing the International Vintage Recipe Tour 2020!

Happy New Year! Hope your holidays were festive and that your new year is off to a great start. Here in the Vintage Kitchen, there are lots of fun things in the works for 2020 – ones that incorporate both cooking and collecting. After the emotional events of last year, I’m ready to pour a giant amount of joy into this new decade starting right now, with January, and the announcement of a big year-long project…

international-vintage-recipe-tour

Pack your market bags dear readers, we are going on an adventure. Welcome to the International Vintage Recipe Tour of 2020. Each week throughout the year, I’ll be cooking an authentic heritage recipe from a different country that was featured in the 1971 edition of the New York Times International Cook Book. Sharing both the experience (and the recipe) here on the blog every Wednesday, I hope you’ll join me in exploring together the cuisine of 45 countries over the course of 12 months. It’s going to be an epic year of discovery, one in which I hope will shine a spotlight on some old, wonderful, possibly forgotten dishes that may have gotten covered up over time.

the-new-york-times-international-cook-book

Throughout this project, we’ll cover all the food groups and prepare unique dishes for all meals of the day including breakfast, lunch, dinner, cocktail hour and dessert. Organized alphabetically by country, we’ll circumnavigate the globe, exploring an eclectic range of landscapes and cuisines together. One week, we’ll be making island fare fit for a summer beach party and the next we’ll be deep in another hemisphere’s mountain range cooking up cuisine much more suited for skiing and snow. Some recipes will be quick to make like mixing up a tropical cocktail or making homemade mustard, while others will involve more time and detailed technique like making a layer cake or pickling vegetables. We’ll visit all the continents (except Antarctica) and we’ll touch upon interesting aspects of each country’s history through interviews, books, movies, music, art and artifacts.

james-spanfeller-illustration

A year-long cooking project is quite a commitment. It’s the biggest endeavor I’ve ever attempted here on the blog and I’m not quite sure how smoothly it’s all going to run.  But exploring foreign foods has been a favorite source of joy and curiosity for me since my college days, when my sister and I used to throw International Dinner Night parties in our Brooklyn apartment. By traveling around the globe via the kitchen this year, I hope this project will spark some unexpected fun in your cook space too.

Since I haven’t previously tested or tried any of these recipes listed in the cookbook before, there’s a good chance we’ll encounter some mishaps along the way and uncover some unusual cooking situations. There are foods from many countries included in this adventure that I have never even tried before, and there are some countries listed in the cookbook that don’t even exist anymore thanks to changes in world history. But through this project I hope to start some conversations with you about the validity of vintage recipes, the ways in which we prepare foreign food and the effect these recipes have upon our modern palettes.

There are lots of books that could have been referenced once this idea of a vintage recipe tour started swirling around, but The New York Times International Cook Book is an ideal fit for this type of world-wide exploration for two main reasons. First, Craig Claiborne…

The recipes in the International Cook Book were collected and tested by Craig Claiborne (1920-2000), a long-time editor at the New York Times and a treasured favorite cook here in the Vintage Kitchen. Throughout his career, Craig came in contact with all sorts of foodies from all sorts of places around the world – famous chefs, restaurateurs, caterers, food critics, industry professionals, home cooks and “those who wanted to communicate their culture via their kitchen.” He was also a talented wonder in the kitchen himself and the author of over twenty cookbooks. There is not a recipe that I’ve tried of his that I haven’t absolutely loved. Needless to say, he knew a good recipe when he saw one and he knew the good sources from which to get them. When he was preparing The New York Times International Cook Book he consulted hundreds of people and traveled thousands of miles to collect the most highly prized recipes he could find. Although he hasn’t been as widely recognized or remembered as some other famous culinary icons of the past, I’m excited to re-introduce him here on the blog. With his name attached to this cookbook, I have a feeling we are in good gourmand hands.

Ingredients for spaghetti and anchovy and clam sauce from the Italy chapter of the The New York Times International Cook Book

The second reason why the International Cook Book is an ideal vintage recipe springboard is because of the decade in which it was produced…the 1970’s. The first edition came out in 1971,  a decade of heightened curiosity and savvy in both the international travel department and the cooking department. While the 1960’s made air travel to foreign countries appear glamorous and exotic, by the beginning of the 1970’s international escapades were more widely accessible to Americans. This interest in other cultures reflected in the food scene of the 1970’s too – by exposing American palates to more diverse cuisine and broadening their culinary horizons.

1970’s travel poster for Qantas Airlines

The disco era ushered in a decade of cosmopolitan dining and entertaining that was backed by newly found confidence, curiosity and skill in the kitchen. Swiss fondue parties were all the rage, Spanish paella became a fashionable dinner food, and homemade Italian tomato sauce consisted of garden-raised ingredients instead of the 1960’s version that often combined conveniences like ketchup and canned tomato soup. Cooking in the 1970’s revolved around excitement, a desire for authenticity and an interest in cultural awareness that is similar to the way we approach food today. Over the course of the year, it will be interesting to see how these vintage recipes compare to our modern palates and standards of both cooking and eating. It is often said that history repeats itself, I’m curious to see if that cliche applies to food as well.

I hope you join me each week in this around the world journey and discover some new favorite recipes yourself. We kick off the big adventure next Wednesday, January 8th, with our first country…

What’s on the menu for Armenia? You’ll just have to wait and see:) Until next week… cheers to the new year!

Blackberry Baking with the Legendary Sally or Solange or Whatever She Once Was Called

In the historic baking world, there’s a legend that springs from a yeast bread.  Depending on the sources and the provenance of specific recipes, facts about this legend vary widely and wildly. In some tales, she’s a 17th-century girl, in others an 18th-century woman.  She was French. She was English. She was colonial American. She was an ordinary teenager, she was a famous baker, she was a lowly domestic servant. She had a name that was either Sally or Solange or Madame or Marie. She was a real human being but she then again she was a fake and then yet again someone else’s flight of fancy. For three centuries, this baking icon has tumbled through time on the flimsiest of resumes. This is the story of Sally Lunn and a cake (or it might have been a bread) that made her famous.

This weekend, after coming home from the market with a batch of blackberries that were so deliciously ripe they smelled like wine, I discovered a vintage recipe that is as difficult to describe as the lady it was named after. Called Fresh Blackberry Sally Lunn, it came from Meta Given’s 1957 Encyclopedia of Modern Cooking.  Surprisingly, out of a stack of forty different vintage cookbooks spanning the early 1900s to the early 1980s, Meta’s book was one of just a few that contained any recipes for fresh blackberries at all. Homemade jam and blackberry pie unified the books that did include the fruit, but Meta’s was the only cookbook that combined blackberries with a cake in the name of Sally Lunn. I love any recipe that is unique and stands out. The name Sally Lunn sounded curious and since I’d never heard of her before I had a feeling this might be fun to share with you too.

Like the age-old conundrum of who came first – the chicken or the egg – there are two different variations of a baked good that purportedly made Sally Lunn famous. One was a yeasted savory bread that looks like a cross between a bundt cake and a hamburger bun…

The yeasted bread version from the Williamsburg Cookbook, 1981 edition
Another version – not quite as bun-like on the bottom. Photo also from the Williamsburg Cookbook, 1981 edition.

and the other is a sweetened tea cake that looks like something between a blueberry pancake and a cobbler…

You wouldn’t be wrong to call either variation a Sally Lunn, even though they are two completely different types of food. Because of that, her name has popped up in recipe titles in a myriad of ways. There’s the Sally Lunn Bun, Virginia Sally Lunn, Sally Lunn Bread, Sally Lunn Cake, Sweet Sally Lunn, and just plain old Sally Lunn among others.  Likewise, in indexes, you’ll find her popping up under L for Lunn, S for Sally, or more specifically under category sections that include Cakes, Breads, Desserts, Baked Goods, Tea Cakes, Yeast Breads, Coffee Cakes, Coffee Breads, etc. So how could one possibly mythical person be identified with two types of very different yet specific baked goods over the course of hundreds of years?

As it turns out no one knows. And thus far it has been impossible to authentically identify any true source that leads to Sally and the bread and cake that share her name. Lots of ideas about her float around.  She was a teenage maidservant named Sally Lunn who delivered a newly invented bread to her master of the house, who in turn delightfully named it for her. She was a talented French baker named Solange, who escaped to a bakery in England where she began to make a popular brioche-style confection that looked like the rising of the sun. She was a working-class woman in 18th century England crying out her name in the streets as a sales tool for the bread that became her trademark. There’s even a historic eating house in England that speculates they might have been the site of Sally’s original bakery in the late 1600s.

Sally Lunn’s Historic Eating House in Bath, England

I like to believe the theory that Sally Lunn was an actual baker living in 1700s England. The story details how she invented a sweet yeast bread that became very popular at first locally, then regionally, then across the sea. With this theory, it makes sense then that references to Sally Lunn would have shown up in early American cookbooks, a favored recipe brought over by the English as they colonized America. Possibly, at some point in history, when yeast either became too expensive, or there was a shortage, a non-yeast cake version was invented by some other creative and clever baker in the 1800s who used all the same ingredients of Sally Lunn bread minus the yeast. Thereby keeping the name Sally Lunn in the recipe title. By the time, the 1950s rolled around perhaps Meta made her own creative choice by marrying blackberries into the non-yeast version of Sally Lunn cake. Whether this is an accurate assumption or not, no one will ever know for certain unless some of Sally’s baking notes happen to show up. But with all this mysteriousness that surrounds Sally and her two contributions to the baking industry, I think she’d be happy knowing that at least her name stayed attached even though the origin story didn’t. It is, after all, the ultimate branding success story, 1700’s style!

Meta Given’s two-volume Modern Encyclopedia of Cooking from the 1950s

Meta Given was a legend in the culinary world in her own right. A nutritionist at heart, she set out to write some of the most comprehensive cookbooks of the 1950s that included recipes for people across the entire economic spectrum. Her books featured everything from thrifty staples like squirrel stew to elegant French dishes with layered sauces and nuanced flavors. Her mission was to make cooking fun, enjoyable, and accessible for everyone while also making it nutritious and creative.  I’m so pleased to present her lovely sweet treat of a dessert that highlights the juicy, sun-ripened flavors of blackberries nearing summer’s end. What I love about this cake in particular is that it is pretty healthy – using small amounts of sugar, butter, and flour. The blackberries really keep the cake moist and add a familiar sweet-tart flavor similar to cobbler but with a velvety more dense consistency like a blueberry pancake.  If you wanted to add an extra dash of sweetness you could drizzle the whole cake with honey or follow Meta’s suggestion of adding a lemon sugar glaze once the cake is out of the oven, but I loved it just as it was… simple and summery.

Meta Given’s Fresh Blackberry Sally Lunn Cake

1-pint box of freshly picked blackberries (enough for 2 1/2 cups)

1 tablespoon sugar

1 1/2 cups all-purpose flour

2 teaspoons baking powder

1/4 teaspoon salt

3 tablespoons salted butter, softened

2/3rd cup sugar ( I used raw cane sugar)

1 large egg

1 1/2 tablespoons lemon juice

1/2 cup sour cream*

1/2 cup whole milk*

(*Note – The milk measurement was left out of the original recipe, but was included in a revised edition in 1959. I used the sour cream/milk combination but you can also substitute those two ingredients for 1 cup of buttermilk).

Preheat oven to 375 degrees. Butter well an 8 1/2″ inch springform cake pan.

Drop berries into a bowl of cold water to rinse and remove any stems or leaf debris. Swish berries gently and then by hand remove them to a colander to drain. Once the berries have drained in the colander transfer them to a medium size bowl and gently toss them with 1 tablespoon of sugar. Set aside.

In a separate bowl, sift the flour, baking soda, and salt together. Set aside.

In another bowl, whip the butter, sugar, and egg together until creamy. Stir in lemon juice using a wooden spoon and then add the flour, sour cream, and milk, blending until smooth.

Gently fold in the blackberries until just well distributed. Turn batter into prepared pan.

Bake until golden brown (about 40-55 minutes) or until a toothpick inserted in the center comes out clean. Once ready to remove from oven, let cake cool slightly in pan on a cooling rack before serving either lukewarm or at room temperature.

In addition to enjoying the end-of-season fruit harvest this month, Fresh Blackberry Sally Lunn cake also freezes well. So if you choose that storage method you’ll still be able to taste the warm days of summer even on the coldest winter nights. And because it does have a pancake-esque quality to it, it wouldn’t be terrible to serve it for breakfast or even alongside a summer salad for brunch or lunch. This Fall, I’ll share the other version of Sally Lunn as we dive into bread-baking season to see how these two, and if these two compare in any way other than by name.

In the meantime, cheers to Sally and to Meta for baking delicious food that withstands not only multiple decades but multiple centuries too!  If you are interested in learning more about Meta and her cookbooks, find a few in the shop here. The Williamsburg Cookbook will also be heading to the shop shortly as well, in case you want to catch up on your colonial fare before heading into the holiday season. Find that one coming to the cookbook section shortly. And finally, this cake was styled using the lovely vintage 1960s Italian cut glass cake stand which you can find in the shop here.

The Art of the Vintage Picnic

Happy August! As promised in the last post, here is the article written for Artisans List that highlights the beauty and joy of a vintage style picnic. We’ve got just six weeks left before Autumn officially starts, but rest assured that doesn’t mean that picnic season, as we most traditionally know it, is over. There are plenty of Fall foliage opportunities for all you Northerners intent on a day trip and a dine out in nature. If you happen to live in the Southern half of the hemisphere than lucky you – everyday is a good day for a picnic no matter what time of year. When we settle into the cooler months, I’ll also be featuring two outside of the box picnic ideas – the carpet picnic and the car picnic  – both which promise to hold as much fun as their summertime counterpart. So stayed tuned on that front. In the meantime, six full weeks of summer still await. From somewhere I can hear a basket calling your name…

Twentieth century foodie, gourmand and all around good cook, James Beard declared that “picnicking is one of the supreme pleasures of outdoor life.” Indeed. No other dining experience seems quite so decadent. The fresh air, the natural setting, the creative food choices, the deliciously idle intentions. Picnics have a wonderful way of engaging all of our senses in such a fantastic way. It’s almost overwhelming.

Those first few moments at picnic’s start – when you are dizzy with the view and the weather and the notion of doing nothing but relaxing and reveling in food and friends – is satisfaction enough. But then a truckload of simple delights follow one right after another. There is that liberating sensation of kicking off shoes and wiggling bare toes in soft grass.  The crisp, snapping action of the picnic blanket as it unfurls from containment, joyfully sailing on the breeze before floating to the ground. There is the laying out of the carefully wrapped food parcels and the first sip of a celebratory toast. The giddy laughter, the bird songs, the sound of leafy trees dancing on the breeze… suddenly you are aware of the musical vitality of nature and yourself in it.

On a picnic, the world shines newly bright with details mostly overlooked in the hustle bustle routine of everyday life. It is an activity that encourages you to stop and to breathe and to melt – into your surroundings, into your friends, into the food that makes up your lunch or your dinner or your breakfast time snack. Yes, picnics are a triumphant and pleasurable experience. And there’s no better season for them then right now. In today’s post, we will be discussing the art of of the vintage picnic – how it came to be, how it shaped us, and why we still need to celebrate it now. Highlighting a handful of old, but still very relevant recipes, this post also offers suggestions on how to build your own vintage picnic experience so that you too can succumb to the relaxing style of outdoor eating that our ancestors favored so long ago. It’s history in a most delicious form, unveiled, just as we are about to round the corner towards the 4th of July, the most popular picnic holiday of the year.

This idea of eating outdoors from a basket on a blanket is no trend. It has been around for centuries and has taken eaters on a plethora of picturesque adventures. But it wasn’t always a simple act. At first, outdoor dining began in grand style. Lavish entertaining in lavish settings. In the 1700’s, there were the hunting after-parties which made glorious outdoor feasts of animals bagged from the day’s sport. Garden gatherings in the 1800’s involved fine china, silverware and fancy dress. Plein air luncheons in the early 1900’s focused on seasonal foods, artistic creativity and exquisite manners. Today, picnics involve technology fueled cooling mechanisms, compartmentalized backpacks and fitted amenities made for details and devices. Needless to say, the desire to picnic has never been lost, but the way we eat outdoors has evolved quite a bit over time.

Nowadays, anything goes when it comes to picnic style and presentation.  An impromptu paper bag lunch for two in a city park can be just as engaging as a thoughtfully prepared country basket for six. But just like any activity worth doing, there is a certain art form to a well produced picnic that makes for a more pleasurable experience. The vintage-style picnic favors china plates and real glassware, classic cocktails and linen napkins, and most importantly, homemade food. It is the sort of affair that wraps you up in a long, restful lazy day adventure fueled with time-honored tradition and attention to detail. It discourages anything fast or obtuse- like technology and frenzied time schedules and plastic utensils. It champions a slower, simpler and more relaxing rhythm. The type of experience that not only feeds your appetite but also your senses, your spirit and your sanity. Basically, a vintage-style picnic is a big, long break in your day meant for resting, relaxing and restoring through small details… the time-worn touch of an old plate, the taste of an heirloom recipe, the time-out of technology, and the tune in to your natural surroundings.

Legend loosely states that the word picnic stemmed from the French pique-nique which derives from the action of picking and selecting small spots or things. Originally, pique-niques were more like potlucks, in that all invited guests were asked to contribute a little food or drink for the group to share together. But it was England, in the 19th century, not France who created the picnic in the modern sense that we know it as today. Both a mealtime and a leisure activity, the English made picnicking a deliciously long-term and lengthy event that could last all day and well into the night if done right. They played games, read books, plucked instruments, talked, sang, painted, swam, flew kites, played sports and generally just all around enjoyed themselves while snacking on small plates of assorted foods from wicker hampers and baskets.

Monet’s painting, Le Dejeuner Sur L’Herbe (Dinner on the Grass) was painted between 1865 and 1866.

In America, prior to the Civil War, there were no lackadaisical, carefree picnic outings. If any outdoor eating occurred before that time period, it was eating en masse – generally a large sociable event where whole communities of people turned out to enjoy a barbecue or a church social or a political rally. The Victorians ushered in more intimate, family-style picnic parties, rambling in close proximity to home, as their appreciation of nature and outdoor enthusiasm bloomed in the late 1800’s.  But the rise of the automobile, the building of the U.S. highway system, and the introduction of drive-up motor lodges and nationals parks all encouraged a whole new independence when it came to on-the-go eating as the 20th century began. Suddenly, the English style picnic took hold as Americans began exploring their more easy-to-navigate country. Economical, spontaneous and available to everyone, picnics naturally turned destinations into dining opportunities. All you needed was a basket, a blanket, a small collection of foodstuffs and an adventurous spirit. Outdoor eating euphoria had arrived!

A group of picnickers photographed in 1914 by Albert M. Price. Photo credit: Library of Congress

Back in earlier centuries, outdoor eating meant bountiful quantities and dramatic fare. Whole animals roasted over fire pits, multiple courses served by domestic staff, exotic ingredients, rich foods, elaborate presentation. But as outdoor dining began to evolve over time into smaller parties and simpler affairs, the food that accompanied it changed also. As serving staffs diminished and people became more independent, picnics and the baskets they represented, became simpler – filled with foods that could be easily made, easily transported and easily unpacked. By the time the mid-20th century rolled around, there was a definite type of picnic fare anticipated and defined by the activity. Fried chicken, salads and deviled eggs topped the favorites list, along with hot dogs, sandwiches, pies, cakes, bread and fruit.

The picnic basket spread out before you in this post highlights vintage recipes that capture that same essence of familiarity and practicality, while also providing a well-rounded balance of flavors and tastes. Vintage recipes include Sicilian-Style Marinated Olives, Oven-Fried Chicken, Deviled Eggs, Cheese Straws and Blueberry Tart. Americanos join the party as a refreshing aperitif to toast the season and the stars. 

Ranging from the 1960’s to the 1980’s, these recipes came from a handful of treasured vintage cookbooks. They pair gourmet creations from famous chefs like James Beard with regional favorites from lesser-known sources, like the ladies of the Junior League of Huntsville, Alabama. Covering all matters of taste from sweet to salty, savory to sour, they are considered traditional picnic foods, but each contains an unusual twist in the form of a cooking method or an ingredient pairing that makes them both interesting and innovative. Whether you make all of these recipes at once for your next outing or just focus on a dish or two to sample and try, you’ll discover that all of these options listed here are steeped in simplicity. Almost all of them can be made a day or two ahead of time, so that your restful day of picnicking doesn’t include you running around the kitchen like a crazed cook.  

And, just one more note before we get to the recipes. While food is obviously the main attraction in a picnic, the vintage-style picnic places just as much importance on the accessories that go along with it as well – a.k.a. the servingware.  While it is true that we may no longer entertain as formally as we did in centuries past, there is something lovely about incorporating some little niceties into your basket in the form of linen napkins, china plates and glass drinkware. These details add an elevated aesthetic to your picnic that reflects the elegant English versions of yesteryear, and really just makes for a nicer overall dining experience.  A cocktail enjoyed from a plastic cup or a homemade dessert pierced with a plastic fork is never quite the same experience as using real glass and real flatware. Even James Beard agreed about that point. “Skimp on all the other dishware if you have too – but never on the glassware for your cocktail,” he advised.

A few vintage items featured in this post are a handwoven picnic basket from the 1930’s, a matching set of W.H. Grindley hotelware salad plates made in England (also in the 1930’s) and a handful of embroidered vintage linens in various shapes and sizes. Vintage restaurantware dishes in general are a great choice for picnics because they are heavy duty and aren’t quite as fragile as delicate ceramic or porcelain dishes. Salad plates or bread and butter plates are also the perfect size for your small snack needs and aren’t as bulky to pack as dinner sized equivalents. Likewise, vintage tablecloths make ideal picnic blankets thanks to their soft fabrics (decades of washing and drying!), variety of sizes and nostalgic designs. As you build your vintage accessories collection, you’ll also notice that these elements have a fun way of engaging people in conversation too.  Each item in your basket expresses its own unique story.  When packing all these elements up I like to designate the sturdy picnic basket for fragile foods, a separate tote bag for the servingware and linens and an additional tote for drinks and ice. That way everything remains intact from the moment you leave your kitchen to the moment you arrive at your destination.

Americano (serves 1)

1 1/2 oz. Campari

1 1/2 oz. Sweet Vermouth

3 oz. Club Soda

Ice Cubes

Twist or Slice of lemon or orange for garnish

Add the Campari and vermouth to an old-fashioned glass. Add ice cubes and club soda. Stir to combine. Garnish with a slice or twist of lemon or orange.

Marinated Olives, Sicilian Style (from the Silver Palate Good Times Cookbook, 1985)

1 pound Ligurian, Nicoise or Greek Olives  or a combination, drained

8 cloves garlic, cut lengthwise in half

Zest of 1/2 orange

Zest of 1/2 lemon

2 tablespoons fennel seeds

1 tablespoon chopped fresh rosemary

1/2 cup fresh lemon juice (about 2 lemons)

3 tablespoons olive oil

Combine olives, garlic, citrus, fennel and rosemary in a large bowl. Drizzle with lemon juice and oil. Marinate, stirring occasionally at room temperature at least 24 hours.

Deviled Eggs (from James Beard’s Menus for Entertaining Cookbook, 1965)

8 hard boiled eggs, shells removed

1 small tin boneless skinless sardines

1 small onion, finely chopped

1/4 cup parsley, finely chopped

Mayonnaise

Cut the hard-boiled eggs in half and remove the yolks to a small bowl. Mash yolks with sardines, onion and parsley. Blend with mayonnaise until you reach ideal consistency then fill each egg half. Chill in fridge until ready to pack into your picnic basket. These can be made up to 24 hours in advance.  * If you don’t have a portable egg carrier, disposable muffin tins make a great alternative.

Oven-Fried Chicken (adapted from Better Homes & Gardens New Cook Book , 1965 Souvenir Edition)

1 lb. chicken cutlets

1/4 teaspoon garlic powder

1/4 teaspoon salt

1/4 teaspoon pepper

4 tablespoons Herbes de Provence

1/8 cup fresh parsley, finely chopped

1/3 cup butter, melted but cooled to room temperature

6 cups corn flakes, crushed

Preheat oven to 375 degrees. Combine the garlic, salt, pepper, herbs, parsley and melted butter in a shallow dish and mix thoroughly. In a separate shallow dish add the crushed cornflakes. Dredge each piece of chicken on both sides in the butter mixture and then coat them on each side in the cornflakes. Place the prepared chicken on a lightly greased cookie sheet and bake for 20 minutes or until chicken is golden brown and crispy. *Note: This chicken recipe will loose its crunch factor the longer it sits. So if you are picnicking, this should be the last dish you make before packing the picnic basket and heading out the door. That being said, it’s still wonderful hours later or even the next day, but the corn flake coating will have a more breaded consistency rather than a crispy crunch.

Belle’s Star-Spangled Cheese Straws (from the Huntsville Heritage Cookbook, 1967 Edition)

1 lb. New York State sharp cheese (or any sharp cheddar), grated

3/4 cup butter

2 cups flour

1 teaspoon salt

1/2 teaspoon red pepper

smoked paprika for garnish

Leave both the cheese and the butter out overnight on the counter to soften. The next morning, preheat the oven to 350 degrees. Mix all the ingredients together (except the smoked paprika)  in a medium bowl by hand. Knead the dough until it turns into a consistency like play-doh. Form into a ball shape. On a lightly floured pastry cloth, roll the dough out firmly to 1/4 inch thickness with a wooden rolling pin. By pressing it into the cloth with the rolling pin, you’ll be able to smooth out any crumbly or wrinkly areas as you work. Using a small star shaped cookie cutter, cut out the stars and place them on an ungreased cookie sheet. Bake for 12-14 minutes or until lightly golden in color. Let stars cool on a rack and dust with smoked paprika just before serving.

Homemade Blueberry Tart (recipes adapted from the Smitten Kitchen and Martha Stewart)

For the tart shell:

1 1/2 cups all-purpose flour

1/2 cup confectioner’s sugar

1/4 teaspoon salt

1/2 teaspoon cinnamon

9 tablespoons very cold (or frozen) butter, cut into small pieces

1 large egg

In a large bowl, mix the flour, sugar, salt and cinnamon together. Add the chopped butter pieces and blend with with a fork until the mixture resembles small bread crumbs in various sizes. Add the egg and mix until combined. Form the dough into a ball, wrap in plastic wrap and chill in the fridge for at least 2 hours.

Butter a 9-inch tart pan (the kind with a removable bottom). Place the chilled dough on a lightly floured pastry cloth and roll out to a size big enough to accommodate an extra 1/2 inch of dough in diameter when placed in the tart pan. Add dough to pan, trim any excess dough beyond the extra 1/2″inch that hangs over the sides. Fold the remaining  1/2″ inch of dough back into the tart pan, so that you are re-enforcing the side walls with an extra layer of dough. Pierce crust all over (bottom and sides) with a fork. Place tart pan in freezer for at least 45 minutes.

Preheat oven to 375 degrees. Remove tart pan from freezer and place directly in oven for 20-25 minutes or until the tart shell turns a soft golden brown. Remove from oven and let cool on a rack.

For the blueberry filling:

6 cups fresh blueberries

2/3 cup cane sugar

1/2 teaspoon cinnamon

1/2 teaspoon nutmeg

4 tablespoons all-purpose flour

3 tablespoons fresh lemon juice

pinch of salt

In a medium saucepan, bring 1/4 cup water and 1 1/2 cups blueberries to a boil over high heat. Reduce heat and let berries simmer, stirring occasionally for about 4 minutes.

In a small bowl mix the flour with 4 tablespoons of water until smooth and then add to the blueberries in the pan. Next, add the lemon juice, sugar, salt, cinnamon and nutmeg. Bring to a boil and then reduce heat. Let the mixture thicken for about 1 minute. Remove from heat and stir in 3 1/2 cups of blueberries. Immediately, add this hot blueberry mixture to the tart shell.

Sprinkle the remaining cup of fresh blueberries across the top of the hot mixture, gently pressing the berries down so that they stick into the hot mixture enough to bind them together. Place the tart in the fridge for at least 30 minutes or at most overnight.

Additional Picnic Companions

One of the joys of picnic fare is the ability to snack and nibble on little bits of food at whim throughout the day. Since the original pique-nique days, small has been the favored size and serving proportion. For that purpose, a wooden cutting board filled with fresh fruit, a sampling of cheeses, cured meats, fresh herbs and bread offer an infinite number of little edibles that can be combined in interesting ways with the food options listed above. From chicken baguette sandwiches to cheese and crackers to deviled egg wrapped prosciutto, variety runs the gamut. The picnic board here included rainier cherries, strawberries, blackberries, raspberries, goat’s milk Gouda, cave-aged cheddar, blueberry Stilton, herb stuffed salami, thinly sliced prosciutto, Genoa salami, a bouquet of fresh herbs and a French baguette.

Finally, when bellies are full and appetites satisfied, the vintage-style picnic experience celebrates and salutes the pursuit of leisurely activities. There’s no rushing to clean up or clear out once you finish eating.  The whole, blissful idea behind a vintage-style picnic is to stay awhile and relax into yourself and your surroundings. One of my most favorite picnic activities is bird watching and tree scouting. I usually tote along a couple of species guides and a pair of binoculars, so that I can identify what’s flying over and growing up around me. Other fun activity suggestions (depending on your setting) include painting, sketching, walking, kite flying, playing cards, reading, talking, napping, swimming, collecting and just appreciating the people and places that share your afternoon. 

The world is a beautiful place. Time is a priceless gift. Eating is a ceremonial act. The art of the vintage picnic reminds us of that. Just as it has in the past and will continue to do so in the future. Wherever your picnic adventures take you this summer, I hope they are magical and delicious. Cheers to dining out in nature. Hope it is your best meal yet!