Hope your holiday is filled with all sorts of delicious delights and that you are staying warm and cozy. We are spending the holiday cooking up a whole new batch of vintage recipes and stories that I can’t wait to share with you.
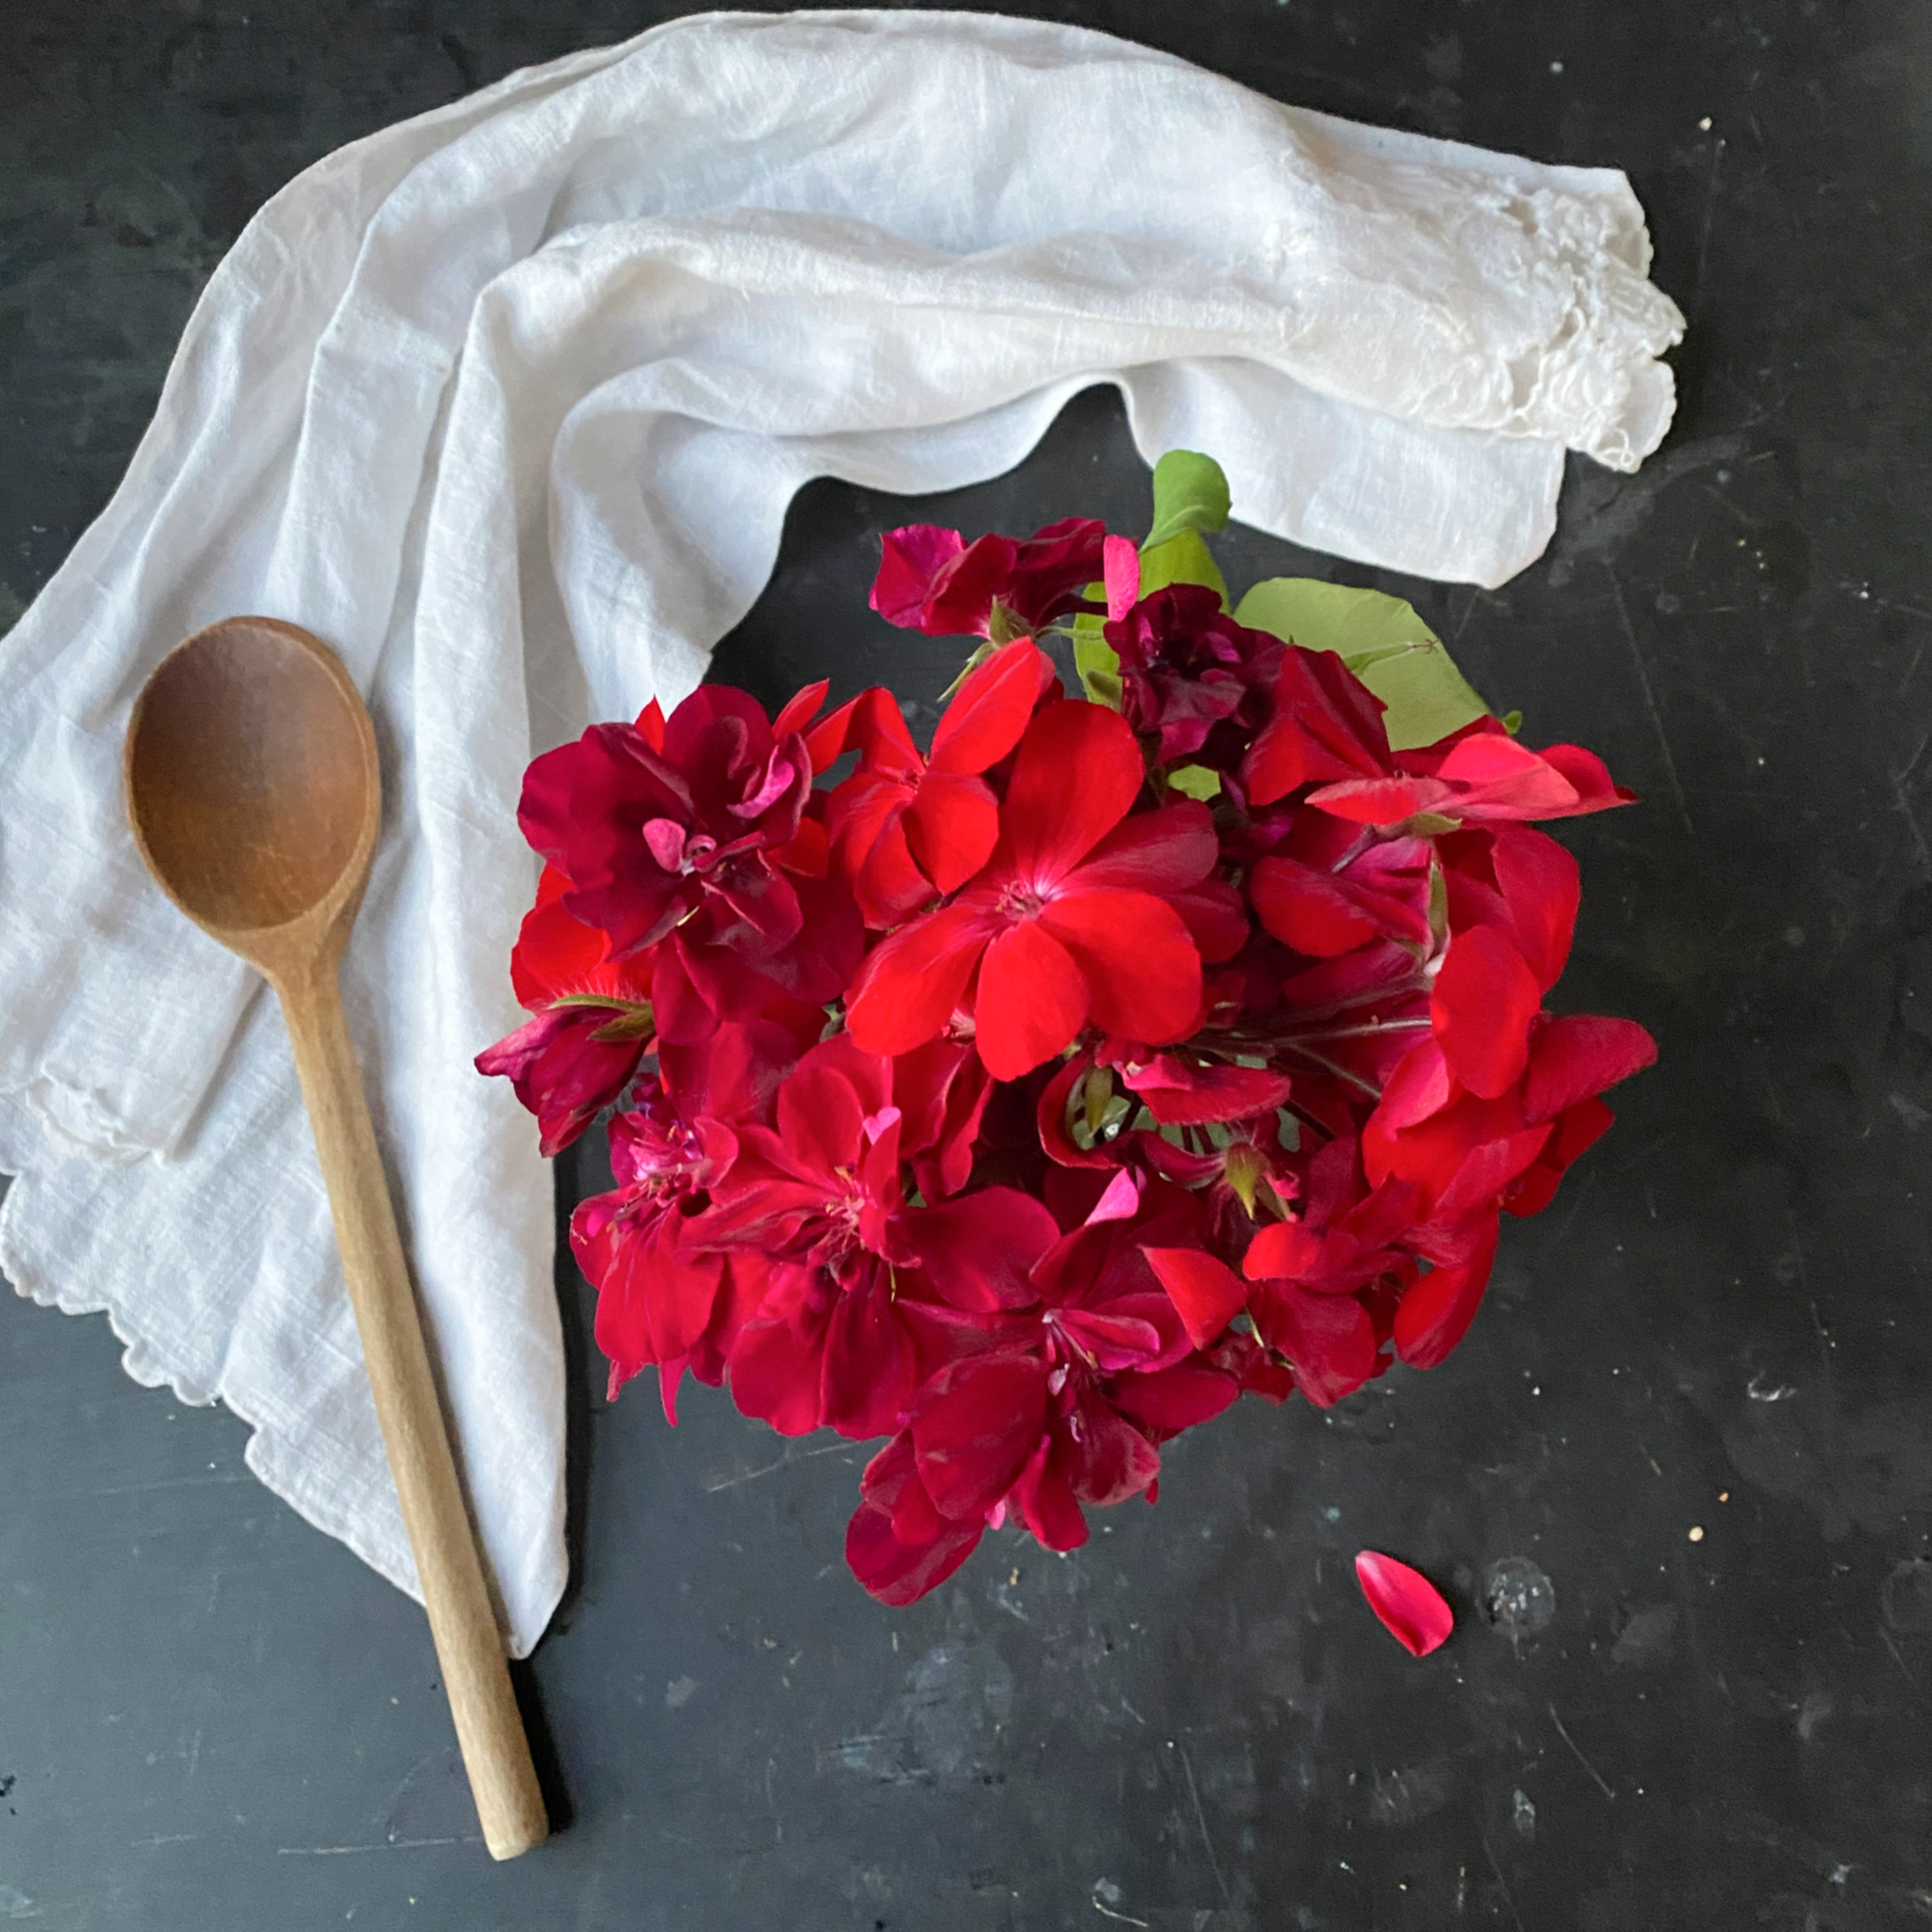
The Greenhouse Diaries are on break for the holiday, but we’ll be back next week to share lots of news of how our little growing station has fared on these chilly days and nights. In the meantime, the geraniums surprised us this week with enough new blooms in pink and red to make a bouquet for Christmas Day.
Sending lots of love and good wishes for a happy holiday.
current outside temperature: 33 degrees, greenhouse temp: 61.2 degrees
Last week, we left off with two cliffhangers… an impending snowstorm and an outbreak of powdery mildew. Did the greenhouse stay warm during our first storm? Have the sage and the tarragon recovered? Let’s see…
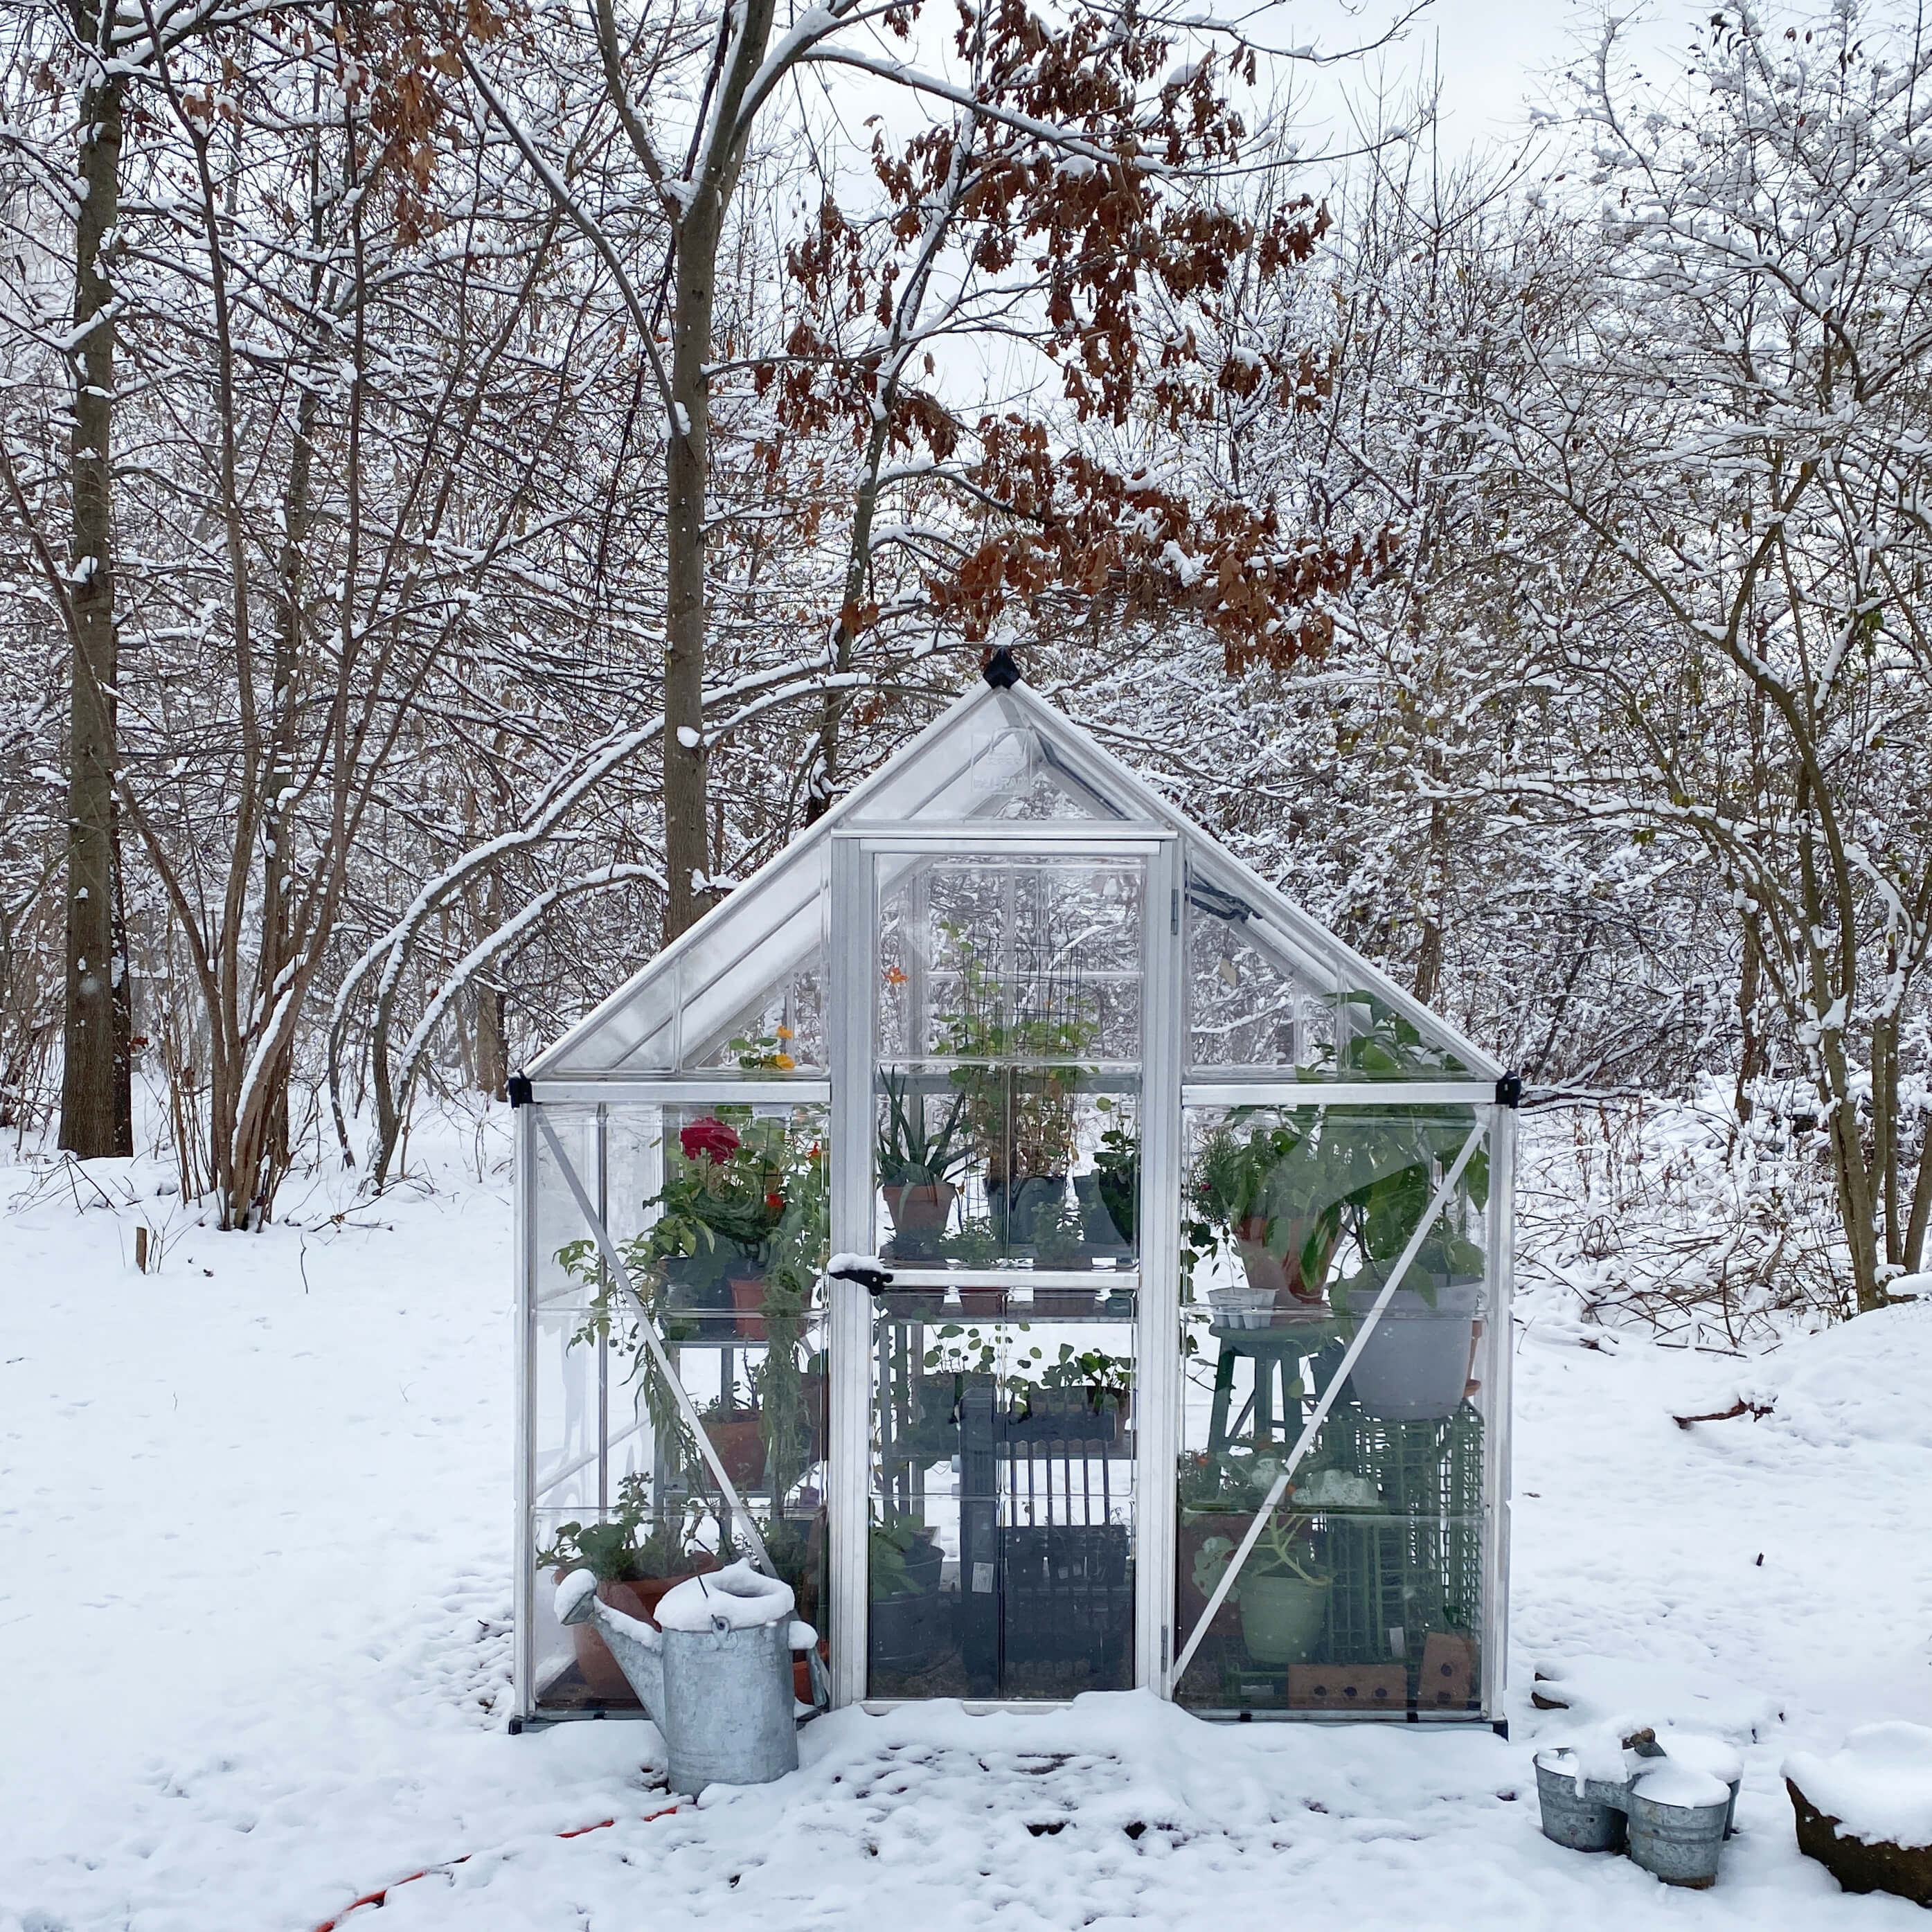
The total accumulation last Sunday night was 2.5″ inches. The greenhouse didn’t blow away or collapse (a victory!) and nothing was frost covered inside. We didn’t get the haybales purchased and placed before the storm for two reasons… 1) we wanted to see how the greenhouse would do on its own and 2) perhaps there might be a better alternative.
In theory, haybales placed around the outside base of the greenhouse act as insulation. They cover any vulnerable seams or crevices from drafts as well as act like a barrier against cold winter winds. Our greenhouse was never meant to be air-tight in its design. There are tiny exposed airways around some connector pieces and screws, which is good for ventilation. I hesitated about the bale method of winterization because there are about a dozen plants in our greenhouse that draw light from the bottom sidewalls and the hay bales once placed around the base would block their access to light from that direction. Of course, that would probably only encourage the plants to grow taller, to reach for the light above the bales and towards the roof but the idea of covering up this beautifully airy space with something heavy and dense didn’t seem quite right. In honor of light, we chose to wait and see.
So the snow came and the greenhouse experienced it sans haybales and everything was fine, except for the temperature. The coldest the greenhouse has ever been, even with the heater going at level 3 (the maximum setting) was that night. 43 degrees. Not cold enough for frost to appear but more than twenty degrees away from ideal interior temperatures. This first snowfall was such a good test. We definitely needed to protect it more.
My husband came up with the great idea of a plastic sheet covering the door frame from the peak all the way down to the base. The plastic at the roof was held down with two leftover 2 x 6 pieces of lumber, one on each side of the peak with the board ends resting in the gutters to help hold it all in place. Three treated 4x4s weighted down the plastic at the base. Essentially, he made a makeshift curtain panel for the front door that looked like this…
By covering the greenhouse in this way, it eliminated the draft that comes in around the door while still allowing lots of light to come through. Once this new plastic panel was added, the interior temp went right back up to 65 degrees within an hour. Success!
Until the next night.
Wind got a hold of the plastic and carried the curtain across the yard at some point in the middle of the night. The internal greenhouse temp plummeted straight back down to the low 40s.
Not entirely deterred, my husband set out for a second attempt. This time he stapled the plastic to the treated wood at the base, nailed two shorter boards together to form a wooden peak for the top that mimicked the pitch of the roofline, and then stapled the top end of the plastic to the wooden frame…
And that turned out to make all the difference. For the rest of the week, the plastic has stayed in place and the greenhouse is warm and draft free. To gain entry, we just take the wooden peak down and set the treated wood off to the side and then put it all back in place once we’re done inside. So simple.
Temperatures fluctuations and winter weather aside, luckily the greenhouse plants didn’t seem to be affected by all these up-and-down changes. The sage and tarragon were still flocked with powdery mildew so they got a second spray of the organic fungicide. The tarragon responded to this extra care and attention by slowly unraveling its first flower…
The marigolds have been thinning themselves out one by one since they arrived in the greenhouse, so they got repotted to a smaller container. If I had to peg any of the summer flowers that I thought would do best in the greenhouse it was the marigolds. They were such hardy growers in the garden from spring to fall, so I was surprised to see them losing leaves, drying out and getting long and leggy in the greenhouse. Hopefully, this new home will encourage them to fill out more around the middle.
On the growth spurt front, the geranium leaves tripled in size…
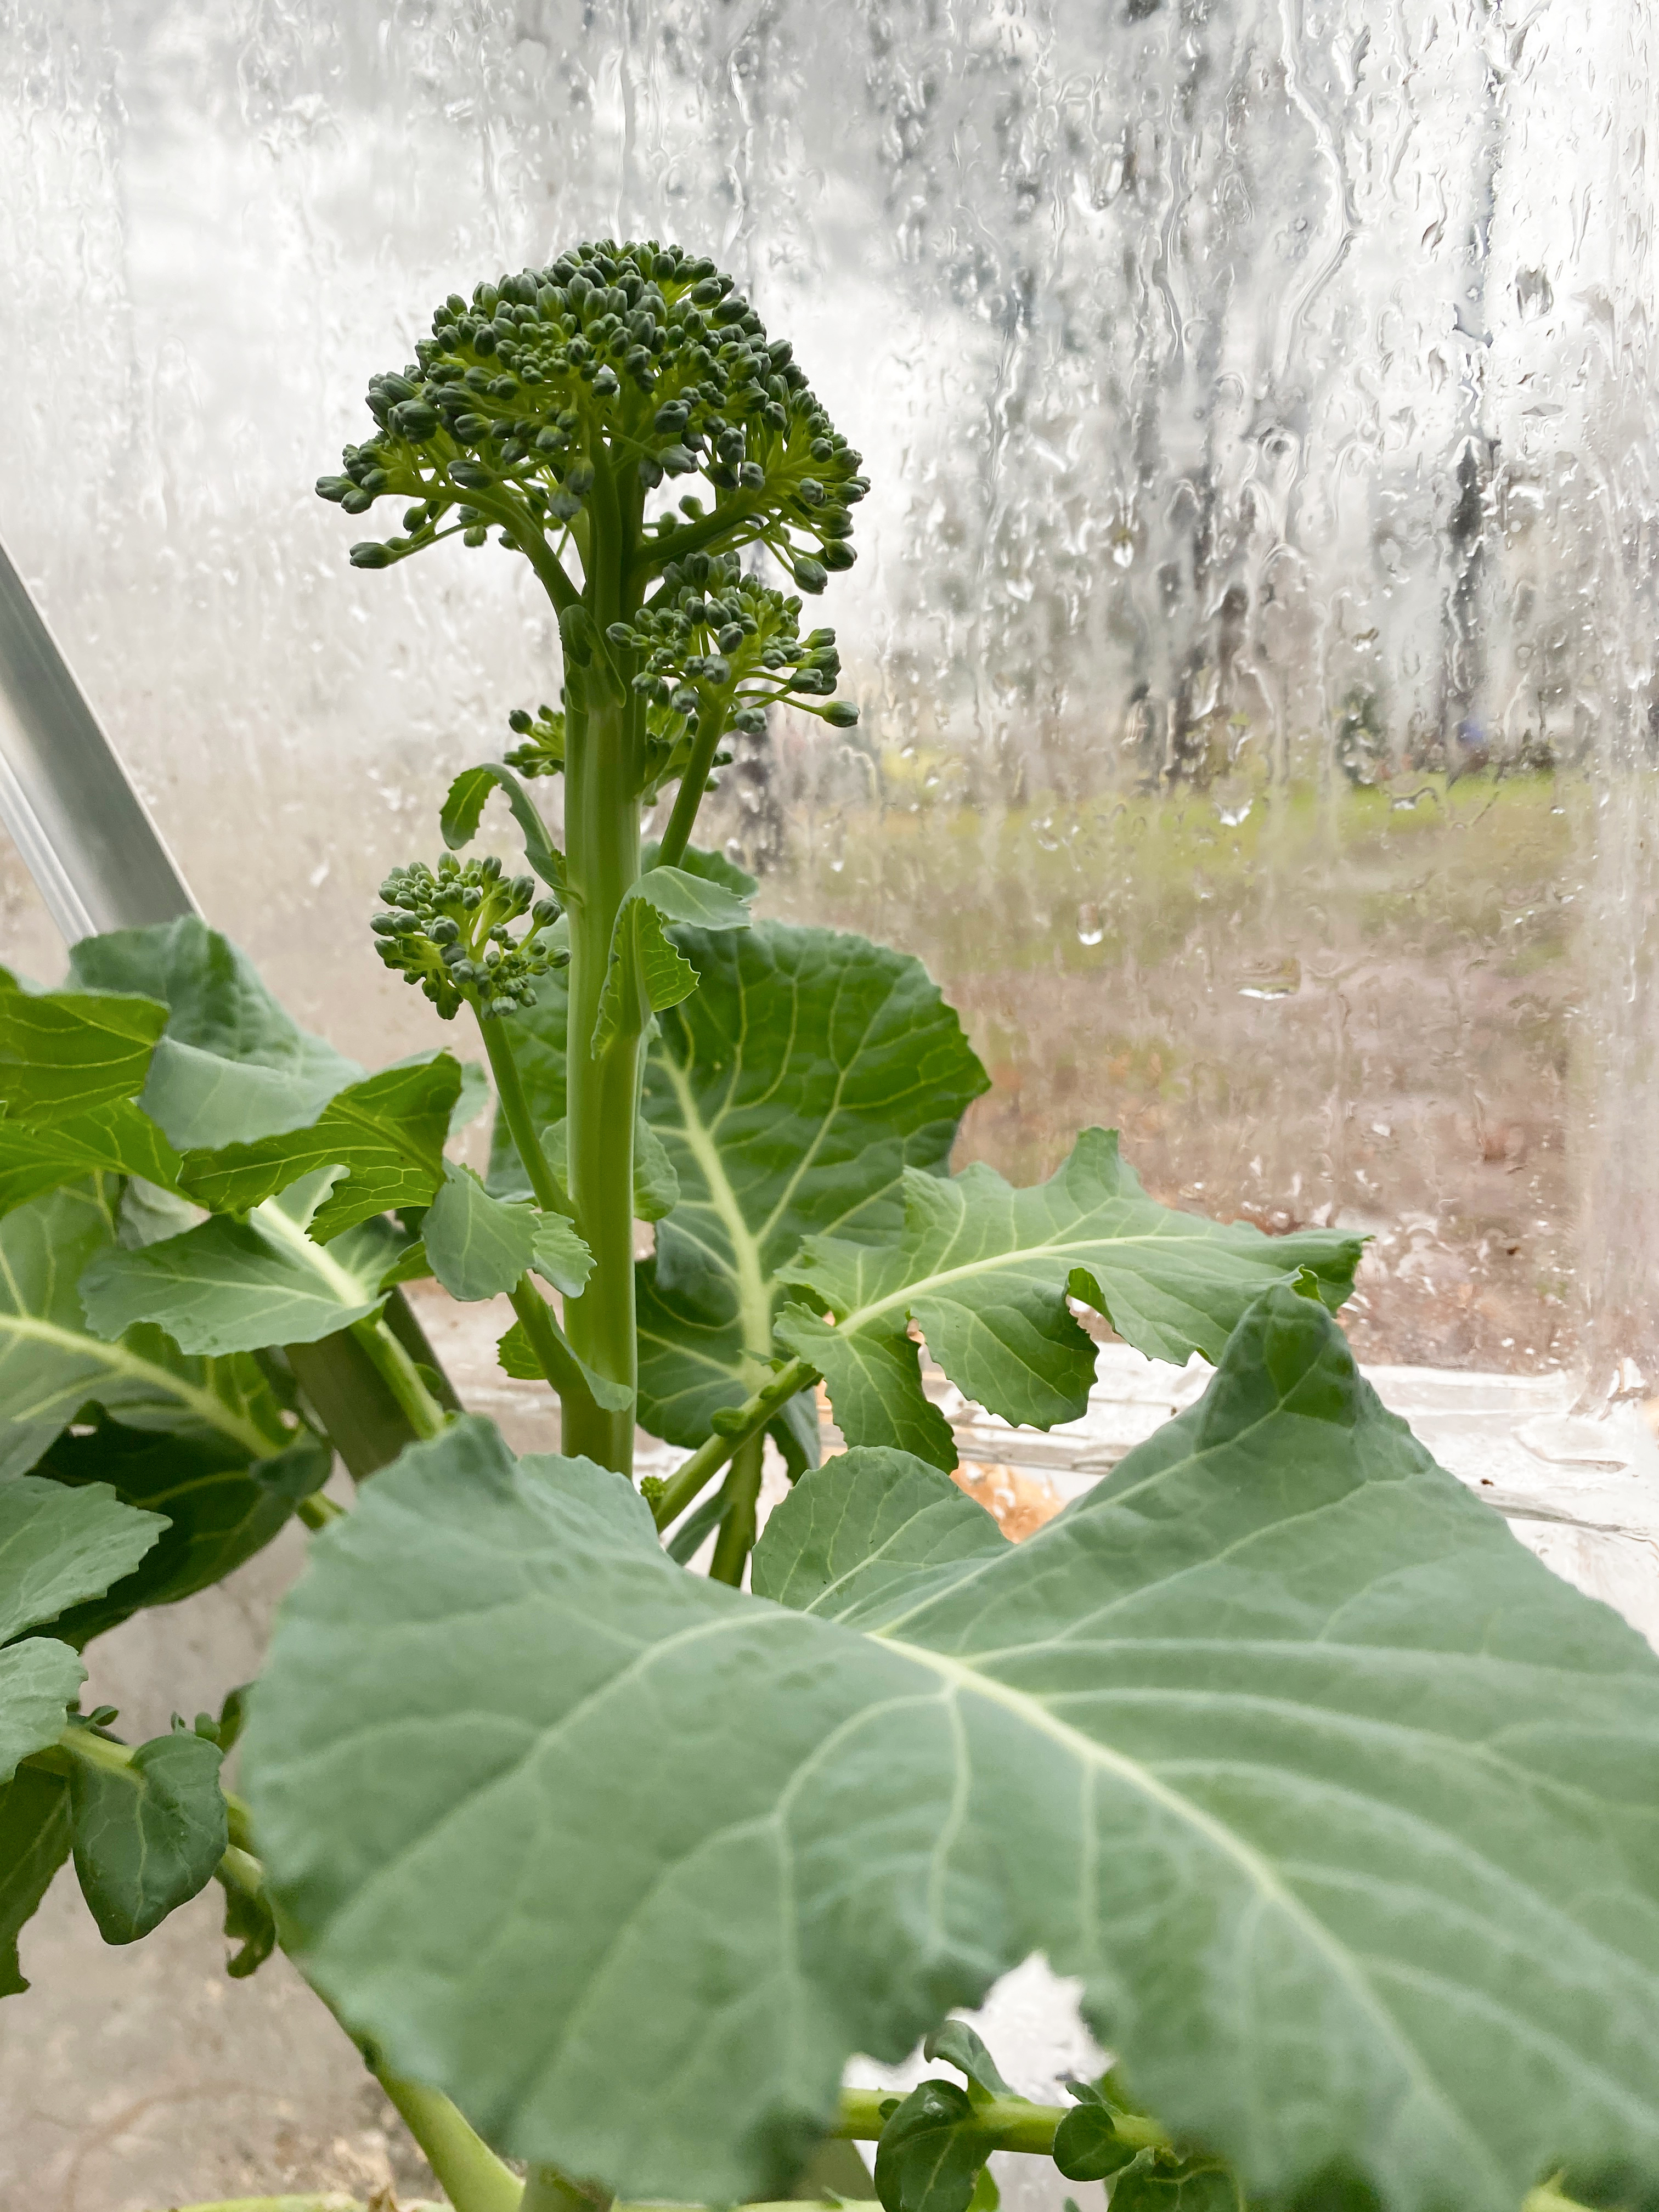
the broccoli grew by another inch…
the spicy Santaka pepper seedlings put out a whole new layer of leaves…
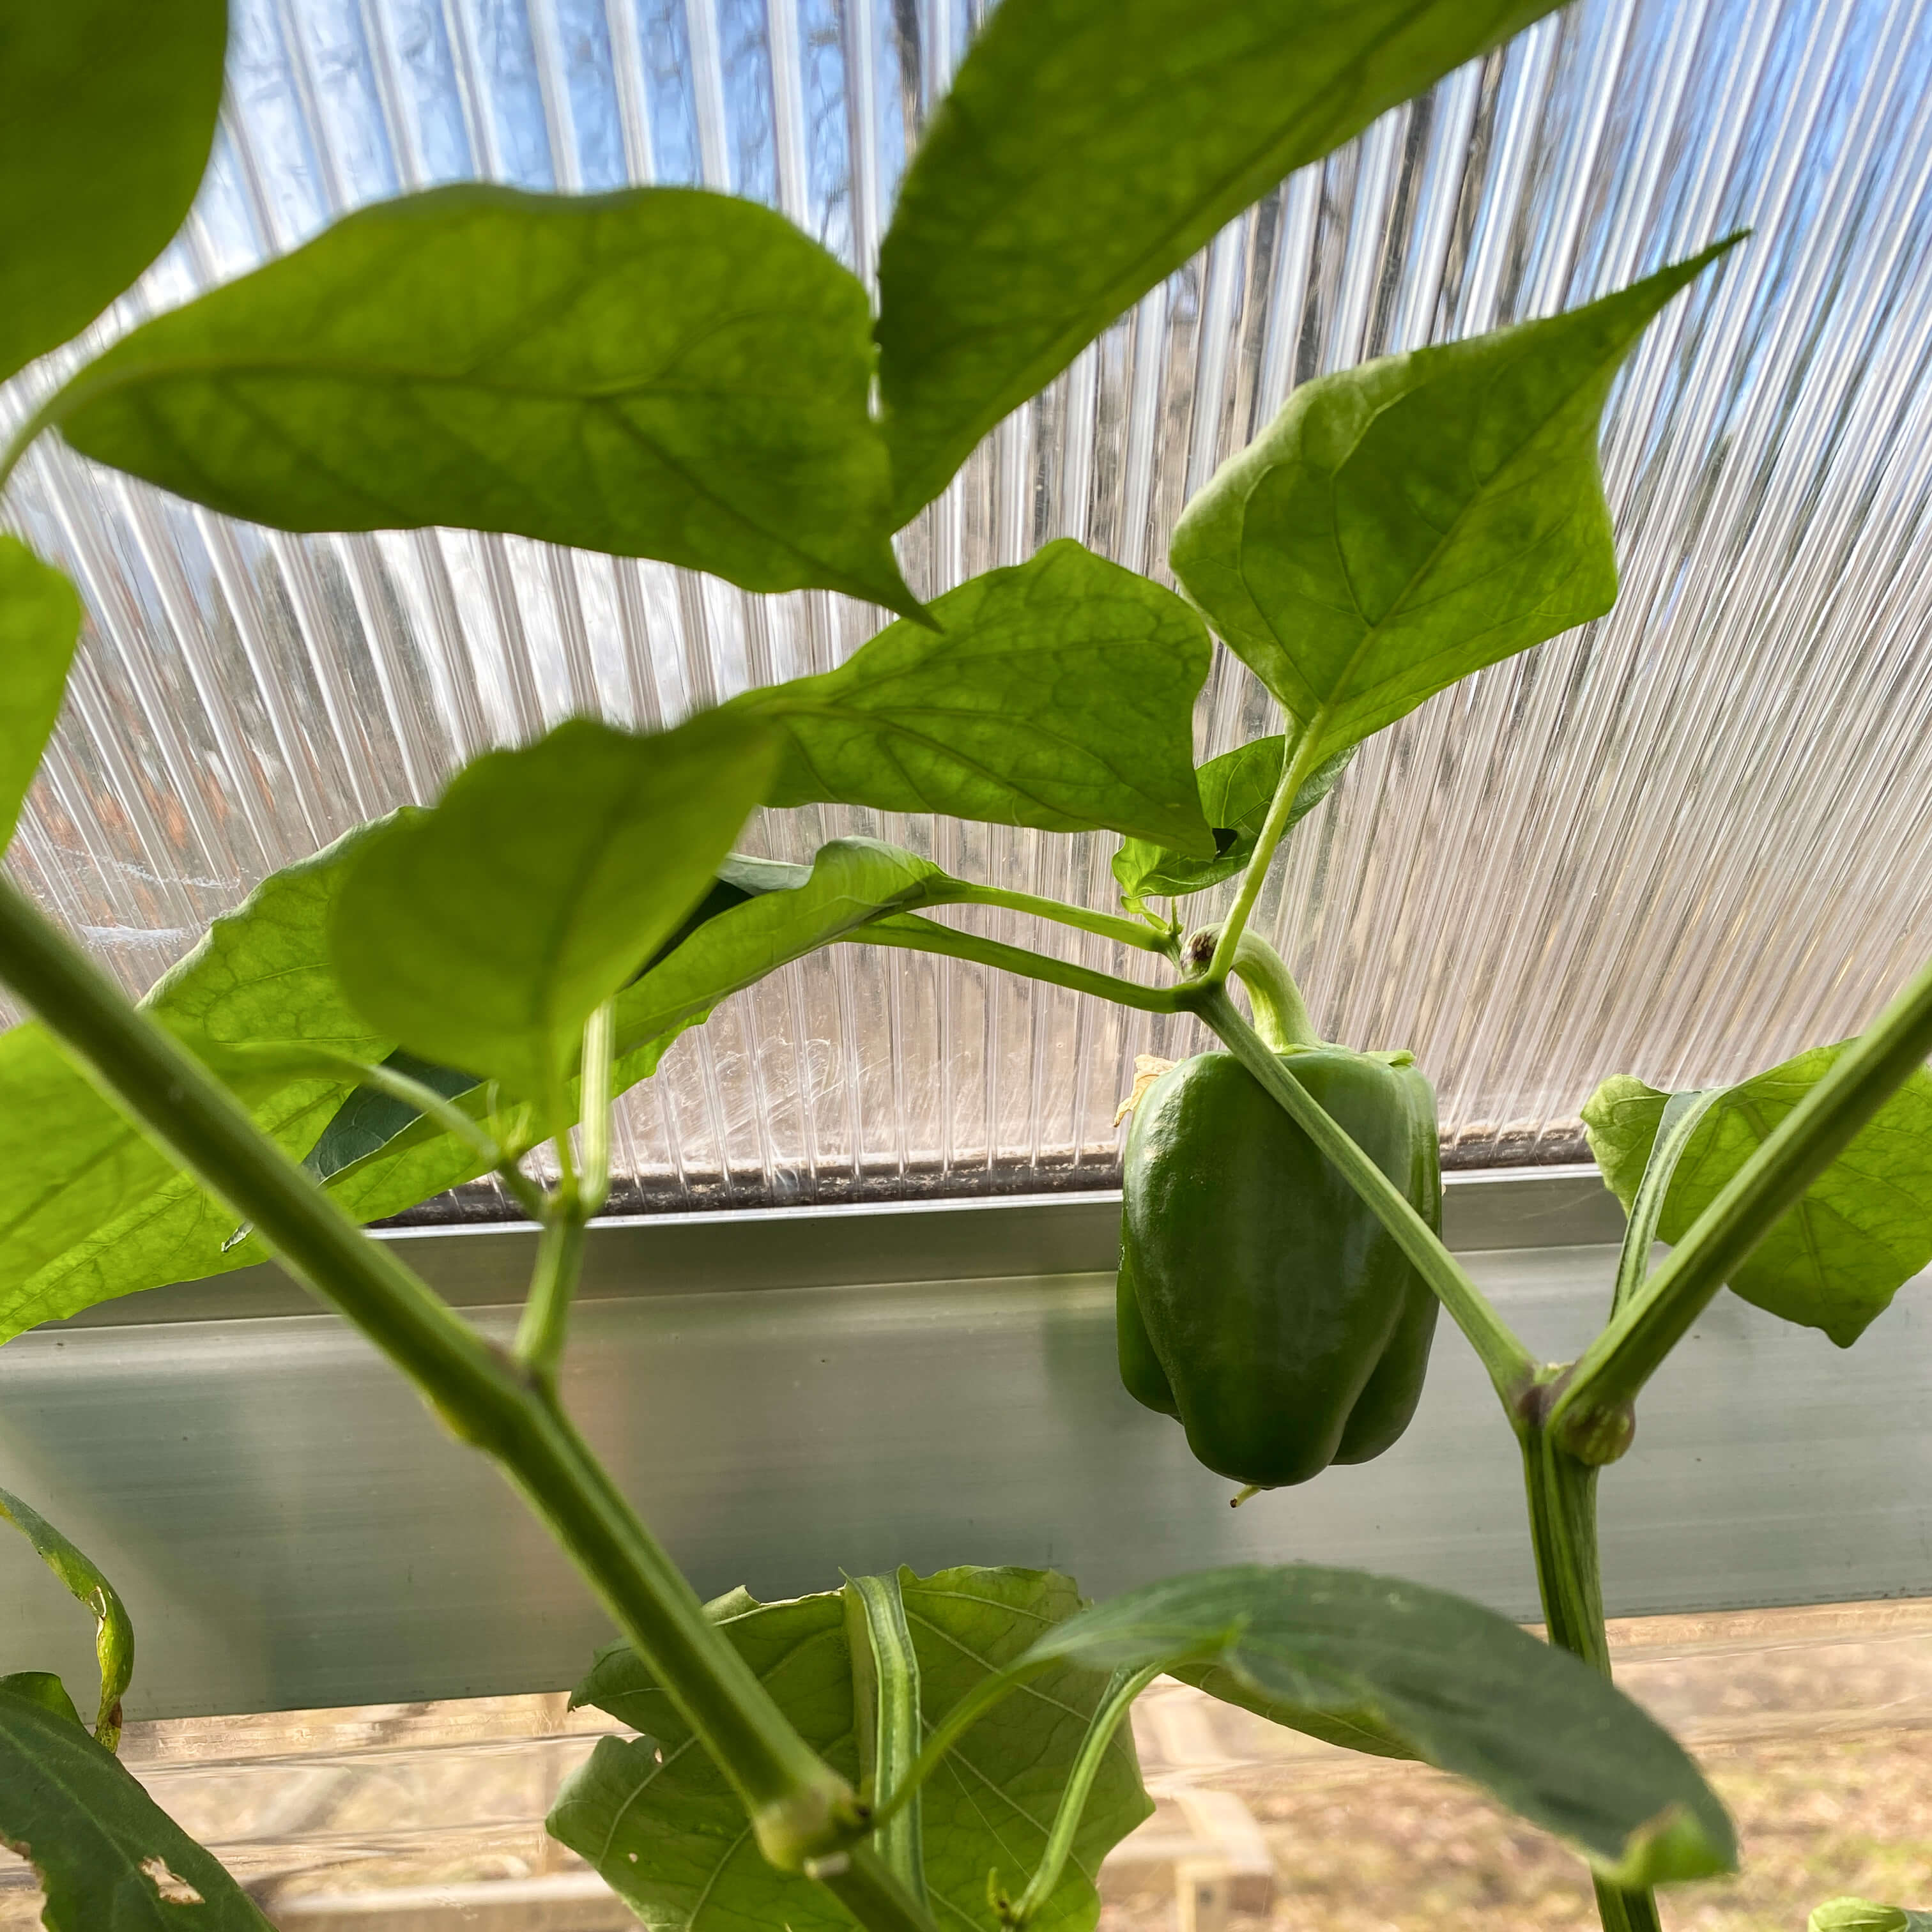
and our lone bell pepper seems to grow bigger by the minute…
Between seeing the greenhouse outlined in snow early in the week and then hearing the tinkling of raindrops on the roof at the end of the week, I can understand now why Philip Johnson built and loved his Glass House so much.
The Glass House in New Canaan, CT designed by Philip Johnson in 1945 and built in 1949.
While working on that and the neighboring Brick House, Philip mentioned being overtaken by waves of emotion for certain details during the design process. He was talking about archways and vantage points and shapes that felt like hugs, but I loved that he used the word overtaken to describe his attraction to the space and his ideas in it. That’s exactly what it feels like to stand in the greenhouse. To be overtaken by nature, by light, by warmth, by possibility, by protection. It’s no wonder plants thrive in such an environment.
Ivy-Leaf Geranium
As we work through renovations on the 1750 House during these fall and winter months, oftentimes the greenhouse is the warmest, quietest, calmest place to be. The polycarbonate walls muffle man-made sounds from the environment but oddly amplify the sounds of surrounding nature like birds singing in the trees or leaves whirling around on the ground. The bright light, even when the sky is cloudy and threatening with rain or snow, illuminates all the details on every leaf, on every petal. Possessed of an ever-evolving scent similar to warm tea the whole space changes aromatically day by day depending on what’s in bloom. And the heater – that warm little hug of a heater wraps everything up like a cozy sweater on the coldest of days. I used to think The Glass House was such a vulnerable piece of art, exposed, and unsettling in its lack of privacy. But now I see that what Philip created there was a love letter to the senses. This greenhouse is much the same. Plastic curtain panels and all.
The chronicling of the greenhouse is underway. If you are new to the blog this week, catch up with our new gardening series in Entry #1 here. For everyone else who is all caught up let’s carry on to week two of news from the growing greenhouse.
It’s only been seven days since our last post but already there is much to discuss on both the good and bad fronts. First off, we’ll start with the food portion since that was a big reason to build a greenhouse to begin with.
We harvested our first bowl of arugula last Sunday and ever since, it and the nasturtiums have been adorning our plates all week long. Here, they were a part of last Sunday’s brunch of eggs cooked in foccacia bread pockets…
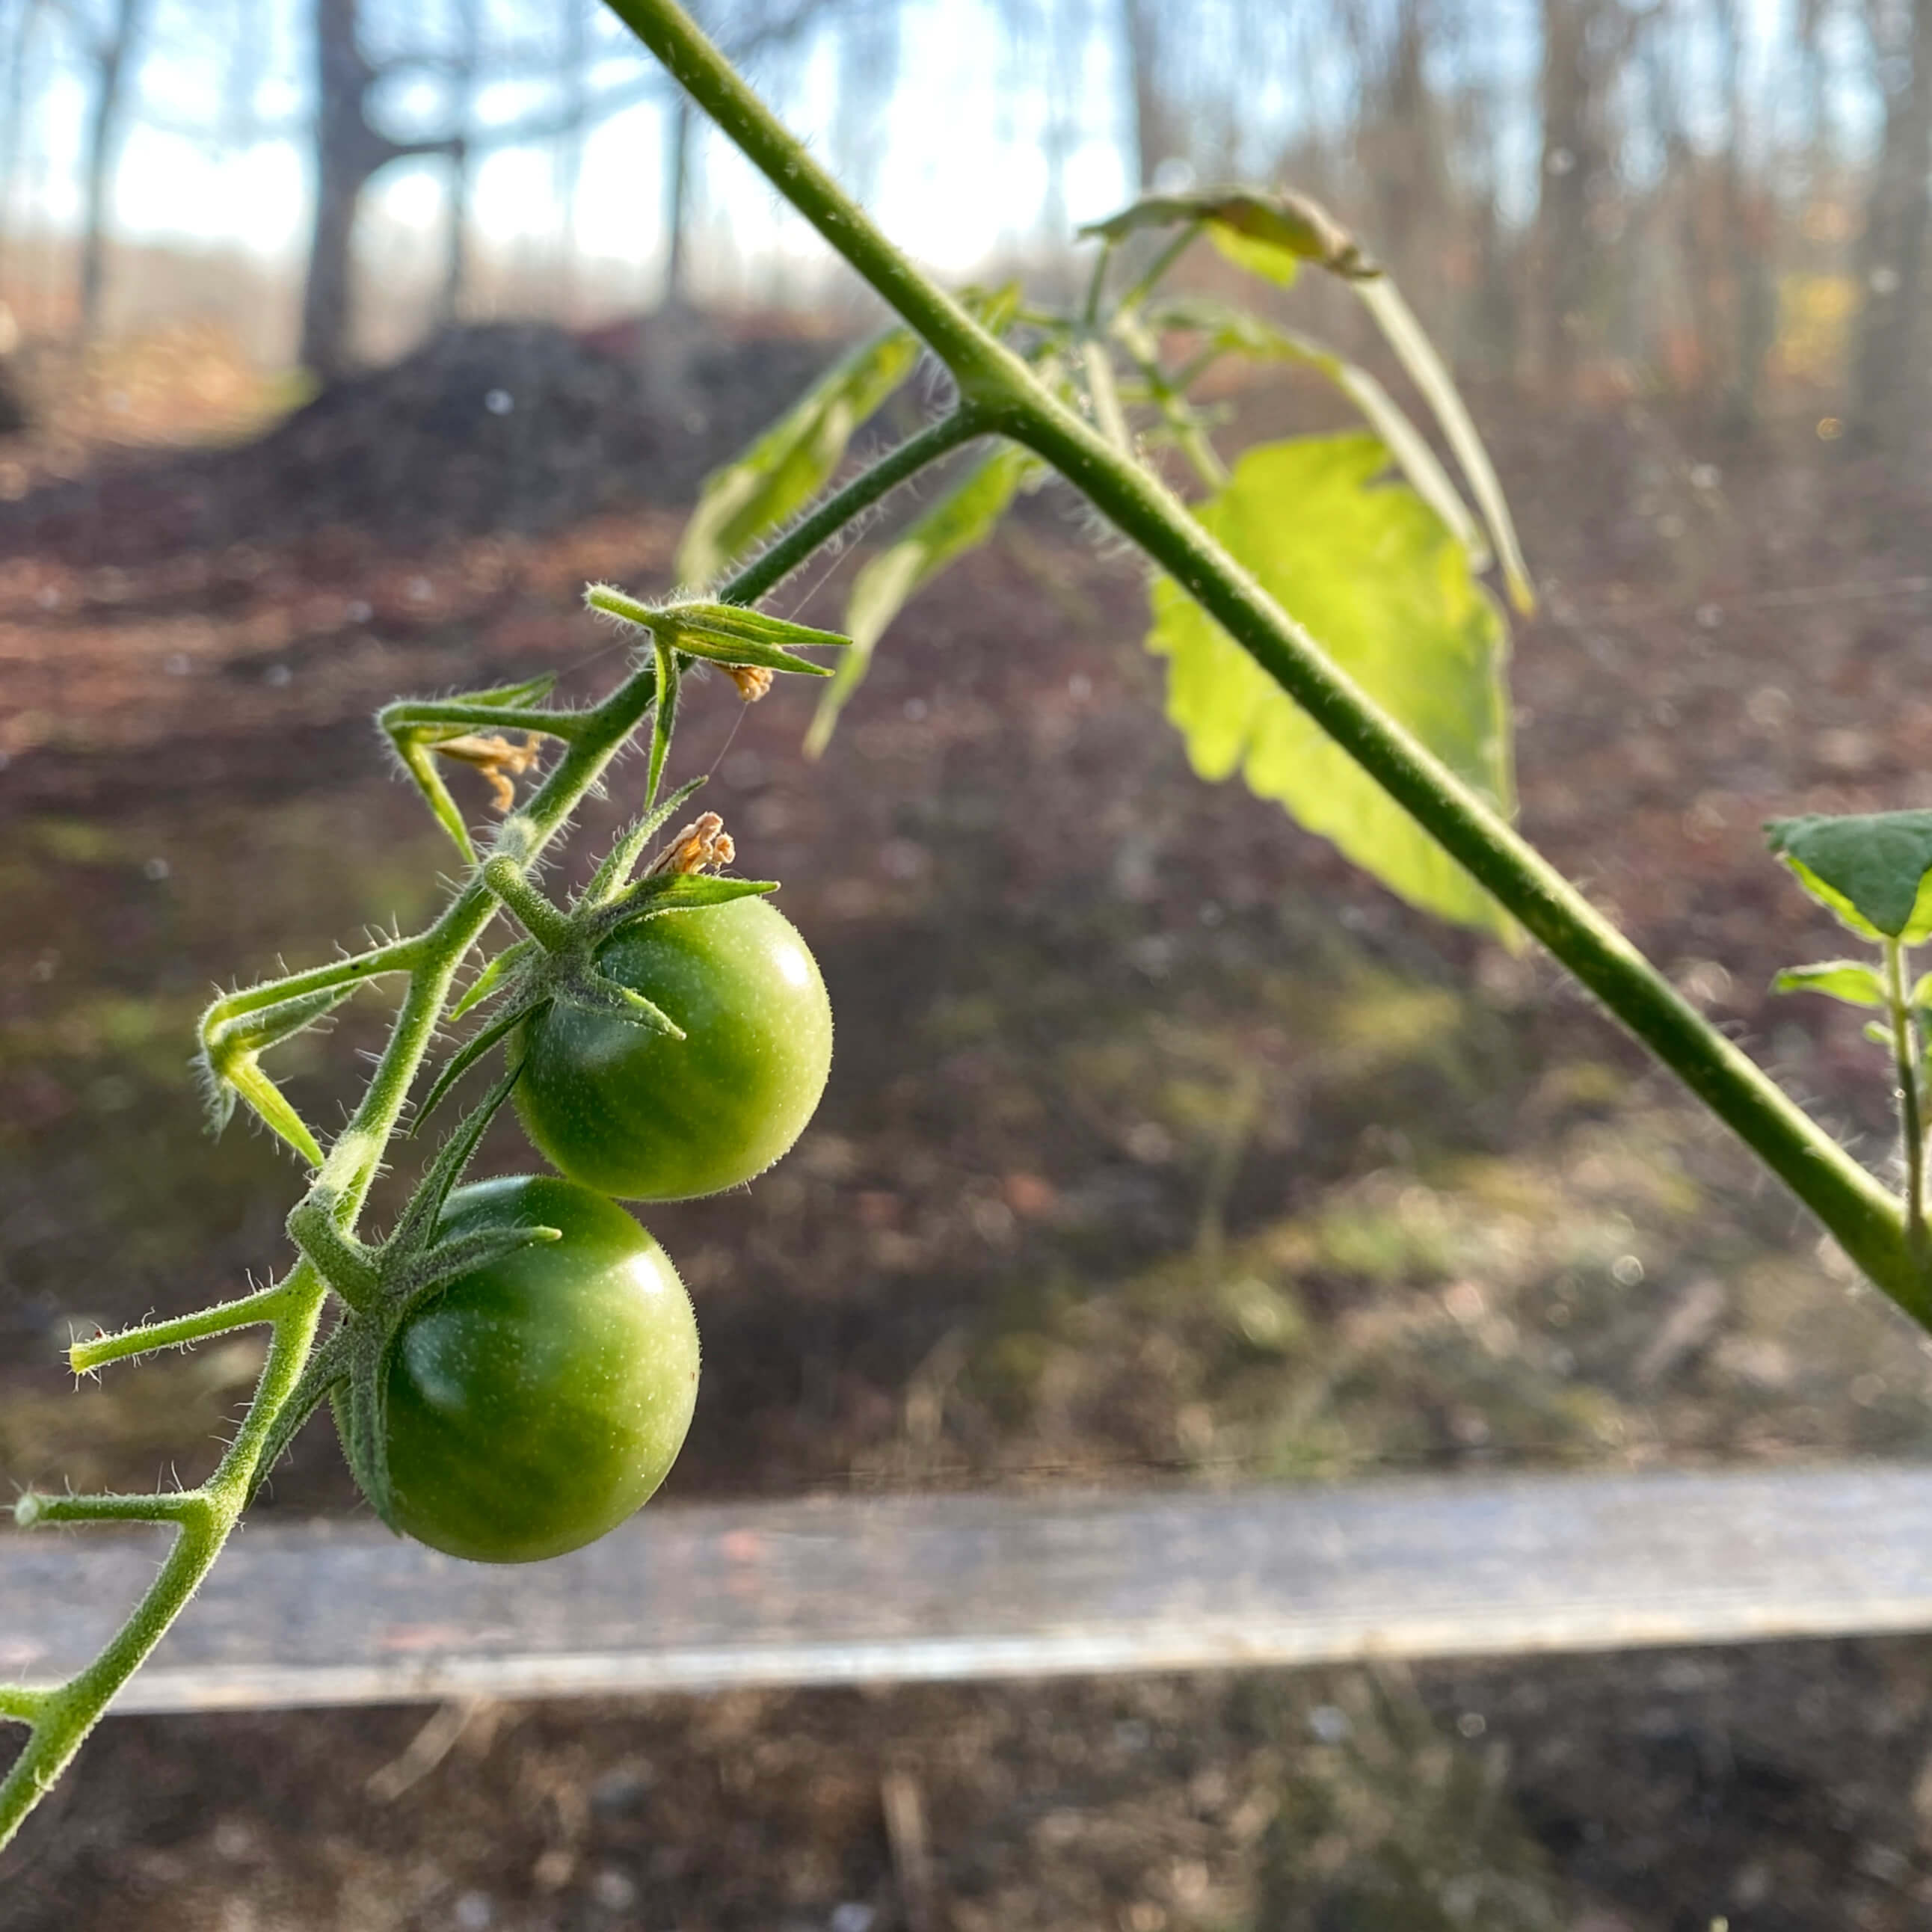
The tomatoes ripened! In just one week they went from a zesty shade of green apple to sunny golden orange. We were curious to see if these indoor growers would taste the same as the ones we enjoyed in the garden all summer, and much to our delight I’m happy to say they tasted equivalent. Which means they tasted fantastic. Sweet, soft yet slightly firm, and just as juicy as their summer counterparts, these two beauties ended the week on a sweet note.
Grown from seed purchased from our favorite seed company (A true review! They are not a blog sponsor.) these tomatoes were determined to grow regardless. Producing fruit the size of large marbles, we grew eight plants of the Sun Gold Cherry varietal this summer. Some reached monster heights of over 10′ feet tall and they produced a couple of big handfuls every other day from August-October. The branch grown in the greenhouse was from a stem cutting. It was our first experiment to see if the cutting would root in water, which it did, and then immediately it went to flower. A little bit of hand-pollinating with a paintbrush, and two weeks later these two tomatoes started forming. They grew so quickly, we never even had a chance to plant the cutting in actual soil. These are just growing and flowering in a jar of water. Isn’t nature amazing?
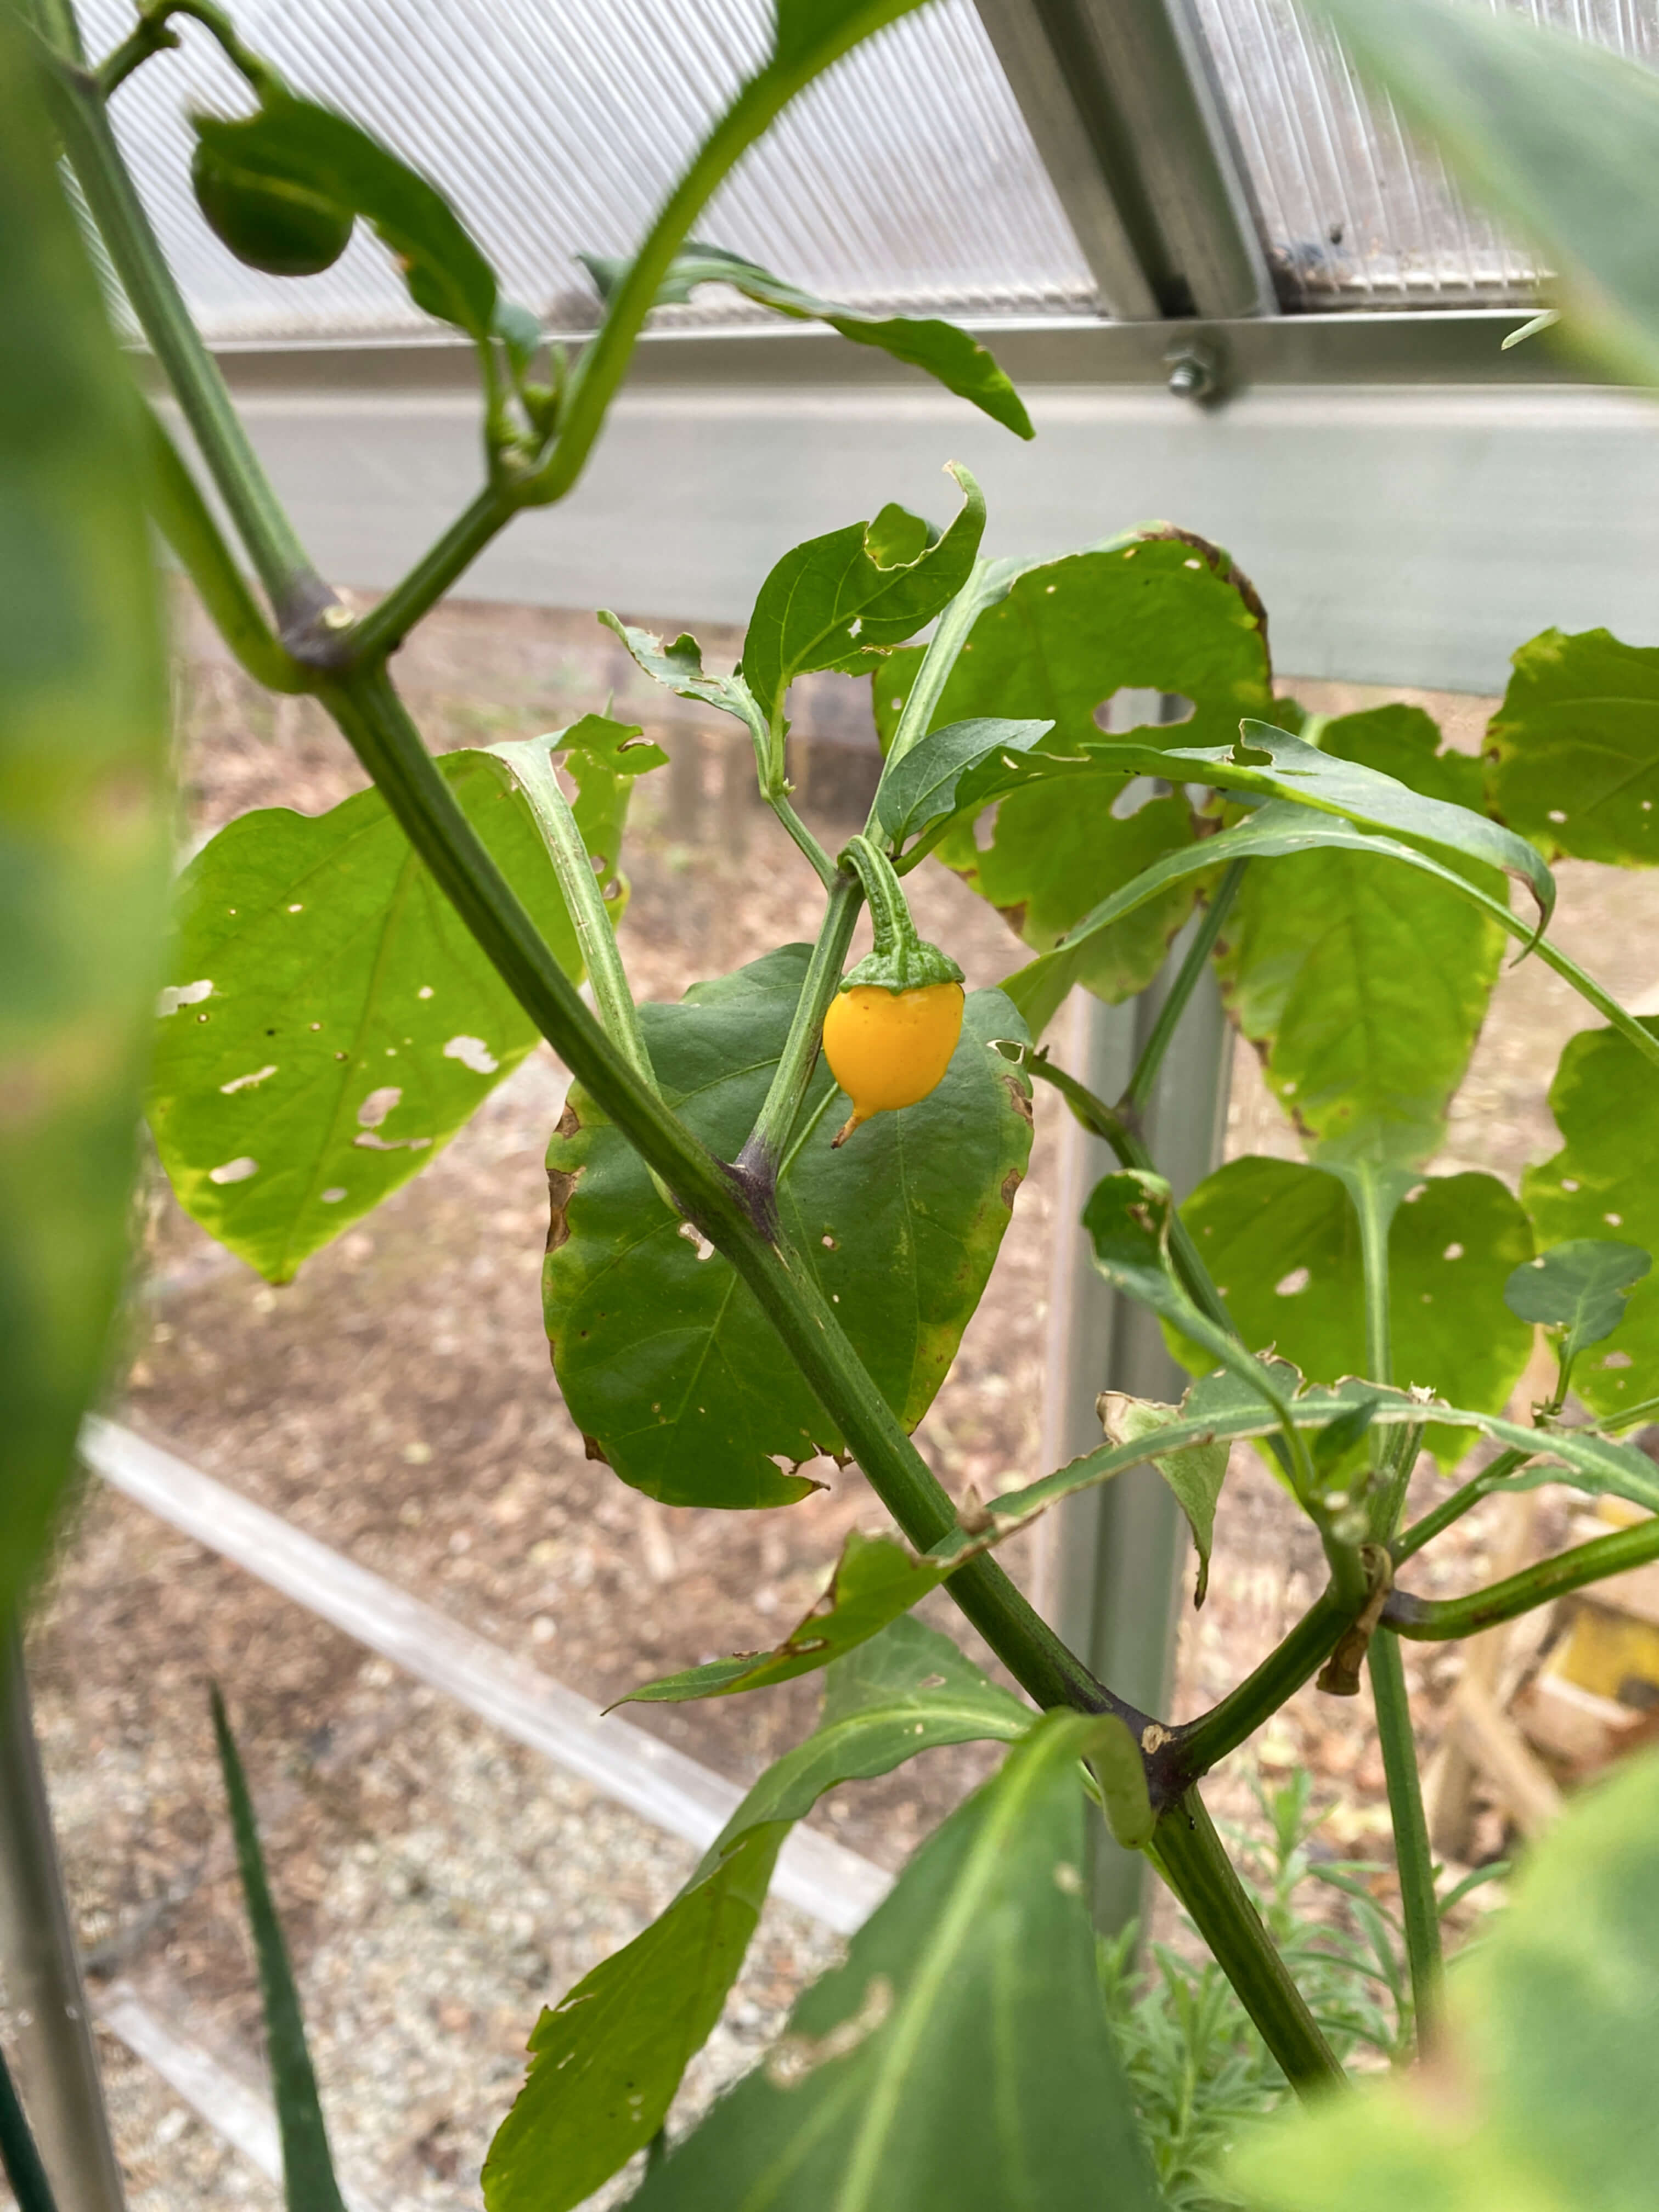
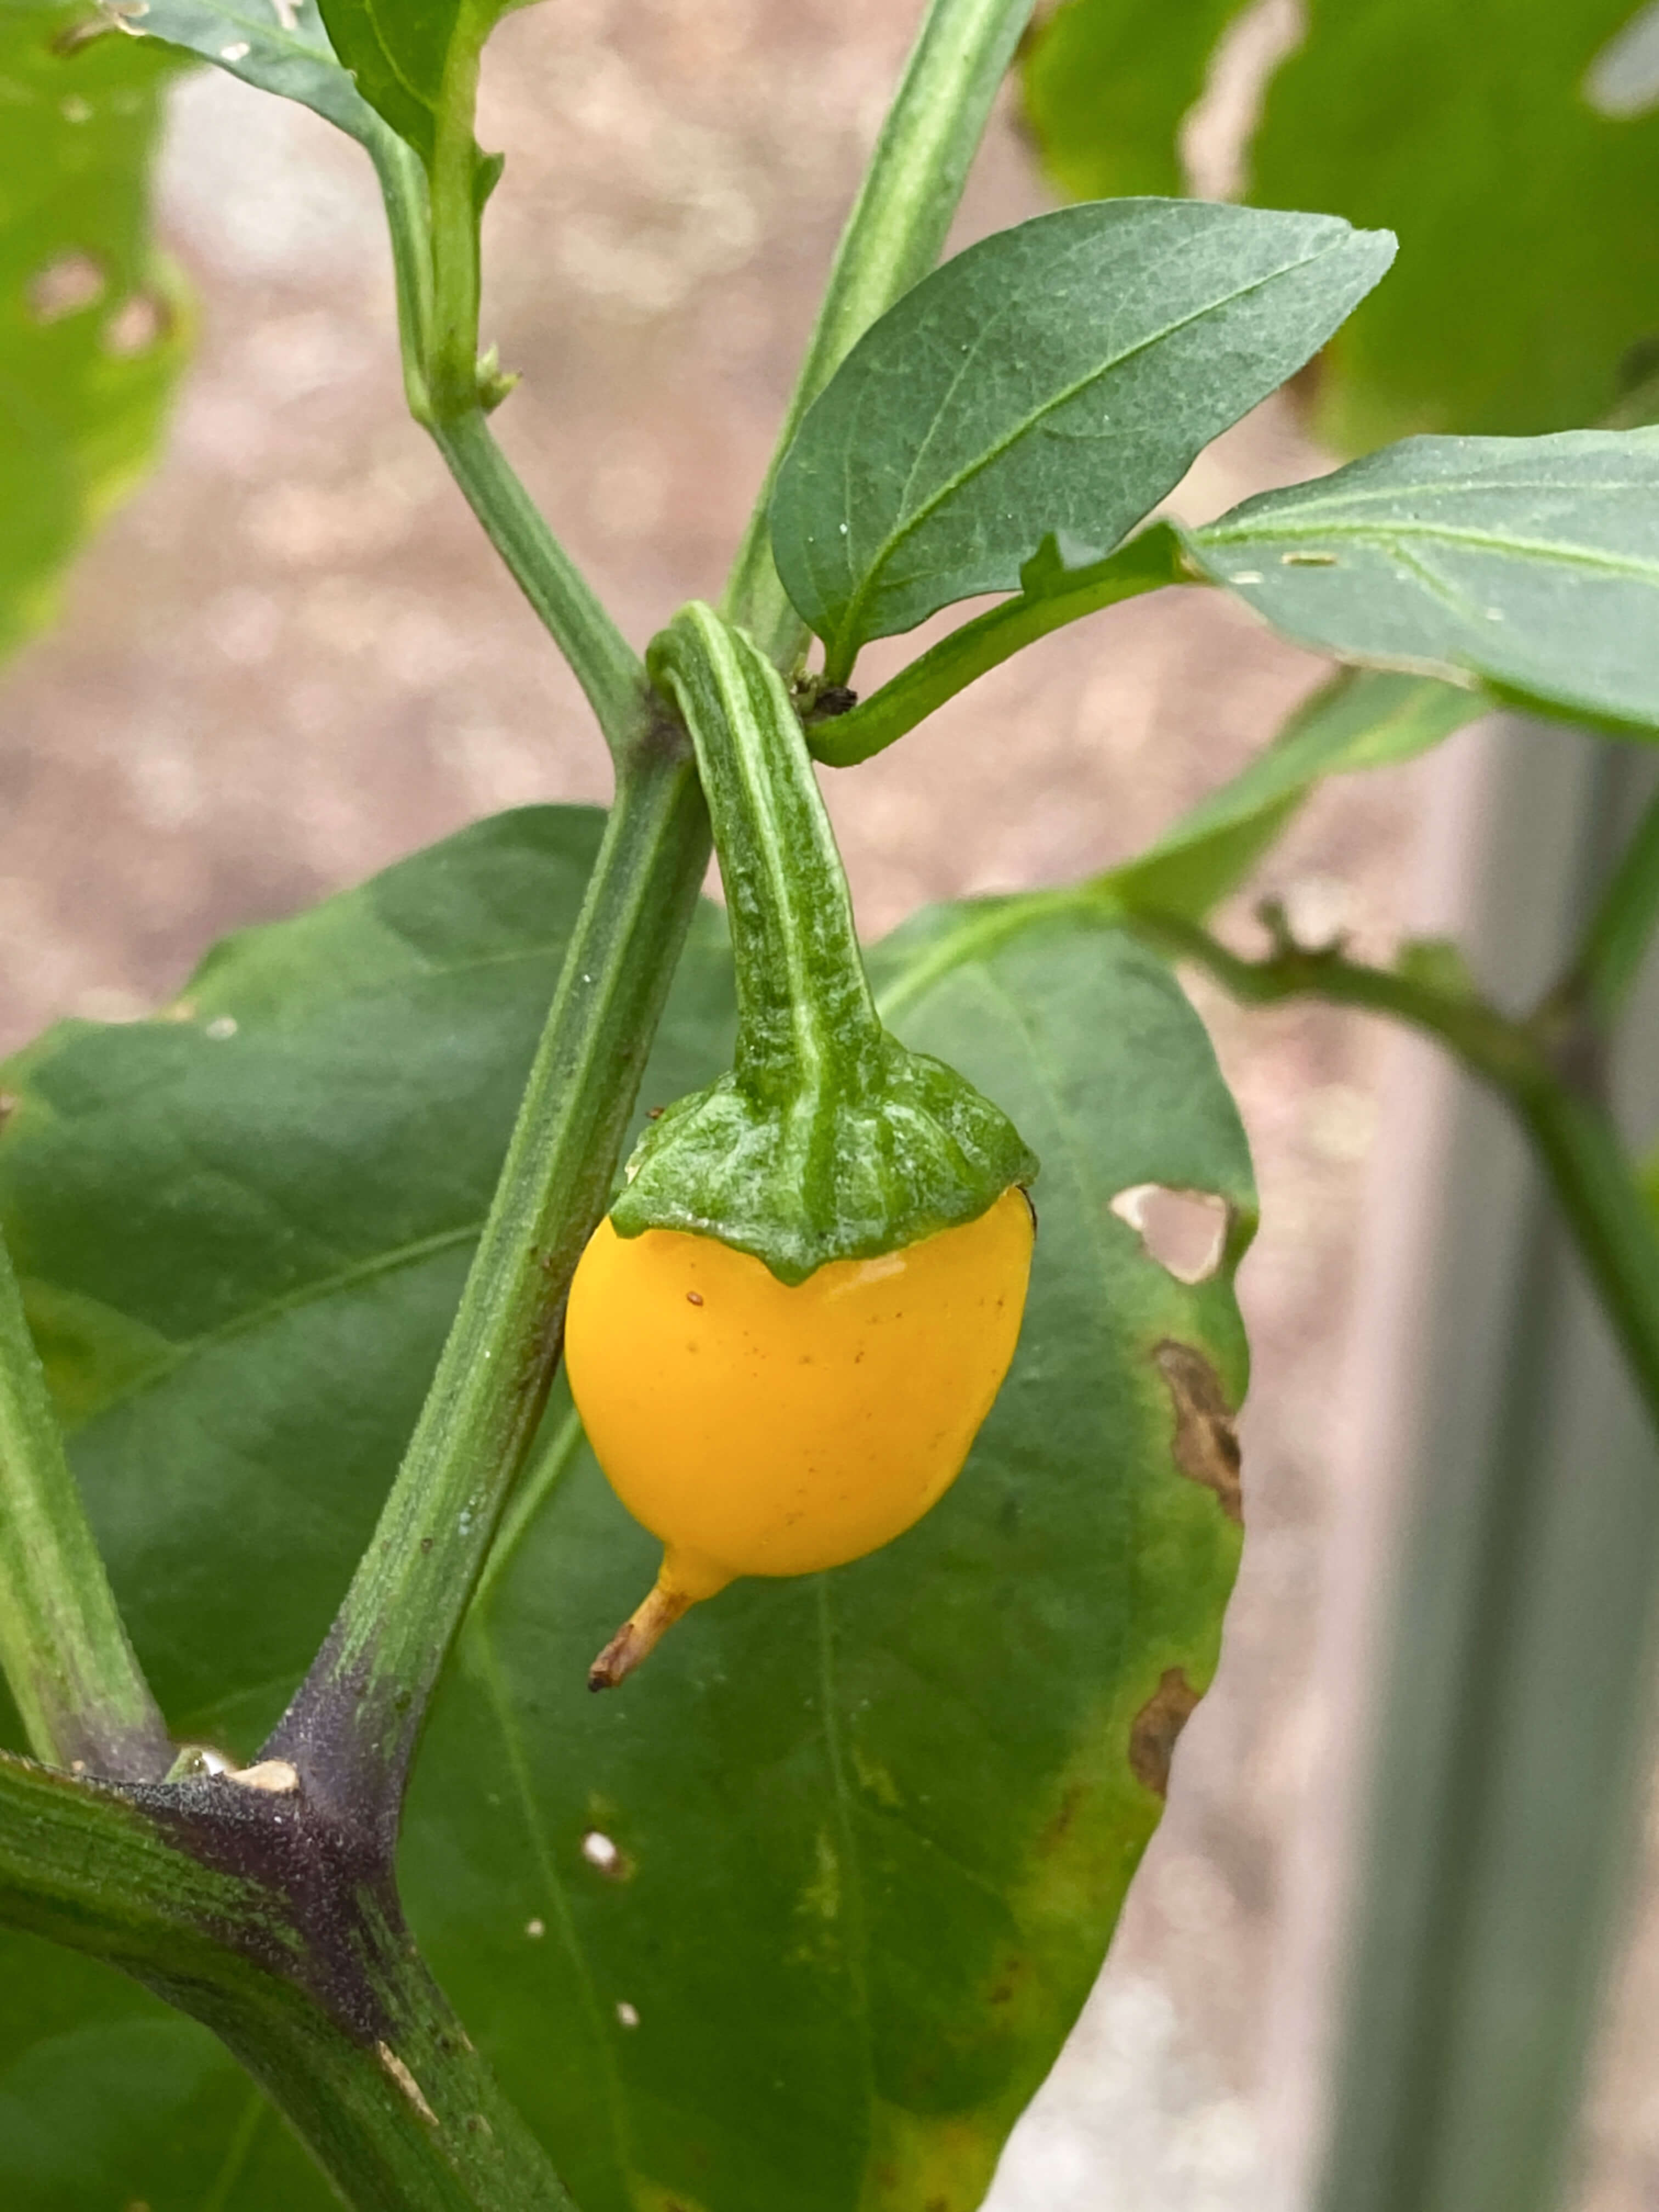
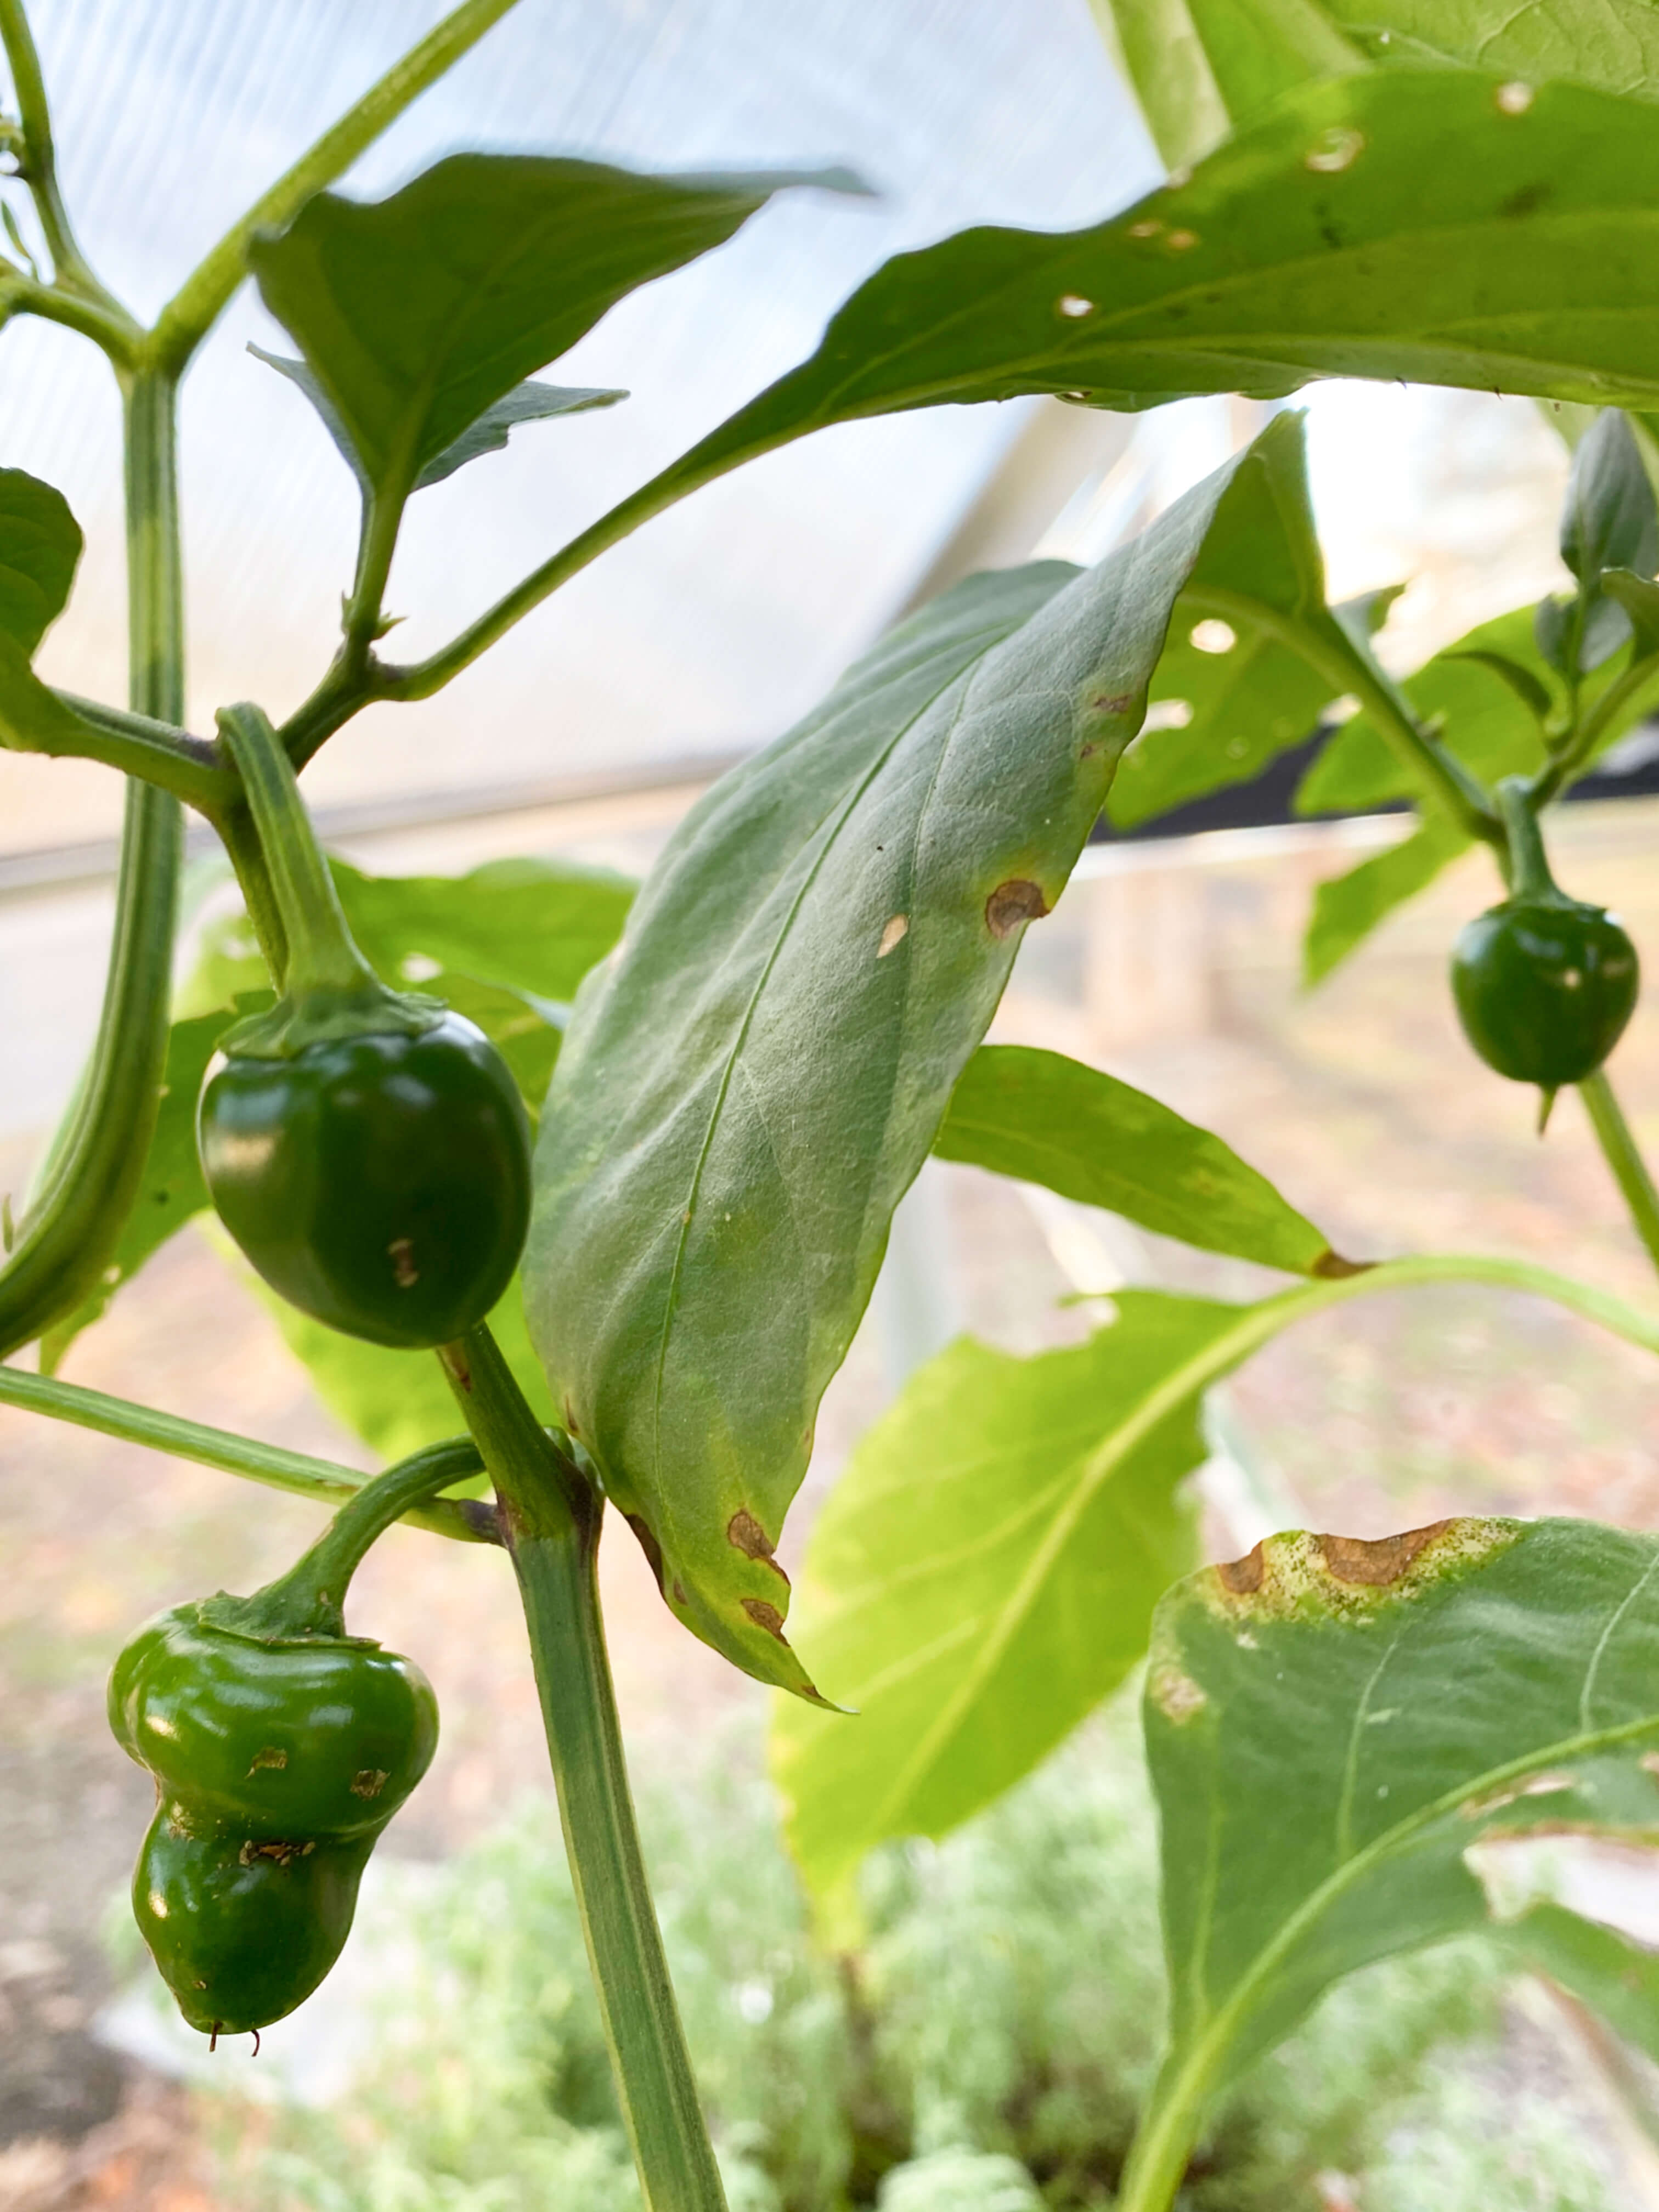
Next in the ripening department is the Numex Lemon Jalapeno pepper. Because of the timing last spring of when we moved to 1750 House, we started our seeds and our garden beds pretty late in the season. The pepper plants didn’t have a full chance to grow, bloom and then produce mature peppers before the cold autumn weather settled in, so we pulled the three strongest from the ground and potted them for the greenhouse.
This summer, we had a big struggle with slugs in the garden beds so you can see the leaves are quite chewed through, but the plants continued to flower and persevere regardless. In the greenhouse, they look a little raggedy, but they are still growing so we are encouraged. Unintentionally, we may have stunted them a bit when we moved them to the greenhouse during their early post-flower days as they are now producing smaller fruit. But nevertheless, one pepper so far has turned yellow, which means in theory, it is ready for picking even though it’s just a little pip of a pepper. I’m going to leave it on the plant for a few more days to see if it grows any bigger – otherwise, we’ll pull it and see how it tastes.
Our last vegetable of the week that’s really taken off is the broccoli. It sits closest to the door, which is the coldest part of the greenhouse and since broccoli prefers cooler weather, this seems like an ideal location. From last week to this week, the floret has grown taller and wider by about an inch in both directions and has a new companion shoot growing up next to it. Like the peppers, the broccoli also suffered through slug season, but for every leaf that the slugs ate, a new leaf grew in its place. All summer I loved the broccoli’s optimism. In the face of slug defeats, it was the ever-present cheerleader that kept encouraging us to keep going.
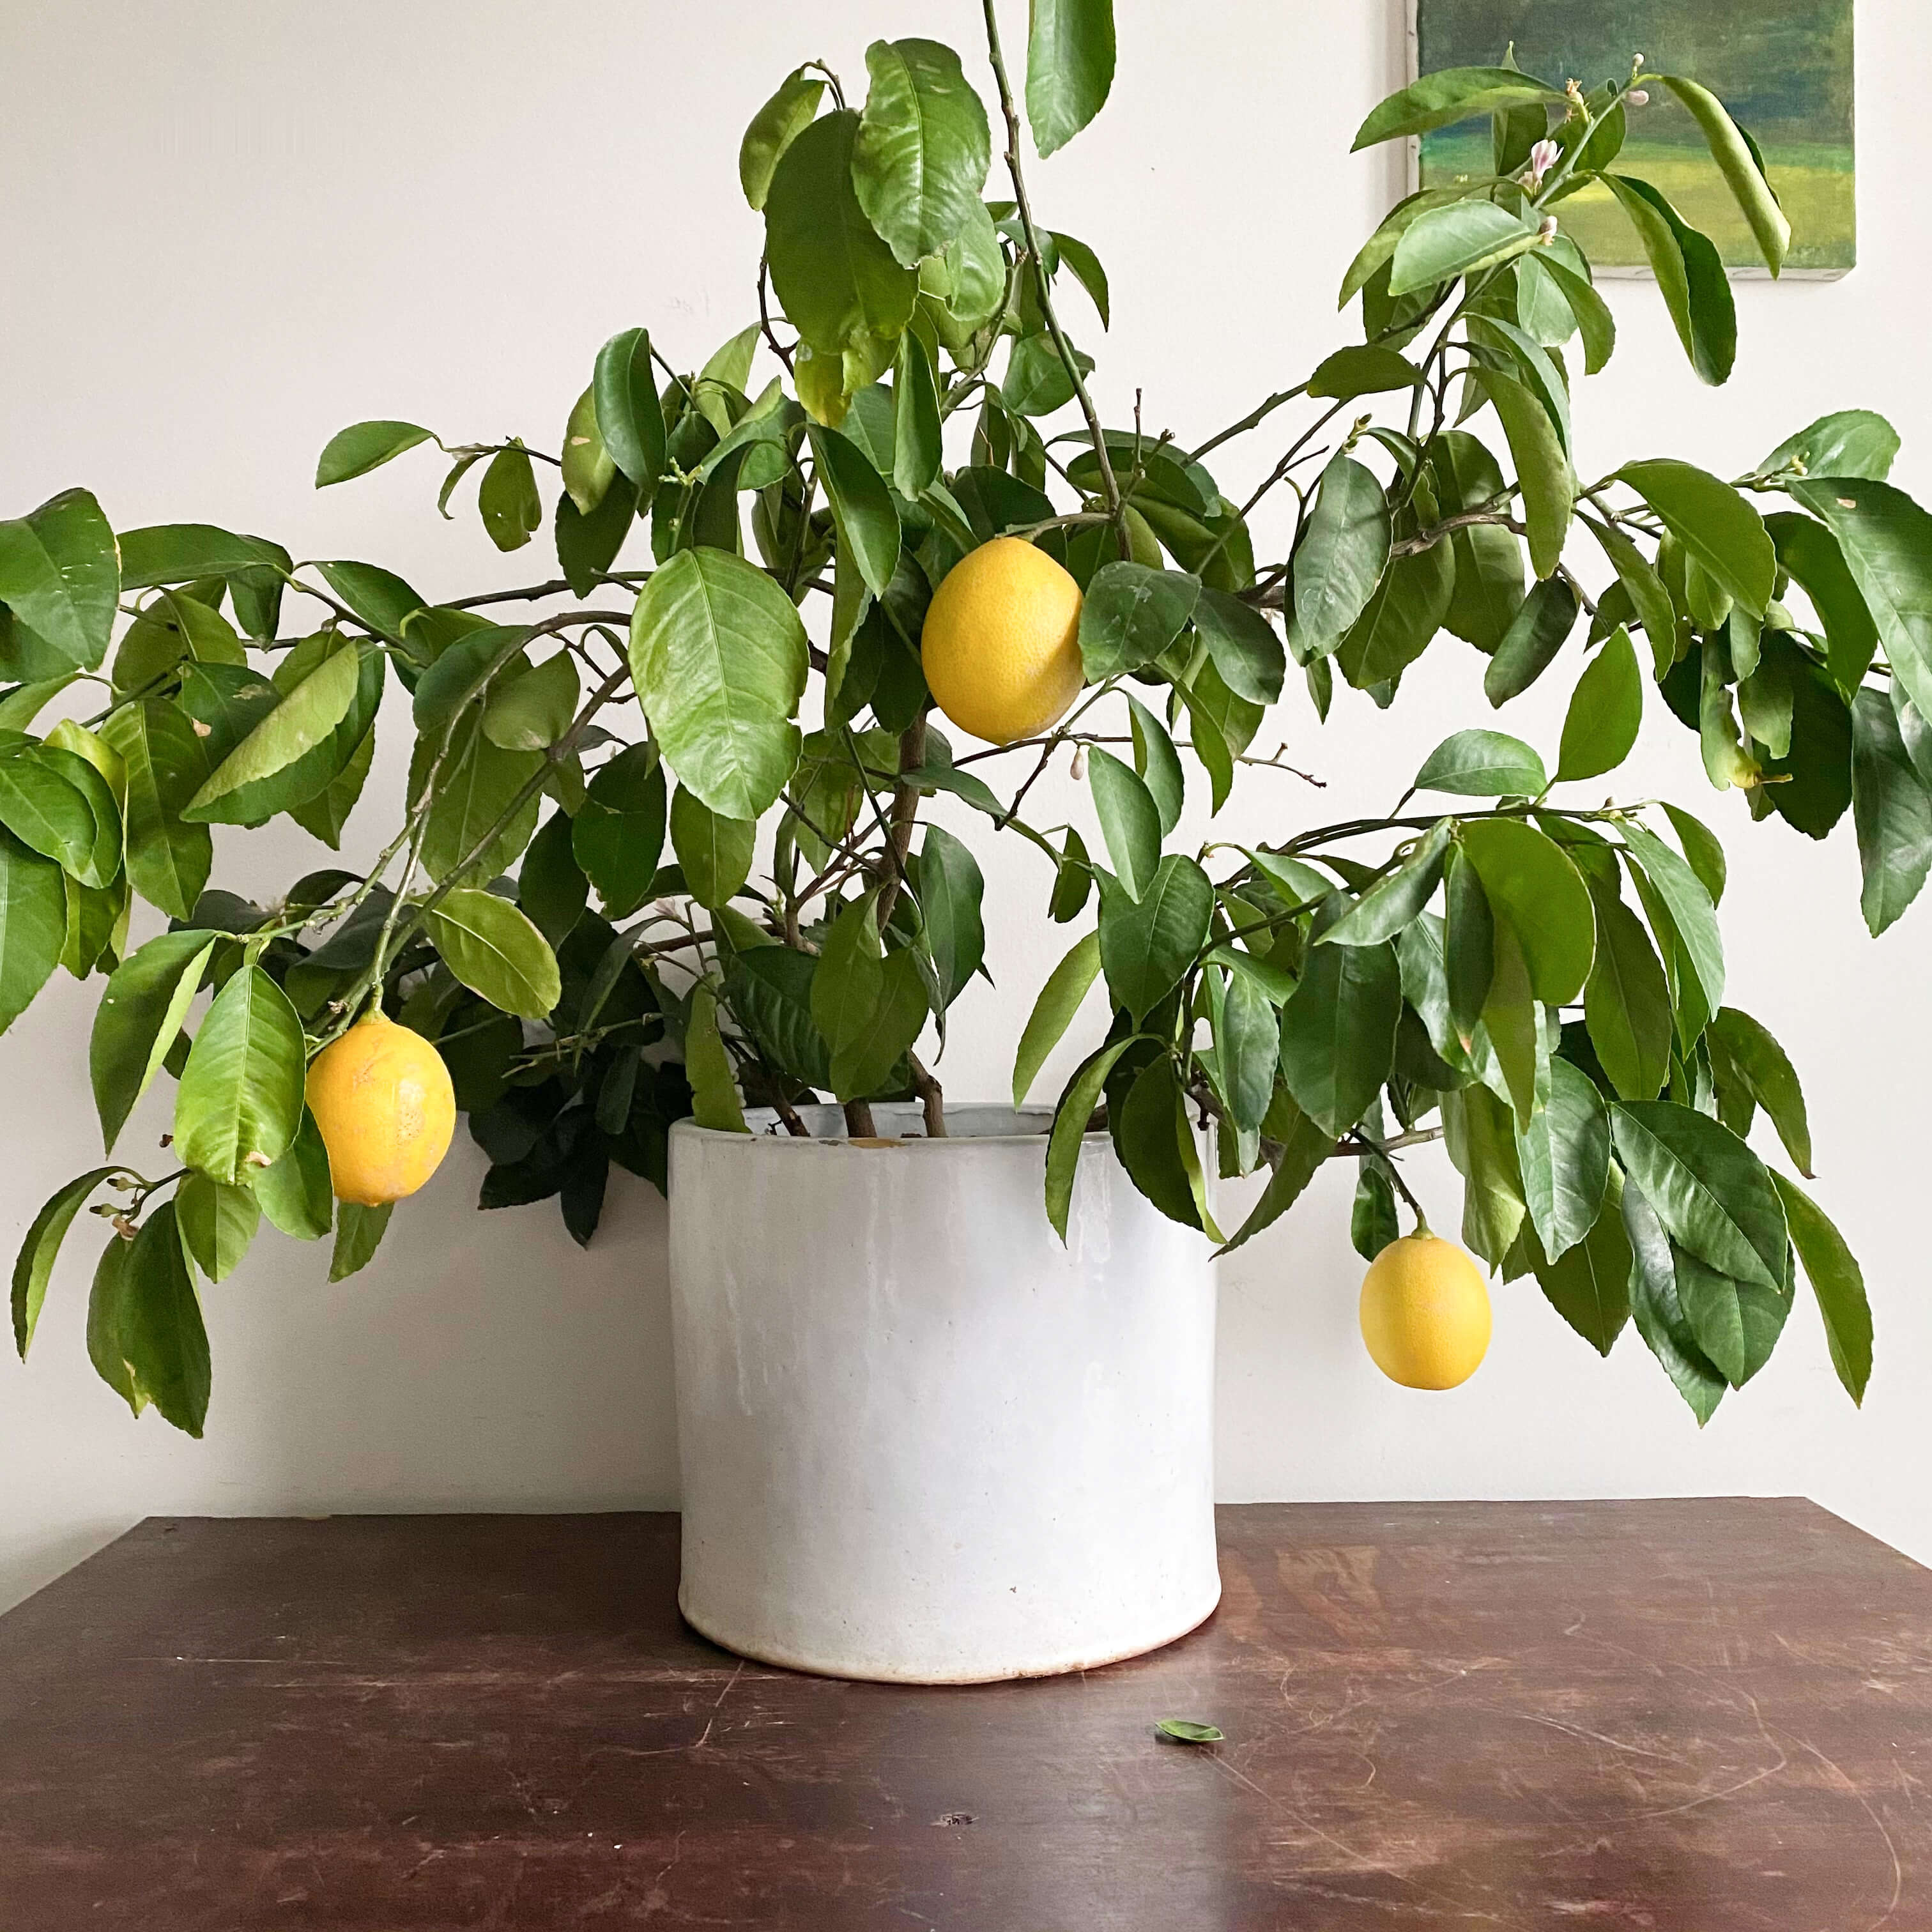
On the flower front, the highlight of the week was Liz Lemon. For long-time readers of the blog, you’ll remember Liz from her indoor orchard stories. The last time we checked in with her on the blog was in November of 2020, when she was a Southerner living in the city and looked like this…
A little while after that photo was taken, she showered us in lemons (three!)…
But things took a bleak turn when we moved north. The indoor orchard, cultivated over six years of Southern city living, had many casualties. Avi the Avocado (age 6), Grace the Grapefruit (age 4). Jools the Date Palm (age 2). By the time, we loaded up the truck and moved a thousand miles away from the southern sun, we were down to two plants – Liz Lemon and Pappy the Papaya. Neither were thrilled at leaving the heat and humidity of the South. To put it lightly, Liz especially was NOT a fan of the new 20-degree weather, or the weekly snowfalls or the five months spent in a cottage on a lake in wintertime Pennsylvania. She lost every single leaf but three and was down to two twigs – just a skeleton of a body.
When we finally found the 1750 House in spring and became official New Englanders, I thought a summer spent in the warm air and sunny backyard garden would be Liz’s cureall. But nothing happened there either. All around her pots of daisies bloomed, the okra headed skyward, the tomatoes blushed rosy red and gold. Even Pappy flourished and became so content with New England life that he sported his first flower in August…
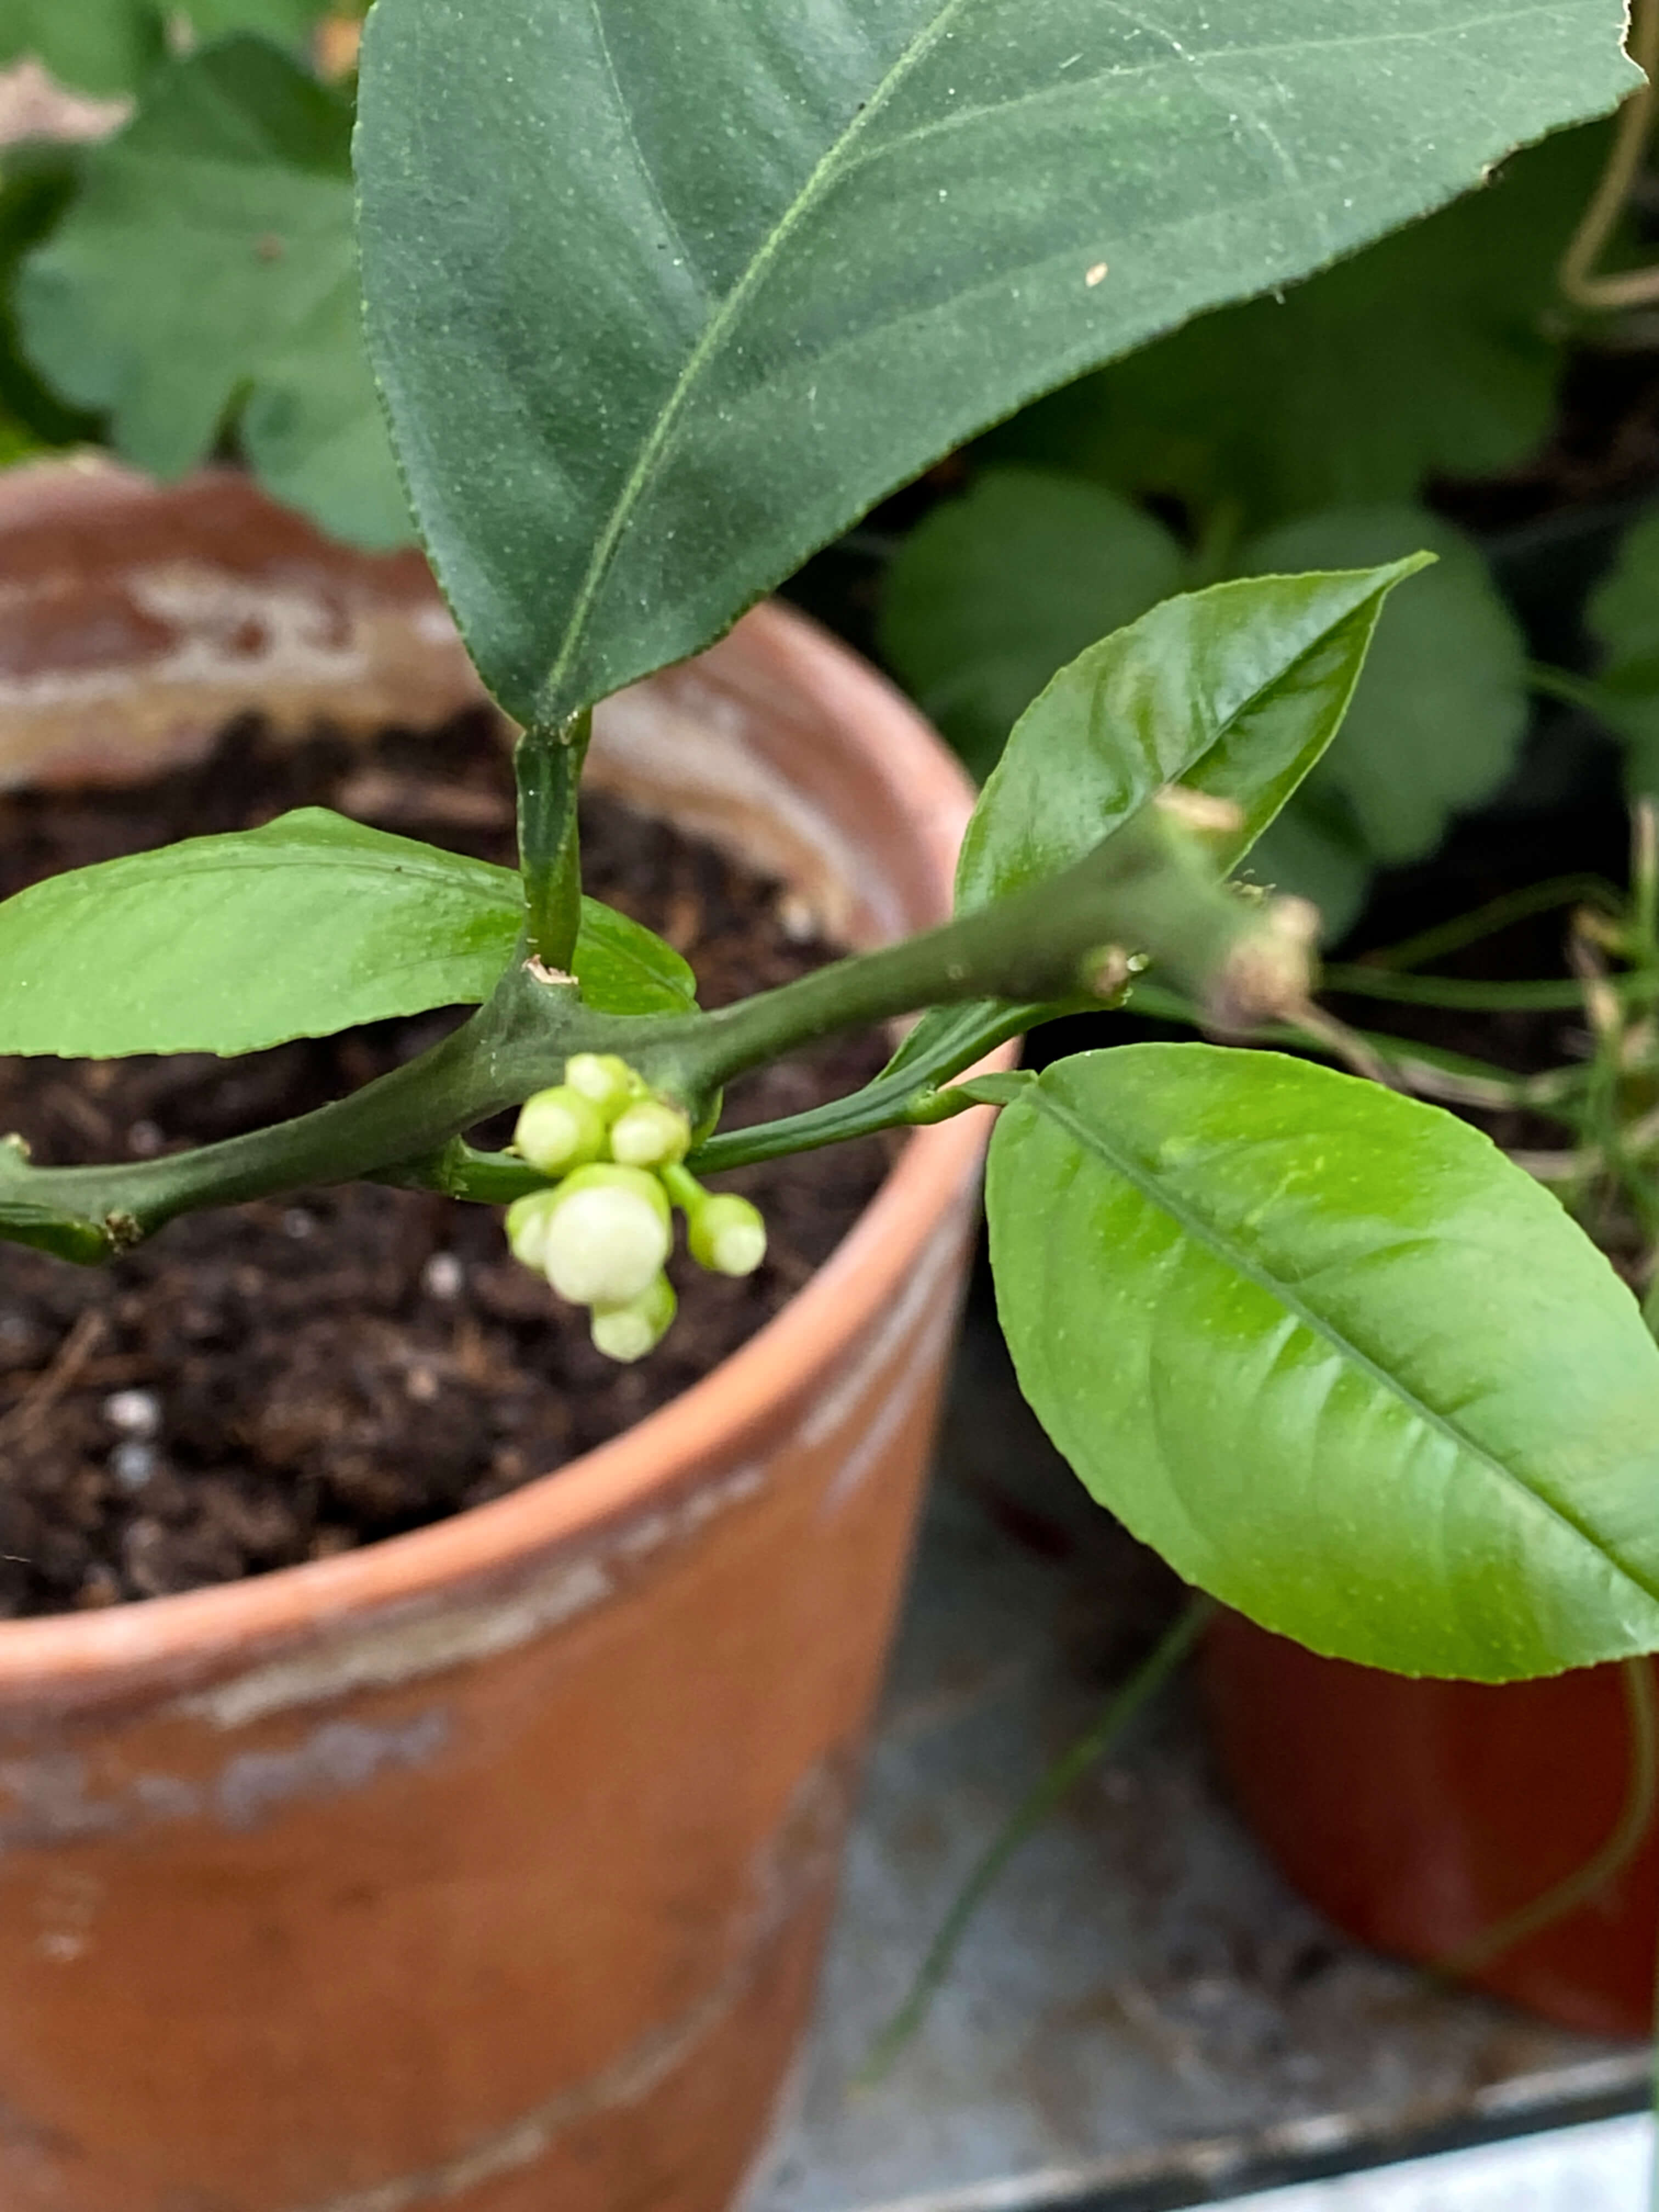
But Liz was not following suit. Out of ideas as to how to fix her, a repot and a move to the greenhouse seemed like the final attempt at revival. There, for more than two months, she just sat there on the shelf with nothing changing. And then this week, magic happened. At long last, Liz has come around. She sprouted five new leaves and two sets of flower buds. Just like that. Practically overnight.
Like an early Christmas gift, I was so excited, I took her inside for a portrait. Holiday magic comes in all sorts of shapes and sizes around here. And it is never what I think it might be. Two years ago, we had holiday magic in the form of a lost cookie recipe found thanks to Ken and Cindy. Last year, it was a bevy of snowstorms one right after the other. This year, our holiday magic comes with lemons.
The other happy campers these days are the geraniums, which are growing more and more leaves each day. Here’s the growth spurt from last week to this week…
But for all this growth and joy and magic of this second week in December, there has been a challenge to contend with in the greenhouse too. The sage came down with it first. And then the tarragon. Powdery mildew.
This can happen when there is not enough air circulation in the greenhouse. Along with winterizing the greenhouse, I also should be adding a small fan just to move the air around. When the daytime temperatures are warm enough (above 60 degrees) of which we, surprisingly, have had a few recently, the heater can be shut off and the greenhouse window vent opened, and that usually allows for adequate air circulation.
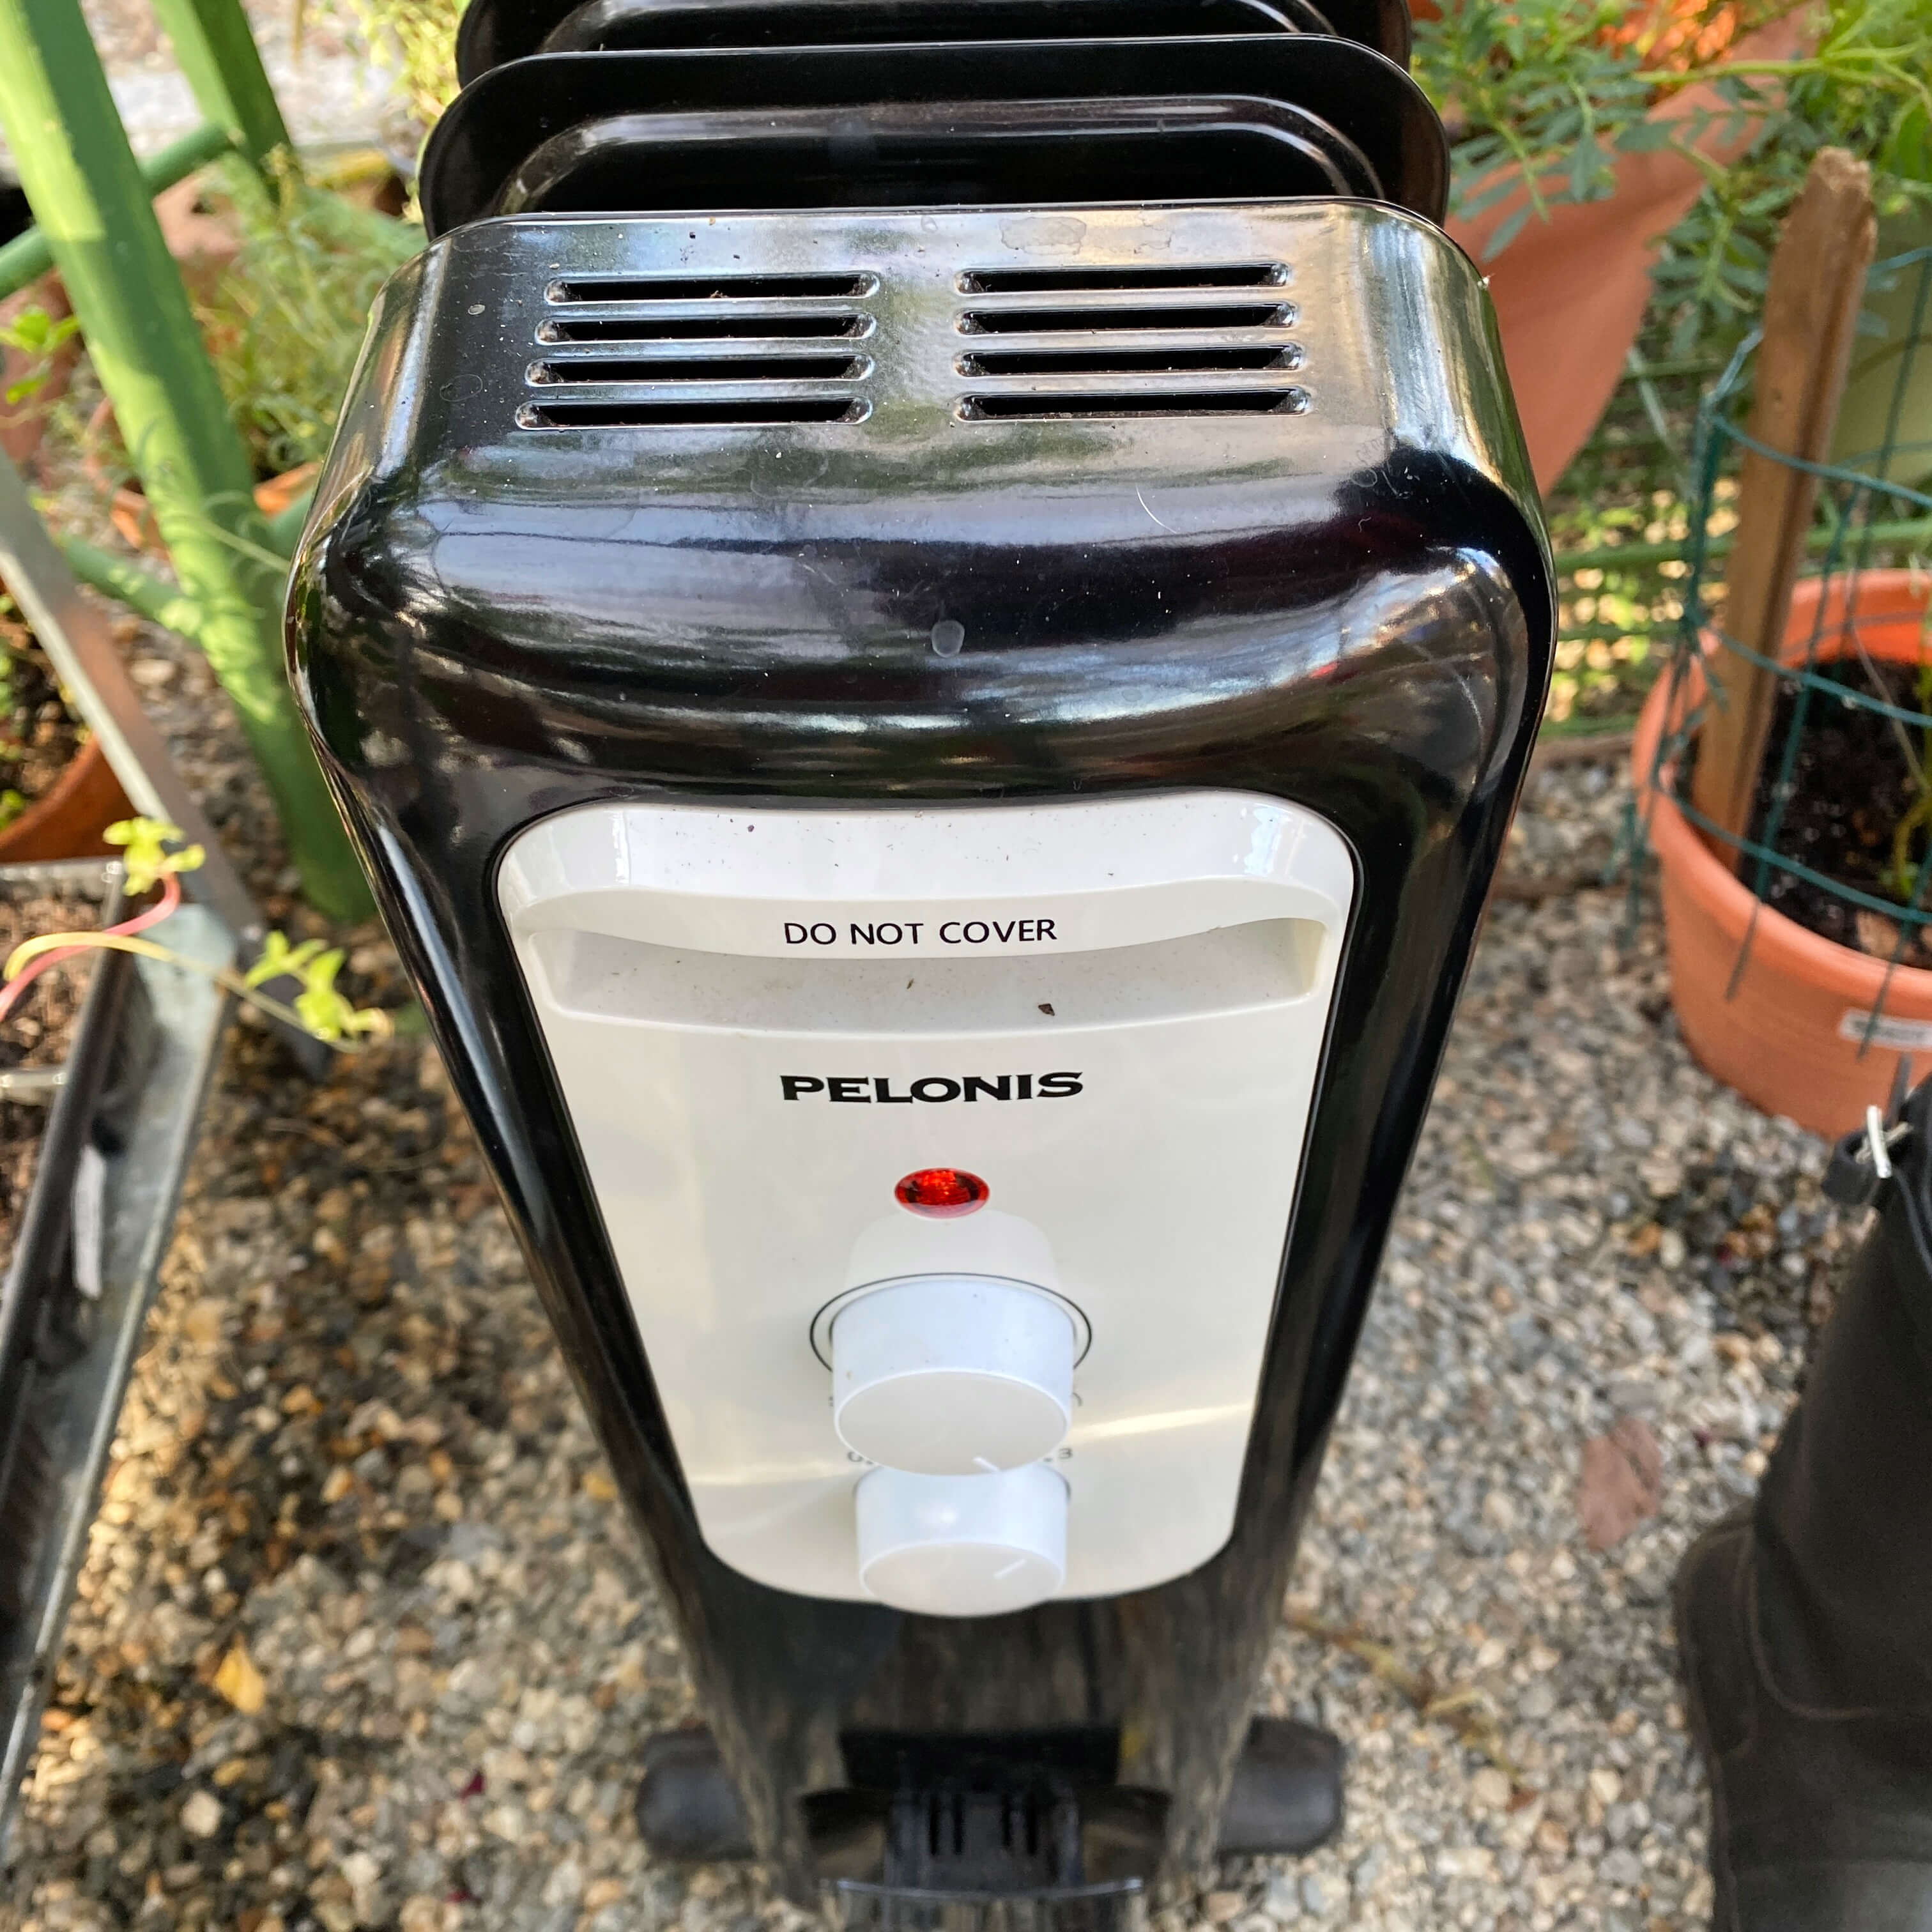
But now it’s too chilly to open the vent. Ideally, I’m trying to keep the daytime temps in the greenhouse between 70-75 degrees and the nightime temperature between 55-65. There are only three settings on the heater 1, 2 & 3 with 3 being the warmest. Depending on the daytime temperatures outside and the amount of sun on each particular day, there is usually a bit of fiddling around with the heat settings once or twice a day to keep things balanced. The warmer it gets in the greenhouse, the higher the humidity gets which then welcomes pesky problems like powdery mildew, scale bugs and funguses. Just like life in the outside world, life in the greenhouse is a continuous adjustment of care and considerations. I treated the sage and tarragon with an organic garden-friendly fungicide, so hopefully, that will clear things up. More on that next week.
Today there is a possibility of 2-4 inches of snow. Although we have had two nights of flurries already this month, the storm tonight will be our first accumulation of the season. Like sending a baby out into the world for the first time, I’m anxious and excited to see how the greenhouse will manage when enshrouded in a snow blanket. Will it remain warm and cozy and fragrant with the scent of honeyed perfume all season long or will it be too delicate of a creature to stand up to a strong New England winter?
Katharine with her husband E.B White and one of their furry friends.
I looked to the garden writer, Katharine White who inspired this series, for advice. She lived in Maine and was used to snow and winter and caring for flowers and plants in the off-season. “Outdoors, nature is apt to take over and save you from many a stupidity, but indoors you are strictly on your own,” wrote Katharine. It was not exactly the reassurance I was looking for.
When you move into a new (old) house in a new state with a new agriculture zone, there’s a lot of waiting and seeing and observing and guessing all buoyed by optimism. Next year at this time, we’ll know a lot more about the capabilities of the greenhouse in cold weather. But for now, here’s to hoping that the wild and willful nature present inside the greenhouse at the moment will suffice enough to save us from any serious stupidities of our own doing, at least in this first snowstorm. More on that, next week.
In the meantime, cheers to the Christmas magic of Liz Lemon, to the nasturtiums who look like little kids lined up at the window waiting on the first flurries, and to our first impending snowstorm. Hope your week brings some unexpected joys this week too.
Inspired by the writings of Katharine Sergeant Angell White, there’s a new series coming to the blog called The Greenhouse Diaries. A week-by-week account of growing flowers, food and ornamentals in a 4′ x 6′ greenhouse in New England, it’s a work-in-progress series that chronicles our adventures as we build the gardens of 1750 House and grow ingredients for our vintage recipe posts.
Katharine Sergeant Angell White (1892-1977)
If you are unfamiliar with Katharine, she was a longtime editor of The New Yorker magazine, working there from its infancy to the mid-20th century. She was also the wife of E.B. White, who wrote Charlotte’s Web, Stuart Little and other fantastic works that delighted the imaginations of both kids and adults.
Katharine and E.B.’s home in Brooklin, Maine. Image courtesy of maineaneducation.org
In the 1950s, when Katharine and E.B. left their New York City apartment to take up permanent residence in their vacation house in Maine, Katharine embarked on a writing career. After decades of working around some of the best literary talents of her generation including her own husband, you might suppose she would turn to writing things she was accustomed to reading at the magazine – fiction or poetry or short stories or perhaps some reminiscences about life in the publishing world that she had known so well for so long. Not so. Instead, Katharine was inspired by the thing that grew around her in Maine – her garden and all that it entailed. From planning and plotting to cultivating and researching, she fell in love with horticulture from all angles. On index cards, in diary pages, and in letters to friends, for two decades she enthusiastically documented her successes and failures, her insights and observations, the learned histories, and the passed-along advice relating to gardening as hobby, art, and food source.
Katharine’s expertise grew by trial and error, by curiosity, and by a passion that captured her attention year-round despite the cold winds that blew off the Atlantic, the snow that inevitably piled up in winter, and the wild, rugged landscape that made growing anything in Maine both a challenge and a reward. Her published pieces eventually led to a book of collected works on gardening compiled by E.B. after Katharine’s death in 1977. Lauded for her fresh perspective and interesting subject matters (like one essay that reviewed the writers of garden catalogs), she had a unique voice that resonated with other gardening enthusiasts around the country. Even E.B. was surprised at his wife’s candor and affection for her subject matter.
Katharine’s book of collected garden writing published in 1977.
As you might recall from previous posts, we have big plans for the heirloom gardens that will envelop 1750 House just like they would have done one hundred, two hundred or almost three hundred years earlier. Having spent most of the spring, summer and fall building and establishing garden beds and planning out landscaping details for the front and back yards, we will be ready for Phase Two of our landscape design by next spring, which means putting the greenhouse to full use this winter. Just like Katharine approached gardening in Maine with continual curiosity and enthusiasm, I thought it would be fun to share our progress of winter gardening as it unfolds. Since we are new to gardening in New England and also new to greenhouse gardening in general, this weekly diary will be an adventure in unknown outcomes. Nature is rarely predictable. Surprises can be encountered at every turn. It’s my hope that by discussing both challenges and successes, this series will help attract and connect fellow greenhouse gardeners so that we can all learn together by sharing tips and techniques discovered along the way.
So let’s get going and growing. The Greenhouse Diaries await…
First and foremost, a formal introduction to our workspace.
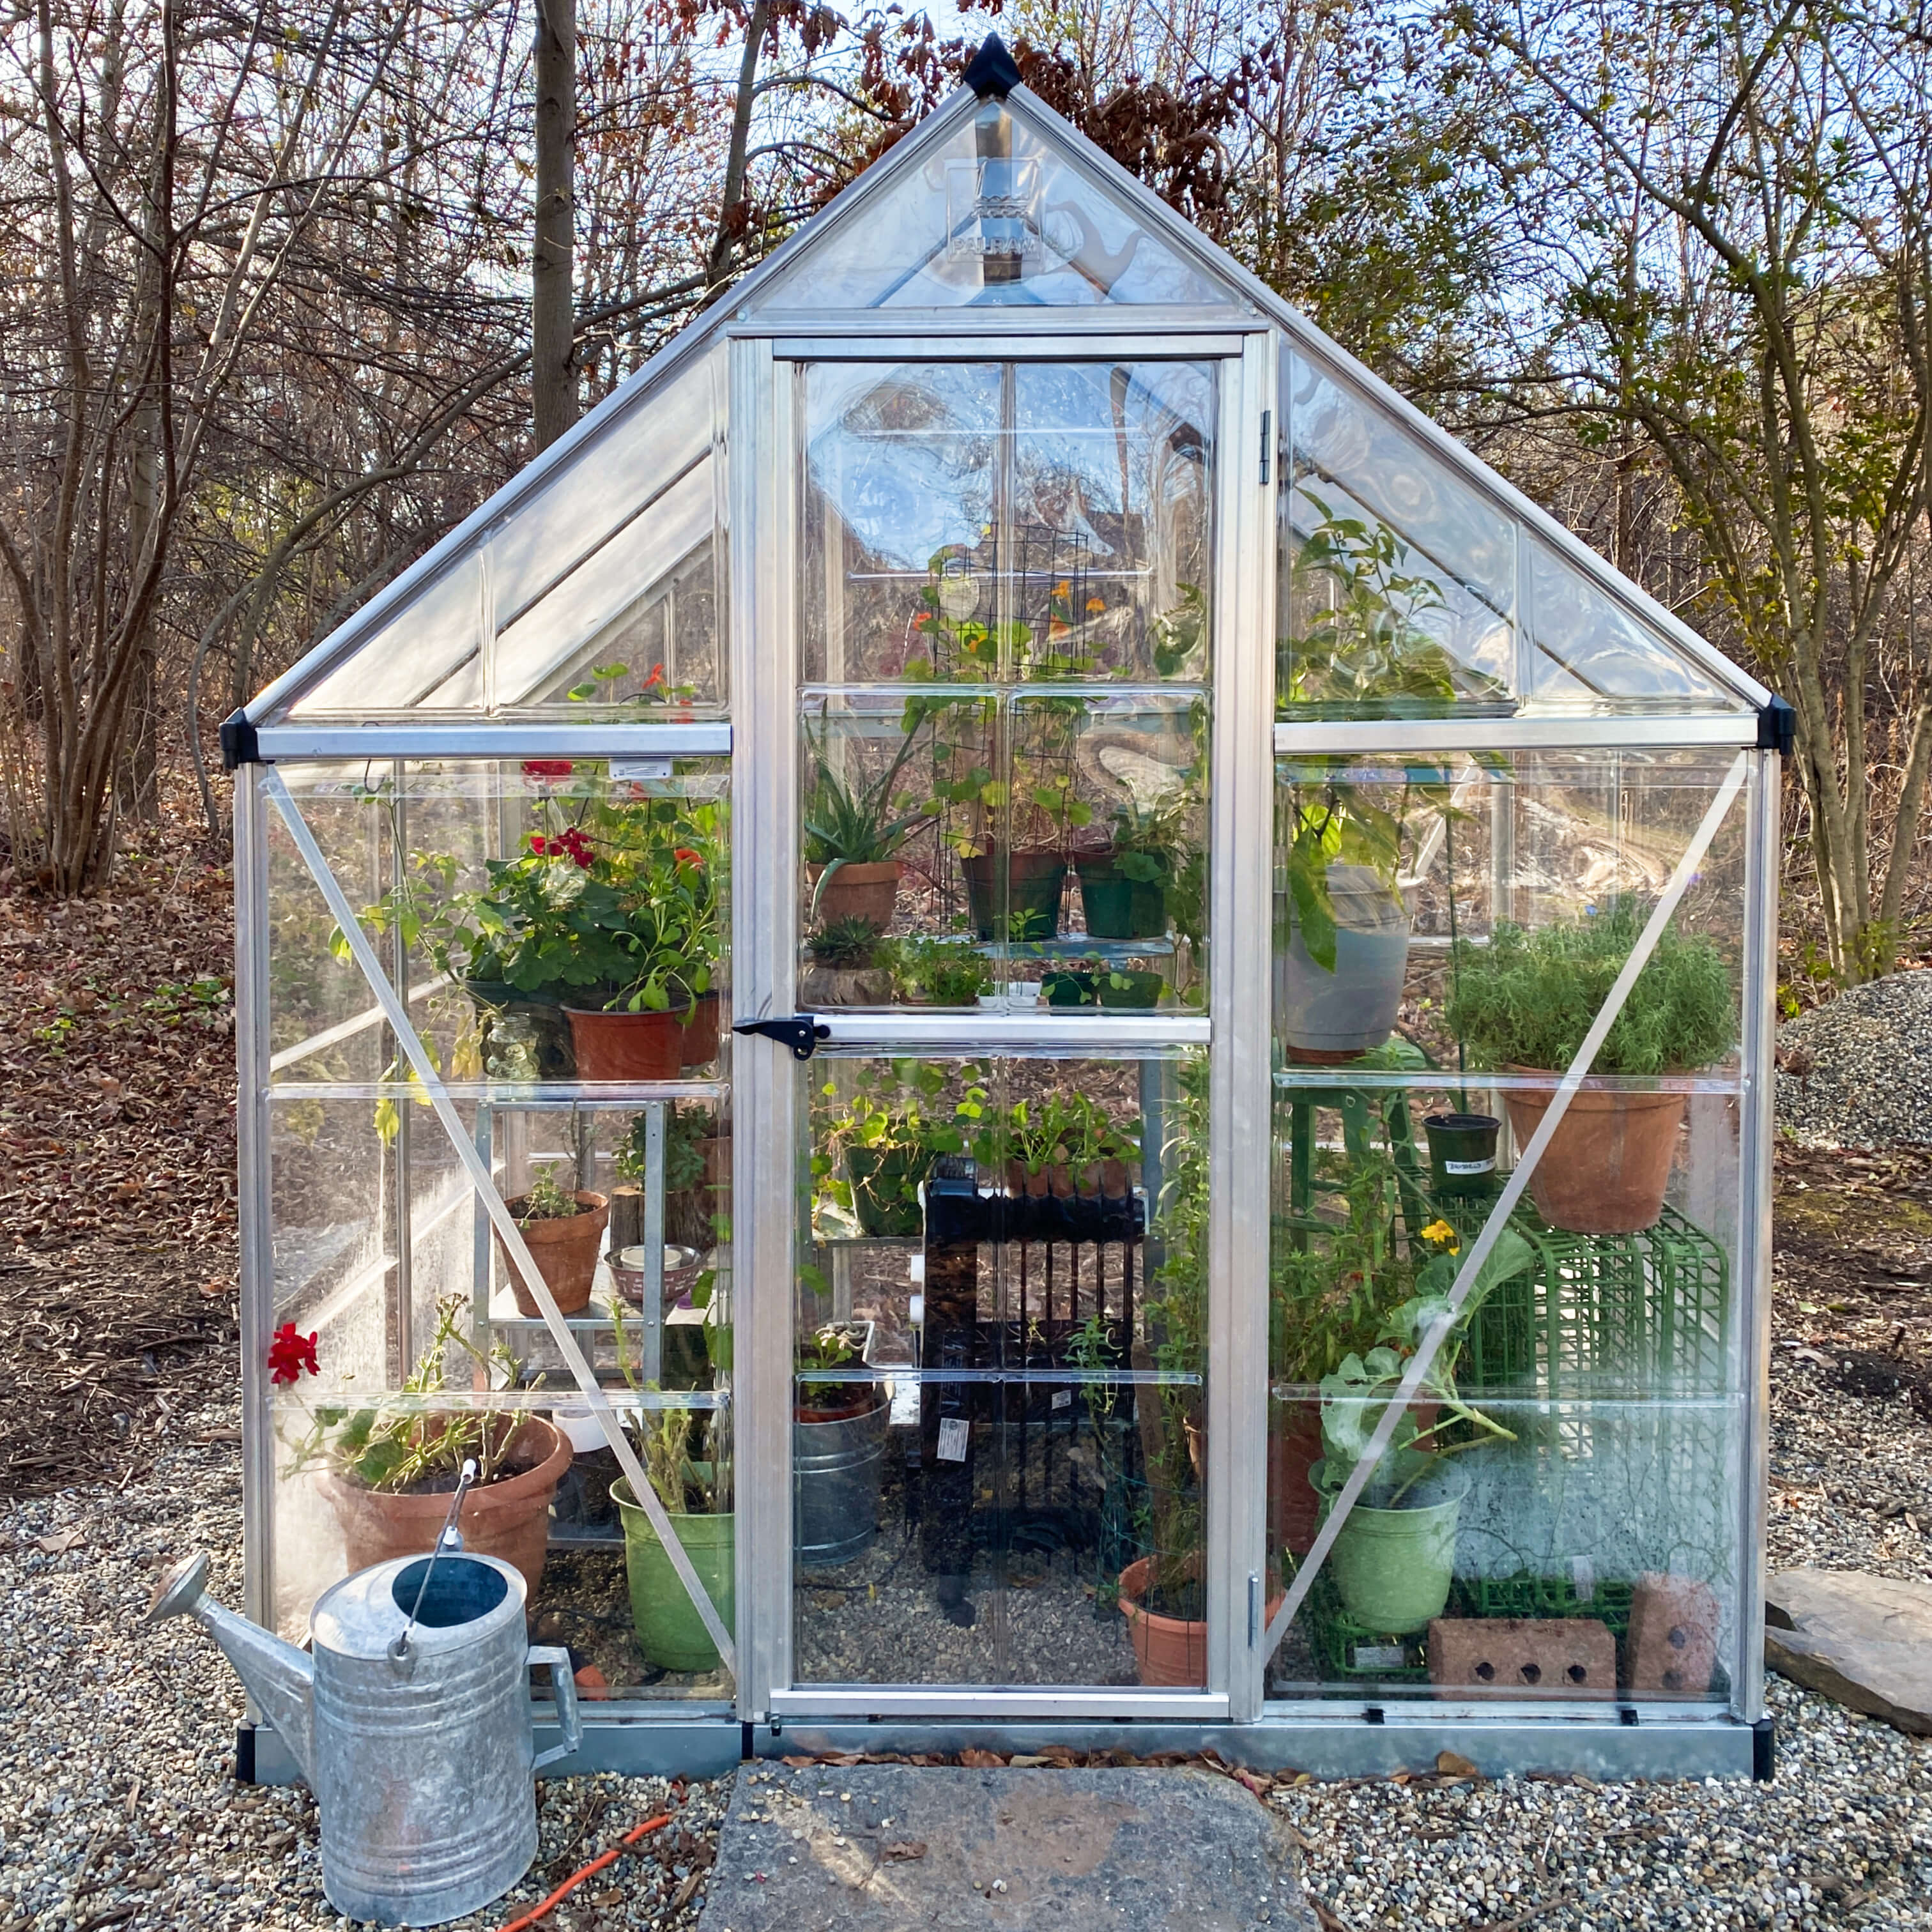
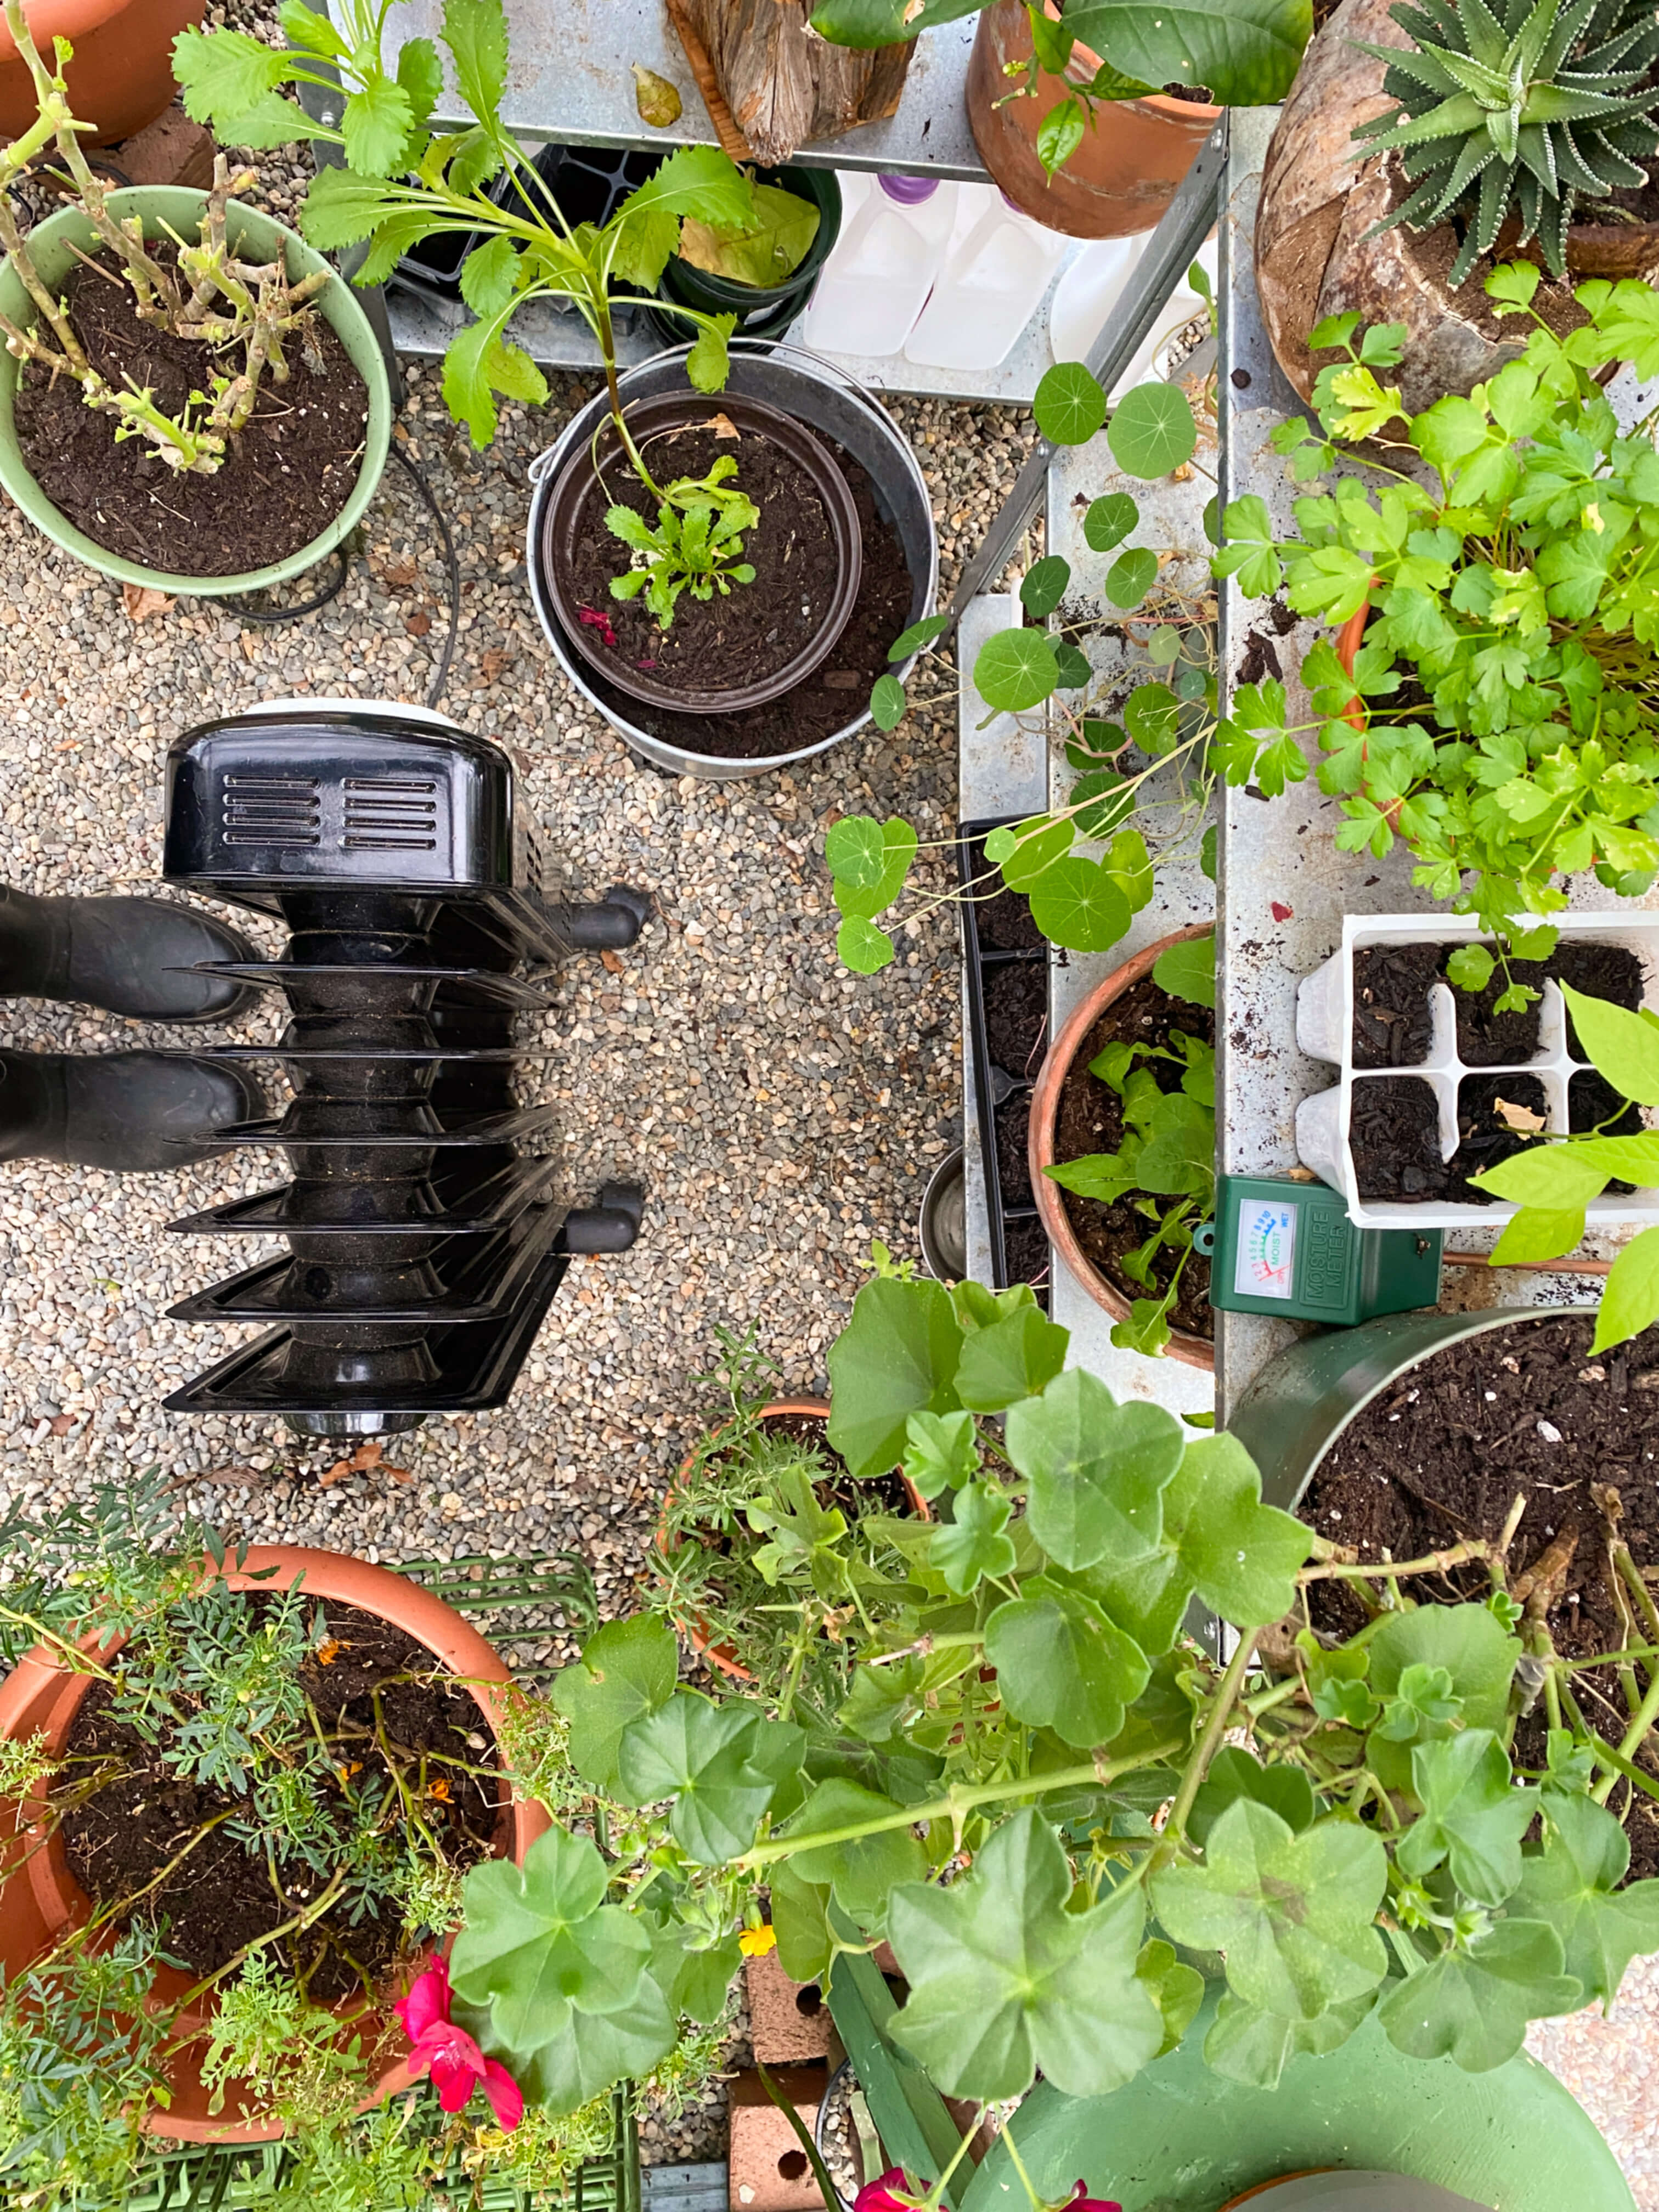
Our greenhouse measures 4’x6′. It has a steel base, aluminum framing, a pea gravel floor, a door with a secure handle, an adjustable roof vent, and clear polycarbonate walls. Inside, there is room enough for two metal shelving units, a wooden stool, 33 pots of varying sizes, one galvanized bucket, two water jugs, a hand soap station, and a portable heater. Tucked in between all that, is a little extra space for standing and potting.
We assembled the greenhouse in the late spring in the sunniest spot in the backyard. During the warm months, it held trays of seed starts and some plants that preferred to be out of the direct path of slugs and cutworms. But once autumn came and the threat of the first frost hovered, we turned it into an experiment station. Curious to see what we could keep alive from the summer garden, we potted our most successful growers and crossed our fingers. So far so good. Everything but the oregano and one pot of marigolds have taken well to the location change.
The nasturtiums in particular really like their new spot. Blooming at a rate of three to four new flowers a day, they keep the greenhouse bright with color and the air sweetly scented like honeyed perfume.
Currently, the greenhouse is uninsulated, an issue that will need to be addressed as the daytime temperatures fall into the 20s and 30s. But for now, we have found success in creating a summer climate using a portable electric heater that was put into service as soon as the outdoor temperatures began to repeatedly fall below 50 degrees.
With just the help of the heater and the sun, the greenhouse right now averages temperatures that are 20-35 degrees above the outdoor temperature. Once we get our insulation plan in place, it should become even warmer. For now though, all the plants seem happy with this cozy climate.
I read once that a single geranium plant can live up to 50 years if properly cared for season by season. That’s my goal for the four pots that are overwintering now.
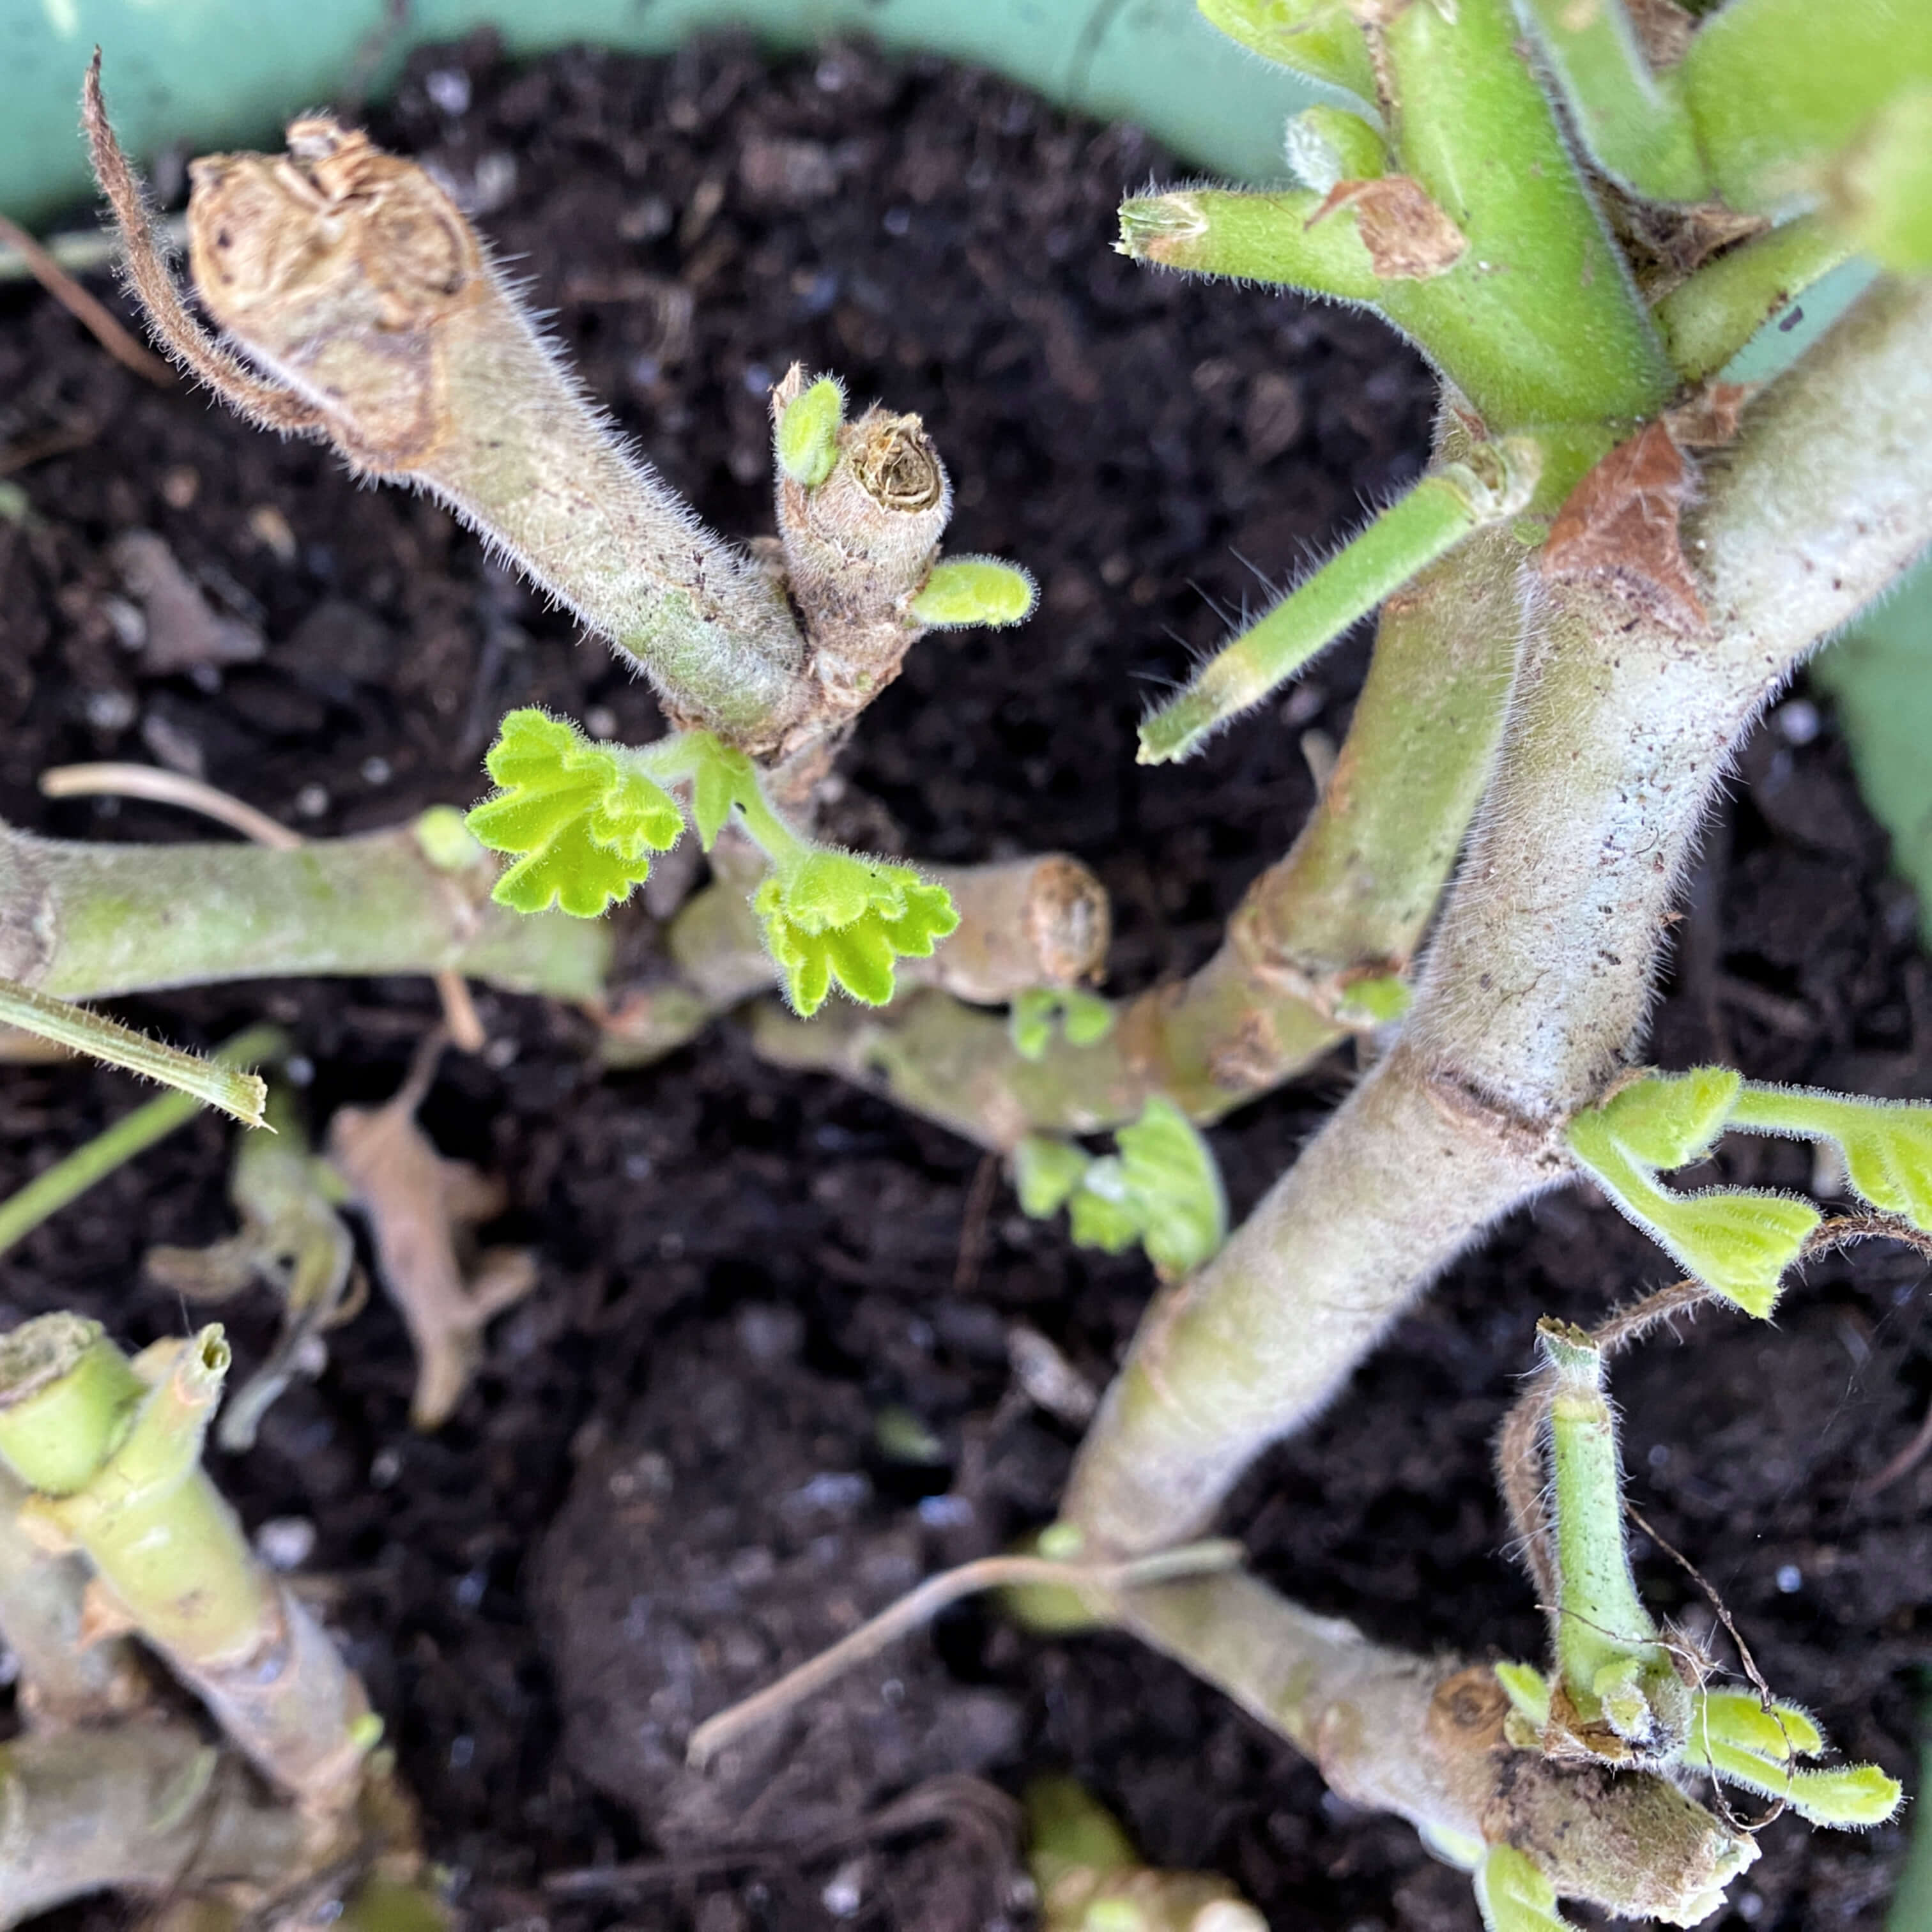
Accidently overlooked, two of the four geranium pots experienced the first frost in mid-November before they made it into the greenhouse. Wilted and weepy-looking, I cut off all the affected leaves and stalks and brought them into the greenhouse, hoping that the warmth might help them recover and encourage new growth. Yesterday, they started sprouting new leaves…
The other companions that make up this house full of green are…
lavender
tarragon
mint
parsley
rosemary
broccoli
basil
succulents
sage
tomato
peppers
thyme
arugula
zinnia
pincushions
lemon tree
collard greens
chives
aloe
bunny ear cactus
brussels sprouts
Lavender
The peppers, tomatoes, and broccoli are all sporting fruit these days. I’m not sure how long they will take to grow and ripen but if we could manage a small harvest in the dead of winter that would be exciting.
Lemon jalapenosCherry tomatoesBroccoli
The winter crops that we are trying out this year – broccoli, arugula, collard greens and Brussels sprouts – hopefully, will reach maturity and harvest time by late February. We run the chance of running out of room if these guys get really big, but a full house is better than none at all, so we’ll take it one week at a time and see what happens.
Arugula
In one of her essays, Katharine wrote.. “from December through March, there are for many of us three gardens – the garden outdoors, the garden of pots and bowls in the house, and the garden of the mind’s eye.” Gardening in a greenhouse in winter gives us the ability to experience all three – to create, to grow, and to dream during a time of year that the outside world reserves for dormancy and hibernation. Our small structure set in pea gravel with a portable heater and a steel base, aluminum framing, and metal shelves shelters big, colorful dreams – ones both realized and yet to be imagined. We can’t wait to see what blooms.
Cheers to Katharine for inspiring this new series, to the greenhouse for holding all our hopes and to nature for feeding our brains and our bellies.
Happy Halloween! In today’s post, we are starting off your holiday with a rare treat – a little something sweet from the files of food history.
In 1960, a bit of marketing magic happened to a specific sector of the food industry that no one ever saw coming. It didn’t burst onto the scene with immediate stardom but it was fresh and fun and set the stage for something much bigger down the road. This initial marketing campaign didn’t debut at Halloween, but it did get caught up in the fervor of the holiday and all the potential that trick or treating offered.
In celebration of this sweet treat day, in today’s post, I thought it would be fun to feature a vintage advertising campaign that centers around a very rare piece of Halloween ephemera that was almost lost to history. This one piece of found paper tells the story of a food, an industry, a holiday, and one group of clever individuals who had an unfailing love for one very specific product.
It all starts with the advertising campaign that began rolling out in 1960. This was a campaign that was not promoting a food or a recipe or a meal that was rare or coveted or exotic. It was actually the opposite. It was spotlighting a food that was quite humble and ordinary and pretty unremarkable in the appearance department. It was one of those foods that lies under the radar. Helpful, necessary, enjoyable, but not exactly glamorous, it wasn’t until a certain advisory board formed that this food’s reputation got a total makeover in the likeability department. Through clever ads, product placement, and innovative promotions, this group grabbed attention and shook things up. Eventually, two decades later the food they promoted would become a pop culture icon known by millions of people around the world. By then, it would be forever linked with a catchy theme song and a field of merchandise that stretched way beyond anything to do with kitchens and cooking. The Smithsonian Museum even took note and acquired it for their collection.
So what is it you ask? What is this magical food that went from simple to superstar over the latter half of the 20th century? Here’s a clue… it’s brown and wrinkly. It comes in petite boxes and big canisters. It’s used in baking and cooking. It’s sweet and small, mini and meaty. Can you guess what it might be?
It’s a raisin.
The group of individuals responsible for bringing the raisin into the limelight was the California Raisin Advisory Board, based in Fresno. Founded in the 1950s, the Board was crazy for raisins and wanted to share their joy of this dehydrated fruit with eaters everywhere. Their enthusiasm was backed by noble intent too. They wanted to help draw attention to the local raisin growers who were struggling to make a profit in mid-20th century California.
Typically, when you hear the words “advisory board” you don’t automatically think of whimsy and fun but the California Raisin Advisory Board (also ironically known as C.R.A.B.) proposed a marketing campaign that was full of joy from beginning to end. Their mission was to produce effective advertisements that targeted the heart of the home – the kitchen – and all the ways in which raisins could become a household favorite and a sustainable staple, cherished enough to support the industry that grew them.
This is still life painted by Clara Peeters in 1615 featuring a bowl of raisins and almonds.
Raisins of course had been an ingredient in cooking and baking since the 1600s, so in the 1960s they were not a new food, but the industry was struggling and the Advisory Board wanted to step in to help. They wanted to take the raisin out of the cabinet of yesteryear, dust off its stodgy patina, and give it some zing. With centuries worth of material to work with there was no shortage of ideas when it came to inspiration, but the Advisory Board wanted to focus on a fresh approach and universal appeal. So where did they start?
With bread. As in raisin bread. A sweet, studded cinnamon-laced loaf often enjoyed at breakfast, this baker’s delight was centuries old too, just like the fruit it featured. But in the 1920s, raisin bread received some new interest when it was deemed a “health food” by dieticians and nutritionists. Sugar aside, raisins hold a lot of vitamins and minerals in their puckered little shape including magnesium, potassium, and fiber. Added to the protein found in bread, the combination formed a magical collaboration of a seemingly decadent eating experience paired with a hearty dose of healthy goodness. That gave the Advisory Board a lot of angles to play with when it came to promotion. Raisin bread was nutritious. It was affordable. It could be store-bought or home-baked. It smelled like heaven when toasted. And it appealed to both kids and adults. Paired with some clever writing and marketing during National Raisin Bread Month (November), the Advisory Board launched a raisin campaign full of plucky personality…
A cookie campaign followed suit…
The Advisory Board was off and running. Throughout the 1960s, the Advisory Board launched a flurry of seasonal promotions that included National Raisin Week in April, summer picnic season in July, back-to-school snack packs in September, and the Raisins for Happy Holidays campaign in December. In-store grocery taste tests, advertisements, sweepstakes and giveaways encouraged repeat buyers and kept the noble raisin front of mind.
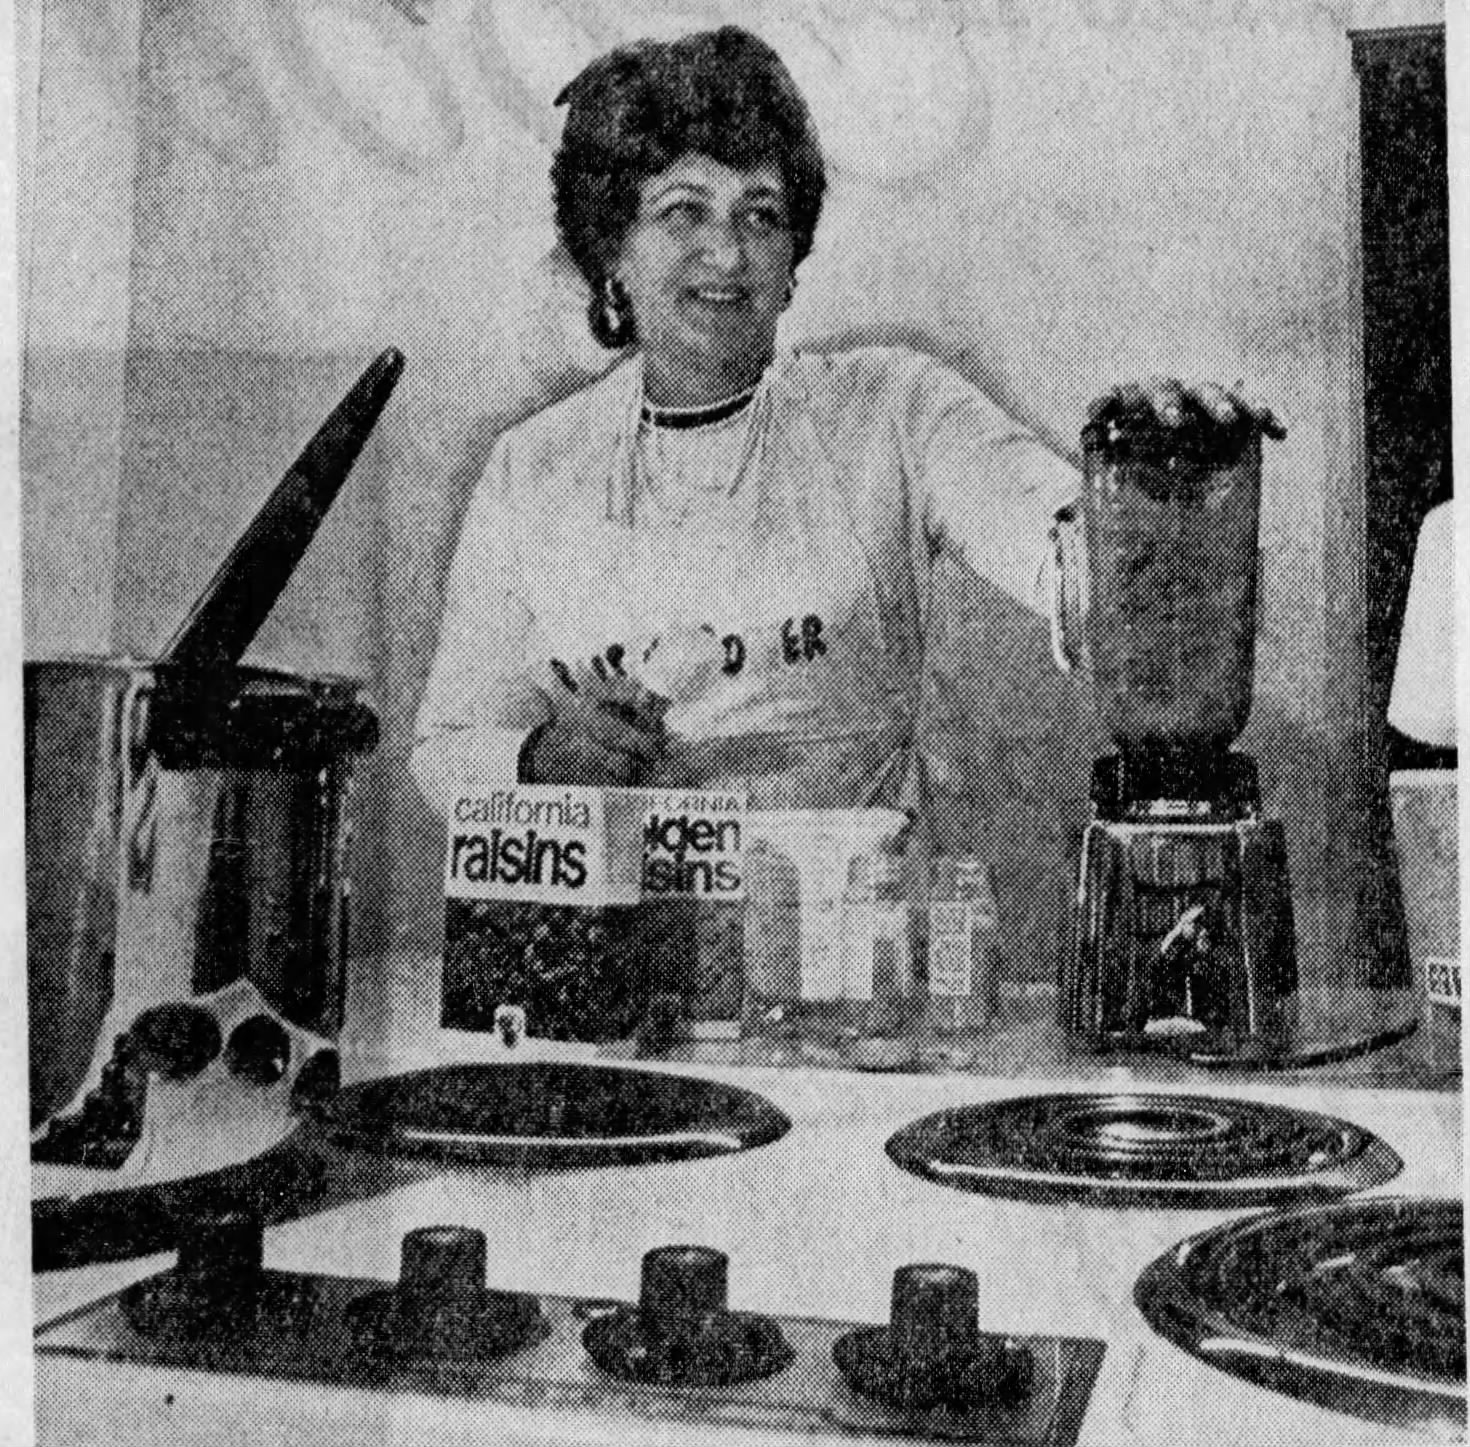
The California Raisin Advisory Board also churned out raisin recipes year-round for newspaper columns from their test kitchen. Photo courtesy of the Sacramento Bee, 1970.
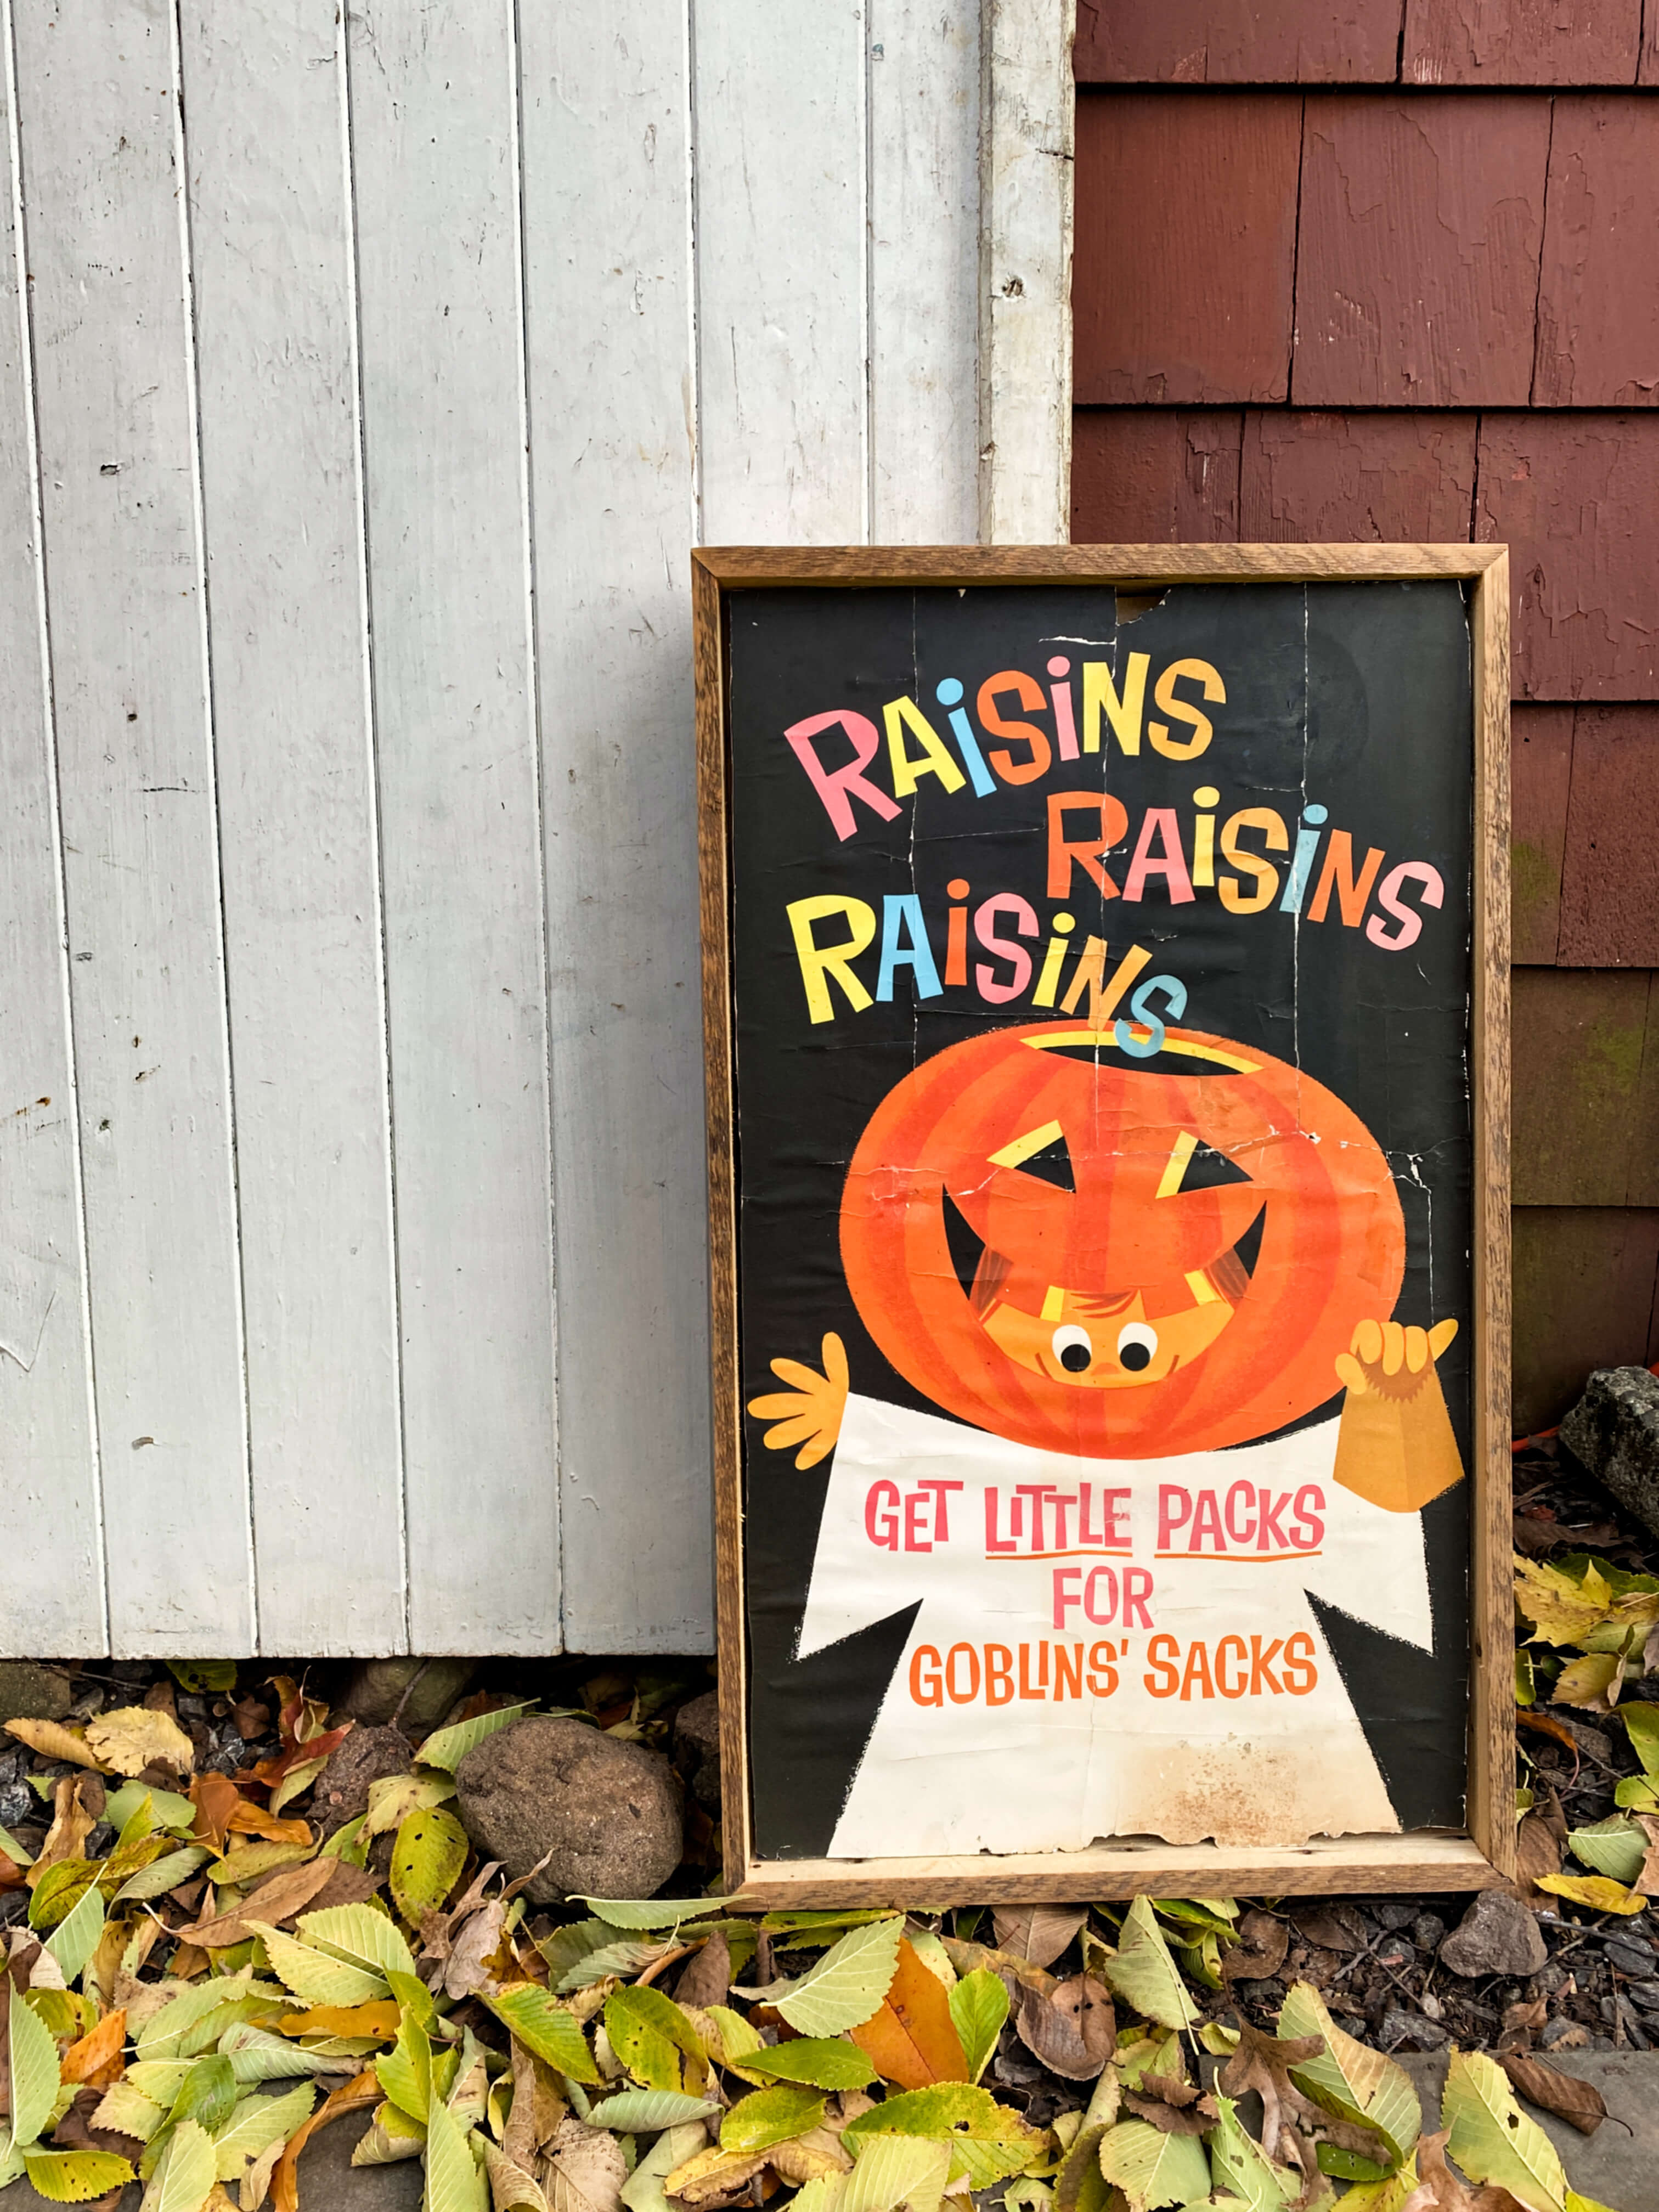
When Halloween time rolled around each year, the holiday provided an additional opportunity to remind parents and kids how sweet a treat, a raisin was. Just like traditional Halloween candy, albeit healthier, during the month of October, the Advisory Board promoted the fact that raisins came in small boxes – a handy size for trick-or-treaters. Posters made for grocery stores and food shops hinted at Halloween excitement. This is an example of a very rare original grocery store poster featuring the California Raisins Advisory Board…
Measuring 25″ inches x 14.25″ inches it is a true survivor of history and a real-life example of the Advisory Board’s cute and colorful messaging. Most food store advertising was discarded in the trash promptly after a promotion ended to make way for new advertising in its place. Printed on thin, inexpensive paper these eye-catching advertisements were not made to last more than 60 days let alone six decades. Oftentimes, they were hung in store windows exposed to heat, sun,, humidity, and temperature changes which would cause them to crinkle and fade over time. When I found this one, it was in fragile and brittle shape and was held together only by hope and a dehydrated rubber band. Ripped and torn in so many places it was impossible to unravel it without it completely breaking apart. A quick peek down the interior of its rolled-up shape, yielded the image of a pumpkin face smiling back. How fun! Home to the Kitchen it came for further investigation and repair.
Carefully rolling out the paper, rehydrating it with a warm, ever-so-moist-paper towel, and then gluing it to acid-free archival poster board took a couple days of attention. Each time a ripped section was flattened out and smoothed over it was a small victory in revealing the bigger picture. Little by little, inch by inch, the poster’s overall image went from bits and pieces to one whole poster.
Finally put back together, for a year, the poster sat just like that – attached to the thick archival poster board with a big wide border surrounding it. Waiting to see if it would stay secured, retain its bright colors and not disintegrate, it was wonderful to see that 360 days later the poster looked exactly the same. Removing the excess matting by cutting it down to its original size, a wood frame was built for it using antique wood remnants from the 1750 House. Floating the poster inside the wood frame allows for all the imperfections along the top nad bottom edge of the poster to show – a visual record of its fragile history. The poster, although greatly improved from its original found state, still bears its wounds in Frankensteinish patchwork.
But what I love most about this poster now, is how despite all its rough and tumble elements, it still manages to radiate joy and a sense of enthusiasm. That was the power of the Advisory Board’s campaign. Raisins are fun.
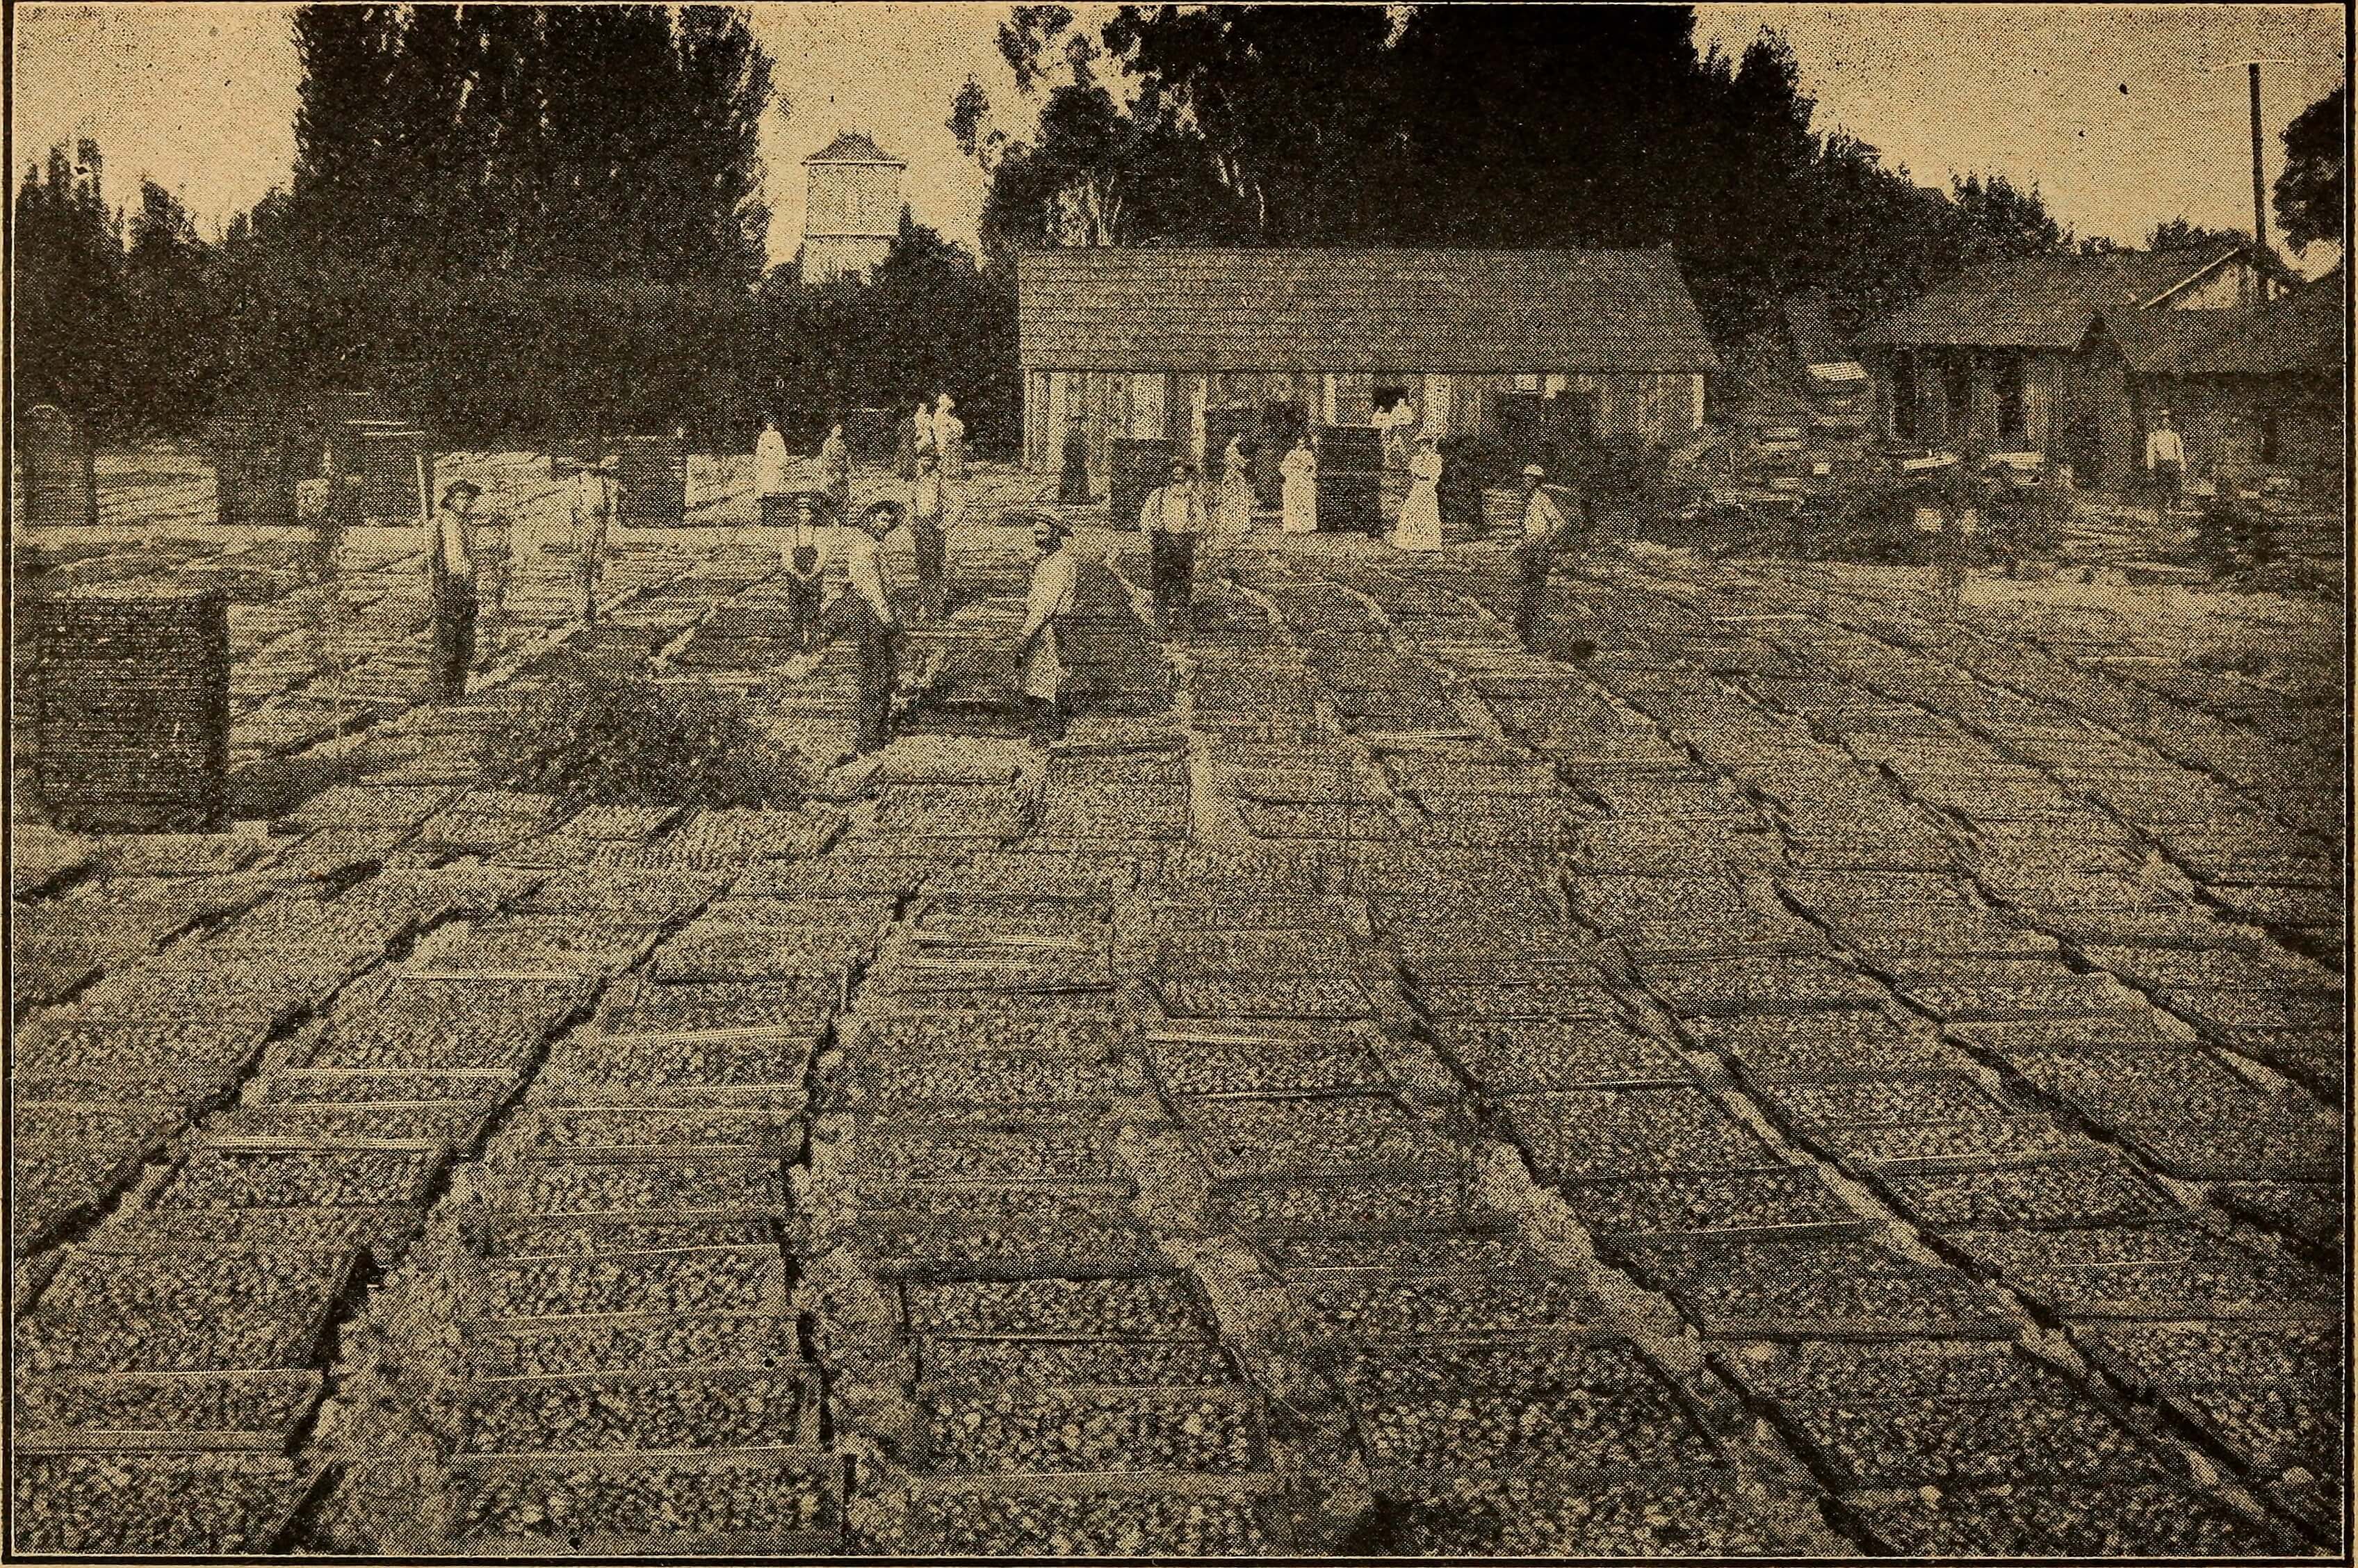
Raisin drying racks. Fresno, CA. 1901. Image courtesy of the Library of Congress
The first raisin farms in Fresno were started by a group of female schoolteachers in 1876. They decided to set aside four acres out of one hundred acres that they purchased so that they could grow grapes for a raisin harvest. Two years later, the first batch (30 boxes) was ready for market and a West Coast industry began.
In the early 1900s, Raisin growers in Fresno would make anywhere from $50-$125.00 per harvested acre.
By the 1960s, the US produced 250,000 tons a year, mostly from farms in the Fresno area. Foreign competition was tough though and the raisin growers were struggling to keep afloat. That’s when the Advisory Board stepped in with their breads and their cookies and their sweet, colorful, clever campaigns declaring raisins raisins raisins a wonderful thing.
As cute as the pumpkin goblin face was on the poster, it was not the imagery that launched the raisins to worldwide fame. That would happen in the mid-1980s when the Advisory Board approved an idea from a Foote, Cone, and Belding advertising executive who pitched an idea about raisins and a band and a signature song.
The California Raisins, singing Marvin Gaye’s 1968 Motown hit, Heard It Through The Grapevine was born. Indicative of the Advisory Board’s continuous efforts to pitch their product in clever ways, the California Raisins soaked into the fabric of mainstream society like no other fruit campaign had done before. This is the first commercial that started the success…
Making up a whole world of claymation figures and storytelling, the California Raisin band was an immediate hit and could be seen everywhere – on tv, in print ads, and on cross-promotional advertising products across grocery store shelves. This was the kind of big-splash notoriety that the Advisory Board was after in the 1960s. With more and more customers buying raisins in the 1980s and 1990s, thanks to the singing sensations, the Advisory Board was fulfilling its mission.
Photo courtesy of Crazy for Costumes.
In 1986, the California Raisin became the most popular Halloween costume of the year. The Raisin band members were reproduced in figurine form and Heard it Through the Grapevine reached the top 100 song charts. When the Smithsonian acquired the original California raisin claymation figures in 1991, it firmly sealed the success of the Raisin Advisory Board. Their singularly beloved product was now beloved by all.
Unfortunately, the sweet taste of success didn’t yield the type of monetary compensation that was hoped for when it came to the raisin growers. The Advisory Board disbanded in 1994 after struggling to balance the costs between promoting the raisins and keeping the growers profitable. Creativity can be harsh that way. Sometimes clever doesn’t equal capitalism. But in this case, it sure did produce some fun art and a new way to look at the world, even if it was discovered decades later than intended.
Cheers to joyful advertising, loving what you love completely, and to our little rescued poster whose celebrating its 60th Halloween this year! Hope it added a little something sweet to your holiday. Happy Halloween!
The last bouquet of summer included the final flourish of zinnias, dill, okra, daisies, cosmos and nasturiums.
The leaves are falling, the pumpkins are picked, the last of the summer tomatoes have been plucked. The zinnias were clipped for a final garden bouquet. The okra stalks were added to the compost pile. The herbs moved from the garden to the greenhouse and the rockery raised beds are full of autumn leaves. October is waving goodbye. And that means something exciting is just around the corner… our annual one-day-only 40% off sale.
If you are new to the blog or the shop, you might not know that we always host this sale on All Souls Day, which falls on November 2nd every year. Technically a Catholic holiday, we selected All Souls Day not for its religious connection, nor its aura of spookiness (being so close to Halloween), but for the sheer fact that it is one of the few holidays in the calendar year that pays tribute to deceased ancestors. We wouldn’t have a shop full of wonderful heirlooms had they not traveled through other people’s lives, other people’s hands for generations, collecting stories and memories along the way. To us, all Souls Day seems like the perfect day to celebrate vintage style.
It’s also a lovely time of year to start preparing not only for the holiday season but also for the winter ahead where cooking adventures, gift-giving, and craft time await. Autumn doesn’t officially end this year until December 21st. If you’d like to hang onto the season as long as possible you’ll find many fall-favored pieces in the shop that will carry you all the way through…
If you are ready to start gathering ideas for Thanksgiving, you’ll find an assortment of items ideally suited for Turkey Day 2022 and beyond…
Christmas in the Vintage Kitchen always comes in little details. Red and white restaurant ware, a mini Christmas tree, an antique green striped serving plate or a shimmery candelabra that we are sure has seen some magnificent parties in its day. In the shop, you’ll discover a sampling of festive treasures waiting to add a little sparkle to your celebrations…
The sale begins at 12:00am on Wednesday, November 2nd, and ends at 11:59pm that same day. All items in the shop will automatically receive the 40% discount at checkout, so there is no need to fuss with coupon codes or discount names. We encourage you to use the wishlist feature on our site if you have multiple items that have caught your eye. Just click on the heart under each listing title and it will automatically add the item to your favorites list where you can then add them directly to your cart.
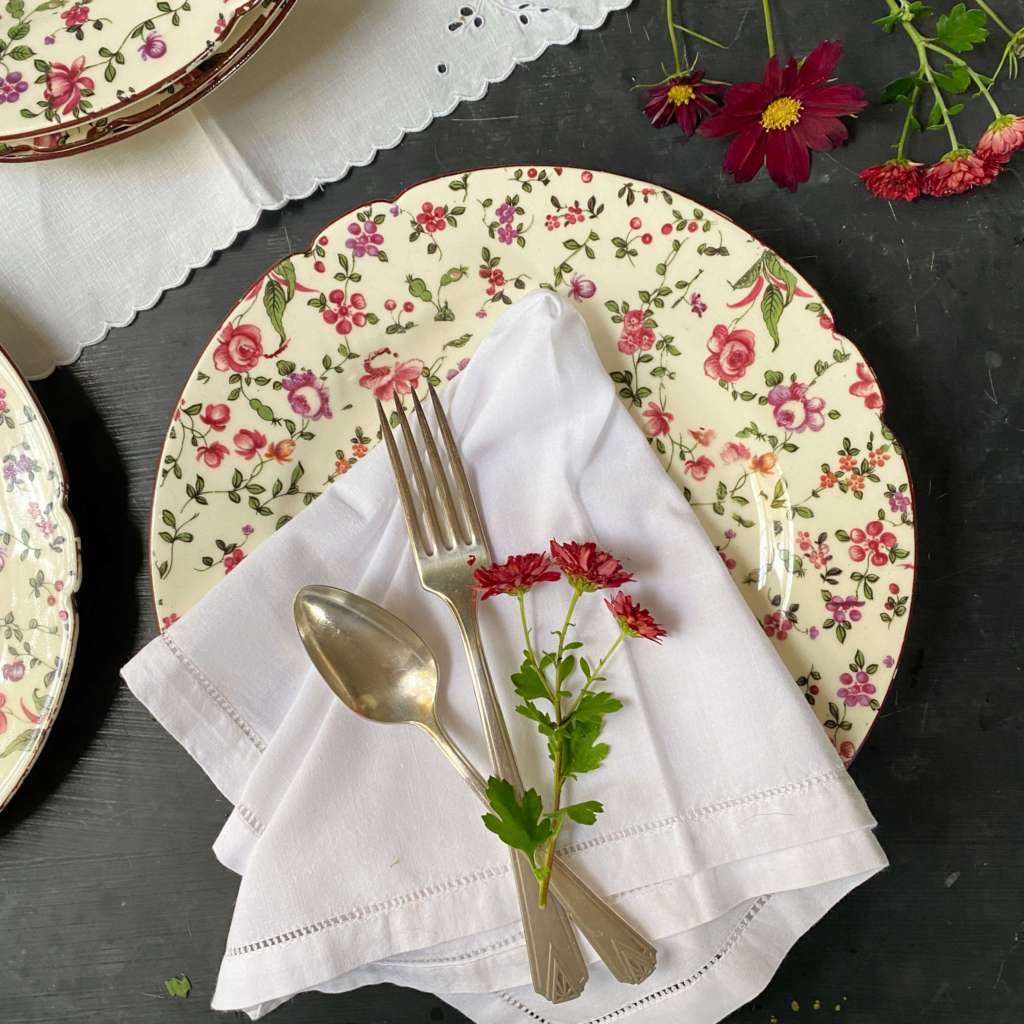
Since it is our only sale of the year, shoppers in the past have been known to set their alarms for the moment the sale starts at midnight. If you have fallen completely in love with something in particular, please keep that in mind. New (old) items continue to be added to the shop daily, so stop by for fresh finds leading all the way up to the sale. One of the items coming to the shop today is this set of six vintage Czechoslovakian luncheon plates full of pink, purple and cranberry-colored flowers.
.
As always, if you are looking for something that we no longer have in stock or you can’t find in the shop, please send us a message. We’ll be happy to add your name and needs to our waitlist. Having said that, I hope on this year’s sale day you will find something truly magical that makes your heart sing with joy. Cheers to all the old souls. And to all the cherished items that they have left for us to enjoy. Happy shopping!
Rumor has it that one time when Julia Child made this recipe for dinner guests, she overcooked the pumpkin and the whole entire bottom of it fell out onto the floor on its way to the table. I mention this right off the bat, not to illicit alarm as to the perils that might befall cooks who attempt this recipe but to demonstrate the joy of Julia in all her humanness. Isn’t that what was so endearing about her to begin with? As experienced as she became, as attentive a cook as she was, as precise she always endeavored to be, Julia was still fallible just like the rest of us.
Julia in her kitchen in Cambridge, MA circa 1980s. Photo credit: Jim Scherer
Cooking mishaps and all, Julia’s golden rule in the kitchen was to have fun and enjoy the pleasures of preparing food and feeding people. Pour a glass of wine, engage in a little chit-chat, chop some vegetables, create a convivial environment. That was Julia’s way. Cooking is fun. Whatever situations happen along the path to culinary creation is part of the adventure.
That being said, this vintage recipe is one of the most interesting we have made on the blog to date. In part, because it is very fitting with the season which makes it very fun for fall, but also in part because we added a little twist, a bit of experimentation, based on our current kitchen renovation constraints. The recipe that we are making today, the one that hopefully will not end up on your kitchen floor, is Julia’s Soup in A Pumpkin from her 1989 The Way to Cook book…
Julia published this cookbook twenty-eight years after Mastering the Art of French Cooking debuted – the book which set her on the path to international acclaim. By the time The Way to Cook came out, Julia was in her late 70s and was most interested in producing a cookbook that showcased creativity in the kitchen for a younger generation. One that might not have experienced some of her older work. Based on her signature time-honored techniques, Julia featured a looser, more casual style of cooking instead of precise by-the-book formalities. More aware of health-conscious choices, she slimmed down butter usage and altered heavier recipes turning them into lighter, leaner, but still equally delicious offerings. She encouraged independent variety by suggesting alternative ways to serve dishes and was cognisant of budget and time-saving methods that would appeal to busy cooks who didn’t want to sacrifice quality meals for lack of adequate funds or hectic schedules. At the turn of every chapter, she championed experimentation and creativity.
In true spirit of the cookbook and Julia’s encouragement to amend, invent, and explore new ways of approaching meal preparation, we took her lead and added our own twist to her recipe by grilling the pumpkin outdoors instead of baking it in the oven indoors as Julia did.
While we have the ceiling in, the pantry framed out, and the exterior walls sealed up for the winter ahead, we are still hard at work on our kitchen renovations in the 1750 House. Photos of our work will be coming soon! In the meantime, currently, our fridge is in the living room, our sink is in the basement and we are without a stove, so the choice to grill the pumpkin came out of necessity but also curiosity. Can you even grill a pumpkin? We weren’t sure but we had Julia’s confidence and joie de vivre on our side, so we were ready to experiment with our trusty grill that has yet to disappoint us.
Rest assured, despite our change in cooking method and Julia’s tipple, this is not a difficult recipe to make and you don’t need to be nervous about executing it. It actually is quite a fun cooking adventure.
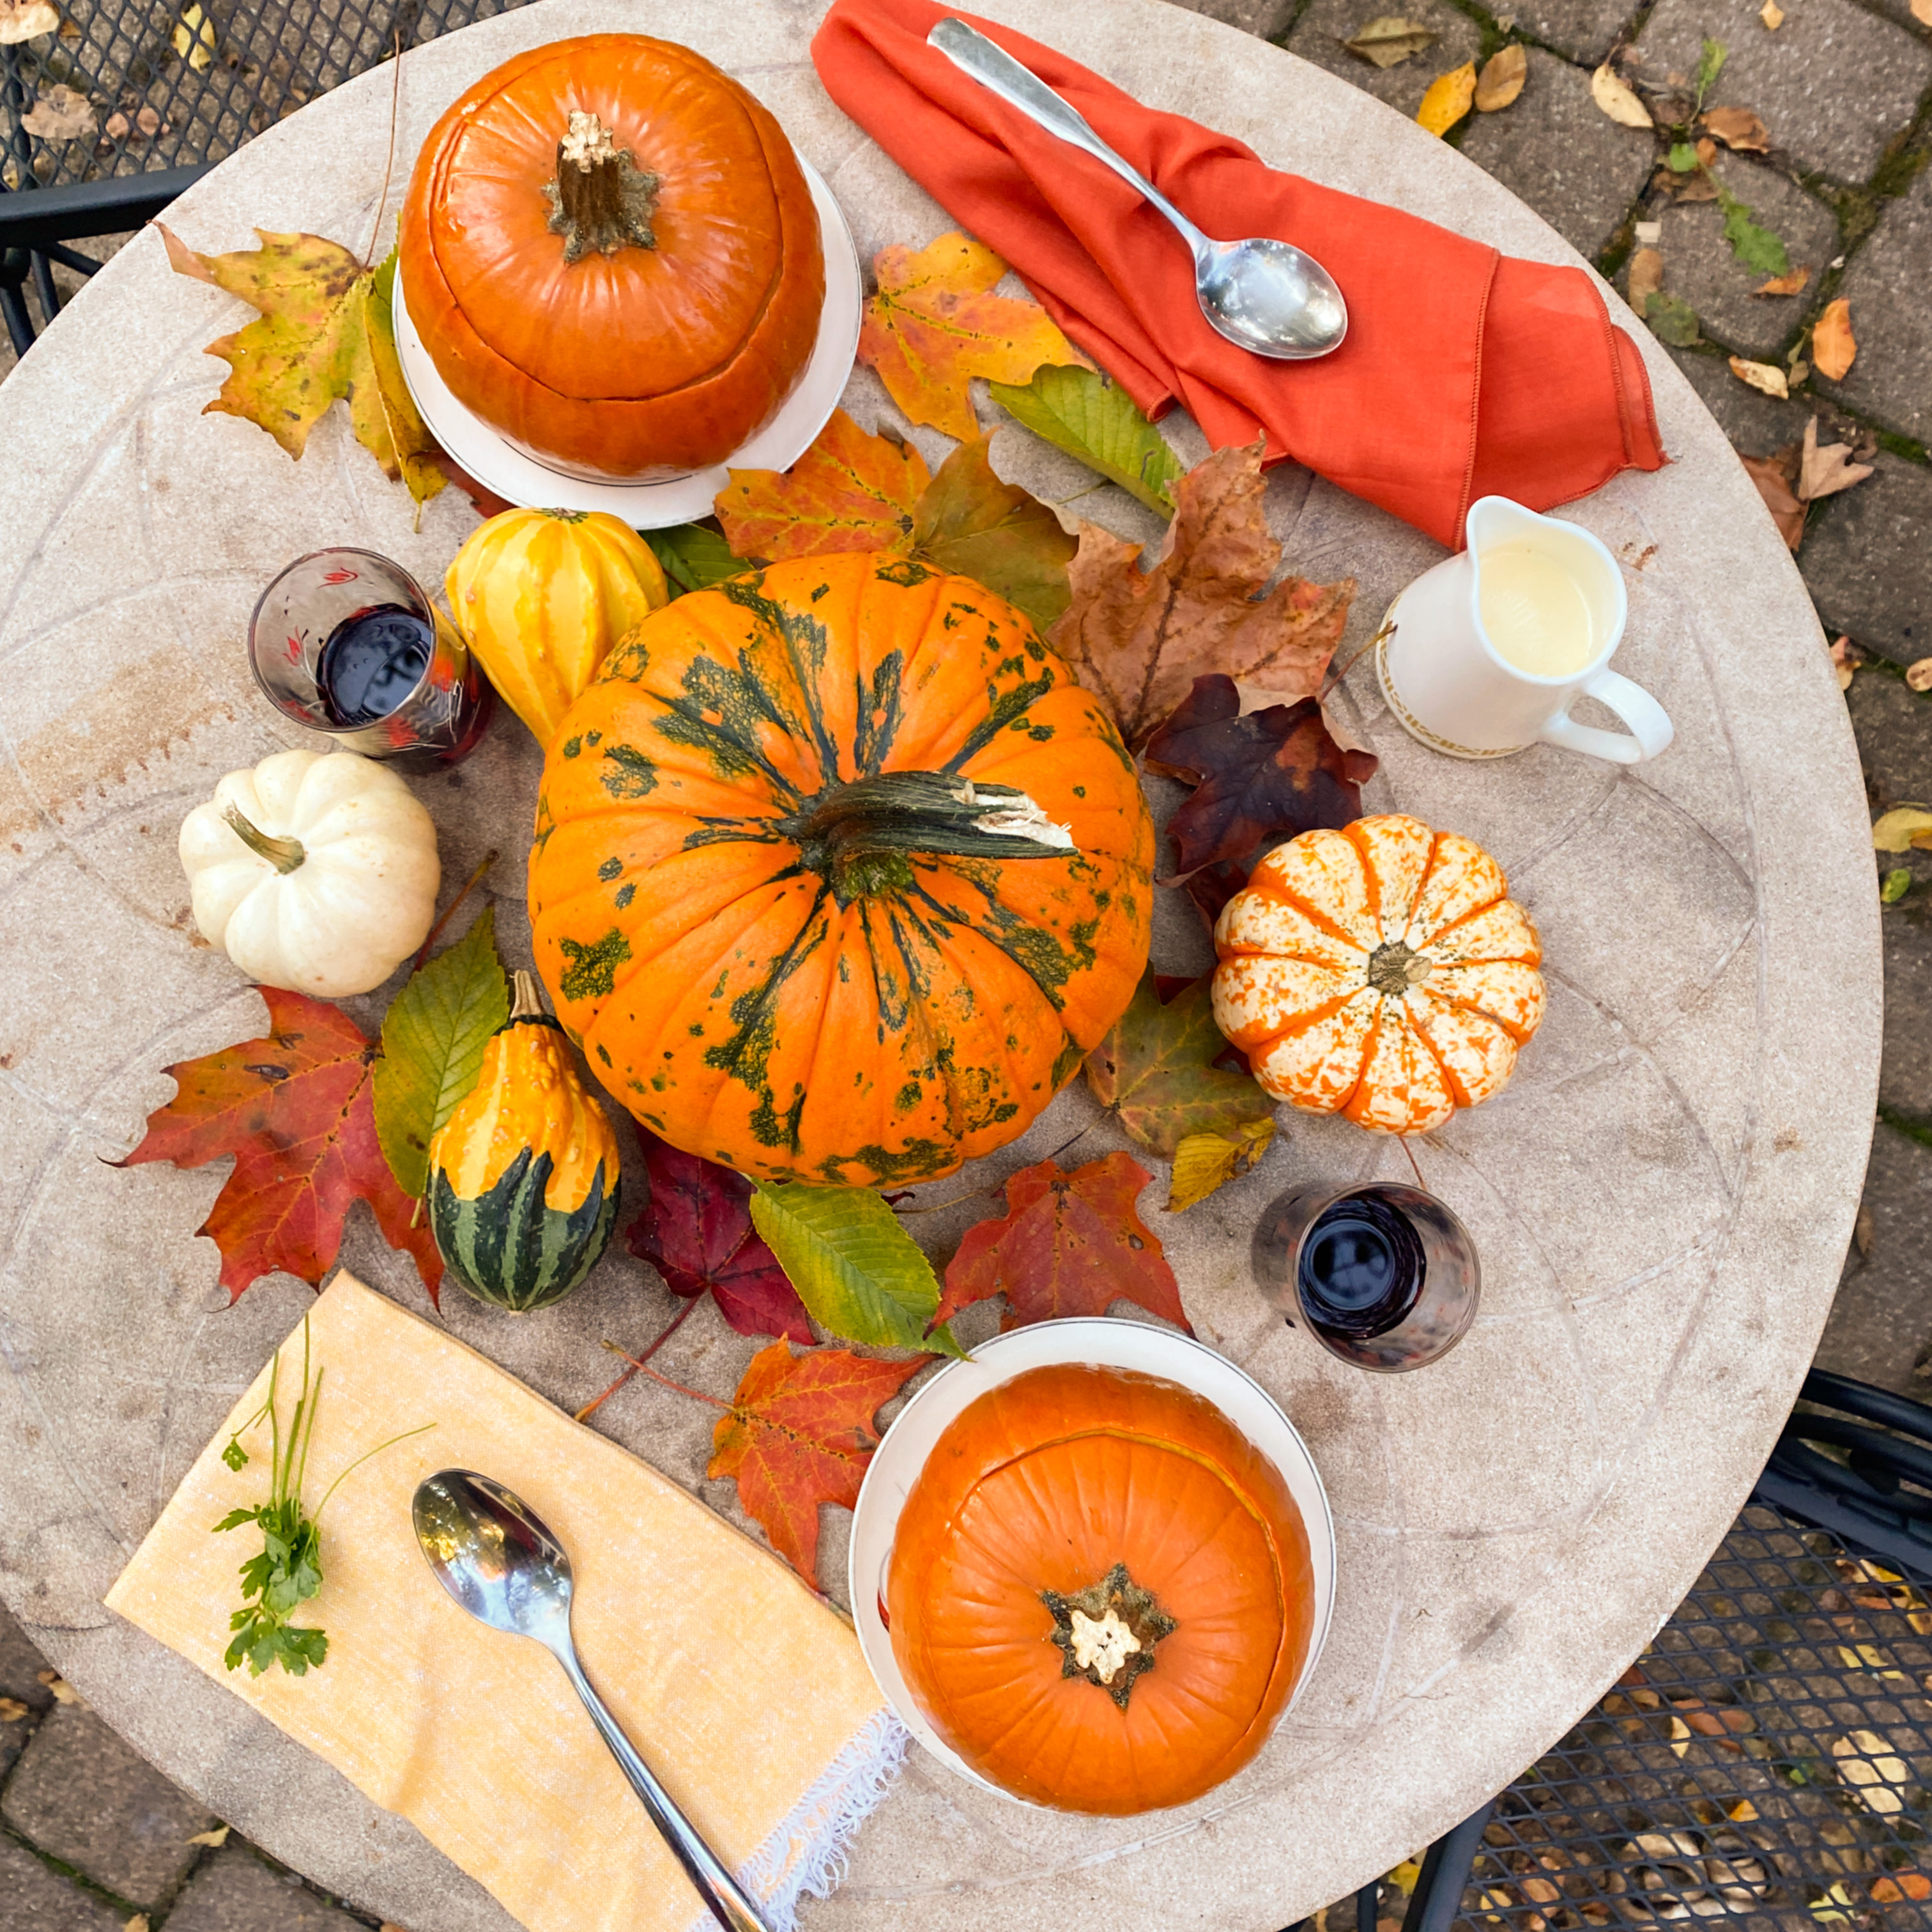
Soup in a Pumpkin made on the grill.
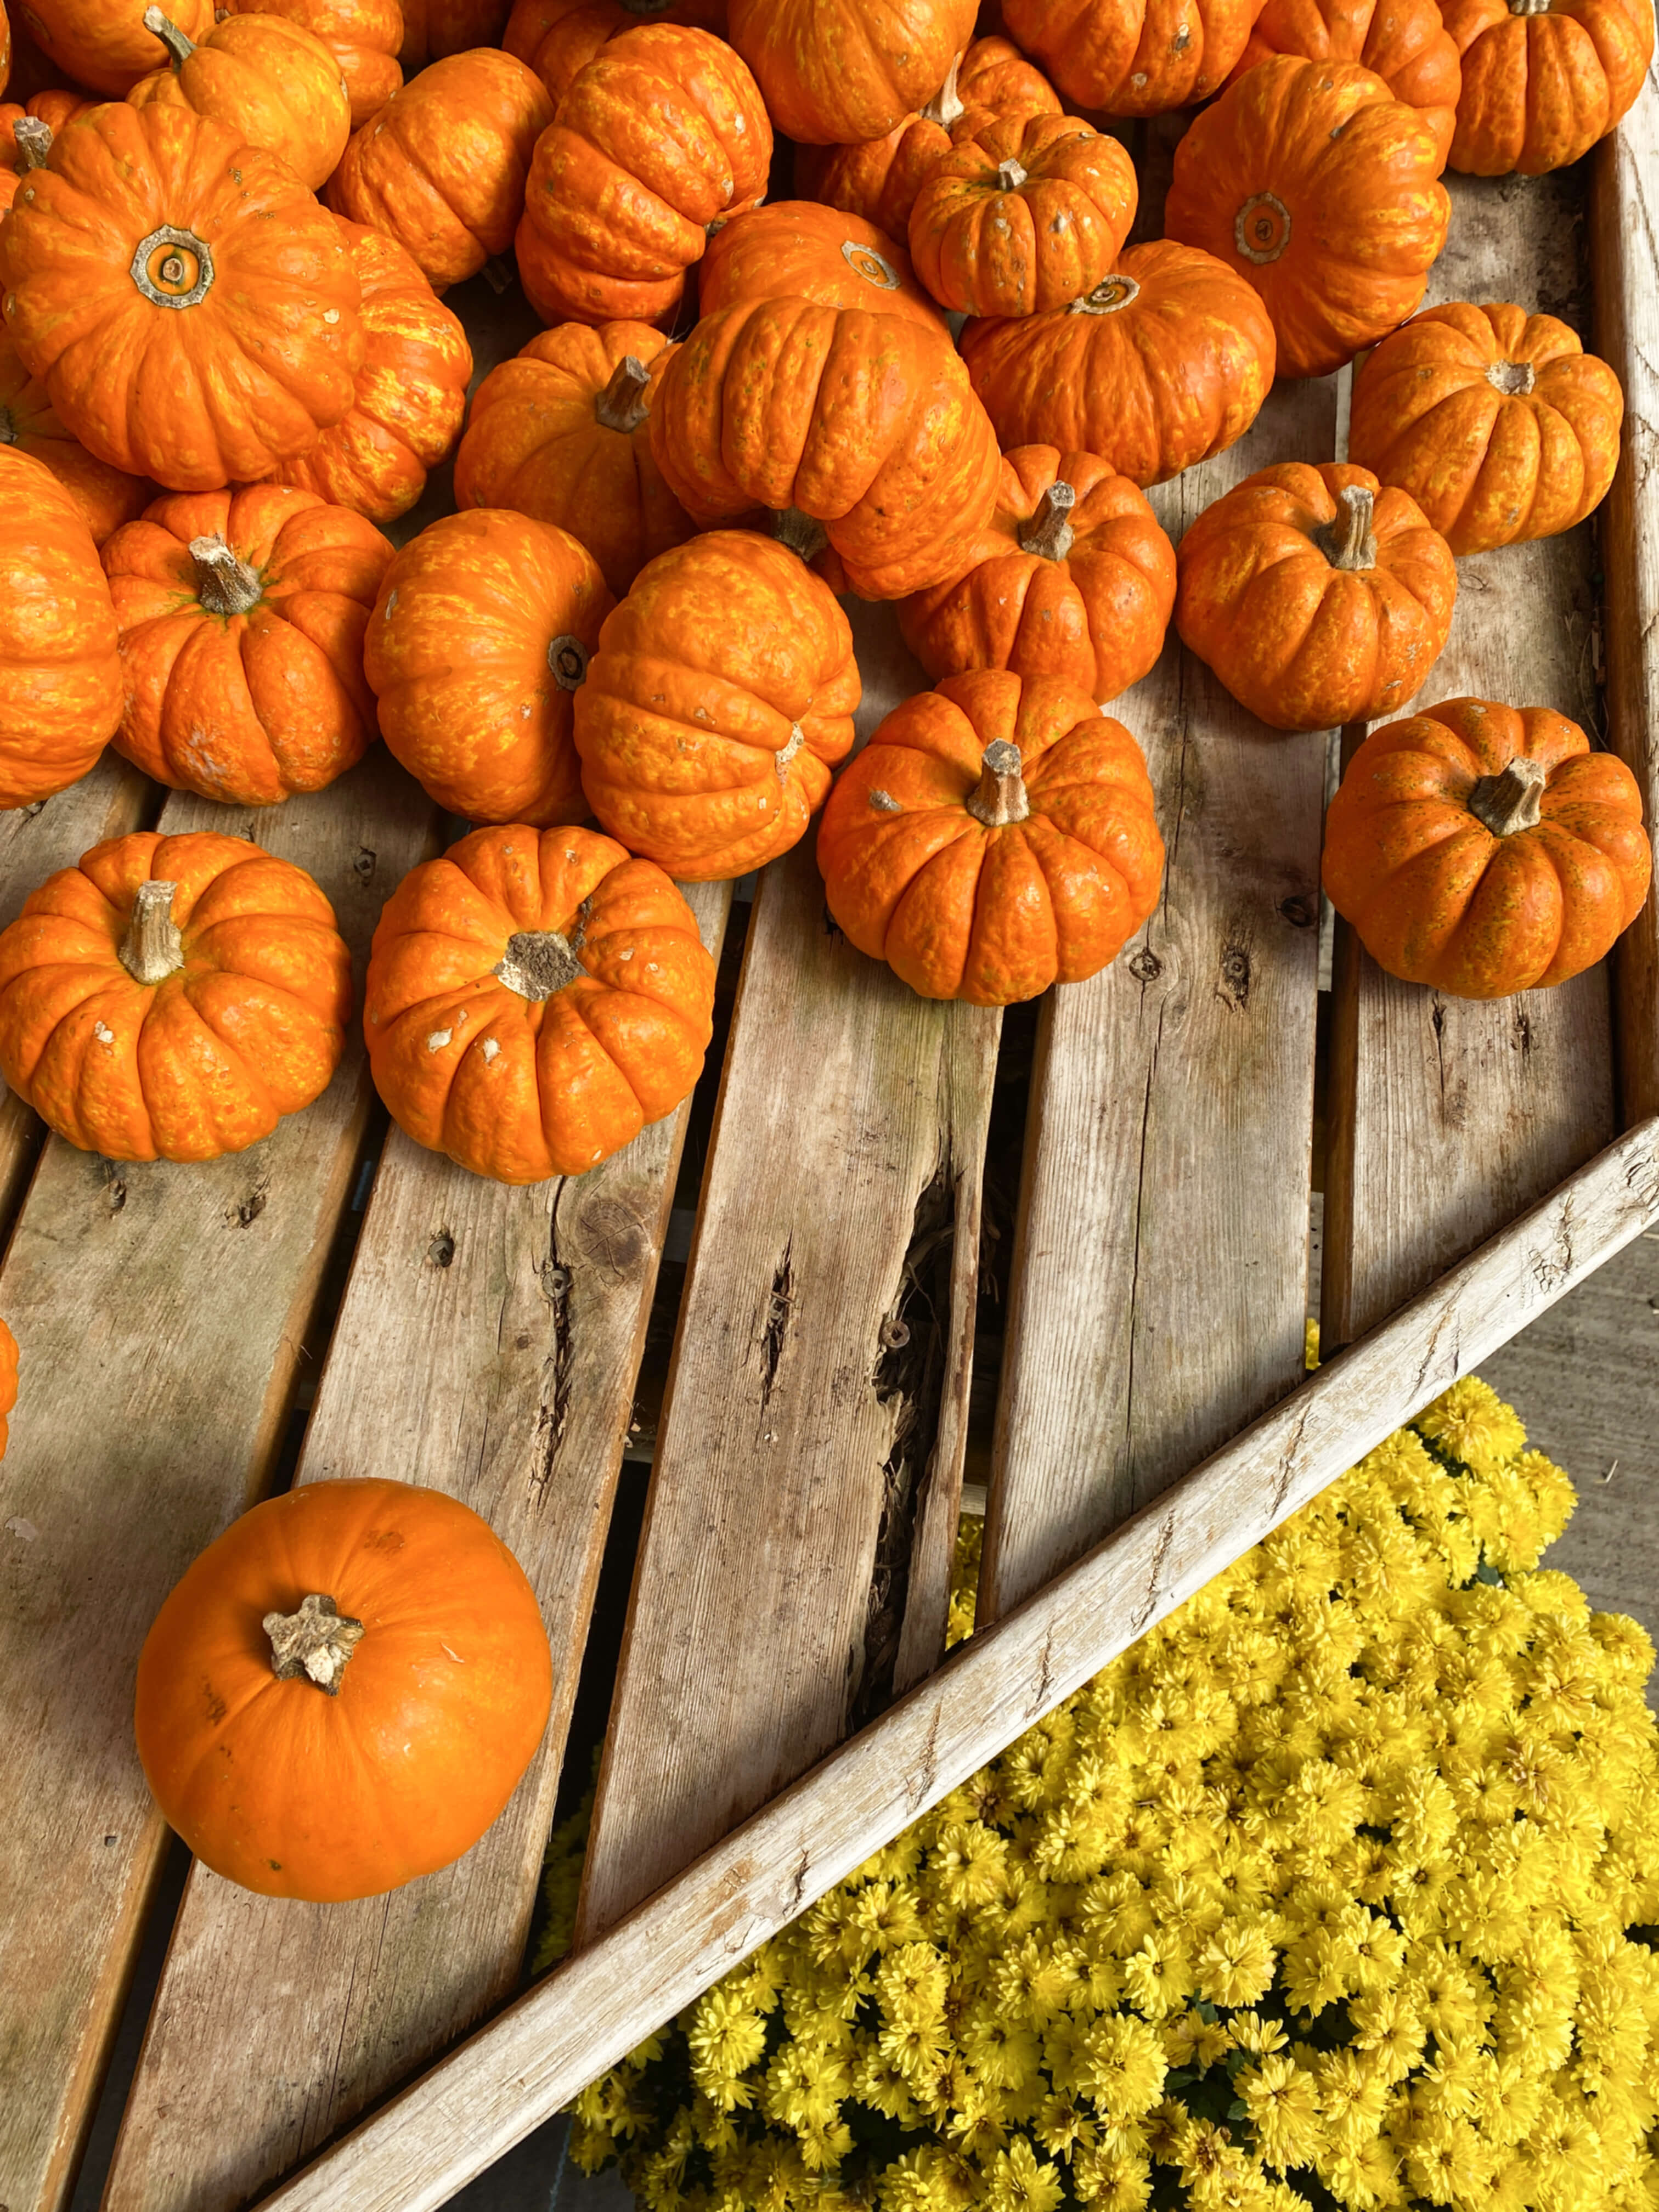
Full of autumn color and flavor from start to finish, the seasonal joy of this vintage meal starts with picking out your pumpkin. We are very lucky here in Connecticut to have this really gorgeous nursery just a few minutes from the house that has a dazzling display of just about every plant and homegrown pumpkin you could ever want in a New England garden. Right now there are mums for miles…
And rows of squash and gourds and pumpkins in all different shapes and shades…
So many beautiful pumpkins to choose from!
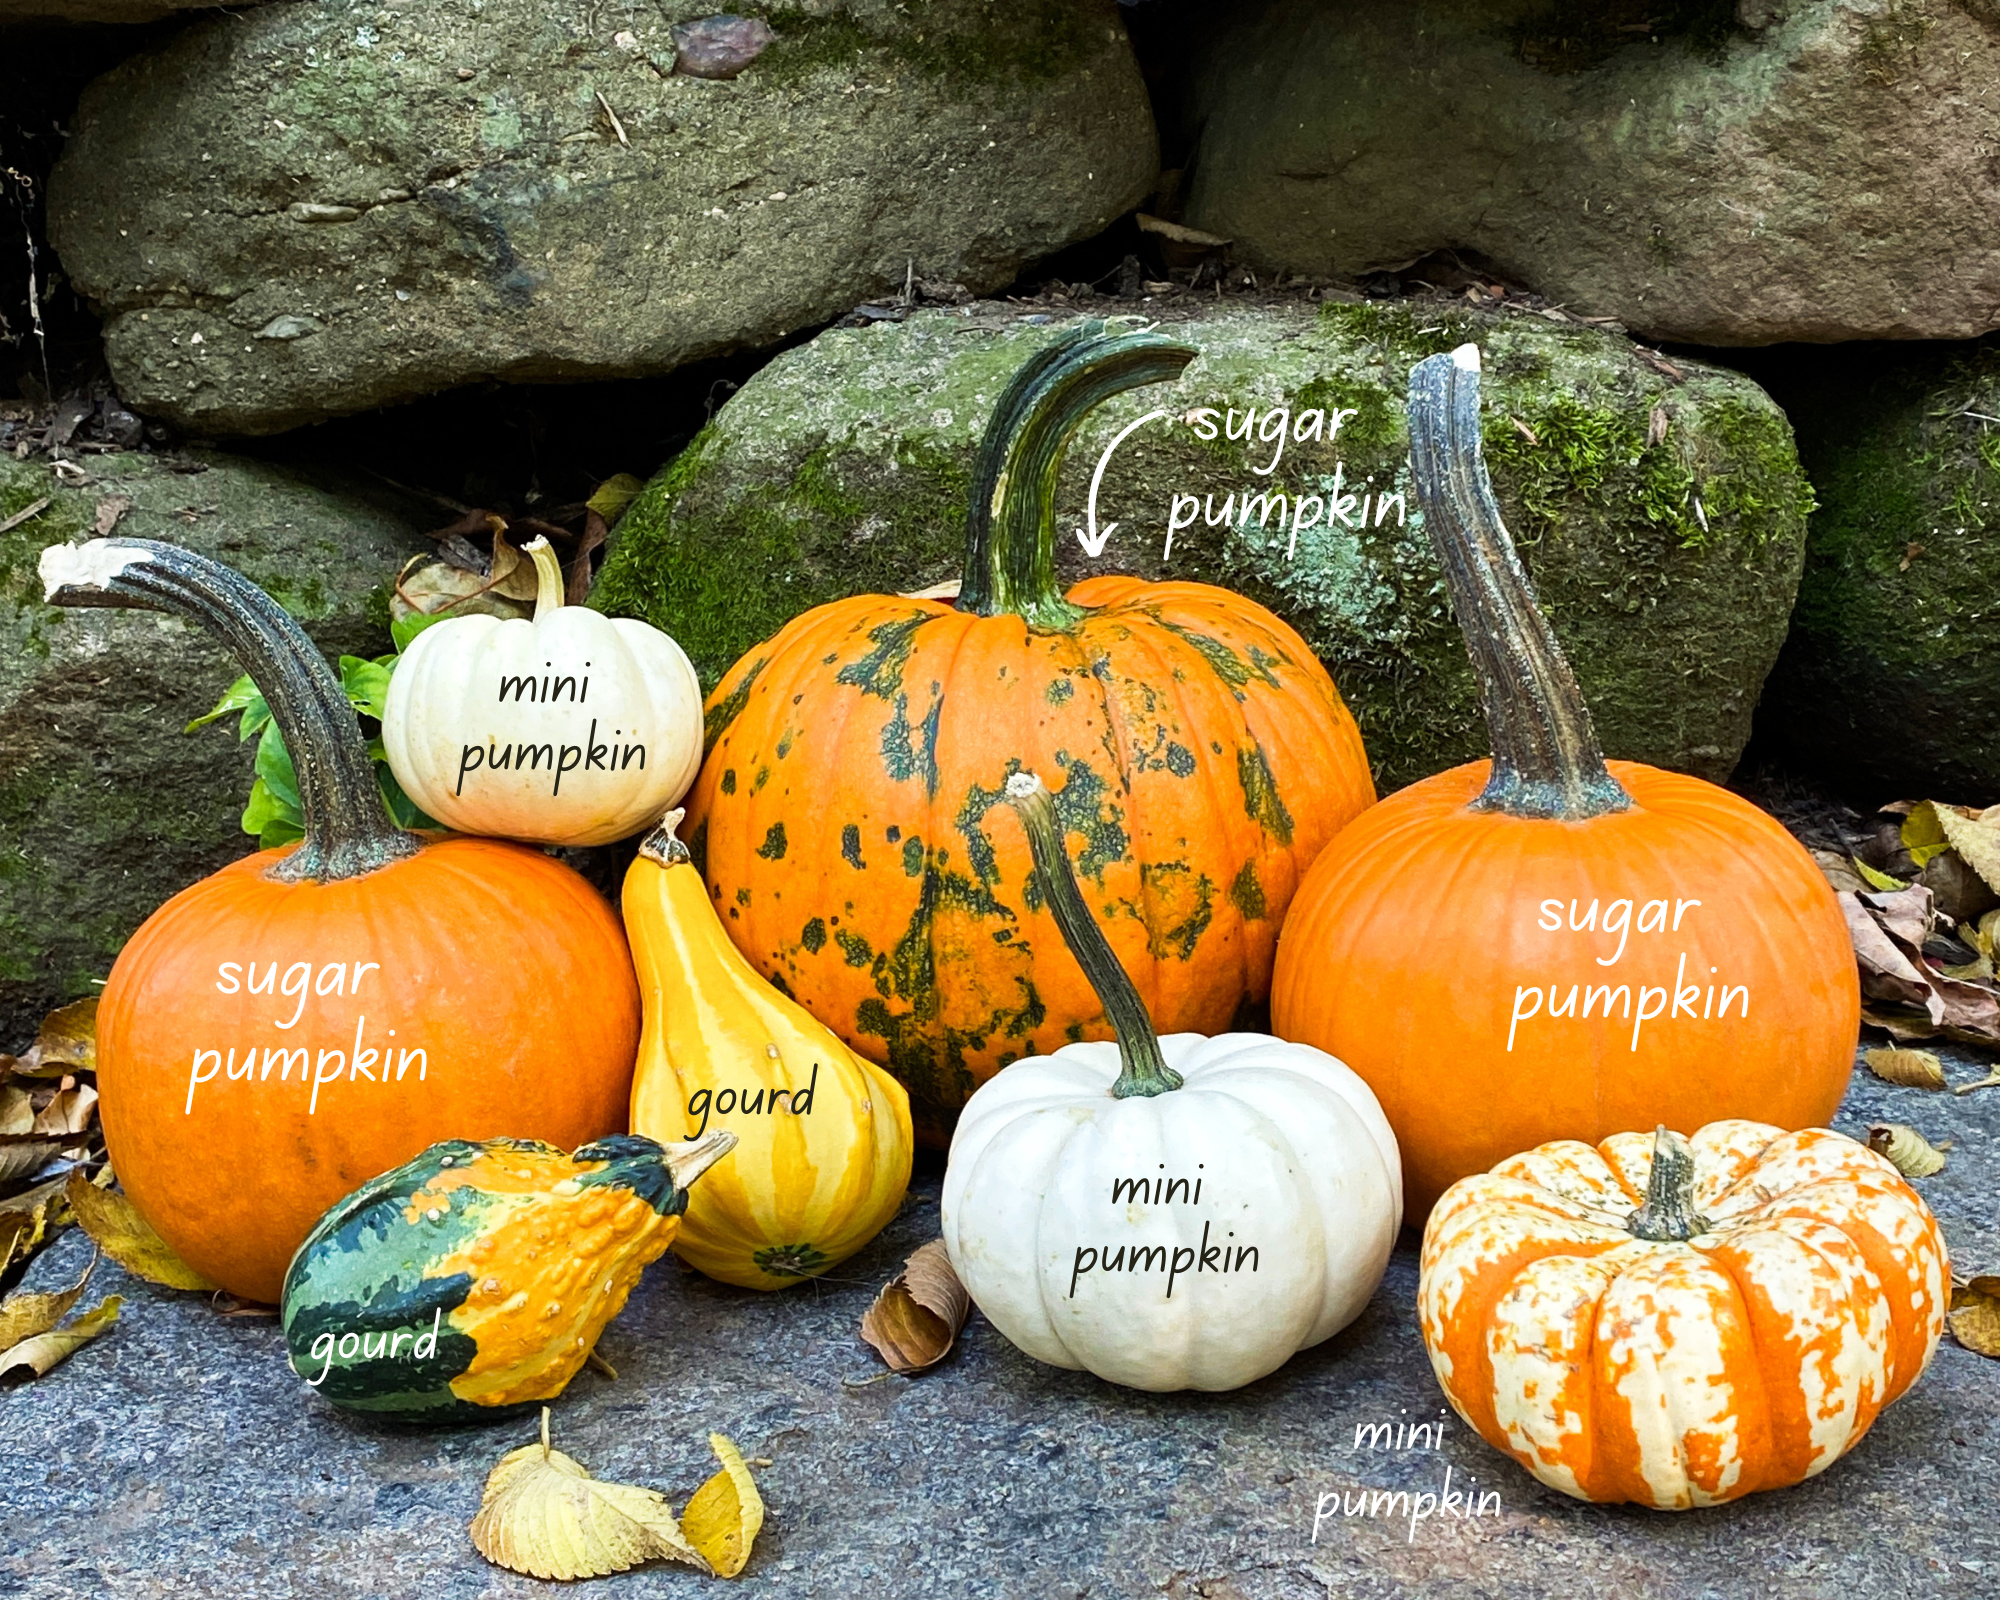
Since Julia didn’t specify what type of pumpkin to use, we had our choice of over a dozen varieties to pick from at the nursery. While all pumpkins are edible, even the little minis, for this recipe, we chose the sugar variety which is the preferred pumpkin for baking.
Sugar pumpkins!
Also known as pie pumpkins, they come in smaller sizes – an ideal factor for this recipe since we had to make sure it would fit on the grill. When you are selecting your pumpkins, look for ones that are of equal size and shape and that sit flat and balanced on the counter.
It is important to note that sugar pumpkins have thicker skin, and less stringy fibers, making them a good choice for roasting whole. A part of the American diet since the 1800s, they are ideally suited for baking and pie-making thanks to their slightly sweeter flesh. Larger carving pumpkins, on the other hand, have thinner skin, which makes them best for Halloween carvings but less stable in the oven or on the grill due to their more fragile composition. Instead of one 7-pound pumpkin that would serve 8-10 people as Julia recommended, we picked two 2 lb. sugar pumpkins that would serve two to four people and then cut Julia’s recipe in half.
When Julia was preparing The Way To Cook, she was living in Cambridge, Massachusetts. She noted that this recipe was a delightful start to any fall dinner but also that it held its weight as a main course. “A real rib sticker,” she called it. I couldn’t agree more. It’s a meal just calling out for cold, blustery days and hearty appetites. Filling and full of flavor, while it is cooked in a pumpkin, this is not a typical pumpkin soup that has been pureed in a pot and accented with aromatic seasonal spices. This soup is chunky and layered. More like onion meets squash, it’s a veritable hot pot that contains all the delicate, deconstructed elements of French Onion soup with bites of pumpkin that you scrape from the inner walls while you eat. Swiss cheese and heavy cream add a bit of rich flavor. Toasted bread crumbs, garden herbs, and chicken broth add depth, and the pumpkin itself adds color and dimension when presented at table.
I love the fact that the pumpkin is an individual-sized serving bowl and that it really keeps the soup hot and insulated for quite a length of time. Since it cooks on the grill in a simmering bath of butter, broth, and the onion, cheese and herb mixture, the pumpkin soaks up all the savory flavor components making it taste bright and vibrant, instead of what sometimes can be a bland vegetable when eaten on its own. Grilling the soup outdoors made for a real sensory experience between the cool weather, the falling leaves, and the excitement of trying something new.
The recipe below is adapted for the grill but continue reading all the way to the end and you’ll also learn how to easily return the recipe to Julia’s original design.
Soup In A Pumpkin On A Grill
Serves 2-4
1 1/4 cups fresh country-style white bread, cubed for crouton-style bread crumbs
1 cup sweet Vidalia onion, minced
2 oz. butter (1/2 stick) plus 1 tbsp soft butter
2 two-pound sugar pumpkins
3/4 cup coarsely grated Swiss Cheese
2 cups chicken stock
Salt
Freshly ground pepper
8-10 fresh sage leaves, finely chopped
1/2 cup heavy cream (optional)
1/4 cup fresh parsley for garnish
Heat the grill to 400 degrees. Preheat a medium cast iron pan. Cut the bread into crouton-style cubes, about 1/2 inch in size. Spread crumbs in one single layer in the pan and toast for two minutes with the grill lid open. Remove from heat and set crumbs to cool in a single layer on a plate. Cover the grill to keep warm and maintain the 400-degree internal temperature.
Toasted bread crumbs.
In a pan on the stovetop (or in our case an electric hot plate!), melt the 1/2 stick of butter. Add the minced onion and cook over medium-low heat until the onions are translucent and tender (about 15 minutes). Add the toasted bread crumbs to the onion mixture, toss them completely, and cook for an additional three minutes. Remove from heat.
Rinse the outside of your pumpkins with warm water to remove dirt and dust and towel dry. Cut a lid out of the top of each pumpkin in the same way you would carve a hat for a jack-o-lantern. Remove all the seeds from the interior of each pumpkin and scrape the inner walls to remove the pumpkin strings. Rub the interior of each pumpkin with the remaining tablespoon of butter. Place the prepared pumpkins on a large flat cast iron pan or tray.
Add the onion/breadcrumb mixture to the inside of each pumpkin, making sure the mixture is evenly distributed between the pumpkins. Repeat with the grated cheese.
In a separate pan, bring the chicken broth to a boil. Once it is hot remove from heat and fill each pumpkin cavity with the broth. Make sure to leave at least two inches of space from the broth line to the top rim of the pumpkin so that the soup does not boil over onto the grill while cooking. Season each pumpkin with salt, pepper, and sage. I used about 1/2 teaspoon of freshly ground sea salt and about 1/4 teaspoon of freshly ground pepper per pumpkin. Depending on your taste and the saltiness of your broth you may want to add more or less according to your preference. Place the pumpkin top lids back on the pumpkins.
Making sure the grill is still holding an even 400-degree internal temperature, elevate the cooking pan or tray holding the pumpkins so that it is not sitting directly on the grill rack. We did this using a brick wrapped in tin foil and then placing the pumpkin pan on top of that, but whatever system you can manage to achieve indirect heat for the pumpkin pan is fine just as long as the pumpkin pan is not sitting directly on the grill rack.
Cover the grill and cook the pumpkins for 30 minutes. It is important not to overcook the pumpkins or you will wind up with weak bottoms and your soup might fall out like Julia’s did all over the floor. At the 30-minute mark, check the pumpkins to see if the outer skin has softened to the touch. Instinct will definitely guide you here. When you press the outer skin you want it to give but not collapse. You are looking for a similar firmness to a semi-deflated basketball or a just-about-ripe avocado. If the pumpkins are not quite soft enough, lower the grill lid and keep checking them every five minutes. As a reference guide, one of our pumpkins wound up taking 35 minutes to cook and the other 40 minutes.
If you are adding heavy cream, just before the pumpkins come off the grill, heat the cream in a smalll saucepan until it just begins to simmer. When the pumpkins are ready, remove them from the heat to small plates (bread and butter size), lift the lids, divide the cream equally amongst the pumpkins and give each a gentle stir to incorporate the cream. Serve immediately. If one of your pumpkins is ready before the other, you can remove it from the grill to a plate and cover it in tin foil until the other pumpkin is ready. But do not let the pumpkins sit on their own for an extended amount of time before serving. As they cool, the pumpkins will eventually start to sink into the plate. Rest assured though, there is plenty of time to enjoy your soup before the pumpkin begins slumping so if you are worried about table presentation, don’t fret, you should be able to get through all of your meal before the pumpkins start to droop.
Cheesy, warm, and brothy, all you need is a soup spoon in the flatware department for this meal. The inner walls of the pumpkins will be soft enough to scrape with just the edge of the spoon. No forks or knives required for this dish!
Since presentation is a big part of the fun of this recipe, it is best enjoyed on the day of, hot off the grill. If you have leftovers, the soup is still delicious the next day but the breadcrumbs will continue to soak up the broth, so you will need to add more broth and a dash of cream if you choose to reheat it. Also, the pumpkin bowl will not keep its shape well overnight, so it is recommended to scoop out any leftovers, discard the pumpkins and store the soup in a separate container in the fridge.
If you choose to make this recipe using Julia Child’s oven method. Follow the instructions exactly but set your oven to 350 degrees to toast the bread crumbs and then to 400 degrees to roast the pumpkins. And if you choose to use one big pumpkin like Julia’s below, then double the number of ingredients for a 6-7 lb pumpkin which will serve 8-10 people.
Julia Child’s Soup in a Pumpkin utilizing one 8lb pumpkin circa 1989. Photo courtesy of her book, The Way to Cook.
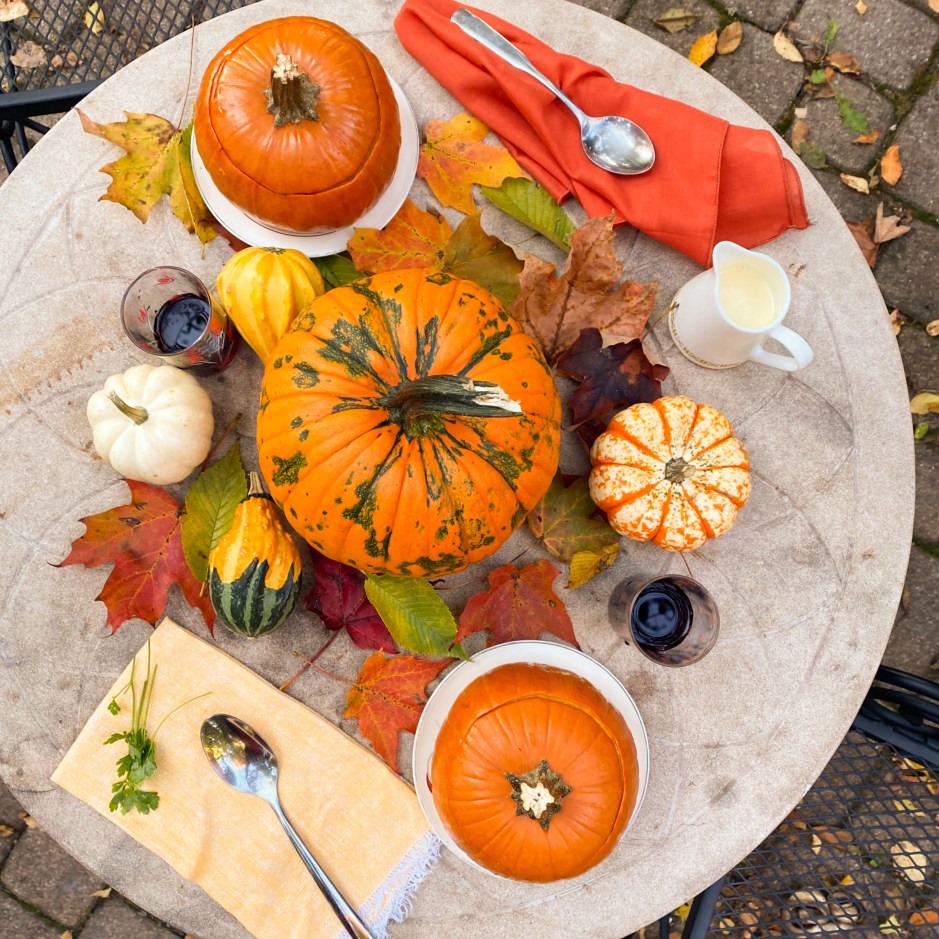
Either way you cook it… oven vs grill… big pumpkin vs. small pumpkins… I hope you love this recipe just as much as we did. As we enjoy the autumn weather, this pumpkin soup is lovely outdoor party food and also tailgate fare for all you sports enthusiasts who like to gather around a grill while cheering on your team. Celebrate beforehand with an autumn-themed cocktail or serve a glass of wine with your soup and you’ll be warm and full of autumn joy by meal’s end. This soup pairs especially well with red or white wine. I recommend Cabernet Sauvignon or Chardonnay depending on your preference. Add some fall leaves to your table for decoration and you’ll have an easily put-together autumnal feast accented by Mother Nature. Come winter, this soup will fuel you through the holidays and snow shoveling season with aplomb. It might even inspire you to plant a few pumpkin seeds next spring, so that you can continue this creative cooking endeavor year-round and grow your own serving bowls for next fall.
Cheers to a happy Autumn and to loveable Julia who always paves the way to wonderfully delicious dining experiences.
Autumn has officially arrived in our neighborhood! Keep up with us on Instagram to see how the sugar maples are changing day by day in the yard of 1750 House.
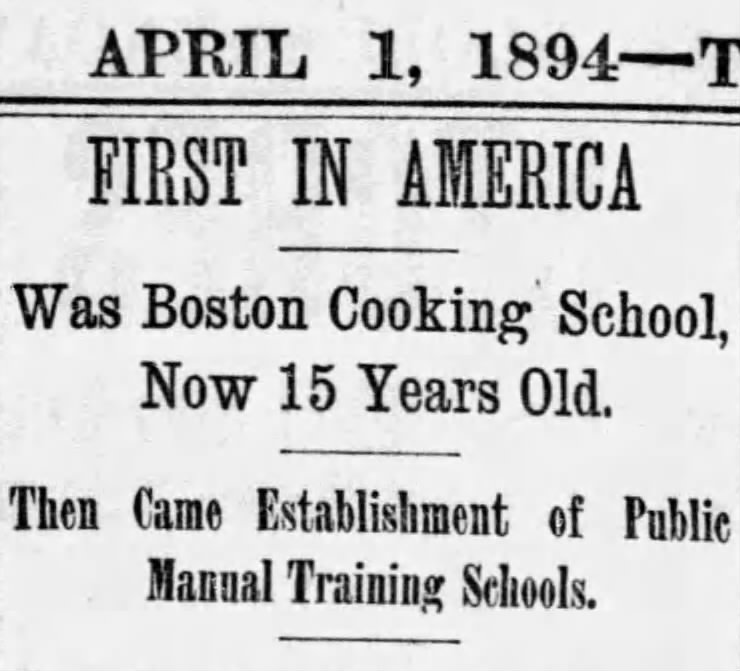
Photo courtesy of the Boston Globe – April 1st, 1894
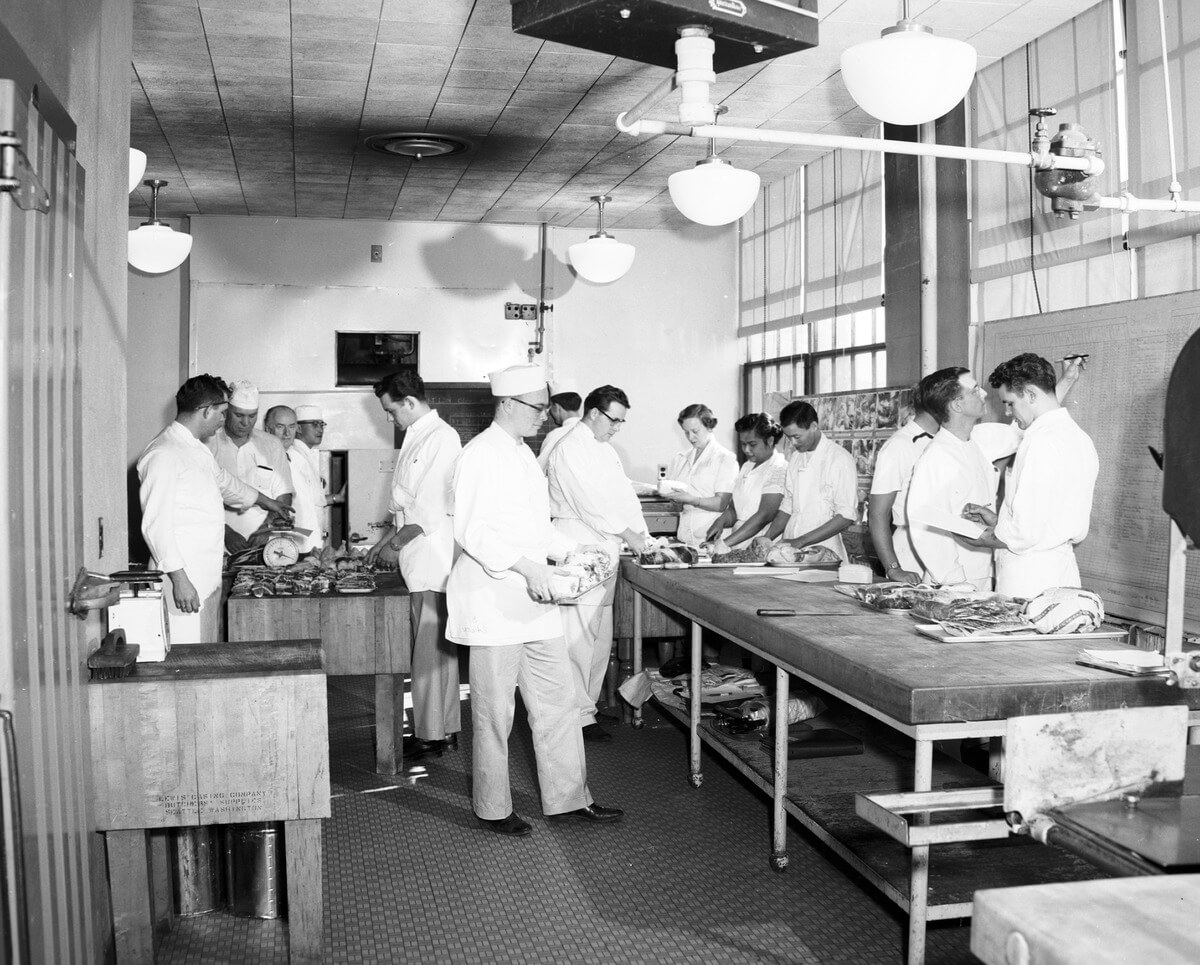
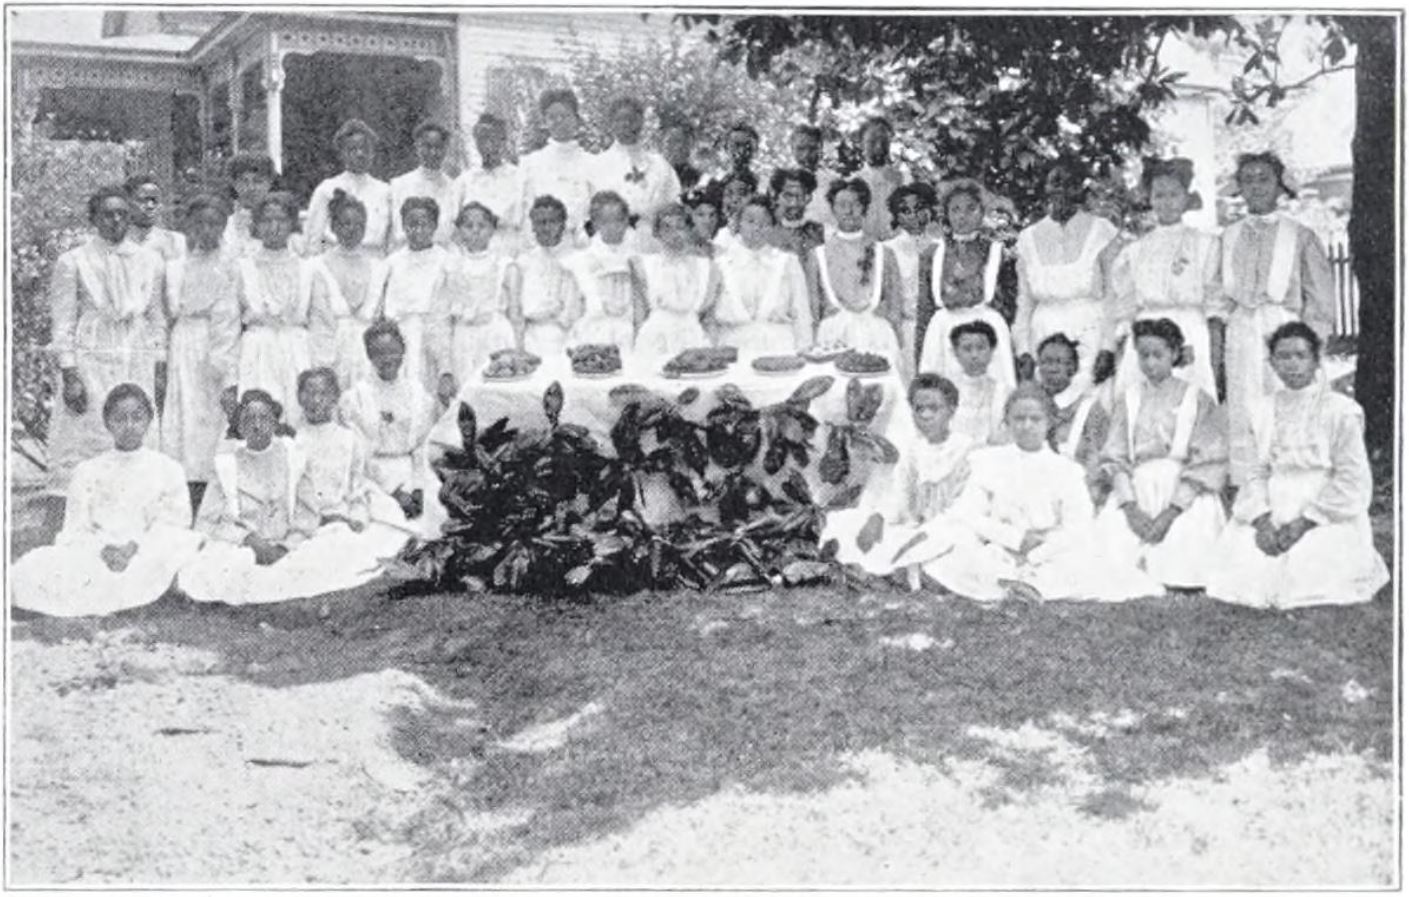
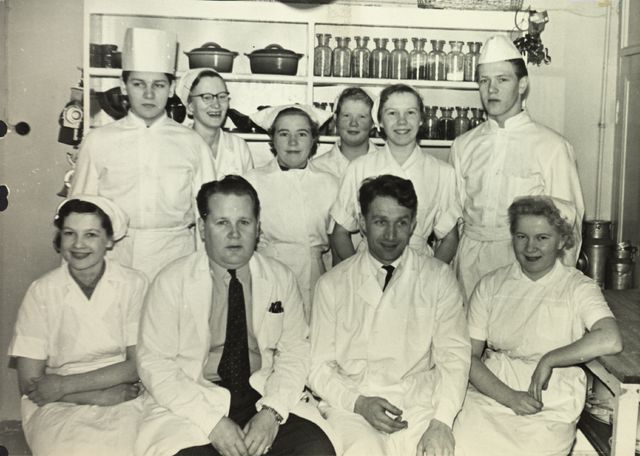
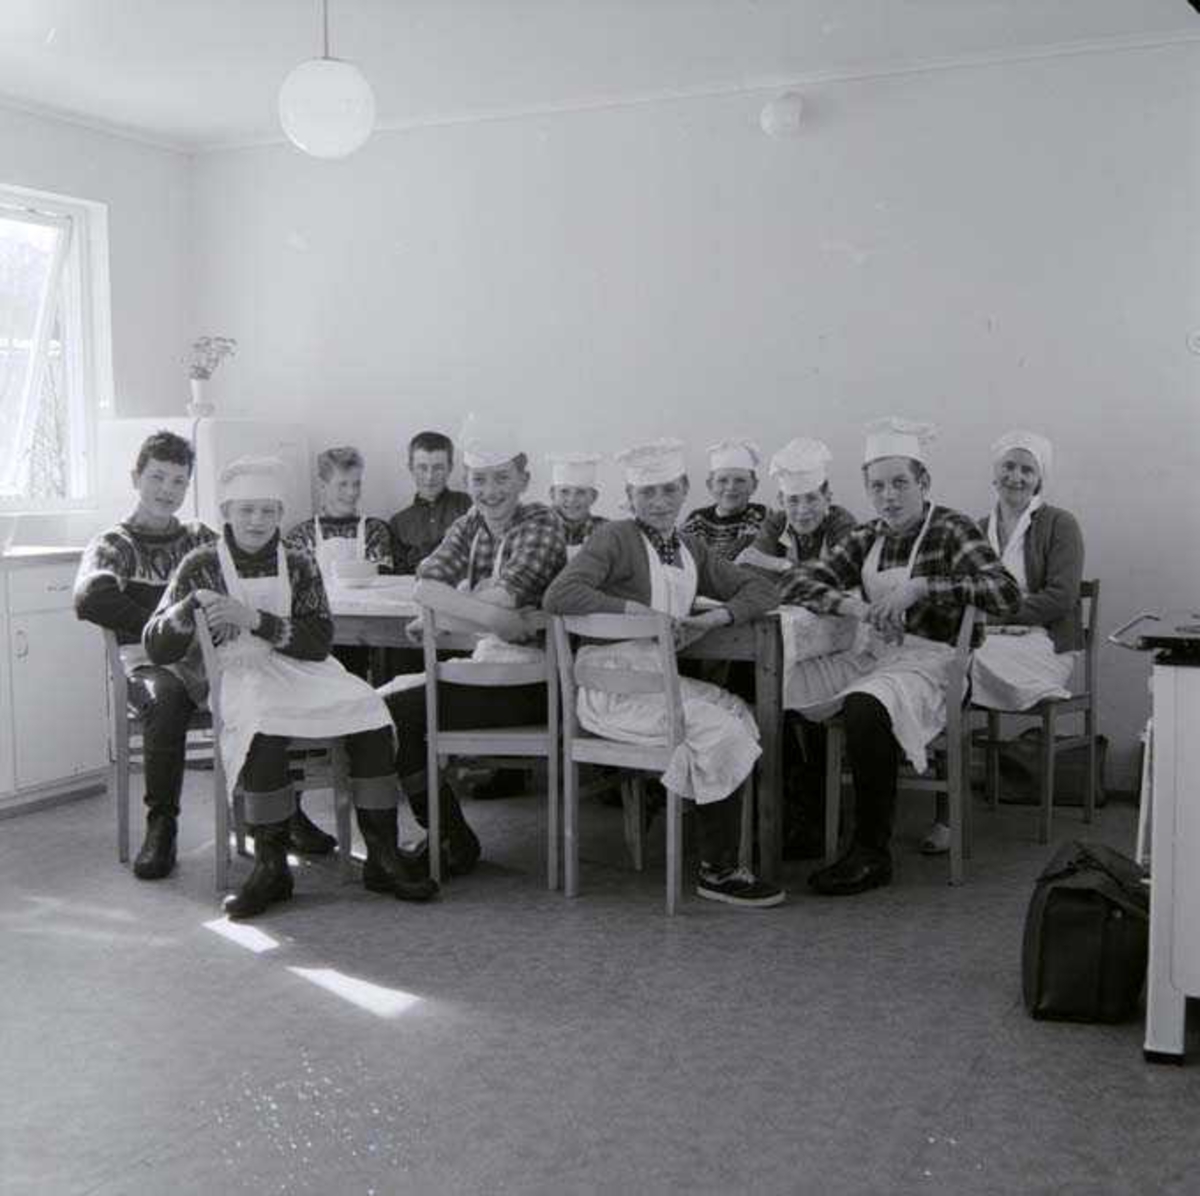
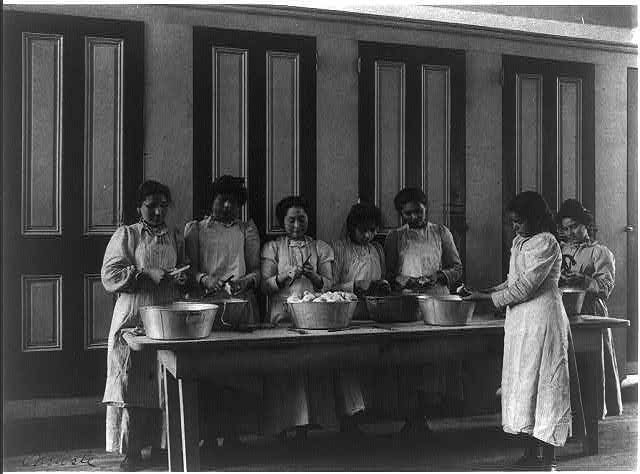
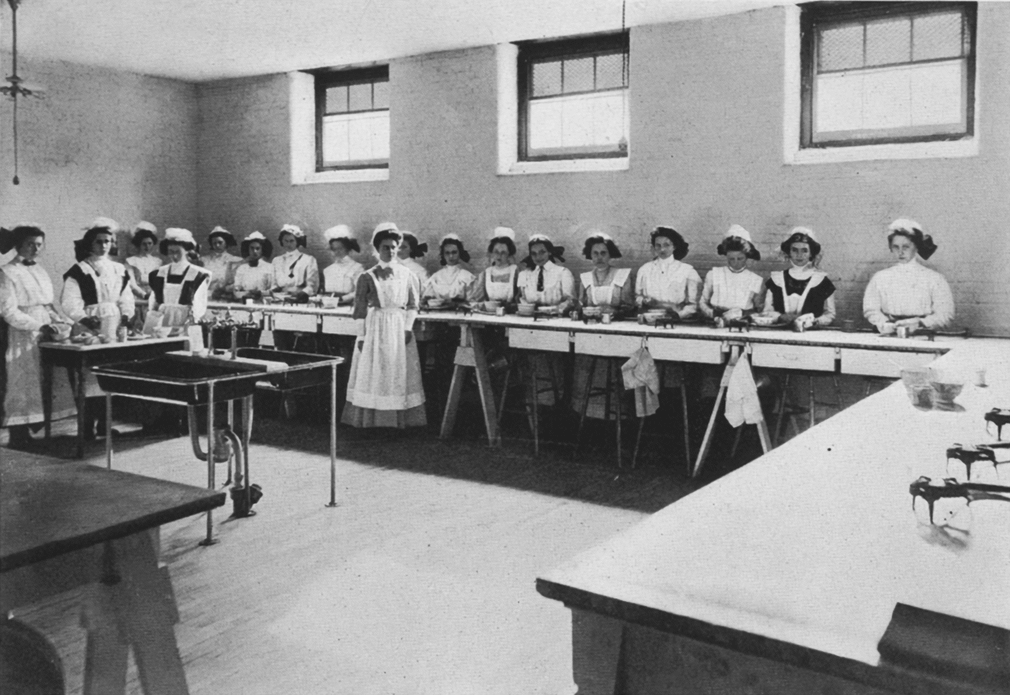
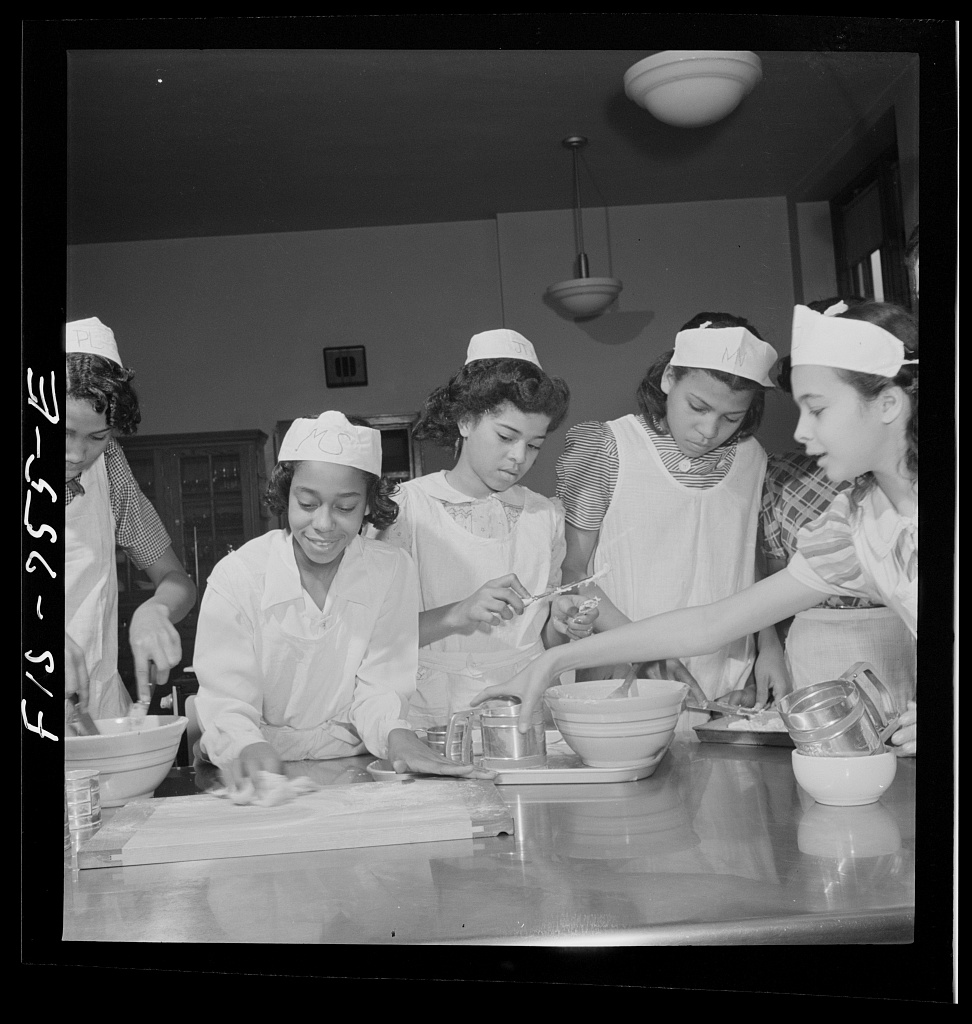
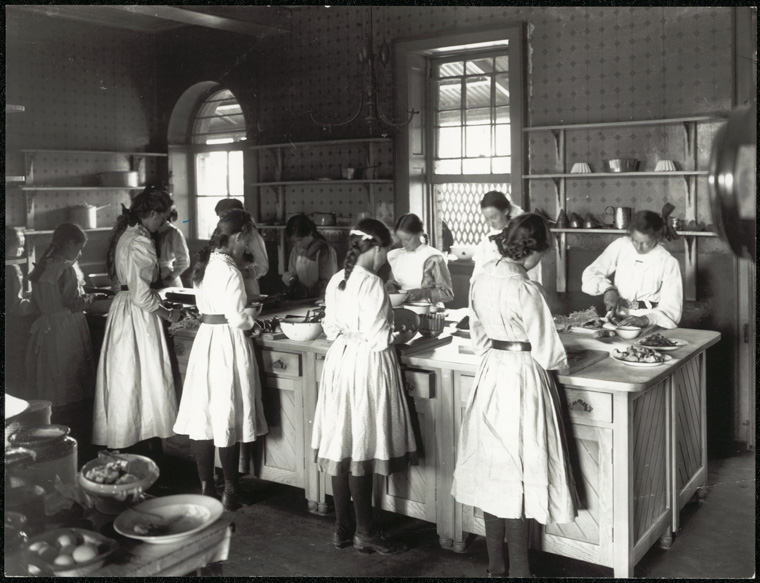
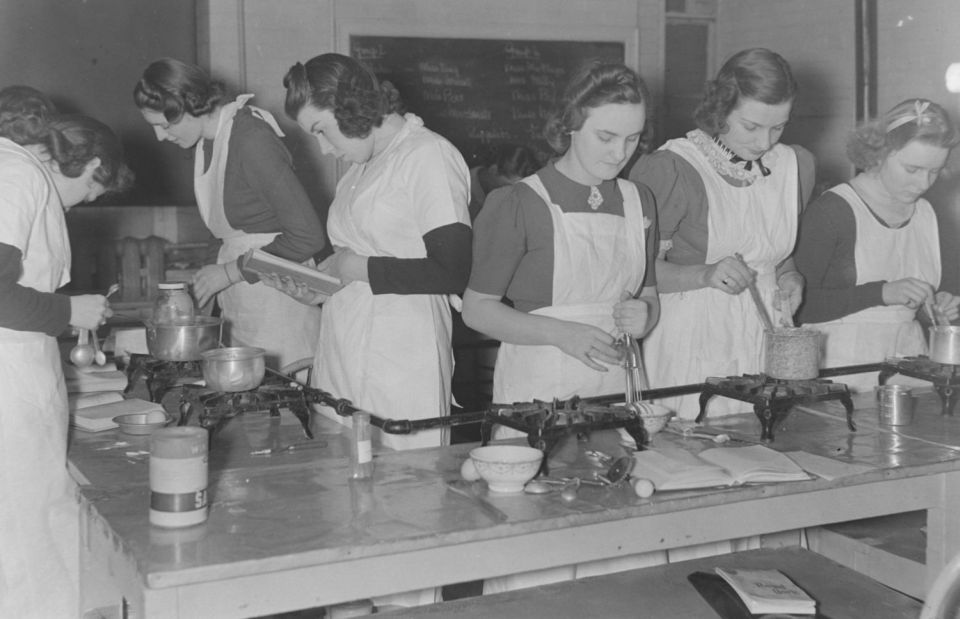
The first cooking school in America opened its doors to students in 1879. That was the Boston Cooking School, founded by the Women’s Education Association. The school’s chairman was Sarah E. Hooper, who after traveling abroad during the 1850s, was so impressed with the vocational training provided at industrial schools for domestic workers in England and Scotland, that she opened her own school in Australia where she was living at the time. There, a much-needed type of education, Sarah’s school became a big success giving her the confidence and expertise to try such an endeavor when she moved back to America. Since then, cooking and education have gone hand in hand. In today’s post, you’ll find 26 vintage photographs that highlight the relationship between food and teaching as seen in classrooms around the globe. It’s a fun look at history via the kitchen lens. Each of these photos tells its own unique story, from the equipment used to the clothing worn to the expressions on the faces of the teachers and students themselves. Let’s take a look…
The Naval Cooking School, New York City circa 1915-1920Cake Making at the Boston Cooking School, Boston, MA, 1908Cooking class at Stanthorpe State School, Australia, 1933The Edison Cooking School, Seattle, 1955Students preparing lunch at the Boston Cooking School, Boston, MA, 1908Cooking Students at the Montgomery Industrial School for Girls, Montgomery, Alabama, 1910Welfare Hall cooking class, Boston, MA, 1905Cooking School for Working Mothers, Berlin, Germany, 1913Sherman Indian High School Cooking Class, Riverside, California, 1910 Teachers and Students at The Hotel and Culinary School of Finland, Helsinki, 1956High school cooking class, Washington DC, 1899Cooking class at Grafton Public School, Australia, 1926Cooking Class for Boys, Norway, 1963Cooking class at the Carlisle Indian School, Carlisle, Pennsylvania, 1901Elementary school cooking laboratory, New York circa 1908-1915Chevy Chase High School cooking class, Bethesda, Maryland, 1935The Frigidaire Cooking School, Clarkesville, Georgia, 1950High school cooking class, Watertown, New York, 1909Montgomery Blair High School cooking class, Silver Spring Maryland, 1935Cooking class at a school for girls, Jerusalem 1936 Cooking class at Banneker Junior High School, Washington DC 1942Forst Street Public School cookery class, New South Wales, 1910Home Economics class, Ontario, Canada, 1959The Star Bulletin Cooking School, Honolulu, Hawaii, 1934Y.W.C.A. Cooking class, Canada 1939Salem Boys Club cooking class Salem, Oregon, 1976. Photo courtesy of the Statesman JournalAfrican American Cooking Class circa 1910-1940Teacher’s College Domestic Science Class & Cooking Laboratory, Oxford Ohio, 1915Housekeeping and cooking students, Germany, 1905Ohio State Normal College Cooking Laboratory, 1910Wood Stove Cooking Class circa 1899
As we welcome this studious month of September, we wanted to say a special cheers to all the teachers out there who have kept our minds fed and our bellies full throughout history. Hope you have enjoyed this unique glimpse into the past. Happy Labor Day!
F. Scott Fitzgerald wrote about the feel of the air (Life starts all over again when it gets crisp in the fall). Albert Camus describes beauty in the leaves (Autumn is a second spring when every leaf is a flower) and Jane Austen describes the sentimental atmosphere that envelops September through December (Autumn.. that season of peculiar and inexhaustible influence on the mind of taste and tenderness). Isn’t it wonderful how one season can inspire so much?
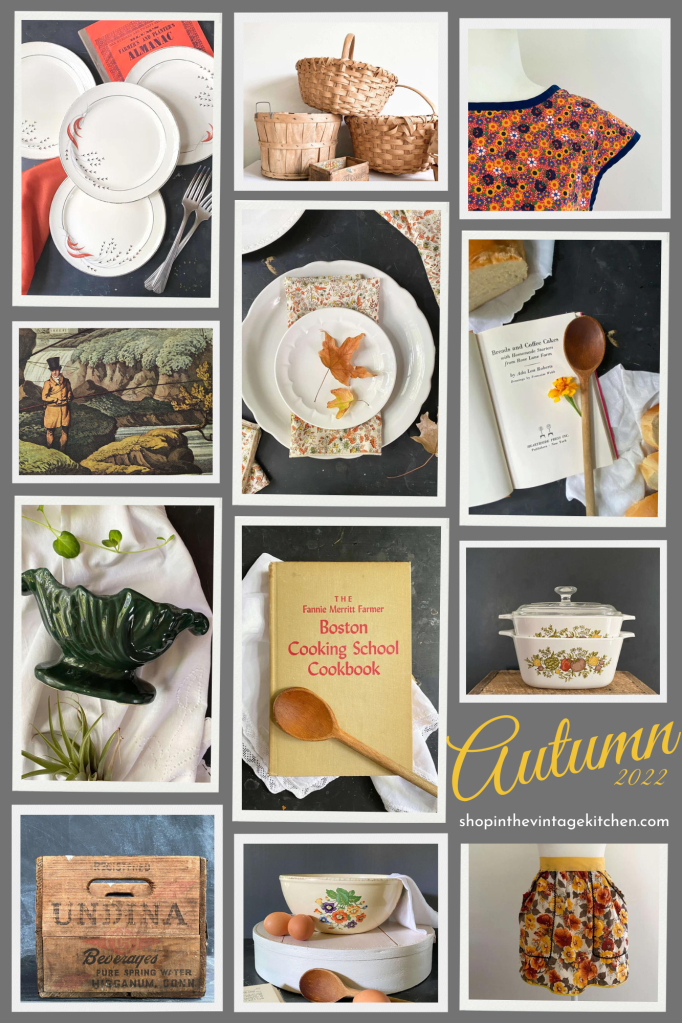
Over the past couple of weeks, we have been slowly transitioning from August to autumn over in the Vintage Kitchen shop. Excited to celebrate the cool, cozy cooking season ahead, we have been collecting vintage and antique heirlooms for the shop all summer that highlight the beauty of a season spent with food, friends, and festivity.
Above, is just a glimpse of a few fall-themed items that have recently been added to the shop. Below is a sneak peek of more cozy comforts that will be added shortly…
A sneak peek of just some of the new old heirlooms coming to the shop soon.
As summer winds down, and we gear up for our busiest months of the year, we just wanted to send out a quick reminder to let you know that the Vintage Kitchen shop sends out a weekly email highlighting new arrivals, seasonal inspiration, vintage recipes, and ITVK updates.
We send one email a week, and each week it’s a different theme or topic, so if you haven’t signed up yet please head to the shop and click on the weekly update button on the home page here. If you prefer to receive the weekly update via your mobile device, please text +1 (833) 244-2272 and include the keyword: JOIN to be automatically signed up. Mobile updates tend to be delivered faster, so if you are a “hot off the press” kind of reader you might prefer mobile vs. email.
Researching this antique vegetable dish led to uncovering a story about child labor during the Industrial Revolution in Victorian England. Read more about it here.
For those of you who are new to the blog and the shop, you might not know yet how crazy we are for history. Just like the blog posts, a lot of research (hours, days, sometimes weeks) goes into telling the story of each item in the shop, which basically turns each listing into a little mini blog post in and of itself. That means if you are a fan of the longer-form storytelling found here on the blog, then chances are you might enjoy perusing the shop and the weekly email for quick bursts of interesting historical insights as well.
We never want anyone to miss out on all the fun we have around here. We hope you’ll join us for a festive and fascinating time this fall over in the shop.
Hope your last few days of summer are magical ones. Cheers to new beginnings and happy endings.
I wish there was a way to tally friendship in the kitchen. How many recipes were inspired throughout history by friends or for friends? How many meals were shared in convivial collaboration between one cook and another? How many dishes were dissected? Techniques taught? Secrets traded? How many hours were spent by friends, with friends, for friends tasting, touching, and talking about food?
I bet the number is in the billions. A billion hours. A billion recipes. A billion friends. I bet it is a safe assumption to say that friendship in the kitchen has been a major influence on the culinary world since the caveman days when everybody cooked, and then subsequently ate, together, around an open fire. Aside from health, friendship must surely be the foundation of food. The building block of life.
This weekend we are featuring a recipe that is friend friendly. It was created by two best pals – James Beard and Helen Evans Brown in 1955 and highlights the diverse possibilities of the outdoor grill. On the menu today, it’s Savoy Potatoes, a tipple topple stack of thinly sliced potatoes tucked between layers of cheese and dotted with herbs and butter. The recipe was part of the Frills for the Grill chapter from Helen and James’ Complete Book of Outdoor Cookery.
Frills for the grill indeed. The fun of this recipe, aside from its delectable composition and fancy presentation, is that it can be made entirely out of doors from start to finish. All you need is a prep table, a cutting board, a cast iron pan, a cheese grater, a bowl and a sharp knife. Grab a friend or two to help prepare everything, and the joy begins.
Of all the vegetables to be cooked on the grill, the noble potato oftentimes gets left behind. Understandably so. They are dense and big and take a long time to cook if left whole. If they do make it to the wire racks, most recipes are not that imaginative. There’s the baked potato wrapped in tin foil, the quartered potato steamed in paper, and the mini oval-shaped potatoes par-boiled and skewered for kebabs. But this recipe presents a whole new way to look at serving potatoes hot off the grill with an elegant twist.
Presentation-wise Savoy Potatoes is lovely, with thin layers of stacked slices browned by butter and melted cheese. Caramelization leaves the potatoes on the bottom layer crispy and golden while the top layer is tender like a casserole. Most similar to Scalloped Potatoes (a.k.a. Potatoes Gratin) minus the cream, it has a hearty consistency and flavorful yet subtle depth thanks to the two cheeses and the herbs. This recipe can be made in one large round cast iron pan or many mini cast irons, depending on your preference and your available pan options. Either way, it will be delicious.
When James and Helen finally got together to create a cookbook, it was a long-time dream come true. Both were busy, well-respected cooks and authors in their own right. Helen on the West Coast, and James on the East Coast.
A sampling of Helen’s cookbooks published between the 1950s and 1960s.
Supportive and encouraging of each other’s work, they each had their own unique way with food and writing, which meant there was no room for competition between them, just a sense of mutual respect, camaraderie and curiosity regarding the culinary industry they both loved.
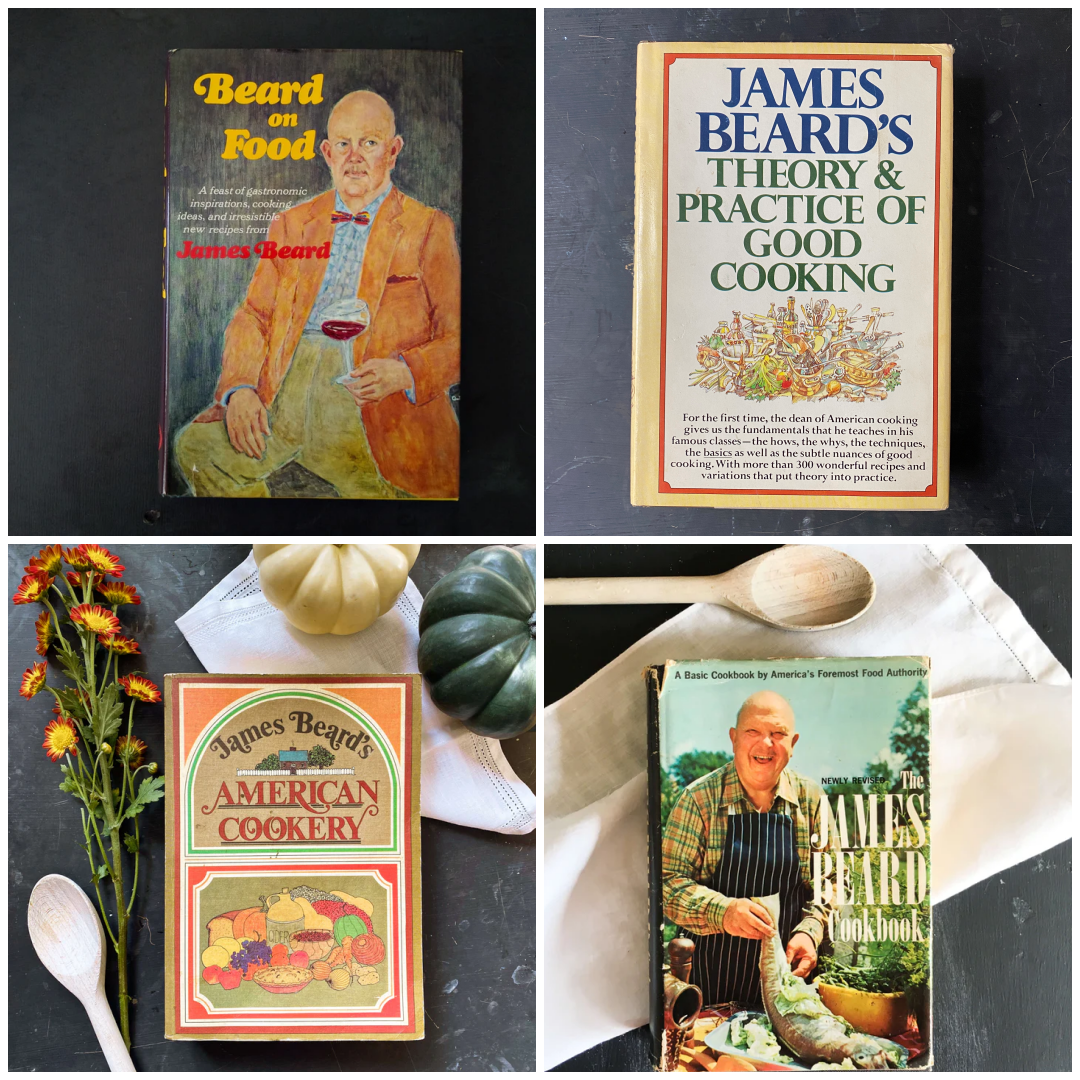
A sampling of James Beard’s cookbooks
Enamored with each other as most best friends are, their relationship was strictly platonic (Helen was married and James was gay) but they showered each other with affection and attention every chance they got. For years, they maintained an epistolary relationship where letters flew between coasts at a rapid-fire pace. In these letters, Helen and James exchanged recipes, cooking questions, industry gossip, travel adventures, menus, food samples, diets, and stories surrounding what they ate and with whom. A consistent topic of the letters were ideas bounced around about projects they could collaborate on together… a restaurant in the Hamptons, a snack shop in New York City, a kitchen store filled with books and antiques, a magazine for gourmands, a cooking school, a newspaper column. Time, distance, and scheduling made many of these ideas difficult to undertake when it came to reality, but of all the possibilities they dreamed up, a cookbook turned out to be the one idea that took shape. To their mutual excitement, in May of 1955, The Complete Book of Outdoor Cookery was published by Doubleday & Company.
Helen and James’ mission for the book was to cover recipes that included all methods of outdoor cooking equipment in one place. Grills, campfires, hibachis, spit-roasts, cooking on a boat, cooking from a trailer, cooking at the beach, along with defined roles for men and women in the art of creating a jovial outdoor dining experience. Helen and James suggested that women be in charge of menu planning, market shopping, and presentation, while the guys were in charge of the actual cooking. Helen called it a night off for the ladies (grab a cocktail and a lounge chair, she suggested) while James referred to the actual task of grilling as a man’s sport and the ultimate culinary proving ground. Both viewpoints may seem a bit boxed in today, but in the 1950s when almost every homecooked family meal in households across the country was made indoors by women, this idea of getting guys involved in the meal-making process was both novel and exciting. Cookbooks began springing up on shelves across the country about this adventurous way to prepare a meal.
1950s Barbeque books like this one – Better Homes and Gardens Barbeque Book – illustrated the sheer joy of outdoor cooking especially when it came to domestic family life.
Gender roles aside, Savoy Potatoes is best prepared by two people, if not more. There are herbs to gather from the garden, potatoes to chop, cheese to grate, and the grill to tend to, so multiple hands are encouraged not only for practicality but for fun too.
Note: We used a charcoal grill for this recipe. Cooking times and temps may vary if you are using a gas grill.
Savoy Potatoes
Serves 8
1/4 cup butter
6 medium potatoes
1 1/2 cups grated Gruyere cheese
1/2 cup grated Parmesan cheese
Salt & Pepper to taste
1 handful of fresh thyme, chopped (optional)
Butter cast iron skillet(s) generously to prevent the potatoes from sticking during the cooking process. Combine the two cheeses together into a medium-sized bowl. Leaving the skins on, thinly slice the potatoes into rounds. Arrange a layer of potatoes inside the bottom of the buttered pan, then add a layer of cheese. Season with salt and pepper and a dab of butter. Repeat the layers of potatoes, cheese, butter, and salt and pepper again. Top with a sprinkle of fresh thyme.
Cover skillet with foil and cook on the grill over medium heat (between 280-300 degrees) until the potatoes are tender when pierced with a fork and the cheese is thoroughly melted (about 25-30 minutes).
Remove from the grill, let cool for a few minutes and then flip the potatoes over onto a plate and serve.
At this point, the potatoes should come out of the pan in one solid piece. You don’t have to flip the potatoes over before serving them. They look appetizing on both ends, but the bottom has such a nice golden brown color and a crispy texture, it makes for a delicious first-bite introduction to this vintage recipe. The slightly smoky flavor from the grill mingles with the nuttiness of the cheese and the soft potatoes in the most tasty and aromatic of ways.
Helen and James recommended that Savoy Potatoes be served with roast beef, grilled fish, or poultry. During the hot days of summer, we liked it best as a vegetarian dinner served alongside a simple garden salad and a glass of chilled sauvignon blanc. In the cooler months when you crave something heartier, in addition to James and Helen’s suggestions we would recommend adding a fried egg on top and a sprinkle of chopped bacon, ham, or pancetta. A drizzle of maple syrup would add another level of interesting flavor.
Like good friends, this is a relaxed recipe. Not hard to make, it’s very accommodating when it comes to your own cooking creativity. Play around with different cheeses, and different toppings, or make it the foundation of a build-your-own-food bar and invite your friends to add their own custom toppings. Sour cream, chives, dill, smoked salmon, a variety of spices, sauteed spinach and onions, diced peppers and tomatoes, hot sauce… there are so many options that would pair equally as well with this dish.
When I asked my sister, who is one of James Beard’s biggest fans and one of my favorite people to exchange recipes with, what she liked most about his style of cooking, she shared that it was all about his universal love of food and friendship. “He felt that people could be unified through the experience of a meal no matter their country or culture.” In other words, he recognized food as the foundation of friendship. Cheers to that! Hope this recipe instigates an impromptu dinner party with your friends and family and that you love the whole experience of making it just as much as we did.
Cheers to James and Helen for this gorgeous recipe and the friendship that made it. I hope it inspires many more. If you’d like to learn more about these two culinary icons and their impact on American cooking, stop by the shop and peruse the cookbook shelf.