Bacon, Montana & The Family Pie Crust: It’s Tradition Time!

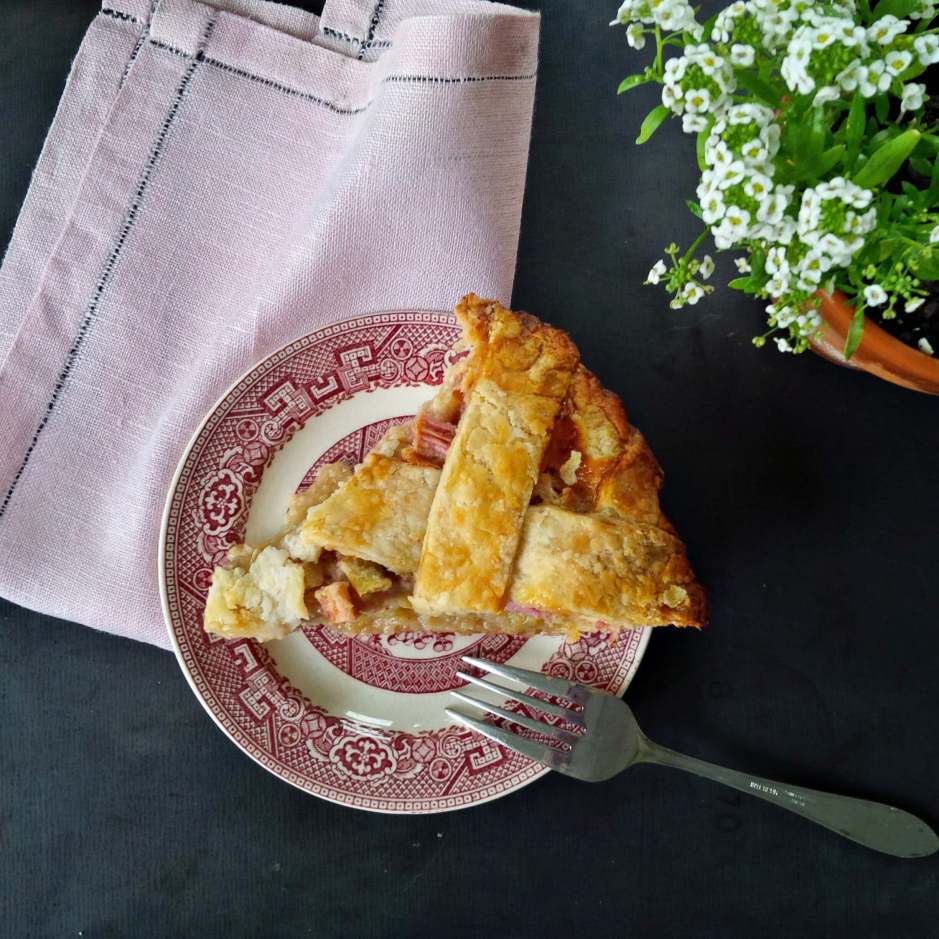
If you are looking for a fun dessert to make for Easter dinner or you are heading out to someone else’s house for the holiday and want to bring something new (but old) along, we recommend the little known but amazingly delicious Rhubarb Custard Pie.  It has been an Easter tradition in my family since the 1960’s when my mom first started making it with the help of her husband’s grandfather’s homemade pie crust recipe and Betty Crocker’s 1950 Picture Cookbook.

Rhubarb in its natural state.

Rhubarb is one of those quirky vegetables. Some people call it pink celery. Understandably, it really does resemble the green hued variety with its long stalks and tufted green leaves. But rhubarb is actually part of the buckwheat family and celery is part of the parsnip family so their similarities end at face value.  Unlike the subtle soapy taste of celery, rhubarb is tart like a Granny Smith apple and more spongey in texture than a crisp stalk of celery. It’s ideal baking consistency is soft like a ripe pear with a bright white interior and a pale pink exterior. The general rule of thumb when it comes to selecting rhubarb for purchase is the firmer and redder the stalk the tarter the taste.  Ideally, you want something in-between – slightly spongy to the touch and a 40/60 ratio of stalks ranging from deep red to pale pink for dynamic flavor.
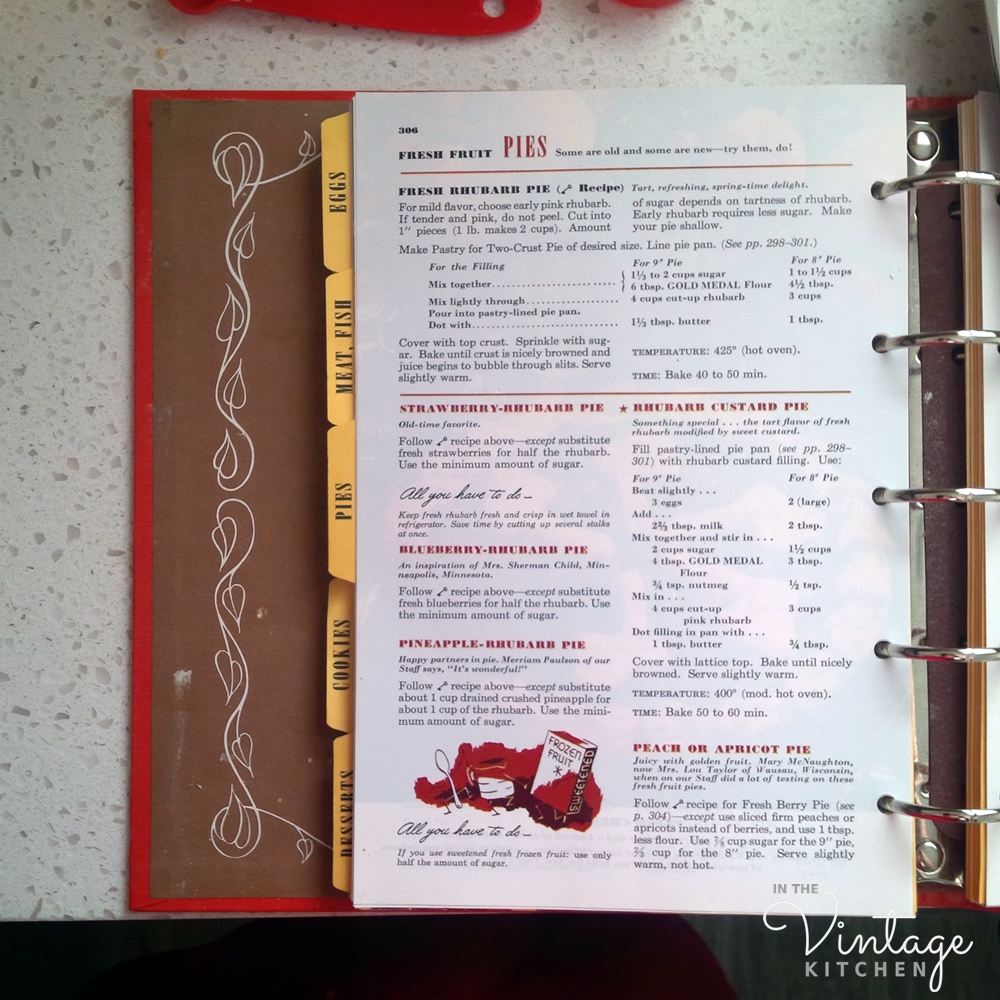
Two important factors go into making this pie a repeat favorite year after year – the filling and the pie crust.  Most people (and pie recipes) pair rhubarb with fresh strawberries, which is a good Spring combo since both are usually in season at the same time.  Sometimes though, these two put together can result in a watery pie which makes the crust soggy and each bite extra drippy. The secret addition to the rhubarb custard pie is the eggs. They act like a binder holding everything in place, so that you get all the sweet-tart taste of the filling without the thin and liquidy consistency. Betty Crocker’s 1950’s version is easy to prepare and always delicious.

The second important factor to this pie (and to all pies, really) is the homemade pie crust. It only takes about 10 minutes and four ingredients to make no-fail pie dough and it cooks beautifully and consistently every time.  Passed down through the generations, this recipe is so good it has been in active use in my family for almost 100 years thanks to this guy who taught everyone how to make it in the very beginning…
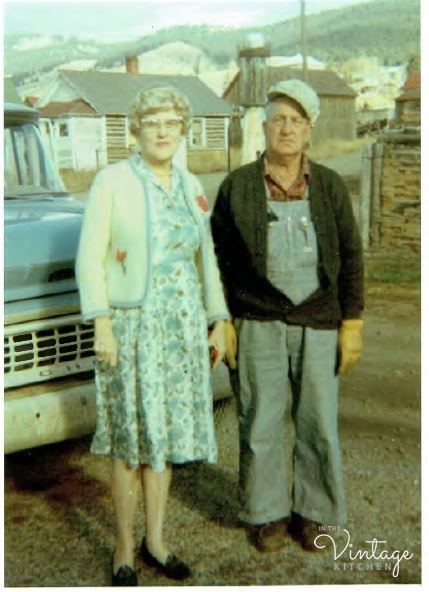
Bacon & Dolly Day in Montana circa 1950’s/1960’s

Meet Bacon Day and his wife Dolly. Bacon (yes, that’s his real name!) first moved to Montana in the 1920’s where he married his bride, Dolly, in Missoula and went straight to work in the rural mining town of Gold Creek, as the train depot clerk for Northern Pacific Railroad. The railroad was so eager to have Bacon join the team, that they gave he and Dolly two railcars to live in and set up homekeeping. Bacon was originally from St. Paul and Dolly from Seattle, so this railroad life was a whole new and exciting adventure for the newlyweds.

1930’s Northern Railroad travel poster

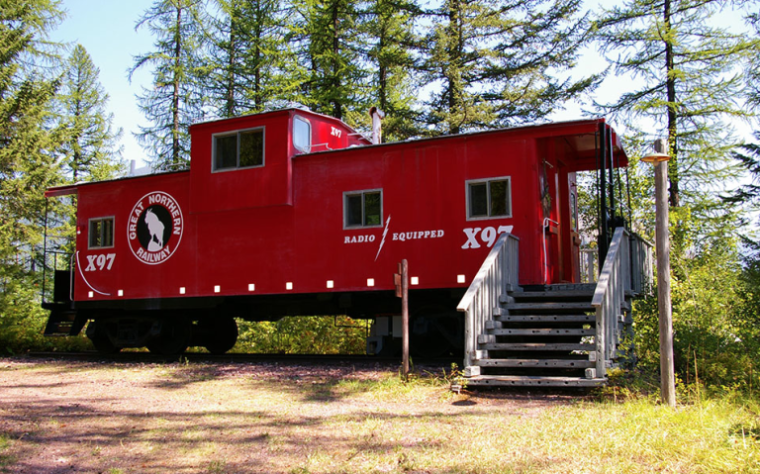
We don’t have any pictures of Dolly and Bacon in their rail car housing but we can imagine that it looked something like these two (now serving as luxury hotel accommodations in Montana)…
Or maybe it looked something like the rail car library built in 1926 that serviced the reading needs of Montana’s lumberjack and logging communities…
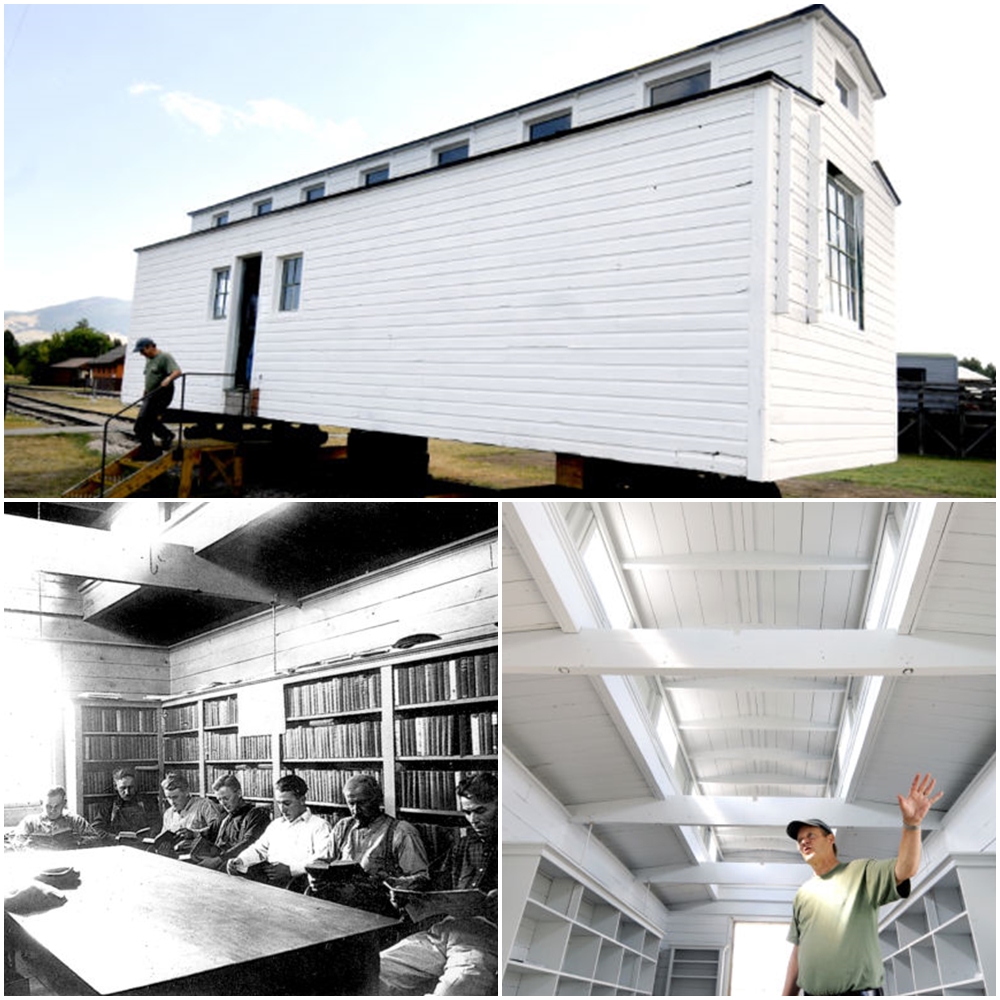
Library rail car built in 1926 to serve the literature names of logging camps in early 20th century Montana. Read more about the library car here.

Either way, it must have been a pretty unusual first home for Bacon and Dolly, and a pretty unusual life for two people new to a state that was not quite yet developed. 1920’s Montana wasn’t for the timid or the faint of heart.  Interesting but also tumultuous, it was stunning in topography, erratic in business opportunity, progressive in gender equality and rebellious when it came to law and decorum. Especially when it came to train life.

Northern Pacfic Railroad Advertising 1910-1920’s

When the railroad companies first started building tracks out west with the ultimate goal of connecting the East coast to the West coast, Montana was marketed to new settlers as a land of stunning beauty and abundant farming opportunities. Homesteaders came from the East coast with intentions of building farms, raising livestock and growing food for commerce. But when these newcomers arrived they experienced a climate far different then what they knew back home. The winters were longer, the temperatures were colder, the open prairies were vast and resources were scarce forcing everyone to be immediately self-reliant. By the early 1900’s, livestock brought in from the East (mostly cows) had arrived in such excess they depleted the natural prairie grasses and upset the delicate balance of the natural eco-system, basically reducing the landscape to bare patches. Add-in an almost decade-long drought that occurred in the 1920’s, and the typography of Montana came to look more like a dessert of death than a lush and verdant valley of promise that all the postcards had been promoting..

Butte, Montana postcard from the 1920’s

The rail companies wanted to keep tourism and homesteading moving through the state though, so they would pay local homesteaders $1000 to grow the most attractive crop they could manage from the poor soil and then took those displays back East to show people how wonderful the agriculture was in Montana.

Montana Homestead Poster

This unscrupulous marketing ploy worked, and new settlers came by the train-full to start a fresh life in green and growing Montana. Only when they got they got off the train, they could see the landscape was devasted and the dry soil virtually unmanageable.  Bacon, in his train depot office, would have been witness to all the excitement and disappointment that came through his station, especially when he worked in Gold Creek which was known for its gold mining potential.

Eventually, all this agriculture business got sorted out once the rains came and residents were properly educated on how and what to grow in this new environment. Montana began to thrive once again. Leaving Gold Creek, Dolly and Bacon moved on to settle into another rural rail town, Phillipsburg, where Bacon worked as a train conductor on a transportation line for livestock and mining equipment.
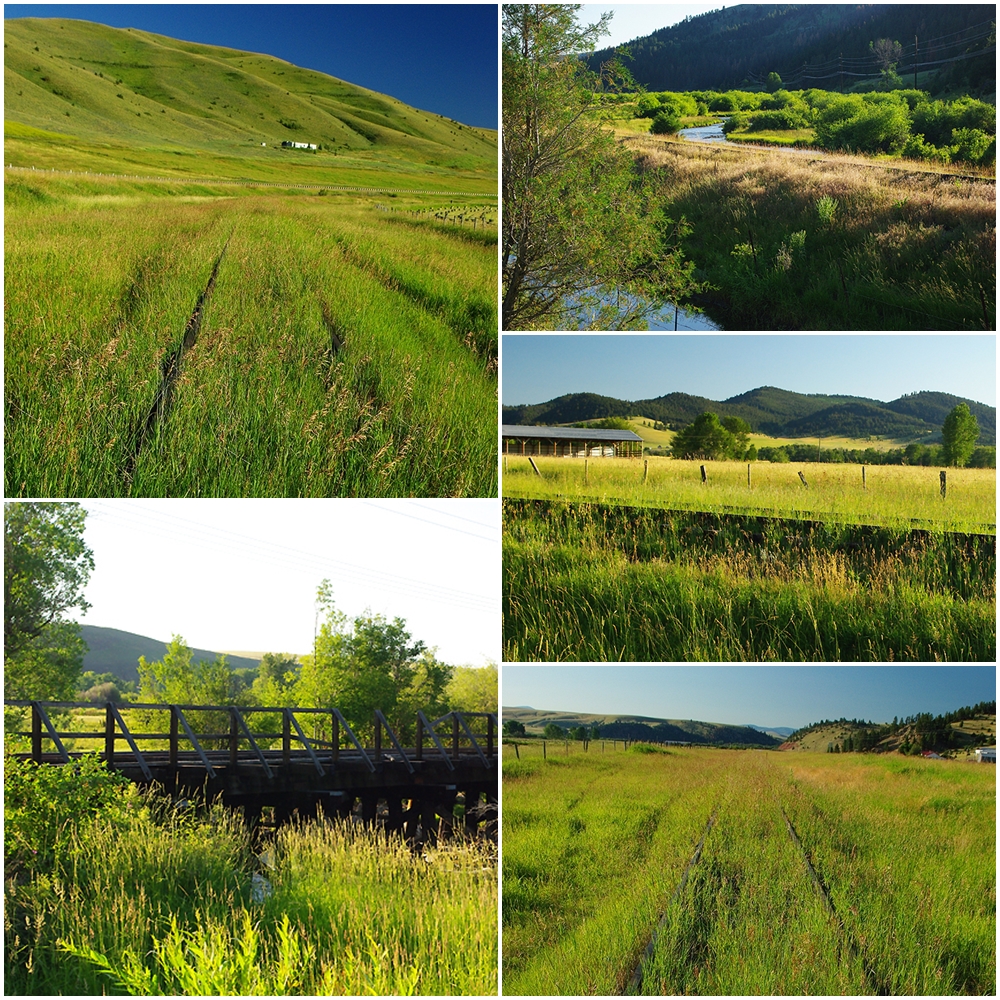
Now an abandoned track, these are recent photos of the train line running through Phillipsburg with views that Dolly and Bacon would have seen on a daily basis.  Photos courtesy of D & D Travel.

From their wedding forward, Bacon and Dolly lived in Montana and loved it. Dolly often wrote poems about the natural beauty of her surroundings. They both mastered baking – Bacon with his pies and Dolly with her bread. Stories have been passed down that tell of breakfast at their house – often fresh caught trout and a homemade loaf of bread, served possibly with a slice of pie. For over 55 years, these two watched the growth and evolution of their marriage,  their state, their family and their landscape all from the vantage point of the railroad tracks that ran through their lives and their hearts.

In some future posts, there will be more stories about Dolly and Bacon and their wild Montana life, but in the meantime, we have a holiday to celebrate and a pie to bake so it’s back to the rhubarb custard.

I recommend preparing the filling first. It can sit off to the side for a little bit while you make your pie crust.

Betty Crocker’s Rhubarb Custard Pie Filling

Makes enough filling for one 9″ inch pie

3 eggs

2 2/3 tablespoons milk

2 cups sugar  (I use cane sugar)

4 tablespoons flour

3/4 tsp. nutmeg

4 cups chopped fresh rhubarb (about 8-10 long stalks)

1 tablespoon butter

Preheat the oven to 400 degrees. Wash, dry and cut the rhubarb into small bite-size pieces.

In a medium mixing bowl, beat 3 eggs slightly. Add the milk and then mix again before adding the sugar, flour and nutmeg.

Toss in the rhubarb and mix thoroughly. Then set aside while you make the pie crust.

Great-Grandpa Bacon’s Fool-Proof Pie Crust

2 cups flour

1/2 tsp salt

3/4 cup butter or shortening ( I always use butter)

1/2 cup ice cold water

1/8 cup milk (reserved until the end)

In a bowl, mix the flour and salt. Roughly chop the butter and add to the flour mixture. With a fork press the butter into the flour until the mixture resembles course meal. If its easier, you can also do this quickly using your hands – jus don’t crumble the butter so much that it starts to melt from your body heat.

Once the butter is mixed in, add the ice-cold water (the colder the water the better). Mix until the dough clumps together and you can easily form a crumbly yet cohesive ball.

Place the dough on a lightly floured pastry cloth, board or marble slab and cut in half with a sharp knife. Place one half of the dough ball off to the side. Roll out the remaining half of the dough with a wooden roller that has been dusted with flour. If you don’t have a wooden rolling pin you can use a wine bottle, or a cylindrical jar or vase (if you use either make sure to dust it with flour). Roll the dough out as much as possible without tearing it. Makes sure it is big enough to accommodate your pie dish. Once the dough is the right size, gently fold the dough in half on the cloth.
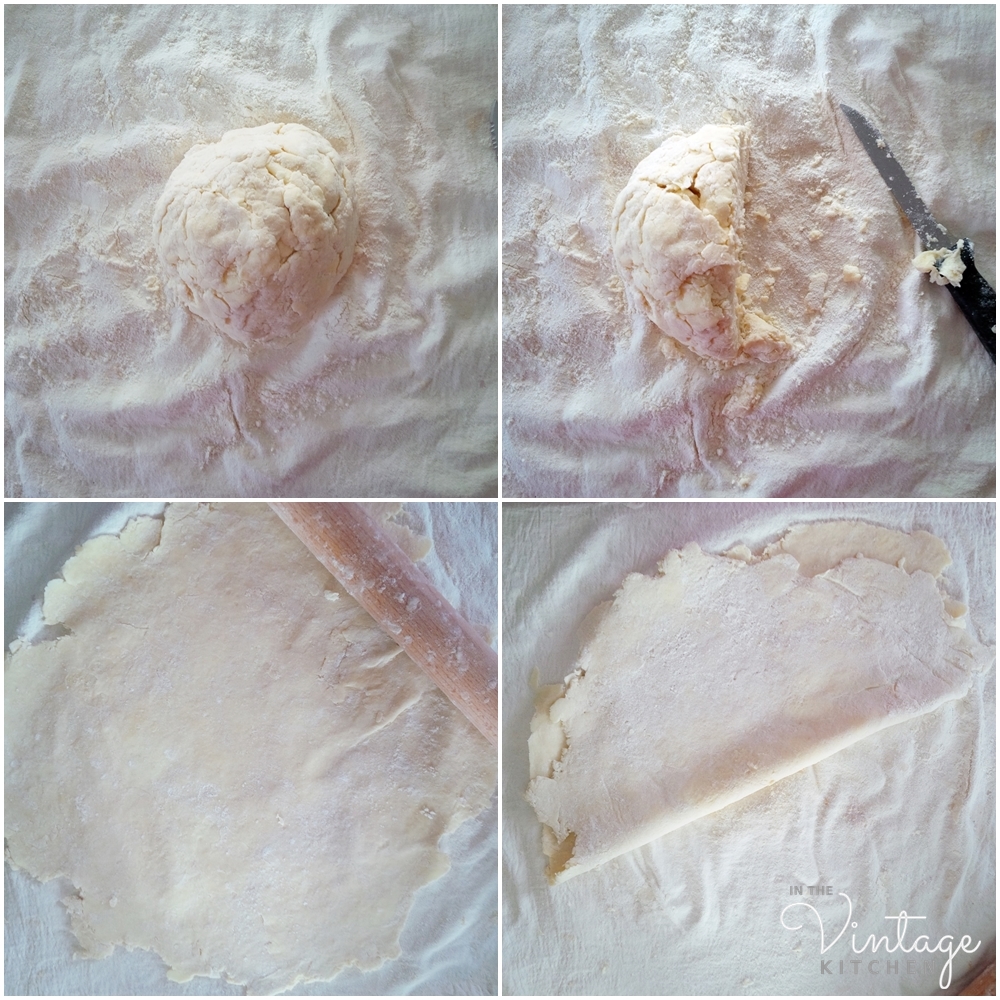
Line the crease of the fold line up with the center of your pie dish and gently lay the crust (still folded) down so that it covers just one side of your dish, then unfold the other half to cover the other half of the dish.  There should be excess dough hanging off the sides of the dish. It should like this…

Pour the rhubarb mixture into the pie dish and set aside.

Next, in the same fashion as before, roll out the other half of the dough ball. In order to make a basket weave design for the top crust, you’ll need a sharp knife to cut strips of dough.
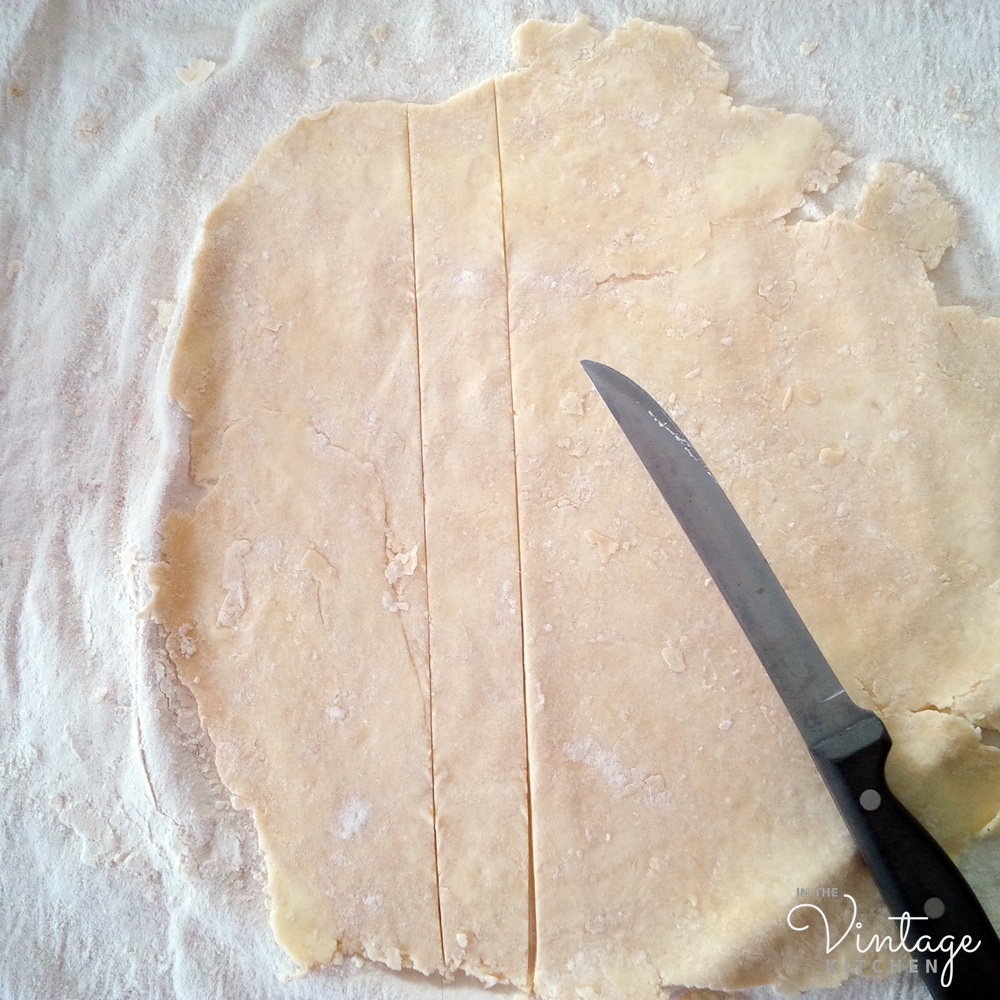
Place the first strip of dough vertically on the pie and the second strip of dough horizontally so that it forms a cross. Next weave the remaining strips in an over-under pattern, alternating each slice as you go.

Next, cut away the excess dough along the sides, leaving a collar of about 1 inch of extra dough all the way around the rim.  Pinch the edges of the top and bottom crust together.

When finished dot the exposed holes with the remaining tablespoon of butter and brush the top crust lightly with milk.

Bake for 50-60 minutes until the crust is golden brown and the rhubarb custard is bubbling. Let cool on a wire rack before serving. This pie is very versatile in the presentation department –  serve it warm, cold or at room temperature.

Like pecan pie it is pretty sweet as it is, so you don’t need to add whipped cream or ice cream. Its ideal companion is a hot cup of coffee. And no one would look twice if you wanted to enjoy a slice for breakfast. Sometimes that’s the best time of day for a little decadence. If he was still alive, Bacon would be right there with you, enjoying a plate of breakfast trout.
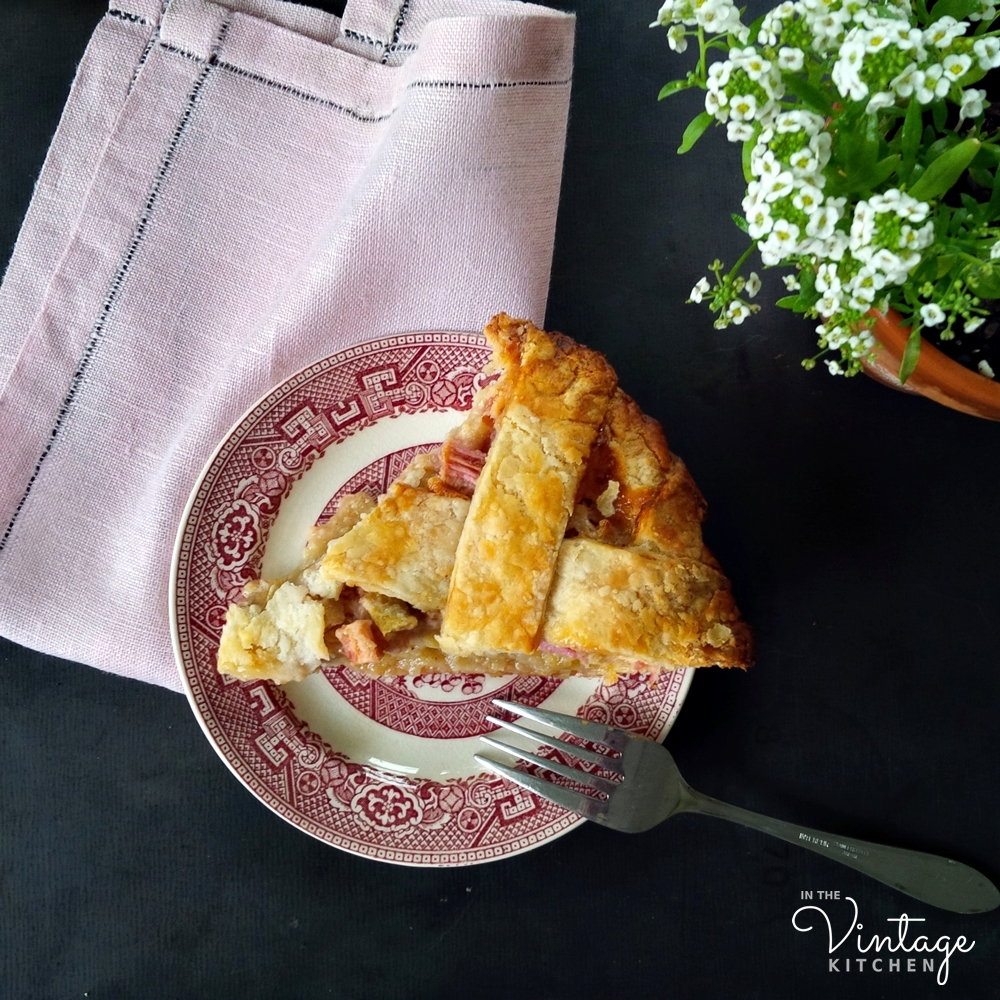
If you get a chance to try this recipe, please let us know how you liked it. And if you have any questions on how to make your pie crust please comment below and we’ll get right back to you.

In the meantime, cheers to all the recipes that turn into traditions and cheers to Bacon and Dolly for always being a part of our most delicious holiday celebrations.

2024 Update!

This 2018 blog post became the linchpin in solving a mystery in 2021 surrounding a lost heirloom, and it’s 20 year journey back home to its original owners. It’s a true story of fate, family, persistence, and the incredible kindness of strangers that seems like something straight out of a fiction novel or a film, but it’s even better because it’s real life.  Read all about it as the mystery unfolded in real time in our five part series on the blog starting here. 

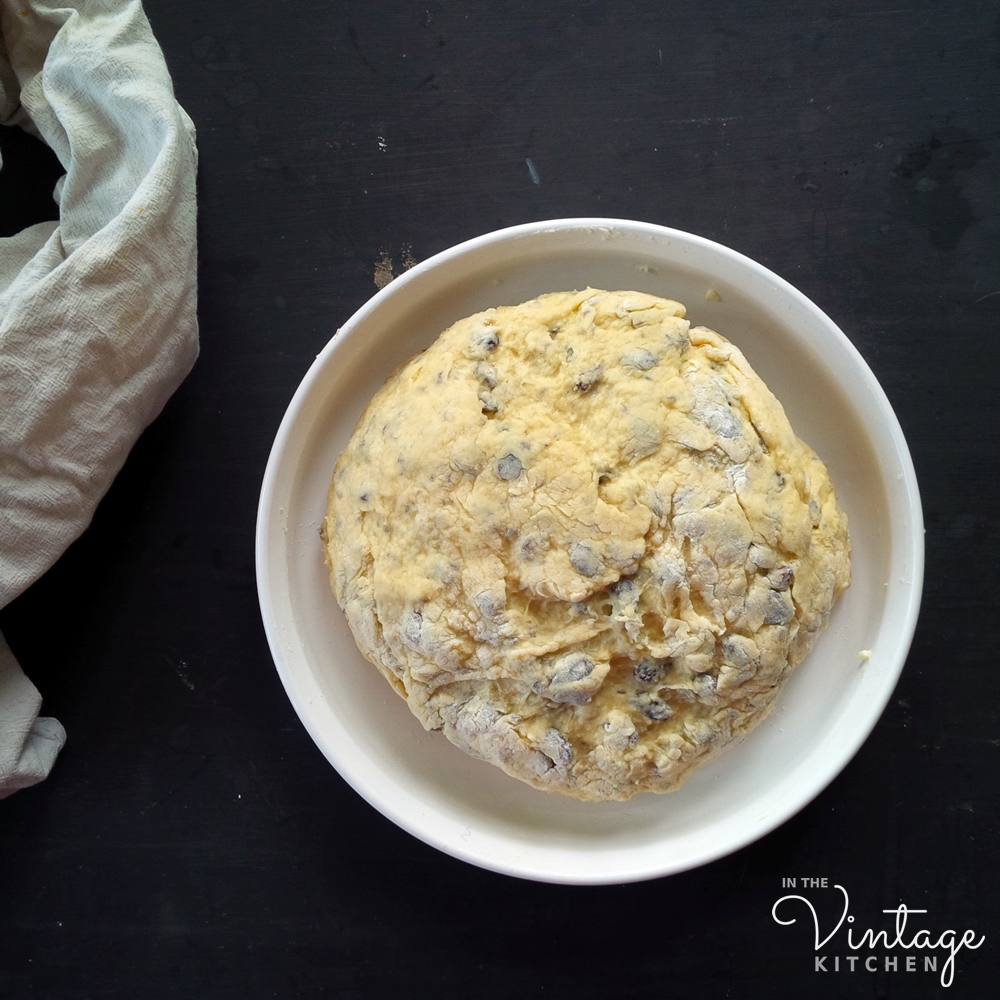
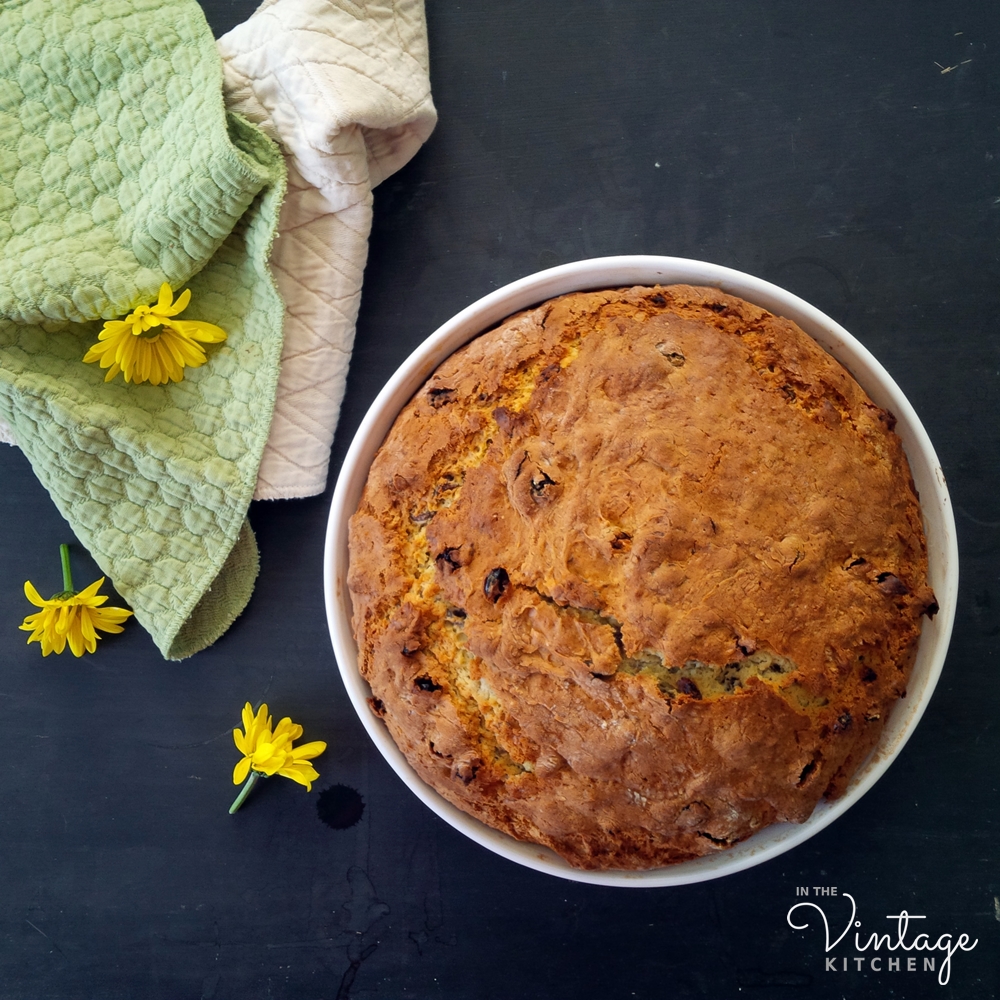
Katharine’s Norah’s Cousin’s Irish Soda Bread: From the Kitchen of the Hepburn Household

If you’ve been a long-time reader of the blog, you’ll know what big fans we are of Katharine Hepburn.  Last Fall, we made her famous Lace Cookies. The ones that were in constant request at both her city house and her country house, so much so that extra batches were kept on hand, either freshly baked or on standby in the freezer. Was Katharine always the one baking away? Sometimes. But mostly it was Norah, Katharine’s longtime personal cook, domestic helper and treasured friend.

Norah Considine. Photo from the book At Home With Kate.

Norah Considine worked for Kate for 30 years, day in and day out, making the kind of food that Katharine loved best – simple, hearty, and well-balanced. Sometimes, though, Norah would sneak in her own recipes, a combination of food from her Irish heritage and dishes that she made up on the fly to feed her five kids. With guests continuously coming and going from the Turtle Bay city townhouse and from Fenwick, the Hepburn family compound in Connecticut, mealtimes were always eventful, and Norah was always up to the task to make them as delicious as possible. Cooking for everyone with equal aplomb, making meals that were thoughtfully prepared and proven to please, Norah was accustomed to feeding an ever-evolving crowd that ranged from household staff to famous celebrities. In turn, she became a little bit famous herself, with returning guests regularly requesting her rum cake, or her beef stew, or her creamed chipped beef on toast.

Katharine Hepburn’s townhouse in the Turtle Bay neighborhood of NYC

Even though Kate liked to run a tight ship, she was generous with her friends and her staff. Every year on St. Patrick’s Day, Kate would leave New York City and head to Fenwick so that Norah could have the townhouse to herself to entertain her friends and family for St. Patrick’s Day. This party was no small gathering, sometimes counting over 100 people or more.  But no matter what the attendance numbers were, large or small,  Kate always wanted Norah to be the star of the show for her special event, so she’d graciously leave in order to give Norah the run of the place.

For a change, Norah would cook for herself and her friends, and she would relax into the traditional celebrations of her heritage day.  At these parties, you didn’t always know who was going to be attending – friends and family flew in, drove in and walked over from all corners of the city, the country, and the world. There were homemade costumes and contests, musicians and dancers and tables full of traditional food and drinks. One of the edibles Norah always made for these parties was her cousin’s Irish Soda Bread, a recipe that traveled all the way from Ireland.

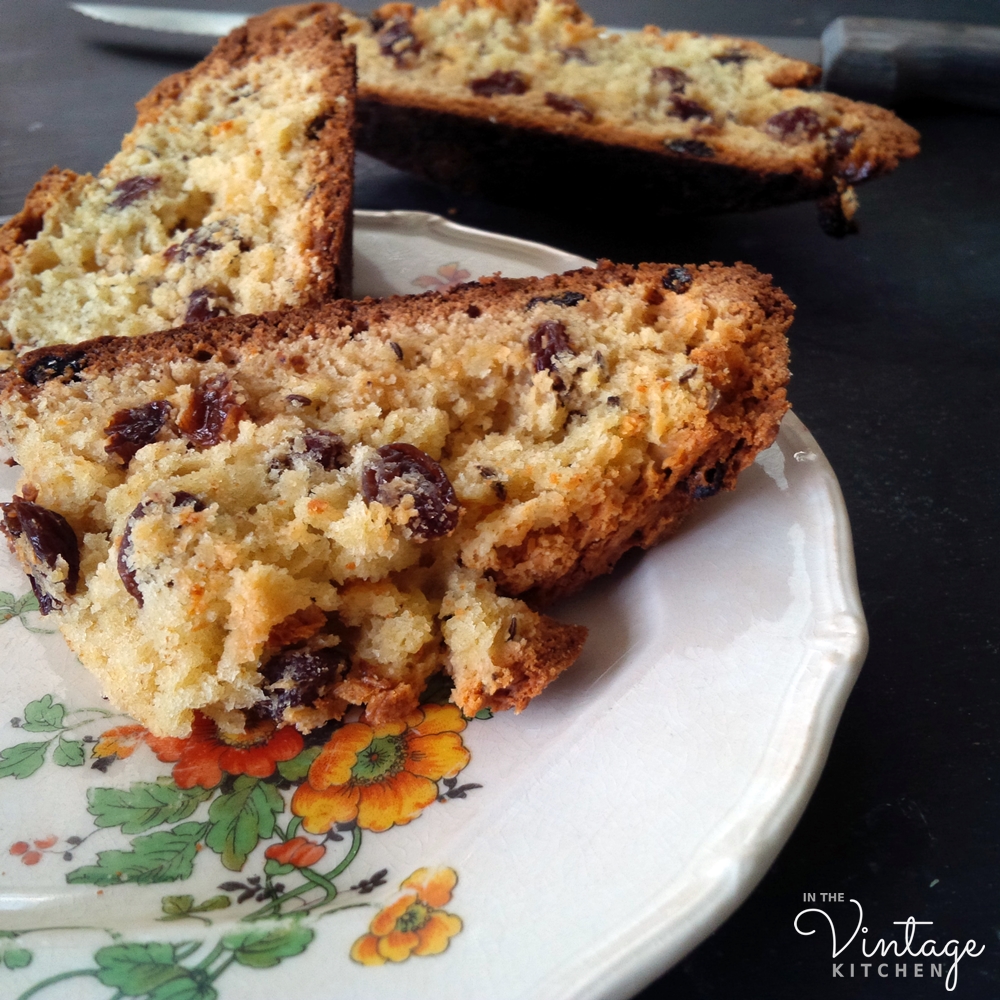
This was the soda bread recipe that was legendary in Norah’s family and in Katharine’s house. It has fed hundreds of people throughout hundreds of parties, and like Kate’s Lace Cookies, it represents wonderful memories and extraordinary experiences.  Not bad for a humble bread born out of lean economic times.  With a consistency somewhere between a fluffy cake and a crumbly cornbread, Norah’s cousin’s Irish Soda Bread is a decadent little treat, both sweet and hearty in a satisfyingly nourishing way. One slice makes you understand how it fortified a country for two and a half centuries.

Although technically, not really Irish in origin (the Native Americans were the first to come up with the general idea), Ireland has been proclaiming soda bread a national staple since the 1830s. Because it contains no yeast, an expensive ingredient in times past, soda bread gets its bulk from baking soda, which chemically raises the dough when combined with flour and any acidic property like sour milk, buttermilk, or, in Norah’s case, sour cream.  Some people even add a touch of orange juice or lemon rind to their soda bread for an extra dose of certainty that the chemical reaction will yield a tall and fluffy loaf.

There are lots of variations on the traditional soda bread recipe, but Norah’s is interesting because it includes caraway seeds, sour cream, and just a little bit more butter. Super fast and easy to put together, this recipe only takes about 15 minutes to prepare and bakes to a crunchy, golden brown within an hour. Norah recommended enjoying it warm, just minutes out of the oven, or if you want to wait a bit,  let it cool to room temperature and toast it with a little butter right before you are ready to serve it. The one drawback of Irish soda bread is that it dries out quickly – so if you are not going to serve it the day you make it, then it is best to freeze it and reheat it when the occasion arises.

Not as hard as biscotti and not as dense as cornbread, Irish soda bread lands somewhere in the middle as far as form. It pairs beautifully with any salty meat like ham, sausage or brisket for a savory-sweet combo, and would be marvelous with a soft creamy-textured cheese like Brie or goat cheese.  In an adventurous mood, we might even top a toasted slice with cream cheese and bacon and kale for an interesting brunch option or serve it alongside baked apples or a chopped salad of pear and fig.  In the next couple of months, we’ll be experimenting with Norah’s soda bread recipe, trying out some different food pairings. Once we’ve determined our favorites, we’ll post them here on the blog.

In the meantime, we encourage you to try this delicious holiday bread and look forward to hearing your thoughts on it.

Norah’s Cousin’s Irish Soda Bread

4 cups unbleached flour* plus more for dusting (*Norah liked King Arthur flour best) 

4 teaspoons baking powder

1 cup granulated sugar

2 cups raisins

4 teaspoons caraway seeds

4 eggs

1 pint sour cream (2 cups)

1 teaspoon baking soda

1 1/2 sticks, salted butter, plus more for pan

Preheat the oven to 375 degrees. In a large mixing bowl, combine the flour, baking powder, sugar, raisins, and caraway seeds.

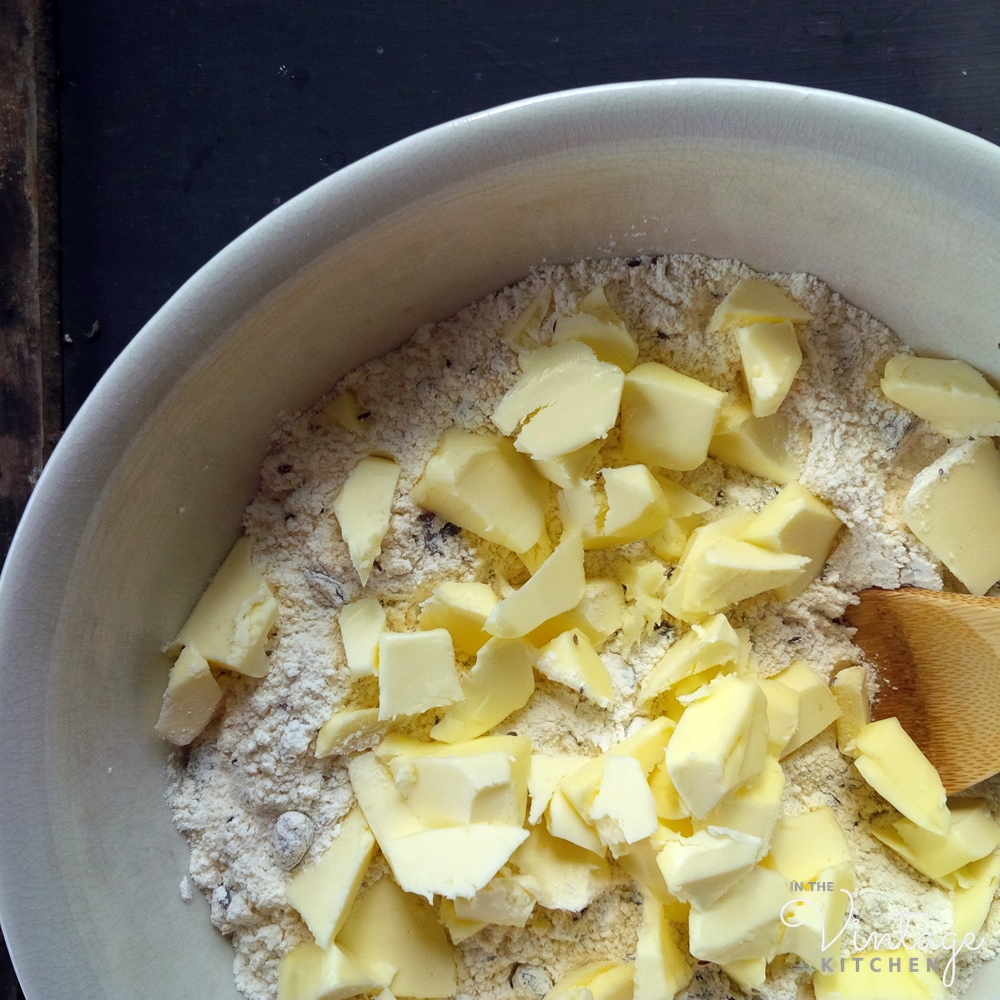
Roughly chop the butter into the flour mixture and combine to the point that the mixture looks like coarse meal. You can do this with the tines of a fork, a wooden spoon, or your own two hands. Set aside.

In a small bowl combine the sour cream, eggs, and baking soda.

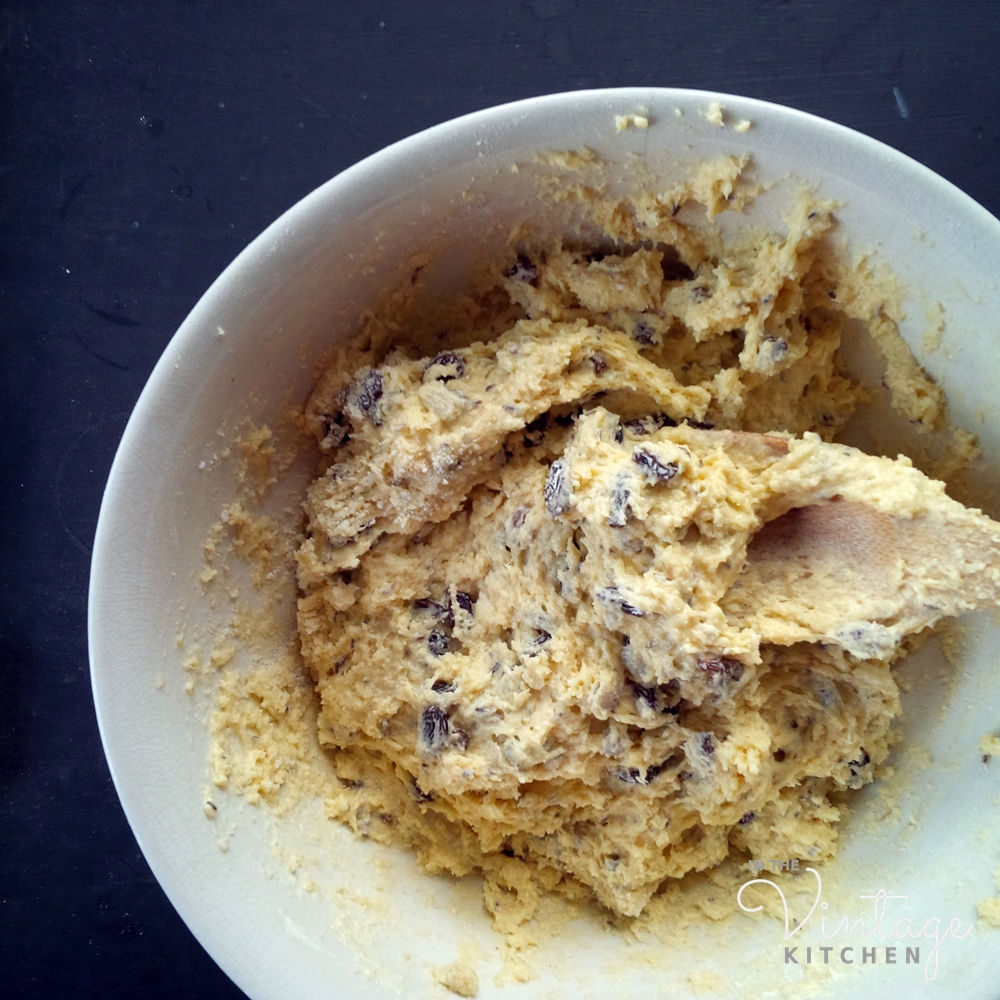
Mix well and then slowly add the liquid mixture to the dry ingredients…

Mix until combined and until the bread is no longer sticky. You might need to add as much as 1/4 cup extra flour to this process, but be careful not to overmix the dough.

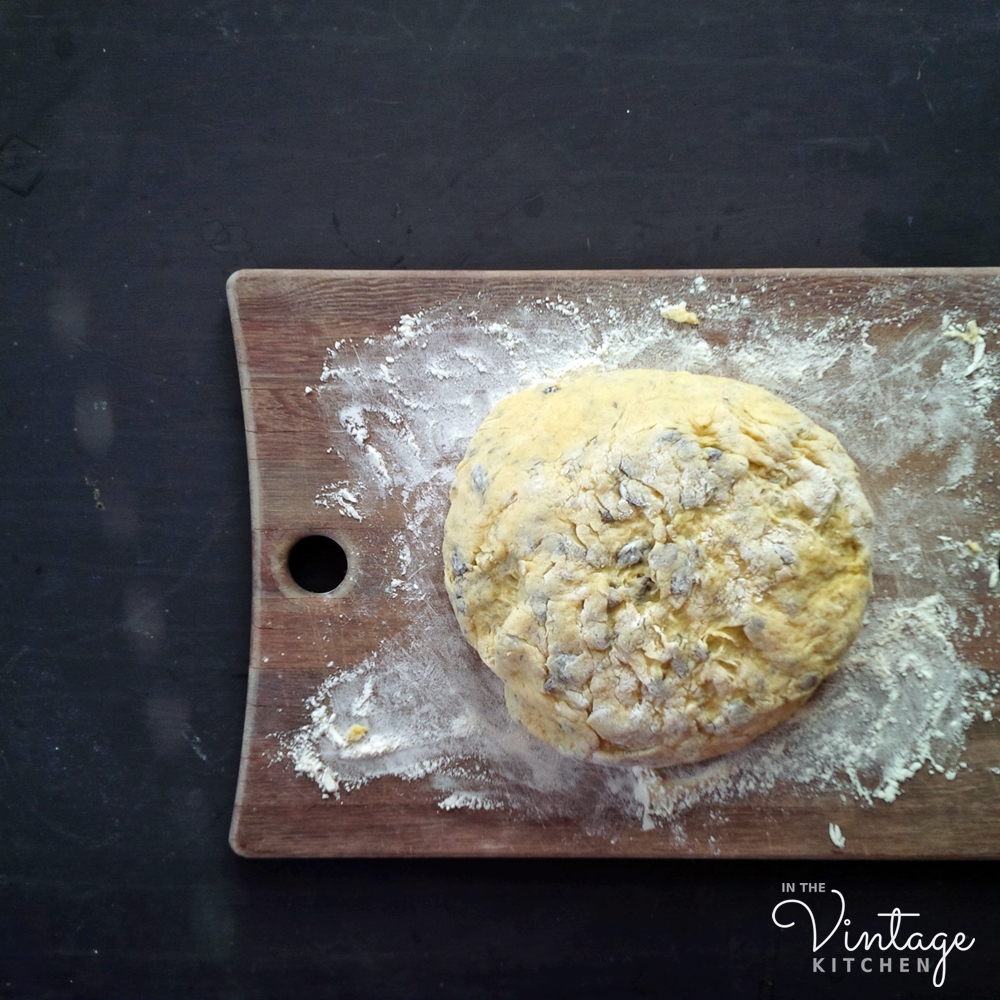
Ideally, you want the dough to be just smooth enough so that you can pick it up in your fingers and transfer it to a lightly floured cutting board without it sticking to your hands.

On the board, shape the dough and then transfer it to a greased 2-quart baking pan. Keep in mind, the dough expands to fit its baking container and then rises – so if you are using something other than a 2-quart dish, just be aware that it will grow in size.

Bake for 1 hour. Cool on a wire rack for a few minutes before removing from the pan and slicing.

However you choose to spend St. Patrick’s Day, whether it be at a big house party like Norah’s, or at a simple celebratory supper for a few (much more Kate Hepburn style), we hope you have a wonderful holiday full of good food, good friends, and good spirits!

Cheers to Kate and to Norah and to Norah’s cousin, whose family recipe has traveled across countries, continents, kitchens, and time. Happy St. Patrick’s Day with much love from In The Vintage Kitchen.

That’s Norah (wearing the polka dot blouse) in the midst of her St. Patrick’s Day merrymaking.

Gender Discrimination in the 1940s: Why a Correspondent Turned From War to Cookbooks

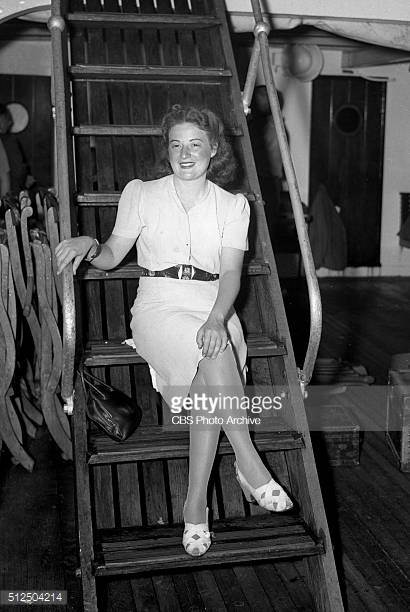
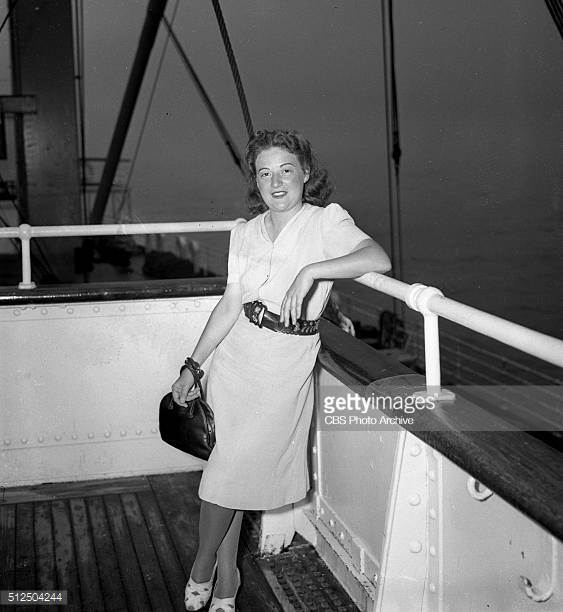
Betty Wason (1912-2001)

In Sweden, in 1939, as Nazi troops began their invasion of Norway, a young American journalist staying in Stockholm began delivering eyewitness accounts of the historic event.  She was 28 years old and the only correspondent in that section of the world broadcasting live stories for CBS Radio. Her name was Betty Wason and her vantage point was intimate. Her reports were well-written, authentic, and timely in the transmission of details. She was brave, dedicated, and determined, eventually getting close to Nazi troops in Norway in order to tell the stories of wounded British soldiers and all that they had seen.  She was a woman alone in a war zone, a thoughtful writer in a chaotic environment, and a new traveler out discovering foreign lands. But for all the things Betty was, there was one thing she wasn’t. She was not a man.

And that affected everything.

Gender discrimination runs rampant in every field throughout history, except maybe one…. radio news broadcasting in the 1930s and the 1940s. Mainly because there wasn’t any argument against the discrimination. Things were simply done and not done and there were rules to abide by.  One of those rules concerned women. Women  simply did not, were not, allowed to read the news over the air.  It was firmly believed that the feminine register could not convey the seriousness and importance of hard-hitting news stories. Instead, women’s voices were relegated only to entertainment-type shows… cooking lessons, homemaking stories, commercial ads and literature readings. Anything more serious or historically significant was left up to men to communicate on-air.  This proved a problem, for our gal Betty.

Growing up in Indiana in the 1920s, Betty was a creative spirit from the start with interests in music, art and fashion design. After graduating from Perdue University with a degree in home economics in the early 1930s, Betty bounced around a few jobs in her home state before realizing she wanted a more exotic life than Indiana could provide.  As a young woman full of vivaciousness and adventure and a desire to see the world, Betty went to New York and settled into a two-year job working at McCall’s magazine. But even in the exciting city of New York, her wanderlust could not be quelled. Europe was calling and Betty wanted to travel.

Vintage 1930’s travel posters to Czechoslovakia show the beauty and attraction of foreign travel. This was one of the countries Betty would visit and report from.

Not having the financial means to live abroad without working, Betty contacted TransRadio Press who was willing to pay young journalists overseas for eyewitness stories concerning World War II. A brief stint in Europe trying to make a go of it as a correspondent didn’t yield enough money for Betty to live on,  so she came back to New York only to try again less than a year later. On her second go-around though, she worked with CBS who was desperate to get any and all international news they could get their hands on in regards to the war. That’s when Betty headed to Sweden, just before Hitler arrived in Norway.

Betty’s contact at  CBS was Paul White who was in charge of news broadcasting.

There were many male war correspondents living and working overseas at this time, but they were mainly focused on print pieces suitable for newspapers and magazine readers. Radio was becoming more and more popular in terms of delivering news, but the seasoned overseas reporters, so focused on their writing, were out of the loop on the fact that radio news was rising in popularity. There was a niche market blooming in quick, short news briefs for ears instead of eyes and Betty saw an opportunity to be a part of it.

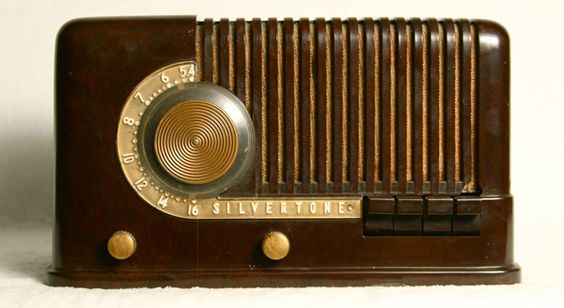
A 1940’s radio

Since Betty was the only correspondent in the Scandinavian region, she was recording and filing her own reports for CBS and being paid on a weekly basis.  But quickly, CBS determined that Betty’s voice was a problem (too light, too feminine, too high in pitch).  It was believed, even in times of war, especially in times of war, that radio listeners didn’t want to hear a delicate voice reporting on death and destruction. Her reporting content was strong though, so CBS said that she had to find a male counterpart to step in as the voice in front of her work.

Betty was upset that she couldn’t speak the words that she was writing, but she wanted to keep her job, so she trained Winston Burdett, an American newly arrived in Stockholm, in the art of journalism for a radio audience, and he read her reports for her. Incidentally, she trained Burdett so well that she wound up working herself right out of Sweden. Burdett was after all a man and now (thanks to Betty) a good broadcaster.

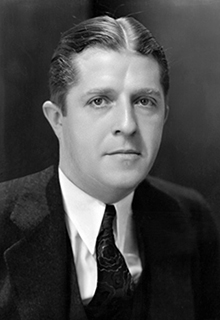
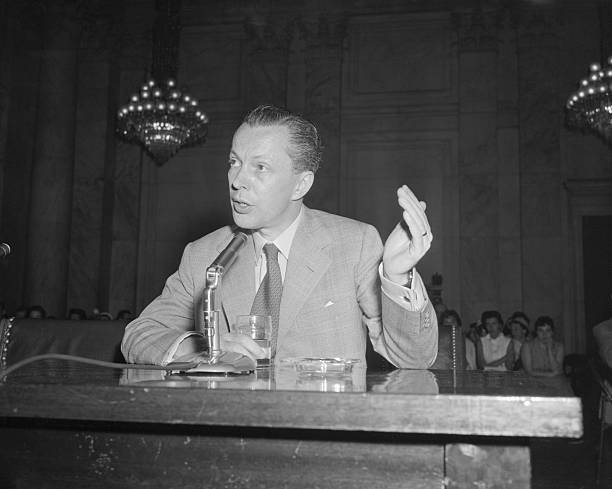
Winston went on to have a lengthy career as a broadcast journalist at CBS. In 1955, he admitted to being a communist spy during the 1930s and 1940s when Betty worked with him.

Trying to find another unique vantage point like she had in Stockholm, Betty went to the Balkan Islands, and to Turkey before settling in Greece where she again sent reports home to CBS. Again, CBS said she needed a male counterpart to vocally relay her stories. And again Betty complied, this time working with a male Embassy secretary, who, at least, introduced himself on-air as “Phil Brown speaking for Betty Wason.”

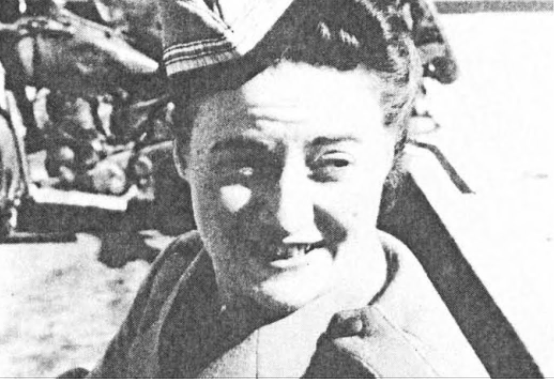
Betty Wason in Greece. She made her own uniform to appear more professional since there was no dress code for correspondents. Photo courtesy of Hard News: Women in Broadcast Journalism.

As the Nazis occupied Greece, Betty’s bravery was called upon again as she reported eyewitness occurrences on a regular basis through her Embassy mouthpiece. While there, she endured house arrest under Nazi supervision for two months before the regime flew her and several other journalists to Europe for questioning. Concerned that Betty might be a spy, the Nazis detained her for an additional week by herself before eventually allowing her to fly back home to the US, where she was greeted with fanfare for having endured captivity and detainment.

Invigorated by the attention she received upon returning home and by the contributions she had made to broadcast journalism overseas, Betty naturally went to the CBS offices in New York to inquire after more work or a new assignment. Shockingly, executives at CBS refused to acknowledge that she played any significant part in the broadcasting realm overseas and denounced her requests for more story assignments. In an instant, Betty was dismissed like she had never been a part of the reporting team in the first place. Immediately, her work was marginalized even though CBS had been using her content repeatedly throughout the war, finding it valuable enough at the time to pay her for it. But upon Betty’s return, none of that seemed to matter. Had Betty been a man she would have been offered a position like Winston Burdett or handed a new assignment and sent to another corner of the globe. She would have been encouraged and supported by her colleagues and eventually been able to dispel the ridiculous notion that women couldn’t vocally report the news. But that didn’t happen.

After being turned away by CBS, Betty left New York and went on to Washinton DC, where she joined forces with other women in broadcasting, collaborating on various news shows and continuing on with her writing.  Those few years of dangerous foreign reporting and her budding career of broadcast journalism didn’t turn out the way Betty expected, but ultimately, good things came out of this redirection in her life.  Her ability to believe in her own talents and to creatively work around roadblocks with persistence and perseverance led her to a fulfilling career as a writer, on her own terms.

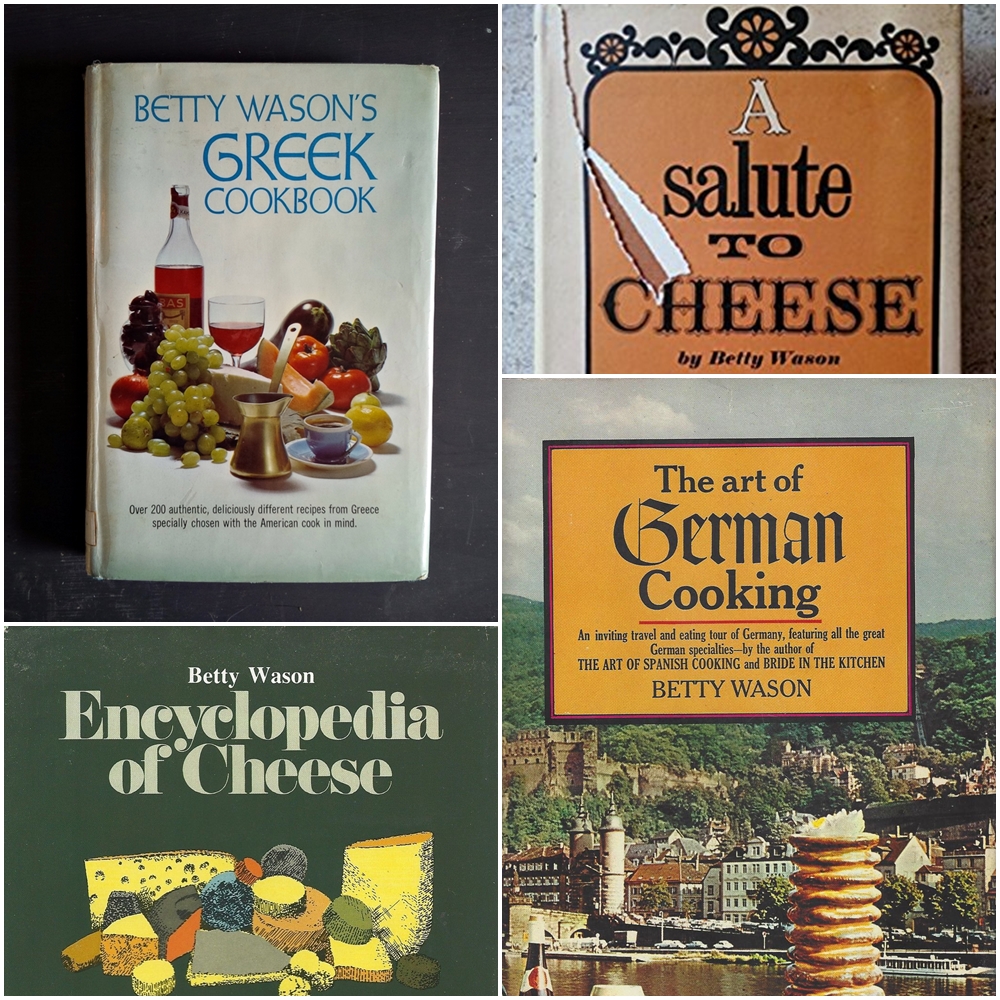
A sampling of Betty’s cookbooks published from the 1950s-1980s

Inspired by her travels and her curiosity to learn more about local cultures and customs, Betty was devoted to exploring the history and the food scene in all the countries she visited, each eventually yielding their own distinct cookbook. Through her explorations in The Art of Spanish Cooking, The Art of German Cooking… of Vegetable Cooking… of Mediterranean Cooking…  Betty wanted readers to experience the sights, sounds, smells, and tastes of her favorite places.  That genuine, awestruck wonder led to over 20 beautifully written books that pull readers (and home cooks!) in from page one…

How I wish I were about to fly to Greece again, to relive once more that special thrill of seeing from the sky the ragged ochre shoreline with its-jewel-like border of turqouise merging into the royal blue of the Aegean…(from the introduction of her Greek cookbook)

Betty pictured here with her daughter Ellen, in 1963, aboard a TWA flight bound for Spain to research recipes for The Art of Spanish Cooking.

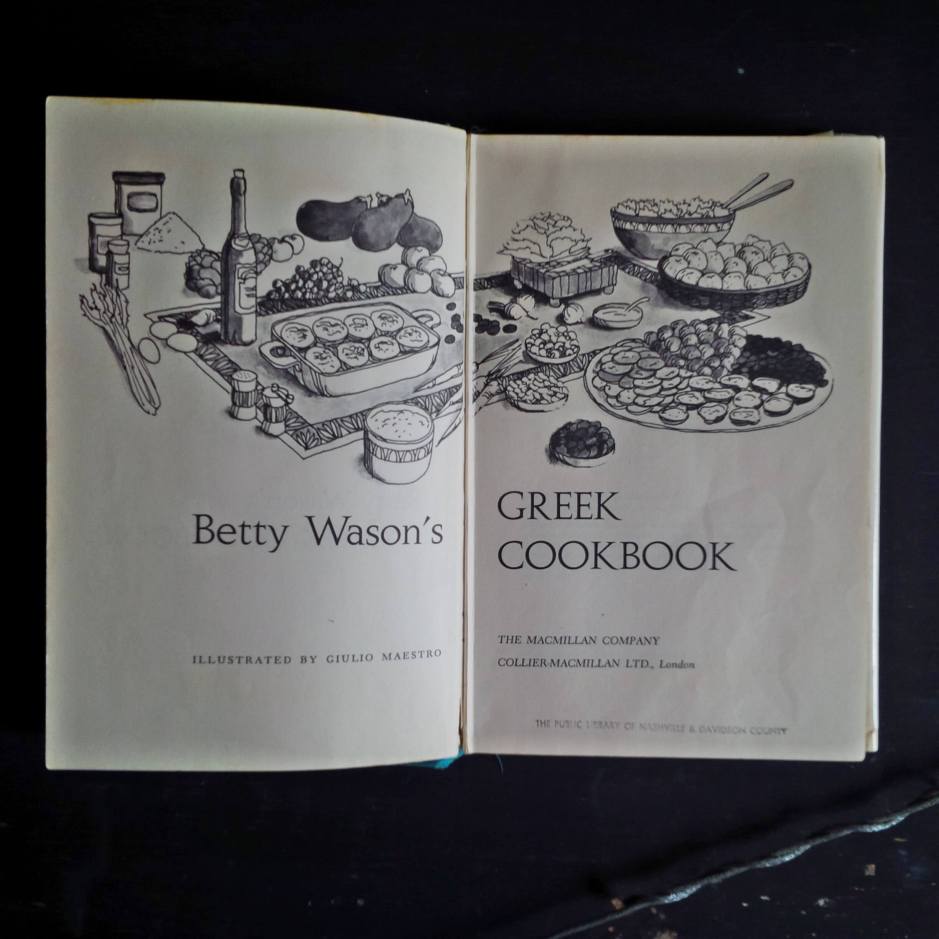
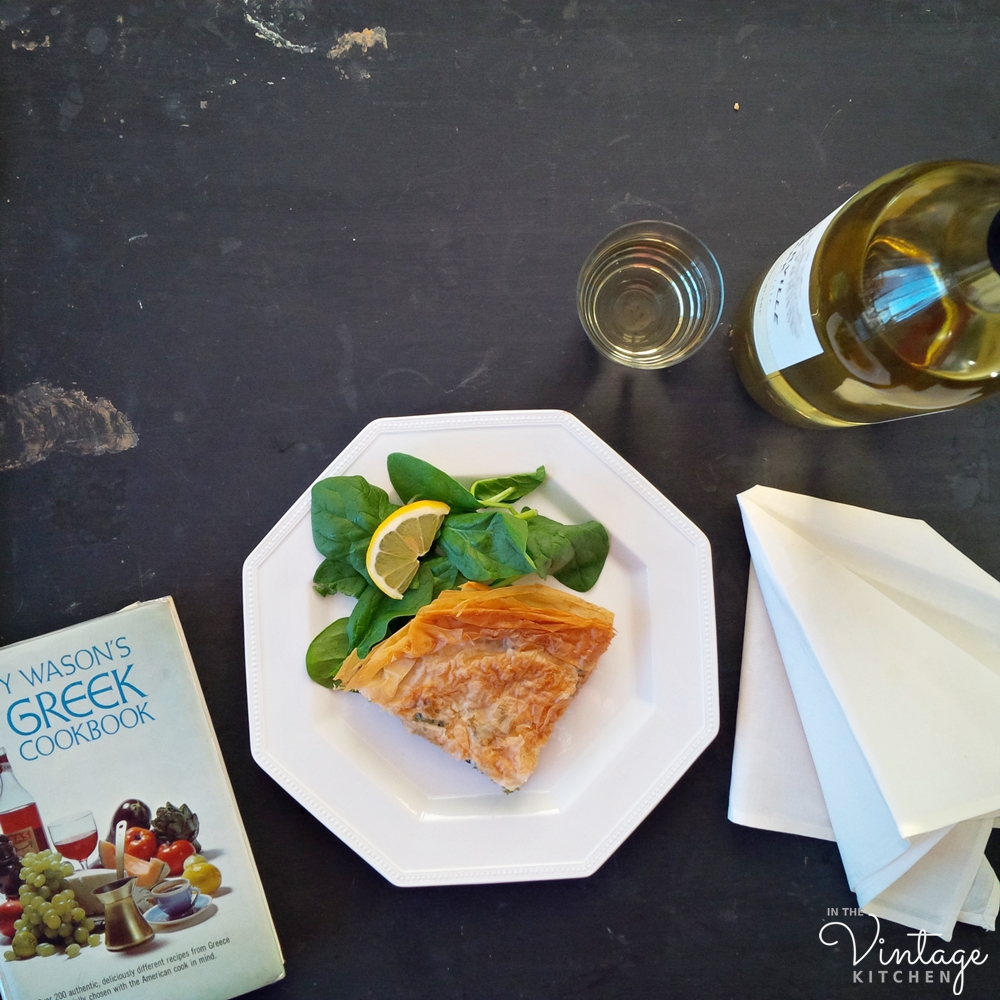
In the Vintage Kitchen, we were introduced to Betty through her Greek cookbook simply titled Betty Wason’s Greek Cookbook, a stained and splattered edition worthy of its adventurous war correspondent author.

If a cookbook could ever be a travel guide, it would be Betty’s style of approaching food. Not only does she include authentic recipes, but she writes about them with the eye of a curious tourist learning a country in detail.  In her Greek Cookbook, published in 1969, in addition to 200 recipes, she also included a state-by-state reference guide on where to buy authentic Greek ingredients in the US, a glossary of Greek terms, and special tips and tricks to make sure that the cooking experience remained as easily replicated as possible.

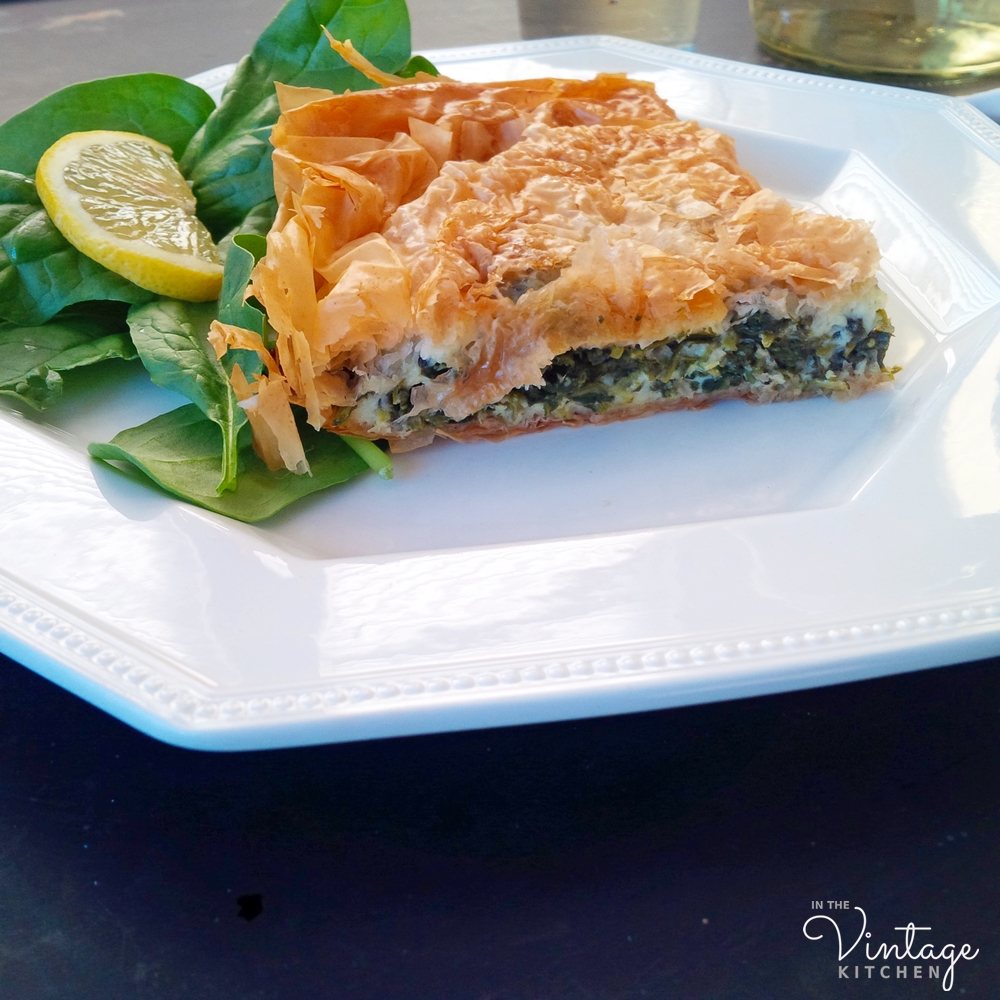
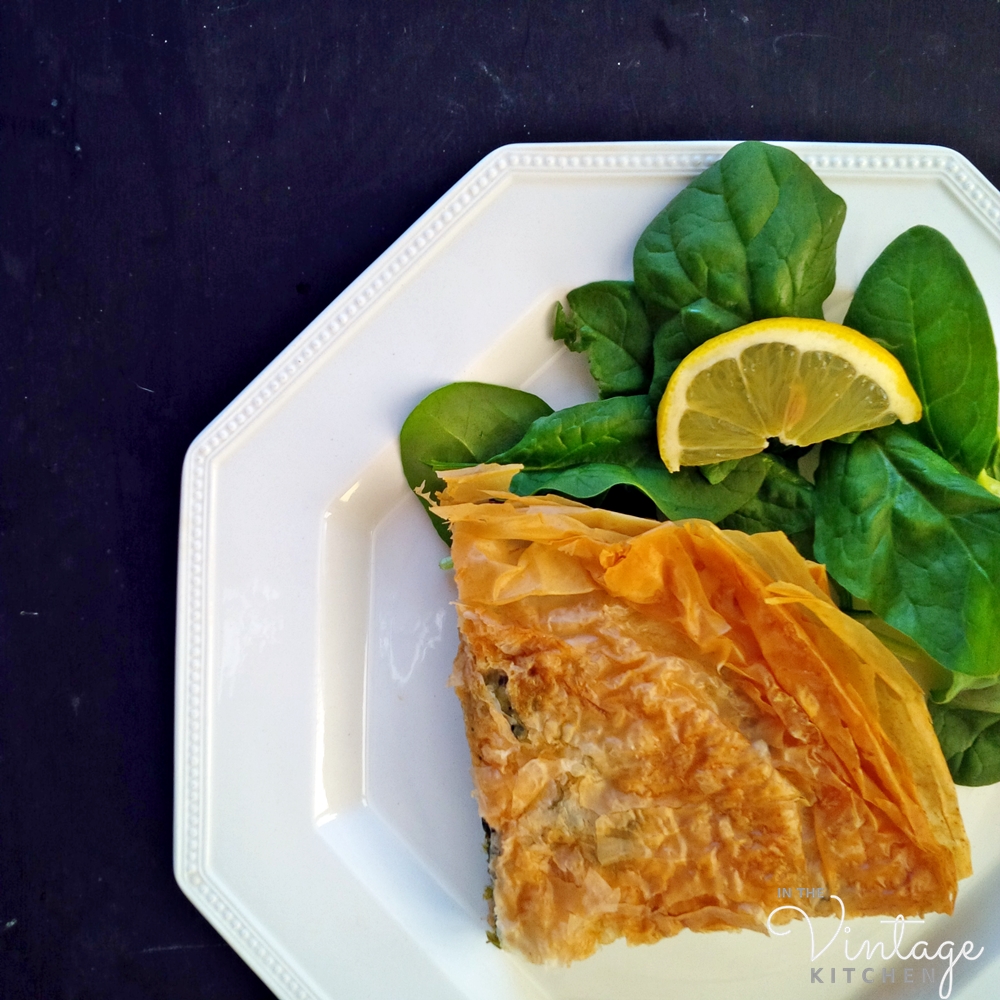
Yesterday, it was Betty’s birthday and today it is International Women’s Day. We couldn’t think of a better post to publish than this one on the forgotten lady of broadcast journalism and now the remembered author of important vintage cookbooks.  In celebration, we made her recipe for Spanakopeta from her Greek cookbook. With spinach now coming into season,  it is an ideal dish for Spring and a guaranteed crowd-pleaser for upcoming holidays like Easter and Mother’s Day. If you have never had Spanakopeta before, it is similar to quiche…. a mixture of cheese and spinach and herbs stuffed between two layers of phyllo dough.

Betty Wason’s recipe for Spanakopeta, A Greek version of Spinach Pie

It’s light in texture and constitution so it can be enjoyed as a side dish or a small dinner or a brunch accompaniment. Betty suggested that it could be served hot or at room temperature, which makes picnic basketing an option too.  It reheats well and can sit in the fridge for a few days without getting soggy so if you are a make-ahead meal planner this recipe will be effortlessly easy and valuable.

Betty Wason’s SPANAKOPETA

Serves 6

12 phyllo pastry sheets

2 pounds fresh or frozen spinach (we used fresh)

1 teaspoon fresh dill, minced and chopped

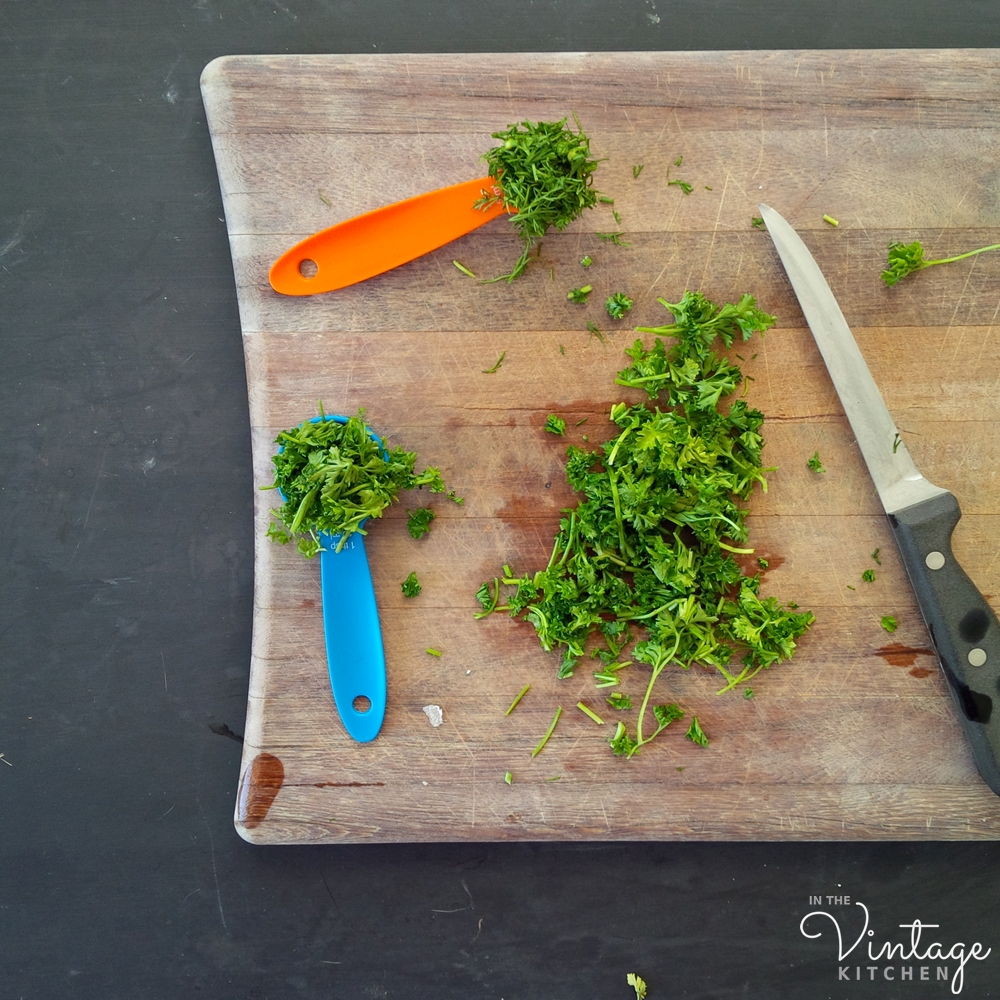
2 tablespoons fresh parsley, minced

Salt to taste (optional)

2 eggs

1/2 lb. Gruyere-type cheese, feta cheese or dry pot cheese (* see notes)

1/2 cup melted butter or olive oil (we combined 1/4 cup of each)

Preheat the oven to 350 degrees.

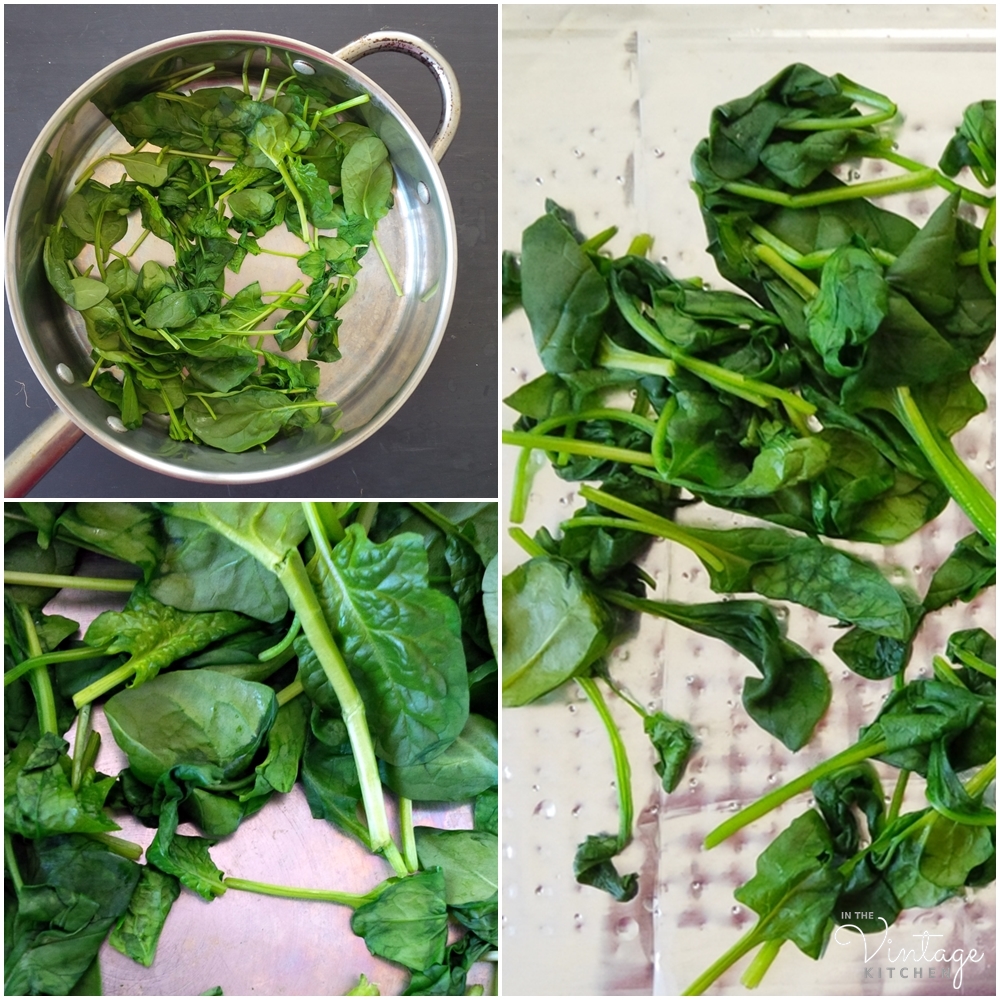
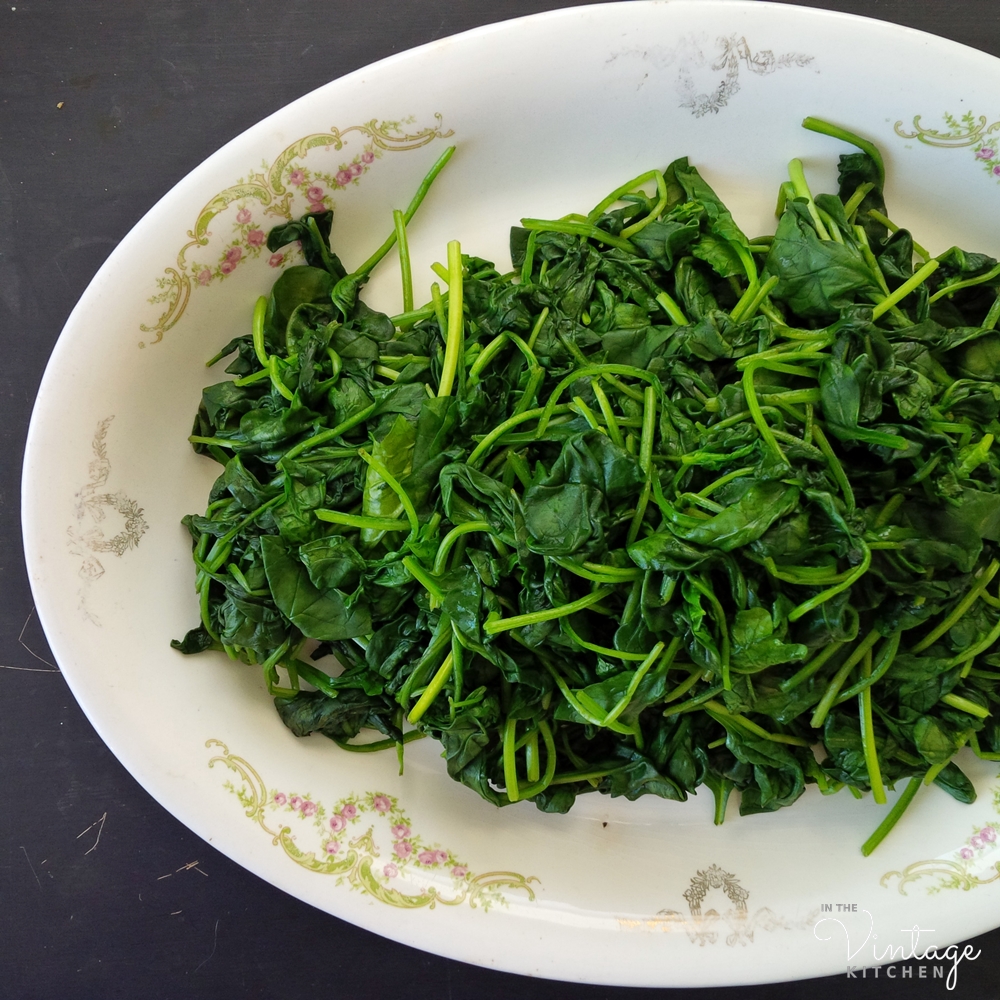
If frozen spinach is used, cook as directed on package and drain well. If fresh spinach is used, wash and clean the leaves to remove any traces of dirt and pat dry. Heat a large saucepan over medium-high heat. Do not add any butter, oil or water to the pan. Working in batches, add as many large handfuls of spinach as will fit reasonably in the pan and toss with a wooden spoon until all spinach is wilted (about 2-3 minutes per batch). You may have to do this step in several batches depending on the size of your pan. Spread each cooked batch of spinach out on a cookie sheet to cool.

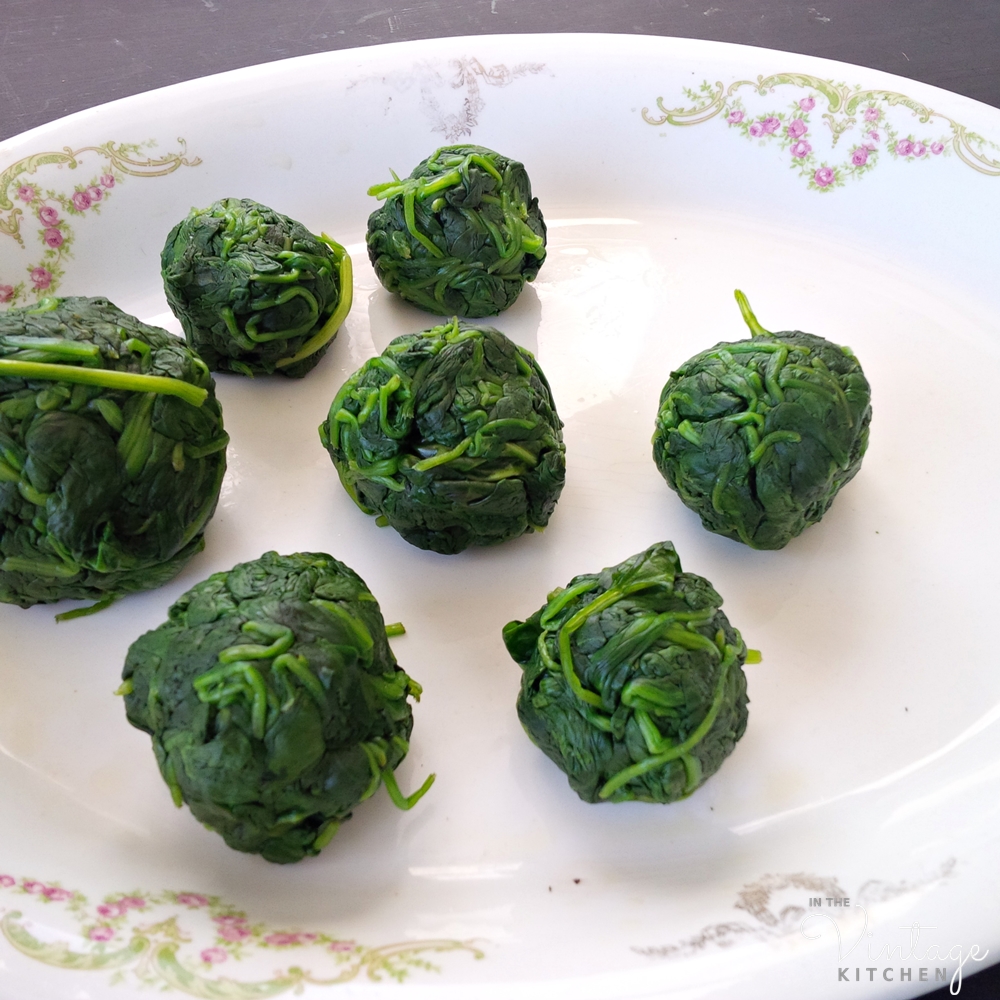
Once all the spinach is cooked, it will look like this…

At this point, you’ll need to wring as much water out of the spinach as possible. The easiest way to do this is to grab clumps in your hand and wring them out forming tightly packed meatball-like shapes. The drier the spinach the better so wring as much water out as you can.

Next, on a cutting board roughly chop each of the spinach balls. Mix in the dill, parsley, and salt to taste and toss until combined. I found there to be enough natural salt in the spinach and the cheese, so we didn’t add any extra salt to this dish at all, but season it to your preference.

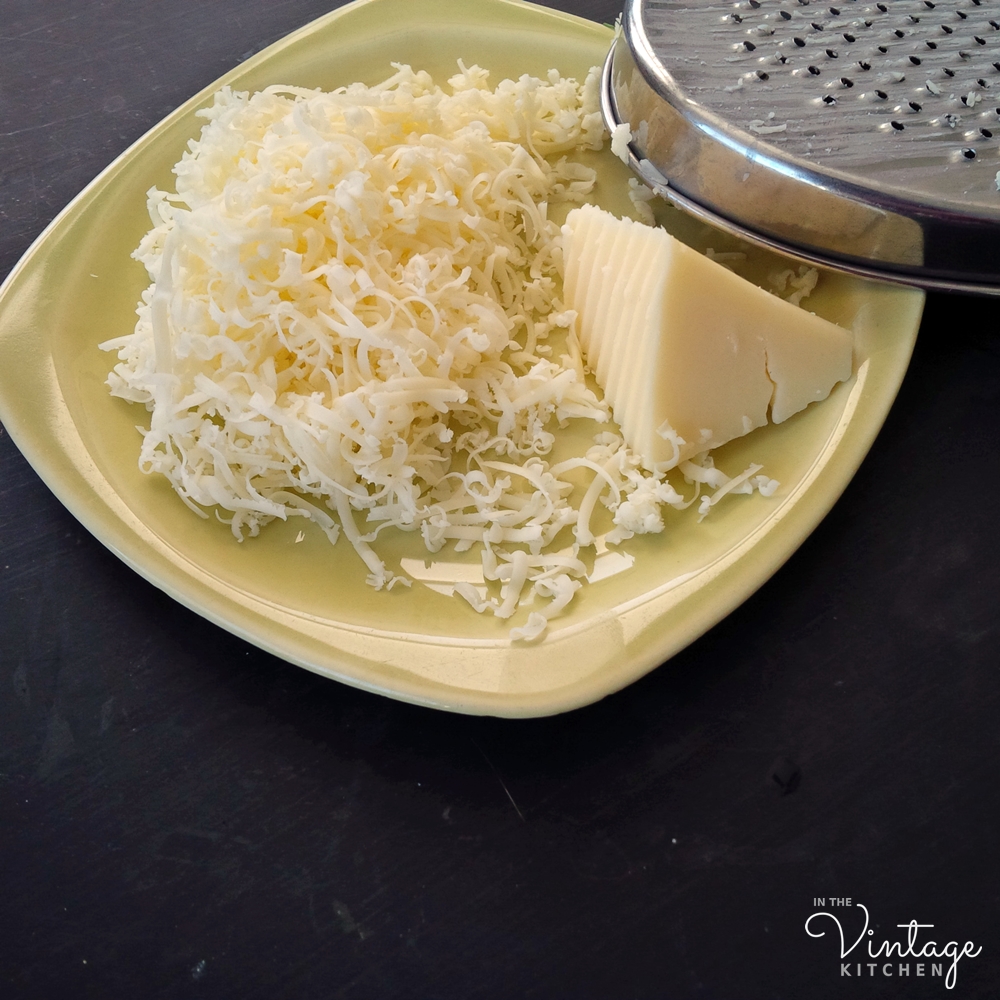
Add one egg to the spinach and herbs and toss to combine. Grate the cheese. We can only find Gruyere at our grocery store occasionally, so I used Danish Fontina which is similar. Other options are Jarlsberg, Swiss or Feta.

Add the second egg to the grated cheese and mix to combine.

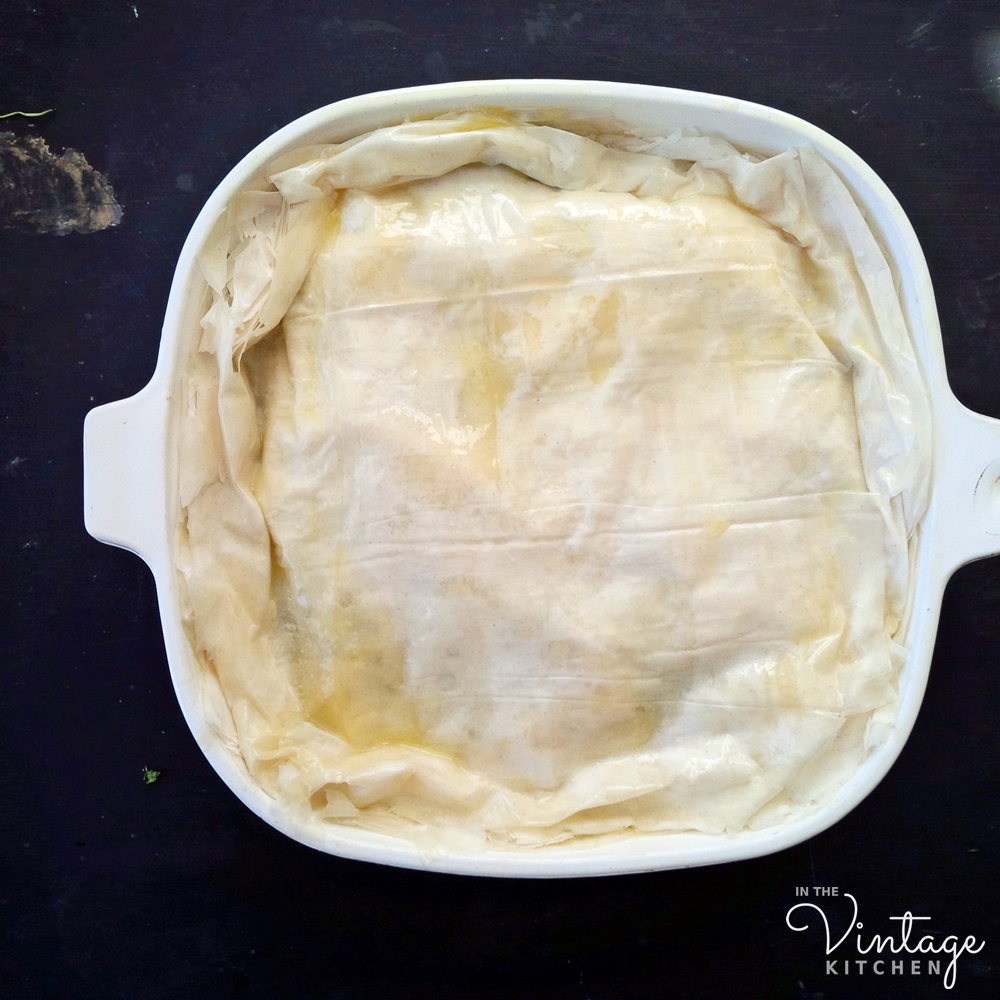
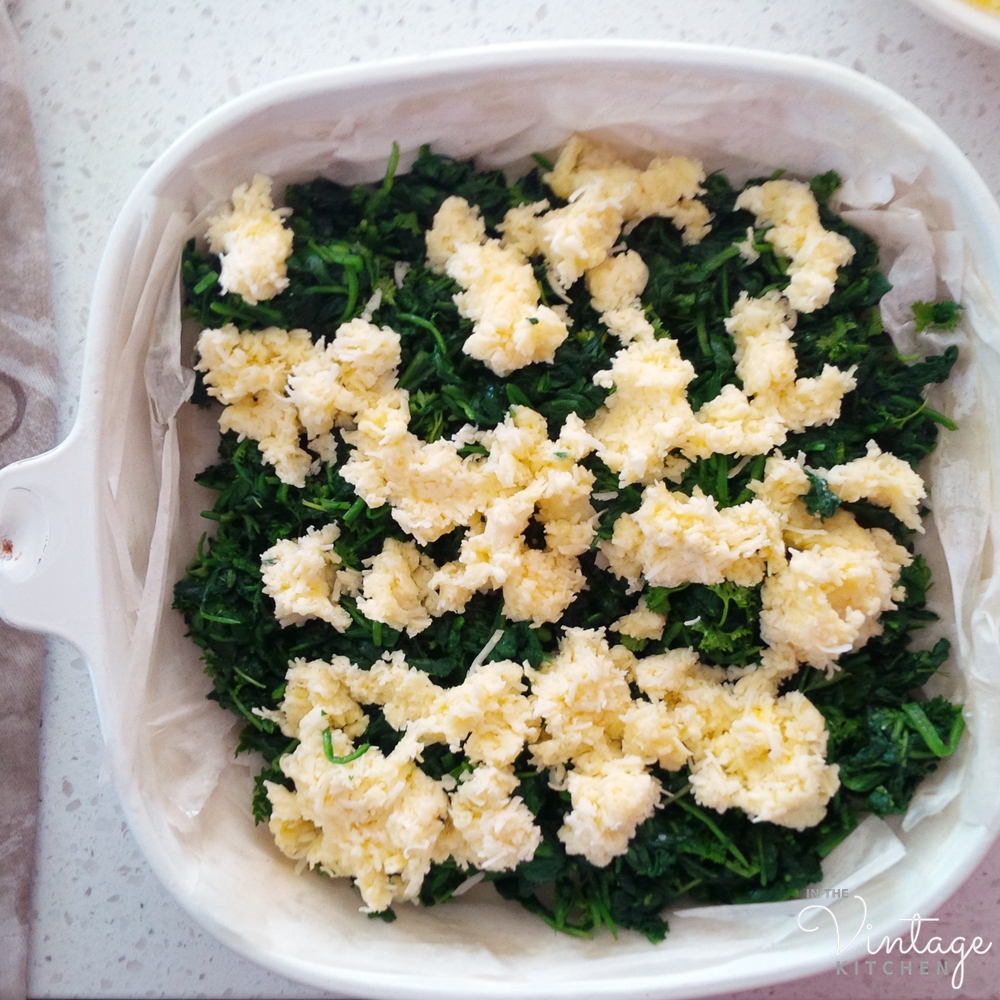
Butter a square 9×9 baking dish and place 6 sheets of phyllo pastry in the bottom. Brush each sheet with the olive oil and/or butter. Then add the spinach, and top with the cheese.

Cover with six more sheets of phyllo, each brushed in butter/olive oil. Don’t forget to brush the top layer.

Ready for the oven!

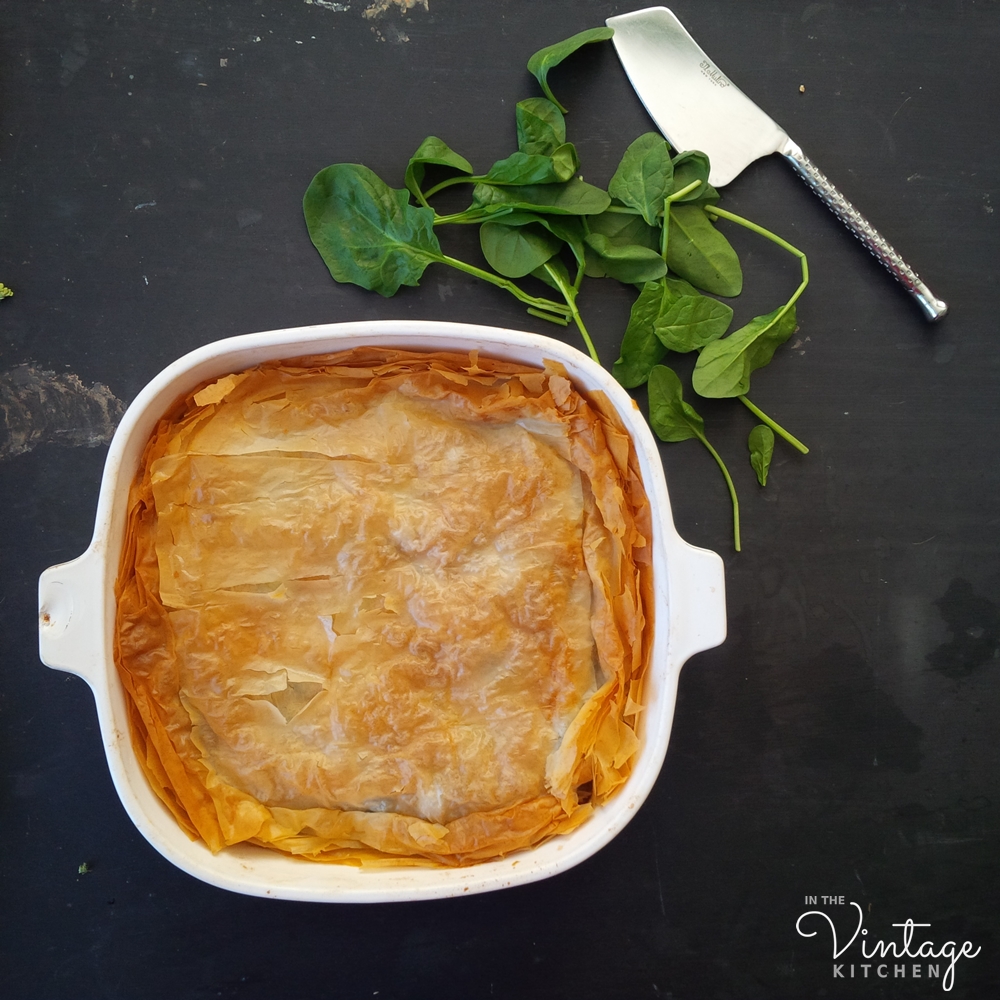
Bake in a 350-degree oven for 35 to 40 minutes until pastry is golden. Remove from the oven, let cool until the dish can be handled,

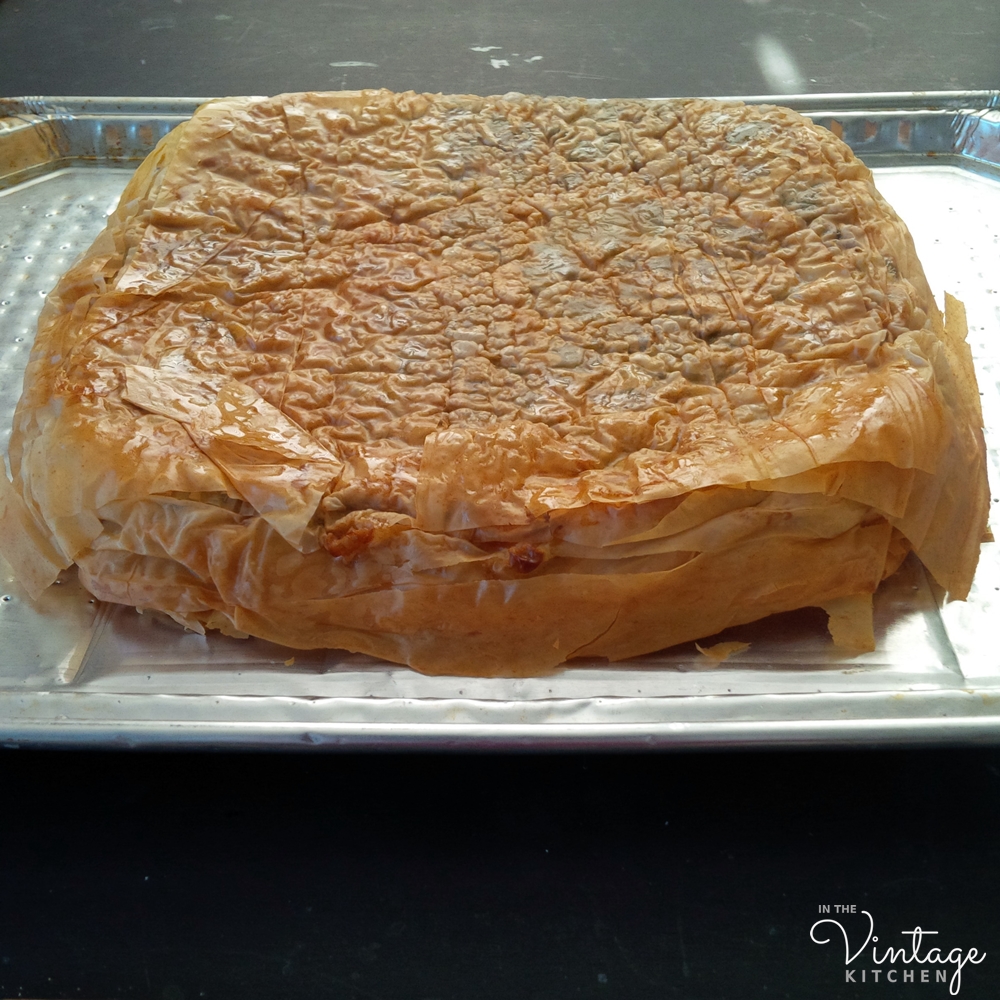
then turn out upside down on a baking sheet and return it to the oven so that the undercrust can become crisp and golden (about 15-20 minutes).

Back into the oven!

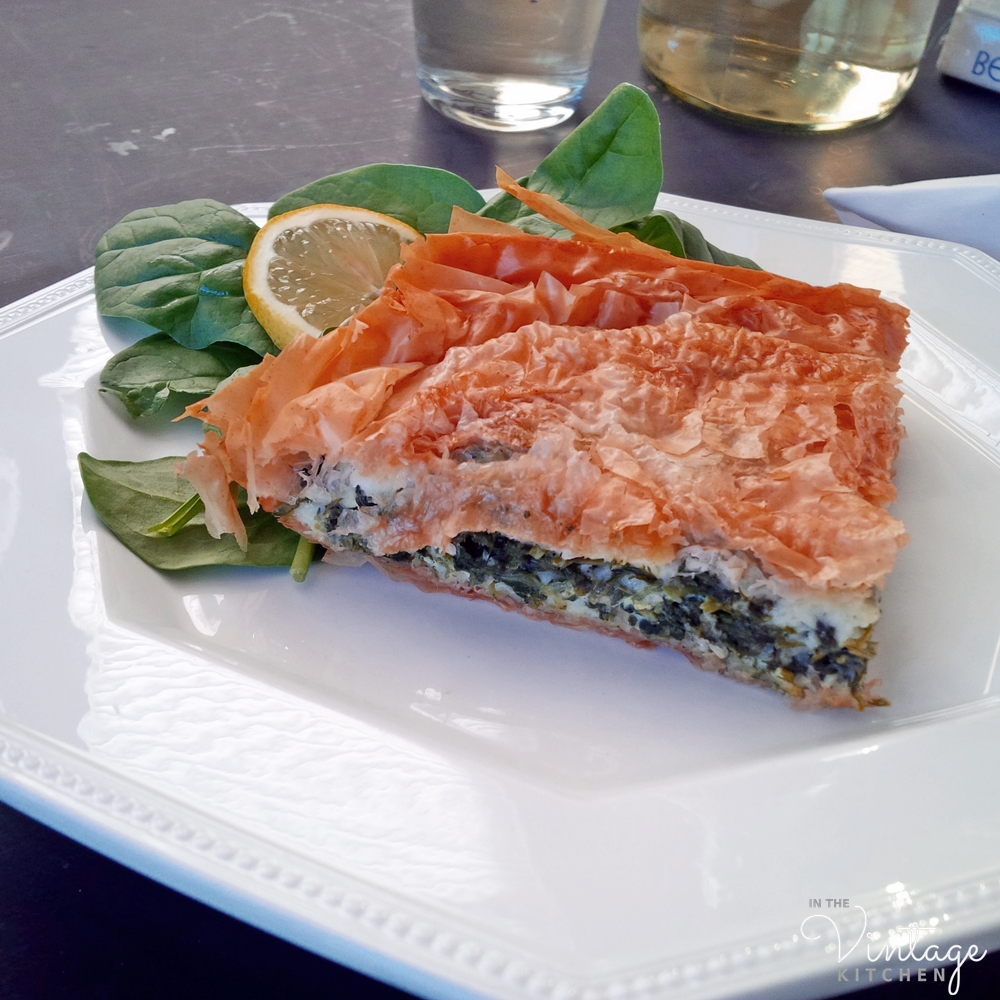
Remove from the oven, flip back over and cut into squares. Serve while hot or wait for it to cool to room temperature. We served our spanakopeta with a glass of sauvignon blanc and a simple side salad tossed in olive oil and lemon juice. Other additional sides that would be lovely with this include hard-boiled eggs, olives, mixed nuts,  prosciutto, or roasted sweet potatoes.

Light, airy, and full of subtle flavors that are a little bit nutty (the cheese), a little bit zesty (the herbs) and a little bit earthy (the spinach), Betty’s spanakopeta is packed full of good, healthy nutrients, providing a simple introduction to the lovely world of Greek food.

It’s a good-for-your-spirit food mirroring Betty’s healthy outlook on life. She cast aside all the bitterness and resentment that could have filled her up in the post-CBS days and instead stuffed her life full of light, bright joy that enriched her spirit and fed her soul. Cheers and happy birthday to Betty for continuing to inspire women around the world with your writing.

Interested in learning more about Betty and her Greek recipes? Find her cookbook in the Vintage Kitchen shop here.
Culinary Creativity: Recipes From Our Prize Winner!

By day they are executives in New York City but by night (and most weekends too) they are culinary wizards adventuring their way around the inventive kitchen. Meet blog reader Michael, one of the winners in last month’s Spartan Souvenir giveaway and his lovely wife Renee.

reneemichael

As soon as their prize of Greek olive oil and wild mountain oregano hit their mailbox they started daydreaming about what they could make. Possibilities abounded of course, but it didn’t take very long before they settled on two Mediterranean-style dishes that highlighted their new winnings and captured the simple fresh flavors of their farmer’s market palates.  In a lovely spirit of community, these two home chefs not only sent back a follow-up note on their gift receipt but also included recipes and photos of everything they made with their Sparta samplings. Fantastic! Here is what they made…

greekdishes2
“The olive oil has such a nice fruitiness and the oregano is slightly floral and delicate,” shared Renee. “We love it!”

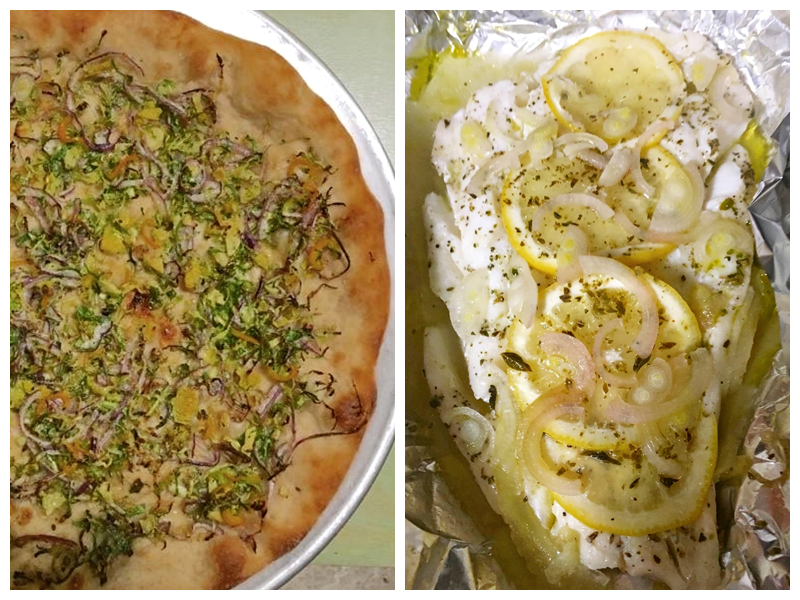
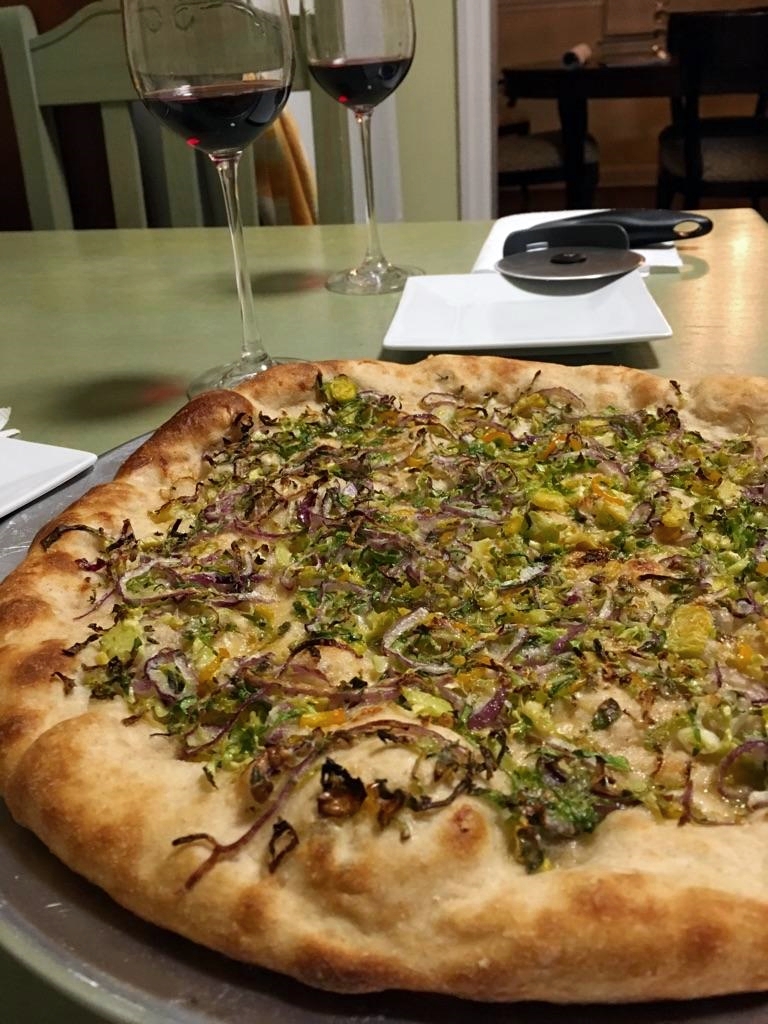
Long-time connoisseurs of make-it-yourself pizza they first prepared a Mediterranean style Greek pizza with homemade dough and an inventive brussels sprout topping. Next, (just in time for Fish Friday) they made a simple Greek-style baked cod using local fish and an array of herbs.

Michael and Renee’s recipes couldn’t have come at a better time in our calendar year. If you are still entertaining holiday house guests the Greek Pizza makes for a fun party pleaser and can be doubled or tripled in size to fit all appetites.  Or if you find yourself ready to put the heavy plates of the holiday season behind you then the Greek Baked Cod would be just the ticket for a light and refreshing meal. Both recipes highlight the unique flavor of the olive oil and oregano from Sparta, Greece which you can find at thespartantable.com All other ingredients can be locally sourced from your grocery or market.

pizza3

Greek Pizza

Note: Michael and Renee followed Jim Lahey’s lead on the pizza dough preparation. You can find a step-by-step guide here which includes a casual video on the making of it all. If you have never made homemade pizza dough before don’t feel intimidated, it’s very easy and this is a no-knead recipe which makes it even easier. If you can’t sacrifice the time for the dough, start out simple with a pre-raised dough ball from Trader Joe’s or the fresh bakery department at most supermarkets.

(for the dough)

3.5 cups all-purpose flour ( M&R veered slightly from the dough recipe and incorporated some whole wheat flour as well. This recipe reflects their version.)

1/2 cup whole wheat flour

1/4 teaspoon active dry yeast

2 teaspoons fine sea salt

1 1/2 cups water

(for the topping)

1/2 red onion, thinly sliced and placed in a bowl, covered with water for at least 30 minutes, then drained and dried

1 Serrano chili pepper, thinly sliced (remove the seeds and veins if you are averse to heat or if your chili is super strong)

8-10 raw brussels sprouts, shaved

1/4- 1/3 cup (plus more for topping) Parmesan cheese, freshly grated

1/2 teaspoon Spartan Table wild mountain Greek Oregano

5 ounces Spartan Table Extra Virgin Greek olive oil

Salt and Pepper to taste

Prepare dough as directed. Preheat oven to 475 degrees. Add pizza stone about one hour prior to baking. Mold the dough into a circle on a pizza peel lined with semolina flour to prevent sticking and for easy sliding.

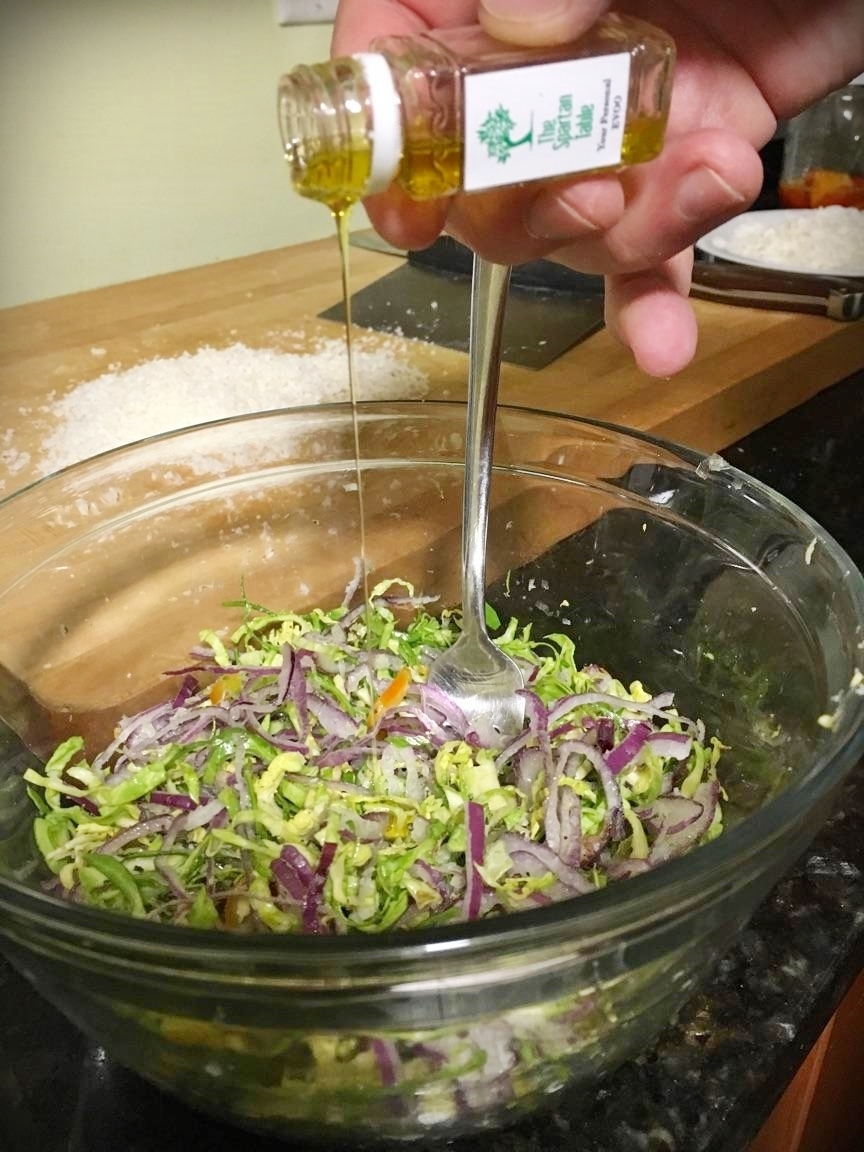
Place all topping ingredients together in a bowl and mix in olive oil and salt and pepper to coat.

pizza2

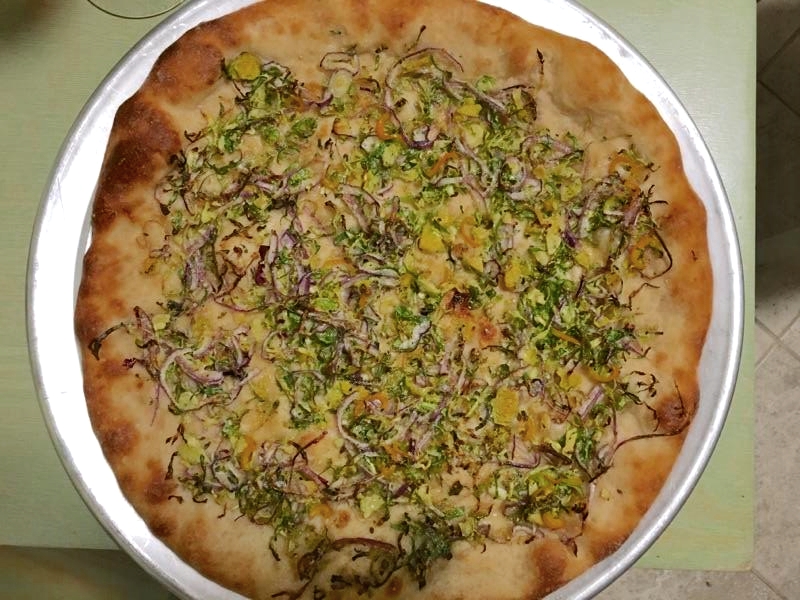
Scatter your toppings evenly on top of the dough. Bake until bubbly and slightly browned about 10-12 minutes. Depending on your oven, this could take more or less time. Finish with olive oil,  sea salt, and extra Parmesan cheese.

pizza1

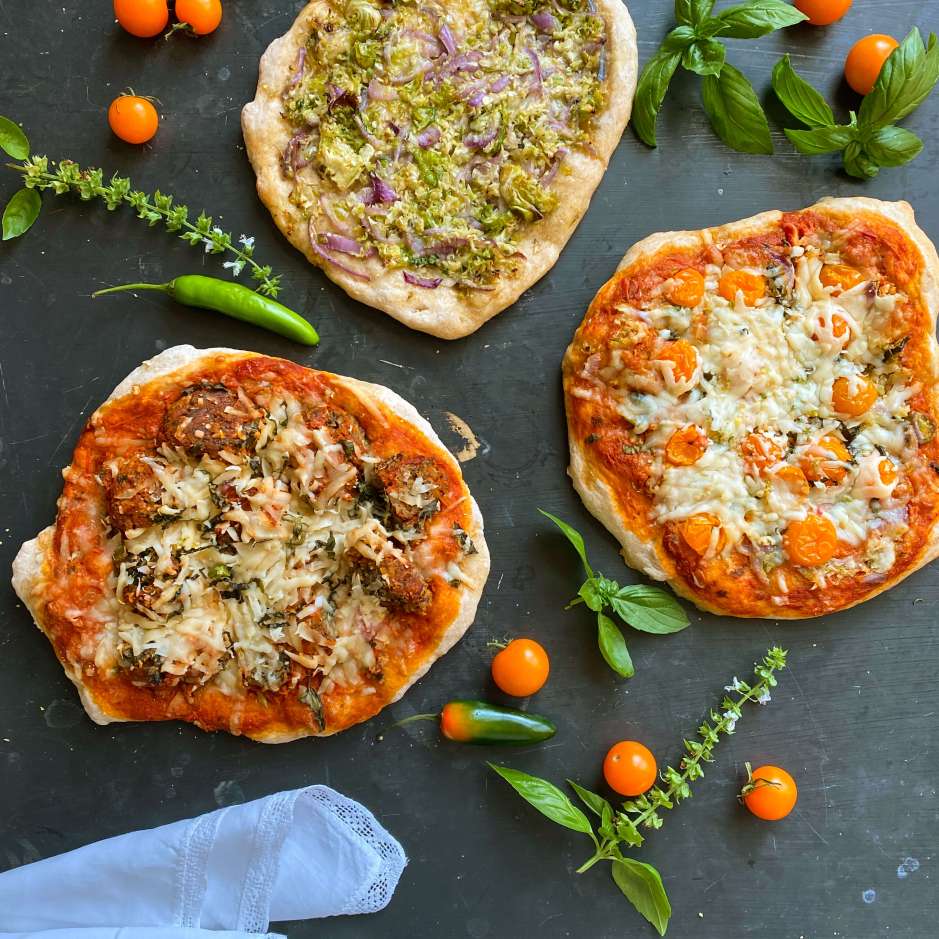
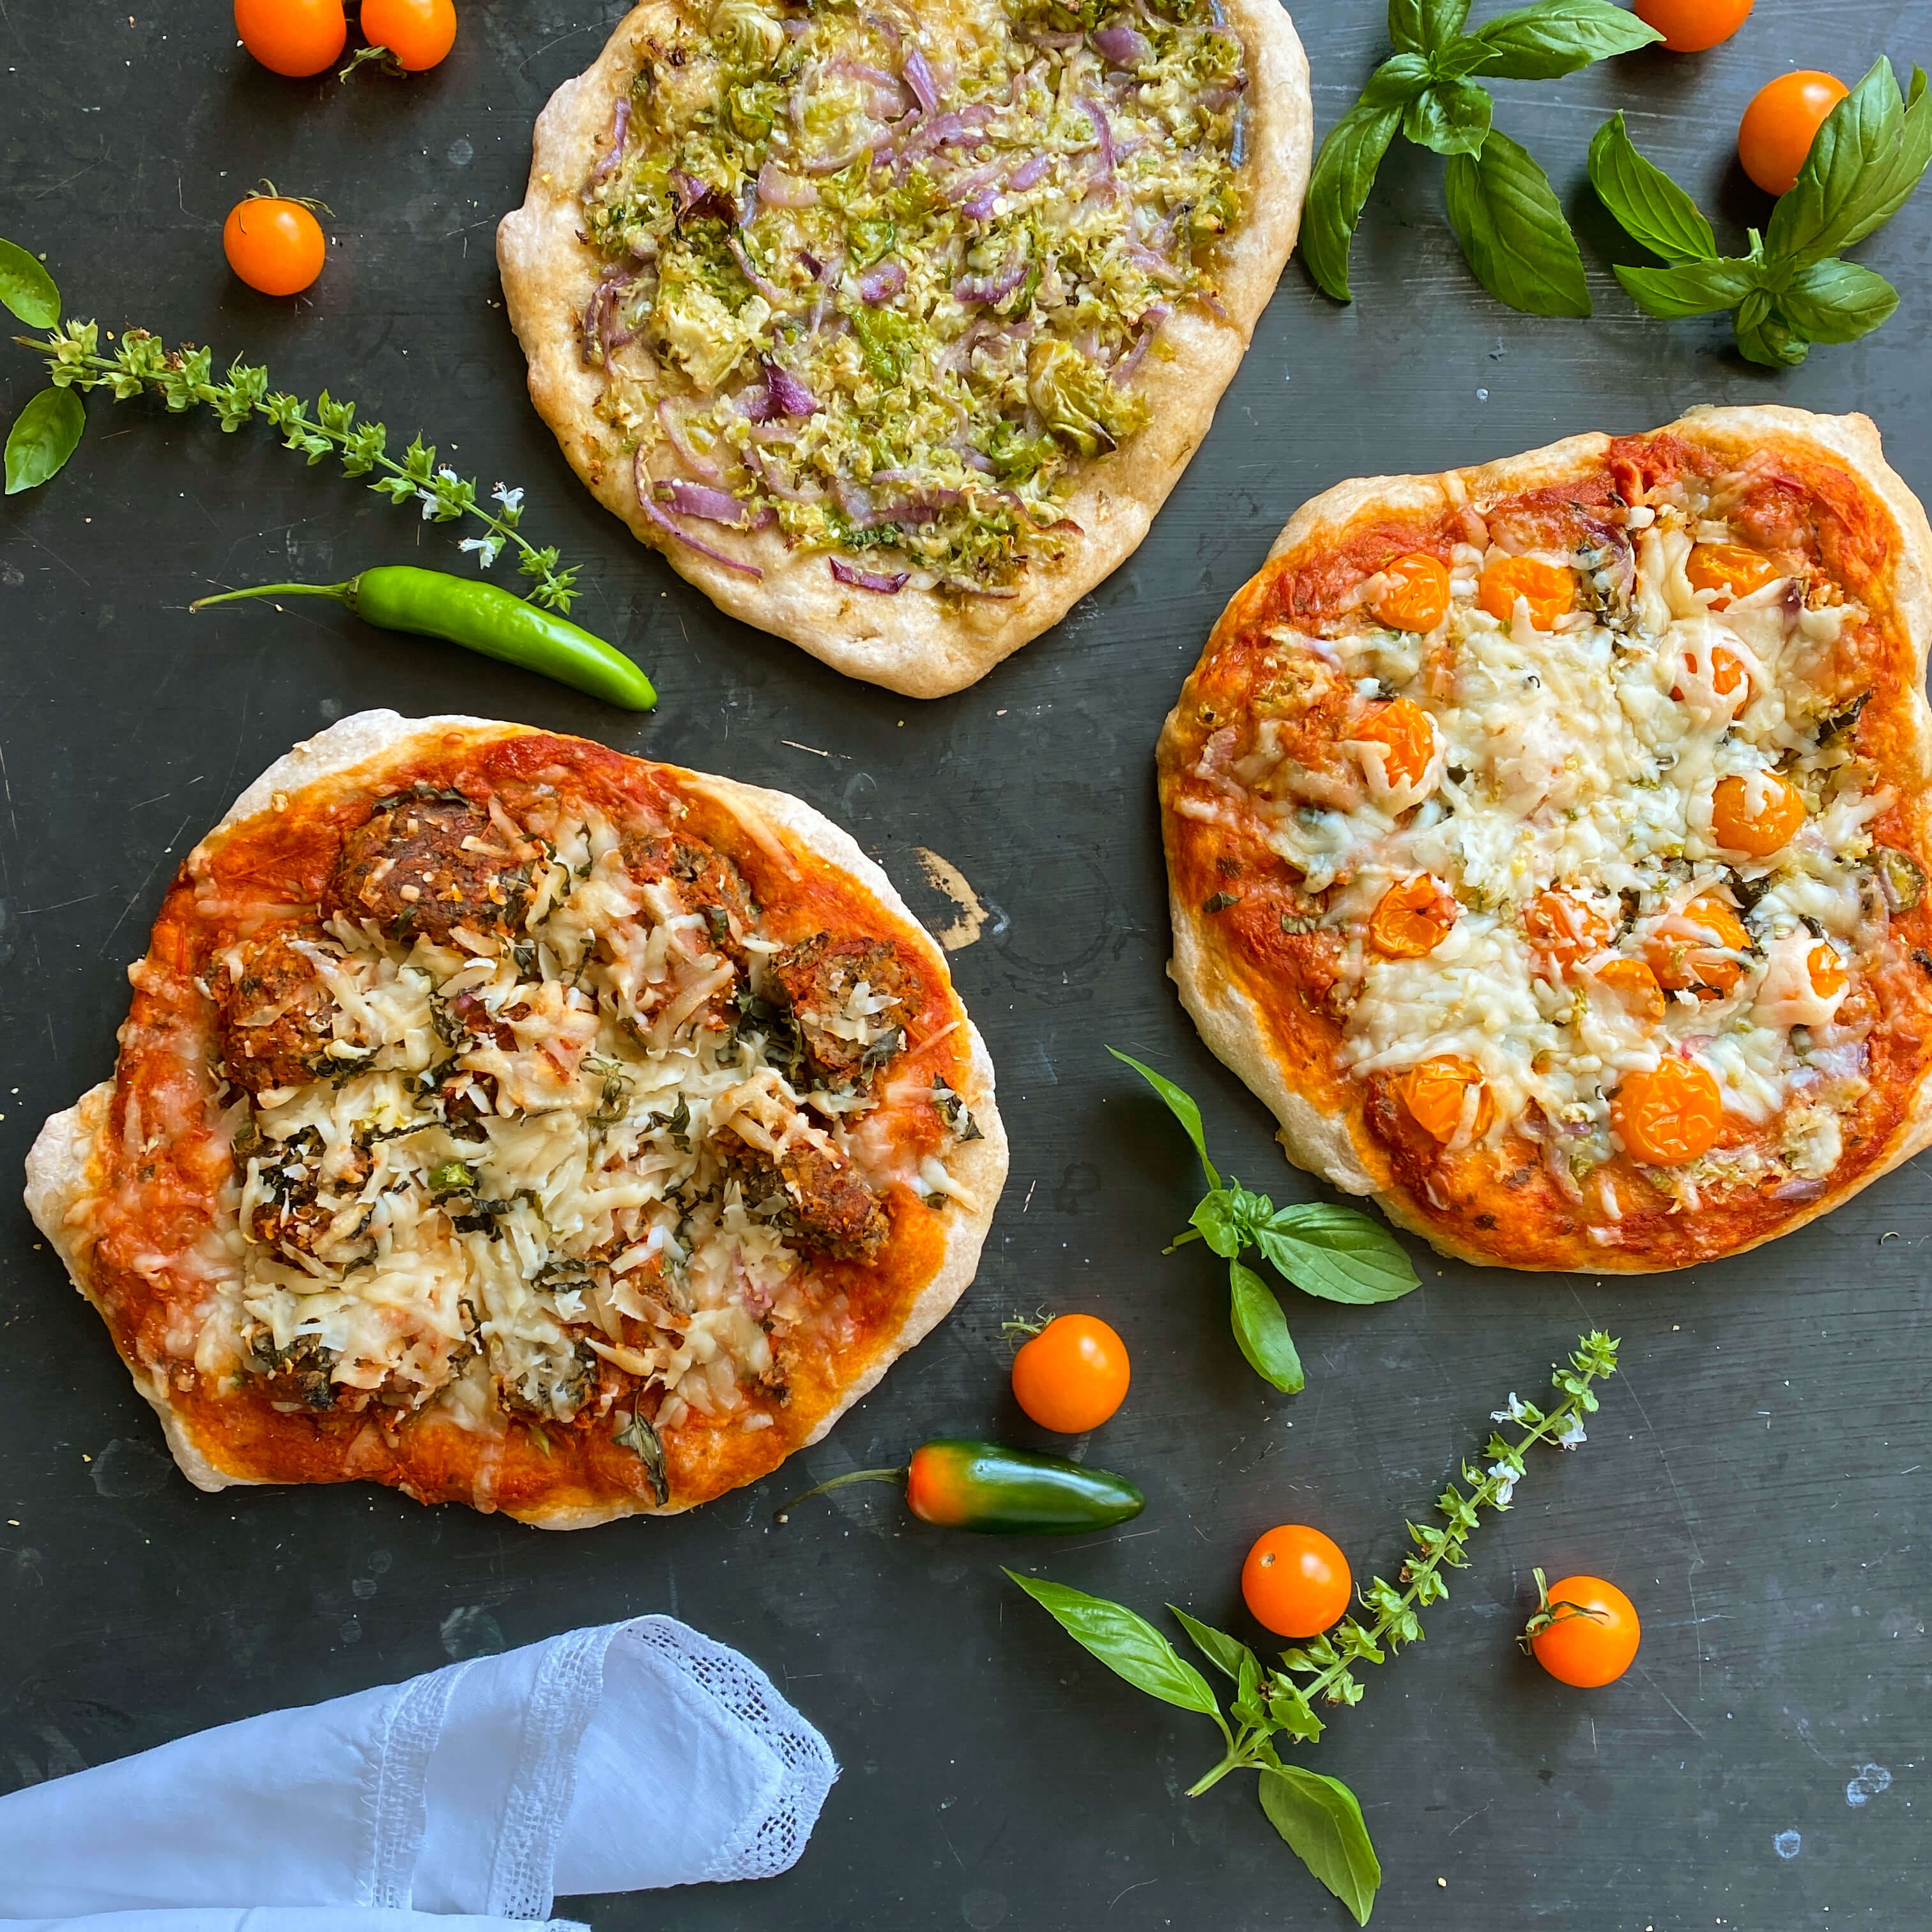
In The Vintage Kitchen UPDATE! August 2021 – The sky is the limit when it comes to experimenting with this homemade pizza recipe.  Greek olive oil and wild mountain oregano pair beautifully with an array of toppings… 

including mushroom meatballs, fresh basil, cherry tomatoes and this heirloom Italian sauce recipe.  Featured here are (clockwise from top) Greek Pizza; Italian Cherry Tomato; and Meatless Mushroom Meatball.

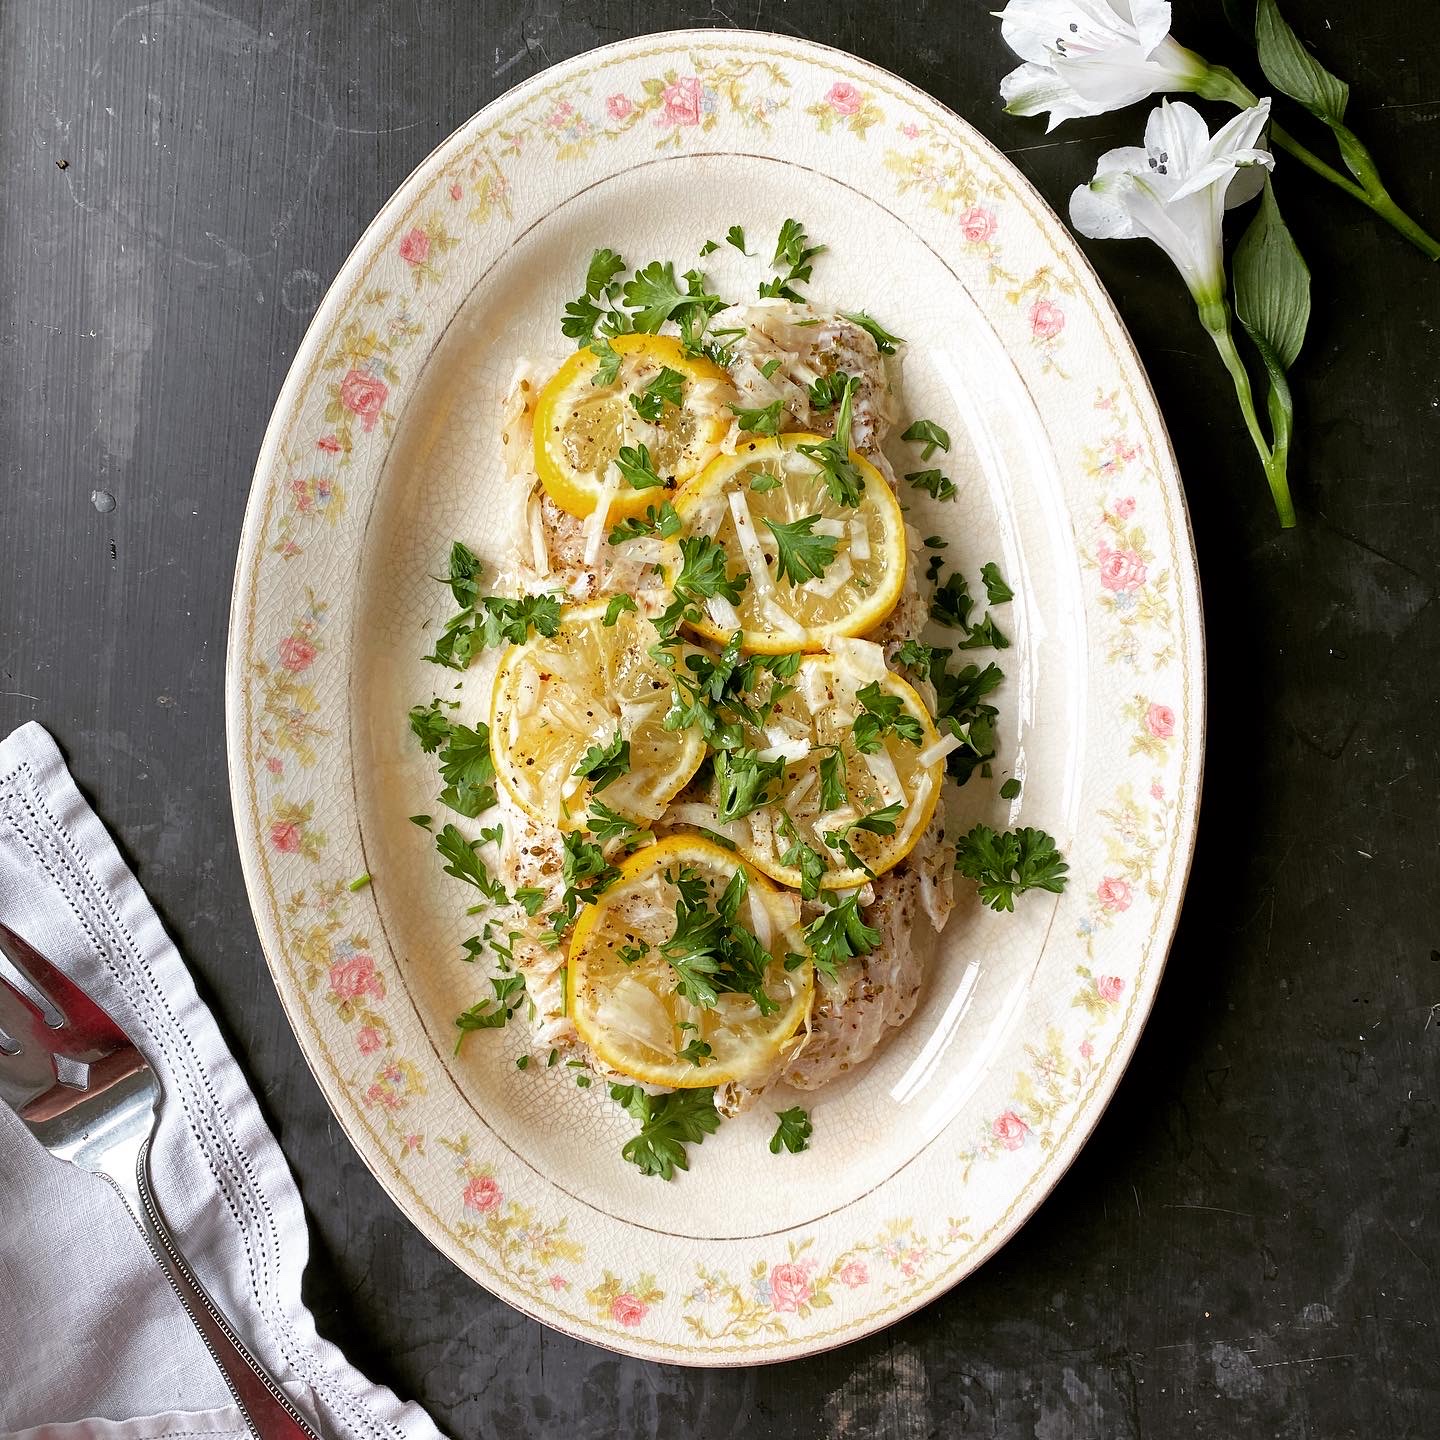
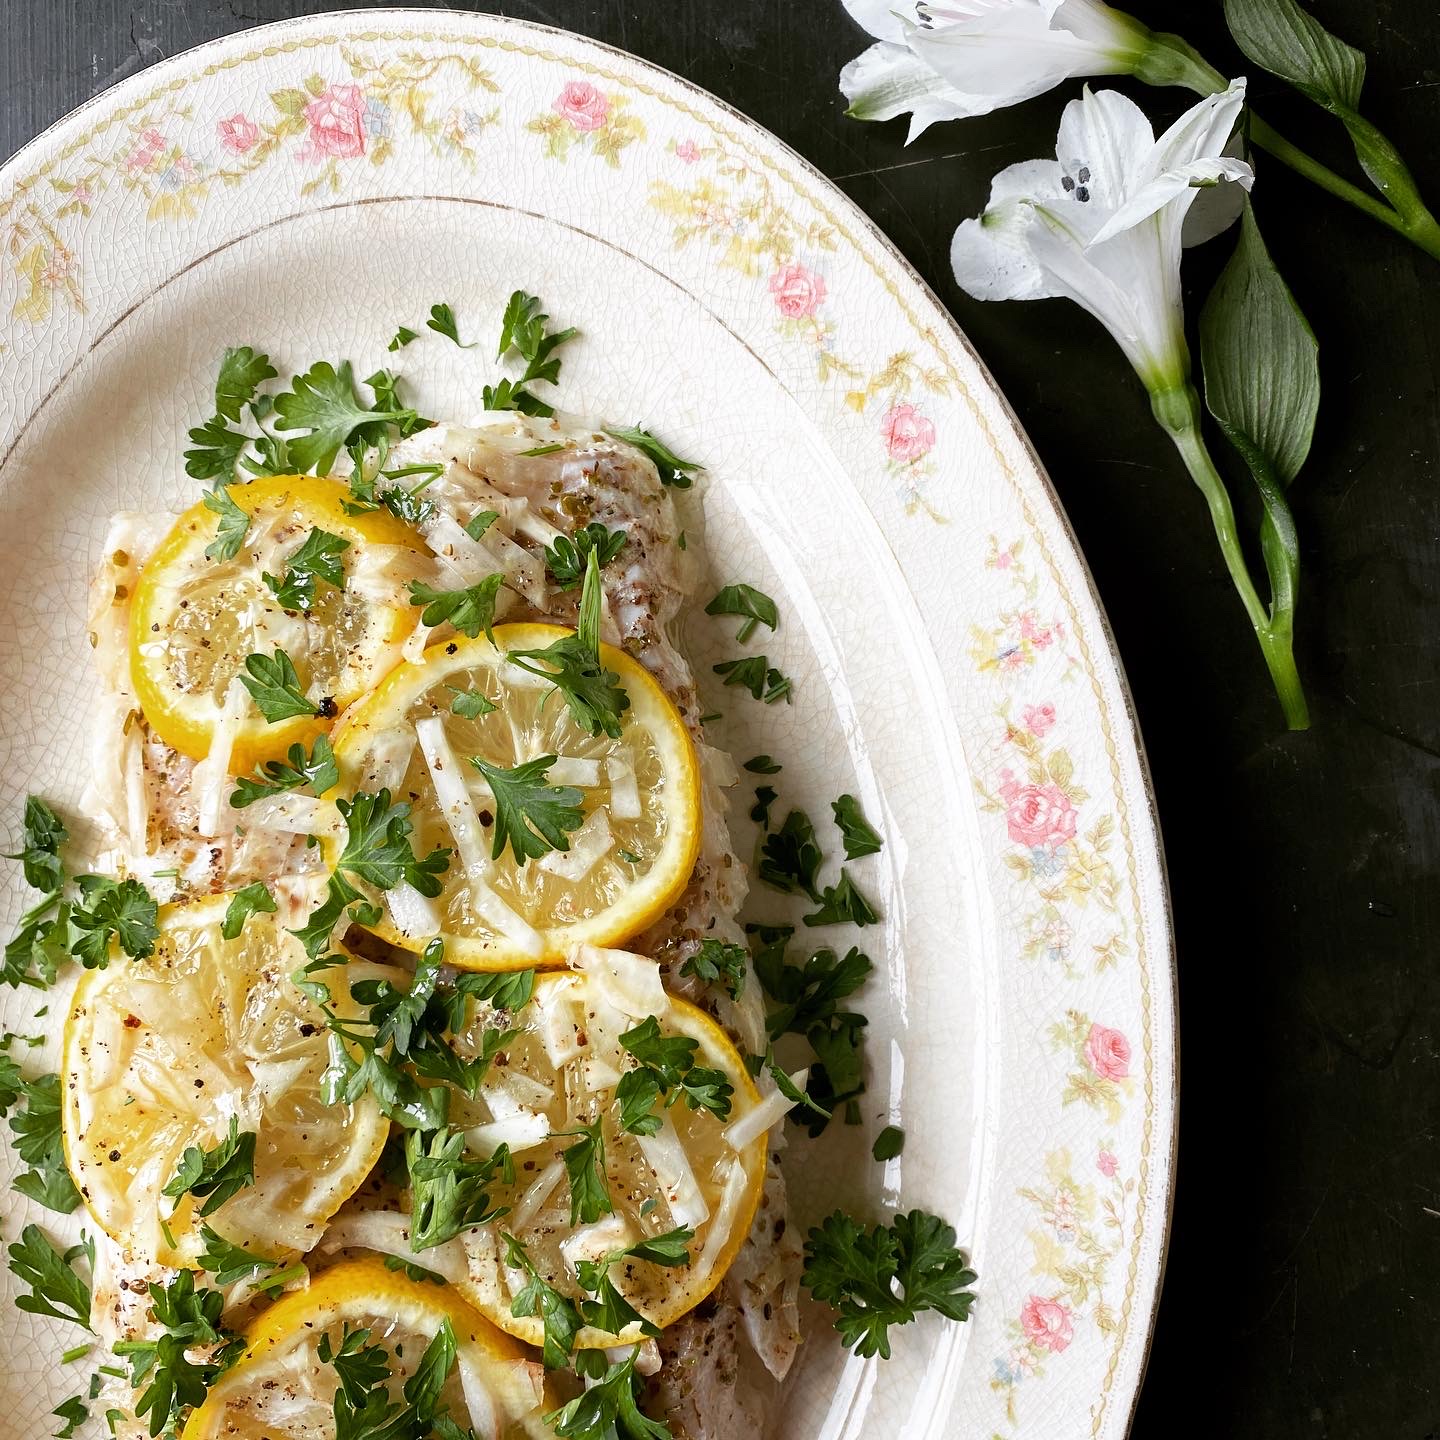
Greek Baked Cod (serves 2)

Fresh, local cod  (enough for two portions)

1/2 teaspoon Spartan Table Greek oregano

5 ounces Spartan Table Greek olive oil for drizzling and finishing

1  quarter of a large organic lemon, thinly sliced

1 half of a medium shallot, thinly sliced

1/4 quarter cup of thinly sliced fresh fennel (from the bulb)
 
Salt and pepper to taste
 
1/2 tablespoon fresh parsley, finely minced, for finishing

Preheat oven to 425 degrees.

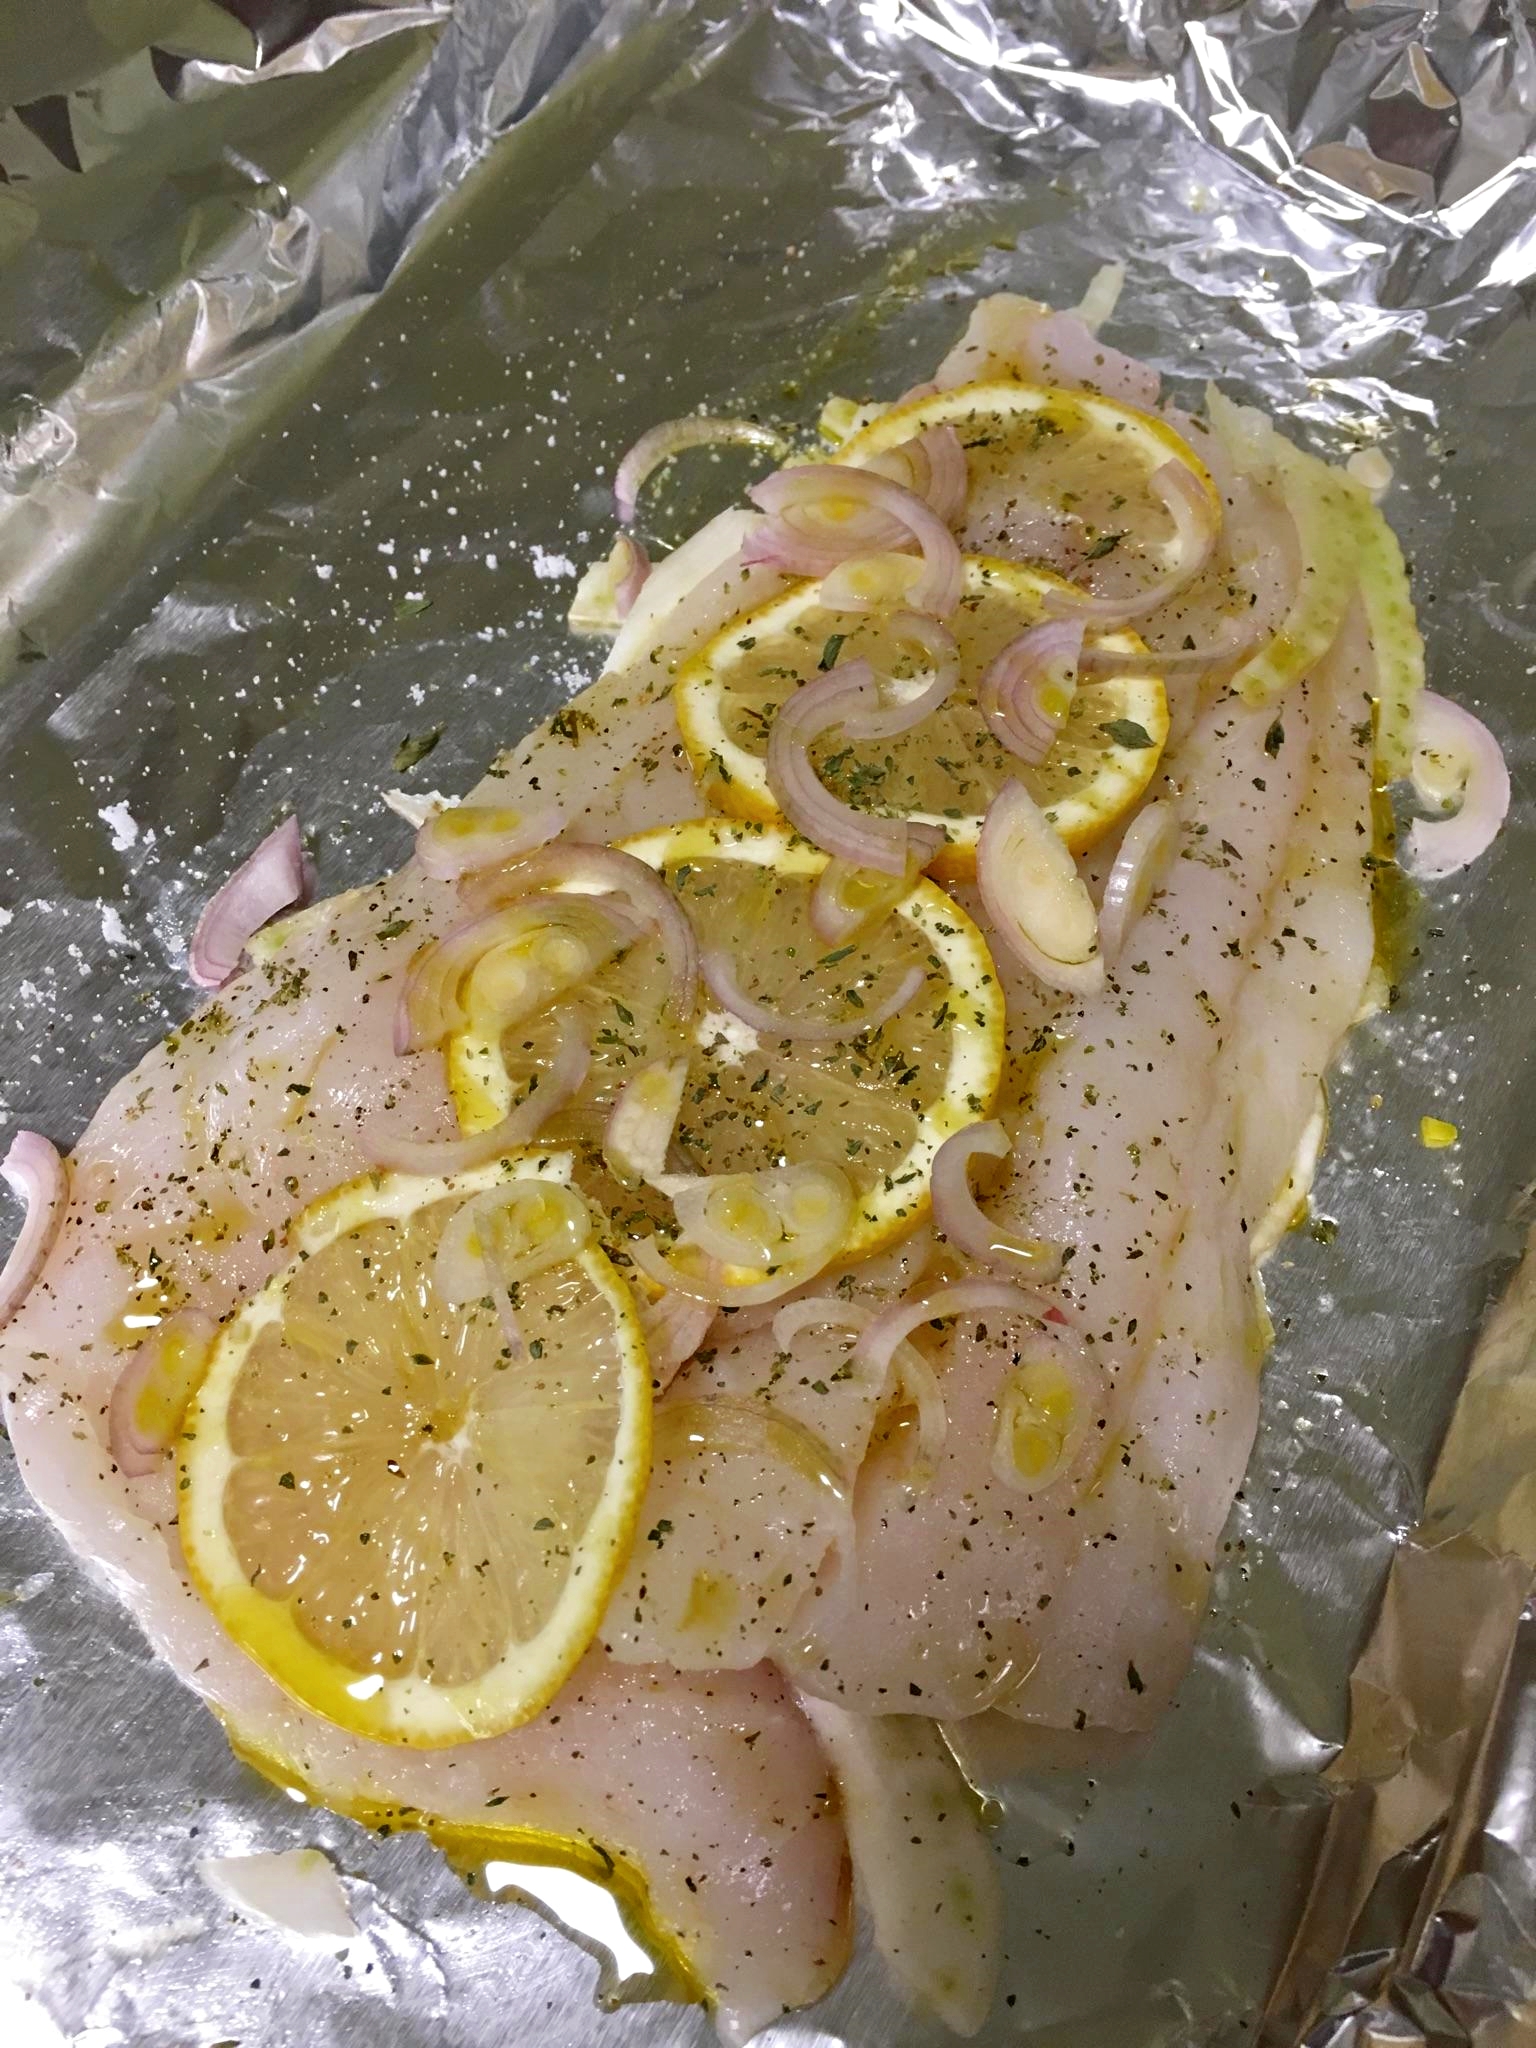
Add cod to two pieces of foil paper (doubled so that it doesn’t leak) placed on a baking sheet. Drizzle fish with the olive oil, oregano, and salt and pepper. Arrange the shallot slices on the bottom of the foil, place the cod filet on top with the fennel and lemon slices.

fish1
 
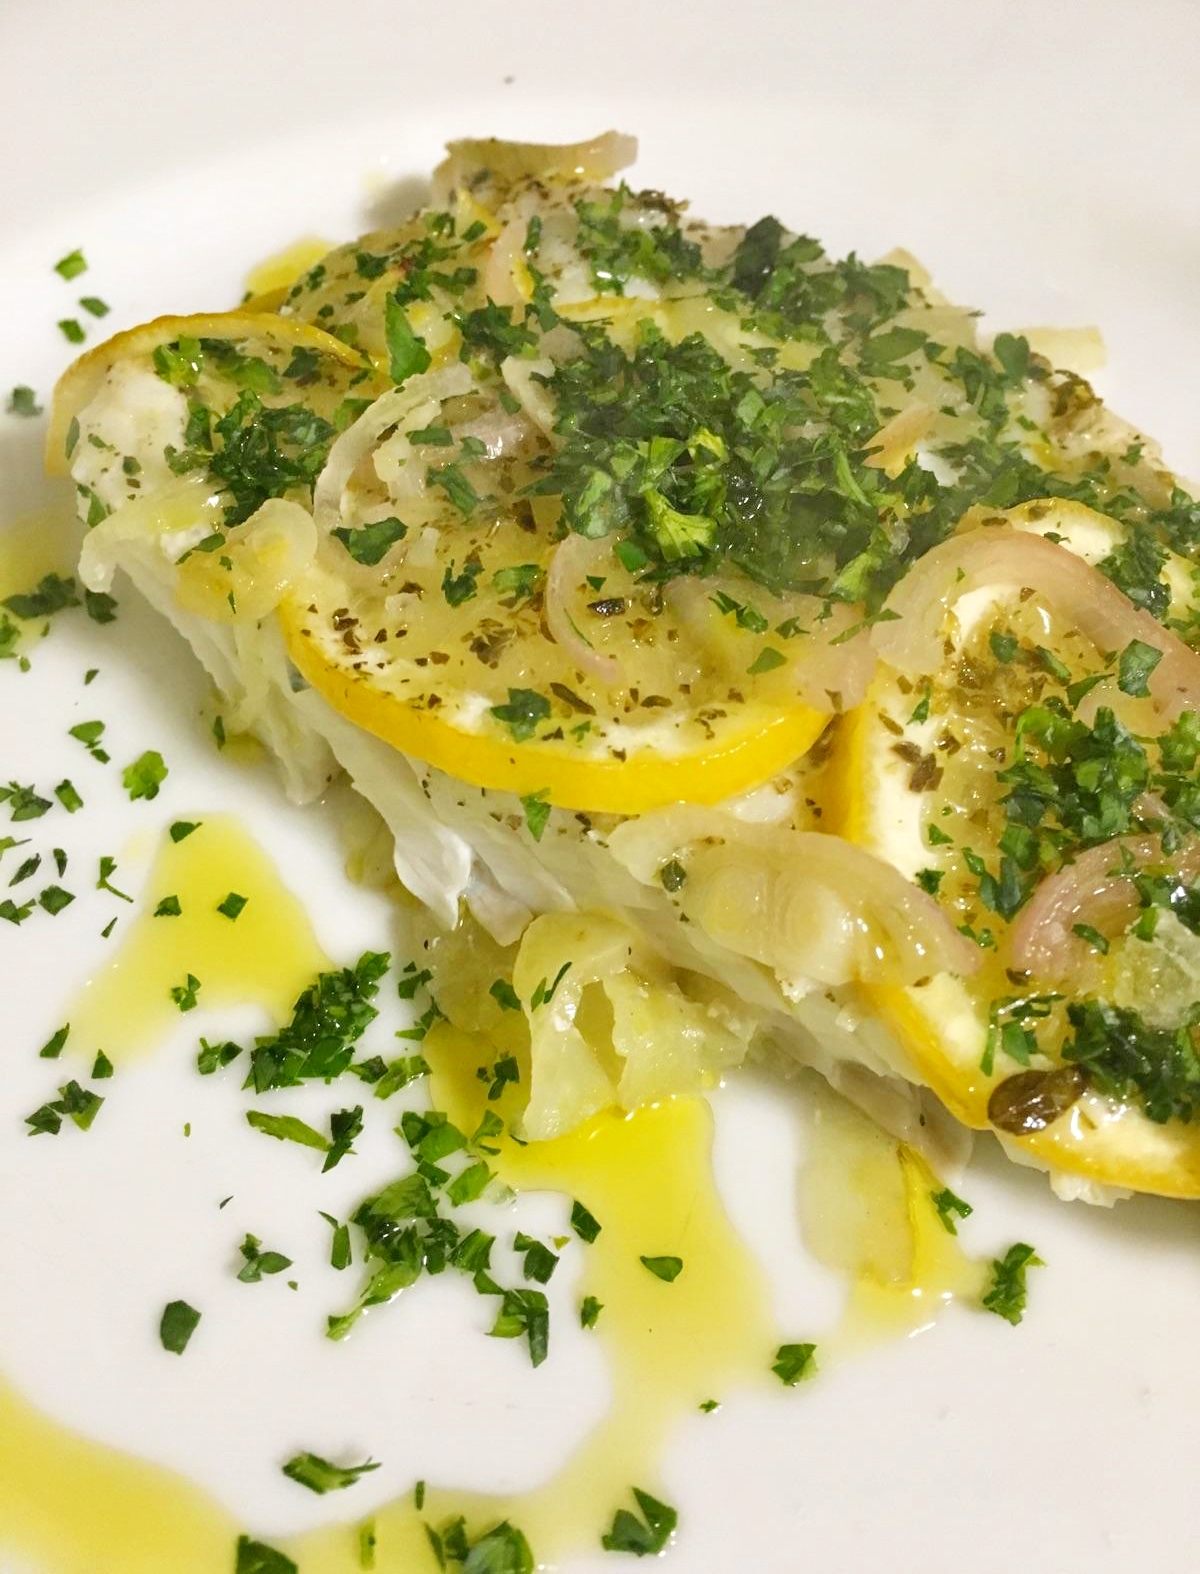
Close the foil (like a packet) and bake for about 20-25 minutes, depending on your oven and size of the cod. Ours took about 20 minutes to cook. Finish with an extra drizzle of the oil, sea salt and parsley.
 
fish3
 

In the land of the Vintage Kitchen, it is very exciting to have such an enthusiastic (and delicious!) response to a blog post. Hopefully, Michael and Renee’s recipes will help pave the way for more culinary adventures discovered by our readers. Having come full circle with an interview that originated months ago in the faraway, mystical olive groves of Greece and ended up finally on the kitchen table of two New York foodies, this post feels a bit like magic. Even though a zillion miles separates us from Sparta and  Nashville and New York we now share a commonality in the history of a food. And our cross-culture community feels a bit more close-knit.  As Homer said, “the journey is the thing.”

Again, a big thank you to Jehny and George for carrying on the family tradition of olive-growing in Greece and to Michael and Renee in New York for inspiring us with two new recipes fit for a feast.

 
If you missed the interview with Jehny and George from The Spartan Table find it here.  If you have any questions regarding Michael and Renee’s recipes post them in the comment box and we’ll get them answered ASAP.
 

Cheers or opa, as they say in Greece, to the final days of 2016. May they be both merry and bright.


kitchen prep

On This Day in 1948: Flowers Bloomed in a Book

wildflower1

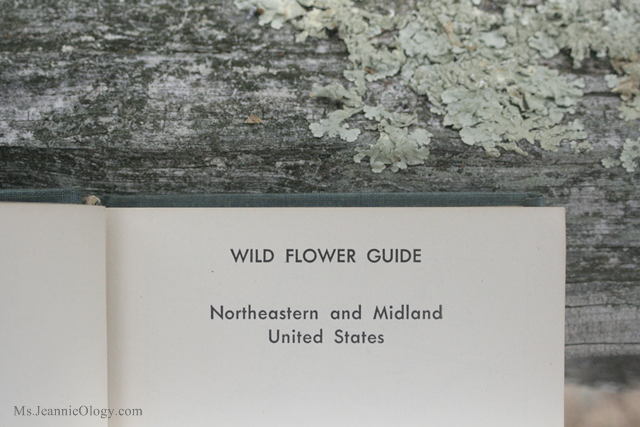
On this day 68 years ago, Edgar T. Wherry, a well renowned mineralogist was celebrating an accomplishment with a certain bouquet of flowers that had just come into bloom. March 11th, 1948 was publication day for his springtime book…

wildflower3

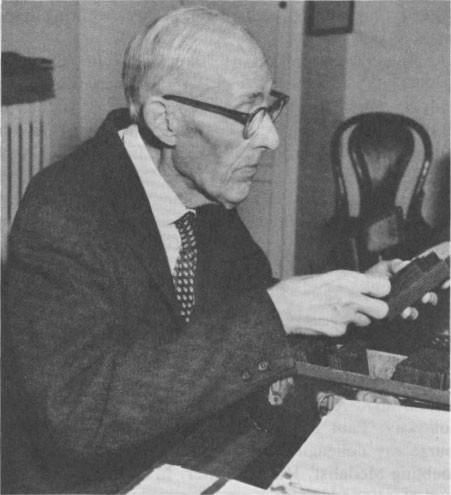
At the time of publication, Edgar was living in Philadelphia and teaching botany at UPenn. The weather that day was cloudy and cool, with temperatures only reaching the mid 40’s. Not rainy but not sunny either, it was another grey day in a long stretch of grey days that would mark March the cloudiest month of the entire year in Philadelphia. Daylight savings time wouldn’t arrive until April 25th, 1948; which means the light was weak, the landscape was heavy and the overall climate was dreary. Edgar, like his contemporaries today, was tired of the winter snow, the freezing rains, the ice covered sidewalks. Spring couldn’t come soon enough.

Photo courtesy of American Mineralogist
Edgar at work. Photo courtesy of American Mineralogist

But finally a mental break came for all Northerners on March 11th, when this gem of a treasure hit bookshelves for the first time. Bright and beautiful, it lightened spirits everywhere in the form of color plates and caring words. Flowers were blooming if not in the garden at least on the page.

wildflower5

wildflower6

wildflower

In his book, Wild Flower Guide: Northeastern and Midland United States, Edgar compiled hundreds of different types of wild flowers native to these two regions in an effort to highlight their importance in the natural landscape. Mixed in with descriptions of each flower were both color plates and black and white illustrations describing shape and size and color. Edgar wanted to make it as easy as possible to help identify, propagate and encourage long-lasting growth of species facing possible extinction.

Edgar T. Wherry at home in his garden alongside his wife, Gertrude. Chevy Chase, MD circa 1921. Photo: Library of Congress

As an ecologist and a nature lover, Edgar like many mid-century conservationists, was concerned that urbanization and lack of attention to natural green space was going to eradicate many of the flowers that make the varied North American landscape one of the most beautiful and diverse in the world.

His dedication in the opening pages of the book praises efforts made on behalf of the flowers …

wildflower2

Considered a visionary for his forward thinking about protecting what some people considered “weeds,” Wherry was determined to educate people about the importance of incorporating native plants into garden design. 1948 was the perfect time to launch his book. Victory gardens established during the war years introduced a whole new wave of home horticulture enthusiasts.  Excitement revolving around the concept of building backyard vegetable gardens was proud patriotism at its best and captured the hearts of all ages from the young to the old.

Victory Garden. Photo via pinterest
Victory gardeners. Photo via pinterest

Edgar rode the wave of people’s interest in making even the smallest garden a productive one. Benefits for people and plants abounded. Edgar teamed up with illustrator Tabea Hofmann to show readers just how pretty a weed could be and how useful it was to the big garden picture.  Edgar’s book is chock-full of interesting fun facts about plants including special notes that inform and entertain. Here he explains how the touch-me-not flower helps soothe poison ivy.
wildflower7

Edgar managed to combine both practicality and dreaminess in one volume. With names like Golden Alexander, Star Violet, Queen of the Prairie, Fairyslipper, and Rosybells, he seduced people in 1948. This book of botany was, and still is, pretty scintillating stuff for anyone who has just come through the freezing month of February. It doesn’t matter if it was 60 years ago or six minutes ago, Edgar still has the ability to soothes us, to inspire us, to teach us.  Spring will come. The cold air will warm. The flowers will bloom. And what a sight it will be.
The fanciful fairyslipper!

This post is dedicated to all our readers who live in colder climates and just can’t bear one more day of winter. Hang tight! Spring is coming! The flowers are stirring! Edgar said so.

wildflower4